had a little lamb a little lamb quilt designed by ... 6 1/2" x 6 1/2" log cabin a block....
TRANSCRIPT
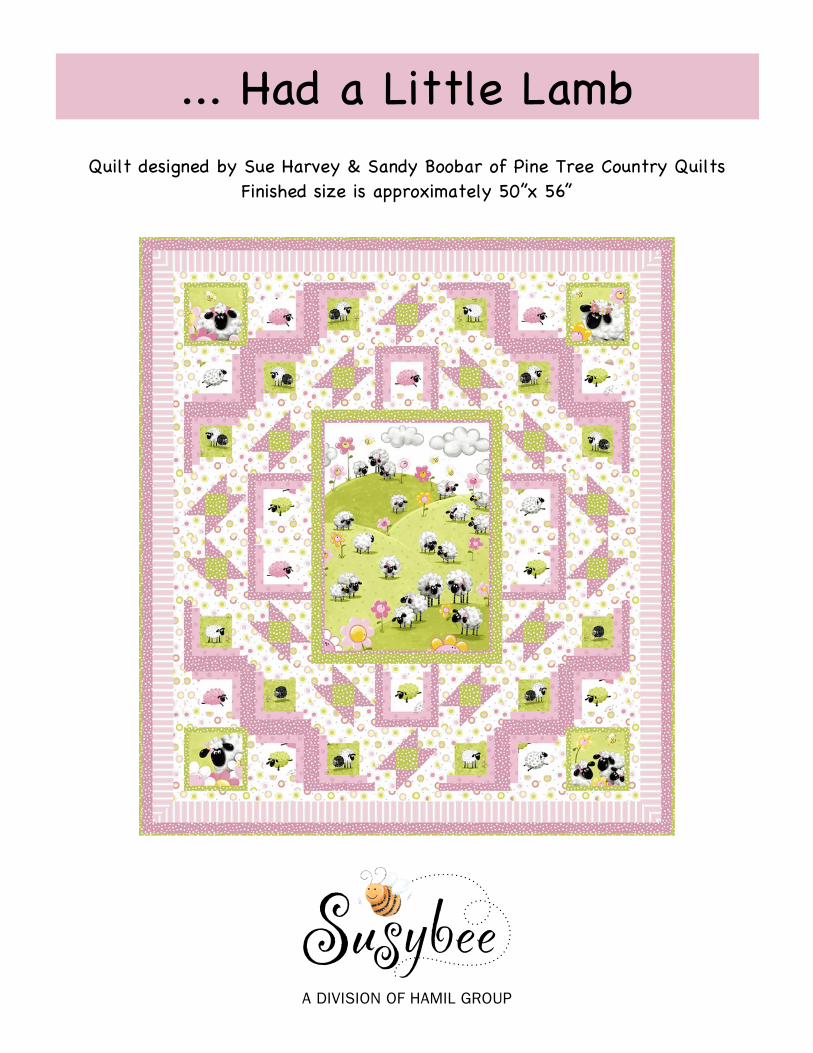
... Had a Little Lamb Quilt designed by Sue Harvey & Sandy Boobar of Pine Tree Country Quilts
Finished size is approximately 50”x 56”
A DIVISION OF HAMIL GROUP

Quilt designed by Sue Harvey and Sandy Boobar of Pine Tree Country Quilts www.pinetreecountryquilts.com
Yardages and Cutting Note: WOF means width of fabric from selvage edge to selvage edge. Label block strips with letters given in the
cutting steps. These will be used to identify strips throughout the instructions. 1 yard Lal panel, SB20240-520 • 4 squares 5 1/2" x 5 1/2" from the 4 corner panels. • 1 rectangle from the large center panel, cutting 1/4" out from the inside edge of the black outline all around (approx. 16 1/2" x 22 1/2"). An exact size is not important. It is framed and trimmed to the correct size in piecing. 1/2 yard white sheep print, SB20052-520 • Fussy-cut (14) 3 1/2" squares with a sheep centered in each square. 1/2 yard green sheep print, SB20049-830 • Fussy-cut (12) 3 1/2" squares with sheep centered in each square. 3/8 yard light pink swirl, SB20053-520 • 7 strips 1 1/4" x WOF; cut into (26) 1 1/4" x 5" D strips and (28) 1 1/4" x 4 1/4" C strips. 1 yard green dot, SB20171-830 • 3 strips 1" x WOF; cut into (8) 1" x 6 1/2" strips and (8) 1" x 5 1/2" strips for small panel framing. • 3 strips 2" x WOF; cut into (2) 23" and (2) 19 1/2" lengths for large panel framing. • 1 strip 2 1/2" x WOF; cut into (14) 2 1/2" squares. • 6 strips 2 1/4" x WOF for binding.
1 1/3 yards white circle print, SB20113-520 • 2 strips 2 1/2" x WOF; cut into (28) 2 1/2" squares. • 2 strips 4 7/8" x WOF; cut into (14) 4 7/8" squares, then cut in half diagonally to make 28 triangles. • 12 strips 1 1/4" x WOF; cut into (24) 1 1/4" x 5 3/4" F strips, (26) 1 1/4" x 5" E strips, (24) 1 1/4" x 4 1/4" B strips and (26) 1 1/4" x 3 1/2" A strips. • 5 strips 1 1/2" x WOF for first border. 1 yard dark pink dot, SB20171-520 • 2 strips 2 7/8" x WOF; cut into (28) 2 7/8" squares, then cut in half diagonally to make 56 triangles. • 2 strips 1" x WOF, cut into (2) 23" and (2) 17" lengths for large panel decorative flange. • 9 strips 1 1/4" x WOF; cut into (26) 1 1/4" x 6 1/2" H strips and (28) 1 1/4" x 5 3/4" G strips. • 5 strips 1 1/2" x WOF for third border. 5/8 yard pink stripe, SB20149-520 • 6 strips 2 1/2" x WOF for second border. 3 3/4 yards backing fabric • 2 pieces 64" x WOF
Piecing the Blocks Note: Use a 1/4" seam allowance for all stitching. Panel Blocks
1. Press the 1" x 23" and 1" x 17" dark pink strips in half lengthwise with wrong sides together. Referring to diagrams on the next page, place the 23" strips on top of the long sides of the large panel rectangle with the raw edges of the strips aligned with the raw edges of the rectangle and the folded edges toward the center of the rectangle. Pin the strips in place. Trim the strip ends even with the top and bottom of the rectangle. Repeat with the 17" strips on the top and bottom of the rectangle. Pin and trim ends even with the rectangle. Machine-baste the strips in place 1/8" from the outer edges all around. Remove pins. Note: The folded edges of the dark pink strips will stay flat on top of the panel rectangle to form a decorative flange.
2. Sew the 2" x 23" green strips to the long sides of the rectangle. Press seams toward the strips, leaving the folded dark pink strips flat on top of the rectangle. Trim strip ends even at the top and bottom edges. Stitch the 2" x 19" green strips to the top and bottom. Press seams toward the strips, leaving the folded dark pink strips flat on top of the rectangle.
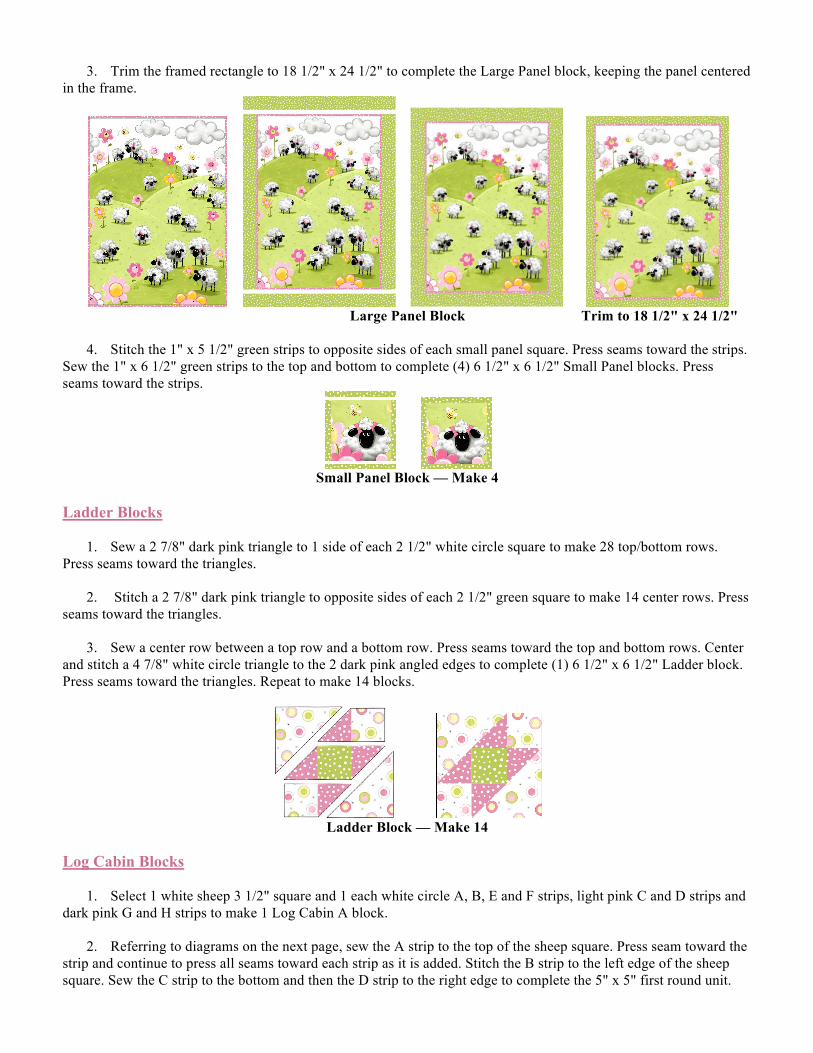
3. Trim the framed rectangle to 18 1/2" x 24 1/2" to complete the Large Panel block, keeping the panel centered in the frame.
Large Panel Block Trim to 18 1/2" x 24 1/2"
4. Stitch the 1" x 5 1/2" green strips to opposite sides of each small panel square. Press seams toward the strips. Sew the 1" x 6 1/2" green strips to the top and bottom to complete (4) 6 1/2" x 6 1/2" Small Panel blocks. Press seams toward the strips.
Small Panel Block — Make 4
Ladder Blocks
1. Sew a 2 7/8" dark pink triangle to 1 side of each 2 1/2" white circle square to make 28 top/bottom rows. Press seams toward the triangles.
2. Stitch a 2 7/8" dark pink triangle to opposite sides of each 2 1/2" green square to make 14 center rows. Press seams toward the triangles.
3. Sew a center row between a top row and a bottom row. Press seams toward the top and bottom rows. Center and stitch a 4 7/8" white circle triangle to the 2 dark pink angled edges to complete (1) 6 1/2" x 6 1/2" Ladder block. Press seams toward the triangles. Repeat to make 14 blocks.
Ladder Block — Make 14
Log Cabin Blocks
1. Select 1 white sheep 3 1/2" square and 1 each white circle A, B, E and F strips, light pink C and D strips and dark pink G and H strips to make 1 Log Cabin A block.
2. Referring to diagrams on the next page, sew the A strip to the top of the sheep square. Press seam toward the strip and continue to press all seams toward each strip as it is added. Stitch the B strip to the left edge of the sheep square. Sew the C strip to the bottom and then the D strip to the right edge to complete the 5" x 5" first round unit.

3. Repeat step 2 with the E, F, G and H strips to complete (1) 6 1/2" x 6 1/2" Log Cabin A block.
4. Repeat steps 1–3 to make 3 Log Cabin A blocks.
Log Cabin A Block — Make 3
5. Repeat to make 3 each Log Cabin B, Log Cabin C and Log Cabin D blocks, stitching strips counterclockwise
around the center square in alphabetical order. Pay careful attention to the starting edge (A strip edge) for each block to place the white strips and pink strips on the correct sides of the center square.
Log Cabin B Log Cabin C Log Cabin D
Make 3 of each block
6. Repeat to make 3 each Log Cabin E, Log Cabin F, Log Cabin G and Log Cabin H blocks using a 3 1/2" green sheep square in the center of each block.
Log Cabin E Log Cabin F Log Cabin G Log Cabin H
Make 3 of each block Steps Blocks
1. Select 1 white sheep 3 1/2" square; 1 each white circle A and E strips, light pink D strip and dark pink H strip; and 2 each light pink C strips and dark pink G strips to make the Steps Top block.
2. Sew the A strip to the bottom of the sheep square. Press all seams toward each strip as it is added. Stitch a C strip to the left and right edges of the square. Add the D strip to the top to complete the 5" x 5" first round unit.
3. Repeat step 2 with the E, G and H strips to complete the 6 1/2" x 6 1/2" Steps Top block.
4. Repeat to make 1 Step Bottom block, sewing the A strip to the top of the sheep square to begin and paying careful attention to the positioning of the remaining strips.
Steps Top Block Steps Bottom Block

Completing the Quilt Refer to the exploded quilt diagram on the next page as needed throughout the following steps.
1. Join 2 Small Panel blocks, 1 Ladder block and 1 each Log Cabin A, B, E and F blocks to make the 6 1/2" x 42 1/2" top row 1. Press all seams to the right.
2. Join 2 Ladder blocks, the Step Top block and 1 each Log Cabin A, B, E and F blocks to make the 6 1/2" x 42 1/2" top row 2. Press all seams to the left.
3. Sew row 1 to row 2 to complete the 12 1/2" x 42 1/2" top section. Press seam to 1 side.
4. Join 2 Ladder blocks and 1 each Log Cabin E and H blocks to make the 6 1/2" x 24 1/2" left side row 1. Press seams toward the bottom of the row.
5. Join 2 Ladder blocks and 1 each Log Cabin B and C blocks to make the 6 1/2" x 24 1/2" left side row 2. Press seams toward the top of the row.
6. Join the left side rows to make the 12 1/2" x 24 1/2" left section. Press seam to the right. Sew to the left edge of the Large Panel block. Press seam toward the Large Panel block.
7. Referring to the exploded quilt diagram for correct blocks, repeat steps 4–6 to complete right side rows 1 and 2. Join to complete the right section and stitch to the right edge of the Large Panel block to complete the 24 1/2" x 42 1/2" center section.
8. Referring to the exploded quilt diagram for correct blocks, repeat steps 1 and 2 to make the 2 bottom rows. Press seams to the left in row 1 and to the right in row 2. Join the rows to complete the 12 1/2" x 42 1/2" bottom section. Press seam to 1 side.
9. Sew the top and bottom sections to opposite long sides of the center section to complete the 42 1/2" x 48 1/2"
quilt center. Press seams to 1 side.
10. Sew the 1 1/2" x WOF white circle print strips short ends together to make a long strip. Press seams to 1 side. Cut into (2) 48 1/2" strips and (2) 44 1/2" strips. Stitch the 48 1/2" strips to the long sides of the quilt center and the 44 1/2" strips to the top and bottom. Press seams toward the strips.
11. Stitch the 2 1/2" x WOF pink stripe strips short ends together to make a long strip, continuing stripe order at the seams. Press seams to 1 side. Cut into (2) 59" strips and (2) 53" strips.
12. Center and sew the 59" strips to the long sides, stopping stitching and backstitching 1/4" from the corners of the quilt center. Repeat with the 53" strips on the top and bottom. Miter corners using your favorite method. Trim the seam allowance at each corner to 1/4". Press the corner seam open and the border seams toward the strips.
13. Sew the 1 1/2" x WOF dark pink dot strips short ends together to make a long strip. Press seams to 1 side. Cut into (2) 54 1/2" strips and (2) 50 1/2" strips. Stitch the 54 1/2" strips to the long sides of the quilt center and the 50 1/2" strips to the top and bottom to complete the top. Press seams toward the strips.
14. Remove the selvage edges from the 64" backing pieces. Join the pieces on the long edges with a 1/2" seam allowance. Press seam open. Trim the side edges to make a 58" x 64" backing piece.
15. Layer the quilt top and backing with a 58" x 64" batting piece. Quilt as desired and bind using your favorite methods and the green dot binding strips.

Exploded Quilt Diagram