h - prusa3d - 3d printers from josef prusa in what program you can create your own models? 8.3...
TRANSCRIPT
Please always refer to the http://www.prusa3d.com/drivers/ for updated version of this 3D printing handbook (PDF download).
QUICK GUIDE TO THE FIRST PRINT 1. Place the printer on a flat and stable surface (page 10) 2. Read the safety instructions carefully (page 5) 3. Download and install the drivers (page 22) 4. Prepare the glass (page 10) and calibrate the printer (page 12) 5. Insert SD into the printer and print your first model (page 16)
Handbook version 1.01 from September 15th, 2015. © Prusa Research s.r.o.
2
Table of contents
1 Product details 2 Introduction
2.1 Glossary 2.2 Used symbols 2.3 Safety instructions 2.4 Assembled Original Prusa i3 Plus printer 2.5 Original Prusa i3 Plus printer kit 2.6 Licenses
3 Original Prusa i3 Plus printer 4 Original Prusa i3 Plus printer kit 5 First steps
5.1 Printer unpacking and proper handling 5.2 Printer assembly 5.3 Setup before printing
5.3.1 Glass preparation 5.3.2 ABS Juice preparation 5.3.3 Plugging the AC power 5.3.4 Calibration 5.3.5 Loading the filament into the extruder
6 Printing 6.1 Printer controls
6.1.1 LCD screen 6.1.2 LCD layout 6.1.3 Print speed versus print quality 6.1.4 USB cable and Pronterface
7 Printer drivers 8 Printing your own models
8.1 Where you can get the 3D models? 8.2 In what program you can create your own models? 8.3 Slic3r 8.4 Printing of nonstandard models
8.4.1 Printing with support material 8.4.2 Large object printing
9 Materials 9.1 ABS 9.2 PLA 9.3 PET 9.4 HIPS 9.5 PP 9.6 Flex
10 FAQ Printer maintenance and print issues 10.1 Glass cleaning 10.2 Clogged / jammed extruder
3
10.3 Nozzle cleaning 10.4 Axis fluency 10.5 Calibration issues
10.5.1 Nozzle taps the glass 10.5.2 Different spacing between nozzle and glass after every Zaxis reset 10.5.3 Glass is unstable and doesn’t hold firmly 10.5.4 Default Xaxis position is outside the glass 10.5.5 Uneven spacing of the nozzle on the Xaxis opposite ends
10.6 Printing problems 10.6.1 ABS models tear up from the glass when printing 10.6.2 Layers break and split when printing from ABS material 10.6.3 Models move the glass during the print 10.6.4 Models contain either too much or not enough of the filament
10.7 Problems with finished models 10.7.1 Model breaks and/or is easily destructed
11 FAQ common issues when assembling the printer kit 11.1 Nozzle/glass gap is greater in the middle than at the corners 11.2 Printer stops printing soon after start 11.3 Printer can’t read SD card 11.4 Loose X and/or Yaxis belts 11.5 Unattached cables to the heatbed 11.6 Loose heatbed zipties
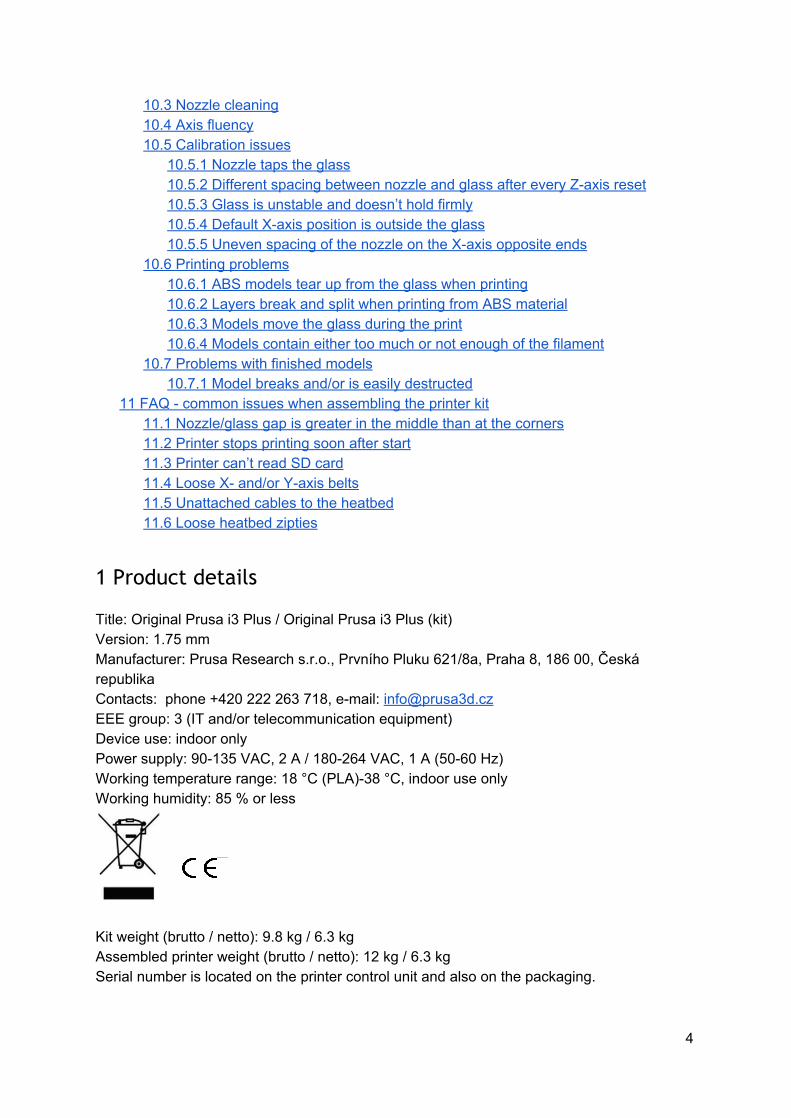
1 Product details Title: Original Prusa i3 Plus / Original Prusa i3 Plus (kit) Version: 1.75 mm Manufacturer: Prusa Research s.r.o., Prvního Pluku 621/8a, Praha 8, 186 00, Česká republika Contacts: phone +420 222 263 718, email: [email protected] EEE group: 3 (IT and/or telecommunication equipment) Device use: indoor only Power supply: 90135 VAC, 2 A / 180264 VAC, 1 A (5060 Hz) Working temperature range: 18 °C (PLA)38 °C, indoor use only Working humidity: 85 % or less
Kit weight (brutto / netto): 9.8 kg / 6.3 kg Assembled printer weight (brutto / netto): 12 kg / 6.3 kg Serial number is located on the printer control unit and also on the packaging.
4

2 Introduction Thank you for purchasing our original 3D printer Prusa i3 Plus 1.75 from Josef Prusa either as a assembled printer or a printer kit as your purchase supports us with its further development. Read the handbook carefully, please, all chapters contain valuable info for the correct service of the printer. Please check the http://prusa3d.com/drivers page for updated version of this 3D printing hanbook (PDF download). In case of any printer related problem do not hesitate to contact us at [email protected] are glad to receive all your valuable comments and tips. We strongly suggest you to visit our official forum at forum.prusa3d.com, where you can find solutions to common issues, tips, advice and hints in addition to actual information about the Original Prusa i3 printer’s development.
2.1 Glossary Bed, Heatbed, Printbed Commonly used term for printing pad a heated area of 3D printer where 3D objects are printed. Extruder Printing head or extruder is a part of a printer consisting of a nozzle, hobbed pulley, idler and a nozzle fan. Filament Term for plastic provided on spool is called “filament”, it’s used throughout this handbook as well as in the LCD menu on the printer. Heater, Hotend other name for a printing nozzle. 1.75 3D printers use two different diameters (thickness) of a filament (thickness): 2.85 mm (commonly called as 3 mm) and 1.75 mm. 1.75mm version is more used worldwide though there is no difference in printing quality.
2.2 Used symbols Important notice, tip, hint or information what helps you print with ease. Read carefully! This part of text has uppermost importance either for user safety of for a proper printer service. This symbol indicates text related to printer kit only.
2.3 Safety instructions Please be very cautious during any interaction with the printer. This printer is an electrical device with moving parts and hottemperature areas.
1. Device is for indoor use only. Do not expose the printer to rain or snow. Always keep the printer in a dry environment at a minimum distance of 30 cm from other objects. 2. Always place the printer on a stable place, where it can not fall or tip over.
5

3. The printer supply is household power outlet 230 VAC, 50 Hz or 110 VAC / 60 Hz; Never connect the printer to a different power supply, it may cause malfunction or damage to the printer. 4. Place the power cord so you can’t stumble on it, or step on it or otherwise expose to any damage. Make sure that the power cord is not mechanically or otherwise damaged. Stop using damaged cable immediately and replace it. 5. When you disconnect the power cord from the socket, pull the plug rather than the cord to reduce the risk of damage to plug or AC outlet. 6. Never disassemble the printer power supply, it does not contain any parts that could be repaired by unskilled worker. All repairs must be provided by a qualified technician. 7. Do not touch the nozzle or heat bed when the printer is printing or is warming up. Note that the temperature of the nozzle is 210260 °C; heatbed temperature can reach over 100 °C. Temperatures above 40 °C can cause harm to human body. 8. Prevent children from unsupervised access to the printer even when the printer is not printing.
2.4 Assembled Original Prusa i3 Plus printer You can find a picture of an assembled Original Prusa i3 Plus printer with description in pict. 1 next page of this handbook. Unlike the printer kit it’s completely assembled and almost ready to print. After plugging in and necessary calibration you can print the 3D object in the matter of minutes after unpacking the printer. Keep in mind you can use our support email when you purchased the assembled printer. Do not hesitate to write us if you need any advice or help. We will gladly help with any specific prints.
3D printers use two different diameters of a filament (you find more in chapter Materials): 2.85 mm and 1.75 mm. 1.75mm version is more used worldwide though there is no difference in printing quality. Filament is provided on a spool where you can find the basic information filament maker, material (ABS, PLA, etc.) and
filament diameter. 2.85 mm filament is commonly called as 3 mm. This printer supports only a 1.75 mm filament. Please check the filament diameter to be 1.75mm before inserting into the extruder. Do not try to insert wider filament it could damage the extruder.
2.5 Original Prusa i3 Plus printer kit Original Prusa i3 Plus kit is pictured in pict. 2. Detailed information and assembly description can be found in chapter Printer assembly. We offer the support for users who purchased the printer kit through our official forum. If you need help do not hesitate to visit our forum at forum.prusa3d.com. You can find the answers for your
problem there. If not, please just ask your question here.
2.6 Licenses Original Prusa i3 Plus printer is a part of the RepRap project, the first open source 3D printer project free to use under a GNU GPL v3 license (www.gnu.org/licenses/gpl3.0.en.html). If you improve or alter any part of a printer and you are willing to sell, then you have to publish the source codes under a same license. All 3Dprinted elements of the printer that can be improved upon can be found at http://www.prusa3d.com/prusai3printableparts/.
6
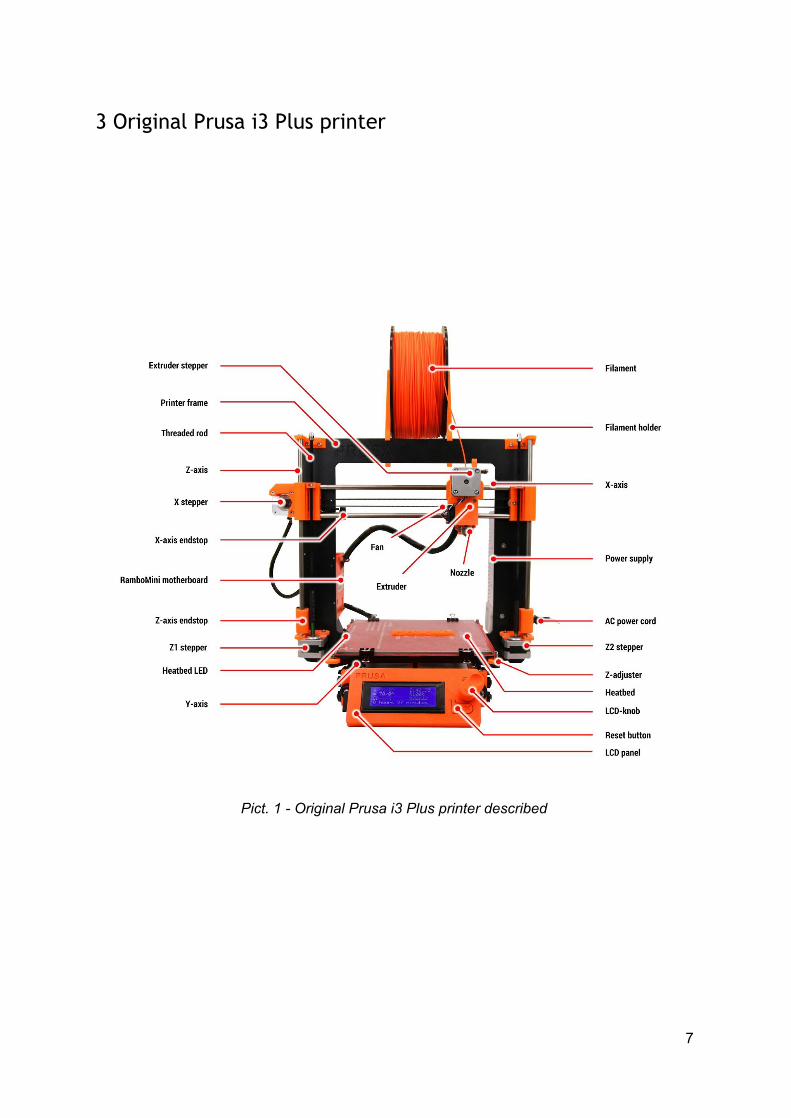
3 Original Prusa i3 Plus printer
Pict. 1 Original Prusa i3 Plus printer described
7

4 Original Prusa i3 Plus printer kit
The complete contents of the printer kit box can be seen on the picture below.
Pict. 2 Original Prusa i3 Plus printer kit unboxed
8

5 First steps
5.1 Printer unpacking and proper handling Take the printer for the upper frame pull it out from the box. Be careful when handling with the printer not to damage the electronics and thus the proper printer functionality. Anytime you move the printer always hold it for the upper frame with hotbed upright pointing away from you as pictured in pict. 3.
Pict. 3 Proper handling of a printer
9
5.2 Printer assembly With Original Prusa i3 Plus printer kit we suggest to follow the guidelines and assemble the kit according to the the online manual at manual.prusa3d.com. (Online manual is available in several languages on the website). The construction of the printer should not take more than one working day. After a successful compilation
continue to the chapter Setup before printing.
5.3 Setup before printing
Place the printer to the horizontally stable position, best place is a workbench where there is no risk of draft.
Attach the filament holders to the upper frame. Attach Filament to the holders. Make sure the filament spool doesn’t jam and can
move freely.
Filament is a common term for the plastic rod material provided on spool, from which 3D objects are printed.
5.3.1 Glass preparation The printed object will not attach to the heatbed properly if you do not prepare the bed correctly. Different materials require different glass preparation you can find more in the chapter Materials. Common steps are:
Glass always has to be prepared cold, not preheated. Put a smooth even layer of Kores (or regular glue stick you can source locally) glue
provided with the printer. One thin layer is enough. Let the glue dry and then apply one layer of ABS Juice provided with the printer in
plastic sprayer. When the glass is dry attach it firmly to the bed with the binder clips.
The glass provided with the printer (both assembled and kit) is already prepared with the Kores glue and ABS Juice so you can use it for the print without any further preparation.
10
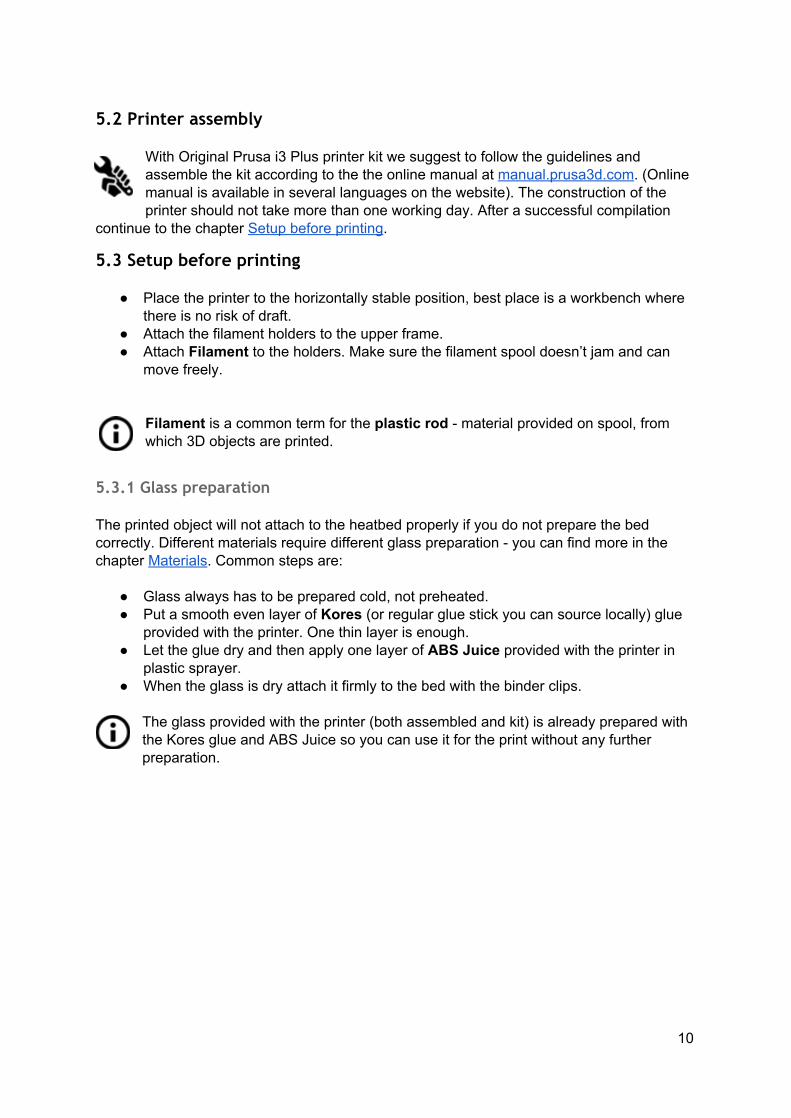
5.3.2 ABS Juice preparation Acetone is extremely flammable, rapidly evaporating liquid. Handle it in a wellventilated area only, protect your eyes and skin from splashes. Never operate with acetone near open flames or other heat source; especially in areas where a spark can occur acetone vapors are easily ignited.
When you run out of the ABS Juice supplied with the printer, you can easily make your own mix. You will need a container in which you can retain pure acetone and an ABS filament. ABS Juice is made by dissolving ABS in pure acetone 34 cm filament (thickness 1.75 mm) to 30 ml of acetone. Original ABS juice container is 100 ml, so you need a filament length of approximately 114 cm. Cut the filament into shorter pieces to fit comfortably into the container and then cover it with 100 ml of acetone. Close the container securely and shake for several minutes. Before first use, let the mixture stand for several hours to ABS filament completely dissolved in acetone.
Prepared juice can be also purchased in our eshop. Unfortunately, UPS service does not allow to deliver any acetonebased products due to shipping constraints. In that case you get only the bottle and ABS from our eshop and you have to source
the acetone locally. You can also use the alternative solution, e.g. hair spray always choose nonperfumed spray and look out for extra hold with ingredients including Acetate, Copolymer and Vinyl.
11
5.3.3 Plugging the AC power
Check the glass placement and attachment to the heatbed. Plug in the AC power cord.
5.3.4 Calibration You need to calibrate the printer before the first print. If you transport the printer or manipulate with it excessively you should check and eventually calibrate it again. For the successful calibration you need to have the printer heated both nozzle and heatbed. Temperature can be set through LCD panel.
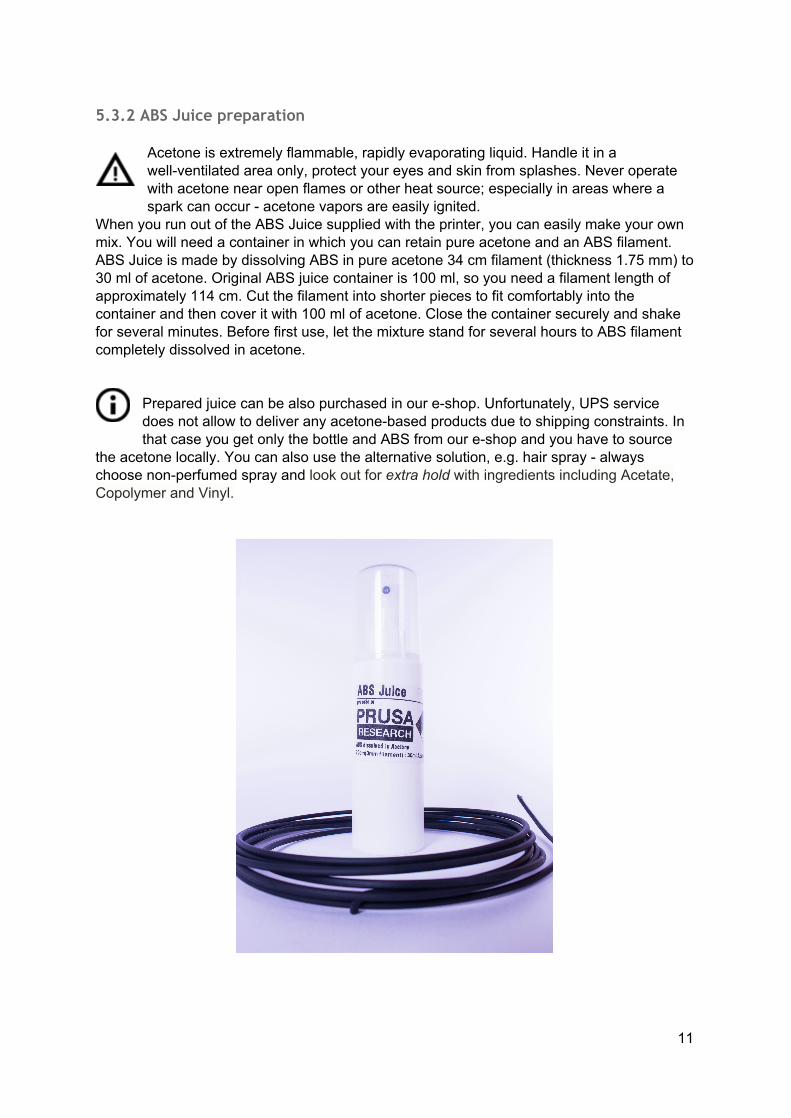
Press the LCDknob to enter the main menu on LCD. Rotate the button to choose Preheat option and confirm by pressing the LCDknob. Next you choose the material you will print from. Choose a material then confirm with LCDknob. Nozzle and heatbed will heat to the requested temperature.
Pict. 4 LCD panel controls
12

You need a common business card for the calibration. Choose Settings in main menu then Auto home option. This step sets all axes to [0, 0, 0] positions.
Try to put and move the calibration paper (business card) between the bed and nozzle. You have to feel a slight friction between the paper and the nozzle. Nozzlebed distance is set with Zadjusters. This step is repeated in all four corners of the printbed. Calibration paper is attached to the package with with the heatbead and the glass. If you don’t have the calibration paper you can use any common business card paper (250 g/m2).
Pict. 5 Printer calibration using the calibration paper, small orange wheel bottom right corner is a Zadjuster (one of four).
13

Figures 6a to 6c show the first printed layer. Pict. 6a shows the result when nozzle is too far from the bed, 6b is correctly calibrated printer and 6c shows the print when the nozzle is too close to the heatbed.
Pict. 6a Nozzle is too far from the glass. Filament couldn’t attach properly and tears out.
Pict. 6b Calibrated printer shows continuous filament layers.
Pict. 6c Nozzle too close to the glass. Layers are too compressed.
14

5.3.5 Loading the filament into the extruder If you follow the manual you should have the nozzle and the bed preheated.
You need to preheat the nozzle before inserting the filament (and the bed too if you like to print right away). The temperature depends on the material used. Detailed information about nozzle and bed temperatures are described at chapter Materials.
Press the LCDknob on the LCD panel to enter the main menu. Insert the filament to the extruder, choose the Load filament option in the menu and press the button to confirm. Filament is then loaded to the extruder by the extruder stepper automatically. You should cut the top of the filament as shown in the picture below (pict.7 detail).
Pict. 7 Loading the filament to the extruder
Check if the filament flows from the nozzle. If you change the filament for a new one do not forget to completely release the old
filament before the printing.
15
6 Printing
Make sure that the nozzle and the bed are heated to the desired temperature. If you forget to preheat the printing nozzle and the bed before printing the printer will automatically check the temperatures of the nozzle and the bed; printing will start when desired temperature is reached it can take several minutes. However, we recommend preheating the printer beforehand as described in the chapter Calibration.
Do not let the preheated printer idle. When a printer is preheated and nonprinting material in an extruder degrades over time it may cause the nozzle to jam up.
Watch the first few printed layers to be sure filament has attached to the bed properly (5 to 10 minutes).
Press the LCDknob and choose the Print from SD option from menu, press to confirm and pick the desired model model_name.gcode. Printer will start printing the object.
The filename (.gcode) must not contain any special characters otherwise the printer is not able to display the file on the LCD. If you remove the SD while printing, printer will pause automatically. When you reinsert the SD, press the LCDknob and choose “Continue” option. Confirm and printing will resume.
Printer firmware allows the filament change during the printing. This option is useful when the filament is running out and you can change the spool and continue with print. Choose the Tune and then Change filament option during the print. Printer will pause the printing process, unload the filament and signals you with the sound to insert the new filament. When you confirm the filament was loaded correctly printing process will continue.
Other options to use the filament change is a multicolored print. The procedure is the same as above choose the Tune and then Change filament option during the print. Printer will pause the printing process, unload the filament and signals you to insert the new filament.
When you change the filament, LCD displays the message “Changed correctly?” with three options:
1. “Yes” Everything went ok and printing can continue. Check if the new color is
clear without any remains of the previous filament if yes, choose this option to continue printing with a new color.
2. “Filament not loaded” If the new filament was not loaded properly, choose this option and the printer will start the automatic filament load again. When the filament is loaded properly, you can choose the “Yes” option and the printing will continue with a new color.
3. “Color not clear” Filament was loaded but the color is still spotted by a previous filament. Press the button with this option and the printer will extrude more filament from the nozzle. When the color is pure without any remains of
16
the previous filament you can choose the “Yes” option and the printing will continue with a new color.
You can repeat this procedure as many times as you want the result for instance can be a fivecolored object.
When printing is finished let the nozzle and heatbed cool down before removing the printed object. Always handle the printed objects when temperature of the bed and nozzle drop to the room temperature, when the bed is hot objects are very hard to remove. Pull the bed towards you and remove the object gently. You can also remove the binding clips, remove the glass with object out of the printer and then separate the object from the glass.
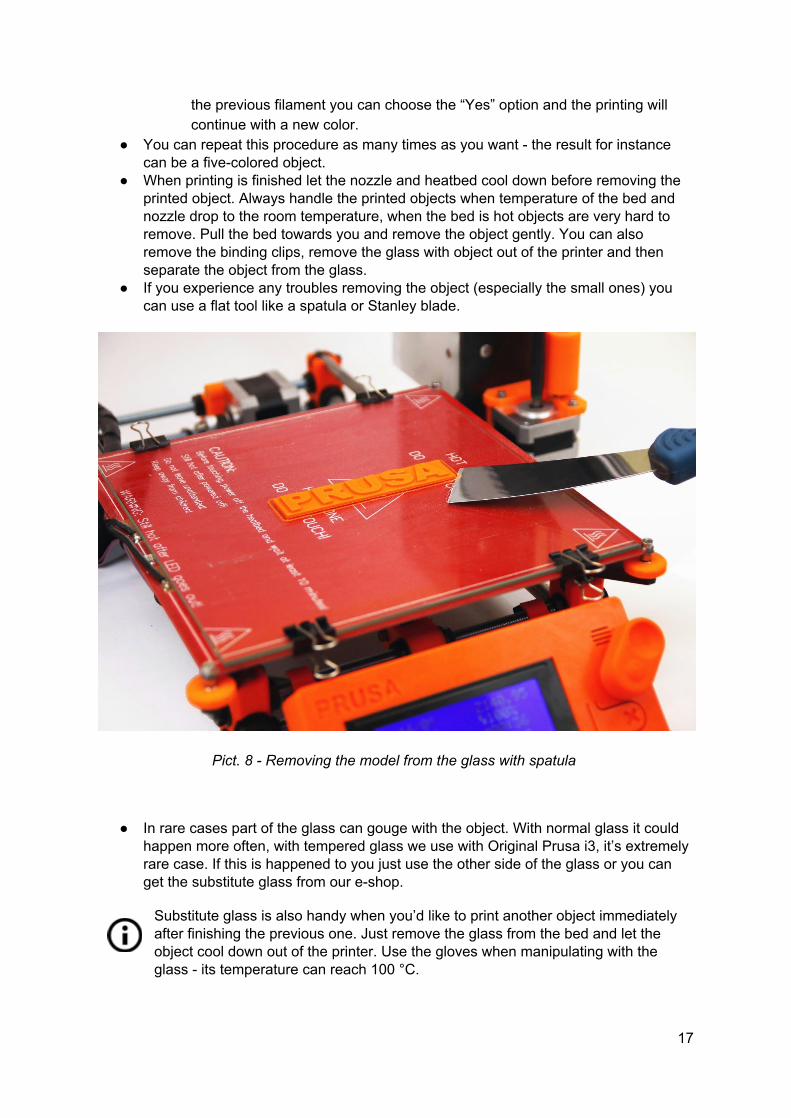
If you experience any troubles removing the object (especially the small ones) you can use a flat tool like a spatula or Stanley blade.
Pict. 8 Removing the model from the glass with spatula
In rare cases part of the glass can gouge with the object. With normal glass it could happen more often, with tempered glass we use with Original Prusa i3, it’s extremely rare case. If this is happened to you just use the other side of the glass or you can get the substitute glass from our eshop.
Substitute glass is also handy when you’d like to print another object immediately after finishing the previous one. Just remove the glass from the bed and let the object cool down out of the printer. Use the gloves when manipulating with the glass its temperature can reach 100 °C.
17
6.1 Printer controls
There are two ways controlling the printer. You can use the LCD panel integrated with the printer or you can connect your computer with USB cable. We suggest the LCD panel because of its speed and reliability, and moreover you do not rely on a computer.
6.1.1 LCD screen
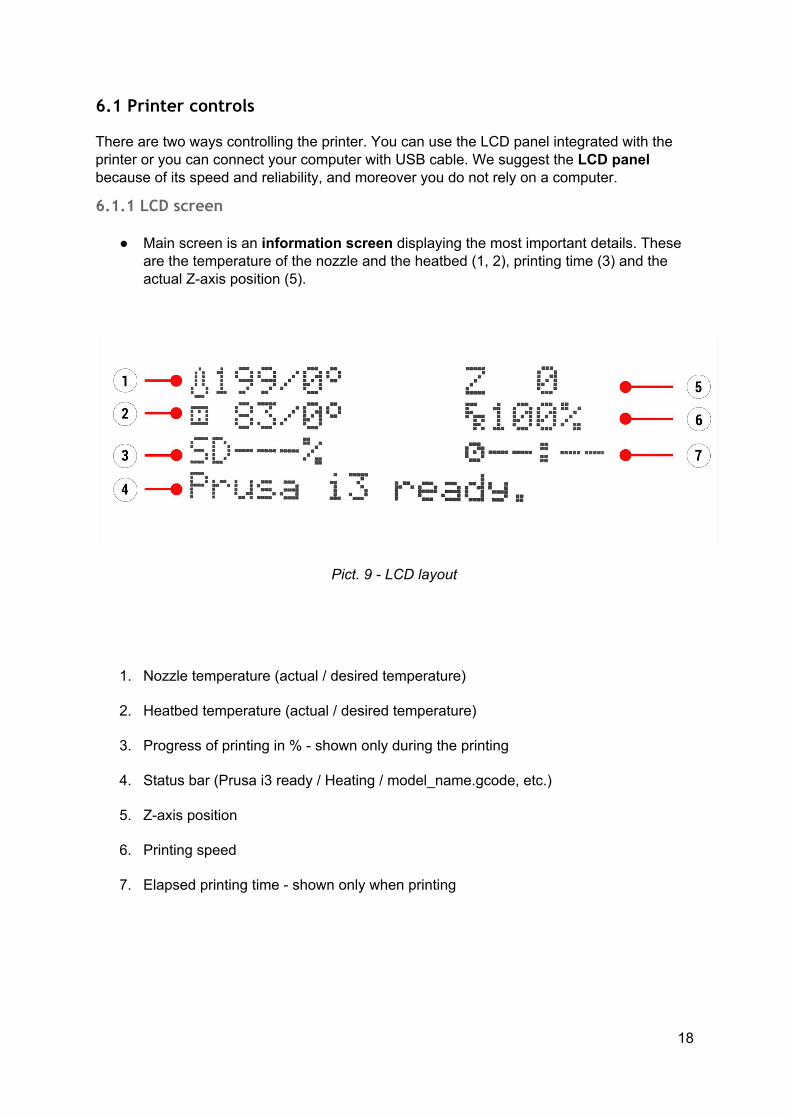
Main screen is an information screen displaying the most important details. These are the temperature of the nozzle and the heatbed (1, 2), printing time (3) and the actual Zaxis position (5).
Pict. 9 LCD layout
1. Nozzle temperature (actual / desired temperature)
2. Heatbed temperature (actual / desired temperature)
3. Progress of printing in % shown only during the printing
4. Status bar (Prusa i3 ready / Heating / model_name.gcode, etc.)
5. Zaxis position
6. Printing speed
7. Elapsed printing time shown only when printing
18

6.1.2 LCD layout
Items not mentioned below are not used for the common print setup you should not change any of the unmentioned items unless you are absolutely sure what you are doing.
Info screen
Tune (during the printing process only)
Speed
Nozzle
Bed
Fan speed
Flow
Change filament
Pause print (during the printing process only)
Stop print (during the printing process only)
Preheat
ABS 255/100
PLA 210/50
PET 240/90
HIPS 220/100
PP 254/100
FLEX 230/50
Cooldown
Print from SD
Load filament
Unload filament
Support
prusa3d.com
forum.prusa3d.com
howto.prusa3d.com
19
6.1.3 Print speed versus print quality
Printing a small object takes a few minutes, but printing larger models is time consuming there are prints taking tens of hours. The overall printing time can be changed by different ways. First way to alter the printing speed is changing layer height in Slic3r upper right windows shows Print settings option. Default setting is 0.20 mm (NORMAL), you can speed up the printer by choosing the 0.25 mm (DRAFT) option. Raising speed will result the model to be less detailed with visible layer borders. If you prefer quality over speed, choose 0.10 mm (DETAIL) option. Printing time will double but the model gets the extra detail. Again, higher printing speed results in less detailed model.
Speed can be changed also while printing. LCD shows the FR 100 % item it’s actual print speed (feed rate). By turning the LCDknob clockwise you can increase the print speed up to 999 %. However, we do not advise to increase the speed over 200 %. Watch the results of increased speed on the printed model and adjust the speed eventually.
When increasing the speed always check the model is cooled properly especially when printing small object from ABS increased speed causes the distortion (sometimes called “warping”) of the model. You can prevent this issue by printing more similar objects together layer printing interval is long enough to prevent this
issue.
If the model shows lower quality than desired you can decrease the printing speed turn the LCDknob counterclockwise. Maximum usable printing speed is around 20 % of nominal speed.
6.1.4 USB cable and Pronterface
We strongly recommend to use LCD panel while printing on Prusa i3 1.75 mm Pronterface doesn’t support all functions of a new firmware (e.g. filament change while printing).
Keep in mind that when printing from the Pronterface the computer must be connected to the printer during the whole printing process computer must be prevented from sleep, hibernation or shutting down. Disconnecting the computer during the print ends the printing without the option to finish the object.
Connect the printer to the computer with the USB cable.
20

Obr. 10 You can find USB port here Choose connection port in Pronterface (download available with the printer drivers,
see the chapter Printer drivers): Mac users use /usbmodem port, PC Windows ports are COM1, COM2, etc.; the correct port is displayed in device manager, Linux users connect the printer using the virtual serial port. When the printer is connected click the Connect button. Right column shows the connection information.
Next step is loading the model with Load model button and choosing the model_name.gcode (no special symbols in file name).
You can control the movement of all printer axes at the control area. Next you can preheat the printer and prepare it for the printing. Set the temperatures
for the nozzle (heater) and heatbed (bed) and click Set button. Printer starts heating immediately. Always check that the temperatures set in Pronterface are correct according to our material guide!
You can check the actual temperatures of nozzle and bed in Pronterface. When model is loaded right column shows the estimated print duration: Estimated
duration (pessimistic)
21
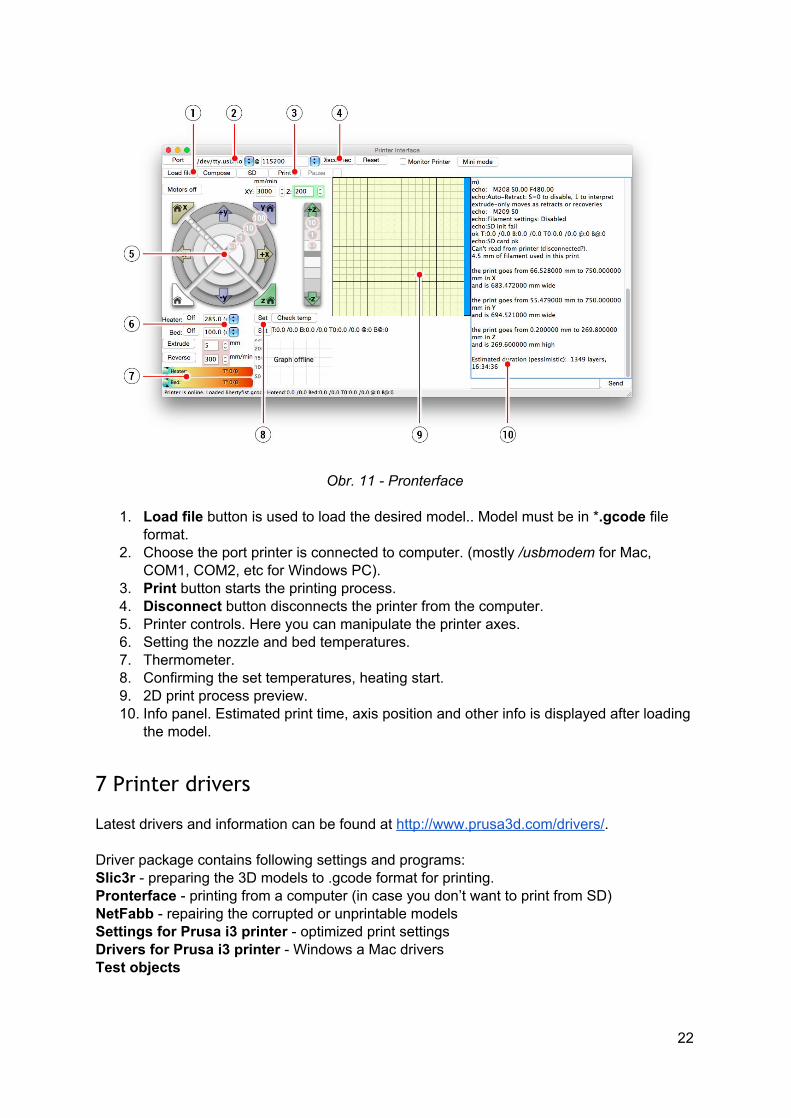
Obr. 11 Pronterface
1. Load file button is used to load the desired model.. Model must be in *.gcode file
format. 2. Choose the port printer is connected to computer. (mostly /usbmodem for Mac,
COM1, COM2, etc for Windows PC). 3. Print button starts the printing process. 4. Disconnect button disconnects the printer from the computer. 5. Printer controls. Here you can manipulate the printer axes. 6. Setting the nozzle and bed temperatures. 7. Thermometer. 8. Confirming the set temperatures, heating start. 9. 2D print process preview. 10. Info panel. Estimated print time, axis position and other info is displayed after loading
the model.
7 Printer drivers Latest drivers and information can be found at http://www.prusa3d.com/drivers/. Driver package contains following settings and programs: Slic3r preparing the 3D models to .gcode format for printing. Pronterface printing from a computer (in case you don’t want to print from SD) NetFabb repairing the corrupted or unprintable models Settings for Prusa i3 printer optimized print settings Drivers for Prusa i3 printer Windows a Mac drivers Test objects
22
8 Printing your own models
8.1 Where you can get the 3D models? The best way to get started with your own 3D printing is to find already created models on internet they should be in the .stl or .obj format . Fortunately there are lot of fans and there are sites from which you can download a wealth of readymade 3D models from a simple shaver holder to a detailed aircraft engine model. 3D models are generally free to download under the Creative Commons Attribution Non Commercial (Models not to be used commercially, you must always include the name of the author) or for a small fee. We have selected the most interesting sites with highquality models:
1. http://www.thingiverse.com/ 2. https://pinshape.com/ 3. https://www.youmagine.com/ 4. http://www.shapeways.com/ 5. http://www.123dapp.com/ 6. http://cubify.com/
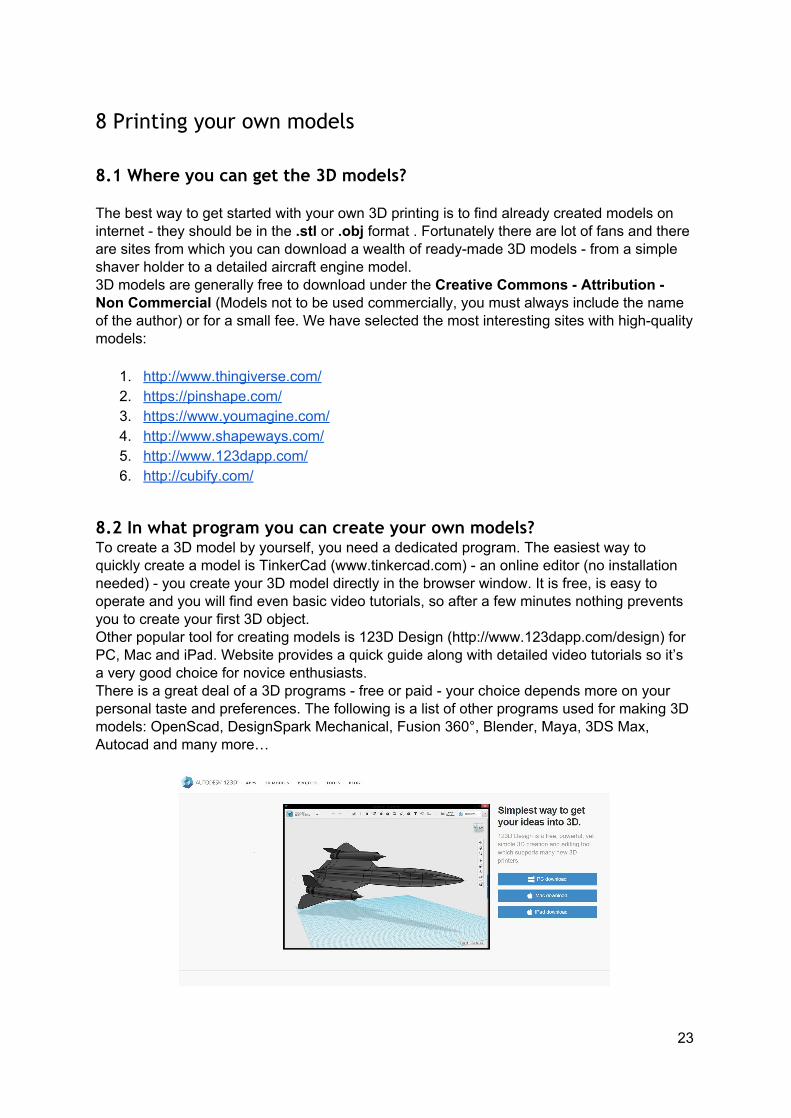
8.2 In what program you can create your own models? To create a 3D model by yourself, you need a dedicated program. The easiest way to quickly create a model is TinkerCad (www.tinkercad.com) an online editor (no installation needed) you create your 3D model directly in the browser window. It is free, is easy to operate and you will find even basic video tutorials, so after a few minutes nothing prevents you to create your first 3D object. Other popular tool for creating models is 123D Design (http://www.123dapp.com/design) for PC, Mac and iPad. Website provides a quick guide along with detailed video tutorials so it’s a very good choice for novice enthusiasts. There is a great deal of a 3D programs free or paid your choice depends more on your personal taste and preferences. The following is a list of other programs used for making 3D models: OpenScad, DesignSpark Mechanical, Fusion 360°, Blender, Maya, 3DS Max, Autocad and many more…
23
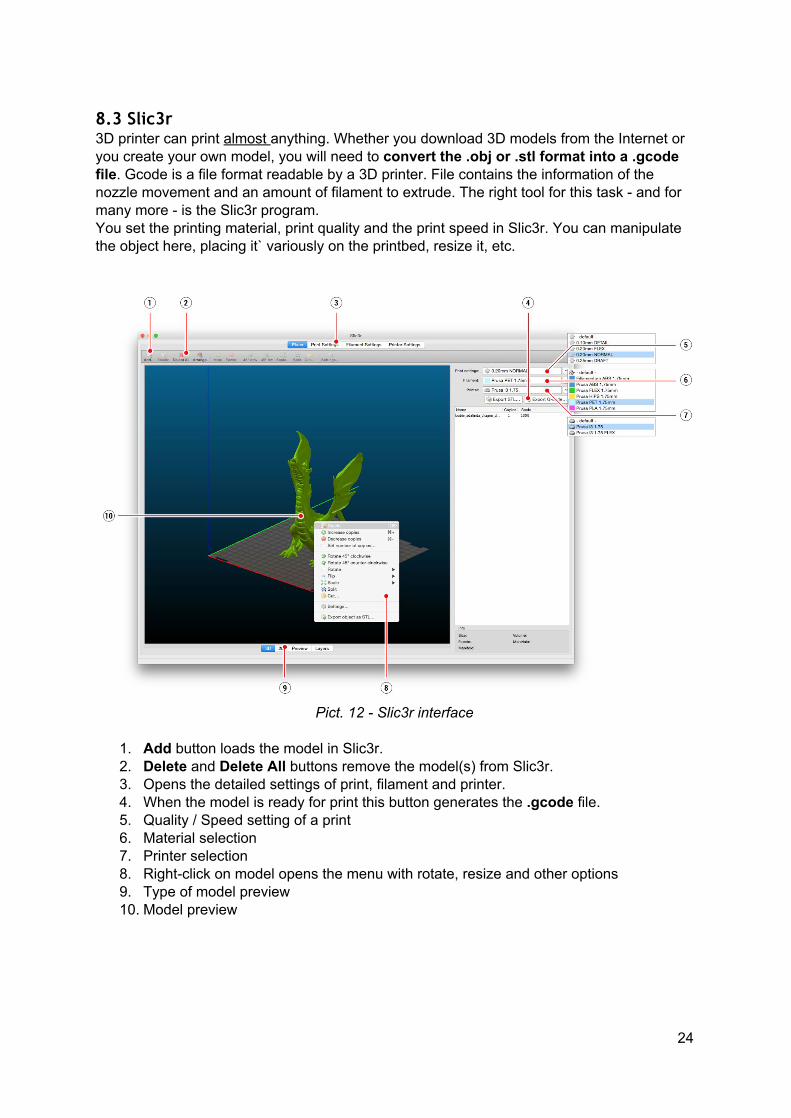
8.3 Slic3r 3D printer can print almost anything. Whether you download 3D models from the Internet or you create your own model, you will need to convert the .obj or .stl format into a .gcode file. Gcode is a file format readable by a 3D printer. File contains the information of the nozzle movement and an amount of filament to extrude. The right tool for this task and for many more is the Slic3r program. You set the printing material, print quality and the print speed in Slic3r. You can manipulate the object here, placing it` variously on the printbed, resize it, etc.
Pict. 12 Slic3r interface
1. Add button loads the model in Slic3r. 2. Delete and Delete All buttons remove the model(s) from Slic3r. 3. Opens the detailed settings of print, filament and printer. 4. When the model is ready for print this button generates the .gcode file. 5. Quality / Speed setting of a print 6. Material selection 7. Printer selection 8. Rightclick on model opens the menu with rotate, resize and other options 9. Type of model preview 10. Model preview
24
8.4 Printing of non-standard models Slic3r helps you while printing the nonstandard models as models with overhangs and/or models larger than a printing bed.
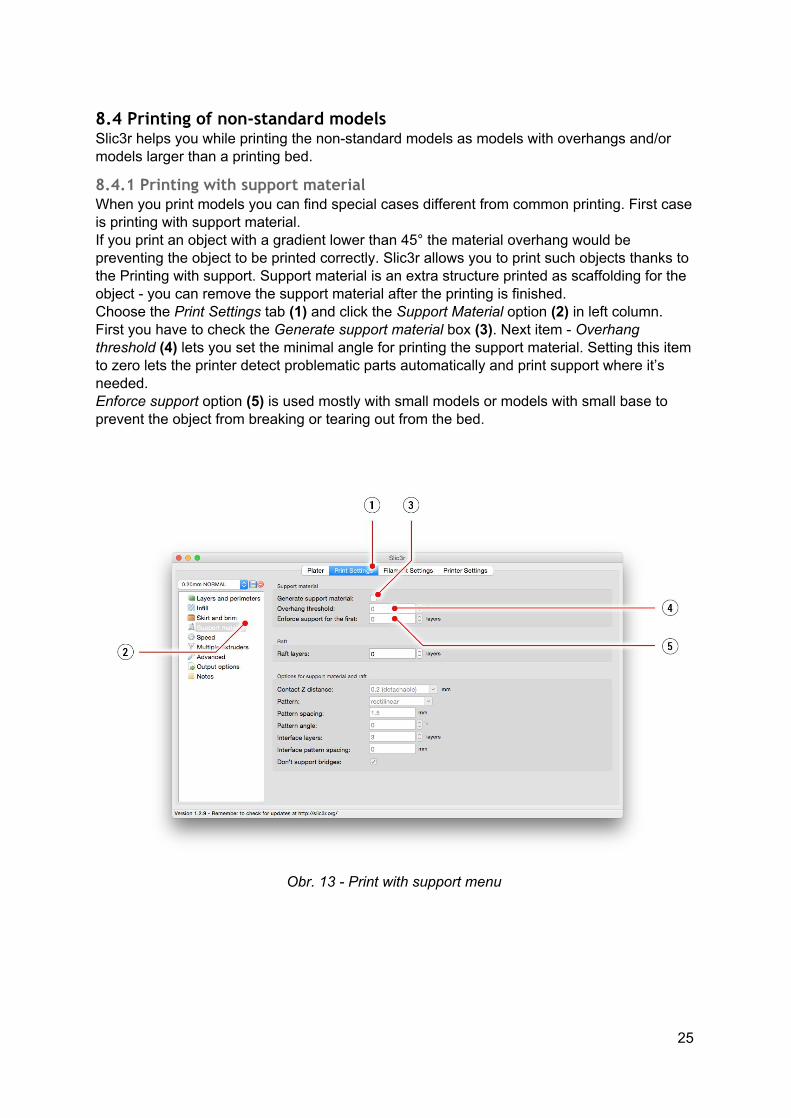
8.4.1 Printing with support material When you print models you can find special cases different from common printing. First case is printing with support material. If you print an object with a gradient lower than 45° the material overhang would be preventing the object to be printed correctly. Slic3r allows you to print such objects thanks to the Printing with support. Support material is an extra structure printed as scaffolding for the object you can remove the support material after the printing is finished. Choose the Print Settings tab (1) and click the Support Material option (2) in left column. First you have to check the Generate support material box (3). Next item Overhang threshold (4) lets you set the minimal angle for printing the support material. Setting this item to zero lets the printer detect problematic parts automatically and print support where it’s needed. Enforce support option (5) is used mostly with small models or models with small base to prevent the object from breaking or tearing out from the bed.
Obr. 13 Print with support menu
25

8.4.2 Large object printing Other special printing case is a printing objects larger than a heatbed. First option is to resize the object to a printable size. Rightclick on an object in Slic3r opens a menu with the Scale… option, then you choose Uniformly, if you want to scale down the model evenly; or you can alter the size of a model along the one of the axes: Along X, Y, Z axis…
Pict. 14 Size change of a printed object
If you need to print an object what doesn’t fit the printer, you have to cut using Slic3r. Rightclick and choose Cut… option in menu. You can cut the object horizontally if you need to perform a cut in a different axis, use the Flip...option in the same menu.
Pict. 15 Cutting the object with Cut option
26
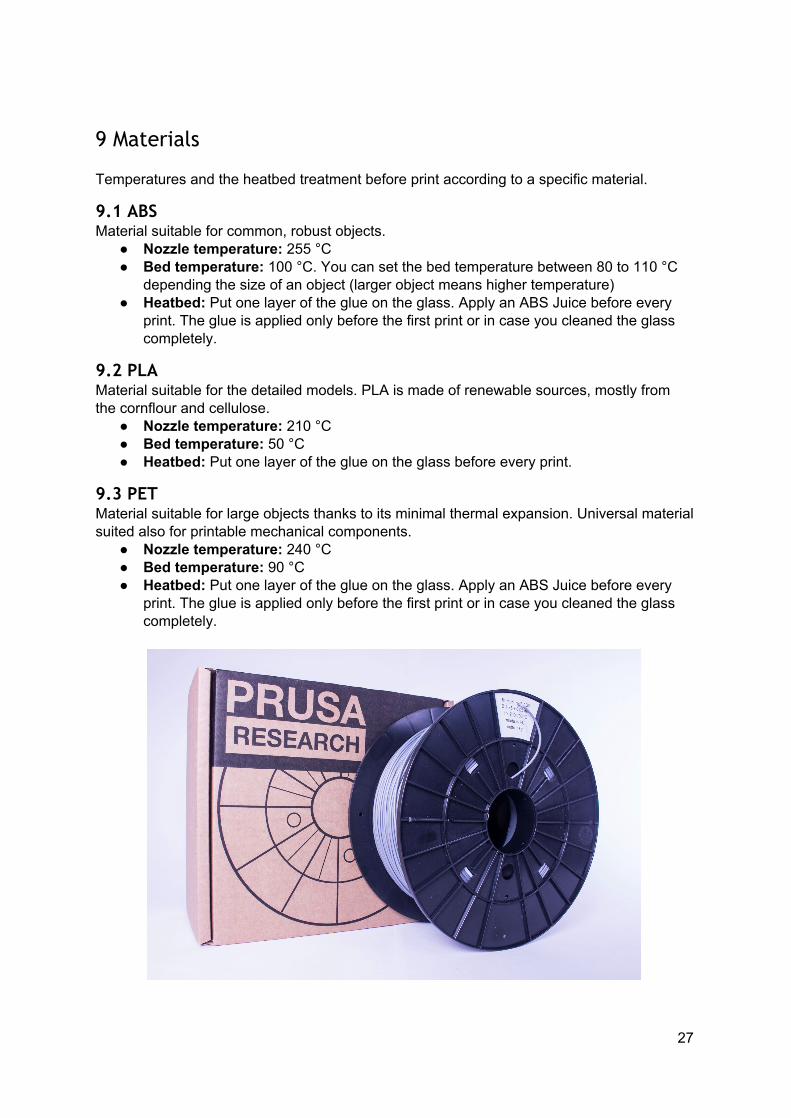
9 Materials Temperatures and the heatbed treatment before print according to a specific material.
9.1 ABS Material suitable for common, robust objects.
Nozzle temperature: 255 °C Bed temperature: 100 °C. You can set the bed temperature between 80 to 110 °C
depending the size of an object (larger object means higher temperature) Heatbed: Put one layer of the glue on the glass. Apply an ABS Juice before every
print. The glue is applied only before the first print or in case you cleaned the glass completely.
9.2 PLA Material suitable for the detailed models. PLA is made of renewable sources, mostly from the cornflour and cellulose.
Nozzle temperature: 210 °C Bed temperature: 50 °C Heatbed: Put one layer of the glue on the glass before every print.
9.3 PET Material suitable for large objects thanks to its minimal thermal expansion. Universal material suited also for printable mechanical components.
Nozzle temperature: 240 °C Bed temperature: 90 °C Heatbed: Put one layer of the glue on the glass. Apply an ABS Juice before every
print. The glue is applied only before the first print or in case you cleaned the glass completely.
27
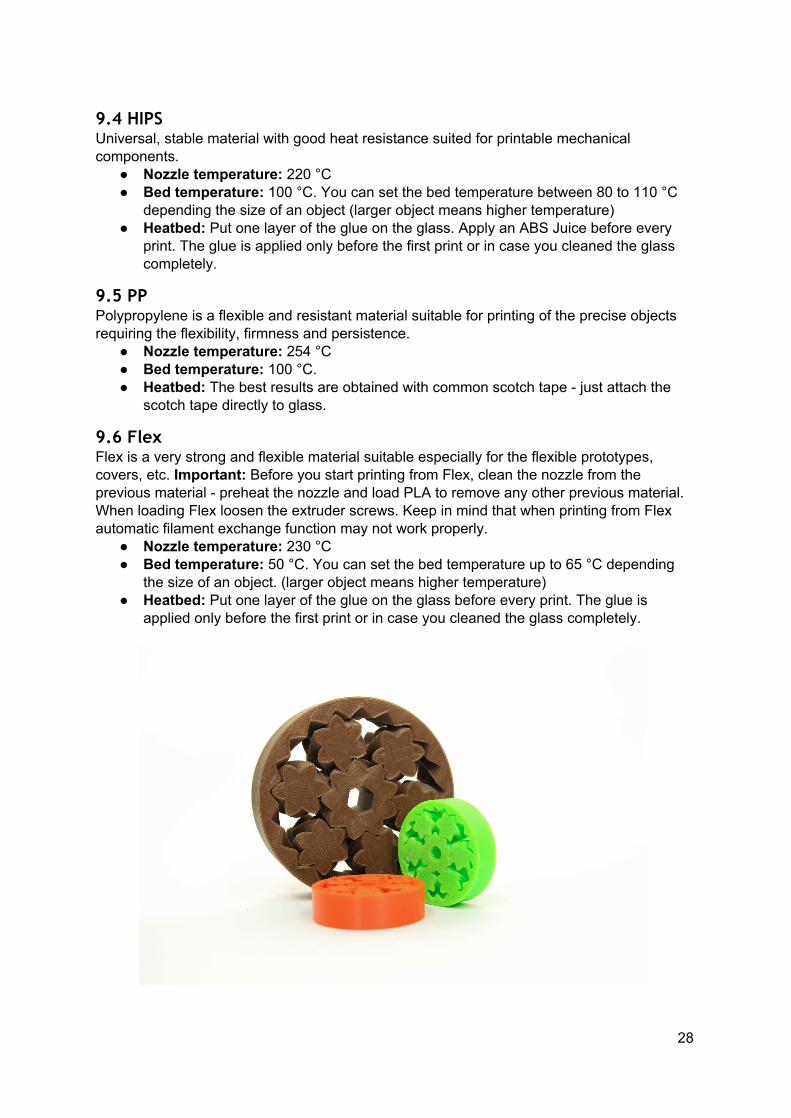
9.4 HIPS Universal, stable material with good heat resistance suited for printable mechanical components.
Nozzle temperature: 220 °C Bed temperature: 100 °C. You can set the bed temperature between 80 to 110 °C
depending the size of an object (larger object means higher temperature) Heatbed: Put one layer of the glue on the glass. Apply an ABS Juice before every
print. The glue is applied only before the first print or in case you cleaned the glass completely.
9.5 PP Polypropylene is a flexible and resistant material suitable for printing of the precise objects requiring the flexibility, firmness and persistence.
Nozzle temperature: 254 °C Bed temperature: 100 °C. Heatbed: The best results are obtained with common scotch tape just attach the
scotch tape directly to glass.
9.6 Flex Flex is a very strong and flexible material suitable especially for the flexible prototypes, covers, etc. Important: Before you start printing from Flex, clean the nozzle from the previous material preheat the nozzle and load PLA to remove any other previous material. When loading Flex loosen the extruder screws. Keep in mind that when printing from Flex automatic filament exchange function may not work properly.
Nozzle temperature: 230 °C Bed temperature: 50 °C. You can set the bed temperature up to 65 °C depending
the size of an object. (larger object means higher temperature) Heatbed: Put one layer of the glue on the glass before every print. The glue is
applied only before the first print or in case you cleaned the glass completely.
28
10 FAQ - Printer maintenance and print issues
10.1 Glass cleaning
Glass cleaning is the most frequent printer maintenance. If the glass is dirty or there is an asymmetrical glue layer, it is recommended to soak the glass in lukewarm water and leave it for a few minutes. The glass can be then easily cleaned.
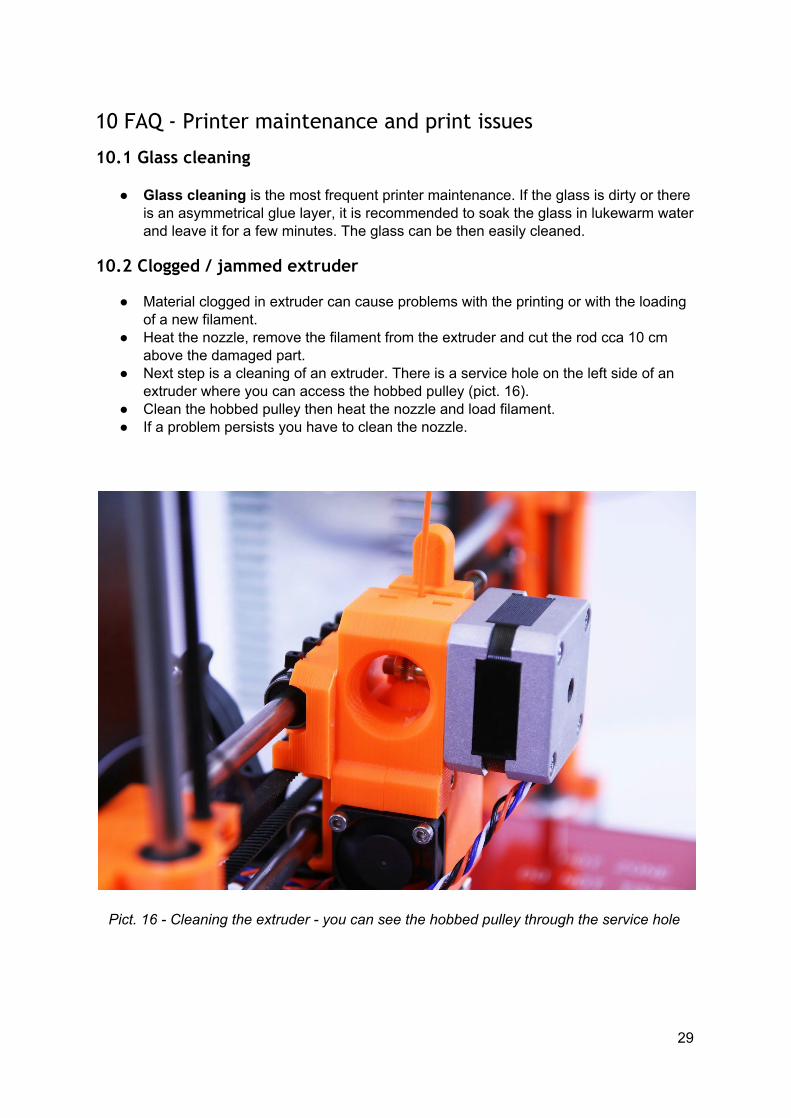
10.2 Clogged / jammed extruder
Material clogged in extruder can cause problems with the printing or with the loading of a new filament.
Heat the nozzle, remove the filament from the extruder and cut the rod cca 10 cm above the damaged part.
Next step is a cleaning of an extruder. There is a service hole on the left side of an extruder where you can access the hobbed pulley (pict. 16).
Clean the hobbed pulley then heat the nozzle and load filament. If a problem persists you have to clean the nozzle.
Pict. 16 Cleaning the extruder you can see the hobbed pulley through the service hole
29
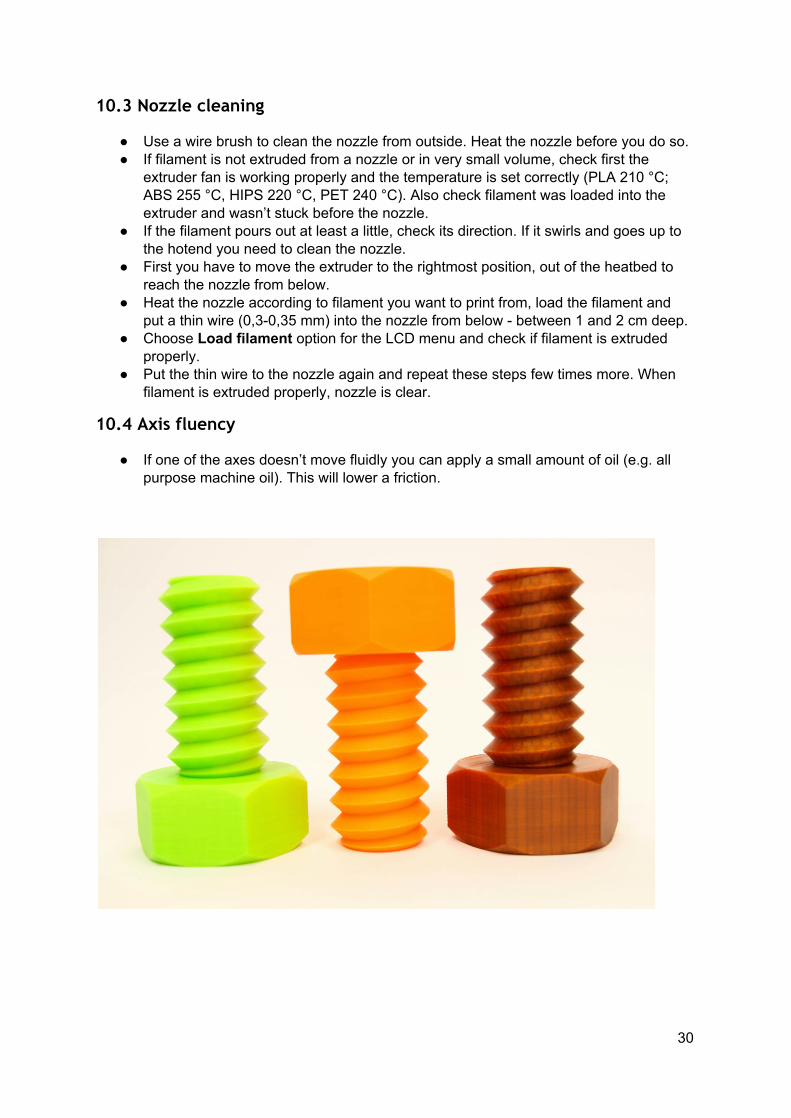
10.3 Nozzle cleaning
Use a wire brush to clean the nozzle from outside. Heat the nozzle before you do so. If filament is not extruded from a nozzle or in very small volume, check first the
extruder fan is working properly and the temperature is set correctly (PLA 210 °C; ABS 255 °C, HIPS 220 °C, PET 240 °C). Also check filament was loaded into the extruder and wasn’t stuck before the nozzle.
If the filament pours out at least a little, check its direction. If it swirls and goes up to the hotend you need to clean the nozzle.
First you have to move the extruder to the rightmost position, out of the heatbed to reach the nozzle from below.
Heat the nozzle according to filament you want to print from, load the filament and put a thin wire (0,30,35 mm) into the nozzle from below between 1 and 2 cm deep.
Choose Load filament option for the LCD menu and check if filament is extruded properly.
Put the thin wire to the nozzle again and repeat these steps few times more. When filament is extruded properly, nozzle is clear.
10.4 Axis fluency
If one of the axes doesn’t move fluidly you can apply a small amount of oil (e.g. all purpose machine oil). This will lower a friction.
30
10.5 Calibration issues
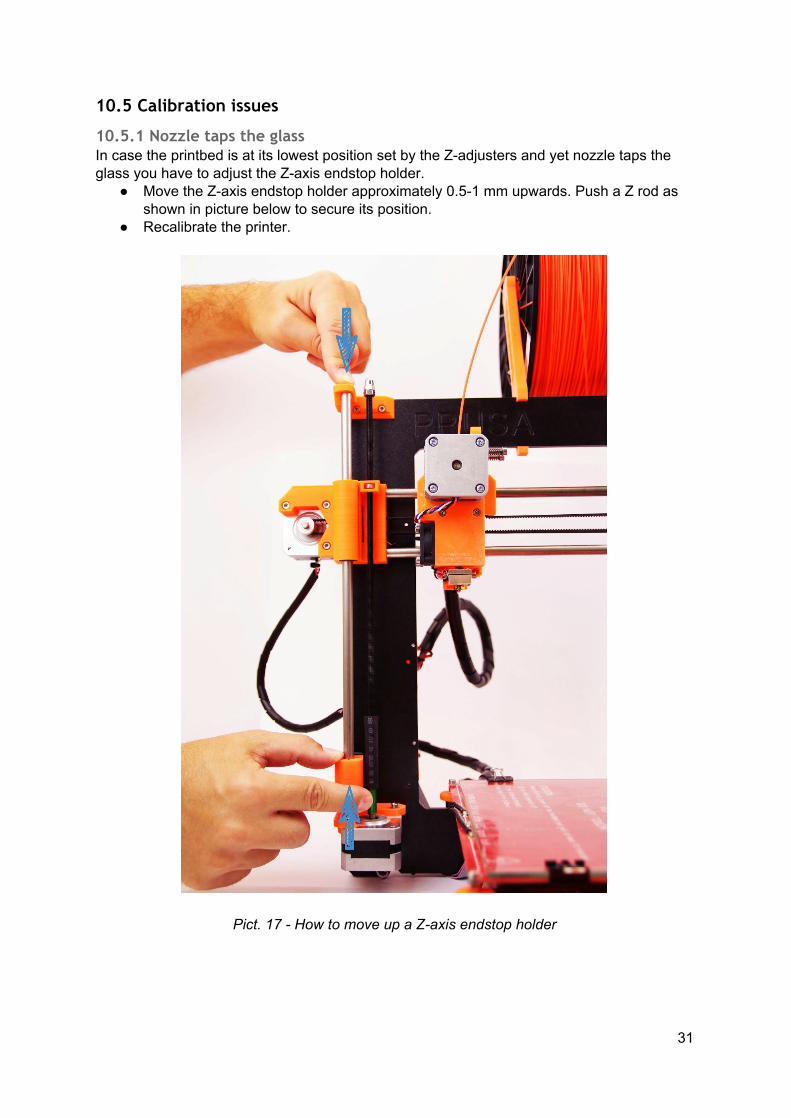
10.5.1 Nozzle taps the glass In case the printbed is at its lowest position set by the Zadjusters and yet nozzle taps the glass you have to adjust the Zaxis endstop holder.
Move the Zaxis endstop holder approximately 0.51 mm upwards. Push a Z rod as shown in picture below to secure its position.
Recalibrate the printer.
Pict. 17 How to move up a Zaxis endstop holder
31
10.5.2 Different spacing between nozzle and glass after every Z-axis reset Tighten the screws holding a Zaxis endstop.
10.5.3 Glass is unstable and doesn’t hold firmly Unstable glass may be caused by two different reasons. First check if there is any
dirt between the glass and heatbed. If yes, remove all dirt. Glass instability may be caused by uneven position of the Zadjusters. Set all Zadjusters to the lowest position heatbed has to be at the lowest possible
position. Recalibrate the printer. Tighten all Zadjusters evenly to avoid the printbed deflection.
10.5.4 Default X-axis position is outside the glass Move the Xaxis endstop to the right so endstop would form a plane with the printer
frame. Reset the Xaxis. If the microswitch moves to the left with the extruder movement, tighten the ziptie
holding a switch or change the ziptie and tighten it properly.
10.5.5 Uneven spacing of the nozzle on the X-axis opposite ends Check if the distance between Xends and Zendstop holders is the same on both
sides. Hold one of the Zaxis threaded rods and rotate with the other one to straighten the
difference. Reset the Zaxis and recalibrate the printer.
32
10.6 Printing problems
10.6.1 ABS models tear up from the glass when printing The most often reason for this issue is too low temperature of the heatbed. If you print a larger object you need to raise the temperature to 105115 °C. The larger the area and the object height, the greater the temperature has to be. Also check the heatbed is calibrated and the glass is prepared properly as described in chapter Glass preparation.
10.6.2 Layers break and split when printing from ABS material ABS material has a higher thermal expansion than other materials. We suggest other materials as PET, HIPS or PLA when you print larger models.
10.6.3 Models move the glass during the print Glass is not fastened to the bed properly. Use more binder clips a print the object again.
10.6.4 Models contain either too much or not enough of the filament You can manage the filament flow during the print. Use the LCDknob and choose Tune Flow xx% where you can adjust the filament flow. Pronterface users can enter the value M221 Sxx into the command line.
When you change the filament flow next print will use the same settings unless you change it again in menu or you reset the printer or unplug it from the power source.
10.7 Problems with finished models
10.7.1 Model breaks and/or is easily destructed A typical feature of larger models printed from ABS. If you have set the temperature properly, the printer is away from drafts and object design is right, the printed object should not break. The easiest way to avoid breaking or overall model fragility is the choice of a different material. The strongest are PET, HIPS and PLA while PLA has low heat resistance and PET is the firmest and has the lowest thermal expansion.
33
11 FAQ - common issues when assembling the printer kit
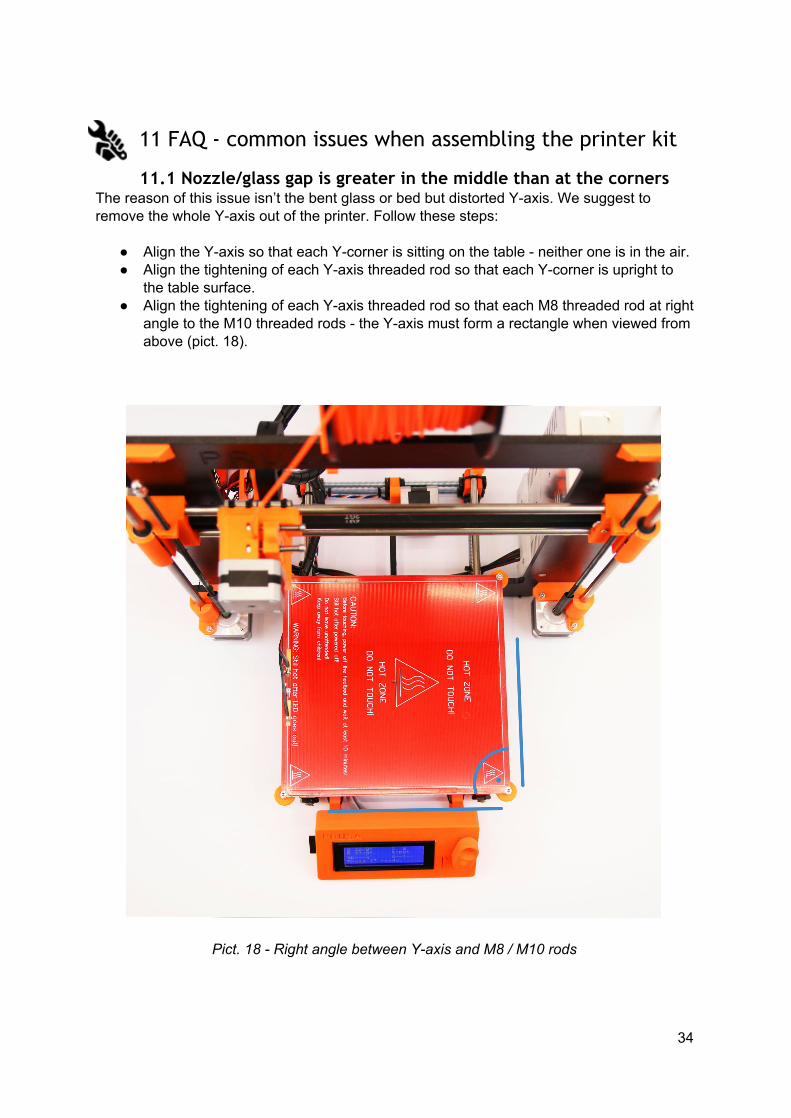
11.1 Nozzle/glass gap is greater in the middle than at the corners The reason of this issue isn’t the bent glass or bed but distorted Yaxis. We suggest to remove the whole Yaxis out of the printer. Follow these steps:
Align the Yaxis so that each Ycorner is sitting on the table neither one is in the air. Align the tightening of each Yaxis threaded rod so that each Ycorner is upright to
the table surface. Align the tightening of each Yaxis threaded rod so that each M8 threaded rod at right
angle to the M10 threaded rods the Yaxis must form a rectangle when viewed from above (pict. 18).
Pict. 18 Right angle between Yaxis and M8 / M10 rods
34

11.2 Printer stops printing soon after start Extruder is overheated. Make sure the nozzle fan is working properly. If not, please inspect its connection according to the assembly manual.
Pict. 19 Proper wiring of the connectors
11.3 Printer can’t read SD card First, make sure that the file name on the SD does not contain special characters otherwise the file could not be displayed on LCD. If there is no error in the file name, check the EXT2 wiring (from electronics to LCD). If the cable is connected properly, try to swap cables.
35
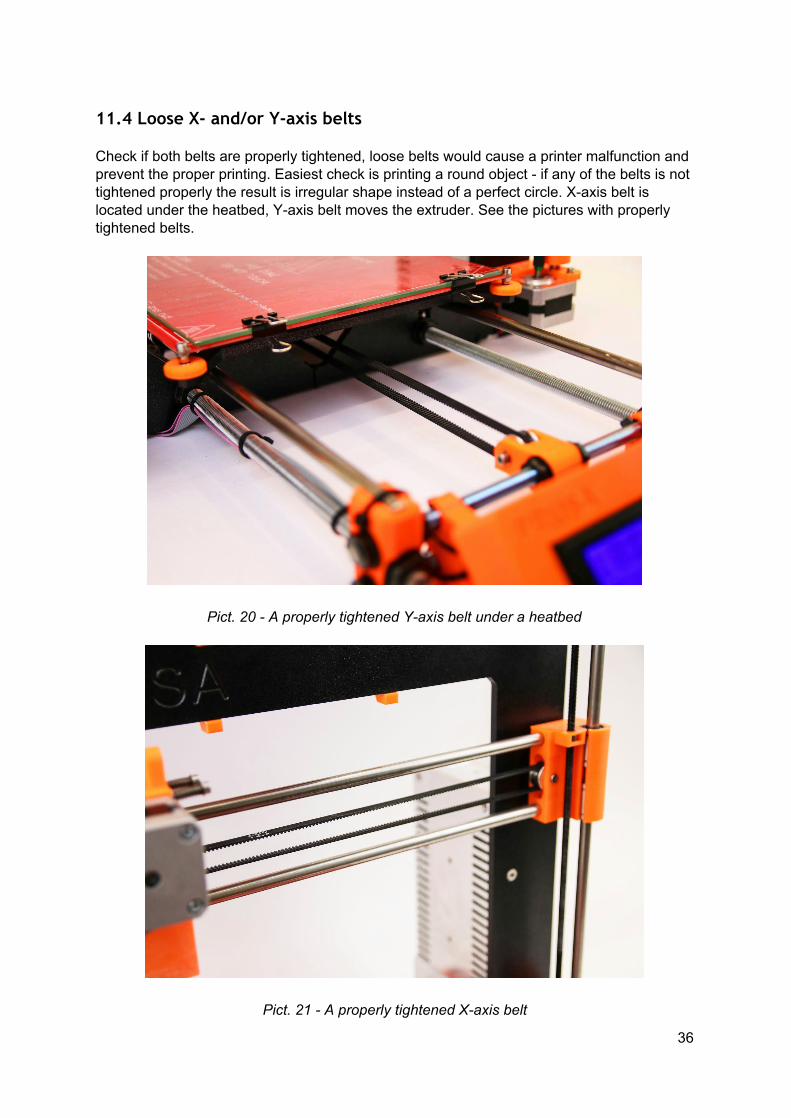
11.4 Loose X- and/or Y-axis belts Check if both belts are properly tightened, loose belts would cause a printer malfunction and prevent the proper printing. Easiest check is printing a round object if any of the belts is not tightened properly the result is irregular shape instead of a perfect circle. Xaxis belt is located under the heatbed, Yaxis belt moves the extruder. See the pictures with properly tightened belts.
Pict. 20 A properly tightened Yaxis belt under a heatbed
Pict. 21 A properly tightened Xaxis belt
36
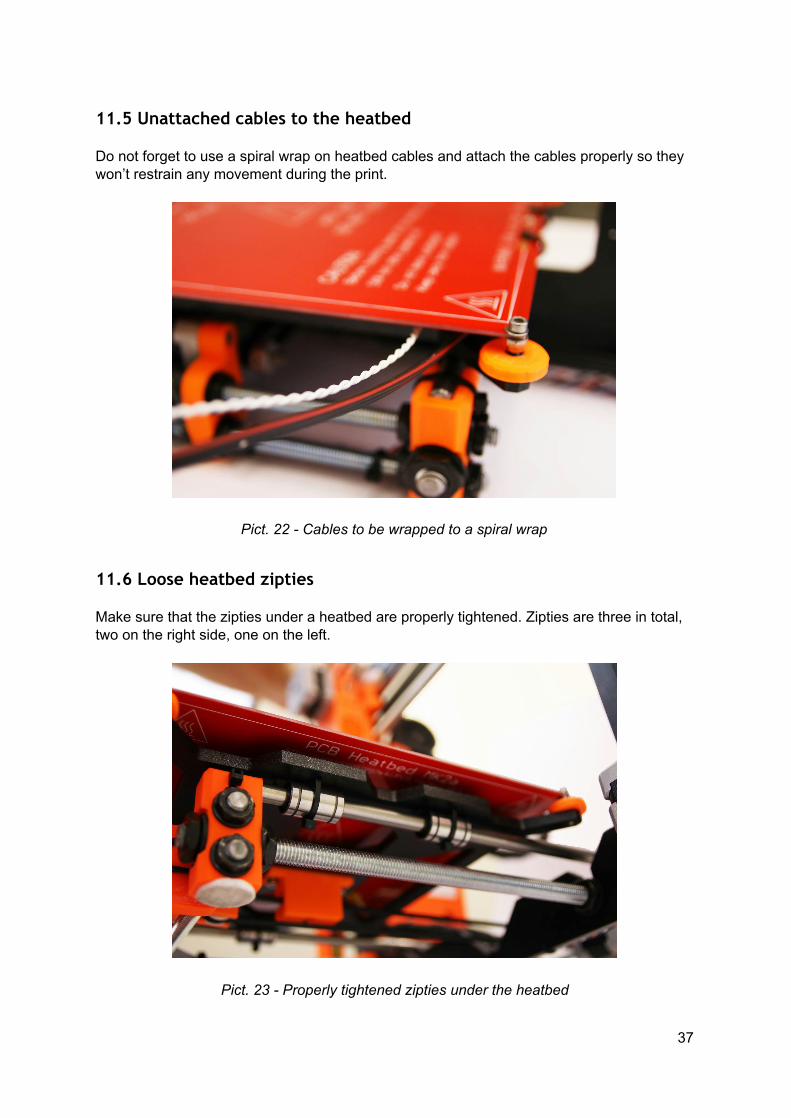
11.5 Unattached cables to the heatbed Do not forget to use a spiral wrap on heatbed cables and attach the cables properly so they won’t restrain any movement during the print.
Pict. 22 Cables to be wrapped to a spiral wrap
11.6 Loose heatbed zipties Make sure that the zipties under a heatbed are properly tightened. Zipties are three in total, two on the right side, one on the left.
Pict. 23 Properly tightened zipties under the heatbed
37

Notes:
