guidelines for project activity surrounding
TRANSCRIPT

1
Guidelines for Project Activity Surrounding:
Who to contact in the Collaboratory
Charter Reviews
MVP Reviews
Individual Performance Reviews
Project Reports
Project Records
Last Updated:
September 26, 2017

2
Contents Who to contact in the Collaboratory .............................................................................................................................. 4
Charter Review .............................................................................................................................................................. 5
Definition ................................................................................................................................................................... 5
Preparing for the Charter Review .............................................................................................................................. 5
Delivering the Charter Review Presentation .............................................................................................................. 5
Charter Review Preparation Checklist ....................................................................................................................... 6
MVP Guidelines ............................................................................................................................................................ 8
Definition ................................................................................................................................................................... 8
Planning at the Start of the MVP Cycle ................................................................................................................... 10
Preparing for an MVP Review at the End of the Cycle ........................................................................................... 10
After the MVP Review… ........................................................................................................................................ 10
Facilitating the MVP Review Session – Recommended Outline ............................................................................. 11
Part 1 – Design Review – 1 Hour ........................................................................................................................ 11
Part 2 – Assessment – 15 minutes ....................................................................................................................... 11
Part 3 –Feedback – 15 minutes ............................................................................................................................ 11
Guideline for Introduction ....................................................................................................................................... 12
Collab Staff Responsibility .................................................................................................................................. 12
Project Team Responsibility ................................................................................................................................ 12
Guideline for Discussion/Facilitated Review .......................................................................................................... 12
MVP Tips ................................................................................................................................................................ 13
MVP Review Preparation Checklist ........................................................................................................................ 14
Individual Performance Assessment ............................................................................................................................ 16
Performance Assessment Meetings ......................................................................................................................... 16
Performance Assessment Survey ............................................................................................................................. 16
Project Report Guidelines ............................................................................................................................................ 18
Definition ................................................................................................................................................................. 18
Report Framework ................................................................................................................................................... 18
Updating the Report ................................................................................................................................................. 18
Report Narrative ...................................................................................................................................................... 18
Figures ..................................................................................................................................................................... 19
Revision Tracking .................................................................................................................................................... 19
Organization ............................................................................................................................................................ 20
Sample Outline ........................................................................................................................................................ 20
Project Report Essential Characteristics/Grading Rubric (Quality of Documentation) ........................................... 20
Project Report Essential Characteristics (Quality of Content) ................................................................................. 21
Project Record Guidelines ........................................................................................................................................... 23
Project Record Definition: ....................................................................................................................................... 23
Project Record Audience: ........................................................................................................................................ 23

3
Project Record Mechanics: ...................................................................................................................................... 24
Planning Well ...................................................................................................................................................... 24
Abstract ................................................................................................................................................................ 24
Figures/Tables ..................................................................................................................................................... 24
Citations ............................................................................................................................................................... 26
Revision Tracking .................................................................................................................................................... 26
Documenting Unresolved Issues ............................................................................................................................. 26
Professionalism ........................................................................................................................................................ 26
Content Expectations ............................................................................................................................................... 26
Level of Effort ......................................................................................................................................................... 26
Project Record Categories, Summary and Definitions ............................................................................................ 27
Essential characteristics of all Project Records (Quality of Documentation) .......................................................... 29
Category-Specific Content Expectations ................................................................................................................. 30
Problem Definition .............................................................................................................................................. 30
Communication ................................................................................................................................................... 31
Research .............................................................................................................................................................. 32
Analysis ............................................................................................................................................................... 33
Engineering Decisions ......................................................................................................................................... 34
Design: Biomedical ............................................................................................................................................. 35
Design: Mechanical/Electrical ............................................................................................................................. 36
Design: Civil/Structural ....................................................................................................................................... 37
Design: Software ................................................................................................................................................. 38
Prototyping .......................................................................................................................................................... 39
Testing ................................................................................................................................................................. 40
Testing: Software Verification............................................................................................................................. 41
How-to/Training .................................................................................................................................................. 42
In-progress ........................................................................................................................................................... 43
Preliminary/Conceptual Design ........................................................................................................................... 44
Other .................................................................................................................................................................... 45

4
Who to contact in the Collaboratory
Doug Flemmens, Director
Connections between Collab and broader Messiah College campus/structure
Connections between Collab and community outside of Messiah
Fundraising and giving to the Collab (not related to site teams)
Concerns about any Collab staff or overall program
Exploring and vetting new project ideas Dereck Plante, Engineering Projects Manager
Engineering Project Support including the following: o Hiring process/staffing a project o Partner communications (can attend meetings or assist if partner is unresponsive) o Deadline or technical issues o Conflict resolution o Arranging meetings with Messiah staff o Unusual project activity that requires special permission or use of facility outside of Frey o Coordinating/connecting with external professional consultants/MVP panelists o Exploring and vetting new project ideas o Ordering project supplies (also Andy Erikson, Paul Myers, John Meyer—depending on
the project) Lori Zimmerman, Program Manager
Overall health of Collab program and its projects
MVP scheduling, tech and room set up
Site team training
Project Support for non-engineering projects and teams o Hiring process/staffing a project
Partner communications (can attend meetings or assist if partner is unresponsive)
o Deadline issues o Conflict resolution o Arranging meetings with or communicating with Messiah staff/offices
Shannon Walker, Administrative Assistant and Logistics Coordinator
Project finances/balances/petty cash
Reserving Frey 353 Conference room
Site team logistics
Ordering supplies for non-engineering projects Jessica Kline, Student Director
General questions/comments/concerns about Collab
How to get involved
Information on Discipleship Community
Student leadership opportunities and support

5
Charter Review
A Guideline for a Charter Review Presentation
Definition
A Charter Review is a brief presentation by the team to relevant stakeholders regarding the
overall mission and vision of the project. The presentation is intended to align all team members
and support personnel on a common direction and vision for project activity. The meeting
should provide opportunity for the team to solicit feedback and to solidify any aspects of the
project charter that were previously unclear.
Preparing for the Charter Review
An essential first step in preparing for a charter review is completing the project charter. The
Collaboratory provides a template for project charters that will guide the team through essential
elements in framing a successful project.
Delivering the Charter Review Presentation
The charter review meeting will be scheduled for 30 minutes. The team should prepare a formal
presentation lasting no more than 15 minutes, leaving the remaining time for questions and
discussion. The presentation should include the following essential elements:
1. Describe the partner’s vision and the target community.
2. Develop a clear problem statement – what is it that your team is hoping to solve?
3. List any design standards, specifications that must be followed, and any specific user
requirements as requested by the partner. This information should also be included in
KPI (Key Performance Indicator) section of the charter.
4. Describe methodology your team plans to take in solving the problem. This includes
briefly updating the audience on work that has already been done.
5. Provide an estimated timeline of major project activity, assigning general themes to the
next two or three MVP cycles.
6. Provide a list of previously drafted documents that are relevant to your team.
7. Describe steps your team will take to meet all project KPI’s. For those teams that are not
traveling or have limited interaction with the target community, do your best to mention
how you how you could work with your partner to define success for these KPI’s.
6
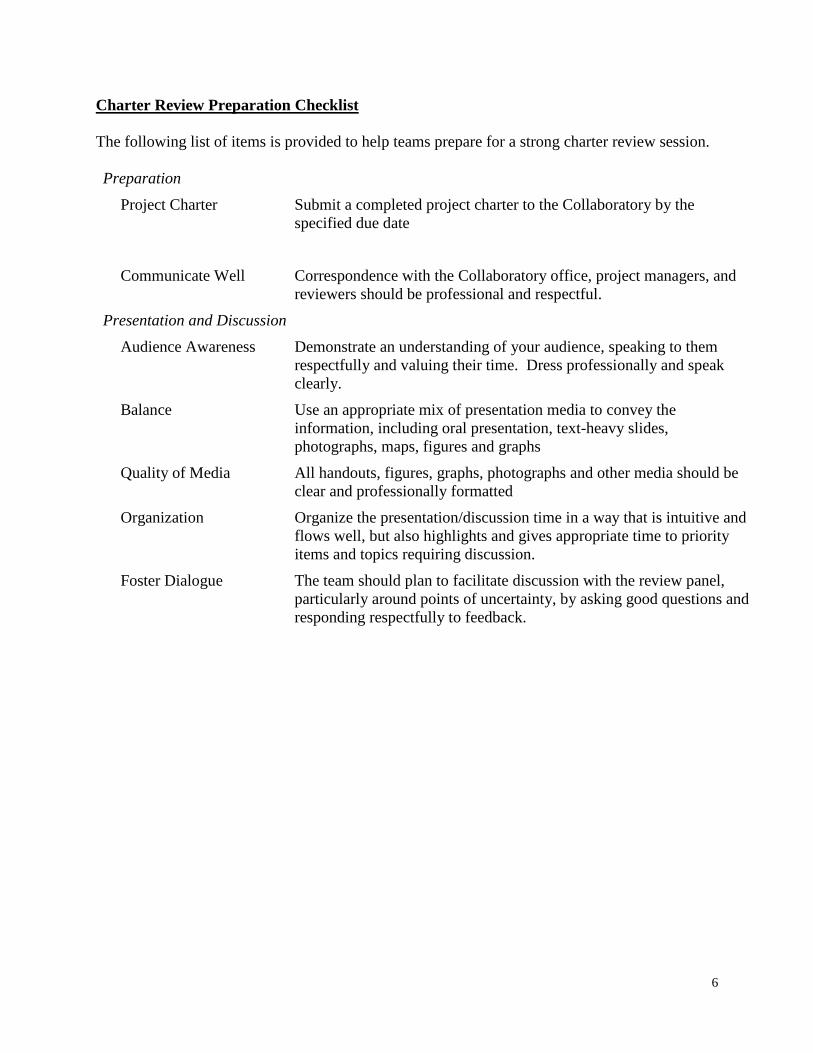
Charter Review Preparation Checklist
The following list of items is provided to help teams prepare for a strong charter review session.
Preparation
Project Charter Submit a completed project charter to the Collaboratory by the
specified due date
Communicate Well Correspondence with the Collaboratory office, project managers, and
reviewers should be professional and respectful.
Presentation and Discussion
Audience Awareness Demonstrate an understanding of your audience, speaking to them
respectfully and valuing their time. Dress professionally and speak
clearly.
Balance Use an appropriate mix of presentation media to convey the
information, including oral presentation, text-heavy slides,
photographs, maps, figures and graphs
Quality of Media All handouts, figures, graphs, photographs and other media should be
clear and professionally formatted
Organization Organize the presentation/discussion time in a way that is intuitive and
flows well, but also highlights and gives appropriate time to priority
items and topics requiring discussion.
Foster Dialogue The team should plan to facilitate discussion with the review panel,
particularly around points of uncertainty, by asking good questions and
responding respectfully to feedback.

7
Content
Partner/Client Describe the nature of the partnership and that partner’s vision and
mission. In the absence of a partnership, describe the stakeholders for
your work.
Problem Statement Clearly articulate the problem that needs to be solved, focusing on the
problem itself not on possible solutions.
Specification Describe what a successful solution might entail – this probably
involves cost, timeline, and some performance metrics
Goals Clearly explain the overall mission and scope of work taken on by your
team for the coming year. This includes setting context for projects
that span multiple years – briefly summarize work that was done in
previous years and make it clear how this year’s effort fits into the
broader project story.
Methodology Describe the team’s general approach to solving the problem at hand.
Timeline Demonstrate awareness of an overall project timeline, including target
dates for key deliverables
Documentation For project teams inheriting work from previous years, provide a list of
currently drafted or completed documents that are current, relevant,
and will become part of your project report.
KPI’s Describe how your team defines success or take the necessary steps to
define success for all project KPI’s

8
MVP Guidelines
A Guideline for MVP Planning and Reviews
Definition
An MVP (Minimum Viable Progress) review provides an opportunity for the team to present
the overall purpose of the project with particular focus on recent activities towards achieving that
purpose. The presentation shall anticipate and encourage dialogue with a review panel. Effective
MVP reviews will leave the panelists with an accurate perception of the project’s status and the
team with helpful input from the panelists towards achieving their goals. MVP reviews also
provide an opportunity for the Collaboratory Staff to check in on the status and health of a
project team. Time between MVP reviews will be approximately 7 working weeks.
Scheduling MVPs for the 2017-2018 Academic year for Engineering Teams
In an effort to better support MVP presentations and create more space for Monday night
discipleship and project work, we are attempting to plan the MVPs for all engineering teams for
the entire academic year. All teams will submit their top three choices for their schedule for the
year during Workshop week or as soon as able. Each team will have the option between the
following 8 scheduling plans which allow for 2 or 3 MVPs per academic year. The final
schedule will take into consideration the availability of all required attendees and the students on
the project. All MVPs will take place on Friday afternoons.
Scheduling options A, B and C include 3 MVPs for the academic year
Scheduling options D, E, F, G and H include 2 MVPs for the academic year
OPTION SPECIFIC DESCRIPTIONS
Option “A”: Three MVP Presentations during 2017-18 academic year
Dates Event Details
Aug 29 – Sept 28 Project work 4 weeks of project work and prep before 1st MVP presentation
Sept 29 MVP presentation 2:00 or 3:45
Sept 30 – Dec 7 Project work 7 weeks of project work and prep before 2nd MVP presentation (excluding breaks)
Dec 8 MVP presentation 2:00 or 3:45
Dec 9 – April 12 Project work 7 weeks of project work and prep before 3rd MVP presentation (excluding breaks)
April 13 MVP presentation 2:00 or 3:45 (No additional year-end reporting required)
Option “B”: Three MVP Presentations during 2017-18 academic year
Dates Event Details
Aug 29 – Oct 5 Project work 5 weeks of project work and prep before 1st MVP presentation
Oct 6 MVP presentation 2:00 or 3:45
Oct 7 – Feb 8 Project work 7 weeks of project work and prep before 2nd MVP presentation (excluding breaks)
Feb 9 MVP presentation 2:00 or 3:45
Feb 10 – April 19 Project work 7 weeks of project work and prep before 2nd MVP presentation (excluding breaks)

9
April 20 MVP presentation 2:00 or 3:45 (No additional year-end reporting required)
Option “C”: Three MVP Presentations during 2017-18 academic year
Dates Event Details
Aug 29 – Oct 19 Project work 6 weeks of project work and prep before 1st MVP presentation (excluding breaks)
Oct 20 MVP presentation 2:00 or 3:45
Oct 21 – Feb 15 Project work 7 weeks of project work and prep before 2nd MVP presentation (excluding breaks)
Feb 16 MVP presentation 2:00 or 3:45
Feb 17 – April 26 Project work 7 weeks of project work and prep before 2nd MVP presentation (excluding breaks)
April 27 MVP presentation 2:00 or 3:45 (No additional year-end reporting required)
Option “D”: Two MVP Presentations during 2017-18 academic year
Dates Event Details
Aug 29 – Oct 26 Project work 7 weeks of project work and prep before 1st MVP presentation (excluding breaks)
Oct 27 MVP presentation 2:00 or 3:45
Oct 28 – Feb 22 Project work 7 weeks of project work and prep before 2nd MVP presentation (excluding breaks)
Feb 23 MVP presentation 2:00 or 3:45
Feb 24 – May 3 Project work 7 weeks of project work until end of year - Additional year-end reporting required
Option “E”: Two MVP Presentations during 2017-18 academic year
Dates Event Details
Aug 29 – Nov 2 Project work 8 weeks of project work and prep before 1st MVP presentation (excluding breaks)
Nov 3 MVP presentation 2:00 or 3:45
Nov 4 – Mar 1 Project work 7 weeks of project work and prep before 2nd MVP presentation (excluding breaks)
Mar 2 MVP presentation 2:00 or 3:45
Mar 3 – May 3 Project work 6 weeks of project work until end of year - Additional year-end reporting required
Option “F”: Two MVP Presentations during 2017-18 academic year
Dates Event Details
Aug 29 – Nov 9 Project work 9 weeks of project work and prep before 1st MVP presentation (excluding breaks)
Nov 10 MVP presentation 2:00 or 3:45
Nov 11 – Mar 8 Project work 7 weeks of project work and prep before 2nd MVP presentation (excluding breaks)
Mar 9 MVP presentation 2:00 or 3:45
Mar 10 – May 3 Project work 5 weeks of project work until end of year - Additional year-end reporting required
Option “G”: Two MVP Presentations during 2017-18 academic year
Dates Event Details
Aug 29 – Nov 16 Project work 10 weeks of project work and prep before 1st MVP presentation (excluding breaks)
Nov 17 MVP presentation 2:00 or 3:45
Nov 18 – Mar 22 Project work 7 weeks of project work and prep before 2nd MVP presentation (excluding breaks)
Mar 23 MVP presentation 2:00 or 3:45
Mar 24 – May 3 Project work 4 weeks of project work until end of year - Additional year-end reporting required
Option “H”: Two MVP Presentations during 2017-18 academic year
Dates Event Details
Aug 29 – Nov 30 Project work 11 weeks of project work and prep before 1st MVP presentation (excluding breaks)
Dec 1 MVP presentation 2:00 or 3:45
Dec 2 – Apr 5 Project work 7 weeks of project work and prep before 2nd MVP presentation (excluding breaks)
Apr 6 MVP presentation 2:00 or 3:45
Apr 7 – May 3 Project work 3 weeks of project work until end of year - Additional year-end reporting required

10
Planning at the Start of the MVP Cycle
1. At the beginning of the academic year, all teams should complete an MVP Planning form
no later than September 15, 2017 regardless of when their MVP is scheduled.
2. After each MVP, an MVP planning form should be filled out no later than 2 weeks after
the MVP has occurred.
Preparing for an MVP Review at the End of the Cycle
1. Submit no less than 3 business days before MVP presentation:
o MVP Submission Form
Report and Records included in this form
o Deadlines for the Submission Form are due by 5pm on the Tuesday before your
Friday MVP.
2. Develop your preliminary, high-level goals for the next MVP cycle in time to share at the
review.
3. Prepare each project team member for the MVP review session. The Collaboratory will
prepare a project summary sheet for the review panel and facilitate the meeting.
After the MVP Review…
1. MVP Review panelists will upload review comments for project report and records by
the MVP Review date via the “Project Report and Records (First Draft Comments)”
form.
2. After receiving review comments, the team has one week to resubmit documents, if
required or desired, via the “Project Report and Records (Final Submission)” form. See
the assessment and grading portion of this document for more details.
o Deadlines for the Final Submission Form are due by 5pm on the following Friday.

11
Facilitating the MVP Review Session – Recommended Outline
Part 1 – Design Review – 1 Hour
MVP Review sessions are often most fruitful when there is open multi-directional dialogue.
There may be components of the meeting that are presentation-based, but those times should be
minimized and interspersed with opportunities for discussion and feedback.
Collab Staff
Introduce the MVP approach and review format, welcome and thank volunteers.
Moderate the time and transitions to keep the meeting on schedule.
Review Panel
Introduce themselves and participate in dialogue with the team through the review.
Design Team
5-10 minutes – Introduction (this should include overall context of the project)
~50 minutes – Facilitated Discussion/Review The team should be prepared to manage
the 50 minutes well to ensure that the most important topics receive appropriate time for
discussion. (This will typically mean having about 20 minutes of “uninterrupted” content.
See detailed “Guideline for Discussion/Facilitated Review” section below.
Guests
Guests other than those on the review panel are welcome to observe the session and
participate in the discussion.
Part 2 – Assessment – 15 minutes
Collab Staff
Facilitate the review panel assessment conversation while moderating time.
Review Panel
Discuss the health of the team and assess the team performance according to the MVP
rubric privately, apart from the design team.
Design Team
Self-assess their performance separate from the review panel using the same rubric.
Develop overall goals for the next MVP based on the feedback already received. Teams
should come to the meeting prepared with drafts of those goals that will be honed during
the review meeting (Part 1) and later delivered to the panel (Part 3).
Part 3 –Feedback – 15 minutes
Collab Staff
Moderate time and facilitate transition points in discussion.
Review Panel
Provide real-time feedback to the team towards improvement comparing the two rubric
assessments.
Provide feedback on the updated goals for the next MVP developed by the team.
Design Team
Share self-assessment and goals for the next MVP and accept feedback.

12
Guideline for Introduction
Collab Staff Responsibility
A Collaboratory staff person will give a brief introduction/overview of the MVP structure and
allow people to introduce themselves, particularly if there is a guest from off campus. The
Collaboratory staff person equips the panelists, enforces time limits, and communicates results to
Collaboratory leadership.
Project Team Responsibility
A member(s) from the project team gives a short overview of the project (3-4 minutes):
o Briefly, state names and area of study for each member on the team.
o Explain the need this project will meet and describe the relevant stakeholders.
o Who is your partner? How frequently and to what degree are you in contact with
them?
If applicable, show a geographic representation of where the project is
focusing.
o Explain the goal and current progress towards applicable KPI’s.
o Clearly outline goals specific to this MVP review.
Guideline for Discussion/Facilitated Review
The project team should lead a discussion focused on progress towards goals of the MVP cycle.
Portions of the discussion could be direct presentation, but the one-directional presentation time
should be limited to 20 minutes (in other words, a presentation prepared assuming zero
discussion would take no more than 20 minutes so that there is time remaining for discussion to
take place at the MVP review within the 50 minute timeframe.)
Management of that time will require intentional prioritization. It may not be necessary to share
details related to all work done during the MVP cycle. Instead, focus on key activities and on
items for which the team most needs feedback from the review panel. It is helpful to prepare
questions in advance of the review in areas where the team is most in need of support from the
review panel.
Everyone on the team is responsible for the quality of the facilitated review, but not everyone
needs to have a formal presentation or speaking role. Throughout an academic year all team
members should have a speaking role in the MVP setting at least once.
If the partner is present, gratefully acknowledge their role in the project and adjust your meeting
plan to incorporate them, perhaps asking them to reaffirm your understanding of the need and
specifications for your project and requesting specific feedback about the proposed solution to
meet that need. When the partner is present, the Project Manager should affiliate with the team
as one of the people charged with meeting the needs of the partner while taking on a less-critical
review approach than might be the case in reviews in which the partner is absent.

13
MVP Tips
1. Edit your PowerPoint for proper grammar and content relevant to the MVP presentation.
2. Wear professional or business casual dress, and treat the MVP presentation as a business
event. The MVP review panel consist of faculty and other industry or professional
representatives.
3. Practice transitions to make them flow smoothly and quickly.
4. Ensure the font and font sizes are legible on the PowerPoint. There is a template
Collaboratory PowerPoint available on Collab Internal.
5. If you have detailed calculations and charts in your project records that are important in
your presentation, print them as a handout so your reviewers can look at them during the
presentation. Feel free to refer to these handouts, but do not go through each of them in
detail. If you receive a question, then you can use the handout to talk more specifically
regarding your response.

14
MVP Review Preparation Checklist
The following list of items is provided to help teams prepare for a strong MVP review session.
The review panelists will be expecting to see each of these addressed:
Preparation
MVP Submission Be sure to prepare the MVP Submission form on time, no less than
three business days prior to the MVP review.
Communicate Well Correspondence with the Collaboratory office, project managers, and
MVP reviewers should be professional and respectful.
Presentation and Discussion
Audience Awareness Demonstrate an understanding of your audience, speaking to them
respectfully and valuing their time. Dress professionally and speak
clearly.
Evidence Show evidence of the work that the team has accomplished. This can
include such things as photos, drawings, or physical prototypes.
Oftentimes the evidence will be documented within a project record.
Project Story Be prepared to tell the overall ‘story’ of the project, particularly if there
are guests present who know little about the project. Be sure to include
a clear definition of the problem to be solved and describe the various
stakeholders.
Organization Organize the presentation/discussion time in a way that is intuitive and
flows well, but also highlights and gives appropriate time to priority
items and topics requiring discussion.
Foster Dialogue The best MVP reviews come about when the team facilitates discussion
with the review panel, asking good questions and responding
respectfully to feedback.

15
Evidence of Planning
Goals – Clarity Clearly articulate the goals that had been established for the MVP
planning cycle.
Goals – Difficulty Demonstrate that the goals set were an appropriate level of challenge. In
the event that you began work and realized the goals were either too
challenging or too trivial, how did you respond?
Goals – Deliverables Demonstrate that the deliverables for the MVP, including project records,
were well planned and developed over the course of the MVP, not all
thrown together on the last day.
Goals – Alignment Demonstrate that the goals for the MVP were well aligned with the
overall project goals (e.g. KPIs). In instances where project scope creep
started to occur, explain how you adjusted and maintained a healthy
trajectory.
Goals – Looking
Ahead
Be prepared to share preliminary goals for the next MVP cycle with the
review panel. In particular, it will be important to make sure that what
you perceive to be highest priority moving forward aligns with the
panel’s thinking on priorities.
Evidence of Progress
Goals - MVP Document and explain progress made towards the project’s MVP goals
and offer clarification on goals not achieved.
Documentation The project report should be updated and the project records should be
complete and professional (see separate guidelines documents for each of
these).
Trajectory Demonstrate that the team is on track for on-time delivery of applicable
KPIs. In the event that the team is not on track, acknowledge that and
develop an adjusted timeline and plan.
Team Health
Partner Relationship Clarify the roles of any partners or clients involved in the project and
indicate whether they are appropriately involved in your work.
Efficiency Demonstrate that the team is working efficiently and that the hours
expended on the project are proving fruitful.
Commitment Demonstrate the team’s commitment to overall project success. This
could be in the form of hours worked or heart-felt passion for the project
and target community.
Expertise Demonstrate that the necessary expertise for success is present on the
current team. In the event that other expertise is needed, clearly
articulate that.

16
Individual Performance Assessment
Strong team performance relies heavily on meaningful contributions from each team member.
The Collaboratory project management framework aims to provide formative feedback to
individuals so that they can learn how to become stronger team members. The framework also
provides accountability so that those underperforming are identified.
Individual performance is addressed via two different venues: 1. Performance Assessment
Meetings, and 2. Performance Assessment Surveys
Performance Assessment Meetings
A Performance Assessment Meeting is held one-on-one between the individual and project
manager. The project manager may solicit input from other team members about the
individual’s performance in advance of the meeting.
A significant aspect of the performance assessment meeting is the reflective self-assessment that
the team member should execute in advance of the meeting. The meeting itself then provides an
opportunity for the project manager to affirm or refute the individual’s self-evaluation. The team
member should come to the meeting prepared to lead a discussion about his/her performance on
the team. Factors likely to be relevant include, but are not limited to:
Hours worked
o The number of hours the individual has engaged with the project should align
with that individual’s commitment level
o For credit bearing students, the official institutional commitment is 40 hours of
effort during the semester for each credit hour registered.
This includes hours recorded in categories: Working on tasks,
Documentation, Team meetings, MVP Review meetings and prep, Other
o Hours committed to Collaboratory discipleship and team building exercises are
valued and encouraged. Such commitments are rewarded within the credit
bearing Project structure as a student who invests deeply, positively impacting
individual performance evaluations.
Prompt task completion
Level of difficulty in tasks
Collegiality
Initiative
Overall investment
Performance Assessment Survey
Another tool used to assess individual performance and to provide feedback so that individuals
can grow as team members is an anonymous survey completed by all members of the team.
Anonymity is preferred in this tool so that respondents are more likely to provide a candid
assessment. Team members will be asked the following questions about each other:

17
Person X consistently contributes to meetings by offering ideas or suggestions that
demonstrate a collaborative spirit with the rest of the team
Person X facilitates contributions from other team members by demonstrating respect for
others’ ideas and building upon them in a helpful way
Person X completes assigned tasks on time
Person X takes on tasks at a level of difficulty that is fair and reasonable considering
his/her commitment level to the team and level of preparation (e.g. class year)
Person X fosters a positive team climate
Person X delivers the effort expected for the commitment level
Person X demonstrates initiative by eagerly seeking out opportunities to help the team
succeed.
Person X invests deeply in the project activity or in the Collaboratory, as a whole, by
working more hours than required for the commitment or by bringing a level of passion
that is infectious to the rest of the team

18
Project Report Guidelines
Definition
A project report provides the reader with an accurate and timely perspective on the current state
of the project. The project report should be as complete as possible at any point in time, as if the
project end is imminent. The project report is a living document that will be updated often, but
updates should be saved as new versions so that old versions serve the purpose of archiving.
Report Framework
Determine the audience for your final deliverable/report
Develop an outline of the final report that makes sense for your topic and your audience
Updating the Report
The project report should be updated (in a new version; save the old version for
archiving) each MVP cycle.
The version tracking table in the project report should be kept up-to-date
Report Narrative
The report should begin with an executive summary or abstract that concisely states the
overall purpose and goal of the project, along with the salient points of any conclusions
and the current status.
The goals and objectives should be clearly stated
o What problem are you trying to solve?
o Who cares about the success of the project?
o How will you measure success?
o Are the goals SMART?
The narrative should be updated each MVP cycle. New information should be added,
and outdated information should be updated or removed.
The narrative should be comprehensive, but concise. It should also be cohesive across
sections, even if written by different authors. Avoid including information about aspects
of the project that are no longer relevant – maintain them in an appendix if the team feels
strongly that this piece of project history needs to be included for the end reader.
The tone should be professional and technical, not conversational.
o Technical level: written for other engineers – not necessarily experts in your
discipline and certainly not your project.
The narrative guides the reader to appropriate project records
o Include a summary or abstract of the project record within the report
o Clearly state the implications of the record on the project
o Not all project records need to be included – some are outdated.
Include an appendix with relevant but no longer timely project records
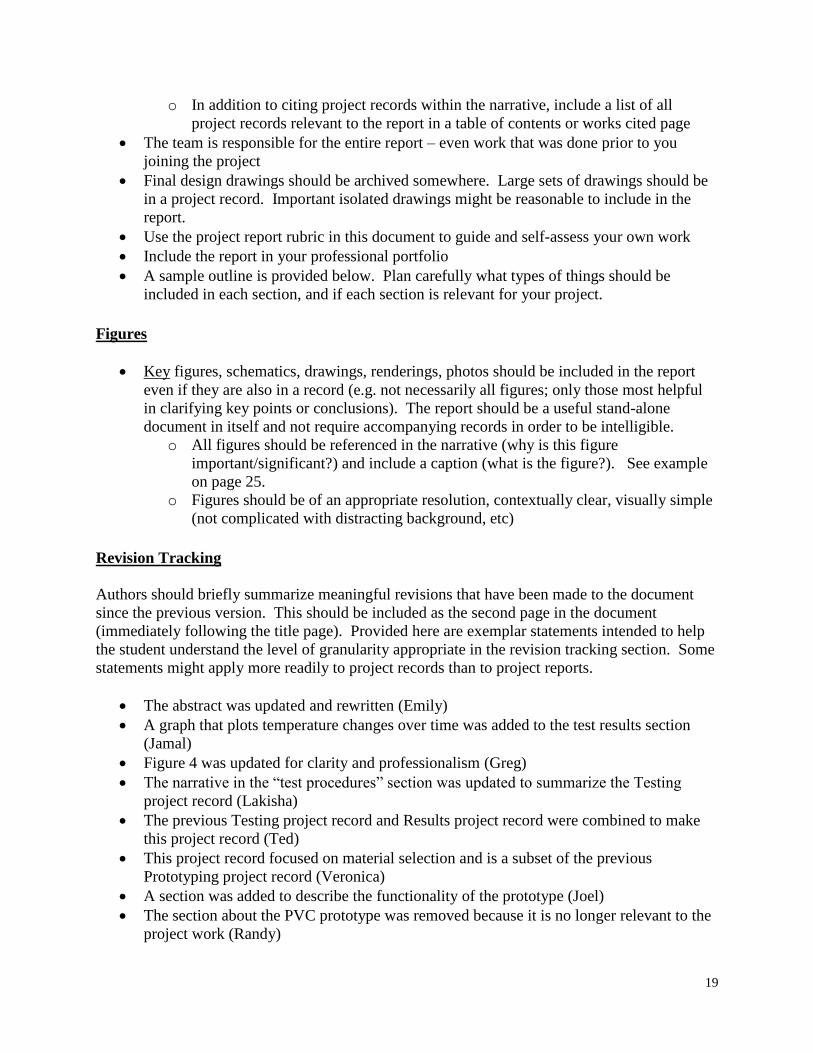
19
o In addition to citing project records within the narrative, include a list of all
project records relevant to the report in a table of contents or works cited page
The team is responsible for the entire report – even work that was done prior to you
joining the project
Final design drawings should be archived somewhere. Large sets of drawings should be
in a project record. Important isolated drawings might be reasonable to include in the
report.
Use the project report rubric in this document to guide and self-assess your own work
Include the report in your professional portfolio
A sample outline is provided below. Plan carefully what types of things should be
included in each section, and if each section is relevant for your project.
Figures
Key figures, schematics, drawings, renderings, photos should be included in the report
even if they are also in a record (e.g. not necessarily all figures; only those most helpful
in clarifying key points or conclusions). The report should be a useful stand-alone
document in itself and not require accompanying records in order to be intelligible.
o All figures should be referenced in the narrative (why is this figure
important/significant?) and include a caption (what is the figure?). See example
on page 25.
o Figures should be of an appropriate resolution, contextually clear, visually simple
(not complicated with distracting background, etc)
Revision Tracking
Authors should briefly summarize meaningful revisions that have been made to the document
since the previous version. This should be included as the second page in the document
(immediately following the title page). Provided here are exemplar statements intended to help
the student understand the level of granularity appropriate in the revision tracking section. Some
statements might apply more readily to project records than to project reports.
The abstract was updated and rewritten (Emily)
A graph that plots temperature changes over time was added to the test results section
(Jamal)
Figure 4 was updated for clarity and professionalism (Greg)
The narrative in the “test procedures” section was updated to summarize the Testing
project record (Lakisha)
The previous Testing project record and Results project record were combined to make
this project record (Ted)
This project record focused on material selection and is a subset of the previous
Prototyping project record (Veronica)
A section was added to describe the functionality of the prototype (Joel)
The section about the PVC prototype was removed because it is no longer relevant to the
project work (Randy)

20
Grammar, spelling, and word choices were improved throughout the document in
response to editorial comments by John Doe. (Helen)
Organization
The organization of the report should be intuitive and appropriate for the content and audience.
There is not a prescribed outline (except a few sections noted below) that all project teams must
follow; instead teams are expected to develop and adopt an organizational scheme that makes
sense in their own context. A sample outline is provided below as a starting point, but additional
sections could be included, some sections could be excluded, and the order could be changed
where appropriate.
Sample Outline
1. Executive Summary or Abstract (required)
2. Problem Definition (required)
3. Project Goals (required)
4. Research
5. Design and Analysis
6. Prototype development
7. Testing and Evaluation
8. Summary of Proposed Solution
9. Implementation and Maintenance plan
10. Conclusion (required)
Project Report Essential Characteristics/Grading Rubric (Quality of Documentation)
Setup and Framing
Title Page Include a descriptive title, updated revision chart, list of contributing
authors, and date of most recent update.
Abstract
Context The abstract should very briefly describe the overall context or the problem
that needs to be solved. Later sections of the report will flesh this out in
greater detail, but the abstract should quickly characterize the overall
situation facing the project team or the team’s client.
Summary The abstract should accurately and efficiently summarize the body of work
contained in the project report.
Conclusion The conclusions or recommendations of the report should be apparent in the
abstract. This is a living document, so conclusions should summarize the
current status or the current thinking of the team even though they may
change once more work has been done.
Communication – High Level
21
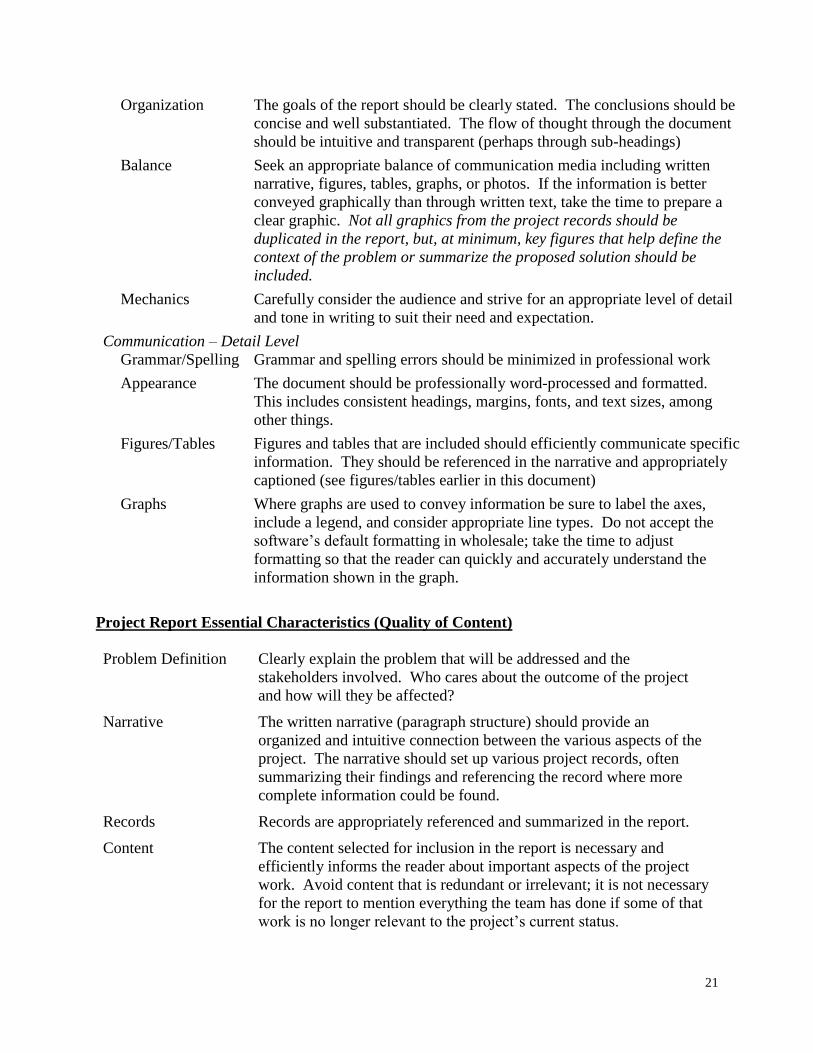
Organization The goals of the report should be clearly stated. The conclusions should be
concise and well substantiated. The flow of thought through the document
should be intuitive and transparent (perhaps through sub-headings)
Balance Seek an appropriate balance of communication media including written
narrative, figures, tables, graphs, or photos. If the information is better
conveyed graphically than through written text, take the time to prepare a
clear graphic. Not all graphics from the project records should be
duplicated in the report, but, at minimum, key figures that help define the
context of the problem or summarize the proposed solution should be
included.
Mechanics Carefully consider the audience and strive for an appropriate level of detail
and tone in writing to suit their need and expectation.
Communication – Detail Level
Grammar/Spelling Grammar and spelling errors should be minimized in professional work
Appearance The document should be professionally word-processed and formatted.
This includes consistent headings, margins, fonts, and text sizes, among
other things.
Figures/Tables Figures and tables that are included should efficiently communicate specific
information. They should be referenced in the narrative and appropriately
captioned (see figures/tables earlier in this document)
Graphs Where graphs are used to convey information be sure to label the axes,
include a legend, and consider appropriate line types. Do not accept the
software’s default formatting in wholesale; take the time to adjust
formatting so that the reader can quickly and accurately understand the
information shown in the graph.
Project Report Essential Characteristics (Quality of Content)
Problem Definition Clearly explain the problem that will be addressed and the
stakeholders involved. Who cares about the outcome of the project
and how will they be affected?
Narrative The written narrative (paragraph structure) should provide an
organized and intuitive connection between the various aspects of the
project. The narrative should set up various project records, often
summarizing their findings and referencing the record where more
complete information could be found.
Records Records are appropriately referenced and summarized in the report.
Content The content selected for inclusion in the report is necessary and
efficiently informs the reader about important aspects of the project
work. Avoid content that is redundant or irrelevant; it is not necessary
for the report to mention everything the team has done if some of that
work is no longer relevant to the project’s current status.

22
Updates The project report should be up-to-date for the current state of the
project. For projects of longer duration, the report should be
periodically updated and cleansed of outdated and irrelevant
information.
Conclusions Conclusions and recommendations should be clear and concise. For
reports drafted while the project remains in progress, the conclusions
should be consistent with the current status of the project even if they
are likely to change once more work has been done.

23
Project Record Guidelines
Project Record Definition:
A project record documents the results of work undertaken to achieve a specific task associated
with a project goal. The scope of this work is expected to be completed within a short (several
weeks) period of time and often not require the efforts of the entire project team. Results or
conclusions of the work documented in a Project Record are expected to be cited in the Project
Report. Project records are living documents and should be updated if there is ongoing activity
on the same topic (update is a new version; maintain the old version for archiving). It is
understood that Project Records used during MVP reviews and cited in current Project Reports
will at times be incomplete because work is ongoing.
Project Record Audience:
There are multiple audiences for a Project Record.
Yourself: Include the detail needed for you to recall the process and reasoning
you used to reach your stated conclusion. You will reference this in
the future
Your Team: Include enough detail for those following you to learn about this
facet of your project at a sufficient level to pick up the work if this
question needs to be revisited
MVP Panelists: Include sufficient detail for panelists to ask well informed questions
about your process and conclusions
Partner/Client: In some instances project teams will need to provide documentation
to a client or partner. Preparing project records with this audience
in mind limits the amount of re-writing needed at the project’s
completion.

24
Project Record Mechanics:
Planning Well
Before you begin work you need to:
Identify with your advisor what type of project record will be used to report your process
and results – Examples: Prototyping, Testing, Research, Engineering Decisions, Design,
etc.
Write the Goal statement. This should provide the context for your work – why was it
needed to make progress towards a project objective?
Create an outline of the record
o Identify the section headings appropriate for the work being undertaken
o Identify anticipated figures and tables
Abstract
After the work has been completed, write the Abstract. This is summary of your document that
elevates the most important points. The abstract sets a short context of why the work was
undertaken and states the conclusion.
Figures/Tables
Anticipate that most project records will require some combination of figures and tables
to summarize or convey key information
Figures include drawings, photographs and graphs of results.
Every figure and table must be labeled with an identifying number or letter and a caption.
Typically figure captions are shown below the figure and table captions are above the
table. To insert a caption in Microsoft Word, right-click on the figure or table and choose
“Insert Caption.” (example on the next page)
The caption includes enough information for the reader to know what the figure or table
is without reading the text of the record
The written narrative must reference all figures and tables. “Figure 3 shows the
prototype as set up in the testing rig.”
Figures and tables should be located close to the text which references them; either on the
same page or the next page.

25
Figure/Table Example – Captions and References:
The previous investigation of appropriate testing protocol determined that we would use the
PH1000 meter for the testing of all our water samples. Use of this device and the set-up of the
test is shown in Figure 1. All samples collected from the various scenarios under study were
tested by the same means. The pH data from the tests is summarized in Table 1. It is apparent
from the table that parameter 3 has the most impact on the water’s pH.
Figure 1. Test setup using the PH1000 meter.
Table 1. Summary of measured pH for all water samples.
Sample Test Scenario Measured pH
A Control 7.0
B Parameter 1 6.8
C Parameter 2 6.6
D Parameter 3 9.1
E Parameter 4 7.2

26
Citations
Cite the source of any claim that you make unless one of the following statements is true
The claim springs directly from measurements or analysis undertaken as a part of the
record. Data or other items coming from other project records should cite those project
records.
The claim is commonly understood to be true within your profession’s expertise.
Revision Tracking
Refer to the “Revision Tracking” section under Project Reports; apply the same concept to Project Records.
Documenting Unresolved Issues
If the work documented in a project record is still in process, include a summary of outstanding
questions or work needing to be done to finish the goals articulated at the beginning of the effort.
At times the work documented in a project record leads to the need for additional work which
will be included in a different record. Document the issues identified by the current effort that
are initiating that new phase of work.
Professionalism
Project records should be written for a well-informed audience. The tone of writing should be
professional, not conversational or informal. Slang and casual phrases should be avoided.
Content Expectations
There are some general expectations of all project records that are explained in the next section.
Following that, note that each category of work (prototyping, testing, etc.) has a unique and
specific set of expectations. Refer to the pages that follow.
Level of Effort
The level of work involved with drafting the current version of a project record will be
characterized by one of the following statements:
(2) Nearly the entire document was drafted in this MVP cycle
(2) The document was started in a previous MVP cycle but was substantially updated in
this cycle
(1) The document was nominally updated after being drafted in a previous MVP cycle
(1) The document was started in this MVP cycle but is a work in progress and not nearly
complete
(1) The record summarized activity that is trivial to document, such as meeting minutes
or communication records

27
Project Record Categories, Summary and Definitions
Project records shall be of high quality in terms of documentation (see Essential characteristics
of all Project Records) and of high quality in terms of content (Specific Content Expectations are
clarified for each of the categories defined below).
Problem definition - often involves investigation that better clarifies the problem that must be
solved or the specifications of the end user.
Communication - records summarize salient points from key correspondence that impacts the
problem definition or design process.
Research - often involves careful investigation of a particular question while considering
appropriate sources of information.
Analysis - generally refers to modelling (often mathematically) some physical reality in an
existing or proposed design in order to determine some specific performance metric – force in a
member, flow in a pipe, etc.
Engineering decisions - often involve a non-trivial choice between two or more alternatives.
This can range from choosing which prototype design to move towards final design or which
supply to use for sourcing a particular raw material.
Design: Biomedical - appropriate for any device that interacts with the human body or bodily
fluids. There are specific considerations such as safety and biocompatibility that need to be
examined when the device is intended for use in patient health.
Design: Mechanical/Electrical - involves the careful selection of component sizes, materials, and
other details to refine a conceptual mechanical design and schematic, board, and wiring details
for electrical designs.
Design: Civil/Structural - often includes development of plans for something that will be built
only once and will not involve prototyping or other iterative development.
Design: Software - involves the planning and organizing of a section of code that needs to be
written.
Prototyping - often involves physical or analytical construction of something intended to
simulate portions of a future completed design.
Testing - often involves verifying the performance level of an existing element or anticipating its
performance by evaluating a prototype.
Testing: Software verification - involves the testing of developed code to ensure functionality
and accuracy.

28
How-to/Training - involves developing a clear procedure for others to follow, such as an
assembly sequence.
In-progress - records that have yet to draft significant content but are instead assembled to
provide a framework for future writing and documentation.
Preliminary/Conceptual design - involves development of ideas and concepts that will be vetted
as potential solutions for a problem and advanced to final design.
Other - Wait, do not default to choosing ‘other’ because you did not diligently consider the other
categories. Choose other only if the project record truly does not align with another category.

29
Essential characteristics of all Project Records (Quality of Documentation)
Setup and Framing
Title Page Include a descriptive title, updated revision chart, list of contributing
authors, and date of most recent update.
Title The title itself should be descriptive and intuitively understood by the
reader.
Classification The record should be classified as a particular type – prototyping, testing,
etc.
Abstract
Context The abstract should clearly explain how the work documented in this
project record fits within the context of the overall project. Why is this
work being done and how will its conclusion affect the project?
Summary The abstract should accurately and efficiently summarize the body of work
contained in the project record.
Conclusion The conclusions or recommendations of the record should be apparent in
the abstract.
Communication – High Level
Organization The goals of the record should be clearly stated. The conclusions should be
concise and well substantiated. The flow of thought through the document
should be intuitive and transparent (perhaps through sub-headings)
Balance Seek an appropriate balance of communication media including written
narrative, figures, tables, graphs, or photos. If the information is better
conveyed graphically than through written text, take the time to prepare a
clear graphic.
Mechanics Carefully consider the audience and strive for an appropriate level of detail
and tone in writing to suit their need and expectation.
Communication – Detail Level
Grammar/Spelling Grammar and spelling errors should be minimized in professional work
Appearance The document should be professionally word-processed and formatted.
This includes consistent headings, margins, fonts, and text sizes, among
other things.
Figures/Tables Figures and tables that are included should efficiently communicate specific
information. They should be referenced in the narrative and appropriately
captioned (see figures/tables earlier in this document)
Graphs Where graphs are used to convey information be sure to label the axes,
include a legend, and consider appropriate line types. Do not accept the
software’s default formatting in wholesale; take the time to adjust
formatting so that the reader can quickly and accurately understand the
information shown in the graph.

30
Category-Specific Content Expectations
Each project record shall satisfy the minimum expectations described in the following sections
for its particular category.
Problem Definition
Problem definition often involves investigation that better clarifies the problem that must be
solved or the specifications of the end user.
Problem definition records will typically address the following items:
Statement of Need The record should clearly define and articulate the need – what is the
problem that must be solved. If conducted in the midst of an existing
larger problem, one might only need to clarify what additional
information about the problem is needed and why it is being sought at
this stage of the design.
Investigation Summarize the data or other evidence that is gathered in order to
better understand the need.
Performance
Specification
Carefully describe the specification by which the solution’s
performance will be measured. The solution will be considered
successful if costs less than fifty dollars, purifies 50 gallons of
drinking water per day, and can be maintained by local villagers.

31
Communication
Communication records summarize salient points from key correspondence that impacts the
problem definition or design process.
Communication records will typically address the following items:
Topic Clearly describe the primary topic or purpose of the communication
record. The following correspondence clarifies the partnership
obligations of the Collaboratory and of Forward Edge.
Content Often the correspondence can be consolidated and summarized to
include only main points. Carefully track the dates and sources of the
correspondence. Skype call on June 6. Email received by John Doe
from Harry Smith on October 2.
Conclusion Conclusions based on the correspondence that impact the project
should be summarized and clearly stated. Rio Missions indicated that
lumber is much harder to source locally than cable so the design will
include minimal amounts of lumber.

32
Research
Research often involves careful investigation of a particular question while considering
appropriate sources of information.
Research records will typically address the following items:
Topic Selection The topic or purpose of the research should be clearly defined and
articulated.
Sources The sources of information used should be appropriate for the purpose
of the work. This could range anywhere from a merchant’s website to
a design standard or a journal publication.
Content Relevant information from the various sources is adequately
summarized.
Citation Citations should be such that one could find the same information
again in a second search, if necessary.
Substantiating Claims Any claim made in the written work should be adequately
substantiated by citation and the narrative itself. Oftentimes tagging a
citation on the end of a line that makes a claim is dissatisfying to the
reader – it helps to include in the narrative a brief summary that
includes that sources right to make the claim.
Conclusions The research work ends with a clear conclusion or recommendation
based on the information available.

33
Analysis
Analysis generally refers to modelling (often mathematically) some physical reality in an
existing or proposed design in order to determine some specific performance metric – force in a
member, flow in a pipe, etc.
Analysis records will typically address the following items:
Methodology Why did you use the analysis method you did? This could include
your choice of equation to use (the assumptions of that equation
match the reality of this situation) or the software program to use (the
situation required an analysis more robust than could be done by
hand, so a finite element model was needed). The methodology
chosen should be consistent with the needs of the project at this phase,
both in terms of accuracy and effort required.
Input Specifications The parameters (such as boundary conditions) input to the
mathematical model are a reasonable and appropriate representation of
the physical situation.
Assumptions Some assumptions are almost always made in analysis since it is
impossible to precisely model most physical scenarios. The
assumptions inherent in the analysis should be carefully identified and
their impact on the results accurately summarized (this choice of
boundary condition will lead to conservative results since it will lead
us to over-estimate the stress)
Accuracy The analysis results themselves should be checked for accuracy.
Often this can be done through comparison with results of similar
situations known to be accurate or by bounding the solution between
extreme scenarios.
Precision The precision of the results and the potential for error should be
considered and, to the extent possible, quantified.
Conclusions Do not assume the results “speak for themselves.” The record should
clearly and succinctly state conclusions that are being drawn from the
analysis results and noting the impact those conclusions have on the
future of the project.

34
Engineering Decisions
Engineering decisions often involve a non-trivial choice between two or more alternatives. This
can range from choosing which prototype design to move towards final design or which supply
to use for sourcing a particular raw material.
Engineering decision records will typically address the following items:
Criteria What are the criteria that will be used in deciding which alternative is
most appropriate? What must be true of the chosen alternative?
Describe Alternatives What are the alternatives that seem to be available and satisfy at least
some of the criteria? These are the choices available in this decision.
Constraints/Impact Demonstrate that the constraints and impacts on various areas (e.g.
budget, social impact, environmental impact, implementation
timeline) are well understood.
Prioritizing Criteria The criteria relevant in the decision are appropriately prioritized or
ranked against each other.
Justification The final decision between alternatives should be well explained,
rationalized, and justified.

35
Design: Biomedical
Biomedical designs are appropriate for any device that interacts with the human body or bodily
fluids. There are specific considerations such as safety and biocompatibility that need to be
examined when the device is intended for use in patient health.
Biomedical Design records often address the following items:
Biocompatibility Any aspects of the device that come into contact with the patient
should be assessed for biocompatibility. Consider how the properties
of the materials in the design interact with the user. If the material
contacts the skin, hygiene, friction, and comfort should be considered.
If the device does not contact the patient, this should be noted.
Material Properties The materials in the design should be chosen carefully to maximize
patient health. For example, this may mean absorbing force,
deforming slowly over time, not reacting to bodily fluid, or being
durable enough to withstand a fall. The material choice should be
clearly justified in the context of patient health.
Safety Consider normal operation and possible failure modes of your design
and how they might affect the safety of the user.
Drawings All components of the design should be drawn according to
engineering standards with full use of units and labels. The type of
drawing should correspond to how the device will be manufactured
(i.e. SolidWorks drawing, optical table layout, plasmid map, etc).
FDA Considerations The designer should give preliminary consideration to FDA
guidelines for medical devices. What class (I, II, or III) is this device
anticipated to be? Could this device be considered 510(k) exempt?
Will it have substantial equivalence to an existing device? If not, what
FDA standards and testing may need to be considered as the design
progresses?

36
Design: Mechanical/Electrical
Mechanical design involves the careful selection of component sizes, materials, and other details
to refine a conceptual design. Electrical design involves an understanding of the specifications
and desired outcome of the circuit, which will guide the circuit design, component selection,
board layout, and wiring and board interconnections.
Mechanical and Electrical Design records often address the following items:
Context Clearly describe the context of the work being done – how does this
fit into the larger project?
Specifications Demonstrate a strong understanding of the specifications (what does
the finished design need to do?) from the client. If the design is of a
particular component/subsystem that becomes part of a larger design,
indicate the requirements of the component/subsystem that will make
it compatible with the finished design.
Conceptualization Use tools appropriate to the task to aid with design conceptualization
and visualization. This could include Solidworks, hand sketches, or
physical models for mechanical design and schematics and board
layouts for electrical design.
Detail The level of detail in the design itself, and its documentation, should
be aligned with the stage of development. Final (or nearly final)
design requires much greater attention to detail than concept
development. Final designs should include a materials list with
vendor information and items costs.
Visualizations Provide appropriate visuals – sketches, photos, renderings – to help
the reader quickly understand what you have developed. The
visualizations should be well labeled and captioned. Electrical design
might include screenshots from oscilloscopes or other test equipment
or include a table of achieved parameters.
Description Describe the features of the design at a level of technical detail
appropriate for the intended audience.
Conclusions Summarize important findings from the design exercise, including any
remaining questions that must be addressed in future work.

37
Design: Civil/Structural
Civil/Structural Design often includes development of plans for something that will be built only
once and will not involve prototyping or other iterative development.
Civil/Structural Design records often address the following items:
Context Clearly describe the components of the overall design that are
documented in the project record.
Standards Summarize the design standards that will be used in guiding the
design.
Analytical Model Describe and substantiate the analytical model that will be used to
anticipate demand on the structure or to predict its performance.
Accuracy and Safety Describe the process used to ensure that analysis and design results
are accurate and sufficiently ‘safe.’
Communicating
Results
The outcome of the design should be clearly communicated so that it
can become part of the construction drawings or documents at some
point towards conclusion of the project. This should often be
presented in the format of a drawing or the language of a
specification.

38
Design: Software
Software design involves the planning and organizing of a section of code that needs to be
written.
Software development records often address the following items:
Purpose Clearly describe the purpose of the software that will be developed.
Flowchart Develop a flowchart or other means to describe the high level
organization and functionality of the planned program.
Platform Select and justify the programming platform/language that will be
used for the software development.
Modules Divide the program into various modules and clearly describe the
purpose and function of each.
Conclusion Summarize important findings from the design exercise, including any
remaining questions that must be addressed in future work.

39
Prototyping
Prototyping often involves physical or analytical construction of something intended to simulate
portions of a future completed design.
Prototyping records will typically address the following items:
Documentation There should be thorough records of the prototype itself.
Documentation might include clearly dimensioned fabrication
drawings, blocks of code that are organized and include comments or
a flowchart, or photographs of prototype assembly.
Prototype
Development
Take reasonable steps during the development of the prototype to
ensure accuracy and reasonableness. For instance, simple mock-ups
or computer renderings may be necessary to ensure geometry, fit, and
basic function of the prototype will be as intended.
Representation The prototype should be appropriately representative of the future
completed design considering the stage of design. For example – the
prototyping approach must be informed by the design stage (concept
review or detailed design) and the intended use of the prototype
(aesthetic mock-up, geometric fit mock-up, performance testing, etc).
Component Selection The choice of component parts used to build up the prototype should
be thoughtfully considered in light of intended use, budget, etc.
Fabrication Fabrication of the prototype should be carefully planned so that work
can be done efficiently with minimal impact on others (e.g. lab
technicians, other project teams).
Workmanship The prototype should be neat with an appropriate level (depending on
intended use) of care given to development.

40
Testing
Testing often involves verifying the performance level of an existing element or anticipating its
performance by evaluating a prototype.
Testing records will typically address the following items:
Purpose of Testing The overall purpose of the test should be clearly defined and articulated.
The results of this test will help in determining whether the existing system
needs to be replaced. Notice below that other aspects of setting up the
test are driven by the test’s purpose.
Identify Parameters The team planning the test should carefully identify all parameters that
could significantly impact the test results. Temperature is known to
influence performance of this material so that was held constant
throughout the study. Relative humidity is known to not affect
performance, so it was not monitored.
Experimental Set-up The testing procedure is likely to produce data with a level of accuracy
and precision appropriate for the purpose of the test.
Test Documentation The testing procedure should be documented in a level of detail sufficient
for someone else to reproduce the test, if needed.
Data Collection Collecting data from a test can range from the primitive (e.g. a tape
measure) to very sophisticated electronic devices. The choice of the data
collection technique should be aligned with the purpose of the test and the
required precision and accuracy.
Presentation of Data The data that is collected should be organized and presented in a format
that is intuitive and easy for the reader to interpret. Carefully consider
whether the data should be presented in a table, a graph, or some other
means. Also consider whether it’s necessary to show ALL the data or if
an important subset of the data is most important to the reader.
Analyze Results Do not assume that the results “speak for themselves” even if it seems like
the conclusion is self-evident upon inspection of the data. The narrative
should clearly summarize “what the data means” and highlight key points.
The performance data shows that the filtration system is capable of
passing only 1.2 gallons of water per minute, compared with the
anticipated demand of 2.5 gallons per minute.
Conclusions Interpret the results for the reader in a way that clearly summarizes
conclusions that will be made based on the testing that has taken place.
Since the capacity of the filtration system is clearly below the anticipated
need of the community, replacement of the system is recommended.

41
Testing: Software Verification
Software verification involves the testing of developed code to ensure functionality and
accuracy.
Software verification records often address the following items:
Context Clearly describe the intended purpose of the code that is being verified
and its role within the project.
Proof conditions Develop a set of conditions or parameters that will be used in proof
testing the code. In other words, determine how many successful runs
and with what specific conditions must be observed in order to declare
the software functional and accurate.
Conclusion Summarize relevant conclusions from the verification exercise.

42
How-to/Training
How-to/Training involves developing a clear procedure for others to follow, such as an assembly
sequence.
How-to/Training records often address the following items:
Context Clearly describe the intended purpose of the training guide
Written narrative The written narrative should be clear and concise with the process or
procedure explained clearly and efficiently.
Non-verbal
communication
Training documents often include strategic and perhaps frequent use
of figures or pictures that clearly communicate various steps in the
activity.
Detail A training document must include the appropriate level of detail for
the audience or end-user. It must be sufficiently detailed so that no
steps in the process are left to the imagination, but not so overly-
detailed that the communication is inefficient or the end-user is
frustrated by trivial information.
Conclusion Summarize relevant conclusions from the process of developing a
training document.

43
In-progress
In-progress records are those that have yet to draft significant content but are instead assembled
to provide a framework for future writing and documentation.
In-Progress records often address the following items:
Context Clearly describe the intended purpose of the document
Outline Clearly demonstrate the intended (future) organization of the
document by outlining major section headings.

44
Preliminary/Conceptual Design
Preliminary design involves development of ideas and concepts that will be vetted as potential
solutions for a problem and advanced to final design.
Preliminary design records often address the following items:
Context Clearly describe the intended purpose of the concept development
work. (Examples: 1 - It leads to prototype development with
functionality that will demonstrate some specific functionality of the
proposed finished product. 2 - It is part of developing a list of many
options that will be compared with one another for selection to move
into final design.)
Problem Statement Development of design alternatives should demonstrate a working
understanding of the problem statement that define a successful
design.
Specification Development of design alternatives should demonstrate a working
understanding of the specifications that define a successful design.
Assessment Documentation should indicate initial assessment design alternatives,
citing strengths and weaknesses of various ideas in meeting the need
of the problem statement.
Description Documentation does not need to approach that required of final
design, but a description sufficient for future generations of the team
to recall what was considered (as an example) is essential.
Conclusion Summarize relevant conclusions from the process of developing a
preliminary design.

45
Other
All generic project records should include at least the following elements:
Context Clearly describe the context and purpose of the work that is being
documented.
Content Develop well-organized content aligned with the purpose of the work.
Conclusion Summarize relevant conclusions and the impact they have on the
project.