growing leaf vegetables under difficult conditions; gardening guidebook
TRANSCRIPT

181
CHAPTER FOURTEEN
Growing Leaf Vegetables Under Difficult Conditions
In an ideal world all vegetables gardeners would have plenty of space; deep, well drained fertile soil; a long warm growing season in full sunlight; an inch of rain every week; enough money to buy the best seeds and tools; and enough time and energy to get to know the plants that are providing them with delicious and nourishing food. In the real world most gardeners face at least a few hurdles between the sowing and reaping. Frequent obstacles to growing greens include conditions that are too hot, too cold, too wet, too dry or too shady, as well as too little time or money for gardening, too little space or saline soil. Often a gardener faces combinations of difficulties. He might have a cold shady spot with little time for gardening, or a small corner of the yard in a hot climate and with saline soil.
If conditions are sufficiently difficult, a household may decide to forego gardening entirely and buy all its vegetables. Leaf crops present such a range of options and growing techniques, however, that it is usually possible to successfully grow some type of greens despite the various obstacles. Below are some of the general tech-niques that can help overcome less-than-optimal growing condi-tions with some of the best leaf crops for those conditions.
SITE AND CLIMATE PROBLEMSToo HotVery few food plants thrive when the temperature get above 32° C (90° F). The increasingly long and hot days of summer can cause bolting. When plants begin to flower their leaves normally donate protein and sugars to the reproductive process, and consequently develop harsher flavors and tougher textures. High tempera-tures can also cause cellular membranes to breakdown, allowing electrolytes to flow out of cells too freely and thus damaging the health of the plant.
A study published in Science in 20011 suggests that heat injury to vegetable crops is likely to become a more serious problem as a consequence of global temperatures rising. The impact on gardeners in the US or Europe may not be severe, at least in the short term, but much of the tropics could be hard hit. Several important crops are already approaching the limit of their heat tolerance in Africa and Latin America, so that even a small temperature increase could reduce yields drastically. This will be especially true where water for irrigation is restricted and in the vast areas that are already classified as semi-arid and marginal for intensive agriculture.
1 Science, 2001 IPCC Third Assessment Report
182
CHAPTER FOURTEEN
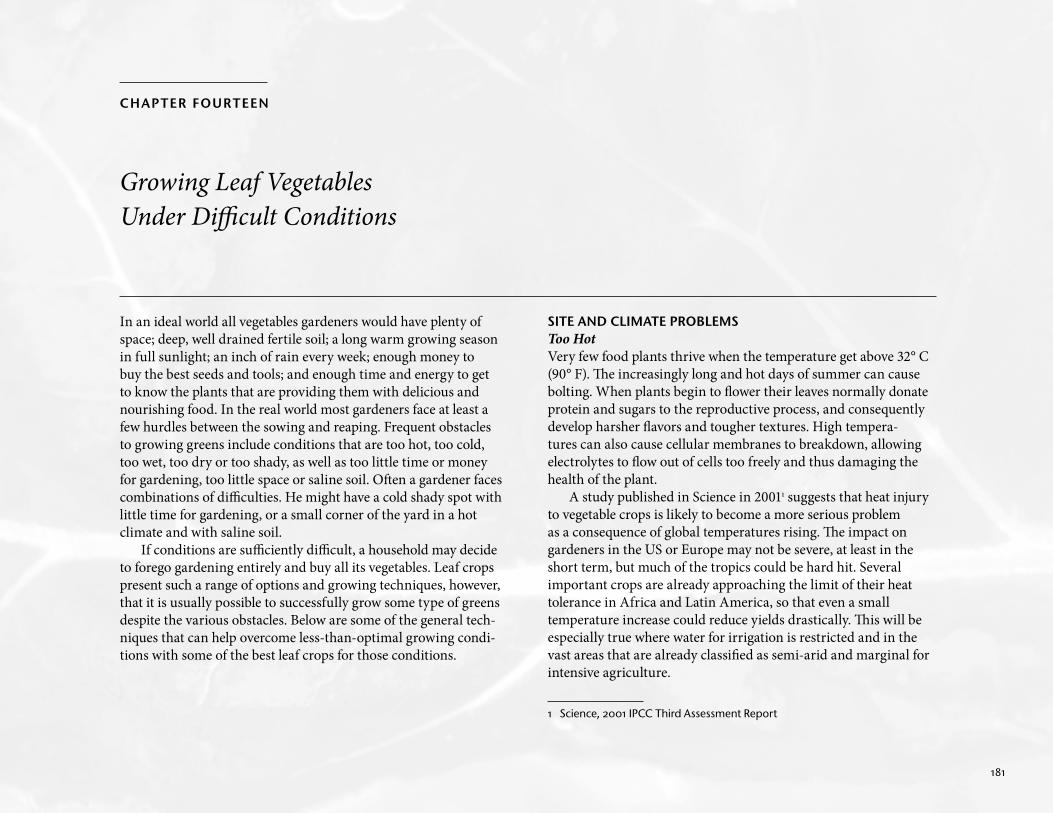
The most obvious approach to excessive heat in the garden is shading. Planting heat-sensitive greens to the north side of taller plants will provide shading. In the northern hemisphere plants on a north- or east-facing slope will receive less direct sunlight and remain cooler than ones on south- or west-facing slopes. As mentioned earlier, sunken growing beds and thick mulch also help to keep the soil temperature down in the hottest months.
Cool weather leaf crops such as lettuce, spinach, kale, collards, and mustard greens can often be grown successfully in the midsummer heat in hoop houses or cold frames by using shade cloth. A study in Kansas,2 where summer heat severely limits production of greens from June through August, showed that “high tunnels covered with 40% shade cloth combined with drip irrigation were able to produce good crops of lettuce (10 cultivars) and Asian greens (5 types) throughout the summer.”
Transplants can be gradually acclima-tized to hot weather in the same manner that fall crops can be hardened off for cold weather. Plants progressively exposed to hot weather will often survive whereas more sudden exposure will lead to wilting and death. Water has a moderating effect on temperature, so plants grown near bodies
2 Organic Farming Research Foundation Project Report, Katherine Kelly, Full Circle Farm, Kansas City, Kansas, http://ofrf.org/funded/reports/kelly_01s36.pdf, Shade-covered high tunnels for summer production of lettuce and leafy greens
of water actually may stay cooler and grow better through the summer heat.
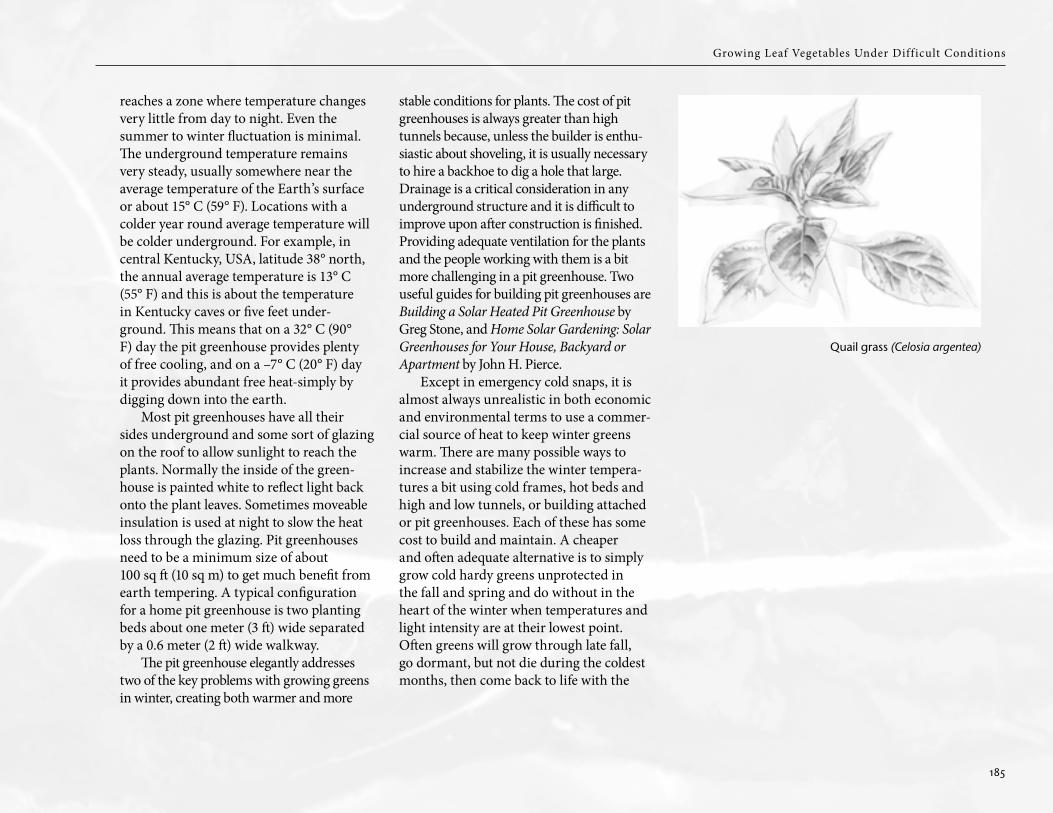
Choosing heat tolerant leaf crops can often provide even more benefit than shading. For example, amaranth (Amaranthus spp.), purslane, (Portulaca oleracea) quail grass (Celosia argentea) and waterleaf (Talinum triangulare) use the more efficient C4 photosynthetic process that developed in hot dry climates. C4 plants have a competitive advantage over more common C3 plants during hot and dry conditions. They can continue photo-synthesizing after the leaf stomata have closed, to conserve moisture, and they are able to operate at higher light saturations. Although C4 plants make up only 1% of all plant species and only 5% of plant biomass, they are estimated to assimilate 30% of all the carbon that is fixed by plants on land.
Not surprisingly, plants that evolved in hot tropical climates are generally more heat tolerant than plants from cooler climates. The plants below are all easily grown and all can produce nutritious greens long after the summer heat wilts spinach and lettuce. Of these, vine spinach (basella) is my favorite hot weather green. A beautiful plant, it is easy to grow, produc-tive, nutritious, and mild enough tasting to eat raw in salads.
183
Growing Leaf Vegetables Under Difficult Conditions
Amaranth - Amaranthus spp.Vine spinach - Basella albaBunching onions - Allium fistulosumCowpeas - Vigna unguiculataCranberry hibiscus - Hibiscus acetosellaNew Zealand spinach - Tetragonia
tetragonioidesOkra - Abelmoschus esculentusQuail grass - Celosia argenteaPurslane - Portulaca oleraceaRoselle - Hibiscus sabdariffaSweet potato - Ipomoea batatas
Too ColdThe length of the growing season in temperate zones is the number of days between the average last frost in the spring and the average first frost in the fall. Much of the tropical world never experi-ences frost, but in the temperate zone cold weather usually spells an end to food growing each year.
When water freezes, it increases in volume by about 9%. This expansion is enough to cause ruptures in plant cell tissues, often killing the plant. Cold hardy greens try to protect their leaf tissues from freezing by converting some of their stored starch into soluble sugars. The presence of the dissolved sugar lowers the tempera-ture at which the plant sap will freeze by several degrees. This is why greens are often described as sweeter after a frost.
Often it is not the intensity of the cold weather but the dramatic fluctuation of temperature that kills plants. It is well known
that hardening a plant started in a green-house or cold frame before transplanting it will increase its resistance to cold weather by several degrees. Hardening is the process of gradually reducing the water and fertilizer the plant is given and exposing it to colder than optimum temperatures for progressively longer times for up to a week. Hardening slows the growth rate, toughens the leaf surface, and reduces the amount of water that can freeze in the plant. A thick (10–15 cm; 4–6 in) layer of mulch can temper the ground temperature a few degrees and can sometimes mean the difference between survival and death for a plant exposed to cold weather.
The best way to protect your leaf crops against damage from cold weather is often to create a microclimate for the plants that provides warmer and more stable tempera-tures. This can be done in several ways, most of which employ a greenhouse effect similar to the one that is responsible for the Earth’s rising temperature. The short wavelengths of visible light from the sun pass through a transparent or translucent covering and are absorbed by whatever is inside the covering, heating it up. That heat is radiated back from the warmed surfaces in the form of longer infrared waves that are less able to pass through the transparent cover. This causes some of the heat to be trapped, which raises the temperature of everything under the transparent cover. In the case of global warming, it is the Earth itself heating up under its transparent atmospheric skin. In the
garden it is plants staying warm in a green-house or cold frame.
Cold frames are simply boxes with a removable transparent or translucent top. They are traditionally used for starting vegetable plants early. Small cold frames tend to overheat unless they have a good means of venting the warmed air, in which case they tend to overcool at night. The problem is that the small volume of air doesn’t hold the heat very long, so the benefit of warming is offset by the fluctuating temperature. A container of water inside the cold frame will increase its heat-holding capacity greatly and moderate the temperature between a sunny day and a cold clear night. Of course, the water container complicates the cold frame design.
Hot beds are an old-fashioned variation on cold frames that use a layer of fresh animal manure to provide a little heat and give the plants a jump on spring. Usually the earth is dug out about 60 cm (24 in) down and filled with about 45 cm (18 in) of fresh manure covered with 15 cm (6 in) of good garden soil. An ordinary cold frame using plastic or old windows for glazing is framed over the manure and topsoil bed. As the manure composts it creates a small but steady heat which warms the soil above it and the roots of the plants growing in that soil.
Bigger cold frames tend to work better than smaller ones, as long as it is still convenient to reach the plants. In recent years, long cold frames with 6-mil polyeth-ylene sheeting stretched over hoops have
184
CHAPTER FOURTEEN
become popular as inexpensive season extenders. The least expensive are only 2 to 4 feet high and cover a single wide or sometimes two narrow garden beds. Often referred to as low tunnels, they can be as long as is convenient for the gardener. Greens usually don’t need more heat protection or headroom than these low tunnels provide. The downside is that they can overheat quickly and that opening and closing the tunnels to control the tempera-ture requires some labor and vigilance.
Larger versions of these tunnels tall enough to walk in have also become popular for growing commercial quanti-ties of winter greens. These are called high tunnels or hoop houses and are basi-cally unheated greenhouses covered with the same 6-mil polyethylene sheeting. Unlike the rolls of plastic from a hardware store, the greenhouse grade polyethylene sheeting has been treated to resist the ultraviolet radiation in sunlight for four years. Ordinary plastic will photodegrade into little flakes within a year if left in full sunlight. The high tunnels can be built from pipe kits in widths from 3.5 to 10 meters (12–32 ft) and to any length. High tunnels are several times more expensive than low tunnels per square foot of growing bed, but they can accommodate taller plants and are far easier to work in.
In very cold climates the metal pipe hoops can be covered with two layers of polyethylene with air blown between the
layers to increase the insulation. Usually a more cost effective approach to growing greens in very cold weather is a single layer of polyethylene over the hoops and a layer of row-cover material over the plants. Row covers are light fabrics, usually polypro-pylene, used to cover rows of plants. They are available from garden and farm supply houses in a variety of weights. Heavier covers provide greater protection against the cold but block out more sunlight, which is always in short supply in winter gardens.
If free sunshine is your only heat source and you need maximum protection from the cold, the best combination may be a hoop house or high tunnel enclosing low tunnels that further protect the plant beds with polypropylene row covers. This provides the needed warmth, stable temperatures and flexibility to produce abundant greens at relatively low cost even in harsh winter weather. There is a great deal of information available on cold frames and hoop houses on the Internet. Many university agriculture departments cover the topic, but the best sources of information on growing cold weather greens are probably Elliott Coleman’s two books, Four-Season Harvest and Winter Harvest Handbook.
Two other types of greenhouses deserve to be in the cold weather greens conversa-tion. These are attached greenhouses and pit green houses. Attached greenhouses, as one might guess, are attached to the south side of a building in the northern hemisphere, or to the north side in the
southern hemisphere. The building serves to block the wind and provides a warmed north wall. If they are brilliantly designed, attached greenhouses can supply surplus heat to help heat the attached building and draw heat from the building if the plants are in danger of a sudden freeze. When attached to homes these are sometimes called sunrooms. They are conveniently located for the kitchen gardener.
Because they are architecturally part of the house, attached greenhouses tend to be built with greater permanence and aesthetics in mind than are high tunnels. They often use glass rather than plastic sheeting to allow light in. Of course, this means they are far more expensive for the same enclosed area. Although the winter sunlight never comes directly from the north, the attached building blocks diffused and reflected light from the north. As a result the plants in attached greenhouses are more prone to lean toward the south and the light (phototropism). Some people quickly lose their enthusiasm for attached greenhouses. Though they may truly love their plants, the dirt, tools, fertilizers, water, soil fungi and bacteria that are central to the greenhouse, are rarely welcome in the house to which it is attached.
The pit greenhouse is an ingenious way to use the vast thermal mass and insula-tion value of the earth to moderate the temperature of your growing environment. Digging down 1.2–1.6 meters (4–5 feet)
185
Growing Leaf Vegetables Under Difficult Conditions
reaches a zone where temperature changes very little from day to night. Even the summer to winter fluctuation is minimal. The underground temperature remains very steady, usually somewhere near the average temperature of the Earth’s surface or about 15° C (59° F). Locations with a colder year round average temperature will be colder underground. For example, in central Kentucky, USA, latitude 38° north, the annual average temperature is 13° C (55° F) and this is about the temperature in Kentucky caves or five feet under-ground. This means that on a 32° C (90° F) day the pit greenhouse provides plenty of free cooling, and on a –7° C (20° F) day it provides abundant free heat-simply by digging down into the earth.
Most pit greenhouses have all their sides underground and some sort of glazing on the roof to allow sunlight to reach the plants. Normally the inside of the green-house is painted white to reflect light back onto the plant leaves. Sometimes moveable insulation is used at night to slow the heat loss through the glazing. Pit greenhouses need to be a minimum size of about 100 sq ft (10 sq m) to get much benefit from earth tempering. A typical configuration for a home pit greenhouse is two planting beds about one meter (3 ft) wide separated by a 0.6 meter (2 ft) wide walkway.
The pit greenhouse elegantly addresses two of the key problems with growing greens in winter, creating both warmer and more
stable conditions for plants. The cost of pit greenhouses is always greater than high tunnels because, unless the builder is enthu-siastic about shoveling, it is usually necessary to hire a backhoe to dig a hole that large. Drainage is a critical consideration in any underground structure and it is difficult to improve upon after construction is finished. Providing adequate ventilation for the plants and the people working with them is a bit more challenging in a pit greenhouse. Two useful guides for building pit greenhouses are Building a Solar Heated Pit Greenhouse by Greg Stone, and Home Solar Gardening: Solar Greenhouses for Your House, Backyard or Apartment by John H. Pierce.
Except in emergency cold snaps, it is almost always unrealistic in both economic and environmental terms to use a commer-cial source of heat to keep winter greens warm. There are many possible ways to increase and stabilize the winter tempera-tures a bit using cold frames, hot beds and high and low tunnels, or building attached or pit greenhouses. Each of these has some cost to build and maintain. A cheaper and often adequate alternative is to simply grow cold hardy greens unprotected in the fall and spring and do without in the heart of the winter when temperatures and light intensity are at their lowest point. Often greens will grow through late fall, go dormant, but not die during the coldest months, then come back to life with the
Quail grass (Celosia argentea)
186
CHAPTER FOURTEEN
first warm days of spring. The crops below are good choices for cold hardy greens.
Kale - Brassica oleracea Acephala groupCollards - Brassica oleracea
Acephala groupTurnips - Brassica rapa var. rapaMustard - Brassica junceaGarden cress - Lepidium sativumBeets - Beta vulgarisBell beans - Vicia fabaAustrian winter peas - Pisum
sativum arvenseWheat - Triticum sppBarley - Hordeum vulgareMache (corn salad) -
Valerianella locustaMiners’ lettuce (claytonia)
- Montia perfoliata
Too DryAlmost all green leafy vegetables are between 80% and 95% water. Good yields of high quality greens require a steady supply of soil moisture during the entire time they are growing. Except in very hot and dry conditions, this means about 25 mm (1 in) of water per week. When the amount of water available to a plant, from either rainfall or irrigation, is inadequate the stomata (small openings) on the leaves close in order to conserve moisture. This prevents the plant from continuing to absorb carbon dioxide from the air, and stops photosyn-thesis and any further plant growth until more water is supplied.
Although the average global precipitation is about one meter (39 in) a year, the distribu-tion of that rainfall is extremely uneven in both place and time. About one-third of the world’s people live in areas of chronic water shortages. Most of the others experience seasonal shortfalls when conditions are too dry for good growth of leaf crops.3
Where it is warm year round people usually adjust their planting schedule so that the thirstiest crops are grown during the rainy season. In the temperate zones, people need to grow food during the warm summer regardless of the rain pattern. Most of the temperate zone has adequate rain in the spring followed by hot dry weather in late summer. Getting good crops of leafy greens is often just a matter of growing them in the spring or capturing some of the spring rain for later use.
The first place to store rainwater is in the garden soil itself. Whether your soil is mainly clay, sand, or silt, its water holding capacity will be greatly improved by adding organic matter with compost or cover crops. Organic matter acts like little sponges in your soil, soaking up water after a rain and releasing it slowly when the weather turns dry. Sandy soil holds the least water and will benefit the most from adding
3 Over 70% of the Earth’s surface is covered by water, so a shortage of water to grow vegetables would seem unlikely. However, 97.5% of the total is salt water and most of the remaining fresh water is frozen in the polar icecaps and in a few large lakes.
organic matter. Organic matter also reduces the tendency of clay soil to form an imper-vious crust that allows rain water to run off before soaking in.
Rainwater can also be captured in ponds and tanks. If you can calculate roughly how many square meters of garden beds you have and how many weeks without rain you are likely to experience, it is possible to calculate how much water you need to capture to provide the beds with one inch of water per week.
Urban and suburban gardeners often rely on municipal water supplies to meet their vegetable irrigation needs. However, it doesn’t make much sense to buy chlo-rinated water pumped in by the local water authority while letting the rainwater landing on your roof run down the storm sewer.4 As energy prices increase and water shortages become more frequent, better understanding and use of the natural patterns of evaporation, rain, and gravity to meet our garden’s water needs will become more important.
Gardeners often underestimate how much water a garden needs to thrive. Catching rainwater in a barrel for the garden is a worthy gesture, but the reality is that a 200 liter (55 gal) barrel full of rain
4 The amount of chlorine in household tap water poses no risk to most plants. Plants in the dracaena and lily families are more vulnerable to chlorine damage. Most of the chlorine in tap water can be eliminated by letting it sit in a container for 24 hours before using it on plants.
187
Growing Leaf Vegetables Under Difficult Conditions
won’t provide even a week’s worth of water for a single 10 sq m (107 sq ft) garden bed. So think big.
Of course, 25 mm (1 in) of rain per week is just a guideline. Some steps can be taken to reduce the water demands of your garden without reducing the harvest. A good starting point is using perma-nent growing beds rather than traditional rows since then only the plants, and not the pathways, get watered. Another easy measure for reducing water loss is applying a thick mulch around your crops. Mulch shades and insulates the summer soil, keeping it cooler and greatly reducing the evaporation of soil moisture. It also keeps weeds from sprouting and competing with crops for available water. Planting leaf crops densely provides some of the same benefit because the leaves provide shade, and shaded soil stays cooler than bare ground.
When crops do need to be watered some irrigation techniques can minimize water loss. Watering in the late afternoon allows more time for the soil to soak up the moisture before the midday sun begins evaporating it from the surface. Root zone irrigation-using a drip system, soaker hoses or wicks-to put the water below the surface where the plant roots feed, will use much less water for the same amount of plant growth. Sprinklers generally are wasteful because some water usually misses the target and because water evaporates quickly as droplets fly through the warm air.
Mulch, harvesting rainwater, and root zone irrigation will go a long way to relieve your garden’s thirst, but what about growing leafy greens where it is truly dry? There are plants called xerophytes that have evolved under arid conditions. Prickly pear, or nopal, (Opuntia ficus-indica) and baobab (Adansonia digitata) are among the few xerophytes used extensively for their edible leaves.
Prickly pear, Nopals - Opuntia ficus-indicaProbably the best known of the xerophytes are the cacti. Natives of the western hemi-sphere, they were brought back to Europe by Columbus. The Mexican prickly pear is eaten for its fruit, confusingly called “tunas,” and its leaves, called nopals. The nopals (pads) are not true leaves but actually cladodes or flat-tened stems, but they function as leaves and are eaten as leaves.
Cacti use the CAM (Crassulacean Acid Metabolism) photosynthetic process, a special adaptation that makes them several times more efficient at using water than any of the C3 or even the C4 plants. Both wild and cultivated prickly pears are eaten. They are usually planted from stem cuttings 30–80 cm (12–32 in) apart. Though they will survive with very little water, produc-tion of nopals is best with 30–60 cm (12–24 in) of rain or irrigation water a year. Prickly pears are sensitive to even brief waterlog-ging and are sometimes attacked by insects or fungal diseases (larger animals avoid their sharp spines). Fertilizer encourages nopal production at the expense of fruit.
Despite their desert origin nopals are about 93% water. They contain modest amounts of vitamin C, folate, and beta-carotene. The subtle flavor and mucilagi-nous texture are valued in soups, stews, and egg dishes.
Baobab - Adansonia digitataBaobab trees are native to the hot, dry savannahs of southern Africa, though they are now also grown in India and some of the Caribbean Islands. They are impressive trees. One baobab tree in the northeastern part of South Africa has a circumference of 45 meters (150 ft) and an estimated age of nearly 6,000 years. It can survive on as little as 8 cm (3 in) of rain but does best with around 40 cm (16 in).They are extremely sensitive to frost.
Africans have eaten baobab leaves, fruit, and flowers for at least a thousand years. The leaves are cooked as a potherb or dried for later use. They are a good source of protein, calcium, vitamin A and beta-caro-tene in areas too dry to raise crops.
Too WetVery few food plants thrive when their roots are submerged in water or in waterlogged soil for any extended time. When soil is waterlogged, water fills all the air spaces between the soil particles, and this prevents oxygen from reaching the roots, which can suffocate or drown plants. Many gardeners have occasional struggles with waterlogged soil, typically when spring rains come in full

188
CHAPTER FOURTEEN
force. For gardeners in low-lying areas around rivers, lakes, swamps, and estuaries, however, it can be a permanent condition.
Overly wet or waterlogged agricultural land is much less common than arid or overly dry land. Only about 5% of Earth’s landmass is considered wetland, compared to 33% that is considered arid land. Most of the wetlands are in the tropics or in sparsely populated northern boreal forests. A significant portion of wetlands in more-populated areas are in some form of ecological preserve and so are out of bounds to most agriculture.
If the waterlogging problem is intermit-tent and not extreme the best solution for gardeners is usually to make raised beds. If growing beds can be built up about 40 cm (16 in) above the soggy soil, the most active roots near the surface will be able to function normally, and most annual leaf crops will do fine.
Two ingenious traditional agricultural systems triumphed over swampy wetlands by using a variation of raised beds. The Aztecs, near present-day Mexico City, grew amaranth, corn, beans, pumpkins, chilies, and flowers in “chinampas,” artificial islands in shallow lake beds. They were usually about 30 x 2.5 m (100 x 8 ft). They were built by fencing off part of the lake with branches then layering mud from the lake bottom and rotting vegetation until a fertile planting bed above the lake level was created.
Roughly half the total land of Bangladesh is wetlands, a higher percentage than any
other country. An ingenious system of floating beds developed several hundred years ago has allowed local people to grow vegeta-bles in marshland. The fierce aquatic weed water hyacinth is gathered around bamboo frames. Layer by layer water hyacinth, mud, and other rotting vegetation are built up. When the bed is complete the bamboo is removed to use on the next bed. The beds float because of the air trapped in the water hyacinth. Seeds are planted in little balls of compost to get them off to a good start. Fast-growing leaf crops such as basella, kang kong, and amaranth thrive in this system. When the monsoons end and the water level drops, the beds are dragged by boat to the water’s edge and used to fertilize the gardens on the adjacent land. It is a labor intensive system but produces abundant food in an area that normally could not be farmed.
There are some environmental chal-lenges unique to food production in wetlands and waterlogged soil. Because so much of our surface water is contaminated with either sewage or toxic chemicals, it is important to be cautious in eating foods grown in wetlands. Cooking greens rather than eating them raw greatly reduces biological dangers but does nothing to remove heavy metals and other chemical agents that may have entered the vegetables.
Another concern with wetland gardening is that fertilizers used to promote vegetable growth, whether organic or not, can end up increasing the nitrogen and
phosphorus level in nearby waterways. Over-fertilization of water is called eutro-phication and typically intensifies algae and waterweed growth. This rapid algae growth alters the water’s oxygen levels, resulting in the rapid die-off of many fish and shellfish. Eutrophication has affected the health and productivity of thousands of freshwater ecosystems as well as an estimated 415 eutrophic and hypoxic (oxygen depleted) coastal systems worldwide.5
In addition, where soil is waterlogged for much of the growing season, fungal attacks on the root systems are a serious problem. Ultimately the most feasible solu-tions are found in choosing food plants that have evolved to live in wet conditions. Some of the best of these are the nutritious leaf crops listed below.
Water cress - Nasturtium officinaleKang kong - Ipomoea aquatica6
Belembe - Xanthosoma brasilienseTaro - Colocasia esculentaLeaf celery - Apium graveolens var.
Secalinum
5 World Resources Institute http://www.wri.org/map/world-hypoxic-and-eutrophic-coastal-areas
6 Kang Kong, sometimes called water spinach or swamp morning glory, is a popular and nutrition-ally important cultivated green vegetable in China, India, Malaysia, Africa, Brazil, the West Indies, and Central America. However, because it can grow up to four inches a day it has great potential to invade moist cultivated areas. Its cultivation is prohibited without a special permit in the US.
189
Growing Leaf Vegetables Under Difficult Conditions
Too Much ShadeMany gardeners, especially in urban areas, find themselves wondering if their site is too shady to grow food. Generally, fruits and seeds need the most sunlight, followed by root crops, then leaf and stem vegetables. We rarely think of tomatoes, cucumbers, peppers, squashes, eggplant, okra, bean pods or corn as fruit, but botanically they are. They need more sunlight than leaf crops because fruits form and mature after the plant flowers, while leaf crops are almost universally harvested before flowering. Root crops also usually need more sunlight than leaf crops because most of the transfer of nutri-ents to storage in the root or tuber takes place after the leaves are full grown.
So your garden may indeed be too shady for a bumper crop of tomatoes, watermelon, or even carrots, but you may still be able to grow some greens. Because plants are solar energy collectors and converters, maximum yields—even of leafy greens—will come from sites with full sunlight. This is especially true in very northern locations (very southern in the southern hemisphere) where the sunlight arrives at a lower angle. However, by organizing your shady spot to optimize the capture of light and by choosing shade tolerant leaf crops you can still have abundant and nutritious home-grown greens. It is especially important not to use synthetic nitrogen fertilizer on leafy greens grown in partial shade, because they can accumulate unhealthy levels of nitrates.
Actually in much of the tropics and in the peak of summer in the temperate zone, there is a combination of high temperature and high light intensity that can favor sites with partial shade. This is especially true if water for irrigation is in short supply since plants growing in partial shade usually need less water.
The pattern of sunlight reaching a garden changes over the year. Spring and fall sunlight is at a lower angle than midsummer sun and will be less shaded by deciduous trees that don’t have their full leaf canopy. Cool weather greens like kale, collards, lettuce, spinach, and mustard can make good use of spring and fall sunlight that is useless to most fruiting crops. Unlike fruit crops that need long sunny days to ripen, most leaf crops can be harvested and eaten at any stage of development until flowering. These same cool-weather greens will actually grow better through the summer if they have some shade to keep them cool.
If your site receives three to six hours of full sunlight through most of the summer you should be able to grow dozens of varieties of greens successfully. The same is true if you have dappled or filtered sunlight, perhaps from tall sparse trees, reaching your garden for the entire day. When you choose a garden site consider how it will evolve over time. People sometimes clear a spot and then are surprised a few years later when a sapling near the edge of the garden
is now a tree shading it. Trees tend to grow quickly at the edge of gardens because their roots can feed on the rich garden soil and they don’t have the competition of other trees, at least on the garden side.
You may be able to cheat the shade by using white or light colored walls or fences to reflect a bit of extra sunlight towards your garden. You might consider planting a few containers with greens. Small containers are light enough to move out of the shade at least once a day. These are obviously marginal maneuvers. The best defense against shade is planting shade tolerant greens. Generally, Asian members of the cabbage family tend to be more shade tolerant than the familiar European members of that family. Among the better known garden greens, the ones listed below will do well with partial sunlight.
Arugula or Rocket - Eruca sativaBeet greens - Beta vulgarisChives - Allium schoenoprasumGarden cress - Lepidium sativumEndive - Chichorium endiviaKale - Brassica oleracea Acephala groupLeaf lettuce - Latuca sativaMustard greens - Brassica juncea, B.
nigraOnions - Allium cepaPak choy - Brassica rapa Chinensis groupParsley - Petroselinum crispumSorrel - Rumex acetosaSpinach - Spinacia oleraceaTurnip greens - Brassica rapa
190
CHAPTER FOURTEEN
There are also several less widely known tropical plants that can produce nutritious greens under even shadier conditions. These include:
Katuk - Sauropus androgynusBelembe - Xanthosoma brasilienseGynura - Gynura or Crassocephalum
crepidioidesGnemon - Gnetum gnemonBrazilian spinach - Alternanthera sissoo
Too Little SpaceIn 1960 there were about 3 billion people on Earth, with enough cropland to average about half a hectare (just over 1 acre) per person. Fifty years later the population has more than doubled and the cropland per person has declined by half. With few exceptions, land with good food-growing potential is becoming much more expensive and people are being forced to learn how to produce more food in smaller spaces. On the household level this translates to more families trying to squeeze some vegetable-growing into very small areas.
Just over half of the world’s popula-tion now lives in urban areas and that percentage is almost certain to rise. Not only is there less farmland per person, but increasingly those people are living farther from the farms. In response to increasing population density, many European cities have allotment systems whereby city dwellers lease tiny vegetable garden plots. Much of densely populated south Asia has developed intensive gardening techniques.
Likewise, in Havana, Cuba, the abrupt loss of diesel fuel for farm tractors with the collapse of the Soviet Union forced a gener-ation of urbanites to quickly learn intensive vegetable gardening techniques. All over the world a dynamic new urban agriculture is emerging that is trying to integrate the traditional craft of gardening with modern botanical science.
People trying to produce vegetables in a small space usually benefit most from learning intensive techniques that have been adapted for gardening on tiny parcels of land. Where there is really no land avail-able, container and rooftop gardening may be solutions. Wherever food growing space is at a minimum, leaf crops are usually the best bet. They can produce more nutrients in less space than any other crops. This becomes more important as the available growing space shrinks but the need for nutrition doesn’t.
When space is very limited it is impor-tant to minimize how much area is taken up by pathways. Permanent beds-as wide as can be comfortably worked from either side-with narrow pathways will allow a much higher percentage of the space to actually grow crops. This usually works out with beds somewhat more than a meter wide (40–48 in) and paths slightly under half a meter (16–18 in). A variation on this idea is to straddle a more narrow bed with one foot in each very minimal pathway. This works best with gardeners who are tall
(and perhaps slightly bow-legged), and with greens that don’t get very tall.
Most annual leaf crops have fairly shallow roots. As a rule of thumb, containers at least 20 cm (8 in) deep can support a good crop of greens. The most common difficulty with container growing is getting the water right. The smaller the container the more this is a problem. Because plants in containers can’t wick soil moisture from the surrounding soil they may need to be watered several times a week. It is likewise important that containers for growing greens and other vegetables have drainage holes near the bottom to prevent accidental waterlog-ging. There are several self-watering planting containers available at garden stores and on the Internet, as well as plans for making your own. They don’t really water themselves, but wick water up from reservoirs that hold enough water for several days.
Inexpensive and serviceable growing containers can be made from a wide variety of objects, including discarded five gallon buckets, barrels cut in half, storage bins, tires with plastic liners, plastic kiddie swimming pools, trays for mixing mortar, discarded sinks and bathtubs and institu-tional size food cans.7
7 Cans used to leach lead from solder, but in 1995 the US Food and Drug Administration banned the use of lead solder in the manufacture of food cans, and required the removal of all lead-soldered cans from grocery shelves by 1996, including imported lead-soldered cans. Most cans worldwide adhere to the new practice. There is now some concern over Bisphenol A (BPA), a chemical used in making epoxy linings
191
Growing Leaf Vegetables Under Difficult Conditions
One of the most innovative aspects of urban agriculture is the practice of rooftop vegetable gardening. Almost any roof or balcony that is relatively flat, and strong enough to walk on is a potential garden spot. A rooftop garden may be the only way to get above the shade cast by build-ings and trees, and find enough sunlight for good plant growth. Most roof gardens use containers rather than beds. In addition to the issue of vigilant watering, roof gardeners need to be aware of weight. The effort required to get dirt up to the roof is substantial. Even more important is making sure the weight of the dirt, especially when wet, doesn’t strain the structural capacity of the roof. Flat roofs are always strongest in the corners, near supporting walls, and over pillars or load bearing interior walls.
Because of the importance of weight, roof gardens are well suited for shallow containers and relatively small plants with shallow root systems. There are several lightweight potting soils and planting mediums available commercially, most of them based on mixtures of peat moss, perlite, and vermiculite. These can be expensive if you have more than a couple of containers, and there are some envi-ronmental concerns with the materials used. Some brilliant low cost and low weight solutions to these problems have been worked out by Martin Price and the
for canned food, leaching into foods. Not all cans have epoxy lining and it is not clear whether BPA would migrate into vegetables grown in cans.
staff at Educational Concerns for Hunger Organization (ECHO). Using just beer or soda cans covered with old socks to wick water and nutrients to plant roots, they have been able to grow lush greens with a fraction of the weight and cost of most rooftop container gardens. The biggest problem with this type of low weight gardening is that all of the plant nutrients need to be supplied by a liquid fertilizer. It is possible to buy complete liquid fertil-izer pre-mixed or to concoct your own liquid fertilizer. Care must be taken to assure all of the essential micronutrients are provided. Price and Meitzner’s booklet Above Ground Gardens at www.echonet.org is an excellent resource for using rooftops and other above-ground spaces to improve our nutrition.
Whether you are growing greens intensively in the ground, or in containers or on the roof, a few things hold true for gardeners who are short on space. The wheelbarrows, rototillers, and lawnmowers used to speed up work are largely useless in very small gardens, so all the work is done by hand. Seeds are usually planted more densely than in larger gardens. When they start to crowd each other some seedlings can be thinned and used as gourmet baby salad greens. The ideal crops for cramped gardens are cut-and-come-again plants that can be partially harvested several times, rather than crops that grow to maturity and then are harvested just once. The perfect
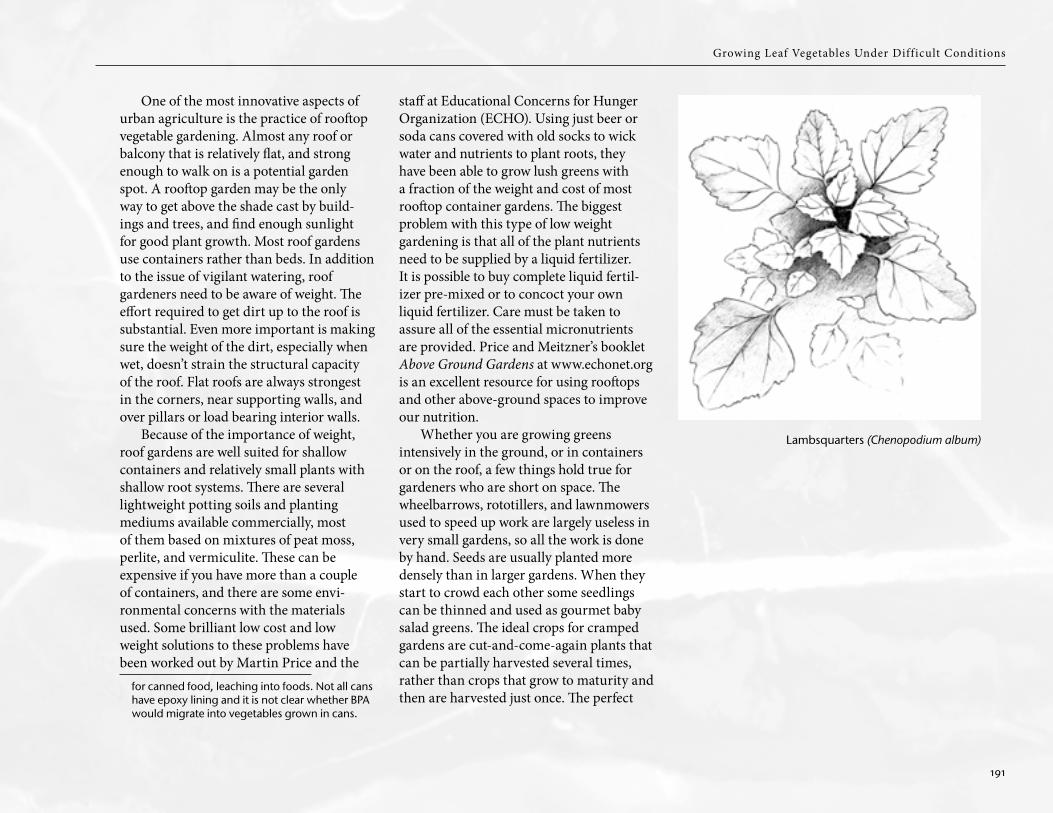
Lambsquarters (Chenopodium album)
192
CHAPTER FOURTEEN
crops for miniature gardens are fast-growing, highly nutritious and beautiful cut-and-come-again greens.
Some of the best of these are:Arugula - Eruca sativaCress - Lepidium sativumEndive - Cichorium endiviaGynura - Gynura bicolorLeaf lettuce - Lactuca sativaMizuna - Brassica rapa nipposinica or B.
juncea var. japonicaMustard greens - Brassica junceaPak choy - Brassica chinensisRed Russian kale - Brassica napus
pabulariaBrazilian spinach - Alternathera sissooTatsoi - Brassica narinosa or B. rapa var.
rosularisScallions - Allium fistulosumSwiss chard - Beta vulgaris var. ciclaTyfon greens - Brassica rapa var. Tyfon
SPROUTS AND MICROGREENSPerennial trees with edible leaves anchor one end of the leaf vegetable spectrum. On the opposite end are sprouts and micro-greens. Sprouts are seeds of various edible plants that have been purposely germi-nated for consumption as salad greens or for stir-fries. They are normally eaten after the cotyledon, or seed leaf, has emerged but before the plant’s first true leaves have come to light. Sprouts are usually grown without soil, in jars or other containers, and are periodically rinsed with cool water to
keep the emerging plants moist and remove surface impurities.
Among the plant seeds commonly used as salad sprouts are alfalfa, mung beans, peas, wheat, barley, clover, broccoli, fenugreek, sunflower, radish, mustard, cress, garbanzo, and lentil. Their sprouts are really infantile whole plants and they are eaten whole with their roots as well as the shoot.
When seeds sprout several beneficial changes take place. The most noticeable change may be the softening of the seed as it takes in water. Thus many seeds that are hard enough to break teeth are rendered soft enough to eat raw through sprouting. However, the most important transforma-tion brought about by germination may be the breakdown of phytates. Phytates are phosphorus compounds commonly found in grains, beans, nuts, and other seeds, which interfere with our bodies’ ability to absorb iron, zinc, and calcium. Because iron deficiency anemia and zinc deficiencies are widespread and serious public health problems, sprouting could provide a poten-tially valuable nutritional service.
Sprouting further aids good nutrition by synthesizing vitamin C, which is present only in trace amounts in most seeds. This can be an important function, especially in colder climates where long winters with little fresh fruit or vegetables are the norm. Vitamin C, or ascorbic acid, significantly improves the absorption of iron, in addition to being an important antioxidant. Levels of B-vitamins,
beta-carotene and vitamin K are also usually enhanced when seeds are sprouted.
Since they are typically eaten raw, hygiene is critical in growing and eating sprouts. Several incidences have been reported of salmonella contaminating alfalfa and bean sprouts and making people sick. Because of this, in May 2009 the US Food and Drug Administration advised the public not to eat raw alfalfa sprouts, as over 100 cases of sickness from salmonella (Saintpaul variant) were linked to contami-nated alfalfa sprouts. As a result some health personnel have recommend avoiding sprouts altogether.
Note: Some nutritionists recommend not eating large quantities of alfalfa sprouts because of possible immune system problems, from canavanine and other components in the sprouts. Moderate consumption doesn’t seem to warrant concern.
Growing your own sprouts allows you far more control over sanitation issues. Because the most likely source of contamination is pathogenic bacteria that may be on the seeds themselves, a reason-able precaution is to soak the seed for 15 minutes in a solution of 1 tsp. bleach to 1 cup hot tap water. Rinse the seeds thor-oughly afterwards to remove any trace of the bleach. Make sure your jars and screens are clean and avoid possible cross-contami-nation during food preparation.
It is important to start with good seeds. Some seeds for outdoor planting have been
193
Growing Leaf Vegetables Under Difficult Conditions
treated with fungicide. These are usually colored pink or purple to avoid accidental consumption and should obviously not be used for sprouting. Broken or moldy seeds should not be used for sprouting. With larger seeds this will be easily visible and they can be removed. Smell small seeds, especially ones that you have saved, for signs of mold.
Simplified Sprouting StepsThere are several variations on sprouting, and more thorough instructions are avail-able on the Internet. Start with a clean wide-mouth jar that will hold at least one liter. Then you will need nylon mesh or some other screen that can be secured with a rubber band to cover the top of the jar while allowing air to enter and water to drain. Sprouting seeds should be kept out of the light until they are almost ready to eat.1. Soak about 2 tablespoons of small
seeds or half a cup of large seeds (i.e. beans, peas, or sunflower seeds) in warm water overnight, in the dark.
2. Rinse with warm water at least twice a day for three days. After each rinse, put the jar on its side in order to spread out the seeds.
3. After three days remove the sprouts and rinse off the loose seed hulls. Drain well.
4. Most sprouts are better and more nutritious if they are then exposed to indirect sunlight for about a day
to allow them to become green (to develop chlorophyll and carotenoids).
5. Rinse and drain again, and the sprouts are ready to eat. They can be kept for a few days in an airtight container in a refrigerator.NOTE: Don’t eat sprouted sorghum seeds!
While sorghum grain has a small, gener-ally safe amount of hydrocyanic acid (HCN) producing compounds, the sprouts are not safe to eat. The average amount of HCN from sprouts grown from 100 g of seed exceeds the average fatal dose for an adult.
Microgreens are plants that have been allowed to develop a bit further than sprouts. They have recently become fashionable in upscale restaurants and gourmet food shops. As consumer tastes become more sophisti-cated, the traditional salad of head lettuce may have trouble competing with the more intense and complex flavors and colors of fresh microgreens. Whether microgreens become a lasting food trend rather than just a passing fad will likely depend on how much their price comes down.
They usually take 1–3 weeks to grow and have at least one set of true leaves. There are many plants well suited for use as microgreens. Members of the cabbage family, including cabbage, mustard, Chinese cabbages and oriental mustards, broccoli, radish, kale, and arugula, usually sprout within three days and dependably make spicy and nutritious microgreens. Spinach, lettuces, Swiss chard, sunflower,
clover, alfalfa, and basil are other popular microgreen crops. Celery, parsley, and carrots add a distinctive flavor to micro-greens, but they are much slower to germi-nate and are best grown separately and mixed with other greens after harvest. Deep red colors can be introduced into your microgreens with red Hopi amaranth (Amaranthus cruentus) or bull’s blood beets, while purples can be added with orach (Atriplex hortensis), red cabbage or purple mizuna.
As with sprouts, there are numerous variations on the basic technique of raising microgreens. More information is avail-able on the Internet and in the book Microgreens: A Guide To Growing Nutrient-Packed Greens by Eric Franks and Jasmine Richardson.
Simplified Microgreen Steps1. Fill a shallow tray with at least 2.5
cm (1 in) of sterile potting soil, vermiculite, or sterilized compost or garden soil. A sterile growing medium will help you avoid problems with damping off and other fungal and mold problems common with young seedlings. If possible use a tray that allows some drainage through small holes in the bottom.
2. Dampen the planting mix so that it is moist, like a wrung out sponge, but not soaking wet.
194
CHAPTER FOURTEEN
3. Spread seed evenly over the planting mix. Sow seeds more thickly than you would in a garden, but not so close together that they are touching. Mixing dry sand with small seeds makes it easier to sow them evenly. Press the seeds lightly into the planting mix with your hands to assure good soil contact. Cover the seeds with a fine layer of the planting mixture or cover with a damp cloth or paper towel until the first seeds begin to germinate.
4. Place tray in a warm sunny spot and keep moist. Misting with a spray bottle works well for keeping the seedlings moist without over watering them.
5. After the seedlings have developed their first true leaves, as opposed to their seed leaves, they are ready to harvest. This is usually about 7–14 days after sowing. Most microgreens are snipped off just above the soil level with clean sharp scissors, and only the above-ground portion is eaten. Exceptions are traditional root crops such as beets, radishes, and carrots, which are sometimes grown as microgreens. In their case the entire plant is usually eaten. They are ready to add to salads, sandwiches, garnishes etc. They will keep for a few days in a refrigerator after being rinsed and well drained.
Beyond offering a nice touch for gener-ally well fed restaurant diners, can micro-greens play any part in the grittier struggle
against malnutrition? Growing and marketing microgreens is more exacting and more labor intensive than growing other commercial greens. Microgreens have almost no shelf life, as they quickly reach and then pass their peak of flavor and appearance. This makes them useless for agribusiness scale production and long distance shipping schemes. As a result they may represent an economic opportunity for the smallest scale food producers.
Microgreens can be produced in the extremely small spaces that are often all that the urban poor have available. They can be grown indoors regardless of the season, providing valuable, fresh, nutrient-rich food when it is most needed and when it is most expensive or inaccessible. Because they don’t flower or produce fruit, micro-greens can be grown where light conditions are too low for most crops. Microgreens grow for such a short time that they are rarely bothered with insect pests, and even if they are, the small containers can easily be covered with protective screen or mesh.
Microgreens produce only one very small plant from each seed and the plant is rarely strong enough to recover for a second harvest. Because of this, growing them for basic nutrition favors sowing inexpensive seed rather than the high priced small packets intended for gardens. Bulk seed for edible cover crops, such as wheat, barley, mustard, fodder radish, rape, forage beet, and winter pea is usually many
times less expensive than garden seed. As with sprouts, it is important to make sure than any seed used for microgreens has not been treated with fungicide. A good source of untreated seeds for microgreens can be your own garden. One or two amaranth plants left to go to seed can provide enough seeds for dozens of trays of microgreens. The same is true for mustard greens (Chenopodium gigantium), quail grass (Celosia argentea) and many other garden greens.
For microgreens to play a significant nutritional role for low-income families, a system of careful succession planting would be needed to assure a nearly continual supply of fresh miniature greens. If that can be accomplished, microgreens could provide important amounts of vitamin C, vitamin A, iron, folate, potassium, and protective antioxidants year round at very little cost. Best when eaten raw or very lightly cooked, they can add flavor, color, and variety that are sorely missing from many bland starchy meals. Microgreens can also provide restless gardeners with something to grow in the off-season.
TIME AND MONEY PROBLEMSToo Little TimeFor those who would like to grow some of their own vegetables but aren’t sure you have enough time, there are a few measures that can reduce the time required. Some of these measures are on the front end, in designing a garden to minimize the labor
195
Growing Leaf Vegetables Under Difficult Conditions
needed. Some are gardening shortcuts to help make the most of the time that you can spare for your garden. The real heroes for a time-stressed gardener, however, are those plants that take care of themselves.
Choose a garden site that is as close to your home as possible, ideally a spot that you have to walk by to get to your door. This will let you make good use of little scraps of time, like the 5 minutes while you are waiting for a pot of water to boil. It will also let you see weed or pest problems early on when they are easiest to deal with.
Make a very small garden spot. It is usually easier to increase yields by improving the soil and growing more intensively than to try to take care of more garden space. You can enlarge the garden later if it is warranted. Laying your garden out in raised beds requires extra labor initially, but it will make gardening consid-erably easier from then on. It is a sound investment of garden labor. Hire a teenager to help for a day.
Work on your soil first-adding plenty of compost-before planting. It is amazing how much less time and effort is required to grow vegetables in deep, rich, fertile soil than in typical yard soil. Again this is labor on the front end of the operation, but unless you are only going to garden for one year it is an investment that will definitely pay off.
Controlling weeds is almost universally considered the most time consuming aspect of vegetable gardening. Using a razor sharp
reciprocating hoe or collinear hoe to slice weeds off just below the surface is almost effortless. Frequent quick weeding takes less time and effort than waiting till weeds are established. Cutting them off before they flower and go to seed also reduces the time spent weeding in next year’s garden. Thick organic mulch is very effective at both mini-mizing weeds and reducing watering needs. If weeds are really troublesome you can lay big sheets of cardboard or several layers of newspaper over your bed, and plant seeds or sets through slits cut in the cardboard.
Growing plants from sets is more expensive than sowing seeds, and the variety available is far less, but it saves time. Very small or low-growing plants, such as mache, are hard to thin and mulch and so take more time to grow than larger plants for an equal amount of food. Plants that have a brief window of edibility before bolting are not well suited for the busy gardener. The leaf crops that require the least time to cultivate are perennials, because they don’t need to be planted anew every year. There are many more low-main-tenance perennial leaf crops available to tropical gardeners than to those gardening in regions prone to freezing. Some of the best combination low-maintenance and high nutrition crops are listed below.
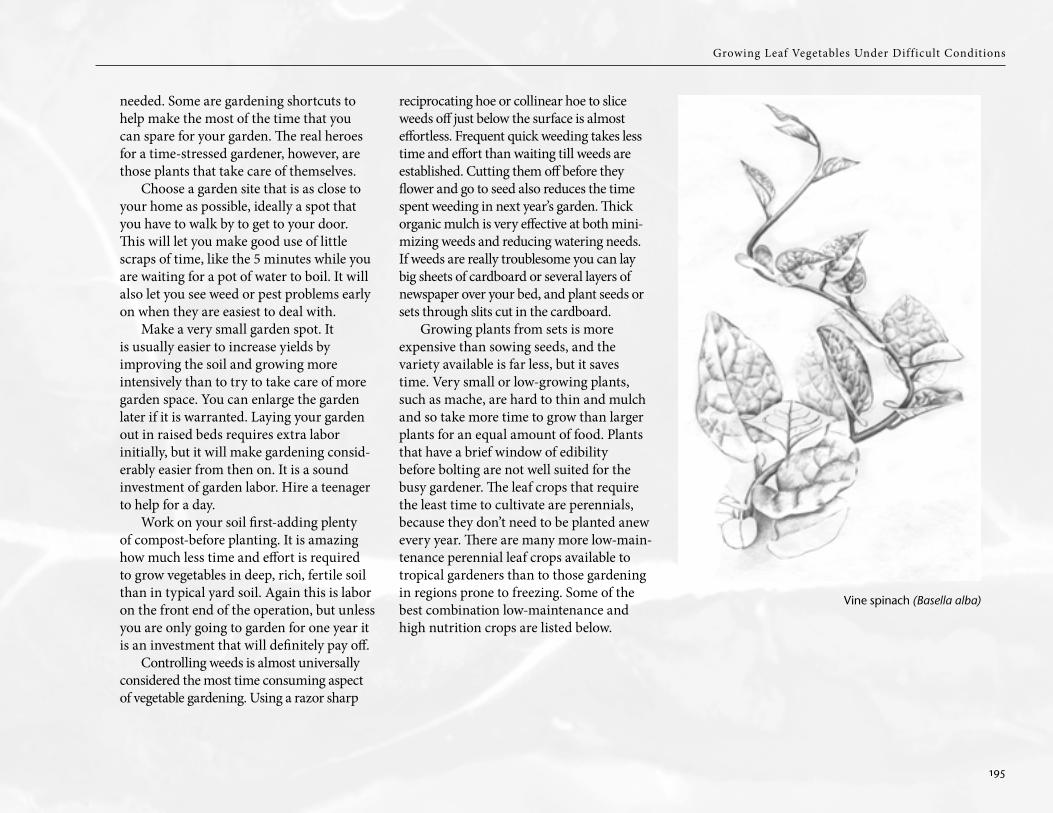
Vine spinach (Basella alba)
196
CHAPTER FOURTEEN
Easy Perennial Leaf Crops for Tropical Gardens
Belembe - Xanthosoma brazilienseCassava - Manihot esculentaChaya - Cnidoscolus acontifoliusMoringa - Moringa oleiferaOkinawan spinach - Gynura crepioidesSissoo spinach - Alternanthera sissoo
Except for wolfberry, the crops below aren’t usually perennial in areas that freeze, but they provide great nutrition for very little effort.
Easy Nutritious Leaf Crops for Temperate Gardens
Cowpeas - Vigna unguiculataOkra - Abelmoschus esculentusQuail grass - Celosia argenteaSweet potato - Ipomoea batatasTurnips - Brassica rapa var. RapaVine Spinach (Malabar spinach) -
Basella rubraWheat - Triticum spp.Wolfberry (goji) - Lycium barbarum and
L. chinense
Too Little MoneyAs of 2005 the median per capita income in the world was about $1,700.8 Half the
8 From Boston Globe October 7, 2007. ~ There is sometimes confusion between the median income (the point at which half have greater income and half have less) and average income (total income divided by total number of people). People living in rich countries had an average income of about $35,000. The high incomes in these countries make the world average income four times larger than the world median income.
people, almost three and a half billion of us, had incomes below that. These are the people most likely to be malnourished and most likely to benefit from growing some high nutrition leaf crops. They are not going to be able to garden with $200 compost spinners and garden carts, but they do still have some possibilities for improving their health by growing greens.
Most people on the hard side of the income median live in the tropics. Easily grown tropical perennial plants with very nutritious leaves are grossly underutilized resources for these people. Many of the best tropical leaf crops don’t even require seed. Moringa, chaya, gynura, katuk, and sissoo, for example, can all be easily started by simply taking a piece of stem about 20 cm (8 in) long and sticking the bottom third of it in the ground. With a little water, these plants will provide a cheap source of protein, iron, calcium, vitamin A, vitamin C, and folate, all of which are likely to be in short supply in the diet. A single plant can provide dozens of cuttings to expand production or share with neighbors.
Chaya in particular stands out as a poor man’s friend. It is rarely attacked by insects or disease and can survive prolonged droughts. Because the leaves have a toxic compound, most animals will avoid it even if left unprotected. Unlike the grazing animals, humans have the advantage of
Economists generally consider the median to give a more accurate view of a typical person’s income.
being able to boil chaya leaves and elimi-nate the toxin completely.
Direct competition with animals for leaf crops is a problem in much of the tropics, especially in cultures with weak prohibi-tions about allowing animals to roam. There are dozens of ingenious methods for making fences to protect gardens that cost little or nothing. Some of these use discarded mattress springs, truck hoods and old metal roofing. Other gardeners may stack rocks, bind together bamboo or weave thorny branches together. Among the more interesting are the living hedges that create a tight wall of living plants that grazing animals won’t pass through. The living hedge can do more than just protect your garden. Some nitrogen-fixing, legu-minous perennial species can be grown closely together to exclude animals, while enriching the soil with nitrogen. Ideally these are pruned or coppiced several times a year to keep them about one meter high. The leaves and branches that are pruned can provide valuable fodder or mulch depending on the species.9
Another way to get the upper hand with animals is to grow leaves above 2 m (6 ft) tall, where most of the browsing takes place. Some tree-like plants, such as moringa and
9 Nitrogen Fixing Contour Hedgerows As A Sustainable Soil And Water Conservation Practice: The Salt Experience http://www.arldf.net/Nitrogen%20Fixing%20Contour%20Hedgerows%20as%20a%20Sustainable%20Conservation%20Practice.pdf
197
Growing Leaf Vegetables Under Difficult Conditions
chaya, can be pruned in such a way as to encourage more foliage higher above the ground. Some plants that produce excellent greens, including basella, chayote, rice bean and many others-especially in the legume and pumpkin families-have aggressive vines. They can easily be trained to climb nearby walls, fences, or even trees, growing quickly above the level of most animal feeding. Of course, this makes harvest a bit more difficult.
Most malnourished people live in the tropics, where there is a cornucopia of perennial leaf crops rich in the very nutrients they lack. Even where poverty is severe, lack of money is rarely the biggest obstacle to making better use of leaf crops. The highest hurdles are more often the lack of information, and cultural resistance to eating green leaves.
Even people well above the world’s median income may feel like gardening is an expensive hobby for the rich. People intending to help out their family budget by growing some of their own food are often discouraged when they start buying tools, plants, fertilizer, and packets of seed.
Although they don’t usually have the luxury of a year round growing season, lower-income people in wealthier societies have a few advantages over their tropical counterparts when it comes to growing their own food. For starters, grazing animals are almost always confined, so competition for leaf crops is lessened.
Also, there are a thousand different ways to get the garden tools, soil building materials, containers, and even the plants and seeds you need, while by-passing the daunting price tags at garden stores. A creative person can get what is needed for vegetable gardening with very little money. Need a five gallon bucket? Look behind restaurants. Need scrap wood or some bricks for borders on your raised beds? Look at construction sites. Need mulch? Try to gather the straw used for Halloween or Thanksgiving decorations after the holiday or ask the crew trimming trees in your neighborhood to dump their wood chips near your garden. Whatever you need, if you can think outside the box you can probably find it, and find a way to haul it. Gardeners without trucks can sometimes swap labor for hauling, or rent a truck for half a day.
The four tools that I consider indis-pensable for gardening are a shovel, a rake, a stirrup hoe, and a file to keep the hoe razor sharp. You can often find all four of these tools used and cheap at auctions, flea markets, or yard sales. Farm supply or hardware stores usually carry bulk seeds of varieties of basic leaf crops—such as spinach, turnips, leaf lettuce, kale, and mustard—proven to do well in that area. You can save money buying these instead of expensive little packets. Save leftover seed tightly sealed in a refrigerator for planting next season. To save seed for more than two
years keep it in a freezer if possible. Most vegetable seed remains viable for at least one year if kept cool and dry.
Three leaf crops that you won’t be able to find in bulk are vine spinach (Basella alba and B. rubra), quail grass (Celosia argentea), and red Hopi amaranth (Amaranthus cruentus). Still they are all excellent for the economy-minded gardener because it is not necessary to buy seed after the first year. They all reliably produce viable seeds and volunteers. Some other plants with edible leaves that depend-ably reproduce without further purchase are cowpeas (Vigna unguiculata), rice beans (Vigna umbellata), cleome (Cleome gynandra), and okra (Abelmoschus esculentus).
If you are gardening on a tight budget your most important resources may well be other vegetable gardeners. They are often happy to share extra seed or stem cuttings. There is no better source of information about gardening where you live than local gardeners. Public libraries and county agri-cultural extension offices are other places to find free gardening information. The colossal new public commons, the Internet, also offers a wealth of information.
Opportunities await even those on tight budgets if they are ready to learn tech-niques, new and old, and master the craft of vegetable gardening.
198
CHAPTER FOURTEEN
DIFFICULTIES WITH LEAF VEGETABLE GARDEN SOILSAbout one-half the total volume of soil is usually mineral particles. These are clas-sified by size as sand, silt, and clay. Sand particles are the largest at 0.05 to 2.00 mm diameter, followed by silt at 0.002 to 0.05 mm. Clay has the smallest particle size at less than 0.002 mm. Particles larger than sand are pebbles or gravel and not really part of the soil. Typically about one-fourth of the volume of soil is water, though obvi-ously this varies a great deal. The remaining fourth of the soil is air, organic matter, and soil biota (living organisms). Organic matter, which is formerly living matter, makes up about 1–8% of garden soil.
The ideal soil for growing leafy vegeta-bles is deep and comprised of roughly equal amounts of sand, silt, and clay, with at least 5% organic matter and a pH of about 6.7. The typical garden soil is hardly ideal. The depth of almost any garden soil can be increased, if not doubled, by removing the soil in the pathways and using it to form raised beds. But what about soil that is too sandy, has too much clay, or is too acid or alkaline?
SOIL STRUCTURE PROBLEMSToo Much SandSoil that has a high percentage of sand offers little resistance to root growth, but drains too quickly. Water passes through sandy soil so fast that the soil is dry again shortly after a rain that would have
provided plants water for a week in less sandy soils. Sandy soils are similarly poor at holding nutrients. Plant roots normally absorb mineral nutrients in solution, and if the soil cannot hold water, neither can it hold dissolved mineral salts.
It is rarely feasible to add clay to a sandy garden because of the great weight involved. Usually a more realistic approach is to substantially increase the organic matter of the soil. Organic matter holds up to a thousand times more water and nutrients than the same amount of soil minerals. Raising the height of a sandy bed is not usually advisable because it aggravates the excessive drainage problem. And, of course, roots have no problem penetrating sandy soil.
Too Much ClayClay is the flip side of sand. Garden soil that is predominantly clay usually has very poor drainage. Rain tends to puddle on the top rather than percolating down to the root zone. When clay soil is wet it becomes slippery mud. When it is dry it can form a crust at the surface and become almost as hard as adobe bricks. Clay soils are difficult for roots to penetrate and they rarely have enough air spaces to provide the roots with oxygen.
Paradoxically, the most effective way to improve the structure of clay soils is the same as for sandy soils: add organic matter. While organic matter increases the water and nutrient holding capacity of sandy soil, it helps to open the structure of clay
soil, allowing better water penetration and drainage, along with increasing the oxygen level for roots. Organic matter serves as food for a large community of soil fungi and bacteria. As fungi consume organic matter one of the key by-products of their soil buffet is called glomalin.
Glomalin is a glycoprotein or protein molecule linked with sugars. The glomalin binds tiny individual clay particles together into little clumps (aggregates). This clumping together of clay particles creates spaces (pores) between the clumps. The formation of these clumps, and more importantly the spaces between them, reduces crusting of the topsoil, runoff, and soil erosion. At the same time the forma-tion of soil clumps increases the amount of oxygen available to plant roots, and the speed of water absorption. Opening up of the structure of clay soils in this way improves seed germination, root growth and nutrient uptake, and generally increases the biological activity in the clay soil. Any sustainable agriculture on clay soil must rely on organic matter, the soil fungi that eat it, and the glomalin it produces.
SOIL CHEMISTRY PROBLEMSToo AcidThe acidity of soil (or anything else) is measured by a pH (potential hydrogen ions) scale ranging from 1 to 14. Distilled water is 7.0. Anything above 7 is basic, or alkaline; anything below is acidic. The lower the number the more acidic it is. The optimal
199
Growing Leaf Vegetables Under Difficult Conditions
soil pH for growing most greens is between 6.3 and 6.8, or slightly acidic. Typically areas with over 80 cm (32 in) of annual rainfall are prone to acid soils.
Water passing through decaying organic materials, such as the leaf litter on the forest floor, creates a weak solution of carbonic acid, which gradually increases soil acidity. The natural acidifying impact of rainfall is greatly accelerated by exhaust fumes, especially from automobiles and coal-fired electric plants. The large amounts of sulfur, nitrogen, and carbon they put into the atmosphere combine with rain to form weak sulfuric, nitric, and carbonic acids.
When the soil pH is below 5.5 there are usually noticeable declines in crop yield. This is partly due to reduced availability of nutrients, especially phosphorus, as well as to the increased solubility of toxic aluminum and manganese. Low soil pH also weakens communities of beneficial bacteria.
Ordinarily the cheapest and most prac-tical solution to acid soil is to add ground limestone to the soil. You can apply ground limestone anytime during the year, but it is most effective if it has a few months for rain to help work it into the soil before planting vegetables. The US National Gardening Association (www.garden.org/) has a handy calculator for how much ground limestone to apply, based on your current pH and soil type. Hydrated lime and slaked lime are not good soil amendments because they can alter
pH too abruptly and damage soil microbial communities. They are made from ground limestone that has been heat treated.
Another low-cost way to raise soil pH is to spread wood ashes. Wood ashes have a pH of 9 to 13. A pound of wood ash has roughly one-fourth to one-half the pH-raising effect of a pound of ground limestone. Wood ashes also supply a signifi-cant amount of potassium and several other minerals to the soil. Ashes should be sifted before spreading, and a mask should be worn since the dust can irritate eyes, nasal passages and lungs. Early spring or about one month before planting is usually the best time to spread ashes on the garden.
Too Basic (Alkaline)Soils with pH above 7.0 are considered to be basic, although they are often called alkaline. This is a bit misleading as all alkaline soils are basic, but not all basic soils are alkaline. For most general gardening purposes, however, the two terms can be used interchangeably. Most soils that have a base pH are in areas with less than 80 cm (32 in) of annual rainfall and were formed initially from the break-down of alkaline rock. Sometimes over-application of agricultural limestone can result in high pH. At a soil pH above 7.5 many nutrients, especially micronutrients like iron, are less available to the plants.
There are two commonly used tech-niques for bringing down the pH of basic soils, and they are often used in
combination. The most direct is to add elemental sulfur. When it contacts moist soil, acid is formed that quickly lowers pH. The National Gardening Association website also has a calculator for adding sulfur to lower the pH of the soil. It is important to calculate how much sulfur to use and to spread it carefully. Applying too much sulfur can temporarily disrupt beneficial soil organisms. Wear gloves and a dust mask when spreading sulfur, and choose a day that is not windy.
The second approach is to add organic matter. Most organic material will lower the pH of soil, especially materials such as pine needles that have a naturally low
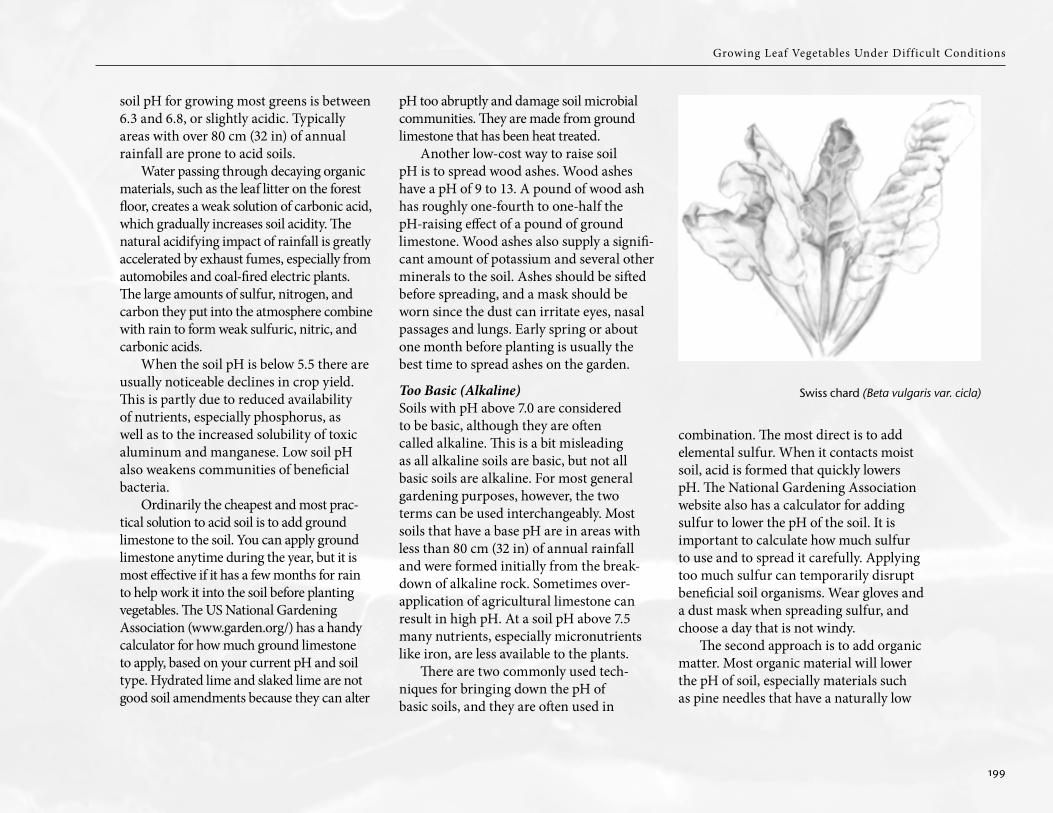
Swiss chard (Beta vulgaris var. cicla)
200
CHAPTER FOURTEEN
pH. The effect is not as rapid or dramatic as with sulfur. On the other hand, adding organic material to the soil has the addi-tional benefits of improving soil structure and supplying a modest but steady stream of nutrients. Even after the pH is corrected it needs to be checked again every two or three years.
Too SaltySoil that has an excess of soluble salts in it is called saline land. The salt can be regular sodium chloride, like table salt, or other salts such as magnesium sulfate, calcium sulfate or calcium bicarbonate. High salinity in the soil or in irrigation water can impact the growth of most plants, causing leaves to drop and rootlets to die. It can even prevent seeds from germinating. High levels of soluble salts will also disrupt soil biology and degrade the soil structure. Saline soils are a huge problem, especially in irrigated crop lands in semi-arid and arid regions. It is estimated that somewhere between 10 and 23% of the world’s culti-vated land is saline.10
Soil has been damaged by salt for thousands of years. It has been surmised that a primary cause of the collapse of the ancient Mesopotamia civilizations may have been salt damage to food-growing land. Historians have plotted the advance 10 Wetlands Ecology and Management 6: 455–456,
2001, ©2001 Kluwer Academic Publishers. Printed in the Netherlands. 455, Halophytes - A resource for the future, M.A. Khan 1 & N.C. Duke 2
of salt damaged land across North Africa from Roman tax records. Romans received most of their tax and tribute in the form of wheat. As land became saline wheat yield dropped sharply, but it could still produce barley, which is more salt tolerant. Romans recorded how much of their tax and tribute each year was paid in the form of barley.
On the global and historical scales saline soil is most often the result of exces-sive irrigation in dry areas with high evapo-ration rates. For gardeners and greenhouse operators it is more often caused by exces-sive soluble fertilizer use or by the overuse of manure. Manure often contains 4–5% soluble salts on a dry weight basis and can be as high as 10%. This means adding 50 kg (110 lb) of dry manure to your garden could be adding 2–5 kg (4–11 lb) of salts. Heavy use of salt on nearby icy roads or the use of water softeners in irrigation water can also cause salinity problems.
If plants in your garden seem stunted, wilted, or weak for no obvious reason it may be worth having your soil tested for saline levels. On the scale of a small garden, greenhouse, or container garden, the best solution to high salinity is usually flushing the soil and then reducing the use of soluble fertilizers and manure. The idea is to run enough water through the soil to simulate two or three very heavy rain storms. In non-arid regions these heavy rains auto-matically control salinity. In heavy clay soil with poor drainage, water will tend to
puddle and flushing may not be feasible. Be sure to scrub any white salt deposits off your containers before replanting them.
The other course of action is to choose plants that have a naturally high tolerance to salt. Most of these are plants that evolved along coastline and are genetically adapted to high salt levels. Some of these plants are listed below.
Salt tolerant plants with edible leavesBarley - Hordeum vulgareSugar beet11 - Beta vulgarisGarden beet - Beta vulgarisSwiss chard - Beta vulgaris var. ciclaSpinach - Spinacia oleraceaQuinoa - Chenopodium quinoaLambsquarters - Chenopodium albumKale - Brassica oleracea Acephala groupRape - Brassica napusNew Zealand spinach - Tetragonia
tetragonoides
Super salt tolerant plants with edible leaves
Orach - Atriplex hortensisSea Orach - Atriplex halimus
11 Sugar beets not only tolerate salt; they are dynamic accumulators of salt. At least in theory the salt content of the soil could be significantly lowered by growing several crops of sugar beets and removing them from the land. A proposal was made in the 1990s, by the British charity Find Your Feet, to reduce soil salinity in northern India by growing sugar beets as a source of leaf concentrate until salt levels were low enough for other crops. As far as I know it was never implemented.
201
Growing Leaf Vegetables Under Difficult Conditions
Rock samphire - Crithmum maritimumSamphire - Salicornia spp.Iceplant - Mesembryanthemum
crystallinumAgretti (saltwort) - Salsola spp.
HOW TO ADD ORGANIC MATTER TO YOUR GARDENWhether you want to increase the water and nutrient holding capacity of sandy soil, loosen the structure of tight clay soil or lower the pH of alkaline soil, adding organic matter is one of the best approaches. Organic material to add to your garden can include compost, kitchen scraps, grass clippings, fallen leaves, animal manures, cover crops, sawdust, straw, and wood chips.
The ideal way to add organic matter to your garden is to spread finished compost over the growing beds each year. Finished compost is a stabilized form of organic matter that provides a much longer lasting benefit to the soil than any of the other organic materials. If you have ever made compost you know how much the pile shrinks before it is finished. Typically compost will weigh only ten to twenty percent as much as the original material used to produce it, but the composting process converts much of the carbon into humus, which can remain stable and beneficial in the soil for many years.
Not only does adding stable organic matter to your garden minimize the problems of water shortage, nutrient
depletion and salinity, but it can also help stabilize the Earth’s climate. More carbon is stored in the planet’s soil than in the entire atmosphere and all vegetation combined.12 Current industrial agricultural practice adds significantly to the carbon in the air, whereas building soil organic matter in your garden does the reverse.
Often the only realistic way to get the large quantities of organic matter needed to improve your garden soil is to grow them as cover crops, or green manures. There are systems for incorporating cover crops directly into the soil, for leaving it on top of the soil as mulch, and for growing them in nearby fields to use for making compost. Each system has some advantages. (See Chapter 12).
Caution should be used when adding a large amount of organic material to your garden soil. Sawdust, wood chips, straw, and dead tree leaves are overly rich in carbon and can temporarily deplete your soil of nitrogen while bacteria and fungi in the soil are decomposing them. It is safer to leave them on top of the soil as mulch until they are decomposed. Animal manure, fresh grass clippings and kitchen scraps may be overly rich in nitrogen, which can be lost to the air or leached out to pollute nearby bodies of water. The best solution is to mix two or three parts of the carbon-rich
12 Batjes, Niels H. (1996). “Total carbon and nitrogen in the soils of the world.” European Journal of Soil Science 47: 151–63. doi:10.1111/j.1365–2389.1996.tb01386
material with one part of high nitrogen material, and turn them into compost before applying the mix to your garden.
It is hard to use too much compost. If you can make enough, a 2.5 cm (1 in) thick layer of compost spread over the garden beds each year will keep your soil in top shape. To spread this much compost over a 10 sq m (108 sq ft) bed you will need about 135 kg (300 lb) of compost. This is about 1/4 cu m (8 cu ft) in volume.