grade 5 earth in space
TRANSCRIPT

Grade 5 Earth in Space
Developers Belinda Basca, Colleen Bell, Diane Bell, Cindy Buchenroth-Martin, Debbie Leslie, David Sherman, Andy Cahn, Annie Holdren, Lauren Satterly, Susan Taddei, and Robert Ward
Editors Wanda Gayle and Rachel Burke Cusack
Technical Art, Graphics, and Book Production Anthony Lewis, Erin Basca, Diana Barrie, Kevin Lineback, and Meg Ross, Lineworks, Inc.; Picas & Points, Plus (Carolyn Loxton), and MaryBeth Schulze
Pedagogy and Content Advisors Jean Bell, Max Bell, Nick Cabot, and Mary Jean McDermott
Activate Learning PRIME Contributors Lance Campbell, Alex Bulmahn, Kevin Sherman, Colleen Bell, Lauren Satterly, Belinda Basca, Liz Lehman, Debbie Leslie, Jeanne DiDomenico, and Joy Reynolds
Copyright © 2022 The University of Chicago All Rights Reserved A UChicago STEM Education product
Printed in the United States of America. Except as permitted under the United States Copyright Act, no part of this publication may be reproduced or distributed in any form or by any means or stored in a database or retrieval system without the prior written permission of the publisher.
Printed in the United States of America. Command Digital, New JerseyISBN 13: 978-1-64578-599-61st Printing1 2 3 4 25 24 23 22 www.activatelearning.com

TABLE OF CONTENTS Introduction . . . . . . . . . . . . . . . . . . . . . . . . . . . . . . . . . . . . . . . . . . . . . . . . . . . v
n Lessons Gravity on Earth Cluster
Overview . . . . . . . . . . . . . . . . . . . . . . . . . . . . . . . . . . . . . . . . . . . . . . . . . . . . . 1 DQB Artifacts Chart . . . . . . . . . . . . . . . . . . . . . . . . . . . . . . . . . . . . . . . . . . . . . . 2 Before You Begin Teaching . . . . . . . . . . . . . . . . . . . . . . . . . . . . . . . . . . . . . . . . . . 4 Science Center . . . . . . . . . . . . . . . . . . . . . . . . . . . . . . . . . . . . . . . . . . . . . . . . . 5 Next Generation Science Standards (NGSS) . . . . . . . . . . . . . . . . . . . . . . . . . . . . . . . 6
Vocabulary . . . . . . . . . . . . . . . . . . . . . . . . . . . . . . . . . . . . . . . . . . . . . . . . . . . . 7
LessonsModeling Earth’s Shape . . . . . . . . . . . . . . . . . . . . . . . . . . . . . . . . . . . . . 9
Earth’s Gravitational Force . . . . . . . . . . . . . . . . . . . . . . . . . . . . . . . . . . 17
Daily Pattern of the Sun Cluster Overview . . . . . . . . . . . . . . . . . . . . . . . . . . . . . . . . . . . . . . . . . . . . . . . . . . . . 25 DQB Artifacts Chart . . . . . . . . . . . . . . . . . . . . . . . . . . . . . . . . . . . . . . . . . . . . . 26 Before You Begin Teaching . . . . . . . . . . . . . . . . . . . . . . . . . . . . . . . . . . . . . . . . . 32 Science Center . . . . . . . . . . . . . . . . . . . . . . . . . . . . . . . . . . . . . . . . . . . . . . . . 34 Next Generation Science Standards (NGSS) . . . . . . . . . . . . . . . . . . . . . . . . . . . . . . 35 Vocabulary . . . . . . . . . . . . . . . . . . . . . . . . . . . . . . . . . . . . . . . . . . . . . . . . . . . 37
Lessons Day and Night . . . . . . . . . . . . . . . . . . . . . . . . . . . . . . . . . . . . . . . . . . . 39
Observing Shadow Patterns . . . . . . . . . . . . . . . . . . . . . . . . . . . . . . . . . . 47
Observing the Sun for a Day. . . . . . . . . . . . . . . . . . . . . . . . . . . . . . . . . . 57
Tracking Shadows During a Day . . . . . . . . . . . . . . . . . . . . . . . . . . . . . . . 73
Models of the Sun and Shadows . . . . . . . . . . . . . . . . . . . . . . . . . . . . . . . 85
Models of Daytime and Nighttime . . . . . . . . . . . . . . . . . . . . . . . . . . . . . . 93
Modeling Earth’s Rotation . . . . . . . . . . . . . . . . . . . . . . . . . . . . . . . . . . 103
Sun and Other Stars Cluster Overview . . . . . . . . . . . . . . . . . . . . . . . . . . . . . . . . . . . . . . . . . . . . . . . . . . . 113 DQB Artifacts Chart . . . . . . . . . . . . . . . . . . . . . . . . . . . . . . . . . . . . . . . . . . . . 114 Before You Begin Teaching . . . . . . . . . . . . . . . . . . . . . . . . . . . . . . . . . . . . . . . . 117 Science Center . . . . . . . . . . . . . . . . . . . . . . . . . . . . . . . . . . . . . . . . . . . . . . . 118 Next Generation Science Standards (NGSS) . . . . . . . . . . . . . . . . . . . . . . . . . . . . . 119 Vocabulary . . . . . . . . . . . . . . . . . . . . . . . . . . . . . . . . . . . . . . . . . . . . . . . . . . 120
Lessons Our Sun Is a Star . . . . . . . . . . . . . . . . . . . . . . . . . . . . . . . . . . . . . . . . 121
Seeing Stars from Earth . . . . . . . . . . . . . . . . . . . . . . . . . . . . . . . . . . . . 131

Earth’s Orbit and Stars . . . . . . . . . . . . . . . . . . . . . . . . . . . . . . . . . . . . 141
Star Patterns. . . . . . . . . . . . . . . . . . . . . . . . . . . . . . . . . . . . . . . . . . . 151
Science Skill Builders
Lessons Using Models in Science . . . . . . . . . . . . . . . . . . . . . . . . . . . . . . . . . . . 163
Building to Scale . . . . . . . . . . . . . . . . . . . . . . . . . . . . . . . . . . . . . . . . 171
n Science Notebook Teacher Guide
n Assessments
n Teacher Background Information
n Glossary
Earth in Space: Introduction v
Earth in Space
Introduction People have always had questions about their world. Over thousands of years, people have developed their ideas about the universe. Originally, they based their models on observations with the unaided eye and on speculation. Over time, as people have invented instruments to observe objects on Earth and in space and learn more about them, these ideas have changed.
Earth seems enormous to most people, especially to children. With children’s immediate family, friends, and school usually located within one city or county, crossing state boundaries is an infrequent occurrence, and crossing national boundaries an unusual adventure. To discuss what lies outside Earth’s atmosphere—the magnitude of space, of the universe—can seem beyond comprehension. However, it is possible to consider space in terms that are relevant to children, and it is possible to observe space objects from children’s own schools and homes on Earth.
To involve students and to enable them to consciously question their own ideas about the Earth and space, the lessons in this topic offer multiple opportunities to make direct observations of objects on Earth and in space and to build and use hands-on models. The topic begins with exploring the Earth and Earth’s gravity. Students model the Earth and its shape and explore various models to discover the effects of Earth’s gravity on objects. They next focus on the Earth and the sun. They learn about the sun by recording shadows and day length. Once they have made a series of observations, they use models to understand Earth’s relationship to the sun as seen in the day-and-night cycle. Finally, they focus on the sun and other stars and use models to discover when stars are visible and not visible. They also learn that some stars appear small and dim yet are much larger than the sun because they are so much farther away.
vi Earth in Space: Introduction
Anchoring Phenomenon
Driving Question: How does the Earth interact with objects near and far?To organize class study of the Earth in Space topic, plan to create a Driving Question Board (DQB) to help focus student attention and to document what they have learned. The DQB serves as a visual reference that remains in place throughout a topic. Although the teacher maintains the DQB, because it functions as a shared space to represent learning, students might also contribute regularly to the display. Across the topic, the DQB will come to include drawings, photographs, artifacts, objects, and sample student work. The DQB will serve as a focal reference helpful to all but especially important for students for whom visual representations aid in their learning, such as connecting new ideas to previous learning. The use of a DQB keeps learning student-centered. Student questions are pursued, and many answered as part of the curriculum, so they have an investment that goes beyond, “We’re all studying X now” to “my ideas matter.
Revisit the DQB with students in each lesson. Refer to it often. Point to artifacts displayed on it as a reminder of previous activities or understandings. Post on it the Big Ideas of the topic as students learn them, as well as artifacts students create that relate to specific questions. Any image used in the topic could be printed, laminated, or inserted into a plastic sleeve and displayed on the DQB. This includes models or data tables developed as a class or any other visual representation of concepts students have studied.
Space on the Driving Question Board may be limited, but it is important that aesthetics and the neatness of the DQB do not outweigh the support provided to students when they can frequently refer to the visual representations as a reminder of activities done and content learned throughout a unit.

Earth in Space: Introduction vii
Earth In SpaceThe Driving Question works in conjunction with the Cluster content to regularly make connections between the anchoring phenomenon and the investigative phenomenon. Each Cluster contains lessons that coherently build conceptual understanding of specific content. They work together, using firsthand experiences, so students can construct an answer to the Driving Question over the course of the unit.
Unit Driving Question(Anchoring Phenomenon)
Unit Clusters Content Focus(Investigative Phenomenon)
How does the Earth interact with objects near and far?
Cluster 1: Gravity on Earth They investigate:
• the gravitational force exerted on objects by the spherical shape of Earth. (Students draw models then use them to explain and compare their drawings. They use evidence obtained from various models to construct an evidence based argument that Earth’s gravity pulls toward the center.)
Cluster 2: Daily Pattern of the SunThey investigate:
• the predictable daily pattern of the sun’s apparent movement. (Students share ideas about the causes of daytime and nighttime. They observe and manipulate shadows to determine how shadows indicate the position of the sun.)
• evidence provided by shadows of the sun’s apparent movement. (Students collect, record, graph and analyze data of how shadows change during the day and the position of the sun to explain daily patterns.)
• how the rotation of Earth provides an explanation for the sun’s predictable daily patterns. (Students use previously created models to explain how the Earth’s rotation around its axis causes the sun’s daily pattern in the sky, as well as the pattern of stars’ movement across the night sky.)
continued
viii Earth in Space: Introduction
Unit Driving Question(Anchoring Phenomenon)
Unit Clusters Content Focus(Investigative Phenomenon)
How does the Earth interact with objects near and far?
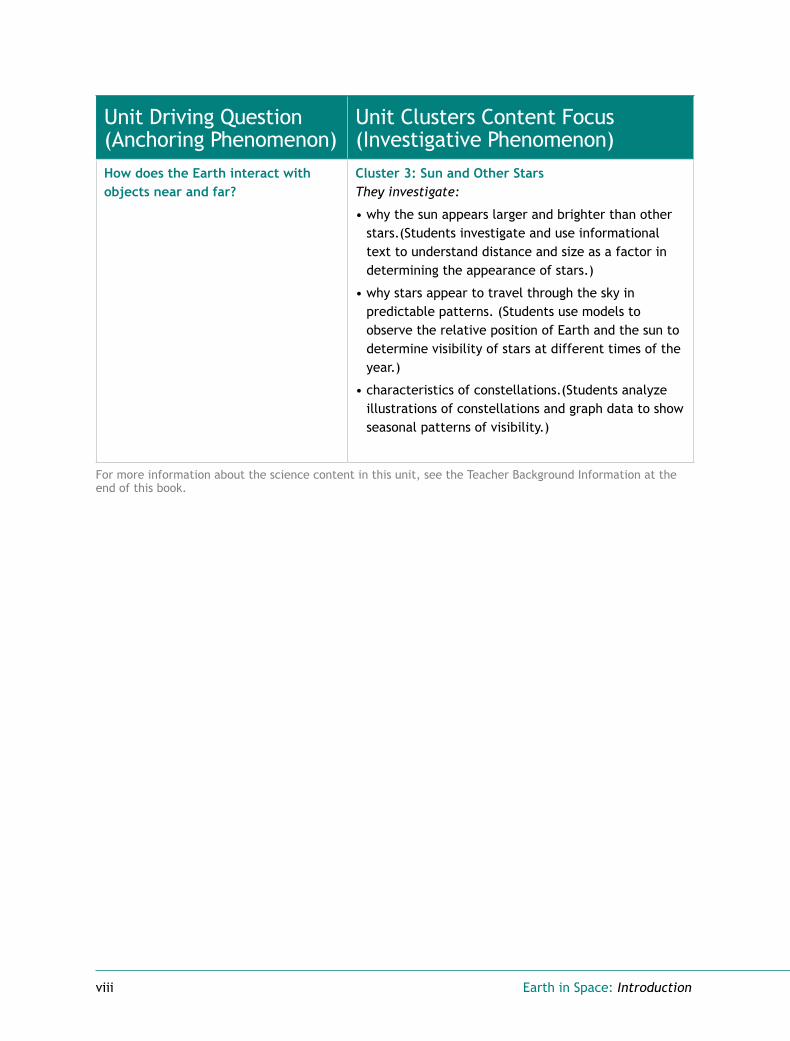
Cluster 3: Sun and Other StarsThey investigate:
• why the sun appears larger and brighter than other stars.(Students investigate and use informational text to understand distance and size as a factor in determining the appearance of stars.)
• why stars appear to travel through the sky in predictable patterns. (Students use models to observe the relative position of Earth and the sun to determine visibility of stars at different times of the year.)
• characteristics of constellations.(Students analyze illustrations of constellations and graph data to show seasonal patterns of visibility.)
For more information about the science content in this unit, see the Teacher Background Information at the end of this book.
Lessons


Earth in Space: Gravity on Earth Cluster 1
Cluster #1
Gravity on Earth
Big Ideas• The Earth is shaped like a
sphere.
• The gravitational force exerted on objects by the spherical Earth is directed toward its center.
OverviewOverviewStudents begin the Earth in Space topic by focusing on the shape of our own planet. Although students live on Earth, they may have misconceptions about its shape, as well as how Earth’s gravity affects objects. In these lessons, students develop and work with models to help dispel some of these misconceptions. They draw models of Earth’s shape based on their own experiences and compare their models with a spherical model of Earth. They also use several two- and three-dimensional models to gather evidence and construct an argument that Earth’s gravity pulls objects toward its center.
Investigative Phenomena• the gravitational force exerted on objects by the spherical
shape of Earth. (Students draw models then use them to explain and compare their drawings. They use evidence obtained from various models to construct an evidence based argument that Earth’s gravity pulls toward the center.)

2 Earth in Space: Gravity on Earth Cluster
DQB Artifacts ChartThis table provides suggestions for when you might explicitly address the Big Ideas. Consider printing them on cards so you can easily add them to the DQB and refer to them throughout the topic.
Adding Student Questions to the Driving Question Board
Possible Artifacts to add to the Driving Question Board
Lesson: Modeling Earth’s ShapeIntroduce the topic Earth in Space and the driving question: How does Earth interact with objects near and far?
Investigative Phenomena: Students (Ss) draw a model of the Earth based on their own observations.
Reflect and Discuss: Elicit Ss questions about the shape of the Earth and Earth in Space and post them on the DQB. Ask Ss how the force of gravity affects their everyday lives.
• Ss’ drawings to model the Earth
• A sphere or globe. You can place the sphere or globe near the DQB, since it may be difficult to attach.
• Big Idea: The Earth is shaped like a sphere.
• Earth from Space visuals
Lesson: Earth’s Gravitational ForceInvestigative Phenomena: Ss use rubber and styrofoam balls to explore and describe how gravity pulls objects toward the center of the Earth.
Reflect and Discuss: Post the claim that the gravitational force of the Earth pulls all objects towards its center and add Ss’ evidence. Elicit questions about the practice of modeling or gravity’s effect on Earth. Post any questions from the Synthesizing discussion that Ss were unable to clearly address. Have Ss think about how they can use their understanding of gravity’s effect on objects to begin to answer the driving question. As a bridge to the next lesson, have Ss think about what causes day and night.
• Ss’ models of Earth’s Gravity: Dropping Balls
• Toy people, attached to the sphere or globe in several places. The sphere or globe was added in the previous lesson.
• Big Idea: The gravitational force exerted on objects by the spherical Earth is directed toward its center.

Earth in Space: Gravity on Earth Cluster 3
Lessons at a GlanceModeling Earth’s ShapeStudents are introduced to the Earth in Space topic. They draw models of the Earth, then share and compare their models with their classmates. Based on their own experience, they explain why they think their models are accurate. The teacher shares a spherical model of Earth that students compare to their own models.
Earth’s Gravitational ForceStudents focus on the effects of gravity on objects. They apply the crosscutting concept of Patterns by looking for similar evidence from a variety of two- and three-dimensional models of Earth. They use this evidence to construct an argument that Earth’s gravity pulls objects towards its center.
Family LinkWelcome to the Earth in Space topic.
ExtensionsFurther Science Explorations: Draw models of the sun and moon, and share the evidence they used to create the models. Research the effects of gravity on other planets. Encourage students to test the effects of gravity by dropping objects of the same size and various weights from the same height. Explore how the moon is held in its orbit by Earth’s gravity.
Language Arts: Describe what life would be like on a spherical Earth versus a flat Earth. Imagine and describe what it would be like to fall through a hole dug through the center of the Earth.

4 Earth in Space: Gravity on Earth Cluster
Before You Begin TeachingBefore You Begin TeachingPlan for Special Scheduling and Materials ConsiderationsUse the table below as a reference for scheduling the lessons and to anticipate preparation issues that involve advance planning.
Lesson Scheduling Considerations
Preparation Considerations
Modeling Earth’s Shape Single session. Consider teaching the Skill Builder: Using Models in Science prior to this lesson.
Earth’s Gravitational Force Single session.

Earth in Space: Gravity on Earth Cluster 5
Science CenterScience CenterSelecting MaterialsThe materials listed below are a good starting point for your Gravity on Earth Science Center. As you consider which materials to include and how long to keep them available, try to follow the interests of your students.
ExploraGear • Styrofoam balls
• Toothpicks
Classroom Supplies • Earth model drawings
Inviting Exploration The suggestions here and in the lessons are intended only as starting points, or “invitations,” to launch students into further explorations. As you add new materials or activities to the Science Center, take a few minutes to introduce them to students. Periodically make time for students to share and discuss their Science Center explorations and discoveries.
During the Gravity on Earth lesson cluster, students might:
• Examine their classmate’s Earth model drawings and compare them with their own.
• Use Styrofoam balls and toothpicks to continue modeling the effects of an object that falls to Earth.
6 Earth in Space: Gravity on Earth Cluster
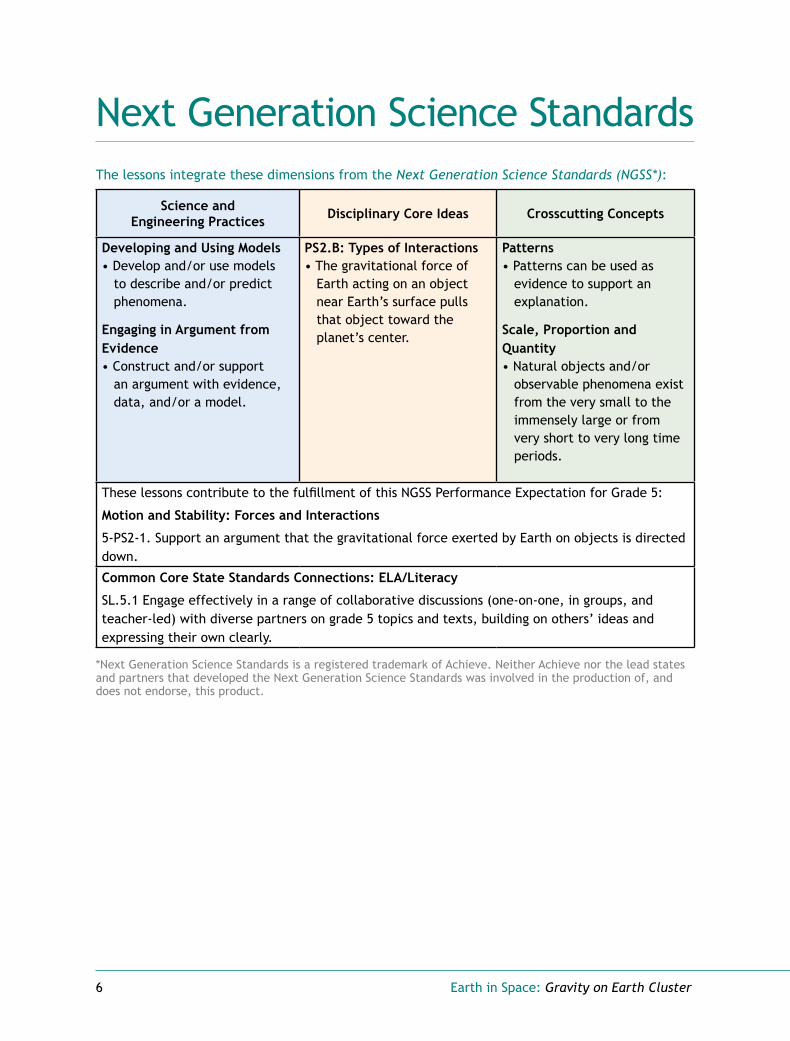
Next Generation Science StandardsNext Generation Science StandardsThe lessons integrate these dimensions from the Next Generation Science Standards (NGSS*):
Science and Engineering Practices Disciplinary Core Ideas Crosscutting Concepts
Developing and Using Models • Develop and/or use models
to describe and/or predict phenomena.
Engaging in Argument from Evidence • Construct and/or support
an argument with evidence, data, and/or a model.
PS2.B: Types of Interactions• The gravitational force of
Earth acting on an object near Earth’s surface pulls that object toward the planet’s center.
Patterns• Patterns can be used as
evidence to support an explanation.
Scale, Proportion and Quantity • Natural objects and/or
observable phenomena exist from the very small to the immensely large or from very short to very long time periods.
These lessons contribute to the fulfillment of this NGSS Performance Expectation for Grade 5:
Motion and Stability: Forces and Interactions
5-PS2-1. Support an argument that the gravitational force exerted by Earth on objects is directed down.
Common Core State Standards Connections: ELA/Literacy
SL.5.1 Engage effectively in a range of collaborative discussions (one-on-one, in groups, and teacher-led) with diverse partners on grade 5 topics and texts, building on others’ ideas and expressing their own clearly.
*Next Generation Science Standards is a registered trademark of Achieve. Neither Achieve nor the lead states and partners that developed the Next Generation Science Standards was involved in the production of, and does not endorse, this product.
Earth in Space: Gravity on Earth Cluster 7
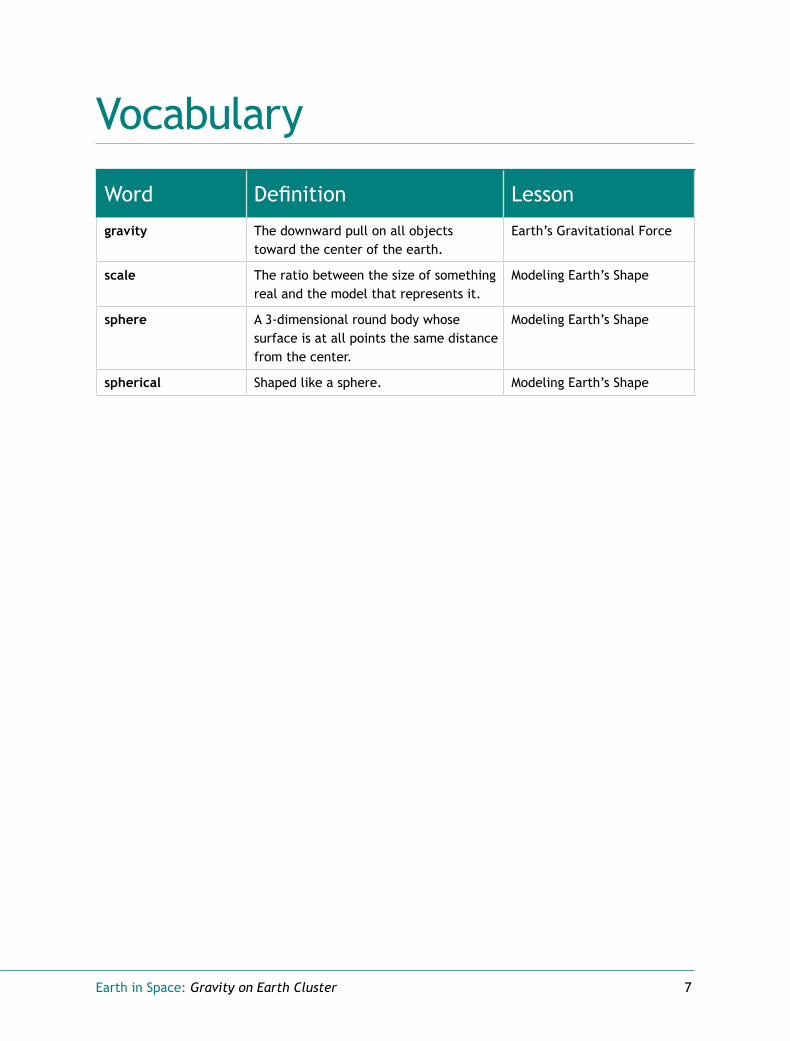
VocabularyVocabulary
Word Definition Lesson
gravity The downward pull on all objects toward the center of the earth.
Earth’s Gravitational Force
scale The ratio between the size of something real and the model that represents it.
Modeling Earth’s Shape
sphere A 3-dimensional round body whose surface is at all points the same distance from the center.
Modeling Earth’s Shape
spherical Shaped like a sphere. Modeling Earth’s Shape

8 Earth in Space: Gravity on Earth Cluster

Earth in Space: Lesson: Modeling Earth’s Shape 9
Lesson:
Modeling Earth’s Shape
Big IdeaThe Earth is shaped like a sphere.
Overview Overview Students are introduced to the Earth in Space topic. They draw models of the Earth, then share and compare their models with their classmates. Based on their own experience, they explain why they think their models are accurate. The teacher shares a spherical model of Earth that students compare to their own models.
Key Notes• Students draw models of Earth in this lesson. Consider
teaching the Skill Builder: Using Models in Science prior to this lesson to provide students with practice making and using models.
• For more information about the science content in this lesson, see the “Earth’s Shape” section of the Teacher Background Information.
Lesson Goals1. Draw a model of Earth that describes phenomena they
have experienced.
2. Observe a spherical model of Earth and compare it with their model.
Assessment Options• This lesson offers an opportunity to pre-assess students’
understanding that the Earth is shaped like a sphere. You can use criterion A of the Earth’s Gravity rubric to note your findings at this time.
10 Earth in Space: Lesson: Modeling Earth’s Shape
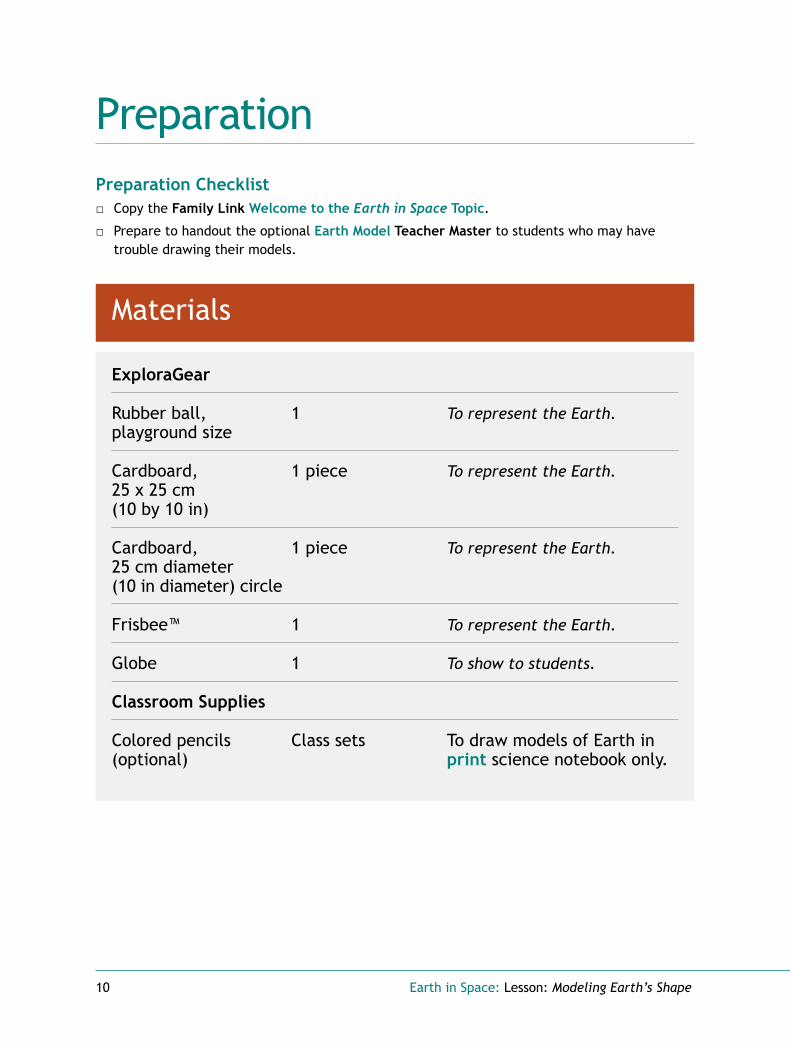
PreparationPreparationPreparation Checklist
□ Copy the Family Link Welcome to the Earth in Space Topic.
□ Prepare to handout the optional Earth Model Teacher Master to students who may have trouble drawing their models.
Materials
ExploraGear
Rubber ball, 1 To represent the Earth. playground size
Cardboard, 1 piece To represent the Earth. 25 x 25 cm (10 by 10 in)
Cardboard, 1 piece To represent the Earth. 25 cm diameter (10 in diameter) circle
Frisbee™ 1 To represent the Earth.
Globe 1 To show to students.
Classroom Supplies
Colored pencils Class sets To draw models of Earth in (optional) print science notebook only.

Earth in Space: Lesson: Modeling Earth’s Shape 11
Curriculum ItemsItem Resource LocationVisual: Earth from Space–East
Visual: Earth from Space–WestTeacher Portal Files/ Teaching the Lesson Resources
Science Notebook: Hello Scientist online print
Earth in Space Student Glossary online print
Student Lessons Teach Lesson
Student Lessons Teach Lesson
Science Notebook: Earth Model online print teacher guide
Student Lessons Teach Lesson Teach Lesson
Family Link: Welcome to the Earth in Space Topic Teacher Portal Files/ Teaching the Lesson Resources
Rubric: Earth’s Gravity (optional) Assessments
Teacher Master: Earth Model (optional)Teacher Portal Files/ Teaching the Lesson Resources
Skill Builder: Using Models in Science Science Skill Builders

12 Earth in Space: Lesson: Modeling Earth’s Shape
Teaching the LessonTeaching the LessonEngageIntroductory Discussion1. Explain that today the students are beginning a topic called Earth in Space.
2. First you would like them to draw a model of the Earth. Before having them draw the model, ask some of the following questions:
• How would you describe a model? (It’s a representation of a real object, a system, or a process.)
• What are some examples of models? (Maps, models of the solar system, models of microscopic things, drawings of things that are either smaller or larger than actual size, the water cycle, pictures with labels identifying parts, diagrams with arrows.)
• Why might we use models in science? (When objects are too small to be seen with the naked eye, or too large to be seen in their entirety. To simulate a process or test how a process works. To make a large object available in a small space.)
Explore
NGSS ConnectionStudents draw models of the Earth to describe its shape. In doing so, they use the practice of Developing and Using Models:
Develop and/or use models to describe and/or predict phenomena.
Drawing Earth Models
TEACHER NOTE: If students are having trouble getting started drawing their models, consider handing out the optional Earth Model Teacher Master. This
Teacher Master is intended to help the students focus on what they might want to draw.
1. Explain that you would like them to draw models of Earth as they experience it on the Earth Model: Drawing section of their online or print science notebooks.
2. The model should include:
• the Earth and what it looks like;
• the point of view of the drawing. (i.e. from up in the sky looking down, from a spaceship, from their front door, etc.)
3. Circulate as students work. Encourage them to draw their models based on their own observations of Earth, views from airplanes, or other observations.

Earth in Space: Lesson: Modeling Earth’s Shape 13
4. Have students respond to the prompts on the Earth Model: Supporting an Argument science notebook section.
5. Invite the students to pair up with another student. Have them share and compare with one another. Have them compare their models. In what ways are they similar? In what ways are they different?
6. While sharing have them discuss the experiences that led them to model the Earth the way they did.
Reflect and Discuss: Making Sense
Big IdeaThe Earth is shaped like a sphere.
NGSS ConnectionWhen students describe how the size of their drawings compares to the actual size of Earth, they engage with the crosscutting concept of Scale, Proportion, and Quantity:
Natural objects and/or observable phenomena exist from the very small to the immensely large or from very short to very long time periods.
Sharing1. Have students share their models with the class by describing:
• the Earth and what it looks like;
• the point of view of the drawing; and
• the limitations of their model.
2. Present a rectangular and a circular flat piece of cardboard, a frisbee, and a ball. Have the students select the object that most closely aligns with their model and explain why.
• What evidence from their own experience tells them this is the best model?
• Do they have any other evidence?
TEACHER NOTE: Here, and in step 3, the term evidence applies to student’s own experiences. The standard of evidence is not the same as the standard that
scientists might use to support a theory or to explain a phenomena.
3. Invite a student who drew a spherical model of Earth to share it with the class. What evidence do they have that made them draw this model of Earth?
Synthesizing1. Ask: How can the evidence from what we personally experience (e.g., walking on a flat
surface under a sky) and what an astronaut experiences (e.g., looking down on Earth from above) both be true? (It depends on each person’s point of view. It also depends on the distance from the Earth.)

14 Earth in Space: Lesson: Modeling Earth’s Shape
2. Ask some the following questions to probe students’ understanding of the scale of their drawings:
• What does the scale of a drawing mean? (The size of the objects in the drawing compared to the things that they represent in the real world.)
• How does the size of their drawings of Earth compare with the actual size of Earth? (Their drawings of Earth are much smaller than the actual Earth.)
• Even though their drawings are smaller than the actual Earth, in what ways do they accurately represent Earth?
• How does the point of view of a drawing affect the way objects look? (Depending on where the viewer is located, objects in the drawing may look larger or smaller. For example, if the viewer is in space, the Earth will look small compared to when the viewer is standing on Earth.)
3. Let students know that while the other objects could model portions of the Earth’s surface, the sphere is the model accepted by scientists that models the shape of the whole Earth.
4. Show the students a spherical globe of the Earth.
• Ask: What are some limitations of the spherical model? (E.g., it is much smaller than Earth. It doesn’t include land masses or bodies of water.)
5. To help give students a perspective about what Earth looks like from space, display the visuals Earth from Space–East and Earth from Space–West.
• Do these views of Earth look like any of the models students drew?
• What are some similarities? What are some differences?
• How do the sizes of these photos of Earth compare with the actual size of Earth? (They are much smaller.)
• Even though they are much smaller than the Earth, in what ways do these photos represent the Earth? (The show what the Earth looks like from space. They show water and land on Earth.)

Earth in Space: Lesson: Modeling Earth’s Shape 15
After the LessonAfter the Lesson
Ongoing Learning Science Center
Materials: Earth model drawings
Place examples of Earth model drawings in the science center for students to examine and compare with their own models.
Family LinkSend home the Family Link: Welcome to the Earth in Space Topic after the lesson.
ExtensionsFurther Science ExplorationsMoon and Sun ModelsEncourage students to draw models of the sun and moon. Have them share the evidence they have to draw upon in order to create the models.
Language Arts ExtensionComparing a Spherical Earth and a Flat Earth Ask students to think about what life would be like on a spherical Earth versus a flat Earth. Have them write a story comparing how life would be similar and how life would be different.

16 Earth in Space: Lesson: Modeling Earth’s Shape
Next Generation Science StandardsNext Generation Science StandardsThis lesson integrates these dimensions from the Next Generation Science Standards (NGSS*):
Science and Engineering Practices
Disciplinary Core Ideas Crosscutting Concepts
Developing and Using Models• Develop and/or use models
to describe and/or predict phenomena.
PS2.B: Types of Interactions • The gravitational force of
Earth acting on an object near Earth’s surface pulls that object toward the planet’s center.
Scale, Proportion, and Quantity• Natural objects and/or
observable phenomena exist from the very small to the immensely large or from very short to very long time periods.
This lesson lays the foundation for the fulfillment of this NGSS Performance Expectation for Grade 5:
Motion and Stability: Forces and Interactions
5-PS2-1. Support an argument that the gravitational force exerted by Earth on objects is directed down.
Lesson Goals:
1. Draw a model of Earth that describes phenomena they have experienced.
2. Observe a spherical model of Earth and compare it with their model.
Common Core State Standards Connections: ELA/Literacy
SL.5.1 Engage effectively in a range of collaborative discussions (one-on-one, in groups, and teacher-led) with diverse partners on grade 5 topics and texts, building on others’ ideas and expressing their own clearly.
*Next Generation Science Standards is a registered trademark of Achieve. Neither Achieve nor the lead states and partners that developed the Next Generation Science Standards was involved in the production of, and does not endorse, this product.

Earth in Space: Lesson: Earth’s Gravitational Force 17
Big IdeaThe gravitational force exerted on objects by the spherical Earth is directed toward its center.
Lesson:
Earth’s Gravitational Force
Overview Overview Students focus on the effects of gravity on objects. They apply the crosscutting concept of Patterns by looking for similar evidence from a variety of two- and three-dimensional models of Earth. They use this evidence to construct an argument that Earth’s gravity pulls objects towards its center.
Key Notes• For more information about the science content in this
lesson, see the “Earth’s Gravity” section of the Teacher Background Information.
Lesson GoalsUse two- and three-dimensional models to support an argument that the gravitational force exerted by Earth pulls objects toward its center.
Assessment Options• Observe the students during the explorations to see whether they understand the phenomenon
that the gravitational force exerted by Earth on objects is directed toward Earth’s center. Also, evaluate their understanding in the Earth’s Gravity science notebook section after the final exploration. Use criterion B of the Earth’s Gravity rubric to note your findings.
• Review student drawings on the Earth’s Gravity section of the science notebooks and assess their modeling skills using the Developing and Using Models checklist. Also, consider having students evaluate their own skills with the Using Models in Science self-assessment.
• Use the optional Dropped Object Performance Task after this lesson to assess students’ understanding and application of criterion B on the Earth’s Gravity rubric.
• This is the last lesson in the Gravity on Earth cluster. Consider using the Gravity on Earth Quick Check after this lesson to assess students’ understanding of the criteria on the Earth’s Gravity rubric.

18 Earth in Space: Lesson: Earth’s Gravitational Force
PreparationPreparation
Materials
Curriculum ItemsItem Resource LocationScience Notebook: Earth’s Gravity online print teacher guide
Student Lessons Teach Lesson Teach Lesson
Rubric: Earth’s Gravity (optional)
Checklist: Developing and Using Models (optional)
Self-Assessment: Using Models in Science (optional) online print
Assessments
Performance Task: Dropped Object (optional) online print teacher guide
Assessments
Quick Check: Gravity on Earth (optional) online print teacher guide
Assessments
ExploraGear
Styrofoam balls, 1 per pair To explore gravity. 5 cm (2 in) diameter
Toothpicks Several per pair To explore gravity.
Rubber ball, 1 To represent Earth. playground size
Toy person, small 1 To demonstrate effects of gravity.
Earth in Space: Lesson: Earth’s Gravitational Force 19
Teaching the LessonTeaching the LessonEngageIntroductory DiscussionShow the students a ball. Review what they learned in the previous lesson: the spherical ball can represent a model of the spherical Earth.
• In what ways is this model accurate and useful? (It is spherical like Earth. It is easy to manipulate.)
• What are some limitations of this model? (It is much smaller than Earth. In many ways, it does not look like Earth.)
Explore
NGSS ConnectionWhen students use two- and three-dimensional models to describe the effects of gravity on an object, they engage with the practice of Developing and Using Models:
Develop and/or use models to describe and/or predict phenomena.
Students record arguments based on evidence from their modeling activities to support the claim that the gravitational force of the Earth pulls all objects towards its center. In doing so, they focus on the practice of Engaging in Argument from evidence:
Construct and/or support an argument with evidence, data, and/or a model.
Pull of Earth’s Gravity: 2-Dimensional Model1. Have students look at the diagram on the Earth’s Gravity: Dropping Balls section of their
online or print science notebooks.
2. Explain that each of the points A through H represents a place on Earth where a person is standing and preparing to drop an object. Have students draw arrows on the diagram to model where the object will fall.
3. Group the class into pairs and have each student work to convince their partner that their ideas are accurate. If need be, allow partners to drop objects to the floor to clarify their points.
4. Have a couple of pairs explain where gravity is directed while standing at points A through H and all points in between. (Toward the center of the Earth.)
A 3-Dimensional Model 1. Show students a toy person and a model of Earth. Hold a toy person at the following points,
and ask students to explain what would happen if a person standing there dropped an object:
• standing on the top of the model Earth
• standing at the bottom of the model Earth

20 Earth in Space: Lesson: Earth’s Gravitational Force
• standing on a side of the model Earth
• standing on another side of the model Earth
2. Students will likely respond that the object will fall down. Probe student thinking to clarify what “down” means for each person. (toward their feet, toward the Earth, toward the center of Earth.)
3. For a toy person on the bottom or sides of Earth, gesture to show an object falling away from the model earth but toward the floor in your classroom. Ask: why doesn’t the object fall this way? As needed, rotate the model of Earth so that the toy person is right side up and discuss how, from their perspective, it’s the other people that would seem sideways or upside-down.
Using Toothpicks to Indicate Gravity: 3-Dimensional Model (Optional) 1. Put the class in pairs. Pass out a 5 cm (2 in) diameter Styrofoam ball and several toothpicks
to each pair.
2. Explain that the Styrofoam ball represents the Earth; the toothpicks represent the direction of the force of gravity. Point out that this is another scientific model.
3. Have the students use all their toothpicks to model the way gravity would affect an object dropped at a variety of locations on Earth. Explain that they should push the toothpicks into the Styrofoam ball in the direction that an object would fall.
4. After they finish sticking all of their toothpicks into the ball, have students share their ideas about what this three-dimensional model depicts. Ask: based on this model, what is the effect of Earth’s gravity? (It causes objects to be pulled toward the center of Earth.)
Pull of Earth’s Gravity: Arguing from Evidence Now that the students have used a variety of models to think about gravity, they support an argument using these models as evidence. They record this evidence on the Earth’s Gravity: Support an Argument section of their science notebooks.
Reflect and Discuss: Making Sense
Big IdeaThe gravitational force exerted on objects by the spherical Earth is directed toward its center.
NGSS Connection After working with different two- and three-dimensional models, a pattern emerges that the falling objects are always pulled to Earth’s center. As students become aware of this pattern, they develop the crosscutting concept of Patterns:
Patterns can be used as evidence to support an explanation.

Earth in Space: Lesson: Earth’s Gravitational Force 21
Sharing1. Explain that scientists use models as evidence to support an argument and explain
phenomena. Sometimes using more than one model is helpful.
2. Ask different volunteers to share their evidence for the claim made about the behavior of a dropped object on Earth. Students may refer to the Earth’s Gravity: Support an Argument science notebook section. Help them recognize that in all of the models, the pattern of the effect of Earth’s gravity is the same. Reinforce that Earth’s gravity pulls objects down toward its center.
Synthesizing
1. Ask some of the following questions to get students thinking about the value of the models they used:
• Which model do you find most useful to explain gravity and its effects?
• What made that more useful than others? Did one of these convince you that Earth’s gravity pulls an object to the center of the planet? Or, did it take more than one model to help you understand this phenomenon?
• What pattern did the models help to reveal? (In all of the models, a falling object would be pulled by Earth’s gravity toward Earth’s center.)
2. Invite students to speculate on gravity’s effects on other objects by asking the following:
• Is the moon affected by Earth’s gravity? If so, why doesn’t it fall “down” toward the Earth?
• Why doesn’t a plane or bird fall from the sky?
• Does gravity stop working or are there other forces at work?

22 Earth in Space: Lesson: Earth’s Gravitational Force
After the LessonAfter the Lesson
Ongoing Learning Science Center
Materials: Styrofoam balls, toothpicks
Place Styrofoam balls and toothpicks in the Science Center so students can use them to continue modeling the effects of an object that falls to Earth.
ExtensionsFurther Science Explorations
Gravity on Other Planets Encourage students to research the effects of gravity on other planets. For example, on Mercury, Venus, Mars, and other planets would objects also fall toward the center of the planets? How is the pull of gravity the same or different on other planets?
More Effects of Gravity Galileo Galilei proposed that objects of different weights fall to Earth at the same speed (as long as the air resistance is the same). Encourage students to drop objects of the same size and different weights (like plastic and steel marbles) from the same heights and have them note when they hit the floor. (Students should observe that they hit the floor at the same time.)
Gravity and Orbits The moon is held in its orbit around the Earth by Earth’s gravity. It does not fall straight down to Earth because it is in motion. Invite students to explore this phenomenon.
Language Arts ExtensionFalling to the Center of EarthSuppose there is a hole dug all the way through the center of the Earth and out the other side. Ask students to write about what it would be like to fall through this hole. How long would it take? How fast would they go? What would happen when they reached the center? Would they keep going to the other side, or would they stay there?

Earth in Space: Lesson: Earth’s Gravitational Force 23
Next Generation Science StandardsNext Generation Science StandardsThis lesson integrates these dimensions from the Next Generation Science Standards (NGSS*):
Science and Engineering Practices Disciplinary Core Ideas Crosscutting Concepts
Developing and Using Models• Develop and/or use models
to describe and/or predict phenomena.
Engaging in Argument from Evidence• Construct and/or support
an argument with evidence, data, and/or a model.
PS2.B: Types of Interactions• The gravitational force of
Earth acting on an object near Earth’s surface pulls that object toward the planet’s center.
Patterns• Patterns can be used as
evidence to support an explanation.
This lesson contributes to the fulfillment of this NGSS Performance Expectation for Grade 5:
Motion and Stability: Forces and Interactions
5-PS2-1. Support an argument that the gravitational force exerted by Earth on objects is directed down.
Lesson Goals:
Use two- and three-dimensional models to support an argument that the gravitational force exerted by Earth pulls objects toward its center.
Common Core State Standards Connections: ELA/Literacy
SL.5.1 Engage effectively in a range of collaborative discussions (one-on-one, in groups, and teacher-led) with diverse partners on grade 5 topics and texts, building on others’ ideas and expressing their own clearly.
*Next Generation Science Standards is a registered trademark of Achieve. Neither Achieve nor the lead states and partners that developed the Next Generation Science Standards was involved in the production of, and does not endorse, this product.

24 Earth in Space: Lesson: Earth’s Gravitational Force
Cluster #1
Earth in Space: Daily Pattern of the Sun Cluster 25
Lesson:
Daily Pattern of the Sun
Overview Overview Throughout this lesson cluster, students apply the crosscutting concept of Patterns as they make observations and use models to discover that a rotating Earth explains the patterns of daytime, nighttime, and shadows. Students begin with a science talk in which they explore their ideas about the causes of daytime and nighttime. During the remainder of the lessons, they observe the sun and various shadows to gather evidence to create a model of daytime and nighttime. In a culminating lesson, students compare their models with the model scientists have developed.
Investigative Phenomena• the predictable daily pattern of the sun’s apparent
movement. (Students share ideas about the causes of daytime and nighttime. They observe and manipulate shadows to determine how shadows indicate the position of the sun.)
• evidence provided by shadows of the sun’s apparent movement. (Students collect, record, graph and analyze data of how shadows change during the day and the position of the sun to explain daily patterns.)
• how the rotation of Earth provides an explanation for the sun’s predictable daily patterns. (Students use previously created models to explain how the Earth’s rotation around its axis causes the sun’s daily pattern in the sky, as well as the pattern of stars’ movement across the night sky.)
Cluster #2
Big Ideas• The sun appears to travel
through the sky in a predictable daily pattern, an arc.
• Shadows cast by sunlight provide evidence for the sun’s movement.
• The sun’s predictable daily pattern can be explained by the rotation of Earth.

26 Earth in Space: Daily Pattern of the Sun Cluster
DQB Artifacts ChartThis table provides suggestions for when you might explicitly address the Big Ideas. Consider printing them on cards so you can easily add them to the DQB and refer to them throughout the topic.
Adding Student Questions to the Driving Question Board
Possible Artifacts to add to the Driving Question Board
Lesson: Day and NightInvestigative Phenomena: Ss explain their ideas of what causes day and night using flashlights and balls.
Explore: To focus on the Science Talk, post a question to the DQB (e.g. What are the causes of day and night? How do you know?)
Reflect and Discuss: Elicit Ss’ questions about what causes day and night. Check if Ss are able to answer any questions from the previous cluster. Have Ss think about how the sky changes in a predictable manner throughout the day.
• Ss’ initial models of daytime and nighttime
• Ss’ observations of the night sky
Lesson: Observing Shadow PatternsInvestigative Phenomena: Ss observe and manipulate shadows to determine how shadows indicate the position of the sun.
Explore: After Ss observe the shadows cast by a pole throughout the day, they may have many questions to add to the DQB.
Reflect and Discuss: Post a common claim Ss have (e.g. Shadows change because the sun’s position changes in the sky.) and record Ss’ evidence. Have Ss think about how they could document the changes of the position of the sun throughout the day.
• Ss’ drawings of the pole and its shadow
• Post the teacher master Shadow Challenge Cards (optional).
• Big Idea: Shadows cast by sunlight provide evidence for the sun’s movement.
• Silhouettes created in the Art Extension

Earth in Space: Daily Pattern of the Sun Cluster 27
Adding Student Questions to the Driving Question Board
Possible Artifacts to add to the Driving Question Board
Lesson: Observing the Sun for a DayInvestigative phenomena: Ss observe and record the position of the sun over the course of the day.
Engage: Use the DQB to review what Ss observed in the previous lesson.
Explore: Post the question, “What patterns do we notice about the sun’s position in the sky throughout the day?”
Reflect and Discuss: Post student summaries of the apparent movement of the Sun across the sky during the day. Ss may have additional questions after they draw the sun’s location throughout the day. They also may be able to address questions from the previous lesson. Have Ss think about whether shadows might be affected by the position of the sun in the sky.
• Class sun drawing showing the sun’s location in the sky throughout the day
• Ss’ sun height data tables and/or graphs
• Big Idea: The sun appears to travel through the sky in a predictable daily pattern, an arc.
Lesson: Tracking Shadows During a DayInvestigative phenomena: Ss observe and record how shadows change throughout the day with the change of the position of the sun.
Session 1Engage: Use the DQB to review what the Ss learned in the previous lessons. You may want to post information of how good scientists keep accurate records of their observations:
Session 2Reflect and Discuss: Have a few Ss summarize the patterns they discovered when analyzing their data and post it on the DQB.
Have Ss think about how they might model their sun and shadow observations.
• Completed Shadow Data teacher master. Consider completing a class Shadow Data page that you can post in the DQB, since Ss will continue to use theirs in the following lessons.
• Also, refer back to the Big Idea you added in the previous lesson to reinforce it here.
• Ss’ shadow data tables and/or graphs
continued
28 Earth in Space: Daily Pattern of the Sun Cluster
Adding Student Questions to the Driving Question Board
Possible Artifacts to add to the Driving Question Board
Lesson: Models of the Sun and ShadowsInvestigative Phenomena: Ss figure out a path for a moving flashlight that will cast shadows that match their records from previous observations.
Engage: Use the DQB to review how and why the shadows change throughout the day.
Reflect and Discuss: Record and post examples of Ss’ question, claim, and argument. You may want to add any questions from this discussion that Ss were unable to clearly answer. Check for any new questions and have Ss think about how they can improve their initial model of what causes daytime and nighttime.
• Photographs of Ss modeling changes in shadows using flashlights and a shadow recording tool. Have Ss write or dictate a caption for the activity photographs, summarizing what they did and what they learned.
• Refer back to the Big Idea from the previous two lessons to reinforce it again here.
Lesson: Models of Daytime and NighttimeInvestigative Phenomena: Ss create physical models that explain their observations (describe what causes daytime and nighttime and explain why the sun seems to move across the sky during the daytime).
Session 1Explore: Post the model criteria for Ss to reference.
Session 2Explore: Support Ss’ ideas during their presentation by writing appropriate vocabulary on the board, such as rotate, sphere, or orbit.
Reflect and Discuss: Post a few student summaries of which model best explained the observations of the sun’s apparent movement across the sky. Address any questions from the DQB that can now be answered and elicit any new questions. Have Ss think about how Earth’s rotation affects daytime and nighttime.
• Sketches of Ss’ models of daytime and nighttime
• Definitions of any relevant words from Ss’ presentations (e.g., rotation)
Earth in Space: Daily Pattern of the Sun Cluster 29
Adding Student Questions to the Driving Question Board
Possible Artifacts to add to the Driving Question Board
Lesson: Modeling Earth’s RotationInvestigative Phenomena: Ss participate in a physical model of how Earth’s rotation causes day and night and compare their models with those of scientists.
Engage: Post the Family Link Reflecting on Models of Daytime and Nighttime as you review what Ss learned in previous lessons.
Reflect and Discuss: Have Ss expand upon their initial response to the driving question for this topic using evidence from this lesson cluster. Let Ss know that in this final cluster they will be investigating the sun and other stars. Elicit Ss’ questions about stars and have Ss think about why some stars appear brighter than others.
• Completed Family Links with Ss’ reflections on their models of daytime and nighttime
• Big Idea: The sun’s predictable daily pattern can be explained by the rotation of Earth.

30 Earth in Space: Daily Pattern of the Sun Cluster
Lessons at a GlanceDay and Night Students list objects they can see in the sky. They are introduced to the concept of the Sun’s daily pattern with a science talk that explores their ideas about the causes of daytime and nighttime. As children share their concepts of day and night during the science talk, they will likely invoke the crosscutting concept of Cause and Effect.
Observing Shadow Patterns Students consider the sun as Earth’s principal source of light and observe one effect that sunlight has on Earth: shadows. They manipulate their own shadows to get a sense of how shadows indicate the position of the sun. In doing so, they develop the crosscutting concept of Patterns.
Observing the Sun for a Day Students use landmarks to observe the relative position of the sun over the course of a day. Once initial observations are made, they document their thoughts about how the path or position of the sun might change throughout the day. They return to the same location throughout the day to collect and graph data that shows how the height of the sun in the sky changes during the day. Students engage with the crosscutting concept of Patterns by confirming that the sun appears to travel in a predictable pattern.
Tracking Shadows During a DayIn this two-session lesson, students track how the length and position of shadows changes during the day, and use that data to determine when shadows are longest and shortest. In Session 1, they observe shadows and record the sun’s position several times during the day. They confirm their observations from the previous lessons that the sun moves in an arc through the daytime sky. In Session 2, they graph data that shows how the length of shadows changes during the day, and compare their shadow graph with the previous lesson’s sun graph. They apply the crosscutting concept of Patterns as their data reveals the relationship between the length of shadows and the sun’s height in the sky.
Models of the Sun and Shadows This lesson challenges students to use a flashlight with the shadow recording tool to model the changes in the sun’s position in the sky during the day. They use this model to review how the patterns of shadows depend on the position of the sun. They confirm previous observations that the sun’s relative position changes during the day.
Models of Daytime and Nighttime In Session 1 of this two-session lesson, students create models to explain their observations of daytime and nighttime, and the sun’s apparent movement across the sky during the daytime. In Session 2, they present and critique each other’s models and decide what makes a useful model. The crosscutting concept of Cause and Effect is applied as students base their explanations on observations of relationships between the sun and Earth.

Earth in Space: Daily Pattern of the Sun Cluster 31
Modeling Earth’s Rotation Students compare and contrast the models they created in the previous lesson to the model of Earth’s rotation that scientists use to explain their observations of daytime and nighttime, and the apparent movement of the sun across the sky. They apply the crosscutting concept of Patterns as they appreciate that a rotating Earth explains the patterns of daytime, nighttime, and shadows.
Family LinksObserve and record what they see in the nighttime sky. Reflect on their model building experiences and share terminology related to models with a family member. Observe and describe the brightness of a flashlight as they move farther and farther away from it.
ExtensionsFurther Science Explorations: Keep a daily “Sky Journal” to help recognize the many different kinds of objects in the sky and whether the objects appear according to a pattern. Work in small groups to discuss the science talk ideas they generated and the evidence they have for their ideas. Point a path to the sun using their arms and note that each person’s arm is pointed in the same direction. Track indoor shadows on the floor or a wall. Discuss how the sun affects animals in various ways. Make simple shading tools to reinforce their understanding of the position of the sun. Use a light and other objects to represent the sun, Earth, and moon to model a lunar eclipse. View a database of live webcams around the world to provide evidence to support their developing understanding of daytime and nighttime.
Mathematics: Trace objects to define parts of a circle.
Arts: Create silhouettes which are shadows of a profile. Groups that created pictorial models of daytime and nighttime can challenge themselves by creating a physical model. Groups that created a physical model, can challenge themselves by creating pictorial models.
Language Arts: Compile a list of words that include the root words “sol” and “sun,” and write sentences using those words. Read the poem “My Shadow” from A Child’s Garden of Verses by Robert Louis Stevenson.
Social Studies: Explore how ancient civilizations regarded the sun in their cultures. Read a compass rose and use it to locate directions to places on a map. Research how different cultures have noted or celebrated the autumnal and spring equinoxes.

32 Earth in Space: Daily Pattern of the Sun Cluster
Before You Begin TeachingBefore You Begin TeachingPlan for Special Scheduling and Materials ConsiderationsUse the table below as a reference for scheduling the lessons and to anticipate preparation issues that involve advance planning.
Lesson Scheduling Considerations
Preparation Considerations
Day and Night Single session. Collect the globe, flashlights, spheres of various sizes (e.g., racquet ball, tennis ball, golf ball, bocce ball, marbles, rubber ball) for the students to use as manipulatives during the science talk.
Observing Shadow Patterns
Single session.
This lesson requires a clear, bright day. Plan to do the outdoor activities in the early or mid-morning.
Watch the Setting Up for Light and Shadow at a Pole teacher video for ideas on how to use a pole to track shadows during the day.
Students observe shadows cast by a pole located in an area that receives sun throughout the day. See the Preparation section for ideas about where to locate the outdoor activities.
Observing the Sun for a Day
Single session.
This lesson requires a clear day during which the sun is visible. A minimum of three observations is needed, so do this lesson in one day or over several days (at different times of day) within one week.
Find an outside location that you can return to for multiple observations and that has several obvious, distinct landmarks (such as trees or buildings) towards the south that can be used as reference points.
Earth in Space: Daily Pattern of the Sun Cluster 33
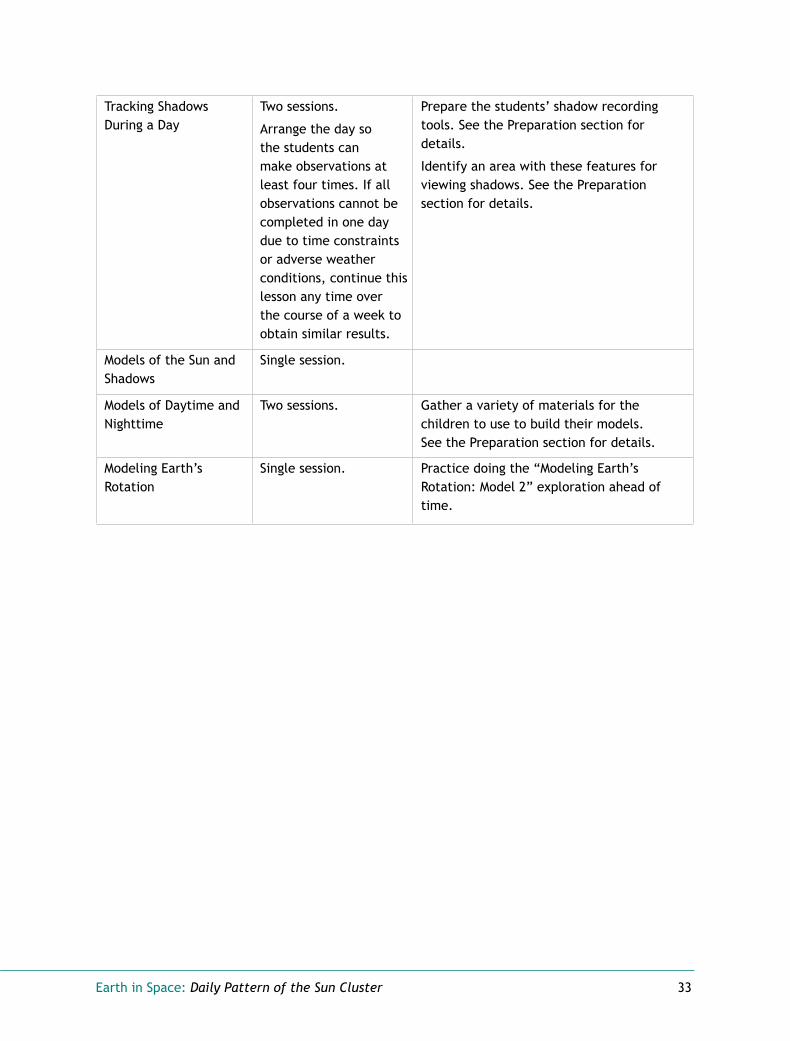
Tracking Shadows During a Day
Two sessions.
Arrange the day so the students can make observations at least four times. If all observations cannot be completed in one day due to time constraints or adverse weather conditions, continue this lesson any time over the course of a week to obtain similar results.
Prepare the students’ shadow recording tools. See the Preparation section for details.
Identify an area with these features for viewing shadows. See the Preparation section for details.
Models of the Sun and Shadows
Single session.
Models of Daytime and Nighttime
Two sessions. Gather a variety of materials for the children to use to build their models. See the Preparation section for details.
Modeling Earth’s Rotation
Single session. Practice doing the “Modeling Earth’s Rotation: Model 2” exploration ahead of time.
34 Earth in Space: Daily Pattern of the Sun Cluster
Science CenterScience CenterSelecting MaterialsThe materials listed below are a good starting point for your Daily Pattern of the Sun Science Center. As you consider which materials to include and how long to keep them available, try to follow the interests of your students.
ExploraGear • Flashlights
• Shadow recording tool
• Spheres and discs of different sizes
• Styrofoam™ balls
Classroom Supplies • Flat shapes (plates, cardboard squares, cardboard triangles)
• Light sources
• Model-making materials
• Scientists’ model of Earth
• Solid geometrical shapes (blocks, cylinders, cones, and pyramids)
• Student models of Earth
Inviting Exploration The suggestions here and in the lessons are intended only as starting points, or “invitations,” to launch students into further explorations. As you add new materials or activities to the Science Center, take a few minutes to introduce them to students. Periodically make time for students to share and discuss their Science Center explorations and discoveries.
During the Daily Pattern of the Sun lesson cluster, students might:
• Explore the causes of daytime and nighttime using light sources, spheres and discs of various sizes, and model-making materials.
• Use a variety of shapes to cast different types of shadows.
• Use a flashlight to explore the types of shadows cast by the shadow-recording tool.
• Model the sun’s location in the sky using a flashlight and cast shadows with the shadow-recording tool.
• Practice with the scientists’ model of Earth’s rotation, as a way for them to think more about how they modelled Earth’s rotation.
• Place their Earth’s rotation models in the Science Center so others can use them to keep exploring.
• Look for more evidence about how the Earth looks from space and how it moves in relation to the sun.

Earth in Space: Daily Pattern of the Sun Cluster 35
Next Generation Science StandardsNext Generation Science StandardsThe lessons integrate these dimensions from the Next Generation Science Standards (NGSS*):
Science and Engineering Practices Disciplinary Core Ideas Crosscutting Concepts
Developing and Using Models • Identify limitations of models.
• Develop and/or use models to describe and/or predict phenomena.
Analyzing and Interpreting Data • Analyze and interpret data to
make sense of phenomena, using logical reasoning, mathematics, and/or computation.
Constructing Explanations and Designing Solutions • Use evidence (e.g.,
measurements, observations, patterns) to construct or support an explanation or design a solution to a problem.
• Identify the evidence that supports particular points in an explanation.
Engaging in Argument from Evidence • Respectfully provide and
receive critiques from peers about a proposed procedure, explanation or model by citing relevant evidence and posing specific questions.
• Construct and/or support an argument with evidence, data, and/or a model.
ESS1.B: Earth and the Solar System• The orbits of Earth around
the sun and of the moon around Earth, together with the rotation of Earth about an axis between its North and South poles, cause observable patterns. These include day and night; daily changes in the length and direction of shadows; and different positions of the sun, moon, and stars at different times of the day, month, and year.
Patterns• Patterns can be used as
evidence to support an explanation.
Cause and Effect • Cause and effect
relationships are routinely identified, tested, and used to explain change.
Scale, Proportion and Quantity • Natural objects and/or
observable phenomena exist from the very small to the immensely large or from very short to very long time periods.
These lessons contribute to the fulfillment of this NGSS Performance Expectation for Grade 5:
Earth’s Place in the Universe
5-ESS1-2. Represent data in graphical displays to reveal patterns of daily changes in length and direction of shadows, day and night, and the seasonal appearance of some stars in the night sky.
continued
36 Earth in Space: Daily Pattern of the Sun Cluster
Common Core State Standards Connections: ELA/Literacy
SL.5.1 Engage effectively in a range of collaborative discussions (one-on-one, in groups, and teacher-led) with diverse partners on grade 5 topics and texts, building on others’ ideas and expressing their own clearly.
Common Core State Standards Connections: Mathematics
5.G.A.2 Represent real world and mathematical problems by graphing points in the first quadrant of the coordinate plane, and interpret coordinate values of points in the context of the situation.
* Next Generation Science Standards is a registered trademark of Achieve. Neither Achieve nor the lead states and partners that developed the Next Generation Science Standards was involved in the production of, and does not endorse, this product.

Earth in Space: Daily Pattern of the Sun Cluster 37
VocabularyVocabulary
Word Definition Lesson
arc A part of a circle or a curve. It describes the apparent path of the sun across the sky.
Observing the Sun for a Day
axis An imaginary, straight line that passes through the center of Earth between the North and South poles.
Modeling Earth’s Rotation
celestial An object located outside of Earth’s atmosphere, such as the sun, the moon, other planets, and stars.
Modeling Earth’s Rotation
compass A tool used to find the direction of magnetic north.
Tracking Shadows During a Day
compass directions The directions of the compass. North is towards the North Pole. East is 90° to the right of north; south is 180° directly opposite north; and west is 90° to the left of north.
Tracking Shadows During a Day
daytime The time when there is daylight. The time from sunrise to sunset.
Day and Night
diameter The measurement across a sphere at its widest point. The diameter always goes through the center of the sphere.
Modeling Earth’s Rotation
Earth The planet third from the sun, and the one on which we live.
Day and Night
equinox One of two times during the year—on or about March 20 and September 22—when the hours of daylight in one day are equal to the hours of nighttime.
Tracking Shadows During a Day
gnomon An object that makes a shadow showing how the sun moves during a day.
Modeling Earth’s Rotation
investigative question A question that scientists pose to help guide an investigation.
Day and Night
landmark A permanent feature in a landscape. Observing the Sun for a Day
mental model A model someone is thinking about in their mind.
Models of Daytime and Nighttime

38 Earth in Space: Daily Pattern of the Sun Cluster
model A representation of something that is similar to real thing in many ways, but different in some ways.
Models of Daytime and Nighttime
moon The object that orbits Earth and shines by light reflected from the sun.
Day and Night
nighttime When there is not daylight. The time from sunset to sunrise
Day and Night
orbit The path of one object in space around another. For example, Earth orbits the sun, and the moon orbits Earth.
Models of Daytime and Nighttime
pattern Something that has regularly repeating characteristics.
Observing Shadow Patterns
perspective The outlook from which one considers something. Can be actual (direct view) or mental (abstract view).
Modeling Earth’s Rotation
quantitative Involving or relating to an amount or a size.
Observing the Sun for a Day
rotate To turn around in a circle. To spin with the point in the middle staying in the same place.
Models of Daytime and Nighttime
shade A place sheltered from sunlight. Observing Shadow Patterns
shadow The dark image made by an object blocking the sun or other light source.
Observing Shadow Patterns
solar Relating to the sun. Day and Night
sphere A 3-dimensional round body whose surface is at all points the same distance from the center.
Models of Daytime and Nighttime
sun The shining object in outer space that provides heat and light to Earth.
Day and Night
sunlight Light coming from the sun. Observing Shadow Patterns
Earth in Space: Lesson: Day and Night 39
Big IdeaThe sun appears to travel through the sky in a predictable daily pattern, an arc.
Lesson:
Day and Night
Overview Overview Students list objects they can see in the sky. They are introduced to the concept of the Sun’s daily pattern with a science talk that explores their ideas about the causes of daytime and nighttime. As children share their concepts of day and night during the science talk, they will likely invoke the crosscutting concept of Cause and Effect.
Key Notes • Leave the big idea unspoken at this point so the students
can discover it on their own as they progress through the Daily Pattern of the Sun cluster. Instead, to help students consider the Big Idea, you might pose this question: Where and when do we see the sun in the sky?
• Because many ideas are discussed in the lesson, you may want to allow the students an extra day for reflection before having them draw their ideas about the cause of daytime and nighttime in their science notebooks.
• For more information about the science content in this lesson, see the “Daily Pattern of the Sun” section of the Teacher Background Information.
Lesson Goals 1. Participate in a science talk to uncover and model initial
ideas about the causes of daytime and nighttime.
2. Create and compare drawings that depict ideas about what causes the phenomena of daytime and nighttime.
Assessment Options • Use the science talk as a pre-assessment of the students’ ideas about what makes daytime
and nighttime and review the models students draw in their science notebooks to assess the class’s initial familiarity with and understanding of the sun’s daily pattern. As you review their drawings, identify strengths and gaps in the students’ understandings, as well as any misconceptions they may have. You can use criterion A on the Sun and Shadows rubric to record your pre-assessments.

40 Earth in Space: Lesson: Day and Night
PreparationPreparationPreparation Checklist
□ Prepare to copy and handout the Family Link Watching the Night Sky at the end of the lesson. In this assignment the students and their family members observe and record what they see in the nighttime sky.
□ Collect the globe, flashlights, spheres of various sizes (e.g., racquet ball, tennis ball, golf ball, bocce ball, marbles, rubber ball) for the students to use as manipulatives during the science talk.
□ Clear a space in the room for the science talk that is large enough for the students to sit in a circle comfortably. Keep in mind that you will be placing the manipulatives in the center of the circle.
Materials
ExploraGear
Flashlights 4 To use as manipulatives to support explanations.
Self-sticking notes, 1 pack To record ideas and questions. large
Globe 1 To use in explanations.
Modeling clay 1 package To form into manipulatives to support explanations.
Sphere-shaped items, Several To use as manipulatives to various sizes (racquet support explanations. ball, tennis ball, golf ball, bocce ball, marbles, rubber ball)
Earth in Space: Lesson: Day and Night 41
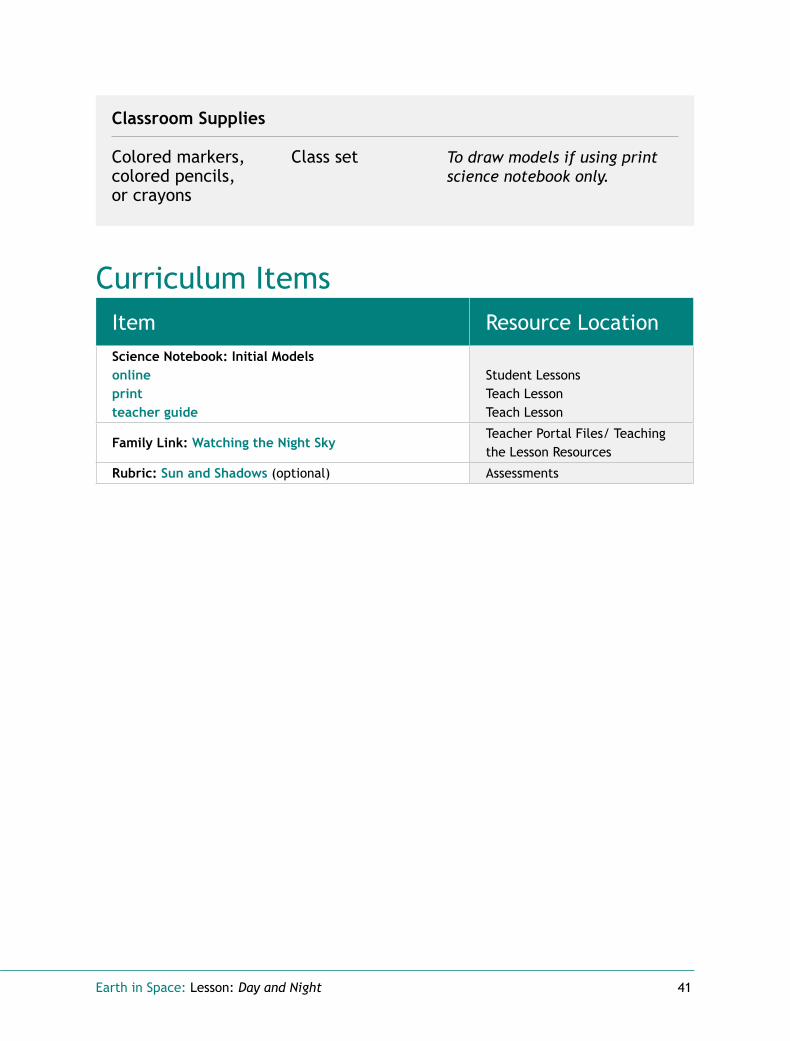
Classroom Supplies
Colored markers, Class set To draw models if using print colored pencils, science notebook only. or crayons
Curriculum ItemsItem Resource LocationScience Notebook: Initial Models online print teacher guide
Student Lessons Teach Lesson Teach Lesson
Family Link: Watching the Night Sky Teacher Portal Files/ Teaching the Lesson Resources
Rubric: Sun and Shadows (optional) Assessments

42 Earth in Space: Lesson: Day and Night
Teaching the LessonTeaching the LessonEngageIntroductory Discussion1. (Optional) Close any blinds or curtains you have in the room to block out the daytime sky.
2. Ask students questions about what they have noticed in the sky, such as:
• What did the sky look like when you arrived at school this morning?
• What objects did you notice in the sky this morning? (Responses might include the sun, clouds, colors of the sky, or even the moon.)
• What did the sky look like last night? (Students will most likely mention noticing stars, the moon, or clouds, but may not be able to provide details such as the phase of the moon.)
• What objects can be seen in the sky during day or night from Earth? (The sun, the moon, the stars, birds, clouds, airplanes, and satellites.)
• What can be seen in the sky during the day, but can’t be seen at night? (The sun.)
TEACHER NOTE: If the students in your class have noticed few of the sky’s features, consider teaching the Further Science Exploration “My Sky Journal.”
Explore
NGSS ConnectionRegardless of whether or not their explanations are accurate, using flashlights, balls, or clay to explain their thinking about the causes of the phenomena of daytime and nighttime supports students’ engagement with the practice of Developing and Using Models:
Develop and/or use models to describe and/or predict phenomena.
As students share their ideas and models about what causes daytime and nighttime, they apply the crosscutting concept of Cause and Effect:
Cause and effect relationships are routinely identified, tested and used to explain change.
Science Talk Students hold a collaborative discussion about the causes of day and night.
1. Gather the students into a circle and place the manipulatives you’ve collected in the center.
Earth in Space: Lesson: Day and Night 43
2. Promote the sharing of ideas about the question “What causes daytime and nighttime?” Emphasize the following ways to express ideas during the discussion:
• Share ideas and questions, not answers.
• Think of and share your own ideas.
• Use the manipulatives to model your ideas.
• Touch the manipulatives only when it is your turn to model an idea about the causes of daytime and nighttime. They are tools, not toys.
• Talk on your own, respect others, and let everyone have a turn speaking.
• Ask “why” when appropriate rather than just believing something.
TEACHER NOTES: Children’s ideas may vary widely. Consider teaching the Further Science Exploration “Discussing Science Talk Ideas” to probe students’ initial
responses. Student’s ideas of what causes daytime and nighttime typically fall into a few areas. Some students believe that the moon, night, dark, clouds, or the atmosphere cover the sun at nighttime. Some students this age understand that Earth spins on its axis once a day, but most have the misconception that the sun goes around Earth once a day and this makes daytime and nighttime. Some students may know that Earth rotates once every 24 hours to make daytime and nighttime.
3. Discuss briefly how the science talk went:
• Use your notes to comment about the kinds of things you saw and heard that let you know someone was listening and thinking about the questions and statements of others.
• Praise those students who used the manipulatives to support their explanations.
4. Have students depict their initial models about what causes daytime and nighttime on the Initial Models: Daytime and Nighttime sections of their online or print science notebooks.
Reflect and Discuss: Making Sense
Big IdeaThe sun appears to travel through the sky in a predictable daily pattern, an arc.
SharingOnce the students complete their initial models, have them share, observe, and comment on each other’s different perspectives.
MaintenanceAfter the students have had a chance to complete the Family Link Watching the Night Sky, discuss the observations they made and their questions about the sky at night.
44 Earth in Space: Lesson: Day and Night
After the Lesson After the Lesson
Ongoing Learning Science Center
Materials: light sources, spheres and discs of different sizes, model-making materials
Place light sources, spheres and discs of different sizes, and model-making materials in the Science Center. Encourage the students to continue to explore the causes of daytime and nighttime.
Family LinkAssign the Family Link Watching the Night Sky. In this home activity, the students and their family members observe and record what they see in the nighttime sky.
ExtensionsFurther Science Explorations
My Sky Journal To help students recognize the many different kinds of objects in the sky and whether the objects appear according to a pattern, have them keep a daily “Sky Journal” for one month. In the journal, have them note the times and places they see the sun, moon, and stars in the sky.
Discussing Science Talk Ideas During the science talk, collect the students’ most common contributions, questions, and responses. Write them on separate cards. Have students work in small groups to discuss the ideas they generated and the evidence they have for their ideas.
Language Arts Extension
Sun and Sol The term “solar” comes from the ancient Latin word sol, meaning sun. Have the students compile a list of words that include the root words “sol” and “sun,” and write sentences using those words.

Earth in Space: Lesson: Day and Night 45
Next Generation Science StandardsNext Generation Science StandardsThis lesson integrates these dimensions from the Next Generation Science Standards (NGSS*):
Science and Engineering Practices Disciplinary Core Ideas Crosscutting Concepts
Developing and Using Models• Develop and/or use models
to describe and/or predict phenomena.
ESS1.B Earth and the Solar System• The orbits of Earth around the
sun and of the moon around Earth, together with the rotation of Earth about an axis between its North and South poles, cause observable patterns. These include day and night; daily changes in the length and direction of shadows; and different positions of the sun, moon, and stars at different times of the day, month, and year.
Cause and Effect • Cause and effect
relationships are routinely identified, tested, and used to explain change.
This lesson lays the foundation for this NGSS Performance Expectation for Grade 5:
Earth’s Place in the Universe
5-ESS1-2. Represent data in graphical displays to reveal patterns of daily changes in length and direction of shadows, day and night, and the seasonal appearance of some stars in the night sky.
Lesson Goals:
1. Participate in a science talk to uncover and model initial ideas about the causes of daytime and nighttime.
2. Create and compare drawings that depict ideas about what causes the phenomena of daytime and nighttime.
Common Core State Standards Connections: ELA/Literacy
SL.5.1 Engage effectively in a range of collaborative discussions (one-on-one, in groups, and teacher-led) with diverse partners on grade 5 topics and texts, building on others’ ideas and expressing their own clearly.
*Next Generation Science Standards is a registered trademark of Achieve. Neither Achieve nor the lead states and partners that developed the Next Generation Science Standards was involved in the production of, and does not endorse, this product.

46 Earth in Space: Lesson: Day and Night

Earth in Space: Lesson: Observing Shadow Patterns 47
Big IdeaShadows cast by sunlight provide evidence for the sun’s movement.
Lesson:
Observing Shadow Patterns
Overview Overview Students consider the sun as Earth’s principal source of light and observe one effect that sunlight has on Earth: shadows. They manipulate their own shadows to get a sense of how shadows indicate the position of the sun. In doing so, they develop the crosscutting concept of Patterns.
Key Notes• This lesson requires a clear, bright day. Plan to do the
outdoor activities in the early or mid-morning.
• Students observe shadows cast by a pole located in an area that receives sun throughout the day. See the Preparation section for ideas about where to locate the outdoor activities.
• For more information about the science content in this lesson, see the “Daily Pattern of the Sun” section of the Teacher Background Information.
Lesson GoalsUse observations to explain how a shadow’s shape, direction, and movement are related to the sun’s position and to the path it travels across the sky.
Assessment Options• The synthesizing discussion offers opportunities to make a
pre-assessment of students’ understanding of criterion C on the Sun and Shadows rubric.
• Use the optional Shadow Performance Task after this lesson to assess students’ understanding and application of criterion D on the Sun and Shadows rubric.
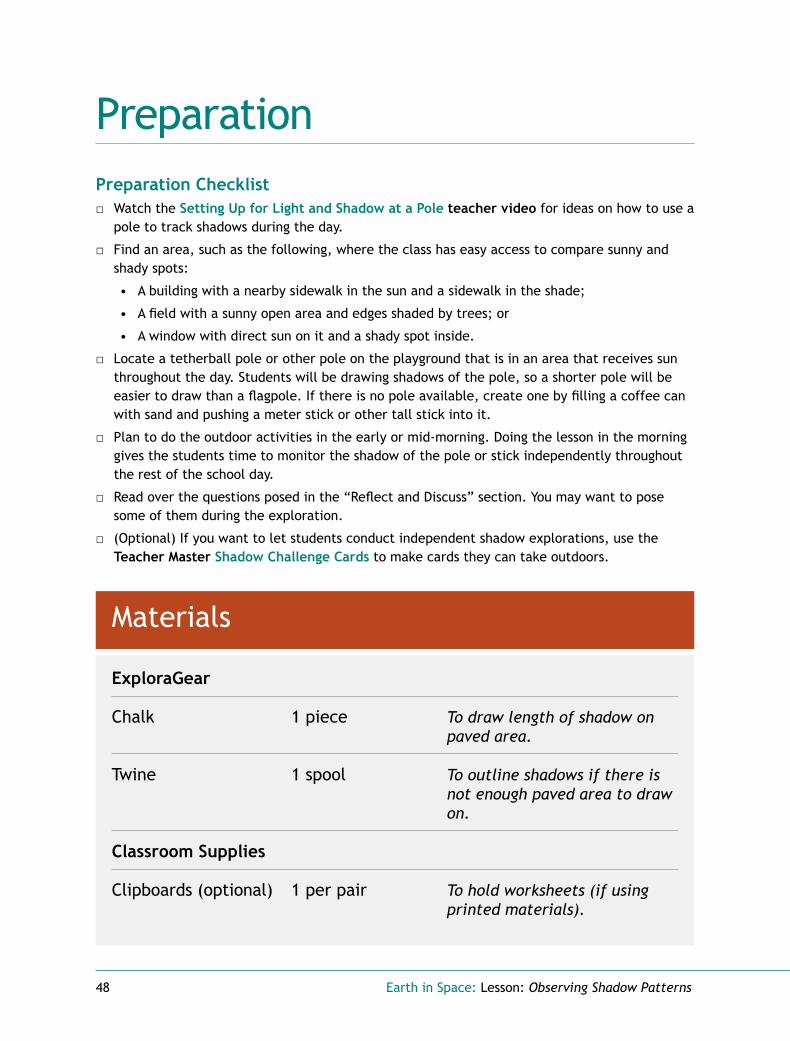
48 Earth in Space: Lesson: Observing Shadow Patterns
PreparationPreparationPreparation Checklist
□ Watch the Setting Up for Light and Shadow at a Pole teacher video for ideas on how to use a pole to track shadows during the day.
□ Find an area, such as the following, where the class has easy access to compare sunny and shady spots:
• A building with a nearby sidewalk in the sun and a sidewalk in the shade;
• A field with a sunny open area and edges shaded by trees; or
• A window with direct sun on it and a shady spot inside.
□ Locate a tetherball pole or other pole on the playground that is in an area that receives sun throughout the day. Students will be drawing shadows of the pole, so a shorter pole will be easier to draw than a flagpole. If there is no pole available, create one by filling a coffee can with sand and pushing a meter stick or other tall stick into it.
□ Plan to do the outdoor activities in the early or mid-morning. Doing the lesson in the morning gives the students time to monitor the shadow of the pole or stick independently throughout the rest of the school day.
□ Read over the questions posed in the “Reflect and Discuss” section. You may want to pose some of them during the exploration.
□ (Optional) If you want to let students conduct independent shadow explorations, use the Teacher Master Shadow Challenge Cards to make cards they can take outdoors.
Materials
ExploraGear
Chalk 1 piece To draw length of shadow on paved area.
Twine 1 spool To outline shadows if there is not enough paved area to draw on.
Classroom Supplies
Clipboards (optional) 1 per pair To hold worksheets (if using printed materials).

Earth in Space: Lesson: Observing Shadow Patterns 49
Coffee can or other 1 To hold meter stick and sand. similarly shaped object (optional)
Colored pencils 2 colors per child For drawing if using print (optional) science notebook.
Meter stick (optional) 1 To make a shadow.
Sand (optional) ¾ can full To support meter stick.
Curriculum ItemsItem Resource LocationTeacher Video: Setting Up for Light and Shadow at a Pole
Teacher Video: Sensing the Position of the Sun
Teacher Portal Files/ Lesson Planning Resources
Science Notebook: Observing Shadows online print teacher guide
Student Lessons Teach Lesson Teach Lesson
Rubric: Sun and Shadows (optional) Assessments
Performance Task: Shadow (optional) online print teacher guide
Assessments
Teacher Master: Shadow Challenge Cards (optional) Teacher Portal Files/ Teaching the Lesson Resources
50 Earth in Space: Lesson: Observing Shadow Patterns
Teaching the LessonTeaching the LessonEngage
Sensory Observation
SAFETY NOTE: Before you go outside, remind the students to never look directly at the sun. Looking at the sun causes permanent eye damage.
1. Take the students outside to sense the light of the sun on their faces or backs as they face different directions. Help students connect what they sense with the sun’s production of light by asking the following questions:
• What direction do they need to face to feel the light of the sun on their faces? (They need to stand directly before the sun.)
• What direction do they need to face to feel the light of the sun on their backs? (They need to turn around.)
2. Bring the students into the shadow of a building or other large object and discuss these topics:
• How standing in the shade feels different from standing in the sun. (The shade is less bright and generally cooler. It is harder to feel the heat of the sunlight on your arms or to make shadows in the shady spot.)
• Where the sun is located. (It’s on the other side of the building or object.)
• What causes the shade. (An object blocking sunlight causes shade.)
Explore
NGSS ConnectionWhen they discuss the patterns they observe about the location of their shadows and use those patterns as evidence to explain why shadows appear where they do, students develop the crosscutting concept of Patterns:
Patterns can be used as evidence to support an explanation.
Light and Shadow at a Pole1. Bring the students to the pole or stick when it is in the sun and is casting an easily observable
shadow.

Earth in Space: Lesson: Observing Shadow Patterns 51
2. Help students think about light and shadows by posing these questions:
• What happens when the sun shines on the pole? (The sun creates a shadow of the pole.)
• Where is the sun? (Students may or may not identify that the sun is on the opposite side of the pole from the shadow.)
• What pattern always exists between the sun and the shadow of the pole? (The sun is always on the opposite side of the shadow.)
3. Use chalk to outline the shadow cast by the pole on the ground. Have students draw pictures of the pole and shadow on the Observing Shadows: Pole section of their online or print science notebooks.
MANAGEMENT NOTE: If the pole’s shadow is not located on a paved surface where you can outline it with chalk, use a string or rope to outline it instead.
4. Discuss whether the shadow will change over time and, if so, how it will change (e.g., position, size, shape). (Students might think that the shadow will not change its position, but will get longer or shorter in length or move to the left or the right of its current position.)
5. Explain that they will come back in a little while to see how the shadow has changed.
Shadows and Bodies1. Take the class to a large, open area in direct sunlight.
TEACHER NOTE: Watch the Teacher Video: Sensing the Position of the Sun for ideas on how to talk students through the shadow observations.
2. Talk the students through these shadow observations motions, using their own bodies:
• Have the students face their shadow. Ask: Where is the sun? (Behind them.)
• What do they observe about the sun when they face their shadow? (The sun is behind them.) Why does their shadow appear there? (Their bodies block the sunlight.)
• Where would the sun be if they faced their shadow over and over again? (The sun would always be behind them.)
• Tell them to move so their shadow is on the right side. Where is the sun? (On their left side.) Why does their shadow appear there? (Because their bodies block the sunlight.)
• What would they need to do to cause a shadow on their right side every time they went outside? (Stand with the sun to their left side.)
• Can both the sun and our shadow ever be on the same side of us? (No.) Why not? (Something must block the sun’s light to create a shadow.)
• Can they face the sun and face their shadow at the same time? (No.) Why or why not? (Something must block the sun’s light to create a shadow.)
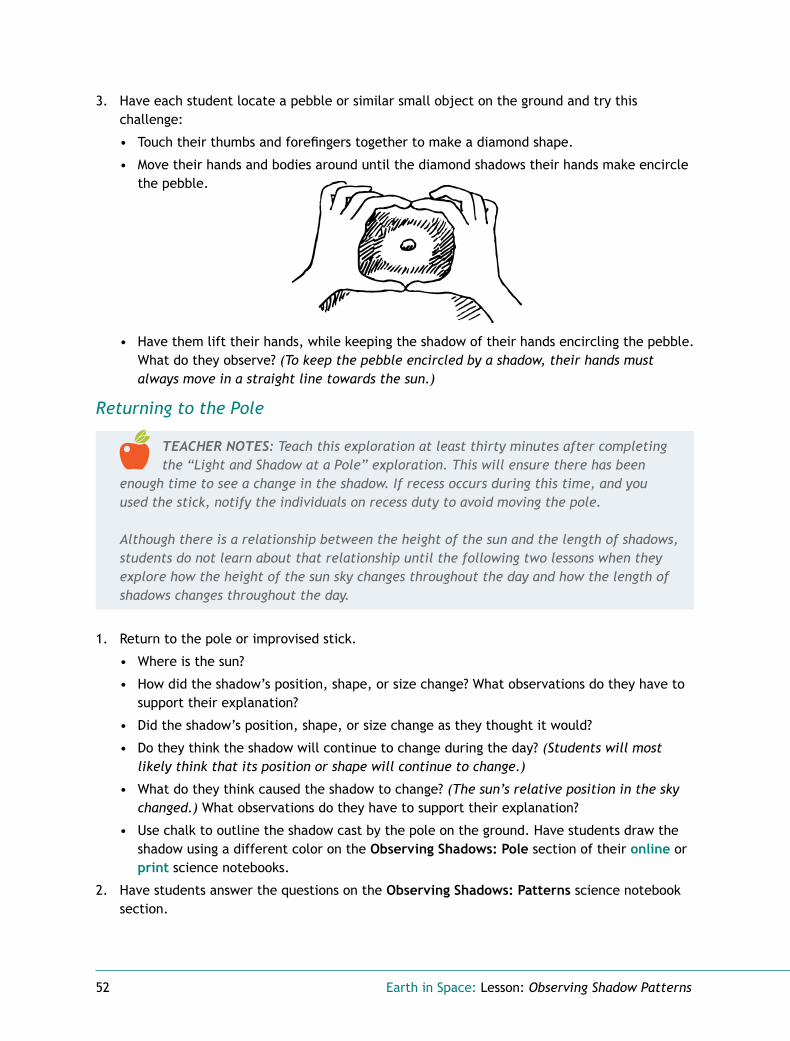
52 Earth in Space: Lesson: Observing Shadow Patterns
3. Have each student locate a pebble or similar small object on the ground and try this challenge:
• Touch their thumbs and forefingers together to make a diamond shape.
• Move their hands and bodies around until the diamond shadows their hands make encircle the pebble.
• Have them lift their hands, while keeping the shadow of their hands encircling the pebble. What do they observe? (To keep the pebble encircled by a shadow, their hands must always move in a straight line towards the sun.)
Returning to the Pole
TEACHER NOTES: Teach this exploration at least thirty minutes after completing the “Light and Shadow at a Pole” exploration. This will ensure there has been
enough time to see a change in the shadow. If recess occurs during this time, and you used the stick, notify the individuals on recess duty to avoid moving the pole. Although there is a relationship between the height of the sun and the length of shadows, students do not learn about that relationship until the following two lessons when they explore how the height of the sun sky changes throughout the day and how the length of shadows changes throughout the day.
1. Return to the pole or improvised stick.
• Where is the sun?
• How did the shadow’s position, shape, or size change? What observations do they have to support their explanation?
• Did the shadow’s position, shape, or size change as they thought it would?
• Do they think the shadow will continue to change during the day? (Students will most likely think that its position or shape will continue to change.)
• What do they think caused the shadow to change? (The sun’s relative position in the sky changed.) What observations do they have to support their explanation?
• Use chalk to outline the shadow cast by the pole on the ground. Have students draw the shadow using a different color on the Observing Shadows: Pole section of their online or print science notebooks.
2. Have students answer the questions on the Observing Shadows: Patterns science notebook section.

Earth in Space: Lesson: Observing Shadow Patterns 53
TEACHER NOTE: Encourage students to track the pole’s shadow throughout the day, perhaps during lunch and again later in the afternoon. Use chalk to outline
the shadows and have students draw the shadows in their science notebooks.
Reflect and Discuss: Making Sense
Big IdeaShadows cast by sunlight provide evidence for the sun’s movement.
NGSS ConnectionWhen students share the evidence they have to support an explanation for how shadows are made and change, they focus on the practice of Constructing Explanations and Designing Solutions:
Use evidence (e.g., measurements, observations, patterns) to construct or support an explanation or design a solution to a problem.
Sharing and Synthesizing1. Invite students to consult their Observing Shadows online or print science notebook section
while you ask:
• How are shadows made outside in the daytime? (An object blocks light from the sun.) What evidence do they have to support that explanation?
• Can shadows be made inside the classroom? (Yes, by blocking sunlight through windows or blocking artificial light.)
• Do outside shadows change during the day? How? Refer to the pole or stick the class observed outside if needed. (They change position and length over the course of the day.)
2. Guide students through a discussion of Questions 5 and 6 of the Observing Shadows online or print science notebook section.
• Have students turn to a partner and share the claims that they wrote. Model for students by writing a claim that seems to represent what many students wrote (e.g. Shadows change because the sun’s position changes in the sky.)
• Have students share evidence from their data to support the claim. Record the evidence under the claim statement that you wrote. Explain that data becomes evidence when it is used to support a claim.
54 Earth in Space: Lesson: Observing Shadow Patterns
After the LessonAfter the Lesson
ExtensionsFurther Science Explorations
Pointing a Path to the SunHave students close one eye, hold their arm out at full length, and make a fist to block the sun from reaching their eye. Call their attention to the pattern that everyone’s arm is pointed in the same direction and relate the direction to the straight path of sun’s light.
Tracking Indoor ShadowsFind a sunny place on a classroom floor or wall. Mark an “X” with masking tape on the window where the sun comes in, so that the shadow of the “X” falls on the floor or wall. Encourage the students to use masking tape to mark the shadow on the floor or wall, and write the time and date on the tape. Repeat the process to see the pattern in the shadow’s path.
Animals, Sun, and ShadeDiscuss how the sun affects certain animals, such as:
• Nocturnal animals who only come out at night; or
• Snakes and lizards whose body heat is regulated by the sun.
Art Extension
Silhouettes Create silhouettes, which are shadows of a profile.
1. Sit so that a bright light casts a shadow of a profile onto paper.
2. Remain very still while a friend traces the profile outline on paper.
3. Cut out the tracing and fill it in with dark paper, marker, or crayon.
Language Arts Extension Read the poem “My Shadow” from A Child’s Garden of Verses by Robert Louis Stevenson.
Social Studies Extension Explore how ancient civilizations regarded the sun in their cultures.
• Cultures that worshiped sun gods. For example, the ancient Egyptians worshipped Ra, the ancient Greeks worshipped Helios, the Aztecs worshipped Huitzilopochtli, and the Incas thought the sun was their king’s ancestor.
• Cultures that built landmarks or observatories for astronomical phenomena such as solstices. Examples include Stonehenge in England, Bighorn Medicine Wheel in Wyoming, and Machu Picchu in Peru.
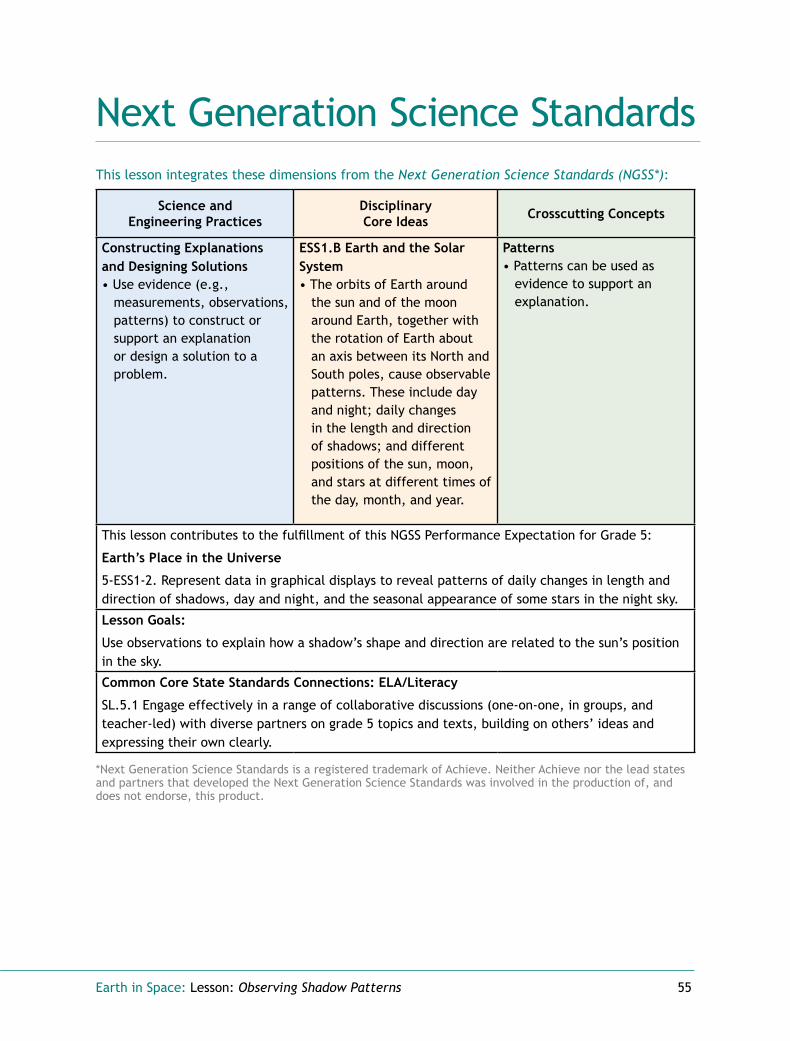
Earth in Space: Lesson: Observing Shadow Patterns 55
Next Generation Science StandardsNext Generation Science StandardsThis lesson integrates these dimensions from the Next Generation Science Standards (NGSS*):
Science and Engineering Practices
Disciplinary Core Ideas Crosscutting Concepts
Constructing Explanations and Designing Solutions• Use evidence (e.g.,
measurements, observations, patterns) to construct or support an explanation or design a solution to a problem.
ESS1.B Earth and the Solar System• The orbits of Earth around
the sun and of the moon around Earth, together with the rotation of Earth about an axis between its North and South poles, cause observable patterns. These include day and night; daily changes in the length and direction of shadows; and different positions of the sun, moon, and stars at different times of the day, month, and year.
Patterns• Patterns can be used as
evidence to support an explanation.
This lesson contributes to the fulfillment of this NGSS Performance Expectation for Grade 5:
Earth’s Place in the Universe
5-ESS1-2. Represent data in graphical displays to reveal patterns of daily changes in length and direction of shadows, day and night, and the seasonal appearance of some stars in the night sky.
Lesson Goals:
Use observations to explain how a shadow’s shape and direction are related to the sun’s position in the sky.
Common Core State Standards Connections: ELA/Literacy
SL.5.1 Engage effectively in a range of collaborative discussions (one-on-one, in groups, and teacher-led) with diverse partners on grade 5 topics and texts, building on others’ ideas and expressing their own clearly.
*Next Generation Science Standards is a registered trademark of Achieve. Neither Achieve nor the lead states and partners that developed the Next Generation Science Standards was involved in the production of, and does not endorse, this product.

56 Earth in Space: Lesson: Observing Shadow Patterns

Earth in Space: Lesson: Observing the Sun for a Day 57
Big IdeaThe sun appears to travel through the sky in a predictable daily pattern, an arc.
Lesson:
Observing the Sun for a Day
Overview Overview Students use landmarks to observe the relative position of the sun over the course of a day. Once initial observations are made, they document their thoughts about how the path or position of the sun might change throughout the day. They return to the same location throughout the day to collect and graph data that shows how the height of the sun in the sky changes during the day. Students engage with the crosscutting concept of Patterns by confirming that the sun appears to travel in a predictable pattern.
Key Notes• This lesson requires a clear day during which the sun is
visible. A minimum of three observations is needed, so do this lesson in one day or over several days (at different times of day) within one week.
• For more information about the science content in this lesson, see the “Daily Pattern of the Sun” section of the Teacher Background Information.
Lesson Goals1. Consider the requirements for making accurate
observations of the change in the sun’s position throughout the day.
2. Observe and record the position of the sun over the course of the day.
3. Analyze data from the sun observations to make sense of the phenomenon that the sun appears to travel in an arc through the sky during the day.
4. Record, graph, and analyze data about the height of the sun at different times during the day.

58 Earth in Space: Lesson: Observing the Sun for a Day
Assessment Options• Use this lesson as a pre-assessment of students’ ideas about why the sun appears to travel in
an arc across the sky. Listen to students during the reflective discussion and review the Sun’s Position section of their science notebooks to gauge their initial understanding of criterion A on the Earth’s Rotation and Orbit rubric. As children progress through the unit, they will have more opportunities to develop their understanding of this criterion.
• In addition, you can evaluate how well children understand criterion B on the Sun and Shadows rubric during the introductory discussion.
• Use the optional Sun’s Position Performance Task after this lesson to assess students’ understanding and application of criterion B on the Sun and Shadows rubric.

Earth in Space: Lesson: Observing the Sun for a Day 59
PreparationPreparationPreparation Checklist
□ Watch the Setting Up for Observing the Sun over a Day teacher video for ideas on how to make drawings of the sun’s apparent movement across the sky during a day.
□ Plan your day (or days) so that the students can observe the position of the sun four times. At least one time before noon, one at noon, and at least one time in the afternoon. Observations should be more than an hour apart. Possibilities include:
• Structure the day’s other subjects around the science sessions, and between subjects take the students outside as a group.
• Make the first observation with the whole class, and then allow students to go outside in small groups when they have available time.
• Arrange for adult volunteers to accompany small groups outside.
• Make the observations through a window, especially if your classroom does not have convenient outdoor access.
□ Find an outside location that you can return to for multiple observations and that has several obvious, distinct landmarks (such as trees or buildings) towards the south that can be used as reference points. Make sure that these are far enough away so that the student’s position outside does not effect the observation of the sun’s position relative to the landmark.
□ Determine which direction is north at the observation area you decide to use. See the Teacher Directions Finding North Using a Compass or Finding North Using Shadows, or use an app on your phone or a street map of the area to find which direction is north. If you use shadow data, you will need to find north at noon the day before the lesson. Mark the cardinal directions on the ground with chalk. You will set up the easel, chart paper, and markers for the exploration facing south.
□ Assemble the items you need to bring outdoors for the activity:
• Easel or other large and stable display for drawing
• Chart paper
• Colored pencils
• Markers
• Materials to locate north (if you haven’t done so already)
• Self-sticking notes
• Watch
• Science notebooks (online or print)
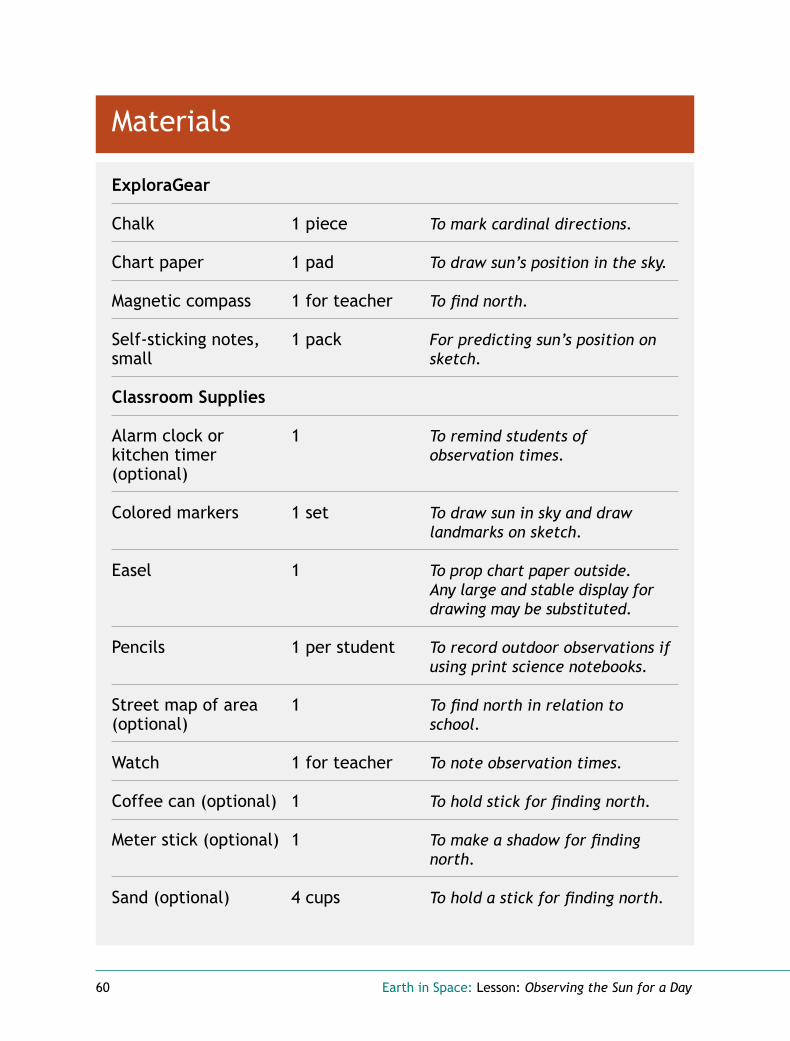
60 Earth in Space: Lesson: Observing the Sun for a Day
Materials
ExploraGear
Chalk 1 piece To mark cardinal directions.
Chart paper 1 pad To draw sun’s position in the sky.
Magnetic compass 1 for teacher To find north.
Self-sticking notes, 1 pack For predicting sun’s position on small sketch.
Classroom Supplies
Alarm clock or 1 To remind students of kitchen timer observation times. (optional)
Colored markers 1 set To draw sun in sky and draw landmarks on sketch.
Easel 1 To prop chart paper outside. Any large and stable display for drawing may be substituted.
Pencils 1 per student To record outdoor observations if using print science notebooks.
Street map of area 1 To find north in relation to (optional) school.
Watch 1 for teacher To note observation times.
Coffee can (optional) 1 To hold stick for finding north.
Meter stick (optional) 1 To make a shadow for finding north.
Sand (optional) 4 cups To hold a stick for finding north.

Earth in Space: Lesson: Observing the Sun for a Day 61
Curriculum ItemsItem Resource Location
Teacher Video: Setting Up for Observing the Sun over a Day
Teacher Portal Files/ Lesson Planning Resources
Science Notebook: Sun’s Position online print teacher guide
Science Notebook: Sun’s Height online print teacher guide
Student Lessons Teach Lesson Teach Lesson
Student Lessons Teach Lesson Teach Lesson
Rubric: Sun and Shadows (optional)
Rubric: Earth’s Rotation and Orbit (optional)Assessments
Performance Task: Sun’s Position (optional) online print teacher guide
Assessments

62 Earth in Space: Lesson: Observing the Sun for a Day
Teaching the Lesson Teaching the Lesson Engage
Introductory Discussion 1. Review what the students did in the Observing Shadow Patterns lesson, and pose questions
to remind them of what they learned about the sun’s position in the sky:
TEACHER NOTE: In this exploration, there are two activities. In one, the class draws a picture of the sun in the sky. In another, students measure the height of
the sun in the sky using their fists. Each time you teach this exploration, you will need to do the first activity, then immediately do the second activity.
• What did they observe about how the shadows changed throughout the day? (They moved around the pole. They became longer and shorter.)
• What caused the shadows to change? (Some students may relate the shadows’ changing positions and sizes to the position of the sun compared to the pole.)
• How can we see whether the sun’s position in the sky changes during the day? (Responses might include making multiple observations of it throughout the day, or watching shadows over time.)
2. Explain that today they will be making further observations of the sun to look for patterns in its position in the sky throughout the day.
Explore
Locating the Sun in the Sky
SAFETY NOTE: Before going outside, remind the students to never look directly at the sun. Looking at the sun causes permanent eye damage.
1. Bring the class outside to the observation location you selected and sit them facing south. Explain to the students that facing south enables them to best see the sun during the day.
2. Set up the easel with chart paper and permanent markers in front of the students. Have a device handy for telling them the time.

Earth in Space: Lesson: Observing the Sun for a Day 63
TEACHER NOTE: In the continental United States, the sun is in the southern sky most of the time. During the summer, up until the autumnal equinox on
September 22,the sun rises north of east. From the autumnal equinox until the spring equinox on March 21, the sun rises south of east.
• Ask what specific landmarks could help mark the sun’s position in the sky. (Things that don’t move—like buildings, trees, flagpoles, and features on the horizon--—all make good landmarks.)
TEACHER NOTE: You may want to draw in the horizon and an object or two when you choose the easel location during preparation. Then at this point you
can add landmarks that students point out.
b. Once the students agree that they have located enough landmarks, have a student draw where the sun is in the sky on the diagram.
TEACHER NOTE: If this observation is done in the
morning, the sun should be to the student’s left. The earlier your first observation, the closer the sun will be to the horizon line.
c. Record the time on the sun drawing.
5. On the Sun’s Position: Sun’s Path section of their online or print science notebooks, have students draw the selected landmarks and the sun’s position and note the time of the observation.
3. Since no one should ever look directly at the sun, solicit strategies from students for finding the sun’s location in the sky. (Responses might include finding objects on the ground below the sun in the sky, finding clouds near the sun, or measuring the sun’s distance above the horizon.)
4. Share the definition of a landmark. Landmarks are objects that don’t change shape or location, so the position of moving objects can be compared to these nonmoving objects. A permanent and distant landmark makes it useful to help observe change. Stress the importance of using landmarks to note the relative position of things, and discuss what makes a good landmark.
a. Sketch the students’ ideas on the chart paper as they list them. (Be sure to include the horizon if students haven’t already suggested it.)

64 Earth in Space: Lesson: Observing the Sun for a Day
6. Have students think about the sun’s next position:
• When they come back outside later, where do they think the sun will be?
• What can they do if they want to see whether the sun’s position has changed? (Draw where the sun is next time on the same sketch, and compare its place to where they just drew the sun.)
7. Describe how they will make their remaining observations throughout the day.
• A different volunteer will record the position and time of their observation on the chart paper.
• Everyone will record the sun’s position in their science notebooks, and then use a different color to record where they think the sun will be next time.
TEACHER NOTE: Three observations are the minimum for this activity. Ideally, enough observations need to be made so that the students get a sense of the
pattern and shape (an arc) of the sun’s movement across the sky during the daytime. If you make observations on multiple days, make sure they are all within the same week and are at different times of day (e.g., morning, mid-day, afternoon).
Measuring and Recording the Sun’s Height with Fists Each time your class makes a sun observation, measure and record the position of the sun in the sky.
1. Tell the students that now they are going to make their data collection quantitative. Ask the students what they think the word “quantitative” means. Guide them to arrive at an understanding that quantitative data is numerical, or measured in units, so the data is easier to compare.
2. Explain that they are going to collect quantitative data about the position of the sun in the sky using their fists as a unit of measure.
3. Have them face the sun and put one arm out in front of them at eye level, pointing at the horizon. Then with their hand in a fist, close one eye.
4. Ask them to begin moving the arm stiffly up, watching and counting how many fists there are between their eye level and the location of the sun.
5. Have them record the time and the number of fists on the Sun’s Height: Data section of their online or print science notebooks.
6. When they are finished collecting data for the day, have them graph the data on the Sun’s Height: Graph science notebook section.

Earth in Space: Lesson:Observing the Sun for a Day 65
Reflect and Discuss: Making Sense
Big Idea
The sun appears to travel through the sky in a predictable daily pattern, an arc.
NGSS Connection
Students analyze the “fist data” they collected about the phenomenon of the sun’s apparent movement in the sky. In doing so, they engage in the practice of Analyzing and Interpreting Data:
Analyze and interpret data to make sense of phenomena, using logical reasoning, mathematics, and/or computation.
Students share the evidence from their observational drawings of the sun’s apparent movement across the sky. They also share evidence from their graphs of the height of the sun during the day. In doing so, they support an explanation that the sun travels in an arc shaped pattern and they focus on the practice of Constructing Explanations and Designing Solutions:
Use evidence (e.g., measurements, observations, patterns) to construct or support an explanation or design a solution to a problem.
When they describe the pattern of movement that the sun follows, and explain that the pattern is an arc, students develop the crosscutting concept of Patterns:
Patterns can be used as evidence to support an explanation.
SharingStudents discuss their findings once the final afternoon observation and graph has been made.
1. Invite students to share their data from the Sun’s Position: Sun’s Path section of their online or print science notebooks. What pattern of movement did the sun appear to follow in the sky? (Responses might include a rainbow, a bridge, a half circle, an arc, etc.) What evidence do they have to support their explanation? (The observational drawings recorded in their science notebook.)
2. Have students share their data from the Sun’s Height: Graph section of their science notebook. How did the height of the sun change during the day? (It started out low in the sky, moved higher in the sky, and then moved lower in the sky.) What evidence do you have to support your explanation? (The observations I made with my fist and the data recorded on the graph.)
3. How does the pattern on the graph compare with the Sun’s Position: Sun’s Path section of their science notebook? (The pattern is the same.)
4. Ask: Why was it important to use the same landmark(s) for each observation? (To make accurate observations, the location needed to remain the same. Landmarks help determine the relative position of an object that appears to move.)

66 Earth in Space: Lesson: Observing the Sun for a Day
SynthesizingTo consolidate students’ thinking and prepare for subsequent lessons, pose the following questions about the sun’s apparent movement across the sky:
• When you analyze your landmark data from the day, how did the sun’s relative position seem to change? (As the day progressed, the sun appeared to move from east to west across the sky.)
• If they did the same activity next week, do they think they would see the same pattern of movement of the sun? Why? (Yes, the sun rises, moves across the sky, and sets in an arc each day and week—although the times of sunrise and sunset change throughout the year.)
• Based on their observations, where do they think the sun goes in the evening? (Students may say the sun goes to the other side of the world.)
TEACHER NOTE: At this point in the topic, do not be surprised if students have misconceptions about the cause of daytime and nighttime. By now the students
should understand that the sun appears to travel through the sky in a predictable daily pattern; however, they might still attribute this notion to the sun going around Earth, or to the Earth orbiting the sun every day, rather than Earth rotating on its axis. Earth’s rotation is the focus of the Modeling Earth’s Rotation lesson.

Earth in Space: Lesson: Observing the Sun for a Day 67
After the Lesson After the Lesson
Ongoing Learning Science Center
Materials: Light sources, spherical objects, solid geometrical shapes (blocks, cylinders, cones, pyramids), flat shapes (plates, cardboard squares, cardboard triangles)
Provide light sources, some spheres (any kind of ball), some solid geometrical shapes (blocks, cylinders, cones, and pyramids) and some flat shapes (paper plates, cardboard squares, and cardboard triangles). Invite the students to use the shapes to cast shadows, asking:
• Which objects can be used to cast a shadow in the shape of a circle?
• An oval?
• A square?
• A rectangle?
• A triangle?
• Any other shape?
Extensions Mathematics Extension
Defining the Parts of a Circle 1. With a can or other cylindrical object, trace around part of the bottom of the object on a
sheet of paper. What’s on the paper when the object is lifted? (Part of a circle.)
2. Put the object back down where it was and trace some more—but still not all the way around the object. When the object is lifted now, what’s on the paper? (A longer part of a circle.)
3. Write the word “arc” on the board, and explain that it is a name for a part (segment) of a circle or curve. An arc is anything shaped like a curve.
• Where have they seen examples of arcs? (An arch, a bow.)
• Do they remember seeing an arc from tracing the path of the sun across the sky?
4. Place the object on the paper and trace all the way around it. When the object is lifted now, what’s on the paper? (A circle.)
5. Write the words circle and circumference on the board. Explain that circumference is a name for the distance around the whole outside of a circle. (If the students know what a perimeter is, explain that circumference is a special word for the perimeter of a circle.)
6. Cut out the circle and fold it in half.
7. Write the word diameter on the board. Explain that the fold is the diameter of the circle, and that it is the distance across the circle through its center.
68 Earth in Space: Lesson: Observing the Sun for a Day
8. Fold the circle in half again, and then open the circle up. Explain that the point where the two folds meet is the center of the circle.
9. Measure across the diameters of the paper circle and the object.
• Is the diameter the same in both directions along the folds on the paper circle?
• Is the diameter the same across the center of the object?
• What is the outside half of the circle called, between the two places where the ruler measures diameter? (An arc.)
Social Studies Extension
Reading a Compass Rose On a blank copy of a compass rose, fill in the directions: north, south, east, west. Look at a map of the United States. Ask questions that will elicit understanding that a map shows how a place looks from above, and answers that involve identifying directions, such as:
• What is a bird’s-eye view?
• Where are we on the map?
• How should the compass rose be placed on the map so it lines up with the correct compass directions?
• What direction is San Francisco?
• What direction is New York?
• What direction is Texas?
• What direction is Canada?

Earth in Space: Lesson: Observing the Sun for a Day 69
Next Generation Science StandardsNext Generation Science StandardsThis lesson integrates these dimensions from the Next Generation Science Standards (NGSS*):
Science and Engineering Practices Disciplinary Core Ideas Crosscutting Concepts
Analyzing and Interpreting Data • Analyze and interpret data to
make sense of phenomena, using logical reasoning, mathematics, and/or computation.
Constructing Explanations and Designing Solutions • Use evidence (e.g.,
measurements, observations, patterns) to construct or support an explanation or design a solution to a problem.
ESS1.B Earth and the Solar System• The orbits of Earth around
the sun and of the moon around Earth, together with the rotation of Earth about an axis between its North and South poles, cause observable patterns. These include day and night; daily changes in the length and direction of shadows; and different positions of the sun, moon, and stars at different times of the day, month, and year.
Patterns• Patterns can be used as
evidence to support an explanation.
This lesson contributes to the fulfillment of this NGSS Performance Expectation for Grade 5:
Earth’s Place in the Universe
5-ESS1-2. Represent data in graphical displays to reveal patterns of daily changes in length and direction of shadows, day and night, and the seasonal appearance of some stars in the night sky.
Lesson Goals:
1. Consider the requirements for making accurate observations of the change in the sun’s position throughout the day, such as standing in the same place and choosing features to use as landmarks.
2. Observe and record the position of the sun over the course of the day.
3. Analyze data from the sun observations to make sense of the phenomenon that the sun appears to travel through the sky during the day.
4. Record, graph, and analyze data about the sun’s position in the sky during the day.
Common Core State Standards Connections: ELA/Literacy
SL.5.1 Engage effectively in a range of collaborative discussions (one-on-one, in groups, and teacher-led) with diverse partners on grade 5 topics and texts, building on others’ ideas and expressing their own clearly.
Common Core State Standards Connections: Mathematics
5.G.A.2 Represent real world and mathematical problems by graphing points in the first quadrant of the coordinate plane, and interpret coordinate values of points in the context of the situation.
*Next Generation Science Standards is a registered trademark of Achieve. Neither Achieve nor the lead states and partners that developed the Next Generation Science Standards was involved in the production of, and does not endorse, this product.
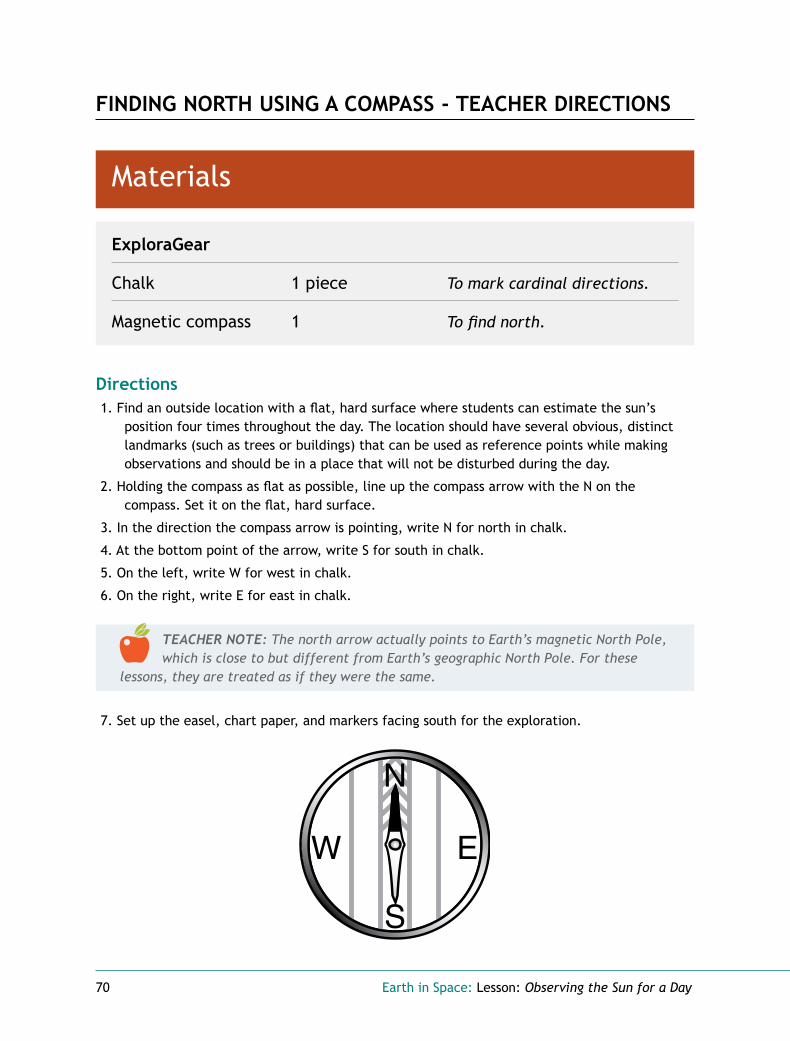
70 Earth in Space: Lesson: Observing the Sun for a Day
FINDING NORTH USING A COMPASS - TEACHER DIRECTIONS
Materials
ExploraGear
Chalk 1 piece To mark cardinal directions.
Magnetic compass 1 To find north.
Directions1. Find an outside location with a flat, hard surface where students can estimate the sun’s
position four times throughout the day. The location should have several obvious, distinct landmarks (such as trees or buildings) that can be used as reference points while making observations and should be in a place that will not be disturbed during the day.
2. Holding the compass as flat as possible, line up the compass arrow with the N on the compass. Set it on the flat, hard surface.
3. In the direction the compass arrow is pointing, write N for north in chalk.
4. At the bottom point of the arrow, write S for south in chalk.
5. On the left, write W for west in chalk.
6. On the right, write E for east in chalk.
TEACHER NOTE: The north arrow actually points to Earth’s magnetic North Pole, which is close to but different from Earth’s geographic North Pole. For these
lessons, they are treated as if they were the same.
7. Set up the easel, chart paper, and markers facing south for the exploration.

Earth in Space: Lesson: Observing the Sun for a Day 71
FINDING NORTH USING SHADOWS - TEACHER DIRECTIONS
Materials
ExploraGear
Chalk 1 piece To mark cardinal directions.
Classroom Supplies
Coffee can 1 To hold stick for finding north.
Meter stick 1 To make a shadow for finding north.
Sand 4 cups To hold a stick for finding north.
Directions1. Find an outside location with a flat, hard surface
where students can estimate the sun’s position four times throughout the day. The location should have several obvious, distinct landmarks (such as trees or buildings) that can be used as reference points while making observations and should be in a place that will not be disturbed during the day.
2. Assemble the shadow-recording tool by filling a coffee can halfway with sand. Place the meter stick pointing out of it.
3. Set the shadow-recording tool on the ground, making sure the stick is pointing upright.
4. Around midday, mark the end point of the shadow using chalk.
5. Wait one hour and mark the end point of the new shadow point using chalk.
6. Draw a line to connect the two points. The line from the first mark to the second mark will be approximately west-east (see figure at right).
7. Draw a perpendicular line through the west-east line. Mark this line south-north.
8. Set up the easel, chart paper, and markers facing south for the exploration.

72 Earth in Space: Lesson: Observing the Sun for a Day

Earth in Space: Lesson: Tracking Shadows During a Day 73
Big IdeaThe sun appears to travel through the sky in a predictable daily pattern, an arc.
Lesson:
Tracking Shadows During a Day
Overview Overview In this two-session lesson, students track how the length and position of shadows changes during the day, and use that data to determine when shadows are longest and shortest. In Session 1, they observe shadows and record the sun’s position several times during the day. They confirm their observations from the previous lessons that the sun moves in an arc through the daytime sky. In Session 2, they graph data that shows how the length of shadows changes during the day, and compare their shadow graph with the previous lesson’s sun graph. They apply the crosscutting concept of Patterns as their data reveals the relationship between the length of shadows and the sun’s height in the sky.
Key Notes• If all observations cannot be completed in one day due
to time constraints or adverse weather conditions, continue this lesson any time over the course of a week to obtain similar results.
• For more information about the science content in this lesson, see the “Shadows” section of the Teacher Background Information.
Lesson Goals1. Analyze and interpret data to explain the phenomenon
that the sun appears to travel in an arc in the sky every day.
2. Graph shadow data that was collected during the day.
3. Compare and analyze data to make sense of the phenomenon that changes in shadows correspond to the sun’s position in the sky.
4. Use shadow patterns as evidence to support the explanation that shadows are long when the sun is low in the sky and short when the sun is high in the sky.

74 Earth in Space: Lesson: Tracking Shadows During a Day
Assessment Options• Use this lesson as an ongoing assessment of the students’ understanding of the daytime
sun. Listen to the students as they reflect on their data in the synthesizing discussion. Consider using criterion D on the Sun and Shadows rubric to evaluate the students’ developing understanding of these ideas.
• Consider using the Shadow Data and Graph and Sun Data and Graph Performance Tasks after the lesson to assess students’ understanding and application of criteria C and D on the Sun and Shadows rubric.

Earth in Space: Lesson: Tracking Shadows During a Day 75
PreparationPreparationPreparation Checklist
□ Plan to do this lesson on a clear day when the sun is visible all day.
□ Arrange the day so the students can make observations at least four times. One observation should be done around noon when the sun is at its highest relative position in the sky (midway between sunrise and sunset). Possibilities for planning the day include:
• Make observations once or twice in the morning (meeting the class outside as it arrives), once at lunch, and once or twice in the afternoon (taking the class outside before dismissal). If you choose this option, you might teach the “Engage” and “Explore” sections of the lesson on one day and have the reflective discussion on the next day.
• Structure the day’s other subjects around the science sessions and between subjects take the children outside as a group.
• Make the first observation with the whole class, and then allow students to go outside in small groups when they have time available.
□ Identify an area with these features for viewing shadows:
• Flat
• Paved
• Receives morning, noon, and afternoon sun
• Has a clear view of the sky to the southeast, south, and southwest
• Is away from buildings or trees that might cast shadows on the recording surface
□ Prepare the students’ shadow recording tools. Use the bolts from the ExploraGear and a permanent marker to:
a. Draw a small perpendicular line on one side of the slope of the base of the bolt to serve as the north mark for setting up the tools the same way each time.
b. Number the tools 1 through 8 on the bottom of the base.
□ Use chalk to draw rectangles on the pavement to indicate where students will place their Shadow Data Teacher Master.
TEACHER NOTE: If possible, create enough rectangles so groups of three to four children can work simultaneously.
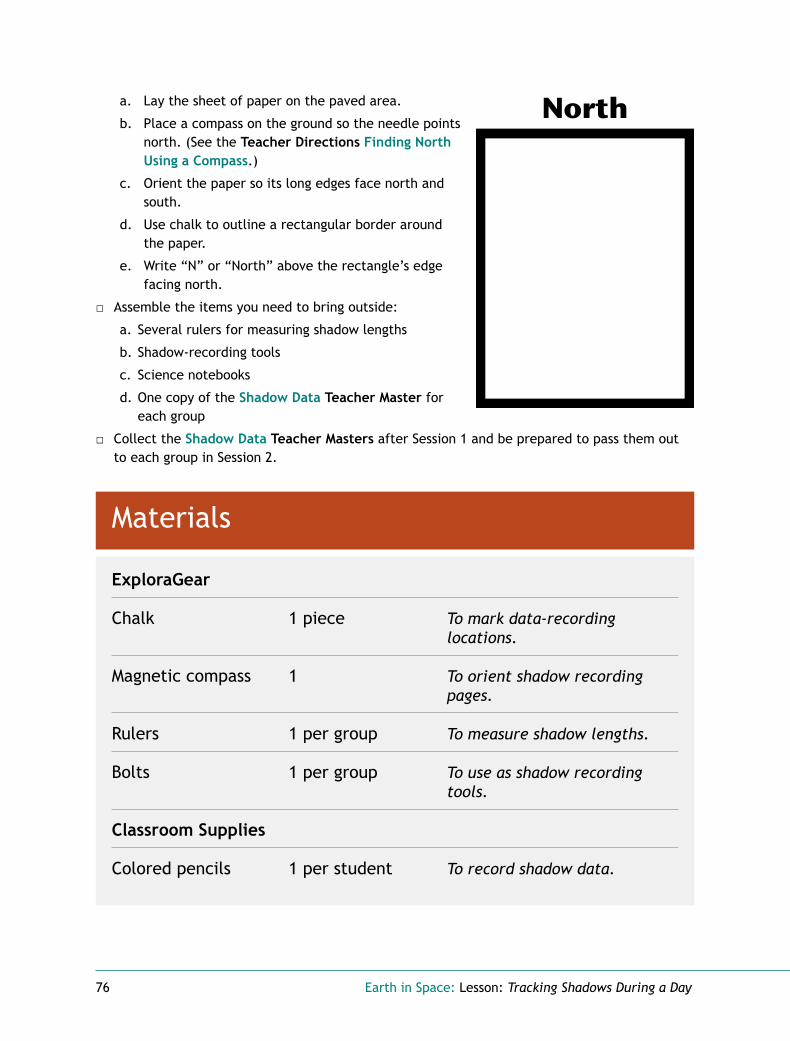
76 Earth in Space: Lesson: Tracking Shadows During a Day
a. Lay the sheet of paper on the paved area.
b. Place a compass on the ground so the needle points north. (See the Teacher Directions Finding North Using a Compass.)
c. Orient the paper so its long edges face north and south.
d. Use chalk to outline a rectangular border around the paper.
e. Write “N” or “North” above the rectangle’s edge facing north.
□ Assemble the items you need to bring outside:
a. Several rulers for measuring shadow lengths
b. Shadow-recording tools
c. Science notebooks
d. One copy of the Shadow Data Teacher Master for each group
□ Collect the Shadow Data Teacher Masters after Session 1 and be prepared to pass them out to each group in Session 2.
Materials
ExploraGear
Chalk 1 piece To mark data-recording locations.
Magnetic compass 1 To orient shadow recording pages.
Rulers 1 per group To measure shadow lengths.
Bolts 1 per group To use as shadow recording tools.
Classroom Supplies
Colored pencils 1 per student To record shadow data.

Earth in Space: Lesson: Tracking Shadows During a Day 77
Kitchen timer or 1 To remind students of alarm clock (optional) observation times.
Permanent marker, 1 To create shadow recording black, fine-tipped tools and to record times that
information was collected.
Curriculum ItemsItem Resource LocationScience Notebook: Shadow online print teacher guide
Student Lessons Teach Lesson Teach Lesson
Science Notebook: Sun’s Height online print
From the Observing the Sun for a Day lesson
Rubric: Sun and Shadows (optional)
Rubric: Earth’s Rotation and Orbit (optional) Assessments
Performance Task: Shadow Data and Graph (optional) online print teacher guide
Performance Task: Sun Data and Graph (optional) online print teacher guide
Assessments
Teacher Master: Shadow Data Teacher Portal Files/ Teaching the Lesson Resources
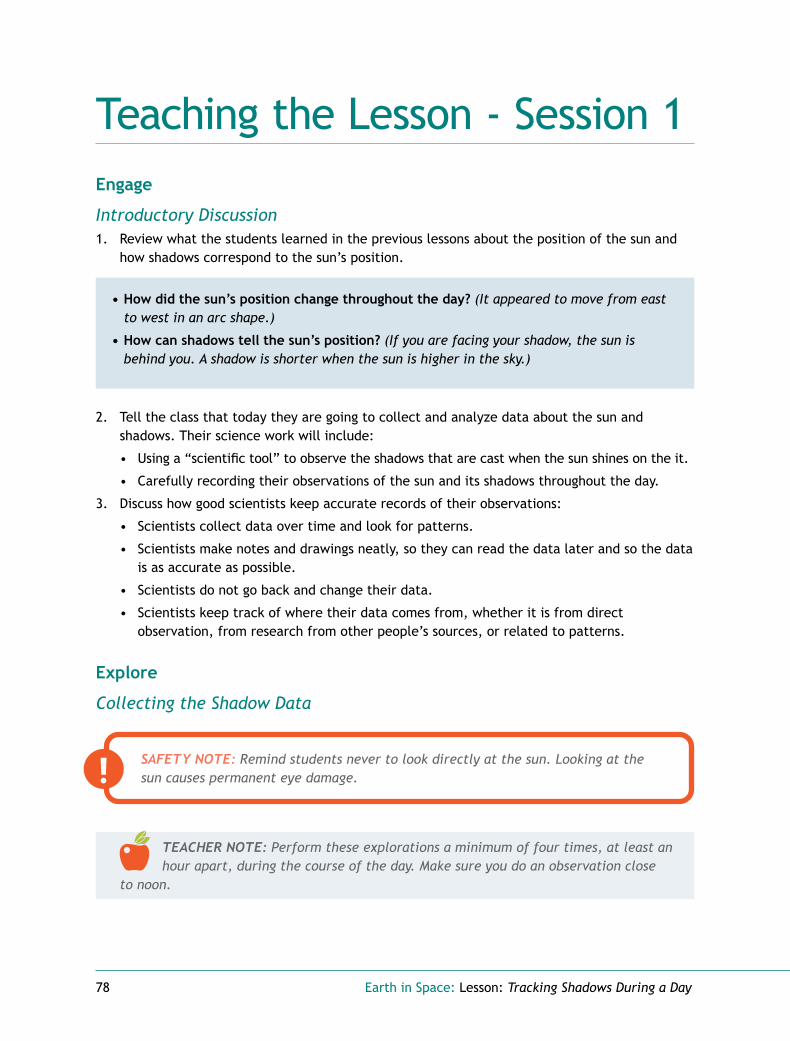
78 Earth in Space: Lesson: Tracking Shadows During a Day
Teaching the Lesson - Session 1Teaching the Lesson - Session 1Engage
Introductory Discussion1. Review what the students learned in the previous lessons about the position of the sun and
how shadows correspond to the sun’s position.
• How did the sun’s position change throughout the day? (It appeared to move from east to west in an arc shape.)
• How can shadows tell the sun’s position? (If you are facing your shadow, the sun is behind you. A shadow is shorter when the sun is higher in the sky.)
2. Tell the class that today they are going to collect and analyze data about the sun and shadows. Their science work will include:
• Using a “scientific tool” to observe the shadows that are cast when the sun shines on the it.
• Carefully recording their observations of the sun and its shadows throughout the day.
3. Discuss how good scientists keep accurate records of their observations:
• Scientists collect data over time and look for patterns.
• Scientists make notes and drawings neatly, so they can read the data later and so the data is as accurate as possible.
• Scientists do not go back and change their data.
• Scientists keep track of where their data comes from, whether it is from direct observation, from research from other people’s sources, or related to patterns.
Explore
Collecting the Shadow Data
SAFETY NOTE: Remind students never to look directly at the sun. Looking at the sun causes permanent eye damage.
TEACHER NOTE: Perform these explorations a minimum of four times, at least an hour apart, during the course of the day. Make sure you do an observation close
to noon.

Earth in Space: Lesson: Tracking Shadows During a Day 79
1. Arrange students into small groups and distribute a Shadow Data Teacher Master to each group.
2. Have them carefully position the Teacher Master in one of the rectangles. Explain that they should:
a. Align the north side of the page with the north side of the rectangle.
b. Fit all four corners of the Teacher Master within the four corners of the rectangle.
3. Distribute a shadow-recording tool to each group and introduce the tool as a scientific instrument for collecting data about the sun’s position.
4. Model how to set up a shadow-recording tool on the Teacher Masters:
a. Center the shadow-recording tool on the dot in the middle of the Teacher Master.
b. Hold the shadow-recording tool firmly in place. Carefully trace an outline around the base.
5. Have the students begin collecting shadow data. Encourage them to do the following:
a. Make sure the shadow-recording tool is on the dot on in the middle of the Teacher Master.
b. Lightly trace the outline of the entire shadow cast by the shadow-recording tool.
c. Write down the time of the observation in small, neat numbers next to the drawing of the shadow.
6. Encourage the class to notice how the shadows cast by other students’ shadow-recording tools all point in the same direction and are all approximately the same length.
7. Store each group’s Shadow Data Teacher Master for use in Session 2.
TEACHER NOTE: If students have difficulty relating the use of the shadow-recording tool to the direction of the sun, consider teaching Further Science
Exploration “Finding the Position of the Sun.”
80 Earth in Space: Lesson: Tracking Shadows During a Day
Teaching the Lesson - Session 2Teaching the Lesson - Session 2Engage
Introductory DiscussionExplain that today the students will measure and graph the shadow data that they recorded with the shadow tool. This will help them to observe patterns related to the shadows during the day.
Explore
Measuring Shadows and Graphing Data1. Tell the students that they will make their shadow data collection quantitative by measuring
the shadows on the Teacher Master.
2. Have them measure the shadows on the Shadow Data Teacher Master starting with the one earliest in the day. They record the time the shadow was drawn and the length of each shadow on the Shadow: Data section of their online or print science notebooks, then graph the data on the Shadow: Graph science notebook section.
3. Have students answer the questions on the Shadow: Patterns science notebook section.
Reflect and Discuss: Making Sense
Big IdeaThe sun appears to travel through the sky in a predictable daily pattern, an arc.
NGSS ConnectionWhen students analyze their graphs to determine when the longest shadows occurred and when the shortest shadows occurred, they focus on the practice of Analyzing and Interpreting Data:
Analyze and interpret data to make sense of phenomena, using logical reasoning, mathematics, and/or computation.
When students discuss the patterns they observed about the recorded shadows as well as what they think causes these patterns, they engage with the crosscutting concept of Patterns:
Patterns can be used as evidence to support an explanation.

Earth in Space: Lesson: Tracking Shadows During a Day 81
Sharing and Synthesizing 1. From previous lessons, students discovered that the sun’s relative position in the sky changes
during the day. To reinforce this concept, ask the following questions about this lesson’s observations and graphs:
• How does the shadow data from the shadow-recording tool compare with the shadows observed from the pole in the Observing Shadow Patterns lesson? (In both cases the shadows changed direction and length as the sun’s position in the sky changed.)
• What patterns did they notice about the recorded shadows? (The shadows got shorter until around noon, then got longer. The shadows moved in one direction [clockwise] around the base of the recording tool.)
• What causes these patterns? (They are caused by the apparent movement of the sun.)
• When they analyze their shadow graphs, when did the longest shadows occur? (Early morning and late afternoon.) Why? (The sun was low in the sky.) How long were the longest shadows? (Answers vary.)
• When they analyze their shadows graphs, when did the shortest shadows occur? (Around noon.) Why? (The sun was high in the sky.) How long were the shortest shadows? (Answers vary.)
• Why did the shadow data from the shadow-recording tool change throughout the day? (The sun was in a different position each time observations were made.)
• What patterns in shadow data would they expect to see tomorrow? (The shadows would get shorter until around noon, then get longer. The shadows would move in one direction [clockwise] around the base of the recording tool.)
MaintenanceStore each group’s Shadow Data Teacher Master for use in the next lesson. Be prepared to hand out each Teacher Master to the group who worked on it.
82 Earth in Space: Lesson: Tracking Shadows During a Day
After the LessonAfter the Lesson
Ongoing Learning Science Center
Materials: Shadow recording tool, flashlight
Add a shadow-recording tool to the objects set out after the Observing the Sun for a Day lesson. Let the students use a flashlight to explore the types of shadows cast by the shadow-recording tool.
ExtensionsFurther Science Explorations
Finding the Position of the Sun
Make simple shading tools to reinforce the students’ understanding of the position of the sun. You will need meter sticks (or any relatively straight stick that is approximately the same length), construction paper, and masking tape.
1. Divide the students into groups and have them assemble the shading tools by following these steps:
a. Lay the meter stick down on a flat surface.
b. Cut out a circle 2–3 inches in diameter from the construction paper.
c. Place the circle at one end of the meter stick and secure it with masking tape.
2. Explain how to find the position of the sun using the shading tool.
a. Hold the shading tool in one hand so the circle is at the top.
b. Close one eye.
c. Arrange the shading tool so the circle covers the sun.
3. Call attention to how everyone’s shading tool points in the same direction (if they are pointed correctly).
SAFETY NOTE: Before going outside, remind the students to never look directly at the sun. Looking at the sun causes permanent eye damage.
4. Ask: How does the shading tool demonstrate the position of the sun? (The tool has to be pointed in the direction of the sun to cast a shadow.)

Earth in Space: Lesson: Tracking Shadows During a Day 83
Social Studies Extension
Autumnal and Spring EquinoxResearch how different cultures have noted or even celebrated the autumnal and spring equinoxes (unless you live at the equator they are the only two days during the year when the hours of daylight are equal to the hours of nighttime).
Asking questions such as the following may help the students understand the concept of the autumnal and spring equinoxes and relate it to the concepts in this lesson:
• How many hours of daylight are there during the autumnal equinox? (Approximately 12 hours)
• How many hours of nighttime are there during the autumnal equinox? (Approximately 12 hours)

84 Earth in Space: Lesson: Tracking Shadows During a Day
Next Generation Science StandardsNext Generation Science StandardsThis lesson integrates these dimensions from the Next Generation Science Standards (NGSS*):
Science and Engineering Practices Disciplinary Core Ideas Crosscutting Concepts
Analyzing and Interpreting Data• Analyze and interpret
data to make sense of phenomena, using logical reasoning, mathematics, and/or computation.
ESS1.B: Earth and the Solar System• The orbits of Earth around the
sun and of the moon around Earth, together with the rotation of Earth about an axis between its North and South poles, cause observable patterns. These include day and night; daily changes in the length and direction of shadows; and different positions of the sun, moon, and stars at different times of the day, month, and year.
Patterns• Patterns can be used as
evidence to support an explanation.
This lesson contributes to the fulfillment of this NGSS Performance Expectation for Grade 5:
Earth’s Place in the Universe
5-ESS1-2. Represent data in graphical displays to reveal patterns of daily changes in length and direction of shadows, day and night, and the seasonal appearance of some stars in the night sky.
Lesson Goals
1. Analyze and interpret data to explain the phenomenon that the sun appears to travel in an arc in the sky every day.
2. Graph shadow data that was collected during the day.
3. Compare and analyze data to make sense of the phenomenon that changes in shadows correspond to the sun’s position in the sky.
4. Use shadow patterns as evidence to support the explanation that shadows are long when the sun is low in the sky and short when the sun is high in the sky.
Common Core State Standards Connections: ELA/Literacy
SL.5.1 Engage effectively in a range of collaborative discussions (one-on-one, in groups, and teacher-led) with diverse partners on grade 5 topics and texts, building on others’ ideas and expressing their own clearly.
Common Core State Standards Connections: Mathematics
5.G.A.2 Represent real world and mathematical problems by graphing points in the first quadrant of the coordinate plane, and interpret coordinate values of points in the context of the situation.
*Next Generation Science Standards is a registered trademark of Achieve. Neither Achieve nor the lead states and partners that developed the Next Generation Science Standards was involved in the production of, and does not endorse, this product.

Earth in Space: Lesson: Models of the Sun and Shadows 85
Big IdeaThe sun appears to travel through the sky in a predictable daily pattern, an arc.
Lesson:
Models of the Sun and Shadows
Overview Overview This lesson challenges students to use a flashlight with the shadow recording tool to model the changes in the sun’s position in the sky during the day. They use this model to review how the patterns of shadows depend on the position of the sun. They confirm previous observations that the sun’s relative position changes during the day.
Key Notes• For more information about the science content in this
lesson, see the “Modeling Sun and Shadows” section of the Teacher Background Information.
Lesson Goals1. Use a model to describe how shadows change during the
daytime as the relative position of the sun in the sky changes.
2. Use shadow data to evaluate claims about the causes of different lengths of shadows.
Assessment Options• This lesson also provides another opportunity to gauge the
children’s understanding of how the sun’s apparent path in the sky changes throughout the day. Apply criterion A on the Earth’s Rotation and Orbit rubric during the exploration.
• In addition, in this lesson, students use models to represent processes in the solar system. Consider using the Developing and Using Models checklist to record their understanding of models.

86 Earth in Space: Lesson: Models of the Sun and Shadows
PreparationPreparationPreparation Checklist
□ Check that all flashlights have batteries and are working.
□ Keep students in the same groups they were in during the last lesson. Be prepared to pass out the appropriate Shadow Data Teacher Master to each group.
Materials
ExploraGear
Flashlights 1 per group To create shadows.
Index cards Several To record students’ predictions.
Previous Lessons
Bolts 1 per group To demonstrate sun’s position.
Curriculum ItemsItem Resource LocationScience Notebook: Creating Shadows online print teacher guide
Student Lessons Teach Lesson Teach Lesson
Rubric: Earth’s Rotation and Orbit (optional)
Checklist: Developing and Using Models (optional) Assessments
Teacher Master: Shadow Data From the Tracking Shadows During a Day lesson.
Earth in Space: Lesson: Models of the Sun and Shadows 87
Teaching the LessonTeaching the LessonEngage
Introductory Discussion1. Review what the students did in the last lesson by having them describe how the shadows
changed throughout the day. (Their positions and lengths changed throughout the day.) What caused these changes? (The change in the relative position of the sun.)
2. Show the students a flashlight, a shadow recording tool, and a Shadow Data Teacher Master. Invite them to speculate about how they could use the materials to:
a. model the shadows they observed in the previous lesson; and
b. use the model and their observations to explain what causes shadows to change length and position.
3. Ask students about the materials in the model:
• What does the flashlight represent? (The sun.)
• What is modeled when they move the flashlight? (How the position of the sun in the sky changes during the day.)
• What is modeled when the flashlight shines on the shadow recording tool? (How the sun’s position in the sky causes shadows.)
Explore
NGSS ConnectionAs children use their models to demonstrate and explain the relationship between the position of the sun and the length of shadows they apply the crosscutting concept of Cause and Effect:
Cause and effect relationships are routinely identified, tested, and used to explain change.
Flashlight Shadows with the Shadow-Recording Tool1. Divide the students into the groups and distribute a flashlight to each group.
2. Pass out the Shadow Data Teacher Master to each group. Give instructions to:
• Erect the shadow-recording tool on the outline in the middle of the Teacher Master.
• Line up the north mark on the tool with the north mark on the Teacher Master.
3. Have each group shine the flashlight on their shadow-recording tool, moving the flashlight around until the shadow cast by the tool exactly matches one of the shadows drawn on the Teacher Master.

88 Earth in Space: Lesson: Models of the Sun and Shadows
4. Guide students to think about what they are modeling with some questions such as:
MANAGEMENT NOTE: Regardless of the height of the flashlight, students should shine it directly at the shadow recording tool. Some students may be tempted to hold the flashlight parallel to the floor, which would alter the appearance of the shadows.
• Did they find a position for the flashlight that casts the same shadow as the sun?
• Can they find other positions for the flashlight that cast the same shadow in the same place? (If the students move the flashlight up, down, left, or right, the shadow will no longer be in the correct position. However, if they move the flashlight farther away or bring it closer, the shadow stays in the correct position.)
5. Challenge the students to figure out a path for a moving flashlight that will cast shadows that match their records. (They can model how the sun’s position appears to change during a day by slowly sweeping the flashlight over the shadow-recording tool from “east” to “west.” All the shadows cast from the shadow-recording tool should match the shadows recorded in the science notebook.)
Making Claims About Shadows1. Have students discuss and record the answers to the questions on the Creating Shadows
online or print science notebook section.
Reflect and Discuss: Making Sense
Big IdeaThe sun appears to travel through the sky in a predictable daily pattern, an arc.
NGSS ConnectionStudents make a claim that the length of shadows is caused by the height of the sun. When they use a model to defend that claim and support their thinking, they use the practice of Engaging in Argument from Evidence:
Construct and/or support an argument with evidence, data, and/or a model.
Students reflect on the way the model of the flashlight and the shadow recording tools compare to the sun and the shadow recording tools. They also discuss ways that the model helped them to describe the phenomenon of the way shadows change during the daytime as the relative position of the sun in the sky changes. In doing so, they focus on the practice of Developing and Using Models:
Develop and/or use models to describe and/or predict phenomena.
Sharing1. Have each group state a question from the Creating Shadows online or print science
notebook, share their claim, and support their argument with a demonstration that uses their model. If this is challenging for students, consider outlining the demonstration more
Earth in Space: Lesson: Models of the Sun and Shadows 89
explicitly with this example:
a. Our question is: When do long shadows occur?
b. Our claim is: Shadows are longest in the early morning and late afternoon.
c. We can support our argument with our model (demonstrate with their model and explain with words)
2. Have each group invite questions about their demonstration. Encourage them to support their answers with demonstrations that use their model.
Synthesizing 1. Ask some of the following to help reinforce how the students used the model to describe
phenomena.
• How did you find a position for the flashlight that cast the same shadow as the sun? (Moving it around until the shadow cast by the shadow-recording tool matched one of the shadows drawn on the science notebook section.)
TEACHER NOTE: This is a good time to reinforce the importance of recording accurate observations. If the shadows traced from the shadow-recording tool were
longer or shorter than the actual shadow, the modeling activity would not be accurate because the flashlight would have to be held at a different position to match the incorrect shadow.
• What phenomenon occurred when the position of the flashlight was low? (The shadows were long.)
• What phenomenon occurred when the position of the flashlight was high? (The shadows were shorter.)
• What caused the shadows to change positions throughout the day? (The sun’s position appeared to change throughout the day causing the shadows to shift positions.)
2. Encourage students to reflect on the use of a model in today’s activity.
• How was the model similar to the sun? (Possible answers include: The flashlight modeled the position of the sun in the sky, the flashlight shines light like the sun, and the flashlight causes shadows.)
• How was the model different from the sun? (Possible answers include: The flashlight is not as hot as the sun, the sun shines light in all directions but the flashlight only points the light in one direction, and the flashlight doesn’t accurately show the distance of the sun to the shadow recording tool.)
• How did the model help them to describe the phenomenon of the way shadows change during the daytime as the relative position of the sun in the sky changes?
MaintenanceStore each group’s Shadow Data Teacher Master for use in the Modeling Earth’s Rotation lesson.

90 Earth in Space: Lesson: Models of the Sun and Shadows
After the LessonAfter the Lesson
Ongoing Learning Science Center
Materials: Daylight: Chart section of the science notebook
Leave one of the shadow-recording tools and a flashlight out in the Science Center, as well as a laminated copy of one group’s Shadow Data Teacher Master. Let the students model the sun’s location in the sky.
Further Science Explorations
Modeling a Lunar EclipseA lunar eclipse occurs when the moon passes directly behind the Earth’s shadow. This can occur only when the sun, Earth and moon are aligned, with the Earth between the moon and sun. Have the students use a clamp lamp to represent the sun, a volleyball to represent Earth, and a small foam ball to represent the moon. Then ask them to model a lunar eclipse.

Earth in Space: Lesson: Models of the Sun and Shadows 91
Next Generation Science StandardsNext Generation Science StandardsThis lesson integrates these dimensions from the Next Generation Science Standards (NGSS*):
Science and Engineering Practices Disciplinary Core Ideas Crosscutting Concepts
Developing and Using Models• Develop and/or use models
to describe and/or predict phenomena.
Constructing Explanations and Designing Solutions• Use evidence (e.g.,
measurements, observations, patterns) to construct or support an explanation or design a solution to a problem.
Engaging in Argument from Evidence • Construct and/or support
an argument with evidence, data, and/or a model.
ESS1.B Earth and the Solar System • The orbits of Earth around
the sun and of the moon around Earth, together with the rotation of Earth about an axis between its North and South poles, cause observable patterns. These include day and night; daily changes in the length and direction of shadows; and different positions of the sun, moon, and stars at different times of the day, month, and year.
Patterns• Patterns can be used as
evidence to support an explanation.
Cause and Effect• Cause and effect
relationships are routinely identified, tested, and used to explain change.
This lesson contributes to the fulfillment of this NGSS Performance Expectation for Grade 5:
Earth’s Place in the Universe
5-ESS1-2. Represent data in graphical displays to reveal patterns of daily changes in length and direction of shadows, day and night, and the seasonal appearance of some stars in the night sky.
Lesson Goals
1. Use a model to describe how shadows change during the daytime as the relative position of the sun in the sky changes.
2. Use shadow data to evaluate claims about the causes of different lengths of shadows.
Common Core State Standards Connections: ELA/Literacy
SL.5.1 Engage effectively in a range of collaborative discussions (one-on-one, in groups, and teacher-led) with diverse partners on grade 5 topics and texts, building on others’ ideas and expressing their own clearly.
*Next Generation Science Standards is a registered trademark of Achieve. Neither Achieve nor the lead states and partners that developed the Next Generation Science Standards was involved in the production of, and does not endorse, this product.

92 Earth in Space: Lesson: Models of the Sun and Shadows

Earth in Space: Lesson: Models of Daytime and Nighttime 93
Lesson:
Models of Daytime and Nighttime
Big IdeaThe sun’s predictable daily pattern can be explained by the rotation of Earth.
Overview Overview In Session 1 of this two-session lesson, students create models to explain their observations of daytime and nighttime, and the sun’s apparent movement across the sky during the daytime. In Session 2, they present and critique each other’s models and decide what makes a useful model. The crosscutting concept of Cause and Effect is applied as students base their explanations on observations of relationships between the sun and Earth.
Key Notes• Gather a variety of materials for the children to use
to build their models. See the Preparation section for details.
• For more information about the science content in this lesson, see the “Daily Pattern of the Sun” section of the Teacher Background Information.
Lesson Goals1. Develop a mental model to describe the causes of daytime and nighttime.
2. Compare physical models and choose one to create and revise.
3. Evaluate models to find the one that best explains their observations of the sun and shadows.
4. Use their final model to construct an argument about what causes daytime and nighttime.
Assessment Options• This lesson offers opportunities to assess students’ understanding that Earth’s rotation
on its axis causes the apparent arc of the sun across the sky during daytime and causes nighttime. You can use criterion A on the Earth’s Rotation and Orbit rubric to record your observations.
• Circulate around the room as the students create their models. Note how well the students design, use, and interpret their models. Listen to the students’ comments and questions during the reflective discussion as they compare and contrast their models. Record the students’ understanding of science models using the Developing and Using Models checklist. Also, consider having students evaluate their own skills with the Using Models in Science self-assessment.

94 Earth in Space: Lesson: Models of Daytime and Nighttime
PreparationPreparationPreparation Checklist
□ Prepare materials for the children to use to build their models. Items might include:
• sphere-shaped objects (basketballs, foam balls, golf balls, tennis balls, marbles, dried peas)
• other objects (flashlights, string, cubes, pipe cleaners, straws, clay, toothpicks)
• general supplies (glue, scissors)
• art supplies (colored pencils, markers, crayons, paint, colored paper)
□ Decide on the groups of students who will work together in the exploration. Three make a good size team for this exploration.
□ Plan for a safe place to store the models. The children will refer to them again in the Modeling Earth’s Rotation lesson.
□ Copy the Family Link Reflecting on Models of Daytime and Nighttime.
Materials
ExploraGear
Clay 1 package To make model.
Flashlights 16 To make model.
Glue 8 bottles To make model.
Paper, various colors 1 pack To make model.
Pipe cleaners 1 package To make model.
Sphere-shaped items, Several To make model. various sizes (racquet ball, tennis ball, golf ball, bocce ball, marbles, rubber ball)
Straws 1 box To make model.

Earth in Space: Lesson: Models of Daytime and Nighttime 95
Twine 1 spool To make model.
Toothpicks 1 box To make model.
Classroom Supplies
Colored pencils 1 set per group To make model.
Crayons 1 box per group To make model.
Foam balls Several To make model.
Markers, 1 box per group To make model. various colors
Paint, various colors 1 set per group To make model.
People figures, Several To make model. miniature
Scissors 1 per group To make model.
Wood or plastic cubes, Several To make model. small- and medium- sized

96 Earth in Space: Lesson: Models of Daytime and Nighttime
Curriculum ItemsItem Resource LocationScience Notebook: Making Models online print teacher guide
Student Lessons Teach Lesson Teach Lesson
Science Notebook: Initial Models online print
From the Day and Night lesson.
Family Link: Reflecting on Models of Daytime and Nighttime
Teacher Portal Files/ Teaching the Lesson Resources
Rubric: Earth’s Rotation and Orbit (optional)
Checklist: Developing and Using Models (optional)
Self-Assessment: Using Models in Science (optional) online print
Assessments

Earth in Space: Lesson: Models of Daytime and Nighttime 97
Teaching the Lesson - Session 1Teaching the Lesson - Session 1Engage
Introductory Discussion1. Have students review what they learned in the Modeling Earth’s Shape lesson by asking what
the Earth is shaped like. (A sphere.)
2. Inform the students that today they are going to make models that describe what causes the phenomena of daytime and nighttime on Earth.
3. Divide the students into groups. Tell them that before they construct their models, they need to make a mental model. Instruct the students to:
a. Shut their eyes and recall how they tracked the sun’s apparent position across the sky.
b. Try to visualize the shape of the Earth.
c. Try to visualize why the sun appears to move throughout the sky during the daytime.
d. Try to visualize what makes daytime and nighttime.
e. Open their eyes.
4. Tell the students that what they visualized in their minds was their own mental model. Explain that each of them has a different mental model, but they will need to create a physical model that the group agrees on.
5. Explain that each student should use evidence to convince others that their idea is accurate. Then the group might create a model that is like one person’s mental model. Or, they might create a model that is a blend of all of their mental models.
6. Have each group look at the Making Models: Challenge online or print science notebook section. Explain that their challenge is to create a physical model that explains the observations they have been making, and that:
• Describes what causes daytime and nighttime; and
• Explains why the sun seems to move across the sky during the daytime.
7. Have students use the Making Models: Ideas and Notes science notebook section to draw ideas and take notes from their group’s discussions.
TEACHER NOTE: You may want to have students look back at the drawings they made in the Day and Night lesson where they depicted their ideas about what
causes daytime and nighttime. These drawings are on the Initial Models: Daytime and Nighttime sections of their online or print science notebooks.
98 Earth in Space: Lesson: Models of Daytime and Nighttime
Explore
NGSS ConnectionWhen students are asked to convince or argue in favor of their model they apply the practice of Engaging in Argument from Evidence:
Construct and/or support an argument with evidence, data, and/or a model.
When students share the observations they used and how they incorporated them into their model, they engage in the practice of Constructing Explanations and Designing Solutions:
Identify the evidence that supports particular points in an explanation.
When students develop and revise a model that describes what causes daytime and nighttime and why the sun seems to move across the sky during the daytime, they engage in the practice of Developing and Using Models:
Develop and/or use models to describe and/or predict phenomena.
Making Models 1. Share these criteria with the students:
• They can create either a pictorial model or a physical model.
• They might want to include a figure of themselves in the model and imagine where they might be inside the model if they were able to get in it.
• They can use their bodies and act out their model.
• They need to compare their mental models once in a while to make sure the group model they are creating explains their observations from the previous lessons.
2. Have the groups make a sketch of their models on the Making Models: Sketch science notebook section.
3. After the sketches are complete, have them create their models.
TEACHER NOTE: Circulate around the room and observe the students as they work on their models. It might be interesting to note which groups create models from
the perspective of Earth and which create models from the perspective of outer space. It can be cognitively difficult at this age for some students to shift their perspective from Earth to outer space.
4. Suggest that the groups make a written explanation of their model before sharing the model with the class.
5. Explain that in the next session each group will present their model to the class.
Earth in Space: Lesson: Models of Daytime and Nighttime 99
Teaching the Lesson - Session 2Teaching the Lesson - Session 2Engage
Introductory DiscussionExplain that each group is going to present their model to the class. The other groups need to think about whether the model they are seeing:
• Describes what causes daytime and nighttime; and
• Explains why the sun appears to move throughout the sky during the daytime.
TEACHER NOTE: Students may get discouraged if their model does not clearly describe the phenomena. Emphasize that all models are valuable and all ideas are
valid. Their skills will become more developed as they practice in this and other topics. Receiving critiques is hard for anyone. If students can understand that even the teacher or other adults keep working at things to make them better, it may help. Having students say what they understand from each group’s model helps. The groups then get to see what information they communicated, and perhaps what was not communicated.
Explore
NGSS Connection
When students review each other’s work and provide input on what they like and what they found challenging, they demonstrate the practice of Engaging in Argument from Evidence:
Respectfully provide and receive critiques from peers about a proposed procedure, explanation or model by citing relevant evidence and posing specific questions.
When students present their models to the class and show how their models explain what causes day and night, they focus on the crosscutting concept of Cause and Effect:
Cause and effect relationships are routinely identified, tested, and used to explain change.
Presenting Models1. Before they present their models to the class, instruct students to review the questions
on the Making Models: Presentation online or print science notebook section. You might suggest that they take notes on this section.
2. Have each group present their model to the class. Feel free to support their ideas by writing appropriate vocabulary on the board, such as rotate, sphere, or orbit.
3. At the end of each presentation, encourage students to critique their classmate’s models by posing the following questions:
• How does the model answer the challenge?
• How did they incorporate prior observations?
100 Earth in Space: Lesson: Models of Daytime and Nighttime
• What does this representation show? What does it not show?
• What features of the model were based on evidence from their experience? What features were not?
• What do they find challenging about the model?
• How does this model support an argument about what causes daytime and nighttime?
Reflect and Discuss: Making Sense
Big IdeaThe sun’s predictable daily pattern can be explained by the rotation of Earth.
Sharing and Synthesizing1. After all of the presentations, ask the students to discuss the following:
• What makes a good model? (A good model is one that uses evidence to explain their ideas or describe phenomena. It is well communicated through words, actions, drawings, and manipulatives.)
• Was there one model that they thought best explained the observations of the sun’s apparent movement across the sky? If so, which one?
• Which models involved having Earth rotate?
TEACHER NOTE: Ideally, a sun-centered, Earth-rotating model is the consensus of the class. However, there may be many models that are Earth-centered or in
which Earth orbits the sun daily. To change these concepts, you will need the students to reflect on the differences between their models and the scientists’ models during the next lesson.
2. Have students review the Drawing: Daytime and Nighttime sections of their online or print science notebooks. How have their ideas about daytime and nighttime changed?
Planning Ahead• Store the students’ models in an undisturbed location. The students will return to them in the
following lesson.
• In the next lesson the students discuss the Family Link Reflecting on Models of Daytime and Nighttime during the introductory discussion. Make sure they’ve all completed the Family Link prior to the lesson.
Earth in Space: Lesson: Models of Daytime and Nighttime 101
After the Lesson After the Lesson
Ongoing Learning Science CenterContinue with the materials and explorations introduced in the Science Center for previous lessons about the sun’s daily pattern.
Family LinkAssign the Family Link Reflecting on Models of Daytime and Nighttime in which students share their model building experiences with a family member in order to reflect on their models.
ExtensionsFurther Science Explorations
Thinking GloballyThe Internet provides access to a database of live cameras set up around the world. Finding a country the students choose and looking at a “live” picture will provide evidence to support their developing understanding of daytime and nighttime. Use the suggested web sites listed for this lesson at resources.activatelearningprime.com to show the students whether it is daytime or nighttime in different parts of the world at the time of the lesson. You might also use software such as Google Earth™ to illustrate this concept.
Art Extension
Making ModelsFor groups who created pictorial models, challenge them to create physical models. For groups who created physical models, challenge them to create a pictorial model. Both types of models reinforce spatial reasoning.
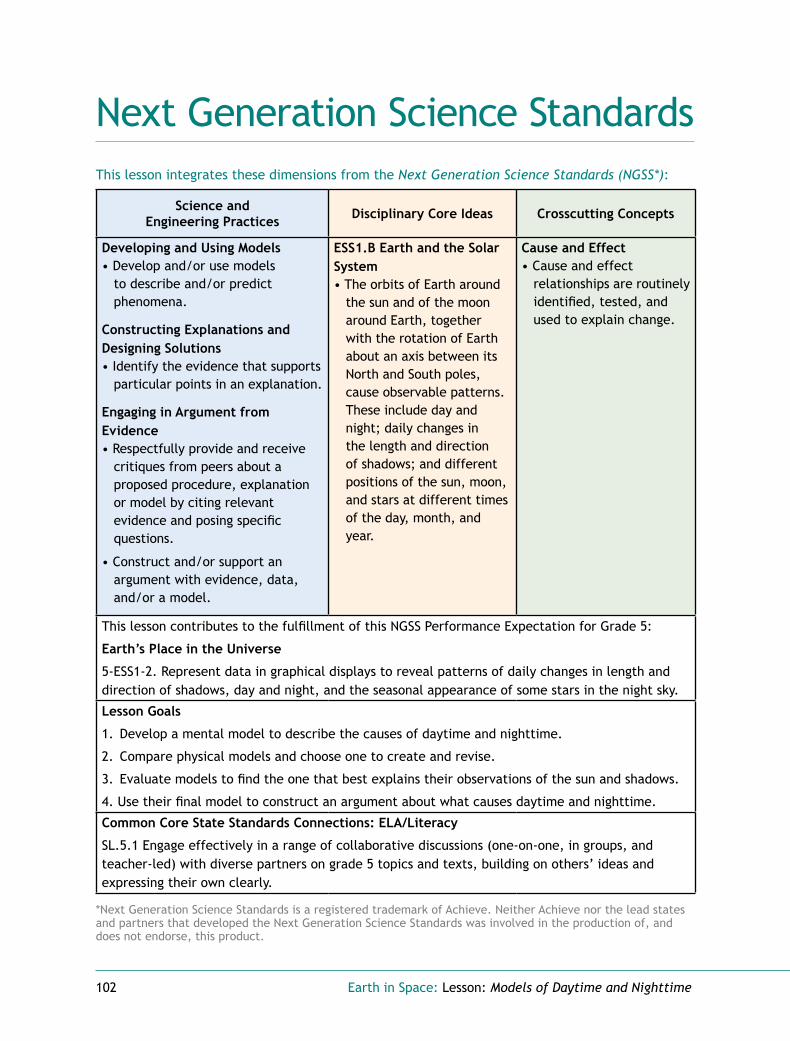
102 Earth in Space: Lesson: Models of Daytime and Nighttime
Next Generation Science StandardsNext Generation Science StandardsThis lesson integrates these dimensions from the Next Generation Science Standards (NGSS*):
Science and Engineering Practices Disciplinary Core Ideas Crosscutting Concepts
Developing and Using Models• Develop and/or use models
to describe and/or predict phenomena.
Constructing Explanations and Designing Solutions• Identify the evidence that supports
particular points in an explanation.
Engaging in Argument from Evidence • Respectfully provide and receive
critiques from peers about a proposed procedure, explanation or model by citing relevant evidence and posing specific questions.
• Construct and/or support an argument with evidence, data, and/or a model.
ESS1.B Earth and the Solar System• The orbits of Earth around
the sun and of the moon around Earth, together with the rotation of Earth about an axis between its North and South poles, cause observable patterns. These include day and night; daily changes in the length and direction of shadows; and different positions of the sun, moon, and stars at different times of the day, month, and year.
Cause and Effect • Cause and effect
relationships are routinely identified, tested, and used to explain change.
This lesson contributes to the fulfillment of this NGSS Performance Expectation for Grade 5:
Earth’s Place in the Universe
5-ESS1-2. Represent data in graphical displays to reveal patterns of daily changes in length and direction of shadows, day and night, and the seasonal appearance of some stars in the night sky.
Lesson Goals
1. Develop a mental model to describe the causes of daytime and nighttime.
2. Compare physical models and choose one to create and revise.
3. Evaluate models to find the one that best explains their observations of the sun and shadows.
4. Use their final model to construct an argument about what causes daytime and nighttime.
Common Core State Standards Connections: ELA/Literacy
SL.5.1 Engage effectively in a range of collaborative discussions (one-on-one, in groups, and teacher-led) with diverse partners on grade 5 topics and texts, building on others’ ideas and expressing their own clearly.
*Next Generation Science Standards is a registered trademark of Achieve. Neither Achieve nor the lead states and partners that developed the Next Generation Science Standards was involved in the production of, and does not endorse, this product.

Earth in Space: Lesson: Modeling Earth’s Rotation 103
Big IdeaThe sun’s predictable daily pattern can be explained by the rotation of Earth.
Lesson:
Modeling Earth’s Rotation
Overview Overview Students compare and contrast the models they created in the previous lesson to the model of Earth’s rotation that scientists use to explain their observations of daytime and nighttime, and the apparent movement of the sun across the sky. They apply the crosscutting concept of Patterns as they appreciate that a rotating Earth explains the patterns of daytime, nighttime, and shadows.
Key Notes• Practice doing the “Modeling Earth’s Rotation: Model 2”
exploration ahead of time. Secure the clamp lamp to the back of a chair, ensuring that no flammable objects are near the light.
• For more information about the science content in this lesson, see the “Daily Pattern of the Sun” section of the Teacher Background Information.
Lesson Goals1. Evaluate the scientific model of what makes daytime and
nighttime in comparison to their own models.
2. Use a model to describe how it is the rotation of Earth on its axis that causes the phenomenon of the sun’s daily pattern in the sky.
Assessment Options• This is the last lesson in the Daily Pattern of the Sun cluster. In addition to the summative
assessments, you might also offer students a task. Provide them with a globe and a light shining on half of it, and ask them:
• What time is it here?
• What countries are watching the sunset right now?
• What countries are watching sunrise right now?
• Where on the globe is it nighttime?
104 Earth in Space: Lesson: Modeling Earth’s Rotation
• Evaluate students’ responses to the various modeling tasks, and listen to their ideas during the exploration and reflective discussions to assess their understanding of criterion B on the Sun and Shadows rubric and criterion A on the Earth’s Rotation and Orbit rubric.
• Review responses on item 3 of the Earth’s Rotation Models science notebook section and assess student understanding of criterion B on the Sun and Shadows rubric.
• Use the optional Daytime and Nighttime Performance Task after this lesson to assess students’ understanding and application of criterion A on the Earth’s Rotation and Orbit rubric.
• Use the optional Daily Pattern of the Sun Quick Check after this lesson to assess students’ understanding of the criteria on the Sun and Shadows rubric and criterion A on the Earth’s Rotation and Orbit rubric.
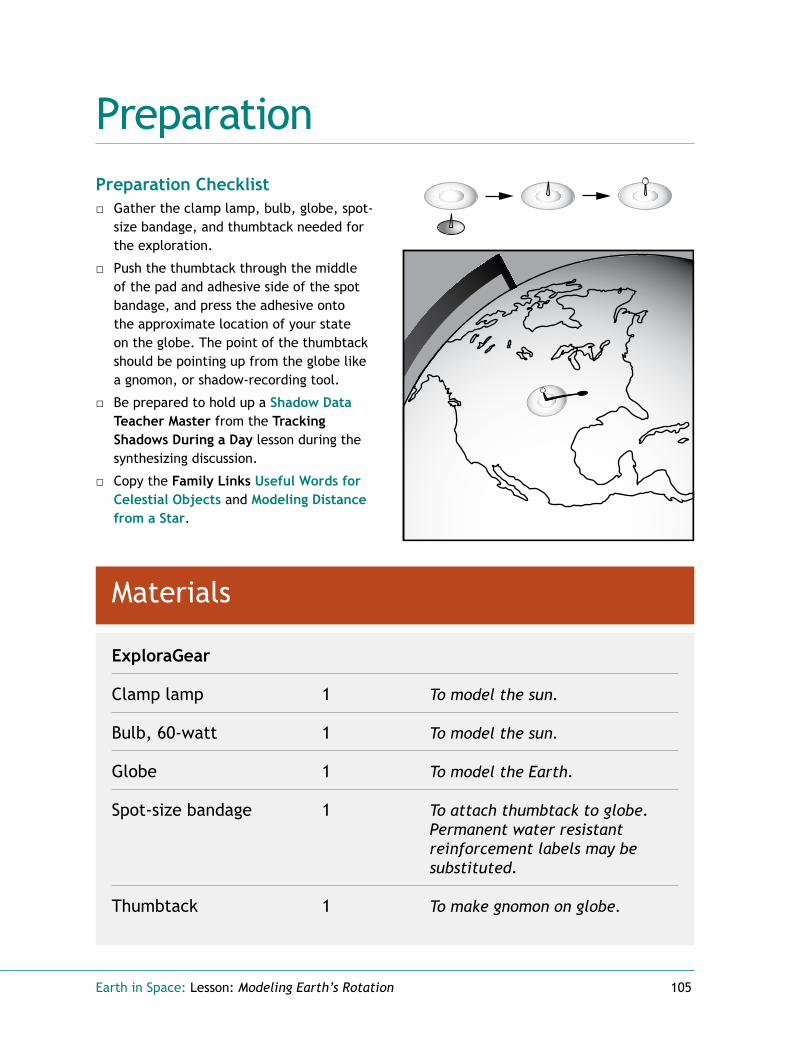
Earth in Space: Lesson: Modeling Earth’s Rotation 105
PreparationPreparationPreparation Checklist
□ Gather the clamp lamp, bulb, globe, spot-size bandage, and thumbtack needed for the exploration.
□ Push the thumbtack through the middle of the pad and adhesive side of the spot bandage, and press the adhesive onto the approximate location of your state on the globe. The point of the thumbtack should be pointing up from the globe like a gnomon, or shadow-recording tool.
□ Be prepared to hold up a Shadow Data Teacher Master from the Tracking Shadows During a Day lesson during the synthesizing discussion.
□ Copy the Family Links Useful Words for Celestial Objects and Modeling Distance from a Star.
Materials
ExploraGear
Clamp lamp 1 To model the sun.
Bulb, 60-watt 1 To model the sun.
Globe 1 To model the Earth.
Spot-size bandage 1 To attach thumbtack to globe. Permanent water resistant reinforcement labels may be substituted.
Thumbtack 1 To make gnomon on globe.
106 Earth in Space: Lesson: Modeling Earth’s Rotation
Previous Lessons
Models students created all To compare to scientific model. in the Models of Daytime and Nighttime lesson.
Completed Family 1 To use to support explanations. Link Reflecting on per student Models of Daytime and Nighttime
Teacher Master: 1 From the Tracking Shadows During Shadow Data per group a Day lesson.
Curriculum ItemsItem Resource LocationScience Notebook: Earth’s Rotation Models online print teacher guide
Student Lessons Teach Lesson Teach Lesson
Family Link: Useful Words for Celestial Objects
Family Link: Modeling Distance from a StarTeacher Portal Files/ Teaching the Lesson Resources
Rubric: Sun and Shadows (optional)
Rubric: Earth’s Rotation and Orbit (optional) Assessments
Performance Task: Daytime and Nighttime (optional) online print teacher guide
Assessments
Quick Check: Daily Pattern of the Sun (optional) online print teacher guide
Assessments

Earth in Space: Lesson: Modeling Earth’s Rotation 107
Teaching the Lesson Teaching the Lesson Engage
Introductory Discussion1. Have the students gather the models they created in the Models of Daytime and Nighttime
lesson, so they can refer to them as they review the Family Link.
2. To review learnings from the previous lesson, have students share some responses to the Family Link Reflecting on Models of Daytime and Nighttime.
3. Ask: Throughout history, what did people think were the causes of daytime and nighttime? If no one mentions it, explain that for thousands of years, most people thought that Earth stood still and that the sun moved around it. Ask the following questions:
• How did it explain the phenomenon of what caused the apparent movement of the sun across the sky? (It explained that the sun moved across the sky and that people saw the sun move.)
• How did it explain the phenomena of the causes of day and night? (When the sun was in the sky it was daytime, and when it was not in the sky it was nighttime.)
• Why did people think Earth was stationary? (Because they could not feel it move.)
4. Ask: In the previous lesson, did anyone make a model where the Earth stood still and the sun moved around it?
5. Tell the students that today they are going to further explore their ideas about what makes daytime and nighttime by comparing their models to those of scientists. Just as they created models, scientists have also created models to explain daytime and nighttime, as well as the sun’s apparent movement through the sky.
Explore
NGSS ConnectionAs students observe new models that are used to describe causes of the phenomena of day and night and how shadows change with the apparent movement of the sun, they engage with the practice of Developing and Using Models:
Develop and/or use models to describe and/or predict phenomena.
When they describe the patterns involved in each model they used or observed, students develop the crosscutting concept of Patterns:
Patterns can be used as evidence to support an explanation.
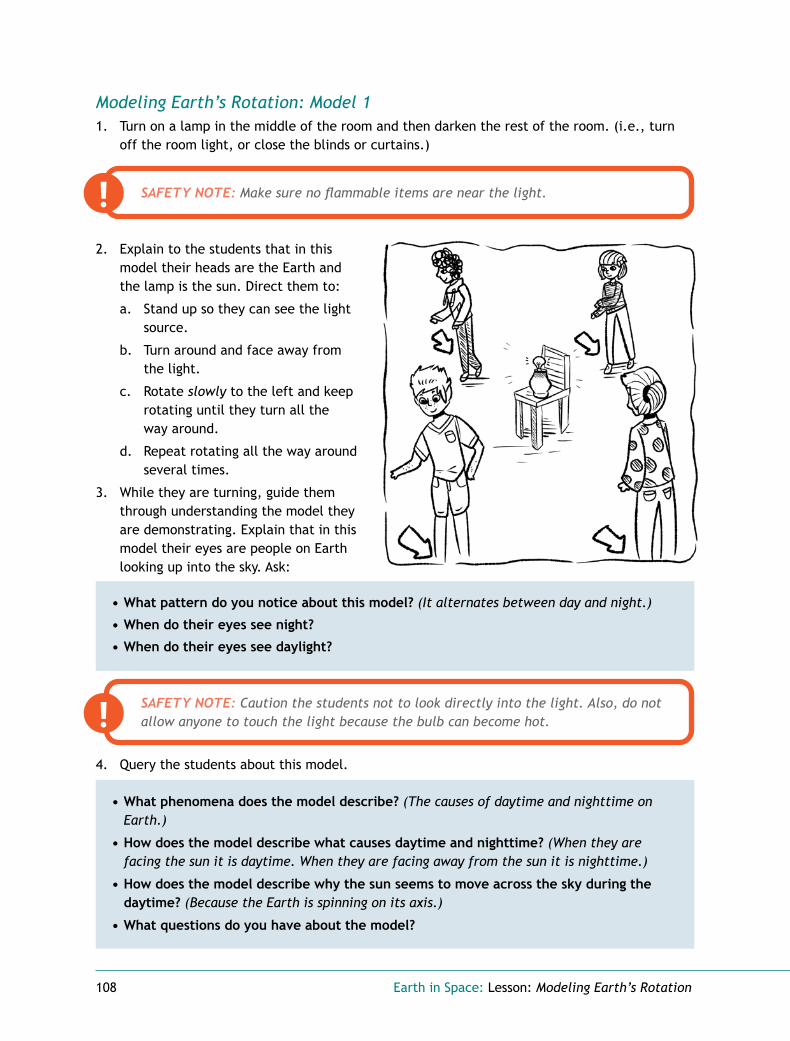
108 Earth in Space: Lesson: Modeling Earth’s Rotation
Modeling Earth’s Rotation: Model 1 1. Turn on a lamp in the middle of the room and then darken the rest of the room. (i.e., turn
off the room light, or close the blinds or curtains.)
SAFETY NOTE: Make sure no flammable items are near the light.
2. Explain to the students that in this model their heads are the Earth and the lamp is the sun. Direct them to:
a. Stand up so they can see the light source.
b. Turn around and face away from the light.
c. Rotate slowly to the left and keep rotating until they turn all the way around.
d. Repeat rotating all the way around several times.
3. While they are turning, guide them through understanding the model they are demonstrating. Explain that in this model their eyes are people on Earth looking up into the sky. Ask:
• What pattern do you notice about this model? (It alternates between day and night.)
• When do their eyes see night?
• When do their eyes see daylight?
4. Query the students about this model.
SAFETY NOTE: Caution the students not to look directly into the light. Also, do not allow anyone to touch the light because the bulb can become hot.
• What phenomena does the model describe? (The causes of daytime and nighttime on Earth.)
• How does the model describe what causes daytime and nighttime? (When they are facing the sun it is daytime. When they are facing away from the sun it is nighttime.)
• How does the model describe why the sun seems to move across the sky during the daytime? (Because the Earth is spinning on its axis.)
• What questions do you have about the model?
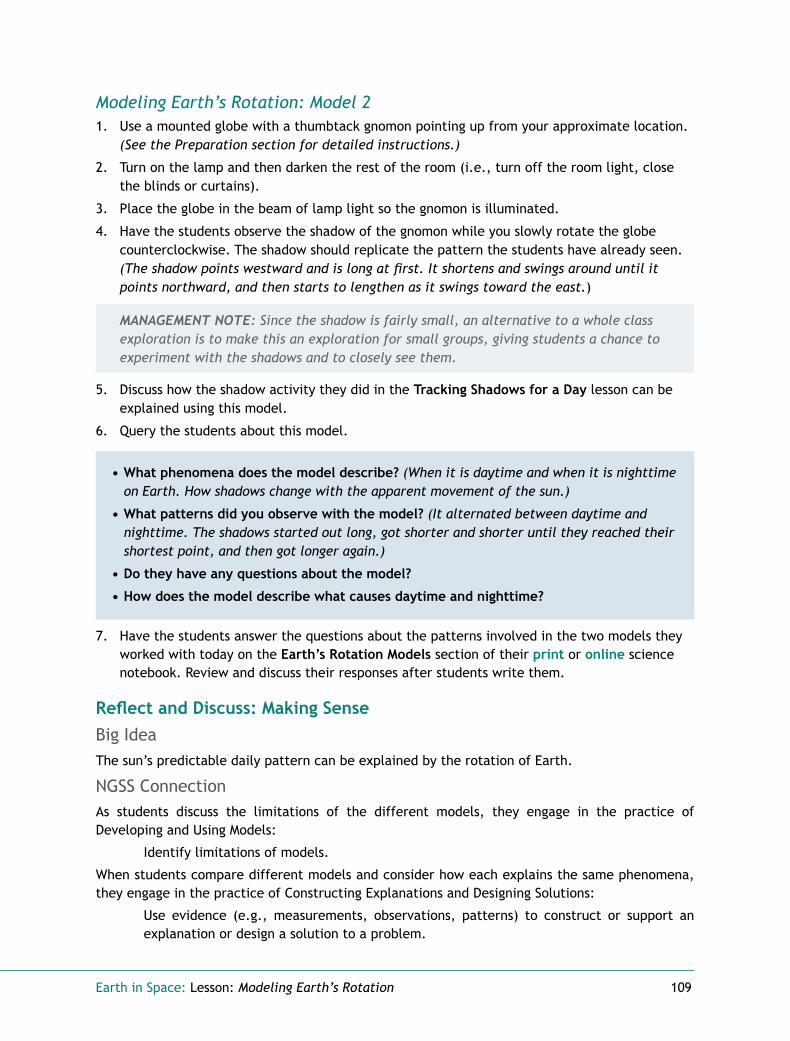
Earth in Space: Lesson: Modeling Earth’s Rotation 109
Modeling Earth’s Rotation: Model 2 1. Use a mounted globe with a thumbtack gnomon pointing up from your approximate location.
(See the Preparation section for detailed instructions.)
2. Turn on the lamp and then darken the rest of the room (i.e., turn off the room light, close the blinds or curtains).
3. Place the globe in the beam of lamp light so the gnomon is illuminated.
4. Have the students observe the shadow of the gnomon while you slowly rotate the globe counterclockwise. The shadow should replicate the pattern the students have already seen. (The shadow points westward and is long at first. It shortens and swings around until it points northward, and then starts to lengthen as it swings toward the east.)
MANAGEMENT NOTE: Since the shadow is fairly small, an alternative to a whole class exploration is to make this an exploration for small groups, giving students a chance to experiment with the shadows and to closely see them.
5. Discuss how the shadow activity they did in the Tracking Shadows for a Day lesson can be explained using this model.
6. Query the students about this model.
• What phenomena does the model describe? (When it is daytime and when it is nighttime on Earth. How shadows change with the apparent movement of the sun.)
• What patterns did you observe with the model? (It alternated between daytime and nighttime. The shadows started out long, got shorter and shorter until they reached their shortest point, and then got longer again.)
• Do they have any questions about the model?
• How does the model describe what causes daytime and nighttime?
7. Have the students answer the questions about the patterns involved in the two models they worked with today on the Earth’s Rotation Models section of their print or online science notebook. Review and discuss their responses after students write them.
Reflect and Discuss: Making SenseBig IdeaThe sun’s predictable daily pattern can be explained by the rotation of Earth.
NGSS ConnectionAs students discuss the limitations of the different models, they engage in the practice of Developing and Using Models:
Identify limitations of models.
When students compare different models and consider how each explains the same phenomena, they engage in the practice of Constructing Explanations and Designing Solutions:
Use evidence (e.g., measurements, observations, patterns) to construct or support an explanation or design a solution to a problem.

110 Earth in Space: Lesson: Modeling Earth’s Rotation
SharingOffer students the opportunity to reflect on their own models from the previous lesson and compare them to the scientific models of Earth’s rotation that they just used.
Synthesizing1. Hold up one of the students’ Shadow Data Teacher Masters. Have students compare the
shadows cast from the globe with the shadow drawings on the Teacher Master. Ask:
• Do the two models explain the same thing or different things? (The same thing.)
• When they observed the sun moving across the sky in the Observing the Sun for a Day lesson was the sun really moving? (No, it just appeared to move from the perspective of Earth’s surface.)
• How can multiple models be used to explain the same thing? (The models might be different sizes, have different points of view, or be made from different materials.)
2. Explain that less than 500 years ago, Nicholas Copernicus, a famous Polish scientist, proposed a revolutionary idea that the sun did not move around Earth, and that Earth rotated once every 24 hours, making daytime and nighttime. Explain that this is the model scientists use and the one they modeled today.
3. Have students consider the limitations of similar models. Ask:
• What are some limitations of models? (Some parts of the models correspond to the real world while other parts do not.)
• How do scientists determine which model is the best one to describe phenomena? (They continue to collect evidence and revise their models based on what they observe.)
Planning Ahead In the next lesson the students discuss the Family Link Modeling Distance from a Star. Make sure they’ve all completed the Family Link prior to that lesson.
4. In this lesson we saw that two models can explain the same phenomena. Revisit the question:
• Which model best explains the sun’s daily pattern, a model where the sun moves around the Earth, or a model where the Earth rotates once every 24 hours? (Since the sun is so far away from Earth, a model where the Earth rotates once every 24 hours best explains the sun’s daily pattern.)
• What evidence from your observations of models makes you say that? (When the model Earth spun on its axis, the model sun appeared to move across the sky.)
• How would we know which model is better? (Determine which model best explains the natural phenomena. In this case, since the sun is so much larger and so far away from Earth, it makes more sense for the Earth to rotate than for the sun to move around the Earth.)
Earth in Space: Lesson: Modeling Earth’s Rotation 111
After the LessonAfter the Lesson
Ongoing Learning Science Center
Materials: Scientists’ model of Earth, student models of Earth
• Allow time for students to develop or practice with the scientists’ model, as a way for them to think more about the models they used during the lesson.
• Encourage the students to place their models in the Science Center so others can use them to keep exploring. If there is time, students may want to include some written work to accompany and explain their models.
• Encourage students to look for more evidence about how the Earth looks from space and how it moves in relation to the sun. See resources.activatelearningprime.com for suggestions.
Family Links• Assign the Family Link Useful Words for Celestial Objects so students can share with their
family members terminology used during their model-building experiences.
• Assign the Family Link Modeling Distance from a Star for use in the next lesson. In this Family Link, students observe and describe the brightness of a flashlight as they move farther and farther away from it.
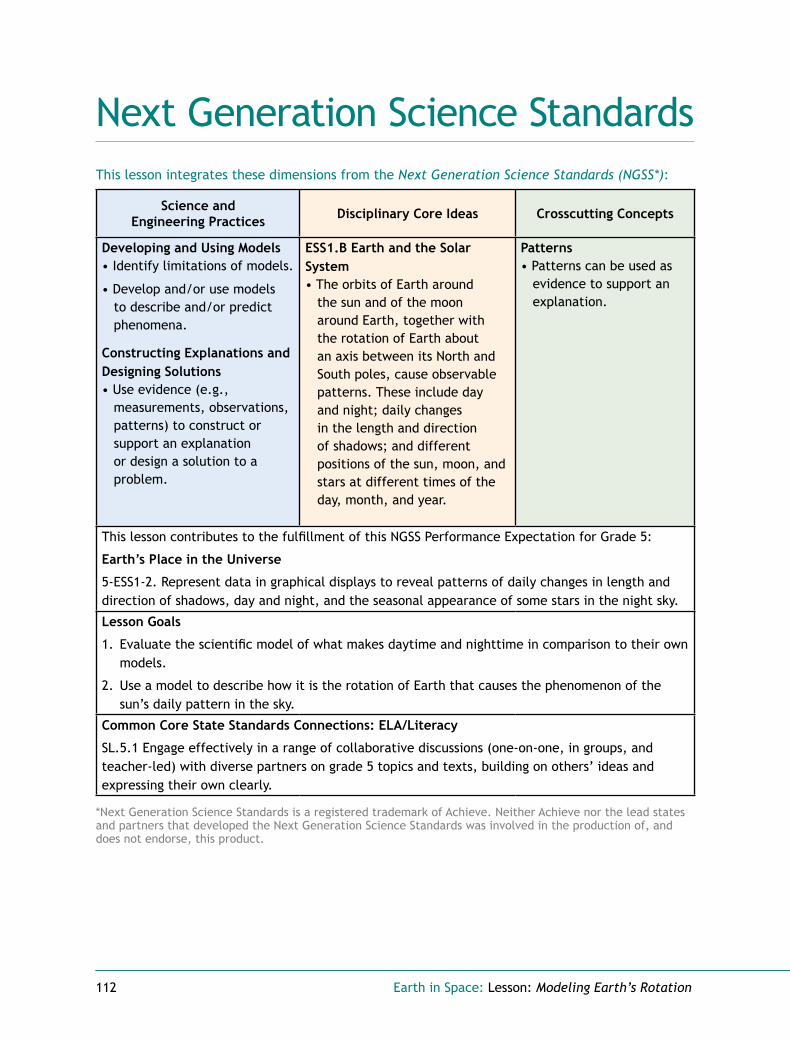
112 Earth in Space: Lesson: Modeling Earth’s Rotation
Next Generation Science StandardsNext Generation Science StandardsThis lesson integrates these dimensions from the Next Generation Science Standards (NGSS*):
Science and Engineering Practices Disciplinary Core Ideas Crosscutting Concepts
Developing and Using Models• Identify limitations of models.
• Develop and/or use models to describe and/or predict phenomena.
Constructing Explanations and Designing Solutions• Use evidence (e.g.,
measurements, observations, patterns) to construct or support an explanation or design a solution to a problem.
ESS1.B Earth and the Solar System • The orbits of Earth around
the sun and of the moon around Earth, together with the rotation of Earth about an axis between its North and South poles, cause observable patterns. These include day and night; daily changes in the length and direction of shadows; and different positions of the sun, moon, and stars at different times of the day, month, and year.
Patterns• Patterns can be used as
evidence to support an explanation.
This lesson contributes to the fulfillment of this NGSS Performance Expectation for Grade 5:
Earth’s Place in the Universe
5-ESS1-2. Represent data in graphical displays to reveal patterns of daily changes in length and direction of shadows, day and night, and the seasonal appearance of some stars in the night sky.
Lesson Goals
1. Evaluate the scientific model of what makes daytime and nighttime in comparison to their own models.
2. Use a model to describe how it is the rotation of Earth that causes the phenomenon of the sun’s daily pattern in the sky.
Common Core State Standards Connections: ELA/Literacy
SL.5.1 Engage effectively in a range of collaborative discussions (one-on-one, in groups, and teacher-led) with diverse partners on grade 5 topics and texts, building on others’ ideas and expressing their own clearly.
*Next Generation Science Standards is a registered trademark of Achieve. Neither Achieve nor the lead states and partners that developed the Next Generation Science Standards was involved in the production of, and does not endorse, this product.

Earth in Space: Sun and Other Stars Cluster 113
Sun and Other Stars
Cluster #3
Overview Overview In this final cluster of Earth in Space lessons, students are introduced to the idea that the apparent brightness of the sun and stars is due to their relative distance from Earth. They focus on the crosscutting concept of Scale, Proportion, and Quantity as they learn that different stars range in size, brightness, and distance from Earth. They apply the crosscutting concept of Patterns when they describe how the movement of stars across the sky repeats night after night. They also engage with the crosscutting concept of Cause and Effect when they explain the reason for this apparent movement, and for the fact that stars are not visible by day. Students research one of eight constellations and create graphs to show the seasons during which they are visible. They focus on the crosscutting concept of Patterns as they explain that the same constellations are visible during the same seasons each year due to Earth’s annual orbit of the sun.
Investigative Phenomena• why the sun appears larger and brighter than other stars.
(Students investigate and use informational text to understand distance and size as a factor in determining the appearance of stars.)
• why stars appear to travel through the sky in predictable patterns. (Students use models to observe the relative position of Earth and the sun to determine visibility of stars at different times of the year.)
• characteristics of constellations.(Students analyze illustrations of constellations and graph data to show seasonal patterns of visibility.)
Big Ideas• The sun is a star that appears
larger and brighter than other stars because it is closer. Stars vary greatly in their distance from Earth.
• The stars appear to travel through the sky in a predictable daily pattern. This pattern can be explained by the rotation of Earth.
• Stars appear in the sky in a predictable annual pattern.
• Constellations are well-defined patterns of stars that represent the shape of a person, animal, or mythological figure.

114 Earth in Space: Sun and Other Stars Cluster
DQB Artifacts ChartThis table provides suggestions for when you might explicitly address the Big Ideas. Consider printing them on cards so you can easily add them to the DQB and refer to them throughout the topic.
Adding Student Questions to the Driving Question Board
Possible Artifacts to add to the Driving Question Board
Lesson: Our Sun is a StarInvestigative Phenomena: Ss read and engage in a physical demonstration of how star size and distance away affects our ability to see it.
Engage: Post the Family Link Modeling Distance from a Star and the question, “Why do some stars appear brighter than other stars?
Reflect and Discuss: Have a few Ss summarize the understandings from this discussion and add them to the DQB. Elicit any new student questions and address any answerable questions on the DQB. Ask the Ss if they have noticed that stars seem to disappear at sunrise and return at sunset. Have Ss consider where the stars “go.”
• Photograph of Modeling Distance of a Star activity
• Photograph of Modeling Star Size (large ball/small ball) activity. Have Ss write or dictate a caption for the activity photographs, summarizing what they did and what they learned.
• Big Idea: The sun is a star that appears larger and brighter than other stars because it is closer. Stars vary greatly in their distance from Earth.
Lesson: Seeing Stars from EarthInvestigative Phenomenon: Ss experience a 3D model of when we see stars.
Session 1Engage: You may want to add questions from the Introductory Discussion to the DQB.
Session 2Explore: Add the Star Model criteria to the DQB.
Reflect and Discuss: Add any questions from the discussion that were unclear for Ss to the DQB. Check to see if any student questions can now be addressed and elicit new questions from the Ss. Ask Ss whether or not the same stars are visible all year. Does it change? How do they know?
• Photograph of Seeing Stars modeling activity. Have Ss write or dictate a caption for the modeling activity photograph, summarizing what they did and what they learned.
• Students’ star models
• Big Idea: The stars appear to travel through the sky in a predictable daily pattern. This pattern can be explained by the rotation of Earth.

Earth in Space: Sun and Other Stars Cluster 115
Adding Student Questions to the Driving Question Board
Possible Artifacts to add to the Driving Question Board
Lesson: Earth’s Orbit and StarsInvestigative Phenomenon: Ss experience 3D models of Earth’s orbit around the Sun and annual star patterns.
Reflect and Discuss: Have a few Ss summarize what they learned from the models and post them to the DQB. Elicit any new questions about how star patterns change throughout the year. Ask Ss if they have ever noticed the shape that groups of stars seem to make.
• Photograph of Star Patterns demonstration and/or Observing Annual Star Patterns modeling activity. Have Ss write or dictate a caption for the activity photograph(s), summarizing what they did and what they learned.
• Big Idea: Stars appear in the sky in a predictable annual pattern.
Lesson: Star PatternsInvestigative phenomenon: Ss research one constellation and analyze illustrations that show which constellations are visible by season.
Session 1Reflect and Discuss: Have a student summarize how the cross-cutting concept of Patterns supports their research and post it to the DQB.
Session 2Reflect and Discuss: Record how Ss distinguish between daily and seasonal patterns of the position of stars and add it to the DQB.
If Ss are struggling with the role that the constellations’ location in the sky plays in whether or not they are visible, use the artifacts from the Seeing Stars from Earth Lesson to review. Challenge Ss to independently research any unanswered questions on the DQB and encourage them to share their findings with the class.
Hold a final discussion of what Ss understand about the Driving Question: How does the Earth interact with objects near and far? Remind Ss to use evidence from the lessons to support their thinking.
• Ss’ constellation drawings
• Constellation Graph visual and Constellation Patterns charts
• Big Idea: Constellations are well-defined patterns of stars that represent the shape of a person, animal, or mythological figure.
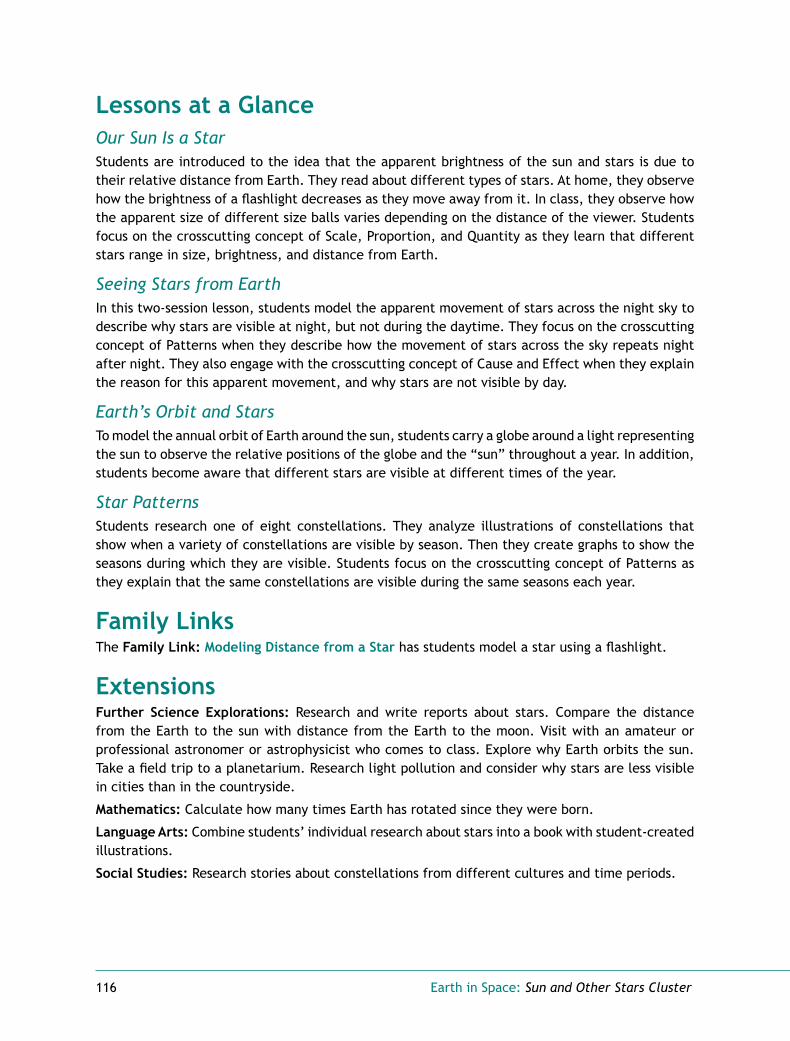
116 Earth in Space: Sun and Other Stars Cluster
Lessons at a Glance Our Sun Is a Star Students are introduced to the idea that the apparent brightness of the sun and stars is due to their relative distance from Earth. They read about different types of stars. At home, they observe how the brightness of a flashlight decreases as they move away from it. In class, they observe how the apparent size of different size balls varies depending on the distance of the viewer. Students focus on the crosscutting concept of Scale, Proportion, and Quantity as they learn that different stars range in size, brightness, and distance from Earth.
Seeing Stars from Earth In this two-session lesson, students model the apparent movement of stars across the night sky to describe why stars are visible at night, but not during the daytime. They focus on the crosscutting concept of Patterns when they describe how the movement of stars across the sky repeats night after night. They also engage with the crosscutting concept of Cause and Effect when they explain the reason for this apparent movement, and why stars are not visible by day.
Earth’s Orbit and Stars To model the annual orbit of Earth around the sun, students carry a globe around a light representing the sun to observe the relative positions of the globe and the “sun” throughout a year. In addition, students become aware that different stars are visible at different times of the year.
Star Patterns Students research one of eight constellations. They analyze illustrations of constellations that show when a variety of constellations are visible by season. Then they create graphs to show the seasons during which they are visible. Students focus on the crosscutting concept of Patterns as they explain that the same constellations are visible during the same seasons each year.
Family Links The Family Link: Modeling Distance from a Star has students model a star using a flashlight.
Extensions Further Science Explorations: Research and write reports about stars. Compare the distance from the Earth to the sun with distance from the Earth to the moon. Visit with an amateur or professional astronomer or astrophysicist who comes to class. Explore why Earth orbits the sun. Take a field trip to a planetarium. Research light pollution and consider why stars are less visible in cities than in the countryside.
Mathematics: Calculate how many times Earth has rotated since they were born.
Language Arts: Combine students’ individual research about stars into a book with student-created illustrations.
Social Studies: Research stories about constellations from different cultures and time periods.

Earth in Space: Sun and Other Stars Cluster 117
Before You Begin TeachingBefore You Begin TeachingPlan for Special Scheduling and Materials ConsiderationsUse the table below as a reference for scheduling the lessons and to anticipate preparation issues that involve advance planning.
Lesson Scheduling Considerations
Preparation Considerations
Our Sun Is a Star Single session.
Make sure students have completed the Family Link Modeling Distance from a Star prior to teaching the lesson.
Become familiar with the material in the Stars student reader.
Find a location outside where student groups have plenty of room to spread out.
Consider teaching the Skill Builder Building to Scale prior to teaching this lesson.
Seeing Stars from Earth Two sessions. You will need a large space for the “Seeing Stars” exploration. Consider teaching it in a multi-purpose room or the gymnasium.
Test the flashlights to make sure they work.
Earth’s Orbit and Stars Single session. You will need a large space for the explorations. Consider teaching the activities in a multi-purpose room or the gymnasium.
There are several smart phone applications that can be used to learn about the night sky. Test some, and if your students have mobile devices, have students use them during the exploration. See resources.activatelearningprime.com for recommended apps.
Test the flashlights to make sure they work.
Star Patterns Single session. Review the student-friendly online resources at resources.activatelearningprime.com. Be prepared to guide students in their research.
Test the flashlights to make sure they work.
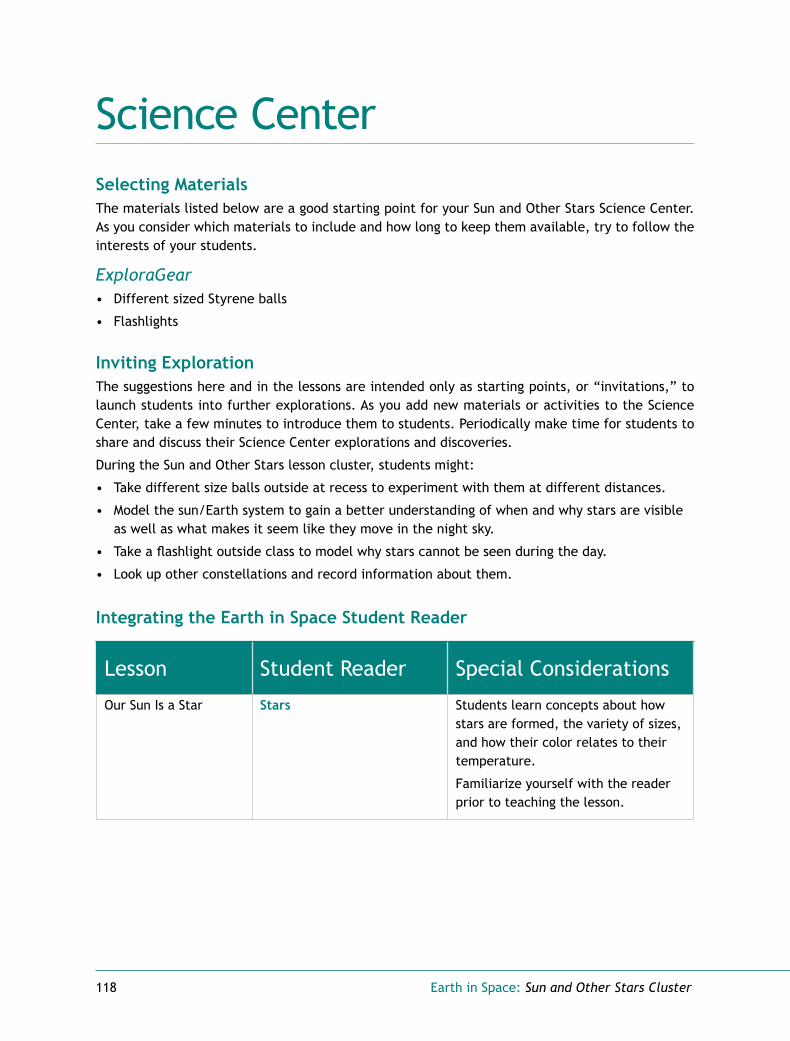
118 Earth in Space: Sun and Other Stars Cluster
Science CenterScience CenterSelecting MaterialsThe materials listed below are a good starting point for your Sun and Other Stars Science Center. As you consider which materials to include and how long to keep them available, try to follow the interests of your students.
ExploraGear • Different sized Styrene balls
• Flashlights
Inviting ExplorationThe suggestions here and in the lessons are intended only as starting points, or “invitations,” to launch students into further explorations. As you add new materials or activities to the Science Center, take a few minutes to introduce them to students. Periodically make time for students to share and discuss their Science Center explorations and discoveries.
During the Sun and Other Stars lesson cluster, students might:
• Take different size balls outside at recess to experiment with them at different distances.
• Model the sun/Earth system to gain a better understanding of when and why stars are visible as well as what makes it seem like they move in the night sky.
• Take a flashlight outside class to model why stars cannot be seen during the day.
• Look up other constellations and record information about them.
Integrating the Earth in Space Student Reader
Lesson Student Reader Special Considerations
Our Sun Is a Star Stars Students learn concepts about how stars are formed, the variety of sizes, and how their color relates to their temperature.
Familiarize yourself with the reader prior to teaching the lesson.
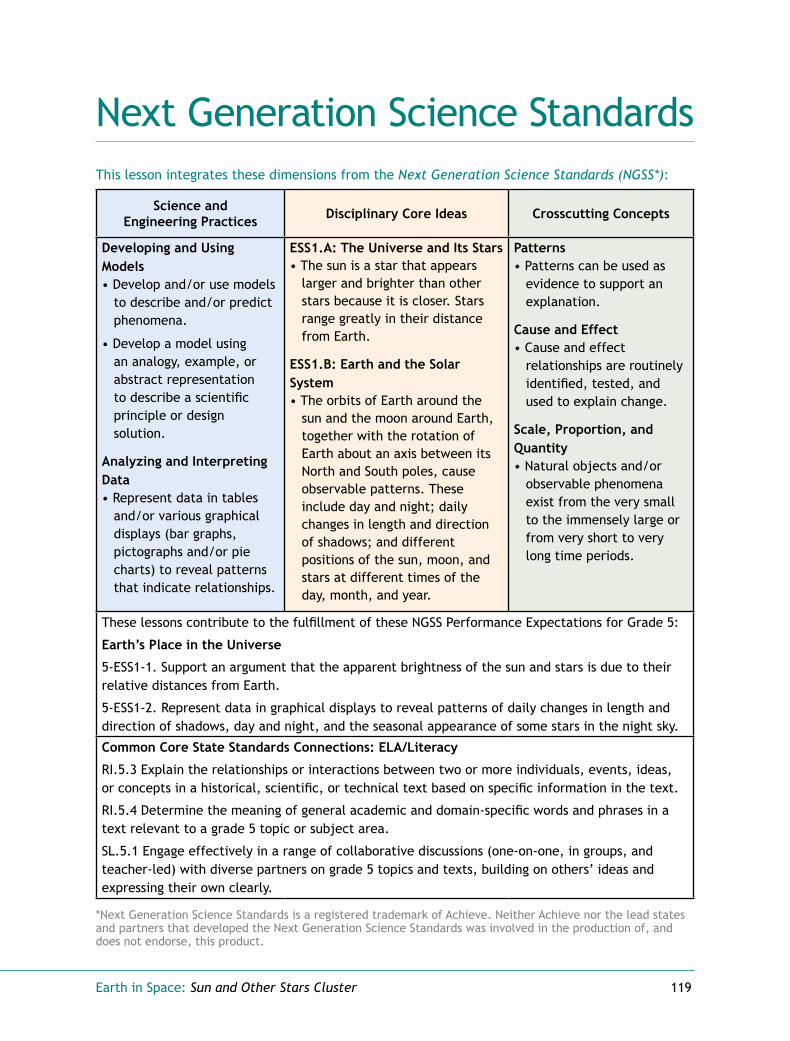
Earth in Space: Sun and Other Stars Cluster 119
Next Generation Science StandardsNext Generation Science StandardsThis lesson integrates these dimensions from the Next Generation Science Standards (NGSS*):
Science and Engineering Practices Disciplinary Core Ideas Crosscutting Concepts
Developing and Using Models• Develop and/or use models
to describe and/or predict phenomena.
• Develop a model using an analogy, example, or abstract representation to describe a scientific principle or design solution.
Analyzing and Interpreting Data • Represent data in tables
and/or various graphical displays (bar graphs, pictographs and/or pie charts) to reveal patterns that indicate relationships.
ESS1.A: The Universe and Its Stars • The sun is a star that appears
larger and brighter than other stars because it is closer. Stars range greatly in their distance from Earth.
ESS1.B: Earth and the Solar System • The orbits of Earth around the
sun and the moon around Earth, together with the rotation of Earth about an axis between its North and South poles, cause observable patterns. These include day and night; daily changes in length and direction of shadows; and different positions of the sun, moon, and stars at different times of the day, month, and year.
Patterns• Patterns can be used as
evidence to support an explanation.
Cause and Effect • Cause and effect
relationships are routinely identified, tested, and used to explain change.
Scale, Proportion, and Quantity • Natural objects and/or
observable phenomena exist from the very small to the immensely large or from very short to very long time periods.
These lessons contribute to the fulfillment of these NGSS Performance Expectations for Grade 5:
Earth’s Place in the Universe
5-ESS1-1. Support an argument that the apparent brightness of the sun and stars is due to their relative distances from Earth.
5-ESS1-2. Represent data in graphical displays to reveal patterns of daily changes in length and direction of shadows, day and night, and the seasonal appearance of some stars in the night sky.
Common Core State Standards Connections: ELA/Literacy
RI.5.3 Explain the relationships or interactions between two or more individuals, events, ideas, or concepts in a historical, scientific, or technical text based on specific information in the text.
RI.5.4 Determine the meaning of general academic and domain-specific words and phrases in a text relevant to a grade 5 topic or subject area.
SL.5.1 Engage effectively in a range of collaborative discussions (one-on-one, in groups, and teacher-led) with diverse partners on grade 5 topics and texts, building on others’ ideas and expressing their own clearly.
*Next Generation Science Standards is a registered trademark of Achieve. Neither Achieve nor the lead states and partners that developed the Next Generation Science Standards was involved in the production of, and does not endorse, this product.

120 Earth in Space: Sun and Other Stars Cluster
VocabularyVocabulary
Word Definition Lesson
constellation A well-defined pattern of stars that represent the shape of a person, animal, or mythological figure.
Star Patterns
orbit The path of one object in space around another. For example, Earth orbits the sun, and the moon orbits Earth.
Earth’s Orbit and Stars
season One of the four periods of the year: spring, summer, fall, and winter.
Star Patterns
seasonal Pertaining to the four seasons of the year.
Star Patterns
space The physical universe beyond Earth’s atmosphere.
Seeing Stars from Earth
star A natural body in space that gives off its own heat and light.
Our Sun Is a Star
time lapse photography
A technology in which objects are shown to move much faster than they do in reality.
Seeing Stars from Earth

Earth in Space: Lesson: Our Sun Is a Star 121
Lesson:
Our Sun Is a Star
Big IdeaThe sun is a star that appears larger and brighter than other stars because it is closer. Stars vary greatly in their distance from Earth.
Overview Overview Students are introduced to the idea that the apparent brightness of the sun and stars is due to their relative distance from Earth. They read about different types of stars. At home, they observe how the brightness of a flashlight decreases as they move away from it. In class, they observe how the apparent size of different size balls varies depending on the distance of the viewer. Students focus on the crosscutting concept of Scale, Proportion, and Quantity as they learn that different stars range in size, brightness, and distance from Earth.
Key Notes • Make sure students have completed the Family Link
Modeling Distance from a Star prior to teaching the lesson.
• Become familiar with the material in the Stars student reader.
• For the exploration, find a location outside where student groups have plenty of room to spread out.
• Consider teaching the Skill Builder Building to Scale prior to teaching this lesson.
• For more information about the science content in this lesson, see the “Sun and Other Stars” section of the Teacher Background Information.
Lesson Goals 1. Use a flashlight to model a star and observe the
phenomenon of how its brightness changes at different distances.
2. Observe different size balls at different distances to support the argument that the apparent size and brightness of the sun and stars is due to their relative distances from Earth.
3. Read about stars and learn about the phenomenon that the sun appears larger and brighter than other stars because it is closer.

122 Earth in Space: Lesson: Our Sun Is a Star
Assessment Options • Apply criterion A of the Our Sun and Other Stars rubric as you review the Star Size and
Brightness science notebook section.
• Use the optional Our Sun and Other Stars Performance Task after this lesson to assess students’ understanding and application of criteria A and B on the Our Sun and Other Stars rubric.

Earth in Space: Lesson: Our Sun Is a Star 123
PreparationPreparationPreparation Checklist • Prepare to hand out a three-inch diameter and a two-inch diameter ball to each group. You
might want to have a bag or box handy to carry these outside.
Materials
ExploraGear
Balls, Styrene, 1 per group For modeling stars. To use in 5 cm (2 in) diameter sensory observation.
Balls, Styrene, 1 per group For modeling stars. To use in 7.5 cm (3 in) diameter sensory observation.
Classroom Supplies
Bag or box 1 To carry balls.
Volleyball 1 To use in sensory observation.

124 Earth in Space: Lesson: Our Sun Is a Star
Curriculum ItemsItem Resource LocationScience Notebook: Star Size and Brightness online print teacher guide
Student Lessons Teach Lesson Teach Lesson
Student Reader: StarsStudent Lessons
Teacher Portal Files/ Teaching the Lesson Resources
Family Link: Modeling Distance from a Star From the Modeling Earth’s Rotation lesson
Rubric: Our Sun and Other Stars (optional) Assessments
Performance Task: Our Sun and Other Stars (optional) online print teacher guide
Assessments
Skill Builder: Building to Scale Science Skill Builders
Earth in Space: Lesson: Our Sun Is a Star 125
Teaching the Lesson Teaching the Lesson Engage
Introductory Discussion1. Ask questions to find out how much the students already know about stars:
• What is our sun? (Students may or may not know that our sun is a star. It is the closest star to us.)
• Are there other stars besides the sun? Where are the other stars?
• Why does the sun appear so much larger in the sky than other stars?
TEACHER NOTE: Accept all answers at this time. By the end of the lesson, students should be able to explain that it’s because the sun is much closer than
the other stars.
2. Ask a student to explain what they did in the Family Link Modeling Distance from a Star. Ask:
• What did the flashlight represent? (A model of a star.)
• When they were near the flashlight how bright was the ‘star’? (As bright as possible.)
• What happened when they moved farther from the ‘star’? (It got dimmer.)
• How does this relate to when a star is less bright than another one? (Stars are often less bright when we are farther away from them. Stars are less bright than the sun because we are much closer to the sun.)
Sensory Observation1. Have a volunteer hold up a volleyball, while you hold up a large (7.5 cm diameter) and a
small (5 cm diameter) ball. Ask students to describe what they see.
2. Explain that all three balls are all meant to represent a volleyball.
a. Ask: Which one is most like a volleyball? (The actual volleyball.)
b. Ask: Which one is least like a volleyball? (The small ball.) Why? (It is the smallest ball.) In what way is it like the volleyball? (It is a sphere.) In what ways is it different? (It is much smaller; it has a smaller diameter.)
3. Compare the large ball to the volleyball. (It is smaller and made out of a different material.) In what way is it like a scale model of the volleyball? (It is a sphere.) In what ways is it different? (It is much smaller; it has a smaller diameter.)

126 Earth in Space: Lesson: Our Sun Is a Star
Explore
NGSS ConnectionWhen students use different sized balls to model how the apparent size of stars decreases when they are farther away, they focus on the practice of Developing and Using Models:
Develop and/or use models to describe and/or predict phenomena.
Students read about various phenomena about stars. Stars appear small and dim because they are very far away. Similar stars vary in brightness because they vary in distance from Earth. This reading selection integrates the crosscutting concept of Scale, Proportion, and Quantity:
Natural objects and/or observable phenomena exist from the very small to the immensely large or from very short to very long time periods.
Modeling Star Size In this exploration, students view different size balls at different distances. They discover that a large ball that is far away can look smaller than a small ball that is closer.
1. Show students one large ball and one small ball. Ask: In a model of stars in space, what might these balls represent? (Stars)
2. Take students outside. Divide the class into small groups.
3. Pass out one large ball and one small ball to each group.
4. Have students read the instructions on the Star Size and Brightness: Large Ball, Small Ball online or print science notebooks section.
Star Phenomena Have the students read the Stars student reader and then answer the questions on the Star Size and Brightness: Phenomena sections of their online or print science notebooks.
Reflect and Discuss: Making Sense
Big IdeaThe sun is a star that appears larger and brighter than other stars because it is closer. Stars range greatly in their distance from Earth.
Sharing and Synthesizing1. Review the exploration and the Family Link with students to highlight the use of models.
• What did the styrene balls represent? (Different size stars.)
• How does the scale of the ball stars compare to the actual size of the stars? (The balls are much, much smaller than the stars.)
• What occurred when a large ball was much farther away than a small ball? (The small ball looked larger.)
• Think about your experience with the large and small balls. If a large star was much further away than a small star, which star would look larger? (The small star)

Earth in Space: Lesson: Our Sun Is a Star 127
• Also think about your experience with walking farther away from the flashlight. If a large star was much further away than a small star, could the small star appear brighter? Why? (The small star could appear brighter because it is closer to us.)
2. Follow-up on the reading by asking students to explain their answers on the Star Size and Brightness: Phenomena science notebook section:
a. What is a star?
b. Why does the sun appear larger and brighter than any other star in the sky?
c. Except for the sun, why do stars appear small and dim?
d. Why do similar size stars vary in apparent brightness?
128 Earth in Space: Lesson: Our Sun Is a Star
After the Lesson After the Lesson
Ongoing Learning Science Center
Materials: Different sized styrene balls
Place different sized balls in the Science Center. Let students take them outside at recess to experiment with them at different distances. Have them record their discoveries.
ExtensionsFurther Science Explorations
Star ResearchResearch and write reports about stars. In the report, include the star’s name, size, distance from Earth, brightness (luminosity) and apparent brightness (how bright they look from Earth), as well as anything else that captures students’ interest. Have them include how long it takes light to get from other stars to Earth. This will give them an idea of how far away the stars are in terms of light-years.
Comparing the Sun and the MoonLooking at the sun and moon from Earth, they seem to be about the same size. How far away is each object, and how long would it take a spaceship to travel to each? What are their relative sizes? Does the moon emit light?
Language Arts Extension
Book with Star Research If you do the Further Science Exploration, combine students’ individual research about stars into a book with student-created illustrations. Share the books with students in other classes.
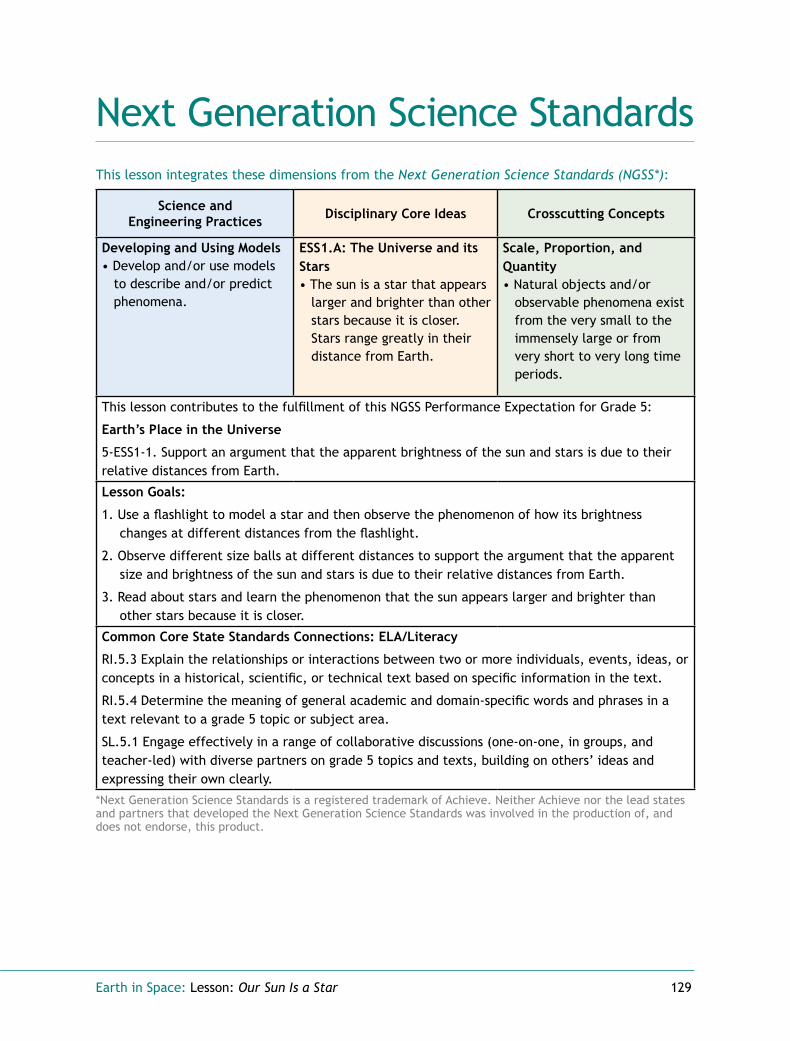
Earth in Space: Lesson: Our Sun Is a Star 129
Next Generation Science StandardsNext Generation Science StandardsThis lesson integrates these dimensions from the Next Generation Science Standards (NGSS*):
Science and Engineering Practices Disciplinary Core Ideas Crosscutting Concepts
Developing and Using Models • Develop and/or use models
to describe and/or predict phenomena.
ESS1.A: The Universe and its Stars• The sun is a star that appears
larger and brighter than other stars because it is closer. Stars range greatly in their distance from Earth.
Scale, Proportion, and Quantity • Natural objects and/or
observable phenomena exist from the very small to the immensely large or from very short to very long time periods.
This lesson contributes to the fulfillment of this NGSS Performance Expectation for Grade 5:
Earth’s Place in the Universe
5-ESS1-1. Support an argument that the apparent brightness of the sun and stars is due to their relative distances from Earth.
Lesson Goals:
1. Use a flashlight to model a star and then observe the phenomenon of how its brightness changes at different distances from the flashlight.
2. Observe different size balls at different distances to support the argument that the apparent size and brightness of the sun and stars is due to their relative distances from Earth.
3. Read about stars and learn the phenomenon that the sun appears larger and brighter than other stars because it is closer.
Common Core State Standards Connections: ELA/Literacy
RI.5.3 Explain the relationships or interactions between two or more individuals, events, ideas, or concepts in a historical, scientific, or technical text based on specific information in the text.
RI.5.4 Determine the meaning of general academic and domain-specific words and phrases in a text relevant to a grade 5 topic or subject area.
SL.5.1 Engage effectively in a range of collaborative discussions (one-on-one, in groups, and teacher-led) with diverse partners on grade 5 topics and texts, building on others’ ideas and expressing their own clearly.
*Next Generation Science Standards is a registered trademark of Achieve. Neither Achieve nor the lead states and partners that developed the Next Generation Science Standards was involved in the production of, and does not endorse, this product.

130 Earth in Space: Lesson: Our Sun Is a Star
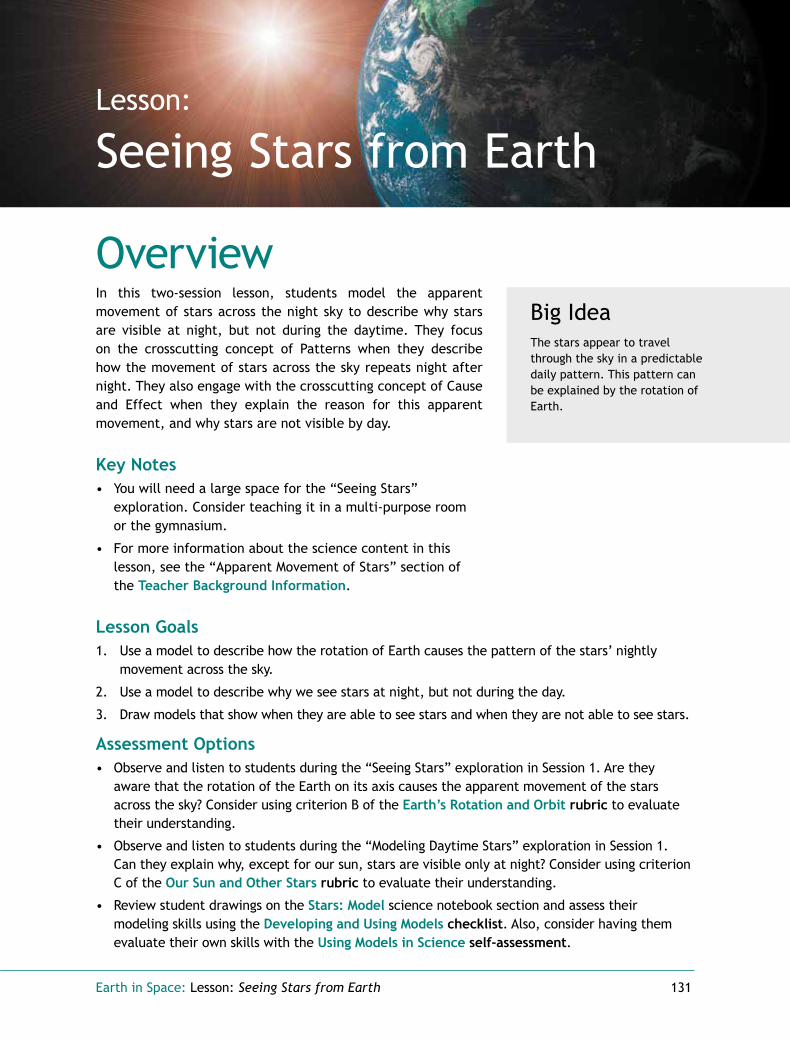
Earth in Space: Lesson: Seeing Stars from Earth 131
Lesson:
Seeing Stars from Earth
Big IdeaThe stars appear to travel through the sky in a predictable daily pattern. This pattern can be explained by the rotation of Earth.
Overview Overview In this two-session lesson, students model the apparent movement of stars across the night sky to describe why stars are visible at night, but not during the daytime. They focus on the crosscutting concept of Patterns when they describe how the movement of stars across the sky repeats night after night. They also engage with the crosscutting concept of Cause and Effect when they explain the reason for this apparent movement, and why stars are not visible by day.
Key Notes • You will need a large space for the “Seeing Stars”
exploration. Consider teaching it in a multi-purpose room or the gymnasium.
• For more information about the science content in this lesson, see the “Apparent Movement of Stars” section of the Teacher Background Information.
Lesson Goals 1. Use a model to describe how the rotation of Earth causes the pattern of the stars’ nightly
movement across the sky.
2. Use a model to describe why we see stars at night, but not during the day.
3. Draw models that show when they are able to see stars and when they are not able to see stars.
Assessment Options • Observe and listen to students during the “Seeing Stars” exploration in Session 1. Are they
aware that the rotation of the Earth on its axis causes the apparent movement of the stars across the sky? Consider using criterion B of the Earth’s Rotation and Orbit rubric to evaluate their understanding.
• Observe and listen to students during the “Modeling Daytime Stars” exploration in Session 1. Can they explain why, except for our sun, stars are visible only at night? Consider using criterion C of the Our Sun and Other Stars rubric to evaluate their understanding.
• Review student drawings on the Stars: Model science notebook section and assess their modeling skills using the Developing and Using Models checklist. Also, consider having them evaluate their own skills with the Using Models in Science self-assessment.

132 Earth in Space: Lesson: Seeing Stars from Earth
PreparationPreparationPreparation Checklist
□ Test the flashlights to make sure they all work.
Materials
ExploraGear
Flashlights 1 per pair To represent stars.
Classroom Supplies
Ball, basketball 1 To represent the sun. or volleyball
Curriculum ItemsItem Resource Location
Student Video: Stars 1
Student Video: Stars 2
Student Lessons
Teacher Portal Files/ Teaching the Lesson Resources
Science Notebook: Stars online print teacher guide
Student Lessons Teach Lesson Teach Lesson
Rubric: Earth’s Rotation and Orbit (optional)
Rubric: Our Sun and Other Stars (optional)
Checklist: Developing and Using Models (optional)
Self-Assessment: Using Models in Science (optional) online print
Assessments
Earth in Space: Lesson: Seeing Stars from Earth 133
Teaching the Lesson - Session 1Teaching the Lesson - Session 1Engage
Introductory Discussion
1. Ask questions to see what the students know about the sun and other stars:
• When do we see the sun? (During the day.)
• When do we see other stars? (During the night.)
• What happens to the stars when the sun rises? (They fade and disappear.)
• What happens to the stars when the sun sets? (The stars slowly return.)
• What do you think causes the phenomena of the stars “disappearing” at sunrise and “returning” at sunset? Where do they go? What makes you think that?
TEACHER NOTE: Accept all answers at this stage of the lesson.
2. Tell the class that today they will explore the stars in the sky.
Explore
NGSS Connection
Students model the apparent movement of stars as they act as Earth rotating on its axis. They also participate in a model to discover what happens to stars during the daytime. In doing so, they focus on the practice of Developing and Using Models:
Develop and/or use models to describe and/or predict phenomena.
As they answer what causes the apparent movement of stars across the sky in the nighttime and what causes stars to be visible at night but not during the day, students develop the crosscutting concept of Cause and Effect:
Cause and effect relationships are routinely identified, tested, and used to explain change.
Seeing Stars
MANAGEMENT NOTE: Since you will need a large space for this activity, consider teaching it in a multi-purpose room or the gymnasium.
1. Hold up a ball and point out the flashlights. Invite students to suggest a way they could use these materials to make a model that shows how the light of stars is visible on Earth.
2. Let them demonstrate their ideas by holding and using the materials.
3. Explain that they will model the Earth’s rotation similar to how they did in the Modeling Earth’s Rotation lesson.

134 Earth in Space: Lesson: Seeing Stars from Earth
4. Pass out flashlights to half the students, and have them create a large circle around you in the classroom while you hold the ball. Have them turn on the flashlights, and then dim the room lights. Explain that the flashlights represent stars, the ball represents the sun, and the room is space.
5. Ask a volunteer to define what we mean by space. Offer this definition: The physical universe beyond Earth’s atmosphere.
6. Position the remaining students around the ball (sun), and within the circle of flashlights (stars). Instruct them to:
• Stand so they can see the ball.
• Turn around, facing away from the ball, toward the outer ring of flashlights.
• Look forward and slowly rotate their bodies to the left, continuing to turn a full 360°.
• Continue slowly rotating several times.
7. As students model the rotating Earth, ask:
a. When they face away from the ball (sun), what time does the model represent, day or night? (Night)
b. Do the flashlights move? (No)
c. Does the light of the flashlights appear to move? (Yes, the light of the flashlights appears to move.)
8. Have the students with the flashlights hand them to the other students and swap places. Repeat steps 5 and 6.
9. Remind students to turn off their flashlights before collecting them.
Modeling Daytime Stars 1. While the room is still dark, demonstrate why we don’t see stars other than our sun during
the daytime.
a. Turn on a flashlight to model the light coming from a star.
b. Brighten the room (e.g., turn on overhead lights, open curtains) to model the presence of sunlight.
2. Ask students to share their thoughts about stars in the daytime.
• How is the light in the room like the sunlight? (The sun gives us a much brighter light than the other stars.)
• How is the flashlight like a star that is far away? (It is much dimmer than the daylight or classroom lights.)
Earth in Space: Lesson: Seeing Stars from Earth 135
• Why is it more difficult to see the flashlight in the room’s light than it is in the dark? (Because the room’s light is much brighter than the flashlight.)
• Where do the stars go during the daytime? (They don’t “go” anywhere; they stay in the same place.)
• What is moving? (The Earth is rotating on its axis.)
• Why can’t we see the other stars during daytime? (Because the sun is our nearest star, its light is closer, and so it illuminates much more than other stars.)
3. Have the students answer the questions on the Stars: Cause and Effect online or print science notebook section.
4. Show the students the Stars 1 and Stars 2 videos to reinforce what they did with the models today. Ask a volunteer to describe what is happening in the videos. (Stars seem to be moving together across the nighttime sky.)
5. Explain that these videos use a technology called time-lapse photography. Stars actually move much, much slower across the sky than what is shown in these videos.

136 Earth in Space: Lesson: Seeing Stars from Earth
Teaching the Lesson - Session 2Teaching the Lesson - Session 2Engage
Introductory DiscussionExplain that the students will draw star models using the knowledge they gained from using the 3-D model in the previous session.
Explore
NGSS ConnectionBy drawing models that show when they are able to see stars and when they are not able to see stars, students engage with the practice of Developing and Using Models:
Develop and/or use models to describe and/or predict phenomena.
Develop a model using an analogy, example, or abstract representation to describe a scientific principle or design solution.
Drawing Star Models Have the students draw models that show when they are able to see stars and when they are not able to see stars on the Stars: Model section of their online or print science notebooks. They should include the following in their models:
• the Earth
• the sun
• stars
• a location on Earth’s surface where people on Earth cannot see stars
• a location on Earth’s surface where people on Earth can see stars
Reflect and Discuss: Making Sense
Big IdeaThe stars appear to travel through the sky in a predictable daily pattern. This pattern can be explained by the rotation of Earth.
Sharing and Synthesizing1. Call on volunteers to show the models they drew on the Stars: Model science notebook
section. Encourage them to explain:
• Where are daytime and nighttime on the Earth part of their model?
• What is moving in their models?
• What is relatively stationary?
• What causes the phenomenon of the pattern of movement of stars across the night sky?
Earth in Space: Lesson: Seeing Stars from Earth 137
2. Ask the following questions to help students identify some patterns of star visibility:
• What is a regular pattern related to when stars are visible? (They are visible during the nighttime. They are not visible during the day.)
• What are some other patterns that exist? (From one night to the next, the same stars are visible. The stars appear to move from east to west just as the sun does.)
TEACHER NOTE: For the purposes of this lesson it is accurate enough to say that from one night to the next, the same stars are visible. During the next lesson,
students learn that some stars may or may not be visible over the course of the year.
3. To help students understand the cause and effect relationships related to the visibility of the stars, ask the following questions. (If need be, they can refer to their Stars science notebook section.)
• What causes stars to be visible at night? (Since it is dark out when looking out toward space from the side of Earth that’s turned away from the sun, the stars are bright enough to be seen.)
• Are there always stars in the sky during the day? (Yes) Why can’t we see them? (The sun outshines those stars, so they are not bright enough to be seen.)

138 Earth in Space: Lesson: Seeing Stars from Earth
After the Lesson After the Lesson
Ongoing Learning Science Center
Materials: Flashlights
• Place flashlights in the Science Center. Invite students to model the sun/Earth system so they gain a better understanding of when and why stars are visible as well as what makes it seem like they move in the night sky.
• For students who do not fully understand the concept of daytime stars, provide flashlights for them to take outside in the bright sun during recess, and ask them how well they see the flashlight beam from across the playground.
ExtensionsFurther Science Explorations
Astronomer VisitContact an amateur or professional astronomer or astrophysicist and ask him or her to come and talk about using telescopes, satellites, and other scientific tools to view the stars.
Mathematics ExtensionCalculate how many times Earth has rotated since they were born (365 days x number of years). You may want to mention that the number of days since their last birthday would be added to the total, and that they would have to add two or three days for leap years.
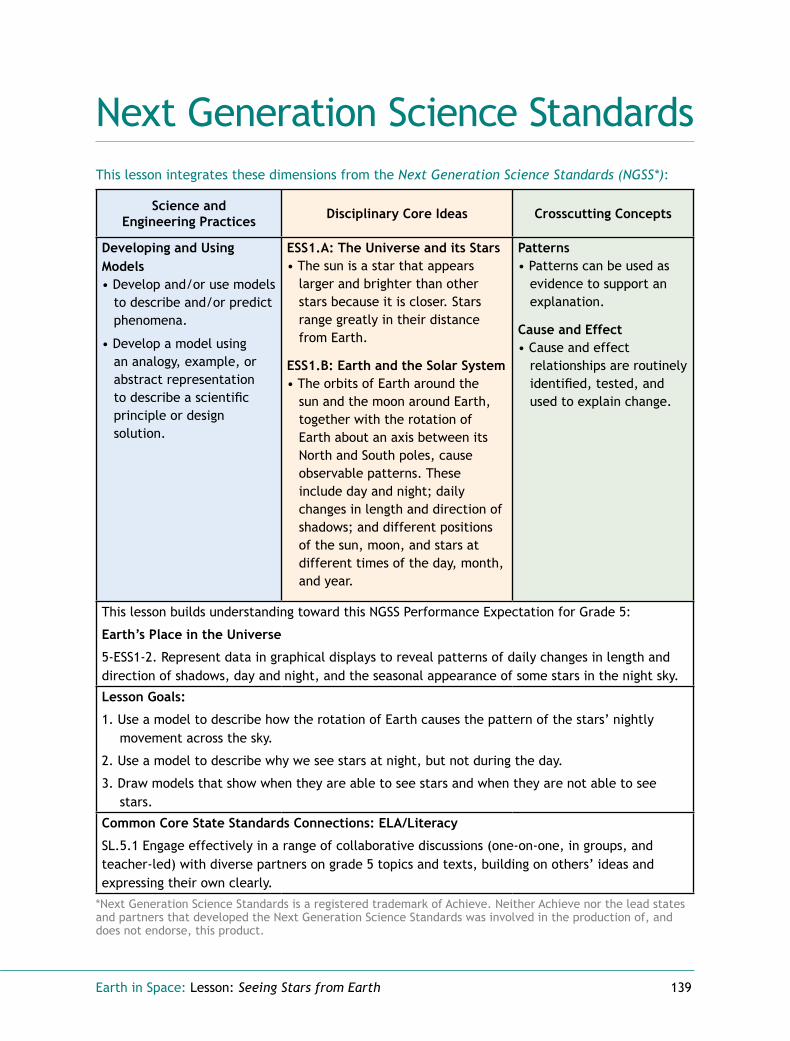
Earth in Space: Lesson: Seeing Stars from Earth 139
Next Generation Science StandardsNext Generation Science StandardsThis lesson integrates these dimensions from the Next Generation Science Standards (NGSS*):
Science and Engineering Practices Disciplinary Core Ideas Crosscutting Concepts
Developing and Using Models • Develop and/or use models
to describe and/or predict phenomena.
• Develop a model using an analogy, example, or abstract representation to describe a scientific principle or design solution.
ESS1.A: The Universe and its Stars• The sun is a star that appears
larger and brighter than other stars because it is closer. Stars range greatly in their distance from Earth.
ESS1.B: Earth and the Solar System• The orbits of Earth around the
sun and the moon around Earth, together with the rotation of Earth about an axis between its North and South poles, cause observable patterns. These include day and night; daily changes in length and direction of shadows; and different positions of the sun, moon, and stars at different times of the day, month, and year.
Patterns • Patterns can be used as
evidence to support an explanation.
Cause and Effect • Cause and effect
relationships are routinely identified, tested, and used to explain change.
This lesson builds understanding toward this NGSS Performance Expectation for Grade 5:
Earth’s Place in the Universe
5-ESS1-2. Represent data in graphical displays to reveal patterns of daily changes in length and direction of shadows, day and night, and the seasonal appearance of some stars in the night sky.
Lesson Goals:
1. Use a model to describe how the rotation of Earth causes the pattern of the stars’ nightly movement across the sky.
2. Use a model to describe why we see stars at night, but not during the day.
3. Draw models that show when they are able to see stars and when they are not able to see stars.
Common Core State Standards Connections: ELA/Literacy
SL.5.1 Engage effectively in a range of collaborative discussions (one-on-one, in groups, and teacher-led) with diverse partners on grade 5 topics and texts, building on others’ ideas and expressing their own clearly.
*Next Generation Science Standards is a registered trademark of Achieve. Neither Achieve nor the lead states and partners that developed the Next Generation Science Standards was involved in the production of, and does not endorse, this product.

140 Earth in Space: Lesson: Seeing Stars from Earth

Earth in Space: Lesson: Earth’s Orbit and Stars 141
Big IdeaStars appear in the sky in a predictable annual pattern.
Lesson:
Earth’s Orbit and Stars
Overview Overview To model the annual orbit of Earth around the sun, students carry a globe around a light representing the sun to observe the relative positions of the globe and the “sun” throughout a year. In addition, students become aware that different stars are visible at different times of the year.
Key Notes • You will need a large space for the explorations. Consider
teaching the activities in a multi-purpose room or the gymnasium.
• There are several applications available for smart phones that can be used to observe the night sky. You may want to try them out and if your students have mobile devices, have students use them during the exploration. See resources.activatelearningprime.com for recommended apps.
• For more information about the science content in this lesson, see the “Earth’s Orbit Around the Sun” section of the Teacher Background Information.
Lesson Goals 1. Model how Earth travels around the sun on its annual
orbit.
2. Use the model of Earth’s annual orbit to describe the pattern of stars visible from Earth.
Assessment Options • Use criterion C of the Earth’s Rotation and Orbit
rubric while listening to students’ responses during the “Demonstration of Star Patterns” exploration, and evaluate their responses in the Annual Star Patterns section of their science notebook.
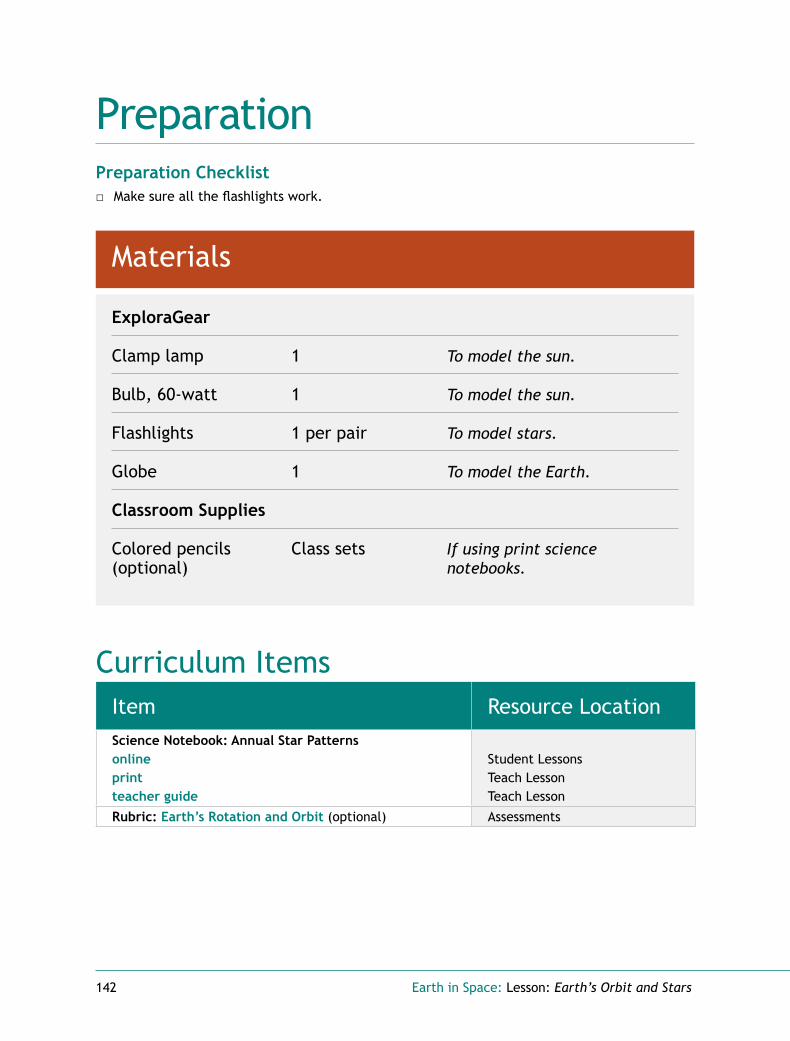
142 Earth in Space: Lesson: Earth’s Orbit and Stars
PreparationPreparationPreparation Checklist
□ Make sure all the flashlights work.
Materials
Curriculum ItemsItem Resource LocationScience Notebook: Annual Star Patterns online print teacher guide
Student Lessons Teach Lesson Teach Lesson
Rubric: Earth’s Rotation and Orbit (optional) Assessments
ExploraGear
Clamp lamp 1 To model the sun.
Bulb, 60-watt 1 To model the sun.
Flashlights 1 per pair To model stars.
Globe 1 To model the Earth.
Classroom Supplies
Colored pencils Class sets If using print science (optional) notebooks.

Earth in Space: Lesson: Earth’s Orbit and Stars 143
Teaching the LessonTeaching the LessonEngage
Sensory Observation 1. Show the students the clamp lamp and the globe. Ask: How might they use those items to
model the relationship between Earth and sun? What does each object represent? How could they be set up to demonstrate how Earth and sun move?
2. Invite students to share their ideas with their classmates.
3. If no one mentions it, place the clamp lamp in the middle of an open space. Explain that the lamp is a model of the sun.
Introductory Discussion
TEACHER NOTE: When using a globe to model how the Earth orbits the sun, make sure to hold it with the axis always pointing in the same direction relative to one
end of the room, and tilted at about 23.5° (mounted globes are set at the correct tilt). Although the class does not explore the effect of Earth’s tilt on seasons in this topic, it’s important to model the orbit as accurately as possible to avoid creating misconceptions.
1. Hold the globe so that the light from the lamp illuminates it, and slowly rotate the globe counterclockwise. Ask:
• What is Earth doing? (It is rotating on its axis.)
• How long does it take Earth to rotate one full turn on its axis? (One day or 24 hours.)
2. Hold the globe and walk counterclockwise in a circle around the clamp lamp. As you orbit, say the following:
TEACHER NOTE: Walk in a circle even though Earth’s orbit around the sun is a somewhat elliptical shape. Earth’s orbit is so slightly elliptical that if it were
drawn to scale, it would be very hard to see that it is not a perfect circle.
• This is an orbit and I am holding Earth. What is Earth orbiting? (The sun.)
• How long does it take me to complete one orbit around the sun? (Responses may vary, but the consensus should be one year.)
• What shape do I follow in my orbit around the sun? (Earth orbits in a shape that is almost circular.)
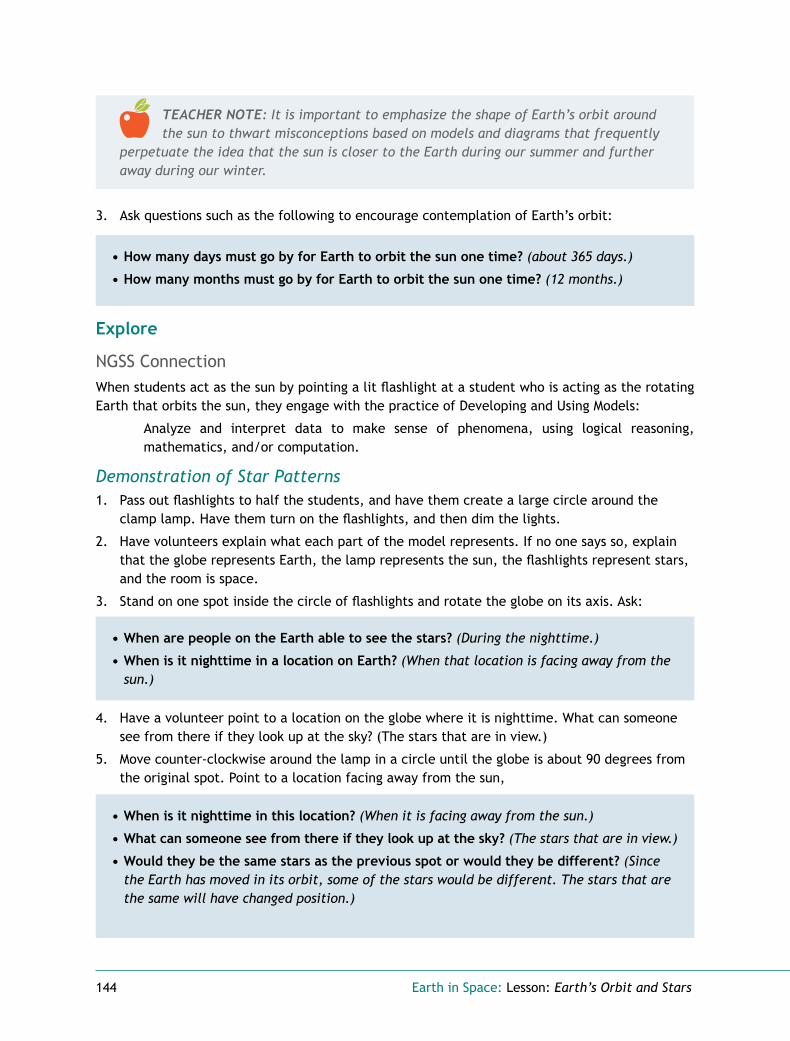
144 Earth in Space: Lesson: Earth’s Orbit and Stars
TEACHER NOTE: It is important to emphasize the shape of Earth’s orbit around the sun to thwart misconceptions based on models and diagrams that frequently
perpetuate the idea that the sun is closer to the Earth during our summer and further away during our winter.
3. Ask questions such as the following to encourage contemplation of Earth’s orbit:
• How many days must go by for Earth to orbit the sun one time? (about 365 days.)
• How many months must go by for Earth to orbit the sun one time? (12 months.)
Explore
NGSS ConnectionWhen students act as the sun by pointing a lit flashlight at a student who is acting as the rotating Earth that orbits the sun, they engage with the practice of Developing and Using Models:
Analyze and interpret data to make sense of phenomena, using logical reasoning, mathematics, and/or computation.
Demonstration of Star Patterns 1. Pass out flashlights to half the students, and have them create a large circle around the
clamp lamp. Have them turn on the flashlights, and then dim the lights.
2. Have volunteers explain what each part of the model represents. If no one says so, explain that the globe represents Earth, the lamp represents the sun, the flashlights represent stars, and the room is space.
3. Stand on one spot inside the circle of flashlights and rotate the globe on its axis. Ask:
• When are people on the Earth able to see the stars? (During the nighttime.)
• When is it nighttime in a location on Earth? (When that location is facing away from the sun.)
4. Have a volunteer point to a location on the globe where it is nighttime. What can someone see from there if they look up at the sky? (The stars that are in view.)
5. Move counter-clockwise around the lamp in a circle until the globe is about 90 degrees from the original spot. Point to a location facing away from the sun,
• When is it nighttime in this location? (When it is facing away from the sun.)
• What can someone see from there if they look up at the sky? (The stars that are in view.)
• Would they be the same stars as the previous spot or would they be different? (Since the Earth has moved in its orbit, some of the stars would be different. The stars that are the same will have changed position.)

Earth in Space: Lesson: Earth’s Orbit and Stars 145
TEACHER NOTE: If students struggle picturing this phenomena with the model, consider having a student stand next to you as you orbit. As you move to each
position, have that student point out the flashlights (stars) they can see when standing with their back to the clamp lamp (sun).
6. Continue orbiting the lamp until the globe is another 90 degrees from the previous spot. Point to a location facing away from the sun.
• When is it nighttime in this location? (When it is facing away from the sun.)
• What can someone see from there if they look up at the sky? (The stars that are in view.)
• Would they be the same stars as the previous spot or would they be different? (Since the Earth has moved in its orbit, they would be different stars.)
7. Continue orbiting the lamp until the globe is back at its original location. What can someone see from there if they look up at the sky? (The same stars that they saw at this spot before.)
8. Ask: What pattern of stars will they see as the Earth orbits around the sun. (Each time the Earth reaches the same spot in its orbit, the same stars will be visible.)
TEACHER NOTE: If students are confused, you might explain that on a particular day each year the same stars will be visible. For example on January 1st of one
year the same stars will be visible as on January 1st of the previous year. This pattern holds true on January 1st of every year.
Observing Annual Star Patterns 1. Divide the class into small groups and hand out a flashlight to each group. Explain that in this
model, the flashlight represents the sun, not stars.
2. Let one student act as the sun by pointing the lit flashlight at a student who is acting as the Earth orbiting the sun. The student’s head represents the Earth.
3. As they orbit the sun (counter-clockwise in a circle), they should also slowly rotate their bodies (also counter-clockwise). As they orbit and rotate, they should imagine the stars they might see during the nighttime. (For example, the objects on the walls on one side of the room should represent stars they would see as they look out to space from that portion of their orbit.)
4. Students should complete at least three orbits and swap roles until everyone has had a chance to model the sun, Earth, and stars.

146 Earth in Space: Lesson: Earth’s Orbit and Stars
• As they orbited the sun, did they see the same stars or different stars? (The same stars.)
• Did the position of the stars change? (Yes, as the Earth orbited, the stars appeared to move. The stars at one point in the orbit were completely different than those on the opposite side.)
TEACHER NOTE: The students’ rotational speed (Earth’s rotation) will be much slower than real when compared to their orbital speed (Earth orbiting the sun).
For the purposes of this model, the time factor is unimportant. You might want to point this out to discuss one of the limitations of this model.
6. Have students describe the phenomena they modeled and observed on the Annual Star Patterns section of their online or print science notebooks.
Reflect and Discuss: Making Sense
Big IdeaStars appear in the sky in a predictable annual pattern.
NGSS ConnectionWhen students explain what pattern in stars that are visible occurs as they orbit the sun, they focus on the crosscutting concept of patterns:
Patterns can be used as evidence to support an explanation.
Sharing1. Have students answer the following questions about Earth and its orbit of the sun:
5. After all students have had the chance to orbit the sun several times, ask the following:
• What is an orbit?
• What direction does Earth orbit the sun? (Counter-clockwise)
• What direction does Earth spin on its axis? (Counter-clockwise)
• How long does it take for Earth to orbit the sun? (One year. 365 days. 12 months.)
• What shape is Earth’s orbit? (Nearly circular)
2. Describe what you saw in the following situations:
• When you modeled the Earth, faced the sun, and rotated on your axis. (When facing toward the sun, I saw the sun but no stars.)
• When you modeled the Earth, faced away from the sun, and rotated on your axis. (When facing away from the sun, I saw stars.)

Earth in Space: Lesson: Earth’s Orbit and Stars 147
3. What pattern did the rotation on your axis represent? (The daily pattern of Earth rotating on its axis, or one day.)
4. Describe what you saw when you modeled the Earth and orbited the sun. (When they orbited the sun they saw different stars at different places in the orbit.)
5. What pattern did the orbit represent? (The annual pattern of Earth orbiting the sun, or a year.)
Synthesizing1. Have students describe how the visible stars change during the course of a year. (Different
stars are visible at different times of the year.)
2. Have students describe the annual pattern of visible stars. (As the Earth orbits the sun, the same stars become visible at the same point in that orbit.)
3. When the Earth completes one orbit around the sun, where is it compared to where it started? (It is in the same place as where it started.)
4. What evidence supports an explanation that the same stars are visible? (The model we used provides evidence that when the Earth is in the same place at each point in its orbit, the same stars will be visible.)

148 Earth in Space: Lesson: Earth’s Orbit and Stars
After the Lesson After the Lesson
Ongoing Learning
Extensions Further Science Exploration
Gravity, the Sun, and EarthExplore why Earth orbits the sun.
1. Tie a loop at one end of a long piece of string.
2. Tape the other end of the string to a tennis ball or a rubber ball. Make sure the tape is secure.
3. Explain that this exploration is a way to see how gravity keeps the Earth ‘tied’ to the sun. Display the ball (Earth) with the string (representing gravity) attached.
4. Ask a volunteer to place his or her finger in the loop of string. Position the finger on the floor, keeping the ball near the finger.
5. Ask a second volunteer to gently roll the ball away from the first person’s finger until the string is taut. Then have the volunteer roll the ball perpendicular to the string.
6. Find out if any of the students can answer questions about how gravity works between the sun and Earth. How does the ball travel when it is rolled at the end of the string? (It travels in a circular path.)
7. Have the first volunteer remove the string from the ball and roll the ball gently.
8. Ask: Did the ball do what it did before? (No. It continues to roll away.) Then ask why the ball started to roll in a circle earlier. (The string kept the ball from escaping.)
9. Discuss how this demonstration relates to the sun and Earth. What part of the model represents gravity? (The “string” holding the Earth to the sun.) Explain that like the string, gravity pulls Earth towards the center of the sun. (Earth’s gravity also pulls us to its center.) Without the sun’s gravity, Earth would drift out of its orbit into space.
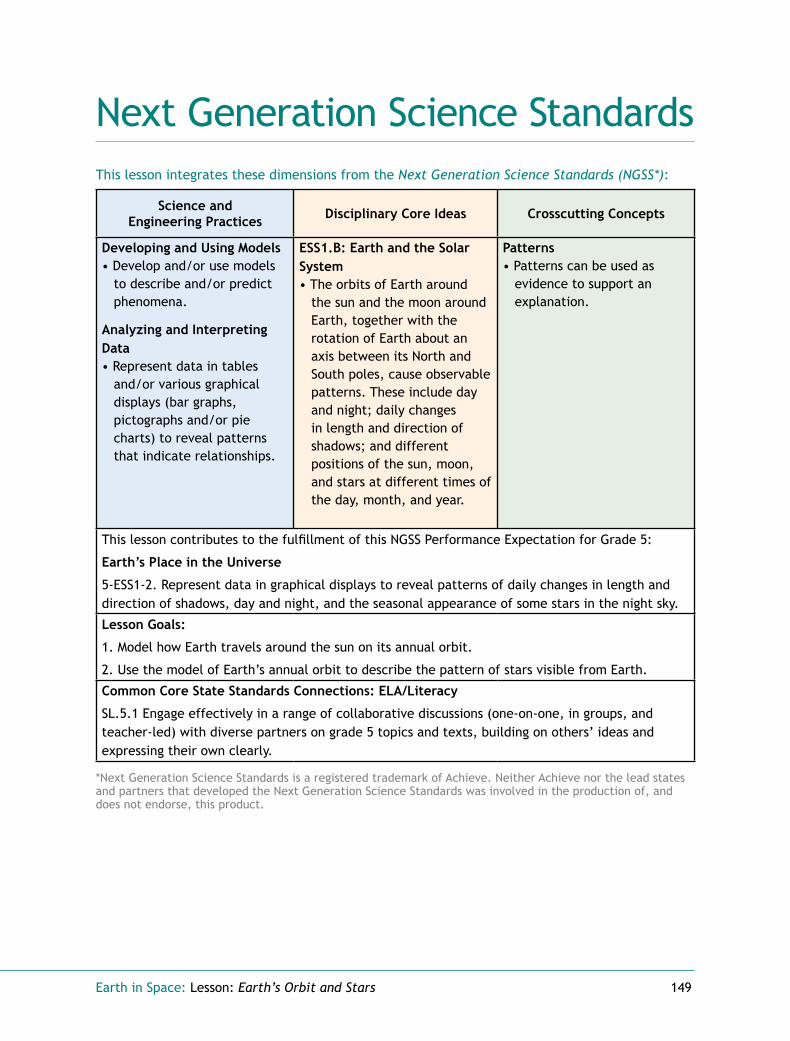
Earth in Space: Lesson: Earth’s Orbit and Stars 149
Next Generation Science StandardsNext Generation Science StandardsThis lesson integrates these dimensions from the Next Generation Science Standards (NGSS*):
Science and Engineering Practices Disciplinary Core Ideas Crosscutting Concepts
Developing and Using Models • Develop and/or use models
to describe and/or predict phenomena.
Analyzing and Interpreting Data • Represent data in tables
and/or various graphical displays (bar graphs, pictographs and/or pie charts) to reveal patterns that indicate relationships.
ESS1.B: Earth and the Solar System• The orbits of Earth around
the sun and the moon around Earth, together with the rotation of Earth about an axis between its North and South poles, cause observable patterns. These include day and night; daily changes in length and direction of shadows; and different positions of the sun, moon, and stars at different times of the day, month, and year.
Patterns • Patterns can be used as
evidence to support an explanation.
This lesson contributes to the fulfillment of this NGSS Performance Expectation for Grade 5:
Earth’s Place in the Universe
5-ESS1-2. Represent data in graphical displays to reveal patterns of daily changes in length and direction of shadows, day and night, and the seasonal appearance of some stars in the night sky.
Lesson Goals:
1. Model how Earth travels around the sun on its annual orbit.
2. Use the model of Earth’s annual orbit to describe the pattern of stars visible from Earth.
Common Core State Standards Connections: ELA/Literacy
SL.5.1 Engage effectively in a range of collaborative discussions (one-on-one, in groups, and teacher-led) with diverse partners on grade 5 topics and texts, building on others’ ideas and expressing their own clearly.
*Next Generation Science Standards is a registered trademark of Achieve. Neither Achieve nor the lead states and partners that developed the Next Generation Science Standards was involved in the production of, and does not endorse, this product.

150 Earth in Space: Lesson: Earth’s Orbit and Stars

Earth in Space: Lesson: Star Patterns 151
Lesson:
Star Patterns
Big IdeaConstellations are well-defined patterns of stars that represent the shape of a person, animal, or mythological figure.
Overview Overview Students research one of eight constellations. They analyze illustrations of constellations that show when a variety of constellations are visible by season. Then they create graphs to show the seasons during which they are visible. Students focus on the crosscutting concept of Patterns as they explain that the same constellations are visible during the same seasons each year.
Key Notes • For more information about the science content in this
lesson, see the “Constellations” section of the Teacher Background Information.
Lesson Goals 1. Research a chosen constellation.
2. Chart the quarterly appearance of eight constellations in the Northern Hemisphere.
Assessment Options • Evaluate student responses in the Constellation Patterns: Analysis section of their science
notebook. You can use criterion D of the Our Sun and Other Stars rubric to note your findings.
• Use the optional Constellation Graph Performance Task after this lesson to assess students’ understanding and application of criterion C on the Earth’s Rotation and Orbit rubric.
• This is the last lesson in the Sun and Other Stars cluster. Consider using the Sun and Other Stars Quick Check after this lesson to assess students’ understanding of criteria B and C on the Earth’s Rotation and Orbit rubric and the criteria on the Our Sun and Other Stars rubric.
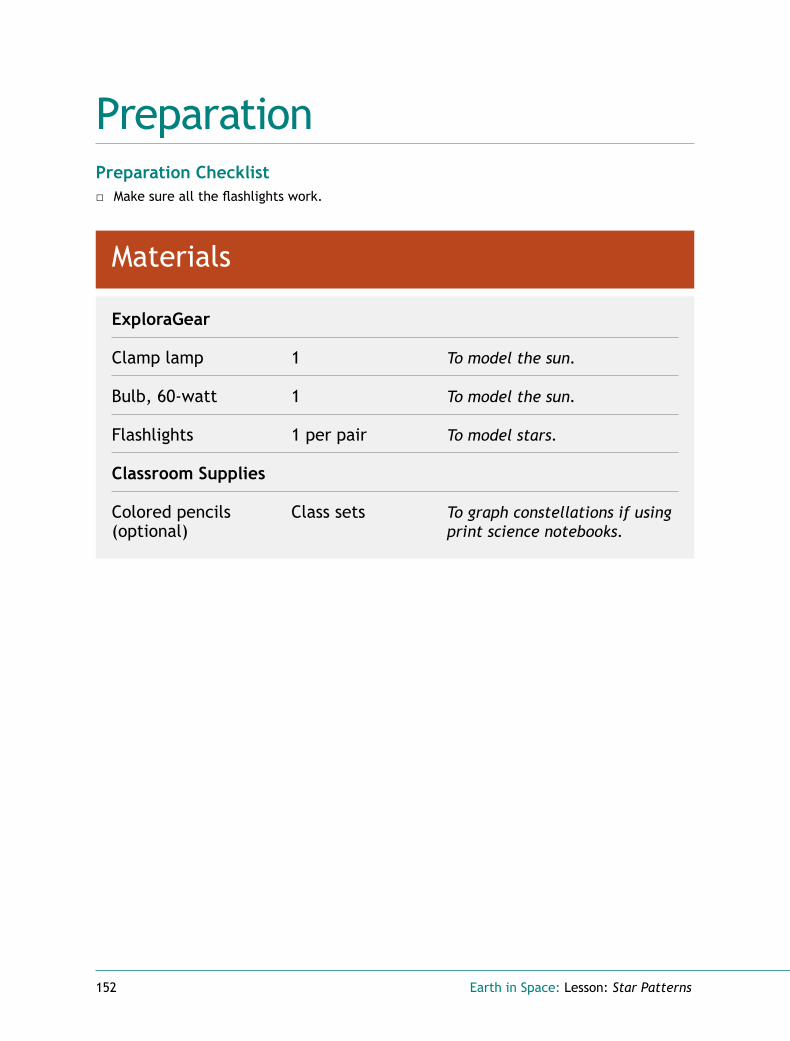
152 Earth in Space: Lesson: Star Patterns
PreparationPreparationPreparation Checklist
□ Make sure all the flashlights work.
Materials
ExploraGear
Clamp lamp 1 To model the sun.
Bulb, 60-watt 1 To model the sun.
Flashlights 1 per pair To model stars.
Classroom Supplies
Colored pencils Class sets To graph constellations if using (optional) print science notebooks.

Earth in Space: Lesson: Star Patterns 153
Curriculum ItemsItem Resource LocationVisual: Constellation Graph (optional) Teacher Portal Files/ Teaching
the Lesson Resources
Science Notebook: Constellation Research online print teacher guide
Science Notebook: Constellation Patterns online print teacher guide
Student Lessons Teach Lesson Teach Lesson
Student Lessons Teach Lesson Teach Lesson
Rubric: Earth’s Rotation and Orbit (optional)
Rubric: Our Sun and Other Stars (optional)Assessments
Performance Task: Constellation Graph (optional) online print teacher guide
Assessments
Quick Check: Sun and Other Stars (optional) online print teacher guide
Assessments

154 Earth in Space: Lesson: Star Patterns
Teaching the Lesson - Session 1Teaching the Lesson - Session 1Engage
Introductory Discussion 1. Ask students to explain what they know about constellations. What is a constellation? What
are some examples of constellations?
2. If no one says so, explain that constellations are well-defined patterns of stars that represent the shape of a person, animal, or mythological figure.
3. Tell students that today they will find information about specific constellations.
Explore
Researching Constellations 1. Divide the class into pairs. Have each pair choose one of the following constellations to
research:
• Ursa Major
• Cassiopeia
• Leo
• Orion
• Scorpius
• Pegasus
• Cygnus
• Hercules
2. During their research, students should find the following:
• The constellation’s common name
• What the constellations looks like (They will draw it.)
• The name of one star in the constellation
• The size of the star (dwarf, main sequence, giant, supergiant) and color of the star (red, white, blue). If this information is unavailable, how the star compares to the sun.
TEACHER NOTE: Some resources might compare the size and brightness of certain stars with the sun. For example a star might be described as being “10 times
brighter” and “3 times larger” than the sun.
• Some interesting facts about the constellation (e.g., its mythological basis)
3. They can look at resources.activatelearningprime.com for resources with information.
4. Have them record their findings on the Constellation Research online or print science notebook section.
5. Let the students share any questions they have about their research. If students were unable to find all the necessary information, give them more time for research.
Earth in Space: Lesson: Star Patterns 155
Reflect and Discuss: Making Sense
Big IdeaConstellations are well-defined patterns of stars that represent the shape of a person, animal, or mythological figure.
Sharing and Synthesizing Ask the following to help students relate their research to the crosscutting concept of Patterns:
• What do the constellations represent? (Mythological figures, animals, people.)
• How did ancient peoples create these patterns of stars? (By using their imaginations.)
• Why might ancient peoples have created them?
• How did the constellations help ancient peoples distinguish parts of the sky? (The unique patterns of stars helped them identify different regions of the nighttime sky.)

156 Earth in Space: Lesson: Star Patterns
Teaching the Lesson - Session 2Teaching the Lesson - Session 2Explore
NGSS ConnectionStudents create charts that show the patterns of when different constellations are visible during different seasons of the year. They employ the practice of Analyzing and Interpreting Data:
Represent data in tables and/or various graphical displays (bar graphs, pictographs and/or pie charts) to reveal patterns that indicate relationships.
When students explain the pattern in constellation visibility they would expect to see year after year, they focus on the crosscutting concept of Patterns:
Patterns can be used as evidence to support an explanation.
Seasonal Constellation Chart 1. Explain that students will create charts showing when several different constellations are
visible in the night sky in the Northern Hemisphere.
2. Have them look at the Constellation Patterns: Winter, Spring, Summer, and Fall Charts sections of their online or print science notebooks. Explain that these images show when a variety of constellations are visible each season. They also show where in the sky the constellations are found if one were to look up into the sky.
3. Have a volunteer locate the constellation Ursa Minor during winter. Where in the sky is it located? (In the northwest part of the sky.)
4. Where is the constellation Pisces located at this time during autumn? (In the Southeast part of the sky.)
MANAGEMENT NOTE: If students are using print science notebooks, make sure there are eight different shades of colored pencils available for them to draw the chart.
5. Point out the Constellation Patterns: Graph section of their science notebooks. Explain that they will create a graph to show when the constellations are visible in each season.
TEACHER NOTE: To help students graph the data, one bar in the graph has been drawn for Ursa Major.
6. Circulate as students work and remind them to accurately draw the bars.
7. (Optional) Display the visual Constellation Graph if students need help drawing the bars.
8. Have students analyze the graph’s data on the Constellation Patterns: Analysis science notebook section.

Earth in Space: Lesson: Star Patterns 157
Reflect and Discuss: Making Sense
Big IdeaConstellations are well-defined patterns of stars that represent the shape of a person, animal, or mythological figure.
NGSS ConnectionWhen students explain the cause of seasonal patterns of constellations’ visibility, they focus on the crosscutting concept of patterns:
Patterns can be used as evidence to support an explanation.
Sharing1. Have students share and discuss responses to the analytical questions on the Constellation
Patterns: Analysis science notebook section.
2. (Optional) If you think students need more experience interpreting the chart, have them identify which seasons the other constellations are visible.
Synthesizing1. Help students distinguish between daily and seasonal patterns of the position of stars by
asking the following:
a. How many of the constellations are visible in the daytime? (Just like all stars [except our sun] none of the stars in these constellations would be visible in the daytime.)
b. Would the same constellations be visible at night over the course of a week? (Yes)
c. Would all of those constellations visible at night six months later? (Some might be visible, others would not.)
d. What pattern of constellations would you expect to see every spring? What pattern would you expect to see every summer? Autumn? Winter? (The same constellations would be visible during the same seasons each year.)
e. Explain why some constellations are only visible during certain seasons. (Constellations are in different parts of the sky. They are visible at times of the year as the Earth orbits the sun.)
f. Why does this pattern repeat? (This pattern repeats every year because Earth orbits the sun.)

158 Earth in Space: Lesson: Star Patterns
2. Help students consider the role that the constellations’ location in the sky plays in whether or not they are visible.
a. What constellations are visible for the entire year? (Ursa Major and Cassiopeia.)
b. Where in the night sky are these constellations located? (They are located close to the Earth’s North Pole.)
c. Explain why are they visible for the entire year.
MANAGEMENT NOTE: To help students explain their ideas, you might draw a model of the Earth, sun, and stars on the board. Include a circle to represent Earth’s orbit. Explain that this view is looking straight down on Earth’s northern hemisphere. Consider inviting students to the board to refer to the model while making their explanations.
Earth in Space: Lesson: Star Patterns 159
After the Lesson After the Lesson
Ongoing LearningScience CenterHave students look up other constellations (there are 88 recognized constellations) and record information about them. Are there any others we can see all year round in the Northern Hemisphere? When can we see the remaining constellations in the Zodiac?
Extensions Further Science Exploration
Visiting a Planetarium Schedule a field trip to a planetarium. This can be particularly useful if you teach in an urban area where it is difficult to observe stars in the night sky.
Light Pollution Do research projects on light pollution, especially if the children live in an urban area. Consider why stars are less visible in cities than in the countryside.
Social Studies Extension
Constellation Stories People have looked upon the stars since ancient times, trying to find meaning in the specks of light in the sky. Have students research stories about constellations from different cultures and time periods to gain an understanding of the mythology behind them.

160 Earth in Space: Lesson: Star Patterns
Next Generation Science StandardsNext Generation Science StandardsThis lesson integrates these dimensions from the Next Generation Science Standards (NGSS*):
Science and Engineering Practices Disciplinary Core Ideas Crosscutting Concepts
Analyzing and Interpreting Data • Represent data in tables
and/or various graphical displays (bar graphs, pictographs and/or pie charts) to reveal patterns that indicate relationships.
ESS1.B: Earth and the Solar System• The orbits of Earth around
the sun and the moon around Earth, together with the rotation of Earth about an axis between its North and South poles, cause observable patterns. These include day and night; daily changes in length and direction of shadows; and different positions of the sun, moon, and stars at different times of the day, month, and year.
Patterns • Patterns can be used as
evidence to support an explanation.
This lesson contributes to the fulfillment of this NGSS Performance Expectation for Grade 5:
Earth’s Place in the Universe
5-ESS1-2. Represent data in graphical displays to reveal patterns of daily changes in length and direction of shadows, day and night, and the seasonal appearance of some stars in the night sky.
Lesson Goals:
1. Research a chosen constellation.
2. Chart the quarterly appearance of eight constellations in the Northern Hemisphere.
Common Core State Standards Connections: ELA/Literacy
SL.5.1 Engage effectively in a range of collaborative discussions (one-on-one, in groups, and teacher-led) with diverse partners on grade 5 topics and texts, building on others’ ideas and expressing their own clearly.
*Next Generation Science Standards is a registered trademark of Achieve. Neither Achieve nor the lead states and partners that developed the Next Generation Science Standards was involved in the production of, and does not endorse, this product.

Science Skill Builders

Earth in Space: SSB Lesson: Using Models in Science 163
Big IdeaScientists use models to represent things that are too big, small, fast, slow, far away, or dangerous to observe in the real world.
Lesson:
Using Models in Science
Overview Overview Children study various types of models and consider how they are used in science. They also make models of their own.
Key Notes • Collect some examples of models (dolls, stuffed toys, toy
cars) prior to this lesson.
• Gather a variety of art supplies for making the physical models. (See the Preparation section for suggestions.)
Lesson Goals1. Evaluate various types of models.
2. Recognize why models are used in science.
Assessment Options• Use the synthesizing discussion to informally assess
the children’s understanding of models at this time. In particular, note how well the children understand that models are representations of actual objects that scientists use to understand science more deeply. Use the Creating and Using Models Checklist to assess the children’s understanding of models in science. You might also consider having the children assess themselves using the print or online Making Models Self-Assessment.

164 Earth in Space: SSB Lesson: Using Models in Science
PreparationPreparationPreparation Checklist
□ Assemble the following materials:
• Examples of models (dolls, stuffed animals, toy cars)
• Drawing materials (paper, colored pencils, markers, and crayons)
• Physical model materials (art and craft supplies such as straws, twist-ties, fabric, glue, yarn, markers, and modeling clay)
□ Supply the Science Center with lots of materials the children can use to create models.
□ (Optional) To assess each child’s progress in creating and using models, copy the Creating and Using Models Checklist for each child. If you would like the children to assess their own skills, assign online or copy the Making Models Self-Assessment for each child.
Materials
Classroom Supplies
Dolls 2 To use as examples.
Drawing materials Class set To make pictorial models.
Fabric, a variety Several pieces To make physical models.
Glue Several bottles To make physical models.
Modeling clay 1 piece per child To make physical models.
Pipe cleaners 1 pack To make physical models.
Straws 1 pack To use as examples.
Stuffed animals 2 To use as examples.
Toy cars 2 To use as examples.
Twist-ties 1 pack To make physical models.
Yarn, various colors Several balls To make physical models.

Earth in Space: SSB Lesson: Using Models in Science 165
Curriculum ItemsItem Resource LocationChecklist: Creating and Using Models (optional)
Self-Assessment: Making Models (optional) online print
Assessments

166 Earth in Space: SSB Lesson: Using Models in Science
Teaching the Lesson Teaching the Lesson Engage
Introductory Discussion1. Introduce the concept of models by showing some of the examples of models you collected
and brought for this discussion. For each example, determine the level of understanding about models with questions such as the following:
• What is this supposed to be?
• What is it supposed to represent?
• How, or in what ways, is it like the thing it’s supposed to represent?
• How is it unlike the thing it’s supposed to represent?
2. Discuss the relationship between a model and the object a model represents with further questions such as the following. Elicit information from the children that demonstrates they understand a model represents something else, though often in a different scale.
• What is a model car?
• What is a model train?
• What is a model?
3. Tell the children that scientists often use various types of models in science and that today they are going to create models of their own.
Explore
Making Mental Models of Favorite Animals 1. Explain that you are going to help the children explore one kind of model called a “mental
model.” All they have to do for this exploration is close their eyes and think about their favorite animal in their mind.
2. After a few minutes, invite several children to tell the class what animal they visualized. Make sure they describe details about their mental model, such as size, color, and shape.
3. Discuss with the children how what they each saw in their mind was a mental model because it was a representation in their mind of their favorite animal. Explore children’s ideas about whether they think mental models are unique or if two people could have the same mental model, then explain that mental models are usually personal and unique, though they could be similar in some ways to someone else’s model.
Earth in Space: SSB Lesson: Using Models in Science 167
Making Pictorial Models of Favorite Animals1. Distribute the drawing materials and explain that they are going to explore another kind of
model called a “pictorial model.” Explain that the word pictorial means “picture” and what they have to do for this kind of model is draw a picture of their favorite animal.
2. When most of the children have their pictures ready, ask several children to show their models to the class. If any children drew the same animal, discuss how the pictures of the same animal look the same or different.
3. Ask the children who shared their pictures how their pictorial model is the same or different from their mental model and use these comments to focus on the idea that their pictorial models are their mental models put down on paper in a two-dimensional representation.
Art Connection:
Making pictorial models reinforces drawing skills and the ability to shift perspectives.
Making Physical Models of Favorite Animals1. Distribute the art and craft supplies and explain that they are going to explore another kind
of model called a “physical model.” Explain that what they have to do for this kind of model is use the art and craft supplies to create an animal based on their pictorial model.
2. When most of the children have their animals ready, ask several children to show their models to the class. Discuss how the physical models are similar to and different from one another such as those models that might be the same size or color when the animals are different colors and sizes in real life.
3. Ask the children who shared their animals how their physical model is the same or different from their pictorial model and mental model. Use these comments to focus on the idea that their physical models represent the same animal but in a three-dimensional representation.
Art Connection:
Making physical models fosters spatial skills and the ability to shift perspectives.
Mathematics Connection:
The children learn that three-dimensional shapes are solid objects that take up space such as boxes, books, and chairs. The children might also discover that some solids, such as animals, do not have regular shapes such as spheres and rectangles.
Reflect and Discuss: Making Sense
Big Idea
Scientists use models to represent things that are too big, small, fast, slow, far away, or dangerous to observe in the real world.

168 Earth in Space: SSB Lesson: Using Models in Science
Synthesizing1. Encourage discussion about the children’s mental, pictorial, and physical models by having
them consider which type of model is the easiest to understand and which would be the easiest to explain to others. Extend their thinking by having them consider which type of model would work best for something in motion.
2. Prompt the children to brainstorm instances when models would be useful in science class. Examples might include things that:
• Are too small to see (such as cells, viruses, or air particles)
• Are too big to see (such as planets or the solar system)
• May happen over long time periods (such as decay, growth, or mountain formation)
• Are not obvious (such as forces, gravity, or pressure)
3. Let the children know that sometimes our mental models might not match how scientists think about things. Probe them to consider why a thought or mental model of how something works may not be the same as what scientists think. Even though scientists have more evidence and experience than they do, it’s important to note that many models in science develop over hundreds of years and are constantly being modified as new discoveries are made. Confirm with the children that model building is a constant process of discovery, exploration, modification, and transformation.
4. (Optional) Have each student complete the print or online Making Models Self-Assessment to assess their skill in making models at this time. Consider having students re-assess themselves in other lessons as they develop their model-making skills.

Earth in Space: SSB Lesson: Using Models in Science 169
After the Lesson After the Lesson Extensions
Further Science Explorations
More Model MakingIf the children need additional experience with models, consider having them create mental models, pictorial models, and physical models of the following:
• Earth from outer space
• Their bedroom at home
• Vehicles they use to get to school or go on trips
• Favorite foods
• Buildings they are familiar with
Making a Model ZooMake a class zoo with the model animals made in the lesson. For this activity, have the children research and determine which animals should be placed in which parts of the class zoo. They could divide their zoo regions by continents on which the animals are found, major animal groups (mammals, invertebrates, insects, etc.), or alphabetical groupings (A-H, I-K, L-R, S-Z).

170 Earth in Space: SSB Lesson: Using Models in Science
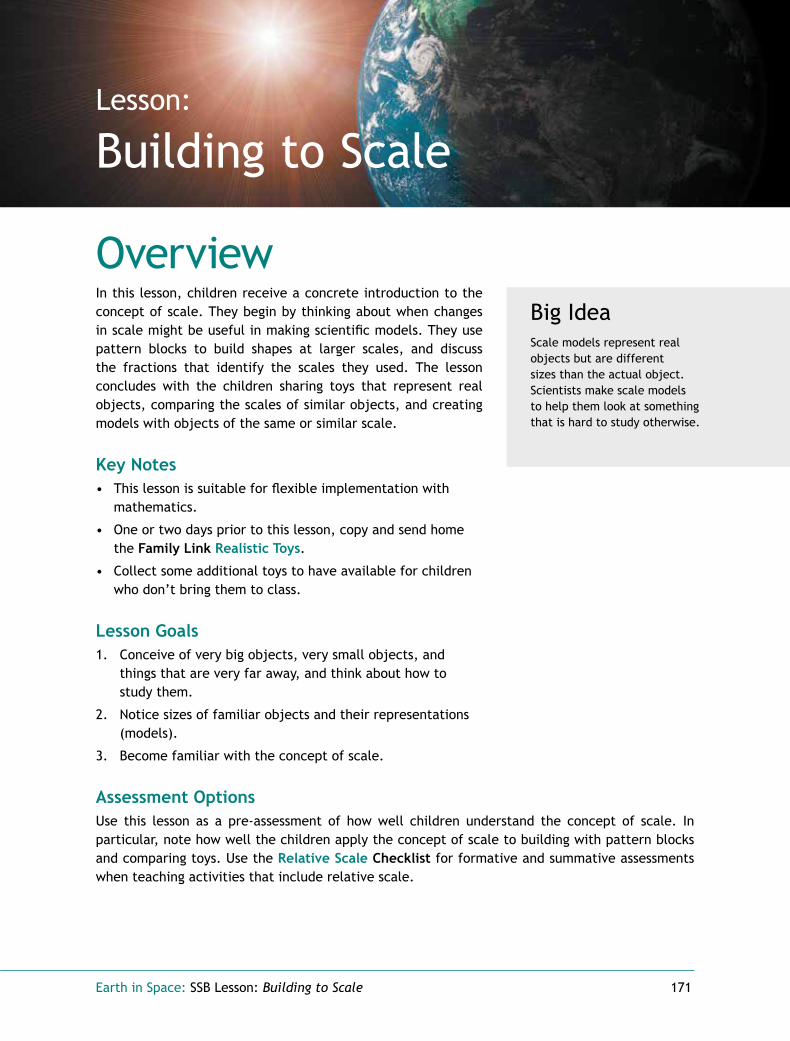
Earth in Space: SSB Lesson: Building to Scale 171
Big IdeaScale models represent real objects but are different sizes than the actual object. Scientists make scale models to help them look at something that is hard to study otherwise.
Lesson:
Building to Scale
Overview Overview In this lesson, children receive a concrete introduction to the concept of scale. They begin by thinking about when changes in scale might be useful in making scientific models. They use pattern blocks to build shapes at larger scales, and discuss the fractions that identify the scales they used. The lesson concludes with the children sharing toys that represent real objects, comparing the scales of similar objects, and creating models with objects of the same or similar scale.
Key Notes • This lesson is suitable for flexible implementation with
mathematics.
• One or two days prior to this lesson, copy and send home the Family Link Realistic Toys.
• Collect some additional toys to have available for children who don’t bring them to class.
Lesson Goals1. Conceive of very big objects, very small objects, and
things that are very far away, and think about how to study them.
2. Notice sizes of familiar objects and their representations (models).
3. Become familiar with the concept of scale.
Assessment OptionsUse this lesson as a pre-assessment of how well children understand the concept of scale. In particular, note how well the children apply the concept of scale to building with pattern blocks and comparing toys. Use the Relative Scale Checklist for formative and summative assessments when teaching activities that include relative scale.
172 Earth in Space: SSB Lesson: Building to Scale
PreparationPreparationPreparation Checklist
□ Copy and send home the Family Link Realistic Toys a day or two before teaching this lesson. The Family Link requests that children bring a toy to school—and any of its accessories—that represents a real object. Remind the children not to bring any toy that is valuable or irreplaceable.
□ Collect some additional toys for children who don’t bring them to class. Examples include dolls, dollhouse furniture, trains, train tracks and tunnels, cars, airplanes, plastic horses, and other animals.
□ Assemble the pattern blocks according to shape. If you don’t have enough pattern blocks to provide 20 of one shape to each child, alternatives are (a) provide at least four of one shape to each child and skip step 4 in the “Building to Scale with Pattern Blocks” activity; or (b) have the children work in pairs or groups.
□ (Optional) To assess each child’s progress in understanding relative scale, copy the Relative Scale Checklist for each child.
Materials
Curriculum ItemsItem Resource Location
Checklist: Relative Scale (optional) Assessments
Family Link: Realistic ToysTeacher Portal Files/ Teaching the Lesson Resources
Classroom Supplies
Pattern blocks 20 of one Fewer may be used (see (square, triangle, shape per child “Preparation”). rhombus, and trapezoid)
Toys that represent 1 per child A Family Link requests children real objects to bring these in.
Earth in Space: SSB Lesson: Building to Scale 173
Teaching the LessonTeaching the LessonEngage
Introductory Discussion1. Challenge the children to brainstorm some examples of very large objects, very small
objects, and objects that are very far away. (For example, whales, Earth, the sun, the universe, insects, sand, dust, atoms.)
TEACHER NOTE: See the Language Arts extension for ideas using the book Is a Blue Whale the Biggest Thing There Is?
2. Using the examples the children provide, ask them to think about how scientists might study these objects:
• What tools do scientists use to study these objects and when or why would they need tools? (They might use telescopes or microscopes because the objects are too big or too small or too far way to study with the “naked” eye.)
• Would anyone use models that are bigger or smaller than the real object? Why?
Explore
Building to Scale with Pattern Blocks
Mathematics Connection
If the children have experience with equivalent fractions, you may want to ask them what the equivalent fraction for 2/4 is.
1. Give each child 20 pattern blocks of one shape: square, triangle, rhombus, or trapezoid.
2. Tell the children to make a shape (call it “B”) that is the same shape as, but larger than, a single pattern block (call it “A”). The challenge is to use as few pattern blocks as they can to make the larger shape. For example, make a larger square out of square pattern blocks, or make a larger triangle out of triangle pattern blocks. Ask the children to report:
• How many pattern blocks did it take to make each of the larger shapes? (4 squares, 4 triangles, 4 rhombuses, 4 trapezoids)
• How many pattern blocks are along one side of the larger shapes? (2 squares, 2 triangles, 2 rhombuses, 2 trapezoids)

174 Earth in Space: SSB Lesson: Building to Scale
3. Now tell the children to make the next largest shape (call it “C”) with the pattern blocks. Ask the children to report:
• What their group’s toys are models of
• Whether the toys are bigger or smaller than the real thing
• Whether everyone’s toy is the same size
• Whether everyone’s toy is the same scale
• How many pattern blocks did it take? (16 for each)
• How many pattern blocks are along one side? (4 for each)
• What is the fraction that compares the single block (A) to this bigger shape (C)? (1/4)
• What is the fraction that compares how many pattern blocks were along one side of the first shape (B) compared with this bigger shape (C)? (2/4)
4. Tell the children that the fraction comparing the number of pattern blocks along one side of the shapes identifies the scale of the shapes compared to each other. They built shape B using a “one-to-two” (1:2) scale, meaning that one edge on the original block (A) equaled two pattern blocks along the larger shape’s edge. They built shape C using a “one-to-four” (1:4) scale.
TEACHER NOTE: Both B and C are scale models of A, at two different scales (1:2 and 1:4).
5. (Optional) Help the children recognize that when they changed the scale along one edge of their shapes, they also changed the size of the shape’s area. Shape B is two times larger than block A along its edge, but four times larger in area. In other words, increasing the linear scale “two-to-one” increased the area “four-to-one” for these shapes.
Comparing Toy ScalesHave children share with the class the toy dolls, cars, trains, horses, or other representations of real objects they brought from home.
1. Begin by directing the children to assemble in groups that have the same type of real object represented by their toy (e.g., trains, cars, animals).
2. Ask each group to consider:
3. Explain the difference between the words size and scale.
4. Prompt the children to reassemble in groups that have toys that are of approximately the same scale.
Earth in Space: SSB Lesson: Building to Scale 175
TEACHER NOTE: Let the children have plenty of time to decide which toys are of the same scale. The comparisons they make and the conversations that ensue will
make the idea of scale concrete for them.
5. Tell the new groups to arrange their toys in a model “scene,” and give the class time to look at and discuss each scene.
Reflect and Discuss: Making Sense
Big Idea
Scale models represent real objects but are different sizes than the actual object. Scientists make scale models to help them look at something that is hard to study otherwise.
Sharing1. While the class is looking at each group’s toy “scenes,” ask them to comment on any scale
discrepancies they observe in the models. Have them consider questions such as:
• Can they have objects of different scale sizes in the same model?
• Why not? (If the objects are in different scales, then the scene will not be to scale.)
• At what scale do they think a particular model scene is built?
• How could they figure out the scale of a model scene? (By comparing the length or height of the model to the length or height of the original.)
MANAGEMENT NOTE: You can judge the scale of some common objects by being familiar with the objects. But for less familiar objects, such as various airplanes or ships, it may be hard to know scale unless you have some idea of the size of the original.
2. Let the children know that people commonly use the phrases “to scale” and “not to scale” to talk about whether all of the objects in a model or drawing use the same scale of size and distance.

176 Earth in Space: SSB Lesson: Building to Scale
After the Lesson After the Lesson
ExtensionsMathematics Extension
Figuring Out Fractions and ScaleYou can demonstrate this extension by writing it on the board, or have children do it themselves in groups or pairs and record it on a piece of paper.
1. Use a ruler or measuring tape to measure the longest dimension (i.e., height or length) of a toy. (For example, an American Girl™ doll is 1.5 feet [18 inches tall].)
2. Write down the measurement and put a fraction slash (/) after the number.
3. Estimate how big the same dimension on the real object would be. (For example, an average pre- or early teen girl is about 4.5 feet [54 inches] tall.)
4. Write the estimate after the fraction slash. (For example, 18/54.)
5. Have a volunteer read the number out loud, and ask the children:
• What kind of number is this? (A fraction.)
• What does it mean? (For example, an American Girl™ doll is 18/54 the size of a real girl; or, 18 inches in the doll’s world corresponds to 54 inches in the real world.)
6. Calculate the least equivalent fraction, and tell the children that this is the toy’s scale. (For example, an American Girl™ doll’s scale is 1:3.)
TEACHER NOTE: If you think the children are ready for the extra information, tell them that scales are not only written like fractions, but are often written using a
colon between the two numbers. The colon is like an equal sign. For example, one inch or centimeter in doll height corresponds to three inches or centimeters in human height.

Earth in Space: SSB Lesson: Building to Scale 177
Art ExtensionDrawing to ScaleGive the children two-dimensional, simple geometric shapes (e.g., squares, triangles, circles), rulers, and graph paper. Have them draw objects at 1:2 scale (one-half the real size) and 2:1 scale (two times the real size).
Language Arts ExtensionIs a Blue Whale the Biggest Thing There Is?Give children the book Is a Blue Whale the Biggest Thing There Is? (by Robert E. Wells; 1993, Albert Whitman & Co.) to read independently. Let the children know that, while the book may be easy to read for some, you are giving it to them because you want them to focus on something harder: what it says about scale. Tell them to make sure they read the last page, “Some additional thoughts on Very Big Things.” What does the author say about picturing our galaxy to scale?
Technology ExtensionBuilding a Scale ModelEncourage children to build scale models of objects. Many kits are available in craft stores.
Social Studies ExtensionUsing Map ScalesMaps often have a scale, which tells how to change the distances on the map to real-life distances. Give children maps, and have them use the map scale and a ruler to calculate the real distance between two points.

178 Earth in Space: SSB Lesson: Building to Scale

Science Notebook Teacher Guide

2
Date:
Earth Model
Drawing
Draw a model of the planet.
Drawings vary.
From what point of view did you draw your model? (For example, did you imagine that you were in a plane? High above the Earth, viewing it from space? Or looking out a window?)
Responses vary.
Earth in Space: Modeling Earth’s Shape lesson EIS.C1

3
Date:
Earth Model
Supporting an Argument
1. The Earth looks like my model because:
Responses vary.
2. The experiences that led me to think this are:
Responses vary.
EIS.C1 Earth in Space: Modeling Earth’s Shape lesson

4
Date:
Earth’s Gravity
Dropping Balls
What direction would a ball fall if a person dropped it from each of the points A through H?
Draw an arrow from each person that represents the direction the ball would travel.
Responses vary.
A
B
C
D
E
F
C
H
Earth in Space: Earth’s Gravitational Force lesson EIS.C1

5
Date:
Earth’s Gravity
Support an Argument
Claim: the gravitational force of the Earth pulls all objects towards its center.
List the evidence from the models you used to support this claim:
Responses vary, but should include specific references to the models. For example:• The lines I drew to represent balls falling all landed on the surface of the Earth. The lines
would all cross in the center of the Earth if they were extended. • The tips of the toothpicks met in the center of the ball.• No matter where the toy was placed on the model Earth, the dropped object would fall toward
the center of the Earth.
What pattern can you see in all of these models?
Students should point out that in all of the models, a “dropped object” is pulled towards Earth’s center by gravity.
EIS.C1 Earth in Space: Earth’s Gravitational Force lesson

6
Date:
Initial Models
Daytime
Draw a model of what you think is the cause of daytime in the space below:
Note students initial idea about what causes daytime. To get a more complete idea of what students understand, you might ask them to describe what their drawings show.
Earth in Space: Day and Night lesson EIS.C2
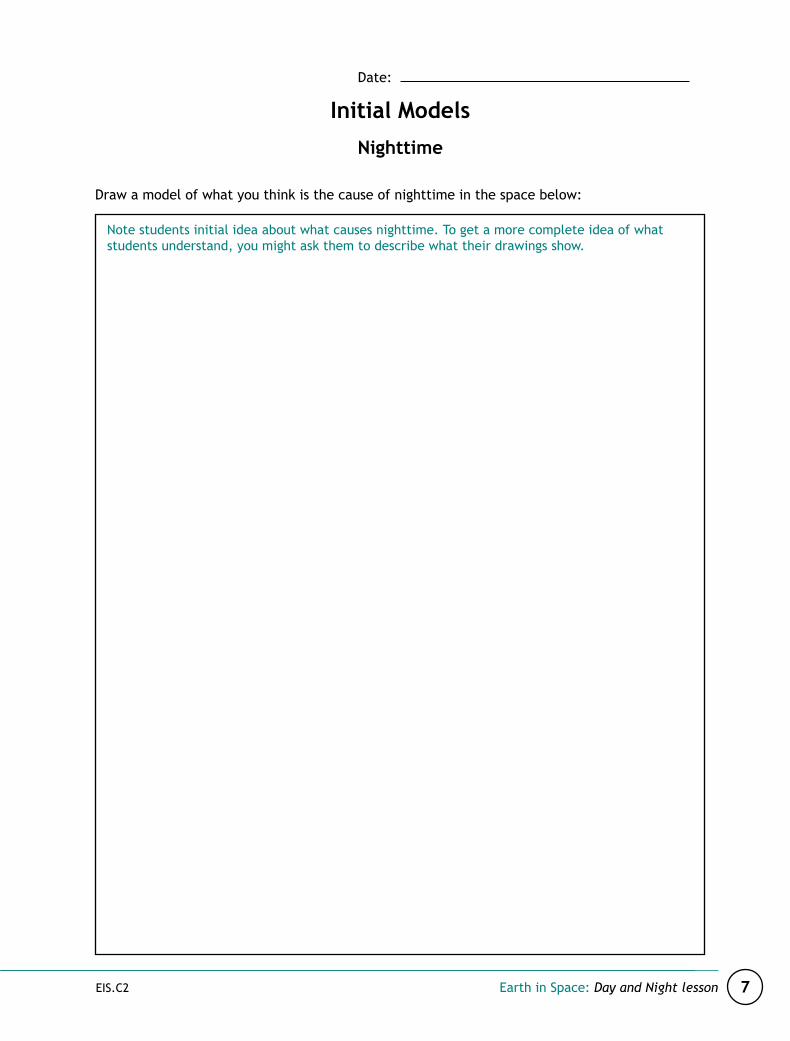
7
Date:
Initial Models
Nighttime
Draw a model of what you think is the cause of nighttime in the space below:
Note students initial idea about what causes nighttime. To get a more complete idea of what students understand, you might ask them to describe what their drawings show.
EIS.C2 Earth in Space: Day and Night lesson

8
Date:
Observing Shadows
Pole
1. Draw what the pole and shadow look like. Where is the sun?
Check for the following elements in students’ drawings:• The pole• The sun’s shadows drawn in a different color for each observation• The sun’s location on the opposite side of the pole from the shadow
2. The next time you visit the pole and shadow, use a different color to draw what the shadow looks like.
Earth in Space: Observing Shadow Patterns lesson EIS.C2
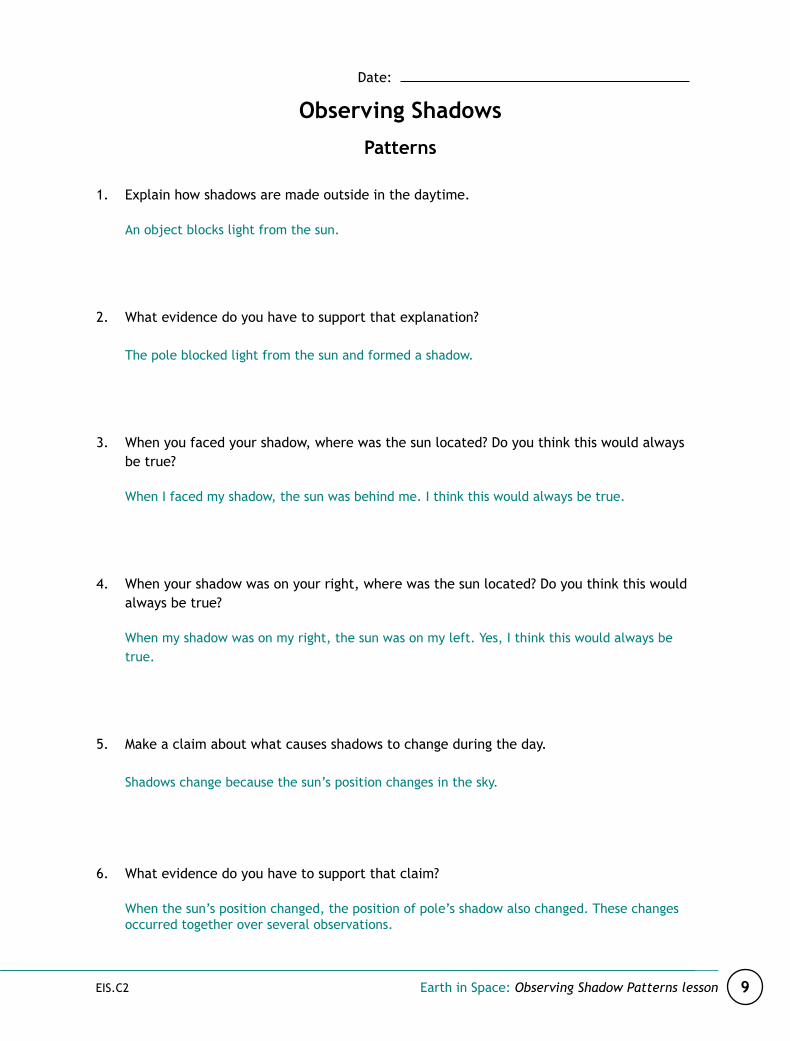
9
Date:
Observing Shadows
Patterns
1. Explain how shadows are made outside in the daytime.
An object blocks light from the sun.
2. What evidence do you have to support that explanation?
The pole blocked light from the sun and formed a shadow.
3. When you faced your shadow, where was the sun located? Do you think this would always be true?
When I faced my shadow, the sun was behind me. I think this would always be true.
4. When your shadow was on your right, where was the sun located? Do you think this would always be true?
When my shadow was on my right, the sun was on my left. Yes, I think this would always be true.
5. Make a claim about what causes shadows to change during the day.
Shadows change because the sun’s position changes in the sky.
6. What evidence do you have to support that claim?
When the sun’s position changed, the position of pole’s shadow also changed. These changes occurred together over several observations.
EIS.C2 Earth in Space: Observing Shadow Patterns lesson
10
Date:
Sun’s Position
Procedure
1. Face south.
2. On the next section, Sun’s Path, draw a few landmarks to help you describe the sun’s position in the sky.
3. Neatly draw the sun’s position in the sky and write the time of your observation next to the sun.
Earth in Space: Observing the Sun for a Day lesson EIS.C2

11
Date:
Sun’
s Po
siti
on
Sun’
s Pa
th
EW
Hor
izon
EIS.C2 Earth in Space: Observing the Sun for a Day lesson
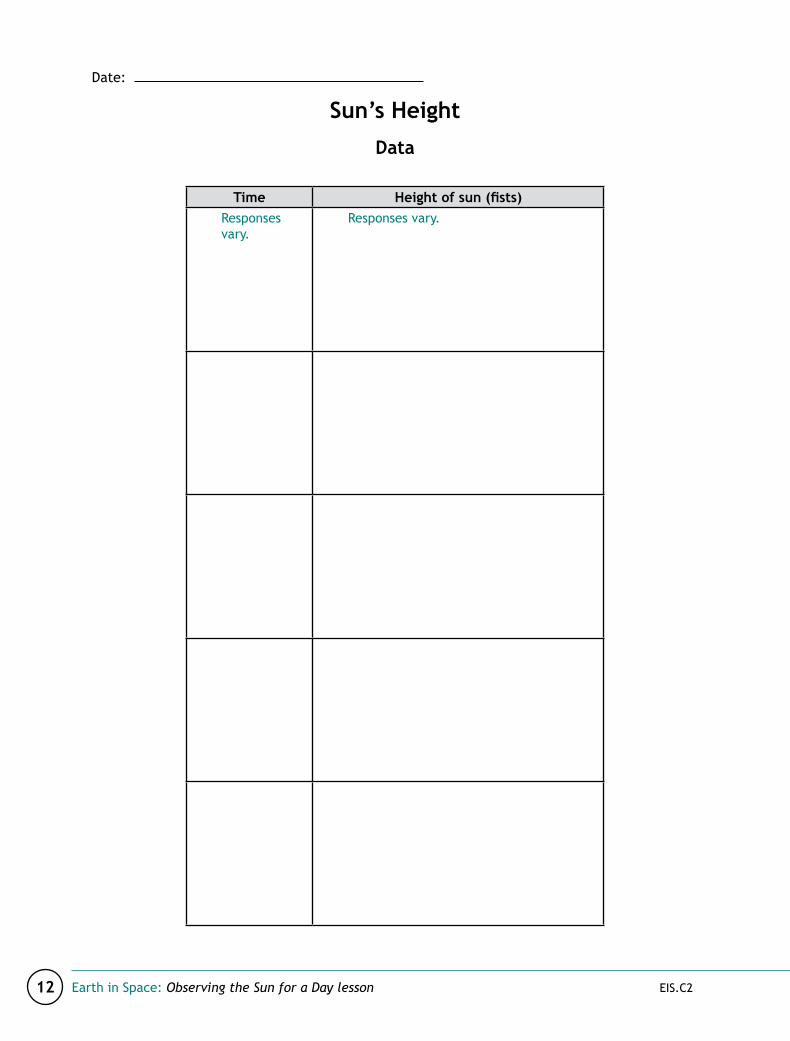
12
Date:
Sun’s Height
Data
Time Height of sun (fists)Responses vary.
Responses vary.
Earth in Space: Observing the Sun for a Day lesson EIS.C2
13
Date:
Sun’s Height
Graph
Time of Day
Hei
ght
of S
un (
fists
)
Graphs vary depending on data.
EIS.C2 Earth in Space: Observing the Sun for a Day lesson

14
Date:
Shadow
Data
Time Shadow Length (cm)Responses vary. Responses vary.
Earth in Space: Tracking Shadows During a Day lesson EIS.C2
15
Date:
Shadow
Graph
Time of Day
Leng
th o
f Sh
adow
(cm
)
Graphs vary depending on data.
EIS.C2 Earth in Space: Tracking Shadows During a Day lesson

16
Date:
Shadow
Patterns
Compare the shape of the shadow graph with the graph you created during the previous lesson on the Sun’s Height: Graph science notebook section.
1. By comparing the two graphs, what patterns related to shadows can you see?
When the sun is lowest in the sky, shadows are longest. When the sun is highest in the sky, shadows are shortest.
2. What pattern in the data do you see in the way shadows change during the day?
They are long in the morning, short around noon, and then get long again until sunset.
3. What pattern in the data do you see related to the shape of the two graphs?
They are opposite in shape.
Earth in Space: Tracking Shadows During a Day lesson EIS.C2

17
Date:
Creating Shadows
Based on your work with a flashlight and the shadow tool model as well as what you’ve observed outside, answer the following questions:
1. When do long shadows occur?
Early or late in the day.
2. When do short shadows occur?
In the middle of the day.
3. When do shadows not occur?
When the sun is not visible.
4. Make a claim about the effect that the height of the sun has on shadows. Compare a low height to a high height. What evidence do you have to support your claim?
Shorter shadows are caused when the sun is high in the sky. By contrast, when the sun is low in the sky, the shadows are longer.
EIS.C2 Earth in Space: Models of the Sun and Shadows lesson
18
Date:
Making Models
Challenge
Your group will work together and create one model to share after the activity. The following students are in your group:
Challenge
Your challenge today is to create a model that:
1. Describes what causes daytime and nighttime.
2. Explains why the sun seems to move across the sky during the daytime.
Sharing
Each group will share the model they’ve created with the class. The other groups need to think about whether or not the model they are seeing addresses the two challenge questions.
Remember, all models are valuable, and all ideas are valid.
Follow-up
Be prepared to discuss:
• What you liked.• What your group found challenging.• Questions your group has about the models.
• Was there one model that you thought best explained the observations? If so, which model was it?
Earth in Space: Models of Daytime and Nighttime lesson EIS.C2
19
Date:
Making Models
Ideas and Notes
Use this page to draw ideas and take notes from your group’s discussions.
Responses vary.
EIS.C2 Earth in Space: Models of Daytime and Nighttime lesson

20
Date:
Making Models
Sketch
Use this page to sketch your model.
Drawings vary.
Earth in Space: Models of Daytime and Nighttime lesson EIS.C2

21
Date:
Making Models
Presentation
Think about these questions before you present your model and while you watch your classmates present their models.
1. How does the model answer the challenge?
Responses vary.
2. How did you/they incorporate previous observations during this topic?
Responses vary.
3. What does the model show? What does it not show?
Responses vary.
4. What features of the model were based on evidence from your/their experience? What features were not?
Responses vary.
5. What do they find challenging about the model?
Responses vary.
6. How does this model support an argument about what causes daytime and nighttime?
Responses vary.
EIS.C2 Earth in Space: Models of Daytime and Nighttime lesson

22
Date:
Earth’s Rotation Models
1. What patterns did you observe with the first model (the lamp and the turning students)?
When facing the ‘sun’ it was daytime. When facing away from the ‘sun’ it was nighttime.
2. How are these patterns similar to what you saw in your observations of the sun?
When the sun was in the sky it was daytime. When the sun was not in the sky, it was nighttime.
3. What patterns did you observe with the second model (the globe and the gnomon)?
When the globe was in the ‘sun’ it was daytime. When it was not in the ‘sun’ it was nighttime. At the start of the day, the shadows were long. They became shorter as the day progressed until the sun was at its highest point, then they started getting longer again.
4. How are these patterns similar to what you saw in your observations of the sun?
The patterns are the same.
Earth in Space: Modeling Earth’s Rotation lesson EIS.C2

23
Date:
Star Size and Brightness
Large Ball, Small Ball
Instructions:
1. Compare the sizes of the small ball and the large ball and note how much bigger the large ball is than the small ball.
2. Have one member of your group hold the small ball and stay standing in one place.
3. Have one member of your group walk away with the large ball to a place where the large and small balls look about the same size.
4. After this have the student holding the large ball continue walking away for about 50 paces while the rest of the group stays in the same place and observes each ball.
Questions:
1. After Step 4, how did the size of the large ball look compared to the size of the small ball (to group members who stayed in place and were not holding either ball)?
The large ball looks smaller than the small ball.
2. How does this model help explain the apparent size of small and large stars?
A small star can look bigger than a large star if it is closer.
3. How does this model and the flashlight model you used in the Family Link help explain the apparent brightness of small and large stars?
A small star can look brighter than a large star if it is closer.
EIS.C3 Earth in Space: Our Sun is a Star lesson
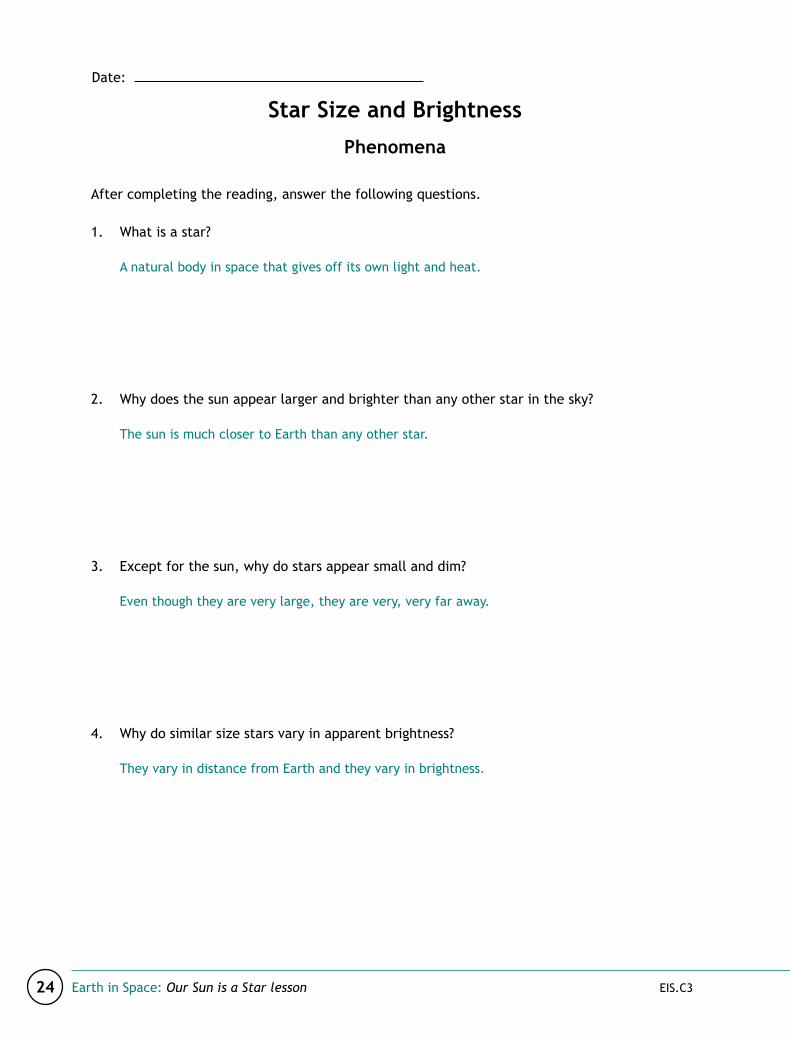
24
Date:
Star Size and Brightness
Phenomena
After completing the reading, answer the following questions.
1. What is a star?
A natural body in space that gives off its own light and heat.
2. Why does the sun appear larger and brighter than any other star in the sky?
The sun is much closer to Earth than any other star.
3. Except for the sun, why do stars appear small and dim?
Even though they are very large, they are very, very far away.
4. Why do similar size stars vary in apparent brightness?
They vary in distance from Earth and they vary in brightness.
Earth in Space: Our Sun is a Star lesson EIS.C3

25
Date:
Stars
Cause and Effect
1. What causes the apparent movement of stars across the night sky?
The rotation of Earth on its axis.
2. Why can’t we see stars during the day? What causes stars to be visible at night?
With the sun shining, the stars are not bright enough to be seen. At night, the Earth is turned away from the sun, so it is dark out and the stars are bright enough to be seen.
3. Are there always stars in the sky that we cannot see during the day?
Yes.
EIS.C3 Earth in Space: Seeing Stars from Earth lesson

26
Date:
Stars
Model
Draw a model that shows when you are able to see stars and when you are not able to see stars. Include the following in your model:
• The Earth• The sun • Stars • A location on Earth’s surface where people on Earth can’t see stars• A location on Earth’s surface where people on Earth can see stars
Drawings vary, but should include the elements listed above.
Earth in Space: Seeing Stars from Earth lesson EIS.C3

27
Date:
Annual Star Patterns
1. Describe what you saw when you modeled the Earth and rotated on your axis.
Responses vary, but students should point out that when they faced toward the sun, they saw the sun, but no stars. When they faced away from the sun, they saw the stars.
2. What pattern did this rotation represent?
Responses vary, but might mention the daily pattern of Earth rotating on its axis, or a day.
3. Describe what you saw when you modeled the Earth and orbited the sun.
Responses vary, but students should write that when they orbit the sun they see different stars at different places along the orbit.
4. What pattern did the orbit represent?
Responses vary, but might mention the annual pattern of Earth orbiting the sun, or a year.
5. Did the position of the stars change at different points in the orbit? What changed?
The stars remained in the same place in the room (space). But I could only see certain stars at certain places in the orbit of the Earth.
6. What pattern in the stars did you notice when you completed each orbit?
Responses vary, but students should say that after completing each orbit, the same stars were visible.
EIS.C3 Earth in Space: Earth’s Orbit and Stars lesson

28
Date:
Constellation Research
Constellation: _____________________________________________________________
1. Draw a picture of the constellation and label one star in it.
Drawings vary.
Responses vary.
Earth in Space: Star Patterns lesson EIS.C3

29
Date:
Constellation Research
2. Record the size and color of the star you labelled. (If you’re unable to find that information, describe how the star compares to the sun.)
Responses vary.
3. Record three facts about the constellation.
Responses vary depending on the constellation.
EIS.C3 Earth in Space: Star Patterns lesson

30
Date:
Constellation Patterns
Winter Chart
Typical view of the Northern Hemisphere winter night sky viewed from the United States.
Earth in Space: Star Patterns lesson EIS.C3

31
Date:
Constellation Patterns
Spring Chart
Typical view of the Northern Hemisphere spring night sky viewed from the United States.
EIS.C3 Earth in Space: Star Patterns lesson
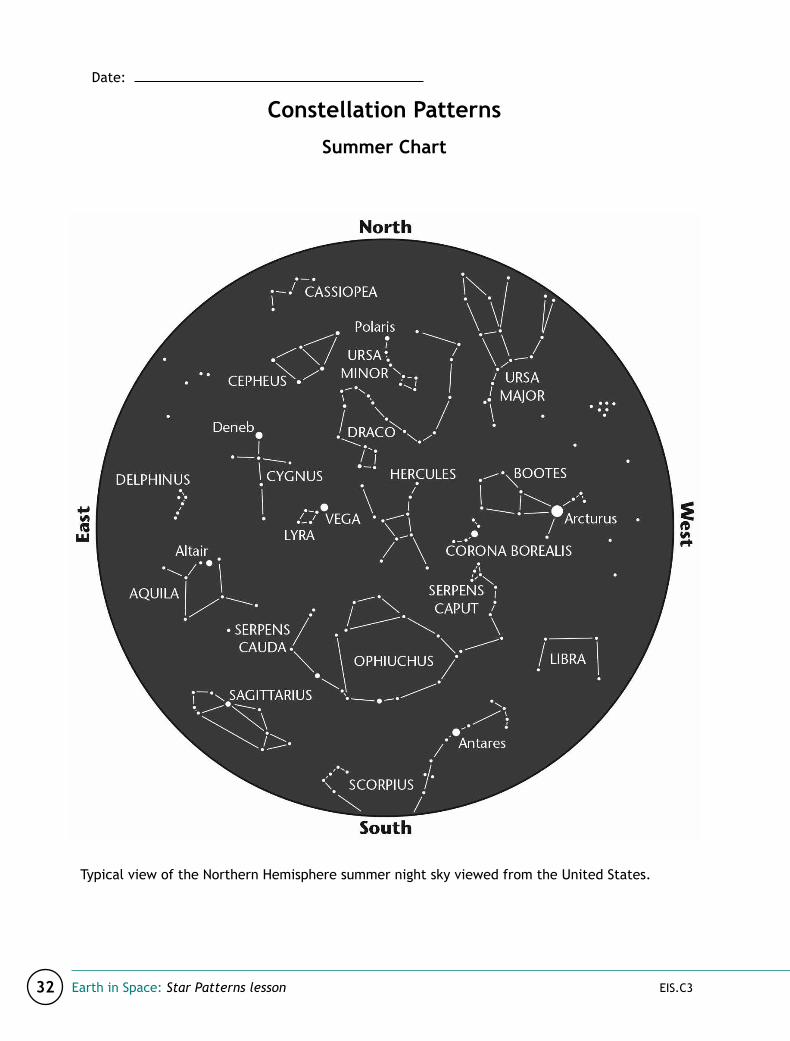
32
Date:
Constellation Patterns
Summer Chart
Typical view of the Northern Hemisphere summer night sky viewed from the United States.
Earth in Space: Star Patterns lesson EIS.C3
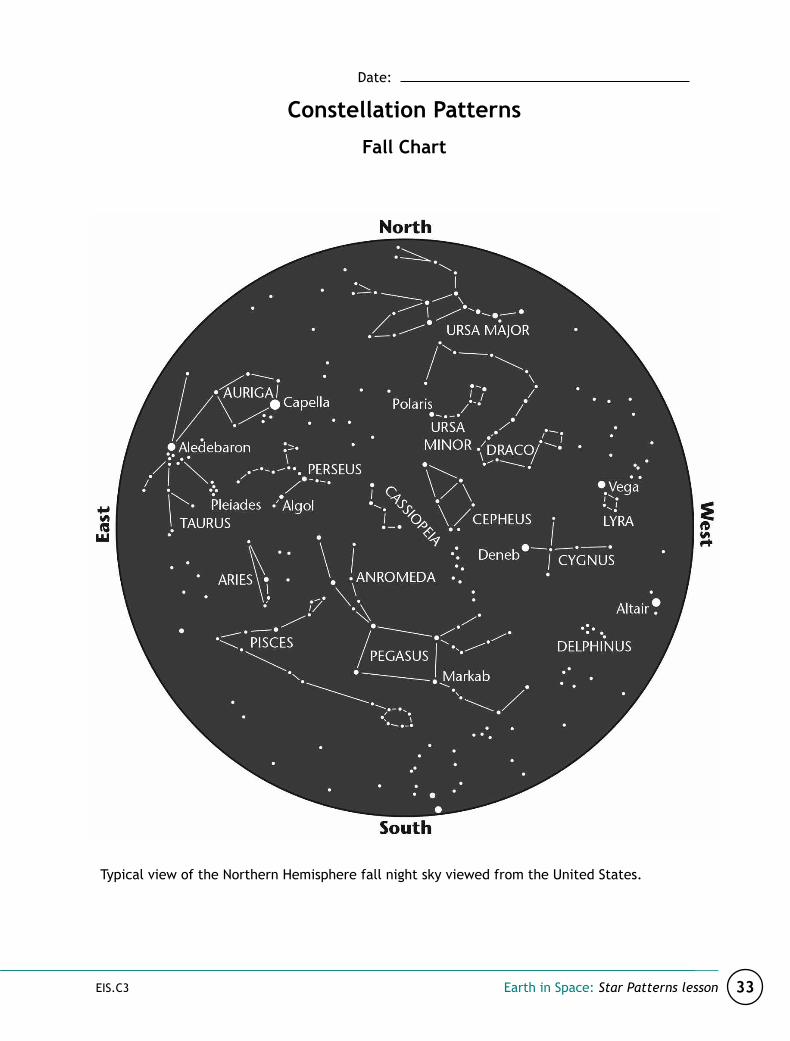
33
Date:
Constellation Patterns
Fall Chart
Typical view of the Northern Hemisphere fall night sky viewed from the United States.
EIS.C3 Earth in Space: Star Patterns lesson

34
Date:
Cons
tella
tion
Pat
tern
s
Gra
ph
W
inte
r Sp
ring
Su
mm
er
Fall
Pega
sus
Cygn
us
Scor
pius
Her
cule
s
Leo
Ori
on
Cass
iope
ia
Urs
a M
inor
Earth in Space: Star Patterns lesson EIS.C3
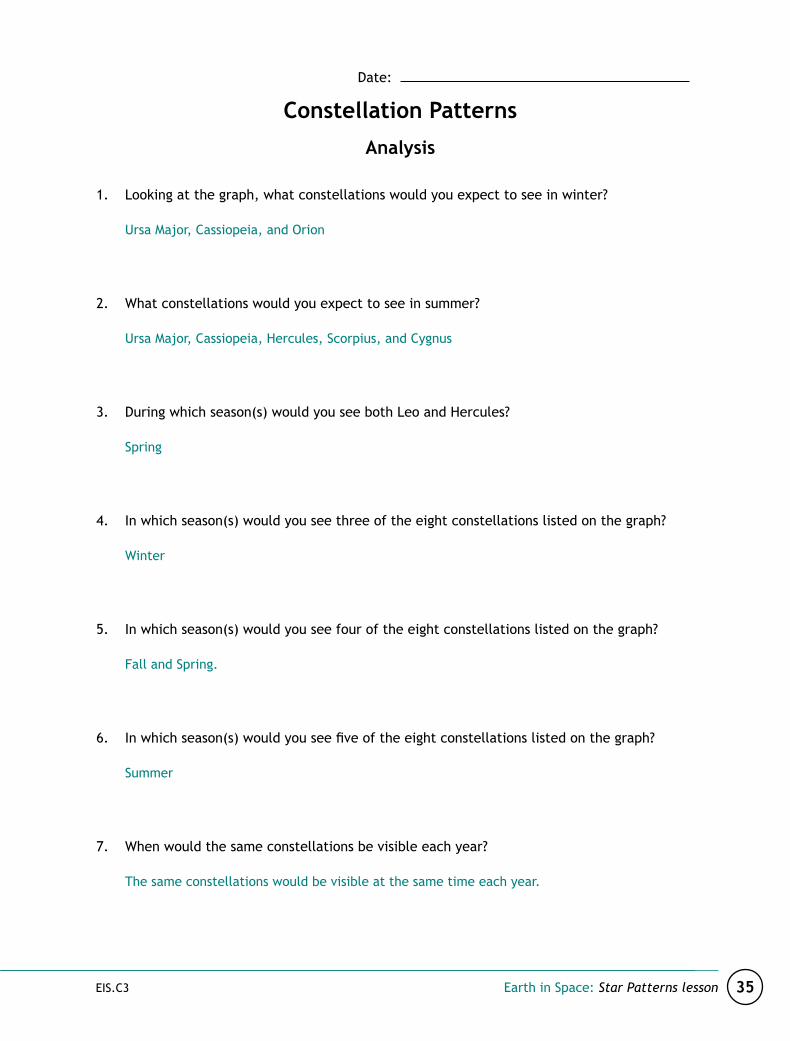
35
Date:
Cons
tella
tion
Pat
tern
s
Gra
ph
Constellation Patterns
Analysis
1. Looking at the graph, what constellations would you expect to see in winter?
Ursa Major, Cassiopeia, and Orion
2. What constellations would you expect to see in summer?
Ursa Major, Cassiopeia, Hercules, Scorpius, and Cygnus
3. During which season(s) would you see both Leo and Hercules?
Spring
4. In which season(s) would you see three of the eight constellations listed on the graph?
Winter
5. In which season(s) would you see four of the eight constellations listed on the graph?
Fall and Spring.
6. In which season(s) would you see five of the eight constellations listed on the graph?
Summer
7. When would the same constellations be visible each year?
The same constellations would be visible at the same time each year.
EIS.C3 Earth in Space: Star Patterns lesson


Assessments

Earth in Space: Gravity on Earth Cluster Table of Contents
Content RubricsRubric: Earth’s GravityRubric: Earth’s Rotation and Orbit Rubric: Sun and ShadowsRubric: Our Sun and Other Stars
Skills and Attitudes Checklists and Self-Assessments Checklist: Developing and Using Models Self-Assessment: Using Models in ScienceChecklist: Relative Scale
Performance Tasks Teacher GuidePerformance Task Teacher Guide: Dropped Object Performance Task Teacher Guide: Shadow Performance Task Teacher Guide: Sun’s Position Performance Task Teacher Guide: Shadow Data and Graph Performance Task Teacher Guide: Sun Data and Graph Performance Task Teacher Guide: Daytime and Nighttime Performance Task Teacher Guide: Our Sun and Other StarsPerformance Task Teacher Guide: Constellation Graph
Quick Check Teacher GuideQuick Check Teacher Guide: Gravity on Earth Quick Check Teacher Guide: Daily Pattern of the SunQuick Check Teacher Guide: Sun and Other Stars
Assessment MastersPerformance Task: Dropped Object Quick Check: Gravity on Earth Performance Task: Shadow Performance Task: Sun’s Position Performance Task: Shadow Data and Graph Performance Task: Sun Data and Graph Performance Task: Daytime and Nighttime Quick Check: Daily Pattern of the Sun Performance Task: Our Sun and Other StarsPerformance Task: Constellation GraphQuick Check: Sun and Other Stars

Rubric: Earth’s Gravity Criterion A Criterion B
The Earth is shaped like a sphere. The gravitational force exerted by Earth pulls objects toward the center of the Earth.
4 - Exceeds Expectations
Understands at a secure level (see box below), and seeks information about the shape of other planets in the solar system.
Understands at a secure level (see box below), and tries to determine whether objects exert any gravitational force on the Earth.Explores content
beyond the level presented in the lessons.
3 - Secure(Meets Expectations)
Uses evidence to explain that Earth is shaped like a sphere.
Uses models to explain that the gravitational force exerted by Earth on objects is directed toward the center of the Earth.
Understands content at the level presented in the lessons and does not exhibit misconceptions.
2 - Developing(Approaches Expectations)
Explains that Earth is shaped like a sphere, but does not provide any evidence to support that explanation.
Explains that the gravitational force exerted by Earth on objects is directed “down,” but cannot explain that the objects are pulled toward Earth’s center, or demonstrate this using a model.
Shows an increasing competency with lesson content.
1 - Beginning Does not know that Earth is shaped like a sphere.
Does not understand that the gravitational force exerted by Earth pulls objects toward its center.Has no previous
knowledge of lesson content.
EIS.C1 Earth in Space: Gravity on Earth Cluster

Rubric: Earth’s Rotation and Orbit Criterion A Criterion B Criterion C
Earth’s rotation on its axis causes the sun’s apparent arc across the sky every day.
Most stars appear to move across the sky every night, because of Earth’s rotation on its axis.
Some stars are visible and some stars are not visible throughout the entire year as the Earth orbits the sun.
4 - Exceeds Expectations
Understands at a secure level (see box below) and investigates how the rotation of other planets compares to Earth’s.
Understands at a secure level (see box below) and seeks more information to explain why the North Star (and other stars close to the North Star) do not appear to move across the sky during the night.
Understands at a secure level (see box below) and seeks to explain why some stars are visible and some stars are not visible throughout the entire year.
Explores content beyond the level presented in the lessons.
3 - Secure(Meets Expectations)
Explains that Earth’s rotation makes the sun appear to travel in an arc across the sky every day.
Explains that most stars appear to move across the sky every night because of Earth’s rotation.
Gives examples of stars that are visible and stars that are not visible throughout the entire year as the Earth orbits the sun.
Understands content at the level presented in the lessons and does not exhibit misconceptions.
2 - Developing(Approaches Expectations)
Explains that Earth rotates on its axis, but does not connect how the rotation makes the sun appear to travel in an arc across the sky every day.
Explains that most stars appear to move across the sky every night, but does not attribute the motion to the rotation of Earth.
Explains that some stars are visible and some stars are not visible throughout the entire year as the Earth orbits the sun, but is unable to give examples of the stars.
Shows an increasing competency with lesson content.
1 - Beginning Does not understand that Earth rotates.
Does not recognize that most stars appear to move across the sky every night.
Does not know that some stars are visible and some stars are not visible throughout the entire year as the Earth orbits the sun.
Has no previous knowledge of lesson content.
EIS.C1 Earth in Space: Gravity on Earth Cluster
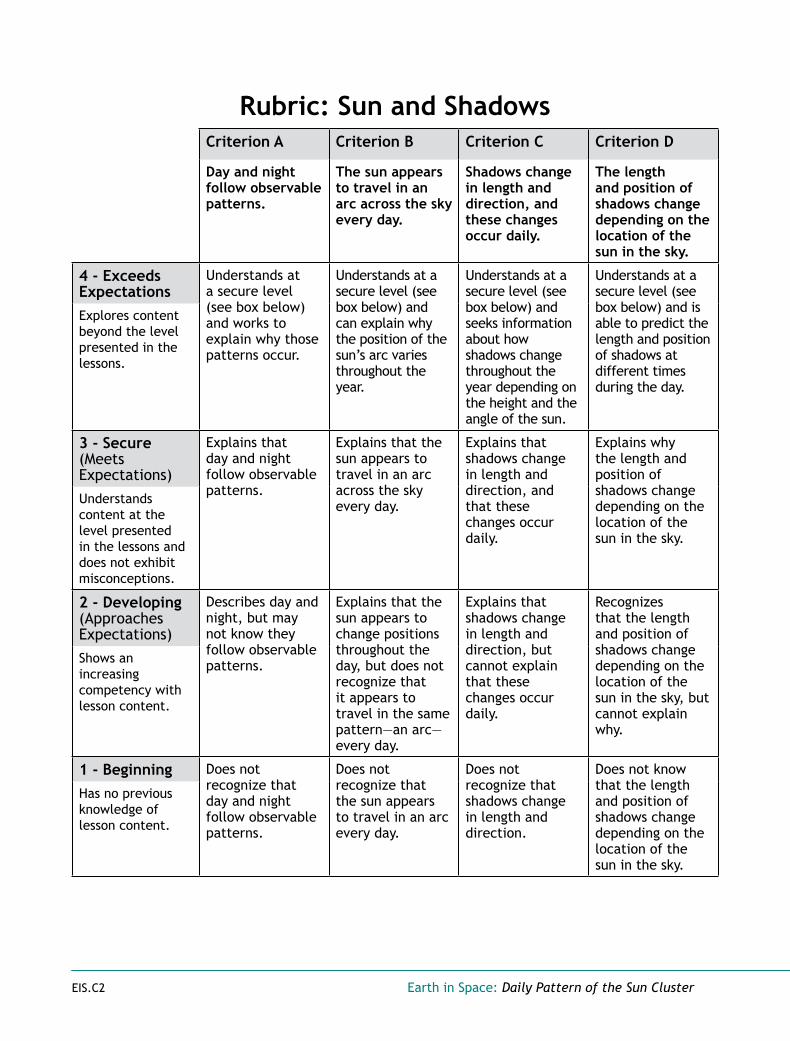
Rubric: Sun and Shadows Criterion A Criterion B Criterion C Criterion D
Day and night follow observable patterns.
The sun appears to travel in an arc across the sky every day.
Shadows change in length and direction, and these changes occur daily.
The length and position of shadows change depending on the location of the sun in the sky.
4 - Exceeds Expectations
Understands at a secure level (see box below) and works to explain why those patterns occur.
Understands at a secure level (see box below) and can explain why the position of the sun’s arc varies throughout the year.
Understands at a secure level (see box below) and seeks information about how shadows change throughout the year depending on the height and the angle of the sun.
Understands at a secure level (see box below) and is able to predict the length and position of shadows at different times during the day.
Explores content beyond the level presented in the lessons.
3 - Secure(Meets Expectations)
Explains that day and night follow observable patterns.
Explains that the sun appears to travel in an arc across the sky every day.
Explains that shadows change in length and direction, and that these changes occur daily.
Explains why the length and position of shadows change depending on the location of the sun in the sky.
Understands content at the level presented in the lessons and does not exhibit misconceptions.
2 - Developing(Approaches Expectations)
Describes day and night, but may not know they follow observable patterns.
Explains that the sun appears to change positions throughout the day, but does not recognize that it appears to travel in the same pattern—an arc—every day.
Explains that shadows change in length and direction, but cannot explain that these changes occur daily.
Recognizes that the length and position of shadows change depending on the location of the sun in the sky, but cannot explain why.
Shows an increasing competency with lesson content.
1 - Beginning Does not recognize that day and night follow observable patterns.
Does not recognize that the sun appears to travel in an arc every day.
Does not recognize that shadows change in length and direction.
Does not know that the length and position of shadows change depending on the location of the sun in the sky.
Has no previous knowledge of lesson content.
EIS.C2 Earth in Space: Daily Pattern of the Sun Cluster

Rubric: Our Sun and Other StarsCriterion A Criterion B Criterion C Criterion D
The sun is a star that appears larger and brighter than other stars because it is closer.
Stars range greatly in their distance from Earth. Larger and brighter stars may appear smaller and dimmer because they are farther away.
Except for the sun, stars are visible only during nighttime.
Patterns of data revealed by graphical displays can describe the seasonal appearance of some stars in the night sky.
4 - Exceeds Expectations
Understands at a secure level (see box below) and seeks information to explain how far away the sun is from other planets.
Understands at a secure level (see box below) and researches stars we can still see with a telescope that are farthest away from Earth.
Understands at a secure level (see box below) and can explain why planets are only visible at night.
Understands at a secure level (see box below) and shows an interest in investigating changes in the position of stars over millennia.
Explores content beyond the level presented in the lessons.
3 - Secure(Meets Expectations)
Explains that the sun is a star that appears larger and brighter than other stars because it is closer.
Explains that stars range greatly in their distance from Earth and that larger and brighter stars may look smaller and dimmer because they are farther away.
Explains why, except for the sun, stars are visible only at night.
Uses the patterns of data revealed by graphical displays to describe the seasonal appearance of stars in the night sky.
Understands content at the level presented in the lessons and does not exhibit misconceptions.
2 - Developing(Approaches Expectations)
Explains that the sun is a star that appears larger and brighter than other stars, but does not know the reason is because the sun is closer.
Explains that stars range greatly in their distance from Earth, but does not recognize that larger and brighter stars may look smaller and dimmer because they are farther away.
Explains that the sun is visible during the day and that other stars are visible only at night, but cannot explain why.
Knows that there are seasonal patterns in the night sky, but cannot use data in graphical displays to describe those patterns.
Shows an increasing competency with lesson content.
1 - Beginning Does not understand that the sun is a star.
Does not know that stars range greatly in their distance away from Earth.
Does not recognize that stars other than our sun are visible during the nighttime, but not during the daytime.
Does not know that data in graphical displays can reveal patterns of the seasonal appearance of some stars in the night sky.
Has no previous knowledge of lesson content.
EIS.C3 Earth in Space: Sun and Other Stars Cluster
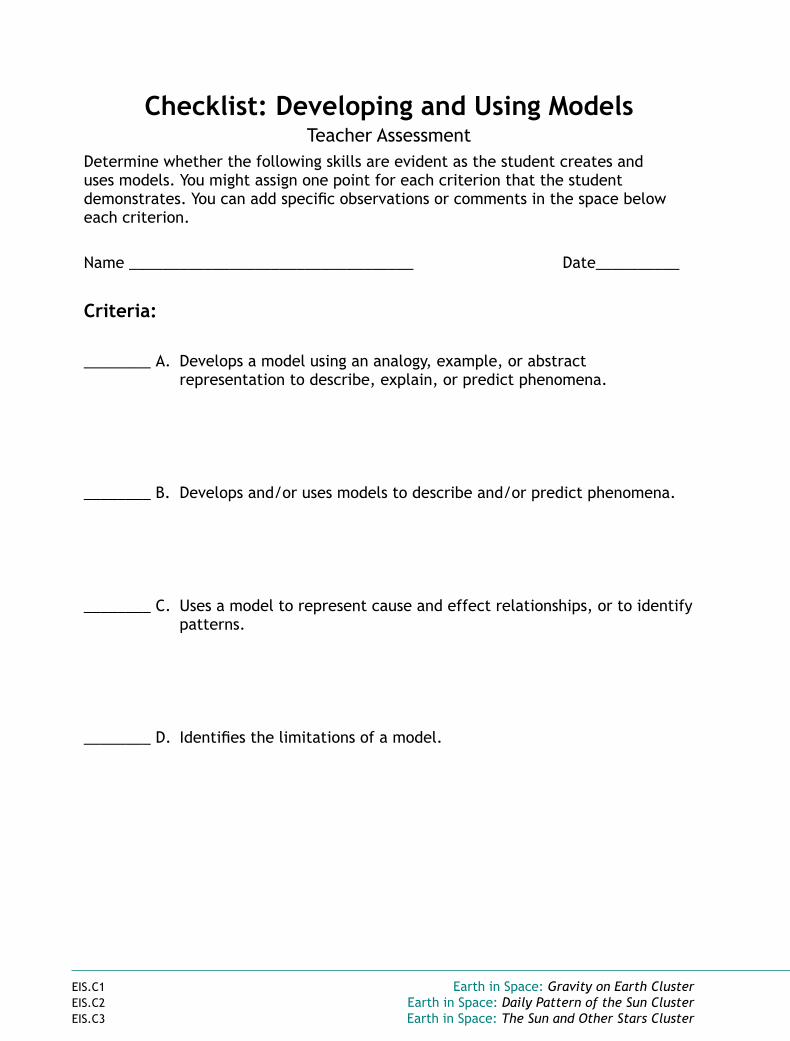
Checklist: Developing and Using ModelsTeacher Assessment
Determine whether the following skills are evident as the student creates and uses models. You might assign one point for each criterion that the student demonstrates. You can add specific observations or comments in the space below each criterion.
Name __________________________________ Date__________
Criteria:
________ A. Develops a model using an analogy, example, or abstract representation to describe, explain, or predict phenomena.
________ B. Develops and/or uses models to describe and/or predict phenomena.
________ C. Uses a model to represent cause and effect relationships, or to identify patterns.
________ D. Identifies the limitations of a model.
EIS.C1 Earth in Space: Gravity on Earth ClusterEIS.C2 Earth in Space: Daily Pattern of the Sun ClusterEIS.C3 Earth in Space: The Sun and Other Stars Cluster

Name _________________________________ Date_____________________________
Self Assessment: Using Models in ScienceThink about your use of models in science. Answer the following questions to show how well you use models.
1. How well does your model describe, explain, or predict phenomena?
Very well Okay Not very well
Explain:
2. How well does your model represent cause and effect relationships, or help to identify patterns?
Very well Okay Not very well
Explain:
3. Explain the limitations to the models you have made.
Earth in Space: Gravity on Earth Cluster EIS.C1Earth in Space: Daily Pattern of the Sun Cluster EIS.C2Earth in Space: The Sun and Other Stars Cluster EIS.C3

Checklist: Relative ScaleTeacher Assessment
Determine whether the following concepts are evident as the child works with relative scale. You might assign one point for each criterion that the child demonstrates. You can add specific observations or comments in the space below each criterion.
Name __________________________________ Date__________
Criteria:
________ A. Understands that scale models are used to represent things in the real world.
________ B. Recognizes that scale is the size of the model compared to the real object.
________ C. Understands that a change in scale of one variable (such as length or distance) requires a change in scale of another variable (such as size).
EIS.C3 Earth in Space: Sun and Other Stars Cluster

Dropped ObjectPerformance Task Teacher Guide
Teacher NoTe:
Use this assessment after teaching the Earth's Gravitational Force lesson.
The model below represents the Earth and people standing on the Earth in different locations. Draw lines that show the pull of Earth’s gravity on dropped objects in each location.
evaluaTioN GuideliNes:
Students’ drawing should include lines that begin at the outstretched arms of each person and end in the center of Earth.
EIS.C1 Earth in Space: Gravity on Earth Cluster

ShadowPerformance Task Teacher Guide
Teacher NoTe:
Use this assessment after teaching the Observing Shadows Patterns lesson.
1. The illustration above shows a flagpole at 9:00 in the morning. On the illustration, draw and label the sun and the shadow cast by the flagpole. Drawings vary, but the sun and the shadow should be on opposite sides of the flagpole.
2. Describe the location of the sun as compared to the shadow. Response should be something like, “They are on opposite sides of the flagpole from each other.” Or “The flagpole is between the sun and its shadow.”
3. Use a different color to draw the location and shape of the flagpole’s shadow at 11:00 A.M., two hours later in the day. Drawings vary, but the shadow should be shorter than the first shadow and closer to vertical.
EIS.C2 Earth in Space: Daily Pattern of the Sun Cluster

Sun’s PositionPerformance Task Teacher Guide
Teacher NoTe:
Use this assessment after teaching the Observing the Sun for a Day lesson.
On the picture below, draw the path the sun seems to travel across the skyduring the day. Use an arrow to indicate the direction the sun appears to travel.
evaluaTioN GuideliNes:
• Students’ drawings should depict the sun traveling in an arc across the sky.
• Students should also use an arrow to indicate that the sun travels from east to west.
EIS.C2 Earth in Space: Daily Pattern of the Sun Cluster

Shadow Data and GraphPerformance Task Teacher Guide
Teacher NoTe:
Use this assessment after teaching the Tracking Shadows During a Day lesson.
Basil collected shadow data during the school day. The following table shows his data.Analyze the shadow data. Answer the questions below. Then graph the data on the following page.
Time Length of Shadow (cm)
9:15 a.m. 7
10:38 a.m. 5
12:16 p.m. 3
1:28 p.m. 4
2:35 p.m. 5
3:20 p.m. 6
1. At what time was the sun lowest in the sky? ____________9:15 a.m.
2. At what time were shadows the shortest? ____________12:16 p.m.
3. At what time was the sun highest in the sky? ___________12:16 p.m.
4. At what time were shadows the longest? ____________9:15 a.m.
5. What pattern related to shadows does the data reveal? Shadows are long in the morning. They get shorter and shorter until around noon. Then they get longer again.
EIS.C2 Earth in Space: Daily Pattern of the Sun Cluster

Shadow Data and GraphPerformance Task Teacher Guide
Time of Day
Leng
th o
f Sh
adow
(cm
)
1
2
3
4
5
6
7
10 am 11 am 12 pm 1 pm 2 pm 3 pm 4 pm
EIS.C2 Earth in Space: Daily Pattern of the Sun Cluster

Sun Data and GraphPerformance Task Teacher Guide
Teacher NoTe:
Use this assessment after teaching the Tracking Shadows During a Day lesson.
Felix and Rhonda collected data about the height of the sun during the school day. The following table shows their data.Analyze the sun’s height data. Answer the questions below. Then graph the data on the following page.
Time Height of Sun (fists)
9:07 a.m. 2
10:43 a.m. 4
11:38 a.m. 5
12:55 p.m. 6
2:35 p.m. 5
3:43 p.m. 4
1. At what time was the sun lowest in the sky? ____________9:07 a.m.
2. At what time was the sun highest in the sky? ___________12:55 p.m.
3. What pattern related to the sun’s path in the sky does the data reveal? The sun appears to travel in an arc shaped path across the sky.
4. Think about what you have learned about how the length of a shadow depends on the height of the sun in the sky. At what time would the shadows have been the shortest? What time would they have been the longest? The shadows would have been shortest at 12:55pm. The shadows would have been longest at 9:07am.
EIS.C2 Earth in Space: Daily Pattern of the Sun Cluster

Sun Data and GraphPerformance Task Teacher Guide
Time of Day
Hei
ght
of S
un (
fist
s)
1
2
3
4
5
6
10 am 11 am 12 pm 1 pm 2 pm 3 pm 4 pm
EIS.C2 Earth in Space: Daily Pattern of the Sun Cluster

Daytime and NighttimePerformance Task Teacher Guide
Teacher NoTe:
Use this assessment after teaching the Modeling Earth’s Rotation lesson.
In the space below, draw and describe what causes daytime and nighttime.
evaluaTioN GuideliNes:
When evaluating children’s answers, consider whether they include the following elements in their drawings and written explanations:
• As Earth rotates, the side facing the sun experiences daytime.
• As Earth rotates, the side opposite the sun experiences nighttime.
EIS.C2 Earth in Space: Daily Pattern of the Sun Cluster

Our Sun and Other StarsPerformance Task Teacher Guide
Teacher NoTe:
Use this assessment after teaching the Our Sun Is a Star lesson.
Lebron and Trina are talking about our sun and other stars. Trina argues that the sun is much larger than all the other stars in the sky. She also explains that most of the other stars are about the same size as each other and the same distance from Earth. Lebron disagrees. He explains that the sun looks larger than the other stars because it is closer. He also argues that the other stars vary a great deal in size and distance from Earth.Who is correct? Explain your answer.
evaluaTioN GuideliNes:
When evaluating student answers, consider whether they include the following elements in their identifications:
• The sun looks larger than other stars because it is much closer.
• Stars range greatly in their size and distance from Earth. Larger and brighter stars may look smaller and dimmer because they are farther away.
Advanced answers may mention the dwarf, giant, and supergiant stars that vary a great deal in size.
EIS.C3 Earth in Space: Sun and Other Stars Cluster

Constellation GraphPerformance Task Teacher Guide
Teacher NoTe:
Use this assessment after teaching the Star Patterns lesson.
The graph on the next page shows a number of constellations, as well as the seasons in which they are visible in the Northern Hemisphere. Analyze the graph and answer the following questions:
1. What constellations are visible all year?
Ursa Minor and Draco
2. What constellations are visible for only part of Earth’s annual orbit?
Canis Major, Hydra, Libra, Aquila, Lyra, Auriga
3. In which season(s) would you see three of the constellations listed on the graph?
Winter and Spring
4. In which season(s) would you see four of the constellations listed on the graph?
Fall
5. In which season(s) would you see five of the constellations listed on the graph?
Summer
EIS.C3 Earth in Space: Sun and Other Stars Cluster

Cons
tella
tion
Gra
phPe
rfor
man
ce T
ask
Teac
her
Gui
de
Auri
ga
Lyra
Aqui
la
Libr
a
Hyd
ra
Cani
s M
ajor
Dra
co
Urs
a M
inor
W
inte
r Sp
ring
Su
mm
er
Fall
EIS.C3 Earth in Space: Sun and Other Stars Cluster
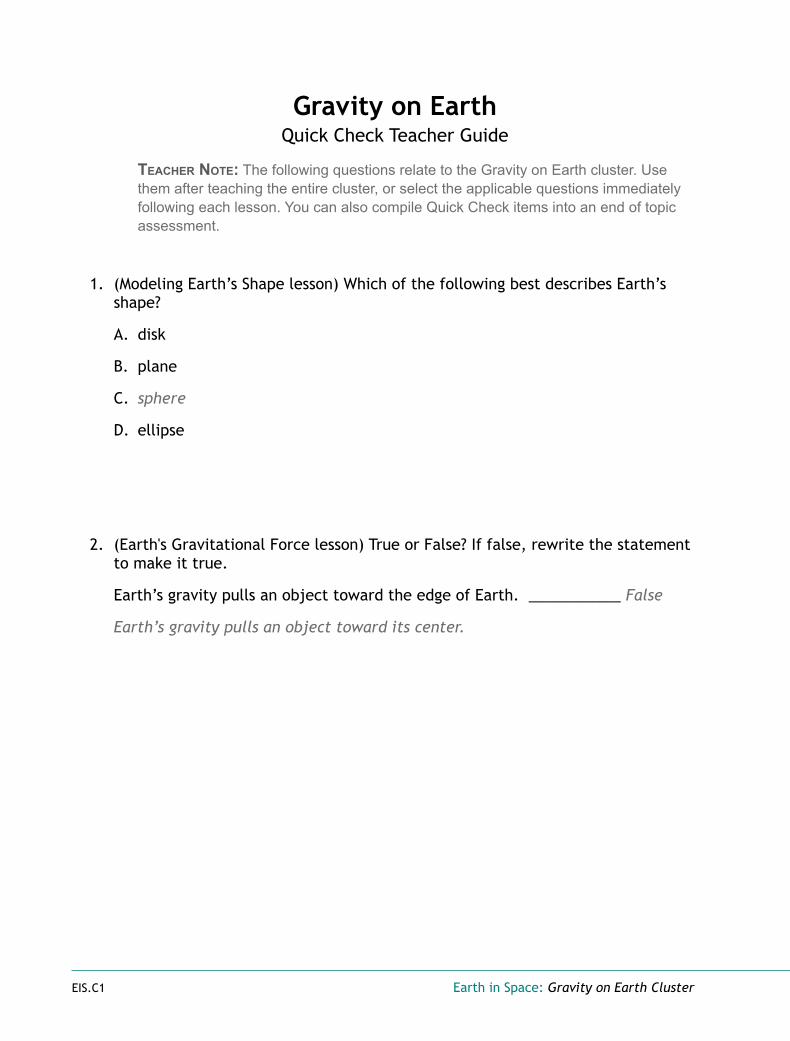
Gravity on EarthQuick Check Teacher Guide
Teacher NoTe: The following questions relate to the Gravity on Earth cluster. Use them after teaching the entire cluster, or select the applicable questions immediately following each lesson. You can also compile Quick Check items into an end of topic assessment.
1. (Modeling Earth’s Shape lesson) Which of the following best describes Earth’s shape?
A. disk
B. plane
C. sphere
D. ellipse
2. (Earth's Gravitational Force lesson) True or False? If false, rewrite the statement to make it true.
Earth’s gravity pulls an object toward the edge of Earth. ___________ False
Earth’s gravity pulls an object toward its center.
EIS.C1 Earth in Space: Gravity on Earth Cluster

3. (Earth's Gravitational Force lesson) Look at the models of Earth and people standing on Earth below. Select the one that best shows the pull of Earth’s gravity on an object dropped by the people.
a. b.
c. d.
EIS.C1 Earth in Space: Gravity on Earth Cluster

Daily Pattern of the SunQuick Check Teacher Guide
Teacher NoTe: The following questions relate to the Daily Pattern of the Sun cluster. Use them after teaching the entire cluster, or select the applicable questions immediately following each lesson. You can also compile Quick Check items into an end of topic assessment.
1. (Observing Shadow Patterns lesson) Select the most accurate statement from the following:
a. Your shadow and the sun are always on the same side.
b. Your shadow is always in front of you.
c. You are always between your shadow and the sun.
d. Your shadow is always behind you.
2. (Observing Shadow Patterns lesson) True or false? If false, rewrite the statement to make it true.
Shadows are created when an object lets in light from the sun. __________ false
Shadows are created when an object blocks light from the sun.
3. (Observing the Sun for a Day lesson) Which of the following statements about the path of the sun is most accurate?
a. The sun seems to travel in a U-shaped path across the sky each day.
b. The sun seems to travel in a straight line across the sky each day.
c. The sun seems to travel in a zig-zag pattern across the sky each day.
d. The sun seems to travel in an arc across the sky each day.
EIS.C2 Earth in Space: Daily Pattern of the Sun Cluster
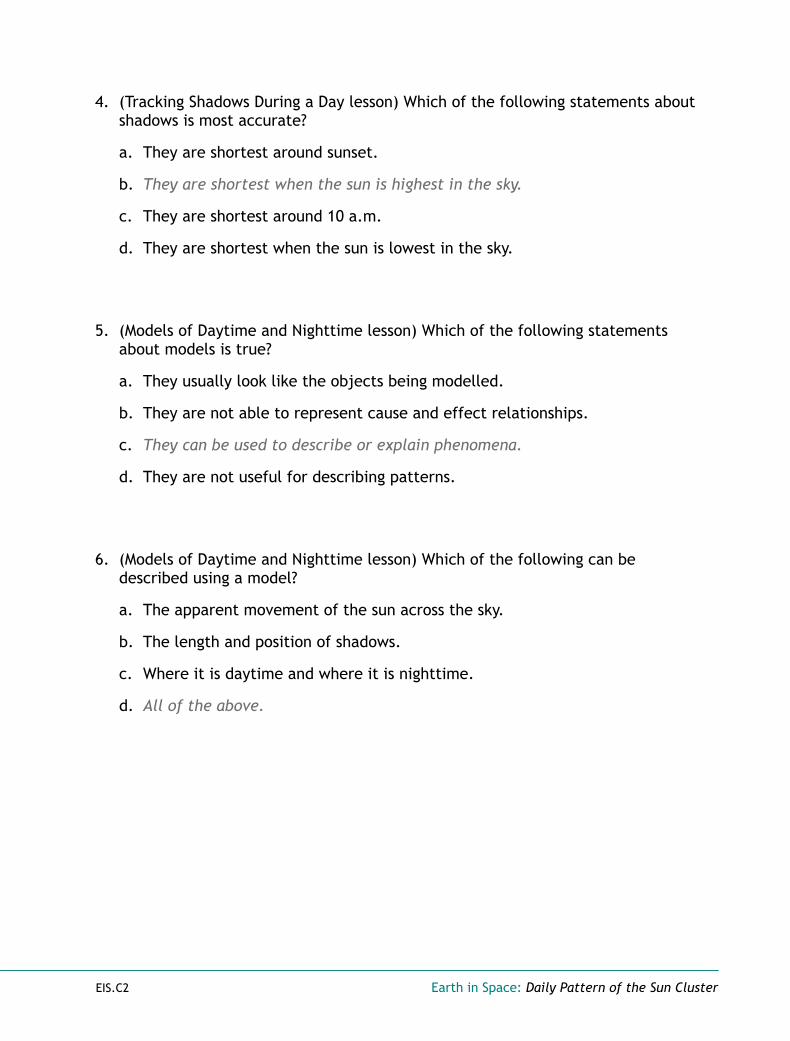
4. (Tracking Shadows During a Day lesson) Which of the following statements about shadows is most accurate?
a. They are shortest around sunset.
b. They are shortest when the sun is highest in the sky.
c. They are shortest around 10 a.m.
d. They are shortest when the sun is lowest in the sky.
5. (Models of Daytime and Nighttime lesson) Which of the following statements about models is true?
a. They usually look like the objects being modelled.
b. They are not able to represent cause and effect relationships.
c. They can be used to describe or explain phenomena.
d. They are not useful for describing patterns.
6. (Models of Daytime and Nighttime lesson) Which of the following can be described using a model?
a. The apparent movement of the sun across the sky.
b. The length and position of shadows.
c. Where it is daytime and where it is nighttime.
d. All of the above.
EIS.C2 Earth in Space: Daily Pattern of the Sun Cluster
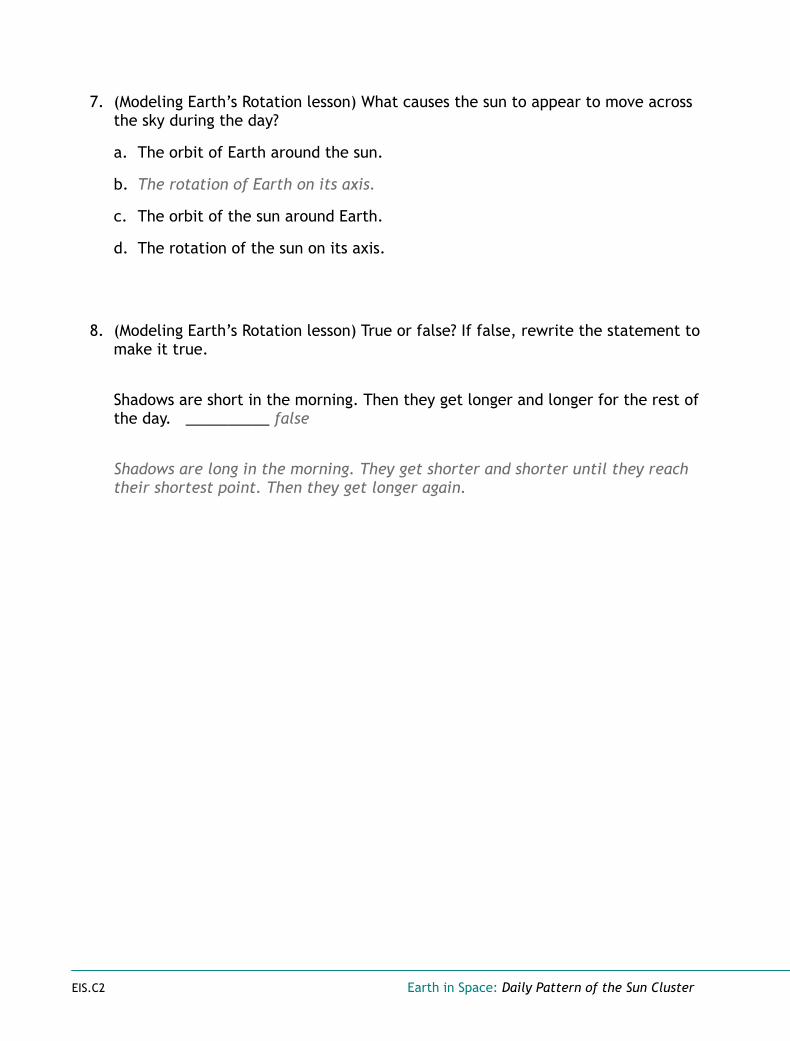
7. (Modeling Earth’s Rotation lesson) What causes the sun to appear to move across the sky during the day?
a. The orbit of Earth around the sun.
b. The rotation of Earth on its axis.
c. The orbit of the sun around Earth.
d. The rotation of the sun on its axis.
8. (Modeling Earth’s Rotation lesson) True or false? If false, rewrite the statement to make it true.
Shadows are short in the morning. Then they get longer and longer for the rest of the day. __________ false
Shadows are long in the morning. They get shorter and shorter until they reach their shortest point. Then they get longer again.
EIS.C2 Earth in Space: Daily Pattern of the Sun Cluster

Sun and Other StarsQuick Check Teacher Guide
Teacher NoTe: The following questions relate to the Sun and Other Stars cluster. Use them after teaching the entire cluster, or select the applicable questions immediately following each lesson. You can also compile Quick Check items into an end of topic assessment.
1. (Our Sun Is a Star lesson) Which of the following is true about stars?
a. The sun appears larger and brighter than other stars because it is larger.
b. The sun appears larger and brighter than other stars because it is closer.
c. Most stars are about the same distance from the Earth.
d. The Earth, the sun, and other stars are about the same size.
2. (Our Sun Is a Star lesson) True or False? If false, rewrite the statement to make it true.
If it is closer to Earth, a small star can appear larger and brighter than a large
star. __________ True
3. (Seeing Stars from Earth lesson) Which of the following explains why the stars appear to move across the sky each night?
a. The stars go around the Earth.
b. The Earth orbits the sun.
c. The Earth rotates on its axis.
d. The stars go around the sun.
EIS.C3 Earth in Space: Sun and Other Stars Cluster
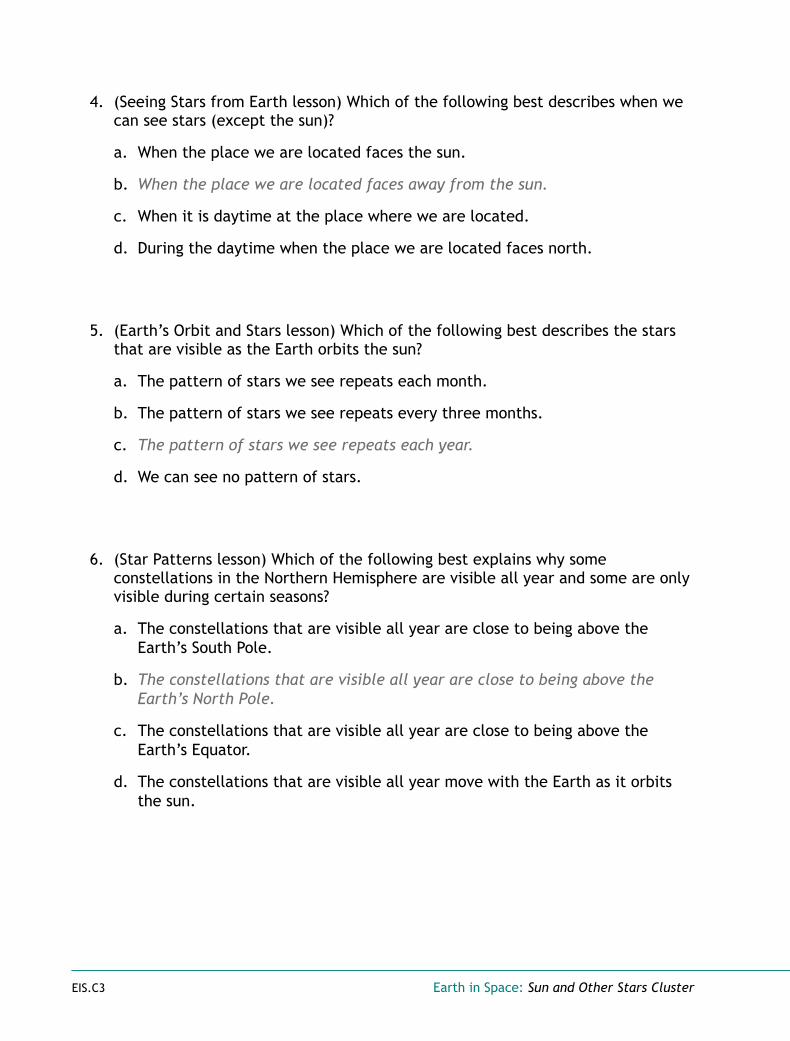
4. (Seeing Stars from Earth lesson) Which of the following best describes when we can see stars (except the sun)?
a. When the place we are located faces the sun.
b. When the place we are located faces away from the sun.
c. When it is daytime at the place where we are located.
d. During the daytime when the place we are located faces north.
5. (Earth’s Orbit and Stars lesson) Which of the following best describes the stars that are visible as the Earth orbits the sun?
a. The pattern of stars we see repeats each month.
b. The pattern of stars we see repeats every three months.
c. The pattern of stars we see repeats each year.
d. We can see no pattern of stars.
6. (Star Patterns lesson) Which of the following best explains why some constellations in the Northern Hemisphere are visible all year and some are only visible during certain seasons?
a. The constellations that are visible all year are close to being above the Earth’s South Pole.
b. The constellations that are visible all year are close to being above the Earth’s North Pole.
c. The constellations that are visible all year are close to being above the Earth’s Equator.
d. The constellations that are visible all year move with the Earth as it orbits the sun.
EIS.C3 Earth in Space: Sun and Other Stars Cluster
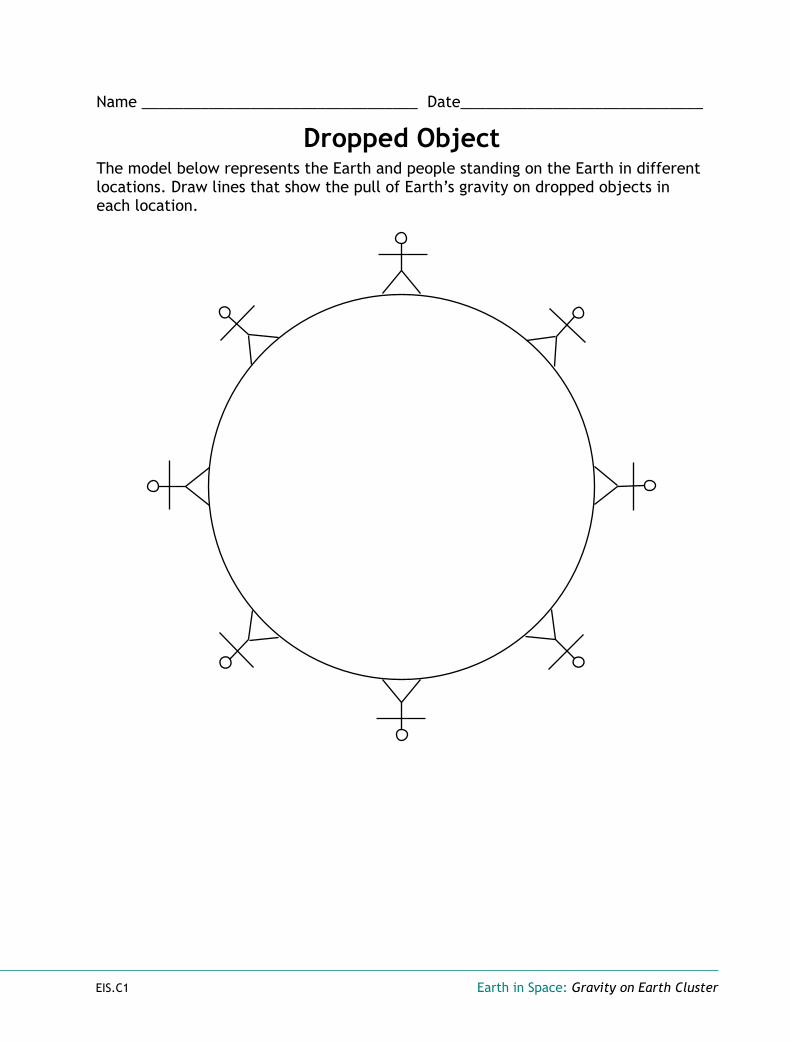
Name _________________________________ Date_____________________________
Dropped ObjectThe model below represents the Earth and people standing on the Earth in different locations. Draw lines that show the pull of Earth’s gravity on dropped objects in each location.
EIS.C1 Earth in Space: Gravity on Earth Cluster

Name _________________________________ Date_____________________________
Gravity on EarthQuick Check Items
1. Which of the following best describes Earth’s shape?
A. disk
B. plane
C. sphere
D. ellipse
2. True or False? If false, rewrite the statement to make it true.
Earth’s gravity pulls an object toward the edge of Earth. ___________
EIS.C1 Earth in Space: Gravity on Earth Cluster

3. Look at the models of Earth and people standing on Earth below. Select the one that best shows the pull of Earth’s gravity on an object dropped by the people.
a. b.
c. d.
EIS.C1 Earth in Space: Gravity on Earth Cluster

Name _________________________________ Date_____________________________
Shadow
1. The illustration above shows a flagpole at 9:00 in the morning. On the illustration, draw and label the sun and the shadow cast by the flagpole.
2. Describe the location of the sun as compared to the shadow.
3. Use a different color to draw the location and shape of the flagpole’s shadow at 11:00 A.M., two hours later in the day.
EIS.C2 Earth in Space: Daily Pattern of the Sun Cluster
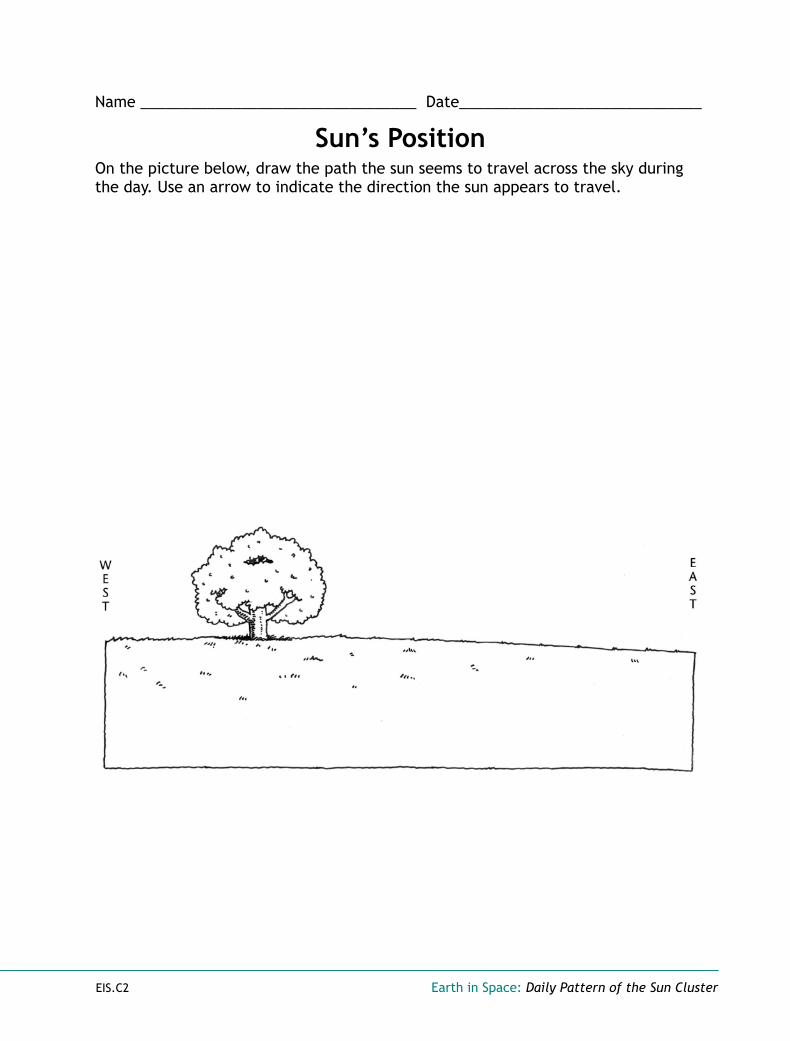
Name _________________________________ Date_____________________________
Sun’s PositionOn the picture below, draw the path the sun seems to travel across the sky during the day. Use an arrow to indicate the direction the sun appears to travel.
EIS.C2 Earth in Space: Daily Pattern of the Sun Cluster

Name _________________________________ Date_____________________________
Shadow Data and GraphBasil collected shadow data during the school day. The following table shows his data.Analyze the shadow data. Answer the questions below. Then graph the data on the following page.
Time Length of Shadow (cm)
9:15 a.m. 7
10:38 a.m. 5
12:16 a.m. 3
1:28 p.m. 4
2:35 p.m. 5
3:20 p.m. 6
1. At what time was the sun lowest in the sky? ____________
2. At what time were shadows the shortest? ____________
3. At what time was the sun highest in the sky? ___________
4. At what time were shadows the longest? ____________
5. What pattern related to shadows does the data reveal?
EIS.C2 Earth in Space: Daily Pattern of the Sun Cluster
Name _________________________________ Date_____________________________
Shadow Data and Graph
EIS.C2 Earth in Space: Daily Pattern of the Sun Cluster
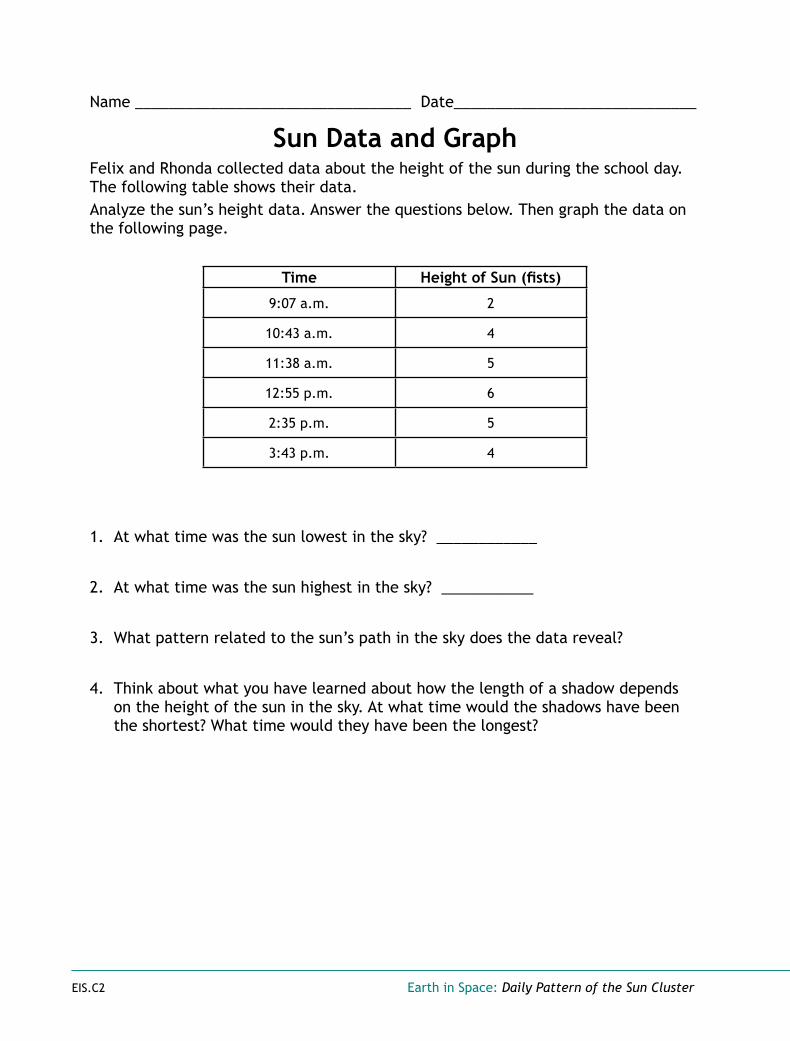
Name _________________________________ Date_____________________________
Sun Data and GraphFelix and Rhonda collected data about the height of the sun during the school day. The following table shows their data.Analyze the sun’s height data. Answer the questions below. Then graph the data on the following page.
Time Height of Sun (fists)
9:07 a.m. 2
10:43 a.m. 4
11:38 a.m. 5
12:55 p.m. 6
2:35 p.m. 5
3:43 p.m. 4
1. At what time was the sun lowest in the sky? ____________
2. At what time was the sun highest in the sky? ___________
3. What pattern related to the sun’s path in the sky does the data reveal?
4. Think about what you have learned about how the length of a shadow depends on the height of the sun in the sky. At what time would the shadows have been the shortest? What time would they have been the longest?
EIS.C2 Earth in Space: Daily Pattern of the Sun Cluster

Name _________________________________ Date_____________________________
Sun Data and Graph
EIS.C2 Earth in Space: Daily Pattern of the Sun Cluster

Name _________________________________ Date_____________________________
Daytime and NighttimeIn the space below, draw and describe what causes daytime and nighttime.
EIS.C2 Earth in Space: Daily Pattern of the Sun Cluster
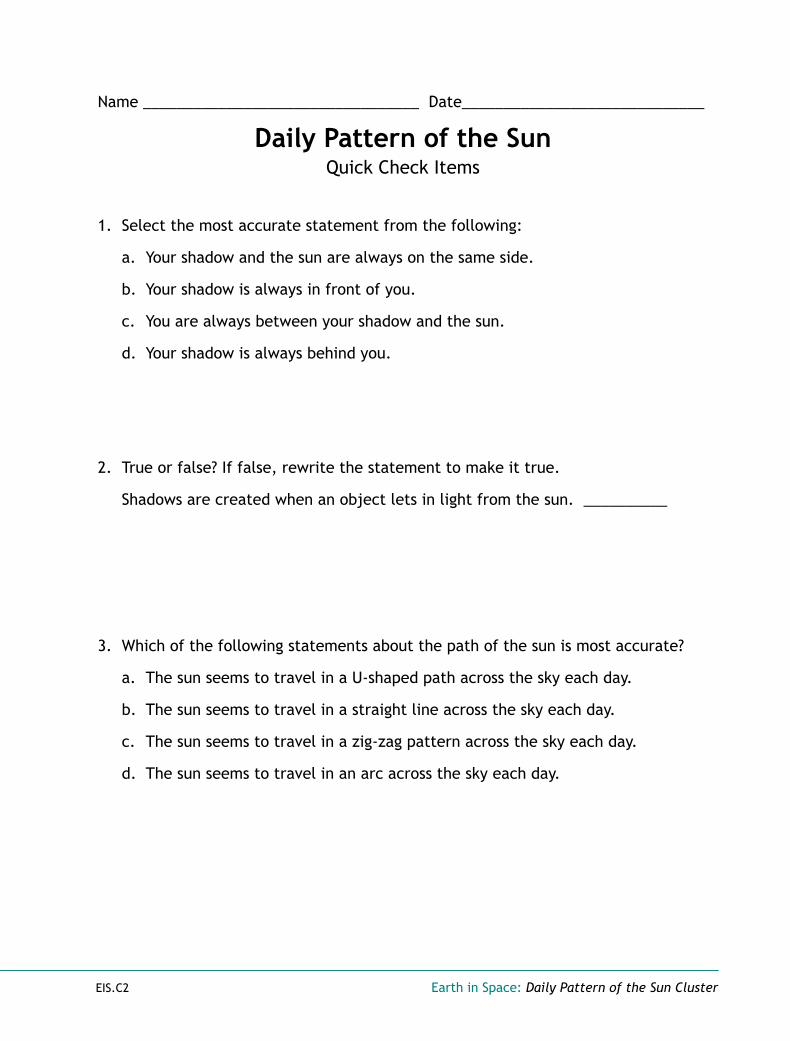
Name _________________________________ Date_____________________________
Daily Pattern of the SunQuick Check Items
1. Select the most accurate statement from the following:
a. Your shadow and the sun are always on the same side.
b. Your shadow is always in front of you.
c. You are always between your shadow and the sun.
d. Your shadow is always behind you.
2. True or false? If false, rewrite the statement to make it true.
Shadows are created when an object lets in light from the sun. __________
3. Which of the following statements about the path of the sun is most accurate?
a. The sun seems to travel in a U-shaped path across the sky each day.
b. The sun seems to travel in a straight line across the sky each day.
c. The sun seems to travel in a zig-zag pattern across the sky each day.
d. The sun seems to travel in an arc across the sky each day.
EIS.C2 Earth in Space: Daily Pattern of the Sun Cluster

4. Which of the following statements about shadows is most accurate?
a. They are shortest around sunset.
b. They are shortest when the sun is highest in the sky.
c. They are shortest around 10 a.m.
d. They are shortest when the sun is lowest in the sky.
5. Which of the following statements about models is true?
a. They usually look like the objects being modelled.
b. They are not able to represent cause and effect relationships.
c. They can be used to describe or explain phenomena.
d. They are not useful for describing patterns.
6. Which of the following can be described using a model?
a. The apparent movement of the sun across the sky.
b. The length and position of shadows.
c. Where it is daytime and where it is nighttime.
d. All of the above.
EIS.C2 Earth in Space: Daily Pattern of the Sun Cluster
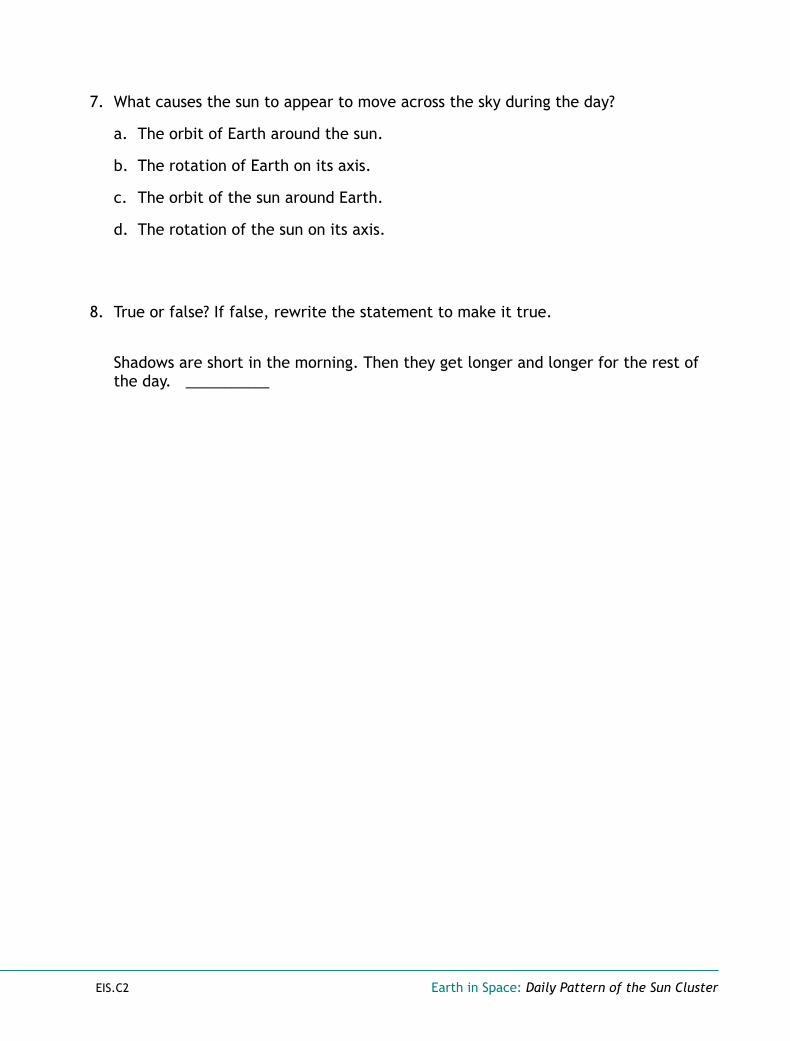
7. What causes the sun to appear to move across the sky during the day?
a. The orbit of Earth around the sun.
b. The rotation of Earth on its axis.
c. The orbit of the sun around Earth.
d. The rotation of the sun on its axis.
8. True or false? If false, rewrite the statement to make it true.
Shadows are short in the morning. Then they get longer and longer for the rest of the day. __________
EIS.C2 Earth in Space: Daily Pattern of the Sun Cluster

Name _________________________________ Date_____________________________
Our Sun and Other StarsLebron and Trina are talking about our sun and other stars. Trina argues that the sun is much larger than all the other stars in the sky. She also explains that most of the other stars are about the same size as each other and the same distance from Earth. Lebron disagrees. He explains that the sun looks larger than the other stars because it is closer. He also argues that the other stars vary a great deal in size and distance from Earth.Who is correct? Explain your answer.
EIS.C3 Earth in Space: Sun and Other Stars Cluster
Name _________________________________ Date_____________________________
Constellation GraphThe graph on the next page shows a number of constellations, as well as the seasons in which they are visible in the Northern Hemisphere. Analyze the graph and answer the following questions:
1. What constellations are visible all year?
2. What constellations are visible for only part of Earth’s annual orbit?
3. In which season(s) would you see three of the constellations listed on the graph?
4. In which season(s) would you see four of the constellations listed on the graph?
5. In which season(s) would you see five of the constellations listed on the graph?
EIS.C3 Earth in Space: Sun and Other Stars Cluster
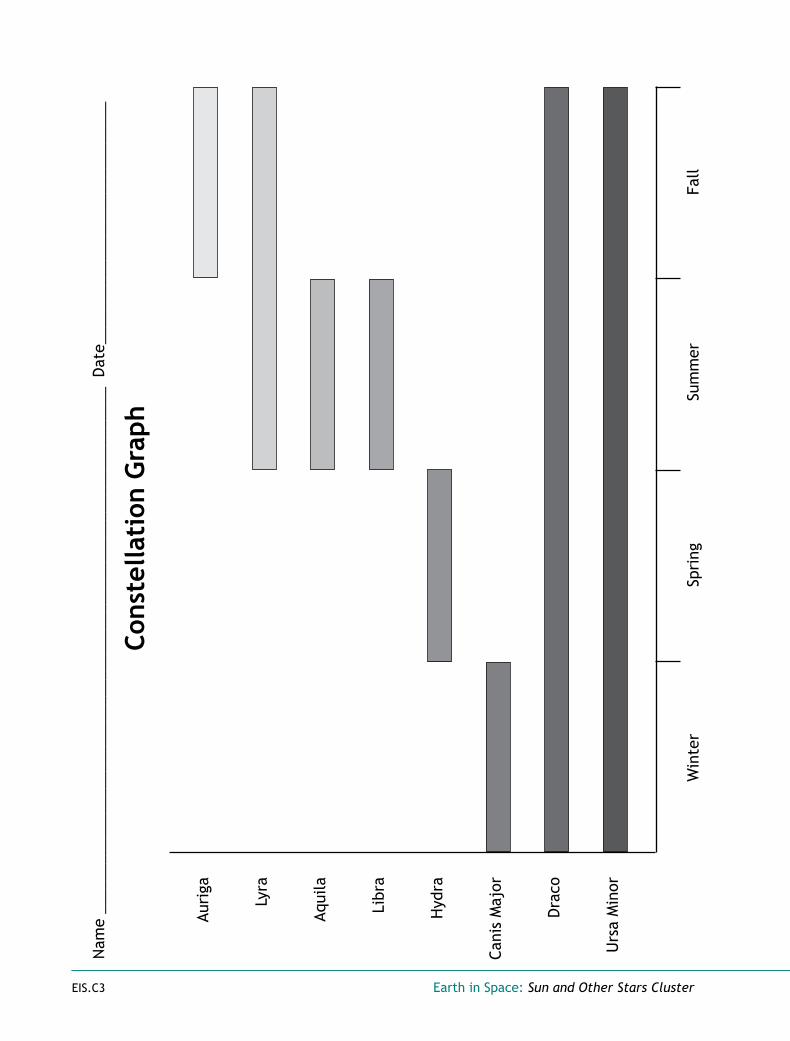
Nam
e __
____
____
____
____
____
____
____
____
____
____
____
____
____
____
____
_ D
ate_
____
____
____
____
____
____
____
Cons
tella
tion
Gra
ph
Auri
ga
Lyra
Aqui
la
Libr
a
Hyd
ra
Cani
s M
ajor
Dra
co
Urs
a M
inor
W
inte
r Sp
ring
Su
mm
er
Fall
EIS.C3 Earth in Space: Sun and Other Stars Cluster

Name _________________________________ Date_____________________________
Sun and Other StarsQuick Check Items
1. Which of the following is true about stars?
a. The sun appears larger and brighter than other stars because it is larger.
b. The sun appears larger and brighter than other stars because it is closer.
c. Most stars are about the same distance from the Earth.
d. The Earth, the sun, and other stars are about the same size.
2. True or False? If false, rewrite the statement to make it true.
If it is closer to Earth, a small star can appear larger and brighter than a large
star. __________
3. Which of the following explains why the stars appear to move across the sky each night?
a. The stars go around the Earth.
b. The Earth orbits the sun.
c. The Earth rotates on its axis.
d. The stars go around the sun.
EIS.C3 Earth in Space: Sun and Other Stars Cluster

4. Which of the following best describes when we can see stars (except the sun)?
a. When the place we are located faces the sun.
b. When the place we are located faces away from the sun.
c. When it is daytime at the place where we are located.
d. During the daytime when the place we are located faces north.
5. Which of the following best describes the stars that are visible as the Earth orbits the sun?
a. The pattern of stars we see repeats each month.
b. The pattern of stars we see repeats every three months.
c. The pattern of stars we see repeats each year.
d. We can see no pattern of stars.
6. Which of the following best explains why some constellations in the Northern Hemisphere are visible all year and some are only visible during certain seasons?
a. The constellations that are visible all year are close to being above the Earth’s South Pole.
b. The constellations that are visible all year are close to being above the Earth’s North Pole.
c. The constellations that are visible all year are close to being above the Earth’s Equator.
d. The constellations that are visible all year move with the Earth as it orbits the sun.
EIS.C3 Earth in Space: Sun and Other Stars Cluster

Teacher Background Information


Earth in Space: Teacher Background Information 181
Teacher Background Information
Gravity on Earth
Earth’s ShapeFor many thousands of years, our ancestors believed that they lived on an endless flat plane. In the 6th century B.C., the Greek mathematician Pythagoras is widely credited with thinking the Earth was roughly spherical. Two centuries later, Aristotle gave specific reasons for thinking the shape of Earth is a sphere:
1. Matter is drawn to Earth’s center and would naturally compress it into a spherical shape.
2. Traveling south reveals new stars rising above the southern horizon.
3. Earth’s shadow on the Moon at lunar eclipses is circular.
The ancient Greek scholar Eratosthenes used trigonometry to calculate the shape and size of the Earth. By measuring the angle of the sun’s rays in one city, and then measuring the angle of the sun’s rays in another city, Eratosthenes calculated that the Earth was approximately 43,000 kilometers (26,700 miles) in circumference. This is the first time that anyone had measured and understood both the size and shape of our planet.
It is now known that the circumference of Earth at the Equator is 40,705 kilometers (24,902 miles). The diameter at the Equator is 12,756 kilometers (7,926 miles). Actually, Earth is not quite spherical but is an oblate spheroid. It is squished in the north-south direction so that the pole-to-pole diameter is only 12,714 kilometers (7,900 miles).
In the Modeling Earth’s Shape lesson, students draw models of the Earth and explain, based on their own experiences, why they think their models are accurate. Then they look at a spherical model of Earth and compare it with the models they drew.
Earth’s GravityOne of the best known stories in science tells of Isaac Newton’s discovery of the Universal Law of Gravity. In 1666, Newton was staying at his country home because Cambridge University, where he worked, was temporarily closed by an outbreak of bubonic plague. One day, as Newton watched apples drop from a tree, it suddenly struck him that the same force that attracted apples to the ground kept the moon in orbit around Earth. He realized that every object possessed a similar kind of attractive force, the force of gravity. Gravity is the invisible fundamental force that pulls objects on Earth downward toward Earth’s center.
Newton’s Universal Law of Gravity states that every object in the universe attracts every other object. He called this force of attraction gravity. The earth attracts you, and pulls you down toward it. You also attract the earth, and you pull the earth upwards. The noonday sun also attracts you and pulls you upward toward it. The North Star pulls you northward, and a

182 Earth in Space: Teacher Background Information
snowflake settling on the ice in Antarctica pulls you southward. In short, every object in the universe is tugging on you, and you are being tugged in every direction. Clearly, these tugs aren’t all equally strong; some tugs are stronger than others.
Newton deduced that there are three factors that determine how strongly an object tugs on you. One factor is the mass of the object. A second factor is your mass. The third factor is how close the object is to you. Since the Earth’s mass is much greater than the snowflake settling in Antarctica, Earth’s pull on you is more than the snowflake’s. Since Earth is much closer to you than the sun, its pull on you is greater than the sun’s, even though the sun has much greater mass than Earth. If you were to float somewhere in space equidistant from the sun and Earth, you would be pulled more strongly toward the sun than toward Earth, because the sun’s mass is so much greater.
Mass is a measure of how much “stuff” is in an object. Mass is usually measured in units of grams or kilograms.
Mass and weight are closely related concepts that are often, but incorrectly, used interchangeably. Mass is a measure of how much inertia (resistance to change) an object has. Weight is a measure of how strongly gravity pulls on an object. If you moved to an area that has less gravity, such as the surface of the moon, an object’s weight would decrease. However, its mass (its resistance to changing its motion) would be unaffected. For example, it is easier to lift a bowling ball on the moon than on the earth because the bowling ball weighs less on the moon. However, it takes just as much force to get a stationary bowling ball to roll along a smooth horizontal bowling alley at a given speed on the moon as on earth, because the bowling ball’s inertia (mass) has not changed.
In the sixteenth century, the Italian scientist Galilei Galileo showed that heavy objects and light objects fall at the same rate. In other words, if you drop a golf ball and a bowling ball from the same height at the same time, they hit the ground at the same time. The fact that a feather or a sheet of paper falls slower is due to air resistance. Air resistance is just friction that forms when an object moves through the air. If there was no air resistance, a light object such as a feather or a sheet of paper would fall just as fast as a heavy bowling ball. Apollo 15 astronauts confirmed this hypothesis when they dropped a hammer and a feather on the moon and both hit the ground at the same time.
Galileo’s finding is counter-intuitive. Most children, and many adults, expect heavy objects to fall faster than light objects because they know that the Earth’s gravity pulls harder on heavy objects. Galileo explained his finding with a thought experiment. He imagined what would happen if he tied a light object and a heavy object together and dropped them. If light objects fall slower than heavy ones, he thought, then the light object should retard the fall of the heavy one. But the light and heavy objects tied together weigh more than the heavy one alone, and therefore, he reasoned, it could be argued that the tied bundle should fall faster than the heavy object, contradicting the assertion that the light object will retard the motion of the heavy one. Galileo’s solution to this contradiction was to discard the assumption that light objects fall slower than heavy ones and replace it with the assumption that all objects fall at the same rate. A more complete explanation for why heavy and light objects fall at the same rate had to wait for Newton to develop his laws of motion.

Earth in Space: Teacher Background Information 183
Student Experiences with GravityStudents have lots of experiences dropping objects and watching them fall to Earth. Most of them are aware that Earth’s gravity is responsible for this movement. However, students do not always understand what happens when objects are dropped at different parts of the world. For example, if someone were to drop an object at the South Pole, what would happen to it?
In the Earth’s Gravitational Force lesson, students focus on the effects of gravity on objects. They develop the crosscutting concept of Cause and Effect as they draw and explain where dropped objects would fall at different points on a model Earth. They use two- and three-dimensional models of Earth as evidence to argue and to describe how a dropped object will be pulled by the force of gravity down towards the center of Earth no matter where it is dropped from.

184 Earth in Space: Teacher Background Information

Earth in Space: Teacher Background Information 185
Teacher Background Information
Daily Pattern of the Sun
Introduction and MisconceptionsEarth’s heat, light, weather, climate, and life depend on our sun. The sun is a star around which Earth and the other planets of our solar system orbit. It is a medium-sized star, but it appears bigger and brighter than the stars outside our solar system because it is so much closer to us. It is about 150 million km (93 million miles) away. By contrast, the distance to Alpha Centauri, the next closest star system, is about 40 trillion km (26 trillion miles).
The lessons in the sun’s daily pattern cluster 2 address the big idea that the sun appears to travel through the sky in a predictable daily pattern. This pattern is an arc and it can be explained by Earth’s rotation. As Earth rotates, or spins on its axis, only one side of the planet faces the sun. The side facing the sun has daytime; the other side has nighttime.
Students hold many misconceptions—furthered by the common saying that the sun “rises” and “sets”—about what causes daytime and nighttime. In the Day and Night lesson, students participate in a science talk that enables you to gauge their initial understanding of where the sun “goes” at night. Students ideas of what causes daytime and nighttime typically fall into four areas: (1) Some students think of the sun as an animate object hiding, going to sleep, turning off, or going behind hills during the night; (2) other students believe that the sun is covered by clouds, the moon, night, dark, or the atmosphere at night; (3) some understand that Earth itself turns once a day; (4) others hold the misconception that the sun goes around Earth once a day.
Shadows and the Sun’s Apparent MovementIn the Observing Shadow Patterns lesson, students begin to learn about the sun’s apparent movement by observing and recording shadows. They use observations to explain how a shadow’s shape and direction are related to the sun’s position in the sky and a shadow’s movement is related to the path the sun travels across the sky. They develop the crosscutting concept of Patterns as they discuss the patterns they observe about the location of their own shadows and the shadows of a pole and use those observations as evidence to explain why shadows appear where they do.
In the Observing the Sun for a Day lesson, students track the sun’s position in the sky, relative to landmarks, and see that it appears to travel in an arc over the course of a day. When they describe the pattern of movement that the sun seems to follow in the sky, they apply the crosscutting concept of Patterns. They also record, graph, and analyze data about the height of the sun at different times during the day. They will use this data in the following lesson to look for patterns between the sun’s height in the sky, and the length of shadows. (When conducting these lessons, make sure you and the students always make observations indirectly, never looking directly at the sun. Partial blindness is easily incurred by looking directly at the

186 Earth in Space: Teacher Background Information
sun, and complete blindness results from looking at the sun through optical instruments such as binoculars or a telescope.)
In the Tracking Shadows During a Day lesson, students use a simple scientific tool to collect shadow data during the course of the day. They graph the shadow data and compare it with the sun’s height data.
Modeling Sun and ShadowsAfter drawing the length and position of shadows for a day, students replicate the shadows by using a model that includes a flashlight to represent the sun and a shadow recording tool. They do this in the Model of the Sun and Shadows lesson where they use their model and their observations to explain what causes shadows to change length and position.
Models of Daytime and NighttimeIn the Models of Daytime and Nighttime and the Modeling Earth’s Rotation lessons, students apply their understanding of what makes daytime and nighttime to create their own models. They evaluate each other’s models to find the model that best explains their observations of the sun, and then evaluate the scientific model in comparison to their own. Evaluating models helps the students discern that the rotation of Earth on its axis supports their observations of daytime and nighttime and the apparent movement of the sun across the sky during the day. Note which students create models from the perspective of Earth and which create models from the perspective of outer space. It can be cognitively difficult at this age for some students to shift their perspective from Earth to outer space. As students show how their models explain what causes day and night, they might focus on the crosscutting concept of Cause and Effect in order help overcome this cognitive challenge.
Although it is not explicitly addressed in the topic, you may find it relevant to know that the time it takes Earth to make one full rotation around its axis is 23 hours and 56 minutes. This is known as a sidereal day. The 24 hours we usually call “a day” is Earth’s solar day—the time from noon one day to noon the next. This results from the fact that Earth is revolving around the sun as well as rotating on its axis.
__________________
2 Some ideas used in this lesson cluster were drawn from Elementary Science Study’s Teacher’s Guide for Daytime Astronomy (1971, McGraw-Hill Book Company) and Everyday Classroom Tools’ Eyes on the Sky, Feet on the Ground (1998, Smithsonian Institution).
Earth in Space: Teacher Background Information 187
Teacher Background Information
Sun and Other Stars
StarsFrom Earth we can look up and see our moon, our sun, hundreds of thousands of other stars, and sometimes a few planets. On clear, dark nights we can see other stars in parts of our Milky Way galaxy. The Milky Way looks like a faint, smudged band of light stretching across the sky. We can even see stars that are grouped together into other galaxies, millions and millions of miles away. The most distant object visible to the naked eye is the Andromeda galaxy, which is 2.5 million light-years away. (Beyond the solar system, astronomers measure distances in light-years—the distance that light can travel in a year.)
Stars are luminous spheres of plasma held together by their own gravity, and that give off their own heat and light. Stars are born inside clouds of gas and dust known as nebulas. Nebulas can be found throughout space. As hydrogen gas fuses together to form helium in the star’s core, it begins to emit an enormous amount of energy in the form of heat and light. This stage of a star’s existence is known as its main sequence. It is where it will spend the majority of its lifetime. Depending on its size it could remain in this state for billions or possibly even trillions of years.
Stars vary a great deal in size, color, and temperature. Our sun is currently a white main sequence star. All stars spend a majority of their lifetimes as main sequence stars. After this stage, they become giants or supergiants. For example, when our sun reaches a certain stage in its lifespan, it will expand greatly and become a red giant star. Giant stars have a diameter of from 10 to 100 times that of the sun’s current diameter.
The color of a main sequence star depends on its surface temperature. This temperature is related to how massive it is. Stars that have a lower mass have a lower surface temperature and appear red. Stars that have a higher mass have higher surface temperatures and appear blue. Red stars are the coolest stars. Blue stars are the hottest stars. The temperatures of white stars are in between those of red and blue stars.
Since stars can vary greatly in size and distance from Earth, when looking at the night sky, it is difficult to tell which stars are closer and which stars are farther away from us. Because the sun is so close to us, it looks huge compared to every other star, but it is actually a medium size main sequence star. Another main sequence star, Sirius, is the brightest star in the night sky. That’s because it is only 8.6 light-years away from Earth. Compare this with Rigel, a supergiant star. A supergiant star has a diameter of more than 100 times that of the sun. Rigel is a much, much larger star than Sirius. But Rigel doesn’t look as bright as Sirius because it is nearly 100 times farther away from Earth.
In the Our Sun Is a Star lesson, students use different models of stars to discover that the size and brightness of stars decreases when the stars are farther away. They also focus on the crosscutting concept of Scale, Proportion and Quantity when they learn that some stars appear small and dim because they are very far away, and that similar stars vary in brightness because they vary in distance from Earth.
188 Earth in Space: Teacher Background Information
Apparent Movement of StarsLike the sun, the stars appear to move across the sky at night because of Earth’s rotation around its axis. There is, however, one star in the northern hemisphere that does not appear to move. That star is Polaris, also called the North Star. Since ancient times, people have used Polaris to find their way at night because it shows which direction is north. It also gives you your latitude. The height of the North Star above the horizon equals your latitude. In the northern hemisphere, Polaris sits very nearly on the north celestial pole. A celestial pole is a point in the sky that sits above Earth’s geographic poles. Therefore it does not appear to move. Between the north and south celestial poles is an imaginary line, Earth’s axis of rotation.
In the Seeing Stars from Earth lesson, students use models of daytime and nighttime stars to explain why stars are visible at night but not during the day. They draw their own models to show that stars are visible at night, but not during the day. When students answer questions about what causes the apparent movement of stars across the sky in the nighttime and what causes stars to be visible at night but not during the day, they develop the crosscutting concept of Cause and Effect.
Earth’s Orbit Around the SunOne rotation of Earth on its axis gives us our day and night. One revolution or orbit of Earth around the sun gives us our year. As the year progresses, seasons change, and the length of time the sun is in the sky each day changes. In other words, changes in the duration, or length, of daytime and nighttime are not part of Earth’s daily relationship to the sun but are due to its annual orbit around the sun.
In the Earth’s Orbit and Stars lesson, students use the model of Earth’s annual orbit to describe the pattern of stars that we can see from Earth. Any misconceptions the students still hold about the relationship between Earth and the sun are challenged in this lesson. Even if children have come to understand that Earth rotates, they may still hold Earth-centered notions such as a fixed, spinning Earth that is orbited by the sun or a spinning Earth that views the static sun during the daytime and the static moon during the nighttime.
Although students are not expected to know what causes seasonal changes, it will be helpful for you to know in case the question arises. The seasons change because Earth’s axis of rotation always points in the same direction and is tilted by 23.5 degrees. During its yearlong orbit of the sun, the earth’s tilt changes Earth’s orientation toward the sun, thus changing the angle at which the sun’s rays reach Earth. Simply put, the seasons change where you live on Earth as the angle of the sunlight falling on your part of Earth changes. Since the topic’s goal is to acquaint children with correct models, make sure that whenever you hold a globe its axis is always pointing in the same direction relative to one end of the room and is tilted (mounted globes are set at the correct tilt).
Also, whenever you are modeling Earth’s orbit around the sun, it is important to emphasize that the shape of Earth’s orbit, although elliptical, is nearly circular. This will help to thwart misconceptions based on models and diagrams that frequently perpetuate the idea that the sun is closer to the Earth during our summer and further away during our winter.
Around December 21, the North Pole tilts most directly away from the sun. This marks the sun’s lowest path across the sky, and the start of winter in the northern hemisphere. This day is called the winter solstice. Six months later, the situation is reversed. Around June 21, the North Pole tilts most directly toward the sun. In the northern hemisphere, it marks the sun’s
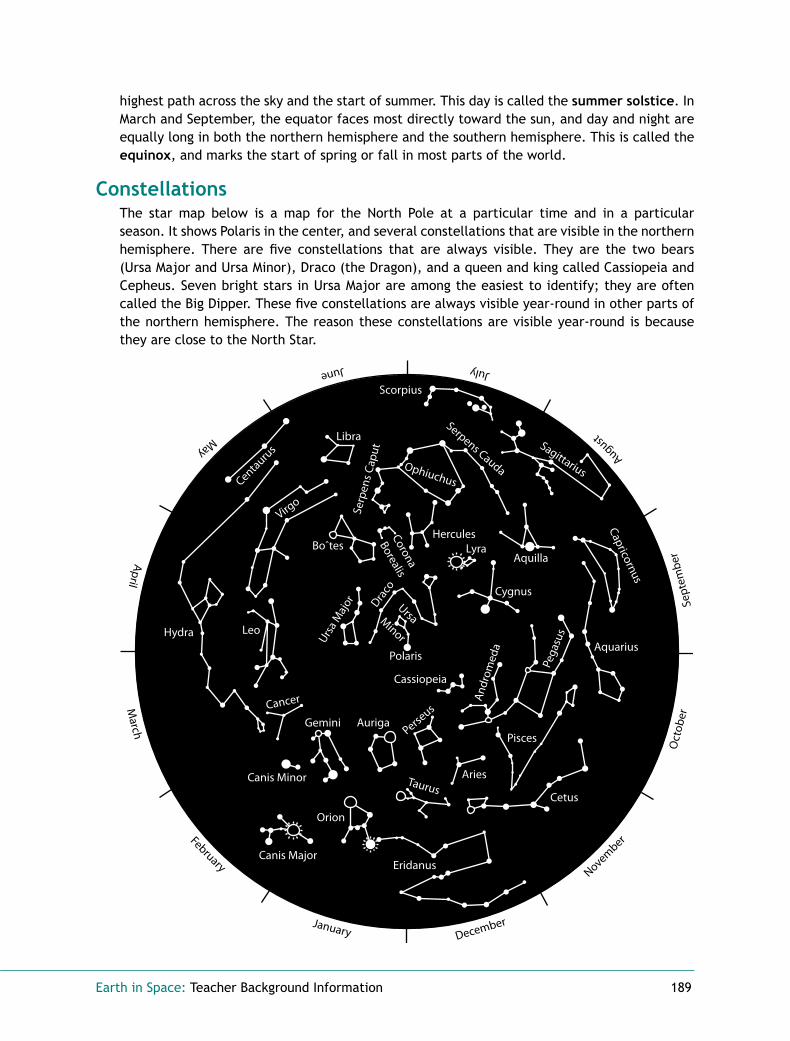
Earth in Space: Teacher Background Information 189
highest path across the sky and the start of summer. This day is called the summer solstice. In March and September, the equator faces most directly toward the sun, and day and night are equally long in both the northern hemisphere and the southern hemisphere. This is called the equinox, and marks the start of spring or fall in most parts of the world.
ConstellationsThe star map below is a map for the North Pole at a particular time and in a particular season. It shows Polaris in the center, and several constellations that are visible in the northern hemisphere. There are five constellations that are always visible. They are the two bears (Ursa Major and Ursa Minor), Draco (the Dragon), and a queen and king called Cassiopeia and Cepheus. Seven bright stars in Ursa Major are among the easiest to identify; they are often called the Big Dipper. These five constellations are always visible year-round in other parts of the northern hemisphere. The reason these constellations are visible year-round is because they are close to the North Star.
190 Earth in Space: Teacher Background Information
In the Star Patterns lesson, students choose a constellation to research. During their research they uncover what the constellations look like, information about a star in the constellations, the size and color of the star, and some interesting facts about the constellation. After doing their research, they chart when the various constellations are visible during the year. They focus on the crosscutting concept of Patterns when they explain that the same constellations are visible during the same seasons year after year.
The Science of AstronomyLong ago, people learned the patterns of stars and followed the paths of planets across the sky. They worked without telescopes, relying on their eyes, a few simple tools, and records. In ancient Sumeria, Babylonia, and Egypt, observers recorded when stars appeared to rise and set, and compiled lists of special events such as solar and lunar eclipses. By watching the sun travel across the sky, they could determine the time of day. They also knew when the seasons were changing by studying the positions of the constellations and sun in the sky.
Early observers saw that every year the sun appeared to travel through 12 constellations, which are now known collectively as the zodiac. They also noticed that some stars within the zodiac moved, and they struggled to understand what they were seeing. Today we know that these moving “stars” are actually planets. (For the same reason, true stars are sometimes referred to as “fixed stars.”)
Past civilizations used the positions of the sun, moon, and stars to help people plan their daily lives and ritual events. Their observations formed the beginnings of both astronomy and astrology. Some people confuse the words “astronomy” and “astrology.” Astronomy is the scientific study of the sun, moon, stars, planets, and other objects in space. Astrology is the belief that these objects influence the behavior of people on Earth.
Although early astronomers kept accurate records of the motions of celestial objects, until the time of the ancient Greeks they never developed scientific models based on those records, models that would show and explain how our galaxy is put together and how its many parts move. By the 300s B.C., the ancient Greeks had established that Earth is round. They also tried to explain the apparent motions of the stars, sun, moon, and planets around Earth. In A.D. 145 a Greek astronomer named Ptolemy published a model that was accepted for more than a thousand years. Ptolemy imagined that the fixed stars were all the same distance from Earth and were all attached on one huge, invisible sphere. The sun was attached to another sphere within it, and the moon to another—each planet on its own sphere—all nesting around an unmoving Earth in the center.
In the 1500s a Polish astronomer named Copernicus asserted that Earth travels around the sun. Because the Church and many people believed that Earth deserved a central place in the universe, Copernicus waited until he was on his deathbed before giving permission to publish his sun-centered views. In 1609 an Italian astronomer, Galilei Galileo, built the first astronomical telescope, and observed evidence in favor of Copernicus’ theory. Galileo discovered four large moons that orbit Jupiter, and he observed that the planets Mercury and Venus have phases like our moon (only possible if they are closer to the sun than Earth is). The Church accused Galileo of heresy, and he ended his life under house arrest as a prisoner of the Inquisition.
In 1709, Isaac Newton, published his Theory of Universal Gravitation, which holds that the same force that gives objects weight on Earth attracts everything in the universe. Planets,

Earth in Space: Teacher Background Information 191
including Earth, are held in their orbits by the gravity of the sun. Using Newton’s model, astronomers could calculate the size and scale of the solar system and accurately predict the orbits of planets, moons, and comets. For example, Edmond Halley confirmed Newton’s theory by predicting that a particular comet would pass by Earth again. When it did return, it was named after him.
Today, many astronomers use powerful telescopes to study the objects in space. Modern telescopes are usually grouped together at observatories, although the Hubble Space Telescope orbits Earth above its atmosphere. Using Hubble, astronomers have taken close-up pictures of most of the planets and moons in the solar system, and have discovered galaxies that can’t be seen using telescopes on Earth. Space exploration by space probes provides further information about our solar system.
Encourage the students in your class to understand that the science of astronomy is a human endeavor. Women and men of various social and ethnic backgrounds work as astronauts, astronomers, and in many other kinds of occupations that help us learn about our solar system and space. The science of astronomy is an adventure that people everywhere can take part in, as they have for centuries.


Glossary
194 Earth in Space: Glossary
annual A cyclical event that occurs once a year.
Aristotle An ancient Greek philosopher who lived from 384 to 322 B.C. He was the pupil of Plato and the tutor of Alexander the Great.
astrology The unscientific belief that objects and their movements in space influence the behavior of people on Earth.
astronomy The scientific study of the sun, moon, stars, planets, and other celestial objects in space.
axis A straight line that passes through an object and around which the object turns. The axis of Earth is an imaginary line through its center, between the North and South Poles. (The side or bottom line of a graph is also called an axis.)
celestial pole A point in the sky that does not appear to move. The north and south celestial poles are the imaginary extensions of Earth’s rotation axis from the North and South Poles out into space. (See also axis.)
core The region inside a star where the temperature and pressures are sufficient to cause nuclear fusion, converting atoms of hydrogen into helium and producing a great deal of energy.
Copernicus A Polish astronomer who lived from 1473-1543. He developed and promoted the now accepted theory that the Earth and other planets move around the sun.
dwarf star A small star that is much fainter than the sun.
equinox The date twice a year (in March and September) when day and night are of equal length everywhere; when the sun is directly above the equator.
Eratosthenes A ancient Greek astronomer and mathematician who lived from about 276 to 194 B.C. He calculated the circumference of Earth by observing the angle of the sun’s rays at different places.
fuse When hydrogen atoms are joined in the core of a star to create helium and a great deal of energy.
Galilei Galileo An Italian physicist and astronomer who lived from 1564-1642. He conducted experiments to understand gravity.
giant star A star with a diameter of from 10 to 100 times that of the sun.
gravity The force that attracts objects toward the center of Earth or, in space, toward more massive objects, such as moons toward planets and planets toward the sun.
helium An inert gas present in the core of the sun and other stars.
hydrogen A colorless, odorless, flammable gas that combines with oxygen to form water. The lightest of the known elements.
Earth in Space: Glossary 195
Isaac Newton An English philosopher and mathematician who lived from 1642-1727. He formulated the universal law of gravity.
light-year A unit for measuring distances outside our solar system. The distance that light travels in one year; about 6 trillion miles (10 trillion kilometers).
main sequence A star that is fusing hydrogen to helium in its core. Our sun is a main sequence star. This is where all stars spend the majority of their lives.
Milky Way The name of the galaxy in which our sun is a medium-sized star among 100 billion other stars.
Newton, Isaac An English mathematician and physicist (1642-1727). He is said to have developed his ideas about gravity while watching an apple fall from a tree. He realized that an invisible force, which he called gravity, pulled the apple. Among his many other accomplishments, Newton proposed three laws of motion.
Newton’s Universal Law of Gravity A law of physics, first formulated by Isaac Newton, that states
that every object in the universe gravitationally attracts every other object in the universe. The strength of this attraction is proportional to the mass of the objects and is inversely proportional to the square of the distance between them.
nebula A cloud of gas and dust in space.
nuclear reaction A process in which matter is either combined or broken apart and energy is released.
oblate spheroid The true shape of the Earth. The term “oblate” refers to its slightly oblong appearance.
orbit The path of one object in space around another. For example, Earth orbits the sun, and the moon orbits Earth.
Ptolemy An ancient Greek mathematician, astronomer, and geographer. He did most of his work from 127-151 A.D.
plasma A fourth state of matter, made up of electrically charged atomic particles. Another term for plasma is “ionized gas.”
Pythagoras An ancient Greek philosopher, mathematician and religious reformer who lived from 582-500 B.C.
rotate To turn around a central point or to spin on an axis. Earth rotates on its axis once a sidereal day. (See also sidereal day and solar day.)
sidereal day The time a planet takes to rotate, measured in relation to the fixed stars. Earth’s sidereal day is 23 hours and 56 minutes.

196 Earth in Space: Glossary
solar day The time from noon one day to noon the next. Earth’s solar day is 24 hours.
star A large ball of hydrogen and helium gases that produces light and heat by means of nuclear reactions in its core. Stars have a wide range of brightness, colors, temperatures, and sizes.
summer solstice The day that marks the sun’s highest path in the sky and the start of summer. The summer solstice happens around June 21 in the northern hemisphere.
supergiant A star whose diameter is more than 100 times that of the sun.
winter solstice The day that marks the sun’s lowest path in the sky and the start of winter. The winter solstice happens around December 21 in the northern hemisphere.