getting started with codeigniter 4 - ds-gear.com · codeigniter . one of the biggest changes,...
TRANSCRIPT

Getting Started with CodeIgniter 4 CodeIgniter 4 at first glance. Start learning how to start using some of the new features in CodeIgniter 4 a Special Thank you and all Credit goes to Kilishan of New Myth Media for all of his time and hard work on this CodeIgniter 4 Document.
2017
PDF file by Raymond King Custom Software Designers, LLC. ( InsiteFX )
8/16/2017

Table of Contents NOTE: ......................................................................................................................................................................... 6
The articles in this document are based on unreleased, pre-alpha versions of the software and specifics may have changed. ..................................................................................................................... 6
This should not be used for a Production Website.................................................................................... 6
Requests and Responses In CodeIgniter 4 .................................................................................................... 7
At A Glance ........................................................................................................................................................... 7
IncomingRequest............................................................................................................................................. 7
Response ............................................................................................................................................................ 8
A Quick Example ................................................................................................................................................ 8
Content Negotiation in CodeIgniter 4 ...........................................................................................................11
What Is Content Negotiation? .....................................................................................................................11
A Quick Example ..............................................................................................................................................12
Dependency Injection in CodeIgniter 4 .......................................................................................................14
Why Is DI Important? .....................................................................................................................................14
The Rise and Fall of the Container ............................................................................................................16
Services ...............................................................................................................................................................17
A Quick Example ..............................................................................................................................................19
Coupling? ........................................................................................................................................................20
Routes in CodeIgniter 4 .....................................................................................................................................21
Route Basics ......................................................................................................................................................21
Module-like Functionality ...........................................................................................................................22
Closures ..............................................................................................................................................................22
Placeholders....................................................................................................................................................23

HTTP Verbs........................................................................................................................................................24
Generating standard Resource routes .....................................................................................................24
No More Magic ..................................................................................................................................................25
Groups .................................................................................................................................................................25
Environment Groups ...................................................................................................................................26
Redirect Old Routes........................................................................................................................................26
Using Routes In Views ...................................................................................................................................26
Named Routes ................................................................................................................................................27
Reverse Routing ............................................................................................................................................27
Global Options ..................................................................................................................................................28
Need More? Customize it ..............................................................................................................................28
Modules in CodeIgniter 4 ..................................................................................................................................29
Module/HMVC Support? ...............................................................................................................................29
Autoloading and Namespaces .....................................................................................................................29
A Quick Example ..............................................................................................................................................30
What About Non-Class Files? .......................................................................................................................32
Loading Helpers ............................................................................................................................................32
Loading Views................................................................................................................................................32
First Glimpse at CodeIgniter 4 Database Layer ........................................................................................34
What's the Same?.............................................................................................................................................34
What's different? .............................................................................................................................................34
Configuration .................................................................................................................................................34
Raw Queries ...................................................................................................................................................36
Saved Queries ................................................................................................................................................37
Query Builder ................................................................................................................................................38

What's Still Coming? .......................................................................................................................................39
CodeIgniter 4 HTTP Client ................................................................................................................................41
The CURLRequest Class .................................................................................................................................41
A Few Quick Examples ...................................................................................................................................42
A Single Call ...................................................................................................................................................42
Consuming an API........................................................................................................................................42
Submitting A Form .......................................................................................................................................43
Multitude of Options ....................................................................................................................................43
Getting Started With CodeIgniter 4 Pre-Alpha 1 ......................................................................................45
Download It .......................................................................................................................................................45
Look Around .....................................................................................................................................................45
Start Playing ......................................................................................................................................................46
PHP Server .....................................................................................................................................................47
Virtual Host ....................................................................................................................................................47
Using Entities in CodeIgniter 4 .......................................................................................................................49
Getting Entities from the Model .................................................................................................................49
The Entity Class ............................................................................................................................................51
Saving the Entity ..............................................................................................................................................52
Up Next ................................................................................................................................................................53
Better Entities in CodeIgniter 4 ......................................................................................................................55
Getters and Setters ............................................................................................................................................55
Filler .....................................................................................................................................................................58
The Entity Class.................................................................................................................................................59
Upgrading the Parser in CodeIgniter 4 ........................................................................................................67
The More Things Change ..............................................................................................................................67

The Little Things..............................................................................................................................................68
Conditional Logic ..........................................................................................................................................68
No-Parse Blocks.............................................................................................................................................68
Comments .......................................................................................................................................................69
Automatic Escaping......................................................................................................................................69
The Bigger Things ...........................................................................................................................................70
Filters ...............................................................................................................................................................70
Plugins .............................................................................................................................................................71
Creating a New Base Controller ......................................................................................................................73
The BaseController .............................................................................................................................................74
The AdminController .........................................................................................................................................76
The PublicController ..........................................................................................................................................78
The Modified Home Controller .......................................................................................................................80

Special Thanks to kilishan of New Myth Media for his hard work on this.
NOTE:
The articles in this document are based on unreleased, pre-alpha versions of the software and specifics may have changed.
This should not be used for a Production Website.

Requests and Responses In CodeIgniter 4 By Lonnie Ezell on Mar 02, 2016 5 Comments codeigniter
One of the biggest changes, conceptually, in CodeIgniter 4 is the way that Input and Output is handled. In prior versions, including the latest v3 releases, Input and Output were handled as two classes that contained mostly related functionality. There wasn't any "grand scheme" behind it, but it still worked pretty nicely. In v4, though, we've modeled the HTTP layer much more closely, building a new hierarchy of classes to represent the common HTTP requests and responses.
At A Glance When working with web applications - as opposed to CLI-only services - you'll really just need to worry about two classes: IncomingRequest and Response.
IncomingRequest The IncomingRequest class provides access to the HTTP request and all of the side data that comes with it, including:
• GET, POST, SERVER, and ENV variables • Headers • Cookies • the URL object that is currently being looked at • uploaded files
and provides convenience methods for things like:
• client IP Address • is it an AJAX request? • is it a CLI request? • is it over HTTPS?
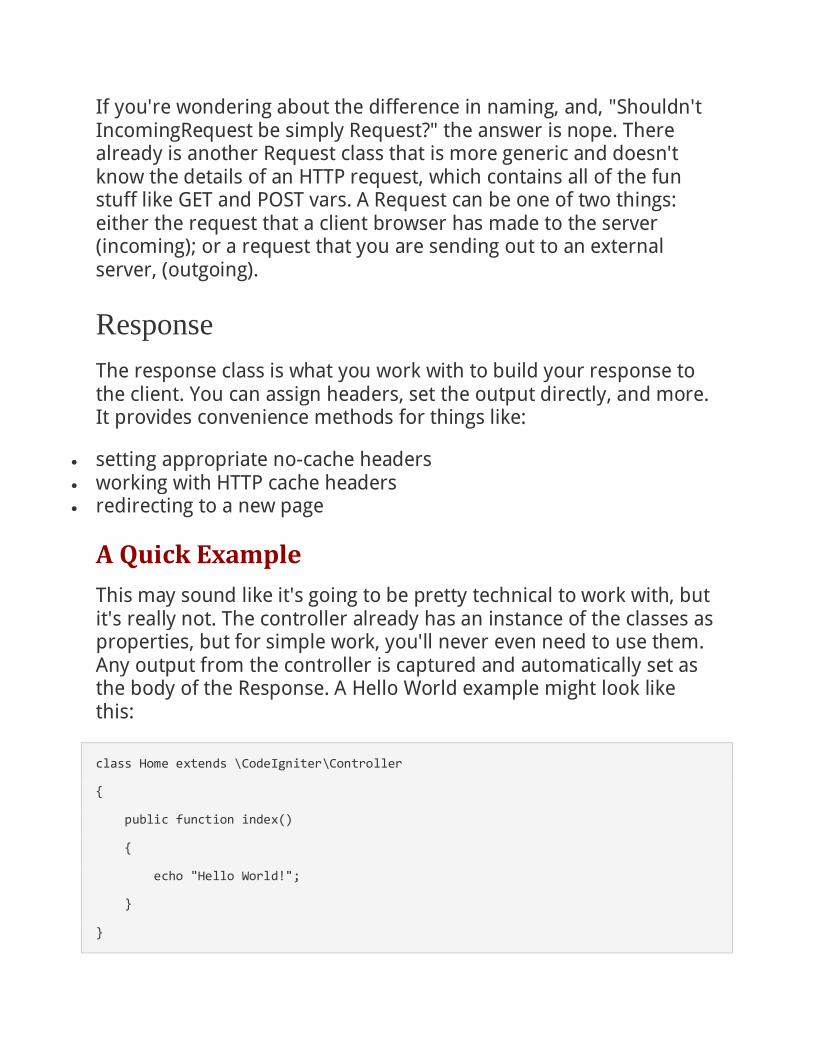
If you're wondering about the difference in naming, and, "Shouldn't IncomingRequest be simply Request?" the answer is nope. There already is another Request class that is more generic and doesn't know the details of an HTTP request, which contains all of the fun stuff like GET and POST vars. A Request can be one of two things: either the request that a client browser has made to the server (incoming); or a request that you are sending out to an external server, (outgoing).
Response The response class is what you work with to build your response to the client. You can assign headers, set the output directly, and more. It provides convenience methods for things like:
• setting appropriate no-cache headers • working with HTTP cache headers • redirecting to a new page
A Quick Example This may sound like it's going to be pretty technical to work with, but it's really not. The controller already has an instance of the classes as properties, but for simple work, you'll never even need to use them. Any output from the controller is captured and automatically set as the body of the Response. A Hello World example might look like this:
class Home extends \CodeIgniter\Controller
{
public function index()
{
echo "Hello World!";
}
}

Easy, peasy.
What this does do, though, is provide you the ability to really dig in and fine-tune the response if you need to. You can create with complex HTTP caching strategies, work with the IncomingRequest to tailor your response through Content Negotiation, and much more.
Here's a slightly more involved example, though you'll see it's all easily readable, and simple to work with.
class Home extends \CodeIgniter\Controller
{
public function __construct(...$params)
{
parent::__construct(...$params);
// This controller is only accessible via HTTPS
if (! $this->request->isSecure())
{
// Redirect the user to this page via HTTPS, and set the Strict-Transport-Security
// header so the browser will automatically convert all links to this page to HTTPS
// for the next year.
force_https();
}
}
public function index()
{
$data = [
...
];
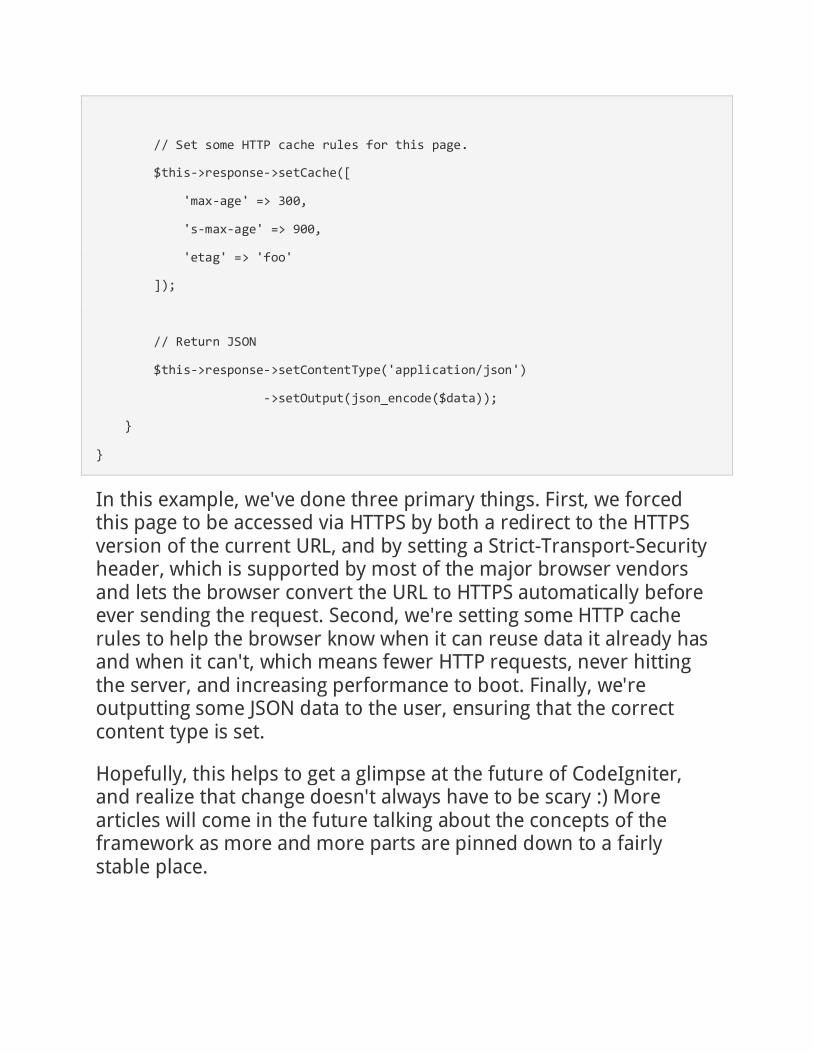
// Set some HTTP cache rules for this page.
$this->response->setCache([
'max-age' => 300,
's-max-age' => 900,
'etag' => 'foo'
]);
// Return JSON
$this->response->setContentType('application/json')
->setOutput(json_encode($data));
}
}
In this example, we've done three primary things. First, we forced this page to be accessed via HTTPS by both a redirect to the HTTPS version of the current URL, and by setting a Strict-Transport-Security header, which is supported by most of the major browser vendors and lets the browser convert the URL to HTTPS automatically before ever sending the request. Second, we're setting some HTTP cache rules to help the browser know when it can reuse data it already has and when it can't, which means fewer HTTP requests, never hitting the server, and increasing performance to boot. Finally, we're outputting some JSON data to the user, ensuring that the correct content type is set.
Hopefully, this helps to get a glimpse at the future of CodeIgniter, and realize that change doesn't always have to be scary :) More articles will come in the future talking about the concepts of the framework as more and more parts are pinned down to a fairly stable place.

Content Negotiation in CodeIgniter 4 By Lonnie Ezell on Mar 03, 2016 0 Comments codeigniter
For many CodeIgniter developers, the idea of Content Negotiation is probably a unfamiliar one. I know it was for me when I started working on the HTTP layer. So, let’s take a look at what it is, and then how it can be used in the upcoming CodeIgniter 4.
What Is Content Negotiation? In its simplest terms, Content Negotiation is your website and the user’s browser working together to decide the best type of data to return. This is done via several Accept headers the browser can send, that can specify the language to return the page in, the types of images it likes, encodings that it supports, and more.
As an example, when I visit Mozilla’s site in Chrome, I see these headers:
• accept:text/html,application/xhtml+xml,application/xml;q=0.9,image/webp,/;q=0.8
• accept-encoding:gzip, deflate, sdch • accept-language:en-US,en;q=0.8
This tells us that the browser can support the formats in the accept header and provides us information (via the q score) about how the preferences are ordered. In this case, it would prefer the response as text/html over all of the other formats. Because of settings in my browser, the accept-language header says that I would like to read the page in American English (en-US).
Obviously, the web still works even if we don’t perform any form of content negotiation. We’ve done it for years just fine without worrying about it. To be fair, the web server itself can do some forms of conneg for us, but we don’t typically take advantage of that, either. That doesn’t mean it’s not handy, though.
The two times that having this ability is really appealing is for sites that support multiple languages, or for API’s that can use it to return the data in specific formats, and more.
Should you always use it? Probably not. There are pros and cons, and some people who claim it should never be used, with others thinking it’s the greatest thing since sliced bread. But if you need it, it’s simple in CodeIgniter.
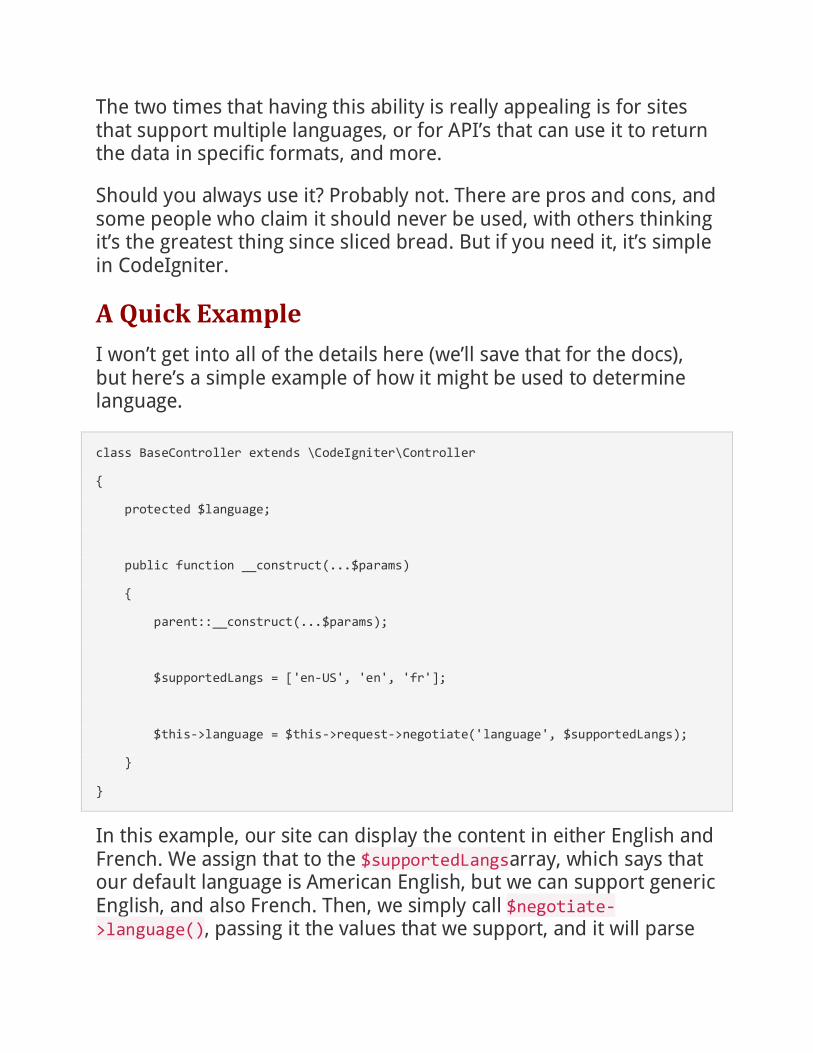
A Quick Example I won’t get into all of the details here (we’ll save that for the docs), but here’s a simple example of how it might be used to determine language.
class BaseController extends \CodeIgniter\Controller
{
protected $language;
public function __construct(...$params)
{
parent::__construct(...$params);
$supportedLangs = ['en-US', 'en', 'fr'];
$this->language = $this->request->negotiate('language', $supportedLangs);
}
}
In this example, our site can display the content in either English and French. We assign that to the $supportedLangsarray, which says that our default language is American English, but we can support generic English, and also French. Then, we simply call $negotiate->language(), passing it the values that we support, and it will parse
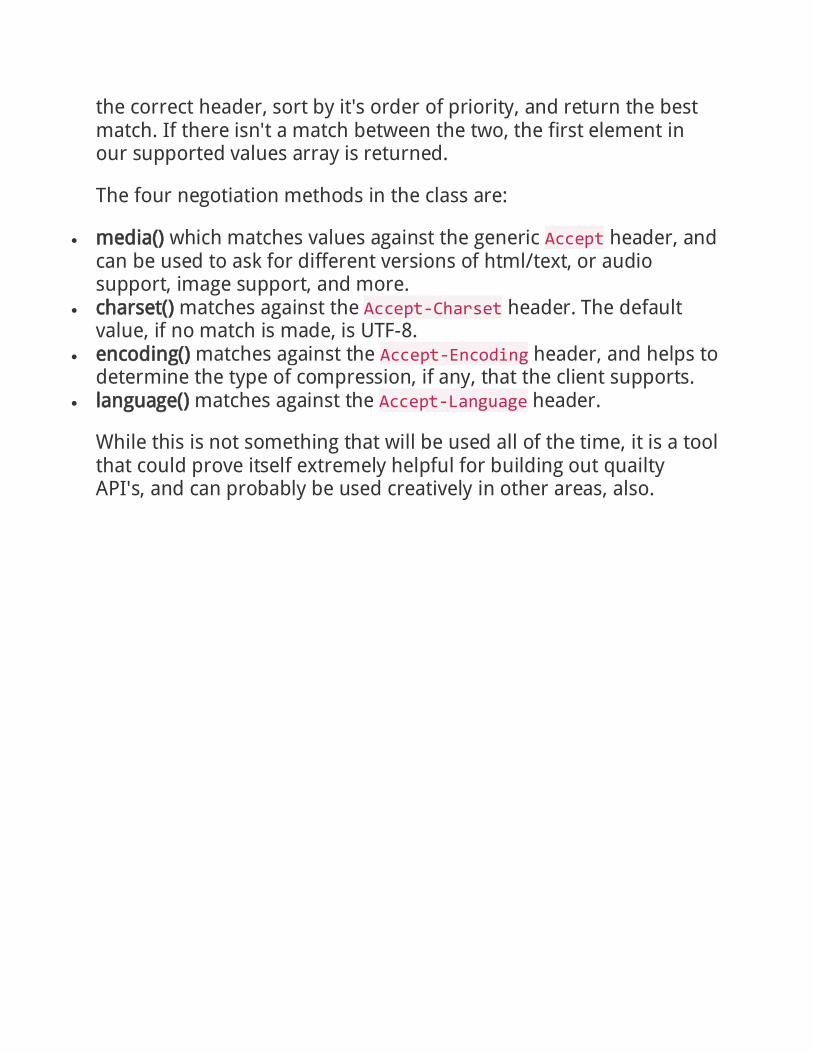
the correct header, sort by it's order of priority, and return the best match. If there isn't a match between the two, the first element in our supported values array is returned.
The four negotiation methods in the class are:
• media() which matches values against the generic Accept header, and can be used to ask for different versions of html/text, or audio support, image support, and more.
• charset() matches against the Accept-Charset header. The default value, if no match is made, is UTF-8.
• encoding() matches against the Accept-Encoding header, and helps to determine the type of compression, if any, that the client supports.
• language() matches against the Accept-Language header.
While this is not something that will be used all of the time, it is a tool that could prove itself extremely helpful for building out quailty API's, and can probably be used creatively in other areas, also.

Dependency Injection in CodeIgniter 4 By Lonnie Ezell on Mar 04, 2016 4 Comments codeigniter
I remember reading a forum thread during the time that we were originally asking for community input on the future of the framework. In it, they ridiculed the community for even considering whether or not we would be using Dependency Injection. At the time, I believe the council was pretty set on having it, but we were letting the discussions and suggestions arise naturally within the community. I read another forum thread the other day on a different site that was looking at our features and wondering why we were bothering since it just read like Laravel, due in large part to the DI, the namespacing, the PSR4 autoloading, etc. I guess you just can't please everyone, right?
Why Is DI Important? Dependency Injection decouples your code from other, specific, classes. When used correctly, it allows you to easily replace dependencies with mock classes during testing, or replace the dependency with a completely different class that handles the task better. In short, it makes the code more resilient to change. It makes it more portable. It's a good thing, without a doubt. If you've spent most of your PHP career using CodeIgniter, you might not have run across Dependency Injection before, so a short example will help clear things up.
Note: The database layer is still under early development. This is purely an example. Let's say you have a model for managing Users. You will, naturally need the database class to work with, so without DI you might do something like:
class UserModel
{

protected $db;
public function __construct()
{
$this->db = new Database();
}
}
But there's a problem here. If you ever need to use a different database library, or switch from MySQL to MongoDB, you have to change code in every class. If you're running tests, you can never separate the logic in your UserModel from the Database class. Long term maintenance can become a problem, too.
To fix this, the next step is to pass the Database class into the constructor as a dependency. This solves all of those problems, especially when you're requiring the a class that implements an interface, instead of any specific class.
class UserModel
{
protected $db;
public function __construct(DatabaseInterface $db)
{
$this->db = $db;
}
}
This is the purest form of Dependency Injection. Any external classes needed are injected into the class, either through the constructor, as shown here, or through a setter method.

Within the core of CodeIgniter 4, constructor-based DI is used everywhere. While this has advantages for the developers of the framework, it has huge implications for you. No longer do you need MY_* classes to extend or replace core files. Now, you can simply create a new class that conforms to the Interface we're expecting, and ensure that class is passed in it's place. How you make sure it gets used instead of the original file requires a bit more story.
The Rise and Fall of the Container If you spend any time at all reading up on "modern PHP" best practices, you'll always see a DI Container (sometimes called an Inversion of Control Container) used. Most of the major frameworks use one, including Symfony, Laravel, Nette, Zend, and most others. Because of this, my natural first reaction was to create one for the framework. I thought it turned it pretty sweet. You could configure classes with their alias, and, through the magic of Reflection, it would examine the constructor and automatically insert a shared instance of any configured classes, or parameters. It worked great, and was pretty fast.
Then I read a blog post by Anthony Ferrara that was discussing the differences between simple and easy when it comes to programming, and recomended optimizing for simplicty. One section in particular hit a chord: "A simple example is the way many PHP frameworks have adopted 'Dependency Injection' . . . But what if instead of using this complex system, we just created a series of functions? Real code that you can debug and understand." Bam. This was shortly after I had written the container, thinking the problem solved. This comment gnawed inside of me for a couple of weeks.
At first, I tried to make excuses about why we needed that container. But as I looked back on the things that keep bringing me back to CodeIgniter over the last 10 years, I realized a big part of it was the simplicity of the framework. It was simple code, that made things simple to understand and trust. You didn't have to wade through 6 different abstractions to understand what was going on. So, I ripped
the container out, replacing it with a simple class that was just "a series of functions".
And you know what? It works great. It even came with a few unintended benefits, the biggest being that backtraces during errors are MUCH more understandable now. I'm currently working on a project that's using Laravel and get so frustrated by the backtrace being full of 15 calls through Laravel's sub-structure before I can find my code, if I even can.
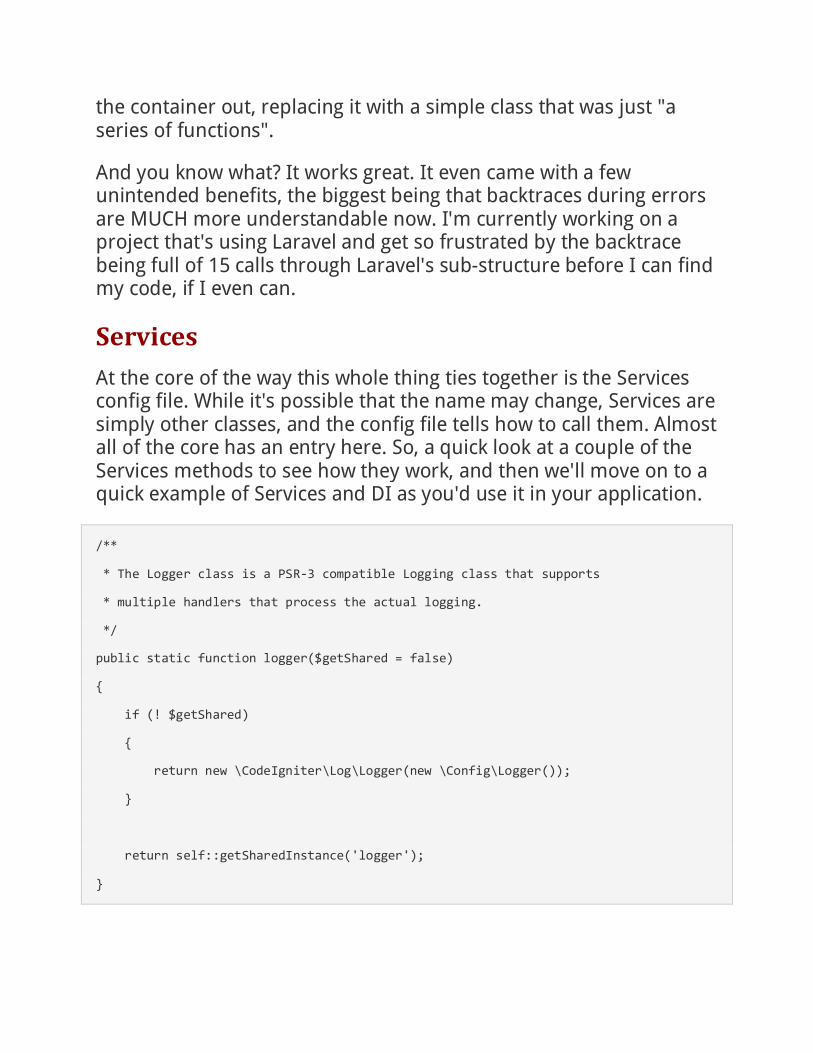
Services At the core of the way this whole thing ties together is the Services config file. While it's possible that the name may change, Services are simply other classes, and the config file tells how to call them. Almost all of the core has an entry here. So, a quick look at a couple of the Services methods to see how they work, and then we'll move on to a quick example of Services and DI as you'd use it in your application.
/**
* The Logger class is a PSR-3 compatible Logging class that supports
* multiple handlers that process the actual logging.
*/
public static function logger($getShared = false)
{
if (! $getShared)
{
return new \CodeIgniter\Log\Logger(new \Config\Logger());
}
return self::getSharedInstance('logger');
}

Here's a service at it's simplest. All of the methods allow you to get either a brand new instance of the class, or one that's shared among all other uses, which is a great option for things like this logger, where there's no real reason to waste memory on multiple instances. Assuming that you did want the shared instance, you'd simply call $logger = Config\Servies::logger(true).
Because they are just simple methods, some of them support parameters to customize how the class works. For instance, the renderer() method, which handles displaying views, can take the path to the views folder as the first parameter.
/**
* The Renderer class is the class that actually displays a file to the user.
* The default View class within CodeIgniter is intentionally simple, but this
* service could easily be replaced by a template engine if the user needed to.
*/
public static function renderer($viewPath = APPPATH.'Views/', $getShared = false)
{
if (! $getShared)
{
return new \CodeIgniter\View\View($viewPath, self::loader(true), CI_DEBUG, self::logger(true));
}
return self::getSharedInstance('renderer');
}
If you want to replace the renderer with a simple solution to use a template engine like Twig, you'd create a small adapter class that implented the CodeIgniter\View\RenderableInterface and modify the Services::renderer() method to return an instance of your new adapter class. Then, you could call the view() command that is

always available, and it would use Twig instead of the simple view-based solution that CodeIgniter provides. Couldn't be simpler.
Alright, you've seen how to define the services, and we've talked about why DI is a great thing, so it's time to take a look at how to use the two together in your own application.
A Quick Example Using Dependency Injection in your applications is not required, though it's recommended. The framework itself uses these files, and they provide a simple way to modify the core, but any other use by yourself is optional. With that disclaimer out of the way, let's look at our UserModel again. Assume that we're in the Users controller and you need to pull all active users. Earlier, we showed the UserModel taking a Database object in it's constructor. Ignoring the exact class names for now, getting a new instance of the model would be done something like this:
class Users extends \CodeIgniter\Controller
{
public function index()
{
$model = new UserModel( Config\Services::database() );
$data = [
'users' => $model->findAll()
];
echo view('users/list_all', $data);
}
}

This way, if you ever change the database solution, you don't have to hunt around trying to find every location. Simply change it in the Services config file, and you're golden. If you're only using a single database connection, you could modify the database() service to insert the correct config, etc. Since there is actually a couple of parameters needed to create a database connection, you could make things even simpler and create a new service for your model if you needed to.
Remember - all database stuff shown here is for example only, and doesn't reflect the end product in any fashion!
Coupling? As a keen observer, you might be yelling at me that this added services stuff just moves the coupling of these classes from the libraries, models, etc, to the controller. And you'd be correct. At some point, though, you have to be able to specify which classes you want to use.
And the truth is that is what a Controller's job is. It glues the other pieces together. It is the one piece of your application that should be tightly coupled with your framework. If you design the rest of your application correctly, it's about the only place that even knows about the framework you're using. And that's great. If, some years down the road, you need to switch frameworks for some reason (it happens, unfortunately), you will mostly just have to change the controllers.
Even better - this simple Services class further reduces your dependency on any specific framework. It's just a simple class, and could be used with any framework you wanted to use.

Routes in CodeIgniter 4 By Lonnie Ezell on Mar 08, 2016 2 Comments codeigniter
Routes in CodeIgniter have gone through a pretty big upgrade from version 3 to 4. This article will give a 100-foot view of some of the new changes, and give you something to look forward to.
Route Basics As a refresher, in version 3 routes were specified in a simple array, where each key was the "URI from" and the value of the element was where it should be routed to. It was simple, elegant, worked great, and looked something like this:
$route['join'] = 'home/register';
$route['login'] = 'home/login';
$route['products/(:any)/details'] = 'products/show/$1';
The capability of routers in other frameworks has surpassed the simple elegance we have enjoyed for years. Even in the CodeIgniter community, there have been several router replacements people could use. So, it was time for an upgrade.
The first thing we had to do was to make it use a class, instead of a simple array. We tried to stick with using simple arrays to increase functionality, but it became too much of an complex beast. So, the new routes would look like this:
$routes->add('join', 'Home::register');
$routes->add('login', 'Home::login');
$routes->add('products/(:segment)', 'Products::show/$1');
While the "to" portion of the route looks different, the functionality is much the same here. The join route is being directed to the Home controller, and its register() method. The products route is

being directed to the Productscontroller, with the captured (:segment) being passed to the show() method. While it might appear that the controllers must now use static methods, that is not the case. The familiar syntax was used to specify the controller/method combination only, and methods are not allowed to be static.
Module-like Functionality Why the new format? Because we don't want to restrict you to controllers in the /application/Controllersdirectory. Instead, you can now route to any class/method that the system can find through its new PSR-4 compatible autoloader. This makes it a breeze to organize code in module-like directories.
For example, if you have a Blog "module" under the namespace App\Blog, you could create some routes like so:
$routes->add('blog', 'App\Blog\Blog::index');
$routes->add('blog/category/(:segment)', 'App\Blog\Blog::byCategory/$1');
If the Blog controller lives under application/Controllers, great. But if you want to move it into it's own folder, say application/Blog, you can update the autoloader config file and everything still works.
Closures Routes no longer have to mapped to a controller. If you have a simple process you can route to an anonymous function, or Closure, that will be ran in place of any controller.
$routes->add('pages/(:segment)', function($segment)
{
if (file_exists(APPPATH.'views/'.$segment.'.php'))
{

echo view($segment);
}
else
{
throw new CodeIgniter\PageNotFoundException($segment);
}
});
Placeholders I'm sure you've noticed a different placeholder than you're used to in the routes: (:segment). This is one of a handful that come stock with CodeIgniter, and is used to replace the (:any) that is in v3 and clear up any confusion. Now, the system recognizes the following placeholders:
• (:any) will match all characters from that point to the end of the URI. This may include multiple URI segments.
• (:segment) will match any character except for a forward slash (/) restricting the result to a single segment.
• (:num) will match any integer. • (:alpha) will match any string of alphabetic characters • (alphanum) will match any string of alphabetic characters or integers,
or any combination of the two.
It doesn't stop there, though. You can create your own at the top of the routes file by assigning a regular expression to it, and then it can be used in any of the routes, making your routes much more readable.
$routes->addPlaceholder('uuid', '[0-9a-f]{8}-[0-9a-f]{4}-[0-9a-f]{4}-[0-9a-f]{4}-[0-9a-f]{12}');
$routes->add('users/(:uuid)', 'Users::show/$1');

HTTP Verbs So far, I've been using the generic add method to add a new route. Routes added this way will be accessible through any HTTP-verb, whether it's a GET request, POST, PATCH, or even from the command line. It's recommended, though, to restrict the route to only the type of access you need.
$routes->get('products', 'Product::feature');
$routes->post('products', 'Product::feature');
$routes->put('products/(:num)', 'Product::feature');
$routes->delete('products/(:num)', 'Product::feature');
$routes->match(['get', 'post'], 'products/edit/(:num)', 'Product::edit/$1');
$routes->cli('maintenance/on', 'CLITools::maintenanceModeOn');
Generating standard Resource routes When working on API's it's best to keep a standard set of routes mapping to the same methods in each controller, just to make maintenance simpler. You can can easily do this with the resources method:
$routes->resources('photos');
This will create the 5 standard routes for a resource:
HTTP Verb Path Action Used for...
GET /photos listAll display a list of photos
GET /photos/{id} show display a specific photo
POST /photos create create a new photo
PUT /photos/{id} update update an existing photo

HTTP Verb Path Action Used for...
DELETE /photos/{id} delete deletes an existing photo
The routes can have a fair amount of customization to them through by passing an array of options in as the second parameter, but we'll leave those for the docs.
No More Magic By default, the URI will attempt to be matched up to a controller/method if no route exists for it. This is very convenient and, for those familiar with it, makes it a breeze to find where the code is that you're trying to use. Sometimes, though, you don't want this functionality.
For example, you might be building an API, and want a single location to serve as documentation for the API. This can be easily handled by turning off the autoRoute feature:
$routes->setAutoRoute(false);
Now, only routes that have been defined can be served up by your application.
Groups Routes can be grouped together under a common prefix, reducing the amount of typing needed and helping to organize the routes.
$routes->group('admin', function($routes) {
$routes->add('users', 'Admin\Users::index');
$routes->add('blog', 'Admin\Blog::index');
});
These routes would now all be available under an 'admin' segment in the URI, like:

• example.com/admin/users • example.com/admin/blog
Environment Groups Another form of grouping, environment() allows you to restrict some routes to only work in a specific environment. This can be great for building some tools that only work on develoment machines, but not on the production server.
$routes->environment('development', function($routes)
{
$routes->add('builder', 'Tools\Builder::index');
});
Redirect Old Routes If your site has some pages that have been moved, you can assign redirect routes that will send a 302 (Temporary) Redirect status and send the user to the correct page.
$routes->addRedirect('users/about', 'users/profile');
This will redirect any routes that match users/about to the new location at users/profile.
Using Routes In Views One of the more fragile things when building links within views is having your URIs change, which forces you to edit the links throughout your system. CodeIgniter now provides a couple of different tools to help get around this.

Named Routes Anytime you create a route, a name is made for it. By default, this is the same as the "from" portion of the route definition. However, this doesn't help, so you can assign a custom name to the route. This can then be used with the route_to() function that is always available to return the correct relative URI.
// Create the route
$route->add('auth/login', 'Users::login', ['as' => 'login']);
// Use it in a view
<a href="<?= route_to('login') ?>">Login</a>
Named routes used in this way can also accept parameters:
// The route is defined as:
$routes->add('users/(:id)/gallery(:any)', 'Galleries::showUserGallery/$1/$2', ['as' => 'user_gallery');
// Generate the relative URL to link to user ID 15, gallery 12
// Generates: /users/15/gallery/12
<a href="<?= route_to('user_gallery', 15, 12) ?>">View Gallery</a>
Reverse Routing For even more fine-grained control, you can use the route_to() function to locate the route that corresponds to the controller/method and parameters that you know won't change.
// The route is defined as:
$routes->add('users/(:id)/gallery(:any)', 'Galleries::showUserGallery/$1/$2');

// Generate the relative URL to link to user ID 15, gallery 12
// Generates: /users/15/gallery/12
<a href="<?= route_to('Galleries::showUserGallery', 15, 12) ?>">View Gallery</a>
Global Options Any of the route creation methods can be passed an array of options that can help further refine the route, doing things like:
• assign a namespace to the controllers, reducing typing • restrict the route to a specific hostname, or sub-domain • offset the matched parameters to ignore one or more (that might
have been used for language, version, etc)
Need More? Customize it If you find that you need something different from the router, it's simple to replace the RouteCollection class with your own, if you want a custom solution. The RouteCollection class is only responsible for reading and parsing the routes, not for doing the actual routing, so everything will still work with your custom solutions.
Just be sure to share what you create with the rest of us! :)
Whew! There's the goodness that you get to look forward to. At least, I think I mentioned it all.

Modules in CodeIgniter 4 By Lonnie Ezell on Mar 15, 2016 13 Comments codeigniter
One of the big hot-buttons that came up during discussion about CodeIgniter 4 features a few months ago was that of HMVC. It seems that most of the comments fell in one of two uses: either for displaying "widgets" on the page, or for simply splitting code into basically modules. In this article, I wanted to look at how modules can work in the upcoming version of the framework.
NOTE: These examples are all based on pre-release code and the specifics are subject to change at any time.
Module/HMVC Support? Let me get this out of the way up front: no, CodeIgniter 4 does not support either HMVC, or modules. At least, not in the traditional way that you might think about it. There's no formal definition of module structure, like you might find in a Yii Extension or Drupal plugin. And, there's no hierarchical loading of classes through a nest of different directories.
If that's the case, then how can we support any form of modules? Autoloading and Namespaces.
Autoloading and Namespaces The framework now ships with a built-in PSR-4 compliant autoloader, no Composer needed (though you're always free to use that in addition to the built-in one).
Why didn't we just use Composer as the core? We talked about it, and I was, at first, a big proponent for it. However, the more we talked and researched, the more it was clear that it wasn't the right thing for the framework. For one thing, it was having an external script at the core of our framework which left us at their mercy. Also,

in different hosting environments, Composer can become problematic to update, especially on tightly-secured shared hosting. Finally, since we didn't have to support all of the flexibility and features that Composer does, we could make it a touch faster by default.
Both the system files and your application files can be namespaced. The system files live under the CodeIgniternamespace, while the application directory takes on the App namespace by default. You don't have to namespace your controllers and models if you don't want to. It's entirely optional and things will still work in the way that you're accustomed to working.
When you combine these two techniques, though, 90% of the work of supporting modules is already done for you. Let's look at a quick example, and then we'll cover the remaining 10% of the solution.
A Quick Example Imagine we are creating a Blog module. The first thing to do is to decide on a namespace and then create a home for all of the files to live. We'll use our company name, Standard, and Blog makes sense for the sub-namespace, since that describes the entire "module". While we could put it anywhere, let's create a new directory alongside the /application directory to hold all of our company's modules. The folder structure might look something like you're used to in HMVC:
/application
/standard
/Blog
/Config
/Controllers
/Helpers
/Libraries
/Models

/Views
/system
Next, open up /application/Config/Autoload.php and let the system know where to find the files. In this example, we'll just create a namespace in the autoloader for the entire company namespace, though you could create additional ones if you want to create one for each module.
$psr4 = [
'Config' => APPPATH.'Config',
APP_NAMESPACE.'\Controllers' => APPPATH.'Controllers',
APP_NAMESPACE => realpath(APPPATH),
'Standard' => APPPATH.'../standard'
];
Now, as long as we namespace all of our classes, the system can find them and they can be used from anywhere.
namespace Standard\Blog;
use Standard\Blog\Models\BlogModel;
use Standard\Blog\Libraries\BlogLibrary;
use Standard\Blog\Config\Blog as BlogConfig;
class BlogController extends \CodeIgniter\Controller
{
public function index()
{
$model = new BlogModel();
$blogLib = new BlogLibrary();
$config = new BlogConfig();

}
}
Simple stuff.
What About Non-Class Files? If you were paying attention, then you are probably saying, "Sure, buddy, but what about the non-class files, like helpers, and views? huh?!" And you're right. Straight PHP cannot load non-class-based files from namespaces. So, we built that functionality into CodeIgniter.
The way it works is that it will locate the folder based on the namespace of the file, and then look for it in the normal sub-directory. Some examples will clear this up.
Loading Helpers In our example, we might have a blog_helper file living at /standard/Blog/Helpers/BlogHelper.php. If this were a class, it might have a fully-qualified name like Standard\Blog\Helpers\BlogHelper.php. So we pretend that it is a class, and use the load_helper() function:
load_helper('Standard\Blog\Helpers\BlogHelper');
And, voila!, it can locate the helper and load it.
Loading Views When using the module pattern, views can be loaded in the exact same way, except using the load_view() function.
echo load_view('Standard\Blog\Views\index', $data);

The system will also look within the traditional CodeIgniter directories within that namespace so you don't have to include it in the name. The above examples could have also bee done like:
load_helper('Standard\Blog\BlogHelper');
echo load_view('Standard\Blog\index', $data);
While this is not the only way that you can structure things in your application, I hope this gets you excited about the possibilities and flexibility that the framework will be bringing to your applications.

First Glimpse at CodeIgniter 4 Database Layer By Lonnie Ezell on Apr 01, 2016 20 Comments codeigniter
While work on the database layer is still under heavy construction, I think we're far enough along to be able to give you a glimpse into how it works, how it's the same, and how it's different from what you're accustomed to in previous versions.
First things first: how far along is it? At the moment we can connect to a MySQL database and run both raw queries, and use the Query Builder to run queries. I just wrapped up tests on the existing Query Builder features, I believe, so it should be fairly solid at the moment. What's left? The Query Caching layer needs built, as does the Forge, and the utility methods, as well as getting the drivers in place and in shape.
What's the Same? While the underlying structure of the database engine has been changed a fair amount, what you'll see while using it will be fairly familiar. The biggest cosmetic difference is in method names using CamelCasing instead of snake_casing. The query builder still largely works like you're used to, so there won't be much to relearn. You should be able to dive right in and use your years of experience with just the tiniest amount of time getting accustomed to it.
What's different? I won't go into all of the details here, just the big items. Instead of a boring little list, let's take a look at a few examples of it in action.
Configuration The config files are still mostly like the old ones. There was no need to reinvent the wheel here since it worked great already. They have

been changed to be a simple class, like the rest of them but the fields are the same.
class Database extends \CodeIgniter\Database\Config
{
/**
* Lets you choose which connection group to
* use if no other is specified.
*
* @var string
*/
public $defaultGroup = 'default';
/**
* The default database connection.
*
* @var array
*/
public $default = [
'dsn' => '',
'hostname' => 'localhost',
'username' => '',
'password' => '',
'database' => '',
'dbdriver' => 'MySQLi',
'dbprefix' => '',
'pconnect' => false,
'db_debug' => (ENVIRONMENT !== 'production'),
'cache_on' => false,
'cachedir' => '',
'charset' => 'utf8',

'dbcollat' => 'utf8_general_ci',
'swapPre' => '',
'encrypt' => false,
'compress' => false,
'stricton' => false,
'failover' => [],
'saveQueries' => true,
];
//--------------------------------------------------------------------
}
Raw Queries Making queries without using the Query Builder is simple. Get a database instance, run the query() method and get back a result object.
// Connects to the default connection, 'default' in this example.
$db = Config\Database::connect();
$query = $db->query('SELECT * FROM users');
// Get results as objects.
$results = $query->getResultArray();
// Get results as arrays
$results = $query->getResultObject();
// Get result as custom class instances
$result = $query->getResult('\My\Class');

The first thing to note is that num_rows() has been removed. For the last few years it's use has been discouraged, and written out of examples, since some drivers have horrible performance and/or memory issues when using it. Instead, all result*() methods return empty arrays if no results, while all row*() methods return null.
Parameter binding still exists:
$query = $db->query('SELECT * FROM users WHERE id > ? AND role = ?', [3, 'Admin']);
Parameter binding has gotten a new trick, though, with named parameters, for more readable (and flexible) queries:
$query = $db->query('SELECT * FROM users WHERE id > :id AND role = :role',
[ 'id' => 3,
'role' => Admin'
]
);
All values are automatically escaped, of course, to keep your queries safe.
Saved Queries One of the big changes in the database layer is that all queries are saved in history as Query objects, instead of strings in an array. This is partially to clean up the code and remove some resposibilities from other classes. But it will also allow for more flexibility in the Query Caching layer, and other places. Just be aware that if you need to get $db->getLastQuery() you're getting a Query object back, not a string.
The query objects hold the query string, which can be retrieved with and without the parameters bound to it, as well as any error

information that query might have, and performance data (when it started, how long it took).
Query Builder The Query builder operates mostly as you're used to, with one big change. The Query Builder is now it's own class, not part of the driver files. This helps keep the code cleaner, and works nicely with the new Query objects and named paramater binding, which is used throughout the builder.
One of the biggest benefits of having it as a completely separate class is that it allows us to keep each query completely seperate. There is no more "query bleeding" where you're in the middle of building a query and make a call out to another method to retrieve some values, only to have the other method build it's own query, and incorrectly using the values from the original query. That's a thing of the past.
The primary visible change in the Query Builder is how you access the builder object. Since it's no longer part of the driver, we need a way to get an instance of it that is setup to work with the current driver. That's where the new table() method comes into play.
$db = Config\Database::connect();
$result = $db->table('users')
->select('id, role')
->where('active', 1)
->get();
Basically, the main table is now specified in the table() method instead of the get() method. Everything else works just like you're used to.

What's Still Coming? Aside from the previously mentioned parts that need implementing, there are some nice additions potentially coming down the pike. There's no guarantee all of these items will make it in, but these are a handful of the ideas I'd currently like to see make it in the database layer.
Native Read/Write Connection Support is likely to make it in the configuration of your database. Once the connections have been defined, using them is automatic. The Connection will determine if your query is a write query or read query and choose the correct connection to use based on that. So, if you have a master/slave setup, this should make things a breeze.
New QueryBuilder Methods will likely be added. I'm going to scout out the other frameworks a little more, to see if there's features that are useful enough to warrant looking into. The following are my short list, though:
• first() is a convenience method to retrieve the first result itself. • increment() and decrement() methods would be nice to have. • chunk() would loop over all matching results in chunks of 100 (or
whatever). This allows you to process potentially thousands or even millions of rows without completely killing your server or running out of memory.
Enhanced Model The only reason the CI_Model class exists in v3 is to provide easy access to the rest of the framework by using magic methods to access the loaded libraries, etc. That's not really necessary anymore, since there is no singleton object. So, it only makes sense to take this opportunity to actually create a Model class that is useful. The details of this haven't been discussed much in the Council, yet, so I can't say what will make it in. Over the years, though, creating base MY_Model classes with a a fair amount of convenience features has become fairly common. Time to build it into the core, I think.

Simpler Pagination This idea is ripped straight from Laravel, but the first project I worked on in Laravel, it was the pagination that blew me away. This would work hand-in-hand with the Enhanced Model, allowing you to simply call$model->paginate(20) and it would be smart enough to figure out the rest of the details. Obviously, there's more involved than that, but if you've ever used Laravel's version, you'll know how much of a breath of fresh air it is compared to CodeIgniter's. Now, there's is built into their ORM, so it might turn out to be not very feasible for our system, but it's definitely something I want to look into.
I hope that gets you excited about the future of the framework, and maybe calms down some fears that things are going to change too much. One of my big goals while rewriting is to keep the system familiar, while bringing more modern code practices and flexibility into the system.
Are there any features from other systems that you love and miss when you work in CodeIgniter that you'd like us to consider? I won't say that everything (or even any of it) will make its way into the system, but we'll definitely consider it.

CodeIgniter 4 HTTP Client By Lonnie Ezell on Apr 18, 2016 1 Comment codeigniter
It used to be that the majority of the websites were silos, not communicating with other websites much at all. That has changed a lot in the last few years, though, to the point where many sites consume information from external APIs, or communicate with third-party services, like payment gateways, social networks, and more, all on a day-to-day basis. For PHP developers, this typically involves the use of curl to make this happen. That means that any full-stack framework should provide some form of capabilities to help you out there. In the upcoming CodeIgniter 4, we've provided a lightweight, yet still very flexible, HTTP client built-in.
The CURLRequest Class The CURLRequest class extends our more generic Request class to provide most of the features that you'd need on a day-to-day basis. It is a synchronous-only HTTP client. Its syntax is modeled very closely after the excellent Guzzle HTTP Client. This way if you find that the built-in client doesn't do everything you need it to, it is very easy to switch over to using Guzzle and take advantage of some of its more advanced features, including asynchronous requests, non-reliance on curl, and more.
Why build our own solution? For the last decade, many developers have looked to CodeIgniter as the framework that you can download and have 90% or more of the features you need to build your site at your fingertips. Bundling something like Guzzle into the framework doesn't make sense, when Guzzle provides its own HTTP layer, duplicating a large part of the core system code. If we wanted to provide a solution, we had to build our own, based around our own HTTP layer. Being a lightweight solution, it is primarily a wrapper around curl and so the only real trick was ensuring syntax compatibility with Guzzle to make your transitions, if you need to do them, as simple as possible.

NOTE: This does require that the curl library be installed and usable.
A Few Quick Examples Let's walk through a few quick examples to see how easy and convenient it is to have a curl wrapper in our bundle of tricks. These examples are obviously very bare-bones and don't provide all of the details you would need in a finished application.
A Single Call Let's say you have another site that you need to communicate with, and that you only need to grab some information from it once, not as part of a larger conversation with the site. You can very simply grab the information you need something like this:
$client = new \Config\Services::curlrequest();
$issues = $client->request('get', 'https://api.github.com/repos/bcit-ci/CodeIgniter/issues');
The request() method takes the HTTP verb and URI and returns an instance of CodeIgniter\HTTP\Response ready for you to use.
if ($issues->getStatusCode() == 200)
{
echo $issues->getBody();
}
Consuming an API If you're working with an API for more than a single call, you can pass the base_uri in as one of a number of available options. Then, all following request URIs are appended to that base_uri.

$client = new \Config\Services::curlrequest(['base_uri' => 'https://example.com/api/v1/']);
// GET http://example.com/api/v1/photos
$client->get('photos');
// GET http://example.com/api/v1/photos/13
$client->delete('photos/13');
Submitting A Form Often, you will need to submit a form to an external site, sometimes even with file attachments. This is easily handled with the class.
$client = new \Config\Servies::curlrequest();
$response = $client->request('POST', 'http://example.com/form', [
'multipart' => [
'foo' => 'bar',
'fuz' => ['bar', 'baz'],
'userfile' => new CURLFile('/path/to/file.txt')
]
]);
Multitude of Options The library supports a wide array of options, allowing you to work with nearly any situation you might find yourself up against, including:
• setting auth values for HTTP Basic or Digest authentication • setting arbitrary header values for more complex authentication (or
any other needs)

• specifying the location of PEM-formatted certificates, • restricting execution time • allowing redirects to be followed, • return content even when it encounters an error • easily upload JSON content • send query string or POST variables with the request • specify whether SSL certificates should be validated or not (helpful
for development servers who don't have full SSL certificates in place) • and more.
Hopefully, this new addition to the framework will come in handy during development and help make using curl much more pleasant.

Getting Started With CodeIgniter 4 Pre-Alpha 1 By Lonnie Ezell on Jun 25, 2016 8 Comments codeigniter
Now that the ribbon has been taken off of the first semi-release of CodeIgniter 4, people are wondering how they get started with it. A couple of things have changed that make a big impact on getting started when you're expecting it to be just like CI3. This article aims to help you out there.
Download It There are two different ways you can download it currently, but they're both basically the same thing.
1. From the terminal type: git clone [email protected]:bcit-ci/CodeIgniter4.git which will pull down the latest version of the develop branch into a new directory called CodeIgniter4.
2. From GitHub do a straight download by clicking Clone or Download and then selecting Download Zip. Unzip into a new folder when you're done.
Look Around If you start taking a look around the new code you'll see a slightly different folder layout than you're used to, though the changes are minimal:
/application - Your app's files go here
/public - This is the "web root" of your application. index.php is here
/system - CodeIgniter lives here
/tests - Holds tests for CodeIgniter and your application
/user_guide_src - The source files for the user guide. Instructions how to build them.
/writable - A place for any folder that needs to be writable

The two most important right now are the public and the user_guide_src folders. public holds the new web root of the application. Best practices tell us that your application should live outside of the web and not be accessible from a browser. With this layout, only the files in public are available to end-users through the browser. This is in line with every other major framework out there, but is a change from the way that CodeIgniter has always done it.
The user_guide_src folder contains all of the current documentation for the framework. To the best of our knowledge it is completely up to date with the current release, and we plan on keeping it in sync as we go. This will be your best friend, as you explore over the coming days or weeks. While this isn't the generated HTML, all of the files in the source folder inside it are human-readable and laid out similarly to what you're used to in CI3 docs. Take time to read through the new things in here as most of your questions should be answered, and you'll hopefully find some nice surprises lurking in places.
The following pages are good reads to get started with:
• Application Structure • Autoloading Files • Services • Global Functions and Constants • URI Routing • Controllers • Models • Views
Start Playing In order to start playing around with the new code, you'll need to get it running in a browser. There's a number of ways to do it, but we'll cover two here.

PHP Server PHP has a built-in web server now. This is the simplest way to get running. Jump to the command line, navigate to the public directory, and type the following:
$ php -S localhost:8000
That's it. Back to your browser, navigate to http://localhost:8000 and you should see the shiny new CI4 welcome page.
Virtual Host A more permanent solution is to have another web server running locally, like Apache or NGINX, and create a new virtual host for it. This allows you to create a name for the site, like ci4.dev, and use that in your browser. This is especially helpful so that you don't have to worry about RewriteBase commands for Apache config, or any other tricky ways to get past the public folder. When you setup the virtual host, make sure it is pointing to the public folder or it won't work.
Here are some helper guides for those of you using popular AMP stacks locally:
• MAMP • XAMPP • WAMP
Note that most of these are essentially the same thing, since you're editing raw Apache config files.
Laravel Homestead is another excellent solution for a PHP7 virtual machine running under NGINX.

Lastly, have fun!
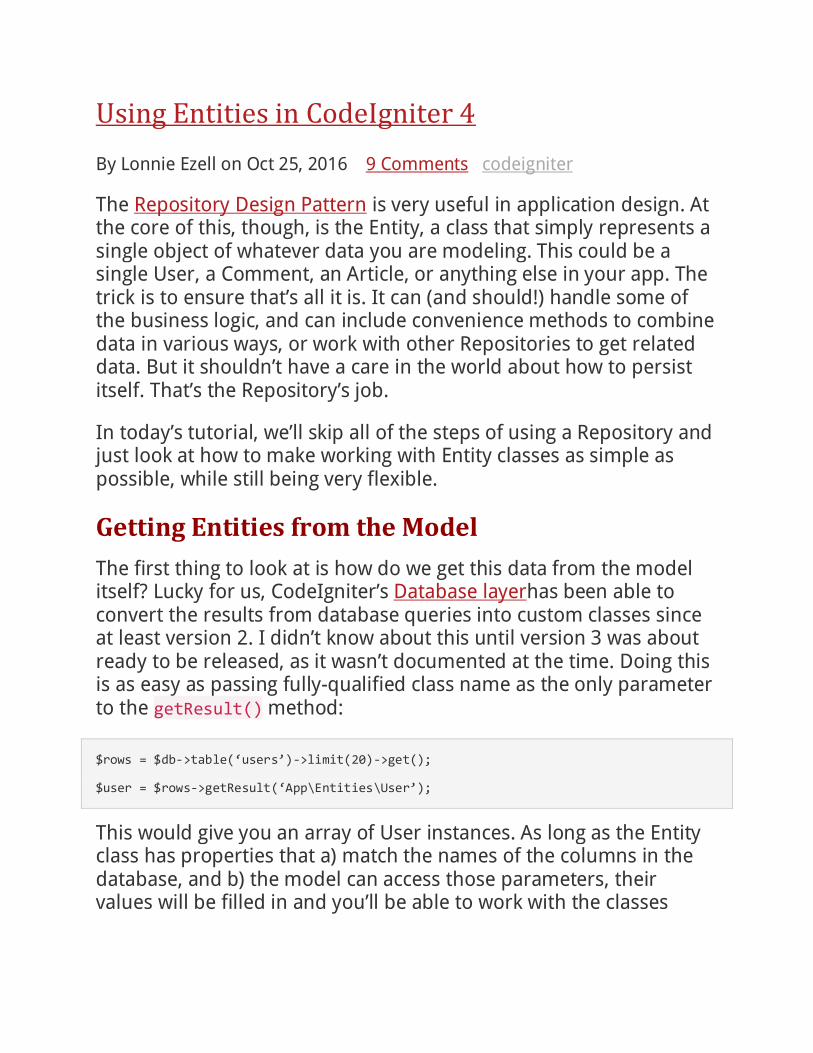
Using Entities in CodeIgniter 4 By Lonnie Ezell on Oct 25, 2016 9 Comments codeigniter
The Repository Design Pattern is very useful in application design. At the core of this, though, is the Entity, a class that simply represents a single object of whatever data you are modeling. This could be a single User, a Comment, an Article, or anything else in your app. The trick is to ensure that’s all it is. It can (and should!) handle some of the business logic, and can include convenience methods to combine data in various ways, or work with other Repositories to get related data. But it shouldn’t have a care in the world about how to persist itself. That’s the Repository’s job.
In today’s tutorial, we’ll skip all of the steps of using a Repository and just look at how to make working with Entity classes as simple as possible, while still being very flexible.
Getting Entities from the Model The first thing to look at is how do we get this data from the model itself? Lucky for us, CodeIgniter’s Database layerhas been able to convert the results from database queries into custom classes since at least version 2. I didn’t know about this until version 3 was about ready to be released, as it wasn’t documented at the time. Doing this is as easy as passing fully-qualified class name as the only parameter to the getResult() method:
$rows = $db->table(‘users’)->limit(20)->get();
$user = $rows->getResult(‘App\Entities\User’);
This would give you an array of User instances. As long as the Entity class has properties that a) match the names of the columns in the database, and b) the model can access those parameters, their values will be filled in and you’ll be able to work with the classes

straight-away. Let’s take a look at some very basic versions to see this in action.
The UserModel might look something like this:
<?php namespace App\Models;
use CodeIgniter\Model;
class UserModel extends Model
{
protected $table = ‘users’;
protected $returnType = ‘App\Entities\User’;
protected $useSoftDeletes = false;
protected $allowedFields = [
‘username’, ‘email’, ‘password_hash’
];
protected $useTimestamps = true;
}
Notice the $returnType property? By setting this to the Entity class, all of our results will be returned as instances of App\Entities\User by default. We can always change that at runtime if we need to.
Also, notice the $allowedFields property. This is especially important for a couple of reasons. The first is that the Model class forces you to fill this in if you want to pass it an array of key/value pairs during a save(), insert(), or update() call to help protect against Mass Assignment attacks, or simple human error. But it will also come in handy when we want to save the object back to the database. More on that a little later.

The Entity Class Now lets look at the simplest version of the Entity class that we can make. In the next blog post we’ll explore a much more powerful version. We would create a new file at /application/Entities/User.php, creating the new Entities folder since it’s not there by default. It might look something like this:
<?php namespace App\Entities;
class User
{
public $id;
public $username;
public $email;
public $password_hash;
public $created_at;
public $updated_at;
public function setPassword(string $password)
{
$this->password_hash = password_hash($password, PASSWORD_DEFAULT);
return $this;
}
public function createdOn($format = ‘Y-m-d’)
{
$date = new DateTime($this->created_at);
return $date->format($format);
}

}
As I said, this is an extremely basic version. But it works to demonstrate the usefulness. It contains properties for all of the columns in the database, not just the ones listed in $allowedFields. Since they are all public, they can be accessed from outside the class whenever you need them, whether in a controller, view, or in the model itself when saving. In real apps, we would likely want to make those protected properties to keep things a little safer. We’ll look at that in the next post, and combine it with some powerful convenience methods to really make working with Entities simple and, dare I say it, fun.
This small example, also includes two convenience methods. The first helps ensure a business rule by make a single place that determines how our password is hashed. The second allows you to retrieve a formatted version of the created_at date. Neither of these are ground-breaking. They’re only there to give you some ideas of basic methods you might find helpful.
Saving the Entity CodeIgniter’s Model class is smart enough to recognize Entity classes whenever you perform a save(), update(), or insert() call, and convert that class to an array of key/value pairs that can be used to create or update the record in the database.
But, how does it know which fields should be allowed to update the database? Remember the $allowedFields array the model has? That’s the key. It uses that list of fields and grabs the values from the Entity class. In our example, it would create an array that looks something like:
[
‘username’ => ‘blackjack’,
‘email’ => ‘[email protected]’,

‘password_hash’ => ‘. . .’
]
Notice that it did not grab the id, created_at, or update_at fields. That’s because the id field is automatically assigned by the database and we shouldn’t be able to change it, and the date fields are managed by the Model class itself, and we don’t want outside classes mucking with the dates.
So, when it comes to saving your data, there’s nothing special to do. Just pass your Entity to the save(), update(), or insert() method, and the Model takes care of the rest.
// Grab a user
$user = $userModel->find(15);
// Update their email
$user->email = ‘[email protected]’;
// Save the user
$userModel->save($user);
Up Next Hopefully, this gets you interested in exploring this type of pattern with your applications. Even if you don’t do a full-repository pattern, this simple change makes your code much more manageable and can be very powerful.
In the next post, we’ll take it a little farther by hiding those class properties, but still ensuring they’re accessible to the Model during creation and saving. Then we’ll craft a small Entity class that we can base all of our Entities from that provides some magic that allows us to manipulate the data on the way in and out, and even provide a

new fill()method that takes an array and populates/changes the class properties. All of this allows for much more freedom, power, and flexibility in your Entity classes.

Better Entities in CodeIgniter 4 By Lonnie Ezell on Oct 27, 2016 0 Comments codeigniter
Continuing on from the previous post, this tutorial will look at taking our basic Entities and making the more flexible, and more capable. Again, this isn’t meant to be a full demonstration of the Repository pattern, but simply examining one particular aspect of it.
What was wrong with the previous example? For starters, all of our class properties had to be public to allow it to work with the Model. While that’s not the worst thing in the world, it is definitely not ideal.
Getters and Setters The first step is to make the class properties protected instead of public. In order to make those visible to the Model, we’ll use the __get() and __set() magic methods to provide access.
public function __get(string $key)
{
if (isset($this->$key))
{
return $this->$key;
}
}
public function __set(string $key, $value = null)
{
if (isset($this->$key))
{
$this->$key = $value;
}

}
This solves our problem, but simply adds extra code between the value and your code, which is good for encapsulation, but we can do better here. There are going to be numerous times that you want to perform some logic whenever we a value on the Entity. For example, you might want to automatically hash a password whenever it’s set. Or you might want to always keep your dates stored as DateTime instances. So, how do we make this simple?
For that, let’s add some new functionality to the setter that allows us to call any method that had set_ and then property name, like set_password.
public function __set(string $key, $value = null)
{
// if a set* method exists for this key,
// use that method to insert this value.
$method = 'set_'.$key;
if (method_exists($this, $method))
{
$this->$method($value);
}
// A simple insert on existing keys otherwise.
elseif (isset($this->$key))
{
$this->$key = $value;
}
}
Now, you could solve your business needs with simple little functions like these:

protected function set_password(string $value)
{
$this->password = password_hash($value, PASSWORD_BCRYPT);
}
protected function set_last_login(string $value)
{
$this->last_login = new DateTime($value);
}
Whenever you set $user->password = ‘abc’, or $user->last_login = ’10-15-2016 3:42pm’ your custom methods will automatically be called, storing the property as your business needs dictate. Let’s do the same thing for the getters.
public function __get(string $key)
{
// if a set* method exists for this key,
// use that method to insert this value.
if (method_exists($this, $key))
{
return $this->$key();
}
if (isset($this->$key))
{
return $this->$key;
}
}
In this case, we’re simply checking for a method with the exact name as the class property. You can set these methods as public and then it would work

the same, no matter whether it was called as a method or a property, $user->last_login or $user->last_login():
public function last_login($format=‘Y-m-d H:i:s’)
{
return $this->last_login->format($format);
}
By setting a default value for $format, it works either way, but you can now get the value in the format you need it at that time, instead of being restricted to a single format.
Filler This has already helped our classes to become more capable and flexible, at the same time helping us to maintain our business rules, and still easily be saved to the database and gotten back out again intact. But wouldn’t it be nice if we could just shove an array of key/value pairs at the class and have it fill the properties out automatically, but only work with existing properties? This makes it simple to grab data from $_POST, create a new Entity class, and shove it there before saving. Even better if we can customize data on the way in the same way we did with setters, right? Welcome to the fill() method:
public function fill(array $data)
{
foreach ($data as $key => $var)
{
$method = 'fill_'. $key;
if (method_exists($this, $method))
{
$this->$method($var);
}
elseif (property_exists($this, $key))

{
$this->$key = $var;
}
}
}
A quick example should make this one make sense. First, let’s grab the POST data, add it to a new User object, and save it to the database:
$data = $_POST;
$user = new App\Entities\User();
$user->fill($data);
$userModel->save($user);
If this were a registration form we were handling, we might be getting apassword field that we wanted to make sure was hashed. So, a quick fill_ method and we’re good to go. For this example, we’ll just re-use the setter we created earlier:
protected function fill_password(string $value)_
{
$this->set_password($value);
}
The Entity Class To make this all simple to re-use, we should create a new Entity class that our Entities can extend and get these features automatically. Here’s one such class, that also takes care of our timestamps, including timezone conversions.
<?php namespace Myth;

/**
* Class Entity
*
* A base class for entities that provides some convenience methods
* that make working with entities a little simpler.
*
* @package App\Entities
*/
class Entity
{
/**
* Given an array of key/value pairs, will fill in the
* data on this instance with those values. Only works
* on fields that exist.
*
* @param array $data
*/
public function fill(array $data)
{
foreach ($data as $key => $var)
{
$method = 'fill_'. $key;
if (method_exists($this, $method))
{
$this->$method($var);
}
elseif (property_exists($this, $key))
{
$this->$key = $var;

}
}
}
//--------------------------------------------------------------------
//--------------------------------------------------------------------
// Getters
//--------------------------------------------------------------------
/**
* Returns the created_at field value as a string. If $format is
* a string it will be used to format the result by. If $format
* is TRUE, the underlying DateTime option will be returned instead.
*
* Either way, the timezone is set to the value of $this->timezone,
* if set, or to the app's default timezone.
*
* @param string $format
*
* @return string
*/
public function created_at($format = 'Y-m-d H:i:s'): string
{
$timezone = isset($this->timezone)
? $this->timezone
: app_timezone();
$this->created_at->setTimezone($timezone);
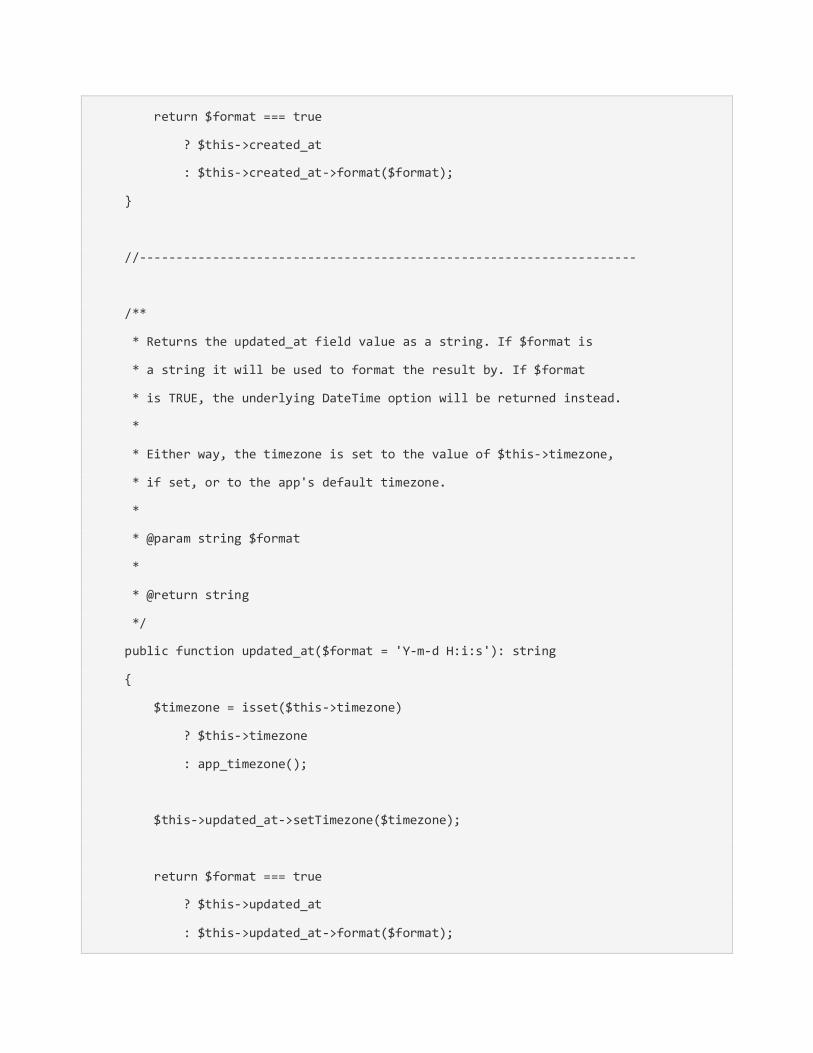
return $format === true
? $this->created_at
: $this->created_at->format($format);
}
//--------------------------------------------------------------------
/**
* Returns the updated_at field value as a string. If $format is
* a string it will be used to format the result by. If $format
* is TRUE, the underlying DateTime option will be returned instead.
*
* Either way, the timezone is set to the value of $this->timezone,
* if set, or to the app's default timezone.
*
* @param string $format
*
* @return string
*/
public function updated_at($format = 'Y-m-d H:i:s'): string
{
$timezone = isset($this->timezone)
? $this->timezone
: app_timezone();
$this->updated_at->setTimezone($timezone);
return $format === true
? $this->updated_at
: $this->updated_at->format($format);

}
//--------------------------------------------------------------------
//--------------------------------------------------------------------
// Setters
//--------------------------------------------------------------------
/**
* Custom value for the `created_at` field used with timestamps.
*
* @param string $datetime
*
* @return $this
*/
public function set_created_at(string $datetime)
{
$this->created_at = new \DateTime($datetime, new \DateTimeZone('UTC'));
return $this;
}
//--------------------------------------------------------------------
/**
* Custom value for the `updated_at` field used with timestamps.
*
* @param string $datetime
*
* @return $this

*/
public function set_updated_at(string $datetime)
{
$this->updated_at = new \DateTime($datetime, new \DateTimeZone('UTC'));
return $this;
}
//--------------------------------------------------------------------
//--------------------------------------------------------------------
// Magic
//--------------------------------------------------------------------
/**
* Allows Models to be able to get any class properties that are
* stored on this class.
*
* For flexibility, child classes can create `get*()` methods
* that will be used in place of getting the value directly.
* For example, a `created_at` property would have a `created_at`
* method.
*
* @param string $key
*
* @return mixed
*/
public function __get(string $key)
{
// if a set* method exists for this key,

// use that method to insert this value.
if (method_exists($this, $key))
{
return $this->$key();
}
if (isset($this->$key))
{
return $this->$key;
}
}
//--------------------------------------------------------------------
/**
* Allows Models to be able to set any class properties
* from the result set.
*
* For flexibility, child classes can create `set*()` methods
* to provide custom setters for keys. For example, a field
* named `created_at` would have a `set_created_at` method.
*
* @param string $key
* @param null $value
*/
public function __set(string $key, $value = null)
{
// if a set* method exists for this key,
// use that method to insert this value.
$method = 'set_'.$key;

if (method_exists($this, $method))
{
$this->$method($value);
}
// A simple insert on existing keys otherwise.
elseif (isset($this->$key))
{
$this->$key = $value;
}
}
//--------------------------------------------------------------------
}
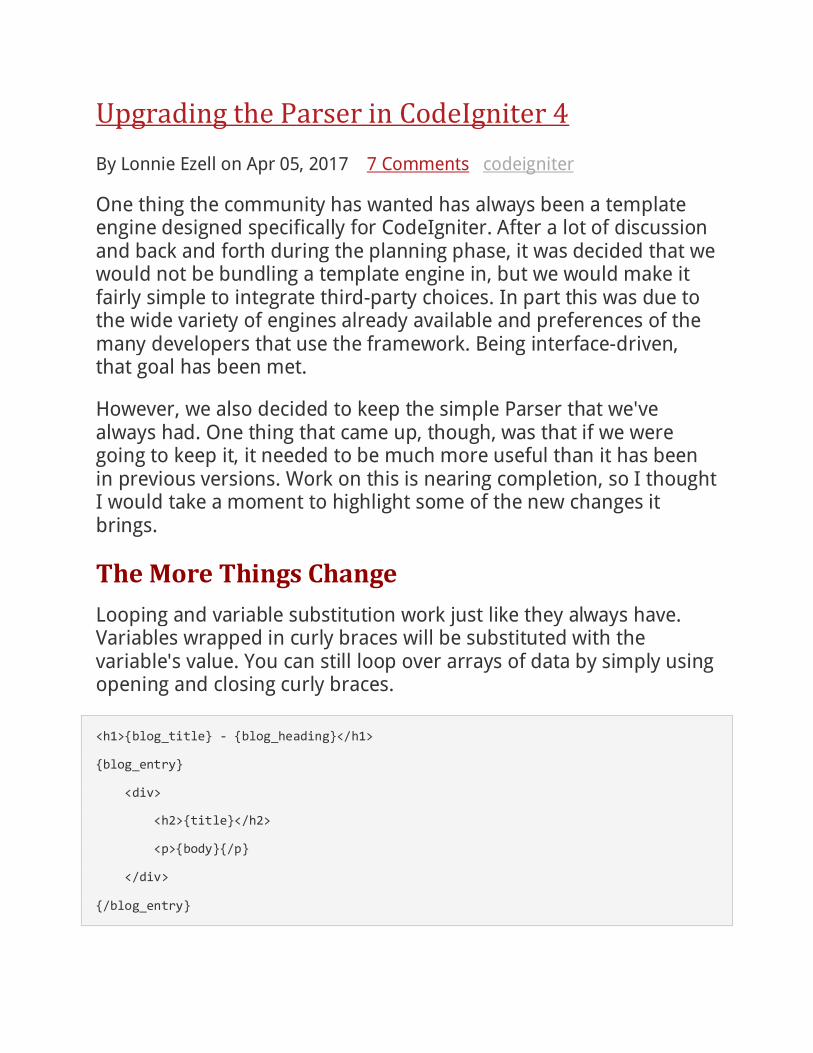
Upgrading the Parser in CodeIgniter 4 By Lonnie Ezell on Apr 05, 2017 7 Comments codeigniter
One thing the community has wanted has always been a template engine designed specifically for CodeIgniter. After a lot of discussion and back and forth during the planning phase, it was decided that we would not be bundling a template engine in, but we would make it fairly simple to integrate third-party choices. In part this was due to the wide variety of engines already available and preferences of the many developers that use the framework. Being interface-driven, that goal has been met.
However, we also decided to keep the simple Parser that we've always had. One thing that came up, though, was that if we were going to keep it, it needed to be much more useful than it has been in previous versions. Work on this is nearing completion, so I thought I would take a moment to highlight some of the new changes it brings.
The More Things Change Looping and variable substitution work just like they always have. Variables wrapped in curly braces will be substituted with the variable's value. You can still loop over arrays of data by simply using opening and closing curly braces.
<h1>{blog_title} - {blog_heading}</h1>
{blog_entry}
<div>
<h2>{title}</h2>
<p>{body}{/p}
</div>
{/blog_entry}

The one major change here, though, is that PHP is no longer executed when parsing views.
The Little Things Since you can no longer use any PHP, you need more tools to make the templates work for you.
Conditional Logic Simple conditional logic is now available with the if, elseif, and else tags.
{if role=='admin'}
<h1>Welcome, Admin</h1>
{elseif role=='moderator'}
<h1>Welcome, Moderator</h1>
{else}
<h1>Welcome, User</h1>
{endif}
While they syntax might look a little cleaner, it is treated exactly like a standard PHP conditional, and all standard PHP rules would apply here. You can use any of the comparison operators you would normally, like ==, ===, !==, <, >, etc.
No-Parse Blocks If you have a section of your template that you don't want the Parser to touch, you can do that easily by wrapping it in noparse tags.
{noparse}
... Your un-parsed content lives here ...
{/noparse}

Comments It's a tiny thing, but sometimes you just have to leave yourself notes in the templates, so it now supports comments that are never displayed in the final HTML.
{# This is a comment #}
Automatic Escaping All variable substitutions are automatically escaped for safer views, greatly reducing the chance of XSS attacks and more. You can choose a different escaping context (html, attr, css, or js) depending on where the variable is appearing. It defaults to html so most of the time you won't need to do anything special to make it happen.
// Defaults to basic HTML escaping
{ some_var }
// Escape within HTML attributes
{ some_var|esc(attr) }
// Escape within Javascript code
{ some_var|esc(js) }
// Escape within CSS style blocks
{ some_var|esc(css) }
If you don't want it escaped at all, you can use {! and !} braces instead of plain curly braces and that one variable will not be escaped.
{! not_escaped_var !}
This one is still being finalized, so it's possible the syntax might change, but this is the current plan.

The Bigger Things These next two items bring a fair amount of power to what used to be an almost pointless parser.
Filters You saw a hint of this above when I was talking about escaping, but the parser now supports filtering the variable to affect its final display. Filters are separated by pipes (|).
// Output: FILTERED
{ filtered | upper }
// Output: Filtered
{ FILTERED | title }
Filters can have one or more parameters to specify options.
// Output: 2017-10-03
{ myDate | date(Y-m-d) }
Multiple filters can be chained together.
// Output: 2018-10-03
{ myDate | date_modify(+1 year) | date(Y-m-d) }
Filters typically only work on strings, but CodeIgniter will still ship with a number of helpful filters. And it's very simple to create your own custom ones. The built-in ones are currently:
• abs • capitalize • date • date_modify • default

• esc • excerpt • highlight • highlight_code • limit_words • limit_chars • lower • nl2br • number_format • prose • round • strip_tags • title • upper
Plugins Word of Warning: This feature is a concept only at this time, and actually implementation hasn't started, yet, but this is what's kicking around in my head. Syntax likely to change.
Plugins are a nod to Expression Engine's syntax that allows you to extend the capability of the Parser to fit most any need that you might have. Heck, you could probably flesh out any missing features needed for a template engine through plugins.
Basically, plugins allow you to specify an alias tag that a library's features can be called from. They are very similar in concept to View Cells, though I believe they'll be able to do some things that Cells can't. The only plugin expected to ship with the framework is the View Cell feature, actually.
This probably best makes sense with an example. Let's just use the View Cell feature to demonstrate, then. With Cells you can specify a class/method to generate and return HTML that is rendered in the Cell's place. It's tag might look something like this:

// A Simple version
{ cell: Acme\Blog\Posts::recentPosts }
// With Parameters
{ cell: Acme\Blog\Posts::recentPosts category=codeigniter limit=5 }
If the Acme\Blog package wanted to make things a little cleaner and create some View plugins, they might provide something like the following:
{ blog:recentPosts category=codeigniter limit=5 }
Again, all of this plugin syntax is preliminary and subject to change, but it's coming.
Hopefully, this type of Parser can be useful to some of you.

Creating a New Base Controller
Under ./application/Controllers we will create a new folder called Base.
So now we should have a folder structure like this:
./application/Controllers/Base
We will create three new Controllers.
./application/Controllers/Base/BaseController.php
./application/Controllers/Base/AdminController.php
./application/Controllers/Base/PublicController.php
We will also be modifying the Home Controller to take advantage of our new Controllers.

The BaseController ./application/Controllers/Base/BaseController.php
<?php namespace App\Controllers\Base; /** * --------------------------------------------------------------------------- * Editor : PhpStorm 2016.3.2 * Date : 6/29/2017 * Time : 10:22 AM * Authors : Raymond L King Sr. * --------------------------------------------------------------------------- * * Class BaseController * * @project ci4 * @author Raymond L King Sr. * @link http://www.procoversfx.com * @copyright Copyright (c) 2009 - 2017 Pro Covers FX, LLC. * @license http://www.procoversfx.com/license * --------------------------------------------------------------------------- */ /** * Start the sessions * We then need to add this to access the sessions elsewhere * $session = \Config\Services::session(); * SEE: The Home Controller */ $session = \Config\Services::session(); $session->start(); /** * Class BaseController * * @package App\Controllers\Base */ class BaseController extends \CodeIgniter\Controller {

/** * Class variables - public, private, protected and static. * ----------------------------------------------------------------------- */ /** * @var array */ protected $helpers = []; /** * __construct () * ----------------------------------------------------------------------- * * Class Constructor * * NOTE: Not needed if not setting values or extending a Class. * */ public function __construct(...$params) { parent::__construct(...$params); // load helpers - helper(['url', 'form']); helper(['url']); } } // End of BaseController Class. /** * --------------------------------------------------------------------------- * Filename: BaseController.php * Location: ./application/Controllers/Base/BaseController.php * --------------------------------------------------------------------------- */

The AdminController ./application/Controllers/Base/AdminController.php
<?php namespace App\Controllers\Base; /** * --------------------------------------------------------------------------- * Editor : PhpStorm 2016.3.2 * Date : 6/29/2017 * Time : 10:22 AM * Authors : Raymond L King Sr. * --------------------------------------------------------------------------- * * Class AdminController * * @project ci4 * @author Raymond L King Sr. * @link http://www.procoversfx.com * @copyright Copyright (c) 2009 - 2017 Pro Covers FX, LLC. * @license http://www.procoversfx.com/license * --------------------------------------------------------------------------- */ /** * Class AdminController * * @package App\Controllers\Base */ class AdminController extends BaseController { /** * Class variables - public, private, protected and static. * ----------------------------------------------------------------------- */ /** * __construct ()
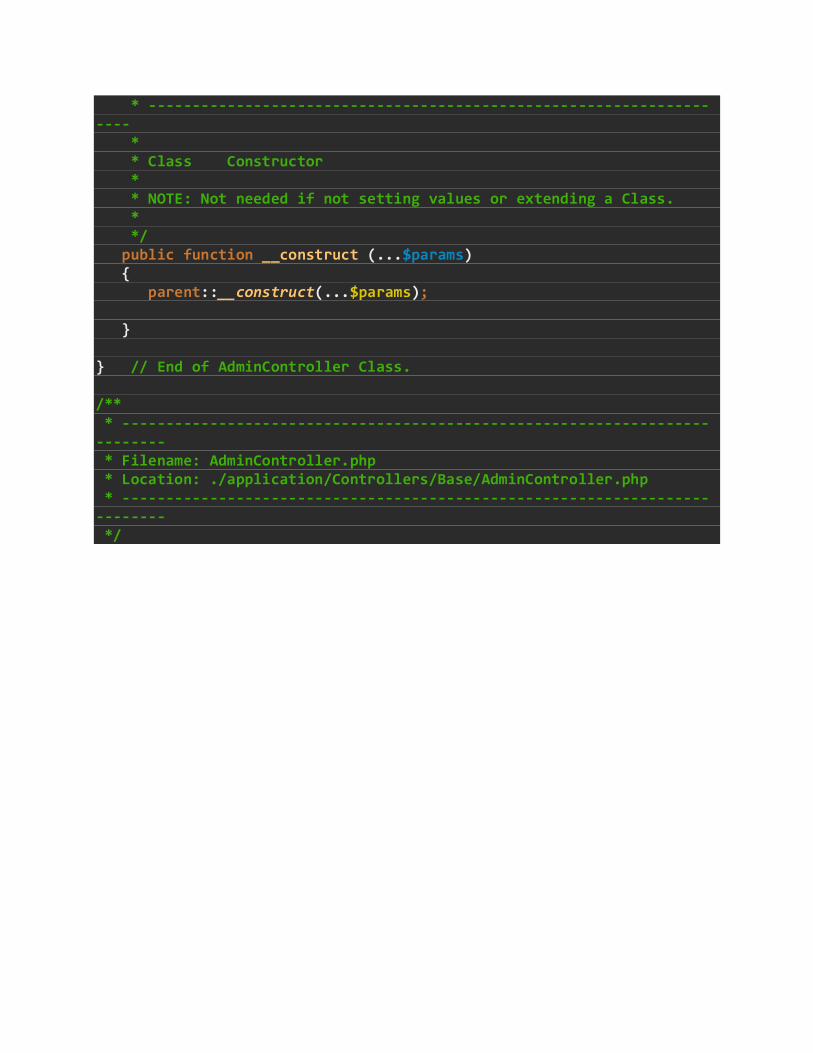
* -------------------------------------------------------------------- * * Class Constructor * * NOTE: Not needed if not setting values or extending a Class. * */ public function __construct (...$params) { parent::__construct(...$params); } } // End of AdminController Class. /** * --------------------------------------------------------------------------- * Filename: AdminController.php * Location: ./application/Controllers/Base/AdminController.php * --------------------------------------------------------------------------- */

The PublicController ./application/Controllers/Base/PublicController.php
<?php namespace App\Controllers\Base; /** * --------------------------------------------------------------------------- * Editor : PhpStorm 2016.3.2 * Date : 6/29/2017 * Time : 10:22 AM * Authors : Raymond L King Sr. * --------------------------------------------------------------------------- * * Class PublicController * * @project ci4 * @author Raymond L King Sr. * @link http://www.procoversfx.com * @copyright Copyright (c) 2009 - 2017 Pro Covers FX, LLC. * @license http://www.procoversfx.com/license * --------------------------------------------------------------------------- */ /** * Class PublicController * * @package App\Controllers\Base */ class PublicController extends BaseController { /** * Class variables - public, private, protected and static. * ----------------------------------------------------------------------- */ /** * __construct ()

* ----------------------------------------------------------------------- * * Class Constructor * * NOTE: Not needed if not setting values or extending a Class. * */ public function __construct(...$params) { parent::__construct(...$params); } } // End of PublicController Class. /** * --------------------------------------------------------------------------- * Filename: PublicController.php * Location: ./application/Controllers/Base/PublicController.php * --------------------------------------------------------------------------- */

The Modified Home Controller ./application/Controllers/Home.php
<?php namespace App\Controllers; //use CodeIgniter\Controller; //use App\Controllers\Base\AdminController; use App\Controllers\Base\PublicController; //class Home extends Controller //class Home extends AdminController class Home extends PublicController { /** * Class variables - public, private, protected and static. * ----------------------------------------------------------------------- */ /** * __construct () * -------------------------------------------------------------------- * * Class Constructor * * NOTE: Not needed if not setting values or extending a Class. * */ public function __construct (...$params) { parent::__construct(...$params); } public function index() { return view('welcome_message'); } //--------------------------------------------------------------------

} // End of Home Class /** * --------------------------------------------------------------------------- * Filename: Home.php * Location: ./application/Controllers/Home.php * --------------------------------------------------------------------------- */
