get ready ahead of time materials - pbs kids · pdf file... not across it. ... • have...
TRANSCRIPT
ROBO ARMLEADER NOTES
CHALLENGE: Design and build a robotic arm that can lift a cup off a table.
LEARNING GOALS: Science: Levers, tension, and compression; NASA: Robotic arms; Engineering: Design process
NASA CONNECTION: To explore the surface of a planet, moon, or asteroid, rovers use robotic mechanical arms to do such things as collect samples, take pictures, and monitor the environment.
GET READY AHEAD OF TIME• Make the cardboard strips. The long strips should
be 15–20 centimeters (6–8 inches). For short strips, cut some long strips in half. The corrugation must run the length of the strip, not across it. Otherwise, it will bend and crimp easily. Punching cardboard is hard for kids. Punch one hole in the corner of each strip.
• Make guides for the string. Pre-cut the straws into 2.5-centimeter (1-inch) lengths. (Six per arm)
• Get the videos. Go to pbskids.org/designsquad/links/solarsystem. Download the Robo Arm, Sandeep Yayathi, and NASA videos. Be prepared to project them. If you’re unable to show videos, review the handout’s overview and steps and tell kids about the NASA work described in the overview and in Step 1.
• Photocopy. Copy the handout and performance assessment rubric.
INTRODUCE THE CHALLENGE (10 minutes)
Set the stage
• Robotic and human arms have similarities. Both use flexible parts (string or muscle) to move rigid parts (cardboard or bone). The string’s or muscle’s pull is directed by a guide (straw or tendons), and the guide’s position affects the arm’s efficiency. Finally, the brass fasteners mirror our joints. Make the “strings” (tendons) in the hand visible by having kids lift their fingers up and back.
• Tell kids the challenge and show them the Robo Arm video.
Give the NASA context
• Show one of the NASA videos that lets kids see a robotic arm in action.
1
MATERIALS (per arm)
• 1 large strip of corrugated cardboard (about 5 x 20 centimeters [2 x 8 inches]) with a hole punched in one corner
• 1 small strip of corrugated cardboard (Cut a large strip in half.) Punch a hole in one corner.
• 1 medium (i.e., 1-inch) brass fastener
• 1 straw, cut into 2.5-centimeter (1-inch) lengths
• 100 centimeters (39 inches) of smooth string (e.g., kite string)
• 2 large paper clips
• 2 paper cups (3-ounce)
• Tape (any kind)
Design Squad Nation™/© 2013 WGBH Educational Foundation.
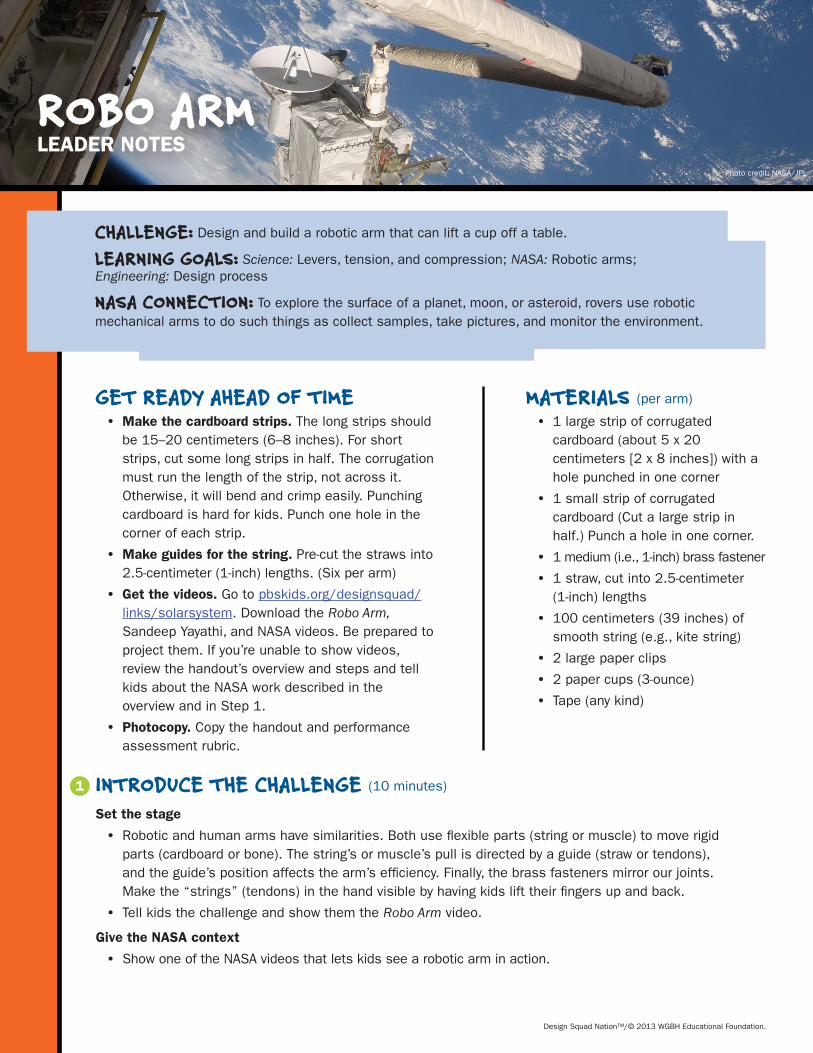
Photo credit: NASA/JPL

BUILD A TWO-SECTION ARM (25 minutes)
Identify the problem
In Step 2, kids build a two-section arm and use it to play “Kick the Cup,” a game where they keep their Robo Arms flat on the table. Step 2 lets kids focus on getting the sections to pivot properly and on using the string and guides to move the “hand.” Mastering these elements ensures success in Step 3.
2
of friction when the joint is tight, which keeps the “hand” from moving easily.
• If the hand doesn’t move in the direction it should… Check that the end of the string is taped to an appropriate spot on the cardboard. Also check that the guide(s) are positioned so the string pulls efficiently.
Test, evaluate, and redesign (5 minutes)
Play “Kick the Cup.” Kids set paper cups near the end of their Robo Arms. They pull the string quickly and try to kick the cup across the table. Once they do, they’re ready for Step 3.
A Robo Arm is a lever system with sections pivoting around a fulcrum.
Brainstorm and design (5 minutes)
In Robo Arm, kids substitute a mechanical system for bones, joints, and muscles. Liken the cardboard to bones, string to muscles and tendons, and pivots to the joints in the hand and arm. Point out the system’s lever arms and pivots. Ask: • How will you connect the cardboard strips so they move freely? (Insert a brass
fastener loosely enough so the sections move easily.)
• Where will you attach the string to the cardboard so that the sections move the way you want? (Different attachment points will yield different results in terms of the pull required and the distance the arm moves.)
• How will you use the straws as guides for the string? (Decide how to make the joint work and THEN tape the guides in place so the string pulls as intended.)
Build (15 minutes)
If any of these issues come up, ask questions to get kids thinking about how they might solve them.• If the sections don’t move freely… Loosen the brass fasteners. There’s a lot
ADD A HOOK TO THE ROBO ARM (10 minutes)
Identify the problem
In Step 3, kids unbend paper clips to form hooks and poke them into one of the arm’s corrugation tubes. They tape a second paper-clip hook to a cup and use their Robo Arms to hook this “target” cup. Gather kids around a big table.• Have a few kids demonstrate how their Robo Arms kick a cup.
• Show them how to fashion a hook out of a paper clip and insert it into a corrugation tube.
• Have kids make hooks and use their Robo Arms to lift target cups.
3
A two-section Robo Arm about to hook a Target Cup.
Build, test, evaluate, and redesign
Have kids play these two games:• Round Robin. Everyone stands around a table, holding his or her Robo Arms. There is one target cup.
The first kid lifts the target cup and sets it in front of the person to the right. This action repeats until the cup ends back at the first person. Can you do it faster?
• Relay Race. Form two teams. Have half of each team stand against one wall and the other half against the opposite wall. Using a Robo Arm, the first kid in line picks up a target cup, races across the room, and sets it down. The kid at the head of that line uses his or her Robo Arm to pick it up and carry it back across the room. The first team to cycle through wins.
Design Squad Nation™/© 2013 WGBH Educational Foundation.

DISCUSS WHAT HAPPENED (10 minutes)
Emphasize key elements in today’s challenge by asking:• Engineering: Basing a design on an existing object is called “reverse
engineering.” How is making a Robo Arm an example of reverse engineering? (By starting with a known [i.e., their hands and arms] and building a mechanical version, kids are reverse engineering.)
• Science: A Robo Arm is a lever system. What part is the fulcrum? The lever arm? What’s the effect of moving a fulcrum, changing the length of a lever arm, or changing the string’s attachment point? (The brass fastener is the fulcrum and the cardboard is the lever arm. Changes will alter the force required to move the lever.)
• NASA: What are some advantages of using robotic arms? (Mechanical arms can be much stronger and more adaptable than human arms. Plus, robotic arms can be remotely operated, even over millions of miles.)
• Career: Show kids the engineer profile featuring Sandeep Yayathi. As a robotics engineer, he designs and builds humanoid robots to work alongside astronauts. His robots have a lot of dexterity, strength, and intelligence. Download the profile sheet for fun facts, discussion prompts, and extension ideas.
4
Kids unbend paper clips to form hooks and poke them into one of the Robo Arm’s corrugation tubes.
Kids use their Robo Arms to play games.
EXTEND THE CHALLENGE• Add a third section to the arm, like a person’s upper arm.
• Figure out a way for the hand to grip and pick up an object.
CURRICULUM CONNECTIONSUse Robo Arm to engage, explain, and extend student understanding of the following topics:• Simple machines. Levers convert a little effort into a lot of
force (like a paper cutter or hammer) or convert a little movement into a large movement (like a broom or baseball bat). Ask kids to identify the lever systems in the arm. Then have them describe the effect of repositioning the fulcrum or changing the length of a section or the string’s attachment point.
• Tension and compression. Tension is a pulling, stretching force. String is good in tension, making it an effective control cable. Compression is a pushing, squeezing force. Cardboard is good in compression, making it an effective lever arm. Have kids point out the places on the arm that are in tension and in compression and how the materials were selected to withstand these forces.
Design Squad Nation™/© 2013 WGBH Educational Foundation.

ROBO ARM
MATERIALS• 1 large strip of corrugated
cardboard (about 5 x 20 centimeters [2 x 8 inches]) Punch a hole in one corner.
• 1 small strip of cardboard (Cut a large strip in half.) Punch a hole in one corner.
• 1 medium (i.e., 1-inch) brass fastener
• 1 straw, cut into 2.5 centimeter (1-inch) lengths
• 100 centimeters (39 inches) of smooth string (e.g., fishing line)
• 2 large paper clips• 2 paper cups (3-ounce)• Tape (any kind)
NASA sends spacecraft equipped with robotic arms to explore places humans can’t yet visit, like Mars and asteroids. These arms are strong and adaptable and are where a lot of work gets done—it’s where many of the Mars rovers’ tools live.
WE CHALLENGE YOU TO……design and build a Robo Arm that you can use to lift a cup off a table.
1. IDENTIFY THE PROBLEM AND BRAINSTORM• How will you connect the cardboard strips so they pivot efficiently?
• Where will you tape the end of the string so that the “hand” moves the way you want it to?
• How can you use the straws as guides for the string?
WORDS TO USE• lever: A rigid bar attached
to a pivot used to transmit force
• tension: A pulling, stretching force
• compression: A pushing, squeezing force
• friction: A force that resists motion
2. DESIGN AND BUILDBelow are some Robo Arm ideas. Invent your own design or improve on one of these.
•Ifthesectionsdon’tmovefreely… Loosen the brass fasteners to reduce friction.
• If the hand doesn’t move in the direction it should… Check where you taped the end of the string to the cardboard. Also check that the guides make the string pull in the right direction.
Design Squad Nation™/© 2013 WGBH Educational Foundation.
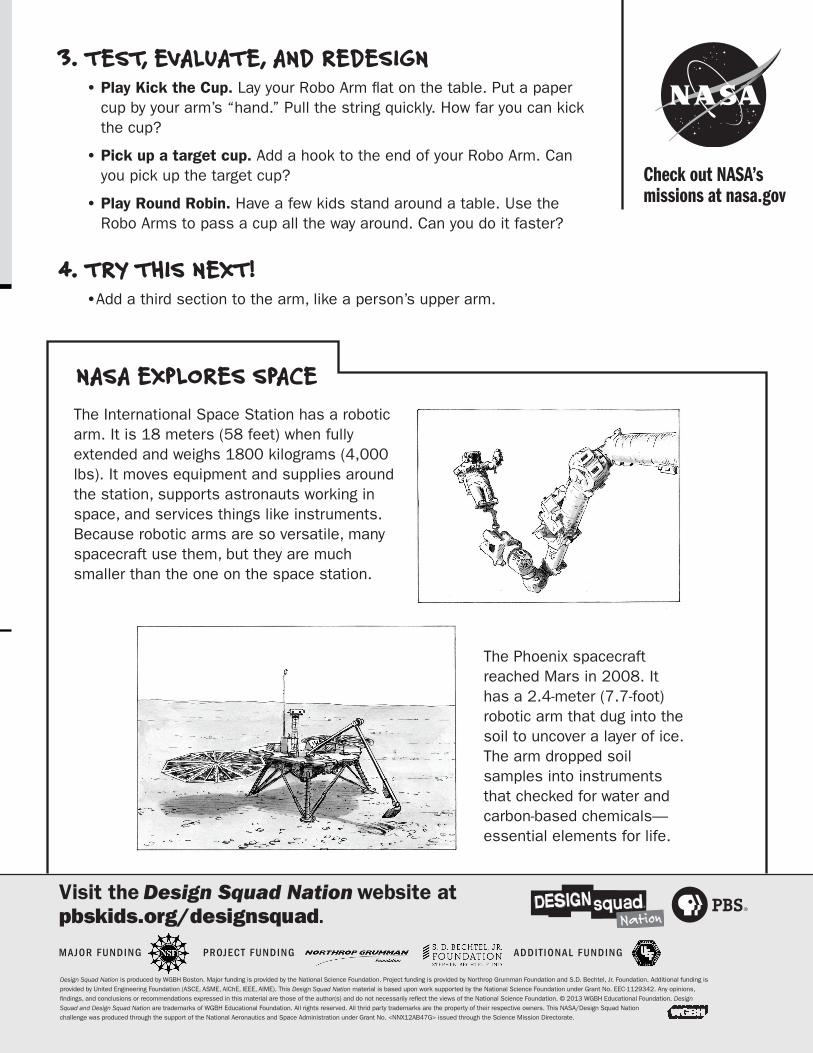
3. TEST, EVALUATE, AND REDESIGN• Play Kick the Cup. Lay your Robo Arm flat on the table. Put a paper
cup by your arm’s “hand.” Pull the string quickly. How far you can kick the cup?
• Pick up a target cup. Add a hook to the end of your Robo Arm. Can you pick up the target cup?
• Play Round Robin. Have a few kids stand around a table. Use the Robo Arms to pass a cup all the way around. Can you do it faster?
4. TRY THIS NEXT!•Add a third section to the arm, like a person’s upper arm.
Check out NASA’s missions at nasa.gov
The International Space Station has a robotic arm. It is 18 meters (58 feet) when fully extended and weighs 1800 kilograms (4,000 lbs). It moves equipment and supplies around the station, supports astronauts working in space, and services things like instruments. Because robotic arms are so versatile, many spacecraft use them, but they are much smaller than the one on the space station.
The Phoenix spacecraft reached Mars in 2008. It has a 2.4-meter (7.7-foot) robotic arm that dug into the soil to uncover a layer of ice. The arm dropped soil samples into instruments that checked for water and carbon-based chemicals—essential elements for life.
NASA EXPLORES SPACE
Design Squad Nation is produced by WGBH Boston. Major funding is provided by the National Science Foundation. Project funding is provided by Northrop Grumman Foundation and S.D. Bechtel, Jr. Foundation. Additional funding is provided by United Engineering Foundation (ASCE, ASME, AlChE, IEEE, AIME). This Design Squad Nation material is based upon work supported by the National Science Foundation under Grant No. EEC-1129342. Any opinions, findings, and conclusions or recommendations expressed in this material are those of the author(s) and do not necessarily reflect the views of the National Science Foundation. © 2013 WGBH Educational Foundation. Design
Squad and Design Squad Nation are trademarks of WGBH Educational Foundation. All rights reserved. All thrid party trademarks are the property of their respective owners. This NASA/Design Squad Nation challenge was produced through the support of the National Aeronautics and Space Administration under Grant No. <NNX12AB47G> issued through the Science Mission Directorate.
MAJOR FUNDING PROJECT FUNDING ADDIT IONAL FUNDING
Visit the Design Squad Nation website at pbskids.org/designsquad.

66
DESIGN CHALLENGE PERFORMANCE ASSESSMENT RUBRIC
Challenge name:
Names of team members:
Design Squad Nation is produced by WGBH Boston. Major funding is provided by the National Science Foundation. Project funding is provided by Northrop Grumman Foundation and S.D. Bechtel, Jr. Foundation. Additional funding is provided by United Engineering Foundation (ASCE, ASME, AlChE, IEEE, AIME). This Design Squad Nation material is based upon work supported by the National Science Foundation under Grant No. EEC-1129342. Any opinions, findings, and conclusions or recommendations expressed in this material are those of the author(s) and do not necessarily reflect the views of the National Science Foundation. © 2013 WGBH Educational Foundation. Design
Squad and Design Squad Nation are trademarks of WGBH Educational Foundation. All rights reserved. All thrid party trademarks are the property of their respective owners. This NASA/Design Squad Nation challenge was produced through the support of the National Aeronautics and Space Administration under Grant No. <NNX12AB47G> issued through the Science Mission Directorate.
MAJOR FUNDING PROJECT FUNDING ADDIT IONAL FUNDING
Visit the Design Squad Nation website at pbskids.org/designsquad.
Identifying the problem(s) and brainstorming solutions
Showed a clear understanding of the problem(s) to solve. Independently brainstormed solutions.
Needed some teacher direction to define the problem(s) and brainstorm possible solutions.
Needed lots of teacher direction to define the problem(s). Little if any independent brainstorming.
Points:
Working as a team member
Worked well together. All team members participated and stayed on task.
Some team members were occasionally off task.
Most team members were often off task and not cooperating or participating fully.
Points:
Using the design process
Team brainstormed many design ideas and tested and improved the design. Final design complete or nearly complete and shows creative problem solving.
Some team members were occasionally off task.
Team brainstormed few design ideas and did little testing or redesigning. Final design lacks clear design idea(s).
Points:
Processing the science and engineering
Team gave a strong presentation of its solution to the challenge and showed clear understanding of the science concepts and design process.
Team gave a basic presentation of its solution to the challenge and showed basic understanding of the science concepts and design process.
Team gave a weak presentation of its solution to the challenge and showed little understanding of the science concepts and design process.
Points:
Total Points: