geogagger pro user manual - solmeta technology ltd.|nikon ...solmeta.com/pic/download/geogagger n1...
TRANSCRIPT
Geogagger N1 User Manual
Solmeta Technology Co., Ltd
Copyright © 2010 Solmeta Technology, Co., Ltd. All Rights Reserved
2
Contents
1. SAFETY INFORMATION..................................................................... 3
2. OVERVIEW ............................................................................................ 4
3. PACKING LIST ...................................................................................... 5
4. PRODUCT VIEW .................................................................................. 6
5. CHARGING ............................................................................................ 7
6. HOW TO USE THE GEOTAGGER N1 ................................................ 8
7. OTHER OPERATIONS...................................................................... 11
8. WARRANTY ....................................................................................... 12
9. SPECIFICATIONS .............................................................................. 13
3
1. Safety Information
To prevent damage to the GPS unit or injury to yourself or to others, please read the following safety
instructions before using this equipment.
Do not disassemble
Touching the product’s internal parts could result in injury. In the event of malfunction, the products
should be repaired only by a qualified technician. Any unauthorized disassembly or modification may void
the unit’s warranty.
Keep the GPS unit dry
Do not immerse in or expose to water or handle with wet hands. Exposing the GPS unit to water could
result fire or electric shock.
Do not subject to high temperatures
The GPS unit can be damaged by exposure to fire or high temperatures. Do not leave the unit in areas
subject to extremely high temperatures. Failure to observe this precaution could result in damage to the
casing or internal circuitry, causing fire.
Keep out of reach of children
Failure to observe this precaution could result in injury.
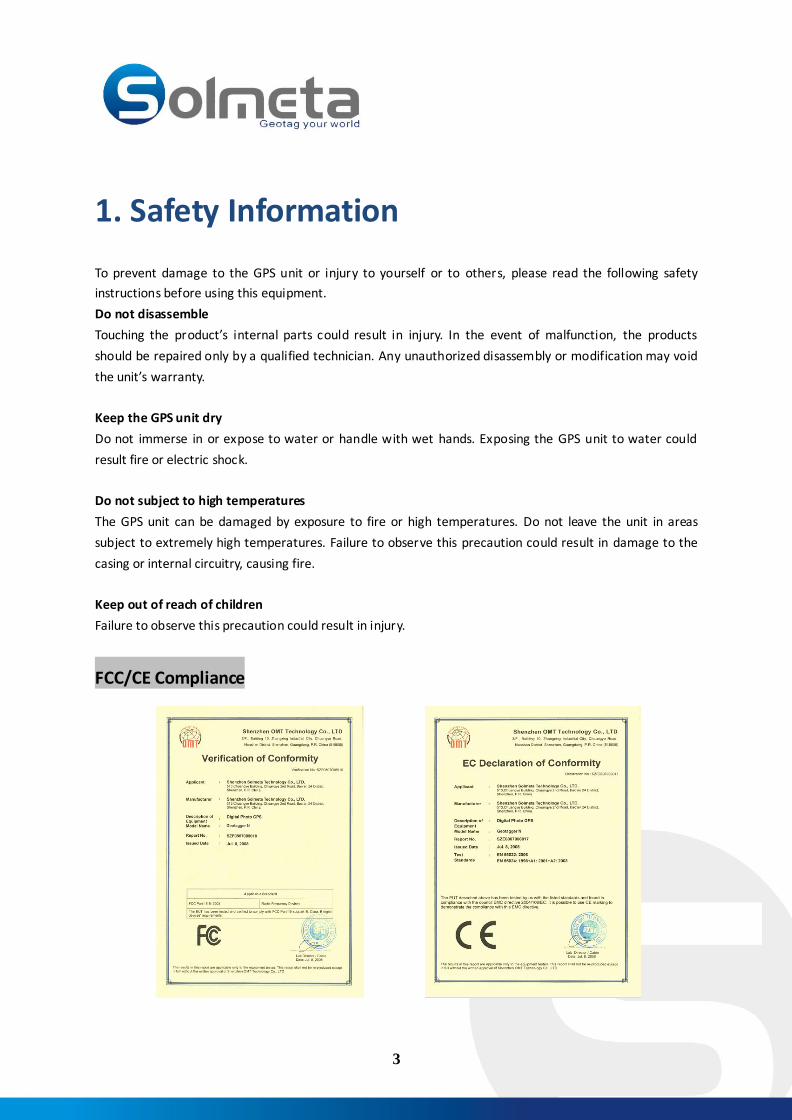
FCC/CE Compliance
4
2. Overview
Thank you for purchasing Solmeta Geotagger N1, a geotagging device that records the latitude, longitude,
altitude, and UTC (Coordinated Universal Time) with your photographs with Nikon D3x, D3s, D3, D700,
D300s, D300, D200, D2/x/xs/Hs and D90, D5000 Cameras. The geotagging information is saved as
metadata with the image, and can be used in a variety of ways to add value to y our photographs.
FFeeaattuurreess
Embedded the real time geographical information to the EXIF data of the digital photo.
Very high sensitivity, quick cold start.
Built-in rechargeable battery, doesn’t consume the power of the camera, lasting up to 20 hours.
Automatically switch to Nikon camera for power source when the device is in low power.
"Auto" switch design, which allow the Geotagger N1 will turn on when the camera is turned on and
will turn off when the camera is turned off. Use-friendly.
Compatible of multi-model design, which allow you choose the different data cable to match different
camera .
Cable-A for connection to Nikon D3x,D3s,D3, D700, D300s,D300, D200, D2/x/xs/Hs
Cable-B for connection to Nikon D90
Cable-C for connection to Nikon D5000
“Indoors” geotagging, automatically tags the photo with the last location information when indoors or
loss of GPS signal.
Supports Flickr, panoramio, Locr, Picasa, etc.
Be sure to read this guide thoroughly before use.
5
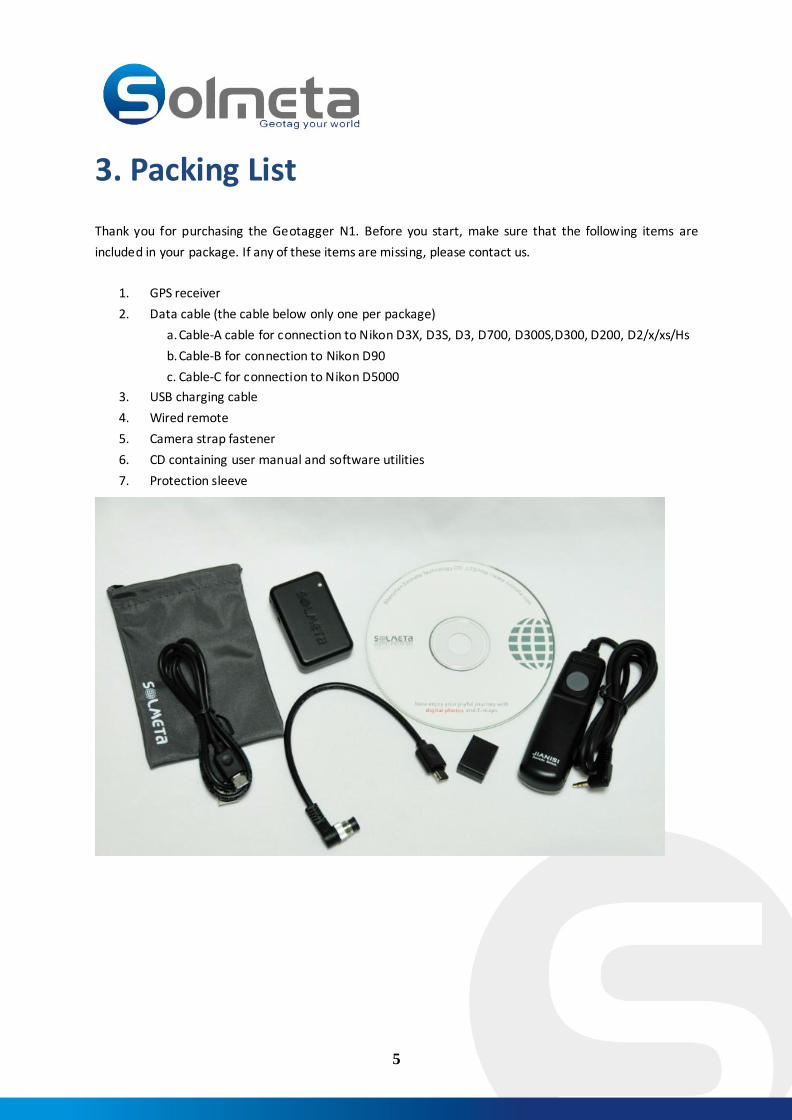
3. Packing List
Thank you for purchasing the Geotagger N1. Before you start, make sure that the following items are
included in your package. If any of these items are missing, please contact us.
1. GPS receiver
2. Data cable (the cable below only one per package)
a. Cable-A cable for connection to Nikon D3X, D3S, D3, D700, D300S,D300, D200, D2/x/xs/Hs
b. Cable-B for connection to Nikon D90
c. Cable-C for connection to Nikon D5000
3. USB charging cable
4. Wired remote
5. Camera strap fastener
6. CD containing user manual and software utilities
7. Protection sleeve
6
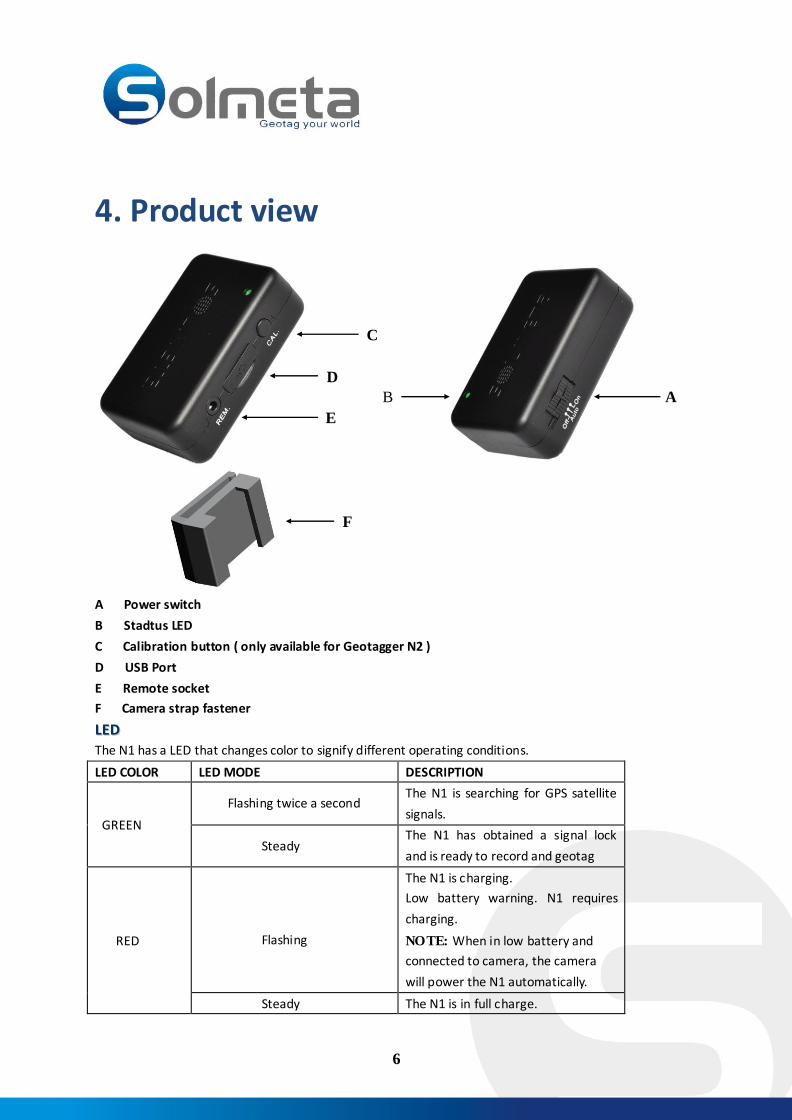
4. Product view
C
D
B A
E
F
A Power switch
B Stadtus LED
C Calibration button ( only available for Geotagger N2 )
D USB Port
E Remote socket
F Camera strap fastener
LLEEDD
The N1 has a LED that changes color to signify different operating conditions.
LED COLOR LED MODE DESCRIPTION
GREEN
Flashing twice a second The N1 is searching for GPS satellite
signals.
Steady The N1 has obtained a signal lock
and is ready to record and geotag
RED
Flashing
The N1 is charging.
Low battery warning. N1 requires
charging.
NOTE: When in low battery and
connected to camera, the camera
will power the N1 automatically.
Steady The N1 is in full charge.

7
5. Charging
1. Power off the Geotagger N1, then connect the device with a computer or an AC adaptor by the USB
charging cable. ( The Geotagger N1 can be charged using any 5V standard USB charger )
2. It takes around three hours to fully charge the Geotagger N1 .
3. The LED on the N1 will be red blinking during the charging, and will be steady when the device is in
full power.
NOTE
The built-in rechargeable battery cannot be replaced by users; it needs to be replaced by our
professional technician if it needs servicing.
Auto Meter off
Nikon added a new function to the D3x, D3s, D3, D700, D300s, D300 and D90, D5000. The new
function resolved a battery drain issue by allowing the user to select the metering system to stay On or
auto Off when GPS signals are received to reduce power consumption.
To access this function on your Nikon camera, please follow the step below:
Menu→ Custom Settings Menu→ (C) Timers/ AE Lock→ c2 Auto meter- off delay
8
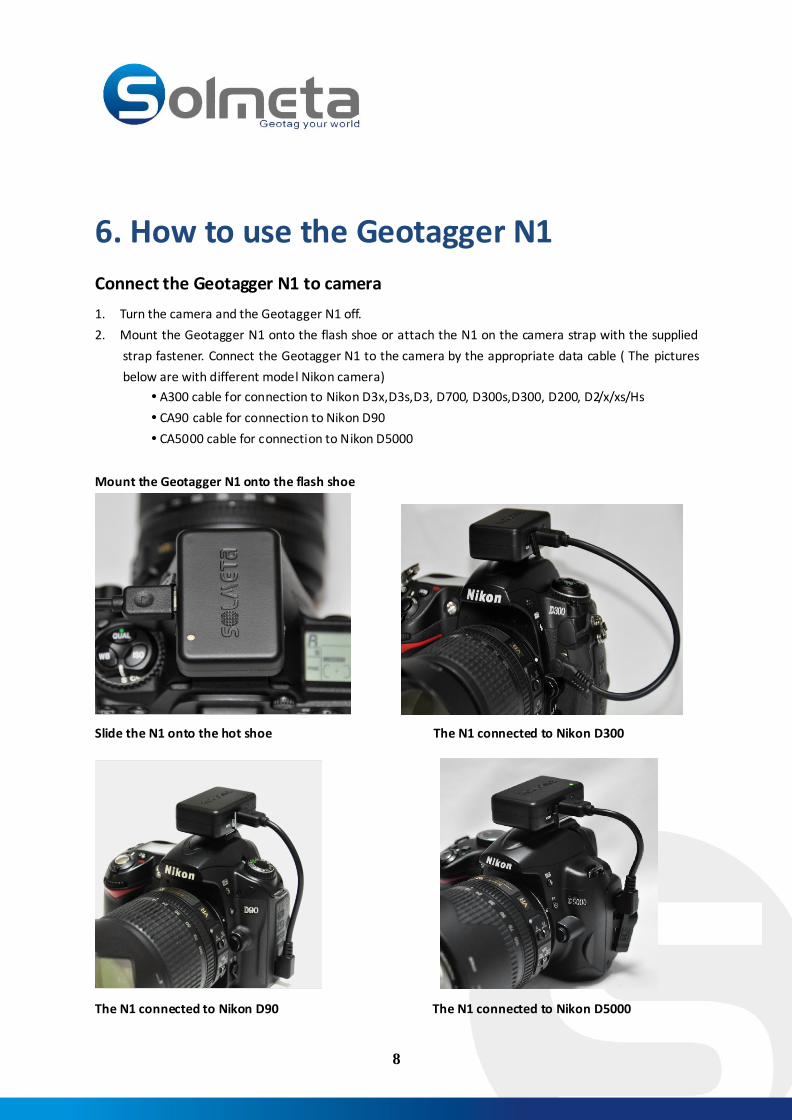
6. How to use the Geotagger N1
Connect the Geotagger N1 to camera
1. Turn the camera and the Geotagger N1 off.
2. Mount the Geotagger N1 onto the flash shoe or attach the N1 on the camera strap with the supplied
strap fastener. Connect the Geotagger N1 to the camera by the appropriate data cable ( The pictures
below are with different model Nikon camera)
A300 cable for connection to Nikon D3x,D3s,D3, D700, D300s,D300, D200, D2/x/xs/Hs
CA90 cable for connection to Nikon D90
CA5000 cable for connection to Nikon D5000
Mount the Geotagger N1 onto the flash shoe
Slide the N1 onto the hot shoe The N1 connected to Nikon D300
The N1 connected to Nikon D90 The N1 connected to Nikon D5000
9
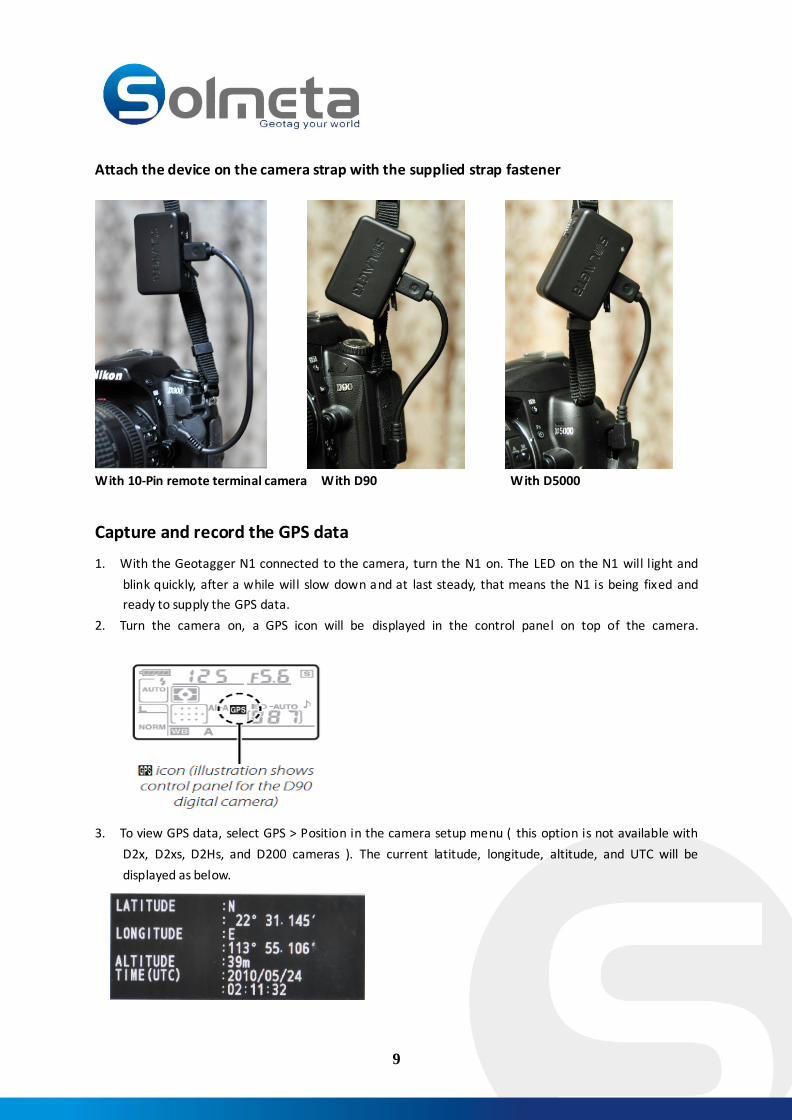
Attach the device on the camera strap with the supplied strap fastener
With 10-Pin remote terminal camera With D90 With D5000
Capture and record the GPS data
1. With the Geotagger N1 connected to the camera, turn the N1 on. The LED on the N1 will light and
blink quickly, after a while will slow down and at last steady, that means the N1 is being fixed and
ready to supply the GPS data.
2. Turn the camera on, a GPS icon will be displayed in the control panel on top of the camera.
3. To view GPS data, select GPS > Position in the camera setup menu ( this option is not available with
D2x, D2xs, D2Hs, and D200 cameras ). The current latitude, longitude, altitude, and UTC will be
displayed as below.

10
4. Take pictures, GPS data and the heading will be recorded with each photograph.
( With the Geotagger N1 on “Auto”switch position, the geotagger N1 will turn on when the camera is
turned on and will turn off when the camera is turned off. Use -friendly, power saved.)
NOTE
To get a quick fix, please take the Geotagger N1 and your camera to an open outside space and stand
still
If there is no blinking GPS icon in the control panel, check the connection, and make sure the switch is
in the correct position.
To get the GPS data more accurate, we suggest holding the camera steady for a few minutes when the
N1 is just being fixed, that is especially important for the value of altitude.
Some of the Nikon camera has an “Auto meter off” option that is also a power saving method. We
suggest adjusting it to 30 seconds or more to avoid missing the GPS data, or half press the shutter to
activate the GPS when taking a photo.
Camera GPS icon status No GPS icon Not connected to the camera
GPS icon blinking Not fixed, signal searching
GPS icon displayed GPS fixed
11
7. Other operations
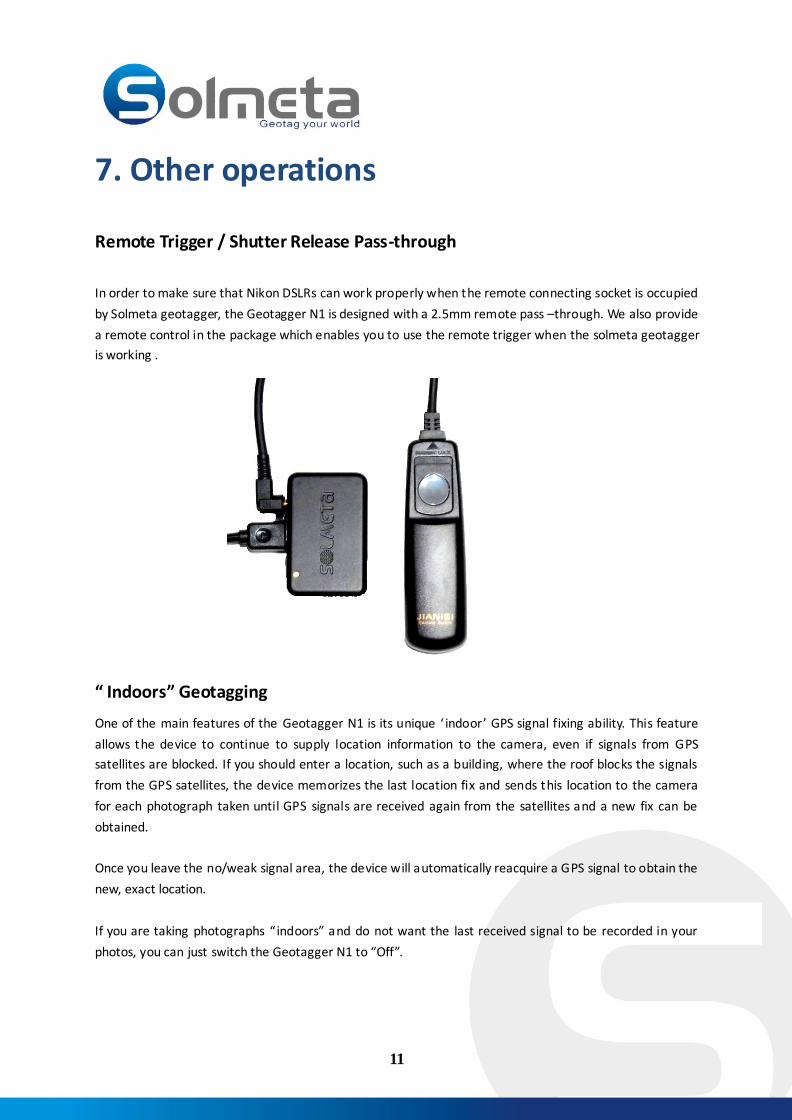
Remote Trigger / Shutter Release Pass-through
In order to make sure that Nikon DSLRs can work properly when the remote connecting socket is occupied
by Solmeta geotagger, the Geotagger N1 is designed with a 2.5mm remote pass –through. We also provide
a remote control in the package which enables you to use the remote trigger when the solmeta geotagger
is working .
“ Indoors” Geotagging
One of the main features of the Geotagger N1 is its unique ‘ indoor’ GPS signal fixing ability. This feature
allows the device to continue to supply location information to the camera, even if signals from GPS
satellites are blocked. If you should enter a location, such as a building, where the roof blocks the signals
from the GPS satellites, the device memorizes the last location fix and sends this location to the camera
for each photograph taken until GPS signals are received again from the satellites and a new fix can be
obtained.
Once you leave the no/weak signal area, the device will automatically reacquire a GPS signal to obtain the
new, exact location.
If you are taking photographs “indoors” and do not want the last received signal to be recorded in your
photos, you can just switch the Geotagger N1 to “Off”.

12
8. Warranty
Solmeta Technology Co.,Limited guarantees its product from manufacturing defects and workmanship
for a period of one-year from the date of original purchase. During the one-year warranty, Solmeta
Technology will repair or replace the product free of charge. Please keep your original invoice as proof
of purchase.
Customers who have products covered under the warranty are required to contact Solmeta Technology
by e-mail ( [email protected]) for troubleshooting issues before returning the product.
Customers are responsible for shipping and insurance charges for returning the product to Solmeta
Technology.
Charges will be imposed for repairing product, which is out of warranty coverage or invalid warranty.
The guarantee is not valid if defect is due to damage caused by incorrect use, poor maintenance or if
persons not authorized by Solmeta Technology have carried out alterations or repairs.
For the device to be used correctly, the user should strictly adhere to all instructions included in the
user guide and should abstain from any actions or uses that are described as undesired or which are
warned against in the user guide.
Precautions for use
Do not drop: The product may malfunction if subjected to strong shocks or vibration.
Keep dry: This product is not waterproof, and may malfunction if immersed in or exposed to water.
Avoid sudden changes in temperature: Sudden changes in temperature, such as occur when entering or
leaving a heated building on a cold day, can cause condensation inside the device. To prevent
condensation, place the device in a carrying case or plastic bag before exposing it to sudden changes in
temperature.
Keep away from strong magnetic fields: Do not use or store this device in the vicinity of equipment that
generates strong electromagnetic radiation or magnetic fields. Strong static charges or the mag netic fields
produced by equipment such as radio transmitters could affect the product ’s internal circuitry.
A note on electronic devices: In extremely rare instances, a strong external static charge may cause the
device to stop functioning. Turn the camera off and disconnect and reconnect the Geotagger N1. In the
event of continued malfunction, contact your retailer or Solmeta-authorized service representative.
Information in this document is subject to change without notice. Solmeta Technology reserves the right
to change or improve their products and to make changes in the content without obligation to notify
any person or organization of such changes or improvements.
13
9. Specifications
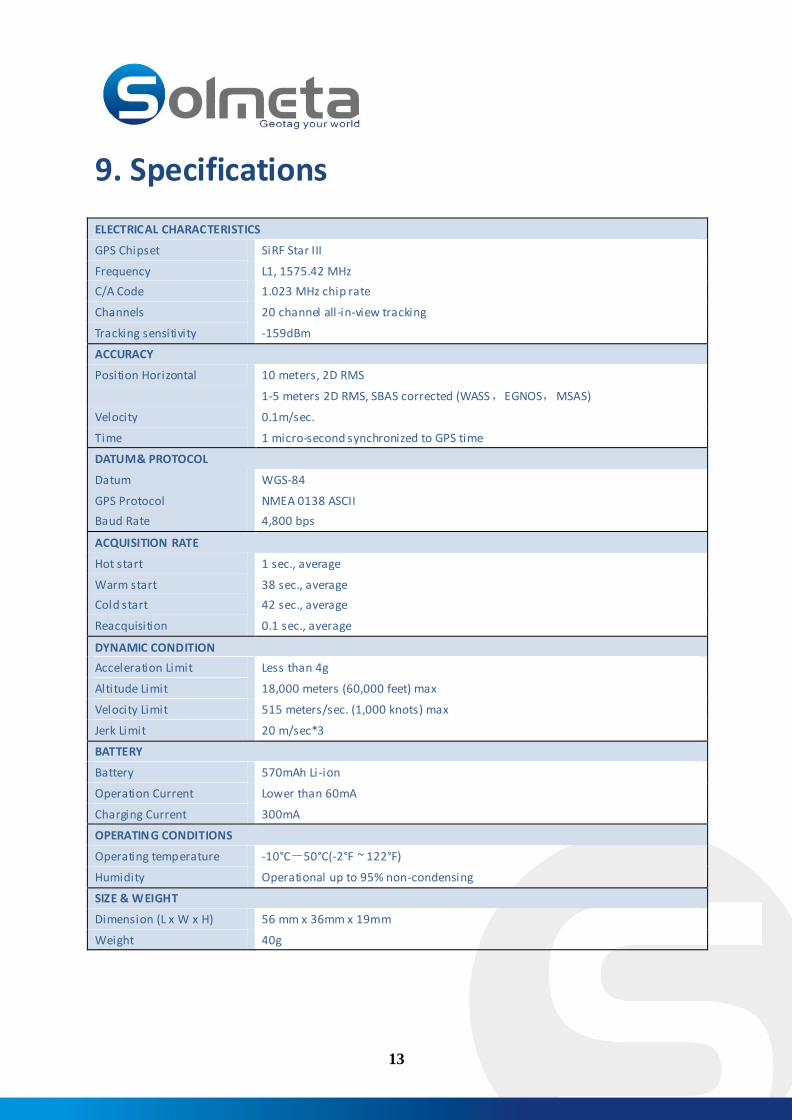
ELECTRICAL CHARACTERISTICS
GPS Chipset SiRF Star III
Frequency L1, 1575.42 MHz
C/A Code 1.023 MHz chip rate
Channels 20 channel all -in-view tracking
Tracking sensitivity -159dBm
ACCURACY
Position Horizontal 10 meters, 2D RMS
1-5 meters 2D RMS, SBAS corrected (WASS,EGNOS,MSAS)
Velocity 0.1m/sec.
Time 1 micro-second synchronized to GPS time
DATUM& PROTOCOL
Datum WGS-84
GPS Protocol NMEA 0138 ASCII
Baud Rate 4,800 bps
ACQUISITION RATE
Hot start 1 sec., average
Warm start 38 sec., average
Cold start 42 sec., average
Reacquisition 0.1 sec., average
DYNAMIC CONDITION
Acceleration Limit Less than 4g
Altitude Limit 18,000 meters (60,000 feet) max
Velocity Limit 515 meters/sec. (1,000 knots) max
Jerk Limit 20 m/sec*3
BATTERY
Battery 570mAh Li-ion
Operation Current Lower than 60mA
Charging Current 300mA
OPERATING CONDITIONS
Operating temperature -10°C-50°C(-2°F ~ 122°F)
Humidity Operational up to 95% non-condensing
SIZE & WEIGHT
Dimension (L x W x H) 56 mm x 36mm x 19mm
Weight 40g