general troubleshooting kronos - electrolux · 10 esse f.z. august 03 kronos system level 2...
TRANSCRIPT

1 August 03
General troubleshooting KRONOS
2ESSE F.Z. August 03
Kronos system
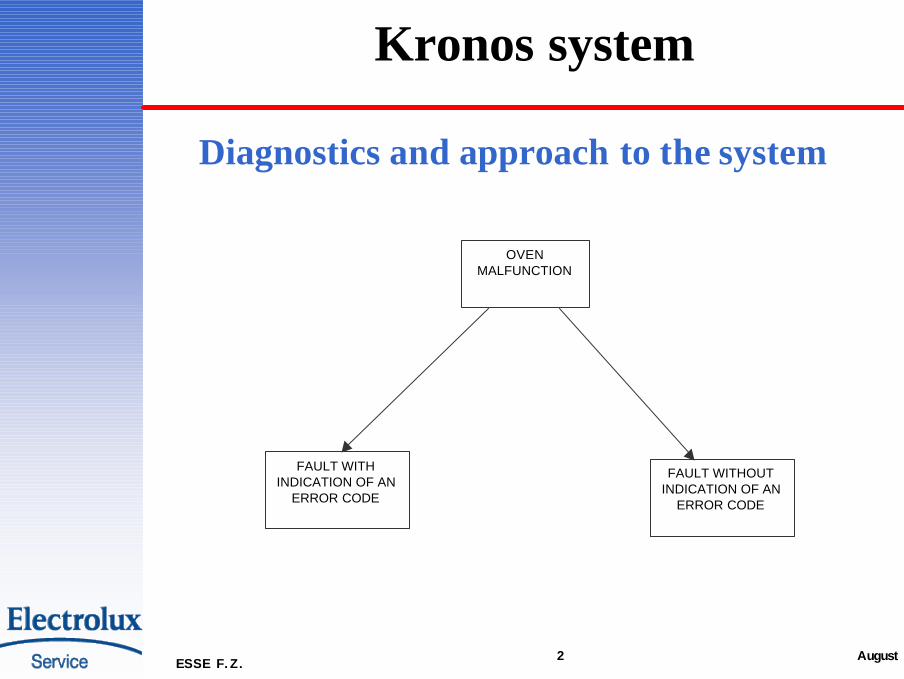
Diagnostics and approach to the system
OVENMALFUNCTION
FAULT WITH INDICATION OF AN
ERROR CODE
FAULT WITHOUT INDICATION OF AN
ERROR CODE

3ESSE F.Z. August 03
Kronos system
Diagnostics and approach to the system
Error code display
• information governed by the microcontroller, monitored by an
internal programme; in the event of certain malfunctions, on the
display an error code.
• Combinations of successive error codes: error code memorized in
one of the registers in the microcontroller; new error code is added
to the code already stored in the register, and the display shows a
third value, which is the sum (in hexadecimal format). To display
the code in a recognizable form, it is necessary to disconnect the
appliance from the power supply and then switch it on again.
4ESSE F.Z. August 03
Kronos system
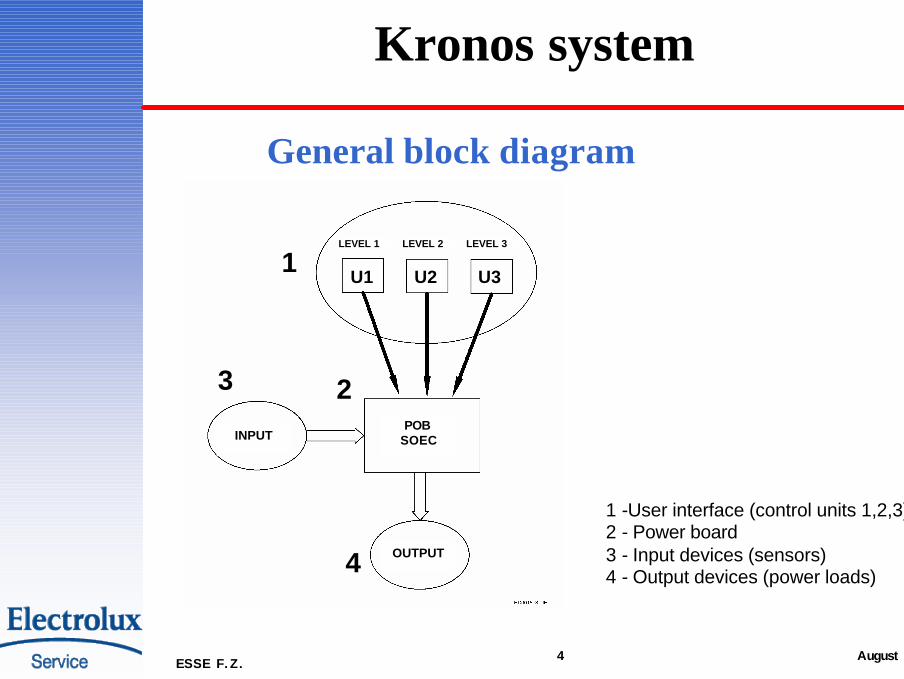
General block diagram
1 -User interface (control units 1,2,3)2 - Power board3 - Input devices (sensors)4 - Output devices (power loads)
U1 U2 U3
LEVEL 1 LEVEL 2 LEVEL 3
POB SOEC INPUT
OUTPUT
1
2 3
4

5ESSE F.Z. August 03
Kronos system
Error code
KRONOS system performs an internal autodiagnostics routine and,
when a malfunction is detected, displays the corresponding error code.
Failure to heat80
Temperature sensor faulty65
Overheating detected + temperature safety limit exceeded
60
Overheating detected40 (*)
Temperature safety limit exceeded20
Temperature sensor short-circuited08
DESCRIPTION OF THE CAUSEERROR CODE

6ESSE F.Z. August 03
Kronos system
Level 1
Error code E65
Level 2
Level 3

7ESSE F.Z. August 03
Kronos system
Troubleshooting using error code
When a malfunction is detected by the control unit:
1. The appliance shows the error code on the display
2. The appliance switches off

8ESSE F.Z. August 03
Kronos system
Troubleshooting without error code

9ESSE F.Z. August 03
Kronos system
Level 2 Diagnostic cycle
To activate the diagnostics routine for the basic version, proceed as follows:
Press and hold down key "FHU" and connect the oven to the power supply.
The test takes place in the following sequence:1 - A number is displayed indicating the initial status of the software (*).2.All the segments of the display light.3.The various control relays for the heating elements are activated in
sequence and the display shows the software code (e.g. "1 E 0020").4. The grill relay remains switched on for a certain time; at the same
time, the three triacs are activated.
(*) This number indicates the status of the internal memory, and changes according to the time that has elapsed since the appliance was last switched off and the data remaining in the system's memory (e.g. “L 3004” or “S 3005”).
10ESSE F.Z. August 03
Kronos system
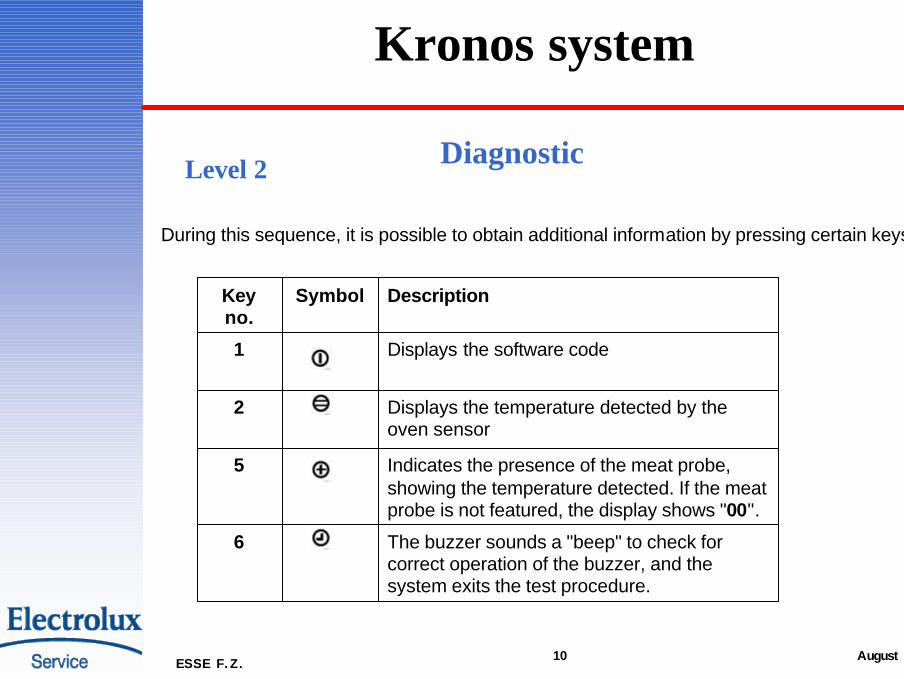
Level 2 Diagnostic
During this sequence, it is possible to obtain additional information by pressing certain keys:
The buzzer sounds a "beep" to check for correct operation of the buzzer, and the system exits the test procedure.
6
Indicates the presence of the meat probe, showing the temperature detected. If the meat probe is not featured, the display shows "00".
5
Displays the temperature detected by the oven sensor
2
Displays the software code1
DescriptionSymbolKeyno.

11ESSE F.Z. August 03
Sistema Kronos
Level 3 Diagnostic cycle
To activate the diagnostics routine for the basic version, proceed as follows:
Press and hold down key "1" and connect the oven to the power supply.The test takes place in the following sequence:1 - A number is displayed indicating the initial status of the software (*).2. All the segments of the display light.3. The various control relays for the heating elements are activated in
sequence and the software code (e.g. "BE 10 W0S48") is shown in the upper section of the display.
4. The grill relay remains switched on for a certain time; at the same time, the three triacs are activated.
(*) This number indicates the status of the internal memory, and changes according to the time that has elapsed since the appliance was last switched off and the data remaining in the system's memory (e.g. “L 3004” or “S 3005”).

12ESSE F.Z. August 03
Kronos system
Level 3 Diagnostic
During this sequence, it is possible to obtain additional information by pressing certain keys:
The buzzer sounds a "beep" to check for correct operation of the buzzer, and the system exits the test procedure.
6
Indicates the presence of the meat probe, showing the temperature detected. If the meat probe is not featured, the display shows "00".
5
Displays the temperature detected by the oven sensor
2
Displays the software code1
DescriptionSymbolKey no.
13ESSE F.Z. August 03
Kronos system
Testing the components
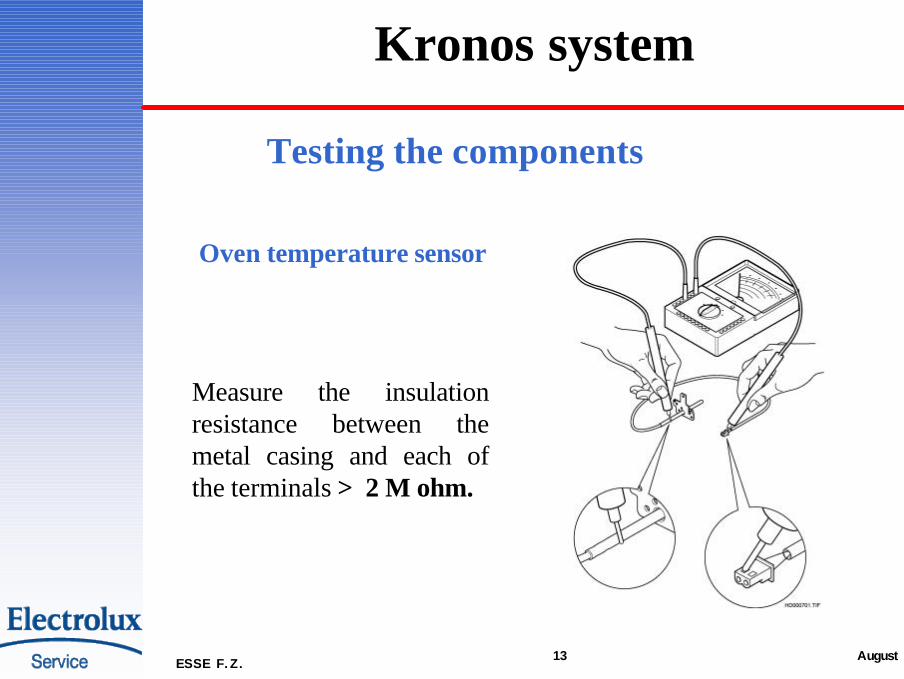
Oven temperature sensor
Measure the insulation resistance between the metal casing and each of the terminals > 2 M ohm.

14ESSE F.Z. August 03
Kronos system
Tesing the components
Oven temperature sensor
resistance at room temperature :500-600 ohm

15ESSE F.Z. August 03
Kronos system
Testing the components
Power absorption tests
NOTA: The values measured refer to a power supply voltage of 230 V.
0,207,408,70
5017002000
CURRENTABSORPTION (A)
POWERABSORPTION (W)
16ESSE F.Z. August 03
Kronos system
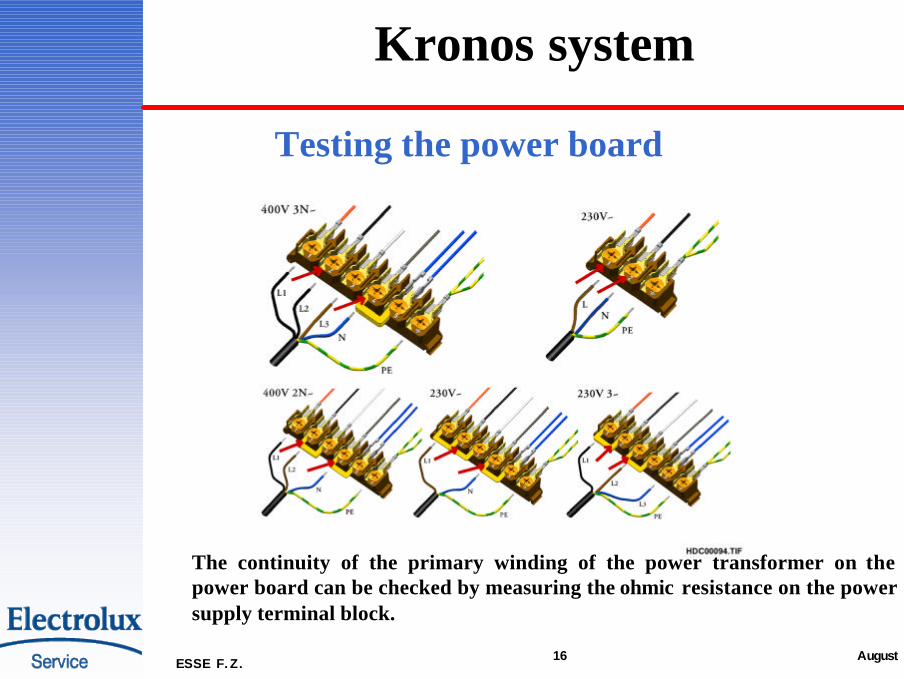
Testing the power board
The continuity of the primary winding of the power transformer on the power board can be checked by measuring the ohmic resistance on the power supply terminal block.
17ESSE F.Z. August 03
Kronos system
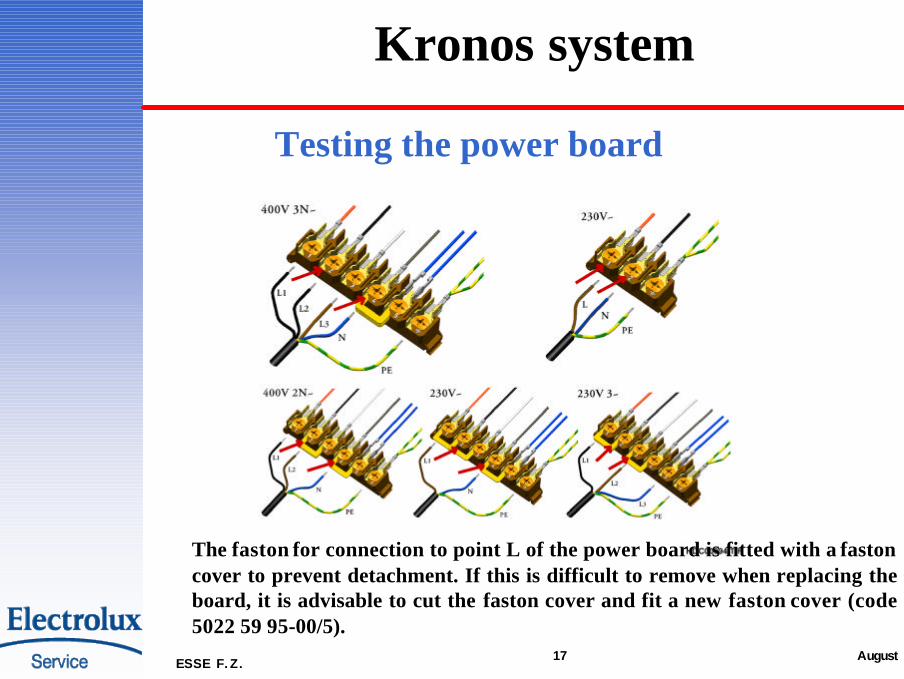
Testing the power board
The faston for connection to point L of the power board is fitted with a fastoncover to prevent detachment. If this is difficult to remove when replacing the board, it is advisable to cut the faston cover and fit a new faston cover (code 5022 59 95-00/5).