gardening from the ground up soil and composting · organisms that decompose organic materials need...
TRANSCRIPT

Joseph A. Carroll Building
401 W. Hickory Street, Suite 112
Denton, TX 76201-9026
Phone: 940-349-2883 or
Help Desk 940-349-2892
https://dcmga.com
Denton County Master Gardener Association educates and engages county residents in the implementation of research-based horticultural and environmental practices that create sustainable gardens, landscapes, and communities.
Gardening from the ground up – soil and
composting

2
3
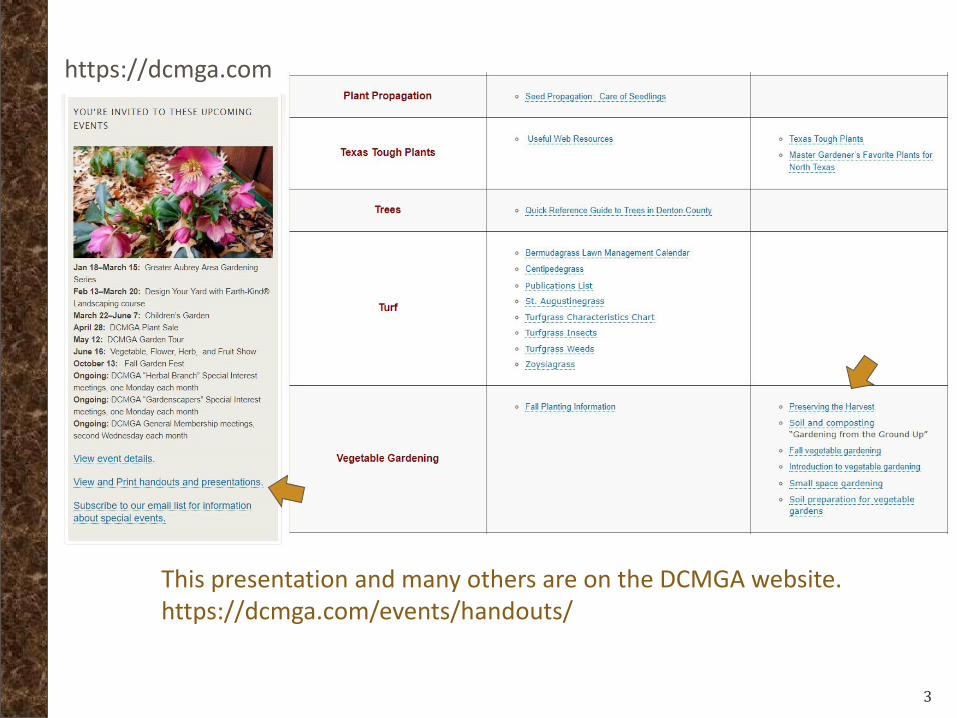
This presentation and many others are on the DCMGA website. https://dcmga.com/events/handouts/
https://dcmga.com
1
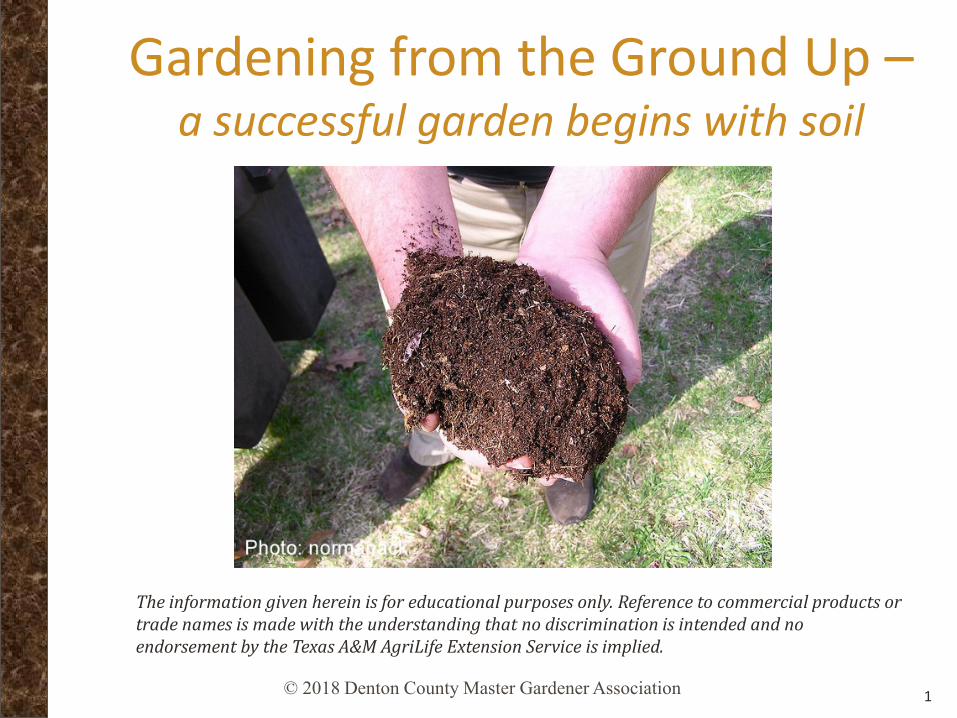
The information given herein is for educational purposes only. Reference to commercial products or trade names is made with the understanding that no discrimination is intended and no endorsement by the Texas A&M AgriLife Extension Service is implied.
© 2018 Denton County Master Gardener Association
Gardening from the Ground Up –a successful garden begins with soil

3

4
Soil is not dirt▪ Dirt is what people and pets bring into the house that needs to be
cleaned up.▪ Soil, with its organic material and microorganisms, contains
EVERYTHING that plants need to grow. Soil should be treasured.▪ Folk wisdom tells us that a poor gardener grows weeds, a good
gardener grows vegetables and a great gardener grows soil.
The dirt in your North Texas
landscape is likely to need some
help to become soil
5
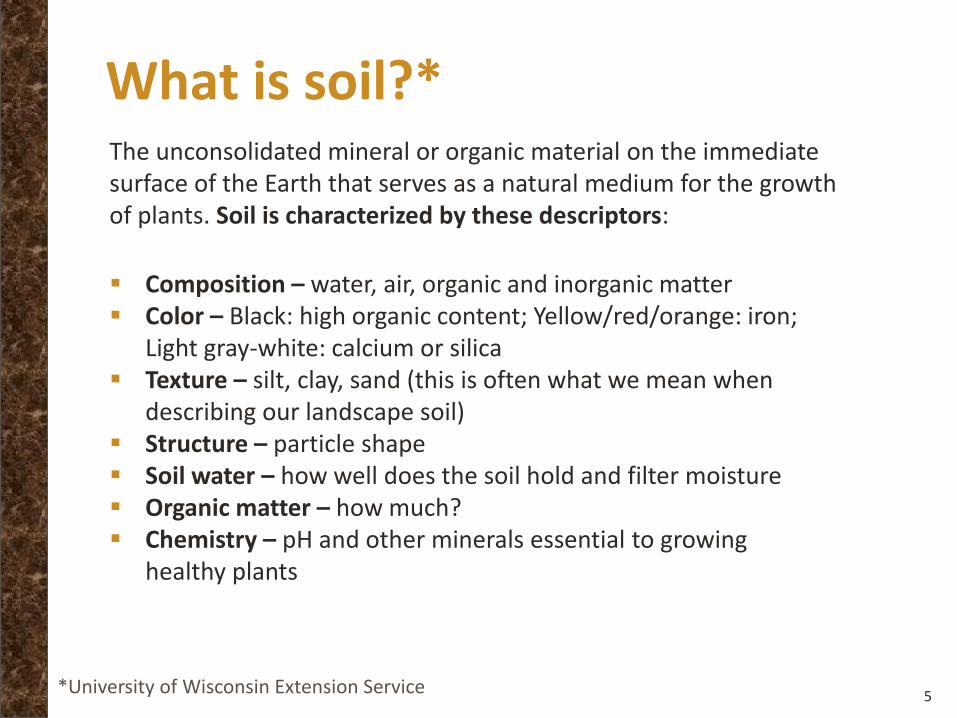
What is soil?*
▪ Composition – water, air, organic and inorganic matter▪ Color – Black: high organic content; Yellow/red/orange: iron;
Light gray-white: calcium or silica▪ Texture – silt, clay, sand (this is often what we mean when
describing our landscape soil)▪ Structure – particle shape▪ Soil water – how well does the soil hold and filter moisture▪ Organic matter – how much?▪ Chemistry – pH and other minerals essential to growing
healthy plants
The unconsolidated mineral or organic material on the immediate surface of the Earth that serves as a natural medium for the growth of plants. Soil is characterized by these descriptors:
*University of Wisconsin Extension Service
6
Types of soil◼ Texture
❖ Sand, silt or clay
❖ Most native soils are a combination of these three particle types
❖ Relative size of particles—if a particle of clay were a BB, then a particle of silt would be the size of a golf ball and a grain of sand would be the size of a chair
❖ Sandy soils feel gritty; silty soils feel floury and clay soils feel greasy
❖ Many North Texas soils are “heavy” with a high proportion of clay
◼ Clay is nutrient rich, but slow draining. Sand is quick draining, but has trouble retaining nutrients and moisture. Loam (a combination of clay, sand and humus) is generally considered to be ideal soil because it retains moisture and nutrients but doesn’t stay soggy.
◼ Clay is not bad gardening soil but it is challenging to achieve desirable structure and tilth (Factors that determine tilth include the formation and stability of aggregated soil particles, moisture content, degree of aeration, rate of water infiltration and drainage.)
Types of soil
7
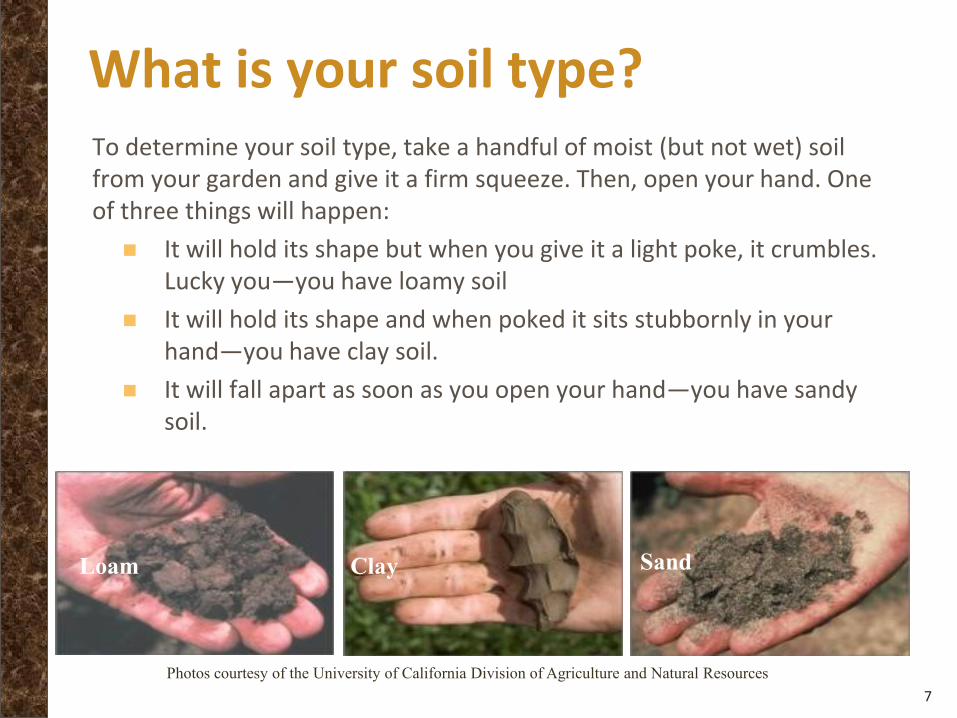
What is your soil type?To determine your soil type, take a handful of moist (but not wet) soil from your garden and give it a firm squeeze. Then, open your hand. One of three things will happen:
◼ It will hold its shape but when you give it a light poke, it crumbles. Lucky you—you have loamy soil
◼ It will hold its shape and when poked it sits stubbornly in your hand—you have clay soil.
◼ It will fall apart as soon as you open your hand—you have sandy soil.
Photos courtesy of the University of California Division of Agriculture and Natural Resources
ClayLoam Sand
What is your soil type?

8
Clay soil: the good, the bad and the ugly
◼ The bad
❖ Difficult to work
❖ Dries out slowly
❖ Surface hard crust restricts moisture penetration
◼ The good
❖ Clay can hold moisture and nutrients between its thin layers
❖ Clay layers have “parking spaces” that can hold nutrients
❖ The parking spaces are negatively charged which attracts positively charged (cations) nutrients such as calcium, magnesium, potassium and ammonium nitrate and zinc

9
Soil analysis
Macro-nutrients = N – nitrogenP – phosphorusK – potassiumCa – calciumMg – magnesiumS – sulfur
Micro-nutrients =Boron (B), Copper (Cu), Iron (Fe), Chloride (Cl), Manganese (Mn), Molybdenum (Mo) Zinc (Zn)
Ph = soil acidity
Take samples from several locations in your garden or landscape bed;4 to 6 inches deep
Mix samples
Pack samples (use two bags for safety), label and ship
How to take a soil sample
http://soiltesting.tamu.edu/

10
Understanding a soil analysis report
More info: google search for soil report interpretation – Oregon State University

11
Adding organic matter (compost) will help transition your dirt into soil
▪ Improve the ability of the soil to accept and store water. ▪ Increase the activity and number of soil organisms. ▪ Over time, a well-amended soil supplies many of the
nutrients your plants require and reduces the need for supplemental chemicals.
▪ Although you might not expect it, adding organic matter to soil also helps to protect water quality and the environment by limiting chemical runoff into watershed.
Heavy clay soil Fertile soil

12
How much compost?▪ For landscape add 3 inches of compost (organic matter) and work into
6 to 8 inches of soil.▪ For vegetable gardens, add 6 inches of compost.▪ Add 3 inches of mulch on top of soil to reduce temperature, limit
weeds and conserve water. Organic mulch breaks down into compost to feed soil. Over time this reduces the need for fertilizer.

13

14
Compost happens! How quickly it happens depends on conditions you
can control.
If the material grew in the earth, it
can be composted

Environmental benefits of making your own compost
15
▪ Food scraps and yard waste take up 20 to 30 percent of trash in our landfills according to the EPA.
▪ Reduces methane emissions from landfills which tend to decompose material anaerobically because the piles are not turned frequently
▪ Lowers your carbon footprint.▪ Saves money

16
What is composting?◼ Composting is the
transformation of organic material (plant matter) through decomposition into a biologically humus-rich substance suitable for growing plants.
◼ Invertebrates (insects and earthworms), and microorganisms (bacteria and fungi) help in this transformation.
Photo: Macalester.edu

17
Composting tasks
◼ Adding ingredients
◼ Maintaining proper temperature
◼ Turning pile
◼ Maintaining moisture
◼ Harvesting finished product

18
What’s happening?
“The Science of Composting” The University of Illinois Extension
▪ Compost piles contain microorganisms, such as bacteria, fungi and actinomycetes and macro-organisms including worms, sow bugs, centipedes and others.
▪ Macro-organisms break down large pieces of materials and transform it into digestible form for the microorganisms.
▪ Microorganisms account for most of the decomposition in a compost pile.
▪ Bacteria use carbon materials for energy and nitrogen materials to build their bodies and reproduce.
▪ Types of bacteria function within a unique temperature range. (Psychrophilic 55° to 70°, Mesophilic 70° to 100° and thermophilic above 100°)
▪ Actinomycetes decompose the more resistant organic substances and contribute dark black to brown pigments to finished compost.
▪ Available oxygen, temperature and moisture significantly affect the health and performance of the living organisms in the compost pile.
19
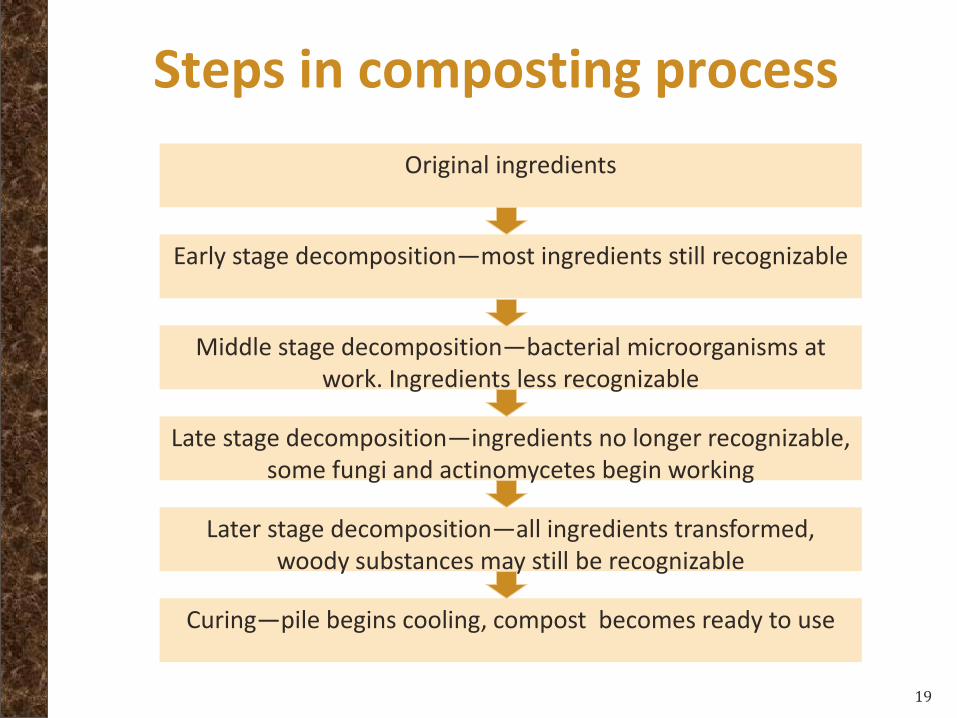
Steps in composting process
Original ingredients
Early stage decomposition—most ingredients still recognizable
Middle stage decomposition—bacterial microorganisms at work. Ingredients less recognizable
Late stage decomposition—ingredients no longer recognizable, some fungi and actinomycetes begin working
Later stage decomposition—all ingredients transformed, woody substances may still be recognizable
Curing—pile begins cooling, compost becomes ready to use
20
Choosing a site for the pile
▪ Place pile on bare ground, not concrete or asphalt.▪ Organisms that decompose organic materials need
free contact with both soil and atmosphere. ▪ The pile should not be directly exposed to sun, wind,
rain, or standing water (direct sun is hostile to micro-organisms and standing water or too much rain may sour pile).
▪ Choose a convenient location to allow turning and moving pile.
▪ Leave space between piles
Information extracted from: http://aggie-horticulture.tamu.edu/earthkind/landscape/dont-bag-
it/chapter-4-building-and-maintaining-a-compost-pile/

21
Building your pile1. You will need to collect enough material to create a 1-cubic-yard
pile. The mixture should ideally approximate a 30:1 carbon-to-nitrogen ratio. (3 cubic yards for creating a hot pile)
2. Chop, cut, or shred any coarse materials to increase their surface area for microbes to work. Add all materials at one time if trying to encourage microbial activity.
3. Layer materials. Start the foundation of the pile by placing a 6-inch layer of bulky materials on the ground. Materials such as brush trimmings or wood chips can be used.
4. Next add to the pile a 6-inch layer of high-carbon material (high C:N ratio) such as leaves, straw, hay or a mixture of these.
5. Add a layer of high-nitrogen materials. Continue to build by layers.6. Water the pile – Conduct a squeeze test to gauge the moisture
content of the compost materials. Add water until squeezing a handful will yield one or two drops of water. Adding too much water may leach out nutrients. Conduct this test each time you add composting materials and water.
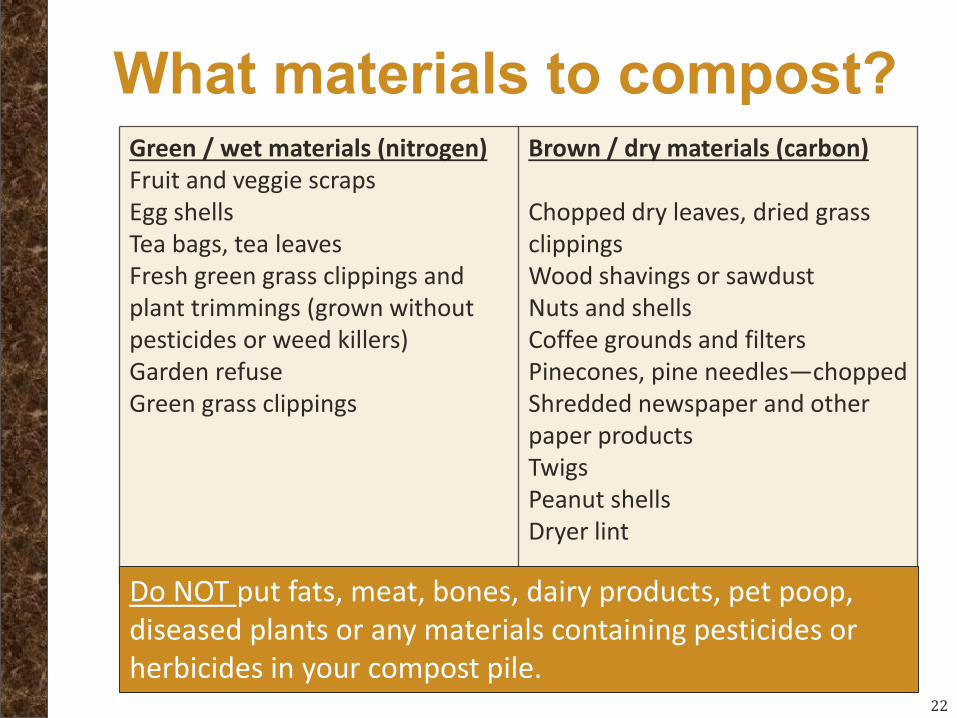
What materials to compost?
22
Green / wet materials (nitrogen)Fruit and veggie scrapsEgg shellsTea bags, tea leavesFresh green grass clippings and plant trimmings (grown without pesticides or weed killers)Garden refuseGreen grass clippings
Brown / dry materials (carbon)
Chopped dry leaves, dried grass clippingsWood shavings or sawdustNuts and shellsCoffee grounds and filtersPinecones, pine needles—choppedShredded newspaper and other paper productsTwigsPeanut shellsDryer lint
Do NOT put fats, meat, bones, dairy products, pet poop, diseased plants or any materials containing pesticides or herbicides in your compost pile.
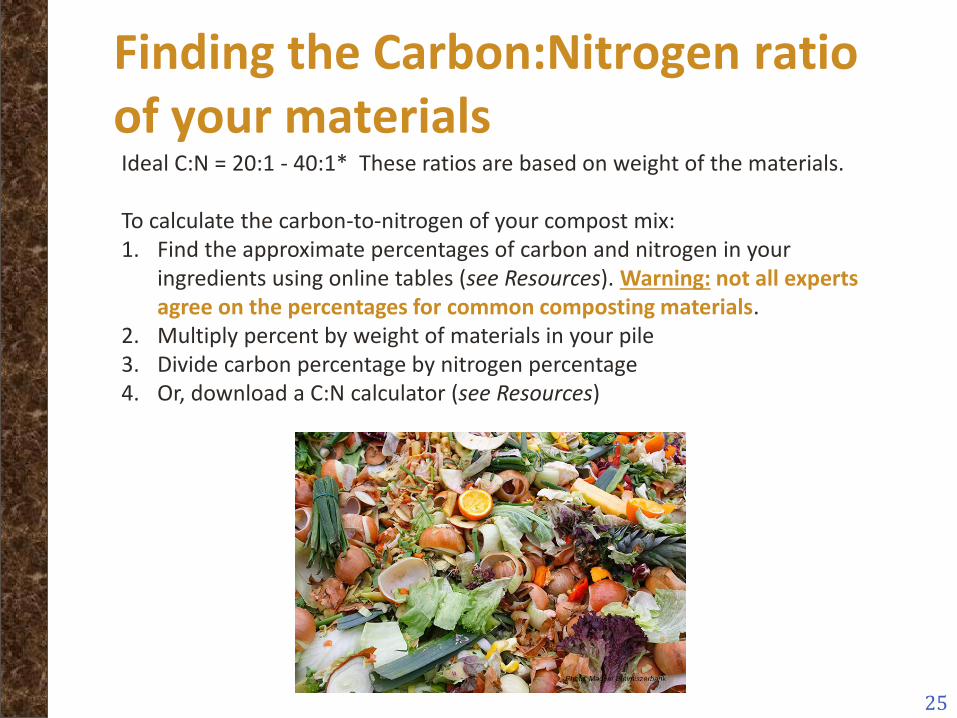
Finding the Carbon:Nitrogen ratio of your materials
25
Ideal C:N = 20:1 - 40:1* These ratios are based on weight of the materials.
To calculate the carbon-to-nitrogen of your compost mix:1. Find the approximate percentages of carbon and nitrogen in your
ingredients using online tables (see Resources). Warning: not all experts agree on the percentages for common composting materials.
2. Multiply percent by weight of materials in your pile3. Divide carbon percentage by nitrogen percentage4. Or, download a C:N calculator (see Resources)
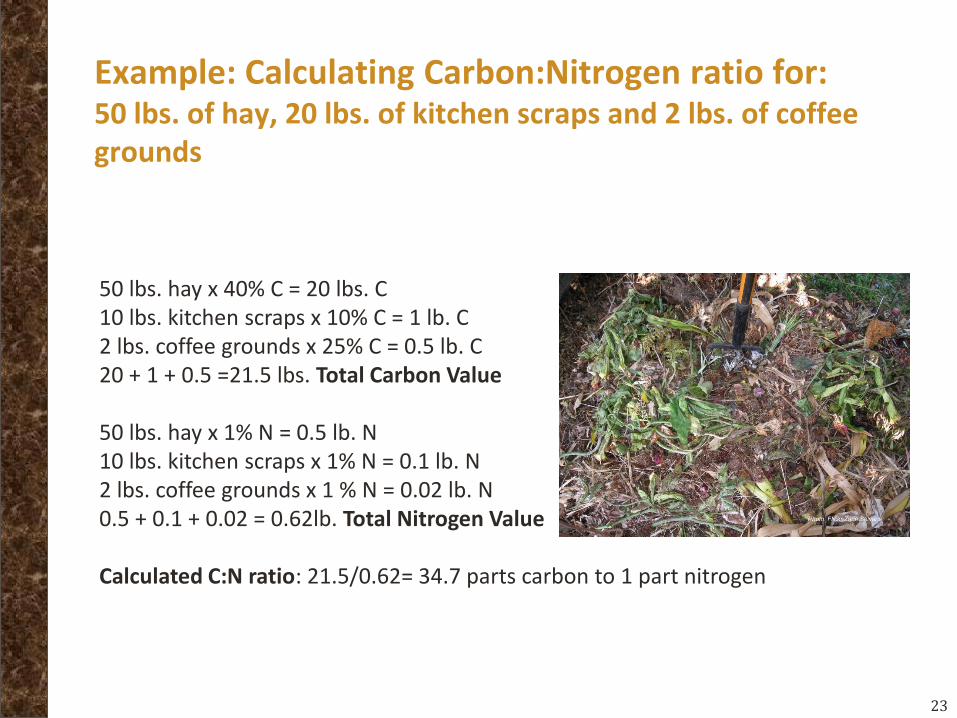
Example: Calculating Carbon:Nitrogen ratio for:50 lbs. of hay, 20 lbs. of kitchen scraps and 2 lbs. of coffee grounds
23
50 lbs. hay x 40% C = 20 lbs. C 10 lbs. kitchen scraps x 10% C = 1 lb. C 2 lbs. coffee grounds x 25% C = 0.5 lb. C 20 + 1 + 0.5 =21.5 lbs. Total Carbon Value
50 lbs. hay x 1% N = 0.5 lb. N 10 lbs. kitchen scraps x 1% N = 0.1 lb. N 2 lbs. coffee grounds x 1 % N = 0.02 lb. N 0.5 + 0.1 + 0.02 = 0.62lb. Total Nitrogen Value
Calculated C:N ratio: 21.5/0.62= 34.7 parts carbon to 1 part nitrogen
Before you get out your calculator
◼ Here is a simplified guideline: Making sure your pile has a greater amount of carbon containing material (about 2/3) than it does nitrogen containing material (about 1/3) because carbon materials need nitrogen to decompose.
◼ If your pile is too wet, add more carbon. If it is too dry, add more nitrogen.
24

Higher carbon compost additions
25
Ingredient C:N
shredded newspaper* 170:1
straw 75:1
shredded cardboard 350:1
dried leaves 70:1
old hay 55:1
sawdust 400:1
wood chips 400:1
small branches/twigs 500:1
paper towel 110:1
tissue paper 70:1
dried grass clippings 50:1
pine needles 80:1
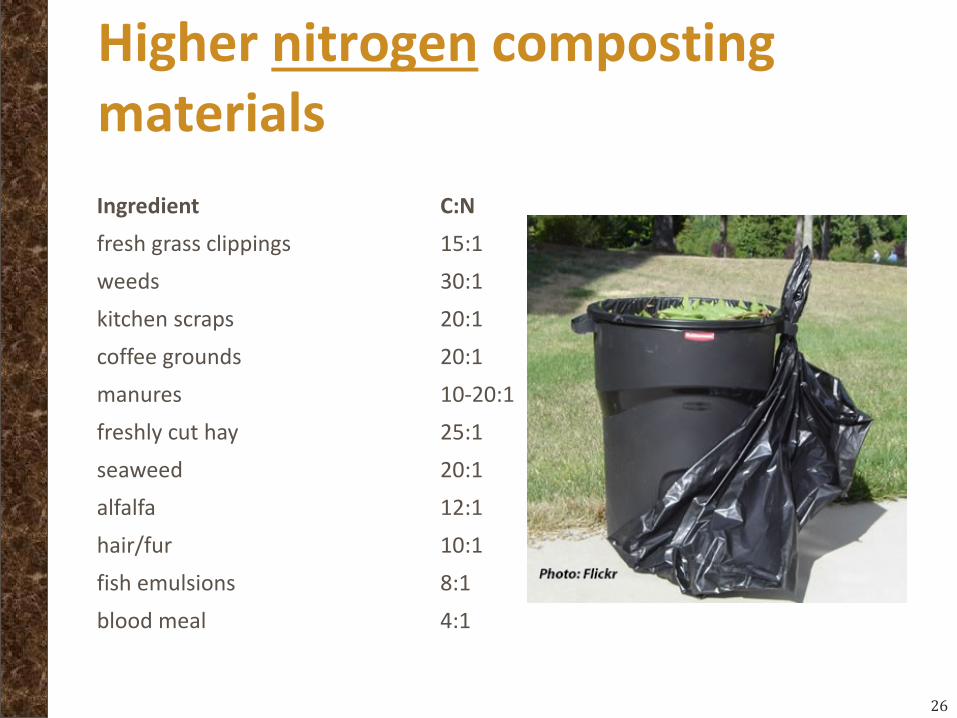
Higher nitrogen composting materials
26
Ingredient C:N
fresh grass clippings 15:1
weeds 30:1
kitchen scraps 20:1
coffee grounds 20:1
manures 10-20:1
freshly cut hay 25:1
seaweed 20:1
alfalfa 12:1
hair/fur 10:1
fish emulsions 8:1
blood meal 4:1

Caution about hay and manure
27
▪ Some commercial composts and mulch can contain herbicide residues, according to a Texas A&M AgriLife Extension Service horticulturist.
▪ Example, the herbicide aminopyralid is used to control broadleaf weeds in pastures, said Dr. Joe Masabni, AgriLife Extension vegetable specialist. “The problem arises when growers use straw mulch composted from hay pastures or composted manure from animals grazing on treated pastures.”
▪ "This is a very serious concern for all growers because the herbicide can survive the animal digestive system and for three years or longer in the compost pile.”
These herbicides are sold under the following trade names.Picloram - sold as Tordon, Access, Surmount, Grazon, and Pathway.Clopyralid - sold as Curtail, Confront, Clopyr AG, Lontrel, Stinger, Millennium Ultra, Millenium Ultra Plus, Reclaim, Redeem, Transline.Aminopyralid - sold as Milestone, Forefront, Pharaoh, Banish.

Taking care of compost pile
28
◼ Passive
❖ Let sit
❖ Takes several months
◼ Active
❖ Turn often
❖ Keep moist (H2O 40-60% of weight)
❖ Have proper ratio of C:N (30:1)
❖ 2-6 weeks (depending on ingredients)

When is the pile done?
29
▪ The pile cools off and decreases to about one-third of its original volume (depending on the original ingredients).
▪ The pile is dark, crumbly, and has an earthy odor.
▪ The temperature is within 10°F of the air temperature.
Unfinished compost may harm plants if worked into soil because of heat from decomposition or stealing nitrogen. However, it may be used as mulch on top of the soil. Or, wait until:

30

Bin-less pile
31
◼ Just a pile with no partitions
◼ Should be several feet deep—Recommended dimensions for a heap are 5 feet wide by 3 feet high (University of Illinois Extension Service)
◼ Hard to maintain sufficient depth to achieve high enough temperatures
◼ Takes several months to achieve useable compost
◼ Easy and nothing to build
◼ Difficult to move

Composting bins
32
◼ Expensive
◼ Limited capacity
◼ Can be challenging to turn
◼ Good choice if available space is small

Homemade
◼ Three bins are best
❖ One to fill
❖ One that’s “cooking”
❖ One to draw from
33

Tumblers
34
A compost tumbler is a fully sealed container that can be rotated to mix the composting materials. The sealed container helps contain the heat generated by the composting process, thereby speeding the process of converting kitchen and yard waste into compost.
▪ Expensive▪ Limited capacity▪ Weight may make it difficult to turn▪ Keeps out rodents and other pests
Trench Composting
35
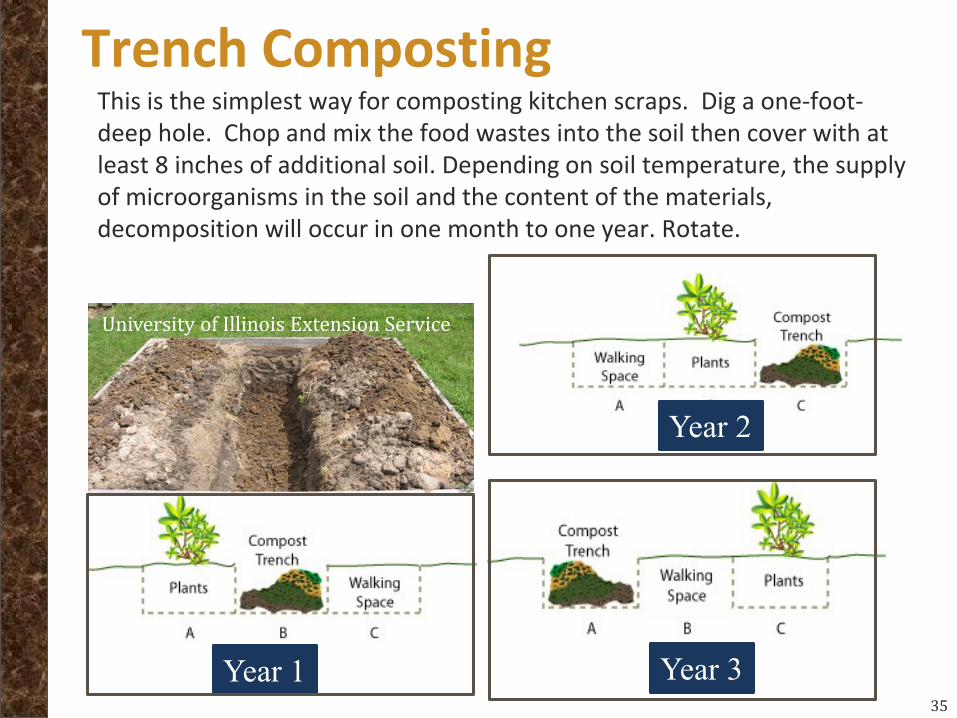
This is the simplest way for composting kitchen scraps. Dig a one-foot-deep hole. Chop and mix the food wastes into the soil then cover with at least 8 inches of additional soil. Depending on soil temperature, the supply of microorganisms in the soil and the content of the materials, decomposition will occur in one month to one year. Rotate.
Year 1 Year 3
Year 2
University of Illinois Extension Service
Vermicomposting
36
▪ What is worm composting?
❖ Worm composting is using worms to recycle food scraps and other organic material into a valuable soil amendment called vermicompost or worm compost. Worms eat food scraps, which become compost as they pass through the worm's body. Compost exits the worm through its' tail end.
❖ The joint action of worms and microbes makes soil nutrients more available to vegetation.
▪ Setting up a worm bin
❖ Setting up a worm bin is easy. All you need is a box, moist newspaper strips, and worms. Worms need moisture, air, food, darkness, and warm (but not hot) temperatures. Bedding, made of newspaper strips or leaves, will hold moisture and contain air spaces essential to worms.
“Worm Composting Basics”; Cornell University: (http://compost.css.cornell.edu/worms/basics.html)

More on vermicomposting
37
▪ Containers: A good size bin is a 5- to 10- gallon box or approximately 24" X 18" X 8". The box should be shallow rather than deep, as red wigglers are surface-dwellers and prefer to live in the top 6" of the soil. Line the bottom with plastic (e.g. from a plastic bag or old shower curtain). Cover the bin with a loose fitting lid. This lid should allow air into the bin.
▪ Worms: Choose red worms or red wigglers, which can be ordered from a worm farm. The scientific name for the two commonly used red worms are Eisenia foetida and Lumbricus rubellus.
▪ Conditions: Worms need moisture, air, food, darkness, and warm (but not hot) temperatures. Bedding, made of newspaper strips or leaves, will hold moisture and contain air spaces essential to worms.
Harvesting worm compost
38
After 3-5 months, when your bin is filled with compost (and very little bedding), it is time to harvest the bin. ▪ To prepare for harvesting, do not add new food to the bin for two
weeks. ▪ Push all of the worm bin contents to one half of the bin, removing any
large pieces of undecomposed food or newspaper. Put fresh bedding and food scraps in empty side of bin. Continue burying food scraps only in freshly bedded half.
▪ Over the next 2-3 weeks, the worms will move over to the new side (where the food is), conveniently leaving their compost behind in one section. When this has happened, remove the compost and replace it with fresh bedding. To facilitate worm migration, cover only the new side of the bin, causing the old side to dry out and encouraging the worms to leave the old side.
▪ Mixed worm compost with your potting or garden soil to make nutrients available to plants. Or, the compost can be used as a top dressing for your indoor or outdoor plants.
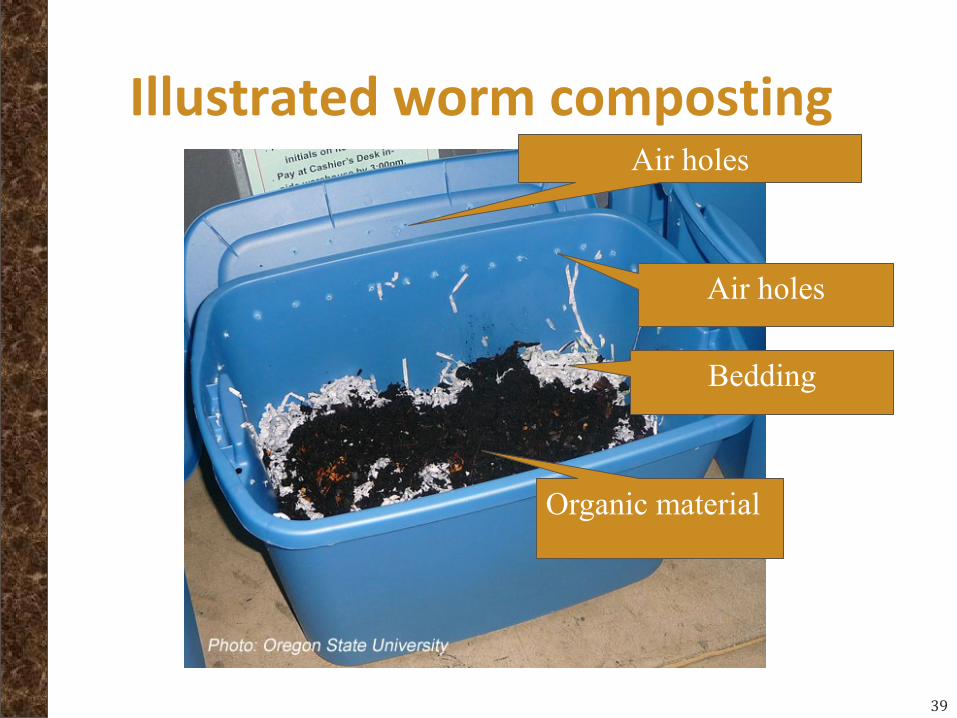
Illustrated worm composting
39
Air holes
Air holes
Bedding
Organic material

Putting fears to rest
Concerns Solutions
I don’t have room Use commercial bin
It takes too long ◼ Maintain proper conditions
◼ Cut up large pieces
It smells Not if you maintain C:N ratio and do not add fats or oils
Temps too low to kill diseases, fungi, weed seeds
Use local community composting facility for problem pieces, compost the rest
Attracts animals Bury food waste in center
40
What method is right for me???
41
◼ How much space do I have?
❖ Is it indoor or outdoor or both?
◼ What do I want to compost?
❖ How much waste do I have a week?
◼ How and where do I want to use the compost?
◼ How much time can I spend on it a week?
◼ What’s my ewww! factor?
◼ How committed am I to composting?
Resources
42
▪ Call Denton County Master Gardener Help Desk: 940-349-2892▪ Email: [email protected]▪ Soil testing: http://soiltesting.tamu.edu/
▪ “Composting Fundamentals:” https://aggie-horticulture.tamu.edu/earthkind/landscape/dont-bag-it/chapter-2-composting-fundamentals/
▪ “Composting for the Homeowner” : http://web.extension.illinois.edu/homecompost/methods.cfm
▪ “COMPOSTING AND MULCHING: A Guide to Managing Organic Landscape Refuse”: http://www.caes.uga.edu/publications/pubDetail.cfm?pk_id=6406
▪ “Worm Composting Basics” : http://compost.css.cornell.edu/worms/basics.html
▪ “Vermicomposting – Composting With Worms”: http://pods.dasnr.okstate.edu/docushare/dsweb/Get/Document-1494/
▪ “Compost C:N calculator” from Cornell University: http://compost.css.cornell.edu/download.html