for consumers & business clients - capital city bank - … guide for consumers & business...
TRANSCRIPT

User Guidefor Consumers & Business ClientsRevised February 2015
www.ccbg.com/upgrade
◗ Online Banking from Capital City Bank
online Banking User Guide page 2
Contents
Overview ................................................................................................................................. 4◗ Exploring the Home page ....................................................................................................... 5◗ menu ................................................................................................................................... 6◗ accounts .............................................................................................................................. 7◗ Sidebar ................................................................................................................................. 7◗ online Banking Hardware and Software requirements ................................................................ 7getting Started ........................................................................................................................ 8◗ installing the CCBmobile Banking app ..................................................................................... 8◗ accessing the online Banking Site ........................................................................................... 9◗ logging in ............................................................................................................................ 9◗ logging in for the first time ..................................................................................................... 9◗ logging in after the first time .................................................................................................10◗ logging off .......................................................................................................................... 11◗ Voluntary log off .................................................................................................................. 11◗ involuntary log off after Session timeout ................................................................................. 11◗ resetting a password .............................................................................................................12Viewing accounts and Transactions ........................................................................................12◗ Viewing account Details ........................................................................................................12◗ Viewing online or mobile Banking transactions in the activity Center ..........................................14◗ Sorting transactions ..............................................................................................................15◗ Searching transactions ..........................................................................................................15◗ Exporting transaction records ................................................................................................15◗ Viewing and printing images associated with a transaction.........................................................16Paying Bills ..............................................................................................................................16◗ managing Bill pay accounts and payees ...................................................................................17◗ Searching for a Bill payment ....................................................................................................18◗ Canceling a Bill payment ........................................................................................................18Managing Transactions ...........................................................................................................19◗ Using transfers ......................................................................................................................19◗ transferring funds .................................................................................................................19◗ Viewing transfers ................................................................................................................. 20◗ Canceling a transfer ............................................................................................................. 20◗ adding External accounts for Bank-to-Bank transfers .................................................................21◗ Verifying an External account for Bank-to-Bank transfers ............................................................ 22◗ Depositing a Check .............................................................................................................. 22◗ Viewing Check Deposits ....................................................................................................... 23◗ Viewing online and mobile Banking transactions in the activity Center ....................................... 24◗ Sorting transactions in the activity Center ............................................................................... 24◗ Canceling pending transactions ............................................................................................. 25◗ Copying a transaction .......................................................................................................... 25◗ Sending a message about a transaction .................................................................................. 25

online Banking User Guide page 3
Managing Messages and alerts ............................................................................................. 26◗ managing Secure messages in the message Center ................................................................. 26◗ Creating a Secure message ................................................................................................... 26◗ reading a Secure message .................................................................................................... 27◗ replying to a Secure message ............................................................................................... 27◗ Deleting Secure message threads ......................................................................................... 27◗ managing alerts .................................................................................................................. 28◗ Creating an alert .................................................................................................................. 29◗ Editing alerts ....................................................................................................................... 29◗ Enabling and Disabling alerts ................................................................................................ 30◗ Deleting an alert .................................................................................................................. 30◗ Configuring Security alerts .................................................................................................... 30Finding an Office or aTM .........................................................................................................31Configuring Settings .............................................................................................................. 32◗ requesting an address Change ............................................................................................. 32◗ Configuring account preferences ........................................................................................... 32◗ Changing your Security preferences ....................................................................................... 33◗ Changing your password ...................................................................................................... 33◗ Changing your Username ..................................................................................................... 33◗ Configuring Secure access Code Delivery Contacts ................................................................. 33◗ Configuring text Banking ...................................................................................................... 35◗ Configuring account preferences for text Banking .................................................................... 35◗ Using text Banking ............................................................................................................... 36◗ Updating text Banking preferences ........................................................................................ 37◗ Configuring E-Document Delivery Settings .............................................................................. 37Staying Secure ....................................................................................................................... 38◗ password tips and recommendations .................................................................................... 38◗ Verifying your identity with Secure access Codes..................................................................... 39◗ registering a Browser or Device ............................................................................................. 40

online Banking User Guide page 4
OVeRVieW
online Banking from Capital City Bank offers a modern design with all-in-one online and mobile access that’s faster and easier to use than ever before. Enjoy the consistent look and feel of the account-management experience on your desktop, tablet or smartphone. pay your bills faster, easily search your personal data or find a nearby atm while you’re out and about, deposit checks on-the-go and much more with our online banking experience designed with you in mind.
this consistent user experience in online banking and the mobile banking app allows your service to adjust to the unique needs of each device, including screen size and other hardware differences. for example, on tablets and smartphones the menu is hidden by default. When you need it, you tap or swipe to display it. When you make a change on one device, it is reflected on another. if you update a setting in online banking, the same setting takes effect in the mobile banking app the next time you log in. When you set up a transaction on one device, you can review it on another.
for the best account-management experience on apple or android devices, use our free CCBmobile banking app. on a desktop or another device, use online banking in a browser that supports Html5. not sure what browser you have? Click here or visit www.thismachine.info to check.
(You are leaving the Capital City Bank website for a third-party web tool to help you determine your current operating system. This site is independent and not maintained by Capital City Bank, therefore we cannot guarantee accuracy of the information contained therein.)

online Banking User Guide page 5
for a brief explanation of the most common tasks in our online banking service and CCBmobile app, refer to our getting Started guide available at ccbg.com/upgrade.
Exploring the Home pageWhen you log in, the Home appears and includes the following information or actions:
• Menu (see 1 in the example below)
• account Overview with the names and balances of each of your accounts (see 2 in the example below)
• Sidebar with quick links to common transactions and mobile Deposit history search
(see 3 in the example below)
• Your last login date and time
• A summary graph of the balances in your accounts
• System notifications for online banking or the mobile banking app
to return to the Home page from any other page, click or tap Home on the menu. the following examples demonstrate the appearance of the Home page on a desktop computer, tablet and smartphone. the numbers correspond to the list above:
1
2
3
Des
ktop
Tabl
et
Smar
tpho
ne
1
23
1
2
3
online Banking User Guide page 6
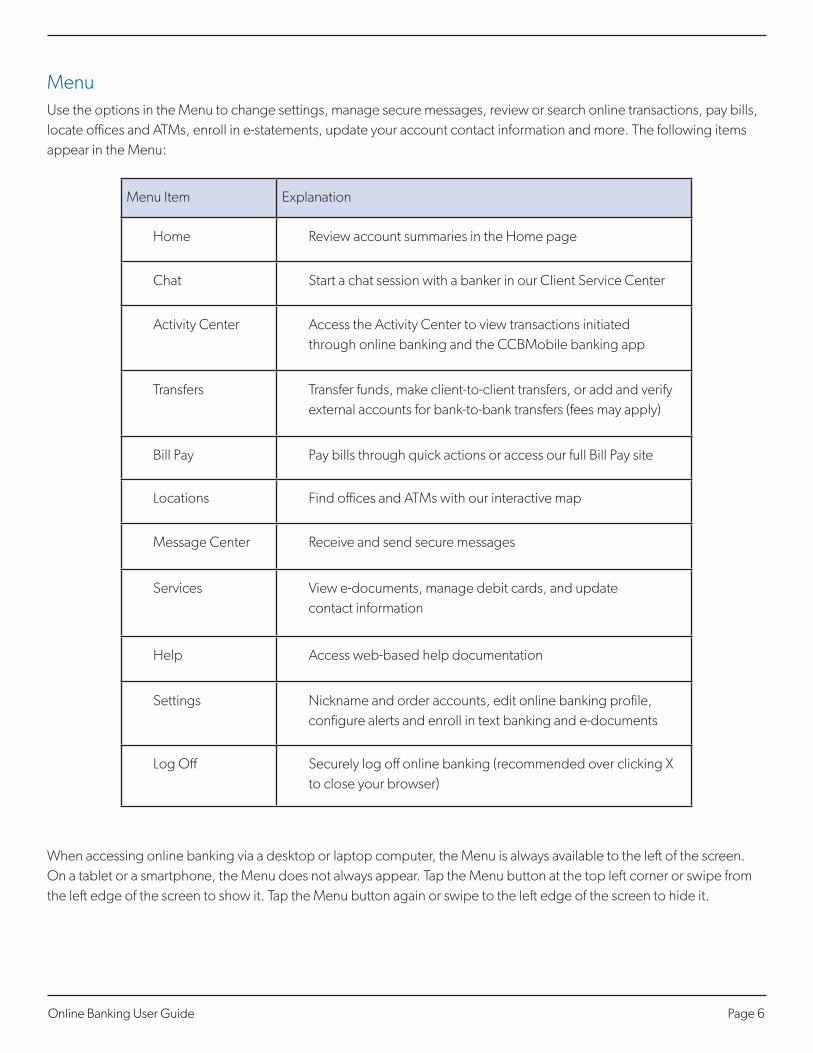
menuUse the options in the menu to change settings, manage secure messages, review or search online transactions, pay bills, locate offices and atms, enroll in e-statements, update your account contact information and more. the following items appear in the menu:
menu item Explanation
Home review account summaries in the Home page
Chat Start a chat session with a banker in our Client Service Center
activity Center access the activity Center to view transactions initiated through online banking and the CCBmobile banking app
transfers transfer funds, make client-to-client transfers, or add and verify external accounts for bank-to-bank transfers (fees may apply)
Bill pay pay bills through quick actions or access our full Bill pay site
locations find offices and atms with our interactive map
message Center receive and send secure messages
Services View e-documents, manage debit cards, and update contact information
Help access web-based help documentation
Settings nickname and order accounts, edit online banking profile, configure alerts and enroll in text banking and e-documents
log off Securely log off online banking (recommended over clicking X to close your browser)
When accessing online banking via a desktop or laptop computer, the menu is always available to the left of the screen. on a tablet or a smartphone, the menu does not always appear. tap the menu button at the top left corner or swipe from the left edge of the screen to show it. tap the menu button again or swipe to the left edge of the screen to hide it.

online Banking User Guide page 7
accountson the Home page, the accounts area lists every account connected to your online banking service that has history you can view. accounts are groups by account type unless you change the order in Settings > account Preferences. for each account, you will see the account name, all or part of the account number and the balance. if you configure nicknames for accounts in the Settings > account Preferences, the nicknames appear as the account names.
you can drill down into any account to see account details and up to 100 items per page of the most recent transactions in the account.
Sidebarthe Sidebar appears on the right side of the screen and includes the following:
• Quick action links to make Transfers and enroll in Bill Pay
• mobile Deposit History Search
• other information from Capital City Bank
on a tablet or a smartphone, the Sidebar does not always appear. to view the Sidebar in the CCBmobile app, tap Sidebar on any page or swipe from the right edge of the screen. to hide the Sidebar in the mobile banking app, tap Sidebar again or swipe to the right edge of the screen.
online Banking Hardware and Software requirementsin order to use online and mobile banking, your device must meet specific minimum hardware and software requirements.
the computer you use to access online banking should meet the following minimum requirements:
• Computer Processor and Storage: Standard pC or mac with at least 1GHz processor and 1GB of ram
• Browser: latest internet browser version for improved security and greater anti-virus and spyware protections.Supported browsers are microsoft internet Explorer®, Google Chrome™, Safari® and mozilla firefox®. See below for more information.
• Operating System: microsoft Windows® 7/8/Vista Sp2 or mac oS X (Note: Windows XP is no longer compatible with the latest version of Internet Explorer. If you do not intend to update your operating system from Windows® XP, then we advise downloading Google Chrome™.)
• Internet Connection: Cable, DSl or iSDn internet connection needed (dial-up and satellite service will not provide an optimal online banking experience).
• Click here to determine what operating system and internet browser you are using. (Note: This is a third-party web tool to help you determine your current operating system.)
• You may also determine your operating system by viewing your computer’s system properties/preferences, and view your browser version by opening your browser and selecting from the menu the “about internet Explorer” or similar option.

online Banking User Guide page 8
the mobile device(s) you use to access online or mobile banking should meet the following minimum requirements:
• Operating System: iOS version 5.0 or later or Android version 2.3 or later (Note: Currently, Windows® Phone,Blackberry® and Kindle Fire™ operating systems are not compatible with our upgraded mobile banking app).
• Camera: to utilize mobile deposit functionality, your mobile device must have a camera with more than 1.9 megapixels.
Having a current browser installed also is a key component to keeping your online banking experience and financial information safe and secure. no matter what browser you use, make sure you have the latest version installed. Visit your preferred internet browser provider’s website to download the most recent version:
Browsers for microsoft operating systems:
• Microsoft Internet Explorer®
• Mozilla Firefox®
• Google Chrome™
Note: Our online banking system is not compatible with Safari® for Microsoft Windows® because Apple® has discontinued development of security patches for Windows.
Browsers for mac operating systems:
• Microsoft Internet Explorer®
• Mozilla Firefox®
• Google Chrome™
if you attempt to log in without the recommended browser, online banking may direct you to either a version of online banking that is compatible with your browser or to a website to download a new browser version.
geTTing STaRTeD
to begin using online banking from Capital City Bank, you must have enrolled in the service via our website (www.ccbg.com) or with your banker in one of our offices. once you are assigned a Username, access online banking from our homepage at www.ccbg.com or via our CCBmobile banking app on your apple or android device.
installing the CCBmobile Banking appWhile you may access online banking from your mobile browser, you will have a better mobile banking experience and, in most cases, be able to make mobile check deposits with our CCBmobile app for your apple (ioS) or android tablet or smartphone. Download the free mobile banking app from the apple app Store or the Google play Store. Messaging and data rates may apply and are the responsibility of the user. Mobile Deposit access is subject to approval.

online Banking User Guide page 9
to help protect the security of your financial information, you should only download and install the mobile banking app directly from the apple app Store or the Google play Store. in the store, verify that Capital City Bank is listed as the seller of the app, and not a third party. you should also verify that our name is spelled correctly.
accessing the online Banking SiteUse a web browser to connect to the online banking site on a desktop computer or other device with an Html5 compliant browser. Visit www.ccbg.com and look for online banking log in section. Enter your Capital City Bank online banking Username, click or tap lOg in, and then follow the prompts to enter your password. for the best experience with online banking on an apple (ioS) or android tablet or smartphone, use the CCBmobile app.
Consider enabling pop-ups in your browser for the online banking site. Certain features are shown in separate windows in your browser and may not appear if you block pop-up windows.
logging inWhen you log in to online banking or the mobile banking app, you will enter a Username and password when prompted. if you enter an incorrect password too many times, we automatically block your account for the security of your financial information. if your account is blocked, contact our Client Service Center to unblock your account. See the Contact Us page at www.ccbg.com for ways to contact our Client Service Center and the hours of service.
logging in for the first timeVisit www.ccbg.com to log in from your desktop or mobile browser, or open the CCBmobile app. you will need your existing Capital City Bank online banking Username and security token (if applicable). the login process varies slightly depending on whether you are a consumer, business or treasury management client.
for all clients, the first time you log in you must verify your identity. the most common methods of identity verification are:
• Secure access Code (Consumer and most Business clients)
• Security Token (treasury management clients)
When you use a Secure access Code, we send a one-time code to an e-mail address, mobile phone number via SmS (text) message or phone number via automated voice message that is on file for you. you will need to be able to access one of these methods of communication during your initial log in.
To log in for the first time with a Secure access Code:
• enter your existing Capital City Bank online banking Username and click or tap activate My Service.
• Select a delivery method, or target, for your Secure access Code (e-mail, SmS (text), phone). your delivery options are based upon the contact information we have on file, but you may update this information for future verifications in Settings > Security Preferences once you are logged in. Note: Changing delivery information for Secure Access Codes will not change the contact information on your account. These settings are only for online banking purposes.

online Banking User Guide page 10
• enter the Secure access Code in the space provided.
• Select a new password when prompted. passwords must be at least 8 characters long (but not more than 25), contain a number and include an uppercase letter.
• Review your Online Banking Profile and click next.
• Review the Online Banking Terms & Conditions and click or tap Continue.
• Register the device to keep from needing an access code the next time you log in. anytime you log in from a new device or browser, however, you will be prompted to enter a Secure access Code for your protection. you may register multiple devices for use with our online banking service.
• After completing these steps, you will be taken to your account summary page. This page may be personalized in Settings > account Preferences.
To log in for the first time with a Security Token:
• enter your existing Capital City Bank online banking Username.
• The enter Security Token page appears.
• locate the current code on your Security Token and enter the code in the enter Security Token field.
• Wait for a new code to appear. Enter the second code in the enter Second Security Token field and click Submit.
• Select a new password when prompted. passwords must be at least 8 characters long (but not more than 25), contain a number and include an uppercase letter.
• Review the Online Banking Terms & Conditions and click i accept to continue.
• After completing these steps, you will be taken to your account summary page. This page may be personalized in Settings > account Preferences.
logging in after the first timefrom the www.ccbg.com homepage or CCBmobile app, enter your Username and password and click Sign in. you have the option to select Remember me to save your Username for future log ins. if you use a browser or a device that has not been registered, you must also enter a Secure access Code.
To log in after the first time with a Security Token:
• Enter your Username and password and click Sign in.
• Select Remember me to save your Username for future log ins, if desired.
• The enter Security Token page appears if the device or browser was not registered on a previous log in.
• Locate the current code on your Security Token and enter it in the enter Security Token field.
• Click or tap Submit and your account summary page will appear when the connection is complete.

online Banking User Guide page 11
logging offlogging off online banking or the CCBmobile app is an important part of keeping your financial information secure. if you navigate from online banking to another site and do not close the browser, you may remain logged in to online banking until the session timeout. this could make it possible for someone else who uses the desktop to access data from your previous online banking session. the same is true if you switch mobile apps without closing your CCBmobile app completely and another person uses your mobile device. you may log off voluntarily when you have finished your banking, or you may be logged off involuntarily if your online banking session times out (typically when you’ve been logged in for an extended period).
Voluntary log offyou may log off voluntarily when you finish using online banking or the mobile banking app by selecting log Off in the menu. in online banking, you should always log off before you close the browser window. in the mobile banking app, except to get a Secure access code from your e-mail, messages, or phone app, you should always log off before you open another app on your tablet or smartphone.
involuntary log off after Session timeoutto help ensure your security, we automatically log you off when you have been logged in for an extended period. this session timeout is designed to protect the security of your financial information. there are two types of session timeouts.
Session Timeout Types
timeout type Explanation
logged in but inactive protects you if you are logged in and inadvertently leave your device. a warning message appears to give you the opportunity to stay logged in. if you miss the warning message, you may immediately log back in on the same browser or device, restoring your session and any tasks you were working on. However, if you enter an incorrect password, any pending work is discarded.
logged in but exceed session time limit
limits the maximum time of any session. When the maximum time ends, you are prompted to save your work and log off manually. if you do not log off manually, we automatically log you off.

online Banking User Guide page 12
resetting a passwordif you forget your password and your account is not locked (because of too many bad password attempts), you can use the Forgot Password option on the login page to reset your password.
To reset a forgotten password:
• On the log in page, click or tap Forgot your password?
• Enter your Username and click or tap Submit.
• When prompted, do one of the following:
◗ Click or tap i already have a Secure access Code.
◗ Click or tap one of the delivery methods that are on file for you (phone, text or e-mail). We send you the code using the delivery method that you selected.
• On the Secure access Code page, enter the code and click or tap Submit.
• The new Password page appears.
• Enter your new password in the new Password field and re-enter the password in the Confirm Password field.
• Click or tap Submit and you are directed to the Home page.
VieWing aCCOUnTS anD TRanSaCTiOnS
Viewing account Detailsfrom your homepage (account Summary page), select the name of the account you wish you view. the account Details page includes information about the account selected and details of up to 100 transactions at one time. Click (>) to view more transactions.
Some transactions may appear in both the account Details and activity Center pages, depending upon the transaction status and how you created it. a transaction that originates within online or mobile banking will appear on both pages, but a transaction performed in an office or at an atm will only appear in the account Details page. the account Details page includes all transactions on an account, while the activity Center (accessible from the menu) only includes transactions made via online or mobile banking.

online Banking User Guide page 13
page transactions included:
account Details all posted and pending transactions, including:
• Checks
• Deposits
• Transactions at Offices
• Transactions at ATMs
• Bill Payments
• Transfers
activity Center transactions created in online banking or mobile banking app, including:
• Recurring Transactions
• Transfers
• Online Bill Payments
• Mobile Deposits
• Wire Transfers
• ACH Payments
• ACH Receipts
• ACH Batches
• ACH Collections
• ACH Pass-thru Payments
actions You Can Take on the account Details Page:
• View Additional Transactions:
◗ Click or tap the next icon (>) to view the next set of transactions.
◗ Click or tap the previous icon (<) to view the previous set of transactions.
• View Transaction Details:
◗ Click or tap the transaction to expand the details.
◗ if you need assistance with a transaction, expand the transaction details and select ask about transaction to send a secure message.
◗ Click or tap the transaction again to hide the details.

online Banking User Guide page 14
• Filter Transactions:
◗ Click or tap Show Filters.
◗ Select one or more of the following:
- Date range from the Time Period drop-down list or specify dates in the
Start Date and end Date calendars.
- type of transaction from Transaction Type drop-down list.
- minimum or maximum for the transaction in the Min amount and Max amount fields.
- Check number range in the Check# fields.
◗ Click or tap apply Filters.
Viewing online or mobile Banking transactions in the activity Centerthe activity Center includes all transactions you create in the online banking service and the mobile banking app, including recurring transactions. Use the activity Center to view or cancel a transaction that has not completed processing. after an online or mobile transaction has posted to your account, it also appears on the account Details page.
To view transactions in the activity Center:
• From the Menu, click or tap activity Center.
• Select one or more of the following:
◗ Click or tap Single Transactions to view single, or one-time, transaction. Click or tap Search and enter your search text in the transactions field. the results list includes all matching payments and transfers.
◗ Click or tap Recurring Transactions to view a recurring transaction series. Choose a date range from the Time Period drop-down list or specify dates in the Start Date and end Date calendars. to view an individual transaction in a series, select Show associated Transactions. Click or tap Search and enter your search text in the transactions field. the results list includes all matching payments and transfers.
◗ Click or tap Deposited Checks to view checks deposited with your mobile device. Choose a date range from the Time Period drop-down list or specify dates in the Start Date and end Date calendars. Enter other search criteria in the the fields provided and select apply Filters.
• Browse to locate the transaction you wish to view.
• Click or tap on the transaction to expand, or hide, the details.
online Banking User Guide page 15
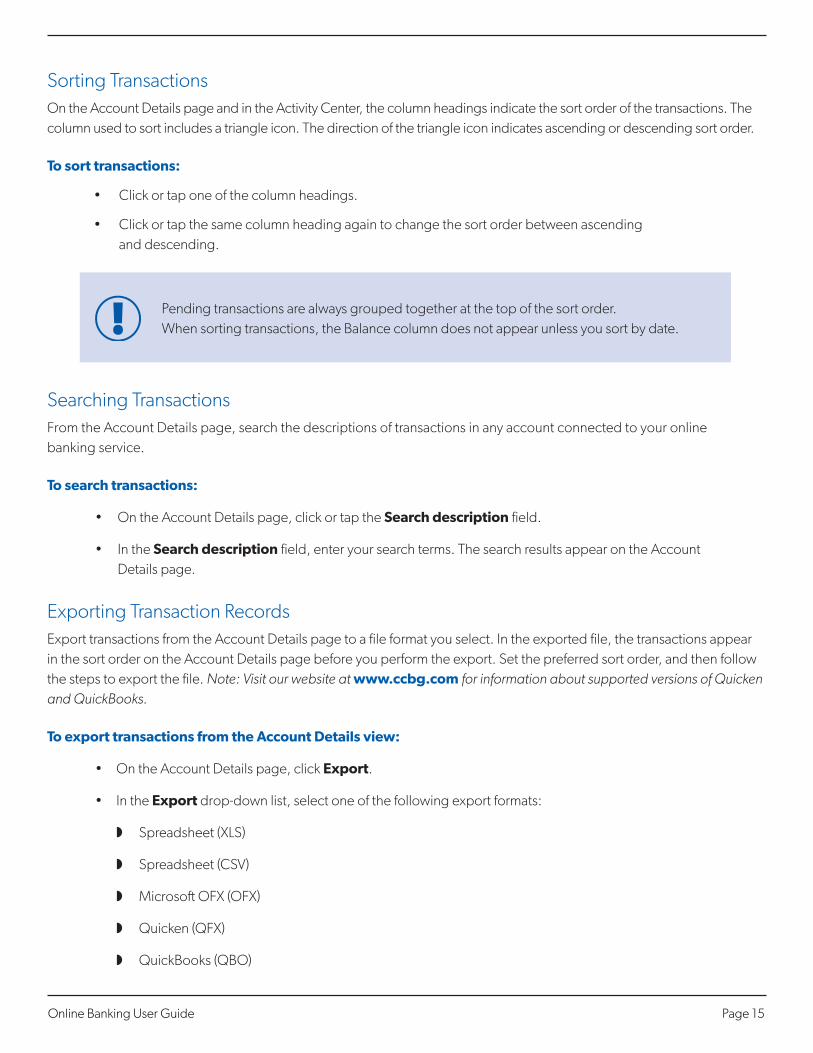
Sorting transactionson the account Details page and in the activity Center, the column headings indicate the sort order of the transactions. the column used to sort includes a triangle icon. the direction of the triangle icon indicates ascending or descending sort order.
To sort transactions:
• Click or tap one of the column headings.
• Click or tap the same column heading again to change the sort order between ascending and descending.
pending transactions are always grouped together at the top of the sort order. When sorting transactions, the Balance column does not appear unless you sort by date.
Searching transactionsfrom the account Details page, search the descriptions of transactions in any account connected to your online banking service.
To search transactions:
• On the Account Details page, click or tap the Search description field.
• In the Search description field, enter your search terms. the search results appear on the account Details page.
Exporting transaction recordsExport transactions from the account Details page to a file format you select. in the exported file, the transactions appear in the sort order on the account Details page before you perform the export. Set the preferred sort order, and then follow the steps to export the file. Note: Visit our website at www.ccbg.com for information about supported versions of Quicken and QuickBooks.
To export transactions from the account Details view:
• On the Account Details page, click export.
• In the export drop-down list, select one of the following export formats:
◗ Spreadsheet (XlS)
◗ Spreadsheet (CSV)
◗ microsoft ofX (ofX)
◗ Quicken (QfX)
◗ QuickBooks (QBo)

online Banking User Guide page 16
• Depending on your browser settings, one of the following should happen:
◗ if your browser automatically saves files to a specific folder, the Export file is saved in that folder. open the folder to view the exported file.
◗ if your browser is configured to prompt you to browse for the folder for downloaded files, select the location to save the exported file.
Viewing and printing images associated with a transactionyou may view and print any images associated with a transaction from account Details page. on the account Details page, any transaction that includes images is marked with an icon ( ).
To view and print the images associated with a transaction:
• On the Home page, click or tap the name of the account that includes the transaction you wish to print and the account Details page appears.
• Click or tap the transaction to view the details. If applicable, the image appears below the transaction. if the transaction includes multiple images, click or tap Previous and next to view additional images.
• [Optional] in online banking, you can print the images. to print the images, do the following:
◗ on the transaction details, click or tap the Print icon ( ).
◗ on the print page, click or tap Print to print the image.
PaYing BillS
you must enroll in Bill pay and select an account to pay from before you can add a payee or pay a bill. after you enroll, you can add additional accounts from which to pay. However, you cannot remove the original account selected when you enrolled.
To enroll in Bill Pay:
• From the Menu, click or tap Bill Pay > Quick Bill Pay. you automatically will be guided through the enrollment process.
• Click or tap the account to enroll and select enroll in Bill Pay.
• On the Agreement page, click or tap i agree to enroll in Bill Pay.
• In the success message, click or tap Continue to Bill Pay and the bill payment page appears.
online Banking User Guide page 17
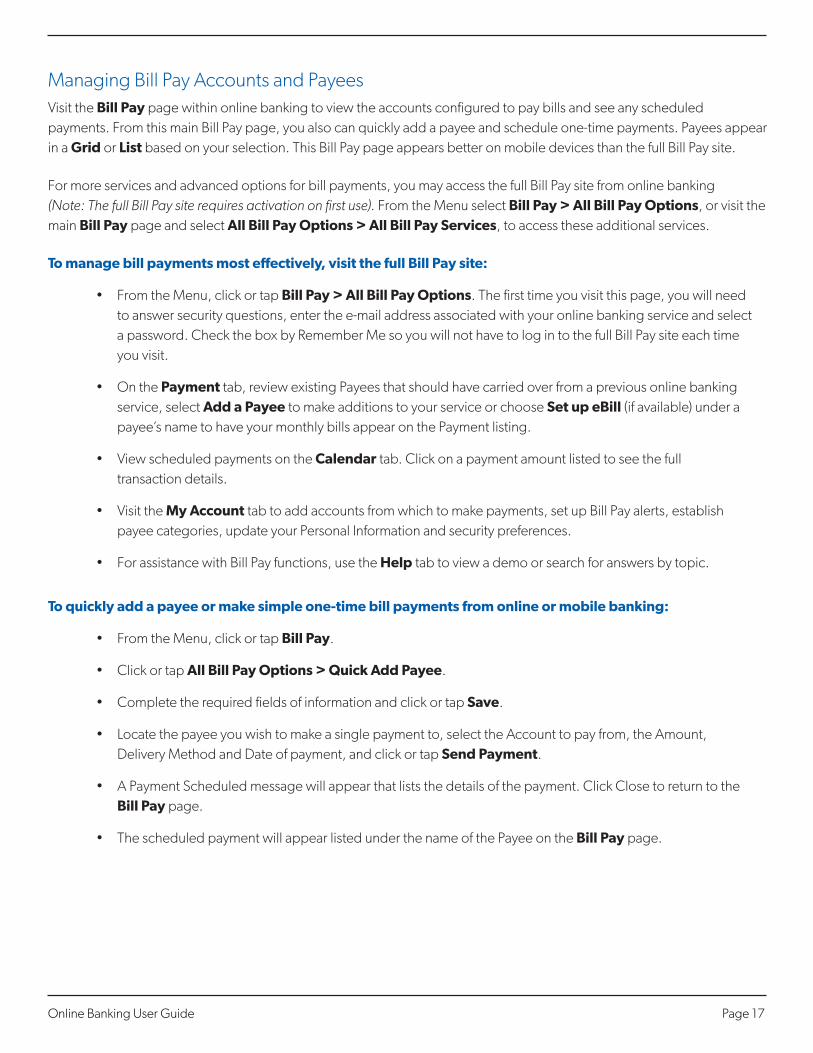
managing Bill pay accounts and payeesVisit the Bill Pay page within online banking to view the accounts configured to pay bills and see any scheduled payments. from this main Bill pay page, you also can quickly add a payee and schedule one-time payments. payees appear in a grid or list based on your selection. this Bill pay page appears better on mobile devices than the full Bill pay site.
for more services and advanced options for bill payments, you may access the full Bill pay site from online banking (Note: The full Bill Pay site requires activation on first use). from the menu select Bill Pay > all Bill Pay Options, or visit the main Bill Pay page and select all Bill Pay Options > all Bill Pay Services, to access these additional services.
To manage bill payments most effectively, visit the full Bill Pay site:
• From the Menu, click or tap Bill Pay > all Bill Pay Options. the first time you visit this page, you will need to answer security questions, enter the e-mail address associated with your online banking service and select a password. Check the box by remember me so you will not have to log in to the full Bill pay site each time you visit.
• On the Payment tab, review existing payees that should have carried over from a previous online banking service, select add a Payee to make additions to your service or choose Set up eBill (if available) under a payee’s name to have your monthly bills appear on the payment listing.
• View scheduled payments on the Calendar tab. Click on a payment amount listed to see the full transaction details.
• Visit the My account tab to add accounts from which to make payments, set up Bill pay alerts, establish payee categories, update your personal information and security preferences.
• For assistance with Bill Pay functions, use the Help tab to view a demo or search for answers by topic.
To quickly add a payee or make simple one-time bill payments from online or mobile banking:
• From the Menu, click or tap Bill Pay.
• Click or tap all Bill Pay Options > Quick add Payee.
• Complete the required fields of information and click or tap Save.
• Locate the payee you wish to make a single payment to, select the Account to pay from, the Amount, Delivery method and Date of payment, and click or tap Send Payment.
• A Payment Scheduled message will appear that lists the details of the payment. Click Close to return to the Bill Pay page.
• The scheduled payment will appear listed under the name of the Payee on the Bill Pay page.

online Banking User Guide page 18
Searching for a Bill paymentSearch for a pending or completed bill payment on the Bill Pay page. more information on a specific transaction may be available on the Bill Pay > all Bill Pay Options page.
To search for a bill payment:
• From the Menu, click or tap Bill Pay.
• The Search Payments area on the right side of the screen lists all of the pending and processed bill payments.
Do one of the following:
◗ Click or tap Pending to view the pending bill payments.
◗ Click or tap Processed to view the processed bill payments.
◗ Click or tap in the Search Payees field, and enter your search text.
◗ in the payment list, click or tap the bill payment for more information.
Canceling a Bill paymentUse the Bill pay page to cancel a pending bill payment that you created. you also may cancel a specific transaction by editing a pending payment in the full Bill pay site.
To cancel a bill payment:
• From the Menu, click or tap Bill Pay.
• The Search Payments area on the right side of the screen lists all of the pending and processed bill payments.
• In the list of Pending bill payments, click or tap the pending bill payment that you want to cancel. a message appears with the status of the bill payment.
• Click or tap Cancel Payment. When the payment has been canceled successfully, a message appears.
• Click or tap Close.
nOTe: to cancel a payment on the full Bill pay site, click or tap Bill Pay > all Bill Pay Options. look for Pending payments on the right side of your screen. locate the payment you wish to cancel, click edit, check the box beside “i would like to stop this payment” and click Submit. on the next screen look for the green box that says, “Payment successfully stopped.”

online Banking User Guide page 19
Managing TRanSaCTiOnS
Using transfersUse online and mobile banking to transfer funds between your accounts, make bank-to-bank transfers between your Capital City accounts and your accounts at other institutions, or make client-to-client transfers to accounts of other Capital City Bank clients (for deposit purposes only).
transferring fundsmake single or recurring transfers between your accounts. plus, add external accounts you hold at other financial institutions to make bank-to-bank transfers (transfer fees apply).
To transfer funds between your own accounts:
• From the Menu, select Transfers > Transfer.
• On the Funds Transfer page, specify the From account, To account, amount and Date of the transfer.
• To create a Recurring Transfer, check the box labeled Make this a recurring transfer and the
Schedule Recurring Transfer window appears. Select when the transfer should recur and for how
long by choosing a date from the calendar or selecting Repeat Forever. Click or tap Save.
• Click or tap Transfer Funds to complete the transaction.
To transfer funds to another Capital City Bank client’s account(s):
• From the Menu, select Transfers > Client-to-Client Transfer.
• To make a one-time transfer, select Single Transfer. if you plan to make multiple or recurring transfers to another client’s account, select link account to link their account to your online banking service (for deposit purposes only).
• Specify the From account, amount and Description of the transfer.
• Enter the e-mail address the other client uses for online banking with Capital City Bank and the last four digits of their checking or savings account.
• Click or tap Submit to complete the transaction.
nOTe: if the client whose account you wish to link does not use Capital City Bank online banking, you will not be able to make single client-to-client transfers or link accounts in your online banking service.

online Banking User Guide page 20
Viewing transfersView or search for an existing pending or processed transfer two ways from the menu:
• Transfers > Transfer
• activity Center
the activity Center may include additional details about a transfer, but will only include transfers initiated through the online banking service.
To view a transfer on the Funds Transfer page:
• From the Menu, click or tap Transfers > Transfer.
• The Search transactions area in the top right of the transfers page lists all of the pending and processed transfers.
• Click or tap Pending to browse the transfers that have not yet processed or click or tap Processed to browse the transfers that have been processed.
• Enter your search text in the Search transactions field. Search for the process date, amount, transaction iD or user who created the transfer. the search results appear below the search field.
• After you locate a transfer, click or tap it for more details.
• [Optional] on the transfer details page, click or tap View in activity Center. the activity Center page appears with the transfer selected and the transaction details visible. this page may provide more detail on transfers made with online or mobile banking service.
To view details of a transfer in the activity Center:
• From the Menu, click or tap activity Center.
• Select individual Transactions to view a single transfer or choose Recurring Transactions to view a recurring series of transfers.
• Browse to locate the transfer you wish to view.
• Click or tap the transfer to expand the details of the transaction.
Canceling a transferUse the activity Center to cancel a pending or Drafted transfer.
To cancel a pending transfer:
• From the Menu, click or tap activity Center.
• Locate the transfer you wish to cancel, and then click or tap to expand the details of the transaction.
• When the transaction details appear, click or tap Cancel and Confirm to complete the cancellation of the transfer.

online Banking User Guide page 21
adding External accounts for Bank-to-Bank transfersadd accounts you hold at other financial institutions to your online banking service for the ability to make bank-to-bank transfers (transfer fees apply).
to enroll an external account (one at another financial institution) for bank-to-bank transfers, you will need the account and routing numbers for the account you wish to enroll. this information typically can be found on a deposit slip or check for that account – see the sample check below. please input the routing and account numbers and the account type in the fields provided, and click or tap “Continue” to accept our terms of use agreement. External accounts will be verified through two “micro,” or trial, deposits within five business days.
only domestic (U.S.) banks are permitted for bank-to-bank transfers. Some financial institutions use special routing numbers for savings or electronic deposits or may not allow for electronic deposits. Contact your other financial institution to confirm this information prior to attempting to add and verify an external account.
To add an external account:
• From the Menu, click or tap Transfers > add external acct.
• In the account number field, enter the account number at the other financial institution.
• In the Routing number field, enter the routing number of the other financial institution. an image on the enrollment screen illustrates where the routing number is located on a check. if the account is not a checking account, verify the correct routing number with the other financial institution.
• From the account Type drop-down list, select the external account type.
• Click or tap Submit.
account Verification: two micro deposits will be generated and sent to your external account (typically within five business days). micro deposits are random deposits in amounts less than $1. When you have received these two micro deposits in your external account, make note of both amounts because you will need them for Step 2 of the verification process. if the micro deposits do not appear in your account within the typical timeframe, contact your other financial institution to verify you are using the correct routing number as some institutions do not use a single number for all account types or may not allow electronic deposits from an external account.
Service Fee: a service fee of $2.00 will be charged for each outbound and inbound transfer, and transfers submitted after 3 p.m. Eastern will be processed the next business day. inbound transfer functionality is subject to Bank approval and may be requested by contacting your banker or sending a secure e-mail from the messages section of the online or mobile banking menu.

online Banking User Guide page 22
Verifying an External account for Bank-to-Bank transfersthe external account Verification page lists the external accounts you have added to your online banking service, along with the verification status of the linked account.
To verify an external account:
• From the Menu, select Transfers > Verify external acct.
• Click or tap the account you wish to verify.
• In the Verify Deposit amounts area, enter the amounts of the two micro deposits we made in the external account and click or tap Continue.
• After verification, the external account appears in the list of accounts you may use when making a transfer from the Transfers > Transfer menu.
Depositing a CheckUse our free CCBmobile app to deposit checks into your accounts. Download the app from the app store on your mobile device.
To deposit a check:
• From the Menu in the CCBMobile app, select Mobile Deposit.
• On the Mobile Deposit page, select the account into which the deposit should be made and enter the Check number and amount.
• Tap Capture image and the image Capture page appears.
• On the Image Capture page, use your device to take a picture of the front and back of the endorsed check and then tap Submit Deposit. Use the guides on the screen to align the check to capture the image. if the picture of the check is blurry, tap Retake Front or Retake Back to take a new picture.
• Tap Close. the check appears in the Submitted tab in the Mobile Deposit History list.

online Banking User Guide page 23
Viewing Check Depositsreview check deposits in the Mobile Deposit History on the right-hand side of the Home page. you also may view deposited checks on the Mobile Deposit page in the CCBmobile banking app. the lists include checks you deposited with the mobile banking app, grouped by status. the check status is one of the following:
Status Description
Submitted Successfully transmitted to Capital City Bank. requires additional review before processing.
accepted Successfully transmitted and accepted for processing.
rejected Successfully transmitted to Capital City Bank, but rejected for processing during review.
To view a check deposit on the Home page:
• On the Home page, locate the Mobile Deposit History list and select Submitted to view pending deposits or accepted to view processed check deposits.
• Enter your search text in the Search transactions field.
• Click or tap a transaction to view more information about the deposit or to see the check images.
To view a check deposit on the Mobile Deposit page in the CCBMobile banking app:
• From the Menu, tap Mobile Deposit.
• Locate the Mobile Deposit History list and select Submitted to view pending deposits or accepted to view processed check deposits.
• Tap the Search transactions field and enter your search text.
• Tap any transaction to view more information about the deposit or to see the check images.
online Banking User Guide page 24
Viewing online or mobile Banking transactions in the activity Centerthe activity Center includes all transactions you create in the online banking service and the mobile banking app, including recurring transactions. Use the activity Center to view or cancel a transaction that has not completed processing. after an online or mobile transaction has posted to your account, it also appears on the account Details page.
To view transactions in the activity Center:
• From the Menu, click or tap activity Center.
• Select one or more of the following:
◗ Click or tap Single Transactions to view single, or one-time, transaction. Click or tap Search and enter your search text in the transactions field. the results list includes all matching payments and transfers.
◗ Click or tap Recurring Transactions to view a recurring transaction series. Choose a date range from the Time Period drop-down list or specify dates in the Start Date and end Date calendars. to view an individual transaction in a series, select Show associated Transactions. Click or tap Search and enter your search text in the transactions field. the results list includes all matching payments and transfers.
◗ Click or tap Deposited Checks to view checks deposited with your mobile device. Choose a date range from the Time Period drop-down list or specify dates in the Start Date and end Date calendars. Enter other search criteria in the the fields provided and select apply Filters.
• Browse to locate the transaction you wish to view.
• Click or tap on the transaction to expand, or hide, the details.
Sorting transactions in the activity Centeron the account Details page and in the activity Center, the column headings indicate the sort order of the transactions. the column used to sort includes a triangle icon. the direction of the triangle icon indicates ascending or descending sort order.
To sort transactions:
• Click or tap one of the column headings.
• Click or tap the same column heading again to change the sort order between ascending and descending.
pending transactions are always grouped together at the top of the sort order.

online Banking User Guide page 25
Canceling pending transactionsUse the activity Center to cancel a pending transaction initiated in online or mobile banking. if you cancel a transaction on the Recurring Transactions tab, you cancel all future recurrences of the transaction. if you cancel an individual transaction in a recurring series on the Single Transactions tab, you only cancel that single occurrence and not the entire series.
To cancel one or more pending transactions:
• From the Menu, click or tap activity Center.
• Browse or search for the transactions you wish to cancel.
• To cancel a single transaction, click or tap the item. When the transaction details appear, select Cancel.
• To cancel multiple transactions, check the box beside each item you wish to cancel and click or tap Cancel.
• When prompted, click or tap Confirm to verify the cancellation. the status of the items will change to Cancelled in the activity Center.
Copying a transactionWithin the activity Center, duplicate an existing transaction to create a new transaction of the same type with the fields already completed.
To copy a transaction:
• From the Menu, click or tap activity Center.
• Browse or search for the transaction you wish to copy.
• Select the transaction and click or tap Copy. a new transaction of the same type appears.
• Make any needed changes to pre-filled information about the transaction. The procedure that you use to make the changes varies, depending on the type of transaction.
• When you are satisfied with your changes, Submit the new transaction.
Sending a message about a transactionSending a message about a transaction is simple in the activity Center.
To send a message about a transaction:
• From the Menu, click or tap activity Center.
• Browse or search the Single Transactions, Recurring Transactions or Deposited Checks to locate the transaction you want to send a message about.
• Click or tap the item.

online Banking User Guide page 26
• When the details appear, click or tap actions > inquire.
• The message automatically includes information to identify the transaction, so you do not need to add transaction details.
• Click or tap in the Message field to enter your message.
• [Optional] in online banking, click the attach file icon ( ). in the open dialog box, select a file to attach to the message and click Open.
• Click or tap Send.
Managing MeSSageS anD aleRTS
managing Secure messages in the message CenterSecure messages provide a protected way to communicate with us and are not used to communicate with any outside party. Secure messages appear in both online banking and the mobile banking app in the message Center accessible from the menu.
Creating a Secure message Secure messages may be created in online banking or in the mobile banking app.
To create to a secure message:
• From the Menu, select Message Center.
• Click or tap new Conversation.
• Select a recipient from the drop-down options and enter a subject and your message in the fields provided.
• [Optional] in online banking you’ll have the opportunity to attach a file. look for the paper clip symbol ( ) and click on it to bring up a dialog box. in the open dialog box, select the file to attach and click Open.
• When your message is complete, click or tap Send.

online Banking User Guide page 27
reading a Secure message When you have unread messages, the number of unread messages appears next to the Message Center item in the menu. in the inbox, unread messages include a red triangle in the top left corner.
To read to a secure message:
• From the Menu, select Message Center.
• If the Inbox appears on the right side of the screen, click or tap the message you wish to read.
• If the Inbox does not appear, click or tap inbox and then select the message you wish to read.
• Messages appear as conversation threads that include the original message and any related messages.
replying to a Secure messagereply to a secure message in either online banking or the mobile banking app.
To reply to a secure message:
• After you read a secure message, click or tap Reply.
• In the Message field, enter your response to the secure message you received.
• [Optional] in online banking, click the attach file icon ( ). in the open dialog box, select a file to attach to the message, and click Open.
• When your reply is complete, click or tap Send.
Deleting Secure message threadsafter you have read the secure messages in a message thread, you can delete the thread and all messages in it. you can delete a single thread, multiple threads or all threads. message threads stay in the inbox until you delete them.
When you delete a thread, the online banking system permanently deletes it. make sure that you do not need the information in the message before you delete it.
To delete secure message threads:
• From the Menu, click or tap Message Center.
• Do one of the following:
◗ if the inbox appears on the right side of the screen, click or tap Delete.
◗ if the inbox does not appear, click or tap inbox, and then click or tap Delete.
• The Delete Message pane appears.

online Banking User Guide page 28
• On the Delete Message pane, do one of the following:
◗ Click or tap the check boxes for the message threads that you want to delete.
◗ Click or tap all to select all message threads.
◗ Click or tap Delete.
• When prompted, click or tap Delete to verify the deletion. the inbox reappears without the deleted messages.
managing alertsalerts remind you of important events, warn you about the status of your accounts and notify you when transactions occur. When you create an alert, you specify the conditions that trigger the alert as well as the way that you receive the alert. these conditions vary depending on the alert type. alert types include:
• Date
• Account
• History
• Insufficient Funds
• Transactions
• Security
you can choose to receive alerts in any of these ways:
• Secure Message
• Telephone call
• Text (SMS) message
you do not need to be logged in for us to send the alert. Secure message and e-mail alerts are sent immediately when they are generated. you specify the time to send alerts in a telephone call or a text message.

online Banking User Guide page 29
Creating an alertWhen you create an alert, it takes effect immediately and stays in effect until you disable or delete it.
To create an alert:
• From the Menu, click or tap Settings > alerts.
• In the Create new alert drop-down list, click or tap the alert type you wish to create.
• Select the conditions that trigger the alert from the options provided.
• Select one of the following from the Select a delivery method drop-down list:
◗ Select Secure Message Only to send the alert as a Secure message. the alert is sent immediately when it is generated, but you must be logged in to read the alert.
◗ Select e-mail to send the alert as an e-mail. Enter the e-mail address where you want to send the alert. an alert is sent immediately when it is generated.
◗ Select Voice to send the alert as a telephone call. Select the country from the Select Phone Country drop-down list, enter the phone number to call and specify the time to call.
◗ Select SMS to send the alert as a text (SmS) message. Select the SmS country, enter the number and time to send the message, and check the box to agree to Terms.
• Select the every Occurrence check box to repeat the alert every time the trigger occurs.
• Click or tap Save.
• In the success message, click or tap Close. the new alert appears on the alerts page.
Editing alertsUse the alerts page to edit an existing alert. any changes take effect immediately.
To edit an existing alert:
• From the Menu, click or tap Settings > alerts.
• Click or tap the type of alert that you wish to edit.
• Click or tap the existing alert that you want to edit.
• Make any needed changes to the alert settings and click or tap Save.
• Click or tap Close on the Save alert message.

online Banking User Guide page 30
Enabling and Disabling alertstemporarily disable an existing alert and later enable it again from the alerts page.
To disable or enable an existing alert:
• From the Menu, click or tap Settings > alerts.
• Click or tap the type of alert you wish to disable or enable.
• On the Alerts page, locate the existing alert and do one of the following in the enabled column:
◗ Click or tap Off to disable the alert.
◗ Click or tap On to enable the alert.
Deleting an alertUse the alerts page to delete an alert you no longer need. Deleting an alert removes it immediately and permanently.
To delete an alert:
• From the Menu, click or tap Settings > alerts.
• Click or tap the type of alert you wish to delete.
• Click or tap the existing alert you wish to delete.
• When Edit Alert page appears, click or tap Delete.
• When prompted, click or tap Confirm to delete the alert.
• When the deletion is complete, a message appears. Click or tap Close.
Configuring Security alertsSecurity alerts inform you immediately when a security-related event occurs. Some security alerts are required. in the list of security alerts, required alerts are dimmed. you can enable or disable optional security alerts. the available security alert types vary, depending on your account type.
When an enabled alert is triggered, we send a security alert message. Security alerts are always sent as secure messages, though you may add additional delivery methods. When a security alert is triggered, the alert is sent to all of the configured delivery methods.
you should not rely on e-mail alerts alone, since e-mail can be delayed or interrupted. always use a second delivery method along with e-mail for greater security.

online Banking User Guide page 31
To enable or disable optional security alerts:
• From the Menu, click or tap Settings > alerts.
• Click or tap Security alerts. the list of available alerts appears.
• Do one of the following:
◗ to enable an alert, click or tap On.
◗ to disable an alert, click or tap Off.
• On the Save Alert page, click or tap Close.
To edit security alert delivery preferences:
• From the Menu, click or tap Settings > alerts.
• Click or tap Security alerts.
• Click or tap edit Delivery Preferences and do the following:
◗ in the e-Mail address field, enter the e-mail address to receive security alerts.
◗ in the phone number area, select the destination from the Country drop-down list and enter the phone number and extension to call in the area Code, Phone number and ext. fields.
◗ in the SmS text number area, select the destination country from the Country drop-down list, and enter the phone number to send the message to in the area Code and Phone number fields.
• On the Delivery Preferences page, click or tap Save. a success message appears.
FinDing an OFFiCe OR aTM
for your convenience, we use built-in location services in your browser or mobile device to determine your location and help you find the closest office or atm. your browser or mobile device may ask for permission to access location information. if your location is available, offices and atms are sorted by their distance from you. if your location is not available or you do not grant permission to access location services, a default list of offices and atms appears. offices and atms also are searchable in the search field provided.
To locate an office or aTM:
• From the Menu, select locations.
• Click or tap Offices or aTMs based on which you would like to view.
• On the Offices or aTMs page, you may view the locations list and zoom to see the map in more detail.
• Click or tap the Search field to enter a city, state or Zip Code.
• Click or tap on a specific Office or ATM for information about office hours and location, or select get Directions to map your route.

online Banking User Guide page 32
COnFigURing SeTTingS
personalize your online banking experience by configuring account, access and security settings.
requesting an address ChangeUse online banking or the CCBmobile app to update an address associated with one or more of your accounts. Depending on the number and type of accounts, it may take 24 to 48 hours to make the changes. the request affects the account profile, statement and other mail and correspondence related to the account(s). for your security, we review the change before it takes effect and may need to contact you to verify the change. We also mail a change-of-address confirmation to both the old and new addresses to ensure you were the one who made the request.
To request an address change:
• From the Menu, click or tap Services > Update Contact info.
• Do the following:
◗ make any needed changes to your contact information.
◗ in the Select an account list, click or tap one or more accounts to include or click or tap Select all.
• Click or tap Submit.
• On the success message, click or tap Close.
Configuring account preferencespersonalize your online banking experience by configuring your account preferences. you can give each account nicknames, set the display order for each account and establish your text banking settings.
To configure an account nickname and display order:
• From the Menu, click or tap Settings > account Preferences.
• Locate the account(s) you wish to assign a nickname. In the list, accounts are grouped by type. Enter the name(s) in the Display name field. the display name, or nickname, appears instead of a system account name in online banking and the mobile banking app.
• In the Account Preferences page, enter a value in the Order field for each account (1, 2, 3, etc. to set the order the accounts should appear).
• Click or tap Submit to submit the changes.

online Banking User Guide page 33
Changing your Security preferencesyou may change your Username or password and update your Secure access Code delivery contact information from the Settings > Security Preferences option on the menu. We will only send a Secure access Code to a known secure delivery contact you have provided. this code helps protect your account if your Username and password are ever lost or stolen, or if you forget your password.
if the Secure Delivery option does not appear, log off from the menu and sign back in. if this option still does not appear, contact our Client Service Center for assistance.
Changing your passwordTo change your password:
• From the Menu, select Settings > Security Preferences.
• Click or tap Change Password and enter your existing password and new password.
• Click or tap Change Password again. When the change is complete, a success message appears.
Changing your UsernameChanging your online and mobile banking Username is simple!
To change your Username:
• From the Menu, click or tap Settings > Security Preferences.
• Click or tap Change Username.
• Enter the new Username in the new Username field.
• Click or tap Submit.
Configuring Secure access Code Delivery Contactsyour Secure access Code delivery options are based upon the contact information we have on file when you activate your online banking service, but you may update this information for future verifications in Settings > Security Preferences > Secure Delivery once you are logged in. Note: Changing delivery information for Secure Access Codes will not change the contact information on your account. These settings are only for online banking purposes.
Whenever possible, use phone and text delivery methods instead of e-mail. attackers may use viruses or other malicious activity to compromise your e-mail and view the Secure access Code. if you do not include an e-mail address as a Secure Delivery Contact in your Settings > Security Preferences > Secure Delivery, you can help prevent this type of attack.
online Banking User Guide page 34
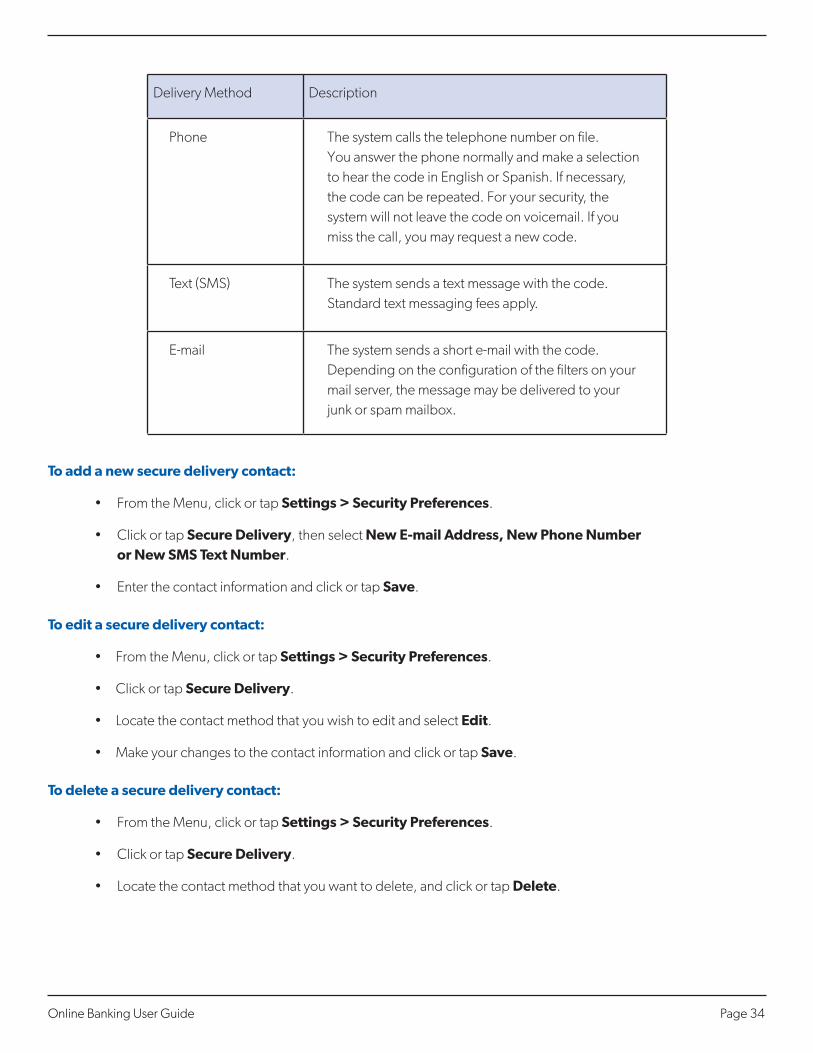
Delivery method Description
phone the system calls the telephone number on file. you answer the phone normally and make a selection to hear the code in English or Spanish. if necessary, the code can be repeated. for your security, the system will not leave the code on voicemail. if you miss the call, you may request a new code.
text (SmS) the system sends a text message with the code. Standard text messaging fees apply.
E-mail the system sends a short e-mail with the code. Depending on the configuration of the filters on your mail server, the message may be delivered to your junk or spam mailbox.
To add a new secure delivery contact:
• From the Menu, click or tap Settings > Security Preferences.
• Click or tap Secure Delivery, then select new e-mail address, new Phone number or new SMS Text number.
• Enter the contact information and click or tap Save.
To edit a secure delivery contact:
• From the Menu, click or tap Settings > Security Preferences.
• Click or tap Secure Delivery.
• Locate the contact method that you wish to edit and select edit.
• Make your changes to the contact information and click or tap Save.
To delete a secure delivery contact:
• From the Menu, click or tap Settings > Security Preferences.
• Click or tap Secure Delivery.
• Locate the contact method that you want to delete, and click or tap Delete.

online Banking User Guide page 35
Configuring text BankingUse text banking to send text (SmS) messages from your mobile phone or other supported device to get account information or to perform transfers.
To enroll in text banking:
• From the Menu, click or tap Settings > Text enrollment.
• Perform the following steps to enroll:
◗ Click or tap On.
◗ Enter the number you wish to enable for text banking in the SMS Text number field.
◗ Click or tap Terms and Conditions and read the terms and conditions.
◗ Click or tap Privacy Policy and read the privacy policy.
◗ Check the box by agree To Terms and click or tap Save.
• When the enrollment Successful message appears, do one of the following:
◗ Click or tap Close to close the text Banking settings.
◗ Click or tap Visit Preferences to configure account preferences for text banking.
Configuring account preferences for text BankingBefore you use text banking, you must select the accounts you wish to access with text banking and assign each a text banking display name, or nickname. Display names are limited to four characters each (e.g. SaVE or CHCk). you can also indicate the order in which your accounts appear.
To configure text banking preferences for accounts:
• From the Menu, click or tap Settings > account Preferences.
• Click or tap Text.
• Locate each account you wish to use with text banking and do the following:
◗ Enter a four-character nickname to use for the account in text banking in the nickname field.
◗ Select the enabled check box for the account. you can only use accounts that you enable for text banking.
◗ in the Order field, enter a number for the account order (e.g. 1, 2, 3).
◗ Click or tap Submit.
look for the green message at the bottom of the page that reads Text account Preferences updated successfully to confirm your preferences were saved.

online Banking User Guide page 36
Using text Bankingto use text banking, send a text message to us with a command. When the action is complete, the text message reply includes the information or the results of the action. message and data rates may apply.
a signature or any other text in a text banking message may cause difficulties processing text banking commands. Disable any automatic signature or other text when you send a text banking command.
Send your text message to 226563 (BankMe) and include one of the following commands:
Command result
Bal the system calls the telephone number on file. you answer the phone normally and make a selection to hear the code in English or Spanish. if necessary, the code can be repeated. for your security, the system will not leave the code on voicemail. if you miss the call, you may request a new code.
Bal <account nickname> the system sends a text message with the code. Standard text messaging fees apply.
HiSt <account nickname> the system sends a short e-mail with the code. Depending on the configuration of the filters on your mail server, the message may be delivered to your junk or spam mailbox.
XfEr <from account nickname> <to account nickname> <amount>
transfers the amount that you specify from one account to another.
liSt a list of all available text banking commands.
HElp a list of contact points for information about text banking. this may include the website address, phone number, or other information.
Stop Disables text banking. you can also use the settings in online banking and the mobile banking app to enable and disable text banking.
online Banking User Guide page 37
Updating text Banking preferencesUse the text Enrollment page to update your mobile phone number or to disable text banking.
To update the mobile number used for text banking:
• From the Menu, click or tap Settings > Text enrollment.
• Enter the new mobile number you wish to enable for text banking in the SMS Text number field.
• Click or tap Save.
To disable text banking:
• From the Menu, click or tap Settings > Text enrollment.
• Click or tap Off.
• Click or tap Save.
Configuring E-Document Delivery SettingsConfigure electronic document delivery options for your accounts or review the e-Document Delivery agreement on the e-Document Delivery page. E-Document delivery settings can vary.
To configure the e-Document delivery method:
• From the Menu, click or tap Settings > e-Document Delivery.
• For each account, select a delivery method in the Delivery Type drop-down list.
• [Optional] if you select E-Statement in the Delivery type drop-down list, the E-Statement Delivery agreement window appears. review the agreement, and click or tap i accept.
• [Optional] if you select E-Statement in the Delivery type drop-down list, in the address field for an account that receives an E-Statement, click or tap the edit icon ( X ). the Select recipient window appears. Do one of the following:
◗ Click or tap the check box for one or more existing delivery addresses.
◗ Click or tap in the address field and type a new delivery address. Click or tap add.
• Click or tap Save.
To view the e-Document Delivery agreement:
• From the Menu, click or tap Settings > e-Document Delivery.
• On the E-Document Delivery page, click or tap View e-Document Delivery agreement. review the statement, and click or tap i accept or the close (X) icon.
online Banking User Guide page 38
STaYing SeCURe
password tips and recommendationsa strong password helps you protect your financial information.
Create a strong password by following these guidelines:
• Create unique, original passwords.
• Use the longest practical password.
• Use a mix of upper and lower case letters.
• Include one or more numbers.
• Do not use repeating or adjacent characters.
• Use at least one special character: `~!@#$%^&()_+={}|[]:”?,./\.
• Avoid using software or toolbars that store your password.
• Change your password regularly.
Try to avoid the following password pitfalls:
• Do not choose a password or security code others can easily guess.
• Avoid reusing passwords for multiple sites.
• Never include your account numbers.
• Do not use personal contact information, such as addresses or phone numbers.
• Do not include personal information, such as your name, birthday, Social Security Number, passport number or the names or information for family members or friends.
• Avoid sequences of characters such as 1234567 or abcdefg.
• Do not rely on look-alike substitutions of numbers or symbols alone. Passwords like P@ssw0rd are easy to guess, but can be effective when you also change the case of the letters, the length of the words and misspellings, or when you use multiple unrelated words in a phrase.
the following links to third-party tools and sites can help you to create strong passwords. Note: Capital City Bank does not endorse or guarantee these sites. They are provided only for your information and convenience.
• Create Strong passwords
• microsoft password Strength Checker

online Banking User Guide page 39
Verifying your identity with Secure access Codesa conventional authentication system relies on two forms of identification to prove your identity: your Username and your password. multi-factor authentication uses multiple forms of identification to make it harder for attackers to access your account. the multiple forms of identification can include something you know, like as a password, and something only you have (i.e. answers to security questions you selected or a Secure access Code).
for the Capital City Bank online banking service and CCBmobile banking app, we send a Secure access Code to a contact phone number or address you have on file. the code is valid only for a single use and it expires after 10 minutes. When prompted, you select one of the following ways to deliver the code:
Delivery method Description
phone the system calls the telephone number on file. you answer the phone normally and make a selection to hear the code in English or Spanish. if necessary, the code can be repeated. for your security, the system will not leave the code on voicemail. if you miss the call, you may request a new code.
text (SmS) the system sends a text message with the code. Standard text messaging fees apply.
E-mail the system sends a short e-mail with the code. Depending on the configuration of the filters on your mail server, the message may be delivered to your junk or spam mailbox.
Whenever possible, use phone and text delivery methods instead of e-mail. attackers may use viruses or other malicious activity to compromise your e-mail and view the Secure access Code. if you do not include an e-mail address as a Secure Delivery Contact in your Settings > Security Preferences > Secure Delivery, you can help prevent this type of attack.

online Banking User Guide page 40
registering a Browser or Deviceif you have never used a particular browser or device to log in to online or mobile banking, you will be prompted to enter a Secure access Code to verify your identity and complete the login process. you may Register this Device to register a browser or device if it is one you plan to use again. this will keep you from needing an access code the next time you log in.
By registering a browser or a device, you confirm that it is under your control and that you intend to use it to access online banking or the mobile banking app. you may register multiple devices for use with our online banking service. plus, multiple users may register the same browser or device.
Under any of the following circumstances, you will be asked to register the device again:
• You use a different browser on your desktop.
• You delete and reinstall the mobile banking app.
• Your browser does not save browser cookies.
• You clear existing browser cookies.
• We reset registration for all users for security reasons.
only register a browser or device if it is under your control. Do not register a browser on a public computer or a device that is not your own.