food processor instructions and recipes food processor ... · food processor instructions and...
TRANSCRIPT
Eng
lish
1
Model 5KFPM770Food Processor
FOOD PROCESSORINSTRUCTIONS AND RECIPES
FOOD PROCESSORINSTRUCTIONS AND RECIPES
FOOD PROCESSORINSTRUCTIONS AND RECIPES
FOOD PROCESSORINSTRUCTIONS AND RECIPES
FOOD PROCESSORINSTRUCTIONS AND RECIPES
FOOD PROCESSORINSTRUCTIONS AND RECIPES
FOOD PROCESSORINSTRUCTIONS AND RECIPES
FOOD PROCESSORINSTRUCTIONS AND RECIPES
FOOD PROCESSORINSTRUCTIONS AND RECIPES
FOOD PROCESSORINSTRUKTIONER OG OPSKRIFTER
FOOD PROCESSORINSTRUCTIONS AND RECIPES
FOOD PROCESSORINSTRUCTIONS AND RECIPES
FOOD PROCESSORINSTRUCTIONS AND RECIPES
Eng
lish
2
Table of ContentsFood Processor Safety....................................................................................3
Electrical Requirements..................................................................................3
Important Safeguards....................................................................................4
Food Processor Features ...............................................................................5
Preparing the Food Processor for Use
Before First Use.......................................................................................7
Work Bowl Assembly .............................................................................7
Multipurpose Blade & Dough Blade Assembly ........................................8
Slicing & Shredding Disc Assembly .........................................................8
Mini Bowl Assembly................................................................................9
Chef’s Bowl Assembly ............................................................................9
Egg Whip Assembly & Use....................................................................10
Citrus Press Assembly & Use..................................................................10
Using the Food Processor
Before Use ............................................................................................12
Food Pusher Interlock ..........................................................................12
Maximum Liquid Level .........................................................................12
Turning the Food Processor On and Off ...............................................12
Using the Pulse Control .......................................................................13
2-Piece Food Pusher .............................................................................13
Disassembling the Food Processor ..............................................................13
Care and Cleaning.......................................................................................15
Troubleshooting .........................................................................................16
Food Processing Tips ...................................................................................17
Using the Multipurpose Blade...............................................................17
Using a Slicing or Shredding Disc..........................................................18
Using the Dough Blade.........................................................................19
Using the Egg Whip..............................................................................19
Helpful Hints.........................................................................................20
Recipes........................................................................................................22
Warranty and Service Information
Household KitchenAid® Food Processor Warranty for Europe ................27
Service Centers......................................................................................27
Customer Service ..................................................................................28

Model 5KFPM770:
220-240 Volts A.C.Hertz: 50/60 Hz
NOTE: Model 5KFPM770 has agrounded plug. To reduce the risk ofelectrical shock, this plug will fit inan outlet only one way. If the plugdoes not fit in the outlet, contact aqualified electrician. Do not modifythe plug in any way.
Do not use an extension cord. If thepower supply cord is too short, havea qualified electrician or servicemaninstall an outlet near the appliance.
Eng
lish
Your safety and the safety of others are very important.
We have provided many important safety messages in this manual and onyour appliance. Always read and obey all safety messages.
This is the safety alert symbol.
This symbol alerts you to potential hazards that can kill or hurtyou and others.
All safety messages will follow the safety alert symbol and eitherthe word “DANGER” or “WARNING.” These words mean:
You can be killed or seriouslyinjured if you don’t immediatelyfollow instructions.
You can be killed or seriouslyinjured if you don’t followinstructions.
All safety messages will tell you what the potential hazard is, tell you how toreduce the chance of injury, and tell you what can happen if the instructionsare not followed.
DANGER
WARNING
Food Processor Safety
Electrical Requirements
3
Eng
lish
4
IMPORTANT SAFEGUARDSWhen using electrical appliances, basic safety precautions should always befollowed, including the following:
1. Read all instructions.2. To protect against risk of electrical shock do not put Food Processor in
water or other liquid.3. Close supervision is necessary when any appliance is used by or near
children.4. Unplug from the outlet when not in use, before putting on or taking off
parts, and before cleaning.5. Avoid contacting moving parts.6. Do not operate any appliance with a damaged cord or plug, or after the
appliance malfunctions, or is dropped or damaged in any manner. Returnappliance to the nearest Authorized Service Facility for examination,repair, or electrical or mechanical adjustment.
7. The use of attachments not recommended or sold by the manufacturermay cause fire, electric shock or injury.
8. Do not use outdoors.9. Do not let cord hang over edge of table or counter.
10. Keep hands and utensils away from moving blades or discs whileprocessing food to reduce the risk of severe injury to persons or damageto the Food Processor. A scraper may be used but must be used onlywhen the Food Processor is not running.
11. Blades are sharp. Handle carefully.12. To reduce the risk of injury, never place cutting blade or discs on base
without first putting bowl properly in place.13. Be certain cover is securely locked in place before operating appliance.14. Never feed food by hand. Always use the food pusher.15. Do not attempt to defeat the cover interlock mechanism.16. This product is designed for household use only.
SAVE THESE INSTRUCTIONS
Eng
lish
5
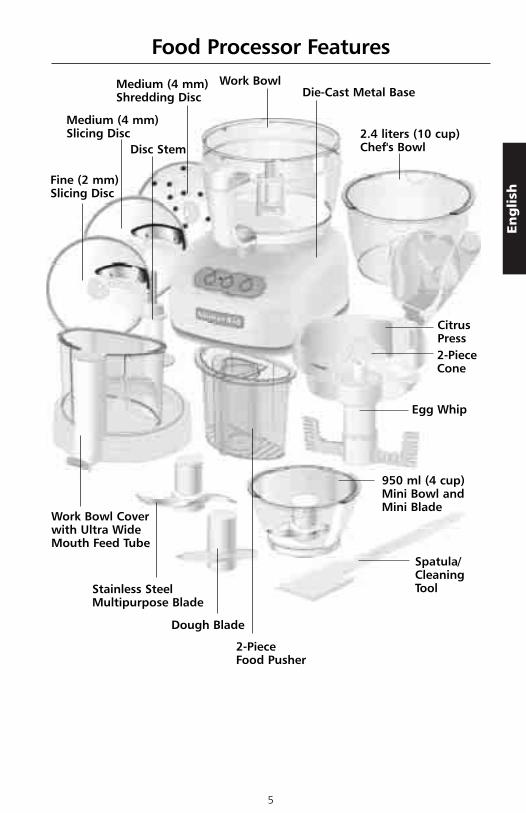
Food Processor Features
Medium (4 mm)Shredding Disc
Fine (2 mm) Slicing Disc
Stainless SteelMultipurpose Blade
Dough Blade
Die-Cast Metal Base
2-Piece Food Pusher
Work Bowl Coverwith Ultra WideMouth Feed Tube
Work Bowl
950 ml (4 cup)Mini Bowl andMini Blade
Medium (4 mm)Slicing Disc
Spatula/CleaningTool
2.4 liters (10 cup)Chef's Bowl
CitrusPress2-PieceCone
Disc Stem
Egg Whip
Eng
lish
6
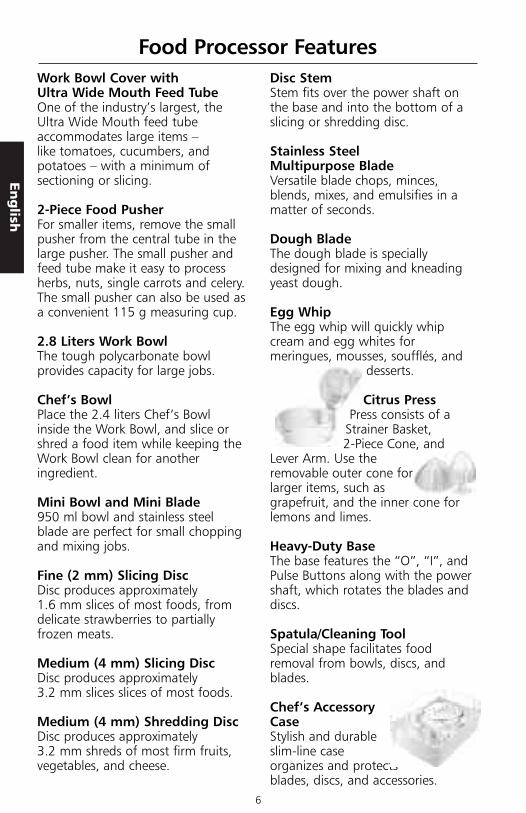
Food Processor FeaturesWork Bowl Cover with Ultra Wide Mouth Feed TubeOne of the industry’s largest, theUltra Wide Mouth feed tubeaccommodates large items – like tomatoes, cucumbers, andpotatoes – with a minimum ofsectioning or slicing.
2-Piece Food PusherFor smaller items, remove the smallpusher from the central tube in thelarge pusher. The small pusher andfeed tube make it easy to processherbs, nuts, single carrots and celery.The small pusher can also be used asa convenient 115 g measuring cup.
2.8 Liters Work BowlThe tough polycarbonate bowlprovides capacity for large jobs.
Chef’s BowlPlace the 2.4 liters Chef’s Bowlinside the Work Bowl, and slice orshred a food item while keeping theWork Bowl clean for anotheringredient.
Mini Bowl and Mini Blade950 ml bowl and stainless steelblade are perfect for small choppingand mixing jobs.
Fine (2 mm) Slicing DiscDisc produces approximately 1.6 mm slices of most foods, fromdelicate strawberries to partiallyfrozen meats.
Medium (4 mm) Slicing DiscDisc produces approximately 3.2 mm slices slices of most foods.
Medium (4 mm) Shredding DiscDisc produces approximately 3.2 mm shreds of most firm fruits,vegetables, and cheese.
Disc StemStem fits over the power shaft onthe base and into the bottom of aslicing or shredding disc.
Stainless Steel Multipurpose BladeVersatile blade chops, minces,blends, mixes, and emulsifies in amatter of seconds.
Dough BladeThe dough blade is speciallydesigned for mixing and kneadingyeast dough.
Egg WhipThe egg whip will quickly whipcream and egg whites formeringues, mousses, soufflés, and
desserts.
Citrus PressPress consists of a
Strainer Basket, 2-Piece Cone, and
Lever Arm. Use theremovable outer cone forlarger items, such asgrapefruit, and the inner cone forlemons and limes.
Heavy-Duty BaseThe base features the “O”, “I”, andPulse Buttons along with the powershaft, which rotates the blades anddiscs.
Spatula/Cleaning ToolSpecial shape facilitates foodremoval from bowls, discs, andblades.
Chef’s AccessoryCaseStylish and durableslim-line caseorganizes and protectsblades, discs, and accessories.
Eng
lish
7
Preparing the Food Processor for Use
Before First Use
Before using your Food Processor forthe first time, wash the work bowl,work bowl cover, chef’s bowl, minibowl, feed tube pusher, discs, andblades either by hand or in thedishwasher (see “Care and Cleaning”on page 15).
Work Bowl Assembly
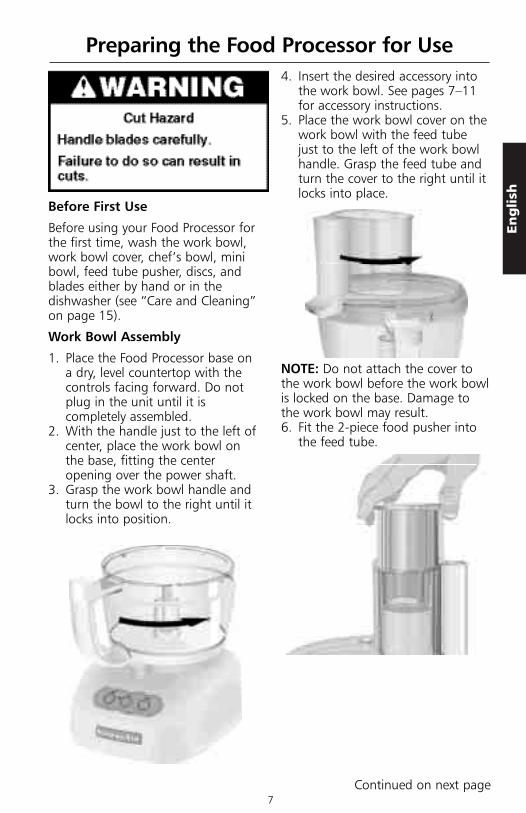
1. Place the Food Processor base ona dry, level countertop with thecontrols facing forward. Do notplug in the unit until it iscompletely assembled.
2. With the handle just to the left ofcenter, place the work bowl onthe base, fitting the centeropening over the power shaft.
3. Grasp the work bowl handle andturn the bowl to the right until itlocks into position.
4. Insert the desired accessory intothe work bowl. See pages 7–11for accessory instructions.
5. Place the work bowl cover on thework bowl with the feed tubejust to the left of the work bowlhandle. Grasp the feed tube andturn the cover to the right until itlocks into place.
NOTE: Do not attach the cover tothe work bowl before the work bowlis locked on the base. Damage tothe work bowl may result.6. Fit the 2-piece food pusher into
the feed tube.
Continued on next page
Eng
lish
8
Preparing the Food Processor for Use
7. Plug into a proper electrical outlet(see “Electrical Requirements” onpage 3).
NOTE: Your Food Processor will notoperate unless the work bowl andwork bowl cover are properly lockedon the base, and the pusher isinserted to the maximum fill line onthe feed tube.
Do not remove the work bowlfrom the base without first removingthe work bowl cover. Damage to thework bowl may result.
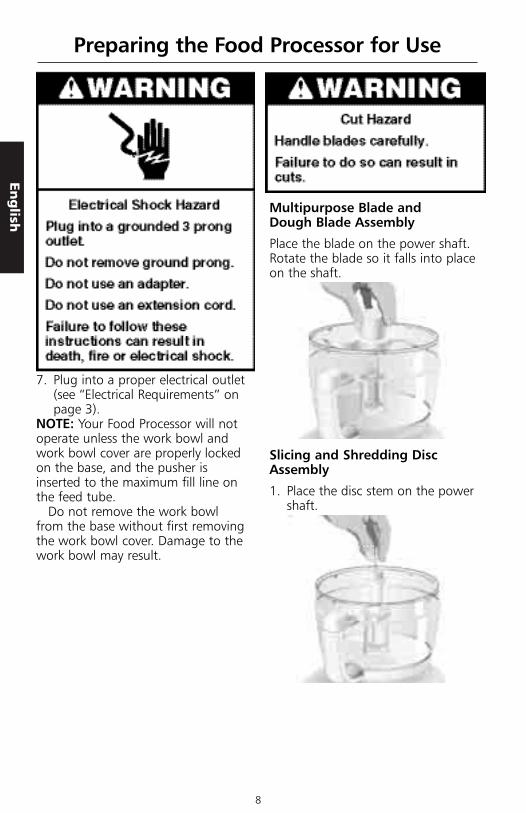
Multipurpose Blade and Dough Blade Assembly
Place the blade on the power shaft.Rotate the blade so it falls into placeon the shaft.
Slicing and Shredding DiscAssembly
1. Place the disc stem on the powershaft.
Eng
lish
9
Preparing the Food Processor for Use
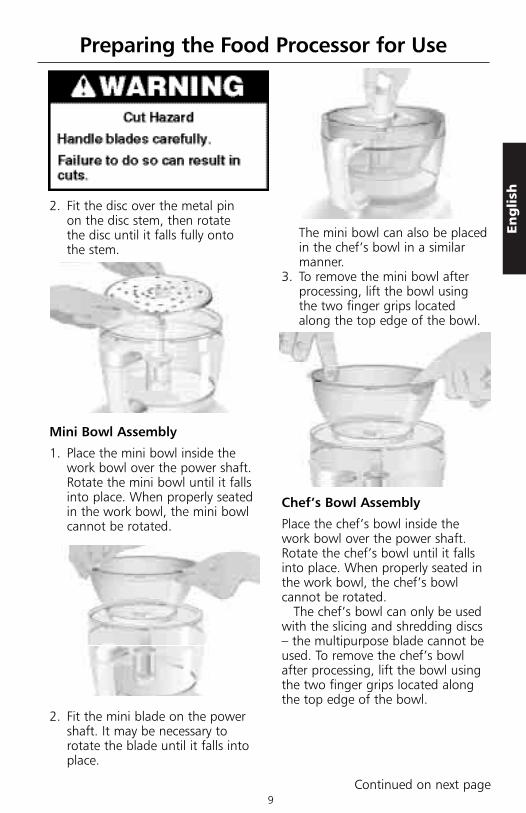
2. Fit the disc over the metal pin on the disc stem, then rotate the disc until it falls fully onto the stem.
Mini Bowl Assembly
1. Place the mini bowl inside thework bowl over the power shaft.Rotate the mini bowl until it fallsinto place. When properly seatedin the work bowl, the mini bowlcannot be rotated.
2. Fit the mini blade on the powershaft. It may be necessary torotate the blade until it falls intoplace.
The mini bowl can also be placedin the chef’s bowl in a similarmanner.
3. To remove the mini bowl afterprocessing, lift the bowl usingthe two finger grips locatedalong the top edge of the bowl.
Chef’s Bowl Assembly
Place the chef’s bowl inside thework bowl over the power shaft.Rotate the chef’s bowl until it fallsinto place. When properly seated inthe work bowl, the chef’s bowlcannot be rotated.
The chef’s bowl can only be usedwith the slicing and shredding discs– the multipurpose blade cannot beused. To remove the chef’s bowlafter processing, lift the bowl usingthe two finger grips located alongthe top edge of the bowl.
Continued on next page
Eng
lish
10
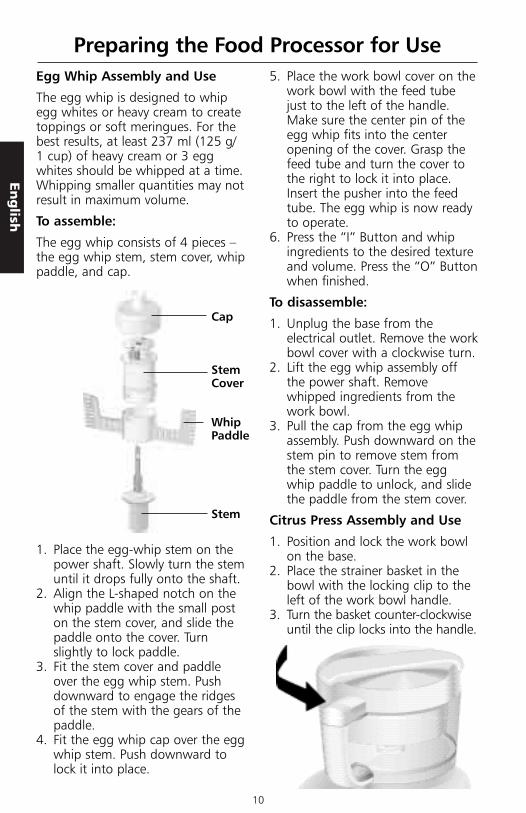
Preparing the Food Processor for UseEgg Whip Assembly and Use
The egg whip is designed to whipegg whites or heavy cream to createtoppings or soft meringues. For thebest results, at least 237 ml (125 g/1 cup) of heavy cream or 3 eggwhites should be whipped at a time.Whipping smaller quantities may notresult in maximum volume.
To assemble:
The egg whip consists of 4 pieces –the egg whip stem, stem cover, whippaddle, and cap.
1. Place the egg-whip stem on thepower shaft. Slowly turn the stemuntil it drops fully onto the shaft.
2. Align the L-shaped notch on thewhip paddle with the small poston the stem cover, and slide thepaddle onto the cover. Turnslightly to lock paddle.
3. Fit the stem cover and paddleover the egg whip stem. Pushdownward to engage the ridgesof the stem with the gears of thepaddle.
4. Fit the egg whip cap over the eggwhip stem. Push downward tolock it into place.
5. Place the work bowl cover on thework bowl with the feed tubejust to the left of the handle.Make sure the center pin of theegg whip fits into the centeropening of the cover. Grasp thefeed tube and turn the cover tothe right to lock it into place.Insert the pusher into the feedtube. The egg whip is now readyto operate.
6. Press the “I” Button and whipingredients to the desired textureand volume. Press the “O” Buttonwhen finished.
To disassemble:
1. Unplug the base from theelectrical outlet. Remove the workbowl cover with a clockwise turn.
2. Lift the egg whip assembly offthe power shaft. Removewhipped ingredients from thework bowl.
3. Pull the cap from the egg whipassembly. Push downward on thestem pin to remove stem fromthe stem cover. Turn the eggwhip paddle to unlock, and slidethe paddle from the stem cover.
Citrus Press Assembly and Use
1. Position and lock the work bowlon the base.
2. Place the strainer basket in thebowl with the locking clip to theleft of the work bowl handle.
3. Turn the basket counter-clockwiseuntil the clip locks into the handle.
Cap
Stem
Whip Paddle
Stem Cover
Eng
lish
11
Preparing the Food Processor for Use4. The 2-piece cone offers two sizes;
choose the right size for the fruityou are juicing. Use the outercone for grapefruit, oranges andother large fruits. Remove theouter cone to reveal a smallerinner cone that’s perfect forlemons and limes.
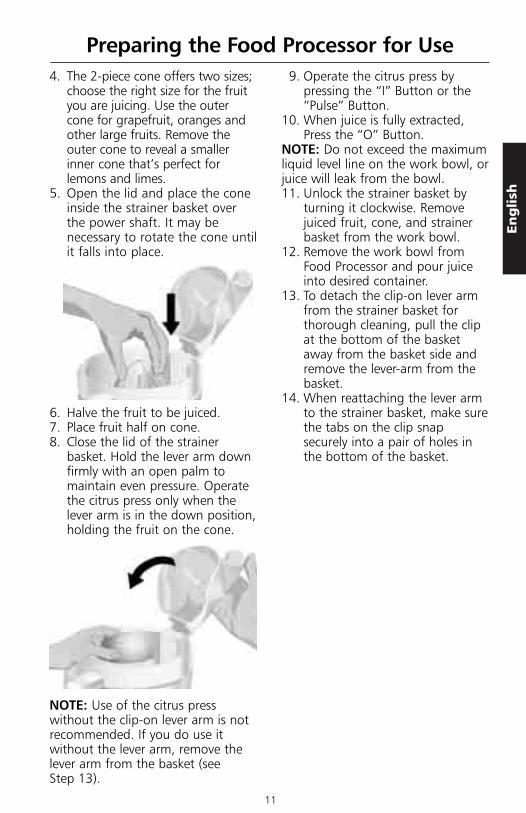
5. Open the lid and place the coneinside the strainer basket over the power shaft. It may benecessary to rotate the cone untilit falls into place.
6. Halve the fruit to be juiced.7. Place fruit half on cone.8. Close the lid of the strainer
basket. Hold the lever arm downfirmly with an open palm tomaintain even pressure. Operatethe citrus press only when thelever arm is in the down position,holding the fruit on the cone.
NOTE: Use of the citrus press without the clip-on lever arm is notrecommended. If you do use itwithout the lever arm, remove thelever arm from the basket (see Step 13).
9. Operate the citrus press bypressing the “I” Button or the“Pulse” Button.
10. When juice is fully extracted,Press the “O” Button.
NOTE: Do not exceed the maximumliquid level line on the work bowl, orjuice will leak from the bowl. 11. Unlock the strainer basket by
turning it clockwise. Removejuiced fruit, cone, and strainerbasket from the work bowl.
12. Remove the work bowl fromFood Processor and pour juiceinto desired container.
13. To detach the clip-on lever armfrom the strainer basket forthorough cleaning, pull the clipat the bottom of the basketaway from the basket side andremove the lever-arm from thebasket.
14. When reattaching the lever armto the strainer basket, make surethe tabs on the clip snapsecurely into a pair of holes inthe bottom of the basket.
Eng
lish
12
Using the Food Processor
Before Use
Before operating the Food Processor,be sure the work bowl, blades, andwork bowl cover are properlyassembled on the Food Processorbase (see “Preparing the FoodProcessor for Use” starting on page 7).
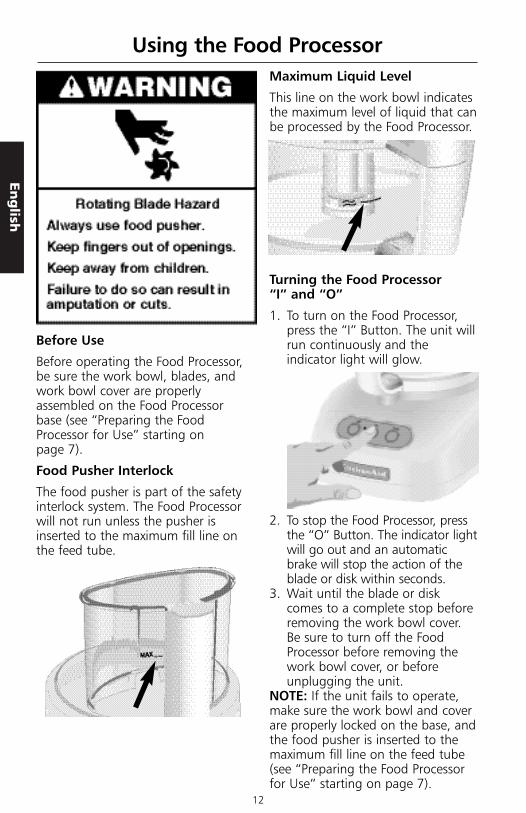
Food Pusher Interlock
The food pusher is part of the safetyinterlock system. The Food Processorwill not run unless the pusher isinserted to the maximum fill line onthe feed tube.
Maximum Liquid Level
This line on the work bowl indicatesthe maximum level of liquid that canbe processed by the Food Processor.
Turning the Food Processor “I” and “O”
1. To turn on the Food Processor,press the “I” Button. The unit willrun continuously and theindicator light will glow.
2. To stop the Food Processor, pressthe “O” Button. The indicator lightwill go out and an automaticbrake will stop the action of theblade or disk within seconds.
3. Wait until the blade or diskcomes to a complete stop beforeremoving the work bowl cover.Be sure to turn off the FoodProcessor before removing thework bowl cover, or beforeunplugging the unit.
NOTE: If the unit fails to operate,make sure the work bowl and coverare properly locked on the base, andthe food pusher is inserted to themaximum fill line on the feed tube(see “Preparing the Food Processorfor Use“ starting on page 7).
Eng
lish
13
Using the Food Processor
Using the Pulse Control
The pulse control allows precisecontrol of the duration and frequencyof processing. It’s great for jobs whichrequire a light touch. Just press andhold the “Pulse” Button to startprocessing, and release it to stop. Theindicator light will glow each timethe “Pulse” Button is pressed.
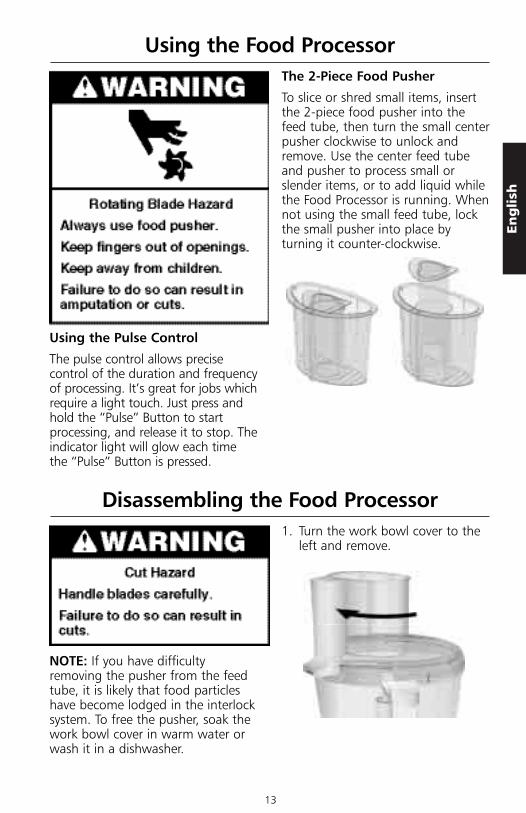
The 2-Piece Food Pusher
To slice or shred small items, insertthe 2-piece food pusher into thefeed tube, then turn the small centerpusher clockwise to unlock andremove. Use the center feed tubeand pusher to process small orslender items, or to add liquid whilethe Food Processor is running. Whennot using the small feed tube, lockthe small pusher into place byturning it counter-clockwise.
Disassembling the Food Processor
NOTE: If you have difficultyremoving the pusher from the feedtube, it is likely that food particleshave become lodged in the interlocksystem. To free the pusher, soak thework bowl cover in warm water orwash it in a dishwasher.
1. Turn the work bowl cover to theleft and remove.
Eng
lish
14
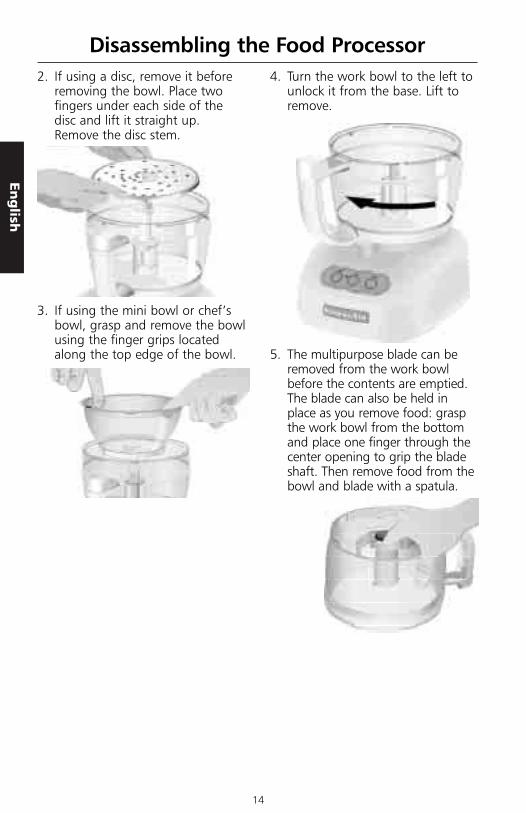
2. If using a disc, remove it beforeremoving the bowl. Place twofingers under each side of thedisc and lift it straight up.Remove the disc stem.
3. If using the mini bowl or chef’sbowl, grasp and remove the bowlusing the finger grips locatedalong the top edge of the bowl.
4. Turn the work bowl to the left tounlock it from the base. Lift toremove.
5. The multipurpose blade can beremoved from the work bowlbefore the contents are emptied.The blade can also be held inplace as you remove food: graspthe work bowl from the bottomand place one finger through thecenter opening to grip the bladeshaft. Then remove food from thebowl and blade with a spatula.
Disassembling the Food Processor
Eng
lish
15
Care and Cleaning
1. Press the “O” Button and unplugthe Food Processor beforecleaning.
2. Wipe the base and cord with awarm, sudsy cloth, and wipeclean with a damp cloth. Drywith a soft cloth. Do not useabrasive cleansers or scouringpads.
3. All the other parts of the FoodProcessor are dishwasher safe. Besure to load them away fromexposed heating elements in thedishwasher. If washing the FoodProcessor parts by hand, avoidthe use of abrasive cleansers orscouring pads. They may scratchor cloud the work bowl andcover. Thoroughly dry all partsafter washing.
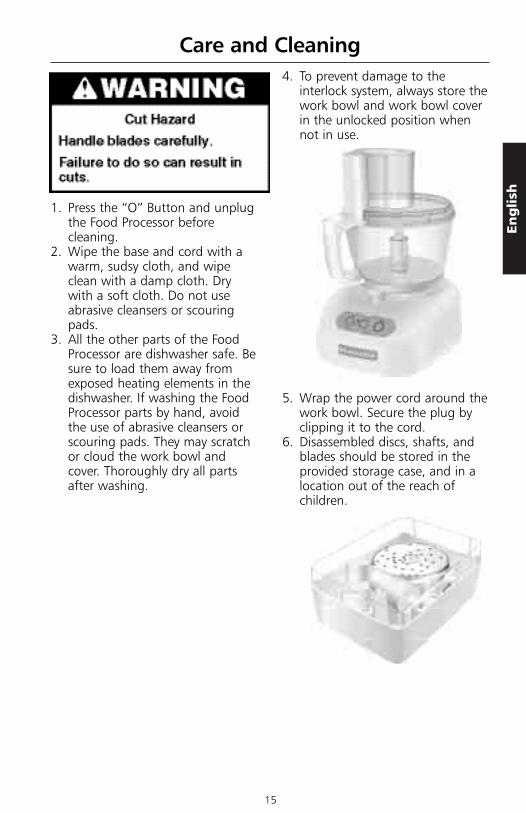
4. To prevent damage to theinterlock system, always store thework bowl and work bowl coverin the unlocked position whennot in use.
5. Wrap the power cord around thework bowl. Secure the plug byclipping it to the cord.
6. Disassembled discs, shafts, andblades should be stored in theprovided storage case, and in alocation out of the reach ofchildren.
Eng
lish
16
Troubleshooting• If your Food Processor should
fail to operate, check thefollowing:
– Make sure the work bowl andwork bowl cover are properlylocked on the base, and the foodpusher is inserted to the maximumfill line on the feed tube.
– See if the power cord is pluggedinto a proper electrical outlet (see “Electrical Requirements” onpage 3). If it is, unplug the FoodProcessor, then plug it into thesame outlet again. If the FoodProcessor still does not work,check the fuse or circuit breaker onthe electrical circuit the FoodProcessor is connected to andmake sure the circuit is closed.
• If the Food Processor shuts offwhile it is running:
– The Food Processor may beoverheated. If the motor exceeds acertain temperature, it willautomatically shut off to preventdamage. This should be anextremely rare occurrence. If ithappens, press the “O” Button andwait 15 minutes for the FoodProcessor to cool before resuming.If the Food Processor still refuses torun, wait an additional 15 minutesfor the Food Processor to cool.
• If you have difficulty removingthe food pusher from the feed tube:
– Food particles are probably lodgedin the interlock system. To free thepusher, soak the work bowl coverin warm water or wash it in adishwasher.
If the problem cannot be correctedwith the steps in this section, see theKitchenAid warranty and after salesservice section on pages 27-28. Donot return the Food Processor to theretailer – they do not provide service.
Eng
lish
17
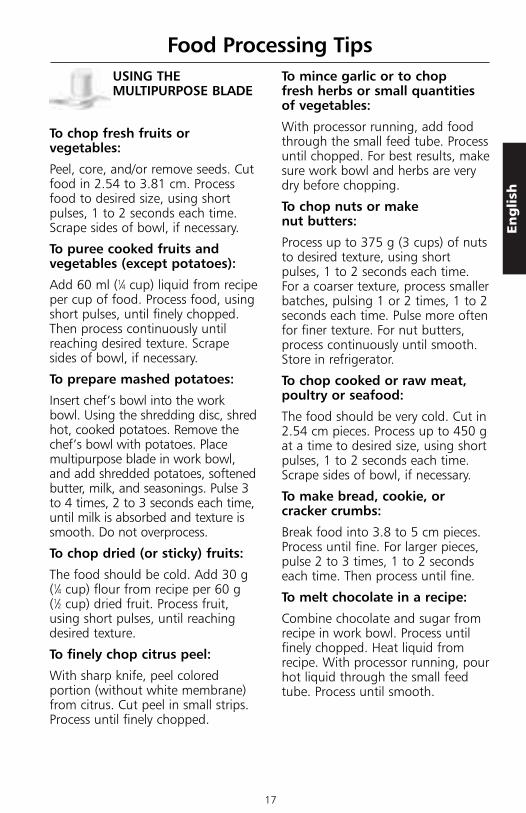
Food Processing TipsUSING THEMULTIPURPOSE BLADE
To chop fresh fruits orvegetables:
Peel, core, and/or remove seeds. Cutfood in 2.54 to 3.81 cm. Processfood to desired size, using shortpulses, 1 to 2 seconds each time.Scrape sides of bowl, if necessary.
To puree cooked fruits andvegetables (except potatoes):
Add 60 ml (1⁄4 cup) liquid from recipeper cup of food. Process food, usingshort pulses, until finely chopped.Then process continuously untilreaching desired texture. Scrapesides of bowl, if necessary.
To prepare mashed potatoes:
Insert chef’s bowl into the workbowl. Using the shredding disc, shredhot, cooked potatoes. Remove thechef’s bowl with potatoes. Placemultipurpose blade in work bowl,and add shredded potatoes, softenedbutter, milk, and seasonings. Pulse 3to 4 times, 2 to 3 seconds each time,until milk is absorbed and texture issmooth. Do not overprocess.
To chop dried (or sticky) fruits:
The food should be cold. Add 30 g (1⁄4 cup) flour from recipe per 60 g (1⁄2 cup) dried fruit. Process fruit,using short pulses, until reachingdesired texture.
To finely chop citrus peel:
With sharp knife, peel coloredportion (without white membrane)from citrus. Cut peel in small strips.Process until finely chopped.
To mince garlic or to chop fresh herbs or small quantities of vegetables:
With processor running, add foodthrough the small feed tube. Processuntil chopped. For best results, makesure work bowl and herbs are verydry before chopping.
To chop nuts or make nut butters:
Process up to 375 g (3 cups) of nutsto desired texture, using shortpulses, 1 to 2 seconds each time.For a coarser texture, process smallerbatches, pulsing 1 or 2 times, 1 to 2seconds each time. Pulse more oftenfor finer texture. For nut butters,process continuously until smooth.Store in refrigerator.
To chop cooked or raw meat,poultry or seafood:
The food should be very cold. Cut in2.54 cm pieces. Process up to 450 gat a time to desired size, using shortpulses, 1 to 2 seconds each time.Scrape sides of bowl, if necessary.
To make bread, cookie, or cracker crumbs:
Break food into 3.8 to 5 cm pieces.Process until fine. For larger pieces,pulse 2 to 3 times, 1 to 2 secondseach time. Then process until fine.
To melt chocolate in a recipe:
Combine chocolate and sugar fromrecipe in work bowl. Process untilfinely chopped. Heat liquid fromrecipe. With processor running, pourhot liquid through the small feedtube. Process until smooth.
Eng
lish
18
Food Processing TipsTo grate hard cheeses, such asParmesan and Pecorino:
Never attempt to process cheesethat cannot be pierced with the tipof a sharp knife. You can use themulti-purpose blade to grate hardcheeses. Cut cheese in 2.54 cmpieces. Place in work bowl. Process,using short pulses, until coarselychopped. Process continuously untilfinely grated. Pieces of cheese canalso added through the small feedtube while the processor is running.
USING A SLICING ORSHREDDING DISC
NOTE: When cutting andpacking food items in the
Ultra Wide Mouth feed tube, do notexceed the maximum fill line. Thiswill permit the pusher to engage theinterlock and the unit to operate.
To cut julienne, or match stick,strips of vegetables and fruits:
Cut food to fit feed tubehorizontally. Position foodhorizontally in feedtube. Process, usingeven pressure to makeplank-like slices. Re-stackslices and positionvertically or horizontallyin feed tube. Process,using even pressure.
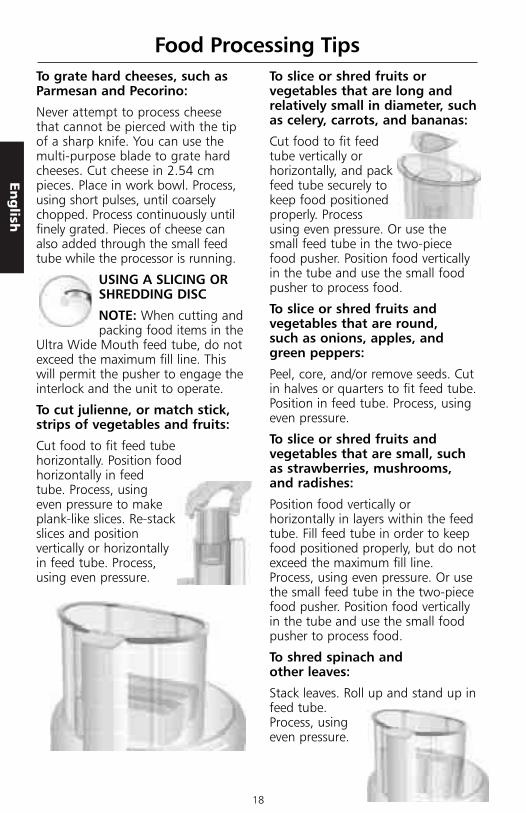
To slice or shred fruits orvegetables that are long andrelatively small in diameter, suchas celery, carrots, and bananas:
Cut food to fit feedtube vertically orhorizontally, and packfeed tube securely tokeep food positionedproperly. Processusing even pressure. Or use thesmall feed tube in the two-piecefood pusher. Position food verticallyin the tube and use the small foodpusher to process food.
To slice or shred fruits andvegetables that are round, such as onions, apples, and green peppers:
Peel, core, and/or remove seeds. Cutin halves or quarters to fit feed tube.Position in feed tube. Process, usingeven pressure.
To slice or shred fruits andvegetables that are small, suchas strawberries, mushrooms,and radishes:
Position food vertically orhorizontally in layers within the feedtube. Fill feed tube in order to keepfood positioned properly, but do notexceed the maximum fill line.Process, using even pressure. Or usethe small feed tube in the two-piecefood pusher. Position food verticallyin the tube and use the small foodpusher to process food.
To shred spinach and other leaves:
Stack leaves. Roll up and stand up infeed tube.Process, usingeven pressure.
Eng
lish
19
Food Processing TipsTo slice uncooked meat orpoultry, such as stir-fry meats:
Cut or roll food to fit feed tube.Wrap and freeze food until hard tothe touch, 30 minutes to 2 hours,depending on thickness of food.Check to be sure you can still piercefood with the tip of a sharp knife. Ifnot, allow to thaw slightly. Process,using even pressure.
To slice cooked meat or poultry,including salami, pepperoni, etc.:
Food should be very cold. Cut inpieces to fit feed tube. Process foodusing firm, even pressure.
To shred firm and soft cheeses:
Firm cheese should be very cold. Forbest results with soft cheeses, such asmozzarella, freeze 10 to 15 minutesbefore processing. Cut to fit feedtube. Process, using even pressure.
USING THE DOUGH BLADE
The dough blade isspecially designed for mixing andkneading yeast dough quickly andthoroughly. For the best results, donot knead recipes which use morethan 250 to 375 g (2-3 cups) offlour.
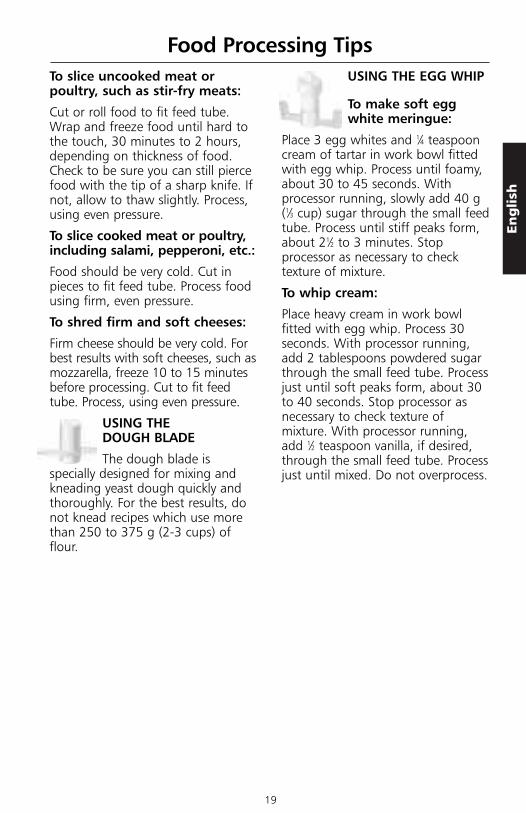
USING THE EGG WHIP
To make soft eggwhite meringue:
Place 3 egg whites and 1⁄4 teaspooncream of tartar in work bowl fittedwith egg whip. Process until foamy,about 30 to 45 seconds. Withprocessor running, slowly add 40 g (1⁄3 cup) sugar through the small feedtube. Process until stiff peaks form,about 21⁄2 to 3 minutes. Stopprocessor as necessary to checktexture of mixture.
To whip cream:
Place heavy cream in work bowlfitted with egg whip. Process 30seconds. With processor running,add 2 tablespoons powdered sugarthrough the small feed tube. Processjust until soft peaks form, about 30to 40 seconds. Stop processor asnecessary to check texture ofmixture. With processor running,add 1⁄2 teaspoon vanilla, if desired,through the small feed tube. Processjust until mixed. Do not overprocess.
Eng
lish
20
Helpful Hints1. When cutting and packing food
items in the Ultra Wide Mouthfeed tube, do not exceed themaximum fill line. This will permitthe pusher to engage theinterlock and the unit to operate.
2. Never process any food that is sohard or firmly frozen that itcannot be pierced with the tip ofa sharp knife. Hard food cancause damage to the blade ormotor. If a piece of hard food,such as carrot, becomes wedgedor stuck on the blade, stop theprocessor and remove the blade.Carefully remove food from theblade.
3. Do not overfill work bowl or minibowl. For thin mixtures, fill workbowl up to 1⁄2 to 2⁄3 full. For thickermixtures, fill work bowl up to 3⁄4 full. For liquids, fill up to themaximum level as described onpage 12. When chopping, thework bowl should be no morethan 1⁄3 to 1⁄2 full. Use the minibowl for up to 237 ml (1 cup) ofliquid or 63 g (1⁄2 cup) solids.
4. Position slicing discs so the cuttingsurface is just to the right of thefeed tube. This allows the blade afull rotation before contacting the food.
5. To capitalize on the speed of theprocessor, drop ingredients to bechopped through the small feedtube while the processor isrunning.
6. Different foods require varyingdegrees of pressure for bestshredding and slicing results. Ingeneral, use light pressure forsoft, delicate foods (strawberries,tomatoes, etc.), moderatepressure for medium foods(zucchini, potatoes, etc.), andfirmer pressure for harder foods(carrots, apples, hard cheeses,partially frozen meats, etc.).
7. Soft and medium-hard cheesemay spread out or roll up on theshredding disc. To avoid this,shred only well-chilled cheese.
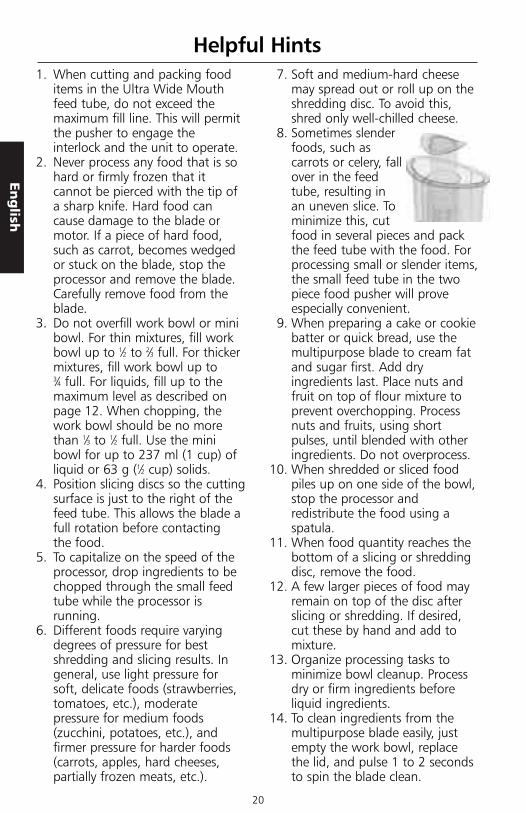
8. Sometimes slenderfoods, such ascarrots or celery, fallover in the feedtube, resulting inan uneven slice. Tominimize this, cutfood in several pieces and packthe feed tube with the food. Forprocessing small or slender items,the small feed tube in the twopiece food pusher will proveespecially convenient.
9. When preparing a cake or cookiebatter or quick bread, use themultipurpose blade to cream fatand sugar first. Add dryingredients last. Place nuts andfruit on top of flour mixture toprevent overchopping. Processnuts and fruits, using shortpulses, until blended with otheringredients. Do not overprocess.
10. When shredded or sliced foodpiles up on one side of the bowl,stop the processor andredistribute the food using aspatula.
11. When food quantity reaches thebottom of a slicing or shreddingdisc, remove the food.
12. A few larger pieces of food mayremain on top of the disc afterslicing or shredding. If desired,cut these by hand and add tomixture.
13. Organize processing tasks tominimize bowl cleanup. Processdry or firm ingredients beforeliquid ingredients.
14. To clean ingredients from themultipurpose blade easily, justempty the work bowl, replacethe lid, and pulse 1 to 2 secondsto spin the blade clean.
Eng
lish
21
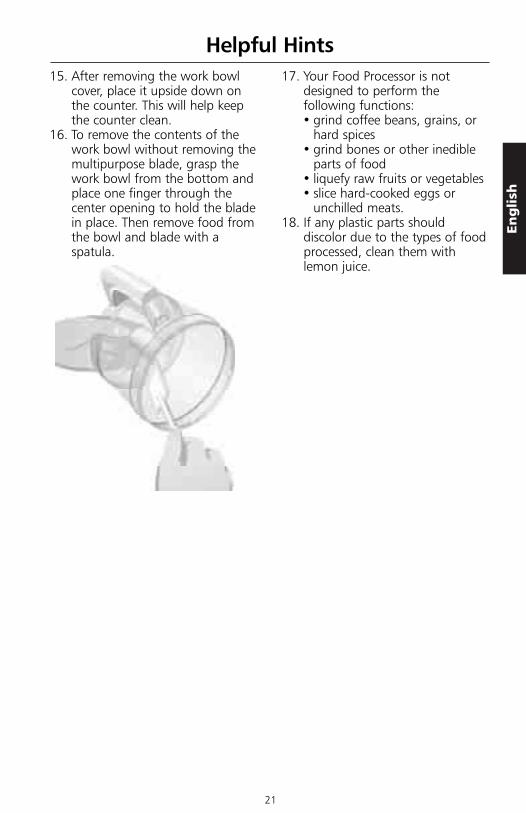
Helpful Hints15. After removing the work bowl
cover, place it upside down onthe counter. This will help keepthe counter clean.
16. To remove the contents of thework bowl without removing themultipurpose blade, grasp thework bowl from the bottom andplace one finger through thecenter opening to hold the bladein place. Then remove food fromthe bowl and blade with aspatula.
17. Your Food Processor is notdesigned to perform thefollowing functions: • grind coffee beans, grains, or
hard spices• grind bones or other inedible
parts of food• liquefy raw fruits or vegetables• slice hard-cooked eggs or
unchilled meats. 18. If any plastic parts should
discolor due to the types of foodprocessed, clean them withlemon juice.

Eng
lish
22
White Balsamic Vinaigrette1 tablespoon fresh
basil leaves1 tablespoon fresh
oregano leaves1 clove garlic 3 tablespoons white
balsamic vinegar*3 tablespoons white
wine vinegar*1⁄2 teaspoon salt1⁄4 teaspoon dry
mustard1⁄8 teaspoon ground red
pepper180 ml (3⁄4 cup) extra
virgin olive oil
Position mini bowl and mini blade in work bowl.With processor running, add basil, oregano, andgarlic through the small feed tube. Process untilchopped, 5 to 8 seconds. Scrape sides of bowl.With processor running, add balsamic vinegar,wine vinegar, salt, mustard, and red pepper.Process until mixed, about 5 seconds. Withprocessor running, slowly drizzle oil through thesmall feed tube. Process until smooth and thick.Serve with green salads.
Yield: 8 servings (2 tablespoons per serving).
*Three tablespoons each of dark balsamic vinegarand red wine vinegar may be substituted.
Per Serving: about 190 cal.
Eng
lish
23
Cheddar Broccoli Soup230 g sharp Cheddar
cheese, chilled 1 small onion, cut into
halves lengthwise1 rib celery, cut into
6 cm pieces2 tablespoons butter
or margarine1 large head (about
450 g) broccoli700 ml (3 cups) chicken
broth475 ml (2 cups) milk,
divided30 g (1⁄4 cups)
all-purpose flour2 teaspoons Dijon
mustard1 teaspoon curry
powder, if desired1⁄8 teaspoon hot pepper
sauce
Position 4 mm shredding disc in work bowl. Addcheese. Process to shred. Remove and set aside.
Exchange shredding disc for 2 mm slicing disc inwork bowl. Add onion and celery. Process to slice.Melt butter in large saucepan or Dutch oven overmedium heat. Remove onion and celery tosaucepan. Cook 2 to 3 minutes, or until crisp-tender, stirring occasionally.
Cut stems from broccoli, and peel tough coatingfrom stems. Cut florets into small pieces. Position 2 mm slicing disc in work bowl. Add broccolistems. Process to slice. Remove to saucepan.
Add broccoli florets and broth to saucepan. Bringto a boil over medium-high heat. Reduce heat;partially cover and simmer 6 to 10 minutes, oruntil broccoli is crisp-tender, stirring occasionally.Remove from heat.
Exchange slicing disc for multipurpose blade inwork bowl. With slotted spoon, removevegetables from saucepan to work bowl. Add 178 ml (3⁄4 cup) milk. Process until chopped, 5 to8 seconds. Set aside.
In medium mixing bowl, whisk flour intoremaining 300 ml (11⁄4 cups) milk, whisking untilsmooth. Add mustard, curry powder, if desired,and pepper sauce. Stir until combined.
Add milk mixture to broth in saucepan. Cook andstir over medium-high heat until bubbly andslightly thickened. Reduce heat to low. Add all but30 g (1⁄4 cup) shredded cheese; stir until melted.
Add broccoli mixture to saucepan. Heatthoroughly. Garnish with remaining remaining 30 g (1⁄4 cup) cheese.
Yield: 7 servings (237 ml/1 cup per serving).
Per Serving: About 250 cal.
Eng
lish
24
Spring Mix Basmati Rice1 clove garlic1 medium shallot, cut
into quarters1 tablespoon olive oil1⁄4 pound (about 125 g)
fresh green beans,trimmed
1 small carrot, peeledand cut into halvescrosswise
356 ml (11⁄2 cups) chickenbroth
237 ml (1 cup) water1 teaspoon salt1⁄4 teaspoon black
pepper1 teaspoon ground
coriander, if desired170 g (11⁄3 cups) rice227 g (1⁄2 pound) fresh
asparagus2 teaspoons fresh
thyme leaves2 tablespoons loosely
packed fresh parsleyleaves
1⁄4 small red bellpepper, cut intoquarters
Position multipurpose blade in work bowl. Withprocessor running, add garlic through the smallfeed tube. Process 5 seconds. Add shallot. Pulse 2 to 3 times, about 2 seconds each time, or untilchopped. In large saucepan over medium heat,heat oil. Add shallot mixture. Cook until tender, 1 to 2 minutes, stirring often. Remove from heat; set aside.
Exchange multipurpose blade for 2 mm slicingdisc in work bowl. Add green beans and carrot.Process to slice. Remove to saucepan with shallotmixture. Add broth, water, salt, black pepper, andcoriander, if desired. Bring to a boil. Stir in rice.Return to boil; reduce heat. Cover, simmer about15 minutes, or until liquid is absorbed.
Meanwhile, cut tips from asparagus and reservestalks; set aside. Exchange slicing disc formultipurpose blade in work bowl. With processorrunning, add thyme and parsley through thesmall feed tube. Process until chopped, about 3 seconds. Add bell pepper. Pulse 2 to 3 times, 1 to 2 seconds each time, or until coarselychopped. Exchange multipurpose blade for 2 mmslicing disc in work bowl. Add asparagus stalks.Process to slice. Remove to saucepan with ricemixture. Add asparagus tips; stir well.
Cover; let stand 10 minutes. Fluff with a fork.
Yield: 6 servings (125 g/1 cup per serving).
Per Serving: About 200 cal.
Eng
lish
25
Chicken Satay with Peanut SauceChicken
2 cloves garlic1 teaspoon coarsely
chopped gingerroot60 ml (1⁄4 cups) soy sauce2 tablespoons peanut
or vegetable oil2 teaspoons brown
sugar455 - 570 g (1-11⁄4 pounds)
chicken breasttenders
Sauce80 ml (1⁄3 cup) coconut
milk30 g (1⁄4 cup) peanut
butter2 tablespoons soy
sauce1⁄2 teaspoon red curry
paste
Position multipurpose blade in work bowl. Withprocessor running, add garlic and gingerrootthrough the small feed tube. Process untilchopped, 5 to 10 seconds. Add soy sauce, oil,and brown sugar. Process until blended and sugardissolves, 15 to 20 seconds. Remove to plasticresealable food storage bag or shallow pan.
Add chicken; coat with marinade. Marinate 1⁄2 hour at room temperature or at least 2 hours inrefrigerator. Remove chicken from marinade,reserving marinade.
Thread chicken tenders on soaked wooden oroiled metal skewers. Grill over medium-hot coalsor broil on oiled broiler pan 10 to 15 cm fromheat for 8 to 10 minutes, or until thoroughlycooked, turning once. Brush with any remainingmarinade once during cooking, if desired. Servewith warm or room temperature Peanut Sauce.
Position multipurpose blade in work bowl. Add allingredients. Process until blended, 5 to 10seconds.
Yield: 4 servings.
Per Serving: About 290 cal.
Eng
lish
26
Fresh Fruit TartCrust125 g (1 cup) all-purpose
flour2 teaspoons sugar1⁄4 teaspoon salt
30 g (1⁄4 cup) cold butter,cut into 2.5 cmpieces
1 tablespoon coldshortening
1 egg yolk2 tablespoons ice
water1 teaspoon lemon
juice1 egg, blended with
1 tablespoon water
Filling30 g (1⁄4 cup) sugar1 tablespoon
cornstarch1⁄8 teaspoon salt
180 ml (3⁄4 cup) half-and-half
2 egg yolks, beaten1⁄2 teaspoon vanilla
Topping1 medium peach,
peeled, cut intohalves, and pitremoved
125 g (1 cup) freshstrawberries, hulled
2 tablespoons applejelly, melted
Position multipurpose blade in work bowl. Addflour, sugar, and salt. Process until mixed, about 2 seconds. Add butter and shortening. Pulse 3 to 4 times, 2 to 3 seconds each time, or untilcrumbly. In small bowl, blend 1 egg yolk, 2 tablespoons water, and lemon juice. Sprinkleevenly over flour mixture. Pulse 2 to 4 times, 2 to3 seconds each time, or until mixture pulls awayfrom sides of bowl and clings together. Removedough, cover, and chill 1⁄2 hour.
Meanwhile, in small saucepan over medium heat,combine sugar, cornstarch, and salt. Add half-and-half and 2 egg yolks. Cook and stir until verythick. Remove from heat. Add vanilla. Whisk untilsmooth. Cool completely.
Place dough on floured surface. Roll into a circle5 cm larger than inverted 25 cm tart pan. Fit intotart pan, being careful not to stretch dough. Trimedges of crust. Prick shell thoroughly with fork.Bake at 200°C for 8 to 12 minutes, or until lightgolden brown. Brush with egg and water mixtureto seal holes. Bake for 1 minute longer to set egg.Cool completely.
Wash processor. Position 2 mm slicing disc inwork bowl. Add peach. Process to slice. Removeand set aside. Position 2 mm slicing disc in workbowl. Add strawberries. Process to slice.
Spread custard mixture in crust. Arrange slicedfruit on custard. Carefully brush with melted jellyto cover fruit completely. Refrigerate at least 1 hour before serving.
Yield: 8 servings.
Tip: Tart is best served the same day it is made.
Per Serving: About 230 cal.

Eng
lish
27
Length of Warranty:
Europe:Three Years FullWarranty from date ofpurchase.
Other:One Year Full Warrantyfrom date of purchase.
KitchenAid Will Pay For:
Replacement parts andrepair labor costs tocorrect defects inmaterials orworkmanship. Servicemust be provided by anAuthorized KitchenAidService Center
KitchenAid Will Not Pay For:
A. Repairs when FoodProcessor is usedfor operationsother than normalhousehold foodpreparation.
B. Damage resultingfrom accident,alterations, misuse,abuse, orinstallation/operation not inaccordance withlocal electricalcodes.
KITCHENAID DOES NOT ASSUME ANY RESPONSIBILITY FOR INDIRECT DAMAGES.
Household KitchenAid®
Food Processor Warranty
Service CentersAll service should be handled locallyby an Authorized KitchenAid ServiceCenter. Contact the dealer fromwhom the unit was purchased toobtain the name of the nearestAuthorized KitchenAid Service Center.
In the U.K.:Call: 0845 6011 287In Ireland:M.X. ELECTRICService Department25 Alymer CrescentKilcock, CO.KILDARE
Call: 1 679 2398/87 2581574
Fax: 1 628 4368
In Australia:Call: 1800 990 990
In New Zealand:Call: 0800 881 200

Eng
lish
28
FOR THE WAY IT’S MADE.™
® Registered Trademark/™ Trademark of KitchenAid, U.S.A.© 2005. All rights reserved.
Specifications subject to change without notice.
(4511dZw105)
™
Customer ServiceIn U.K. & Ireland: Tollfree number 00800 38104026
Address: KitchenAid Europa, Inc.PO BOX 19B-2018 ANTWERP 11BELGIUM
www.KitchenAid.com