fixed assets user guide - uconn health
TRANSCRIPT

Fixed Assets
User Guide

Copyright (c) 2001 Jenzabar, Inc. All rights reserved. You may print any part or the whole of this documentation to support installations of Jenzabar software. Where the documentation is available in an electronic format such as PDF or online help, you may store copies with your Jenzabar software. You may also modify the documentation to reflect your institution's usage and standards. Permission to print, store, or modify copies in no way affects ownership of the documentation; however, Jenzabar, Inc. assumes no responsibility for any changes you make. Filename: ugfixast Distribution date: 08/10/2001 Contact us at www.jenzabar.com
Jenzabar CX and QuickMate are trademarks of Jenzabar, Inc. INFORMIX, PERFORM, and ACE are registered trademarks of the IBM Corporation Impromptu, PowerPlay, Scenario, and Cognos are registered trademarks of the Cognos Corporation UNIX is a registered trademark in the USA and other countries, licensed exclusively through X/Open Company Limited Windows is a registered trademark of the Microsoft Corporation All other brand and product names are trademarks of their respective companies

i
JENZABAR, INC. FIXED ASSETS USER GUIDE
TABLE OF CONTENTS
SECTION 1 - GETTING STARTED.............................................................................................................. 1 Overview..................................................................................................................................................... 1
Introduction............................................................................................................................................. 1 Purpose .................................................................................................................................................. 1 Intended Audience.................................................................................................................................. 1 Learning Objectives................................................................................................................................ 1 How to Use This Guide........................................................................................................................... 1 Structure of Jenzabar Guides................................................................................................................. 1
Before You Begin Fixed Assets.................................................................................................................. 2 Introduction............................................................................................................................................. 2 Fixed Asset Terminology ........................................................................................................................ 2 Purpose of Fixed Assets......................................................................................................................... 2 Prerequisite Tasks.................................................................................................................................. 2 Background Knowledge.......................................................................................................................... 3 Accounts to Use With the Fixed Assets Module .................................................................................... 3 Depreciation Methods............................................................................................................................. 4 Fixed Asset Reports ............................................................................................................................... 4 Fixed Asset Process............................................................................................................................... 4
Conventions Used in This Guide................................................................................................................ 5 Introduction............................................................................................................................................. 5 Style conventions ................................................................................................................................... 5 JENZABAR-Specific Terms.................................................................................................................... 5 Keystrokes.............................................................................................................................................. 6 Capitalized words ................................................................................................................................... 6
SECTION 2 - USING FIXED ASSET SCREENS ......................................................................................... 7 Overview..................................................................................................................................................... 7
Introduction............................................................................................................................................. 7 Screen Differences ................................................................................................................................. 7 Commands in This Section..................................................................................................................... 7
Asset Screens ............................................................................................................................................ 8 Purpose .................................................................................................................................................. 8 How to Access........................................................................................................................................ 8 Records on the Screens......................................................................................................................... 8 Screen Example (Screen 1) ................................................................................................................... 8 Screen Fields (screen 1) ........................................................................................................................ 9 Screen Example (Screen 2) ................................................................................................................. 10 Screen Fields (Screen 2)...................................................................................................................... 10 Screen Example ................................................................................................................................... 12 Screen Fields........................................................................................................................................ 12 Screen Commands............................................................................................................................... 13
SECTION 3 - ADDING OR UPDATING FIXED ASSET INFORMATION.................................................. 15 Overview................................................................................................................................................... 15
Introduction........................................................................................................................................... 15 Before You Begin ................................................................................................................................. 15
Adding Fixed Asset Information ............................................................................................................... 16 How to Add Fixed Asset Information .................................................................................................... 16
Updating Fixed Asset Information ............................................................................................................ 17

ii
How to Update Fixed Asset Information............................................................................................... 17 SECTION 4 - DISPOSING OF FIXED ASSETS......................................................................................... 19
Overview................................................................................................................................................... 19 Introduction........................................................................................................................................... 19 Before You Begin ................................................................................................................................. 19 The Process ......................................................................................................................................... 19
Adding Disposal Information .................................................................................................................... 20 How to Add Disposal Information ......................................................................................................... 20
SECTION 5 - VERIFYING AND POSTING FIXED ASSETS ..................................................................... 21 Overview................................................................................................................................................... 21
Introduction........................................................................................................................................... 21 Before You Begin ................................................................................................................................. 21 The Process ......................................................................................................................................... 21
Verifying Fixed Asset Information............................................................................................................. 22 How to Verify Fixed Asset Information ................................................................................................. 22 Results of the Verification Process....................................................................................................... 22
Posting Fixed Asset Information............................................................................................................... 24 How to Post Fixed Asset Information ................................................................................................... 24 Results of the Posting Process ............................................................................................................ 24
SECTION 6 - RESPONDING TO SYSTEM MESSAGES .......................................................................... 27 Overview................................................................................................................................................... 27
Introduction........................................................................................................................................... 27 Four Types of Messages...................................................................................................................... 27 Descriptions of Message Types ........................................................................................................... 27 Electronic Mail Messages..................................................................................................................... 28
Warning and Error Messages................................................................................................................... 28 Messages you might receive................................................................................................................ 28
INDEX ......................................................................................................................................................... 31
Fixed Assets 1 Getting Started
SECTION 1 - GETTING STARTED
Overview
Introduction
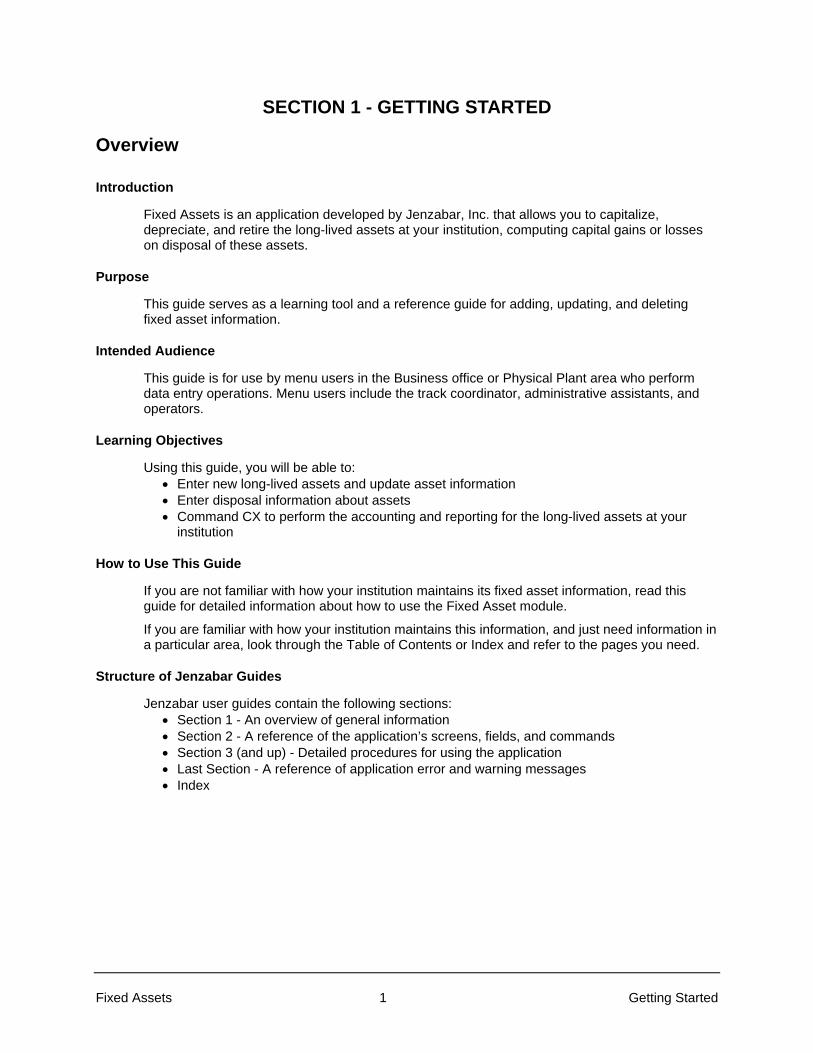
Fixed Assets is an application developed by Jenzabar, Inc. that allows you to capitalize, depreciate, and retire the long-lived assets at your institution, computing capital gains or losses on disposal of these assets.
Purpose
This guide serves as a learning tool and a reference guide for adding, updating, and deleting fixed asset information.
Intended Audience
This guide is for use by menu users in the Business office or Physical Plant area who perform data entry operations. Menu users include the track coordinator, administrative assistants, and operators.
Learning Objectives
Using this guide, you will be able to: • Enter new long-lived assets and update asset information • Enter disposal information about assets • Command CX to perform the accounting and reporting for the long-lived assets at your
institution
How to Use This Guide
If you are not familiar with how your institution maintains its fixed asset information, read this guide for detailed information about how to use the Fixed Asset module.
If you are familiar with how your institution maintains this information, and just need information in a particular area, look through the Table of Contents or Index and refer to the pages you need.
Structure of Jenzabar Guides
Jenzabar user guides contain the following sections: • Section 1 - An overview of general information • Section 2 - A reference of the application’s screens, fields, and commands • Section 3 (and up) - Detailed procedures for using the application • Last Section - A reference of application error and warning messages • Index

Getting Started 2 Fixed Assets
Before You Begin Fixed Assets
Introduction
This section provides the following: • A description of the Fixed Asset module • Terminology used with fixed assets • A summary of the Fixed Asset process • A checklist of information you need to know and tasks you need to perform before using
Fixed Assets • Background knowledge you must possess to use Fixed Assets
Fixed Asset Terminology
Fixed assets are the assets that your institution uses to provide services to students. The assets are expected to have a useful life that exceeds one accounting period. Common examples of fixed assets are land, classroom buildings, vehicles, and furniture.
Other names for fixed assets include the following: • Capital assets • Capitalized assets • Long-lived assets
For more information about fixed asset terminology, see Jenzabar’s Master Glossary.
Purpose of Fixed Assets
The primary purpose of Fixed Assets is to enable you to track the long-lived assets at your institution, including acquisition, capitalization, depreciation, and disposal.
Prerequisite Tasks
Jenzabar emphasizes that you use the following checklist to ensure that you have reviewed all required tasks before you begin using Fixed Assets.
• Identify the account numbers that your institution uses for recording the following: − fixed assets (asset account) − fixed assets (source account) − depreciation expense − accumulated depreciation − gains and losses on disposal of fixed assets
• Identify the types of assets that you record as fixed assets • Identify the types of assets that you want to summarize in a single account
CAUTION: Once you begin to summarize assets in a single account, you cannot report the separate dollar values of the assets.
• Determine the depreciation method that you want to use for each asset type

Fixed Assets 3 Getting Started
Background Knowledge
The following describes the necessary background information that you should know.
Jenzabar CX Know how to use the following:
• CX menu system • CX screens’ command lines, ring menus, and comment lines • CX universal commands, including:
− Help − ID-type − Query − Scroll − Table Lookup
Authorized personnel Know answers to the following questions:
• Who is authorized to enter fixed asset information? • Who is authorized to access online fixed asset information?
Important dates Know when the following occur:
• Processing of month-end reports • Processing of year-end reports
Fixed asset policies and procedures Know answers to the following questions:
• How does your institution obtain fixed assets? • Which office at your institution is in charge of handling fixed assets? • What depreciation method(s) does your institution use? • Does your institution use the same depreciation method for different types of
assets?
Accounts to Use With the Fixed Assets Module
You can associate any number of fixed asset types with a specific general ledger account. For example, you can use the same asset account and accumulated depreciation account for equipment and electronics, but charge the depreciation expense to different accounts. You define the capitalization account, the accumulated depreciation account, and the depreciation expense account in the Fixed Asset table. You define these values during your implementation of the Fixed Assets module.
You enter the source account (e.g., cash, gift, or accounts payable) in the Fixed Asset record every time you add an asset. Lastly, you define the account for recording capital gains and losses in a macro. For more information about the capital gain and loss macro, see Implementation Process Checksheet: Fixed Assets.

Getting Started 4 Fixed Assets
Depreciation Methods
The Fixed Assets module supports the following depreciation methods. A macro file contains the valid values and codes, and when you set up the module, you use the same codes in the Fixed Asset table.
The module can calculate half-month depreciation in the month of acquisition for the straight line method.
• STRAIGHT_LINE SL • DECLINE_200 D200 • DECLINE_150 D150 • DECLINE_125 D125 • ACRS_3 AC3 • ACRS_5 AC5 • ACRS_10 AC10 • ACRS_15 AC15 • ACRS_18 AC18 • ACRS_19 AC19 • MACRS_3 A3 • MACRS_5 MA5 • MACRS_7 MA7 • MACRS_10 MA10 • MACRS_15 MA15 • MACRS_20 MA20 • MACRS_REAL MANP • MACRS_RENTAL MARP
Fixed Asset Reports
The Fixed Asset module contains reports to support its various functions. For example, you can produce lists of assets by location, or detail information about depreciation.
You can access and run reports from CX menus to which they relate. For example, table reports appear on the Table Maintenance menu, and a variety of reports appears on the Fixed Assets: Reports menu.
The initial screen that appears when you select a report prompts you to enter required parameters for producing it. For example, to produce the Asset Acquisition Report, you enter a beginning and an ending date.
Jenzabar also provides two report writers that you can use to produce customized reports for your institution. ACE can help you display and format the information you need for both formal and ad hoc reporting.
Fixed Asset Process
The following describes the overall process involved in using the Fixed Asset module.
Note: The process shown below is an example and is not intended as policy guidance. Your institution's fixed asset processes may vary.
1. Record the acquisition of a long-lived asset.
2. Record the depreciation of the long-lived asset.
3. Record the disposal of the long-lived asset.

Fixed Assets 5 Getting Started
Conventions Used in This Guide
Introduction
Jenzabar has established a set of conventions to help you use this guide. The conventions presented below are not exhaustive, but they include the more frequently-used styles and terms.
Style conventions
Jenzabar guides observe the following style conventions.
Note: Indicates a note, tip, hint, or additional information.
<Enter> Represents the Enter, Return, Line Feed, or ↵ key on your keyboard.
<Key name> Represents a key that you must press.
Boldface type Represents text that you type into the system (e.g., "Type UNDG") and command names or keys you use to execute a command or function (e.g., Finish).
Bulleted list Show items not ranked or without a sequential performance.
CAUTION: Indicates a caution or warning of a potential risk or condition.
Italic type Is used in any of these ways:
• To represent a new or key term • To add emphasis to a word • To cross-reference a section of text • To represent a variable for which you substitute another variable (e.g., substitute
filename with an appropriate filename)
Numbered lists Show ranking of items or sequence of performance.
"Quotation marks" Represent information written in this guide exactly as it appears on the screen (e.g., The message, "Now Running..." appears.).
JENZABAR-Specific Terms
The following table identifies term conventions used in this guide.
Application A group of one or more software programs that enables you to perform a particular procedure, such as entering fixed asset information.
Data Specific information you enter into fields on a particular data entry screen.
Enter To type information on a keyboard and press the <Enter> key.

Getting Started 6 Fixed Assets
F key Any of the function keys located on your keyboard (e.g., <F1>).
Hot key The capitalized and highlighted letter of a command on a ring menu.
ID The number assigned to each student or organization associated with your institution (e.g., 12345).
Institution An established organization of postsecondary education that supports all operating functions (e.g., a college or university).
Parameter A variable in the system that is given a constant value for a specific application (e.g., a date can be a parameter for producing a report).
Select To execute a command by performing the keystrokes, pressing the hot key, or highlighting the command or option and pressing the <Enter> key.
System The CX product and release that your institution currently uses.
Type To press keys on a keyboard for text or characters to appear in a specific position on the screen. To execute a command or function, you must also press the <Enter> key.
Keystrokes
When you see two keys separated by a dash (e.g., <Ctrl-c>), hold down the first key (Ctrl) while pressing the second (c).
Capitalized words
The first letter of each word in a command, option, field name, or menu or screen title is capitalized in Jenzabar guides to set those terms apart from regular text.

Fixed Assets 7 Screens
SECTION 2 - USING FIXED ASSET SCREENS
Overview
Introduction
The purpose of this section is to show the screen displays that you use in Fixed Assets, and to provide explanations for each of the fields. This section also provides a quick reference of the commands and options you use to perform procedures in Fixed Assets.
Refer to this section when you have questions about a specific field, command, or when you are adding or updating your institution’s fixed asset information.
Screen Differences
The screen displays in this section represent those contained in the CX standard product. If your institution changes them to meet its specific needs, then your titles and field names will look different from those shown in this section.
Commands in This Section
The command lines on the CX screens can change, depending on procedures you perform or commands you have previously selected. For example, Query mode and Update mode display different commands. This guide describes all the commands associated with a screen. Remember that you can use a specific command only when it appears on the current command line.

Screens 8 Fixed Assets
Asset Screens
Purpose
The Asset screens enable you to enter descriptive information about all the fixed assets at your institution, in the following categories:
• Asset Information • Asset Valuation • Authorization • Maintenance Information
You enter and view the various categories of information on three related screens.
How to Access
Access the first Asset screen by selecting Enter Assets from the Fiscal Management: Fixed Assets Main menu. Access the second and third screens by selecting Screen from the first screen. You can move among the screens by pressing Screen until the display you want appears.
Records on the Screens
The first and second Asset screens contain information from the Fixed Asset record (fix_rec). The third Asset screen contains information from both the Fixed Asset record, and the Fixed Asset Maintenance record (fixmaint_rec).
Screen Example (Screen 1)
Following is an example of the first Asset screen.
PERFORM: Query Next Previous View Add Update Remove Table Screen ... Searches the active database table. ** 1: fix_rec table** ================================================================================ ASSET INFORMATION Asset Type....[ ] Asset Number.[0 ] Description...[ ] Quantity....[ ] Location......[ ] Campus........[ ] Status......[ ] Building......[ ] Donated.....[ ] Room..........[ ] Leased......[ ] Condition.....[ ] Loan........[ ] Model.........[ ] Hold Title..[ ] Serial Number.[ ] Salvage.....[ ] Tag Number....[ ] Warranty Expiration Date.....[ ]

Fixed Assets 9 Screens
Screen Fields (screen 1)
The following describes the fields that appear on the first Asset screen.
Asset Number A sequence number that identifies the asset and links the asset to its related maintenance records.
Note: This field is system-generated.
Asset type A code that defines the type of asset, e.g., FURN for furniture or EQUIP for equipment.
Note: The value in this field is required, and must be valid in your institution’s Fixed Asset table.
Building A four-character field that names the building where the asset resides. The code can link to the Building table or the Facility table if desired, or it can contain any four-character value. If the code appears in the Building table, the name of the building will appear next to the code.
Campus A four-character field that names the campus where the asset resides. The code can link to the Building table or the Facility table if desired, or it can contain any four-character value.
Condition A four-character field that describes the condition of the asset, e.g., NEW, USED, FAIR.
Description A 24-character field that describes the asset.
Donated Y (yes) or N (no) indicating whether the asset was donated to the institution.
Hold Title Y (yes) or N (no) indicating whether the institution holds the title to the asset.
Leased Y (yes) or N (no) indicating whether the institution leases the asset.
Loan Y (yes) or N (no) indicating whether the institution borrowed the asset, or acquired the asset with borrowed money.
Location A 24-character field that describes the location of the asset.
Model A ten-character free-format field that contains the model number or description of the asset.
Quantity A four-character field that indicates how many of the assets exist on the campus.
Room A four-character field that names the room where the asset resides. The code can link to the Facility table if desired, or it can contain any four-character value.
Salvage Y (yes) or N (no) indicating whether the asset has been salvaged.
Note: The Fixed Asset program updates this field when an asset is fully depreciated, and when you post a salvage value to the General Ledger. You cannot change this field on the Asset screen.

Screens 10 Fixed Assets
Serial Number A ten-character free-format field that contains the serial number or description of the asset.
Status A one-character free-format code that the institution defines and uses as desired.
Tag Number A ten-character free-format field that contains a user-defined number for the asset.
Warranty Expiration Date The date on which the warranty for the asset expires, in the format mm/dd/yyyy.
Screen Example (Screen 2)
Following is an example of the second Asset screen.
PERFORM: Query Next Previous View Add Update Remove Table Screen ... Shows the next page of the form. ** 1: fix_rec table** ================================================================================ ASSET VALUATION Purchase Order No.[ ] Capitalized....[ ] Acquisition Cost..[ $0.00] Date Acquired..[ ] Accumulated Depr..[ $0.00] Date For Depr..[ ] Book Value........[ $0.00] Date Last Upd..[ ] Disposal Proceeds.[ $0.00] Disposal Date..[ ] Salvage Value.....[ $0.00] Expected Life..[ ] Replacement Cost..[ $0.00] Summarized.....[ ] Fund...............[ ] Function...........[ ] Object.............[ ] Subfund............[ ]
Screen Fields (Screen 2)
The following describes the fields that appear on the second Asset screen.
Accumulated Depr The total depreciation already charged for the asset, e.g., if the van depreciated at a straight line rate of $5000 per year, after the second year, Accumulated Depreciation is $10000. The Acquisition Cost, less Accumulated Depreciation, is the book value of the asset.
Note: This field is display only.
Acquisition Cost The purchase price of the asset, or (if donated) the fair market value of the asset, e.g., a van that costs $20,000.
• The value in this field, less the Salvage Value, is the depreciation base. • This field is required.
Book Value The Acquisition Cost (e.g., $20000), less Accumulated Depreciation, (e.g., $10000).
Note: This field is display only.

Fixed Assets 11 Screens
Capitalized Y (yes) or N (no) indicating whether the CX Capitalization program has made capitalization entries for the asset.
Note: If you are converting to the CX Fixed Asset module from another fixed asset system, set this value to Y. Otherwise, set the value to N. CX automatically updates this field when it processes the information on the Asset screens.
Date Acquired The date on which the institution took title or physical ownership of the asset.
Date for Depr The date on which you want to begin depreciating the asset, in the format mm/dd/yyyy. The system will depreciate the asset for a full month for the month in this date field. For example, if the date in this field is 4/15/95, the system will record one full month’s depreciation for April, 1995.
Date Last Upd The last date that the Fixed Asset module processed the records for the asset.
Note: This field is display only.
Disposal Date The date on which the institution disposed of the asset, in the format mm/dd/yyyy. The Fixed Asset module does not compute or charge depreciation for the month of disposal.
Disposal Proceeds The amount actually received when the asset is retired from use at the institution, then sold or scrapped, e.g., a used van might net $4500. Book Value, less Disposal Proceeds, equals the Gain or Loss on Disposal.
Expected Life The estimated life of the asset in years, e.g., a used van may have an estimated life of three (3) years.
Note: This field is required.
Fund/Function/ Object/Subfund
The source account number for the asset, i.e., the account to credit when you acquire the asset. Source accounts might include payables, cash, or a fund balance account.
Note: This field is required.
Purchase Order No The purchase order number for the acquisition of the asset.
Note: This field is maintained manually.
Replacement Cost The cost of replacing the asset.
Note: The system maintains this information for insurance purposes only. Replacement Cost is not part of the computation of depreciation or of any gain or loss.
Salvage Value The expected proceeds when the institution retires the asset, e.g., a used van might be expected to net $5000. The Acquisition Value, less the Salvage Value, equals the amount that you can depreciate.

Screens 12 Fixed Assets
Summarized A flag indicating if the Fixed Asset record relates to a summarized asset, an unsummarized asset, or a record that relates to summarized assets. Valid values include the following:
• I = The asset is one you want summarized (an item to include in a summary group). For example, classroom desks are a type of asset you might want to summarize.
• N = The asset is not one you want summarized. For example, classroom buildings are a type of asset that you might not want to summarize.
• S = The record contains summary information about assets you want to summarize. For example, it includes cost and depreciation information for all classroom desks.
Note: To the right of the Summarized flag, the system places a Y or N to indicate if the asset is a summarized type. The Y or N corresponds to the value in the Fixed Asset table.
Screen Example
Following is an example of the third Asset screen.
Note: CX links maintenance records to the asset records with the Asset Number field. PERFORM: Query Next Previous View Add Update Remove Table Screen ... Shows the next page of the form. ** 1: fix_rec table** ================================================================================ AUTHORIZATION Person Authorized........[ ] Person Responsible.......[ ] Department Responsible...[ ] Lender or Lessor.........[ ] Vendor or Donor..........[ ] ================================================================================ MAINTENANCE INFORMATION Asset No..[0 ] Description.. Maintenance ID#.. Contract Number.. Frequency.... Beginning Date... Ending Date..
Screen Fields
The following describes the fields that appear on the third Asset screen.
Asset No. A sequence number that identifies the maintenance record and links it to its related asset records.
Note: This field is system-generated.
Beginning Date The date on which the service cycle for the asset must begin, in the format mm/dd/yyyy. For assets under a service contract, this is the date on which the contracted service begins.
Contract Number If applicable, the identifying number of the maintenance contract for the asset.
Department Responsible The function number and name of the department that is responsible for the asset.

Fixed Assets 13 Screens
Description A 24-character field that describes the type of maintenance that the asset requires.
Ending Date The date on which the service cycle for the asset ends, or the expiration date of the service contract, in the format mm/dd/yyyy.
Frequency The frequency of service required for the asset. Valid values are:
• 2A = Every two years • 3A = Every three years • 4A = Every four years • 5A = Every five years • 5M = Every five months • AN = Annually • BM = Every two months • BW = Every two weeks • MO = Monthly • QU = Quarterly • SA = Twice each year • SM = Twice monthly • WK = Weekly
Lender or Lessor The ID number and name of the owner or lender who supplied the asset, if applicable.
Maintenance ID # The ID number of the vendor or service company who maintains the asset.
Note: This field can also contain the ID number of an employee of the institution who works in Maintenance.
Person Authorized The ID number and name of the person who authorized the purchase or acquisition of the asset.
Person Responsible The ID number and name of the person who is responsible for the asset.
Vendor or Donor The ID number and name of the seller or donor who supplied the asset, if applicable.
Screen Commands
The following lists the commands that appear on the Asset screen command line and their purposes.
Add Enables you to add a Fixed Asset or Fixed Asset Maintenance record.
Current Displays the current row of the current table.
Detail With Master, enables you to toggle between the first and the third screens.
Exit Enables you to exit from the screen.

Screens 14 Fixed Assets
Master With Detail, enables you to toggle between the first and the third screens.
Next Enables you to view the next record that meets your search criteria.
Note: This command is useful for displaying the various maintenance records that relate to a single Fixed Asset record.
Output Enables you to route the screen contents to a file. When you use this command, the system displays the following prompts:
• Enter output file: Enables you to specify the name of the file to which you want to route the output.
• Append or create: Enables you to specify if you want to add the screen output to an existing file or to create (or overwrite) a file.
• Current-list or One-page: Enables you to specify if you want to route the entire group of selected records to the file, or only the page that currently appears on the screen.
• Unload-format or Screen-format: Enables you to specify if you want the output file to contain the screen layout and labels, or just the data that appears on the screen.
Previous Enables you to display the previous record that meets your search criteria.
Query Enables you to enter search criteria and locate all the records that match your criteria (or enter no search criteria to view all values).
Remove Enables you to delete a record.
Screen Enables you to display each of the screens. Select this command until the screen you want appears.
Table Enables you to toggle between the first and the third screens.
Update Enables you to change the information in the record.
View Currently not in use.

Fixed Assets 15 Adding/Updating Information
SECTION 3 - ADDING OR UPDATING FIXED ASSET INFORMATION
Overview
Introduction
This section provides information and step-by-step procedures for you to follow when you do the following:
• Add a new fixed asset to the CX database • Change fixed asset information
Before You Begin
Before you begin to use the following procedures for adding and updating fixed asset information, remember the following:
• You must know the account (fund, function, object, and subfund) that relates to the asset (for adding assets).
Note: This account is the source account for the asset, e.g., the payable, cash, or fund balance account that you must credit when the institution acquires the asset. You define the debit account in the Fixed Asset table during the implementation of Fixed Assets.
• You must know specific information about the asset (e.g., its location, acquisition date, or other unique facts) so you can query the asset (for updating assets).
• You can use the field descriptions in Using the Fixed Asset Screens section of this guide when you complete the fields on the Asset Information screens.

Adding/Updating Information 16 Fixed Assets
Adding Fixed Asset Information
How to Add Fixed Asset Information
Follow these steps to add fixed asset information. You add this type of information when your institution acquires new assets that require capitalization.
Note: This procedure provides steps for using the Asset screens. For descriptions of all Asset screen fields, see Using the Fixed Asset Screens in this guide.
1. From the Fiscal Management: Fixed Assets Main menu, select Enter Assets and then Finish. The first Asset screen appears.
2. Select Add. The screen enters add mode, and the cursor moves to the Asset Type field.
Note: Remember that the Asset screen is a collection of three screens containing the following categories of data: • Asset Information • Asset Valuation • Authorization • Maintenance Information
3. Complete the screens with information about the asset, then select Adds new data. You add the asset to the CX database, and the system displays the message, “Row added.”
Note: The following fields are required to add an asset: • Asset Type • Description • Acquisition Cost • Expected Life • Fund/Function/Object/Subfund
4. Do you want to add more assets to the database?
If yes, repeat steps 2 and 3 until you are done. You complete the additions to your database.
If no, select Exit, then press <Enter>. The Fiscal Management: Fixed Assets Main menu appears.

Fixed Assets 17 Adding/Updating Information
Updating Fixed Asset Information
How to Update Fixed Asset Information
Follow these steps to update fixed asset information.
Note: This procedure provides steps for using the Asset screen. For descriptions of all Asset Information screen fields, see Using the Fixed Asset Screens in this guide.
1. From the Fiscal Management: Fixed Assets Main menu, select Enter Assets, then Finish. The first Asset screen appears.
2. Select Query. The screen enters query mode, and the cursor moves to the Asset Number field.
3. Do you know the asset number?
If yes, enter the number, then select Queries.
If no, enter the information you know about the asset, then select Queries. If the query locates more than one asset record that meets your search criteria, the screen fills with information about the first asset, and displays the message, “# row(s) found,” where # is the number of records.
Note: You can enter the search criteria in any of the fields on all three Asset screens.
The screen fills with information about the asset, or returns the message, “There are no rows satisfying the conditions.”
4. Did the query locate one or more assets that meet your search criteria?
If yes, go to step 5
If no, repeat steps 2 and 3 until you locate the asset you want.
5. Did the query locate more than one asset based on your search criteria?
If yes, locate the asset that you want to update by using Next and Previous, then select Update.
If no, select Update.
The screen enters update mode, and the cursor moves to the Asset Type field.
6. Enter the changes to the fields that you want to update, then select Changes data. The screen displays the message, “This row has been changed.”
7. Do you want to change information about other assets?
If yes, repeat steps 3 - 6 until you have changed all the information.
If no, select Exit, then press <Enter>. The Fiscal Management: Fixed Assets Main menu appears.


Fixed Assets 19 Disposing of
SECTION 4 - DISPOSING OF FIXED ASSETS
Overview
Introduction
This section provides information and step-by-step procedures to follow when you record the disposal of an asset.
Before You Begin
Before you begin to use the following procedures for adding disposal information, remember the following:
• Your Jenzabar coordinator defines the gain/loss account in the macro file macros/custom/financial.
• The gain/loss account defined in the macro file must be valid in the Defined Account table (gld_rec).
The Process
Recording the disposal of an asset in the CX Fixed Assets module is a two-step process, requiring the use of at least two menu options. First, you must update the fixed asset records with disposal information, then you must post the transactions. If desired, you can verify the disposal information before you post it.
CAUTION: Until you post the information, your accounting records will not reflect the disposal.
This list shows the general phases that take place before, during, and after adding disposal information.
1. Locate the record for the disposal asset.
2. Update the record with disposal information.
3. Verify that the disposal information is correct.
4. Run the posting process.

Disposing of 20 Fixed Assets
Adding Disposal Information
How to Add Disposal Information
Follow these steps to add disposal information.
Note: This procedure provides you with steps for using the Asset screen to enter a disposal. For descriptions of all Asset screen fields, see Using the Fixed Asset Screens in this guide.
1. From the Fiscal Management: Fixed Assets Main menu, select Enter Assets, and Finish. The first Asset screen appears.
2. Select Query. The screen enters query mode, and the cursor moves to the Asset Number field.
3. Do you know the asset number for the asset that has been disposed of?
If yes, enter the number, then select Queries.
If no, enter the information you know about the asset, then select Queries. If the query locates more than one asset record that meets your search criteria, the screen fills with information about the first asset, and displays the message, “# row(s) found,” where # is the number of records.
Note: You can enter the search criteria in any of the fields on all three Asset screens.
The screen fills with information about the asset, or returns the message, “There are no rows satisfying the conditions.”
4. Did the query locate one or more assets that meet your search criteria?
If yes, go to step 5.
If no, repeat steps 2 and 3 until you locate the asset you want.
5. Did the query locate more than one asset based on your search criteria?
If yes, locate the asset that you want to update by using Next and Previous, then select Update.
If no, select Update.
The screen enters update mode, and the cursor moves to the Asset Type field
6. Access the following fields on the second Asset screen, enter the disposal information, then select Changes data:
• Disposal date • Disposal proceeds
The screen displays the message, “This row has been changed.”
7. Do you want to change information about other assets?
If yes, repeat steps 3 - 6 until you have changed all the information.
If no, select Exit., then press <Enter>. The Fiscal Management: Fixed Assets Main menu appears.

Fixed Assets 21 Verifying/Posting
SECTION 5 - VERIFYING AND POSTING FIXED ASSETS
Overview
Introduction
This section provides information and step-by-step procedures to follow when you do the following:
• Verify that the fixed asset information you have entered is correct • Post the fixed assets to the general ledger
Before You Begin
Before you begin to use the following procedures for verifying and posting the institution’s fixed assets, remember the following:
• If you want to verify a single asset entry, use the procedures in Adding or Updating Fixed Asset Information to locate the system-assigned number for the asset.
• Recording asset information in the CX Fixed Assets module is a two-step process, requiring the use of at least two menu options. First, you must add or update the fixed asset records, then you must post the transactions. If desired, you can verify the information before you post it. Until you post the information using the procedures in this section, your accounting records will not reflect the disposal.
• Most reports for the Fixed Assets module appear on the Fixed Assets: Reports menu. The exceptions are the reports that are produced automatically when you verify and post Fixed Asset transactions. Samples of the verification and posting reports appear in this section.
• You can use the field descriptions in Using the Fixed Asset Screens section of this guide when you complete the fields on the Asset screen, and the procedures in Adding Or Updating Fixed Asset Information or Disposing Of Fixed Assets to perform the preliminary information entry procedures.
The Process
This list shows the general phases that take place before, during, and after verifying and posting fixed asset information.
1. Enter or update information about the assets.
2. If desired, verify the entries that the Fixed Asset Posting program will make.
3. If applicable, review the verification reports for accuracy, and make corrections as required.
4. Post the entries.
5. If desired, produce Fixed Asset reports from the Fixed Assets: Reports menu.

Verifying/Posting 22 Fixed Assets
Verifying Fixed Asset Information
How to Verify Fixed Asset Information
Follow these steps to verify fixed asset information.
1. From the Fiscal Management: Fixed Assets main menu, select either of the following two menu options, then select Finish.
• Verify Asset Entries • Verify Single Asset Entry
A parameter screen for producing a report appears. The only difference between the parameter screens for each option is that the screen for verifying a single asset contains a field for entering the asset number.
2. Enter the calculation date, the verification date and, if required, asset number that you want to use, then select Finish. The Output Parameters and Scheduling window appears.
• The calculation date determines the assets to load for processing, and the assets for capitalization or disposal. It also defines the date for computing depreciation.
• The verification date indicates the posting date that would be used if the transactions were to be posted.
3. Enter the time of day you want to produce the verification report, then select Finish. You can schedule the verification report, or produce it immediately.
Note: Enter NOW if you want the process to run immediately, and enter Y in the Background field if you want to perform other CX tasks while the process executes.
Results of the Verification Process
CX sends an electronic mail message to you to report the results of the verification process. You must review your electronic mail for error messages, and resolve the errors. After you resolve the errors, rerun the verification process to review the effect of your corrections.
When you run the verification process, you generate a report that shows what the results will be when you actually post your fixed asset transactions. CX routes the report to your home directory.

Fixed Assets 23 Verifying/Posting
Following is an example of the verification report. • The example report contains capitalization (new acquisitions) and depreciation only; no
disposals occurred during the time specified on the parameter screen. • The report is clearly labeled REPORT ONLY. This label indicates that the report is the
result of verifying assets, and that no general ledger update occurred. ---Asset Capitalization: REPORT ONLY--- For Period: 3/1995 Asset # Description Salvage Value Capitalized Amount 57 Computer 200.00 1,500.00 58 Computer 200.00 1,500.00 ________________ Total Capitalized Amount: 3,000.00 ---Asset Depreciation: REPORT ONLY--- For Period: 3/1995 Asset # Description Accumulated Expense Period Expense 40 Building - Wilson Hall 120,000.00 1,000.00 41 Building - Davidson Hall 136,000.00 1,000.00 42 Building - Men’s dorm 132,000.00 1,200.00 43 Building - Women’s dorm 132,000.00 1,200.00 51 Building - Admin l 100,000.00 2,000.00 52 Equipment - Dorms l 160,000.00 1,600.00 53 Equipment - Classrooms 180,000.00 1,800.00 54 Equipment - Groundskeeping 5,708.33 5,708.33 ---------------- Total Period Expense: 15508.33 Report date: 3/28/1995 ~ ~

Verifying/Posting 24 Fixed Assets
Posting Fixed Asset Information
How to Post Fixed Asset Information
The following lists the steps to follow when you post fixed asset information. • You can run this process as often as necessary. The Fixed Asset module will not duplicate
posting entries if you run the posting program multiple times. • Use Accounting Query (ACQUERY) to review the results of posting your institution’s fixed
assets.
1. From the Fixed Asset menu, select either of the following two menu options, then select Finish.
• Post Assets to G/L • Post Single Asset to G/L
A parameter screen for posting the transactions appears.
Note: The only difference between the parameter screens is: the screen for posting a single asset contains a field for entering the asset number.
2. Enter the calculation date, the posting date and, if required, asset number that you want to use, then select Finish. The Output Parameters and Scheduling window appears.
• The calculation date determines the assets to load for processing, and the assets for capitalization or disposal. It also defines the date for computing depreciation.
• The posting date is the date used in the journal created by the posting process.
3. Enter the time of day you want to post the entries, then select Finish. You can schedule the verification report, or produce it immediately.
Note: Enter NOW if you want the process to run immediately, and enter Y in the Background field if you want to perform other CX tasks while the process executes.
Results of the Posting Process
CX sends an electronic mail message to you to report the results of the posting process. If you ran the verification process, you should receive no error messages. However, if errors occurred, you must review your electronic mail for error messages, and resolve the errors. After you resolve the errors, rerun the verification process to review the effect of your corrections, then rerun the posting.
When you run the posting process, you generate a report that shows the results of posting your fixed asset transactions. CX routes the report to your home directory.
Fixed Assets 25 Verifying/Posting
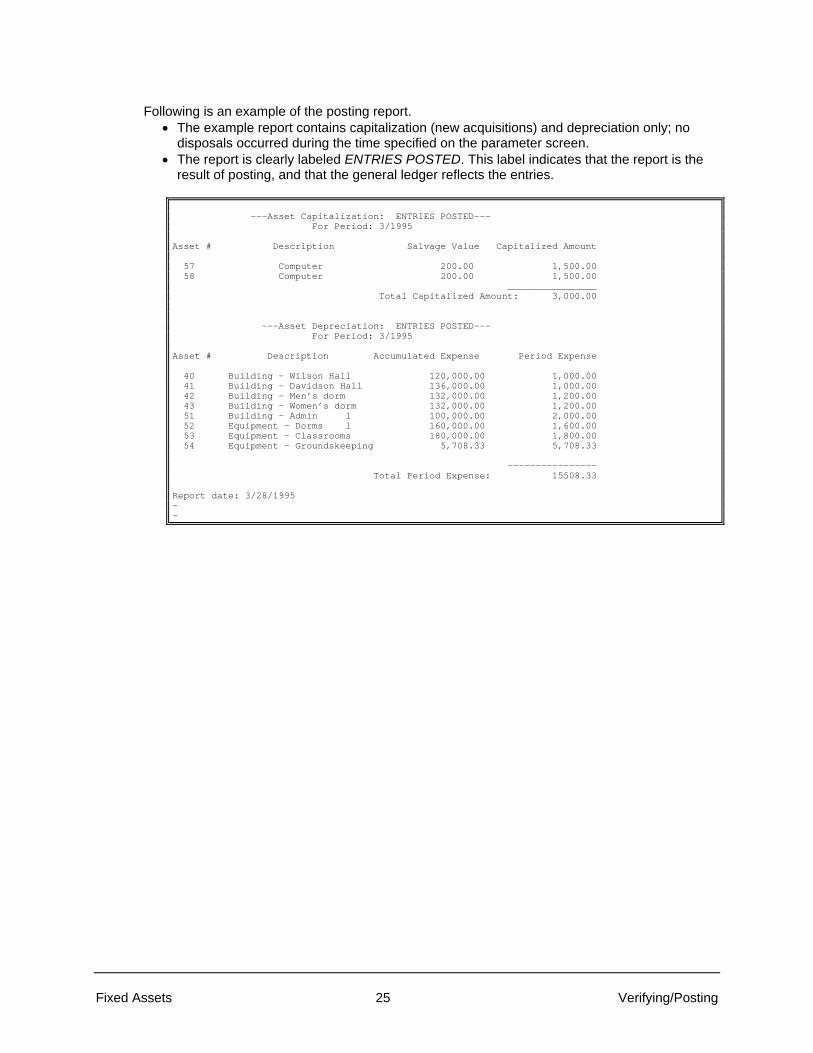
Following is an example of the posting report. • The example report contains capitalization (new acquisitions) and depreciation only; no
disposals occurred during the time specified on the parameter screen. • The report is clearly labeled ENTRIES POSTED. This label indicates that the report is the
result of posting, and that the general ledger reflects the entries. ---Asset Capitalization: ENTRIES POSTED--- For Period: 3/1995 Asset # Description Salvage Value Capitalized Amount 57 Computer 200.00 1,500.00 58 Computer 200.00 1,500.00 ________________ Total Capitalized Amount: 3,000.00 ---Asset Depreciation: ENTRIES POSTED--- For Period: 3/1995 Asset # Description Accumulated Expense Period Expense 40 Building - Wilson Hall 120,000.00 1,000.00 41 Building - Davidson Hall 136,000.00 1,000.00 42 Building - Men’s dorm 132,000.00 1,200.00 43 Building - Women’s dorm 132,000.00 1,200.00 51 Building - Admin l 100,000.00 2,000.00 52 Equipment - Dorms l 160,000.00 1,600.00 53 Equipment - Classrooms 180,000.00 1,800.00 54 Equipment - Groundskeeping 5,708.33 5,708.33 ---------------- Total Period Expense: 15508.33 Report date: 3/28/1995 ~ ~


Fixed Assets 27 Messages
SECTION 6 - RESPONDING TO SYSTEM MESSAGES
Overview
Introduction
This section provides the following: • Descriptions of the status, warning, field error, and fatal error messages that can appear
while you are using the Fixed Assets module • Information you need to respond to status, warning, and error messages
Four Types of Messages
Four types of messages can appear in the Fixed Assets module. The messages appear on the comment line, on the error line, in a dialog box, or in your electronic mail. The types of messages are:
• Status message • Field error message • Warning message • Fatal error message
Descriptions of Message Types
The following describes each of the four types of messages, by degree of severity.
Status To assure you that the program is working properly when you select an option that involves a long pause
• Can appear after you select a command or option, type data, or press a key • Requires no action by you • Appears on the comment line
Example: "Opening files ..."
Field error To tell you of an invalid field value entered, and to provide you with valid field values from which to choose
• Can appear after you enter an invalid code in a field • Requires that you select a valid code from those provided in the field error message, a
table lookup, or a query, and enter it into the field • Appears on the error line
Example: “Valid values: (A,I)”
Warning To inform you of a condition of which you must be aware in order to continue
• Can appear after you select a command or option, type data, or press a key to begin or end a process that requires a decision
• Requires you to act or make a decision • Appears in a dialog box
Example: “Are you sure you want to exit? (Y/N)”

Messages 28 Fixed Assets
Fatal error To inform you of a serious problem occurring within the system
• Can appear when the system is missing information (such as a required table or record) needed to continue processing, or when there is a program error
• Requires that you contact the coordinator immediately to resolve the problem • Appears in a dialog box, or in your electronic mail, as well as in your coordinator's
electronic mail
Example: "XXXX An unrecoverable error has occurred. Contact your Jenzabar coordinator."
Electronic Mail Messages
Occasionally, CX programs send status or error messages to your electronic mail, instead of the comment or error line. Such messages tell you any of the following information:
A process was completed successfully You can delete or save them according to your preferences or established policy.
Information cannot be found Try the process again with new field values.
Errors have occurred while trying to complete a process Tell your Jenzabar coordinator about the message to resolve the problem.
Warning and Error Messages
Messages you might receive
The following alphabetically lists some of the more common field error, warning, and fatal error messages that can appear when you are using Fixed Assets.
Field error and warning messages are types of messages you can correct on your own, simply by following the directions in the message you receive. Fatal error messages, however, are more difficult to correct; if you receive one, you must contact your Jenzabar coordinator immediately.
Account ##-####-####-#### in gle 1 is an invalid account. The specified account number is invalid. To correct, review the account numbers in the Fixed Asset record and the Fixed Asset table and compare the account numbers to the valid numbers in the Defined Account table, making corrections in the records as required.
Accumulated depreciation account invalid: ‘acct ####’. Asset type ‘xxxx’ The specified accumulated depreciation account is blank for either the fund or the object. FIXPOST will not post any depreciation entries for the specified asset type.
Beginning date for depreciation cannot be 00/00/0000. Key ‘FP-##’ The beginning date for depreciation (fix_dep_basis_date) for the asset specified in the Key must contain a valid date. FIXPOST will not post any capitalization or depreciation entries for the specified asset.
Bgvoucher errors for ‘fixpost’: The posting process was interrupted. Check your electronic mail for the cause of the problem, then contact your Jenzabar coordinator.
Could not get instruction, bgv_errno=0, bgv_ptp_errno=-3 The posting process was interrupted. Check your electronic mail for the cause of the problem, then contact your Jenzabar coordinator.

Fixed Assets 29 Messages
Connection to ‘fixpost’ vanished! The posting process was interrupted. Check your electronic mail for the cause of the problem, then contact your Jenzabar coordinator.
Bgvoucher unable to continue. The posting process was interrupted. Check your electronic mail for the cause of the problem, then contact your Jenzabar coordinator.
Verification of entries in journal type ‘AC’ interrupted. The posting process was interrupted. Check your electronic mail for the cause of the problem, then contact your Jenzabar coordinator.
Capitalization control acct invalid: ‘acct ####’. Asset type ‘xxxx’ The specified capitalization control account is blank for either the fund or the object. FIXPOST will not post any capitalization or disposal entries for the specified asset type.
Capitalization source invalid: ‘acct ####’. Key ‘FP-##’ The specified capitalization source account is blank for either the fund or object. FIXPOST will not post any capitalization or disposal entries for the asset specified in the Key.
Database ‘XXXX’: Open failed. Error #### FIXPOST encountered the specific error while trying to open the database. To identify the problem, check the user’s database permissions.
Depreciation ending date required. Asset type ‘XXXX’. Key ‘FP-##’ Neither an expected life (fix_expect_life) nor a disposal date (fix_disp_date) has been given for the asset specified in the Key. This warning will only occur for an asset which is depreciated with a method that requires an ending date. FIXPOST will not post any depreciation entries for this asset.
Depreciation expense account invalid: ‘acct ####’. Asset type ‘xxxx’ The specified depreciation account is blank for either the fund or the object. FIXPOST will not post any depreciation entries for the specified asset type.
Exactly one summary record required. ‘#’ exist. Asset type ‘XXXX’ The specified number of summarized assets does not equal exactly one. You can have only one summary record for a given asset type. This warning can only occur for summarized assets. FIXPOST will not process the specified asset type.
File ‘filename’: DBALIAS failed. Error: #### FIXPOST encountered the specified error while trying to create an alias for the specified filename. Contact the Jenzabar coordinator.
File ‘filename’: DBFIND (procname) failed. Key ‘FP-##’. Error: #### FIXPOST encountered the specified error while trying to find the record (specified in the Key) in the specified filename. Error occurred in the specified “procname”. Contact the Jenzabar coordinator.
File ‘filename’: FILEOPEN failed. Error: #### FIXPOST encountered the specified error while trying to open the specified filename. Contact the Jenzabar coordinator.
File ‘filename’: SELFIELD failed. Key ‘keyfield’. Error: #### FIXPOST encountered the specified error while trying to select the specified keyfield of the specified filename. Contact the Jenzabar coordinator.
File ‘filename’: STRUCTVIEW failed. Error: #### FIXPOST encountered the specified error while trying to initialize the structure of the specified filename. Contact the Jenzabar coordinator.

Messages 30 Fixed Assets
Fiscal calendar for Posting Date (mm/dd/yyyy) is not open. The Fiscal Calendar record, corresponding to the Posting Date, is not opened. FIXPOST cannot run unless an open Fiscal Calendar record exists for the Posting Date. To correct, create the Fiscal Calendar record using the CX option Add Fiscal Calendar on the Accounting: Table Maintenance: Financial (F-I) menu.
Invalid account according to rules in gld_rec. The account that you used for posting a Fixed Asset is not valid in the Defined Account table (gld_rec).
Itemized asset cannot be the only asset processed. Key ‘FP-##’ This error can only occur when running FIXPOST in the single asset mode.
Missing fiscal calendar record. Key ‘XXXXXXXXXX’ The fiscal calendar record, specified in the Key, does not exist. FIXPOST cannot run until it is created.
Missing valid fix_table entry. Asset type ‘XXXX’ Either the dates (tfix_beg_date, tfix_end_date) in the fix_table are invalid for specified asset type or no entry exists in the fix_table for the specified asset type. FIXPOST will not process the specified asset type.
No Capitalization occurred for ‘XXXX’ type assets The capitalization flag (tfix_cptl) in the Fixed Asset table (fix_table) is set to N for the specified asset type.
No Capitalization will occur for ‘XXXX’ type assets The capitalization flag (tfix_cptl) in the Fixed Asset table (fix_table) is set to N for the specified asset type.
No Depreciation occurred for ‘XXXX’ type assets The depreciation flag (tfix_dep) in the Fixed Asset table (fix_table) is set to N for the specified asset type.
No Depreciation will occur for ‘XXXX’ type assets The depreciation flag (tfix_dep) in the Fixed Asset table (fix_table) is set to N for the specified asset type.
Rules table set up incorrectly The account that you used to post a Fixed Assets transaction used an invalid entry in the Defined Account table (gld_rec).
Summarized asset “XXXX’ requires a summarized table code. Key ‘FP-##’ The summary status (fix_sum_stat) of the asset specified in the Key does not coincide with the summary status (tfix_sum) in the corresponding table record. This warning can only occur for summarized assets. FIXPOST will not process the specified asset type.
The following error(s) occurred posting ‘CAPT’ type entries. Key ‘FP-##’ The errors are produced by the BGVOUCHER program during the posting or verifying of general ledger entries.
The following error(s) occurred verifying ‘CAPT’ type entries. Key ‘FP-##’ The errors are produced by the BGVOUCHER program during the posting or verifying of general ledger entries.
Unable to create lock file for FIXPOST program. Please correct!! FIXPOST encountered the specified error while trying to create the lock file located in $CARSPATH/events.
Unable to remove lock file for FIXPOST program. Please correct!! FIXPOST encountered the specified error while trying to remove the lock file located in $CARSPATH/events.

Fixed Assets 31 Messages
INDEX
A accounts
accumulated depreciation, 3 asset capitalization, 3 depreciation expense, 3
ACRS, 4 adding fixed assets
prerequisite knowledge, 15 procedure, 16
audience guide, 1
B background knowledge
for using Fixed Assets, 2
C capital assets. See fixed assets capitalization, 6 capitalized assets. See fixed assets checklist
preliminary for using Fixed Assets, 2
commands all Asset screens, 13
conventions capitalization, 6 keystrokes, 6 style, 5 term, 5
D depreciation methods, 4 disposing of fixed assets
prerequisite knowledge, 19 procedure, 20 process, 19
E electronic mail messages, 28
F fatal error messages, 27, 28 field error messages, 27, 28 fields
first Asset screen, 9 second Asset screen, 10 third Asset screen, 12
Fixed Asset Maintenance record on screens, 8
Fixed Asset record on screens, 8
fixed assets examples, 2
G guide
purpose, 1
H half-month depreciation, 4
K keystrokes, 6
L learning objectives, 1 long-lived assets. See fixed assets
M mail messages, 28 messages. See field errors, fatal errors, warning
errors and status messages
O objectives
guide, 1
P posting fixed asset information
frequency for running, 24 output, 25 prerequisite knowledge, 21 procedure, 24 process, 21 reviewing results with ACQUERY, 24
prerequisites for using Fixed Assets, 2
process overall, 4
purpose Fixed Assets module, 1, 2 guide, 1
R reporting, 4
S screens
Asset

Index 32 Fixed Assets
overall contents, 8 first Asset, 8 second Asset, 10 third Asset, 12
standards. See conventions status messages, 27 straight line method, 4 structure
guide, 1
U updating fixed assets
procedure, 17
using guide, 1
V verifying fixed asset information
output, 23 prerequisite knowledge, 21 procedure, 22 process, 21
W warning messages, 27, 28