final research - ntlrepository.blob.core.windows.net
TRANSCRIPT

Best Practices for the Design and Construction of
Low Volume Roads
2002-17Final
Report
Res
earc
h

Technical Report Documentation Page1. Report No. 2. 3. Recipients Accession No.
MN/RC –2002-174. Title and Subtitle 5. Report Date
March 2002
6.
BEST PRACTICES FOR THE DESIGN AND CONSTRUCTIONOF LOW VOLUME ROADS
7. Author(s) 8. Performing Organization Report No.
Eugene L. Skok, David H. Timm, Marcus L. Brownand Timothy R. Clyne
9. Performing Organization Name and Address 10. Project/Task/Work Unit No.
11. Contract (C) or Grant (G) No.
Department of Civil EngineeringUniversity of Minnesota500 Pillsbury Drive SEMinneapolis, MN 55455
c) 74708 wo) 123
12. Sponsoring Organization Name and Address 13. Type of Report and Period Covered
Final Report 1999-2002
14. Sponsoring Agency Code
Minnesota Department of Transportation395 John Ireland Boulevard Mail Stop 330St. Paul, Minnesota 55155
15. Supplementary Notes
16. Abstract (Limit: 200 words)
This report presents information about the use of the mechanistic-empirical procedure (MnPAVE) in designing hot-mixasphalt pavements in Minnesota.
Researchers developed the MnPAVE software program using information from the Minnesota Road Research Project(Mn/ROAD) test facility and from 40-year-old test sections around Minnesota. MnPAVE procedures use EquivalentStandard Axle Loads (ESALs) to evaluate traffic loading, and the report includes methods to estimate these values fordesign purposes over a 20-year design life, as well as a procedure to measure vehicle type distributions.
In addition, the report presents an evaluation of subgrade soils for each thickness design procedure, summarizesMinnesota Department of Transportation specifications that relate to embankment soil construction and to constructionof the pavement section materials, and recommends specific density or quality compaction using a control strip. It alsoincludes best practices on setting up projects most effectively to follow specifications.
17. Document Analysis/Descriptors 18. Availability Statement
Mechanistic-Empirical
Construction Specifications
Resilient Modulus
Granular Equivalent
Soil Factor Pavement Section
R-Value ESAL’s
Subgrade Soil
Flexible Pavement Thickness Design
No restrictions. Document available from:National Technical Information Services,Springfield, Virginia 22161
19. Security Class (this report) 20. Security Class (this page) 21. No. of Pages 22. Price
Unclassified Unclassified 178

BEST PRACTICESFOR THE DESIGN AND CONSTRUCTION OF LOW
VOLUME ROADS
Final Report
Prepared by:
Eugene L. SkokDavid H. Timm
Marcus L. BrownTimothy R. Clyne
Department of Civil EngineeringUniversity of Minnesota500 Pillsbury Dr. S.E.
Minneapolis, MN 55455
March 2002
Published by:
Minnesota Department of TransportationOffice of Research Services
Mail Stop 330395 John Ireland Boulevard
St. Paul, MN 55155
This report represents the results of research conducted by the authors and does not necessarily represent the viewsor policies of the Minnesota Department of Transportation or the Minnesota Local Road Research Board. This reportdoes not contain a standard or specified technique.

ACKNOWLEDGEMENTS
This project was conducted with funding provided by the Minnesota Local Road Research
Board (MnLRRB). The purpose of the LRRB is to develop and manage a program for county
and municipal state aid road improvements. Funding for the Minnesota LRRB research projects
comes from designated funds equivalent to one-half of one percent of the annual state aid for city
and county roads.

TABLE OF CONTENTS
Chapter 1 Introduction ............................................................................................................. 1
1.1 Introduction ........................................................................................................................... 1
1.2 Minnesota Thickness Design Procedures.............................................................................. 3
1.2.1 Soil Factor Design Procedure....................................................................................... 3
1.2.2 R-Value Procedure ....................................................................................................... 5
1.2.3 MnPAVE Procedure..................................................................................................... 7
1.2.4 Pavement Design Options for 2002 ............................................................................. 9
1.3 Traffic Estimates ................................................................................................................... 9
1.4 Subgrade (Embankment) Soil ............................................................................................. 10
1.4.1 Background ................................................................................................................ 10
1.4.2 Drainage ..................................................................................................................... 11
1.4.3 Subgrade (Embankment) Soil Construction............................................................... 11
1.4.3.1 General .............................................................................................................. 11
1.4.3.2 Specifications .................................................................................................... 11
1.4.3.3 General Design Considerations......................................................................... 12
1.4.3.4 Construction Notes and Procedures .................................................................. 14
1.4.3.5 Subgrade Enhancement ..................................................................................... 14
1.5 Pavement Section Materials ................................................................................................ 14
1.5.1 General ....................................................................................................................... 14
1.5.2 Pavement Layer Construction .................................................................................... 15
1.5.2.1 General .............................................................................................................. 15
1.5.2.2 Specifications .................................................................................................... 15
1.5.2.3 Field Control Procedures to Meet Specifications.............................................. 16
1.5.2.3.1 General ..................................................................................................... 16
1.5.2.3.2 Aggregate ................................................................................................. 16
1.5.2.3.3 Hot Mix Asphalt....................................................................................... 18
1.6 Summary and Recommendations........................................................................................ 19

Chapter 2 Thickness Design Procedures............................................................................... 23
2.1 Background and Introduction.............................................................................................. 23
2.2 Soil Factor Design............................................................................................................... 23
2.3 Stabilometer R-Value Design.............................................................................................. 25
2.4 MnPAVE Design................................................................................................................. 27
2.4.1 General ....................................................................................................................... 27
2.4.2 Set Up......................................................................................................................... 29
2.4.3 Start Up ...................................................................................................................... 29
2.4.3.1 Control Panel..................................................................................................... 29
2.4.3.2 General Operation ............................................................................................. 29
2.4.4 Inputs.......................................................................................................................... 30
2.4.4.1 General .............................................................................................................. 30
2.4.4.2 Climate Inputs (Seasonal Design) ..................................................................... 30
2.4.4.3 Structural Inputs ................................................................................................ 31
2.4.4.4 Traffic Inputs..................................................................................................... 33
2.4.5 Outputs ....................................................................................................................... 34
2.5 Which Procedure Should be Used in 2001-02? .................................................................. 34
Chapter 3 Traffic Predictions ................................................................................................ 37
3.1 Background and Definitions................................................................................................ 37
3.2 Determination of AADT ..................................................................................................... 38
3.3 Determination of HCADT................................................................................................... 39
3.4 ESAL Calculations.............................................................................................................. 39
3.4.1 Estimate AADT.......................................................................................................... 39
3.4.2 Vehicle Type Distribution.......................................................................................... 40
3.4.3 Determination of ESAL Factors by Vehicle Type ..................................................... 41
3.4.4 Determination of Growth Factor ................................................................................ 42
3.4.5 Design Lane Distribution ........................................................................................... 43
3.4.6 ESAL Calculation Spreadsheet .................................................................................. 43
3.5 Summary and Conclusions.................................................................................................. 45

Chapter 4 Subgrade (Embankment) Soil Design and Construction .................................. 47
4.1 Background and Definitions................................................................................................ 47
4.2 Soil Surveys and Sampling ................................................................................................. 48
4.3 Subgrade Soil Design Factors ............................................................................................. 49
4.3.1 General ....................................................................................................................... 49
4.3.2 Laboratory Testing ..................................................................................................... 50
4.3.2.1 The AASHTO Soil Classification System ........................................................ 50
4.3.2.2 Stabilometer R-Value........................................................................................ 52
4.3.2.3 Resilient Modulus (Mr) ..................................................................................... 54
4.3.3 Field Measurements of Subgrade Stiffness................................................................ 57
4.3.3.1 General .............................................................................................................. 57
4.3.3.2 Falling Weight Deflectometer........................................................................... 57
4.3.3.3 Dynamic Cone Penetrometer ............................................................................ 59
4.3.3.4 Additional In Situ Factors ................................................................................. 60
4.3.4 Use of Subgrade Design Factors ................................................................................ 62
4.3.4.1 General .............................................................................................................. 62
4.3.4.2 Soil Factor ......................................................................................................... 62
4.3.4.3 R-Value ............................................................................................................. 62
4.3.4.4 MnPAVE........................................................................................................... 62
4.4 Drainage .............................................................................................................................. 64
4.5 Construction of the Subgrade (Embankment)..................................................................... 65
4.5.1 General ....................................................................................................................... 65
4.5.2 Specifications ............................................................................................................. 65
4.5.2.1 MnDOT Specification 2105 (Excavation and Embankment) ........................... 65
4.5.2.1.1 Materials................................................................................................... 66
4.5.2.1.2 Construction Requirements ...................................................................... 66
4.5.2.1.3 Compaction Requirements ....................................................................... 67
4.5.2.1.3.1 Specified Density Method............................................................... 68
4.5.2.1.3.2 Quality or Visual Inspection Method .............................................. 68
4.5.2.2 MnDOT Specification 2111 (Test Rolling) ...................................................... 69
4.5.2.2.1 Description ............................................................................................... 69

4.5.2.2.2 Equipment ................................................................................................ 69
4.5.2.2.3 Construction Requirements ...................................................................... 69
4.5.3 General Design Considerations.................................................................................. 69
4.5.3.1 General .............................................................................................................. 69
4.5.3.2 Excavation and Embankment Construction ...................................................... 70
4.5.3.3 Soils Evaluation................................................................................................. 70
4.5.3.4 Soils Preparation ............................................................................................... 71
4.5.3.5 Subgrade Correction.......................................................................................... 71
4.5.3.6 Placement of Embankment and Backfill Materials........................................... 72
4.5.3.7 Compaction ....................................................................................................... 72
4.5.4 Construction Notes and Procedures ........................................................................... 73
4.6 Subgrade Enhancement Summary ...................................................................................... 75
4.6.1 General ....................................................................................................................... 75
4.6.2 Categories of Enhancement........................................................................................ 75
4.6.2.1 Improvement of Existing Materials................................................................... 75
4.6.2.2 Remove and Replace......................................................................................... 76
4.6.2.3 Modification ...................................................................................................... 76
4.6.2.4 Geosynthetics .................................................................................................... 76
Chapter 5 Pavement Section Materials ................................................................................. 79
5.1 General ................................................................................................................................ 79
5.2 Definitions........................................................................................................................... 80
5.2.1 Granular Subbase and Select Granular (Mn/DOT Specification 3149-B2)............... 80
5.2.1.1 Granular............................................................................................................. 80
5.2.1.2 Select Granular.................................................................................................. 80
5.2.1.3 Subbase Course (Mn/DOT Specification 3138, Class 4).................................. 80
5.2.2 Aggregate Base Course .............................................................................................. 80
5.2.2.1 Granular (Mn/DOT Specification 3138, Class 3, 5, and 6)............................... 80
5.2.2.2 Salvage Materials (Mn/DOT Specification 3138, Class 7)............................... 80
5.2.3 Stabilized Base Materials ........................................................................................... 80
5.2.3.1 Portland cement, lime and/or fly ash................................................................. 81

5.2.3.2 Asphalt cement, asphalt emulsions and cutbacks.............................................. 81
5.2.4 Recycling and Reclaiming ......................................................................................... 81
5.2.4.1 Cold In-Place Recycling.................................................................................... 81
5.2.4.2 Full Depth Reclamation .................................................................................... 81
5.2.5 Hot Mix Asphalt (HMA)............................................................................................ 81
5.3 Pavement Design Factors .................................................................................................... 81
5.3.1 General ....................................................................................................................... 81
5.3.2 Granular Equivalency Factors.................................................................................... 82
5.3.3 Resilient Modulus for Pavement Materials................................................................ 82
5.4 Construction of the Pavement Layers ................................................................................. 83
5.4.1 Specifications Review................................................................................................ 83
5.4.1.1 Granular Materials Properties and Gradations .................................................. 83
5.4.1.1.1 Granular Subbase (Specification 3149.2B2)............................................ 83
5.4.1.1.2 Aggregate Base and Subbase Materials (Mn/DOT Specification 3138).. 84
5.4.1.1.3 Stabilized Base ......................................................................................... 84
5.4.1.1.4 Recycled and Reclaimed Materials .......................................................... 84
5.4.1.1.5 Sampling and Testing............................................................................... 85
5.4.1.2 Construction of Aggregate Base (Mn/DOT Specification 2211)...................... 85
5.4.1.2.1 Construction Requirements ...................................................................... 86
5.4.1.2.1.1 General ............................................................................................ 86
5.4.1.2.1.2 Placing and Mixing ......................................................................... 86
5.4.1.2.1.3 Spreading......................................................................................... 86
5.4.1.2.1.4 Compaction ..................................................................................... 87
5.4.1.2.1.5 Workmanship and Quality .............................................................. 87
5.4.1.2.1.6 Aggregate in Stockpiles .................................................................. 88
5.4.1.2.1.7 Random Sampling Gradation Acceptance Method......................... 88
5.4.1.2.1.8 Payment........................................................................................... 88
5.4.1.3 Hot Mix Asphalt (HMA) Mixtures ................................................................... 88
5.4.1.3.1 General ..................................................................................................... 88
5.4.1.3.2 MnDOT 2350 Specification ..................................................................... 89
5.4.1.3.3 Mn/DOT 2360 Specification (Gyratory Mix Design).............................. 96

5.4.2 Field Control Procedures to Meet Specifications..................................................... 109
5.4.2.1 General ............................................................................................................ 109
5.4.2.2 Granular Subbases and Aggregate Bases ........................................................ 109
5.4.2.2.1 General ................................................................................................... 109
5.4.2.2.2 Schedule of Materials Control................................................................ 110
5.4.2.2.3 Standard Methods of Testing ................................................................. 110
5.4.2.2.4 Methods of Compaction Control for Granular Bases............................. 111
5.4.2.2.5 Job Guide for Aggregate Base Construction.......................................... 111
5.4.2.3 Hot Mix Asphalt (HMA) Construction ........................................................... 112
5.4.2.3.1 General ................................................................................................... 112
5.4.2.3.2 Standard Methods of Testing ................................................................. 113
5.4.2.3.3 Methods of Compaction Control for HMA............................................ 113
5.4.2.3.4 Job Guide for Plant Mix Bituminous Paving ......................................... 115
Chapter 6 Summary and Recommendations...................................................................... 119
6.1 General .............................................................................................................................. 119
6.2 Thickness Design Procedures............................................................................................ 119
6.3 Traffic................................................................................................................................ 119
6.4 Subgrade (Embankment) Soil ........................................................................................... 121
6.5 Pavement Section Materials .............................................................................................. 122
6.5.1 General ..................................................................................................................... 122
6.5.2 Specifications and Design Factors ........................................................................... 123
6.5.3 Construction of Granular Bases ............................................................................... 123
6.5.4 Construction of Hot Mix Asphalt Materials............................................................. 124
References ............................................................................................................................... 127
Appendix A Use of Investigation 183 and 195 Test Sections As a Long Term Performance Comparison with the Minnesota M-E Design Procedure
Appendix B Vehicle Classification Field Guide for Low Volume Roads

LIST OF TABLES
Table 1.1 MnPAVE Design Moduli Correlation ........................................................................ 6
Table 3.1 Vehicle Classification Percentages – Rural CSAH or County Road ........................ 40
Table 3.2 Average ESAL Factors by Vehicle Type.................................................................. 41
Table 3.3 Sample Computation of ESAL Factor ...................................................................... 42
Table 3.4 Growth Factors.......................................................................................................... 43
Table 3.5 Lane Distribution Factors.......................................................................................... 43
Table 3.6 ESAL Calculation Worksheet ................................................................................... 44
Table 4.1 Sampling Rates.......................................................................................................... 49
Table 4.2 AASHTO Soil Classification .................................................................................... 51
Table 4.3 AASHTO-Soil Factor Correlation ............................................................................ 52
Table 4.4 General Correlation Table for Strength and Stiffness Tests ..................................... 60
Table 4.5 MnPAVE Design Moduli Correlation ...................................................................... 64
Table 5.1 Granular Equivalent (G.E.) Factors .......................................................................... 82
Table 5.2 Default Resilient Modulus Values to Use in MnPAVE............................................ 83

LIST OF FIGURES
Figure 1.1 Flexible Pavement Design Using Soil Factors .......................................................... 4
Figure 1.2 R-Value Design Chart................................................................................................ 5
Figure 2.1 Flexible Pavement Design Using Soil Factors ........................................................ 24
Figure 2.2 R-Value Design Chart.............................................................................................. 26
Figure 4.1 Stabilometer R-Value Testing Apparatus ................................................................ 54
Figure 4.2 Resilient Modulus Testing Apparatus ..................................................................... 55
Figure 4.3 Load and Deformation vs. Time for Resilient Modulus Test .................................. 56
Figure 4.4 FWD Unit ................................................................................................................ 58
Figure 4.5 FWD Deflection Basin ............................................................................................ 59
Figure 4.6 MnDOT DCP........................................................................................................... 61

EXECUTIVE SUMMARY
Currently, Hot Mix Asphalt (HMA) pavements in Minnesota are designed using one of three
thickness design procedures: the Soil Factor, the R-Value or the Mechanistic-Empirical
Procedure (MnPAVE). The Soil Factor and R-Value, which refer to the methods of evaluating
the design soil, have been used by MnDOT and local agencies for the past 25 plus years. A
software program MnPAVE has been developed using information from MnROAD and some
40-year-old test sections around Minnesota. It is now recommended that city and county
agencies calculate thickness designs using the existing procedure they would normally use and
then use the MnPAVE software for an alternate design.
The Soil Factor Design uses two-way Annual Average Daily Traffic (AADT) and Heavy
Commercial Average Daily Traffic (HCADT) to define the loading. The R-Value and MnPAVE
procedures use Equivalent Standard Axle Loads (ESAL’s) to evaluate traffic loading. Chapter 3
presents methods for estimating these values for design purposes over a 20-year design life. A
procedure is presented for measuring vehicle type distributions rather than using assumed
statewide average values. The procedure was evaluated in a separate study discussed in Chapter
3.
The evaluation of subgrade (embankment) soils for each of the procedures is presented in
Chapter 4. The Soil Factor is a function of the AASHTO Classification. The R-Value can be
measured using a standard laboratory procedure or estimated from the AASHTO Classification.
The Resilient Modulus (Mr) can be estimated from the classification or from the R-Value (7). A
laboratory method to measure Mr is now being developed.
Construction of the embankment soil requires that MnDOT Specifications 2105, 2111, and
2123 be followed carefully (9). These specifications are summarized in Chapter 4 along with
recommendations on how they can best be implemented in the field. The procedures presented
should provide the stiffest (strongest) most uniform subgrade using the soils available at the
construction site. A checklist is also provided for the engineer and inspector to help set up and
conduct a well organized project (10, 11).
The pavement section materials for the Soil Factor and R-Value procedures are defined in
terms of the granular equivalency which when totaled yields the Granular Equivalent Thickness
of the pavement. The granular equivalency factors are defined based on the Specification that the

given material passes. A Specification 3138, Class 5 or 6 material has a factor of 1.0. The
resilient modulus of a particular material is used to define it for MnPAVE. For both the subgrade
and the pavement materials the resilient modulus can be varied throughout the year. Five seasons
have been defined using the moduli measured at MnROAD (8). HMA materials passing
Specifications 2350 or 2360 have granular equivalency factors of 2.25. The moduli can also be
varied throughout the year.
Construction of the pavement section materials requires that the layer be constructed
according to Specification 3138 and 2211 for the granular materials and Specification 2350 or
2360 for the HMA materials. These specifications are summarized in Chapter 5 along with
recommendations on how they can be implemented in the field. The 2360 (Superpave)
specification is only used for pavements for which the traffic exceeds 7 million ESAL’s.
Compaction is also very important for the construction of the pavement materials. Specified
Density or the use of the DCP are recommended for granular materials. For HMA materials
specified density or quality compaction using a control strip are recommended. Quality or
ordinary compaction is not recommended.
The Inspector’s Guide for Construction (11) is summarized for subgrade, granular subbase,
base, and HMA surface materials is summarized to help set up projects to most effectively
follow the respective specifications.

1
CHAPTER 1
INTRODUCTION 1.1. Introduction
This report has been developed to present methods for design and construction of Hot Mix
Asphalt (HMA) local roads in Minnesota. At this time, Mn/DOT and the flexible pavement
industry are in a time of transition for thickness design and construction procedures. The
MnPAVE thickness design procedure is a computer software mechanistic-empirical based
method that takes into account many variables that could not be considered previously. The
MnPAVE procedure is based on work done at the University of Minnesota using an elastic
layered system (WESLEA) developed by the Corps of Engineers. The University of Minnesota
program called ROADENT used performance prediction equations for HMA fatigue and
subgrade rutting based on material properties and performance of test sections at Mn/ROAD.
The computer software based methodology implemented in ROADENT provided the concepts
used by Mn/DOT to develop MnPAVE. The performances of some 40-year old test sections
were used to check the performance prediction equations used in ROADENT. Appendix A of the
full report presents the results of these comparisons. A significant advantage of using a
mechanistic-empirical design procedure is that the properties of various materials and conditions
can be entered into the software. This allows various combinations of materials of different
thicknesses to be considered and the most cost efficient pavement structure selected.
Chapter 2 of the report reviews the three HMA thickness design procedures currently used in
Minnesota – the Soil Factor, Stabilometer R-Value and MnPAVE. A survey of the city and
county engineers in Minnesota indicated that both the Soil Factor and R-Value are currently
being used. About two-thirds of the counties use the Soil Factor and about two-thirds of the cities
use the R-Value.
The Soil Factor Design is presented in the Mn/DOT State Aid Manual. The R-Value method
is presented in the Mn/DOT Geotechnical and Pavement Design Manual. The MnPAVE
software Beta Version is now available for review. This version can be downloaded from the
Mn/ROAD internet site:
http://Mn/ROAD.dot.state.mn.us/research/MN/ROAD_Project/restools/mnpave.asp

2
The two-way Annual Average Daily Traffic (AADT) and Heavy Commercial Average Daily
Traffic (HCADT) predicted for the design year (usually 20 years in the future) are used for the
Soil Factor Method. Current AADT and HCADT maps for Minnesota can be found on the
Mn/DOT internet site. The R-Value and MnPAVE Procedures use Equivalent Single Axle Loads
(ESAL’s) to predict the traffic effect. The ESAL concept equates the effect of various axle
weights and configurations to the effect of an 80-kN (18,000-lb) single axle load. Eventually, the
MnPAVE procedure will use the Load Spectrum concept to evaluate traffic. Load spectrum gives
a distribution of axle loads and types predicted to use that road over the design period. The
advantage of load spectrum is that predetermined equivalency factors are not used. The ESAL
equivalency factors are based on the relative performance of pavements at the AASHO Road
Test based on the drop in Present Serviceability Index (PSI).
The subgrade and embankment evaluation procedures for the three design procedures are
presented in Chapter 4. These are the soil factor, R-Value and resilient modulus (Mr) determined
for the soils used for a given project. The soil factor is based on the AASHTO soil classification
and the R-Value can be measured in the laboratory or estimated from the soil classification. The
resilient modulus can be estimated from either the R-Value or soil classification using
established relationships (Chadbourn et al, 2002). For large projects, the estimates of resilient
modulus should be verified by laboratory testing. The resilient modulus of the soil varies
throughout the year and this variation has been estimated using measured Mn/ROAD soil
stiffness. Five seasons have been defined for a given year in Minnesota. These are early spring,
late spring, summer, fall and winter (Ovik, Newcomb, Birgisson, 2000).
The strength, stiffness, and variability of a given subgrade soil are very dependent on the
construction procedures used for selecting, mixing, placing and compacting the soils. The design
procedures start with a good survey of what soils and moisture conditions exist at the
construction site and knowledge of how these materials will react under construction,
environment and loading conditions. The construction procedures start with a good set of
specifications. The specifications recommended for the construction of subgrades are
Specifications 2105, 2111 and 2123 (Mn/DOT Standard Specifications for Construction, 2000).
These specifications are summarized in Section 1.4.
Methods for carrying out the specifications from the Mn/DOT Grading and Base Manual and
the Geotechnical and Pavement Design Manual are summarized. General design considerations

3
and notes from the Inspector’s Job Guide for Construction published by the Mn/DOT Office of
Construction, Technical Certification Section are also presented to help show what procedures
and documentation are recommended for successful subgrade construction.
Methods of subgrade enhancement are also summarized in Section 1.4. The procedures listed
are proper layer construction and compaction of the existing soils, soil modification, soil
stabilization, and reinforcement of the in-place soils. Proper placement and compaction of the
subgrade soils are covered in more detail in Chapter 4. A subsequent study will look at the
various methods of modification, stabilization and reinforcement since they can also be used
with the MnPAVE design procedure.
The methods of evaluating the various pavement layers are presented in Section 1.5. The
materials discussed are select granular and granular subbases, aggregate bases, salvaged/
recycled aggregates and HMA Mixtures. The specifications used to define and construct these
materials are Mn/DOT 3149, 3138, 2350 and 2360 respectively. The pavement material design
parameters used for each thickness design procedure are presented.
Field control procedures needed to meet the specifications are also presented. The Inspector’s
Job Guide for Construction sections for aggregate base and HMA construction are summarized
to present items that will help field personnel and provide checklists to properly construct each
pavement layer. In order to realize the performance predicted by the respective design
procedures in terms of strength, stiffness, and durability the specifications must be followed.
1.2. Minnesota Thickness Design Procedures
1.2.1. Soil Factor Design Procedure
The Soil Factor Design Procedure is shown in Figure 1.1 (Mn/DOT State Aid Manual,
1999). The chart uses seven categories of traffic based on the projected 20-year two-way
Annual Average Daily Traffic (AADT) and Heavy Commercial Average Daily Traffic
(HCADT). AADT and HCADT flow maps are available for the entire state; however, it is
recommended that a District Traffic Engineer or the Office of Transportation Data and
Analysis be contacted to make the 20-year design predictions. Traffic estimates should be
based on future development planned for the area and this information may be available at
both the state and local level.

4
Figure 1.1 Flexible Pavement Design Using Soil Factors
The soil is defined using the soil factor, which is based on the AASHTO classification of
the soil. Section 4.2 reviews methods for determining the appropriate soil classification that
represents the embankment conditions on the project. Soil classification systems and
correlations with other properties are presented in Chapter 4.
The Granular Equivalent (GE) thickness is the equivalent thickness for the Soil Factor
Design Procedure. A Specification 3139 Class 5 or 6 material has an equivalency factor of
1.0. A Class 4 material has a factor of 0.75 because it has a less restrictive gradation band.
The specifications for the other pavement materials are listed in Figure 1.1. Minimum
bituminous GE and total granular GE are shown for each traffic category. The soil factors
shown in Figure 1.1 represent the percentage of GE thickness required relative to the
S.F. Minimum Bit. G.E. Total G.E. S.F. Minimum
Bit. G.E. Total G.E. S.F. Minimum Bit. G.E. Total G.E.
50 3.0 (75) 7.25 (180) 50 7.0 (175) 14.00 (350) 50 8.0 (200) 20.30 (510)75 3.0 (75) 9.38 (235) 75 7.0 (175) 17.50 (440) 75 8.0 (200) 26.40 (660)
100 3.0 (75) 11.50 (290) 100 7.0 (175) 21.00 (525) 100 8.0 (200) 32.50 (815)110 3.0 (75) 12.40 (310) 110 7.0 (175) 22.40 (560) 110 8.0 (200) 35.00 (875)120 3.0 (75) 13.20 (330) 120 7.0 (175) 23.80 (595) 120 8.0 (200) 37.40 (935)130 3.0 (75) 14.00 (350) 130 7.0 (175) 25.20 (630) 130 8.0 (200) 39.80 (995)
Minimum MinimumBit. G.E. Bit. G.E. Superpave Hot Mix Spec. 2360 2.25
50 3.0 (75) 9.00 (225) 50 7.0 (175) 16.00 (400) Plant Mix Asp Pave Spec 2350 2.25/2.25/2.0075 3.0 (75) 12.00 (300) 75 7.0 (175) 20.50 (515) Plant-Mix Bit. Type 41,61 2.25
100 3.0 (75) 15.00 (375) 100 7.0 (175) 25.00 (625) Plant-Mix Bit. Type 31 2110 3.0 (75) 16.20 (405) 110 7.0 (175) 26.80 (670) Aggregate Base (Class 5 & 6) 3138 1120 3.0 (75) 17.40 (435) 120 7.0 (175) 28.60 (715) Aggregate Base (Class 3 & 4) 3138 0.75130 3.0 (75) 18.60 (465) 130 7.0 (175) 30.40 (760) Select Granular Spec 3149.2B 0.5
AASHTO SOIL CLASS
SOIL FACTOR (S.F.) %
ASSUMED R-VALUE
Minimum Minimum A-1 50 - 75 70 - 75Bit. G.E. Bit. G.E. A-2 50 - 75 30 - 70
50 7.0 (175) 10.25 (255) 50 8.0 (200) 18.50 (465) A-3 50 7075 7.0 (175) 13.90 (350) 75 8.0 (200) 23.70 (595) A-4 100-130 20
100 7.0 (175) 17.50 (440) 100 8.0 (200) 29.00 (725) A-5 130 + -110 7.0 (175) 19.00 (475) 110 8.0 (200) 31.10 (780) A-6 100 12120 7.0 (175) 20.50 (515) 120 8.0 (200) 33.20 (830) A-7-5 120 12130 7.0 (175) 22.00 (550) 130 8.0 (200) 35.30 (885) A-7-6 130 10N O TE:If 10 ton (9.1 t) design is to be used, see Road Design M anual 7-3.
For full depth bitum inous pavem ents, see Road Design M anual 7-3.
*Granular Equivalent Factor per M nDO T Technical M em orandum 98-02-M RR-01.
S.F. Total G.E.
9 TON @ LESS THAN 150 HCADT 9 TON - 600 @ 1100 HCADT
S.F. Total G.E.
S.F. Total G.E. S.F. Total G.E.
9 TON - MORE THAN 1100 HCADT
7 TON @ 400 - 1000 ADT 9 TON - 300-600 HCADTMATERIAL TYPE OF
MATERIAL G.E. FACTOR*
7 TON @ LESS THAN 400 ADT 9 TON -150-300 HCADT
FLEXIBLE PA V EM EN T D ESIG N U SIN G SO IL FA CTO RSRequired Gravel Equivalency (G.E.) for various Soil Factors (S.F.)
For new construction or reconstruction use projected A D T. For resurfacing or reconditioning use present A DT.A ll units of G.E. are in inches w ith m illim eters (m m ) in parenthesis.

5
“typical” A-6 clay loam soil found in Minnesota. For granular type soils the soil factor is less
than 100% and for heavy clay and some silty soils the soil factors are greater than 100%.
The thicknesses recommended by the Soil Factor Design Procedure have changed
somewhat through the years because of increased traffic loadings and improved construction
procedures. The construction specifications and procedures presented in Sections 1.4 and 1.5
must be followed to realize the design life predicted by the Soil Factor Design Procedure.
1.2.2. R-Value Procedure
Figure 1.2 is the R-Value design chart currently used by Mn/DOT for HMA pavement
aggregate base thickness design. The embankment soil R-Value should be determined using
the Mn/DOT standard laboratory test procedure.
Figure 1.2 R-Value Design Chart
The R-Value can also be roughly estimated from the AASHTO soil classification as
shown in Table 1.1. The traffic for the R-Value procedure is defined using equivalent
standard [80-kN (18,000-lb)] axle loads (ESAL’s). An ESAL quantifies the effect of the axle

6
load magnitude and configuration on the serviceability decrease of a pavement. ESAL’s in
the design lane are calculated from:
• The total traffic predicted during the design period
• The vehicle type distribution
• The average serviceability decrease of each vehicle type
Table 1.1 MnPAVE Design Moduli Correlation
The values in Table 1.1 are interim values. As more data become available it will be
revised (Chadbourn, et. al, 2002).
A software program named Mn/ESAL’s is also available from the Mn/DOT Office of
Transportation Data and Analysis to calculate design ESAL’s.
Soil Classification Strength Tests MnPAVE Design Moduli
Textural Class AASHTO
Mn/DOT Soil
Factor
R-Value (240 psi Exudation Pressure)
CBR Percentage
DCP mm/blow
Winter & Early Spring Late Spring Summer Fall
Estimated Measured Ave (SD) Estimated Estimated MPa ksi MPa ksi MPa ksi MPa ksi
Gravel (G) A-1 50-75 ND ND 21 ND 350 50 - - - - - -
Sand (S) A-1 A-3 50-75 61 ND 21 13 350 50 60 8.7 73 10.5 85 12.4
Loamy Sand (LS) A-2 50-75 39 60 (14) 6.2 14 350 50 52 7.6 63 9.2 75 10.8
sl pl S Loam pl S Loam
A-2 A-2,A-4
100-130 100-130
30 16
- 33 (16)
5.5 4.4
14 16
350 350
50 50
47 39
6.8 5.7
57 48
8.3 7.0
67 56
9.7 8.2
Loam (L) A-4 100-130 14 20 (6) 4.2 18 350 50 35 5.0 42 6.1 50 7.2
Silt Loam (SiL) A-4 100-130 11 25 (15) 3.9 31 350 50 19 2.7 23 3.3 27 3.9
Sandy Clay Loam (SCL) A-6 100-130 17 21 (6) 4.5 16 350 50 42 6.1 51 7.4 60 8.7
Clay Loam (CL) A-6 100-130 14 17 (4) 4.1 18 350 50 35 5.1 43 6.2 51 7.3
Silty Clay Loam (SiCL) A-6 120-130 11 16 (5) ND 27 350 50 22 3.2 27 3.9 32 4.6
Sandy Clay (SC) A-7 120-130 14 ND ND ND 350 50 ND ND ND ND ND ND
Silty Clay (SiC) A-7 120-130 8 ND 3.4 23 350 50 27 3.9 33 4.8 39 5.6
Clay (C) A-7 120-130 11 14 (3) 3.9 18 350 50 35 5.1 42 6.1 50 7.2

7
The resulting structure from the R-Value Design is the Granular Equivalent thickness
(GE) using the same definition of thickness as the Soil Factor Design Procedure.
The three GE levels obtained from Figure 1.2 are:
• Total GE,
• Bituminous plus base GE and
• Minimum bituminous GE.
Another HMA design termed full-depth is presented in Figure 5-3.7 of the Mn/DOT
Geotechnical and Pavement Manual. Mn/DOT discontinued the use of full-depth designs in
1995 due to poor performance and lack of rehabilitation options. Mn/DOT does not
recommend design and construction of full depth HMA pavements. Now modified and
termed deep-strength design, the design procedure is based on the full-depth design chart
coupled with a requirement for a 0.75-meter (30-in.) granular structure. The soil R-Value is
increased to account for the benefit provided by the added thickness of the granular layer
needed to attain the 0.75-meter (30-in.) depth.
Some cities and counties use deep strength design where there is limited vertical
clearance or where there is a severe aggregate shortage. For the deep strength design it is
very important that the subgrade be compacted well and uniformly to adequately support
construction equipment and the design traffic. Special consideration of HMA durability in
poorly drained conditions is also required.
1.2.3. MnPAVE Procedure
A mechanistic-empirical design procedure (MnPAVE) is now available for thickness
design in Minnesota. Transfer functions based on the structural performance of Mn/ROAD
pavement sections and Mn/DOT experience statewide are used to estimate pavement life.
The HMA pavement structure is simulated using layered elastic analysis. To calculate
stresses and strains in the structure, an elastic modulus and thickness for each layer must be
known. The elastic modulus is defined as the resilient modulus (Mr), which is the ratio of
deviator stress over recoverable strain for particular conditions. The resilient modulus can be
determined by:
1. Direct laboratory measurements using a repeated load triaxial test
2. Estimation of Mr from a standard lab test such as the R-Value
3. Estimation of Mr from the AASHTO or Unified soil classification

8
Resilient moduli can also be estimated from field measurements using either the falling
weight deflectometer (FWD) or the dynamic cone penetrometer (DCP). Other devices have
also been developed for this purpose.
Mn/ROAD sections have been used to determine how the moduli will vary throughout
the year. For MnPAVE the year is divided into five seasons with lengths that can be adjusted
based on location or for special situations. This makes MnPAVE much more versatile than
the Soil Factor and R-Value design procedures.
The resilient moduli (Mr) of the pavement layers vary seasonally. The variations used in the
current version of MnPAVE are based on in-place measurements at Mn/ROAD and testing
around the state. Currently, laboratory triaxial testing has only been performed on very few
Minnesota soils. Table 1.1 can be used to estimate the resilient modulus and R-Value from
the AASHTO and Unified classifications. The high values for each layer in the winter
represent frozen conditions.
Transfer functions are used to estimate pavement life based on HMA fatigue cracking
and subgrade rutting. Fatigue cracking in the HMA is correlated with tensile strains in the
bottom of the HMA layer and subgrade rutting is correlated with compressive strain on top of
the subgrade soil.
Currently, the number of ESAL’s in the design lane is one of the input options for traffic.
The ESAL’s are calculated just as for the R-Value procedure. MnPAVE converts ESAL’s to
a load spectrum that contains only a dual-tire single axle load configuration.
MnPAVE has three levels of data entry:
• Basic
• Intermediate
• Advanced
The Basic level uses data that are currently used for many local roads such as soil
classifications, etc. The Intermediate level uses current mechanistic tests for estimating
moduli. The Advanced level requires that moduli be measured for a given project. A draft of
the MnPAVE operating manual is now available from the Mn/DOT Office of Materials and
Road Research Section. The MnPAVE software is available on the Mn/ROAD website.

9
1.2.4. Pavement Design Options for 2002
Three design procedures are available in Minnesota. More complete descriptions of the
Soil Factor and R-Value procedures are given in the Mn/DOT State Aid and Geotechnical
and Pavement Manuals. These procedures have been used in Minnesota on roads with all
traffic levels for the past 25 plus years. The MnPAVE software beta version program now
being distributed makes it possible to account for many factors that could not be directly
considered previously. The potential for improved design with MnPAVE is great; however,
MnPAVE will require ongoing calibration and validation. Designs with a variety of materials
should be tried to see what design life is predicted from MnPAVE compared to the other
design procedures and performance observed in the field. When new construction procedures
or materials are used the pavement section should be evaluated using MnPAVE.
It is recommended that if a pavement is being designed using either the Soil Factor or R-
Value procedures that a corresponding design also be performed with MnPAVE. A
comparison of the resulting designs should be made and the Mn/DOT Office of Materials and
Road Research should be informed of the results of all comparisons. A form summarizing the
comparisons should be completed so that the experience with MnPAVE relative to the
current designs procedures is documented.
MnPAVE will become more useful as users gain experience with it. Also, the new
AASHTO Design Guide will soon be available. This national procedure will be mechanistic-
empirical similar to MnPAVE, however, the AASHTO procedure will need to be calibrated
in each state. Therefore, as the engineers in Minnesota gain experience with MnPAVE they
will also be gaining the ability to calibrate the AASHTO design to Minnesota climate,
materials and traffic conditions.
1.3. Traffic Estimates
The methods (HCADT, ESAL, and Load Spectrum) recommended for quantifying traffic for
the three design procedures have been summarized. Chapter 3 presents the procedures, tables,
and software available to make the estimates.
The Soil Factor Design requires an estimate of AADT and HCADT predicted 20 years into
the future, or whatever design life is selected for the given roadway. To estimate current and
future HCADT it is necessary to know the percentage of heavy vehicles in the traffic mix. The
HCADT can be estimated from a state map or measured on specific roadways using the

10
technique presented in Chapter 3. For many relatively low volume roads the value from the
statewide map may be appropriate; however, in any special situations such as access routes for
agriculture or manufacturing, a better estimate can be made using the field measurement
procedure.
The R-Value procedure currently uses design lane ESAL’s to quantify traffic. ESAL
estimates require an estimate of AADT, vehicle type distribution, axle weight data for each
vehicle type, an estimate of growth, and design lane distribution. Methods for measuring or
estimating these factors and calculating ESAL’s over the design life are presented in Chapter 3.
The MnPAVE design procedure uses the design lane ESAL or load spectrum to estimate
pavement life. If ESAL’s are input they can be converted to a single axle load dual tire load
spectrum. Load spectrum is a measure of the load distribution within each axle configuration and
will be used for mechanistic design for the new AASHTO Design Guide. Eventually, MnPAVE
will use load spectrum exclusively for thickness design. Mn/DOT is working on procedures to
provide load spectrum data for Minnesota roadways.
1.4. Subgrade (Embankment) Soil
1.4.1. Background
The subgrade or embankment soil on which a pavement is built is the most important part
of the pavement structure because:
• It is the layer on which the remainder of the structure is supported and helps resist the
destructive effects of traffic and weather.
• It acts as a construction platform for building subsequent pavement layers.
• The entire pavement section would have to be removed and replaced to correct
embankment performance problems created by lack of strength or uniformity.
It is imperative that the embankment be built as strong, durable, uniform and economical
as possible. The most economical embankment is one that will perform well for many
decades.
Chapter 4 presents methods to help achieve adequate stiffness, strength and uniformity for
a given embankment soil. This starts with a good soil survey at the location so that proper
design and construction procedures can be included in the project. Methods for conducting
soils surveys are presented in the Mn/DOT Geotechnical and Pavement Manual. Section 4.2
presents the procedure to conduct a good soil survey at a given location.

11
The design factors used to evaluate the soil on a project for the three Minnesota procedures
are also presented in Chapter 4 and the Mn/DOT Geotechnical and Pavement Design
Manual. The Falling Weight Deflectometer (FWD) and Dynamic Cone Penetrometer (DCP)
are used to determine the in-place stiffness or strength of the soils, subbase and base
materials. The advantage of using field measurements is that variability can also be
determined. Variability is an input for the MnPAVE design procedure.
1.4.2. Drainage
Good drainage for a pavement section and most importantly the embankment soil must
be provided. Specific design considerations to achieve adequate drainage are given in the
Mn/DOT Geotechnical and Pavement Manual. An important design factor is to try to keep
the final grade at least 1.7 m (5 ft) above the water table. If this is not possible, a height of 1
m (3 ft) above the water table should be used.
Drains can also be used in the pavement section. However, for them to work properly it is
necessary to construct a drainable base and/or subbase. Proper drainage will help maintain
the strength of the pavement section, and minimize frost heave and thaw weakening.
1.4.3. Subgrade (Embankment) Soil Construction
1.4.3.1. General
To achieve the design values estimated for the actual embankment soils in the field,
proper construction practices must be followed. These start with specifications that help
define good construction. In Chapter 4 the specifications that pertain to embankment soil
construction, general construction design considerations and some field checklists are
presented.
1.4.3.2. Specifications
Mn/DOT has three specifications that pertain to the construction of embankments.
These are Specifications 2105, 2111, and 2123. Specification 2105 “Excavation and
Embankment” includes two types of density control. These are “Specified” (sand cone)
and “Quality” (visual) compaction. Both methods state that compaction must be
accomplished to the satisfaction of the engineer. For “Quality” compaction an
experienced engineer or inspector must be on the project to judge if adequate compaction
is achieved. For “Specified” compaction the judgment of the engineer is aided by the
determination of a measured density. The density must be measured using the

12
representative moisture-density test for the soil being constructed. The Specified Density
Method is recommended by Mn/DOT.
Specification 2111 presents the test rolling method for subgrade acceptance. Test
rolling is a supplement to Specification 2105. Test rolling evaluates uniformity and
consistency of subgrade support relative to rutting. Test rolling will detect weak/unstable
areas due to inadequate compaction or high moisture content. Failed areas will require
corrective measures which could include removing the unstable/unsuitable materials,
reducing moisture content and recompaction of the soils.
Test rolling is not recommended for the following situations:
• Areas having less than 0.75 m (30 in.) subcut backfill in depth. These areas
would probably not pass 2111 requirements.
• Areas having shallow underground utilities or structures.
• Areas having closely spaced bridges.
• Areas where geosynthetics are placed within the upper 1.7 m (5 ft) of the
subgrade.
An experienced inspector can determine where soft spots occur in the constructed
subgrade and make sure measures are taken to correct these. The test roller method of
compaction control is recommended along with Specification 2105 because almost total
coverage of the embankment grade construction is possible.
Specification 2123 lists the equipment and characteristics of the equipment required
to carry out Specifications 2105 and 2111.
1.4.3.3. General Design Considerations
Based on the soil type, project conditions, structural design and specifications, certain
procedures need to be established and followed to achieve good embankment
construction. The goal is to provide a strong and uniform embankment for the pavement
structure. Many of the procedures presented depend on the type of soil encountered on
the project. As the project is started variations in the soils may be encountered and
therefore the field engineer and inspector must be aware of the effect of these changes.
The following recommendations are presented in Chapter 4.
• Excavation and Embankment Construction
1. Ideally, the finished grade should be kept at least 1.7 m (5 ft) above the water

13
table in order to reduce capillary moisture and should be at least equal to the
depth of frost penetration in order to minimize frost heave. A minimum height of
1 m (3 ft) should be maintained.
2. The existing soils and their preparation; including subgrade correction,
embankment placement, and protection of the completed embankment need to be
considered.
• Soils Evaluation: Soils must be evaluated based on whether they are suitable or
unsuitable, excavated soils, salvaged materials or borrow.
• Soils Preparation: Proper preparation of the soils for good uniformity involves
reworking, blending, mixing, and enhancing the existing materials. The mixing of
existing soils will help eliminate pockets of high moisture and unstable soils.
Subcutting, and/or mixing and proper compaction will help provide a uniform
subgrade. Proper compaction can be verified with specified densities and test
rolling. Lime or other treatments for moisture control may be considered.
• Subgrade Correction: Subcuts must be made to ensure uniformity of material and
stability in the upper portion of the embankment. Subcuts are used to reduce or
eliminate differential or pocketed high-moisture conditions, unstable materials,
frost heave potential and non-uniform subgrade conditions. Typical subcut depths
range from 0.6 to 1.2 m (2 to 4 ft) with a 0.3 m (1 ft) minimum. Subcuts must be
used especially where there are silty type soils, which are particularly frost
susceptible. In areas of the embankment that may generate frost heaves the subcut
depth must extend below the frost line. The subcut should be backfilled with
select granular material. If it is not practical to use select granular, then the
existing soil should be mixed uniformly to a moisture content appropriate for
good compaction. Drains may be needed in the bottom of the subcut to assure
that water does not collect in the subcut.
• Placement of Embankment and Backfill Materials: As embankment materials are
placed, the same soil should be used throughout each layer to prevent non-
uniform moisture and drainage conditions.

14
• Compaction: Compaction must be performed in accordance with Mn/DOT
Specification 2105 supplemented with 2111 using the equipment specified in
Specification 2123.
1.4.3.4. Construction Notes and Procedures
The Mn/DOT Office of Construction, Technical Certification Section has published
an “Inspector’s Job Guide for Construction”. This Guide gives the inspector a checklist
that will help get a project started and document the parameters and procedures that need
to be considered based on the specifications. One item in particular that will help keep a
project under control is for the inspector to keep a good daily diary. This will help all
people involved with the project feel confident that work is progressing at an appropriate
rate and that the inspection work is being accomplished.
1.4.3.5. Subgrade Enhancement
Many different procedures have been used to enhance the performance of a subgrade.
The methods that have been used with varying degrees of success are the following:
• Remove and replace
• Improvement of existing materials using density and moisture control
• Modification of existing materials
• Stabilization
• Reinforcement using geosynthetics
Some of the procedures have been tried by Mn/DOT and others by cities and
counties. Minnesota Local Road Research Project 785 is a study of the use of various
methods of modification, stabilization and reinforcement in Minnesota and surrounding
states.
1.5. Pavement Section Materials
1.5.1. General
Pavement section materials are all materials that are added above the subgrade soil to
more effectively withstand the traffic loads. The materials must be stronger and more durable
closer to the surface. All pavement section materials must have low frost susceptibility.
Chapter 5 presents many different materials that are now used in pavement sections in
Minnesota and follows the same format as Chapter 4 for subgrade design and construction.
Definitions of Select Granular to Hot Mix Asphalt (HMA) mixtures are given.

15
The granular equivalent thickness factors are related to the specifications given for the
various materials. The moduli for the pavement layers that can be used for input for the
MnPAVE software are also presented. The pavement moduli are varied by season just as
those of the subgrade soil. As MnPAVE and its inputs are developed it will be possible to
assign moduli to a variety of materials that pass a particular specification. For instance, a
Specification 3138, Class 5 material with 10% passing the 0.075-mm (No. 200) sieve may
have a different set of moduli than one with 5% passing the same sieve. Variations in
gradation and particle angularity result in different moduli. The design factor inputs for the
two HMA specification mixes used by Mn/DOT (2350 and 2360) are also presented.
1.5.2. Pavement Layer Construction
1.5.2.1. General
To obtain the design values discussed above for granular subbase, aggregate base,
stabilized base and HMA, proper construction practices must be followed. Good
specifications and construction methods will assure a good product. Field control
procedures to help meet the specifications are presented. This includes a summary of the
Inspector’s Job Guide for Construction. Mn/DOT has also published a “Materials Control
Schedule” in the Grading and Base Manual, which summarizes the testing frequency and
quantities of materials needed to conform to the respective specifications.
1.5.2.2. Specifications
The specifications pertaining to the construction of the pavement layers include:
• Granular and Select Granular (Mn/DOT Spec. 3149.2B)
• Granular Base and Subbase Materials Gradations (Mn/DOT Spec. 3138)
• Salvaged/Recycled Materials Gradations (Mn/DOT Spec. 3138, Class 7)
• Aggregate Base/Subbase Construction (Mn/DOT Spec. 2211)
• HMA Marshall Mix Design (Mn/DOT Spec. 2350)
• HMA Superpave Mix Design (Mn/DOT Spec. 2360)
The specifications for mixtures cover the materials, mix design, and construction. The
mix design for Specification 2350 uses the Marshall hammer for compaction to develop
the job mix formula and construction control. Specification 2360 is the Minnesota
application of the gyratory mix design that uses the gyratory compactor to compact

16
samples for design and field control. Both of the procedures use volumetrics including
voids in the mineral aggregate (VMA) and total air voids.
Before the 2350 specification was adopted, VMA was used in the design phase of the
mixture, but not checked in the field. Some mixtures were experiencing “VMA collapse”
in the field; therefore, the current specifications require that VMA be controlled in the
final mixture. Ride (smoothness) requirements have also been added to the 2350 and
2360 specifications. Both incentives and disincentives are included for control of ride
quality and density.
Specification 2331 and 2340 mixtures are still being produced. However, asphalt
absorptions are not monitored. Specifications 2331 and 2340 should not be used except
for limited use on very low volume and low load facilities. Asphalt absorptions are
determined in the VMA procedures. The field control procedures for the 2331 and 2340
mixtures also need to be followed carefully, especially for adequate compaction.
Currently, Mn/DOT uses Gyratory (Spec. 2360) mixes for most projects including new
construction and overlays. Three levels of mix are defined for the 2350 specification.
These are low volume (LV) which is defined as traffic less than 1 million ESAL’s,
medium volume (MV) which is defined as traffic between 1 and 3 million ESAL’s and
high volume (HV) which is defined as traffic greater than 3 million ESAL’s.
1.5.2.3. Field Control Procedures to Meet Specifications
1.5.2.3.1. General
The procedures presented in the Mn/DOT Grading and Base Manual and
Geotechnical and Pavement Manual are summarized in Chapter 5. Checklists for field
personnel from Field Notes for Construction Engineers and Inspectors are also
presented. Recommendations are made for good field control.
1.5.2.3.2. Aggregate
The construction of aggregate bases and granular subbases involves the following
procedures:
• Manufacture at a gravel pit or quarry
• Storage of materials
• Transport to the grade
• Placement

17
• Compaction
The material is tested for general quality, gradation, and uniformity of
characteristics. Segregation must be minimized during the entire material handling
and construction process. The current Schedule of Materials Control must be
followed for each project. It is important that the contractor and agency use exactly
the same procedures for Quality Control and Quality Assurance companion testing.
Mn/DOT specifications define three methods that can be used for compaction
control of aggregate base:
• Specified Density (sand cone)
• Dynamic Cone Penetrometer (DCP)
• Quality (visual) Compaction
For the specified density method the in-place density is measured using the 150-
mm (6-in.) Sand Cone Method (ASTM D 1556-90). Random sampling procedures
should be followed to establish density test locations. Mn/DOT currently has
specifications for Class 5, 6, and 7 aggregate base.
The DCP is a quick and easier test to measure shear strength of a granular
material. The standard Mn/DOT procedure should be followed when using the DCP.
The DCP must be conducted within 24 hours of compaction so that the moisture
content is near standard Procter optimum moisture content.
Quality (visual) Compaction should only be used if the equipment is not available
to do either sand cone or DCP testing. If quality compaction is used, the inspector and
engineer must be experienced in the construction of aggregate base and embankment
materials. The compaction operation must be observed continuously. It generally is
only appropriate for small areas where a limited amount of granular material is being
placed.
The Field Notes for Construction Engineers and Inspectors includes a section for
inspection of aggregate base construction. This checklist will help the field personnel
implement the specifications well. Just as for the construction of embankment soils,
one of the most important documentation items is a good diary, which includes such
things as hours, location, lift thickness, test results, quantity, yield and other events
including weather that may have an effect on the work.

18
1.5.2.3.3. Hot Mix Asphalt
The current Schedule of Materials Control should be reviewed and used for
setting up the field control for each HMA construction project. That document will
establish:
• The specification applicable for the project
• The minimum required field acceptance testing rate
• Form number to use
• Minimum required sampling rate for laboratory testing
• Sample size required for laboratory testing
The construction of an HMA pavement layer includes the following operations:
Plant Operations
• Materials delivery or manufacture and storage (asphalt and aggregate)
• Materials proportioning and mixing
• HMA storage and/or transfer to trucks
• Delivery to the construction project
Paving Operations
• Laydown
• Compaction
Each step requires some Quality Control (QC) testing by the contractor and the
Quality Assurance (QA) testing by the agency as defined in Specification 2350 or
2360. Testing will help assure that the material is uniform (not segregated), is placed
to specification density, and that the surface passes ride as defined in Specifications
2350 and 2360. It is very important that the same standard procedures be used for
both QC and QA testing and that the contractor and the agency employ certified
technicians.
Compaction is the most important part of construction of an HMA mixture.
Inadequate compaction and high air voids will result in a shorter life because of
accelerated deterioration due to high permeability and low strength.
Two methods of compaction control are outlined in Specifications 2350 and 2360:
• Maximum Density Method (2350.6B and 2360.5B). The bulk specific gravity
of field cores is compared to the maximum mixture specific gravity

19
representing that day’s production. The maximum density required (Table
2350-8 or 2360-14) is determined by the average bulk specific gravity for
each lot (2350.6B2a or 2360.5B3) divided by the average maximum specific
gravity for that day’s production. The tolerances permitted between QC and
QA testing are listed in Table 2350-6 and 2360-13.
• Ordinary Compaction (2350.6C or 2360.5C). For Ordinary Compaction a
control strip of at least 330 m2 (395 yd2) of the same material, on the same
subgrade and base conditions shall be compacted to determine a proper roller
pattern to achieve maximum density. A growth curve of density with roller
passes must be used to determine when maximum density has been obtained.
If materials or conditions change a new control strip must be constructed. A
given control strip can be used for a maximum of 10 construction days.
The Maximum Density Method should always be used unless otherwise
indicated.
Ordinary Compaction without a control strip should only be used for very
small areas or thin lifts less than 39 mm (1.5 in.). For these areas the HMA should
be compacted until there is no appreciable increase in density with each pass of the
roller as observed by an experienced engineer or inspector.
The type and characteristics of the roller(s) to be used for Ordinary Compaction
are presented in Specifications 2350 and 2360.
The Inspector’s Job Guide for Construction includes sections on both the
inspection of plant and paving operations. This guide assumes that the inspector will
be aware of the whole operation and make sure that a consistent, uniform quality
mixture is produced and constructed and that the inspector will do much more than
simply collect data and samples.
1.6. Summary and Recommendations
During the implementation process of a new design procedure, feedback is needed. It is
recommended that MnPAVE be used to design flexible pavement sections in addition to your
current design procedure. When developing a design for a specific project we ask that you report
information on designed sections (thicknesses, inputs, source of inputs) from both the current

20
design and MnPAVE designs to Mn/DOT by sending the following information to the contacts
listed below:
• MnPAVE design file (Windows *.mpv file) generated by executing Windows “File”
and “Save”, or “Save As” commands (after running the program and saving, this file
will contain all inputs that the user entered).
• Current procedure
• Any additional comments/questions on the program.
Contacts:
Gene Skok, University of Minnesota, Civil Engineering Department
Dave Van Deusen, Minnesota Department of Transportation, Pavement Design
Engineer ([email protected])
Shongtao Dai, Minnesota Department of Transportation, Research Operations Engineer
Traffic is evaluated using 20-year projections of AADT and HCADT for the Soil Factor
design procedure. Design lane Equivalent Standard Axle Loads (ESAL’s) are used for both the
R-Value and MnPAVE procedures. ESAL predictions over a 20-year design period require an
estimate of AADT, vehicle type distribution, axle weight data based on vehicle type, average
effect of vehicle type on performance, a growth factor and lane distribution factor for the
roadway. Tables and procedures are presented in Chapter 3 for determining these values using
estimation techniques and the field procedure is presented for measuring vehicle type
distribution.
The embankment is a very important part of a pavement structure. Chapter 4 presents the
methods of evaluating the subgrade strength and stiffness for the three design procedures. To
realize the design parameters for a given soil, good construction practices must be followed.
Good construction starts with good specifications that define how the pavement structure is to be
constructed and how compensation will be awarded. The Mn/DOT specifications for subgrade
construction are 2105, 2111 and 2123. Chapter 4 includes summaries of these specifications and
the field procedures that will most effectively implement them. The importance of well-trained
knowledgeable personnel is emphasized.

21
Chapter 5 presents how the materials used in the pavement structure are evaluated for the
three design procedures. The granular equivalent factors used for the Soil Factor and the R-Value
procedures are listed in Chapter 5. The resilient moduli used in MnPAVE can be estimated using
the procedures described in the MnPAVE Guide (Chadbourn, et. al, 2002). Eventually
laboratory, DCP, and non-destructive field tests (the FWD) will be used with the laboratory
resilient modulus tests. An advantage of mechanistic-empirical design (MnPAVE) is that
seasonal variations in resilient modulus for materials in the pavement section are considered.
Mn/DOT Specifications 2350 and 2360 are recommended for HMA construction on low
volume roads in Minnesota. Both specifications use volumetrics for field control and quality
management. The contractor is responsible for Quality Control (QC) and the agency, Quality
Assurance (QA). The specifications include requirements for material quality, mixture design,
mixture variability, density (voids), voids in the mineral aggregate (VMA), moisture
susceptibility, field density and smoothness of the finished surface. Construction procedures and
a checklist for field engineers and inspectors are presented.
Finally it is important to remember that one of the primary goals of design and construction
of the subgrade and pavement section materials is to obtain uniformity. Uniformity is critical to
achieving good performance because uniformity reduces the differential movements caused by
settlement, moisture changes and frost heave. Many of the construction methods and testing
procedures presented in this report and other Mn/DOT publications are focused on achieving
maximum uniformity in the final product.

22

23
CHAPTER 2
THICKNESS DESIGN PROCEDURES 2.1. Background and Introduction
There are three flexible pavement thickness design procedures now used in Minnesota. In
addition some pavements, especially at the local level, are designed by experience based on what
has worked in the past. The three formal thickness design procedures are the Soil Factor Design
found in the Mn/DOT State Aid Manual (4), the Stabilometer R-Value Design found in the
Mn/DOT Geotechnical and Design Manual (5) and MnPAVE, which is the mechanistic-
empirical design procedure currently under development. The Soil Factor Procedure was
developed in the 1950’s and has been modified somewhat since then. Mn/DOT adopted the R-
Value Procedure in the early 1970’s. The MnPAVE Procedure is in software form and is being
tested against the other procedures. The Beta version is now available (6). In this Chapter the
procedures are presented along with the factors needed for thickness determination.
The traffic factor for each of the procedures is presented in Chapter 3. The embankment
(subgrade) factors for design and construction specifications and recommended procedures are
given in Chapter 4. The thickness of the pavement section is defined using the Granular
Equivalent for the Soil Factor and R-value design procedures. The Resilient Modulus (Mr) and
the thickness of the layers define the structure for the MnPAVE Procedure. The required
specifications and recommended construction procedures to attain the respective pavement
section factors are presented in Chapter 5.
2.2. Soil Factor Design
Since 1954 some pavements in Minnesota have been designed using a table similar to Figure
2.1. This is the 2001 version from the State Aid Manual which uses English and metric units (4).
The chart uses seven traffic categories based on 20-year projected two-way AADT and HCADT
and eight embankment types using the AASHTO classification system. Thickness in terms of
Granular Equivalent (G.E.) is determined for each level of traffic and soil type. Each design also
has a specified maximum spring axle load.
The traffic factors are Average Daily Traffic (ADT) and Heavy Commercial Average Daily
Traffic (HCADT). The ADT and HCADT are both two-way values. The ADT includes all

24
vehicles and the HCADT is defined as all trucks with six or more tires; thus HCADT does not
include cars, small pickup and panel-type trucks. The ADT and HCADT normally used for
design are values predicted for 20 years into the future. Local conditions must be considered and
the projected value may either be increased or decreased based on the projected future use of the
road. More specific methods of determining design values are presented in Chapter 3.
As noted in Figure 2.1 a soil factor of 100% represents an A-6 or A-4 soil. Stronger soils
have soil factors less than 100% and weaker soils greater than 100%. The soil factor percentage
represents the percent increase or decrease in the thickness of the subbase (D3). There are ranges
of percentages shown for A-1, A-2, A-4 and A-7 soils. Therefore, it is possible to use some
judgment relative to the capabilities of the soils after evaluating drainage and other design
S.F. Minimum Bit. G.E. Total G.E. S.F. Minimum
Bit. G.E. Total G.E. S.F. Minimum Bit. G.E. Total G.E.
50 3.0 (75) 7.25 (180) 50 7.0 (175) 14.00 (350) 50 8.0 (200) 20.30 (510)75 3.0 (75) 9.38 (235) 75 7.0 (175) 17.50 (440) 75 8.0 (200) 26.40 (660)
100 3.0 (75) 11.50 (290) 100 7.0 (175) 21.00 (525) 100 8.0 (200) 32.50 (815)110 3.0 (75) 12.40 (310) 110 7.0 (175) 22.40 (560) 110 8.0 (200) 35.00 (875)120 3.0 (75) 13.20 (330) 120 7.0 (175) 23.80 (595) 120 8.0 (200) 37.40 (935)130 3.0 (75) 14.00 (350) 130 7.0 (175) 25.20 (630) 130 8.0 (200) 39.80 (995)
Minimum MinimumBit. G.E. Bit. G.E. Superpave Hot Mix Spec. 2360 2.25
50 3.0 (75) 9.00 (225) 50 7.0 (175) 16.00 (400) Plant Mix Asp Pave Spec 2350 2.25/2.25/2.0075 3.0 (75) 12.00 (300) 75 7.0 (175) 20.50 (515) Plant-Mix Bit. Type 41,61 2.25
100 3.0 (75) 15.00 (375) 100 7.0 (175) 25.00 (625) Plant-Mix Bit. Type 31 2110 3.0 (75) 16.20 (405) 110 7.0 (175) 26.80 (670) Aggregate Base (Class 5 & 6) 3138 1120 3.0 (75) 17.40 (435) 120 7.0 (175) 28.60 (715) Aggregate Base (Class 3 & 4) 3138 0.75130 3.0 (75) 18.60 (465) 130 7.0 (175) 30.40 (760) Select Granular Spec 3149.2B 0.5
AASHTO SOIL CLASS
SOIL FACTOR (S.F.) %
ASSUMED R-VALUE
Minimum Minimum A-1 50 - 75 70 - 75Bit. G.E. Bit. G.E. A-2 50 - 75 30 - 70
50 7.0 (175) 10.25 (255) 50 8.0 (200) 18.50 (465) A-3 50 7075 7.0 (175) 13.90 (350) 75 8.0 (200) 23.70 (595) A-4 100-130 20
100 7.0 (175) 17.50 (440) 100 8.0 (200) 29.00 (725) A-5 130 + -110 7.0 (175) 19.00 (475) 110 8.0 (200) 31.10 (780) A-6 100 12120 7.0 (175) 20.50 (515) 120 8.0 (200) 33.20 (830) A-7-5 120 12130 7.0 (175) 22.00 (550) 130 8.0 (200) 35.30 (885) A-7-6 130 10N O TE:If 10 ton (9.1 t) design is to be used, see Road Design M anual 7-3.
For full depth bitum inous pavem ents, see Road Design M anual 7-3.
*Granular Equivalent Factor per M nDO T Technical M em orandum 98-02-M RR-01.
S.F. Total G.E.
9 TON @ LESS THAN 150 HCADT 9 TON - 600 @ 1100 HCADT
S.F. Total G.E.
S.F. Total G.E. S.F. Total G.E.
9 TON - MORE THAN 1100 HCADT
7 TON @ 400 - 1000 ADT 9 TON - 300-600 HCADTMATERIAL TYPE OF
MATERIAL G.E. FACTOR*
7 TON @ LESS THAN 400 ADT 9 TON -150-300 HCADT
FLEXIBLE PA V EM EN T D ESIG N U SIN G SO IL FA CTO RSRequired Gravel Equivalency (G.E.) for various Soil Factors (S.F.)
For new construction or reconstruction use projected A D T. For resurfacing or reconditioning use present A DT.A ll units of G.E. are in inches w ith m illim eters (m m ) in parenthesis.
Figure 2.1 Flexible Pavement Design Using Soil Factors

25
considerations. Chapter 4 includes a discussion on the selection of these and other design
parameters for the embankment soils.
The strength and stiffness of the soil supporting the pavement are very dependent on the
density and moisture conditions of the constructed soil. Uniformity is also important to
minimize differential heave during freeze up. The construction specifications and procedures
presented in Chapter 4 must be followed to attain the strength and stiffnesses inferred in the
given soil factors.
The Granular Equivalent (G.E.) defines a pavement section by equating the thickness of each
aggregate or HMA layer to an equivalent thickness of granular base material. Equation 2.1 is
used to calculate the Granular Equivalent. In Minnesota this is a Specification 3139 material,
Class 5 or 6 (9). The relevant specifications for the other pavement materials are listed in Figure
2.1. Minimum bituminous and total granular equivalents are also shown for each traffic category.
The total Granular Equivalent is defined using Equation 2.1.
G.E. = a1D1 + a2D2 + a3D3 + … (2.1)
Where: D1 = thickness of asphalt mix surface, in. (mm)
D2 = thickness of granular base course, in. (mm)
D3 = thickness of granular subbase course, in. (mm)
a1, a2, and a3 = G.E. Factors listed in Figure 2.1.
The required design thicknesses are listed in two categories (minimum bituminous G.E. and
total G.E.). The maximum granular base thickness can be calculated by subtracting the minimum
bituminous G.E. from the total G.E. Other design combinations of bituminous and granular
materials can be determined using the G.E. factors.
The respective specifications and construction procedures necessary to attain the material
characteristics defined for the soil factor design are presented in Section 5.3.2.
2.3. Stabilometer R–Value Design
The Stabilometer R-Value is the current design procedure used by Mn/DOT to determine the
design thickness of an HMA surfaced pavement. This procedure is based on research done in the
1960’s using results from the AASHO Road Test. The basis of the design is limiting spring

26
deflections by increasing the strength (stiffness) of the soil or by increasing the strength
(stiffness) of the pavement layers for a given level of traffic.
Figure 2.2 is the R-Value design chart from the Mn/DOT Design and Geotechnical and
Pavement Design Manual (5). The embankment R-Value can be measured with a standard
laboratory test (ASTM D-2844) or estimated from the soil type or classification. The R-Value
laboratory procedure used in Minnesota is presented in Chapter 4. An exudation pressure of
1655kPa (240 psi) is used for determining a design R-Value in Minnesota. Predictions of R-
Value from soil classification are also presented in Table 4.5.
The traffic is evaluated in terms of 80-kN (18,000-lb) equivalent standard axle loads
(ESAL’s). For a particular road being designed the ESAL’s are estimated for a design lane in one
direction. Calculated ESAL’s will be different for flexible and rigid pavements for the same
traffic mix. Chapter 3 presents methods for estimating design ESAL’s for flexible pavements in
Minnesota.
Figure 2.2 R-Value Design Chart

27
The thickness is defined in terms of Granular Equivalent in inches. Granular equivalent
factors (a1, a 2, and a 3) for the R-Value design are listed in Section 5.3.2. Equation 2-1 is used to
calculate the total granular equivalent in the same way as for the soil factor design. In addition to
the lines for specific R-Values showing the required GE for a given number of ESAL’s, lines on
the R-Value design chart represent:
1. The minimum bituminous thickness GE and
2. Bituminous plus base thickness GE.
The actual thicknesses represented can be calculated using the appropriate G.E. factors.
Examples of designs using the R-Value design chart with minimum thicknesses of
surface and base, plus other combinations are given in Reference 5.
2.4. MnPAVE Design
2.4.1. General
The Minnesota Department of Transportation and the University of Minnesota have
developed a mechanistic-empirical (M-E) design method for flexible pavements. The
procedure has been developed as a software package (MnPAVE) because of the great
quantities of data and analyses used for the design. A Beta Version of the software is now
available. It is still being fine-tuned somewhat.
MnPAVE predicts the structural performance of pavement sections using calculated
strains in a simulated elastic layered system. To use the elastic layered system moduli and the
thickness of each pavement layer must be determined for the pavement. Up to five (5) layers
can be used for the calculations of:
• The tensile strain in the bottom of the surface layer and
• The compressive strain on the top of the subgrade, which is assumed to be infinite in
depth.
Various combinations of material properties (moduli) are used to simulate the seasons
throughout the year. Currently, five seasons are used (winter, early spring, late spring,
summer and fall). MnPAVE calculates the percent of damage that occurs in each season,
maximum stress, strain and displacement at the critical locations, the allowable axle load
repetitions and reliability percentages. The life in years is then predicted using the predicted
traffic in ESAL’s or load spectra.

28
Fatigue cracking has been correlated with the tensile strain in the HMA surface layer and
embankment rutting has been correlated with the compressive strain on the embankment. The
performance equations are derived from the development of fatigue cracking and rut depth
on the Mn/ROAD test sections. Moduli of the layers have been measured throughout the year
using backcalculated Falling Weight Deflectometer (FWD) data or estimated from the
Dynamic Cone Penetrometer (DCP) or other standard tests.
The performance equations were also checked using the performance of a number of 40-
year old test sections from Investigation 183 (15). The research to develop the information to
check the performance of these sections was done as part of this project and reported in
Appendix A of this report.
Variability can also be incorporated into MnPAVE. Variations in the following
parameters contribute to the overall variation of the pavement section.
• Layer Moduli
− HMA Surface
− Granular base and subbase
− Subgrade Soil
• Layer Thicknesses
• Load Predictions
− Vehicle class predictions
− Vehicle weight estimates
− Total number of vehicles
The variability of these parameters is used with the predictions equations to calculate the
reliability of the performance predictions. A Monte Carlo simulation is used to calculate the
reliability of the performance predictions (16). With this type of analysis it is possible to
relate the variability of the thickness, material properties and traffic predictions to required
thickness. More uniform construction can therefore be translated into thickness saved or
increased life predictions.
MnPAVE requires that the materials be described by their stiffness (modulus) for the
seasons defined. This requires that the modulus be defined for these seasons either directly or
backcalculated using the FWD or DCP. Correlations with other standard tests as shown in
Table 4.5 can also be used.

29
At this time MnPAVE should be used in conjunction with one or both of the current
methods. In this way a city or county can develop confidence in the results of the MnPAVE
design. Without the MnPAVE software it has not been possible to take into account the many
variables that affect the performance of a pavement section.
MnPAVE has the following features:
• Three design levels based on input data quality
• Material properties adjusted seasonally
• Traffic quantified using either ESAL’s or load spectra
• English or System International (S.I.) Units
• HMA modulus temperature adjustment equations that can be modified
• Reliability estimates using Monte Carlo simulations
2.4.2. Set Up
MnPAVE is designed for Windows 95/98/NT operating systems and requires 2 MB of
hard drive space and a 200 MHz processor or higher.
Installation can be accomplished using the following procedure:
1. Create a new folder on the hard drive called “MnPAVE”
2. Copy the *.exe file from the floppy disk to the MnPAVE folder.
3. Run the program.
2.4.3. Start Up
2.4.3.1. Control Panel
The “Control Panel” is the first window to appear when MnPAVE is started. The
control panel includes areas for input data which includes “Climate, Structure and
Traffic” A button to display “Output” also appears on the window. The input must be
entered in order beginning with “Climate” and ending with “Traffic”, because the
seasonal factors used in “Structure” depend on Climate and some of the ESAL
calculations in Traffic depend on Structure. Changes can be made in these input windows
at any time. However, for a given design check, all inputs must be completed before
“Output” can be selected.
2.4.3.2. General Operation
MnPAVE uses the pull-down menu and window selection structures common to most
software packages. The pull-down menu at the top of the screen includes, “File, Edit,

30
Record, View, Window and Help.” The Output will provide damage factors for asphalt
fatigue, rutting and the percent of damage for each season. It also displays the maximum
stress, strain and displacements at the critical locations, the allowable load repetitions and
reliability percentages.
2.4.4. Inputs
2.4.4.1. General
MnPAVE can be operated using either S.I. or the English system of units, sometimes
called Customary units. The system of units can be selected separately for the Climate,
Structure and Traffic data. However, is recommended to use the same System for a given
design application.
The data for each of the input parameters, Climate, Structure and Traffic are defined
using three design levels, “Basic, Intermediate or Advanced”.
• The Basic Level requires the least amount of data and is intended for many low
volume roads. It may also be used for preliminary design for higher volume roads.
• The Intermediate Level requires more specific information for a given project
and is similar to the information required for that of the Soil Factor or R-Value
design procedures.
• The Advanced Level requires detailed traffic and material property information
and is intended for high volume trunk and interstate highways. It is possible for
the designer to use a different design level for each type of input data.
For this manual only input for the Basic Level and Intermediate Level are
considered. At this time the procedures for obtaining and using the data for the
Advanced Level have not been developed. However, the actual moduli and other values
that are used for the stress and strain calculations are shown in the Advanced Level
window.
2.4.4.2. Climate Inputs (Seasonal Design)
The material properties used for the design levels are adjusted for seasonal changes in
temperature and moisture. For example, typically the HMA modulus will be lower during
the warm summer season and higher during the cooler seasons. Also, the modulus of an
aggregate base will be lower during the wet spring periods. These variables cannot be
taken into account with the Soil Factor and R-Value Design Procedures.

31
For the current version of MnPAVE the year is divided into five seasons, which
reflect the major periods influencing pavement behavior as observed at Mn/ROAD. The
seasons are “Early Spring, Late Spring, Summer, Fall (standard), and Winter”.
• Early Spring is defined as the period when the aggregate base or subbase is
thawed, but the subgrade is still frozen.
• Late Spring is the period when the aggregate base has drained, but the subgrade
is thawed, saturated and weak.
• During Summer the aggregate base has fully recovered its strength and the
subgrade has only partially regained its strength.
• By Fall, both aggregate base and the subgrade have recovered their strength.
Fall is considered the standard season for estimating stiffness (modulus)
variations throughout the year.
• Winter is the season for which all the pavement layers are frozen.
The duration of the seasons will vary somewhat for different locations around the
State and from year to year. A study by Ovik, et al (8) using moduli calculated at
Mn/ROAD indicated that the season durations were respectively, 4, 7, 13, 13, and 15
weeks for Early Spring, Late Spring, Summer, Fall, and Winter respectively. These must
always total 52 weeks and could be redistributed as more specific data are obtained for
other locations. For the Advanced Level of Climatic data in MnPAVE any combination
of duration and material properties during the various defined periods of the year could
be used.
To estimate the seasonal modulus for the HMA the temperature at one-third the depth
can be entered directly or estimated using seasonal average daily air temperatures and
predictive equation developed by Witczak (17).
2.4.4.3. Structural Inputs
The structural inputs required for the MnPAVE software include the number,
thickness and elastic properties (moduli) of each layer. The number and thicknesses are
the design values being tried for that trial.
The moduli can be directly input if laboratory testing of the materials have been
measured. If the project-specific materials have been tested, this would be considered an
“advanced” determination of the moduli.

32
If the correlations shown in Chapter 4 for subgrade materials or Chapter 5 for the
pavement section materials are used, then these would be considered Basic or
Intermediate Levels of Input.
Layer 1, the surface layer can be either HMA or “Other”. The “Other” option is used
to allow the designer to use materials that have moduli value outside the HMA range
allowed by MnPAVE.
The lower layers may include “Aggregate Base, Subbase, Engineered Soil,
Undisturbed Soil, Groundwater and Bedrock”.
The Aggregate Base and Subbase are to be constructed stiff enough to enhance
HMA compaction as well as provide long term support for the HMA and help protect the
subgrade.
The Engineered Soil is located directly below the base and/or subbase. This is the
layer of soil that is excavated, blended, shaped and compacted to result in the most
efficient use of that material. The construction specifications and procedures outlined in
Chapter 4 must be followed to achieve the properties predicted for these materials.
The Undisturbed Soil is the material in-place that existed along the road alignment
prior to construction. The modulus of the undisturbed soil is assumed to be one half of
that of the same soil if it has been “engineered”.
The Bedrock and Groundwater layers must be included if either occurs within 2 m
(6 ft) of the surface. MnPAVE uses a constant modulus of 350 MPa (50,000 psi) for both
the bedrock and soil below the groundwater table because both materials behave rigidly
under dynamic loads. The ditch bottom is usually assumed to be the depth of the water
table. Poisson’s Ratio is assumed to be 0.15 for bedrock and 0.5 for the groundwater
table. The bottom layer of the pavement structure is to be of infinite depth.
After the basic structure has been defined, a trial thickness for each pavement layer
is entered into the boxes next to the “Materials”. The variability of thickness allowed in
the respective specifications should be considered for prediction of variability of the
design life. Several different materials and thicknesses can be input to develop a variety
of preliminary pavement design structures.
For the Intermediate Design Level the structure is entered in the “Edit Structure”
section of the window. The number of layers is selected by the “Material” and

33
“Thickness”. At the Intermediate Level a single design value of the modulus for each
unbound material is used to estimate the seasonal moduli. These are listed in Table 5-2
and are backcalculated values from FWD tests at Mn/ROAD. The HMA moduli are also
listed in Chapter 5.
The laboratory moduli for each material can either be entered directly or the “design”
modulus can be estimated using correlations presented in Chapters 4 or 5. Currently, it is
not possible to directly measure the moduli with a laboratory test. However, correlations
with modulus have been made with the laboratory R-Value, or soil classification as
shown in Table 4.2. The moduli determined from the correlations will appear on the
Advanced Level screen.
Damage equations are used by MnPAVE to convert the calculated strain values from
each loading into the number of allowable load applications. The allowable load
applications are compared to the estimated traffic to calculate the damage factor and/or
design life. The coefficients in and the format of the damage equations will be changed
periodically as more performance information becomes available.
2.4.4.4. Traffic Inputs
The traffic input is quantified by selecting either “ESAL” or “Load Spectra” above
the “Traffic” button on the Control Panel. At this time only ESAL’s can be used for the
Traffic Input. The definition of ESAL’s and methods for predicting and calculating
ESAL’s are presented in Chapter 3.
For the Basic Design Level the designer can obtain an estimate of ESAL’s by
entering Average Annual Daily Traffic (AADT), Direction Factor, Lane Factor, and
Annual Growth Rate and then can select from a number of typical Vehicle Type
Distributions that have been obtained from around Minnesota.
For the Intermediate Design Level the AADT, Direction Factor, and Annual Growth
Rate are entered along with a Vehicle Type Distribution determined for that specific
location. This value may be obtained from a road with similar traffic, or be a measured
distribution using the procedure presented in Chapter 3.
The Advanced Design Level allows the designer to enter the number of axles
expected in each load class in addition to tire pressure for some special design situations.

34
At this time this sophistication is not recommended except for very special design
situations.
It is necessary to enter information into each of the Input Windows (Climate,
Structure and Traffic) to obtain an estimate of the life and/or damage factors for that
design.
2.4.5. Outputs
The Output can be viewed either in a “Seasons” or “Reliability” format. Seasons output
includes Damage Factors which are the inverse of the number of times the predicted traffic
volume can be supported by the pavement before failing due to either fatigue cracking or
rutting. The input traffic divided by the Fatigue Damage Factor gives the number of
ESAL’s the pavement is able to withstand before developing fatigue failure. Fatigue failure is
defined as 20% of the total lane cracked. The Rutting Damage Factor gives the same type
of prediction for a rutting failure criteria based on a 12-mm (0.5-in.) rut depth. A damage
factor of 1.00 over 20 years would be the goal for most designs.
MnPAVE provides an option for the quick recalculation of damage factors as different
layer thicknesses are considered. The layer thicknesses can be altered individually or as a
group until Damage Factors of 1.0 are obtained for both rutting and fatigue cracking.
2.5. Which Procedure Should be Used in 2001-02?
Three design procedures have been presented and summarized in this chapter. These are the
Soil Factor, Stabilometer R-Value and the Mechanistic-Empirical (MnPAVE) designs. The Soil
Factor and R-Value procedures are published in the Mn/DOT manuals (4)(5). They have been
used for the past 25 plus years for the design of many low, medium and high volume roads. The
MnPAVE procedure has been developed initially at the University of Minnesota and now is
being put into useable form by Mn/DOT.
At this time it is recommended that either the Soil Factor or the R-Value Design continue to
be used and that the resulting design be checked with the MnPAVE Design. The MnPAVE
design takes into account many variables that the other two procedures cannot. For instance the
variation of material properties for different seasons can be input to determine which is the most
critical season and what effect heavier or limited loads will be. Tire pressure, different types of
stabilization or other construction techniques can also be simulated.

35
If all of the parameters necessary to use the MnPAVE procedure are not available then the
values can either be assumed for estimated from the correlations given in the respective chapters.
MnPAVE is versatile and will be improved as more people use the software and compare
performance predictions from the software program with field experience and designs
determined from the currently used procedures. Also, in the next year (or so) nationally, the
AASHTO 2002 Design Guide will be available (12). The experience with MnPAVE will make it
possible for Mn/DOT and other agencies in Minnesota to calibrate the AASHTO 2002 Procedure
to Minnesota climate, materials, and traffic conditions more easily.

36

37
CHAPTER 3
TRAFFIC PREDICTIONS
3.1. Background and Definitions
For design, rehabilitation and maintenance of pavement structures traffic characterization
plays a crucial role. Determination of the amount and type of traffic that the roadway will be
expected to carry over the design life will affect what types of materials are chosen for the
pavement, the thickness design of the pavement structure and the predicted pavement
performance. Traffic analysis is also an essential part of project feasibility studies, project
selection, project path analysis and sizing of facilities. Therefore, it is critical that the traffic be
accurately characterized so that engineers may optimize designs for the expected traffic.
Most pavement design procedures either rely on estimates of heavy commercial average
daily traffic (HCADT) or equivalent single axle loads (ESAL’s) for traffic loading
characterization. This chapter outlines the best practices regarding calculation of these two
traffic parameters. Prior to describing the various aspects of traffic characterization, it is
important to define a number of terms often used in traffic collection and analysis:
1. Average Annual Daily Traffic (AADT): The estimate of daily two-way traffic on a road
segment representing the total traffic on the segment that occurs in one year divided by
365. It is important to note that AADT is a volume that may never actually occur, but
represents the average daily traffic on that segment throughout the year.
2. Average Daily Traffic (ADT): A 24-hour two-way traffic volume that must be qualified
by stating a time period (e.g., average summer weekday).
3. Automated Traffic Recorder (ATR): A permanent device that continually collects and
stores traffic data.
4. Axle Load: The total load transmitted by all wheels in a single, tandem or tridem axle
configuration. A single axle is defined as one axle with two sets of dual tires; a super-
single is one axle with two single tires. A tandem axle has two axles spaced less than 1.7
m (5 ft) apart with two sets of dual tires on each axle. A tridem axle has three spaced less
than 1.7 m (5ft) apart each with two sets of dual tires on each side. Both tandem and

38
tridem axles can have single tires if they are wide enough to decrease the load to 200 kg
(450 lb) per 25 mm (1 in.).
5. Average Daily Load (ADL): The estimate of a daily load on a roadway segment
calculated from the daily vehicle types multiplied by their appropriate ESAL factors.
6. Annual Design Lane ESAL: The estimate of total ESAL damage a roadway segment will
experience in one year.
7. Equivalent Single Axle Load (ESAL): The relative amount of damage imparted to a
pavement structure by the passage of a standard single axle load, with dual tires. The
ESAL standard is typically an 80-kN (18,000-lb) single axle and all other axle
configurations and weights are equilibrated to the standard.
8. ESAL Factor: The average effect of a given vehicle type on a pavement, in terms of
Equivalent Standard Axle Loads (ESAL’s).
9. Heavy Commercial Traffic: All vehicles two or more axles and a minimum of six tires.
10. Heavy Commercial Annual Average Daily Traffic (HCADT): The estimate of heavy
commercial daily two-way traffic on a road segment representing the total traffic on the
segment that occurs in one year divided by 365. It is important to note that HCADT is a
volume that may never actually occur, but represents the average heavy commercial daily
traffic on that segment of road
11. Weigh-In-Motion (WIM): A permanent device that continually collects and stores axle
weight data. This device also collects the total number of vehicles, axle spacing, length,
speed and vehicle type data.
12. Vehicle Classification: The classification of traffic by vehicle type (i.e., cars, pickups, 3-
axle semis, etc.)
3.2. Determination of AADT
For the Soil Factor Pavement Thickness Design Procedure described in Chapter 2 design (20-
year projected, usually) AADT is one of the parameters used to categorize traffic. The design
AADT can be calculated using the current value and increasing it by a growth factor depending
on the projected use of that roadway. Mn/DOT maintains AADT flow maps for the County State
Aid Highway (CSAH) system. These maps, which are up-dated about every two years are
available on CDROM and may be obtained by contacting either the Traffic Forecast and
Analysis Section or the District Traffic Engineer of Mn/DOT.

39
AADT can also be measured by conducting a vehicle count at the location of, or similar
location to the proposed roadway.
3.3. Determination of HCADT
The other factor used to categorize traffic for the Soil Factor Pavement Thickness Design
Procedure is the two-way Heavy Commercial Traffic (HCADT). The design HCADT is the
value projected for the last year of the design life, which is usually 20 years. The current
HCADT can be determined by:
• Using an HCADT flow map that Mn/DOT maintains throughout Minnesota. HCADT
flow maps for County State Aid (CSAH) and other highways are up-dated about every
two years. The HCADT flow maps are available on a CDROM that may be obtained by
contacting the Mn/DOT Traffic Forecast and Analysis Section.
• Conduct a vehicle-type distribution study as outlined in Appendix 3.1. The current
HCADT can be measured and the projected design value can be calculated. Again, the
HCADT includes all vehicles having six or more tires, which includes all vehicles except
passenger cars and pickup trucks.
3.4. ESAL Calculations
The number of Equivalent Standard Axle Loads (ESAL’s) is used to define the traffic effect
for the R-Value (5) and MnPAVE Design Procedures (6). The following parameters must be
determined to calculate predicted ESAL’s. The ESAL concept equates the damage of the
measured number of various axle loads to an 80-kN (18,000-lb) axle load. The following steps
outline the data collection procedure and the ESAL calculation. Determine:
3.4.1. AADT for project location. (Section 3.2)
3.4.2. Vehicle Type Distribution for the location.
3.4.3. ESAL factors by vehicle type.
3.4.4. Traffic growth factor(s).
3.4.5. Design lane traffic percentage.
3.4.6. Calculate ESALs.
3.4.1. Estimate AADT
The determination of AADT is presented in Section 3.2.

40
3.4.2. Vehicle Type Distribution
Vehicle type distribution is very important in calculating ESAL’s because the axle load
weights and configurations greatly affect the damage effect on the pavement very much. The
most practical method of estimating the load effect is to determine the current vehicle type
distribution and project that into the future. Two methods are available to predict current
vehicle type distribution for a given roadway:
• Use statewide average distribution for an estimate. The statewide average for Rural
CSAH and county roads for eight vehicle types are listed in Table 3.1.
• Measure the distribution at a given location using the dual hose technique developed
by Mn/DOT.
Because the distribution presented in Table 3.1 represents a statewide average
distribution from the 1994 Geotechnical and Pavement Manual (5) it may not be directly
applicable for a given location and type of road. A comparison between the assumed and
measured distributions made in 1998 and 1999 on roads in three counties indicated that
significant errors could be made by using the assumed distribution. The complete study is
presented in Reference 18.
Table 3.1. Vehicle Classification Percentages – Rural CSAH or County Road
Vehicle Type Percentage in Traffic Stream Cars and Pickups 94.1
2 Axle, 6 Tire - Single Unit 2.6 3+ Axle - Single Unit 1.7
3 Axle Semi 0.0 4 Axle Semi 0.1
5+ Axle Semi 0.5 Bus/Truck Trailers 1.0
Twin Trailers 0.0 Ref: Mn/DOT - Geotechnical and Pavement Manual, 1994 (5)
A better approach, given the deficiencies of Table 3.1, is to conduct a vehicle
classification field study on the actual roadway, or similar roadway being evaluated. In
doing so, many of the errors introduced by assuming a vehicle type distribution can be
eliminated. Appendix B contains a field guide for conducting such a field study.

41
3.4.3. Determination of ESAL Factors by Vehicle Type
Each of the vehicle types specified above will impart a different amount of damage per
vehicle, expressed in terms of ESAL factors. While the ESAL factors are dependent upon
the type and thickness of the pavement, the default values listed in Table 3.2 may be used. A
range of ESAL factors for various traffic conditions can be found in Appendix H.2 of the
Mn/DOT Geotechnical and Pavement Design Manual (5).
Table 3.2. Average ESAL Factors by Vehicle Type
Vehicle Type ESAL Factor Cars and Pickups .0007
2 Axle, 6 Tire - Single Unit .25 3+ Axle - Single Unit .58
3 Axle Semi .39 4 Axle Semi .51
5+ Axle Semi 1.13 Bus/Truck Trailers .57
Twin Trailers 2.40 Ref: Mn/DOT - Geotechnical and Pavement Manual, 1994 (5).
In cases where axle weight data for a particular vehicle are available and the size and cost
of the project warrant better traffic information, it is possible to calculate the ESAL factors
for particular vehicles. In fact, the values shown in Table 3.2 were obtained through a
method similar to that described in the 1993 AASHTO Guide (19) and requires axle weight
data, an estimate of the structural number (SN) of the pavement and an estimated terminal
serviceability level (pt). Reference 19 recommends the following:
SN = 5.0
pt = 2.5
Table 3.3 illustrates the method to calculate an ESAL factor for a hypothetical 5-axle
truck with corresponding weight data from a study including 165 vehicles. The load
equivalency factors were obtained from Reference 19 and are dependent upon SN and pt.
The equation at the bottom of the table demonstrates that an average ESAL factor (2.078) is
calculated by dividing the total equivalent axle loads (ESAL’s) by the total number of
vehicles weighed. In this case the ESAL factor for these 5-axle trucks, which is somewhat
higher than the value shown in Table 3.2. If a distribution of axle weights can be determined

42
for a given truck type the blank Table 3.3 in the appendix can be used to calculate the
appropriate ESAL factor.
Table 3.3. Sample Computation of ESAL Factor
Axle Load, kips Traffic Equivalency Factor Number of Axles 18 Kip
ESAL’s Singles
3-5 0.002 x 1 = 0.002 5-7 0.01 x 5 = 0.05 7-9 0.034 x 15 = 0.51
9-11 0.088 x 57 = 5.016 11-13 0.189 x 63 = 11.907 13-15 0.36 x 17 = 6.12 23-25 3.03 x 3 = 9.09
Tandems
27-29 0.495 x 50 = 24.75 29-31 0.658 x 72 = 47.376 31-33 0.857 x 85 = 72.845 33-35 1.09 x 120 = 130.8 35-37 1.38 x 25 = 34.5
Total 18 kip ESAL’s = 342.966
ESAL Vehicle Factor = Total 18 kip ESAL’s = 342.966 = 2.078
Number of Trucks Weighed 165
3.4.4. Determination of Growth Factor
The growth factor is key in determining how traffic volume will change over the life of
the pavement. Two methods are available for calculating anticipated growth.
• A method is presented in the Mn/DOT Geotechnical and Pavement Design Manual
(5). This method is illustrated with ESAL calculation spreadsheet (Table 3.6). This
method assumes the volume of traffic will double in twenty years and that the weight
of trucks will increase by about 12%.
• A growth factor table is presented in Reference 19. Table 3.4 lists these factors for 10
and 20-year lives with growth rates of 1, 2, and 4%. Growth rates are rarely greater
than 4%.
These factors when multiplied by the current year estimated ESAL’s yields the total
ESAL’s predicted for the given roadway.

43
Table 3.4. Growth Factors
Assumed Growth Rate, % Design Life, Years 1 2 3
10 10.46 10.95 12.01 20 22.02 24.30 29.78
3.4.5. Design Lane Distribution
The “Design” ESAL’s for a given roadway are the number calculated for the lane that is
expected to have the greatest loading. Lane distribution depends on the total number of lanes
and traffic characteristics based on road usage. If trucks are loaded in one direction and not
the other the loading distribution will be skewed.
Table 3.5 is a list of distribution factors assuming uniform directional traffic for 1, 2 and
3 lanes in each direction. Special attention must be made for turning lanes and other
variations.
Table 3.5. Lane Distribution Factors
Lane Distribution Factor
Number of Lanes in One Direction
Single-Direction Traffic Data
Two-Direction
Traffic Data 1 1 0.5 2 0.9 0.45 3 0.7 0.35
3.4.6. ESAL Calculation Spreadsheet
Once all the data have been determined as specified above, the ESALs may be
determined. Mn/DOT uses a spreadsheet program, MnESALS (20). It is strongly
recommended that the program be used for all ESAL calculations. The MNESAL program is
available from the Traffic Forecast and Analysis Section of Mn/DOT. However, to
demonstrate the essence of the program and how the above data are used, Table 3.6
illustrates an example ESAL calculation.
The second column in Table 3.6 shows the total AADT in the base year and the AADT
by vehicle type. For example, cars and pickups comprise 80.47 percent of the traffic stream
(1207/1500). The fifth column also shows AADT, but it has been increased by
approximately 40 percent for all vehicle types to account for an increase in traffic volume
over the life of the pavement. The base and design year average daily loads are simply

44
calculated by multiplying the ESAL factors by the AADT and summing all the vehicle
classifications together.
Table 3.6. ESAL Calculation Worksheet
Vehicle Classes Base Year
AADT (two-way)
ESAL Factors Base Year
ADL
Design Year AADT
(two-way) Design Year ADL
Cars and Pickups 1207 x .0007 = .8 1690 1.2 2 Axle, 6 Tire -
Single Unit 98 x .25 = 24.5 137 34.2
3+ Axle - Single Unit 34 x .58 = 19.7 48 27.8
3 Axle Semi 6 x .39 = 2.3 8 3.1 4 Axle Semi 8 x .51 = 4.1 11 5.6
5+ Axle Semi 120 x 1.13 = 135.6 168 189.8 Bus/Truck
Trailers 25 x .57 = 14.2 35 20.0
Twin Trailers 2 x 2.40 = 4.8 3 7.2 Total 1500 206 2100 288.9
The worksheet in Table 3.6 only yields the ADL in the base and design years. Additional
calculations must be done to determine the design ESALs. The following steps must be
completed to determine the total ESALs over the design life and take into account the growth
of ESAL’s from the initial year.
1. Determine average ADL over life. Average ADL = (Base ADL + Design ADL) / 2 =
(206 + 288.9) / 2 = 247 (rounded) 2. Determine total ESALs over life.
Total ESALs = Days in N years (assume N = 20 for this example) * Average ADL =
20*365*247 = 1,803,100 3. Apply design lane factor to calculate total ESALs in design lane. (Table 3.4)
Total ESALs in Design Lane = Total ESALs * Design Lane Factor (assume 4-lane in this example) =
1,803,100 * .45 = 811,951 4. Build in a 12% safety factor for the possibility of increased loads during the design.
Adjusted ESALs = 12% increase factor * Total ESALs in Design Lane =
1.12*811,951 = 909,385 5. Round off to the nearest thousand for design.
ESALs = 909,000

45
3.5. Summary and Conclusions
In this chapter the traffic factors needed to design an asphalt pavement have been defined and
procedures have been presented for estimating the traffic factors used from the three current
Minnesota Design Procedures.
For pavement thickness design the traffic factor should consider
1. The total volume of traffic,
2. The distribution of axle weights and types,
3. The distribution of vehicles and axle weights and types by lane and
4. The traffic growth at the given location.
The three Minnesota design procedures are the Soil Factor, the R-Value and the Mechanistic-
Empirical (MnPAVE).
The Soil Factor Procedure uses the design year AADT and HCADT to categorize traffic as
shown in Chapter 2. The methods for determining these factors are presented in Sections 3-2 and
3-3.
The R-value and MnPAVE procedures both use the summation of ESAL’s over the design
period for the facility. The estimation of ESAL’s requires the following parameters, which are
presented in the indicated parts of Section 3.4:
• AADT Section 3.4.1
• Vehicle Type Distribution Section 3.4.2
assumed (Table 3.1)
measured (Appendix 3.1)
• ESAL Vehicle Factors Section 3.4.3.
average for local roads(Table 3.2)
sample calculations (Table 3.3)
• Growth Factors Section 3.4.4. (Table 3.4)
• Design Lane Distribution Section 3.4.5. (Table 3.5)
• Sample ESAL Calculations Section 3.4.6. (Table 3.6)
A more comprehensive procedure for estimating ESAL’s is available in a software package
titled MnESAL’s (20). This program considers the current and past characteristics of the traffic
and predicts future trends from the recent past. MnESAL’s is available from the Mn/DOT Office
of Transportation Data and Analysis or the District Traffic Engineer.

46
At this time it is recommended that county and city engineers estimate ESAL factors and
Vehicle Type distributions for typical roads in their jurisdiction. Annual ESAL calculations can
then be made and for the traffic distributions experienced at specific locations.
As experience and technology in the measurement of traffic factors improves and more data
are accumulated the procedures and factors presented in this chapter should be up-dated.
If the field procedure is used to determine vehicle type distribution the data should be sent by
e-mail or by post to the Mn/DOT Office of Transportation Data and Analysis. The coding for a
given county or city should be used so that the data from around Minnesota can be coordinated
to establish realistic distributions for various areas of the State.

47
CHAPTER 4
SUBGRADE (EMBANKMENT) SOIL DESIGN AND
CONSTRUCTION
4.1 Background and Definitions
Subgrade conditions are an influential factor on pavement performance. A stronger and
stiffer subgrade will provide a more effective foundation for the overlying pavement layers. By
improving the in situ soil conditions to more optimal characteristics, the pavement will be more
resistant to repeated loading and environmental stresses. The in situ conditions must be
considered carefully, and if there is a problem with frost-susceptible or variable soils, appropriate
changes should be made. The subgrade must be strong enough to resist shear failure and have
adequate stiffness to limit significant deflection. To accomplish this effectively adequate
drainage is necessary. The amount of support necessary must be well understood in order to
design a subgrade that will withstand the expected traffic volume and loads. Modification of the
soil may be necessary depending on the in situ soil and local moisture conditions. The subgrade
design should allow for construction processes with local resources that can achieve the desired
support and maintain that condition for the life of the road.
The embankment soil on which a pavement is built is the most important part of the structure
because:
• It is the layer on which the remainder of the structure is supported and helps resist the
destructive effects of traffic and weather.
• It acts as a construction platform for building subsequent pavement layers.
• The entire pavement structure will have to be removed and replaced if there are
embankment performance problems due to lack of strength or uniformity.
It is, therefore, imperative that the embankment be built as strong, durable, uniform, and
economical as possible. The most economical embankment is one that will perform well for
many years. Because of the many different soil and moisture conditions, which can occur along
the grade on any project in Minnesota, the balance between these items is critical.
The following steps need to be followed so that adequate stiffness, strength and uniformity
can be achieved most economically:

48
• Perform soil survey and sampling
• Determine representative design factor(s)
• Establish appropriate specifications and contract documents
• Carry out construction according to specifications
Based on the characteristics of the soil sampled on the given project, a representative design
value for the soil must be established. For current pavement design methods in Minnesota this
will be the Soil Factor, R-Value and/or the Resilient Modulus (Mr). These design values can be
measured in the field, the laboratory, or estimated from soil classification tests and calibrations.
4.2 Soil Surveys and Sampling
A good soil survey and sampling program will provide essential information on the TYPE
and EXTENT of soils to be encountered on a project. Three methods are available to conduct
soil surveys:
• Local soil maps,
• Previous records of soil surveys along the same grade,
• Auger borings using techniques recommended in the Mn/DOT Geotechnical and
Pavement Design Manual (5).
The soil survey will help establish where there are changes in soils, especially at transitions
from one soil type to another. The different soil types will require different moisture-density and
field control criteria. Standard methods should be used for classification of the soils so that
meaningful decisions can be made with respect to design and construction procedures. Borehole
samples should be taken, where the grade changes from cut to fill or fill to cut, a change in soil
type, or a change is drainage conditions. Boreholes should generally be placed at a minimum of
every 150 m (500 ft). Modification of the interval will be necessary for individual locations
depending on the variability and complexity of the in situ soil conditions. For example, it would
be more useful to place boreholes at smaller intervals near marshy areas while increasing the
spacing to 300 m (1000 ft) in relatively uniform areas. An average spacing of 150 m (500 ft) is a
reasonable rule of thumb.
In addition all borrow sources must be tested.
Generally, soils are field classified using the Triangular Textural Classification system or the
AASHTO Classification presented in the Mn/DOT Geotechnical and Pavement Design Manual

49
(5). Use of this procedure for classifying and sampling the soils can give the design staff the
information needed for preliminary thickness design and design of the grade. Sufficient
quantities of each soil type from a project need to be obtained for laboratory testing of the
material to determine AASHTO Classification, R-Value (measured or predicted) and Resilient
Modulus (Mr) (measured or predicted).
The number of samples taken over the length of the project is imperative in determining the
amount and extent of improvement necessary to ensure uniformity throughout the project. The
sampling rates (Table 4.1) given are estimates and more frequent sampling in soil type transition
zones is suggested to ensure that the design adequately addresses variable conditions and
therefore reduces problems during construction (5).
Table 4.1 Sampling Rates (5) Recommended Minimum
Minimum Sampling Rate Number of Samples
Sands 0 (assume an R-value of 70 or 75) 0Clays, Clay Loams 1 every 3 km 3
Sandy Loams(nonplastic to slighty plastic) 2 per km 5
Silt Loams 2 per km 5Silty Clay Loams 2 per km 5
Plastic Sandy Loams 2 per km 5
Major Soil Texture
4.3 Subgrade Soil Design Factors
4.3.1 General
Each of the Minnesota Flexible Pavement Design procedures classify subgrade soils in a
different way:
• The Soil Factor Design uses the AASHTO Classification of the soil to select the
appropriate Soil Factor (4).
• The R-Value design uses the Stabilometer R-Value laboratory test to determine a
laboratory-measured stiffness. A higher R-Value indicates a higher stiffness, which
will require less thickness.
• The Resilient Modulus (Mr) is the soil input for MnPAVE. Currently, only Mn/DOT
and the University of Minnesota perform the Mn/DOT specified standard laboratory
test for measuring resilient modulus. However, Mr has been correlated with R-Value

50
and AASHTO Classification (7). The results now being finalized are summarized in
Section 4.3.2.3.
The correlations between Soil Factor and R-Value are based on testing and experience in
Minnesota over the past 30 years. The relationships between R-Value and Resilient Modulus
are also presented in the 1993 AASHTO Pavement Design Guide (19). In this section the
relationships between soil classification, Soil Factor, R-Value and resilient modulus are
presented. These relationships have been summarized in table form by Siekmeier and Davich
(7) and also partially listed in Table 4.4.
4.3.2 Laboratory Testing
Soil tests such as resilient modulus and R-Value are used in order to estimate the stiffness
properties of the soil and may be estimated from other parameters. The Mn/DOT Road
Research Section has developed a comprehensive correlation table relating soil classification,
soil strength tests, to seasonally varying design moduli. The seasonal factor, which relates the
moduli throughout the five seasons as defined in MnPAVE (6), is determined by the change
in average FWD results collected at the Mn/ROAD test site. This table has been developed to
help predict appropriate and consistent resilient modulus input values for MnPAVE, for a
given soil. These important design moduli for subgrade design are given in Table 4.4.
4.3.2.1 The AASHTO Soil Classification System
The AASHTO Soil Classification System was developed in the 1920’s and is used to
give a general idea of how well a soil will perform in a pavement system. Soils are
classified based on gradation and Atterberg Limits. The classes range from A-1 through
A-7. A-1 soils are very good materials for highway construction and A-7 soils are poor.
Table 4.2 shows the gradation and Atterberg Limits for the various soil classes.
• Gradation for the AASHTO soil classification using the 0.425 mm (No. 40)
and 0.075 mm (No. 200) sieves needs to be determined, using a washed sieve
analysis as described in the AASHTO T-27 Procedure.
• Atterberg Limits – The Plastic Limit and Liquid Limit are used to define the
characteristics of fine-grained soils.
• The Plastic Limit is defined as the moisture content at which the soil
transforms from a friable state to a plastic state. It is determined using the

51
AASHTO Method T-90 for which a small sample of the soil is rolled into a 3 mm
(1/8 in.) diameter.
• The Liquid Limit is defined as the moisture content of a fine-grained soil at
which it transforms from a plastic state to a liquid state. It is determined using
AASHTO Method T-89 for which a sample of soil about 25 mm (1 in.) thick is
placed in a bronze dish, a groove is put in the sample and the number of drops of
the cup is counted until the groove closes. The Liquid Limit is the moisture
content that requires 25 drops of the cup.
• The Plasticity Index (PI) is defined as the difference between the Liquid Limit
and the Plastic Limit. A high PI clay is more active than a low PI material.
• When run according with the standard AASHTO or ASTM Procedures the
Plastic Limit and Liquid Limits are quite repeatable tests that provide a
quantitative index value.
• Table 4.3 shows the conversion of AASHTO Classifications to Soil Factors
according to the State Aid Manual (4).
Table 4.2 ASSHTO Soil Classification (5)
Textural Class Identification by FeelRibbon Length
AASHTO Group (H.R.B. Class)
Group Index
Rating For Upper Emb.
Gravel (G) Stones: Pass 3" sieve, Retained on #10 0 A-1-a 0 ExcellentFine Gravel (FG) Stones: Pass 3/8" sieve, Retained on #10 0 A-1-a 0 ExcellentSand (S) 100% pass #10. Less than 10% silt & clay. 0 A-1-a 0 ExcellentCoarse Sand (CS) Pass #10, Retained on #40 0 A-1-a or A-1-b 0 ExcellentFine Sand (FS) Most will pass #40. Gritty - non plastic 0 A-1-b or A-3 0 Excellent to GoodLoamy Sand (LS) Grains can be felt, Forms a cast 0 A-2-4 or A-3-5 0 Excellent to GoodSandy Loam (SL) a. slightly plastic 0-10% clay. Gritty 0-1/2" A-2-6 or A-2-7 0 Excellent to Good b. plastic 10-20% clay. Gritty 1/2"-1" A-4 0-4 Excellent to GoodLoam (L) Gritty, but smoother than SL 1/4"-1" A-4 0-4 Excellent to GoodSilt Loam (SiL) Smooth, slippery or velvety. Little resistance 0-1" A-4 0-4 Fair to PoorClay Loam (CL) Smooth, Shiny, considerable resistance. 1"-2" A-6 0-16 Good to FairSilty Clay Loam (SiCL) Dull appearance, slippery, less resistance. 1"-2" A-6 or A-5 0-16 Fair to PoorSandy Clay Loam (SCL) Somewhat gritty. Considerable resistance. 1"-2" A-6 or A-5 0-16 Good to FairClay (C) Smooth, shiny, long thin ribbon. 2"+ A-7 0-20 Fair to PoorSilty Clay (SiC) Buttery, smooth, slippery. 2"+ A-7 or A-7-5 0-20 PoorSandy Clay (SC) Very plastic but gritty. Long thin ribbon. 2"+ A-7 or A-7-6 0-20 Fair to PoorNote: Where the group index is expressed as a range, such as 0-16, the lower values are the better foundation soils.

52
Table 4.3 AASHTO-Soil Factor Correlation (4)
4.3.2.2 Stabilometer R-Value
The Stabilometer R-Value has been used in Minnesota since 1970 to measure the
stiffness of embankment soils. The laboratory procedure generally follows AASHTO-T-
190. The procedure includes the use of a kneading compactor. The sample is then
subjected to a final static compaction to compress the soil to the point water is exuded;
called the exudation pressure. In Minnesota an exudation pressure of 1.65 MPa (240 psi)
is used. This moisture and compaction correlated best with field conditions measured at
projects constructed according to Mn/DOT specifications. Compacted specimens are then
put in a device to measure swell pressure while being soaked over night.
The Stabilometer R-Value is then measured by placing the compacted sample in a
device, which measures horizontal pressure (ph) when a given vertical pressure is applied.
A lower horizontal pressure results in a higher R-Value. Equation 4.1 is used to calculate
the R-Value (21).
11*5.2
100100+
−
−=
h
v
pp
D
R (4.1)
Where: D = Turns displacement (Fig. 4.1)
ph = Horizontal pressure (stabilometer gauge reading at 1103 kPa (160 psi)
vertical pressure (pv)
Over the years Mn/DOT and others have conducted stabilometer tests on soils
throughout Minnesota. The R-Value can be either used as input for the R-Value thickness
design procedure or as a method to predict the resilient modulus (Mr) of the soil as input
AASHTO Classification Soil FactorA-1-b, A-2-4, A-3 50 – 75
A-4, A-6 100 A-7-5 120 A-7-6 130A-5* 130+
*an A-5 soil occurs very rarely in Minnesota

53
for MnPAVE. It is important to note that for the R-Value thickness design procedure it is
normal procedure to use the mean minus one standard deviation of the tabulated R-
Values to establish the design value The resilient modulus input for MnPAVE is the
average value.
The R-Value has been correlated with AASHTO Soil Type in Table 5-3.2(a) of the
Mn/DOT Geotechnical and Pavement Manual (5). A general correlation with Textural
Class is also shown. Table 5-3.2(b) lists assumed R-Values for granular subgrade,
subbase, and base courses. This table is for properly constructed AASHTO Soil Types A-
1-a, A-1-b and A-3 soils.
Correlations between Soil Classification(s), R-Value and the seasonal moduli are
presented in Table 4.5. This is a portion of the comprehensive table and correlations used
in the MnPAVE software described in Chapter 2 (7).
The NOTES accompanying the tables in the Geotechnical and Pavement Manual are
very important. To attain the stiffness indicated by the R-Value or any other procedure
the soil must be constructed in a uniform manner with proper density and moisture
control. Section 4.5 will cover construction control and recommended procedures more
completely.

54
Figure 4.1 Stabilometer R-Value Testing Apparatus (22)
4.3.2.3 Resilient Modulus
The Resilient Modulus (Mr) is used to indicate the stiffness of the pavement materials
including the subgrade. Mr is analogous to Young’s modulus, in that it is the
measurement of the recoverable elastic strain of the soil. The Mr values are used for
mechanistic-empirical design procedures including MnPAVE. The Mr varies with
density, moisture content, age, and position. During the SHRP Program a standard
procedure, now AASHTO P46 was developed to measure Mr (22). This procedure is now
being modified to more accurately measure the loading and deformation of the sample.
AASHTO P46 is a repeated load triaxial test for which a confining stress is applied
and the deformation under a repeated vertical haversine stress is measured (22). The
modified procedure includes a load cell and strain measurement devices inside the triaxial
cell as indicated in Figure 4.2. A 0.1-sec load is applied after which a 0.9-sec rest period
is used, illustrated in Figure 4.3. The recovered deformation is used for calculating Mr.

55
Figure 4.2 Resilient Modulus Testing Apparatus (22)
The response of the soil to repeated loadings will change throughout the year. The
reason for this variation is the changing moisture and freeze-thaw conditions. When the
soil mass is frozen throughout the embankment, the response will be almost entirely
recovered. This can be represented by a very high R-Value.
The deviatoric stress is applied for 200 cycles, with the displacements and recovered
strains recorded for the last 50 cycles. The recovered strains from the last 50 loadings are
then averaged to determine the resilient modulus. The confining and deviatoric stress
should be selected to reflect the expected field conditions. A confining pressure of 14 kPa
(2 psi) and a deviatoric stress of 41 kPa (6 psi) are used for AASHTO P-46 (23). It is

56
anticipated that the modified P46 Procedure will be used for the modulus testing for the
2002 AASHTO Design Guide (12). Mn/DOT and the University of Minnesota are the
only laboratories are currently setup to run the Mn/DOT modified AASHTO P46 test.
When running AASHTO P-46 the materials are defined as Material Type 1 and
Material Type 2. Material Type 1 includes all unbound granular material used as subbase
and base and untreated subgrade soils which meet the criteria of less than 70% passing
the 2.00 mm (No.10) sieve and less than 20% passing the 0.075 mm (No. 200) sieve.
Material Type 1 soils are run using a 150-mm (6 in.) diameter sample (5).
Material Type 2 includes all unbound granular base/subbase and untreated subgrade
soils not meeting the Type 1 criteria. Remolded Type 2 materials are tested using a 71-
mm (2.8-in) diameter specimen (5).
The resilient modulus (Mr) (Eq. 4.2) is the ratio of the amplitude of the cyclical
deviatoric stress (σ) to the amplitude of the resultant recoverable axial strain (ε) (4-5),
which is illustrated in Figure 4.3.
covreaxial
axialrM
εσ∆= (4.2)
Figure 4.3 Load and Deformation vs. Time for Resilient Modulus Test (5)

57
4.3.3 Field Measurements of Subgrade Stiffness
4.3.3.1 General
Resilient modulus can be determined in the field, by many different methods (15).
The original method for determining the modulus of the pavement and soils was the Plate
Load Test (15). The primary drawback to this device is that each layer must be removed
in order to test the layer below. The Falling Weight Deflectometer (FWD) and other
surface devices are major improvements over the Plate Load Test because they are non-
destructive, and are able to determine the moduli for the layers below the surface with a
single test. They can also test the same location more than once in order to monitor
change over time. One of the other advantages over the plate load test is that multiple
tests at different locations can be run in a short period of time, allowing changing
conditions along the road to be determined. The Dynamic Cone Penetrometer (DCP) is a
device that is used to test in-situ soil conditions (24). The limit of the soil disturbance is
small, approximately 100 mm (4 in). As with the FWD, the DCP can be run at many
locations in a short period of time, making it very useful for determining the variation
along the embankment during construction. These testing techniques allow the collection
of large quantities of data, over large areas in a short period of time. The ability to collect
data quickly allows for spatial variations to be measured and understood because the test
is non-destructive. The changing characteristics at a particular location with the season
can also be accounted for in the design procedure.
4.3.3.2 Falling Weight Deflectometer
The Falling Weight Deflectometer (FWD) is a device designed to measure the
deflections produced by an impact (falling) load. The device may be hand operated or
mounted in a vehicle. Mounting the FWD to a vehicle allows for rapid data collection by
decreasing the travel time between measurement sites. The FWD is pictured in Figure
4.4. The deflections caused by loading are measured at distances of 0 to 1.5 m (0-5 ft) at
0.3 m (1 ft) intervals (25). The geophone and locations of measurements are shown in
Figures 4.4 and 4.5. The shape of the deflection basin is indicative of the modulus of the
layers (Figure 4.5). The deflection near the load plate is representative of the composite
modulus of all the layers and the deflections measured further away represent the
modulus of the lower layers.

58
Figure 4.4 FWD Unit
The modulus of the soil is then backcalculated for the measured deflection basin.
There are many algorithms commercially available, such as, EVERCALC, WESTEV,
and the HOGG model. The following information must also be known about the
pavement section to obtain a good estimate of the pavement moduli:
a. Accurate determination of pavement and embankment layer thickness
b. Determine presence and location of any near-surface stiff layer
c. Reasonably accurate initial estimate of the moduli
Ground penetrating radar has been used successfully to determine layer thickness and
the depth of the bedrock (26).

Base
Subgrade
Surface
Load
Def
lect
ion
(Sub
grad
e)
Deflection Basin Shape is a Function of:1. Thickness of Layers2. Elastic Modulus of Layers
Def
lect
ion
Def
lect
ion
Def
lect
ion
4.3.3.3 Dynamic Con
The Dynamic Con
test consists of a fallin
in) and an angle of 60°
illustrated in Figure 4.
hammer (24). The test
A cone with an angle o
kg (17 lb) and a drop d
with each blow is calle
The DPI has been corr
compressive strength,
(7). With this correlati
Figure 4.5 FWD Deflection Basin59
e Penetrometer
e Penetrometer (DCP) has been in used for nearly 3 decades. The
g mass that forces a standard cone with a diameter of 20 mm (0.8
into the soil being tested. The Mn/DOT standard DCP is
6. The amount of penetration is recorded after each blow from the
is usually run until a penetration of 0.75-1.0 m (2-3 ft) is achieved.
f 30° can also be used for stiffer soil. The hammer has a mass of 8
istance of 575 mm (23 in.). The rate of movement into the soil
d the DCP Penetration Index (DPI), expressed in mm per blow.
elated to the California Bearing Ratio (CBR), unconfined
elastic modulus, and shear strength of cohesionless granular soils
on the design parameters that are desired can be determined from

60
DCP data. This test is useful because the information can be easily converted into the
form that is useful to work at a specific project.
Table 4.4 General Correlation Table for Strength and Stiffness Tests
Stiffness DCP R-Value Soil Type CBR
Range MPa mm/blow 240 psi exudation pressure
Fine-grained < 10 <40 20-30 10-30 Sand 10-30 50+ 10-25 70
Gravel 20–80 100+ <10 70
4.3.3.4 Additional In Situ Factors
There are many other parameters that can be examined. Density and moisture content
are two of the most common and well understood. Increasing the soil density is one of the
easiest ways to improve strength and stiffness, which reduces the response to loading. If
compaction is performed near optimum water content (AASHTO T-99) the maximum
density can be achieved more easily yielding the stiffest condition for the material. The
long term equilibrium water content in the future and short term peak water content due
to precipitation and runoff must also be considered in order to limit excessive soil creep,
swelling and pumping.

61

62
4.3.4 Use of Subgrade Design Factors
4.3.4.1 General
Mn/DOT currently has three methods of flexible pavement design.
• The Soil Factor
• The R-Value
• The Mechanistic Empirical (MnPAVE)
The embankment characterization depends on the design procedure selected. Proper
subcutting and mixing during construction will limit the variation of soil characteristics
that have to be considered during design. Compaction to AASHTO T-99 density will
increase strength and stiffness. Construction specifications are summarized in Section
4.5. Other methods of embankment stabilization can be employed to increase strength,
such as the addition of lime, portland cement, or various bituminous materials.
Stabilization is covered in Section 4.6.
4.3.4.2 Soil Factor
The Soil Factor design procedure is based on the AASHTO classification system. If
the soil varies over the project area then embankment construction should be specified in
relation to the most critical soil type. More information can be found in the State Aid
manual (4).
4.3.4.3 R-Value
The R-Value is preferred over the Soil Factor, because it provides a quantitative
measure of the strength and stiffness of the soil. The current Mn/DOT design procedure
is presented in the Geotechnical and Pavement Design Manual (5). The existing
information for this design factor is extensive, covering most of the soil types
encountered in Minnesota. A correlation has been made between R-Value, Soil Factor
and AASHTO classification system. The R-Value can also be used to estimate the
resilient modulus for use in the MnPAVE program (7). The design R-Value is normally
the mean value minus one standard deviation
4.3.4.4 MnPAVE
MnPAVE is a computer program available through Mn/DOT for thickness design of
the HMA surface, aggregate base, and subbase for a given subgrade. MnPAVE has the
ability to account for seasonally changing conditions with the use of seasonal factors

63
(Table 4.5). The resilient modulus is varied using the seasonal factor determined at
Mn/ROAD in order to account for the amount and state of water present (8). The
subgrade is given a default resilient modulus of 350 MPa (50 ksi) during winter and early
spring because the water in the soil is frozen creating a very stiff material. In contrast, the
base is given a seasonal factor of 0.3 for the early spring verses the summer value of 1.
This very low seasonal factor is used because the base and subbase are thawed and
saturated, while the subgrade is frozen prohibiting water from draining. The thawed base
causes the strain on the upper thawed layers to increase during the early spring. This
change in stress conditions cannot be accounted for by other design factors. The
application of this change in seasonal conditions to design criteria is a significant advance
in embankment design since the affect of moisture freeze/thaw susceptible materials can
be accounted for. MnPAVE is currently under development by Mn/DOT and is available
and is available for use upon request. Table 4.5 shows the correlations developed by
Siekmeier and Davich (7) relating soil classification, R-Value, and resilient modulus. In
this way the stiffness characteristics of a soil can be roughly estimated from the soil
classification or stabilometer R-Value. Laboratory or field measurements of the resilient
modulus are always preferable.

64
Table 4.5 MnPAVE Design Moduli Correlation
4.4 Drainage
To improve the integrity of the subgrade, it is necessary to reduce water (28). The hydrologic
conditions of the construction site must be evaluated for the initial excavation proceeds.
Knowledge of the in situ conditions before construction begins is necessary to design proper
drainage. In addition an interpretation of the conditions encountered during excavation should be
used when implementing the intent of the design and properly construct the embankment.
Surface infiltration as well as subsurface water sources must be considered. Adequate ditches
will provide sufficient drainage in most cases. Mn/DOT specifications use a standard height of
1.7 m (5 ft) of the pavement grade above the water table. In most areas in Minnesota this will
allow for adequate drainage. However, in some situations additional measures may be required.
Soil Classification Strength Tests MnPAVE Design Moduli
Textural Class AASHTO Mn/DOT
Soil Factor R-Value (240 psi
Exudation Pressure) CBR
Percentage DCP
mm/blow Winter & Early
Spring Late Spring Summer Fall
Estimated Measured Estimated Estimated MPa ksi MPa ksi MPa ksi MPa ksi
Gravel (G) A-1 50-75 70 ND 21 12 350 50 62 9.0 78 11 78 11
Sand (Sa) A-1 A-3 50-75 70 ND 21 12 350 50 62 9.0 78 11 78 11
Loamy Sand (LSa) A-2 50-75 30 46 - 74 6.2 22 350 50 33 4.8 41 6.0 41 6.0
Sandy Loam (SaL)
A-2 A-4 100-130 30 17 - 49 4.4 27 350 50 27 4.0 34 5.0 34 5.0
Loam (L) A-4 100-130 15 14 - 26 4.2 27 350 50 27 3.9 33 4.8 33 4.8
Silt Loam (SiL) A-4 100-130 12 10 - 40 3.9 28 350 50 26 3.7 32 4.6 32 4.6
Sandy Clay Loam
(SaCL) A-6 100-130 17 14 - 27 4.5 26 350 50 28 4.0 35 5.0 35 5.0
Clay Loam (CL) A-6 100-130 13 13 - 21 4.1 28 350 50 26 3.8 33 4.8 33 4.8
Silty Clay Loam (SiCL)
A-6 120-130 10 11 - 21 ND ND 350 50 ND ND ND ND ND ND
Sandy Clay (SaC) A-7 120-130 14 ND ND ND 350 50 ND ND ND ND ND ND
Silty Clay (SiC) A-7 120-130 8 ND 3.4 30 350 50 24 3.5 30 4.3 30 4.3
Clay (C) A-7 120-130 12 10 - 17 3.9 28 350 50 26 3.7 32 4.7 32 4.7

65
Drainage will also limit the effect of the freeze-thaw cycle. Frost heave can be limited by
installing drains to lower the water table. These drains may help reduce capillary water, which is
responsible for frost heave (5). Dewatering during construction is also critical. Proper
remediation of unsuitable hydrologic conditions will yield a stable foundation on which to
construct the remainder of the pavement section.
4.5 Construction of the Subgrade (Embankment)
4.5.1 General
In the previous sections of this chapter, methods used to establish design strength for the
embankment soil have been presented. To obtain the design values indicated in the field,
proper construction practices must be followed. Mn/DOT has three specifications, which
apply to the construction of embankment soils: specifications 2105, 2111 and 2123 in the
2000 Mn/DOT Specification Book (9).
4.5.2 Specifications
Mn/DOT has three specifications that pertain to the construction of embankments. These
are specifications 2105, 2111, and 2123 (9). Specification 2105 “Excavation” and
“Embankment” includes two types of construction control. These are the “Specified Density
Method” and “Quality Compaction Method” (visual inspection). The methods are similar
because both specifications state that the compaction must be accomplished to the
satisfaction of the Engineer. For “Quality” compaction an experienced engineer or inspector
must be on the project to make sure adequate compaction is achieved. For “specified density”
compaction the judgment of the engineer is aided by the determination of a measured
density. The density must be measured using the representative moisture-density for the soil
being constructed. Of the two methods “specified density” is recommended.
Specifications 2105, 2111, and 2123 should be used along with and support appropriate
for placing and compacting the soil embankment as the first and most important step in
constructing an asphalt pavement.
4.5.2.1 Mn/DOT Specification 2105 (Excavation and Embankment) (9)
Specification 2105 states how roadway excavations and embankments should be
constructed within the right of way.

66
4.5.2.1.1 Materials
The engineer classifies excavation materials as the work progresses. The
following types of excavation are defined: Common, Rock, Muck, Subgrade,
Common Channel, Rock Channel and Unclassified. Common and Subgrade materials
are generally the same unless otherwise specified in the proposal defining materials
for a given project. Borrow materials are defined as Granular Borrow if it meets the
select granular specification (3149) or Common Borrow, which can be any type of
soil available near the grade. Topsoil Borrow meeting Specification 3877 may also be
specified. Material salvaged from the existing project may also be used when
appropriate.
4.5.2.1.2 Construction Requirements
The construction requirements are detailed in Section 2105.3 (9). The general
requirements include keeping the embankments well drained at all times by
maintaining surface drainage and installing planned drainage facilities as construction
progresses. Existing drainage must not be interrupted as the project develops. The
preparation of the embankment foundation is always important and even more critical
for embankments less than 2 m (6 ft) in height because it will not be possible to
construct a good embankment if the underlying materials are not stable and uniform.
Before placing any embankment 1 m (3 ft) or less in height all unsuitable soil shall be
removed to a depth determined by the engineer. Unstable materials must be removed
from swamp areas and appropriate materials and methods used if standing water is
present. Wherever possible the foundations for all embankments should be dry and
compacted between shoulder lines with a tamping roller. Before placing an
embankment over an old road the contractor should excavate the old road to 0.3 m (1
ft) below subgrade unless a greater depth is required by the plans.
Excavating operations need to follow plans for the project. Granular backfill must
be designed to prevent trapped water in a “bath tub” created by fine-grained subgrade
soils. When granular materials are uncovered, they should be placed in the uppermost
portion of the embankment. The Contractor shall use disks, plows, graders or other
equipment to blend and mix suitable soils to produce uniform moisture content and
density. No capping of granular material with nongranular materials will be permitted

67
at or within 0.3 m (12 in.) of the subgrade surface. All material including bituminous
and concrete waste that is considered unsuitable for use in the upper portion of the
roadbed shall be placed in embankments at least 1 m (3 ft) below the top of the
subgrade.
When placing the embankment material the following rules shall be followed:
• Before backfilling roadbed subcuts 0.9 m (30 in.) or less in depth, the upper
150 mm (6 in.) of soil at the bottom of the excavation should be compacted to
95 percent AASHTO T-99 maximum density.
• Embankment material should be spread in uniform layers approximately
parallel to the profile grade.
• Where the foundation for the embankment (or backfill) is under water or will
not support the hauling equipment without appreciable movement. The
embankment may be constructed as one layer using granular material up to the
lowest elevation at which the equipment can operate without excessive
deformation of the underlying soils. In no case shall the top of that layer be
less than 1 m (3 ft) below the top of the subgrade.
• When the embankment material is granular [less than 20 percent passing the
0.075 mm (No. 200) sieve] the thickness of the layers in the upper 1 m (3 ft)
should be no greater than 0.2 m (8in.). Below 1 m (3 ft) the compacted lifts
can be 0.3 m (12 in.).
When the embankment is stone of such sizes that the material cannot be
compacted, that material may be placed in the embankment up to an elevation 0.3 m
(1 ft) below the bottom of the grade, in layers not to exceed 0.6 m (2 ft) in thickness.
4.5.2.1.3 Compaction Requirements
Compaction is one of the most important requirements when considering the
stiffness and uniformity of an embankment material. Two methods for controlling
density are listed in Specification 2105. These are the Specified Density Method and
Visual Inspection Method.
Even if Specified Density is being used, the inspector should be aware of the
compaction as it progresses with each pass of the roller. The Visual Inspection should
only be used if enough experienced inspectors are available to observe the operation.

68
Specification 2105 also has some requirements for Finishing Operations, Method
of Measurement for Payment and finally Basis of Payment. In this section parts of
2105 are outlined below which relate primarily to the construction of a strong and
uniform embankment and the Quality or Visual Inspection Method (9).
4.5.2.1.3.1 Specified Density Method
For the Specified Density Method the density is measured and related to the
maximum density measured with the AASHTO T-99 (Standard Procter) Method.
The laboratory method for conducting the Standard Moisture-Density test and for
running the field density tests are presented in the Mn/DOT Grading and Base
Manual (10). The upper 1 m (3 ft) of the subgrade must be compacted to not less
than100 percent of maximum T-99 density and the portions of the embankment
placed below 1 m (3 ft) must be placed to not less than 95% T-99 density. The
compaction moisture content must not be greater than 102%, nor less than 65% of
Optimum Moisture Content when trying to attain 100% Maximum Density and
115% nor less than 65% moisture for 95% Maximum Density. When using
specified density, the field testing and sampling shall be done at locations that
confirm that the minimum specified density has been achieved everywhere.
4.5.2.1.3.2 Quality or Visual Inspection Method
For the Quality or Visual Inspection Method the contractor must be using
equipment in Specification 2123. Subsequent layers must not be added until the
lower layer is compacted adequately. The moisture content used for compaction
must conform to the levels noted above relative to T-99 Optimum Moisture
Content. In plastic soils compaction may be accomplished with pneumatic-tired,
steel-wheeled, or grid rollers as specified in Mn/DOT 2123, for compacting layers
75 mm (3 in.) or less. These devices can be used for granular soil layers up to 200
mm (8 in.) thick. Compaction control using Visual Inspection is defined as
determining when no more densification is occurring.
Even if Specified Density is being used the Inspector should be aware of the
compaction that is progressing with each pass of the roller. The Visual Inspection
should only be used if enough experienced inspectors are available to observe the
operation.

69
Specification 2105 also has some requirements for Finishing Operations,
Method of Measurement for payment and finally Basis of Payment. In this
Section parts of 2105 have been outlined, which relate primarily to the
construction of a strong and uniform embankment soil.
4.5.2.2 Mn/DOT Specification 2111 (Test Rolling) (9)
4.5.2.2.1 Description
Test rolling measures the bearing capacity of the soil to determine if compaction
has been completed uniformly.
4.5.2.2.2 Equipment
The roller used must be pneumatic-tired and conform to Specification 2111.2:
• 2 wheels spaced not less than 1.8 m (6 ft) apart center to center transversely
• Tire size either 18 x 24 or 18 x 25. Tires should be inflated to 650 kPa (95
psi).
• Gross mass of roller not less than 13.5 metric tons (14.9 tons) and not more
than 13.7 metric tons (15.1 tons) on each wheel.
4.5.2.2.3 Construction Requirements
Test rolling should be done when the grading and compaction is completed within
100 mm (4 in.) of the top of the subgrade and. should cover the entire surface. The
roller speed should not be less than 4 km/hr (2.5 mph) nor more than 8 km/hr (5
mph). Care must be taken to protect culverts and other structures. The roadbed shall
be considered to be unstable if under the operation of the roller, the surface shows
yielding or rutting of more than 50 mm (2 in.) measured from the top of the
constructed grade to the bottom of the rut. An extra 25mm (1 in.) is allowed if the
granular soil is to be stabilized. In areas that are unstable the material will be
removed and replaced or revised if aeration or moisture can be used to make uniform
compaction possible. Failed areas should be retested with the area is less than 50 m
(150 ft) in length and the Engineer is satisfied that the corrective action is adequate.
4.5.3 General Design Considerations
4.5.3.1 General
As a project is designed in the Office and then constructed, certain design
considerations need to be followed to provide a strong and uniform subgrade

70
(embankment) for a pavement structure. Many of these depend on the type of soil
encountered on the job. As discussed, a good soil survey will help establish what to
expect. However, variations may occur in the field as the job progresses. Therefore, both
the design and construction engineers must be aware of the general design considerations
so that if changes occur in the field the Construction Engineer will know that a change
may be needed. The following checklist is therefore provided for both.
4.5.3.2 Excavation and Embankment Construction
1. Finished grade elevation is kept at least 1.7 m (5 ft) above the water table.
2. The height of the finished grade above the water table including HMA, granular
base, subbase and engineered soil should be greater than the depth of frost
penetration to minimize frost heaving.
3. The existing soils and their preparation including subgrade correction,
embankment placement, and protection of the completed embankment, all need to
be considered.
4.5.3.3 Soils Evaluation
1. Suitable/Unsuitable Materials: Granular, select granular, and other soils, which
will provide the required stiffness and moisture characteristics are considered
“suitable”. Topsoil, organic materials, debris and other unstable materials are
considered “unsuitable”.
2. Excavated Soils: Excavated soils from a given project should be used as fill on
that project as much as possible.
3. Salvaged Materials: Salvaged aggregate, topsoil, and bituminous materials
should be used as much as possible.
4. Borrow: Borrow material is required for embankment construction when
sufficient excavated soils cannot be obtained from roadway cut sections. Borrow
material should be classified as Select Granular, (Mn/DOT Spec. 3149), common,
or topsoil (Mn/DOT Spec. 3877). To determine the quantities of Borrow needed a
shrinkage factor must be determined. This procedure is covered in Mn/DOT
Geotechnical and Pavement Design Manual Section 5-2.01.01 (5).

71
4.5.3.4 Soils Preparation
1. General: Proper preparation of the soils for good uniformity involves reworking
and enhancing the existing materials and eliminating pockets of high moisture
content and unstable soils.
2. Compaction: The most efficient way to use the existing soil on a project is to
compact it well and uniformly. Good compaction will increase strength and
decrease compressibility, permeability and volume changes. To obtain maximum
density for a given soil it is necessary to compact it at or close to optimum
moisture content. These provisions are covered in Mn/DOT Specification 2105
(9).
3. Lime Treatment: The addition of lime and fly ash are used on occasion in order to
modify and stabilize embankment soils.
4. Geosynthetics: Geotextiles (geofabrics) may effectively be used for
separation/stabilization in the bottom of subcuts, below culverts where soft soils
make placement of the next lift difficult or density is hard to achieve. Generally,
geotextiles should not be used as a substitute for portions of the required granular
materials (5).
4.5.3.5 Subgrade Correction
1. Subcuts: Subcuts are made to ensure uniformity of material and maximize
stability. They are used to eliminate differential conditions or pockets of high-
moisture, unstable materials, frost susceptible materials, and other non-uniform
conditions. Subcuts can range from 0.3 to 1.3 m (1-4 ft) depending on the soil
type. Subcuts should generally be designed to the depth of frost especially when
silt-type soils are encountered. In these cases the subcuts should extend below the
frost depth. Tapers should be provided with each subcut to eliminate abrupt
changes. The bottom of the subcut must be drainable material or with a system
installed to make sure water does not collect in the bottom (5).
2. Culverts: Culverts should be placed with 0.7 m (2 ft) of aggregate bedding and
20H to 1V tapers to minimize the effects of heave and variability of the
embankment soil (5).

72
4.5.3.6 Placement of Embankment and Backfill Materials
UNIFORMITY: To produce uniformity the following materials and procedures
should be specified and followed:
• Each layer of roadbed should be constructed of uniform material.
• If variable soils are encountered over a short distance they must be blended. If
available, they should be mixed.
• When different soil types are encountered in relatively largely well-defined layers
20H to 1V tapers should be used to transition from one soil to the next.
• For soft and unstable soils that will not support construction equipment, the
embankment may be constructed in a single layer to the lowest elevation at which
construction equipment can operate without causing the underlying soils to
intrude into the upper 200 mm (8 in.) of the embankment.
• For placement of granular materials [not more than 20 percent passing the 0.075
mm (No. 200) sieve] in the upper 1 m (3 ft) of the embankment, the lift thickness
may be increased to 0.3 m (12 in.) as long as proper compaction can be achieved.
• The upper 0.7 to 1.3 m (2-4 ft) of the embankment/fill should be comprised of
selected earth material or granular materials. Within 0.3 m (12 in.) of the subgrade
surface granular materials should not be capped with non-granular materials.
• At no time should embankment material be placed frozen or on soil that is frozen
to a depth greater than 100 mm (4 in.). No frozen material exceeding 150 mm (6
in.) in dimension should be permitted in the embankment. Frozen material less
than 150 mm (6 in.) can only be placed outside of a 1H to 1V slope down and
outward from the subgrade point of intersection.
4.5.3.7 Compaction
Compaction must be performed to Mn/DOT Specification 2105 supplemented by
2111 using equipment specified in Specification 2123. Three methods of evaluation are
presented in the specifications. These are the SPECIFIED DENSITY, QUALITY
COMPACTION and PROOF-ROLLING.
Although these methods can be equally effective in evaluating the results of a
Contractor’s compaction work, there are circumstances when one method will be more
practical and effective than another. Examples are:

73
• Specified Density is more appropriate if there are a limited number of inspectors.
• Specified Density is more appropriate on jobs over 38,200 cubic meters (50,000
cubic yards).
• Quality Compaction may be more appropriate if the embankment construction is
less than 38,200 cubic meters (50,000 cubic yards) and the inspectors on the job
are experienced in all aspects of embankment construction and there are enough
inspectors to constantly observe all of the contractor’s operations.
• When Specification 2111 is used, the load carrying capacity with a heavy roller
defined in the Specification monitors the compaction. Test rolling should be used
on projects more than 1.6 km (1 mile) in length. Areas that pump or rut
excessively should be excavated and recompacted to provide adequate bearing
capacity for the pavement.
4.5.4 Construction Notes and Procedures
In summary the following notes are taken from the Field Notes for Construction
Engineers and Inspectors published in 2001 (11). The notes listed pertain particularly to the
construction of a uniform and strong embankment soil.
1. Review the auger borings and other soils reports to ensure the best possible use is
made of the soils available.
2. Monitor topsoil salvaging to ensure proper quantifiable drainage and erosion control.
3. Ensure that unstable material is identified, subcut as required and measured for final
payment.
4. Confirm that existing structures and pavements near subgrade elevation are broken
down as required.
5. Measure and record swamp excavation by cross sectioning prior to backfilling.
6. Monitor soil selection and blending to ensure that embankment is composed of
uniform soils. Check restrictions imposed by the specifications or other contract
documents. Run gradation tests on applicable soils.
7. Ensure large stones, rock and broken concrete are intermixed with soil to prevent
voids. These materials are restricted to specific locations in the embankment as
defined in the specifications.

74
8. Require embankment to be placed and compacted full width in layers not exceeding
the thicknesses given in the specifications or other contract documents.
9. Maintain soil moisture control to prevent instability and keep moisture within the
limits so that proper compaction can be attained.
10. Check for compaction. Correct failing areas before application of the next layer.
11. Ensure that hauling and leveling equipment is working over the full width of the
embankment.
12. Check for yielding of the subgrade under the hauling equipment. Any soft areas due
to excessive moisture should be corrected by drying and recompacting or by
removing and replacing the wet yielding soils.
13. Require a well-drained and shaped work area
14. Maintain continued surveillance of erosion control throughout grading operation.
Ensure temporary erosion control devices are properly constructed, anchored and
maintained.
15. Make sure culverts are “bridged” with sufficient embankment thickness to prevent
damage from hauling equipment and/or the Test Roller.
16. Require grading to proceed in orderly fashion with finishing carried through as work
progresses.
17. Ensure that Test Roller weight, tire pressure, and dimensions specifications are met
before rolling.
18. Maintain daily diary that includes location, type of work, hours, equipment,
quantities, soil types and changes, layer thicknesses, relative moisture, degree of
compaction, information on rutting and displacement, application and quantity of
water and weather information as it impacts the grading activities. A good diary will
be extremely useful to field personnel as they review events and help others
determine how well a job is progressing.
Setting up a contract with these specifications and following through with the procedures
and field control will help ensure the most economical use of embankment soils. A strong,
stiff, and uniform embankment will result and a reliable long lasting pavement section will
be constructed.

75
4.6 Subgrade Enhancement Summary
4.6.1 General
A common problem in the field is soil that is unsuitable for the project. One solution is
replacing the soil, however this may not be economical. Improving the in situ soil by mixing
and compacting is the most common method of stabilization.
Categories of Enhancement
1. Mixing and Compaction
2. Remove and Replace
3. Moisture Content Adjustment
4. Modification and Stabilization
i. Cementing agents
ii. Water-retaining agents
iii. Water-proofing agents
5. Geosynthetics
i. Geotextiles
ii. Geogrids
iii. Geocells
4.6.2 Categories of Enhancement
4.6.2.1 Improvement of Existing Materials
Compaction of granular soil is not as dependent on the moisture content. However,
cohesive soils, or soils with a significant percentage of cohesive material, reach
maximum compaction when the optimum amount of moisture is present. The workability
of granular soils may be less if excess moisture is present. Cohesive soils are easier to
work at or near optimum moisture content. Therefore, a representative moisture-density
test must be run for the soil being worked.
One of the most common modifications is compaction at or slightly wetter than the
AASHTO T-99 (5) optimum moisture content to the specified depth for the project. The
amount of moisture necessary to reach optimum compaction is dependent on the
percentages of silt and clay. The appropriate moisture content can be determined by
AASHTO T-99 procedure (5). Compaction increases the shear strength and stiffness of

76
the soil. If it is determined that compaction alone will not be adequate, other types of
remedial procedures must be implemented.
4.6.2.2 Remove and Replace
This process is also known as undercut and backfill, a process that replaces or covers
the unstable soil with a layer of granular soil that can distribute the loads to the extent
that the underlying soil can support the expected construction and traffic loads.
Replacement is the most direct and certain means of subgrade enhancement. It removes
the uncertainty of whether improvements on the existing soil will be able to provide the
necessary support for the lifetime of the road. The main drawback to this approach is the
cost and the need to find a high quality replacement soil nearby.
4.6.2.3 Modification
Many types of additives are commercially available for in situ soil improvements.
This procedure is usually used on soils containing a significant percentage of silt and
clay, but can be used on any type of soil other than organic. The amount of improvement
depends upon the original soil, the compound chosen and the concentration achieved.
1. Cementing Agents (5)
a. Portland cement – Sandy soils and lean clays
b. Flyash
c. Lime – Granular materials and lean clays
d. Bitumen – Granular soils
2. Water-absorbing Agents
a. Calcium Chloride – Graded aggregate
b. Sodium Chloride – Graded aggregate
3. Waterproofing Agents
a. Bitumen – Sandy soils
4.6.2.4 Geosynthetics
Geotextiles can provide separation and help stop contamination of the granular
material with soil. The proper type of Geotextile will allow for the movement of water to
aid in drainage of the subgrade. Geosynthetics can also dissipate loads by transferring the
vertical stress over a larger area of the subgrade, limiting permanent deformation. This
may decrease the amount of fill required to dissipate the expected stresses. Geosynthetics

77
will limit the shear stresses transferred to the subgrade, increasing the bearing capacity of
the in situ soil. The shear stresses may be dissipated because of the friction developed by
the geosynthetic (29).
Geogrids are used primarily for reinforcement applications because their increased
aperture size reduces their effectiveness as a separator Geogrids are used primarily to
develop friction between the layers of the soil or granular base. Analyses of
embankments indicate that conventional bases are initially structurally stronger than
geogrid reinforced embankments, with a shallower depth of base material. However, after
some time the strengths of the embankments are approximately the same. This indicates
that the reinforced embankments may deteriorate slower (30).
The placement depth of the geosynthetics is critical in order to protect the
geosynthetic and provide the greatest possible support. For an asphalt pavement, the
burial depth for geogrids should be at the bottom of the aggregate base if the base is less
than 0.25 m (10 in.). If the base layer is greater than 0.25 m (10 in.), then the geogrid
should be placed at the midpoint of the base layer (30). The depth of the geosynthetic
may vary for each project, because it is dependant on the fabric chosen as well as soil
types and expected loading. Geosynthetics may or may not enhance the life expectancy
and load carrying capacity of both paved and unpaved roads.
The 1993 AASHTO Guide for Design of Pavement Structures (19) and the Jung
model developed by the Ontario Ministry of Transport, are able to account for the
improvement derived from the introduction of geosynthetics.
The Minnesota Local Road Research Board and Mn/DOT are sponsoring two projects
to review the performance of various methods of embankment modification, stabilization,
and reinforcement. These types of embankment improvements are potentially beneficial,
especially when soil or drainage conditions are poor.

78

79
CHAPTER 5
PAVEMENT SECTION MATERIALS
5.1. Background
Pavement section materials are defined as all the layers overlying the subgrade soil and can
be of many different types and properties. They can vary from a granular subbase material that
will enhance the properties of the subgrade soil, to a 100-percent crushed aggregate base, to a
high quality asphalt mixture that can withstand many applications of very high stresses due to
loading and weather. Generally, the closer to the surface a layer is located the higher the load and
environmental stresses it must withstand. Therefore, layers closer to the surface must be stronger
and more durable. In the previous chapter soil characteristics and embankment design were
presented. The purpose of the procedures presented was to provide a uniform and stiff
foundation with the existing soils. In some cases this will require stabilization and/or
reinforcement. These same principles must be applied to the pavement materials so that a strong
durable pavement will result.
Definitions of the various materials used are given for the three design procedures currently
used in Minnesota [Soil Factor, R-Value, and mechanistic-empirical design (MnPAVE)].
The material must meet Mn/DOT specifications in order for the pavement section materials
to achieve the properties assumed for design the specifications must be carried out in the field.
The specifications must be implemented by knowledgeable people with proper equipment.
Section 5.2 presents definitions of materials used in the layers of a pavement section and the
specifications used for construction of the materials.
Section 5.3 presents the properties used to define how the materials are input for the design
procedures. In order for these properties to be obtained the section must be built according to the
specifications,
Section 5.4 lists field control procedures that should be followed to meet the specifications
and result in a well-constructed project.

80
5.2. Definitions 5.2.1. Granular Subbase and Select Granular (Mn/DOT Specification 3149-B2)
5.2.1.1. Granular 5.2.1.2. Select Granular
For special use in embankment or backfill construction Select Granular may be any
pit-run or crusher-run material that is so graded from coarse to fine that the ratio of the
percent passing the 0.075-mm (No. 200) sieve divided by the portion passing the 25-mm
(1-in.) sieve does not exceed 12 percent by mass.
5.2.1.3. Subbase Course (Mn/DOT Specification 3138, Class 4)
The subbase course will consist of a pit run or crushed aggregate that meets the
gradation specifications in Table 3138-1 of the Mn/DOT 2000 Specifications (9).
5.2.2. Aggregate Base Course
5.2.2.1. Granular (Mn/DOT Specification 3138, Class 3, 5, and 6)
A granular base course consists of any combination of screened pit-run and crushed
aggregates that meet the gradation specifications of the respective columns in Table
3138-1 of the Mn/DOT 2000 Specifications (9).
5.2.2.2. Salvage Materials (Mn/DOT Specification 3138, Class 7)
• Salvaged Concrete (C): Crushed concrete processed to meet Class 4, 5, or 6
gradation specifications listed in Table 3138-1 when being used to substitute for
Class 4, 5, or 6 materials respectively.
• Salvaged Bituminous (B): Crushed bituminous mixtures processed to meet Class
4, 5, or 6 gradation specifications listed in Table 3138-1 when used to substitute
for Class 4, 5, or 6 materials respectively. The maximum percent residual asphalt
permitted is 3 %.
• Reclaimed Glass (G): Up to 10 % by weight of reclaimed glass may be
mixed/blended with virgin or salvaged/recycled aggregates during the crushing
operation. Restrictions on sources, composition, debris content and storage are
included in Specification 3138 A2. A certification procedure is also required.
5.2.3. Stabilized Base Materials.
Many materials have been used for stabilizing base courses with varied success in
Minnesota. When using a stabilizing agent it is necessary to use a mix design procedure that

81
will result in an optimum material content. The material must then be mixed with the
aggregate or salvage material uniformly to provide a consistent product.
5.2.3.1. Portland cement, lime and/or fly ash have been used in many combinations to
provide a stabilized base. Mix design is very important to provide a material that will be
strong and durable without excessive brittleness.
5.2.3.2. Asphalt cement, asphalt emulsions and cutbacks have been used for many
years to stabilize and waterproof granular bases. Mix designs must efficiently use these
materials and result in a strong durable mix. Mn/DOT Specification 2204 covers the
requirements for these mixtures (9).
5.2.4. Recycling and Reclaiming
5.2.4.1. Cold In-Place Recycling: This process involves the grinding of an existing
HMA surface, mixing asphalt and/or aggregate and compacting the final mixture.
Mn/DOT is developing a specification for the process.
5.2.4.2. Full Depth Reclamation: This process involves the grinding and mixing of the
full pavement section and compacting it in place. A Mn/DOT Specification is being
developed for the use of this process.
5.2.5. Hot Mix Asphalt (HMA)
Currently, there are two types of mixtures used by Mn/DOT: the Mn/DOT 2350
Specification (Marshall Mix Design Procedure) and Specification 2360 (Gyratory Mix
Design Procedure). The Gyratory mix design is used on State Highways greater than 5000
tons and project life greater than 5 years. The 2350 Specification is used for all other state
roads.
5.3. Pavement Design Factors
5.3.1. General
The design factors for the Soil Factor and R-Value Design procedures are the Granular
Equivalent Factors used to build up the pavement section in terms of factors a1, a2 and a3
which are for the surface, base and subbase respectively. The factors depend only on the
specification which the material or mixture meets. Based on decades of experience, the
relative values of these factors reflect the contribution that layer provides to the performance
of the pavement structure.

82
The design factors for MnPAVE are the effective moduli of the respective materials.
Resilient Modulus tests are now being run by Mn/DOT to develop a catalogue of moduli to
use for the various combinations of materials used. For MnPAVE five moduli are used to
represent the five seasons defined at Mn/ROAD (6).
5.3.2. Granular Equivalency Factors
Table 5.1 lists the Granular Equivalency Factors used for calculating the Granular
Equivalent Thickness. The factors a1, a2, and a3 relate to the surface, base and subbase
respectively.
Table 5.1 Granular Equivalent (G.E.) Factors
Material Specification G.E. Factor Hot-Mix Asphalt 2360 2.25 2350 2.25 2331 2.00 Road-mix Surface (base) 2321 1.50 Bituminous-treated Base 2204 (rich) 1.50 2204 (lean) 1.25 Aggregate Base Class 5 or 6, 3138 1.00 Aggregate Base Class 3, 4, 7, 3138 0.75 Select Granular 3149.2C 0.50
Other materials and procedures do not have published factors. For procedures such as
cold in-place recycling and reclamation contact the Mn/DOT Pavement Design Engineer.
5.3.3. Resilient Modulus for Pavement Materials For MnPAVE, resilient moduli must be determined for each material for each of the five
seasons. The default values listed in Table 5.2 should be used unless a Mn/DOT District
Materials Engineer or the State Pavement Design Engineer has been consulted.

83
Table 5.2. Default Resilient Modulus Values to Use in MnPAVE
5.4. Construction of the Pavement Layers
5.4.1. Specification Review
5.4.1.1. Granular Materials Properties and Gradations
5.4.1.1.1. Granular Subbase (Specification 3149.2B2)
Select Granular Borrow may be any pit-run or crusher-run material that is graded
from coarse to fine whose ratio of the portion passing the 0.075-mm (No. 200) sieve
divided by the portion passing the 25-mm (1 in.) sieve may not exceed 12 percent by
mass. The material shall not contain oversize salvaged bituminous particles or stone,
MPa ksi MPa ksi MPa ksi MPa ksi MPa ksi2350 Mixture*(MnDOT Spec. 2350)2360 Mixture*(MnDOT Spec. 2360)*Assume PG 58-28 asphalt binder
MPa ksi MPa ksi MPa ksi MPa ksi MPa ksiClass 7(MnDOT Spec. 3138)Class 6(MnDOT Spec. 3138)Class 5(MnDOT Spec. 3138)
MPa ksi MPa ksi MPa ksi MPa ksi MPa ksiClass 4(MnDOT Spec. 3138)Class 3(MnDOT Spec. 3138)Select Granular
(MnDOT Spec. 3149.2B2)
Granular
(MnDOT Spec. 3149.2B1)
Hot Mix Asphalt (HMA) Surface
Hot
Mix
Asp
halt
Prop
ertie
s
varied lengthSF = 0.5 SF = 0.5 SF = 1.0 SF = 1.0 Frozen4 weeks varied length varied length varied length
MnDOT Aggregate Base Classification
MnDOT Granular Subbase Classification
78 11
MnPAVE Design ModuliEarly Spring Late Spring Summer Fall Winter
Wintervaried length
Frozen
MnPAVE Design ModuliSummer
varied lengthSF = 1.0
Fallvaried length
SF = 1.0
Early Spring4 weeksSF = 0.5
Late Springvaried length
SF = 0.5
39 5.6 39 5.6 78 11 78 11 350 50
39 5.6 39 5.6 78 11 78 11 350 50
39 5.6 39 5.6 78 11 78 11 350 50
Agg
rega
te B
ase
Prop
ertie
sG
ranu
lar S
ubba
se P
rope
rties
39 5.6 39 5.6 78 11 350 50
50350117811785.6395.639
39 5.6 39 5.6 78 11 78 11 350 50
503506.0416.0413.0213.021
MnPAVE Design ModuliEarly Spring Late Spring Summer Fall Winter
4 weeks varied length varied length varied length varied length
11,900 1730 5000 725 1850 268 7860 1140 15,200 2200
1850 268 7860 114011,900 1730 5000 725 15,200 2200

84
rock or concrete fragments in excess of the quantity or size permissible for placement
as specified. This is a very open gradation specification. However, the material
should not be very frost or moisture susceptible. To minimize frost and moisture
susceptibility there should be less than seven percent passing the 0.075-mm (No. 200)
sieve.
5.4.1.1.2. Aggregate Base and Subbase Materials (Mn/DOT Specification 3138)
Specification 3138 covers the gradation of surface gravel (Class 1 and 2), subbase
granular materials (Class 3 and 4), and granular base materials (Class 5 and 6). The
following requirements are listed:
• All unsuitable and weathered materials shall be removed from the face of the
pit.
• The mixture must contain 100 percent virgin aggregate and shall consist of
sound durable particles or fragments of gravel and sand except Class 2, which
shall consist of 100 percent crushed quarry or mine rock. The materials should
be free of sod, roots, plants and other organic matter and lumps of clay.
• The insoluble portion of carbonate rock passing the 0.075-mm (No. 200) sieve
shall not exceed 10 percent. This requirement applies to materials from
Anoka, Carver, Dakota, Hennepin, Ramsey, Scott, Washington and all
counties in Mn/DOT District 6.
• The gradations for each of the Classes of materials are listed in Table 3138-1.
• Crushing will be required for Class 5 and 6 aggregates for materials larger
than the maximum size and smaller than a 200-mm (8-in) grizzly. If crushing
causes a poor gradation it must be adjusted or some material will need to be
stockpiled.
• The Los Angeles Abrasion Loss should be no more than 35 percent for Class
6 material and no more than 40 percent for all other Classes; Class 3, 4 and 5
aggregate shall contain no more than 10 percent shale as defined in the
Mn/DOT Grading and Base Manual (10).
5.4.1.1.3. Stabilized Base
5.4.1.1.4. Recycled and Reclaimed Materials may be used or blended with a
combination of virgin aggregates in any percentage if the resulting material meets the

85
requirements of the base or subbase layer being designed. These materials are
covered under Specification 3138, Class 7. Three types of salvaged/recycled materials
are covered:
• Salvaged Bituminous Aggregate Mixtures can be used alone or in
combination with virgin aggregates such that the final mixture meets the
gradation and quality requirements for the Class aggregate for which it is
being substituted.
• Salvaged Crushed Concrete Aggregate has the same requirements as Salvaged
Bituminous.
• Reclaimed Glass can be incorporated up to 10 percent in a granular base.
Restrictions are put on the sources and types of reclaimed glass that can be
used. These are listed under “composition” in Specification 3138. Restrictions
on debris content and storage are also given. The source of the glass must also
be certified.
5.4.1.1.5. Sampling and Testing
Specification 3138 requires the following criteria with respect to Sampling and
Testing:
• All sampling of Class 1, 2 and 7 materials can be done in the stockpile.
• All other sampling for testing Class 3, 4, 5 and 6 materials should be done
during placement to make sure segregation has not occurred.
• If additives such as lime or bituminous materials are being used, the sampling
should be done before they are incorporated into the aggregate.
• Six test procedures are listed in Specification 3138 to be used for evaluating
the aggregates. See page 827 of Mn/DOT Standard Specifications for
Construction, 2000 Edition (9).
5.4.1.2. Construction of Aggregate Base (Mn/DOT Specification 2211)
The work covered under this specification includes the construction of one or more
courses of aggregate base on a prepared subgrade or another base. The base will consist
of granular materials graded to Specification 3138 Classes 1, 2, 3, 4, 5, 6 or 7. The
gradation shall be uniform and checked with random field gradations tests as outlined in
Specification 2211.3F (9).

86
5.4.1.2.1. Construction Requirements
5.4.1.2.1.1. General
• If the aggregate is mined from under water, it shall be stockpiled for 24
hours so as not to saturate the subgrade.
• Individual layers shall be 75 mm (3 in.) or less. Layers up to 150 mm (6
in.) with proper equipment such as heavy rollers and/or relatively clean
aggregate materials can be used.
• Vibratory rollers can be used in compaction if shown to be effective.
• Higher quality material than specified can be used. However, payment will
be based on the material specified.
5.4.1.2.1.2. Placing and Mixing
• Material can only be placed or windrowed on the grade a maximum of 3
km (2 mi.) in advance of construction.
• Multiple layers can be placed a maximum of 5 km (3 mi.) in advance of
construction.
• A single class of aggregate must be placed and compacted along the
project before another class of aggregate is placed.
• The subgrade shall be so dry during aggregate placement that no rutting
will occur.
• Calcium chloride and/or water should be added for proper compaction.
• Material contaminated with subgrade material shall be replaced.
• If a surface course is in the plans the base must be covered with at least
one layer of HMA over the winter. A bituminous penetration coat is not a
substitute for an HMA.
5.4.1.2.1.3. Spreading
• The material must be uniformly spread so as to pass gradation
specifications.
• Each layer must be completed and compacted before the next layer is
spread.
• Each layer must be maintained with the surface aggregate keyed in place
until the next layer is applied.

87
5.4.1.2.1.4. Compaction
Compaction shall be controlled using one of three methods:
• Specified Density – A full layer 75 mm (3 in.) thick shall be compacted to
100% AASHTO T-99 maximum density. The compaction moisture
content shall not be less than 65% of optimum moisture content.
• Quality (Ordinary Compaction) – The material will be compacted until no
further evidence of consolidation occurs under a steel-wheeled or
pneumatic-tired roller defined in Specification 2123 (9). A vibratory roller
may be used if approved by the Engineer. Water should be applied during
compaction as needed.
• Penetration Index Method Class 5, 6, 7 shall be compacted to achieve a
Penetration Index less than or equal to 10 mm (0.4 in.) per blow using a
calibrated Mn/DOT Dynamic Cone Penetrometer (DCP) (24).
A layer is considered to be 75 mm (3 in.) thick unless a vibratory roller is
used; then layers up to 150 mm (6 in.) can be used.
Two passing DCP tests must be obtained for each 800 cubic meters (1000
cubic yards).
If a test fails the material must be reworked compacted and retested.
The DCP testing must be completed within 24 hours of when the placing
and compacting is completed. After 24 hours, the specified compaction
method must be used.
Water must be applied as necessary for proper compaction.
The Penetration Index will be determined using the Mn/DOT Dynamic
Cone Penetrometer (DCP) following the User Guide (24) available at the
Mn/DOT Grading and Base Office (651-779-5564).
If no method of compaction is indicated, then the SPECIFIED
DENSITY method shall be used. For Class 7 material only the Quality or
Penetration Index Method can be used.
5.4.1.2.1.5. Workmanship and Quality
• The aggregate shall be placed to the cross-sectional dimensions shown on
the plans

88
• The grade shall not vary by more than 15 mm (0.05 ft) from the staked
grades.
• Contaminated material shall be replaced.
5.4.1.2.1.6. Aggregate in Stockpiles
When stockpile aggregate is included in the proposal the contract shall, in
addition to the aggregate required for the project, stockpile aggregate of the class
specified at the designated sites as directed by the Engineer.
5.4.1.2.1.7. Random Sampling Gradation Acceptance Method
• The contractor and/or producer must maintain a gradation quality control
program using a random sampling acceptance procedure outlined in the
Mn/DOT Grading and Base Manual (10).
• Form 24346 can be used by the contractor to certify that the material
conforms to specification requirements.
• The contractor shall assume full responsibility for the production and
placement of uniform and acceptable materials.
• Aggregate gradation compliance will be determined in accordance with
Table 2211-A (9). Materials and workmanship shall be uniform and
within the prescribed target values.
• Eleven provisions are listed in Specification 2211-F for the obtaining and
testing of aggregate samples for compliance with Specification 2211 (9).
5.4.1.2.1.8. Payment
Table 2211-B lists the Aggregate Base Payment Schedule using four sublots
and four samples. Table 2211-C lists the Aggregate Base Payment Schedule using
individual tests.
Section 2211.4 presents the Method of Measurement for Aggregate Base
placed (A) and Stockpiled Aggregate (B).
The Basis of Payment for accepted materials is presented in Section 2211.5
5.4.1.3. Hot Asphalt (HMA) Mixtures
5.4.1.3.1. General
The specifications for Hot Mix Asphalt materials cover the materials, mixture
design and construction of the mixtures. Currently, there are two Specifications used

89
by Mn/DOT: Specifications 2350 and 2360. The 2350 mix design uses the Marshall
hammer for the laboratory compaction for initial design and construction control. The
2360 mix design is the Minnesota application of the Superpave mix design that uses
the gyratory compactor for compaction both for design and field control. Both of the
procedures use volumetrics including Voids in the Mineral Aggregate (VMA) for
design and control of the mixes. Previous to the 2350 specification, VMA was used
only in the design phase; however, it was found that lower VMA's were encountered
in the field in some cases. Therefore, a requirement was placed on the field-
manufactured mix. Gyratory (2360) mixtures are used on roadways with greater than
5000 tons and project life greater than 5 years.
In this section, a brief review of the Mn/DOT 2350 and 2360 Specifications is
given. The latest specifications are available at the Mn/DOT website address
http://www.mrr.dot.state.mn.us/pavement/bituminous/bituminous.asp. The numbering
in this section is the same as in the 2350 and 2360 Specifications.
5.4.1.3.2. Mn/DOT 2350 Specification
0.1 Description
The Specification describes mixtures appropriate for three levels of traffic
(Type LV, MV and HV). The levels are defined as:
LV Low Volume Less than 1 million ESAL’s
MV Medium Volume From 1 to 3 million ESAL’s
HV High Volume Greater than 3 million ESAL’s
The specification is for Hot Mix Asphalt on a prepared foundation, base
course or existing surface. It is to be placed in accordance with prescribed plans
or as established by the Engineer.
0.2 Materials
• Aggregate Requirements for carbonate aggregates passing and retained on
the 4.76-mm (No. 4) sieve. Five broad gradation bands based are listed in
Table 2350-1. The fifth gradation is for thin lift leveling.
• Additives requirements are listed. These include mineral filler, hydrated
lime, liquid anti-stripping materials and coating and anti-stripping material

90
covered under Specification 3161 (9). These can be part of the original
mix design as approved by the Bituminous Engineer or by the
Construction Engineer.
• Up to 30% Recycled Asphalt Pavement (RAP) can be used in all wearing
courses and 40% can be used in non-wear courses. Requirements and
methods for estimating the percent crushed for the RAP are presented.
Adjustments in the PG grade to use with RAP if more than 20% is used
are listed in the specification. [2350.2C1;a].
• Crushed Concrete and Salvaged Aggregate. Crushed concrete can only be
used for up to 50% of the aggregate in non-wear courses.
• Salvaged Aggregate can be used for up to 100% of the mixture aggregate
if it meets the requirements of the mixture aggregate and is stored and
proportioned into the mixture as specified.
• Scrap Shingles can be used in the mixture. The percent of shingles will be
included in the percent RAP in the mixture.
• Asphalt binder material is PG graded as designated by the most recent
Mn/DOT memorandum (31).
• Asphalt Mixture Requirements: Table 2350-2 lists the mixture
requirements for HV, MV and LV mixtures. The HV is a 75-blow mixture
whereas the others are 50-blow mixtures. A lower stability and design air
voids are required for the LV mixtures. A TSR of 70% is required for all
mixtures. The requirements for LV mixtures do not include any fine
aggregate angularity. The VMA requirements based on maximum size of
aggregate are listed in Table 2350-3 (9).
0.3 Mixture Design
A. General - Two types of mixture design are presented:
• Laboratory Mixture Design (Option 1): At least 15 days prior to the
start of paving materials and a Laboratory Mixture Design are
submitted to the District Materials Lab where the project is located.
Mn/DOT will evaluate the materials. Then a minimum of 7 days
before paving is scheduled the Contractor will submit a Job Mix

91
Formula. Samples of the mixture will also be submitted 7 days before
paving for Mn/DOT to check Tensile Strength Ratios for the mixture.
No materials in addition to those can be used in the mix. If the mix
proportions change by more than 10% a new mix design must be
performed. Materials to be used in the proposed mix must be
submitted at least 15 working days before paving is planned.
B. Documentation - Each proposed mix design Job Mix Formula shall
include 18 items of documentation listed in Section 2350.3D.
C. Mix Design Report – A Mn/DOT reviewed Mix Design Report includes a
job-mix formula (JMF) from the composite gradation, aggregate
component proportions and asphalt content of the mixture. Design air
voids, VMA and aggregate bulk specific gravity values are also indicated
on the paving recommendations. JMF limits will be shown for gradation
control sieves, percent asphalt binder content, air voids and VMA.
A Mn/DOT reviewed Mix Design Report is required for all paving
except small quantities. All materials must meet specifications before a
Mix Design Report is issued. Mn/DOT will verify two trial mix designs
per mix designated in the plan, per contract at no cost to the Contractor.
Additional mix designs will be verified for $2000 per design.
0.4 Construction Requirements
A. General – The construction requirements listed in the Specification
provide for the construction of all courses.
B. Restrictions – Work can only proceed after load restrictions have been
lifted in the spring. No paving can proceed if the Engineer feels damage
will be caused to the subgrade or the HMA. Generally, no paving should
be done after October 15 north of Browns Valley to Holyoke or after
November 1 south of that line.
C. Equipment – The Specification lays out requirements for asphalt mixing
plants and placement and hauling equipment, including asphalt pavers,
trucks and motor graders.

92
D. Treatment of the Surface – An asphalt tack coat shall be applied to
existing asphalt and concrete and all surfaces of each course or lift
constructed except for the final course or lift according to Mn/DOT
Specification 2357 (9).
E. Compaction Operations – Compaction shall be accomplished with
continuous operation so that all areas are compacted uniformly to the
required density. Rolling with steel-wheeled rollers will not be continued
if crushing of aggregates results. To secure a true surface, variations such
as depressions or high areas that may develop during rolling operations
and lean fat or segregated areas shall be corrected or removed.
F. Construction Joints – Joints must be thoroughly compacted to produce a
neat tightly bonded joint that meets surface tolerances. Both transverse
and longitudinal joints are subject to specified density requirements.
Randomly selected core locations may fall on the joint in which case the
cores will be taken tangent to the joint.
0.5 Mixture Quality Management (Construction)
A. Quality Control (QC) – The Contractor must provide and maintain a
quality control program. This includes all activities and documentation
including mix design, process control inspection, sampling and testing,
and necessary adjustments in the process that are related to the HMA
pavement which meets the requirements of the specification. This also
includes the development and maintenance of a certification plan.
The Contractor is required to provide qualified personnel, a laboratory
with calibrated equipment, and sampling and testing using specific
procedures as listed. The test results will be documented using control
charts, control limits (listed in Table 2350-4), JMF adjustments, corrective
actions and failing materials. Table 2350-5 lists the Payment Schedule for
the various production failures.
B. Quality Assurance (QA) – Mn/DOT will perform QA testing as part of the
acceptance process. The Engineer is responsible for QA testing, records

93
and acceptance. Specific operations for QC and QA are laid out in Section
2350.5.
As part of QA the Engineer will periodically witness the sampling
performed by the Contractor. If the Engineer observes that the sampling
and QC are not being performed properly or tests are not being done
correctly the Engineer may stop production until corrective action is taken.
All sampling and testing must be performed by a Certified Bituminous
(QM) Technician. The agency shall calibrate and correlate all laboratory
equipment in accordance with the latest version of the Mn/DOT
Bituminous Manual (14).
C. Verification Testing – Verification testing of the Contractor’s results shall
be performed daily. Test result tolerances are listed in Table 2350-6 for
the various items used for QC/QA. Verification testing is very important
to make sure the Contractor and Agency technicians are running the
QC/QA tests using the procedures within acceptable limits. Resolution
procedures are also laid out.
0.6 Pavement Density
A. General – For the 2350 Specification all mixtures are to be compacted
using the Maximum Density Method unless otherwise indicated. Some
mixes that would not require maximum density are lifts less than 39 mm
(1.5 in.) wedge sections, patching, driveways or non-traffic areas,
excluding shoulders. These exceptions will be compacted using the
“Ordinary” Compaction Procedure.
B. Maximum Density Determination – For the Maximum Density Method all
courses and layers will be compacted to the values listed in Table 2350-8,
which states that the mixtures shall be compacted to 91.5% of Maximum
Theoretical Density. The mixture used for calculation of densities shall be
a field-manufactured mixture. The requirement may be reduced by 1% if
the first lift of a mix is to be placed on a yielding base. Such cases would
be the first lift on a cold recycled base, aggregate base or on a PCC slab
that is faulted or has mid-panel cracks or other problems. The payment

94
schedule for Maximum Density is presented in Table 2350-10. The Table
shows that incentives can be obtained for higher densities and that the
material must be removed and replaced if the percent of maximum density
is less than 88.5%. The payments for density are based on cores. The
resolution procedure is presented along with Table 2350-10.
The number of density lots is determined by the daily production. The
payment schedule is determined by the core densities. The density is a
percent of the Maximum Theoretical Density. The density of the cores is
to be determined using AASHTO Method T-166. Compaction must be
accomplished by eight (8) hours after the mixture is laid. Coring and
traffic control during the coring operation is the Contractor’s
responsibility.
Density and the resulting voids are very important to the performance
of an asphalt mixture. It is therefore important that specified density be
used to obtain a high quality mix.
C. Ordinary Compaction Method – In areas where the specified density
method is not required, then the Ordinary Compaction Method is used. For
this method a control strip is used to establish how much compaction
effort is needed to densify the mixture. Construction of the control strip
will be directed by the Engineer. It is to commence as soon as possible in
the job. It shall be on the same base conditions and HMA layer thickness
as planned for that section of the project. A growth curve of density versus
roller passes shall be used to establish when no more density can be
achieved. A portable nuclear density device calibrated properly can be
used to establish the growth curves. Specifications for steel-wheeled and
pneumatic-tired rollers to be used for Ordinary Compaction are given.
Three thousand pound per wheel rollers are required for LV and MV
mixtures and five thousand pound per wheel rollers are required for HV
mixtures.
D. Mixture temperature requirements are listed in Table 2350-11. The limits
are based on the thickness of the lift and the air temperature.

95
0.7 Thickness and Surface Smoothness Requirements
The final thickness and smoothness of the HMA surface will affect the
performance of the pavement quite significantly.
A. Thickness – After compaction the thickness of each course shall be within
6 mm (0.25 in.) of the thickness shown in the plan unless automatic grade
controls are used. This thickness requirement will not apply to the first
course placed. If the thickness is less than the minimum specified, that
course shall be replaced. If it is greater than the plans then the excess will
not be included in the payment.
B. Surface Requirements – After compaction, the finished surface shall be
free of open and torn sections and true to grade and cross sections shown
on the Plans using the following definitions:
• For leveling courses a tolerance of 15 mm (1/2 in.) shall be used.
• The surface of the non-wear and the wear course shall show no
variation greater than 3 mm (1/8 in.) from the edge of a 3 m (10 ft)
straightedge.
• The transverse slope shall not vary from the planned slope by more
than 0.4 percent.
• The distance to the edge of each course and the centerline shall not be
more than 75 mm (3 in.).
C. Pavement Smoothness
• General - Pavement smoothness is evaluated on the final mainline
pavement surface because it has been shown to affect the overall
performance of the pavement. Table 2350-12 lists exceptions such as
turn lanes, shoulders, intersections, etc.
• Smoothness Requirements – The smoothness requirements are
based on the type of original surface, base and timing of the project.
The limiting profiles are listed in Tables 2350-13 A, B, and C,
showing the levels of incentive and disincentive.
• Measurement – Smoothness will be measured with a 7.62 m (25 ft)
California Type profilograph. On pass is made 2.74 m (9 ft) from the

96
centerline. The profilograph should be equipped with automatic data
reduction capabilities. Segments of roadway are defined in the
Specification.
• Profile Index – The profile index is calculated for each defined
segment. A blanking band of 5 mm (0.2 in.) is used for the profile.
Bumps and dips equal to or exceeding 10.2 mm in 7.62 m (0.4 in. in
25 ft) are treated separately. Bump, dip and smoothness corrections
shall be done across the full width of the pavement. All corrective
work shall be made by diamond grinding or approved equivalent,
overlaying the area, by replacing or by inlaying.
• Payment – The cost of the smoothness resting and associated traffic
control will be incidental to the cost of the wear course.
The contractor can receive incentives and disincentives for each
segment. However, the total ride incentive for the surface varies by
mix type of the total mix price. Also, the contractor cannot receive an
incentive for ride if more than 25% of all density lots fail to meet
minimum density requirements.
0.8 Method of Measurement
Each type of asphalt mixture will be measured separately by mass based on
the total quantity of material hauled. Asphalt Mixture is measured by the Square
Meter (Square Yard) per specified thickness, mm (in.).
0.9 Basis of Payment
Payment for the accepted quantities of asphalt mixture used in each course at
the Contract prices per unit of material will be compensation in full for all costs of
constructing the asphalt surfacing as specified, including the costs of furnishing
and incorporating any asphalt cement, mineral filler, hydrated lime, or anti-
stripping additives that may be permitted or required.
5.4.1.3.3. Mn/DOT 2360 Specification (Gyratory Mix Design)
0.1 Description
This specification covers the construction of one or more pavement courses of
gyratory hot-plant mixed aggregate-asphalt mixtures on an approved prepared

97
subgrade and/or base course. The HMA must be placed with the lines, grades,
thicknesses and cross sections laid out in the plans for the project.
A. Design Criteria
The design mixtures are divided into three levels based on Nominal
Maximum Size aggregate used in the HMA. These are Types SP 9.5, SP 12.5
and SP 19.0, which represent nominal maximum sizes of 9.5 mm (3/8 in.),
12.5 mm (1/2 in.) and 19.0 mm (5/8 in.) respectively. These are further
designated as Wear and Non-wear mixtures. The gyratory traffic levels are
listed in Table 2360-1. The table shows categories from less than 300,000
ESAL’s to greater than 100,000,000 ESAL’s over a 20-year period. The PG
grading system is used to select the asphalt material. The appropriate PG
grade for a given project depends on the geographic location and the traffic on
a given project. Mn/DOT Technical Memo (31) applies for selecting the
appropriate material.
B. Minimum Lift Thickness
The following minimum lift thickness applies to the three designated
mixtures.
Mixture Minimum Lift Thickness
SP 9.5 wear 40 mm (1.5 in.)
SP 12.5 wear and non-wear 40 mm (1.5 in.)
SP 19.0 non-wear 65 mm (2.5 in.)
0.2 Materials
A. Asphalt Binder
The asphalt binder must meet all of the requirements laid out in AASHTO
MP-1. The grade to be used on Minnesota projects should be established using
the most current Mn/DOT Memorandum “Inspection, Sampling and
Acceptance of Bituminous Materials”(33). It is important that fuel oils or
other distillates not be used in the tanks used for storage of the asphalt
materials. Asphalt materials are usually certified for use by the supplier. The

98
supplier should also provide a memo indicating appropriate mixing and
compaction temperatures in the laboratory and field.
B. Additives
Additives are materials such as mineral filler, hydrated lime, and asphalt
additives such as anti-strip that do not have a specific pay item. If they are
required a pay item can be included. However, if additives are added at the
contractor’s option they will not be compensated. Any additive proposed must
be approved by the Mn/DOT Bituminous Engineer.
C. Gradation Requirements
Three gradation bands are shown in Table 2360-2. These are broad bands
that define the general limits of gradations for each of the mixtures. In
addition restricted zones are recommended as listed in Table 2360-3. The
restricted zone has been defined to help “open up” the gradation between the
2.36-mm (No. 8) and the 0.3-mm (No. 50) sieves. By missing this zone, it
should make it easier to make the VMA requirements for the mixture.
However, experience has shown that it is possible to accomplish the VMA
requirements with gradations that pass through the restricted zone. More
crushed fine aggregate and a lower percent passing the 0.75-mm (No. 200)
sieve can also help the VMA level.
D. Consensus Aggregate Properties
The consensus aggregate properties are an attempt to specify
characteristics that will provide for a good stable durable asphalt mixture. The
properties have been found to enhance stability and stiffness in the Marshall
and Hveem procedures in the past. The following aggregate properties are
specified:
1. Coarse Aggregate Angularity (ASTM D 5821)
2. Fine Aggregate Angularity (ASTM C 1252)
3. Flat and Elongated Particles (ASTM D 4791) The maximum number of
flat and elongated particles is 10 percent by mass for traffic Class 3 and
above. The ratio of length to width used is 3:1.

99
4. The clay content is measured using the Sand Equivalent Test
(AASHTO T-176). Higher percentages indicate a cleaner material.
E. Source-Specific Aggregate Properties
When an aggregate source is selected by the Contractor or the State the
characteristics of the material must be checked to see if the material will be
strong and durable. Strength and durability are important both during
construction and when the mixture is in service. When materials from more
than one source are used samples from each source must be evaluated. The
following tests are used for source evaluation:
• Los Angeles Abrasion (Toughness Test) AASHTO T-96
• Magnesium Sulfate (Soundness Test) AASHTO T-104. Maximum loss
percentages are given for specific sieve sizes. An aggregate proportion
that passes the 4.75-mm (No. 4) sieve and exceeds the loss requirements
listed above on the coarse aggregate fraction cannot be used in the
mixture.
• Total Spall and Lumps (Deleterious Materials Test), Mn/DOT Manual No.
1209. Spall is defined as shale, iron oxide, unsound cherts, pyrite, and
other similar materials. The maximum percentage of spalls and lumps for
the various traffic levels are given in Table 2360-E3.
• Insoluble Residue (Soundness Test), Mn/DOT Laboratory Manual 1221.
The maximum percent insoluble residue must not exceed 10%.
• Aggregate Specific Gravity shall be run on all aggregates used in the
mixtures. AASHTO T-84 and T-85 as modified by Mn/DOT are to be
used.
• All material passing the 0.075-mm (No. 200) sieve is classified mineral
filler and all material passing the 4.75-mm (No. 4) sieve and retained on
the 0.075-mm (No. 200 Sieve) is considered fine aggregate.
• A maximum of 20% recycled materials can be used in a Specification
2360 mixture. The following rules should govern the use of RAP in the
mixture. The combination of RAP aggregate and virgin aggregate must
comply with the consensus properties in Specification 2360.2C and

100
2360.2D. Specific gravities of the RAP materials must be determined. The
percent asphalt binder in the RAP must be determined. RAP containing
any objectionable material such as road tar, metal, glass, plastic, brick and
other materials will not be permitted for use in the HMA mixture.
F. Mixture Requirements
The aggregate fractions shall be proportioned such that the composite
gradation passes the grading listed in Table 2360-2.
• Aggregate Restrictions - The aggregate restrictions should also include the
requirements listed in Table 2360-F1 which shows the maximum
percentage of Class B carbonate aggregate that can be used.
• Gyratory Compaction - Table 2360-7 lists the Superpave Design Gyratory
Compactive Effort for three levels of gyrations: N initial, N design and
Nmaximum. The design criteria in terms of percent of maximum density for
the three levels of gyrations are given in Table 2360-8. The criteria are
listed for mixes within 100 mm (4 in.) of the surface and for those greater
than that depth. The table shows that initial compaction is defined at 89 to
90 percent of maximum density (10 to 11 percent air voids). The number
of gyrations at design level relates to 96 to 97 percent of maximum density
and the maximum levels correspond to 98 to 99 percent maximum density.
These criteria would help make sure the aggregate structure is strong
enough to keep the mix from densifying too much under traffic.
• Volumetric Criteria - The design air void content is 4 percent for mixes to
be placed in the upper 100 mm (4 in.) of the surface and 3 percent for
those at greater depths.
• Voids in the Mineral Aggregate (VMA) - The VMA criteria for Gyratory
mixtures are given in Table 2360-9. The values are given for coarse and
fine mixes that have the same nominal maximum size. The criteria are
slightly lower as the aggregate generally gets coarser. The VMA criteria
are used to make sure the mix is open enough to hold enough asphalt for a
good durable mixture.

101
• Voids Filled with Asphalt (VFA) – The voids filled with asphalt criteria
are listed in Table 2360-10. The criteria are also listed for mixes within the
top 100 mm (4 in.) and those at greater depths. The values for Traffic
levels 4 –7 have been increased slightly.
• Fines to Effective Asphalt Ratio – The effective asphalt content is to be
estimated using the Asphalt Institute Method presented in MS-2 (34). The
Fines to Effective Asphalt Content by mass shall be 0.6 to 1.2.
• Moisture Damage Susceptibility – The retained tensile strength (TSR) of
the mixture using a 150-mm (6-in.) diameter specimen shall be 80 percent
or greater using ASTM D-4867, Mn/DOT modified. The DOT will test the
submitted mixture at least once, unless anti-strip or a different aggregate
composition is submitted.
0.3 Mixture Design
A. General
The asphalt mixture designs are to be carried out by the Contractor and
checked by Mn/DOT. Review and approval is done by either the District
Materials or Central Office Laboratory. Once a mix design is completed the
addition of other aggregates and materials is prohibited. The procedures used
are AASHTO TP-4 or the Asphalt Institute Manual SP-2 (35). If any changes
in proportions exceed 10% a new mix design must be done.
Three options are available for submitting and verifying each mix design.
B. Laboratory Mixture Design (Option 1)
Option 1 is for a new mix design, for which the source properties of the
aggregate must be tested along with the mix design. Contractor test results and
documentation as listed in Section 2360.3E are sent to the Mn/DOT
Bituminous Engineer or District Materials Engineer to check conformance
with the mixture requirements. Fifteen days before construction, aggregate
samples are to be submitted for source, class, type and size of virgin and non-
asphaltic salvage source to be used in the mixture. Aggregates requiring
magnesium sulfate testing need to be submitted 30 days early. Mixture

102
samples are to be submitted 7 days before construction for volumetric
evaluation and moisture susceptibility testing.
C. Laboratory Design / Initial Production Test Strip Verification. For a new
Superpave Mixture at a particular plant placement of the mixture shall be
limited to 500 tonnes (550 tons) of mixture. Two sets of mixture samples are
taken for evaluation by both the Contractor and Mn/DOT. The samples are
used to check gradation and consensus properties according to Tables 2360-
2C and 2360-2D.
Gradation, design air voids, VMA and % asphalt binder are checked
against the JMF. If any of these parameters are not met, it will result in failure
of the 500 tonnes (550 tons) and require the Contractor to use Option 1 to
develop a new mixture design for that project.
D. Documentation For each of the mixture design procedures that are submitted to Mn/DOT
for verification and checking, documentation of the mixture being submitted
must be done in a complete and consistent manner. Fifteen (15) items needed
for acceptable documentation are listed in 2360.3E. Forms are available from
Mn/DOT that include all of the information required for each mixture.
E. HMA Paving Recommendations
Based on the submitted, verified and approved mixtures sent to Mn/DOT
by the Contractor for a given project a Mn/DOT reviewed mix design report
will be made. The mix design includes a job mix formula (JMF) from the
composite gradation, aggregate component proportions, and asphalt content of
the mixture. Design air voids, VMA, and aggregate specific gravity values are
also indicated on the paving recommendations. JMF limits will be shown for
gradation control sieves, percent asphalt binder content, air voids and VMA.
For city, county and other agencies that do not have state aid funding the
Contractor shall provide the Mn/DOT District Materials Laboratory a
complete Project proposal with all the materials and documents that affect the
mix design.

103
If an initial production test strip is to be used (Option 3 above) an initial
JMF for that mix must be issued. Successful verification will be done as laid
in 2360.3D. If it cannot be verified, the JMF will be cancelled.
0.4 Mixture Quality Management
A. Quality Control
The Contractor is to develop and maintain Quality Control (QC) at the
plant. A procedure is spelled out for certifying and maintaining certification of
a plant. If proper control procedures are not followed a plant can be de-
certified. If a plant is relocated it must be certified at the new location.
B. Quality Assurance Mn/DOT will conduct some Quality Assurance (QA) tests to verify the
results of the Contractor QC procedures and testing results. The QA will
include sampling and testing, observation of QC sampling and testing, taking
some additional samples, monitoring summary sheets and charts, checking
calibration of equipment, etc.
C. Contractor’s Quality Control (QC)
The Contractor’s QC will include requirements for personnel (which need
to be certified at a specific level) and laboratory requirements with the
necessary calibrated equipment to run the tests, telephone for communication,
etc.
D. Sampling and Testing Sampling is to be at the prescribed rate using random numbers to
determine the location of the samples.
E. Production Tests
Specific tests are listed for determining asphalt binder content, gyratory
Bulk Specific Gravity, Maximum Specific Gravity, Air Voids-Individual and
Isolated, Voids in the Mineral Aggregate (VMA), Gradation of the blended
aggregate, Field Moisture Damage, Aggregate Specific Gravity, Coarse
Aggregate Angularity, Fine Aggregate Angularity, and Moisture Content.
Asphalt Binder Samples must also be taken in the amount of 1 liter (1 quart)
for every one million liters (250,000 gallons).

104
F. Documentation (Records)
The Contractor shall maintain control charts and records on an on-going
basis. Diaries should be kept and filed as directed and become the property of
Mn/DOT.
G. Documentation (Control Charts)
The following data are to be recorded on standard control charts:
1. Blended aggregate gradation with specification sieves listed in Table
2360-2
2. Percent asphalt binder content
3. Maximum mixture specific gravity
4. Production air voids, percent Gmm @ Ndesign
5. VMA
Both individual values and moving average of four are plotted.
H. Control Limits
Control limits are set for each of the criteria used for mix evaluation and
plotted on the control charts. The production Air Voids and VMA are based
on the minimum specified requirements shown in Tables 2360-8 and 2360-9.
Gradation and asphalt content are based on the current Department approved
JMF. The control limits used for the project are the target value plus or minus
the limits shown in Table 2360-11.
I. JMF Adjustment
Procedures for adjusting the JMF during construction are presented.
J. Corrective Action The procedures for taking corrective action when the mix goes out of the
specified limits are given. Testing rates are increased, and if the problem is
not solved production is to stop. Table 2360-12 lists the Payment Schedule
(penalties) for the various items that may be out of control beyond the time for
corrective action.
K. Failing Materials This section lays out how to handle failing materials, which are defined as
materials outside of the control limits. The following situations are covered:
• Moving Average Failure – Production Air Voids

105
• Moving Average Failure – Percent Asphalt Binder Content, VMA and
Gradation
• Individual Failure – Production Air Voids, Percent Asphalt Content,
and VMA
• Individual Failure – Gradation
• Coarse and Fine Aggregate Crushing Failure
L. Quality Assurance
The Engineer will periodically witness the sampling and testing performed
by the Contractor. Production may be stopped if tests are not being performed
correctly. All testing and data analysis are to be performed by a Certified
Level I Bituminous Quality Management (QM) Technician. The Engineer will
also calibrate and correlate all laboratory equipment.
M. Verification Testing Verification testing is to be conducted as part of QA. This testing includes
one set of production tests and the taking of a companion sample once per
day. A listing of the tolerances between the QC testing and QA testing is
given in Table 2360-13. The following items are considered as part of
Verification testing:
• Testing Methodology Verification
• Sampling Methodology Verification
If verification of test results that are used for acceptance indicate failure to
comply with volumetric or densification properties, the material placed will be
subject to penalties or removal and replacement as described in Tables 2360-
12 and 2360-16.
0.5 Pavement Density
A. General
All pavements must be constructed in accordance with the Maximum
Density Method unless otherwise specified. Construction of leveling layers
less than 40 mm (1.5 in.) thick, thin lift leveling, wedging layers, patching
layers, driveways, and areas which cannot be compacted with standard

106
highway construction equipment will be accomplished according to the
Ordinary Compaction Procedure specified in 2360.5C.
B. Maximum Density Method All courses of HMA in which the Maximum Density is used shall be
compacted to a density not less than the percentage shown in Table 2360-14.
The table shows that all mixes within 100 mm (4 in.) of the surface must be
compacted to 92% of maximum density and non wear courses more than 100
mm (4 in.) must be compacted to 93% of maximum density. Field density is
one of the most important criteria that will affect the performance of the HMA
under traffic and environment. The Maximum Theoretical Density is
determined as part of the JMF and then as required throughout the project.
Determination of the bulk specific gravity of cores taken after construction
is to be according to AASHTO T-166, Mn/DOT modified. For coarse or open
graded mixes the density is to be measured using ASTM D 1188, Mn/DOT
modified.
Compaction operations must be completed within 8 hours after mixture
placement. Re-rolling after this time is not permitted.
The frequency of testing is defined by dividing the day’s production into
equal size “lots” from which three cores are to be taken for density
measurements. Two cores are to be tested and the third used as a companion
sample for verification testing. If random locations fall on a joint, the core is
to be taken tangent to the joint. Procedures for analyzing and evaluation of the
results are presented in Section 2360.5.
The acceptance and payment schedule are listed in Table 2360-16. Density
of the compacted HMA is accepted on a lot basis. Core locations have been
determined by the Engineer. Cores are to be tested by the Contractor and
verified by the Engineer. Density determinations are to be made by the end of
the next working day after placement and compaction and prior to placement
of subsequent layers.

107
C. Ordinary Compaction
Ordinary Compaction is defined as the determination of the level of
compaction beyond which no further compaction will occur. This type of
compaction can only be used in areas defined in Section 6A. Where Ordinary
Compaction is to be used a control strip shall be constructed to establish a
rolling pattern. The Contractor shall use a portable nuclear density or similar
device to establish a density growth curve.
The size of Steel-Wheeled, Pneumatic-Tired and Trench Rollers used in
Ordinary Compaction are specified in 2360.5C.
When Ordinary Compaction is used the minimum laydown temperature in
all courses (measured behind the paver) of the HMA shall be as listed in Table
2360-17. The pavement temperatures required are dependent on the air
temperature and the compacted mat thickness.
0.6 Thickness and Surface Smoothness Requirements
A. Thickness
After compaction the thickness of each course shall be within a tolerance
of 6 mm (0.25 in.) of the thickness shown in the plans. The thickness
requirements do not apply to leveling courses. Lifts that are constructed less
than minimum required thickness may be removed and replaced at the
discretion of the Engineer.
Any materials in the lifts greater than the thickness specified will be
excluded from the payment quantities.
B. Surface Requirements
1. Measurement and Evaluation
After compaction, the finished surface of each course shall be free of
open and torn sections and shall be smooth and true to the grade and cross
section on the Plans with tolerances listed in 2360.6B.
Pavement smoothness is very important when considering the
performance of a pavement section because of the dynamic effects of
roughness. Therefore, it is measured and used to evaluate the quality of the
final pavement. Exclusions to this requirement are listed in Table 2360-18.

108
Identification of pavement sections is given for various construction
types, the criteria for which are listed in Tables 2360-19 A, B and C. Table
2360-19A is for new or pavements with three or more lifts, B is for
projects with fewer lifts or curb and gutter, etc. and Table 2360-19C for
construction on unmilled, single lift or BOC with two lifts on a pavement
with a PSR less than 2.7. The measurement of profile is to be made with a
7.62 m (25 ft) California Type profilograph that produces a profilogram
(a trace of the profiled surface). One pass is to be made in each lane 2.74
m (9 ft) from the centerline. Each lane is treated separately. The
profilograph is to be operated at a speed no greater than a normal walk, 6
km/hr (4 miles/hr).
Specifics for running the profilograph and calculation of the Profile
Index are given in Section 2360.6C. Individual bumps and dips are also
defined. Bump, dip and smoothness correction work shall be done across
the whole lane width. All corrective work shall be done by diamond
grinding or approved equivalent, overlaying the area, by replacing the area
or by inlaying.
2. Payment for Profile Indices
The cost of certified smoothness testing and associated traffic control
will be incidental to the cost of the wear course mixture. Based on the
measured profiles, the contractor may pay a penalty or receive an
incentive for the work. The only limit is that the total incentive shall not
exceed 5 or 10% of the total mix price. Incentives are only based on the
new profile index. The Engineer may, at his discretion, assess a penalty in
lieu of requiring the Contractor to take corrective action when the profile
index for a segment indicates corrective action is necessary.
0.7 Method of Measurement
HMA’s of each type will be measured separately by mass based on the total
quantity of material hauled from the mixing plant, with a deduction made for
bituminous materials. The constructed thickness must meet the requirements
indicated in Section 2360.6A.

109
0.8 Compensation
Payment for the accepted quantities of HMA mixture used in a course at the
Contract prices per unit of material will be compensation in full for all costs of
constructing the HMA surfacing as specified, including the costs of furnishing
and incorporating any aggregate, asphalt binder, mineral filler, hydrated lime, and
any anti-stripping additives permitted or required.
5.4.2. Field Control Procedures to Meet Specifications
5.4.2.1. General
In this section, procedures in the Mn/DOT Grading and Base, Geotechnical and
Bituminous Manuals (10, 5, 14) are presented. Checklists developed by the laboratory
and field staff are also summarized in the Field Notes for Construction Engineers and
Inspectors (11). Some discussion is also made as to which methods are the best to use for
field control of either granular or HMA materials. Field control procedures for cold in-
place recycling and full depth reclamation have not been finalized.
The next section reviews the procedures recommended for the QC/QA of granular
bases and the following will review those considered best practices for HMA materials.
As with other procedures for design and control of pavements, it is anticipated that the
procedures presented here will be improved over the years and therefore, the methods
presented should be up-dated periodically.
5.4.2.2. Granular Subbases and Aggregate Bases
5.4.2.2.1. General
The construction of granular subbases and aggregate bases involves the following
procedures:
• Manufacture of the material from a gravel pit or quarry.
• Storage of the materials (stockpiling)
• Transport to the grade
• Placing of the material
• Compaction
The specifications require that the material be tested initially for general quality,
gradation and compaction. It must be determined that the material being tested is
uniform meaning that very little segregation has occurred. It is also important to make

110
sure the material being constructed is represented by the correct moisture-density test
if specified density is being used.
5.4.2.2.2. Schedule of Materials Control
A current schedule of materials control should be reviewed before each project to
establish:
• The specification applicable for that project
• The minimum required acceptance testing rate
• Form No.
• Minimum required sampling rate for laboratory testing
• Sample size required for laboratory testing
These requirements are listed for gradation, one-point density, Moisture-density,
relative density, relative moisture content, pulverization testing, percent crushing, and
aggregate quality testing.
The Schedule of Materials Control is Tab. A 5-692.100 in the Grading and Base
Manual (10).
A standard sample identification card is also presented in the Grading and Base
Manual Fig. 1 5-692.101 (10).
Standard forms to use for Independent Assurance Sampling and Testing are also
presented.
5.4.2.2.3. Standard Methods of Testing
Standard methods of testing and procedures to be used by the contractor and
Mn/DOT for QC and QA are presented in Section 5-296.200 of the Grading and Base
Manual. It is very important that exactly the same procedures be used by both groups
when quality assurance and verification testing are performed.
Methods to correctly sample and test for statistically based specifications are
presented in Chapter 5-692.700 of the Grading and Base Manual. It is very important
to use the principles of statistics because all pavement construction materials are
variable. When a material is designed the variability is considered. Then in the field
the constructed material must be placed as uniformly as possible and within the
variability assumed during design. The MnPAVE Design procedure will include

111
variability as one of the conditions to consider in thickness design and generally will
show that a thinner pavement can be designed where less variability can be measured.
5.4.2.2.4. Methods of Compaction Control for Aggregate Bases
Three methods are included for Compaction Control of aggregate bases in the
Mn/DOT specifications:
• Specified Density
• Dynamic Cone Penetrometer
• Quality Compaction
Specified density is usually measured using the 150-mm (6-in.) Sand Cone
Method, ASTM D 1556-90. The larger cone is used to minimize side effects of the
hole. It is important to make sure that random sampling procedures are used for
selecting sample locations, that the material being tested has been moisture-density
tested and that the standard test procedure is used for the sand cone test.
The Dynamic Cone Penetrometer (DCP) has recently been added as a test
procedure for aggregate base construction control. This procedure is quicker and
easier to run than the sand cone density. Also, it gives a direct measure of the material
stiffness modulus. It is important to follow the test procedure carefully and to conduct
the test within 24 hours of compaction so that crusting does not occur. Statistical
procedures should again be used to establish the test location and analyze the data.
Quality Compaction should only be used if the equipment is not available to do either
Specified or DCP testing. If quality compaction is used, the inspector and engineer
should be experienced in the construction of aggregate base and embankment
materials. They must also observe the compaction operation continuously. This
method of compaction is appropriate only for very small areas where a limited
amount of material is being placed.
5.4.2.2.5. Job Guide for Aggregate Base Construction
The Mn/DOT Office of Construction, Technical Certification Section has
published Field Notes for Construction Engineers and Inspectors (11). This booklet
presents many items that an inspector should use to do a quality job of construction
control. The following are a portion of the checklist items presented for aggregate
base construction:

112
1. Review the contractor/producer QC procedures and test results. Obtain the
completed Certification of Aggregates (form #24346) from the contractor.
2. Review any certification of crushed glass.
3. Perform the necessary inspection and testing (bitumen content, crushing,
abrasion testing, shale, etc.) before delivery of any materials.
4. Prior to placing the base, verify that the subgrade is true to required grade and
cross-section. Subgrade must be free of ruts, soft spots, large stones and
excess dust.
5. Monitor placement operation. Lift should not exceed 75 mm (3 in.) of
thickness unless approved by the Engineer.
6. Check depth and yield (tons per station) to ensure uniform construction.
7. Obtain samples for testing gradation, moisture-density, etc. according to the
Schedule of Materials Control.
8. Ensure that compaction of each lift is completed satisfactorily to required
density and cross-section before starting placement of the next lift.
9. When weight tickets are required, collect, check, and initial them for each
load as they arrive.
10. Maintain records (Diary) that should include such things as hours, location,
lift thickness, test results, quantity, yield and other events that may have an
effect on the work.
5.4.2.3. Hot Mix Asphalt (HMA) Construction
5.4.2.3.1. General
A current Schedule of Materials Control should be reviewed and used for setting
up the field control for each HMA construction project. That document will establish:
• The specifications applicable for the project
• The minimum required acceptance testing rate
• Form number to use
• Minimum required sampling rate for laboratory testing
• Sample size required for laboratory testing
The construction of an HMA pavement layer can be summarized as follows:

113
Plant Operations
• Materials delivery or manufacture and storage (asphalt and aggregate)
• Materials proportioning and mixing
• HMA storage and transfer to trucks
• Delivery to construction project
Paving Operations
• Laydown
• Compaction
Each of these steps requires Quality Control (QC) testing by the Contractor and
Quality Assurance (QA) testing by Agency as spelled out in the Specifications. The
purpose of this testing is to establish that the material is uniform (no segregation) and
is placed to a specified density so that the mixture will perform well. The ride is also
now checked after construction. Penalties are assessed if specifications are not met
and incentives make it possible to earn bonuses if specifications are exceeded.
5.4.2.3.2. Standard Methods of Testing
Standard testing methods to be used by the Contractor and Mn/DOT for QC and
QA are presented in Mn/DOT 2350 and 2360 Specifications (9). It is very important
that exactly the same procedures be used by both groups when QC, QA and
verification testing are performed.
Procedures to correctly sample and test for statistically based specifications are
presented in Chapter 5-692.700 of the Grading and Base Manual. It is very important
to use the principles of statistics because all construction materials are variable. When
a pavement structure is designed the variability should be considered. Then in the
field the constructed material must be placed as uniformly as possible and within the
variability assumed during design. MnPAVE uses variability as one of the conditions
to consider in thickness design.
5.4.2.3.3. Methods of Compaction Control for HMA
Section 5-3.10 of the Geotechnical and Pavement Manual (5) presents Bituminous
Mixture Compaction Guidelines. Compaction is the final stage in the placement of a
bituminous mixture during the paving operation. At this stage it is possible to develop
or not develop the full potential strength and durability of the mixture. Inadequate

114
compaction of the mixture will result in a shorter pavement life because of
accelerated deterioration due to load and/or environment.
The engineer has a choice of three different compaction control methods to select
from based on the 2350 and 2360 specifications for a given project. The various
methods are presented in detail in the Mn/DOT Bituminous Manual. A brief
description of each and when to use them are given.
• Specified Density Method (2350.6B and 2360.5B). This process involves
comparing the Bulk Specific Gravity of a sample obtained from the roadway
with Bulk Specific Gravity of a sample obtained from the same material prior
to compaction and then compacted by the Marshall method for 2350 and the
gyratory method for 2360. Maximum Theoretical Density determinations are
also made on the field sample to determine if the mixture has been compacted
to the minimum specified density as listed in Tables 2350-8 or 2360-14
respectively. The frequency of and variation between QC and verification
testing are also presented.
• Ordinary Compaction (2350.6C or 2360.5C). For the Ordinary Compaction
Method a control strip of at least 330 m2 (395 yd2) of the same material,
subgrade and base conditions shall be compacted to determine a proper roller
pattern to achieve maximum density. A growth curve of density with passes
must be used to determine when maximum density is obtained. If materials or
conditions change a new control strip must be constructed. A given control
strip can only be used for 10 days of construction.
The Specified Density Method should be used unless otherwise indicated.
Ordinary Compaction can be used without a control strip for very small areas
less than 330 m2 (395 yd2). For these cases the HMA should be compacted until
there is no appreciable increase in density with each pass of the roller as defined
by the engineer.
The type and characteristics of the roller(s) to be used for Ordinary
Compaction are presented in the given sections of the 2350 and 2360
Specifications.

115
5.4.2.3.4. Job Guide for Plant Mix Bituminous Paving
The Mn/DOT Office of Construction, Technical Certification Section has
published Field Notes for Construction Engineers and Inspectors (11). This booklet
presents many items that will help an inspector be ready for working with a contractor
to construct a high quality project. The quality of construction affects the
performance of the pavement more than the thickness design. The items listed are for
mixing plant inspection and then the paving operation. The list presented here is a
selected group of items that influence the performance of the pavement most.
The development of this Guide is set on the principle that the Inspector should not
just be a data and sample taker. The inspector should be aware of the whole operation
to make sure that a consistent, uniform quality mixture is produced and constructed.
Plant
1. Determine under which specification the mixture(s) are to be produced and
review any special provisions.
2. Review the plant certification along with the schematic of the plant. If the
plant is not certified go through the procedure for certification. Have the plant
inspector and Plant Authorized Agent complete and sign the Asphalt Plant
Inspection Report (TP 02142-02, TP 021143-02). By signing the Asphalt
Plant Inspection Report, the plant-authorized agent agrees to maintain all plant
and laboratory equipment within allowable tolerances set forth in the
respective specification and the Bituminous Manual.
3. Identify items to be sampled, rates of sampling and testing using the Materials
Control Schedule. Determine source or access for securing samples.
4. Determine material flow controls and settings to comply with the design
mixture. Review the Mix Design Report.
5. Monitor calibration of plant equipment (pumps, aggregate bins, feeders, etc.).
6. Check that appropriate QC samples are being taken and tested.
7. Check that contractor is monitoring asphalt content through required spot
checks.
8. Make sure that the HMA is being mixed at the temperature recommended by
the asphalt supplier.

116
9. Watch mixture appearance to ensure uniformity and look for any indication of
plant malfunctions such as sticky feeders or other operations.
10. Watch stockpile operations so that contaminated materials are not entered into
the cold feed bins.
11. Ensure that truck boxes are clean and protected against buildup and also free
of excessive cleaning agents. Fuel oil or other distillates must not be used to
clean the truck beds.
12. Make sure segregation is not occurring during the loading operation. Also
make sure trucks are covered when necessary.
13. Weigh tickets are to be completely and properly filled out and automatic scale
printer operations are to be monitored. Make sure scale calibration is being
performed.
14. Monitor asphalt shipments and make sure Contractor is taking necessary
asphalt samples.
15. Monitor Contractor’s testing to ensure that the required number and type of
tests are done and that proper procedures with calibrated equipment are being
followed:
a. Review Contactor’s on-site QC records and charts for accuracy and
completeness.
b. Monitor agency tests and confirm that they are within allowable tolerances
for Contractor and Agency checks.
16. Check that Contractor is maintaining plant diary and daily records that include
hours of operation, production, asphalt delivered, shutdowns (why?), mix
adjustments, temperature and any other significant events.
17. Take or observe the taking of verification samples (one per mix per day).
a. Retain one half of sample for Verification testing.
b. Provide Contractor with companion sample.
c. Deliver Verification sample to the Agency lab.
d. The Contractor must test the Verification sample(s).

117
Paving
1. Check paving and compaction equipment for compliance with specifications.
Get acquainted with the equipment operation.
2. Check adjustments available on the paver including flow gates, auger control,
tamper bar, screed angle, vibration and crown.
3. Check grade for smoothness, compactness, cross slope, grade and alignment.
Make sure the surface is free of gravel, loose patches or excessive patch and
joint material.
4. Identify areas of instability that require repair.
5. Establish the paving and rolling sequence with the Contractor.
6. Observe the tacking operation. It needs to be uniform and not too thick or thin.
7. Collect, check, and initial each delivery ticket.
8. Check material in each load for problems such as segregation or
contamination. Check in truck and as the load is dumped.
9. Watch the paver operation for:
a. Maintaining of grade
b. Incorrect line
c. Malfunctioning automatic screed control
d. Too much starting and stopping
10. Monitor laydown temperature to make sure it is consistent and within the
range recommended by the Supplier.
11. Observe the mat surface for uniformity of texture, presence of spot
segregation, proper thickness, width and yield.
12. Observe breakdown roller operation for uniformity and continuity of
operation with attention to speed, pattern, location of drive wheel and
vibration (if used).
13. Continue observation of roller operations to ensure timely performance geared
to removal of roller marks and bumps.
14. Check surface for compliance with smoothness requirements. If a profilograph
is being used, make sure the settings are correct and the profilograph is
calibrated.

118
15. Cores are to be taken and tested by the Contractor. Core locations are to be
determined and marked by the Agency. Take possession of the companion
cores. Monitor density tests for compliance with proper equipment and test
procedure. The Contractor will schedule testing so that it can be observed by
the Inspector.
16. Maintain daily records that include such things as:
a. Hours of operation
b. Stations paved
c. Course paved
d. Depth, width, tonnage and yield
e. Measured delivered temperature
f. Weather
g. Other events which could affect the quality and quantity of work
17. Take or observe the taking of verification samples (one per mix per day).
a. Retain one half the sample for Agency testing.
b. Provide the Verification companion sample to the Contractor for testing.
c. Deliver Verification sample to Agency lab.
d. Verification companion samples must be tested by the Contractor.
18. Obtain Summary Sheets:
a. Contractor Density Core Worksheets
b. Agency Core Worksheets
c. Agency’s Verification results
d. Tonnages represented by the respective worksheets to establish density
incentives and disincentives.
If there are any questions about the frequency or amount of material to sample,
refer to the Materials Control Schedule.

119
CHAPTER 6
SUMMARY AND RECOMMENDATIONS 6.1. General
This manual presents design and construction methods recommended for Hot Mix Asphalt
(HMA) pavements in Minnesota. Mn/DOT and the asphalt pavement industry are in a time of
transition both for pavement thickness design construction procedures.
6.2. Thickness Design Procedures
Three procedures are now available for use in Minnesota: the Soil Factor Procedure, the
Stabilometer R-Value, and the mechanistic-empirical procedure (MnPAVE). The Soil Factor
Design Procedure is presented in the Mn/DOT State Aid Manual (4) and the R-Value method
is presented in the Mn/DOT Geotechnical and Pavement Manual (5). The MnPAVE software
Beta Version 5.009 is also available (6). A summary of the procedures is presented in Chapter
2. Currently, both the Soil Factor and R-Value procedures are being used for city and county
roads. A summary of the operating manual for MnPAVE is included in Chapter 2. The manual
includes a summary of Setup, Startup, Input and Output for the software.
The current procedures have been used over the past 25 plus years. It is recommended that:
• The current procedure of choice (Soil Factor or R-Value) be used to establish a
thickness design or alternative designs.
• The MnPAVE software be used to establish alternate design(s).
• Send comparisons to the Mn/DOT Road Research Section using the form provided.
• If new materials or existing materials are used in a different way, set up designs using
MnPAVE and report the results.
6.3. Traffic
The methods recommended for estimating traffic for the three design procedures are presented
in Chapter 3.
The Soil Factor Design requires an estimate of AADT and HCADT predicted for 20 years
into the future or other design life. The HCADT prediction requires an estimate of vehicle type

120
distribution. The distribution can be estimated from a statewide HCADT map or measured on
specific roadways using the procedure presented in the appendix.
When predicting traffic for the Soil Factor Procedure, the design AADT and HCADT should
be determined using:
• An estimate current AADT by conducting a vehicle count at the location of, or similar
location to the roadway being designed.
• An estimate current HCADT using the field procedure with two pneumatic tubes
conducted by the Mn/DOT Traffic Forecast and Analysis Section and given in the
Appendix B.
• As an alternate, the current ADT and HCADT are estimated from current statewide
AADT and HCADT maps, which are maintained for State Highways and County State
Aid Highways (CSAH) system. The statewide AADT maps are up-dated about every two
years are available on CDROM and may be obtained by contacting either the Mn/DOT
Traffic Forecast and Analysis Section or the Mn/DOT District Traffic Engineer.
• The future AADT and HCADT predicted using the appropriate growth factor determined
as presented in Section 3.4.4.
The R-Value and MnPAVE Design procedures currently use ESAL’s for traffic load
evaluations. ESAL (Equivalent Standard Axle Loads) estimates require a determination of
current AADT, vehicle type distribution, ESAL factors (the average effect of a given type of
vehicle in terms of ESAL’s), a calculation or estimate of growth, and design lane distribution.
The procedures and tables recommended for these calculations are presented in Chapter 3. The
MnESALS software will result in the best estimate of ESAL’s for a particular design situation.
The procedure(s) are presented in Section 3.4. The procedure requires the following:
• Estimate of AADT as indicated above and in Section 3.4
• Estimate Vehicle Distribution; the procedure recommended is the method presented in
Appendix B. The length of the study depends on the volume of traffic on the roadway. As
an alternate the statewide average for Rural CSAH and county roads for the eight vehicle
types listed in Table 3.1. If at all possible the vehicle type distribution should be
measured for a given location because of the significance of the vehicle distribution
shown in calculating ESAL’s in Reference 18.

121
• Estimate ESAL Factors by vehicle type; Table 3.2 shows a list of ESAL factors for
CSAH and other low volume roads. Other distributions can be assumed based on
loadings determined from knowledge of the usage for the design roadway. Table 3.3
illustrates a method of estimating ESAL effect for a given vehicle type.
• Growth Factor; The growth factor to be used can be estimated using the procedure
presented in Table 3.6 or the factors listed in Table 3.4.
• The Design Lane distribution for 1, 2 and 3 lanes in one direction are listed in Table 3.5.
• An ESAL calculation spreadsheet is presented in Table 3.6. This spreadsheet should be
used if the MNESALS Software is not available.
Eventually, the MnPAVE procedure will use the estimated Load Spectra concept to evaluate
traffic. Load Spectra yields a distribution of axle loads for various configurations of axles. For
the next few years the same type of data will be required to predict Load Spectra as has been
used to predict ESAL’s. Therefore, it is recommended that data and information continue to be
obtained as has been listed herein.
6.4. Subgrade (Embankment) Soil
For the Soil Factor Design procedure the subgrade soil is evaluated using the soil factor,
which is dependent on the AASHTO classification. The AASHTO classification should be
determined by testing the soil “representative” of the project being designed. The
“representative” soil can only be determined using a soil survey with the procedure(s) given in
Section 4.2. To determine the AASHTO classification the gradation uses a sieve analysis and
hydrometer analysis for the fine-grained material. The Atterberg Limits (Plastic Limit and Liquid
Limit) must be run and used for the classification.
The R-Value can be measured directly in the laboratory, or can be estimated from the
AASHTO Classification. It is recommended that the R-Value for the “representative“ be
measured directly using the procedure as modified by Mn/DOT (5). A second choice is to
estimate the R-Value using the correlated values from Reference 7.
The resilient modulus (Mr) can be estimated from either the R-Value or AASHTO soil
classification using relationships developed by Siekmeier and Davich (7). A laboratory test is
now being developed to measure the resilient modulus directly in the laboratory (23). Until this
test is developed, the resilient modulus must be determined preferably using the R-Value
correlation or else with the AASHTO classification correlation.

122
The resilient modulus should be varied throughout the year using the seasonal factors given
in Section 4.3.4.4. More research needs to be conducted to determine how the five seasonal
factors determined from Reference 8 vary with soil type.
Mn/DOT Specifications 2105, 2111 and 2123 should be used for construction of subgrades in
Minnesota (9). Test rolling (2111), specified density and quality compaction are the three
methods of compaction control included in these specifications. Proof rolling, which is covered
in Specification 2111, is recommended. Proof rolling requires an experienced inspector for
observation. Specified density as presented in Specification 2105 is the second choice. Quality
compaction is recommended only if an experienced Inspector is available and/or for relatively
small areas. The situations where one method is appropriate relative to the others are listed in
Section 4.5.3.7.
The six items listed in Section 4.5.3. must be followed to result in a well-constructed
subgrade.
The Mn/DOT Office of Construction, Technical Certification Section has published as
“Inspector’s Job Guide for Construction” (11). This guide should be used so that the Inspector
has a checklist which will help start and keep the project well organized and follow the
specifications set up for the project.
Various methods of subgrade enhancement are presented in Section 4.6.2. As these
procedures are used non-destructive field testing using the Falling Weight Deflectometer (FWD)
or Dynamic Cone Penetrometer (DCP) should be used to determine the magnitude and
variability of the in-place subgrade strength (stiffness). These values along with observations of
performance and traffic should be used to improve the performance predictions used in
MnPAVE.
6.5. Pavement Section Materials
6.5.1. General
The materials used for pavement sections range from select granular materials to high
type Hot Mix Asphalt materials. Each of these materials or combination of materials is
defined by specification for the Soil Factor and R-Value design procedures. Granular
Equivalent factors are assigned to each specification material. These factors are considered
constant throughout the year. The MnPAVE procedure requires that Resilient Modulus
values be assigned to each of the materials. The resilient modulus has been found to vary

123
throughout the year (8) and within specifications. At this time moduli values are being used
based on laboratory and field testing of Mn/ROAD materials (7). The recommendations in
this section are for the specifications to use, the design factors, construction procedures and
specific procedures within the specifications that will result in a good performing pavement.
6.5.2. Specifications and Design Factors
The following granular equivalent factors are recommended for materials that pass the
respective specifications:
Material G.E. Factor Mn/DOT Specifications Select Granular 0.50 3149-2, 2211
Subbase 0.75 3138 (Class 3 & 4), 2211 Granular Base 1.00 3138 (Class 5 & 6), 2211
Plant Mix Bituminous 2.00 2331 Plant Mix Bituminous 2.25 2350, 2360
Various other G.E. factors have been applied to some stabilized bases. However, the
Mn/DOT District Materials Engineer or Pavement Section should be contacted for advice on
these materials.
For MnPAVE default seasonal moduli have been developed based on in-place non-
destructive and laboratory testing of the Mn/ROAD materials. The moduli have been related
to the specifications used at Mn/ROAD and the temperature and moisture conditions
measured. Table 5.2 lists the default moduli used now in MnPAVE. The variation of
modulus throughout the year for pavement materials in other locations must be monitored for
MnPAVE input. Documentation of these values must be an on-going project for the next few
years. At this time the correlation of moduli to specifications shown in Section 5.3 should be
used.
6.5.3. Construction of Granular Bases
For aggregate base and subbase materials construction should follow the procedures and
criteria listed in Specification 2111. The construction requirements for placing and mixing,
spreading, and compaction must be followed. Three methods of compaction control are listed;
specified density, quality (ordinary) compaction and penetration index using the DCP. The
recommended procedures are:

124
1. Use of the penetration index with the DCP.
2. Specified density.
These procedures indicate that the granular material has been compacted to a level where
the construction of the next layers can be accomplished and that the material has the strength
needed to support the design traffic.
Quality or ordinary compaction should only be used for small areas and/or an
experienced Inspector is available to observe the construction continuously.
The “Schedule for Materials Control” must be setup and followed for each project so that
the required sampling and testing are accomplished.
Standard methods of testing whether it be for density or DCP testing must be followed.
The Inspector’s Guide for Construction (11) should be used as a checklist to determine what
materials and procedures will help the Engineer, Inspector and Contractor efficiently carry
out the project specifications.
6.5.4. Construction of Hot Mix Asphalt Materials
Specifications 2350 or 2360 should be followed for construction of HMA surface
mixtures. All HMA mixtures in Minnesota use PG graded asphalts. The cities and counties
should use the PG graded asphalt specified for their region. Laboratory compaction is
accomplished with a standard Marshall hammer that applies blows to each side of the
specimen.
The 2350 LV, MV and HV mixtures are based on strength criteria measured with the
Marshall Stability test and design air voids which are listed in Table 2350-2 (8). Moisture
susceptibility as measured with the modified Lottman test strength ratios is also specified
along with the coarse and fine aggregate angularity.
The 2360 (Superpave) specification does not have a strength or stiffness requirement.
The primary difference in the two specifications is the method of compaction. The 2360
specification uses the gyratory compactor both in the lab and in the field.
Table 2350-3 lists the minimum VMA for the mixture as compacted in the field. Also the
compaction percent of maximum theoretical density is listed in Table 2350-8 and 2360-14.
The mixture design for both procedures is accomplished using Quality Management
procedures; that is the Contractor provides the mix design and Quality Control and the
Agency does check testing or Quality Assurance testing to check the work done by the

125
Contractor. The procedures laid out in Specifications 2350 and 2360 should be followed
carefully to result in a good stable and durable mixture. Section 5.4.2.3.3. presents the
methods of compaction control available. These are:
1. Specified Density – Measurement of density for comparison with maximum
theoretical density.
2. Ordinary compaction with a control strip
3. Ordinary compaction without a control strip.
Specified density should be used unless otherwise indicated. The only reasons would be
lack of equipment or people to run the tests. The second option is Ordinary compaction with
a control strip. The control strip indicates when maximum compaction was achieved and
gives a measure of consistency. The roller requirements for use with ordinary compaction are
given in Section 2350-6 and 2360-5 for the respective specifications. Ordinary compaction
without a control strip should only be used for very small areas and when an experienced
Inspector is on the job to observe the operations continuously. The incentives and
disincentives listed for density control in Table 2350-10 and 2360-6 should be used.
Also, the incentives and disincentives for ride in Tables 2350-13 and 2360-6C should
also be followed. A road built smoother will perform better than one using the mixture and
pavement section built rougher.
The Schedule for Materials Control should be setup and followed for the specifications
on the given project. The listings are for both plant and paving operations. Each of these
requires Contractor (QC) testing and Agency (QA) testing. The specifications lays out the
differences allowable between the tests.
The Inspector’s Job Guide for Plant Mix Bituminous Paving (11) should also be
consulted to help setup and run the project efficiently.
A good diary will help all people involved with the project maintain a good schedule of
construction and field control.
One of the major goals of presenting the specifications and recommended field
procedures for constructing the subgrade and pavement section materials is so that the
available materials are used as effectively as possible. The procedures should also result in
the construction of the materials so that a uniform product will be obtained. The most
uniformly constructed materials will perform the best.

126
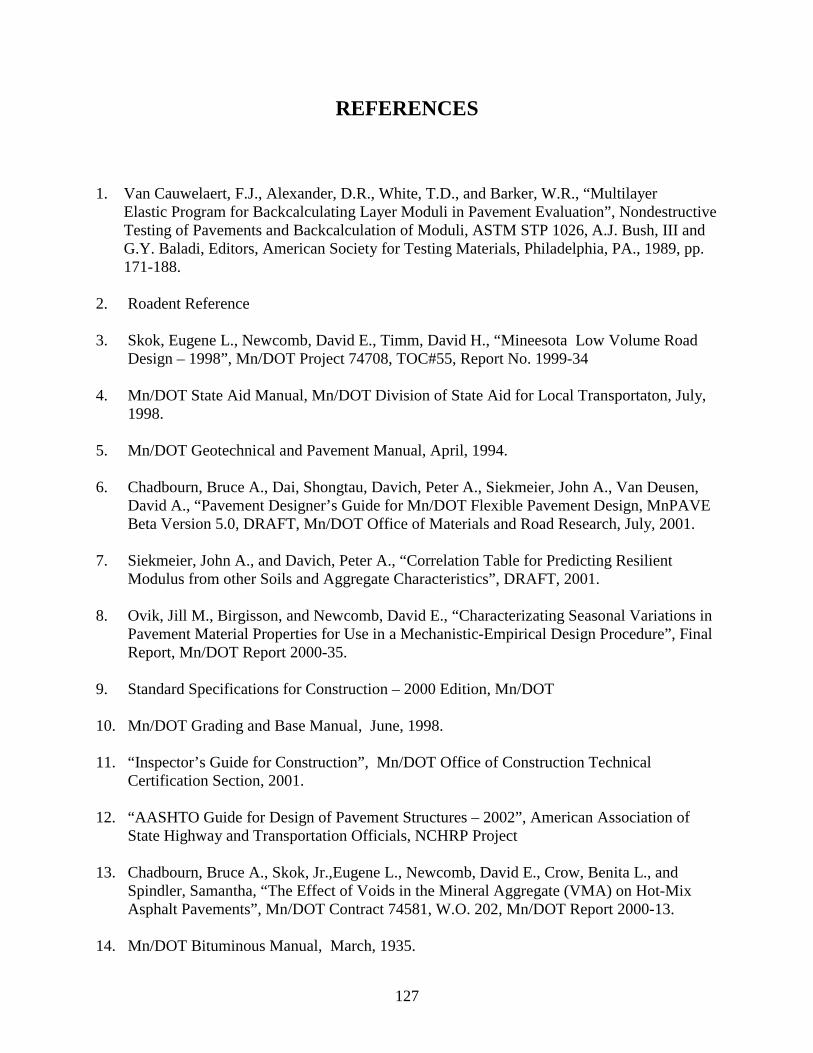
127
REFERENCES
1. Van Cauwelaert, F.J., Alexander, D.R., White, T.D., and Barker, W.R., “Multilayer
Elastic Program for Backcalculating Layer Moduli in Pavement Evaluation”, Nondestructive Testing of Pavements and Backcalculation of Moduli, ASTM STP 1026, A.J. Bush, III and G.Y. Baladi, Editors, American Society for Testing Materials, Philadelphia, PA., 1989, pp. 171-188.
2. Roadent Reference 3. Skok, Eugene L., Newcomb, David E., Timm, David H., “Mineesota Low Volume Road
Design – 1998”, Mn/DOT Project 74708, TOC#55, Report No. 1999-34 4. Mn/DOT State Aid Manual, Mn/DOT Division of State Aid for Local Transportaton, July,
1998. 5. Mn/DOT Geotechnical and Pavement Manual, April, 1994. 6. Chadbourn, Bruce A., Dai, Shongtau, Davich, Peter A., Siekmeier, John A., Van Deusen,
David A., “Pavement Designer’s Guide for Mn/DOT Flexible Pavement Design, MnPAVE Beta Version 5.0, DRAFT, Mn/DOT Office of Materials and Road Research, July, 2001.
7. Siekmeier, John A., and Davich, Peter A., “Correlation Table for Predicting Resilient
Modulus from other Soils and Aggregate Characteristics”, DRAFT, 2001. 8. Ovik, Jill M., Birgisson, and Newcomb, David E., “Characterizating Seasonal Variations in
Pavement Material Properties for Use in a Mechanistic-Empirical Design Procedure”, Final Report, Mn/DOT Report 2000-35.
9. Standard Specifications for Construction – 2000 Edition, Mn/DOT 10. Mn/DOT Grading and Base Manual, June, 1998. 11. “Inspector’s Guide for Construction”, Mn/DOT Office of Construction Technical
Certification Section, 2001. 12. “AASHTO Guide for Design of Pavement Structures – 2002”, American Association of
State Highway and Transportation Officials, NCHRP Project 13. Chadbourn, Bruce A., Skok, Jr.,Eugene L., Newcomb, David E., Crow, Benita L., and
Spindler, Samantha, “The Effect of Voids in the Mineral Aggregate (VMA) on Hot-Mix Asphalt Pavements”, Mn/DOT Contract 74581, W.O. 202, Mn/DOT Report 2000-13.
14. Mn/DOT Bituminous Manual, March, 1935.

128
15. Kersten, Miles S., Skok, Eugene L., “Application of AASHO Road Test Results to the Design of Flexible Pavements in Minnesota”, Final Report, Minnesota Department of Highways Investigation 183, Final Report, 1968.
16. Timm, David A., Newcomb, David E., and Birgisson, Bjorn, “Mechanistic-Empirical
Flexible Pavement Thickness Design: The Minnesota Method”, Mn/DOT Report No. MN/RC – P99-10, January 1999.
17. Witczak, M.W., “Temperature Distribution Prediction Equations.” 18. Skok, Eugene L., Timm, David A., Clyne, Timothy, “Traffic Supplement to Low Volume
Road Best Practices Manual”, Mn/DOT Project 74708, Work Order No. 180, Final Report Draft, 2001.
19. AASHTO Pavement Design Guide, American Association of State Highway and
Transportation Officials, 1993. 20. MnESAL’s Manual, Mn/DOT Traffic Data Collection and Analysis Section. 21. Soils Manual, The Asphalt Institute, Manual Series No. 10, Fourth Edition, USA, 1986. 22. Kupferman, M., Pinciotti, R.D., “Use of a Micro-Computer for Control, Data Acquisition
and Evaluation of the Resilient Modulus Test, Resilient Modulus of Soils: Laboratory Conditions, Elton, D.J., Ray, R.P., Geotechnical Special Publication No. 24, American Society of Civil Engineers, New York, NY, October, 1989.
23. Brodsky, Nancy S., Resilient Modulus Measurements of Cohesive Soils: Laboratory
Conditions”, Elton, D.J., Rat, R.P., Geotechnical Special Publicaton No. 24, American Society of Civil Engineers, New York, NY, October, 1989.
24. User Guide for the Dynamic Cone Penetrometer (DCP), Minnesota Department of
Transportation, 1999. 25. Uzan, J., “Dynamic Linear Backcalculation of Pavement Material Parameters, Journal of
Transportation Engineering, Vol. 120, No. 1, American Society Of Civil Engineers, January/February, 1994.
26. Uzan, J., “Advanced Backcalculation Techniques, Nondestructive Testing of Pavements
and Backcalculation of Moduli”, Second Volume ASTM STP 1198, Harold L.VonQuintos, Albert Bush, III, and Gilbert Baladi, Editors, ASTM, Philadelphia, PA, 1994.
27. Nazarian, S., Tandon, V., Crain, K., and Yuan, D., “Use of Instrumented Dynamic Cone
Penetrometer in Pavement Characterization, Nondestructive Testing of Pavements and Backcalculation of Moduli”, Third Volume, ASTM STP 1375, S.D. Tayabji, S., Lukanen, E.O., Editors, ASTM, West Conshohocken, PA, 2000.

129
28. Yoder, E.J., Witczak, M.W., “Principles of Pavement Design”, Second Edition, 1975, John Wiley & Sons, Inc., New York, NY,
29. Bearden, J.B., and Labuz, J.F., “Fabric Reinorcement and Separation in Unpaved Roads”,
Mn/DOT Report No. MN/RC-1994-04, St, Paul, MN December, 1998. 30. Huntington, G., and Ksaibati, K., “Evaluation of Geogrid-Reinforced Granular Base,
Recent Advances in the Characterizaton of Transportation Geo-Materials” Tutumluer, E., and Papagiannakis, A.T., Geotechnical Special Publication No. 89, American Society for Civil Engineers, Virginia, 1999.
31. Mn/DOT Technical Memo on the use of PG graded asphalt in Minnesota., 2001. 32. “Superpave Asphalt Mixture Design”, AASHTO Method MP-1, 1997. 33. Mn/DOT Technical Memo on Inspection Sampling and Acceptance of Bituminous
Mixtures, 2000 34. Asphalt Mixture Design Manual, The Asphalt Institute Manual Series No. 2 (MS-2) 35. Asphalt Superpave Mixture Design Manual, The Asphalt Institute Special Publication
Series No. 2 (SP-2), 1999.

APPENDIX A
USE OF INVESTIGATION 183 AND 195 TEST SECTIONS AS A LONG TERM PERFORMANCE COMPARISON WITH THE MINNESOTA M-E DESIGN PROCEDURE
March 13, 2002
David H. Timm Eugene L. Skok
Erland O. Lukanen

A-1
INTRODUCTION
A mechanistic-empirical design procedure (ROADENT) has been developed to
determine appropriate design thicknesses of hot-mix asphalt pavements in Minnesota
(1,2). Calculated strains in the pavement section are used with transfer functions to
predict the amount of traffic, in ESALs, the section will support before deterioration in
the form of fatigue cracking or critical rut depth. To make these predictions, field
performance must be observed and related to measured or calculated strains in the
pavement. The first performance prediction equations were developed based on
performance of sections at the Minnesota Road Research Project (Mn/ROAD) after four
years of service (3,4).
Since the Mn/ROAD project represents only a portion of conditions encountered in
Minnesota, it is necessary to expand the calibration data set to a wider range of
conditions. To validate and/or calibrate the performance equations for other traffic
levels, soil types and pavement sections, performance records of some of the
Investigation 183 and 195 test sections (5,6) were reviewed, some of which are over 40
years old. The properties of the soils and pavement layers were measured during the
course of the research studies and included in References (5) and (6). Strain levels for
the pavements were simulated mechanistically and damage factors were calculated for
each season and totaled for each of the years to rehabilitation for the test sections and
observed performance was compared to the predicted performance.
Mr. Tom Nelson and Mr. Mark Levenson of the Mn/DOT Data Management Services
Section made the traffic predictions necessary for comparison. The condition of the 50
test sections from 1964 through 1977 was reported by Lukanen (7). The Mn/DOT

A-2
Pavement Management Section provided information on conditions from 1977 to the
present. The conditions of the sections were observed on videos from 1992 to the present.
Elaine Miron and Erland Lukanen located the sections using the video station at Mn/DOT
and it was necessary to locate the original test sections using historical stationing and
current reference points. This information was retrieved from historical records and files
that had been stored for the past 25 years. The locations using current reference points
were determined using logbooks provided by the Mn/DOT Pavement Design and
Management Sections.
The construction histories of the 10 Investigation 183 test sections were used to relate
the observed performance with the predicted damage ratios calculated from the computer
simulated pavement and empirical transfer functions. The predictions were then
compared to the observed performance and determined to be conservative or not
conservative. This information was used to judge if the current performance prediction
equations should be modified.
MINNESOTA FLEXIBLE PAVEMENT DESIGN TEST SECTIONS
In 1963 and 1964, 50 flexible pavement design test sections were established to help
evaluate flexible pavements in Minnesota using the concepts and results from the
AASHO Road Test. In addition the stabilometer, R-Value was introduced as a strength
test to evaluate subgrade soils and granular bases. Each test section consisted of two 500-
ft test or evaluation sections separated by a 200-ft sampling and destructive testing
segment. The evaluation of the 1200-ft test sections was made using the following
methods:

A-3
1. Sampling and testing of each layer was performed with plate load testing. Thickness
measurements of each layer were also made as trenches were dug.
2. Condition surveys were conducted each year to document the type, severity and
amount of cracking. Alligator cracking was measured in square feet per 1000 square
feet as defined at the AASHO Road Test. Cold temperature cracks were counted
periodically, but not always recorded because they were not considered part of a
structural evaluation.
3. Longitudinal profile was measured using the Bureau of Public Roads (BPR)
roughometer in units of inches per mile and was called the Roughness Index. The
Roughness Index was correlated with Present Serviceability Rating (PSR). Later the
PSR was also correlated with the PCA roadmeter and the Maysmeter.
4. Traffic was measured using load and vehicle type distribution studies conducted in
1964 and 1969 at each test section along with statewide data for other years. This
information was used to calculate equivalent loads in ESALs for each year from the
time of construction.
5. Performance was defined as the number of ESALs the pavement withstood or was
predicted to withstand before the serviceability was reduced to 2.5.
6. The structural capacity of the sections was measured using the plate bearing test and
the Benkelman beam test.
The information from the study of these test sections was used to develop the current
Mn/DOT R-value design procedure, which has been in use since about 1971. A report
summarizing the performance of the original 50 test sections was written in 1980 (7). The

A-4
distress and rideability conditions, applied traffic and strength summaries of each section
were presented through 1977.
SELECTION OF PILOT TEST SECTIONS
With the advent of mechanistic-empirical (M-E) flexible pavement design and the
need for a well-calibrated design system, it was decided to calibrate the mechanistic-
empirical design procedure developed at the University of Minnesota using the
performance and construction histories of the Investigation 183 test sections. The steps
required to accomplish this were the following:
1. Locate the test sections on the trunk highway system, which required determining the
reference points and stationing of the sections. These were obtained from original
project files and Mn/DOT log books in the Mn/DOT design and pavement
management sections.
2. Request traffic predictions for each of the test sections' reference points from original
construction through the year 2000.
3. Obtain pavement condition data. The condition of each section was summarized in
Reference (7) from original construction through 1977. Conditions were observed
using the Pavement Management video station from 1992 to the present. Rut depths
on each section were also measured.
4. Determine structural profile histories of the sections by examining pavement
management records. These records were used to establish when reconstruction or
significant maintenance was performed, changes in thickness were also noted.

A-5
5. Resilient moduli of each layer were estimated using the stabilometer R-value of the
soils and granular materials for each test section. The moduli of the asphalt concrete
layers were estimated from backcalculated moduli at the Mn/ROAD project. The
moduli along with thicknesses were used to calculate strains for each of five seasons.
Using these strain calculations and the traffic estimates damage factors were
determined using the existing performance equations for fatigue and rut depth.
Comparisons of predicted and measured performance were made to check if the
predictions were less or more conservative than the observed performance over the
40-year period.
Selection of Pilot Study Test Sections
As a pilot study to evaluate whether data could be generated to review the 40-year old
test sections, it was decided to develop information from nine of the Investigation 183
test sections. The fifty Investigation 183 test sections were categorized by soil type using
Table 1 and by traffic using Table 2. Table 3 lists the sections along with the district, soil
type and traffic level for each. Table 3 shows that there were five sections with granular
subgrades, 23 semi-plastic and 22 plastic subgrades. There are 24 sections with low
traffic, 17 medium and 8 high traffic sections. The following criteria were used to select
the pilot test sections:
1. At least one test section from each Mn/DOT district.
2. Some test sections with Plastic, Semi-Plastic, and Granular subgrade soils using the
definitions as in Table 1.

A-6
Table 1. Soil Classifications for Pilot Project. Soil Type (Abbreviation) AASHTO Classification
Plastic (P) A-6, A-7 Semi-Plastic (SP) A-4, A-5
Granular (G) A-1, A-2, A-3
3. Test sections which had Low, Medium and High traffic. The traffic categories were
based on the calculated 1966 annual ESALs using the levels as in Table 2:
Table 2. Traffic Classifications for Pilot Project. Traffic Category (Abbreviation) Annual ESAL Level in 1966
Low (L) < 20,000 Medium (M) 20,000 to 100,000
High (H) > 100,000

A-7
Table 3. Investigation 183 Pavement Sections. Soil Category Traffic Category
Test Section District GR SP P L M H 1 4 X X 2 2 X X 3 2 X X 4 1 X X 5 1 X X 6 1 X X 7 1 X X 8 1 X X 9 1 X X
10 3 X X 11 3 X X 12 3 X X 13 3 X X 14 3 X X 15 3 X X 16 3 X X 17 5 X X 18 5 X X 19 5 X X 20 5 X X 21 5 X X 22 5 X X 23 9 X X 24 6 X X 25 6 X X 26 6 X X 27 6 X X 28 6 X X 29 6 X X 30 7 X X 31 7 X X 32 7 X X 33 8 X X 34 8 X X 35 8 X X 36 8 X X 37 8 X X 38 8 X X 39 8 X X 40 8 X X 41 6 X X 42 4 X X 43 4 X X 44 4 X X 45 2 X X 46 2 X X 47 7 X X 48 7 X Unknown 49 7 X X 50 8 X X

A-8
Table 4 lists the test sections selected for the pilot study to establish whether the
pavement management system along with traffic and materials characterization could be
used to trace performance history. One section was selected from each Mn/DOT district
and a variety of soil types and traffic levels. There are four each of semi-plastic and
plastic soils and one with a granular subgrade. There are four sections with low, two
medium and three high traffic levels.
Table 4. Investigation 183 Sections Selected for Pilot Study of 40-Year Performance. District Test Section Soil Type Traffic
1 183-6 SP H 2 183-3 P M 3 183-11 G L 4 183-43 P L 5 183-22 SP M 6 183-26 SP L 7 183-47 P L 8 183-34 P H 9 183-23 SP H
Location
Table 5 lists the Trunk Highway, Lane, Reference Marker (Mile Post) and stationing
for the nine pilot test sections. The information was obtained from the Investigation 183
files and was necessary for locating the sections using the current referencing system in
the Mn/DOT Pavement Management System. It was also necessary to establish the
locations for traffic requests.

A-9
Table 5. Pilot Section Locations. Test
Section District Trunk
Highway Lane* Mile Post
(Mile Post Stationing) Test Section
Station Limits 6 1 2 EB 250 - 251
(372+43.7 - 424+82.3) 372 - 384
3 2 59 SB 363 - 362 (4099+52 - 4155+54)
4140 - 4152
11 3 371 SB 43 - 44 (555+92-608+63)
565-577
43 4 54 NB 4 - 5 (211+22 - 264+20)
227 - 239
22 5 55 EB 179 - 180 (1322+12 - 1374+72)
1335 -1347
26 6 76 SB 30 - 29 (682+50 - 734+79)
693-700
47 7 19 EB 121 - 122 (117+68 - 170+41)
129-141
34 8 7 EB (116 - 117) (456+62 - 509+52)
465-477
23 9 36 EB (13 - 14) (141+89 - 196+73)
171-183
*Lane: The direction of traffic over the test section (EB = Eastbound, WB = Westbound, NB = Northbound and SB = Southbound)
The nine test sections selected for this study were subjected to a mechanistic-
empirical (M-E) analysis to assess whether the current performance transfer functions
accurately predict observed pavement performance. The following subsections detail the
process and findings of the M-E analysis.
PILOT TEST SECTION DATA
Prior to performing the M-E analysis it was necessary to gather information regarding
the structural profiles of the sections, seasonal layer moduli, traffic and performance data.
Each of these is described below.

A-10
Structural Profiles
Records from the pavement management office of Mn/DOT were examined to obtain
the dates of maintenance; rehabilitation or reconstruction activities performed on each of
the test sections. Of interest in this study were changes made to the structural profile of
the sections. Tables 6 through 14 detail the construction histories of the test sections. It
is important to note that, in some cases, sections were milled and overlaid. However, in
the tables, simply total thicknesses are given since only these were needed in the M-E
analysis. Additionally, except where noted, the granular base layers were constructed of
Mn/DOT Class 5 material and subbase layers of Mn/DOT Class 4 material. Finally, the
subgrade soil types are specified according to the AASHTO soil classification system.
Table 6. Section 183-3 Structural Profile History. Year Asphalt Concrete
Thickness (in) Granular Base Thickness (in)
Subgrade Soil Type
1961 2.0 1969 6.5 1987 8.0 1999 10.0
15.5
A-7-6
Table 7. Section 183-6 Structural Profile History.
Year Asphalt Concrete Thickness (in)
Granular Base Thickness (in)
Granular Subbase Thickness (in)
Subgrade Soil Type
1959 1.5 1960 6.0 1981 7.5
5.0
11.0
A-2-4
Table 8. Section 183-11 Structural Profile History.
Year Asphalt Concrete Thickness (in)
Granular Base Thickness (in)
Granular Subbase Thickness (in)
Subgrade Soil Type
1960 2.0 1961 5.5 1986 4.5
5.0
4.0
A-1-b

A-11
Table 9. Section 183-22 Structural Profile History. Year Asphalt Concrete
Thickness (in) Granular Base Thickness (in)
Granular Subbase Thickness (in)
Subgrade Soil Type
1961 7.0 1973 8.5
6.0 16.0 A-4
Table 10. Section 183-23 Structural Profile History.
Year Asphalt Concrete Thickness (in)
Granular Base Thickness (in)
Granular Subbase Thickness (in)
Subgrade Soil Type
1960 7.0 1987 11.75
9.0 12.0 A-2-4
Table 11. Section 183-26 Structural Profile History.
Year Asphalt Concrete Thickness (in)
Granular Base* Thickness (in)
Subgrade Soil Type
1961 3.0 1988 7.5
14 A-4
*Mn/DOT Class 3 Material Table 12. Section 183-34 Structural Profile History.
Year Asphalt Concrete Thickness (in)
Granular Base Thickness (in)
Granular Subbase Thickness (in)
Subgrade Soil Type
1959 9.5 1986 12.5
3.5 4.5 A-6
Table 13. Section 183-43 Structural Profile History.
Year Asphalt Concrete Thickness (in)
Granular Base Thickness (in)
Granular Subbase Thickness (in)
Subgrade Soil Type
1959 2.0 1968 4.0 1989 7.5
7.0
8.0
A-6
Table 14. Section 183-47 Structural Profile History.
Year Asphalt Concrete Thickness (in)
Granular Base* Thickness (in)
Granular Subbase Thickness (in)
Subgrade Soil Type
1954 2.0 1973 4.5
4.0 8.0 A-6
*Asphalt stabilized base

A-12
Seasonal Layer Moduli
Asphalt Concrete
Based upon previous research at Mn/ROAD (8), the asphalt concrete layers were
assigned seasonal moduli as shown in Table 15.
Table 15. Asphalt Concrete Seasonal Moduli. Season Modulus, psi
I (Winter) 1,987,433 II (Spring Thaw) 1,528,794
III (Spring Recovery) 993,717 IV (Summer) 290,471
V (Fall) 764,397
Granular Base and Subbase
Tests to determine the R-value of the granular bases and subbases were done in the
original 183 investigation (5,7). The data were used in this project to determine the
normal or summer modulus using the following relationships (9):
MR = 1000 + 555*R-value (R-value ≤ 20)
MR = 1000 + 250*R-value (R-value > 20)
Seasonal multipliers, obtained from Mn/ROAD (8), were used to determine the moduli in
the other four seasonas as shown in Table 16.

A-13
Table 16. Seasonal Base and Subbase Moduli. Season I* II III IV V
Test Cell and Layer Modulus, psi 183-3 Base 40,000 19,200 24,100 28,650 28,940 183-6 Base 40,000 19,665 24,650 29,350 29,650 183-6 Subbase 40,000 14,070 17,600 21,000 21,200 183-11 Base 40,000 19,900 24,950 29,700 30,000 183-11 Subbase 40,000 8,880 11,100 13,250 13,380 183-22 Base 40,000 19,665 24,700 29,350 29,650 183-22 Subbase 40,000 13,400 16,800 20,000 20,200 183-23 Base 40,000 18,730 23,480 27,950 28,200 183-23 Subbase 40,000 11,200 14,100 16,750 16,900 183-26 Base 40,000 20,600 25,800 30,750 31,100 183-34 Base 40,000 13,800 17,300 20,600 20,800 183-34 Subbase 40,000 11,900 14,900 17,750 17,900 183-43 Base 40,000 18,960 23,770 28,300 28,600 183-43 Subbase 40,000 12,900 16,200 19,250 19,400 183-47 Base 40,000 19,900 24,950 29,700 30,000 183-47 Subbase 40,000 18,730 23,500 27,950 28,200
*Winter modulus assigned a maximum value of 40,000 psi.
Subgrade
Previously measured R-values, as with the base and subbase layers, were used to
determine the moduli for the subgrade soils in the summer condition. The following
equations converted R-value to resilient modulus (9):
MR = 1000 + 555*R-value (R-value ≤ 20)
MR = 1000 + 250*R-value (R-value > 20)
Seasonal multipliers obtained from Mn/ROAD (8) were used to adjust the moduli for
seasonal effects. Table 17 lists the seasonal subgrade moduli by test section. It is
important to point out that soils having the same AASHTO classification typically had
somewhat different R-values resulting in different seasonal moduli.

A-14
Table 17. Seasonal Subgrade Moduli. Season I II III IV V
Test Cell (Soil Type) Modulus, psi 183-3 (A-7-6) 40,000 19,020 5,740 5,550 7,760 183-6 (A-2-4) 40,000 20,800 16,000 16,000 14,550 183-11 (A-1-b) 40,000 23,400 18,000 18,000 16,360 183-22 (A-4) 40,000 31,950 9,650 9,325 13,040 183-23 (A-2-4) 40,000 15,925 12,250 12,250 11,140 183-26 (A-4) 40,000 29,980 9,055 8,750 12,236 183-34 (A-6) 40,000 28,150 8,500 8,215 11,500 183-43 (A-6) 40,000 26,250 7,930 7,660 10,700 183-47 (A-6) 40,000 29,126 8,797 8,500 11,888
Traffic Data
The test section locations were provided to the Management Data Services
Section of Mn/DOT where estimates of accumulated ESALs over the 40 years were
made. Original estimates were made from the initial date of construction through 1980
and then from 1980-2000. The estimates are based on weight and vehicle type
distributions made periodically at the specific test section location throughout these time
periods. Accumulated and yearly total ESAL values were tabulated so that accumulated
ESALs could be noted at the time of rehabilitation or reconstruction. The total number of
ESALs were then determined for each of the structural cross sections shown in Tables 6
through 14. Table 18 lists the relevant ESALs for each structural profile.

A-15
Table 18. ESALs by Test Section During Each Time Span. Years ESALs Section 183-3 1961-1968 109,073 1969-1986 458,126 1987-1998 504,711 1999-2001 100,858 Section 183-6 1959 0 1960-1980 3,241,078 1981-2001 3,705,513 Section 183-11 1960 13,463 1961-1985 477,568 1986-2001 655,432 Section 183-22 1961-1972 258,706 1973-2001 1,771,782 Section 183-23 1960-2001 3,833,503 Section 183-26 1961-1987 126,198 1988-1998 113,450 Section 183-34 1959-1985 1,541,977 1986-2001 1,139,912 Section 183-43 1959-1967 31,730 1968-1988 112,630 1989-2001 69,730 Section 183-47 1954-1972 565,554 1973-2001 1,422,364

A-16
Performance Data
In the original 183 study, yearly measurements of rut depth and amount of cracking
were recorded; however, measurements were taken only through 1977. More recently,
video records of the test sections were evaluated to assess the rutting and cracking
performance of the test sections. These records were available for the years of 1996 to
1998. These two sources of data were merged to give a more complete sectional history
of pavement performance. Figures A1 through A18, in Appendix A, illustrate the rutting
and cracking performance of each section by year. Additionally, the total surface
thickness was plotted on the graphs to give an indication of when the structural profile
changed during the life of the section. It is important to note that years in which there is a
profile change and zero rut depth or cracking corresponds to no performance data
available for that year.
MECHANISTIC-EMPIRICAL ANALYSIS
Once all the necessary inputs had been obtained as specified above, it was possible to
proceed with the M-E analysis of the test sections. The procedure consisted of four steps,
detailed below:
1. Calculate strains for each pavement cross section.
2. Calculate seasonal traffic volumes.
3. Calculate seasonal expected number of allowable loads.
4. Calculate damage factors using Miner’s Hypothesis.

A-17
Calculate Strains for Each Pavement Cross Section
The program, WESLEA for Windows, was used to perform the mechanistic
simulation necessary to determine strains in the pavement structures. The structural
inputs, specified above, were input and an 18-kip single axle load with dual tires inflated
to 100 psi was applied to the pavement surface. The maximum tensile strain (εt) at the
bottom of the asphalt concrete layer and the maximum compressive strain (εv) at the top
of the subgrade were recorded as illustrated in Figure 1. This was done on a seasonal
basis to account for changes in layer stiffnesses due to temperature and moisture changes
in the different layers. The strain data may be found in Appendix B.
Figure 1. Mechanistic Simulation of Pavement Sections.
AC Granular Base Granular Subbase Subgrade
4,500 lb/tire inflated to 100 psi
Maximum tensile strain, εt
Maximum compressive strain, εv

A-18
Calculate Seasonal Traffic Volumes
To accommodate a seasonal evaluation in Miner’s hypothesis, it was necessary to
distribute the ESALs over the five seasons of the analysis. The percentages shown in
Table 19 were used to distribute the traffic to each season. The seasonal traffic data for
each section are in Appendix B.
Table 19. Seasonal Traffic Multipliers. Season % of ESALs In Each Season
I - Winter 23% II - Spring Thaw 5.8%
III - Spring Recovery 5.8% IV - Summer 50%
V - Fall (Normal) 15.4%
Calculate Seasonal Expected Number of Allowable Loads
Transfer functions developed at the Minnesota Road Research Project (Mn/ROAD)
were used to estimate the number of allowable loads for each structural cross section
based on the strain data obtained from WESLEA for Windows. The number of allowable
loads, by test section, season and year are listed in Appendix A. The transfer functions
for fatigue and rutting life are as follows:
206.36
6 101083.2
⋅= −
tfN
ε (1)
929.3
15 1105.5
⋅=
vrN
ε (2)
where: Nf = number of allowable load repetitions until fatigue failure (approximately
10% of area fatigue cracked)
Nr = number of allowable load repetitions until rutting failure (0.5 inch rut depth)
εt = maximum tensile microstrain at bottom of asphalt concrete layer

A-19
εv = maximum compressive microstrain at top of subgrade layer
Calculate Damage Factors Using Miner’s Hypothesis
Using Miner’s hypothesis, which is a damage function that accounts for the
cumulative effects of traffic-related pavement damage, it was possible to determine
damage factors for each structural profile. The equation representing Miner’s hypothesis
is:
∑=
=k
i i
i
NnD
1 (3)
where: D = damage factor
ni = number of actual repeated loads in season i
Ni = number of allowable loads before fatigue or rutting failure in season i
i = Season, 1 through 5
By definition, when D exceeds unity, failure has occurred. When D is less than unity,
then the pavement structure has sufficient capacity to withstand the given traffic level.
The damage factors for each test section, by season and year, are listed in Appendix A.
M-E AND OBSERVED PERFORMANCE COMPARISON
A primary objective of this study was to assess whether the current pavement
performance models accurately predict field performance. To this end, the damage
factors obtained in the M-E analysis were compared to measured distress on the nine test
sections. The comparison process and results are presented below for rutting and fatigue
cracking performance, respectively.

A-20
Rutting Performance
Rut depth measurements from the nine sections were used to classify rutting distress
as low, medium or high severity with corresponding rankings of 1, 2 or 3, respectively.
Rutting damage factors, as calculated in the M-E analysis, were classified in the same
manner. Table 20 lists the classification system.
Table 20. Rutting Classifications. Severity Rank Measured Rut Depth (in.) Simulated Damage Factor
Low 1 < 0.25 < 0.5 Medium 2 0.25 - 0.5 0.5-1.0
High 3 > 0.5 > 1.0
For each pavement profile, the rut depth and damage factors were determined and
assigned a rank according to Table 20. The measured rank was then subtracted from the
predicted rank to give an indication of the conservative or un-conservative nature of the
M-E simulation. For example, if a section had a measured rut depth of 0.2 inches
(Rank=1) and the simulated damage factor was 0.65 (Rank 2), the result would be +1.0,
or a conservative prediction. In other words, the M-E simulation predicted more rutting
than was observed. Table 21 lists the possible outcomes of this ranking system and their
interpretations.
Table 21. Possible Comparison Outcomes and Interpretation. Outcome Interpretation
+2.0 Very Conservative Prediction +1.0 Conservative Prediction
0 Accurate Prediction -1.0 Un-conservative Prediction -2.0 Very Un-conservative Prediction
Figure 2 illustrates the rutting comparisons for all of the test sections. The following
observations are made with respect to the graph:

A-21
1. Most predictions were on the conservative side, only one prediction was un-
conservative.
2. Only four of the seventeen predictions were very conservative, while six were rated
as accurate.
3. The majority of predictions were either off by a ranking of one or were rated as
accurate.
Based on these observations, it may be stated that the rutting performance transfer
function provides somewhat conservative estimates of rutting, yet not excessively so.
Rutting Predictions
-2
-1
0
1
2
183-
3-69
183-
3-87
183-
6-81
183-
6-00
183-
11-8
6
183-
11-0
0
183-
22-7
3
183-
22-0
0
183-
23-8
7
183-
26-8
8
183-
34-8
6
183-
34-0
0
183-
43-6
8
183-
43-8
9
183-
43-0
0
183-
47-7
3
183-
47-0
0
Test Section and Year (183-Section-Year)
Rel
ativ
e Pr
edic
tion
Conservative
Unconservative
Figure 2. Rutting Performance Comparison.
Fatigue Performance
A similar procedure was used in comparing measured fatigue performance to that
predicted in the M-E analysis. Table 22 lists the relative rankings for fatigue

A-22
performance. Figure 3 illustrates the relative outcome and Table 21 may be used to
interpret the results.
Table 22. Fatigue Cracking Classifications. Severity Rank Measured Cracking (ft2/1000ft2) Simulated Damage Factor
Low 1 < 50 < 0.5 Medium 2 50 - 100 0.5-1.0
High 3 > 100 > 1.0
Fatigue Predictions
-2
-1
0
1
2
183-
3-69
183-
3-87
183-
6-81
183-
6-00
183-
11-8
6
183-
11-0
0
183-
22-7
3
183-
22-0
0
183-
23-8
7
183-
26-8
8
183-
34-8
6
183-
34-0
0
183-
43-6
8
183-
43-8
9
183-
43-0
0
183-
47-7
3Test Section and Year (183-Section-Year)
Rel
ativ
e Pr
edic
tion
Conservative
Unconservative
Figure 3. Fatigue Performance Comparison. With respect to Figure 3, the following observations may be made:
1. Nine of the sixteen predictions were found to be accurate.
2. The remaining predictions tended to the conservative side, with two very conservative
predictions.
3. Only two un-conservative predictions were made, one being very un-conservative.

A-23
Based on these observations it may be stated that the current fatigue prediction equation
provides reasonable estimates with respect to fatigue performance.
CONCLUSIONS AND RECOMMENDATIONS
Based on the data presented in this investigation, the following conclusions may be
drawn:
1. The data from Investigation 183 and 195 are sufficient and accessible enough to
execute an M-E validation/calibration procedure as described in this report. As there
are 41 additional sections, it is recommended that the validation/calibration procedure
continue to widen the data set even further.
2. The comparison between predicted and observed rutting performance did not indicate
a need to alter the rutting performance equation at this time. However, as more test
sections are added to the calibration database, a modification may be necessary.
3. Likewise, the comparison between predicted and observed fatigue cracking did not
warrant a change to the current transfer function. As more sections are added, it may
need to be modified.

A-24
REFERENCES
1. Timm, D.H., David E. Newcomb and Theodore V. Galambos, “Incorporation of
Reliability into Mechanistic-Empirical Pavement Design,” Transportation Research
Record, Transportation Research Board, Washington, D.C., 2000 (in press).
2. Timm, D.H., David E. Newcomb and Theodore V. Galambos, “Incorporation of
Reliability into the Minnesota Mechanistic-Empirical Pavement Design Method,”
Final Report, MN/RC-1999-35, Minnesota Department of Transportation, St. Paul,
MN, 1999.
3. Timm, D.H., David E. Newcomb and Bjorn Birgisson, “Development of Mechanistic-
Empirical Design for Minnesota,” Transportation Research Record No. 1629,
Transportation Research Board, Washington, D.C., 1998, pp. 181-188.
4. Timm, D.H., D.E. Newcomb and B. Birgisson, “Mechanistic-Empirical Flexible
Pavement Thickness Design: The Minnesota Method,” Staff Paper, MN/RC-P99-10,
Minnesota Department of Transportation, St. Paul, MN, 1999.
5. Kersten, M.S. and Skok, E.L., “Application of AASHO Road Test Results to Design
of Flexible Pavements in Minnesota,” MHD Investigation 183, Interim Report,
University of Minnesota, 1968.
6. Lukanen, E.O., “Evaluation of Full-Depth Asphalt Pavements,” Investigation No.
195, Interim Report, Minnesota Department of Transportation, 1977.
7. Lukanen, E.O., “Application of AASHO Road Test Results to Design of Flexible
Pavements in Minnesota,” Investigation No. 183, Report No. FHWA-MN-80-09,
Minnesota Department of Transportation, 1980.

A-25
8. Ovik, J.M., “Characterizing Seasonal Variations in Pavement Material Properties for
Use in a Mechanistic-Empirical Design Procedure,” M.S. Thesis, University of
Minnesota, 1998.
9. AASHTO Guide for Design of Pavement Structures, American Association of State
Highway and Transportation Officials, Washington, D.C., 1993.

APPENDIX B
VEHICLE CLASSIFICATION FIELD GUIDE FOR LOW VOLUME ROADS
Task 2
Traffic Supplement to the Low Volume Road Best Practices Manual
MARCH 13, 2002
David H. Timm Eugene L. Skok
Department of Civil Engineering University of Minnesota
500 Pillsbury Dr SE Minneapolis, MN 55455

B-1
INTRODUCTION The purpose of this field guide is to give specific directions in setting up and performing a vehicle classification study on low volume roads. This guide is limited to setting up a study on a two-lane, two-direction roadway. The instructions contain provisions for a one or two data collection unit study, depending on traffic volume. EQUIPMENT LIST • 1 or 2 Timemark Lambda vehicle classification data collection unit (sometimes
referred to as “boxes”), depending on traffic volume • 2 pneumatic air tubes capable of spanning entire pavement width and connecting to
the data collection unit. • 4 metal stakes • 4 anchoring brackets • Chain(s) and lock(s) • Sidewalk chalk • Tape measure (capable of measuring 16 ft) • Mallet • Gloves to protect hands during installation and removal of equipment • Asphalt backed roofing tape, 2” or 4” wide, available from Mn/DOT district traffic
engineers EQUIPMENT POSITIONING Once a roadway has been selected for a classification study, it is important to consider the following factors in placing the air tubes: • Vehicles should cross tubes in a perpendicular fashion. Avoid placing tubes on
curves or in turns. • Vehicles should cross the tubes at uniform speeds. Avoid placing tubes in zones
where acceleration or deceleration is common (e.g., near stop signs or turns). • The tubes should be placed flat against the pavement. Avoid placing tubes where
curbs will prevent tubes from lying flat. • The data collection unit should be locked to a signpost or other roadside stationary
object. • When traffic volumes exceed 3,000 AADT, it is recommended that a two-box setup
be used. Otherwise one box will suffice.

B-2
EQUIPMENT SET UP CAUTION: When working in an area that is under live traffic, exercise extreme caution. Flashing lights on vehicles, fluorescent vests and hats are required. 1. Cut eight 10” strips of roofing tape.
2. Warm up the roofing tape. On a warm day (above 55oF), this may not be necessary.
Otherwise, place the tape near a car heater.
3. Unravel the pneumatic hoses and lay them side by side parallel to the roadway. A. One-box setup: 60-ft hoses are used. These hoses are clamped at one end. B. Two-box setup: 75-ft hose are used. These hoses are free at both ends and have a
stopper in the middle so that data may be collected independently in each lane.
4. Check the hoses for any obvious holes or splits which could affect the ability to collect data.
5. Anchor one end of hose. It is important that the hoses be of identical length so that the air pulse takes the same amount of time to travel down both tubes to the data collection box. The length can be adjusted by moving the anchor at the free end so that the hoses have equivalent length. A. One-box setup: Using mallet and stake, anchor the clamped end of one tube to
the side of the roadway opposite from where the data collection unit will be placed.
B. Two-box setup: Anchor one end of one tube to the side of the roadway near an anchoring device where the box will be placed.
6. Stretch the staked hose, perpendicular to the centerline, to the other side of the roadway. Stretch the hose about 10% of its length. For example, a 40-foot section of hose, unstretched, should be stretched about 4 ft.
7. Anchor other end of hose. A. One-box setup: Using mallet and stake, anchor the free end of the stretched tube. B. Two-box setup: Using mallet and stake, anchor the other end of the stretched
tube. Be sure that the stopper in the hose is near the centerline of the pavement.
8. Check that the staked tube is perpendicular to the centerline.
9. Using the chalk, make three marks adjacent to the staked tube. These marks should be spaced evenly across the pavement.
10. Using the tape measure and chalk, make three parallel marks 16 ft from the first set of marks.

B-3
11. Place the second hose on top of the second set of marks. A. One-box setup: Stake the clamped end on the same side of the roadway as the
first tube. B. Two-box setup: Stake one of the free ends on the side of the roadway.
12. Stretch the second hose about 10% (see step 2) and stake to the other side of the road.
13. Place the data collection unit(s). A. One-box setup: Place the data collection unit near the anchoring device (e.g.,
signpost). B. Two-box setup: Place the data collection units near the anchoring devices (e.g.,
signposts).
14. Connect the tubes to the data collection unit. A. One-box setup: Tube A should be the most northbound or eastbound direction.
Tube B should be the most southbound or westbound direction. B. Two-box setup: Tube A should be the tube that is hit first by oncoming traffic.
Tube B should be the tube hit second by oncoming traffic.
15. Continue with software setup. SOFTWARE SETUP Figure 1 illustrates the inside of the Timemark Lambda data collection unit. Note that the [Select] button will move between different options (indicated by flashing text) in a particular menu, while the [Enter] button will choose the option and go on to the next menu.
Figure 1 Data Collection Unit Controls and Display
Memory Card
Top
Serial Port
Battery Charger
Off On
Timemark LambdaIncorporated
Digital DisplayWindow
7 8 9
4 5 6
1 2 3
Select 0 Enter
Memory Card
Top
Memory Card
Top
Serial PortSerial Port
Battery ChargerBattery Charger
Off OnOff On
Timemark LambdaIncorporated
Digital DisplayWindow
7 8 9
4 5 6
1 2 3
Select 0 Enter

B-4
For a one-box setup, follow these instruction exactly. For a two-box setup, follow the directions for each box. 1. Decide on Data Storage: Decide whether to use the data collection unit’s internal
memory or a data card to record the vehicle hits during the study. If the study will not exceed 25,000 vehicles, then the data collection unit’s internal memory is sufficient. If the study will exceed 25,000 vehicles, then a data card should be used. If you decide to use a data card, insert one into the memory card slot as shown in Figure 1.
2. Turn on the data collection unit: An introductory screen will appear displaying the
software version number. The screen will then proceed to Main Menu automatically.
3. Choose Memory Manager: Under the Main Menu, the following options appear: Record a New Study Monitor Traffic Memory Manager Use the [Select] button, if necessary, to make Memory Manager flash. Then press [Enter]. Select the option to clear the memory and return to the main menu. NOTE: Clearing the memory will erase all previously recorded data. Be sure that previously recorded data has been saved elsewhere or has already been processed.
4. Choose Record a New Study: Under the Main Menu, the following options appear: Record a New Study Monitor Traffic Memory Manager Use the [Select] button, if necessary, to make Record a New Study flash. Then press [Enter]. The Tubes: Raw Data menu will now appear.
5. Choose Select a New Study: Under the Tubes: Raw Data menu, the following options appear: Start Recording Now Set Start/Stop Times Select a New Study Use the [Select] button, if necessary, to make Select a New Study flash. Then press [Enter]. The Enter Site Code screen will now appear.
6. Enter the 12-digit filename using the following guide: Digits 1-4 = site number (each county has been assigned a range of numbers, refer to
the end of the field guide for the appropriate number) Digit 5 = number of boxes used in study (typically 1 or 2)
Digit 6 = direction of traffic in primary direction. This is the direction of traffic crossing Tube A first. Refer to Figure 2 for directional numbers. Digit 7 = lane number for primary direction (1 = Driving, 2 = Passing) Digits 8-9 = route system
01=Interstate

B-5
02=US Hwy 03=MNTH 04=CSAH 05=MASS 07=County Road 08=Township Road 09=Unorganized Township Road 10=City St.
Digits 10-12 = route number Once the data filename has been input, press [Enter] and the Study Type Menu will appear.
Figure 2 Final Setup (One-Box)
7. Choose Raw Data: Under the Study Type Menu the following options appear:
Raw Data Volume Speed Use the [Select] button, if necessary, to make Raw Data flash. Then press [Enter]. The Sensor Type Menu will appear.
8. Choose Road Tubes: Under the Sensor Type Menu the following options appear: Road Tubes
16ft
Eastbound Traffic
Westbound Traffic
Tube A Tube B
Data collection unitAnchoring Signpost
2
3
4
5
6
7
8
Roofing tape in wheelpath
x
x x
x
Stake
16ft
Eastbound Traffic
Westbound Traffic
Tube A Tube B
Data collection unitAnchoring Signpost
2
3
4
5
6
7
8 2
3
4
5
6
7
8
Roofing tape in wheelpath
x
x x
x
Stake

B-6
Piezos Only Loops Only Use the [Select] button, if necessary, to make Road Tubes flash. Then press [Enter]. The Sensor Layout Menu will appear.
9. Choose A/B, C/D Spaced: Under the Sensor Layout Menu the following options appear: A,B,C,D A/B, C/D Spaced Use the [Select] button, if necessary, to make A/B, C/D Spaced flash. Then press [Enter]. The Select Spacing Type menu will appear.
10. Choose Set Universal Value: Under the Select Spacing Type menu the following
options appear: Set Universal Value Set Individual Lanes Use the [Select] button, if necessary, to make Set Universal Value flash. Then press [Enter]. The Enter Sensor Spacing screen will appear.
11. Enter 16-ft Spacing: On the Enter Sensor Spacing screen input 16-ft sensor spacing, this value will usually be there by default. Once '16' has been input, press [Enter]. The Tubes: Raw Data menu will appear.
12. Choose Start Recording Now: Under the Tubes: Raw Data menu, the following options appear: Start Recording Now Set Start/Stop Times Select a New Study Use the [Select] button, if necessary, to make Start Recording Now flash. Then press [Enter]. The data collection screen will now appear. The data collection screen contains a table as shown below: Raw Time Lane: 1 Tube A: 0 TA B: 0 TB
The middle column contains the number of total hits on each of the two tubes, A and B.
13. Verify that the System is Operational: Check that the tubes are recording hits, either by vehicles or by stepping forcefully on one of the tubes. If hits are not being recorded, there may be a problem with the connection of the tubes to the data collection unit or a tube may be damaged. The equipment and connections may need to be inspected. If hits are being recorded, continue with final setup.

B-7
FINAL SETUP 1. Make sure tubes are aligned with chalk marks. Adjust if necessary. 2. Using pre-cut, warm strips of tape, secure tubes in each of the wheelpaths. 3. Check that collection unit is still registering hits. If necessary, even the number of
hits between each tube. 4. Close box and chain to anchoring device.
The final one-box setup is pictured in Figure 2. A two-box setup is shown in Figure 3.
Figure 3 Final Setup (Two-Box)
LENGTH OF STUDY The duration of the study is influenced by several factors. 1. Capacity of data collection unit: Each unit may store up to 25,000 vehicles over the
duration of the study. In most low volume road cases, this number will not be exceeded. For higher volume (>3,000 AADT) two boxes or data cards should be used to handle the increased traffic volume.
2. Traffic Volume: To get an accurate classification of vehicles, it is important to
collect enough data. A minimum of 48 hours should be collected. However, on lower volume roads it may be necessary to collect up to a week’s worth of data. Judgement should be exercised in deciding on the length of the study. A Mn/DOT traffic engineer may be contacted for further guidance.
16ft
Eastbound Traffic
Westbound Traffic
Tube A Tube B
Data collection unitAnchoring Signpost
2
3
4
5
6
7
8
Roofing tape in wheelpath
x
x x
x
Stake
Tube ATube B
Stopper at center of hose16ft
Eastbound Traffic
Westbound Traffic
Tube A Tube B
Data collection unitAnchoring Signpost
2
3
4
5
6
7
8 2
3
4
5
6
7
8
Roofing tape in wheelpath
x
x x
x
Stake
Tube ATube B
Stopper at center of hose

B-8
AFTER THE STUDY 1. Open the data collection unit and verify that data were collected and that it is still
operating. 2. Manually record the number of hits on each tube. This serves as a crude backup in
case the data are lost. 3. Shut off the unit. 4. If a flash card was used to record data during the study, the data have already been
saved to the disk. The disk can now be removed for analysis later. If not, insert a flash card in the disk drive of the data collection unit.
5. Turn on the data collection unit and the new study will automatically be transferred to disk. After data have been transferred, remove the disk for analysis later.
6. Label the disk with the 12-digit number used to specify the study. 7. Remove equipment from roadside and roadway.
CAUTION: When working in an area that is under live traffic, exercise extreme caution. Flashing lights on vehicles, fluorescent vests and hats are required.
8. The labeled disks may be sent to the Traffic Division of Mn/DOT’s Office of Data Management Services for analysis. Send to:
Melissa Thomatz Transportation Data Section Office of Transportation Data and Analysis Mailstop 450 Minnesota Department of Transportation 395 John Ireland Blvd. St Paul, MN 55155 Alternatively, the data files may be emailed to Melissa Thomatz at: [email protected]
IMPORTANT NOTES 1. The air hoses have an approximate life span of 2 years. They will not collect data if
punctured. 2. The batteries in the data collection units typically last one month without recharging.
They can be recharged overnight. 3. On the newer Timemark units, there is a power saver feature that shuts off the screen
if no buttons are pushed after a period of time. However, the unit will still collect data. To reactivate the screen, press [Enter]. The screens on the older units will remain on as long as the unit is on.
4. For further assistance on running a vehicle classification study, the following people are available for contact:


B-10
ASSIGNED COUNTY COUNT NUMBERS COUNTY SITE CODES COUNTY SITE CODES AITKIN 4001-4025 MARSHALL 5451-5475 ANOKA 4026-4075 MARTIN 5476-5500 BECKER 4076-4110 MEEKER 5501-5525 BELTRAMI 4111-4150 MILLE LACS 5526-5550 BENTON 4151-4200 MORRISON 5551-5600 BIG STONE 4201-4225 MOWER 5601-5650 BLUE EARTH 4226-4275 MURRAY 5651-5675 BROWN 4276-4300 NICOLLET 5676-5700 CARLTON 4301-4325 NOBLES 5701-5725 CARVER 4326-4375 NORMAN 5726-5750 CASS 4376-4400 OLMSTED 5751-5800 CHIPPEWA 4401-4425 OTTER TAIL 5801-5850 CHISAGO 4426-4475 PENNINGTON 5851-5875 CLAY 4476-4525 PINE 5876-5900 CLEARWATER 4526-4550 PIPESTONE 5901-5925 COOK 4551-4575 POLK 5926-5975 COTTONWOOD 4576-4600 POPE 5976-6000 CROW WING 4601-4650 RAMSEY 6001-6025 DAKOTA 4651-4700 RED LAKE 6026-6050 DODGE 4701-4725 REDWOOD 6051-6075 DOUGLAS 4726-4750 RENVILLE 6076-6100 FARIBAULT 4751-4775 RICE 6101-6125 FILLMORE 4776-4800 ROCK 6126-6150 FREEBORN 4801-4825 ROSEAU 6151-6175 GOODHUE 4826-4875 ST. LOUIS 6176-6225 GRANT 4876-4900 SCOTT 6226-6275 HENNEPIN 4900-4925 SHERBURNE 6276-6300 HOUSTON 4926-4950 SIBLEY 6301-6325 HUBBARD 4951-4975 STEARNS 6326-6375 ISANTI 4976-5000 STEELE 6376-6400 ITASCA 5001-5050 STEVENS 6401-6425 JACKSON 5051-5075 SWIFT 6425-6450 KANABEC 5076-5100 TODD 6451-6475 KANDIYOHI 5101-5150 TRAVERSE 6476-6500 KITTSON 5151-5175 WABASHA 6501-6525 KOOCHICHING 5176-5225 WADENA 6526-6550 LAC QUI PARLE 5226-5250 WASECA 6551-6575 LAKE 5251-5275 WASHINGTON 6576-6625 LAKE OF THE WOODS 5276-5300 WATONWAN 6626-6650 LeSUEUR 5301-5325 WILKIN 6651-6675 LINCOLN 5326-5350 WINONA 6676-6725 LYON 5351-5400 WRIGHT 6726-6800 McLEOD 5401-5425 YELLOW MEDICINE 6801-6825 MAHNOMEN 5426-5450 Note: If the numbers for your county are insufficient, contact Tom Nelson or Rod Heuer at Mn/DOT for additional site codes.