fg thermostat operating & installation instructions thermostat operating & installation...
TRANSCRIPT
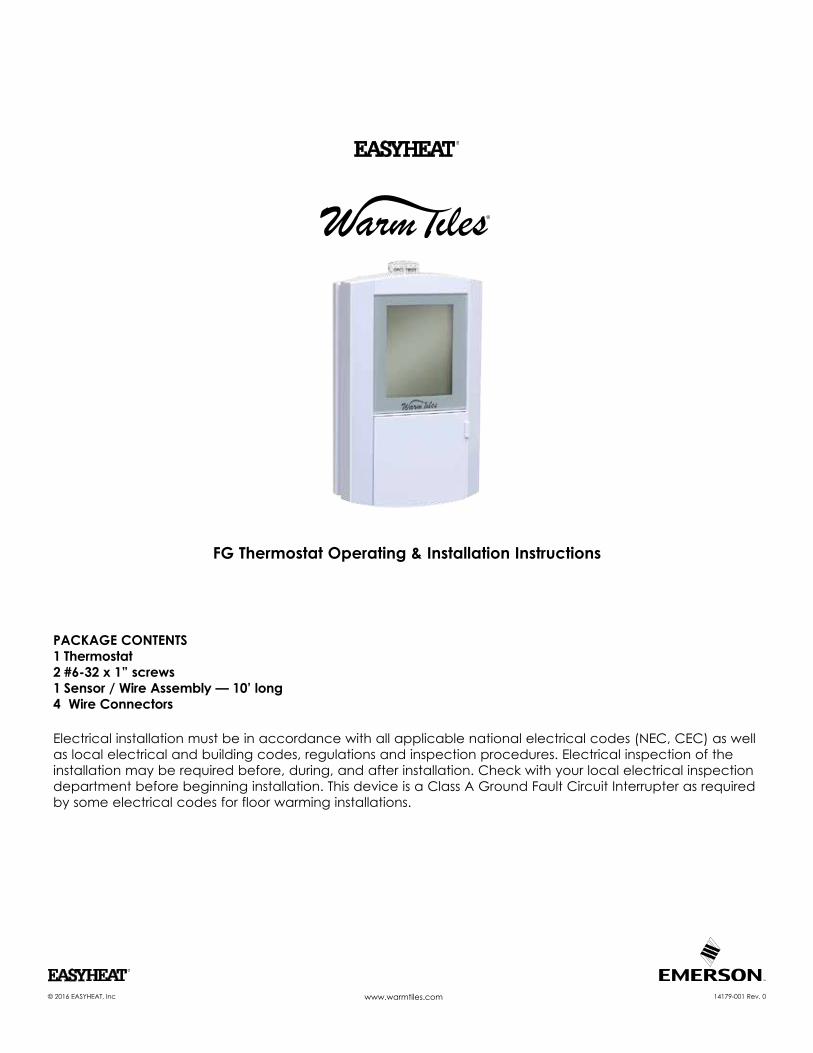
FG Thermostat Operating & Installation Instructions
PackaGe cOnTenTs1 Thermostat2 #6-32 x 1” screws1 sensor / Wire assembly — 10’ long4 Wire connectors
Electrical installation must be in accordance with all applicable national electrical codes (NEC, CEC) as well as local electrical and building codes, regulations and inspection procedures. Electrical inspection of the installation may be required before, during, and after installation. Check with your local electrical inspection department before beginning installation. This device is a Class A Ground Fault Circuit Interrupter as required by some electrical codes for floor warming installations.
© 2016 EASYHEAT, Inc www.warmtiles.com 14179-001 Rev. 0

2
InsTallaTIOnNew Construction Rough-In•Fastenelectricalconnectionbox(ECB)asrequired
per local electrical code on side of stud.•Drillone1-inchholeinbaseplateforsingle-cable
installation and two 1-inch holes for two-cable installation.
•Threadpull-cord(notprovided)throughhole(s)inbaseplateandincorrespondingholesinECB.SecurethepullcordsintheECB. Tie floor ends of pull-cord and fasten to floor.
•Installtheguardplate(notprovided)overthehole for the cold leads and sensor wire before drywalling.
•InstallguardplateasshowninFigure1.
Thermostat Installation•Ensurethesupplybranchcircuithasbeen
disconnected / de-energized.•PullsensorwireintoECBandsecuretothefloor.
See Figure 2. The sensor must not cross or overlap anyothercableonthefloorANDmustbeembedded in the cementituous based mortar in the same manner as the heating cables.
•Thefloortemperaturesensorwirecanbeextendedtoamaximumof50feetwithULorCSArecognized wire 22 AWG rated for 300 V.
•Preparethethermostatforinstallation:1. Remove the thermostat and screws from
packaging.2.LoosenthescrewonthebottomoftheFrontPanelandlifttheFrontPanelasshowninFigure3.
3.Trimexcesslengthofsupplybranchcircuit,cold lead and temperature sensor cables, as necessary, leaving about 6” projecting from theECB,seeFigure4.Mostheatingcablesareprovided with identification labels attached to the end of the cold leads – ensure that these labels remainonthecoldleadinsidetheECB.
a. Button explanation
Figure 1
Guardplate
lcD Display
GFcI Test
Floor Temperature
Back
save
Up
Down
settings
next
On/Off
GFcI Reset
4.Prepareeachheatingcable/coldleadforconnection/splicingandconnectionperFigure5or Figure 6, as applicable.
5.PreparethesensorwireperFigure5orFigure6,asapplicable.Usescrewdriverforconnectiontothesensor wire connections (black and white wires) to correspondingBLKandWHTterminals.
6.NeatlyfoldallwiringintoECBandfastenthermostatwith#6-32screwsprovided.Donotapplyexcessiveforcetothethermostat.Applyfirm but continuous force until the screws can be fully seated.
7. Align the thermostat power base, then finish tightening the two screws.
8.HooktheFrontPanelunittothetopofthePowerBaseunit,swingdownandpresstheFrontPanelintothePowerBaseunitslightly,tightenthescrewat the bottom of the unit.
A. Button ExplanationlcD Display–Largescalereadoutwithbluecolorbacklight which indicates the operational status of the thermostat.On/Off Button – Allows easy selection of switching On or Off the thermostat.Floor Temperature–Pressingthisbuttononceentersthe thermostat’s floor temperature adjusting mode.save Button –Pressingthisbuttononcesavesallthechanges that have been accepted.settings–PressingthisbuttononceenterstheprogrammingoreditingtheTime,Day,°For°C,backlight and Floor Types (Tile or Wood) settings of the thermostat.next Button - Fortheclocksettingonly.Pressingthisbuttononcewillmovetheclocksettingtothenextsetting.

3
Figure 2
Heating cable
sensor Wire
Figure 3 Figure 4
Back Button –Fortheclocksettingonly.Pressingthisbutton once will move the clock setting back to theprevioussetting.Pressandholdthisbuttonfortwosecondstoexitthesettingwithoutsavinganychanges.GFcI Test Button –Usethisbuttontosimulateaground fault, test the GFCI circuitry and activate the GFCI fault light. When a ground fault is detected, the GFCI test button will be illuminated in red color.GFcI Reset – Resets a simulated or repaired GFCI fault, and deactivates GFCI fault light.Up/Down Button –Usedduringprogrammingto move values up or down (if held down for 2 seconds, values will change rapidly).
B. LCD ExplanationOff - Indicates the thermostat is at Off mode and no additionalchangesareallowedunlesstheOn/Offbutton is set to On mode.sensor - Flashes when the Floor Sensor is malfunctioning.set Temp - Indicates the adjusted floor temperature.actual Floor Temp - The floor temperature readings may be represented in either Fahrenheit or Celsius. The operating floor temperature range is from 60° F(16C)to104°F(40°C).Thedisplayedfloortemperaturerangeisfrom32°F(0°C)to120°F (49°C).Thethermostatonlyfunctionsintheoperatingfloortemperaturerangefrom60°F(16°C)to104°F(40°C).
Each individual “S” segment will be growing from small to large which indicates that the floor heating is energized.Min - Indicates the value of time in minutes for the LCDbacklight-turnsonfor2minutesonly.Tile or Wood Mode – TheselectionoftheTile/Woodmodeistolimitthemaximumfloortemperaturedependingonthesurfacetype.Themaximum
floortemperaturefortileissetto40°C(104°F).Themaximumfloortemperatureforwoodissetto30°C(86°F).When all five “sSSSS” segments flash slowly, this indicates that the floor heating is in 3 minutes standby cycle.
C. Energizing the Thermostat When power is first connected to the thermostat or afteranextendedpoweroutage,theLCDDIsplaywill show display segments with backlight on for 10 seconds as per Figure 7 shown. After these 10seconds,thedisplaywillflash“Hour(12:00)”,“PM”,and“Mo”segmentsasperFigure8shownand will continue to flash until time is set. The time canbesetbypressingtheUporDownbuttons.NotethatifyoupressandholdtheUporDownbuttons,theMinuteschangecontinuously(andthenthehoursandthenAM/PM)andtherateofchangegradually increases. Once the time is set, press the Nextbuttontosettheday-usetheUporDownbuttonstoadjustday.PressSavebuttononcetofinishandexitfirsttimesetting.
No additional changes to any settings are allowed unlesstheOn/OffbuttonissettoOnmode.
D. Setting the Time, Day, Fahrenheit or Celsius, Backlight time and Floor Types
1.PresstheSettingsbuttononcetodisablethedisplay.TheHour,Minute,AMorPMdigitswillflash to signify that the time may be adjusted. See Figure 9.
2.PresstheUporDownbuttontoadjustthehourandminutes(includingAM/PM).PresstheNextbutton once to accept the Time setting.

4
Figure 5
BLK WHTSENSOR
TO HEATINGCABLE
L 2
L 1 (N)
L 1 (N) L 2INPUT POWER
To Ground connection sensor Wire
Heating cablecold lead Power supply cable
BLK WHTSENSOR
TO HEATINGCABLE
L 2
L 1 (N)
L 1 (N) L 2INPUT POWER
Heating cablecold leads
Power supply cable
sensor WireTo Ground connection
Figure 6
note: At any time, you may press the Save button oncetosavethechangesandexitthetimesetting mode and return to the previous state.
3.AfteracceptingtheTimesetting,theDaysymbolflashes.SeeFigure10.PresstheUporDownbuttontosettheDay.PresstheNextbuttontoaccepttheDaysetting.
4.AfteracceptingtheDaysetting,thetemperatureunits“F”or“C”flashes.SeeFigure11.PresstheUporDownbuttontoselectFahrenheitorCelsius.PresstheNextbuttononcetoacceptthetemperature unit setting.
5.Afteracceptingthetemperatureunitsetting,the backlight icon flashes – the backlight can be set to be on continuously (in which case “On” is displayed and flashing) or on for two minutes after the last button was pushed (in which case “2” and “Min”aredisplayedandflashing).SeeFigure12.The backlight is preset at factory to be on for 2 minutes.PresstheUporDownbuttontoselectthe“On”or“2”.PresstheSavebuttononcetoaccepttheBacklightSettingandexittosavethesetting.
6.AfteracceptingtheBacklightsetting,theTileorWoodiconflashes.PresstheUporDownbuttontoselelctthetypeoffloor.PresstheSavebuttononcetoacceptandexittosavethesetting.
7. The display returns to normal.
E. Ground Fault Interrupter (GFCI) The thermostat has an integral Ground Fault Interrupter(GFCI)withEndofLife(EOL)featureto isolate the heating cable load and to detect improper operation of the GFCI circuitry. Test the GFCI circuitry monthly using the following procedure:
PresstheGFCITESTbuttononcetosimulateafault:1. If red GFCI light illuminates on the GFCI TEST buttonandthe“GFI”symbolflashesontheLCDdisplay (see Figure 13), the circuitry is working as expectedandhasactivatedtheGFCIprotectionanddisabledthethermostat.PresstheGFCIReset button to restore the thermostat to normal operation.
2. If GFCI light illuminates and flashes on the GFCI TESTbuttonandtheLCDdisplayisblank,theGFCIcircuitry is not functioning properly. If pressing the GFCI Reset button does not reset the fault, then thethermostathasreachedEOLandmustbereplaced with a new thermostat.
IftheGFCItripsandcannotbereset,presstheOn/OffButtontoOffposition;thereisapossiblefaultintheheatingcable.UnderNOcircumstancesshouldthe thermostat be bypassed when a fault condition exists.

5
Figure 7Figure 8
Backlight
2 Min
F
Mo
12 00:PM12 00:
PM
Mo
Figure 9 Figure 10 Figure 11 Figure 12
F. Power Outage RecoveryPowerinterruptionstothethermostatwillnotaffectthe program settings. However, a power interruption of greater than 10 minutes will require the clock bereset(seeSectionD).Forextendedpowerinterruptions, the display will remain blank.
G. Sensor IconIf the thermostat detects a fault with the Floor Sensor,theSensoriconwillflashontheLCD.
--8 00 Sensor
:AM
We
sensor IconFigure 13
188 85/2 Day7 DaySetTemp
WakeLeaveReturnSleep
Actual Floor TempBacklight
18 88AutoOffHoldSensor
:
.
AM
Min
PM
Mo Tu We Th Fr Sa Su
SSSSS
WoodTile

6
lIMITeD WaRRanTy anD lIaBIlITyEasyHeat, Inc. (“easyHeat” or “we” or “our” or “us”), located at the address stated below, provides this limited warranty to the original purchaser only (“you” or “your”) of those products and accessories offered by EasyHeat (the “easyHeat consumer Product”).ThislimitedwarrantyexpresslyterminatesupontransferoftheEasyHeatConsumerProductbytheoriginalpurchaser.What is coveredEasyHeatwarrantstoyouthattheEasyHeatConsumerProduct,wheninstalledandoperatedforresidentialuseonlyinaccordancewiththeapplicableInstallationandOperatingInstructionsand/orOwner’sManual,andsubjecttotheexclusionsbelow,willbefreeofdefectsinmaterialsandworkmanshipforaperiodofeighteen(18)monthsfromthedateofpurchase(the“WarrantyPeriod”),unlessotherwisespecifiedbyEasyHeatinwriting.What is not covered - Warranty exclusions Thislimitedwarrantydoesnotextendtoandexpresslyexcludes:•Normalwearandtearexpectedtooccurduringthenormalcourseofuse,includingwithoutlimitation,cosmeticdamage,scratches,dentsorcomparableandreasonablyexpectedlossesordamages.•LossordamageresultingfromconditionsbeyondEasyHeat’scontrolincludingwithoutlimitation,misuse,accident,abuse,neglect,negligence(otherthanEasyHeat’s),unrelatedmechanicalorelectricalactivities,or
modifications or alterations made by anyone other than EasyHeat •LossordamageresultingfromyourfailuretoinstallandusetheEasyHeatConsumerProductincompliancewiththeapplicableInstallationandOperatingInstructionsand/orOwner’sManual.What We Will Do to correct ProblemsIfaclaimiscoveredunderthislimitedwarranty,EasyHeatatEasyHeat’ssoleoption,(a)repairthedefectiveportionoftheEasyHeatConsumerProductor(b)replacetheentireEasyHeatConsumerProduct,or(c)issuearefundequaltothepurchasepricepaidfortheEasyHeatConsumerProductoracredittobeusedtowardthepurchaseofanewEasyHeatConsumerProduct.IncaseofWarmTilesProducts,thematsandcablescomprisingourWarmTilesProductareembeddedinamortarbase,andthencoveredwithceramictile,marbleorequivalentfinishedflooringmaterial.Afailedmatorcableusuallycannotbeeasilyrepaired.Replacementofafailedmatorcablewillrequirethatthefinishedflooringmaterialunderwhichitisembeddedberemovedtopermitreplacementofthematorcable.THESOLEANDEXCLUSIVEREMEDYFORBREACHOFTHISLIMITEDWARRANTYSHALLBELIMITEDTOREPAIR,CORRECTIONORREPLACEMENTOFTHEEASYHEATCONSUMERPRODUCT,ORREFUNDORCREDITOFTHEPURCHASEPRICE.THISLIMITEDWARRANTYDOESNOTCOVERANYCOSTSRELATINGTOTHEREPAIR,REMOVALORREPLACEMENTOFANYPORTIONOFTHEWARMTILESPRODUCT.no Other express Warranty appliesThislimitedwarrantyisthesoleandexclusivewarrantyprovidedtooriginalpurchasersofanEasyHeatConsumerProduct.ThislimitedwarrantyisexclusiveandmakesnootherwarrantieswithrespecttodescriptionorqualityoftheEasyHeatConsumerProduct.Noaffirmationoffactorpromisemadebyus,bywordsoraction,shallconstituteawarranty.Ifanymodelorsamplewasshowntoyou,themodelorsamplewasusedmerelytoillustratethegeneraltypeandqualityoftheEasyHeatConsumerProductandnottorepresentthattheEasyHeatConsumerProductwouldnecessarilybeofthattypeornature.no easyHeat agent, employee, dealer, or representative or any third party is authorized to alter this limited warranty or bind easyHeat to any affirmation, representation or warranty concerning the easyHeat consumer Product unless such alteration, affirmation, representation or warranty is specifically incorporated by written agreement. The terms of this limited warranty shall not be modified by the original owner, or their respective successors or assigns.How to notify UsIfyoudiscoveranon-compliancewithyourEasyHeatConsumerProductthatyoubelieveiscoveredunderthislimitedwarranty,youmustcontactuswithintheWarrantyPeriodbycallinginUS:(800)537-4732orinCanada:(800)794-3766.Alternatively,youmaycontactEasyHeatatthemailingaddresslistedintheInstallationandOperatingInstructionsand/orOwner’sManualorinUSA:2ConnecticutSouthDrive,EastGranby,CT06026,andinCanada:99UnionStreet,Elmira,ONN3B3L7.YoucanalsocontactusthroughEasyHeat’slocaldealer.Inorderforawarrantyclaimtobeprocessed,acopyoftheoriginalsalesreceiptmustbeprovidedtoEasyHeat.EasyHeatwilldetermine,initssoleandabsolutediscretionwhethertheclaimiscoveredorsubjecttothelimitationsorexclusionsdescribedinthislimitedwarranty.YoumaybeaskedtocontactEasyHeat’slocaldealerforfurtherinstructionsonhowtoobtaintheremediesavailabletoyouunderthislimitedwarranty.IfyouareaskedtoshiptheEasyHeatConsumerProducttoEasyHeatyouwillbeprovidedwithareturnreceiptauthorizationandwewillshiptherepairedorthereplacementEasyHeatConsumerProducttoyouatnocharge.RepairsormodificationsmadetotheEasyHeatConsumerProductbyanyoneotherthanEasyHeatwillnullifythislimitedwarranty.Coverageunderthislimitedwarranty is conditioned at all times upon the original purchaser’s compliance with these required notification and repair procedures.limitation of liabilityTOTHEEXTENTPERMITTEDBYLAW,INNOEVENTSHALLEASYHEATBELIABLEFORANYINCIDENTAL,SPECIAL,INDIRECT,ORCONSEQUENTIALDAMAGES,INCLUDINGANYECONOMICLOSS,WHETHERRESULTINGFROMNONPERFORMANCE,USE,MISUSEORINABILITYTOUSETHEEASYHEATCONSUMERPRODUCTOREASYHEAT’SNEGLIGENCE.EASYHEATSHALLNOTBELIABLEFORDAMAGESCAUSEDBYDELAYINPERFORMANCEANDINNOEVENT,REGARDLESSOFTHEFORMOFTHECLAIMORCAUSEOFACTION(WHETHERBASEDINCONTRACT,INFRINGEMENT,NEGLIGENCE,STRICTLIABILITY,OTHERTORTOROTHERWISE),SHALLEASYHEAT’SLIABILITYTOYOUEXCEEDTHEPRICEPAIDBYYOUFORTHEEASYHEATCONSUMERPRODUCT.Theterm“consequentialdamages”shallinclude,butnotbelimitedto,lossofanticipatedprofits,businessinterruption,lossofuseorrevenue,costofcapitalorlossordamage to property or equipment.Somestatesdonotallowtheexclusionorlimitationofincidentalorconsequentialdamages,sotheabovelimitationorexclusionmaynotapplytoyou.any IMPlIeD WaRRanTy OF MeRcHanTaBIlITy OR FITness FOR PaRTIcUlaR PURPOse THaT May aRIse In cOnnecTIOn WITH THe sale OF an easyHeaT cOnsUMeR PRODUcT sHall Be lIMITeD In DURaTIOn TO THe WaRRanTy PeRIOD. We DIsclaIM all OTHeR IMPlIeD WaRRanTIes, Unless We aRe PROHIBITeD By laW FROM DOInG sO, In WHIcH case all sUcH IMPlIeD WaRRanTIes sHall eXPIRe aT THe eaRlIesT TIMe PeRMITTeD By aPPlIcaBle laW. Some states do not allow limitations on how long an implied warranty lasts, so the above limitation may not apply to you.This warranty gives you specific legal rights, and you may also have other rights which vary from state to state or province to province.USA: Appleton Grp LLC EASYHEAT Inc, 2 Connecticut Drive South, East Granby, CT 06026 • Canada: EGS EASYHEAT Ltd, 99 Union Street, Elmira, ON N3B 3L7
Problem Possible cause suggested correction
DisplayisBlank No power to the thermostat Restore power supply
GFCI test button won’t cause thermostat to trip
Thermostat is in ‘Standby’ mode (Heating Symbol Flashing Slowly)
Wait for 3 minutes, until heating icon stops flashing and is on continuously
GFIflashingonLCDdisplay Ground Fault detected by thermostat
PressResetbuttononthermostat,iffaultdoesnotclear, switch to Off mode, call service technician or contact EasyHeat Customer Service Center
Cold/HotFloor FloorTempSettoolow/high Increase/decreaseFloorTempSetting
Floor Temp won’t reach set level
Heat up time may be longer than one hourCables may not be able to reach set level due to room heat lossCableProblem
Set cables to come on earlier than current programReduce source of heat loss, such as open windows, insulate floor directly under cablesCables must be checked
Floor Heating doesn’t turn on
Thermostat in Off modePowersupplyproblemProblemwithsensorwire,‘Sensor’flashingonLCDdisplayCable problem
SwitchtoOnModeCheck breaker panel and wiringSensorand/orconnectionstothermostatmustbecheckedCables must be checked

7
cOnTenU De l’eMBallaGe1 Thermostat2 vis de 6-32 x 1 po1 ensemble capteur / Fil — longueur de 10 pouces (25,4 cm) connecteurs 4 fils
L’installationélectriquedoitêtrefaiteconformémentauxcodesdel’électriciténationauxapplicables(NEC,CEC),demêmequ’auxcodes,règlementsetprocéduresd’inspectiondesinstallationsélectriquesetdesbâtimentslocaux.Uneinspectiondescircuitsélectriquespeutêtreexigéeavant,pendantetaprèsl’installation.Prendresoindeconsulterleservicelocaldesinspectionsélectriquesdesarégionavantd’entreprendre l’installation. Ce dispositif est un disjoncteur de fuite à la terre de Classe A tel que requis par certainscodesdel’électricitépourlesinstallationsdeplancherchauffant.
© 2016 EASYHEAT, Inc www.warmtiles.com 14179-001 Rev. 0
FG Thermostat Instructions d’utilisation et d’installation

8
InsTallaTIOnMise en place dans un immeuble neuf•Mettreenplaceleboîtierderaccordementélectriqueàl’endroitvoulusurunmontant(conformémentaucodedel’électricitélocal).
•Perceruntroude1poucedanslaplaquedebasepourinstallerunseulcâble,oudeuxtrousde1poucepourl’installationdedeuxcâbles.
•Fairepasserlestirettes(nonfournies)dansleoulestrouspercésdanslaplaquedebaseetdanslestrouscorrespondantsduboîtier.Fixerlestirettesauboîtier.Attacherensemblelesautresextrémitésdestirettesetlesfixerausol.
•Installerlaplaquedeprotection(nonfournie)sur le trou pour les conducteurs froids et le fil du capteur avant de poser le placoplâtre.
•Installerlaplaquedeprotectiondelafaçonindiquéeàlafigure1.
Installation du Thermostat•S’assureràcequelecircuitd’alimentationsoit
débranché et hors tension.•Tirersurlefilducapteurpourl’introduiredansleboîtieretlefixerauplancher.Voirlafigure2.Lefilne doit pas croiser ni passer par-dessus un autre filoucâblesurleplancherETdoitêtreenchâssédanslemortieràbasedecimentdelamêmefaçonquelescâbleschauffants.
•Lefilducapteurthermiquedeplancherpeutêtrerallongéjusqu’àunmaximumde50pieds(15,4m)au moyen d’un fil de calibre 22 AWG, d’une tensionnominalede300volts,homologuéULouCSA.
•Préparerlethermostatpourl’installation:1. Retirer le thermostat et les vis de l’emballage.2.Desserrerlavisenbasdupanneauavantetsouleverlepanneauavantdelamanièreindiquéeàlafigure3.
3.Couperlalongueurexcédentairedesfils
a. Description des Boutons
Figure 1
Plaquedeprotection
AffichageACL
Test GFcI
Température du plancher
Précédent
enregistrer
Haut
Bas
Réglagessuivant
activer/DésactiverRéinitialisation GFcI
d’alimentation, des conducteurs froids et du fil du capteurdetempérature,aubesoin,enlaissantdeslongueursd’environ15cm(6pouces)àl’extérieurduboîtier(voirlafigure4).Laplupartdes câbles chauffants sont fournis avec les étiquettesd’identificationfixéesàl’extrémitédesliaisonsfroides.S’assurerquecesétiquettesrestentsurlaliaisonfroideàl’intérieurduboîtierderaccordementélectrique.
4.Préparerchaquecâblechauffant/conducteurfroidpourconnexion/épissureetbranchementselonlesindicationsdelafigure5oudelafigure6, selon le cas.
5.Préparerlefilsducapteurselonlesindicationsdelafigure5oudelafigure6,selonlecas.Utiliseruntournevispourconnecterlesfilsducapteur(filsnoiretblanc)auxbornesBLKetWHTcorrespondantes.
6.Disposercorrectementtoutlecâblagedansleboîtieretfixerlethermostatàl’aidedesvisde6-32fournies.Nepasappliqueruneforceexcessivesur le thermostat. Appliquer une force ferme et continuejusqu’àcequelesvissoiententièrementengagées.
7. Aligner la base d’alimentation du thermostat, puis terminerleserragedesdeuxvis.
8. Accrocher le panneau avant en haut de la base d’alimentation, basculer vers le bas et pousser légèrementlepanneauavantdanslabased’alimentation,serrerlavisenbasdel’unité.
A. Description des boutonsaffichage acl –Grandaffichagedotéd’unrétroéclairagedecouleurbleuequiindiquel’étatde fonctionnement du thermostat.Bouton On/Off (Marche/arrêt): Permetdefacilementactiveroudésactiverlethermostat.Température du plancher – Appuyer sur ce bouton unefoispourréglerlatempératureduplancher.

9
Figure 2
câble chauffant
Fil du capteur
Figure 3 Figure 4
Bouton de sauvegarde (save) – Appuyer sur ce bouton une fois pour enregistrer toutes les modificationsquiontétéacceptées.Bouton settings (Paramètres) –Utiliserceboutonpouraccéderaumenudesparamètresafindechangerlesréglagesd’heure,jour,°Cou°F,derétroéclairageettypedeplancher(céramiqueoubois) du thermostat.Bouton suivant (next)–Pourleréglagedel’horlogeuniquement. Appuyer sur ce bouton une fois pour passerduréglagedel’horlogeauréglagesuivant.Horloge – Appuyer sur ce bouton une fois pour régleretmodifierl’heure,lejour,l’unitéd’affichagedelatempérature(°Fou°C)etlerétroéclairageduthermostat.Bouton retour –Pourleréglagedel’horlogeuniquement. Appuyer sur ce bouton une fois pour passerduréglagedel’horlogeactuelauréglageprécédent.Appuyersurceboutonetlemaintenirenfoncépendantdeuxsecondespourquitterleréglagesanssauvegarderleschangements.Bouton GFcI Test–Utiliserceboutonpoursimulerunincident de mise à la terre, tester les circuits GFCI et activerlevoyantd’erreurGFCI.Lorsqu’unincidentdemiseàlaterreestdétecté,leboutonGFCIs’allume en rouge.GFcI Reset–RéinitialiseunincidentGFCIsimuléouréparé,puisdésactivelevoyantd’erreurGFCI.Bouton Haut/Bas–Utilisépendantlaprogrammationpour augmenter ou diminuer les valeurs (s’il est maintenuenfoncépendantdeuxsecondes,lesvaleurs changent rapidement).
B. Description de l’affichage à cristaux liquides (ACL)
Off – Indique que le thermostat est en mode Off et qu’aucuneautremodificationauxréglagesn’estautoriséetantqueleboutonOn/Offn’estpasmis
en mode On.capteur – Clignote lorsque le capteur du plancher présenteundysfonctionnement.Température sélectionnée–Indiquelatempératuredeplanchersélectionnée.Température de plancher réelle –LesmesuresdetempératuredeplancherpeuventêtreaffichéesenFahrenheitouenCelsius.Laplagedelatempératureopérationnelleduplancherestcompriseentre16°C(60°F)et40°C(104°F).Laplagedelatempératureaffichéeduplancherestcompriseentre0°C(32°F)et49°C(120°F).Lethermostat fonctionne uniquement dans la plage detempératureopérationnelleduplancherentre16°C(60°F)et40°C(104°F).
Chaque segment « S » individuel devient grand ce qui indique que le chauffage du plancher est sous tension.Min – Indique la valeur de temporisation en « minutes»durétroéclairagedel’affichageàcristauxliquides-actifpendantdeuxminutesseulement.Céramique(Tile)ouBois(Wood)mode–Lasélectiondumodedecéramique/boislimitelatempératuremaximaledeplancherselonletypedesurface.Latempératuremaximaledeplancherpourtuileestfixéà40°C(104°F).Latempératuremaximaledeplancherpourleboisestrégléà30°C(86°F).
Lorsquequelescinqsegmentsclignotentlentement,cela indique que le chauffage du plancher se trouve dans un cycle d’attente de 3 minutes.
C. Mise sous tension du thermostat Lorsquelethermostatestalimentépourlapremièrefoisouaprèsunecoupuredecourantprolongée,l’affichageàcristauxliquidesaffichelessegmentsavecrétroéclairagependant10secondescommeillustréàlafigure7.Aprèsces10secondes,

10
Figure 5
BLK WHTSENSOR
TO HEATINGCABLE
L 2
L 1 (N)
L 1 (N) L 2INPUT POWER
Verslaconnexionàlaterre Fil du capteur
chauffage froidfilsducâble
câble d’alimentation
BLK WHTSENSOR
TO HEATINGCABLE
L 2
L 1 (N)
L 1 (N) L 2INPUT POWER
chauffage froidfilsducâble
câble d’alimentation
Fil du capteur
Verslaconnexionàlaterre
Figure 6
l’affichage fait clignoter les segments « Hour (12:00)»,«PM»et«Mo»commeillustrédanslafigure 8 et continue à clignoter jusqu’à ce que l’heuresoitréglée.L’heurepeutêtrerégléeenappuyantsurlesboutonsHautouBas.NoterquesilesboutonsHautouBassontmaintenusenfoncés,lesMinuteschangentcontinuellement(etensuitelesheures,puisAM/PM)etletauxdechangementaugmenteprogressivement.Unefoisl’heureréglée,appuyersurleboutonNext/Savepourréglerlejour,utiliserlesboutonsHautouBaspourchoisirlejour.Appuyer sur le bouton Save une fois pour terminer etquitterlepremierréglagedel’heure.
Aucuneautremodificationauxréglagesn’estautoriséetantqueleboutonOn/Offn’estpasmisen mode On.
D. Réglage de l’heure, le jour, Fahrenheit ou Celsius, le temps de rétroéclairage et types de plancher
1.AppuyersurleboutonParamètresunefoispourdésactiverl’affichage.Lorsquel’heure,lesminutesetlescaractèresAMouPMclignotent,l’heurepeutêtremodifiée.Voirlafigure9.
2.AppuyersurleboutonHautouBaspourréglerl’heure et les minutes (y compris les indications AM/PM).AppuyersurleboutonNextunefoispouraccepterleréglagedel’heure.
Remarque: À tout moment, vous pouvez appuyer sur le bouton Save pour enregistrer les modifications,quitterlemodederéglagedel’heureetreveniràl’étatprécédent.
3.Aprèsavoiracceptéleréglagedel’heure,lesymbole Jour clignote. Voir la figure 10. Appuyer surleboutonHautouBaspourréglerlejour.AppuyersurleboutonNextpouraccepterleréglagedujour.
4.Aprèsavoiracceptéleréglagedujour,lesunitésdetempérature«F»ou«C»clignotent.Voirlafigure11.AppuyersurleboutonHautouBaspoursélectionnerFahrenheitouCelsius.AppuyersurleboutonNextunefoispouraccepterleréglagedelatempérature.
5.Aprèsavoiracceptél’unitédetempératureparamètre,lerétroéclairageclignote-Lerétroéclairagepeutêtreréglépourêtreconstammentallumé(danscecasle“On”estaffichéetclignotant)ouallumépourdeuxminutesaprèsledernierboutonaétéenfoncé(danscecas,“2”et“Min”sontaffichésetclignotant).VoirFigure12.Lerétroéclairageestprérégléeenusinepourêtre“allumé”(On)pendant 2 minutes. Appuyez sur le bouton Haut ouBaspoursélectionner“constammentallumé”ou “2”. Appuyez sur le bouton Enregistrer une fois pouraccepterleréglagedurétroéclairageetQuitterpourenregistrerleparamètre.
6.Aprèsavoiracceptéleréglagedurétroéclairage, la tuile ou bois icône clignote . Appuyez sur le boutonUpouDownàchoisirletypedeétage.Appuyez sur le bouton Enregistrer une fois pour accepteretquitterpourenregistrerleparamètre.
7.L’affichagerevientàlanormale.

11
Figure 7
Figure 8
Backlight
2 Min
F
Mo
12 00:PM12 00:
PM
Mo
Figure 9 Figure 10 Figure 11 Figure 12
E. Interrupteur GFCI (Ground Fault Interrupter) Lethermostatcomprendundisjoncteurdefuiteàlaterre(GFCI)intégralavecuneoptiondefindevie(EOL)pourisolerlesproblèmesdetensionducâblechauffantetdétecterlemauvaisfonctionnementdescircuitsGFCI.PourtesterlescircuitsduGFCIchaquemois,procédercommesuit:Appuyer sur le bouton GFCI TEST pour simuler un incident:1. Si le voyant rouge GFCI s’allume et clignote sur
le bouton GFCI TEST et le symbole « GFI » clignote surl’affichageACL(voirlafigure13),lescircuitsfonctionnent correctement et la protection GFCIs’estactivéeetadésactivélethermostat.AppuyersurleboutonGFCIRESETpourrétablirlemode normal de fonctionnement du thermostat.
2. Si le voyant GFCI s’allume et clignote sur le boutonGFCITESTetsil’affichageACLestvide,lescircuits GFCI ne fonctionnent pas correctement. Si une pression sur le bouton GFCI RESET ne corrige pas l’erreur, le thermostat a atteint la fin desaduréedevieetdoitêtreremplacéparunnouveau.
SileGFCIsedéclencheetnepeutêtreréinitialisé,mettreleboutonOn/OffsurOff;lecâblechauffantpourraitprésenterundysfonctionnement.IlnefautenAUCUNEcirconstancecontournerlethermostatsiunproblèmeseprésente.
F. Récupération suite à une coupure de courantLescoupuresd’alimentationduthermostatn’ontpasd’incidencesurlesréglagesdeprogrammes.Cependant, une coupure de courant d’une duréesupérieureà10minutesimposeunnouveauréglagedel’horloge(voirsectionD).Encasd’interruptiond’alimentationprolongée,l’affichagerestera vide.
G. Icône capteurSilethermostatdétecteuneerreurauniveauducapteur de plancher, l’icône Capteur clignote sur l’affichageACL.
--8 00 Sensor
:AM
We
Icône capteurFigure 13
188 85/2 Day7 DaySetTemp
WakeLeaveReturnSleep
Actual Floor TempBacklight
18 88AutoOffHoldSensor
:
.
AM
Min
PM
Mo Tu We Th Fr Sa Su
SSSSS
WoodTile

12
Problème cause possible correction conseilléeL’écrannes’allumepas. Lethermostatn’estpasalimenté. Mettreenmarchel’alimentation.
Leboutond’essaiGFCI n’ouvre pas le circuit du thermostat.
Lethermostatestenmoded’attente(lesymbole de chauffage clignote lentement).
Attendre 3 minutes, jusqu’à ce que l’icône de chauffages’arrêtedeclignoterets’allumedefaçoncontinue
L’inscription´GFI´clignotesurl’afficheur.
Fuite àlaterredétectéeparlethermostat.
Appuyer sur le bouton RESET du thermostat, si la fuite àlaterrenedisparaîtpas,mettrelethermostatenmode OFF, et contacter un technicien ou le centre du serviceàlaclientèledeEasyHeat
Leplancherestfroid/chaud
Leréglagedelatempératureduplancheresttropbas/élevé.
Augmenter/diminuerleniveaudetempératureduplancher.
Latempératureduplancher n’atteint pasleniveaufixé
Laprogrammationdel’heurepeutêtrehorsfonction.Lapériodederéchauffementpeutdépasserune heure. Lescâblesnepeuventpasatteindrelatempératurevoulueenraisond’unepertedechaleurdanslapièce.Problèmedecâbles.
Vérifierlesréglages,surveillerl’apparitiondeAM/PM.Devancerledébutprogramméderéchauffementdescâbles.Réduirelessourcesdepertedechaleur,parexempleenfermantdesfenêtresouvertesouenisolantleplancher directement sous les câbles. Fairevérifierlescâbles.
Lechauffagedu plancher ne démarrepas
Lethermostatesthorsfonction (mode Off).Problèmed’alimentation.Problèmeaveclecapteur,l’inscription « Sensor » clignote sur l’afficheur.Problèmedecâbles.
PasserenmodeOn Vérifierletableaudesdisjoncteursetlecâblage.Vérifierlecapteuret(ou)lesconnexionsduthermostat. Fairevérifierlescâbles.
GaRanTIe eT ResPOnsaBIlITé lIMITéesEasyHeat, Inc. (« easyHeat » ou « nous ou « notre » ,),implantéàl’adresseindiquéeci-dessous,fournitcettegarantielimitéeuniquementàl’acheteurd’origine(« vous » ou « votre »)decesproduitsetaccessoiresproposésparEasyHeat (le « produit grand public easyHeat »).CettegarantielimitéeestexplicitementrésiliéelorsdutransfertduProduitgrandpublicd’EasyHeatparl’acheteurd’origine.CequiestcouvertEasyHeatvousgarantitqueleProduitgrandpublicd’EasyHeat,lorsqu’ilestinstalléetutilisédanslecadred’unusageexclusivementrésidentiel,conformémentauxinstructionsd’installationetd’utilisationouaumanueldupropriétaireapplicables,etsousréservedesexclusionsci-dessous,seraexemptdevicesdematériauoudemain-d’œuvrependantunepériodededix-huit(18)moisàcompterdeladated’achat(la«Périodedegarantie»),saufdispositionécritecontraired’EasyHeat.Cequin’estpascouvert–ExclusionsdegarantieLaprésentegarantielimitéenes’étendpasetexclutexpressément:•L’usurenormaledontlasurvenueestattendueaucoursd’uneutilisationnormale,ycomprisetdemanièrenonlimitative,lesdommagesesthétiques,rayures,bosseluresoupertesetdommagescomparablesraisonnablementprévisibles.
•Lespertesoudommagesrésultantdesituationséchappantaucontrôled’EasyHeat,ycomprisetdemanièrenonlimitative,unusageimpropre,unaccident,unmanquement,unenégligence(autrequecelled’EasyHeat),desactivitésmécaniquesouélectriquessansrapport,oudesmodificationsoualtérationseffectuéesparquiconqueautrequ’EasyHeat
•LespertesoudommagesrésultantdevotremanquementàinstallerouutiliserleProduitgrandpublicd’EasyHeatconformémentauxinstructionsd’installationetd’utilisationouaumanueldupropriétaireapplicables.CequenousferonspourremédierauxproblèmesSiuneréclamationestcouverteenvertudelaprésentegarantielimitée,EasyHeat,àsaseulediscrétion,(a)répareralapartiedéfectueuseduProduitgrandpublicd’EasyHeatou(b)remplaceral’intégralitéduProduitgrandpublicd’EasyHeat,ou(c)émettraunremboursementégalauprixd’achatpayépourleProduitgrandpublicd’EasyHeatouuncréditàutiliserdanslecadredel’achatd’unProduitgrandpublicd’EasyHeatneuf.DanslecasdesproduitsWarmTiles,lestreillisetlescâblesconstituantnosproduitsWarmTilesdoiventsontenchâssésdansunecouchedemortier,puisrecouvertsdecarreauxdecéramique,demarbreoud’unmatériauderevêtementdesoldefinitionéquivalent.Iln’esthabituellementpasfacilederépareruntreillisouuncâbledéfectueux.Eneffet,leremplacementd’untreillisoud’uncâbledéfectueuxexigeleretraitdumatériauderevêtementdesoldefinitionsouslequelletreillisoulecâbleestenchâssé.LERECOURSUNIQUEETEXCLUSIFENCASDEVIOLATIONDELAPRÉSENTEGARANTIELIMITÉEDOITÊTRELIMITÉÀLARÉPARATION,ÀLACORRECTIONOUAUREMPLACEMENTDUPRODUITGRANDPUBLICD’EASYHEAT,OUAUREMBOURSEMENTOUÀUNCRÉDITÉGALAUPRIXD’ACHAT.LAPRÉSENTEGARANTIELIMITÉENECOUVREPASDEQUELCONQUESFRAISLIÉSÀLARÉPARATION,AURETRAITOUAUREMPLACEMENTDETOUTEPARTIEDUPRODUITWARMTILES.Aucuneautregarantieexpressenes’appliqueLaprésentegarantielimitéeestlagarantieuniqueetexclusivefournieauxacheteursd’origined’unProduitgrandpublicd’EasyHeat.LaprésentegarantielimitéeestexclusiveetneformuleaucuneautregarantiequantàladescriptionouàlaqualitéduProduitgrandpublicd’EasyHeat.AucuneaffirmationdefaitniaucunepromessefaiteparEasyHeat,enparoleouenaction,nesauraientconstituerunegarantie.Lesmodèlesouéchantillonssusceptiblesd’avoirétéprésentésavaientpourseuletuniquebutd’illustrerletypeetlaqualitégénérauxdesProduitsgrandpublicd’EasyHeatetnondesuggérerquelesProduitsgrandpublicd’EasyHeatseraientnécessairementde ce type ou de cette nature. Aucunagent,employé,concessionnaireoureprésentantoun’importequeltiersd’EasyHeatn’estautoriséàmodifiercettegarantielimitéeniàlierEasyHeatparunequelconqueaffirmation,déclarationougarantierelativeauProduitgrandpublicd’EasyHeat,àmoinsqu’unetellemodification,affirmation,déclarationougarantienesoitspécifiquementincorporéeparconventionécrite.Lesconditionsdecettegarantielimitée ne sauraient être modifiées par le propriétaire d’origine ou leurs successeurs ou ayants droit.comment nous avertirSivousdécouvrezunenon-conformitéaffectantvotreProduitgrandpublicd’EasyHeatquevouspensezêtrecouverteenvertudelaprésentegarantielimitée,vousdeveznouscontacteraucoursdelaPériodedegarantieenappelantdesÉtats-Unis:(800)537-4732ouduCanada:(800)794-3766.VouspouvezégalementcontacterEasyHeatàl’adressepostaleindiquéedanslesinstructionsd’installationetd’utilisationoudanslemanueldupropriétaireouauxÉtats-Unis:2ConnecticutSouthDrive,EastGranby,CT06026,etauCanada:99UnionStreet,Elmira,ONN3B3L7.Vouspouvezaussinouscontacterparl’intermédiaireduconcessionnaireEasyHeatlocal.Afindetraiteruneréclamationautitredelagarantie,unecopiedureçudeventeoriginaldoitêtrefournieàEasyHeat.EasyHeatdéterminera,àsaseuleetuniquediscrétion,silaréclamationestcouverteousujetteauxlimitationsouexclusionsdécritesdanslaprésentegarantielimitée.IlpeutvousêtredemandédecontacterleconcessionnaireEasyHeatlocalpourdeplusamplesinstructionssurlamanièred’obtenirlesrecoursàvotredispositionenvertudelaprésentegarantie.S’ilvousestdemandéd’expédierleProduitgrandpublicd’EasyHeatàEasyHeat,vousrecevrezuneautorisationderéceptionderetouretnousvousexpédieronsgratuitementleProduitgrandpublicd’EasyHeatréparéouderemplacement.Lesréparationsoumodificationsd’unProduitgrandpublicd’EasyHeateffectuéesparquiconqueautrequ’EasyHeatannulentlaprésentegarantielimitée.Lacouvertureenvertudelaprésentegarantielimitéeestenpermanenceassujettieaurespectparl’acheteurd’originedecesprocéduresdenotificationetderéparationobligatoires.limitation de responsabilitéDANSLAMESUREPERMISEPARLALOI,EASYHEATNESAURAITENAUCUNCASÊTRERESPONSABLEDEQUELCONQUESDOMMAGESACCESSOIRES,SPÉCIAUXOUINDIRECTS,YCOMPRISTOUTEPERTEÉCONOMIQUE,QU’ILSRÉSULTENTD’UNEINEXÉCUTION,D’UNEUTILISATION,D’UNEUTILISATIONIMPROPREOUD’UNEINCAPACITÉÀUTILISERLEPRODUITGRANDPUBLICD’EASYHEATOUDELANÉGLIGENCED’EASYHEAT.EASYHEATNESAURAITÊTRERESPONSABLEDESDOMMAGESCAUSÉSPARUNRETARDD’EXÉCUTIONETENAUCUNCAS,QUELLEQUESOITLAFORMEDELARÉCLAMATIONOULACAUSED’ACTION(QU’ELLESOITCONTRACTUELLE,FONDÉESURUNECONTREFAÇON,UNENÉGLIGENCE,UNERESPONSABILITÉSTRICTE,UNAUTREDÉLITCIVILOUTOUTAUTREFONDEMENT),LARESPONSABILITÉD’EASYHEATÀVOTREÉGARDNESAURAITEXCÉDERLEPRIXPAYÉPARVOUSPOURLEPRODUITGRANDPUBLICD’EASYHEAT.L’expression«dommagesindirects»doitinclure,demanièrenonlimitative,lapertedeprofitsespérés,laperted’exploitation,lapertedejouissanceouderevenus,lecoûtducapitaloudesdommagesàlapropriétéouàl’équipement.Certainsétatsetcertainesprovincesn’autorisentpaslesexclusionsnilesrestrictionsrelativesauxdommagesaccessoiresouindirects;enconséquence,lalimitationoul’exclusionci-dessuspeutnepass’appliquer.TOUTe GaRanTIe IMPlIcITe De QUalITé MaRcHanDe OU D’aDaPTaTIOn À Une FIn PaRTIcUlIÈRe sUscePTIBle De naÎTRe Dans le caDRe De la VenTe D’Un PRODUIT GRanD PUBlIc D’easyHeaT DOIT ÊTRe lIMITée À la DURée De la PéRIODe De GaRanTIe. easyHeaT ReJeTTe TOUTe aUTRe GaRanTIe IMPlIcITe, À MOIns QUe la lOI en VIGUeUR ne l’en InTeRDIse; Dans Une Telle sITUaTIOn, laDITe GaRanTIe IMPlIcITe eXPIRe aUssITÔT QUe le PeRMeT la lOI aPPlIcaBle. Certainsétatsn’autorisentpasleslimitationsdeladuréed’unegarantieimplicite;lalimitationci-dessuspeutdoncnepass’appliquer.Laprésentegarantieaccordedesdroitsspécifiquesetilsepeutquevousbénéficiiezaussid’autresdroits,différentsd’unétatoud’uneprovinceàl’autre.États-Unis : Appleton Grp LLC EASYHEAT Inc, 2 Connecticut Drive South, East Granby, CT 06026 • Canada : EGS EASYHEAT Ltd, 99 Union Street, Elmira, ON N3B 3L7

13
Termostato FG Instrucciones de operación e instalación
cOnTenIDOs Del PaQUeTe1 Termostato2 Tornillos n. º 6 32 x 1”1 Montaje de sensor/cable (long. 10’)4 conectores de cables
Lainstalacióneléctricadebecumplirtodosloscódigoseléctricosnacionales(NEC,CEC)vigentes,ademásdeloscódigos,lasnormas,ylosprocedimientosdeinspeccióneléctricosyedilicioslocales.Esposiblequeserequieraunainspeccióneléctricaantes,duranteydespuésdelainstalación.Consulteconeldepartamentodeinspeccióneléctricalocalantesdecomenzarlainstalación.EstedispositivoesuninterruptordecircuitodefallaconectadoatierraClaseA,segúnlorequeridoporalgunoscódigoseléctricosparainstalacionesde sistemas radiantes de piso.
© 2016 EASYHEAT, Inc www.warmtiles.com 14179-001 Rev. 0

14
InsTalacIónEmpotrada en construcción nueva•Ajustelacajadeconexióneléctrica(ECB)segúnlorequeridoporelcódigoeléctricolocalenlapartelateraldelespárrago.
•Taladreunagujerode1pulgadaenlaplacabaseparainstalacióndecablesimpleydosagujerosde1pulgadaparainstalacióndedoscables.
•Ensartelacuerdadetracción(noincluida)atravésdelosagujerosenlaplacabaseyenloscorrespondientesagujerosenlaECB.AsegurelascuerdasdetracciónenlaECB.Atelosextremosdelacuerdadetracción y asegúrelas al piso.
•Instalelaplacadeprotección(noincluida)sobreel agujero para los cables toma corriente y el cable del sensor antes de colocar la pared.
•Instalelaplacadeproteccióncomosemuestraen la Figura 1.
Instalación del termostato•Asegúresedequeelcircuitoderivadode
suministro de corriente esté desconectado/sin corriente.
•JaleeelcabledelsensordelaECB(cajadeconexioneseléctricas)yasegúreloalpiso.Consulte la Figura 2. El sensor no debe cruzar ni montarse sobre ningún otro cable en el piso y debe estar incrustado en la argamasa de cemento del mismo modo que los cables de calor.
•Elcabledelsensordetemperaturadelpisopuedeserextendidoaunmáximode50piesconunalambredecalibre22AWGreconocidoporULo CSA y clasificado para 300 V.
•Prepareeltermostatoparalainstalación:1. Retire el termostato, los conectores de cable y los
tornillos de su empaque.
2. Afloje los tonillos de la cubierta y empujela suavemente por atràs, con el destornillador, Consulte la figura 3.
3.Corteelexcesodelongituddeloscablesdelcircuitoderivacióndefuente,derivaciònde fuente, cable toma corriente y sensor de temperatura,comoseanecesario,dejando6”(15cm)deproyeccióndesdelacajadeconexioneseléctricas(ECB),ConsultefiguraLamayorìadeloscablesdecalefacciònestàndotadosdeetiquetasdeidentificaciònadjuntasalfinaldel cable toma corriente, asegurar que estas etiquetas permanezcan sobre el cable toma corrientedentrodelECB.
4.Preparecadacablecalentador/tomacorrienteparaconexiónoempalmeyconectesegúnlafigura5ofigura6,comoseaaplicable.
5.PrepareelcabledelsensorsegúnlaFigura5ólaFigura6,segúnelcaso.Useundestornilladorparalaconexiónalcabledelsensor(cablesblancoynegro),alosterminalesBLKyWHTcorrespondientes.
6. Cuidadosamente doble todo el cableado dentrodelacajadeconexioneseléctricas(ECB)y ajuste el termostato con los tornillos #6-32 proporcionados.Noapliquefuerzaexcesivaaltermostato. Aplique fuerza firme pero continua hastaquelostornillosesténcompletamenteajustados.
7.Asegúresedealinearlabasedealimentacióndel termostato y luego termine de ajustar los dos tornillos.
8. Enganche la unidad del panel frontal con la parte superiordelaunidaddelabasedealimentación,deslícelo hacia abajo y presione suavemente el panel frontal hacia la unidad de la base de alimentación,ajusteeltornilloenlaparteinferiorde la unidad.
a. explicación de Botónes
Figura 1
Placa de sangría
Pantalla lcD
Prueba de GFcI
la Temperatura del piso
atrás
Guardar
arriba
abajo
ajustes
siguiente
Perilla de activado/desactivadoRestablecer GFcI

15
A. Explicación de los botonesIndicador lcD – pantalla de lectura grande con luz de fondo azul que indica el estado operativo del termostato.Botón On/Off (encendido/apagado): permite unaselecciónfácilparaencenderoapagareltermostato.Floor Temperature (Temperatura del piso) – al presionarestebotónunavezseingresaalmododeajuste de temperatura del piso en el termostato.Botón save (Guardar) –alpresionarestebotónunavez se guardan todos los cambios que han sido aceptados.Botón settings (configuración) –utiliceestebotónparateneraccesoalmenúConfiguraciónparacambiarlaconfiguracióndelahora,eldía,°Co°F,Luzdefondoytiposdepiso(azulejoomadera)deltermostato.Botón next (siguiente) – solo para el ajuste del reloj.Alpresionarestebotónunavezsepasaráalsiguiente ajuste del reloj.Botón Back (anterior) – solo para el ajuste del reloj. Presionarestebotónunavezpararegresaralajusteanteriordelreloj.Presionarymantenerpresionadoestebotóndurantedossegundosparasalirdelmodo de ajuste sin guardar los cambios.Botón GFcI Test (Prueba de GFcI)–usarestebotónpara simular un fallo de tierra, probar los circuitos GFCI y activar la luz de fallo de GFCI. Cuando se detecteunfallodetierra,elbotóndepruebadeGFCIseiluminaráencolorrojo.GFcI Reset (Restablecimiento de GFcI) – restablece unfallodeGFCIsimuladoodereparaciónydesactiva la luz de fallo de GFCI.Botón arriba/abajo – se usa durante la programaciónparaaumentarodisminuirlosvalores(si se mantiene presionado durante 2 segundos, los valorescambiaránrápidamente).
B. Explicación del LCDOff (apagado) –indicaqueeltermostatoestáenmodoOff(Apagado)yquenosepermitenmáscambios,amenosquesepongalaperillaOn/Off(Encendido/Apagado)enmodoOn(Encendido).sensor –destellacuandoelsensordepisonoestáfuncionando correctamente.set Temperature (Temperatura establecida) – indica la temperatura ajustada del piso.actual Floor Temperature (Temperatura real del piso) – las lecturas de temperatura del piso pueden mostrarse en grados Fahrenheit o Celsius. El rango detemperaturadeoperacióndelpisoesde16°C(60°F)a40°C(104°F).El rango de temperatura mostrada del piso es de0°C(32°F)a49°C(120°F).Eltermostatosolofuncionaenelrangodetemperaturadeoperacióndelpisode16°C(60°F)a40°C(104°F).
Cadasegmento“S”individualestarácambiando de pequeño a grande indicando que lacalefaccióndelpisoestáenergizada.Min – Indica el valor de la hora en minutos para la luzdefondodelindicadorLCD-soloseenciendedurante 2 minutos.Modo de loseta ò Madera - Laselecciòndelmododeloseta/maderaesparalimitarlamaximatemperatura del piso dependiendo el tipo de superficie.Lamaximatemperaturadelpisoparalosetaisde40ºC(104ºF).Lamaximatemperaturapara piso de madera es 30º C (86º F).Cuando los cinco segmentos destellen lentamente, estoindicaquelacalefaccióndelpisoestáenunciclo de espera de 3 minutos.
Figura 2
calefacción por cable
Hilo sensor
Figura 3 Figura 4

16
Figura 5 Figura 6
C. Cómo energizar el termostato Cuando se conecta por primera vez la alimentaciónaltermostato,odespuésdeunapagóndeenergíaprolongado,elindicadorLCDmostrarásolamentealgunossegmentosiluminadosdurante 10 segundos, como se muestra en la Figura 7.Despuésdeestos10segundos,enelindicadorparpadearánlossegmentos“Hour(12:00)”,“PM”,y“Mo”,comosemuestraenlaFigura8.Lossegmentosseguiránparpadeandohastaqueseconfigurelahora.LahorapuedeconfigurarseconlosbotonesUporDown.TengaencuentaquesimantienepresionadoslosbotonesUporDown,losMinutoscambiarándeformacontinua(luegolashorasyluegolaopciónAM/PM),ylavelocidadaumentaráprogresivamente.Unavezconfiguradalahora,presioneelbotónNext/Saveparaconfigurareldía.UselosbotonesArribaoAbajoparaajustareldía.Presionaunavezelbotonde salvar “Save” para terminar y salir del modo de preparacion de primera vez.
D.Ajuste de la hora, el día, Fahrenheit o Celsius,tiempo de la iluminación de fondo y tipos de piso
1.PresioneelbotónConfiguraciónunavezparadesactivarelindicador.Losdígitosdehora,minuto,AMoPMdestellaránparaindicarquesepuede ajustar la hora. Vea la figura 9.
2.PresioneelbotónArribaoAbajoparaajustarlahoraylosminutos(incluyendoAM/PM).PresioneelbotónNext(Siguiente)unavezparaaceptarelajuste de la hora.
nota: En cualquier momento, puede presionar el botónSave(Guardar)unavezparaguardarlos
cambios y salir del modo de ajuste de Time (Hora) y regresar al estado anterior.
3.DespuésdeaceptarelajustedeTime(Hora),destellaráelsímboloDay(Día).Vealafigura10.PresioneelbotónArribaoAbajoparaajustareldía.PresioneelbotónNext(Siguiente)paraaceptar el ajuste del día.
4.DespuésdeaceptarelajustedeDay(Día),lasunidadesdetemperatura“F”o“C”destellarán.Vealafigura11.PresioneelbotónArribaoAbajoparaseleccionarFahrenheitoCelsius.PresioneelbotónNext(Siguiente)unavezparaaceptarelajuste de la unidad de temperatura.
5.Despuésdeaceptarlaunidaddetemperatura,eliconodelaluzdefondoparpadeará:laluzsepuedeconfigurarparaqueestéenformacontinua (en cuyo caso la palabra “On” se visualizayparpadea)odedosminutosdespuésdequeelúltimobotónquehasidopulsado(enestecaso“2”y“Min”semuestranyelparpadeo).VealaFigura12.Laluzdefondovieneajustadadefábricaa2minutos.PulseelbotónArribaoAbajoparaseleccionar“On”o“2“.PresioneelbotónGuardarunavezparaaceptarelajustedelailuminaciónysalirparaguardarlaconfiguración.
6.Despuésdeaceptarelajustedelailuminación,eliconodelabaldosaómaderaparpadeará.PulseelbotónArribaóAbajoparaseleccionareltipodepiso.PresioneelbotónGuardarunavezparaaceptarysalirparaguardarlaconfiguración.
7.Lapantallavuelvealanormalidad.E. Interruptor de fallo de tierra (GFCI)El termostato tiene integrado un interruptor de fallodetierra(GFCI)conlafunciónEndofLife
BLK WHTSENSOR
TO HEATINGCABLE
L 2
L 1 (N)
L 1 (N) L 2INPUT POWER
Para hacer conexión a tierra
Hilo sensor
Toma corriente del cable de calen tamiento
cable de alimentación
BLK WHTSENSOR
TO HEATINGCABLE
L 2
L 1 (N)
L 1 (N) L 2INPUT POWER
Toma corriente del cable de calen tamiento
cable de alimentación
Hilo sensor
Para hacer la conexión a tierra

17
Figura 7Figura 8
Backlight
2 Min
F
Mo
12 00:PM12 00:
PM
Mo
Figura 9 Figura 10 Figura 11 Figura 12
(EOL,finaldevidaútil)paraaislarlacargadelcable calefactor y detectar el funcionamiento incorrectodelcircuitoGFCI.PruebeelcircuitoGFCImensualmenteusandoelsiguienteprocedimiento:PresioneelbotónGFCITEST(PruebadeGFCI)unavezparasimularunfallo:1.SiseenciendeunaluzrojaGFCIenelbotónGFCITEST(PruebadeGFCI)yelsímbolo“GFI”destellaenelindicadorLCD(vealafigura13),elcircuitoestáfuncionandocomoseesperayhaactivadolaprotecciónGFCIydesactivadoeltermostato.PresioneelbotónGFCIReset(Restablecimientode GFCI) para restaurar el termostato al funcionamiento normal.
2.SilaluzGFCIseiluminaydestellaenelbotónGFCITEST(PruebadeGFCI)yelindicadorLCDnomuestranada,elcircuitoGFCInoestáfuncionando correctamente. Si al presionar el botónGFCIReset(RestablecimientodeGFCI)nose restablece el fallo, el termostato ha alcanzado elvalorEOL(Finaldevidaútil)ydebesercambiado por un termostato nuevo.
Si el interruptor GFCI se activa y no puede restablecerse,girelaperilladeencendido/apagadoalaposicióndeapagado;posiblementeexisteunfalloenelcablecalefactor.BajoNINGUNAcircunstanciasedebe“puentear”eltermostatocuandoexisteunacondicióndefallo.
F. Recuperación de una falta de energíaLasinterrupcionesdealimentaciónaltermostatonoafectaránlosajustesdelprograma.Sinembargo,unainterrupcióndealimentacióndemásde10minutosrequeriráqueserestablezcaelreloj(vealasecciónD).Parainterrupcionesdealimentaciónprolongadas,elindicadorpermaneceráenblanco.
G. Icono SensorSi el termostato detecta un fallo en Floor Sensor (Sensordepiso),eliconoSensordestellaráenelindicadorLCD.
--8 00 Sensor
:AM
We
Icône capteurFigura 13
188 85/2 Day7 DaySetTemp
WakeLeaveReturnSleep
Actual Floor TempBacklight
18 88AutoOffHoldSensor
:
.
AM
Min
PM
Mo Tu We Th Fr Sa Su
SSSSS
WoodTile

18
GaRanTía y ResPOnsaBIlIDaD lIMITaDasEasyHeat, Inc. (“easyHeat” o “nosotros” o “nuestro”),ubicadoenladirecciónquesemencionaacontinuación,ofreceestagarantíalimitadaexclusivamentealcompradororiginal(“usted” o “su”) sobre aquellos productos o accesorios ofrecidos por EasyHeat (el “Producto de consumo de easyHeat”).EstagarantíalimitadafinalizaexpresamenteluegodequeelcompradortransfiereelProductodeConsumodeEasyHeat.LoquesecubreEasyHeatlegarantizaqueelProductodeConsumodeEasyHeat,cuandoseinstalayseoperaexclusivamenteparausoresidencialydeacuerdoconlasinstruccionesdeinstalaciónyoperación,y/oelmanualdelpropietariocorrespondientes,ysujetoalasexclusionesmencionadasacontinuación,notendrádefectosdematerialesomanodeobraduranteunperiododedieciocho(18)mesesdesdelafechadecompra(el“PeriododeGarantía”),amenosqueEasyHeatespecifiquelo contrario por escrito.Loquenosecubre-ExclusionesdelagarantíaEstagarantíalimitadanoseextiendealosiguiente,queexcluyeexpresamente:•Eldesgastenaturalyesperableduranteelcursonormaldeluso,incluidos,entreotros,dañoscosméticos,rayones,abolladuras,opérdidasodañoscomparablesyrazonables.•PérdidasodañosqueresultendecondicionesmásalládelcontroldeEasyHeat,incluidos,entreotros,maluso,accidentes,abuso,negligencia(quenoseadeEasyHeat),actividadesmecánicasoeléctricasnorelacionadas,omodificaciones
o alteraciones no realizadas por EasyHeat •PérdidasodañosqueresultendefallassuyasenlainstalaciónyelusodelProductodeConsumodeEasyHeatsegúnlasinstruccionesdeinstalaciónyoperacióny/oelmanualdelpropietariocorrespondientes.Qué haremos para corregir problemasSiunreclamoseencuentracubiertobajoestagarantíalimitada,EasyHeat,asusolaopción,(a)repararálapartedefectuosadelProductodeConsumodeEasyHeat,(b)reemplazarátodoelProductodeConsumodeEasyHeat,obien(c)emitiráunreembolsoequivalentealpreciodecomprapagadoporelProductodeConsumodeEasyHeat,ouncréditoausarseparalacompradeunProductodeConsumodeEasyHeatnuevo.EnelcasodelosProductosdeLosasTérmicas,lasrejillasyloscablesincluidosennuestroProductodeLosasTérmicasestánempotradosenunabasedemorteroyluegocubiertosconlosascerámicas,demármolounmaterialdeacabadodepisoequivalente.Unarejillaouncabledefectuosogeneralmentenosepuedenrepararconfacilidad.Parareemplazarunarejillaouncabledefectuoso,sedeberáextraerelmaterialdelacabadodelpisodebajodelcualestáempotradodichocableorejilla,afindepermitirelreemplazodedichoelemento.ELREMEDIOÚNICOYEXCLUSIVOPARAELINCUMPLIMIENTODEESTAGARANTÍALIMITADAESTARÁLIMITADOALAREPARACIÓN,LACORRECCIÓNOELREEMPLAZODELPRODUCTODECONSUMODEEASYHEAT, OUNREEMBOLSOOCRÉDITOPORELPRECIODECOMPRA.ESTAGARANTÍALIMITADANOCUBRENINGUNODELOSCOSTOSRELACIONADOSCONLAREPARACIÓN,LAEXTRACCIÓNOELREEMPLAZODENINGUNAPARTEDELPRODUCTODELOSASTÉRMICAS.no se aplicará ninguna otra garantía explícitaEstagarantíalimitadaeslagarantíaúnicayexclusivaproporcionadaaloscompradoresdeunProductodeConsumodeEasyHeat.EstagarantíalimitadaesexclusivaynobrindaningunaotragarantíarespectoaladescripciónolacalidaddelProductodeConsumodeEasyHeat.Ningunaafirmaciónfácticanipromesaquehagamos,seaconpalabrasoconacciones,constituiráunagarantía.Siseleenseñóunmodeloounamuestra,estosseutilizaronsimplementeparailustrareltipoylacalidadgeneralesdelProductodeConsumodeEasyHeat,peronopararepresentarqueelProductodeConsumodeEasyHeatnecesariamenteseríadeesetipoonaturaleza.Ningúnagente,empleado,distribuidor,representanteoningúnotroterceroqueactúeenlugardeEasyHeatestáautorizadoaalterarestagarantíalimitada,niavincularaEasyHeatconningunaafirmación,declaraciónogarantíarelacionadaconelProductodeConsumodeEasyHeat,amenosqueesaalteración, declaración o garantía esté específicamente incorporada por medio de un acuerdo escrito. ni el propietario original, ni sus respectivos sucesores o cesionarios podrán modificar los términos de esta garantía limitada.cómo notificarnosSidescubreunincumplimientoensuProductodeConsumodeEasyHeatqueasucriterioestácubiertoporestagarantíalimitada,debecontactarseconnosotrosdentrodelPeriododeGarantíallamandoenlosEstadosUnidosal(800)537-4732oenCanadáal(800)794-3766.Demaneraalternativa,puedecontactarseconEasyHeatalasdireccionesdecorreomencionadasenlasinstrucciones deinstalaciónyoperacióny/oelmanualdelpropietario.EnlosEstadosUnidos,2ConnecticutSouthDrive,EastGranby,CT06026;yenCanadá,99UnionStreet,Elmira,ONN3B3L7.TambiénpuedecontactarseconnosotrosatravésdeldistribuidorlocaldeEasyHeat.Paraquepuedaprocesarseunreclamodegarantía,debeproporcionarseaEasyHeatunacopiadelrecibodeventaoriginal.EasyHeatdeterminará,asusolayabsolutadiscreción,sielreclamoestácubiertoosujetoalaslimitacionesoexclusionesdescritasenestagarantíalimitada.SelesolicitaráquesecontacteconeldistribuidorlocaldeEasyHeatparaobtenermásinstruccionessobrelaformadeconseguirlosremediosasudisposiciónsegúnestagarantíalimitada.SiselesolicitaqueenvíeaEasyHeatelProductodeConsumodeEasyHeat,seleproporcionaráunaautorizacióndeacusederecibo,yleenviaremoselProductodeConsumodeEasyHeatreparadoodereemplazosincargo.LasreparacionesomodificacionesrealizadasalProductodeConsumodeEasyHeatnorealizadasporEasyHeatanularánestagarantíalimitada.Lacoberturabajoestagarantíalimitadaestácondicionada,entodomomento,alcumplimientodelcompradororiginalconestanotificaciónylosprocedimientosdereparaciónrequeridos.limitación de responsabilidadENLAMEDIDAPERMITIDAPORLALEY,ENNINGÚNCASOEASYHEATSERÁRESPONSABLEPORNINGÚNDAÑOIMPREVISTO,ESPECIAL,INDIRECTOORESULTANTE,INCLUIDACUALQUIERPÉRDIDAECONÓMICAEMERGENTEDELINCUMPLIMIENTO,USO,MALUSOOINCAPACIDADDEUSODELPRODUCTODECONSUMODEEASYHEAT,OBIENDELANEGLIGENCIADEEASYHEAT.EASYHEATNOSERÁRESPONSABLEPORLOSDAÑOSCAUSADOSPORELRETRASOENELCUMPLIMIENTO,YENNINGÚNCASO,MÁSALLÁDELAFORMADELRECLAMOOLACAUSADEACCIÓN(SEABASADAENCONTRATO,INFRACCIÓN,NEGLIGENCIA,RESPONSABILIDADESTRICTA,OTRARESPONSABILIDADEXTRACONTRACTUALOCUALQUIEROTRA),LARESPONSABILIDADDEEASYHEATANTEUSTEDSUPERARÁELPRECIOQUEUSTEDPAGÓPORELPRODUCTODECONSUMODEEASYHEAT.Eltérmino“dañosresultantes”incluirá,entreotros,pérdidadegananciasprevistas,interrupcióncomercial,pérdidadeusooingresos,costosdecapital,opérdidasodañosapropiedadesyequipos.Algunosestadosnopermitenlaexclusiónnilalimitacióndedañosimprevistosoresultantes;porlotanto,esposiblequelaexclusiónolimitaciónanteriornoseapliqueensucasoespecífico.TODas las GaRanTías IMPlícITas De cOMeRcIaBIlIDaD O aPTITUD PaRa Un PROPósITO PaRTIcUlaR QUe PUeDan sURGIR en RelacIón cOn la VenTa De Un PRODUcTO De cOnsUMO De easy HeaT esTaRÁn lIMITaDas en sU DURacIón al PeRIODO De GaRanTía. nO seReMOs ResPOnsaBles POR nInGUna OTRa GaRanTía IMPlícITa, a MenOs QUe POR ley se DIsPOnGa lO cOnTRaRIO, en cUyO casO TODas esTas GaRanTías IMPlícITas VenceRÁn en la FecHa MínIMa PeRMITIDa POR la ley cORResPOnDIenTe. Algunosestadosnopermitenlimitacionessobreladuracióndeunagarantíaimplícita;porlotanto,esposiblequelalimitaciónanteriornoseapliqueensucasoespecífico.Esta garantía le brinda derechos legales específicos y usted podría tener otros derechos que varían según la provincia o el estado.EE. UU.: Appleton Grp LLCEASYHEATInc,2ConnecticutDriveSouth,EastGranby,CT06026 • Canadá:EGSEASYHEATLtd,99UnionStreet,Elmira,ONN3B3L7
Problema causa posible corrección sugeridaEldisplayestáenblanco No hay energía en el termostato Restaure la fuente de energía
ElbotóndeGFCI no hace que se active el termostato
Eltermostatoestáenmodo“StandBy”(espera, con el símbolo de calentamiento destellando lentamente)
Espere 3 minutos, hasta que el icono de calentamiento deje de destellar y se encienda continuamente
GFI destellando en displayLCD Falla de tierra detectada por el termostato
PresioneelbotónReseteneltermostato,silafallano se libera, conmute al modo Off, llame al servicio técnicoocontáctenos(EasyHeatCustomerServiceCenter)
Pisofrío/caliente Latemperaturedelpisoseajustómuybajao alta
Aumente o disminuya el valor ajustado de temp. del piso
Latemperaturadel piso no llega al nivel fijado
LahorafijadadeprogramapuedeestarapagadaEl tiempo de calentamiento puede ser mayor que una horaLoscablesprobablementenopuedenalcanzarelnivelfijadodebidoapérdidasde calor en el cuartoProblemaconelcable
Reviselosajustesdeprograma,fíjeseenelAM/PMFije los cables para encenderse antes del programa actualReduzcalaspérdidasdecalor,comoventanasabiertas, aisle el piso directamente bajo los cablesSe debe revisar los cables
El calentamiento de piso no enciende
EltermostatoestáenmodoOffProblemaconlafuentedeenergíaProblemaconelcabledelsensor,“Sensor”destellandoeneldisplayLCDProblemaconelcable
Cambiar a modo On (Encendido) Revise el panel del interruptor y el cableadoSedeberevisarelsensorolasconexionesaltermostatoSe debe revisar los cables

19

20
For more information Pourplusdedétails Paraobtenermásinformación
www.warmtiles.comUS(800)537-4732 Canada (800) 794-3766
AppletonGrpLLCd/b/aAppletonGroup.TheEasyHeatandEmersonlogosareregisteredintheU.S.PatentandTrademarkOffice.EasyHeat,Inc.isawhollyownedsubsidiaryofAppletonGrpLLC.Allotherproductorservicenamesarethepropertyoftheirregisteredowners.©2016,AppletonGrpLLC.Allrightsreserved.The Emerson logo is a trademark and a service mark of Emerson Electric Co. ©2016 Emerson Electric Co.
© 2016 EASYHEAT, Inc www.warmtiles.com 14179-001 Rev. 0