family guy - pinball guide by...
TRANSCRIPT
Family Guy Table Guide By ShoryukenToTheChin
1
2
3
4
6
5
7
89
10
11
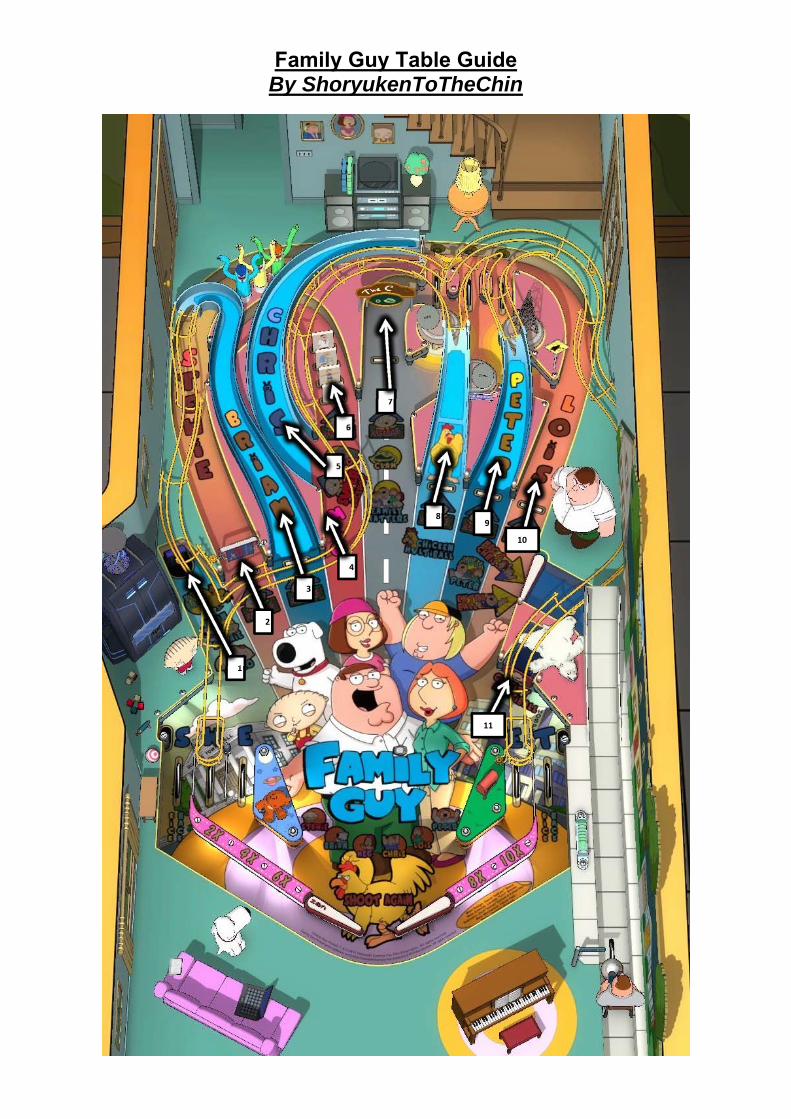
Key to Table Overhead Image –
1. Stewie Sink Hole 2. Stewie Orbit 3. Brian Ramp 4. Meg Targets 5. Chris Ramp 6. Citizen Targets/Orbit 7. Clam Mini - Orbit 8. Chicken Ramp 9. Peter Ramp 10. Lois Orbit 11. Giggity Target/Sink Hole
In this guide when I mention a Ramp, Lane, Hole etc. I will put a number in brackets which will correspond to the above Key, so that you know where on the Table that particular feature is located.

TABLE SPECIFICS
Notice: This Guide is based off of the Zen Pinball 2 (PS4/PS3/Vita) version of the Table on default controls. Some of the controls will be different on the other versions (Pinball FX 2, etc...), but everything
else in the Guide remains the same.
INTRODUCTION Zen Studios has teamed up with Fox to give us an Archer Pinball Table. The Table was released within a pack titled “Balls of Glory” which featured 4 Pinball Tables based on hit animated TV shows, one of those was of course Family Guy. Family Guy Pinball sees you play through various Modes which draw inspiration from many of the shows episodes. The Table incorporates the art style of the cartoon, and various audio works from the Family Guy series itself. The voice work is also ripped straight from the show to add that extra bit of authenticity. I hope my Guide will help you understand the Table better.
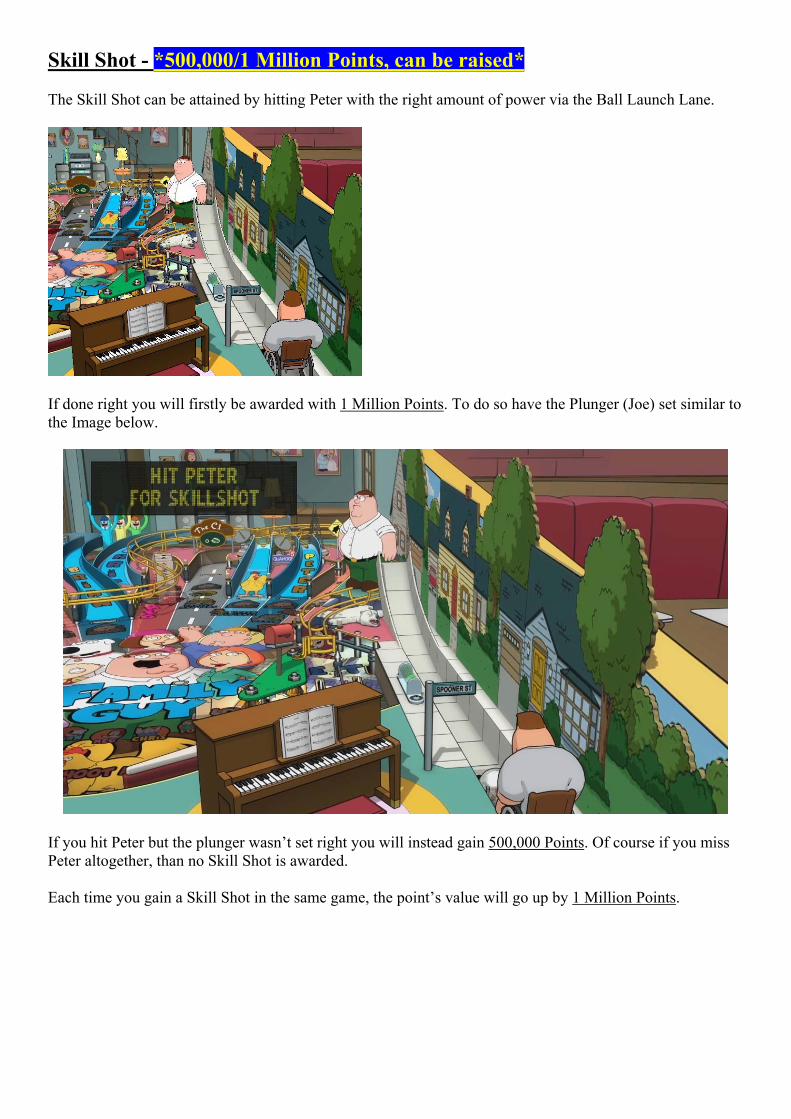
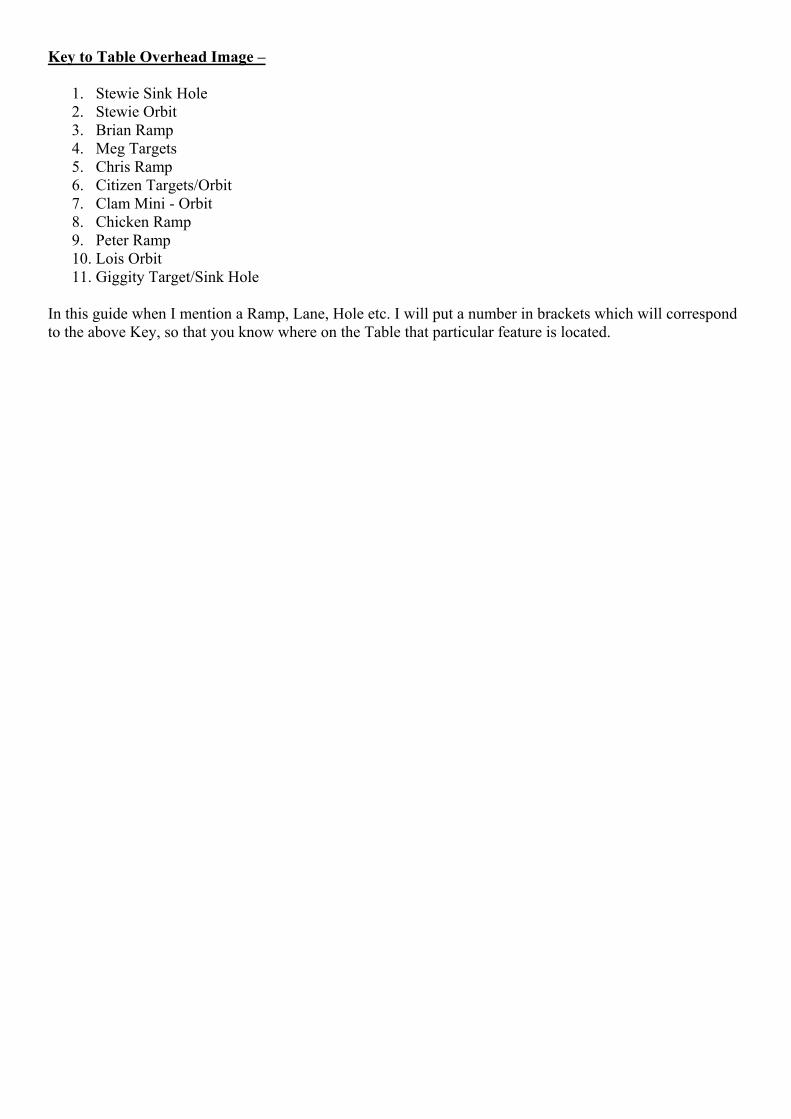
Skill Shot - *500,000/1 Million Points, can be raised* The Skill Shot can be attained by hitting Peter with the right amount of power via the Ball Launch Lane.
If done right you will firstly be awarded with 1 Million Points. To do so have the Plunger (Joe) set similar to the Image below.
If you hit Peter but the plunger wasn’t set right you will instead gain 500,000 Points. Of course if you miss Peter altogether, than no Skill Shot is awarded. Each time you gain a Skill Shot in the same game, the point’s value will go up by 1 Million Points.
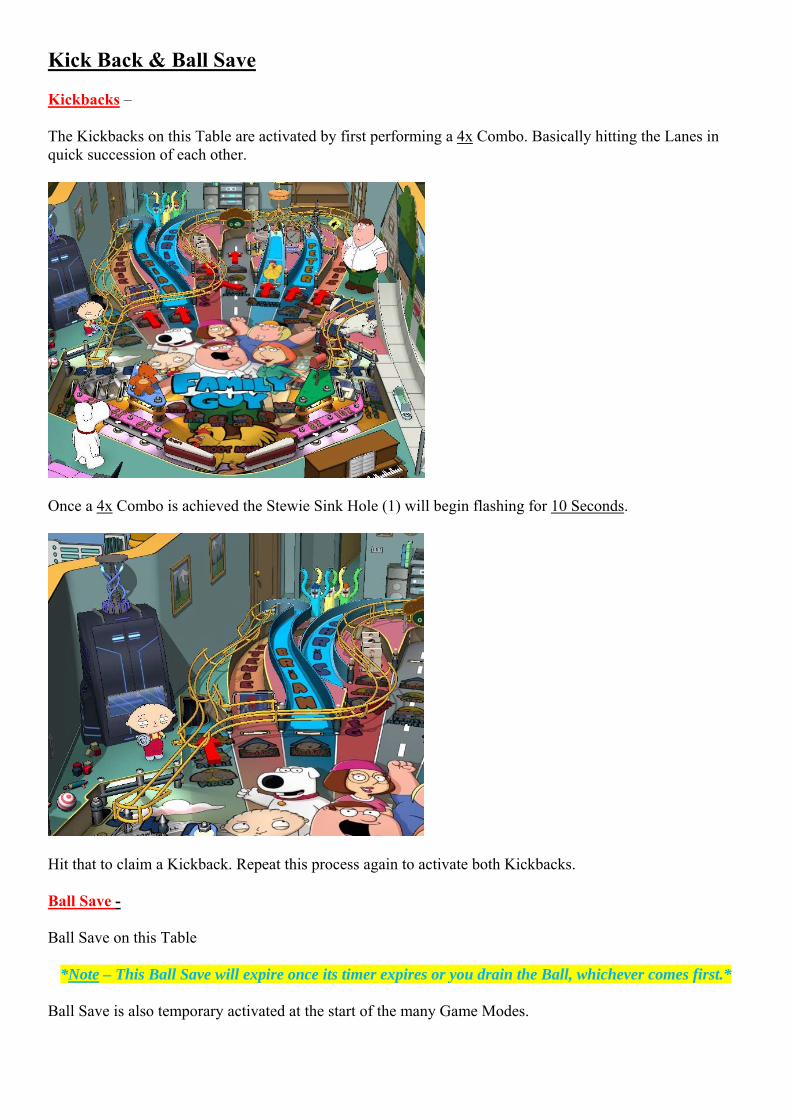
Kick Back & Ball Save Kickbacks – The Kickbacks on this Table are activated by first performing a 4x Combo. Basically hitting the Lanes in quick succession of each other.
Once a 4x Combo is achieved the Stewie Sink Hole (1) will begin flashing for 10 Seconds.
Hit that to claim a Kickback. Repeat this process again to activate both Kickbacks. Ball Save - Ball Save on this Table
*Note – This Ball Save will expire once its timer expires or you drain the Ball, whichever comes first.* Ball Save is also temporary activated at the start of the many Game Modes.
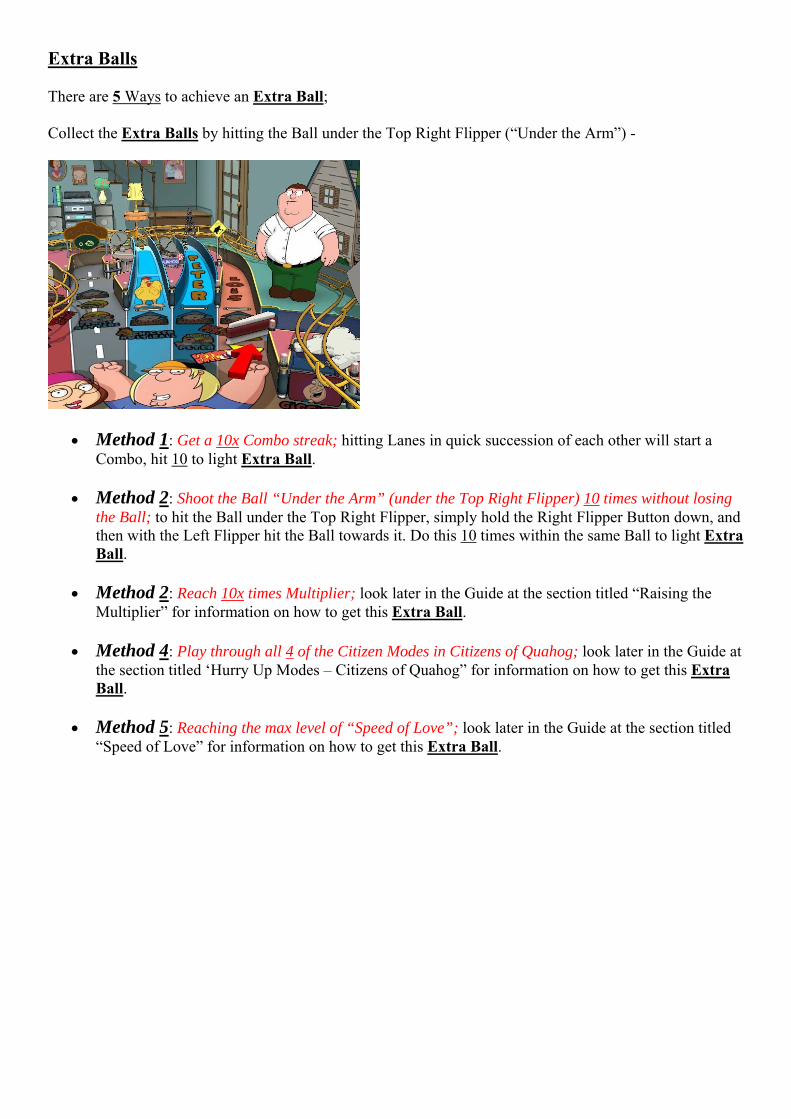
Extra Balls There are 5 Ways to achieve an Extra Ball; Collect the Extra Balls by hitting the Ball under the Top Right Flipper (“Under the Arm”) -
Method 1: Get a 10x Combo streak; hitting Lanes in quick succession of each other will start a Combo, hit 10 to light Extra Ball.
Method 2: Shoot the Ball “Under the Arm” (under the Top Right Flipper) 10 times without losing
the Ball; to hit the Ball under the Top Right Flipper, simply hold the Right Flipper Button down, and then with the Left Flipper hit the Ball towards it. Do this 10 times within the same Ball to light Extra Ball.
Method 2: Reach 10x times Multiplier; look later in the Guide at the section titled “Raising the
Multiplier” for information on how to get this Extra Ball.
Method 4: Play through all 4 of the Citizen Modes in Citizens of Quahog; look later in the Guide at the section titled ‘Hurry Up Modes – Citizens of Quahog” for information on how to get this Extra Ball.
Method 5: Reaching the max level of “Speed of Love”; look later in the Guide at the section titled
“Speed of Love” for information on how to get this Extra Ball.
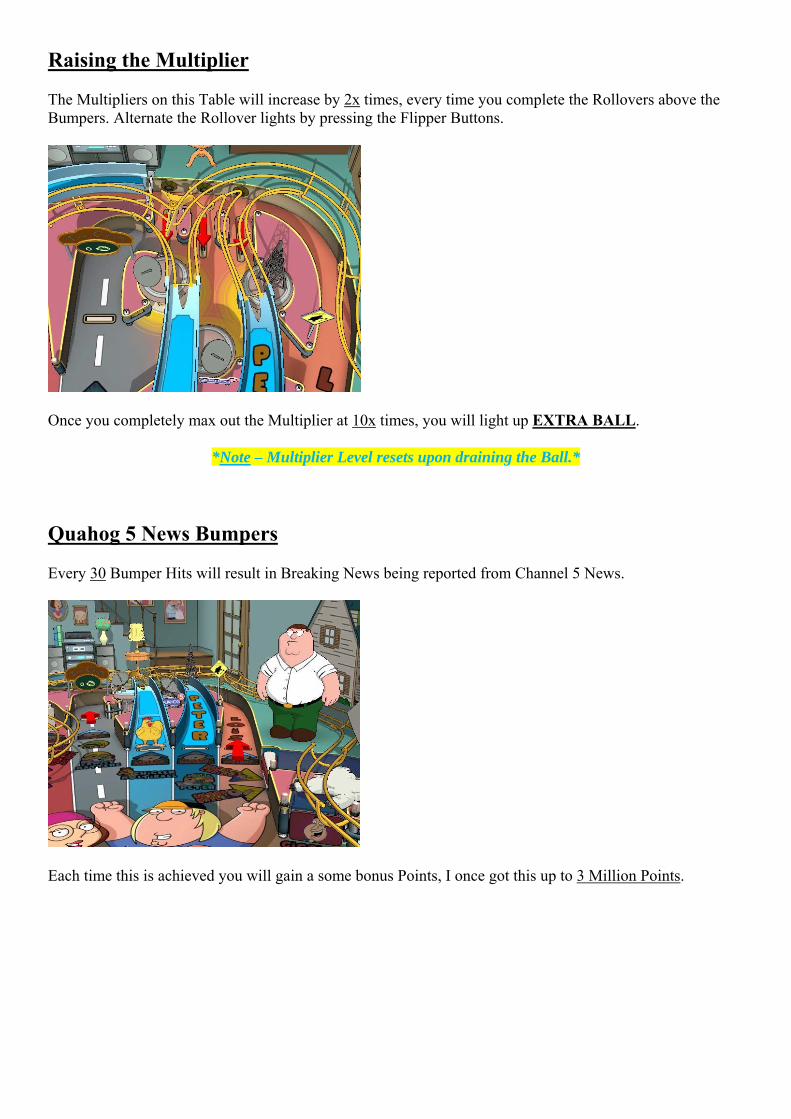
Raising the Multiplier The Multipliers on this Table will increase by 2x times, every time you complete the Rollovers above the Bumpers. Alternate the Rollover lights by pressing the Flipper Buttons.
Once you completely max out the Multiplier at 10x times, you will light up EXTRA BALL.
*Note – Multiplier Level resets upon draining the Ball.*
Quahog 5 News Bumpers Every 30 Bumper Hits will result in Breaking News being reported from Channel 5 News.
Each time this is achieved you will gain a some bonus Points, I once got this up to 3 Million Points.
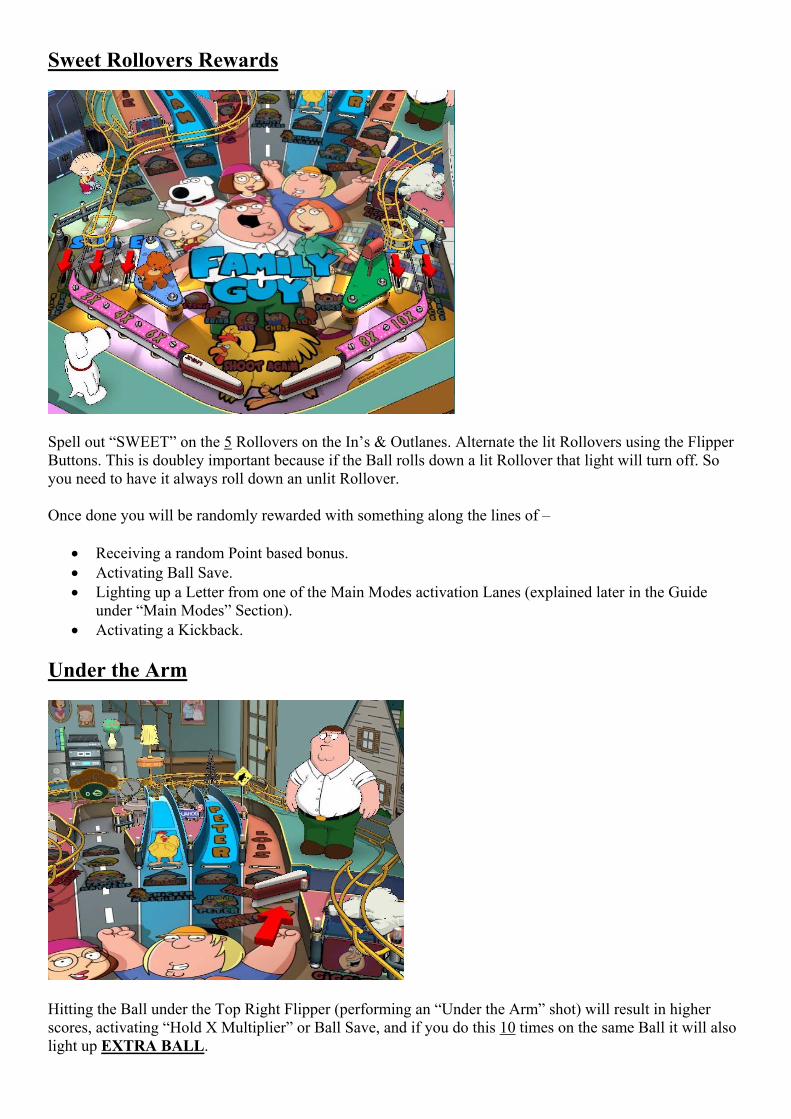
Sweet Rollovers Rewards
Spell out “SWEET” on the 5 Rollovers on the In’s & Outlanes. Alternate the lit Rollovers using the Flipper Buttons. This is doubley important because if the Ball rolls down a lit Rollover that light will turn off. So you need to have it always roll down an unlit Rollover. Once done you will be randomly rewarded with something along the lines of –
Receiving a random Point based bonus. Activating Ball Save. Lighting up a Letter from one of the Main Modes activation Lanes (explained later in the Guide
under “Main Modes” Section). Activating a Kickback.
Under the Arm
Hitting the Ball under the Top Right Flipper (performing an “Under the Arm” shot) will result in higher scores, activating “Hold X Multiplier” or Ball Save, and if you do this 10 times on the same Ball it will also light up EXTRA BALL.
Speed of Love
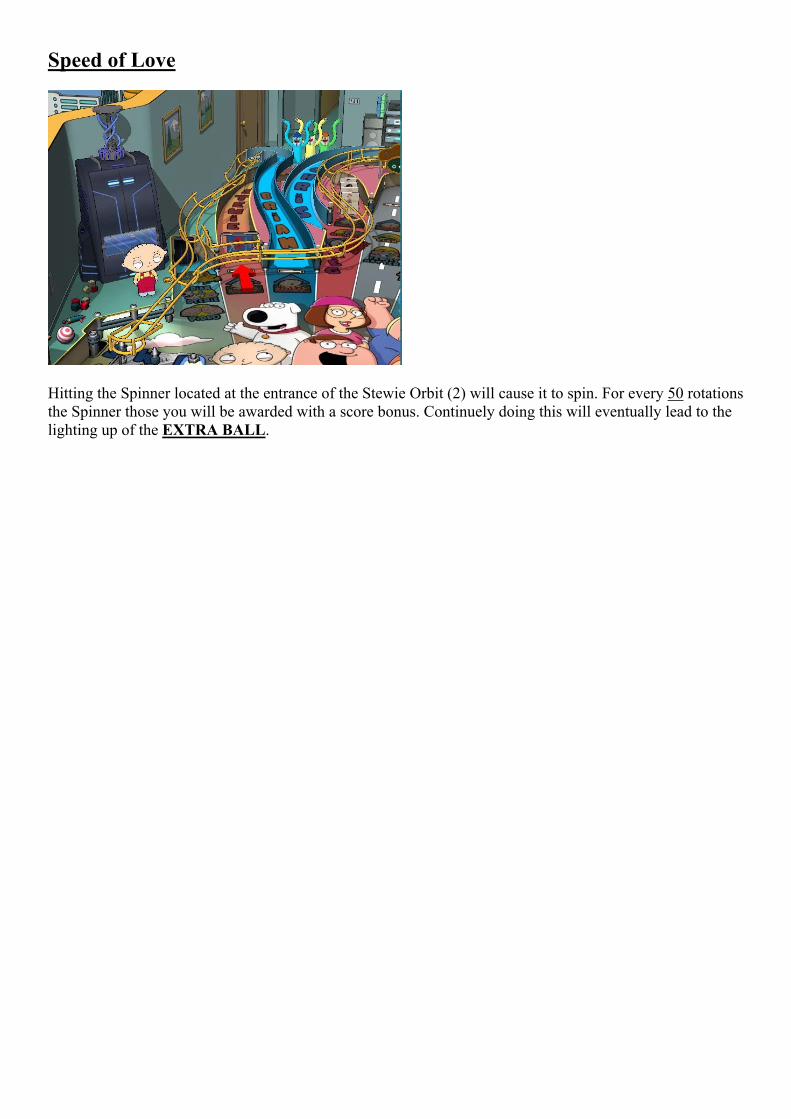
Hitting the Spinner located at the entrance of the Stewie Orbit (2) will cause it to spin. For every 50 rotations the Spinner those you will be awarded with a score bonus. Continuely doing this will eventually lead to the lighting up of the EXTRA BALL.
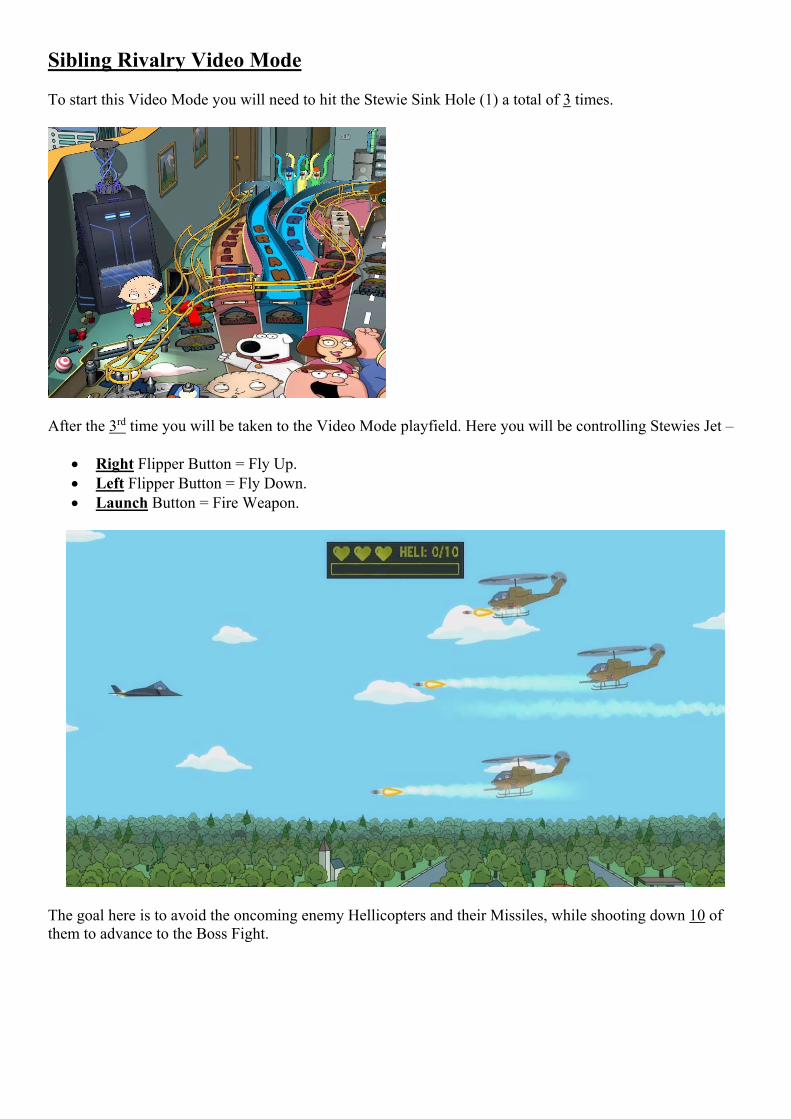
Sibling Rivalry Video Mode To start this Video Mode you will need to hit the Stewie Sink Hole (1) a total of 3 times.
After the 3rd time you will be taken to the Video Mode playfield. Here you will be controlling Stewies Jet –
Right Flipper Button = Fly Up. Left Flipper Button = Fly Down. Launch Button = Fire Weapon.
The goal here is to avoid the oncoming enemy Hellicopters and their Missiles, while shooting down 10 of them to advance to the Boss Fight.
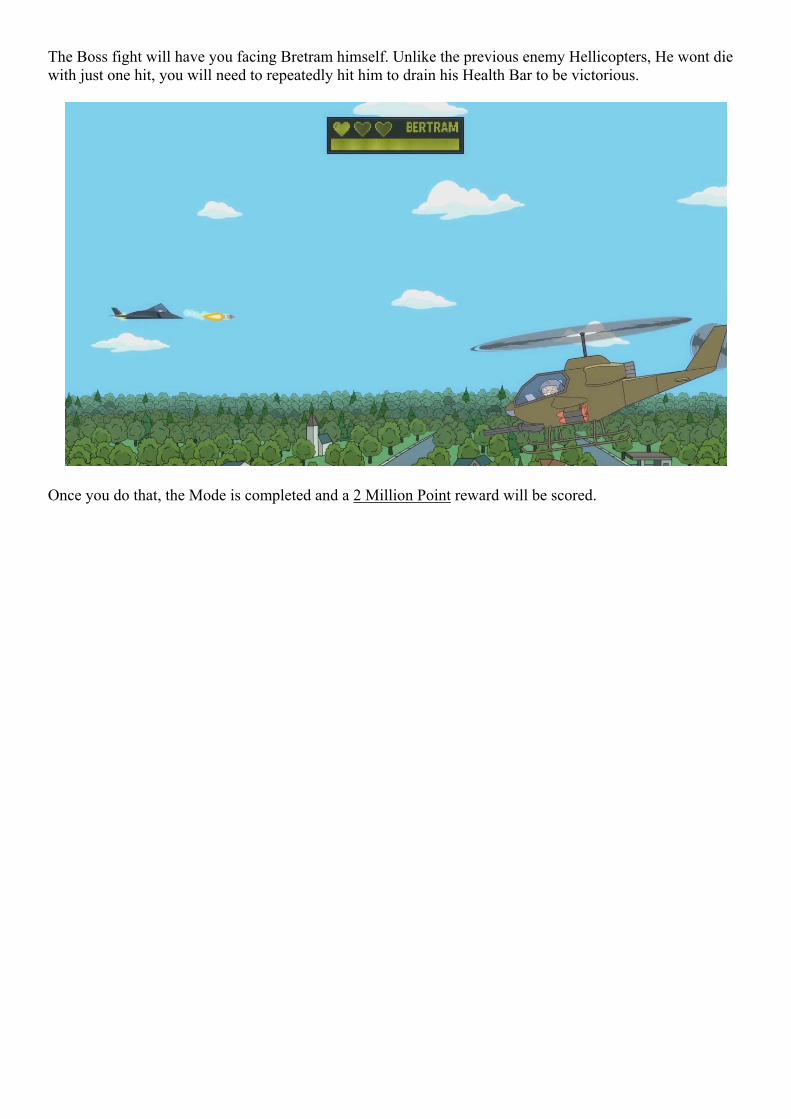
The Boss fight will have you facing Bretram himself. Unlike the previous enemy Hellicopters, He wont die with just one hit, you will need to repeatedly hit him to drain his Health Bar to be victorious.
Once you do that, the Mode is completed and a 2 Million Point reward will be scored.
HurryUpModes
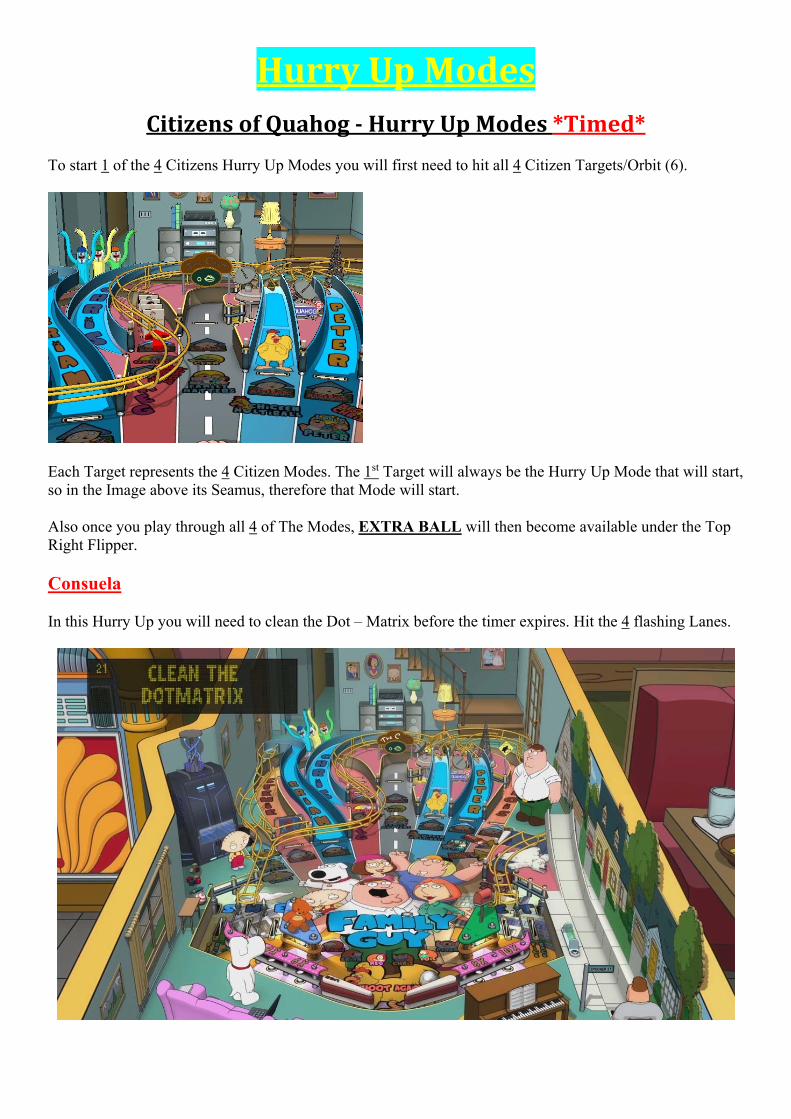
CitizensofQuahog‐HurryUpModes*Timed* To start 1 of the 4 Citizens Hurry Up Modes you will first need to hit all 4 Citizen Targets/Orbit (6).
Each Target represents the 4 Citizen Modes. The 1st Target will always be the Hurry Up Mode that will start, so in the Image above its Seamus, therefore that Mode will start. Also once you play through all 4 of The Modes, EXTRA BALL will then become available under the Top Right Flipper. Consuela In this Hurry Up you will need to clean the Dot – Matrix before the timer expires. Hit the 4 flashing Lanes.
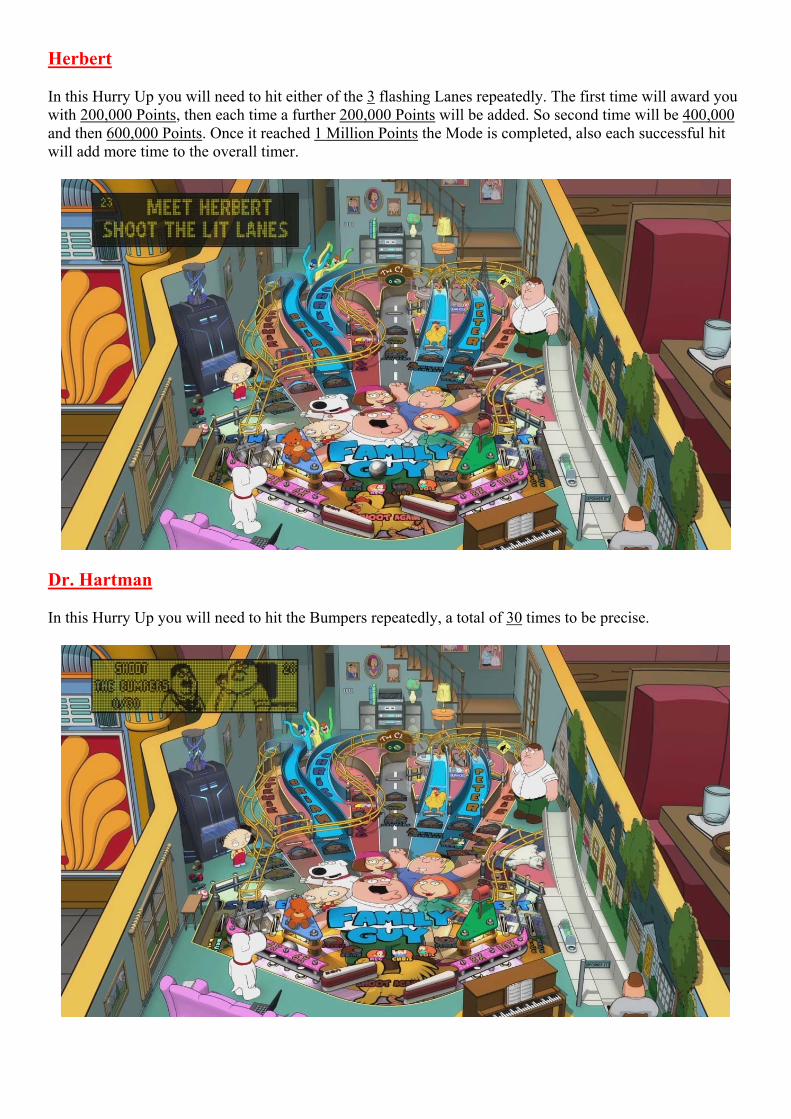
Herbert In this Hurry Up you will need to hit either of the 3 flashing Lanes repeatedly. The first time will award you with 200,000 Points, then each time a further 200,000 Points will be added. So second time will be 400,000 and then 600,000 Points. Once it reached 1 Million Points the Mode is completed, also each successful hit will add more time to the overall timer.
Dr. Hartman In this Hurry Up you will need to hit the Bumpers repeatedly, a total of 30 times to be precise.
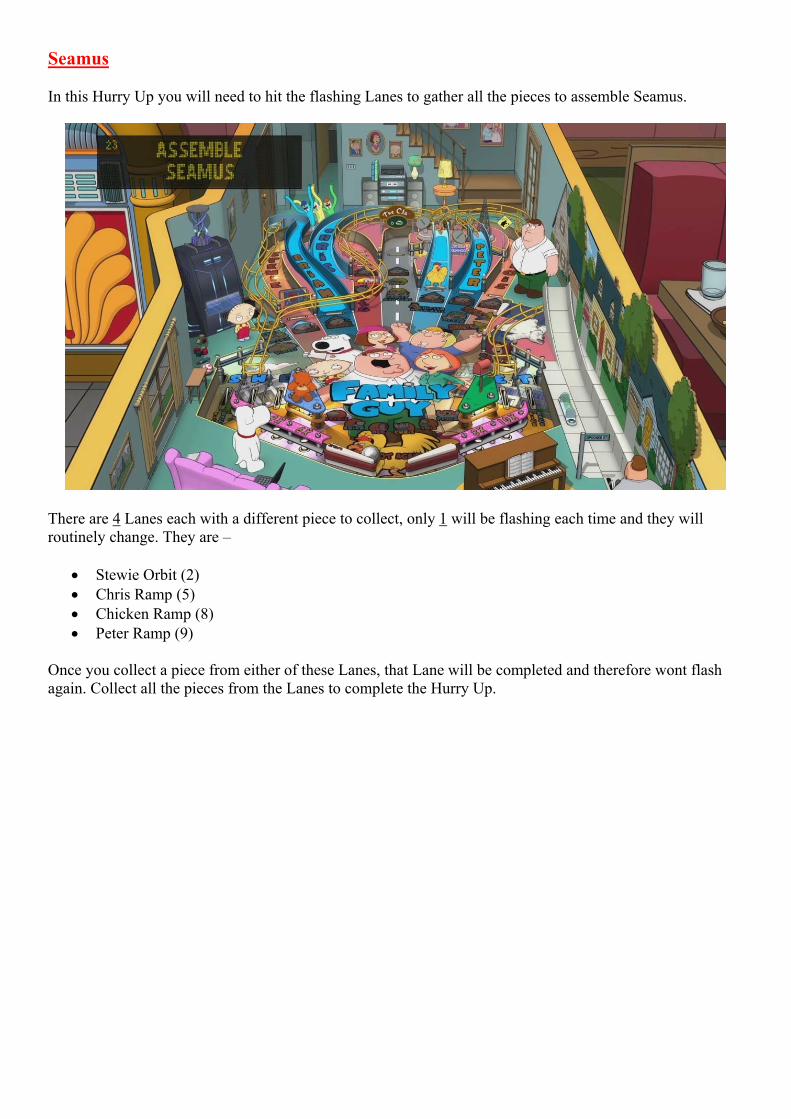
Seamus In this Hurry Up you will need to hit the flashing Lanes to gather all the pieces to assemble Seamus.
There are 4 Lanes each with a different piece to collect, only 1 will be flashing each time and they will routinely change. They are –
Stewie Orbit (2) Chris Ramp (5) Chicken Ramp (8) Peter Ramp (9)
Once you collect a piece from either of these Lanes, that Lane will be completed and therefore wont flash again. Collect all the pieces from the Lanes to complete the Hurry Up.
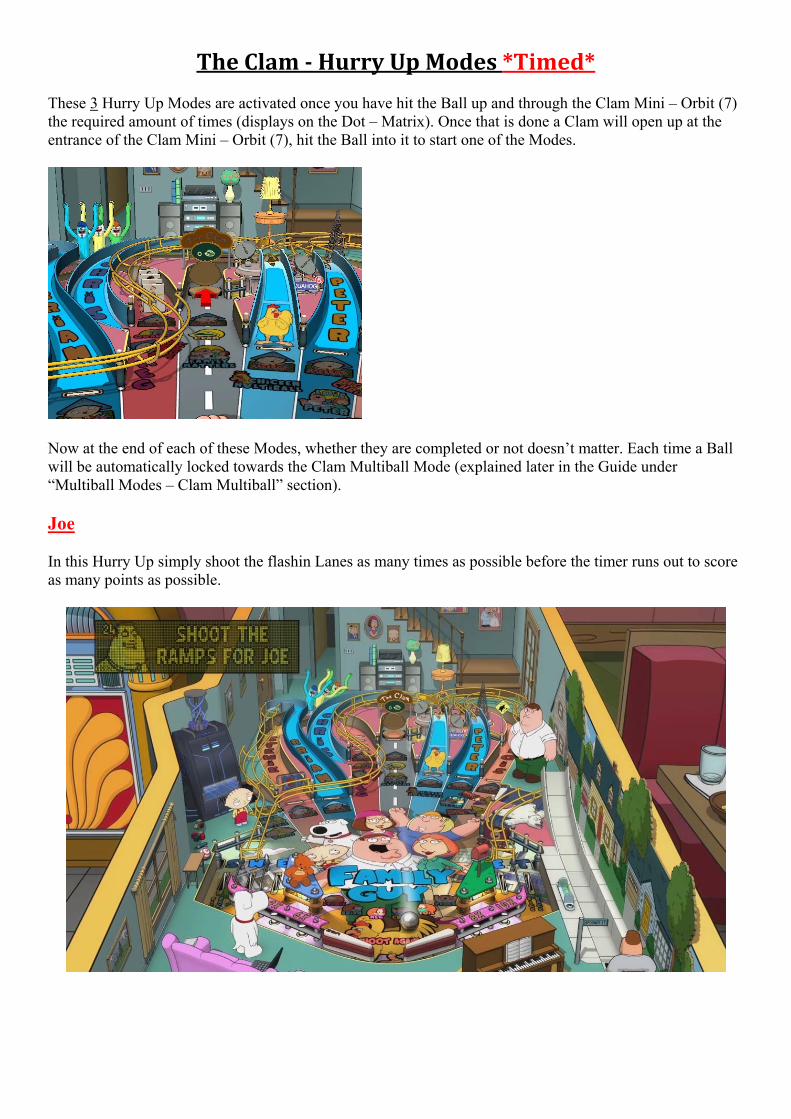
TheClam‐HurryUpModes*Timed* These 3 Hurry Up Modes are activated once you have hit the Ball up and through the Clam Mini – Orbit (7) the required amount of times (displays on the Dot – Matrix). Once that is done a Clam will open up at the entrance of the Clam Mini – Orbit (7), hit the Ball into it to start one of the Modes.
Now at the end of each of these Modes, whether they are completed or not doesn’t matter. Each time a Ball will be automatically locked towards the Clam Multiball Mode (explained later in the Guide under “Multiball Modes – Clam Multiball” section). Joe In this Hurry Up simply shoot the flashin Lanes as many times as possible before the timer runs out to score as many points as possible.
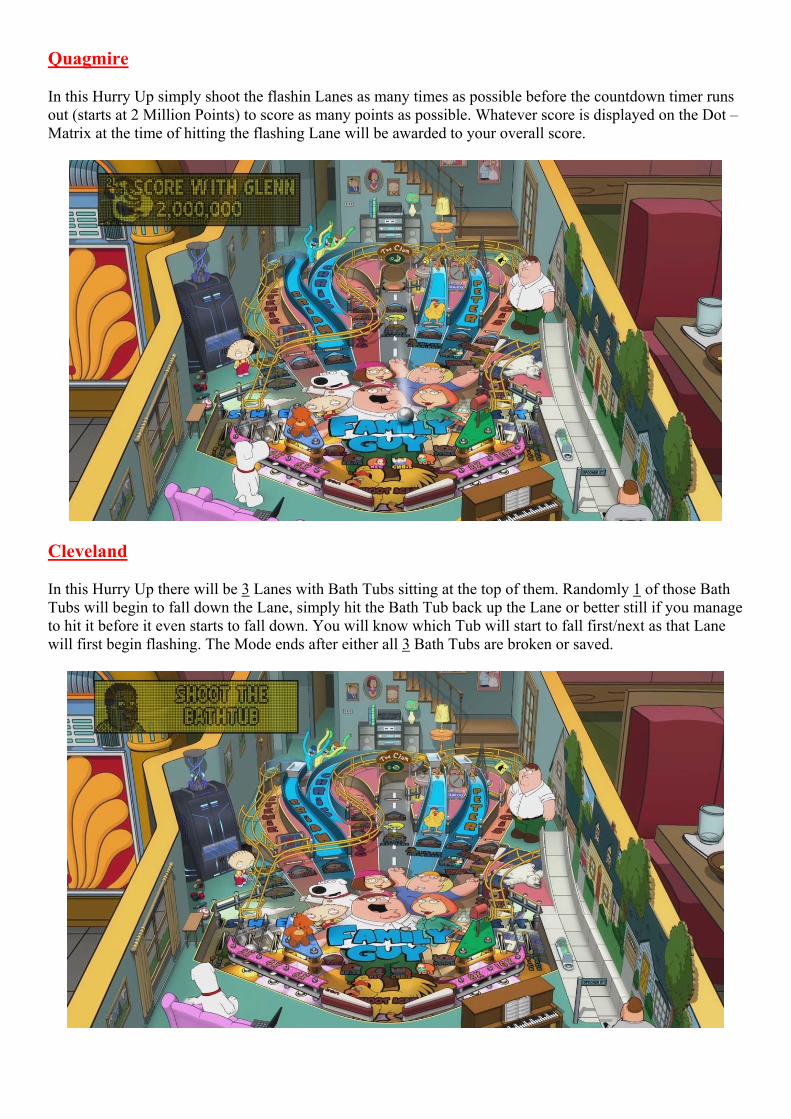
Quagmire In this Hurry Up simply shoot the flashin Lanes as many times as possible before the countdown timer runs out (starts at 2 Million Points) to score as many points as possible. Whatever score is displayed on the Dot – Matrix at the time of hitting the flashing Lane will be awarded to your overall score.
Cleveland In this Hurry Up there will be 3 Lanes with Bath Tubs sitting at the top of them. Randomly 1 of those Bath Tubs will begin to fall down the Lane, simply hit the Bath Tub back up the Lane or better still if you manage to hit it before it even starts to fall down. You will know which Tub will start to fall first/next as that Lane will first begin flashing. The Mode ends after either all 3 Bath Tubs are broken or saved.
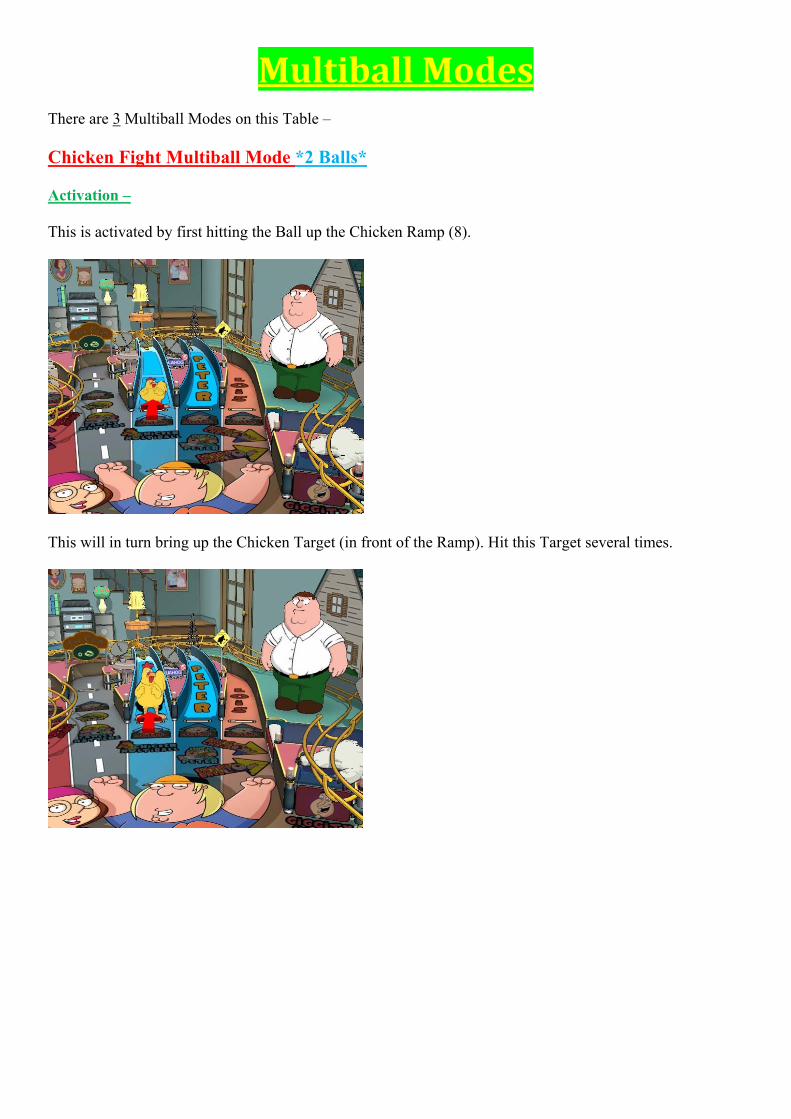
MultiballModes There are 3 Multiball Modes on this Table – Chicken Fight Multiball Mode *2 Balls* Activation – This is activated by first hitting the Ball up the Chicken Ramp (8).
This will in turn bring up the Chicken Target (in front of the Ramp). Hit this Target several times.
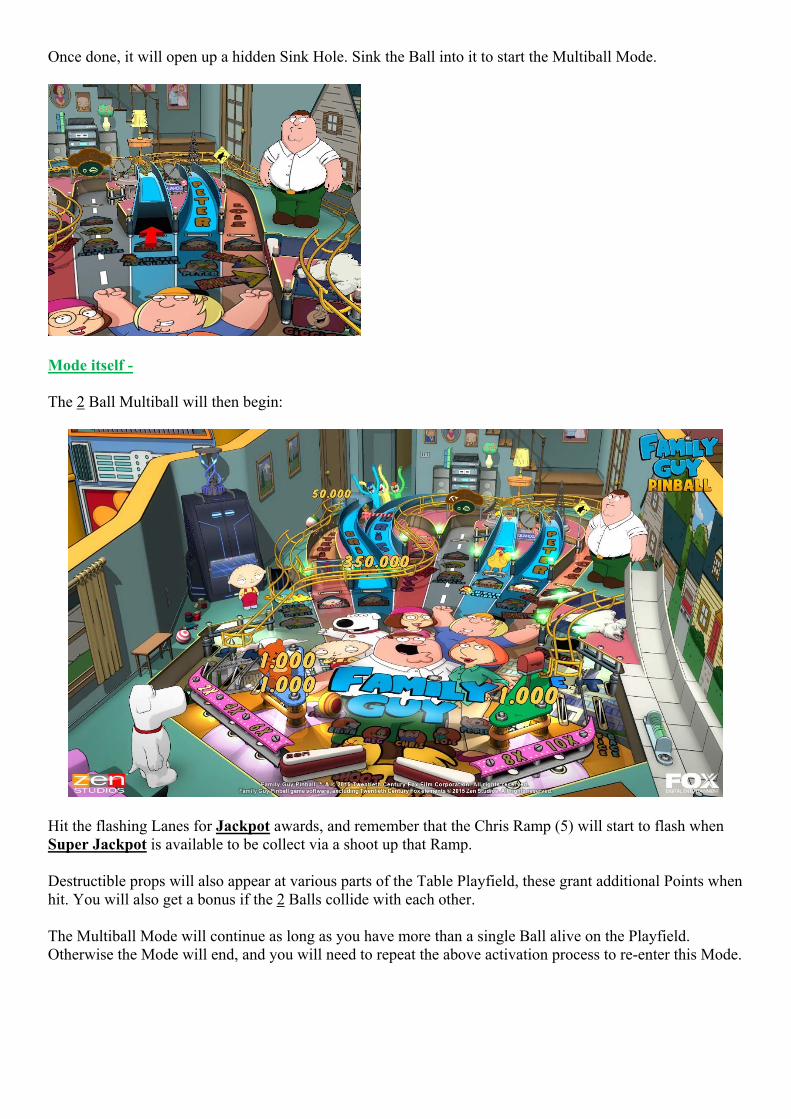
Once done, it will open up a hidden Sink Hole. Sink the Ball into it to start the Multiball Mode.
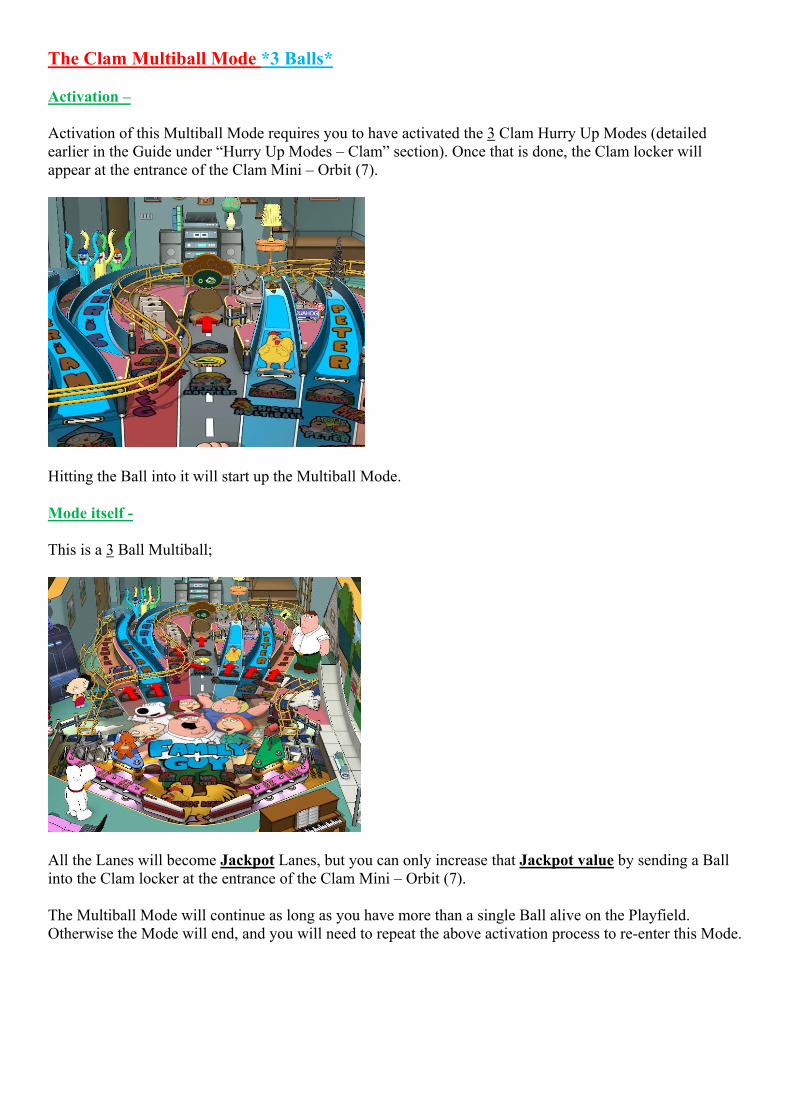
Mode itself - The 2 Ball Multiball will then begin:
Hit the flashing Lanes for Jackpot awards, and remember that the Chris Ramp (5) will start to flash when Super Jackpot is available to be collect via a shoot up that Ramp. Destructible props will also appear at various parts of the Table Playfield, these grant additional Points when hit. You will also get a bonus if the 2 Balls collide with each other. The Multiball Mode will continue as long as you have more than a single Ball alive on the Playfield. Otherwise the Mode will end, and you will need to repeat the above activation process to re-enter this Mode.
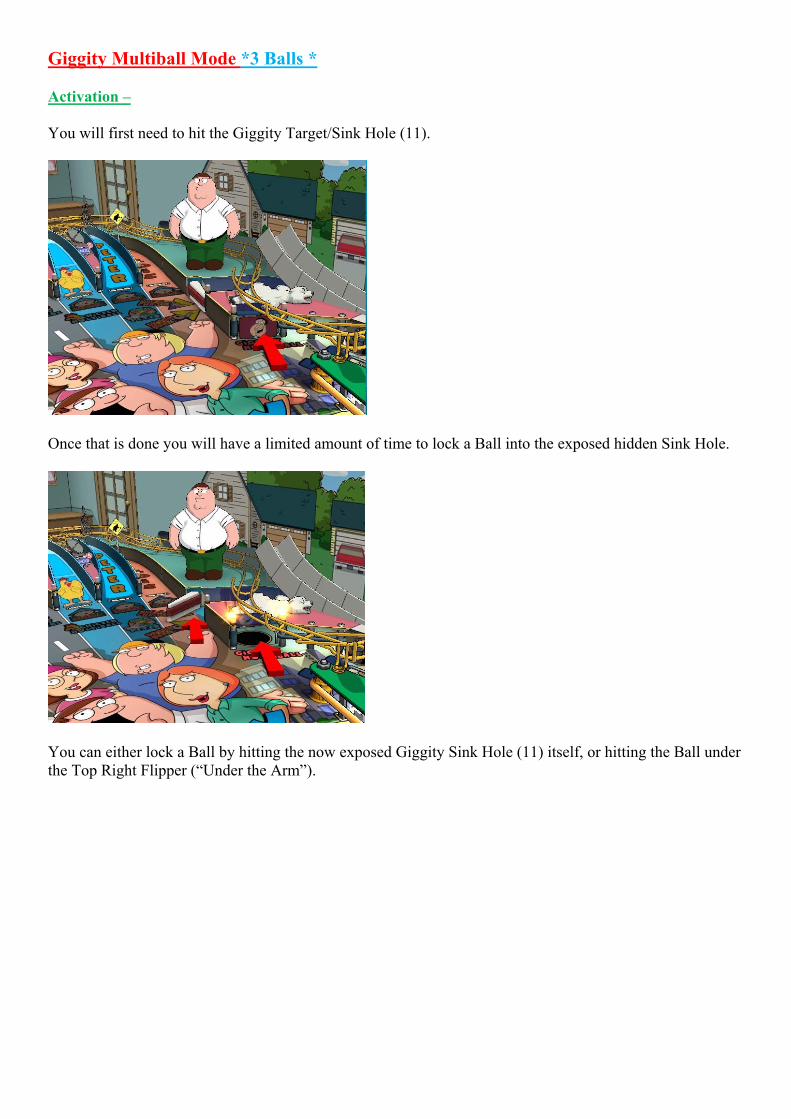
The Clam Multiball Mode *3 Balls* Activation – Activation of this Multiball Mode requires you to have activated the 3 Clam Hurry Up Modes (detailed earlier in the Guide under “Hurry Up Modes – Clam” section). Once that is done, the Clam locker will appear at the entrance of the Clam Mini – Orbit (7).
Hitting the Ball into it will start up the Multiball Mode. Mode itself - This is a 3 Ball Multiball;
All the Lanes will become Jackpot Lanes, but you can only increase that Jackpot value by sending a Ball into the Clam locker at the entrance of the Clam Mini – Orbit (7). The Multiball Mode will continue as long as you have more than a single Ball alive on the Playfield. Otherwise the Mode will end, and you will need to repeat the above activation process to re-enter this Mode.
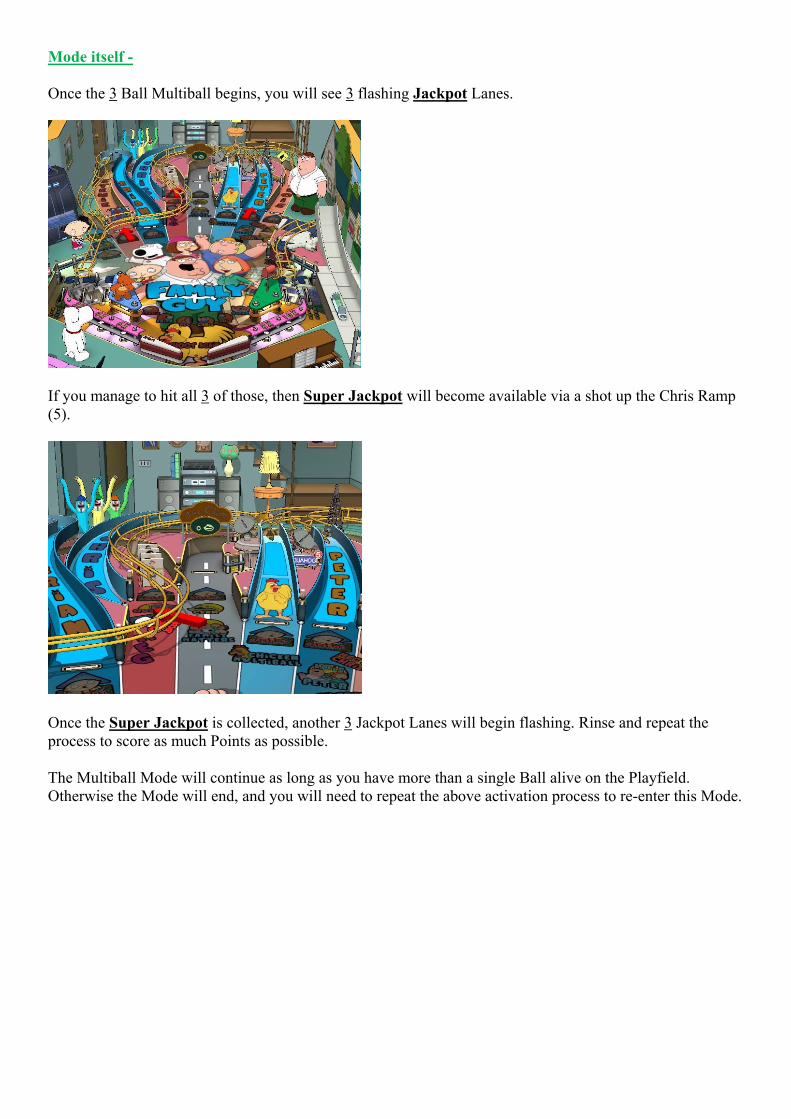
Giggity Multiball Mode *3 Balls * Activation – You will first need to hit the Giggity Target/Sink Hole (11).
Once that is done you will have a limited amount of time to lock a Ball into the exposed hidden Sink Hole.
You can either lock a Ball by hitting the now exposed Giggity Sink Hole (11) itself, or hitting the Ball under the Top Right Flipper (“Under the Arm”).
Mode itself - Once the 3 Ball Multiball begins, you will see 3 flashing Jackpot Lanes.
If you manage to hit all 3 of those, then Super Jackpot will become available via a shot up the Chris Ramp (5).
Once the Super Jackpot is collected, another 3 Jackpot Lanes will begin flashing. Rinse and repeat the process to score as much Points as possible. The Multiball Mode will continue as long as you have more than a single Ball alive on the Playfield. Otherwise the Mode will end, and you will need to repeat the above activation process to re-enter this Mode.
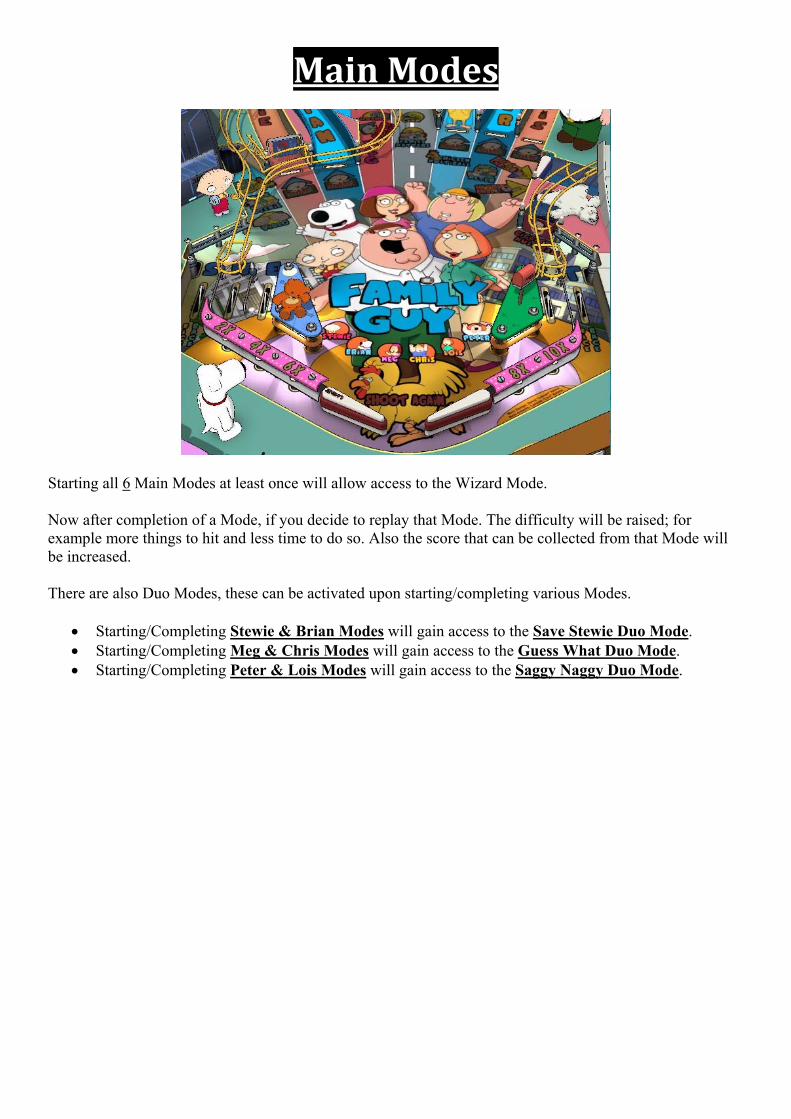
MainModes
Starting all 6 Main Modes at least once will allow access to the Wizard Mode. Now after completion of a Mode, if you decide to replay that Mode. The difficulty will be raised; for example more things to hit and less time to do so. Also the score that can be collected from that Mode will be increased. There are also Duo Modes, these can be activated upon starting/completing various Modes.
Starting/Completing Stewie & Brian Modes will gain access to the Save Stewie Duo Mode. Starting/Completing Meg & Chris Modes will gain access to the Guess What Duo Mode. Starting/Completing Peter & Lois Modes will gain access to the Saggy Naggy Duo Mode.
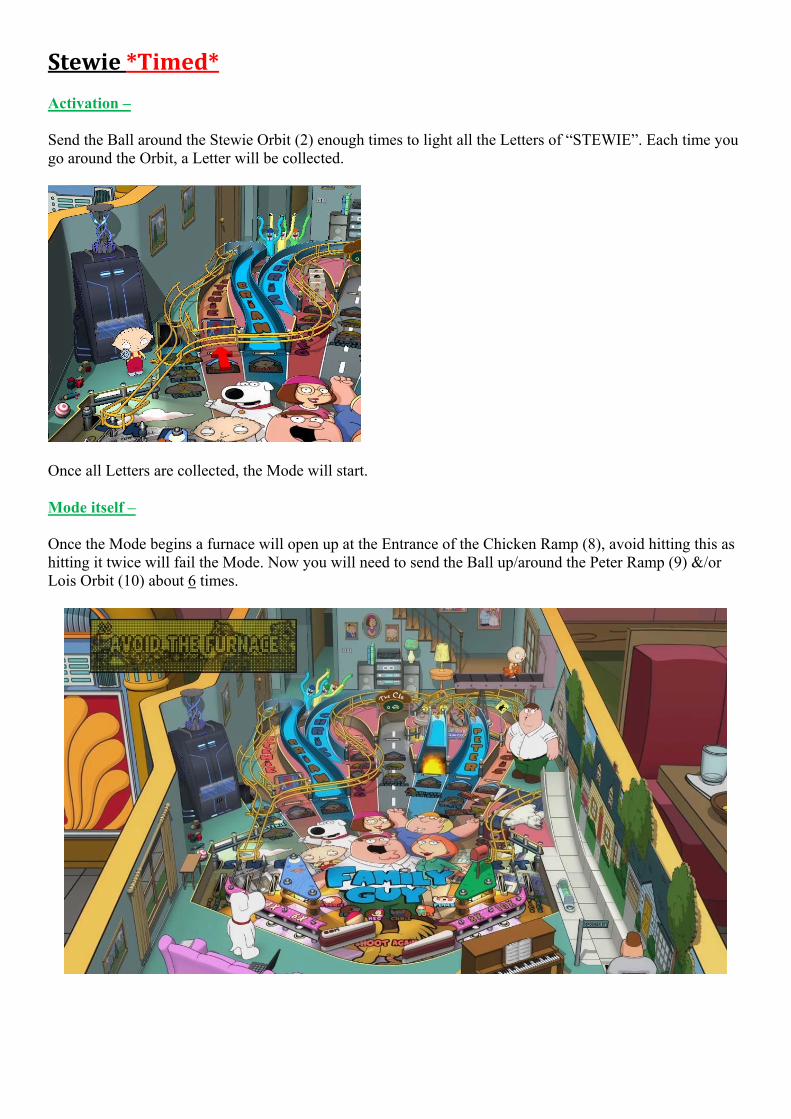
Stewie*Timed* Activation – Send the Ball around the Stewie Orbit (2) enough times to light all the Letters of “STEWIE”. Each time you go around the Orbit, a Letter will be collected.
Once all Letters are collected, the Mode will start. Mode itself – Once the Mode begins a furnace will open up at the Entrance of the Chicken Ramp (8), avoid hitting this as hitting it twice will fail the Mode. Now you will need to send the Ball up/around the Peter Ramp (9) &/or Lois Orbit (10) about 6 times.
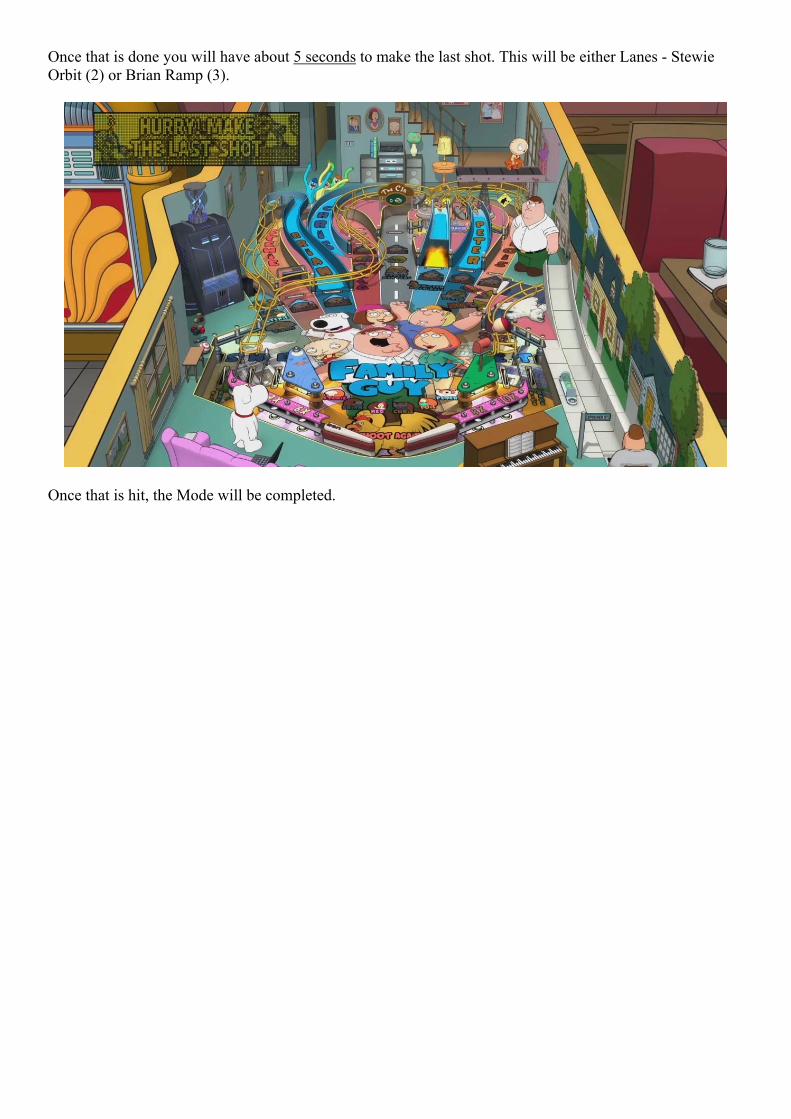
Once that is done you will have about 5 seconds to make the last shot. This will be either Lanes - Stewie Orbit (2) or Brian Ramp (3).
Once that is hit, the Mode will be completed.
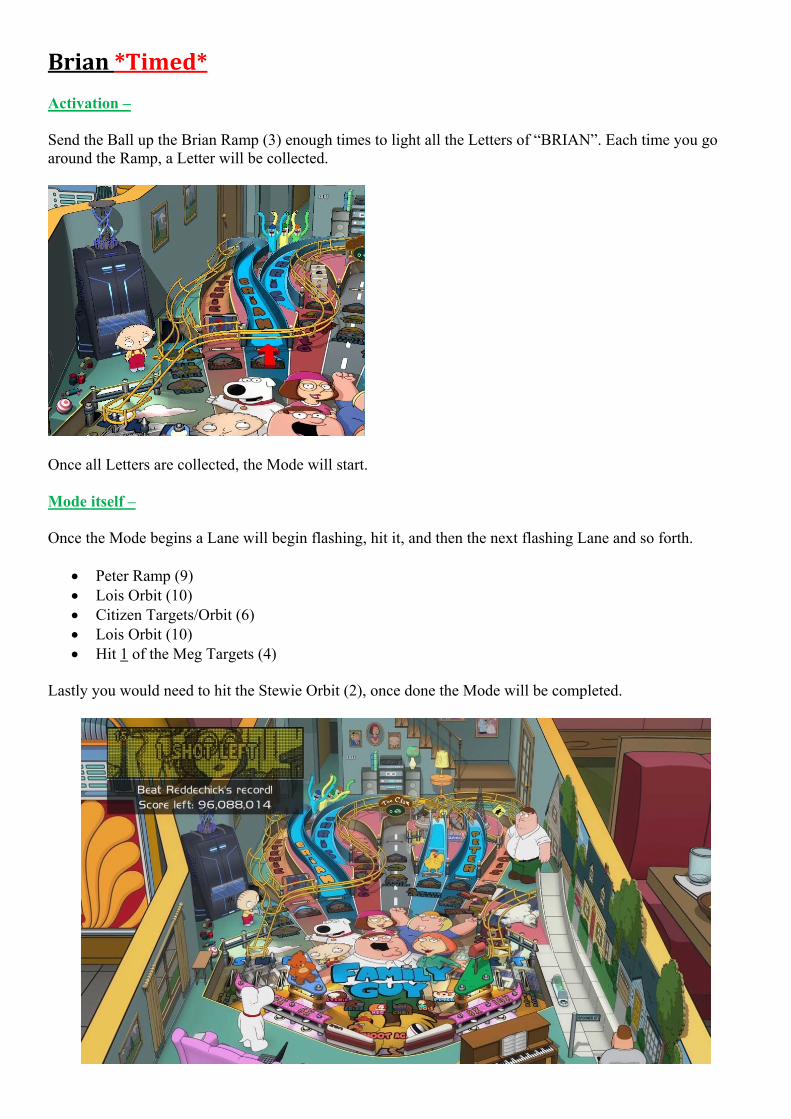
Brian*Timed* Activation – Send the Ball up the Brian Ramp (3) enough times to light all the Letters of “BRIAN”. Each time you go around the Ramp, a Letter will be collected.
Once all Letters are collected, the Mode will start. Mode itself – Once the Mode begins a Lane will begin flashing, hit it, and then the next flashing Lane and so forth.
Peter Ramp (9) Lois Orbit (10) Citizen Targets/Orbit (6) Lois Orbit (10) Hit 1 of the Meg Targets (4)
Lastly you would need to hit the Stewie Orbit (2), once done the Mode will be completed.
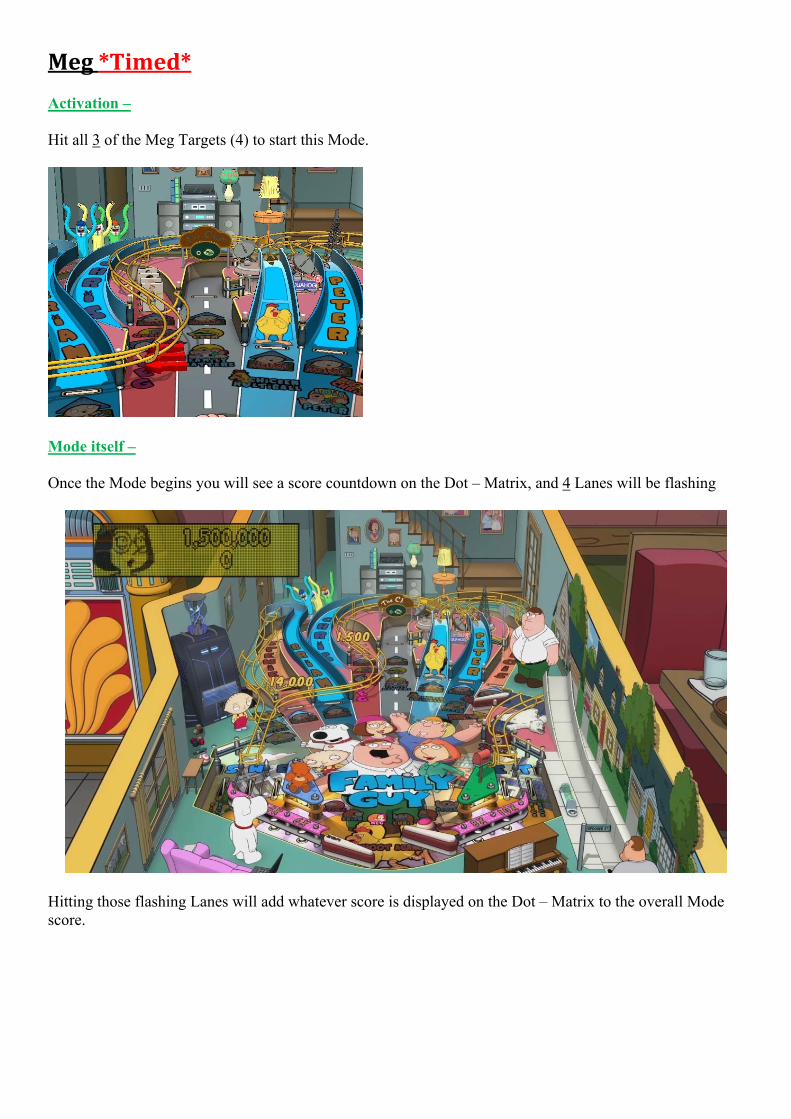
Meg*Timed* Activation – Hit all 3 of the Meg Targets (4) to start this Mode.
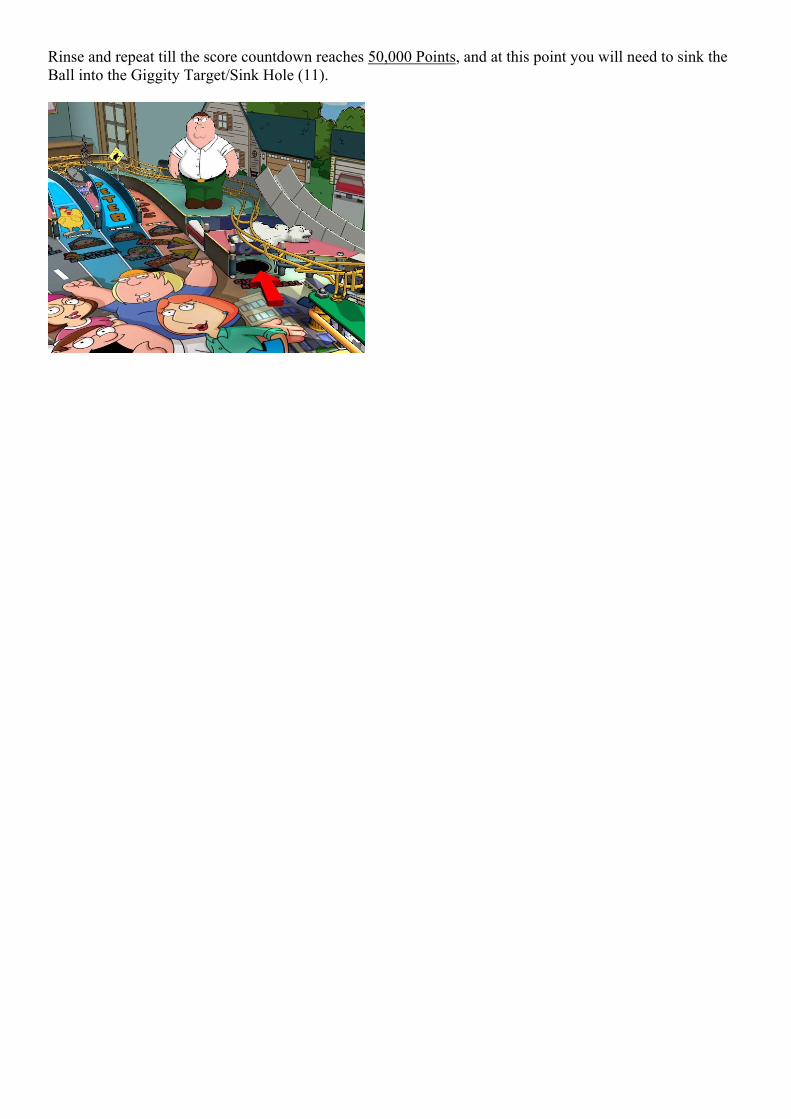
Mode itself – Once the Mode begins you will see a score countdown on the Dot – Matrix, and 4 Lanes will be flashing
Hitting those flashing Lanes will add whatever score is displayed on the Dot – Matrix to the overall Mode score.
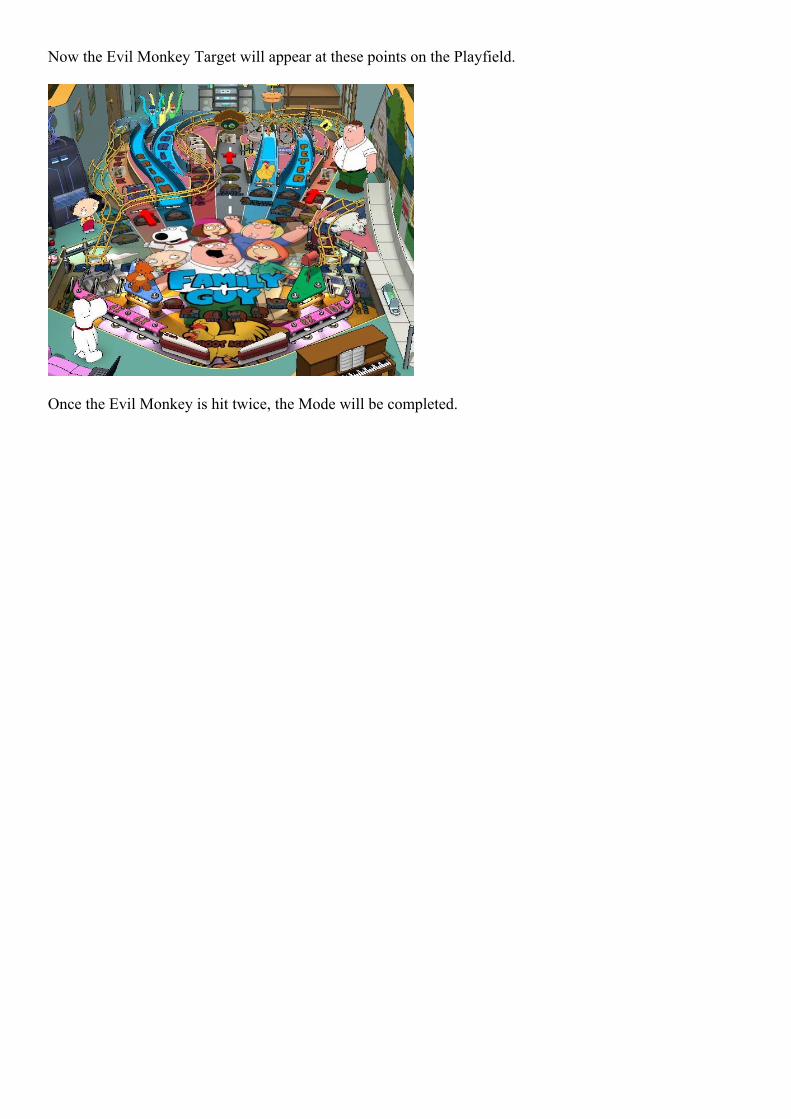
Rinse and repeat till the score countdown reaches 50,000 Points, and at this point you will need to sink the Ball into the Giggity Target/Sink Hole (11).

Chris*Timed* Activation – Send the Ball up the Chris Ramp (5) enough times to light all the Letters of “CHRIS”. Each time you go around the Ramp, a Letter will be collected.
Once all Letters are collected, the Mode will start. Mode itself – To complete this Mode you will need to hit the Evil Monkey Target a total of 2 times. This can be done by hitting the Evil Monkey Target when he pops up, or by hitting the flashing Lanes to set up traps to catch him.
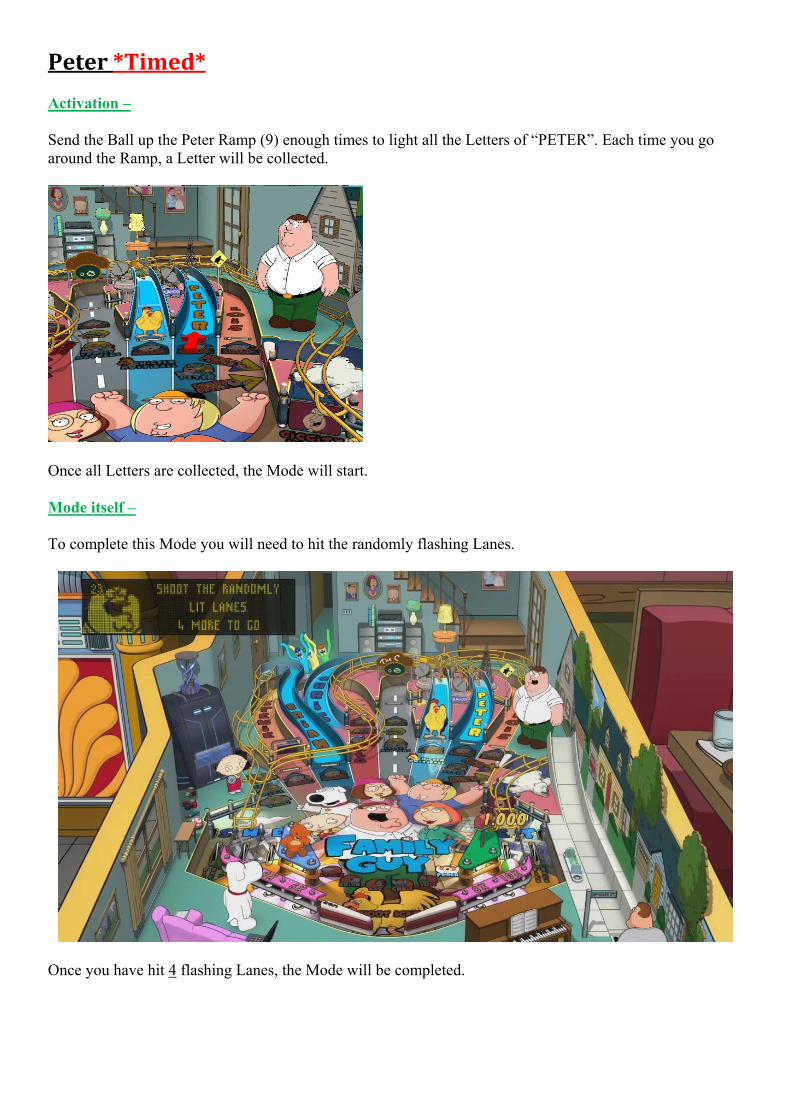
Now the Evil Monkey Target will appear at these points on the Playfield.
Once the Evil Monkey is hit twice, the Mode will be completed.
Peter*Timed* Activation – Send the Ball up the Peter Ramp (9) enough times to light all the Letters of “PETER”. Each time you go around the Ramp, a Letter will be collected.
Once all Letters are collected, the Mode will start. Mode itself – To complete this Mode you will need to hit the randomly flashing Lanes.
Once you have hit 4 flashing Lanes, the Mode will be completed.
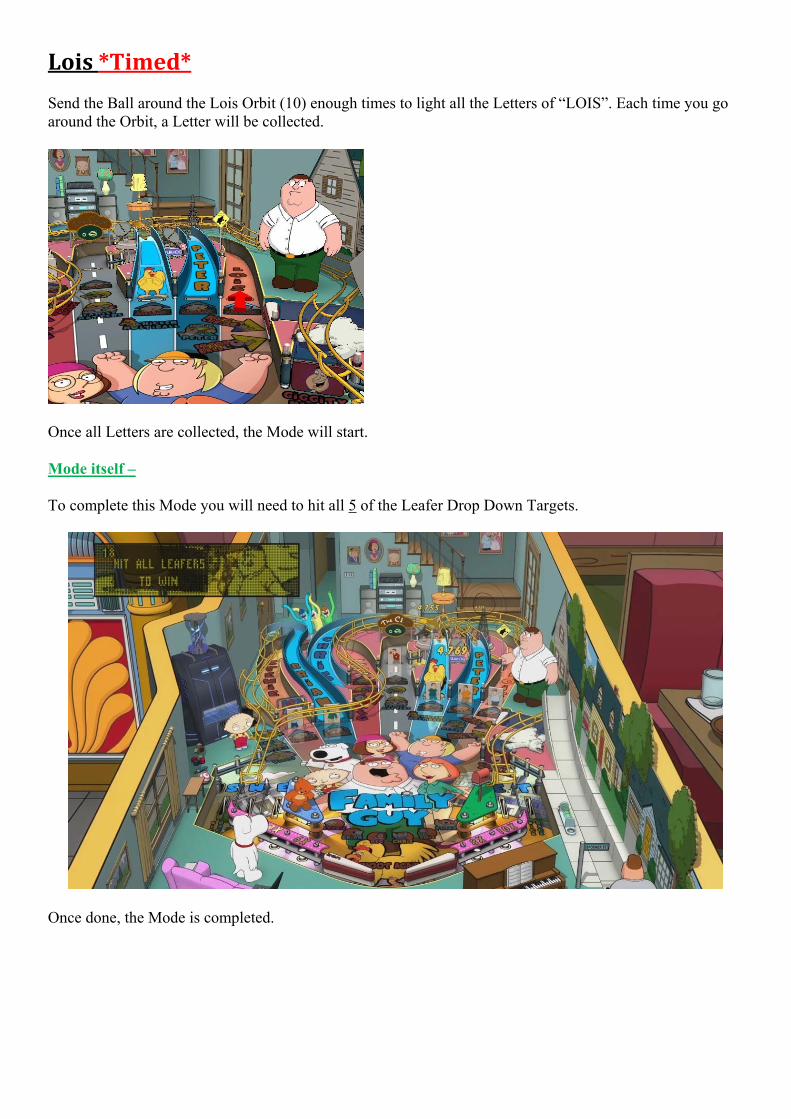
Lois*Timed* Send the Ball around the Lois Orbit (10) enough times to light all the Letters of “LOIS”. Each time you go around the Orbit, a Letter will be collected.
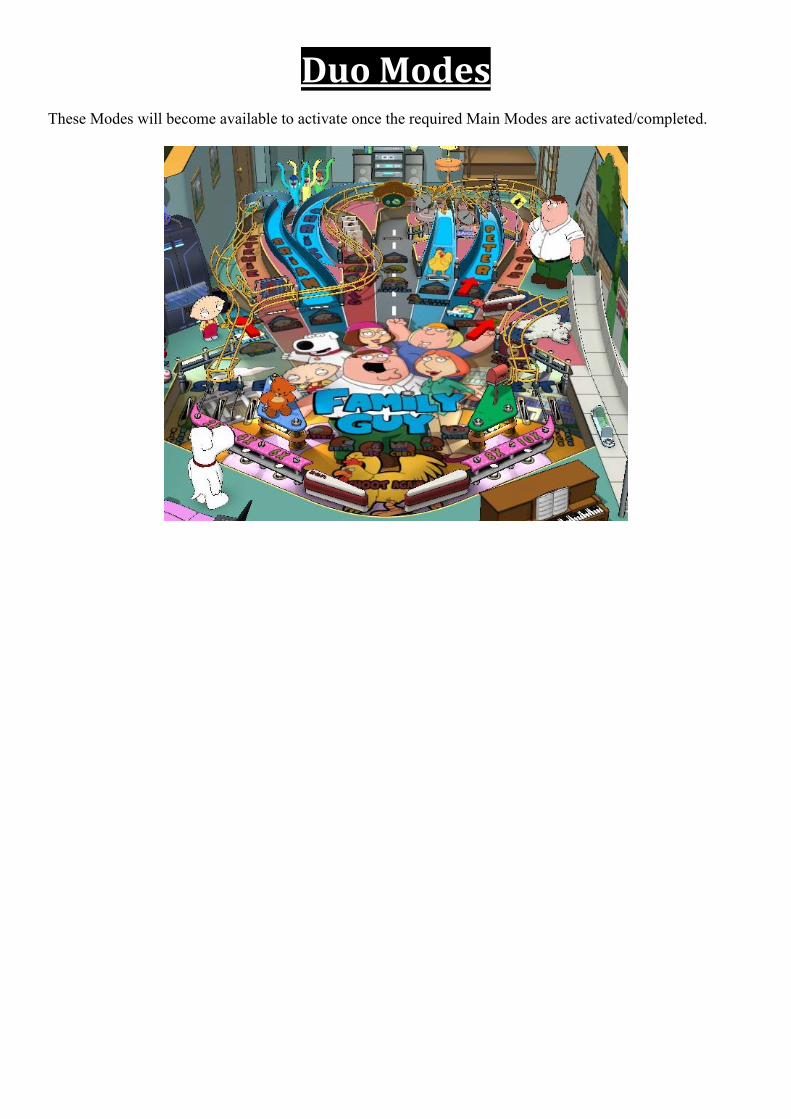
Once all Letters are collected, the Mode will start. Mode itself – To complete this Mode you will need to hit all 5 of the Leafer Drop Down Targets.
Once done, the Mode is completed.
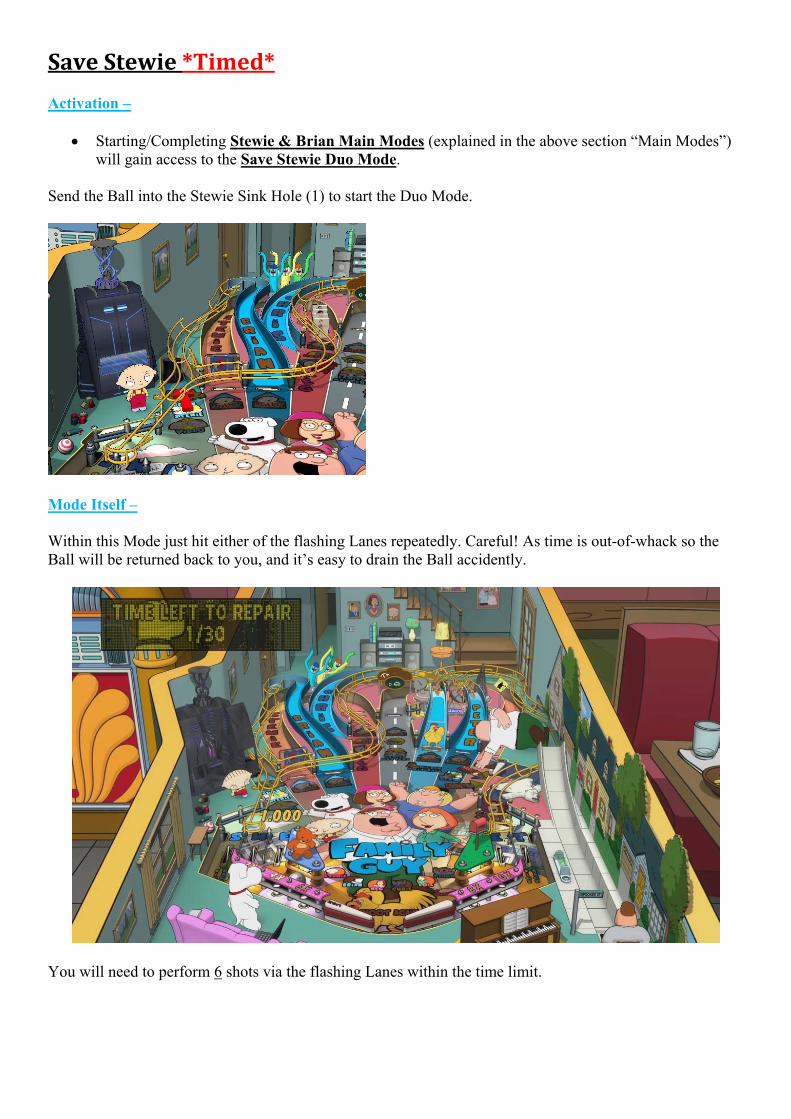
DuoModes These Modes will become available to activate once the required Main Modes are activated/completed.
SaveStewie*Timed* Activation –
Starting/Completing Stewie & Brian Main Modes (explained in the above section “Main Modes”) will gain access to the Save Stewie Duo Mode.
Send the Ball into the Stewie Sink Hole (1) to start the Duo Mode.
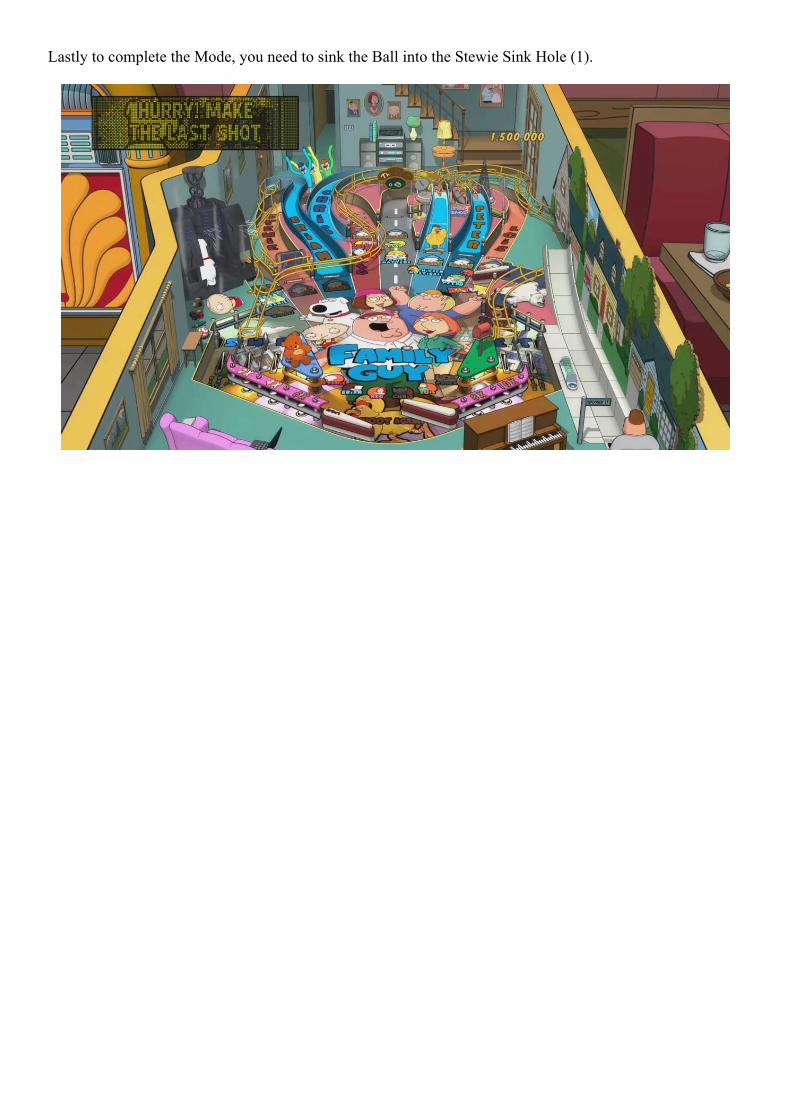
Mode Itself – Within this Mode just hit either of the flashing Lanes repeatedly. Careful! As time is out-of-whack so the Ball will be returned back to you, and it’s easy to drain the Ball accidently.
You will need to perform 6 shots via the flashing Lanes within the time limit.
Lastly to complete the Mode, you need to sink the Ball into the Stewie Sink Hole (1).

GuessWhat*Timed* Activation –
Starting/Completing Meg & Chris Main Modes (explained in the above section “Main Modes”) will gain access to the Guess What Duo Mode.
Start this Mode by sending the Ball under the Top Right Flipper (“Under the Arm”).
Mode Itself – Upon starting the Mode, both the Stewie Orbit (2) & Brian Ramp (3) will be flashing. Hit either of them to move onto the next objective.
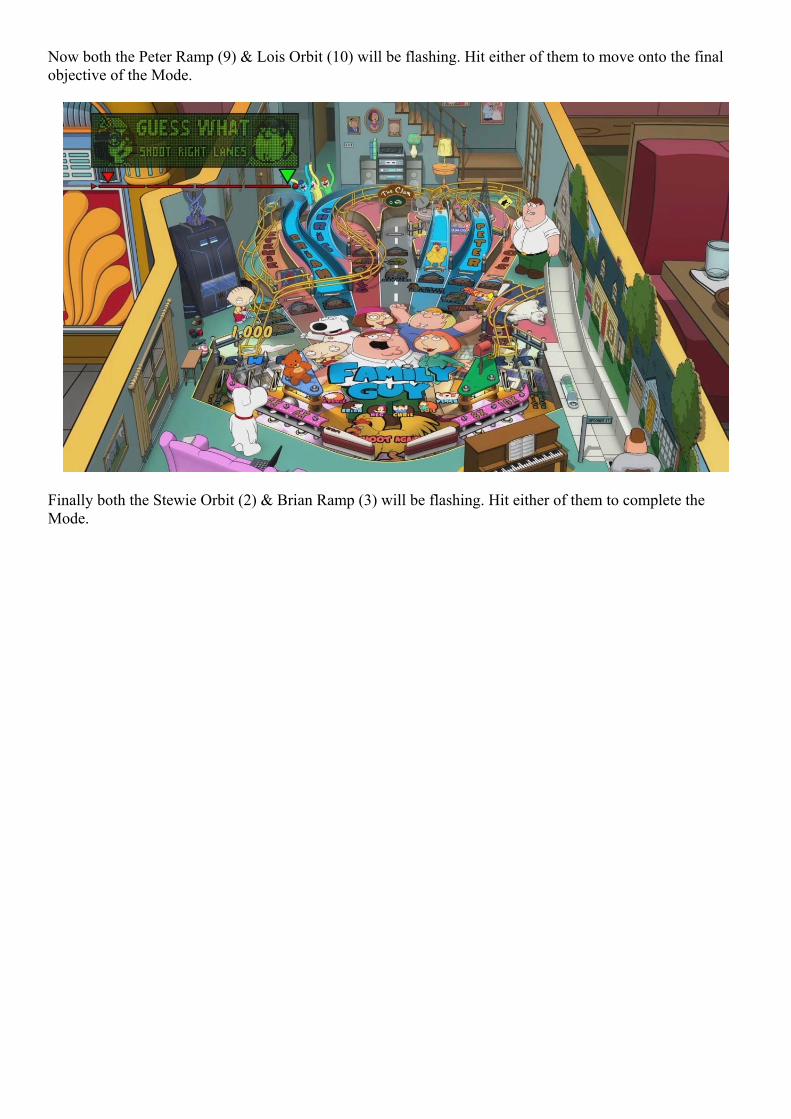
Now both the Peter Ramp (9) & Lois Orbit (10) will be flashing. Hit either of them to move onto the final objective of the Mode.
Finally both the Stewie Orbit (2) & Brian Ramp (3) will be flashing. Hit either of them to complete the Mode.
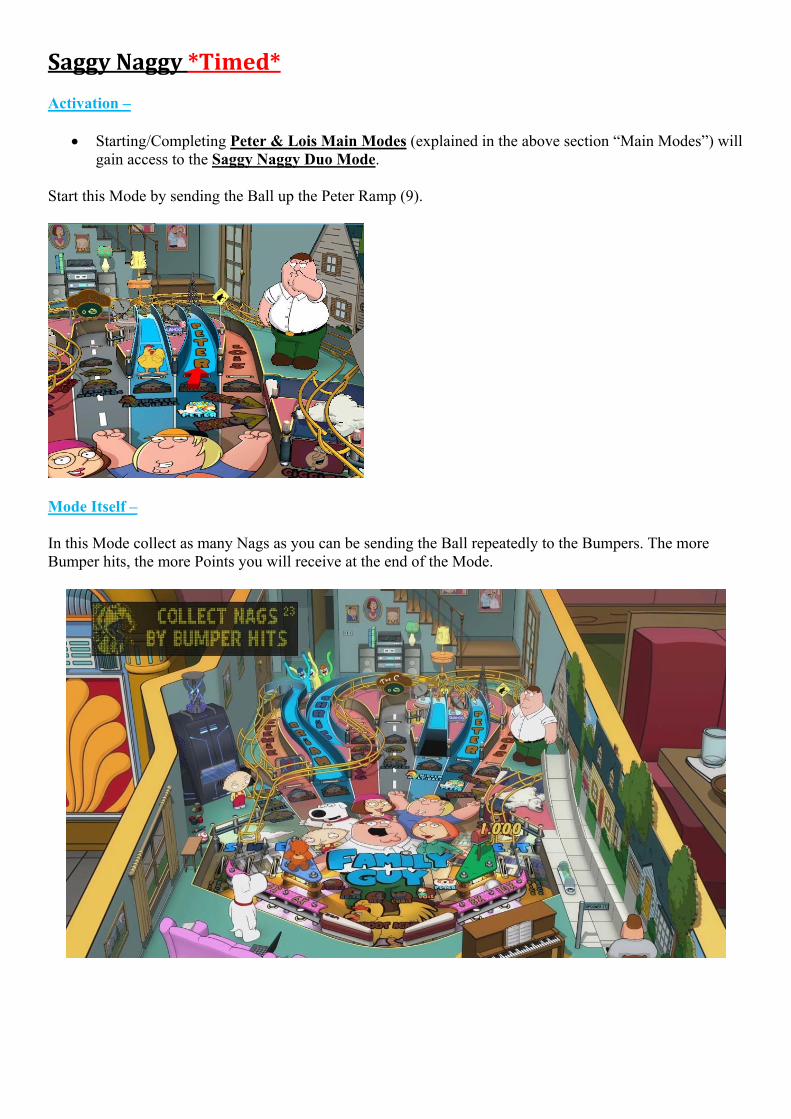
SaggyNaggy*Timed* Activation –
Starting/Completing Peter & Lois Main Modes (explained in the above section “Main Modes”) will gain access to the Saggy Naggy Duo Mode.
Start this Mode by sending the Ball up the Peter Ramp (9).
Mode Itself – In this Mode collect as many Nags as you can be sending the Ball repeatedly to the Bumpers. The more Bumper hits, the more Points you will receive at the end of the Mode.
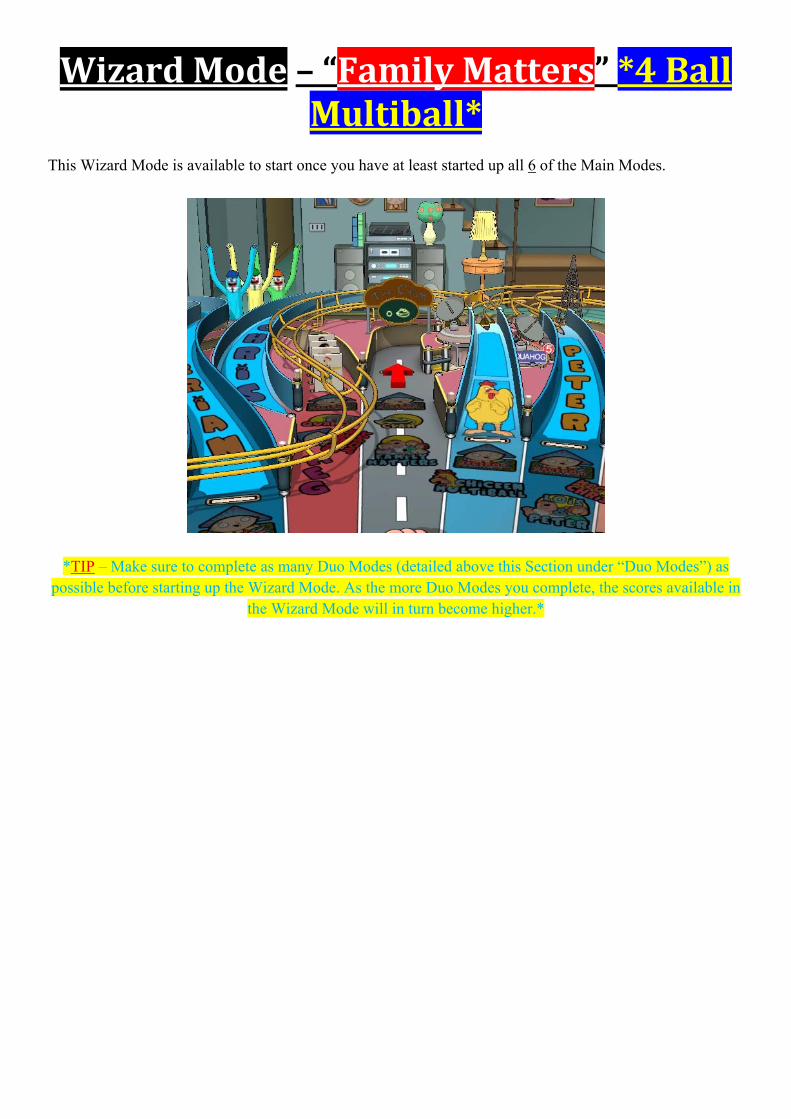
WizardMode–“FamilyMatters”*4BallMultiball*
This Wizard Mode is available to start once you have at least started up all 6 of the Main Modes.
*TIP – Make sure to complete as many Duo Modes (detailed above this Section under “Duo Modes”) as possible before starting up the Wizard Mode. As the more Duo Modes you complete, the scores available in
the Wizard Mode will in turn become higher.*
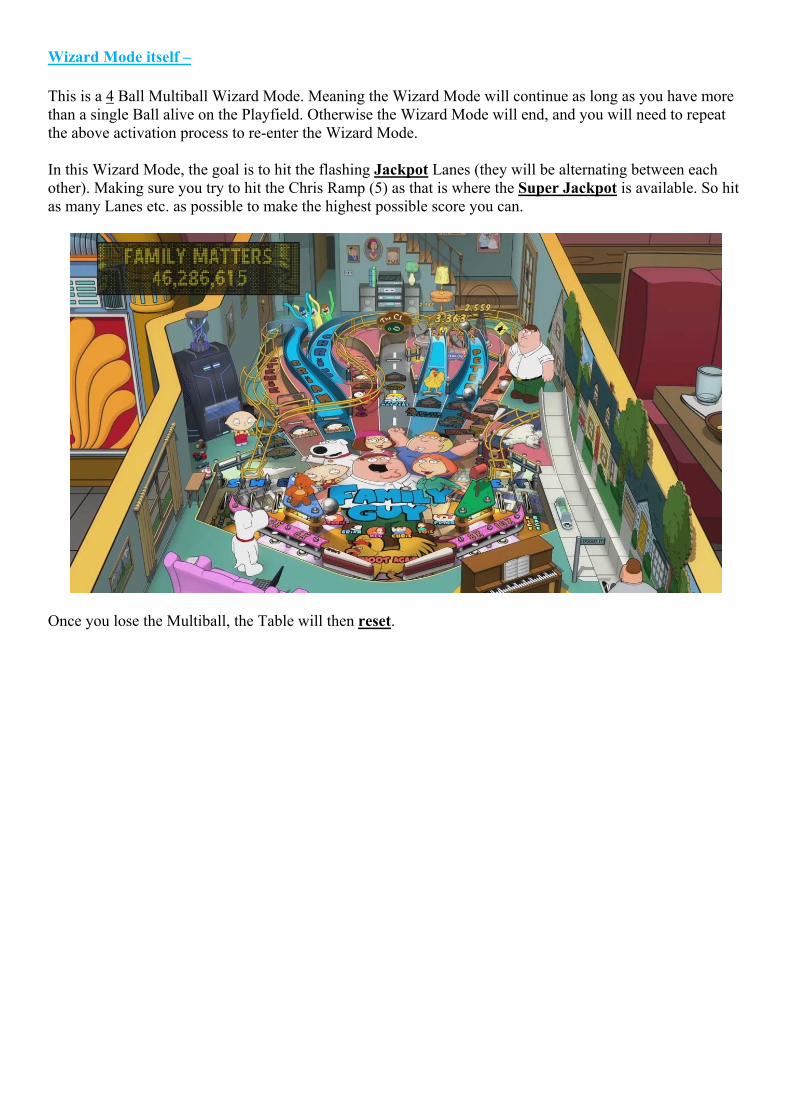
Wizard Mode itself – This is a 4 Ball Multiball Wizard Mode. Meaning the Wizard Mode will continue as long as you have more than a single Ball alive on the Playfield. Otherwise the Wizard Mode will end, and you will need to repeat the above activation process to re-enter the Wizard Mode. In this Wizard Mode, the goal is to hit the flashing Jackpot Lanes (they will be alternating between each other). Making sure you try to hit the Chris Ramp (5) as that is where the Super Jackpot is available. So hit as many Lanes etc. as possible to make the highest possible score you can.
Once you lose the Multiball, the Table will then reset.
Special Thanks to all the Zen Studios Forum Community! Members such as shogun00, Cloda, Ty-43, Deep, wims, skyway73, tenorhero, DiscoKing & surf1der. I couldn’t have completed the Guide without your help either directly or indirectly - you are all awesome!!!
In closing I hope you enjoyed this Table, I certainly have and I hope by using this Guide it increases that Fun factor for you and everyone else who plays with you.
Check out the other Tables available, they are all available to download on the Xbox Live Marketplace in Add-Ons section or download it straight from the PFX2 Platform itself. Zen Pinball 2 on PlayStation Network, Zen Pinball on the Apple AppStore, Zen Pinball 3D on Nintendo 3DS and Zen Pinball THD on Android Marketplace. Thanks for viewing my Guide; any feedback would be greatly appreciated -
“I may be a Guide Writer, but my good sir, I am certainly not a Guider Writer.” Yours ShoryukenToTheChin