fabric8io/fabric8-maven-pluginmaven.fabric8.io/fabric8-maven-plugin.pdf · chapter 1. introduction...
TRANSCRIPT

fabric8io/fabric8-maven-pluginRoland Huß, James Strachan
Version 4.1.0, 2019-04-17

fabric8-maven-plugin1. Introduction . . . . . . . . . . . . . . . . . . . . . . . . . . . . . . . . . . . . . . . . . . . . . . . . . . . . . . . . . . . . . . . . . . . . . . . . . . . . . 2
1.1. Building Images . . . . . . . . . . . . . . . . . . . . . . . . . . . . . . . . . . . . . . . . . . . . . . . . . . . . . . . . . . . . . . . . . . . . . . 2
1.2. Kubernetes and OpenShift Resources . . . . . . . . . . . . . . . . . . . . . . . . . . . . . . . . . . . . . . . . . . . . . . . . . . . 2
1.3. Configuration . . . . . . . . . . . . . . . . . . . . . . . . . . . . . . . . . . . . . . . . . . . . . . . . . . . . . . . . . . . . . . . . . . . . . . . . 2
1.4. Examples . . . . . . . . . . . . . . . . . . . . . . . . . . . . . . . . . . . . . . . . . . . . . . . . . . . . . . . . . . . . . . . . . . . . . . . . . . . . 3
1.4.1. Zero-Config . . . . . . . . . . . . . . . . . . . . . . . . . . . . . . . . . . . . . . . . . . . . . . . . . . . . . . . . . . . . . . . . . . . . . . . 4
1.4.2. XML Configuration . . . . . . . . . . . . . . . . . . . . . . . . . . . . . . . . . . . . . . . . . . . . . . . . . . . . . . . . . . . . . . . . 6
1.4.3. Resource Fragments. . . . . . . . . . . . . . . . . . . . . . . . . . . . . . . . . . . . . . . . . . . . . . . . . . . . . . . . . . . . . . . 9
2. Compatibility with OpenShift and Kubernetes. . . . . . . . . . . . . . . . . . . . . . . . . . . . . . . . . . . . . . . . . . . . . . 11
2.1. OpenShift Compatibility . . . . . . . . . . . . . . . . . . . . . . . . . . . . . . . . . . . . . . . . . . . . . . . . . . . . . . . . . . . . . . 11
2.2. Kubernetes Compatibility . . . . . . . . . . . . . . . . . . . . . . . . . . . . . . . . . . . . . . . . . . . . . . . . . . . . . . . . . . . . 11
3. Installation . . . . . . . . . . . . . . . . . . . . . . . . . . . . . . . . . . . . . . . . . . . . . . . . . . . . . . . . . . . . . . . . . . . . . . . . . . . . . 12
4. Goals Overview . . . . . . . . . . . . . . . . . . . . . . . . . . . . . . . . . . . . . . . . . . . . . . . . . . . . . . . . . . . . . . . . . . . . . . . . . 14
5. Build Goals. . . . . . . . . . . . . . . . . . . . . . . . . . . . . . . . . . . . . . . . . . . . . . . . . . . . . . . . . . . . . . . . . . . . . . . . . . . . . . 15
5.1. fabric8:resource . . . . . . . . . . . . . . . . . . . . . . . . . . . . . . . . . . . . . . . . . . . . . . . . . . . . . . . . . . . . . . . . . . . . 15
5.1.1. Labels and Annotations . . . . . . . . . . . . . . . . . . . . . . . . . . . . . . . . . . . . . . . . . . . . . . . . . . . . . . . . . . 15
5.1.2. Secrets . . . . . . . . . . . . . . . . . . . . . . . . . . . . . . . . . . . . . . . . . . . . . . . . . . . . . . . . . . . . . . . . . . . . . . . . . . 17
5.1.3. Resource Validation . . . . . . . . . . . . . . . . . . . . . . . . . . . . . . . . . . . . . . . . . . . . . . . . . . . . . . . . . . . . . . 18
5.1.4. Route Generation . . . . . . . . . . . . . . . . . . . . . . . . . . . . . . . . . . . . . . . . . . . . . . . . . . . . . . . . . . . . . . . . 19
5.1.5. Other flags . . . . . . . . . . . . . . . . . . . . . . . . . . . . . . . . . . . . . . . . . . . . . . . . . . . . . . . . . . . . . . . . . . . . . . 20
5.2. fabric8:build . . . . . . . . . . . . . . . . . . . . . . . . . . . . . . . . . . . . . . . . . . . . . . . . . . . . . . . . . . . . . . . . . . . . . . . 20
5.2.1. Kubernetes Build . . . . . . . . . . . . . . . . . . . . . . . . . . . . . . . . . . . . . . . . . . . . . . . . . . . . . . . . . . . . . . . . 20
5.2.2. OpenShift Build . . . . . . . . . . . . . . . . . . . . . . . . . . . . . . . . . . . . . . . . . . . . . . . . . . . . . . . . . . . . . . . . . . 21
5.2.3. Configuration . . . . . . . . . . . . . . . . . . . . . . . . . . . . . . . . . . . . . . . . . . . . . . . . . . . . . . . . . . . . . . . . . . . 22
5.2.4. Access Configuration . . . . . . . . . . . . . . . . . . . . . . . . . . . . . . . . . . . . . . . . . . . . . . . . . . . . . . . . . . . . . 25
5.2.5. Image Configuration . . . . . . . . . . . . . . . . . . . . . . . . . . . . . . . . . . . . . . . . . . . . . . . . . . . . . . . . . . . . . 26
5.2.6. Build Configuration . . . . . . . . . . . . . . . . . . . . . . . . . . . . . . . . . . . . . . . . . . . . . . . . . . . . . . . . . . . . . . 27
5.2.7. Assembly . . . . . . . . . . . . . . . . . . . . . . . . . . . . . . . . . . . . . . . . . . . . . . . . . . . . . . . . . . . . . . . . . . . . . . . 35
5.2.8. Environment and Labels . . . . . . . . . . . . . . . . . . . . . . . . . . . . . . . . . . . . . . . . . . . . . . . . . . . . . . . . . 38
5.2.9. Startup Arguments . . . . . . . . . . . . . . . . . . . . . . . . . . . . . . . . . . . . . . . . . . . . . . . . . . . . . . . . . . . . . . . 39
5.2.10. Build Args . . . . . . . . . . . . . . . . . . . . . . . . . . . . . . . . . . . . . . . . . . . . . . . . . . . . . . . . . . . . . . . . . . . . . . 40
5.3. fabric8:push . . . . . . . . . . . . . . . . . . . . . . . . . . . . . . . . . . . . . . . . . . . . . . . . . . . . . . . . . . . . . . . . . . . . . . . . 41
5.4. fabric8:apply . . . . . . . . . . . . . . . . . . . . . . . . . . . . . . . . . . . . . . . . . . . . . . . . . . . . . . . . . . . . . . . . . . . . . . . 41
5.5. fabric8:resource-apply . . . . . . . . . . . . . . . . . . . . . . . . . . . . . . . . . . . . . . . . . . . . . . . . . . . . . . . . . . . . . . 42
5.6. fabric8:helm . . . . . . . . . . . . . . . . . . . . . . . . . . . . . . . . . . . . . . . . . . . . . . . . . . . . . . . . . . . . . . . . . . . . . . . . 43
6. Development Goals . . . . . . . . . . . . . . . . . . . . . . . . . . . . . . . . . . . . . . . . . . . . . . . . . . . . . . . . . . . . . . . . . . . . . . 45
6.1. fabric8:deploy . . . . . . . . . . . . . . . . . . . . . . . . . . . . . . . . . . . . . . . . . . . . . . . . . . . . . . . . . . . . . . . . . . . . . . 45
6.2. fabric8:undeploy . . . . . . . . . . . . . . . . . . . . . . . . . . . . . . . . . . . . . . . . . . . . . . . . . . . . . . . . . . . . . . . . . . . 46

6.3. fabric8:log . . . . . . . . . . . . . . . . . . . . . . . . . . . . . . . . . . . . . . . . . . . . . . . . . . . . . . . . . . . . . . . . . . . . . . . . . . 46
6.4. fabric8:debug . . . . . . . . . . . . . . . . . . . . . . . . . . . . . . . . . . . . . . . . . . . . . . . . . . . . . . . . . . . . . . . . . . . . . . . 47
6.4.1. Speeding up debugging . . . . . . . . . . . . . . . . . . . . . . . . . . . . . . . . . . . . . . . . . . . . . . . . . . . . . . . . . . . 47
6.4.2. Debugging with suspension . . . . . . . . . . . . . . . . . . . . . . . . . . . . . . . . . . . . . . . . . . . . . . . . . . . . . . . 48
6.5. fabric8:watch . . . . . . . . . . . . . . . . . . . . . . . . . . . . . . . . . . . . . . . . . . . . . . . . . . . . . . . . . . . . . . . . . . . . . . . 49
6.5.1. Spring Boot . . . . . . . . . . . . . . . . . . . . . . . . . . . . . . . . . . . . . . . . . . . . . . . . . . . . . . . . . . . . . . . . . . . . . . 50
6.5.2. Docker Image. . . . . . . . . . . . . . . . . . . . . . . . . . . . . . . . . . . . . . . . . . . . . . . . . . . . . . . . . . . . . . . . . . . . 50
7. Generators . . . . . . . . . . . . . . . . . . . . . . . . . . . . . . . . . . . . . . . . . . . . . . . . . . . . . . . . . . . . . . . . . . . . . . . . . . . . . . 51
7.1. Default Generators. . . . . . . . . . . . . . . . . . . . . . . . . . . . . . . . . . . . . . . . . . . . . . . . . . . . . . . . . . . . . . . . . . . 53
7.1.1. Java Applications . . . . . . . . . . . . . . . . . . . . . . . . . . . . . . . . . . . . . . . . . . . . . . . . . . . . . . . . . . . . . . . . 54
7.1.2. Spring Boot . . . . . . . . . . . . . . . . . . . . . . . . . . . . . . . . . . . . . . . . . . . . . . . . . . . . . . . . . . . . . . . . . . . . . . 55
7.1.3. Wildfly Swarm . . . . . . . . . . . . . . . . . . . . . . . . . . . . . . . . . . . . . . . . . . . . . . . . . . . . . . . . . . . . . . . . . . 56
7.1.4. Thorntail v2 . . . . . . . . . . . . . . . . . . . . . . . . . . . . . . . . . . . . . . . . . . . . . . . . . . . . . . . . . . . . . . . . . . . . . 56
7.1.5. Vert.x . . . . . . . . . . . . . . . . . . . . . . . . . . . . . . . . . . . . . . . . . . . . . . . . . . . . . . . . . . . . . . . . . . . . . . . . . . . 56
7.1.6. Karaf . . . . . . . . . . . . . . . . . . . . . . . . . . . . . . . . . . . . . . . . . . . . . . . . . . . . . . . . . . . . . . . . . . . . . . . . . . . 57
7.1.7. Web Applications . . . . . . . . . . . . . . . . . . . . . . . . . . . . . . . . . . . . . . . . . . . . . . . . . . . . . . . . . . . . . . . . 58
7.2. Generator API . . . . . . . . . . . . . . . . . . . . . . . . . . . . . . . . . . . . . . . . . . . . . . . . . . . . . . . . . . . . . . . . . . . . . . . 59
8. Enrichers . . . . . . . . . . . . . . . . . . . . . . . . . . . . . . . . . . . . . . . . . . . . . . . . . . . . . . . . . . . . . . . . . . . . . . . . . . . . . . . 60
8.1. Default Enrichers . . . . . . . . . . . . . . . . . . . . . . . . . . . . . . . . . . . . . . . . . . . . . . . . . . . . . . . . . . . . . . . . . . . . 60
8.1.1. Standard Enrichers . . . . . . . . . . . . . . . . . . . . . . . . . . . . . . . . . . . . . . . . . . . . . . . . . . . . . . . . . . . . . . 62
8.1.2. Fabric8 Enrichers . . . . . . . . . . . . . . . . . . . . . . . . . . . . . . . . . . . . . . . . . . . . . . . . . . . . . . . . . . . . . . . . 67
8.2. Enricher API . . . . . . . . . . . . . . . . . . . . . . . . . . . . . . . . . . . . . . . . . . . . . . . . . . . . . . . . . . . . . . . . . . . . . . . . 84
9. Profiles . . . . . . . . . . . . . . . . . . . . . . . . . . . . . . . . . . . . . . . . . . . . . . . . . . . . . . . . . . . . . . . . . . . . . . . . . . . . . . . . . 85
9.1. Generator and Enricher definitions . . . . . . . . . . . . . . . . . . . . . . . . . . . . . . . . . . . . . . . . . . . . . . . . . . . 86
9.2. Lookup order . . . . . . . . . . . . . . . . . . . . . . . . . . . . . . . . . . . . . . . . . . . . . . . . . . . . . . . . . . . . . . . . . . . . . . . 86
9.3. Using Profiles . . . . . . . . . . . . . . . . . . . . . . . . . . . . . . . . . . . . . . . . . . . . . . . . . . . . . . . . . . . . . . . . . . . . . . . 87
9.4. Predefined Profiles . . . . . . . . . . . . . . . . . . . . . . . . . . . . . . . . . . . . . . . . . . . . . . . . . . . . . . . . . . . . . . . . . . 88
9.5. Extending Profiles . . . . . . . . . . . . . . . . . . . . . . . . . . . . . . . . . . . . . . . . . . . . . . . . . . . . . . . . . . . . . . . . . . . 89
10. Access configuration . . . . . . . . . . . . . . . . . . . . . . . . . . . . . . . . . . . . . . . . . . . . . . . . . . . . . . . . . . . . . . . . . . . . 91
10.1. Docker Access . . . . . . . . . . . . . . . . . . . . . . . . . . . . . . . . . . . . . . . . . . . . . . . . . . . . . . . . . . . . . . . . . . . . . . 91
10.2. OpenShift and Kubernetes Access . . . . . . . . . . . . . . . . . . . . . . . . . . . . . . . . . . . . . . . . . . . . . . . . . . . . 91
11. Registry handling. . . . . . . . . . . . . . . . . . . . . . . . . . . . . . . . . . . . . . . . . . . . . . . . . . . . . . . . . . . . . . . . . . . . . . . 92
12. Authentication . . . . . . . . . . . . . . . . . . . . . . . . . . . . . . . . . . . . . . . . . . . . . . . . . . . . . . . . . . . . . . . . . . . . . . . . . 94
12.1. Pull vs. Push Authentication . . . . . . . . . . . . . . . . . . . . . . . . . . . . . . . . . . . . . . . . . . . . . . . . . . . . . . . . . 95
12.2. OpenShift Authentication . . . . . . . . . . . . . . . . . . . . . . . . . . . . . . . . . . . . . . . . . . . . . . . . . . . . . . . . . . . 96
12.3. Password encryption . . . . . . . . . . . . . . . . . . . . . . . . . . . . . . . . . . . . . . . . . . . . . . . . . . . . . . . . . . . . . . . 97
12.4. Extended Authentication . . . . . . . . . . . . . . . . . . . . . . . . . . . . . . . . . . . . . . . . . . . . . . . . . . . . . . . . . . . . 97
13. Migration from version 2 . . . . . . . . . . . . . . . . . . . . . . . . . . . . . . . . . . . . . . . . . . . . . . . . . . . . . . . . . . . . . . . 98
14. FAQ . . . . . . . . . . . . . . . . . . . . . . . . . . . . . . . . . . . . . . . . . . . . . . . . . . . . . . . . . . . . . . . . . . . . . . . . . . . . . . . . . . . 99
14.1. General questions . . . . . . . . . . . . . . . . . . . . . . . . . . . . . . . . . . . . . . . . . . . . . . . . . . . . . . . . . . . . . . . . . . 99
14.1.1. How do I define an environment variable?. . . . . . . . . . . . . . . . . . . . . . . . . . . . . . . . . . . . . . . . 99

14.1.2. How do I define a system property? . . . . . . . . . . . . . . . . . . . . . . . . . . . . . . . . . . . . . . . . . . . . . . 99
14.1.3. How do I mount a config file from a ConfigMap? . . . . . . . . . . . . . . . . . . . . . . . . . . . . . . . . . . 99
14.1.4. How do I use a Persistent Volume? . . . . . . . . . . . . . . . . . . . . . . . . . . . . . . . . . . . . . . . . . . . . . . 100
15. Appendix . . . . . . . . . . . . . . . . . . . . . . . . . . . . . . . . . . . . . . . . . . . . . . . . . . . . . . . . . . . . . . . . . . . . . . . . . . . . . 102
15.1. Kind/Filename Type Mapping . . . . . . . . . . . . . . . . . . . . . . . . . . . . . . . . . . . . . . . . . . . . . . . . . . . . . . 102
15.2. Custom Kind/Filename Mapping . . . . . . . . . . . . . . . . . . . . . . . . . . . . . . . . . . . . . . . . . . . . . . . . . . . . 103

© 2016 The original authors.
1

Chapter 1. IntroductionThe fabric8-maven-plugin (f8-m-p) brings your Java applications on to Kubernetes and OpenShift.It provides a tight integration into Maven and benefits from the build configuration alreadyprovided. This plugin focus on two tasks: Building Docker images and creating Kubernetes andOpenShift resource descriptors. It can be configured very flexibly and supports multipleconfiguration models for creating: A Zero-Config setup allows for a quick ramp-up with someopinionated defaults. For more advanced requirements, an XML configuration provides additionalconfiguration options which can be added to the pom.xml. For the full power, in order to tune allfacets of the creation, external resource fragments and Dockerfiles can be used.
1.1. Building ImagesThe fabric8:build goal is for creating Docker images containing the actual application. These thencan be deployed later on Kubernetes or OpenShift. It is easy to include build artifacts and theirdependencies into these images. This plugin uses the assembly descriptor format from the maven-assembly-plugin to specify the content which will be added to the image. That images can then bepushed to public or private Docker registries with fabric8:push.
Depending on the operational mode, for building the actual image either a Docker daemon is useddirectly or an OpenShift Docker Build is performed.
A special fabric8:watch goal allows for reacting to code changes to automatically recreate imagesor copy new artifacts into running containers.
These image related features are inherited from the fabric8io/docker-maven-plugin which is part ofthis plugin.
1.2. Kubernetes and OpenShift ResourcesKubernetes and OpenShift resource descriptors can be created or generated fromfabric8:resource. These files are packaged within the Maven artifacts and can be deployed to arunning orchestration platform with fabric8:apply.
Typically you only specify a small part of the real resource descriptors which will be enriched bythis plugin with various extra information taken from the pom.xml. This drastically reducesboilerplate code for common scenarios.
1.3. ConfigurationAs mentioned already there are three levels of configuration:
• Zero-Config mode makes some very opinionated decisions based on what is present in thepom.xml like what base image to use or which ports to expose. This is great for starting upthings and for keeping quickstart applications small and tidy.
• XML plugin configuration mode is similar to what docker-maven-plugin provides. This allowsfor type-safe configuration with IDE support, but only a subset of possible resource descriptor
2

features is provided.
• Kubernetes & OpenShift resource fragments are user provided YAML files that can beenriched by the plugin. This allows expert users to use a plain configuration file with all theircapabilities, but also to add project specific build information and avoid boilerplate code.
The following table gives an overview of the different models
Table 1. Configuration Models
Model Docker Images Resource Descriptors
Zero-Config
Generators are used to create Docker imageconfigurations. Generators can detect certainaspects of the build (e.g. whether Spring Boot isused) and then choose some default like the baseimage, which ports to expose and the startupcommand. They can be configured, but offeronly a few options.
Default Enrichers will create adefault Service and Deployment(DeploymentConfig for OpenShift)when no other resource objects areprovided. Depending on the imagethey can detect which port toexpose in the service. As withGenerators, Enrichers support alimited set of configuration options.
XMLconfiguration
f8-m-p inherits the XML based configuration forbuilding images from the docker-maven-pluginand provides the same functionality. It supportsan assembly descriptor for specifying thecontent of the Docker image.
A subset of possible resource objectscan be configured with a dedicatedXML syntax. With a decent IDE youget autocompletion on most objectand inline documentation for theavailable configuration elements.The provided configuration can bestill enhanced by Enhancers whichis useful for adding e.g. labels andannotations containing build orother information.
ResourceFragmentsandDockerfiles
Similarly to the docker-maven-plugin, f8-m-psupports external Dockerfiles too, which arereferenced from the plugin configuration.
Resource descriptors can beprovided as external YAML fileswhich specify a skeleton. Thisskeleton is then filled by Enricherswhich add labels and more. Mavenproperties within these files areresolved to thier values. With thismodel you can use everyKubernetes / OpenShift resourceobject with all their flexibility, butstill get the benefit of adding buildinformation.
1.4. ExamplesLet’s have a look at some code. The following examples will demonstrate all three configurationsvariants:
3

1.4.1. Zero-Config
This minimal but full working example pom.xml shows how a simple spring boot application can bedockerized and prepared for Kubernetes and OpenShift. The full example can be found in directorysamples/zero-config.
Example
<project> <modelVersion>4.0.0</modelVersion>
<groupId>io.fabric8</groupId> <artifactId>fabric8-maven-sample-zero-config</artifactId> <version>4.1.0</version> <packaging>jar</packaging>
<parent> <groupId>org.springframework.boot</groupId> <artifactId>spring-boot-starter-parent</artifactId> ① <version>1.5.5.RELEASE</version> </parent>
<dependencies> <dependency> <groupId>org.springframework.boot</groupId> <artifactId>spring-boot-starter-web</artifactId> ② </dependency> </dependencies>
<build> <plugins> <plugin> <groupId>org.springframework.boot</groupId> <artifactId>spring-boot-maven-plugin</artifactId> ③ </plugin> <plugin> <groupId>io.fabric8</groupId> <artifactId>fabric8-maven-plugin</artifactId> ④ <version>4.1.0</version> </plugin> </plugins> </build></project>
① This minimalistic spring boot application uses the spring-boot parent POM for setting updependencies and plugins
② The Spring Boot web starter dependency enables a simple embedded Tomcat for serving SpringMVC apps
③ The spring-boot-maven-plugin is responsible for repackaging the application into a fat jar,including all dependencies and the embedded Tomcat
4
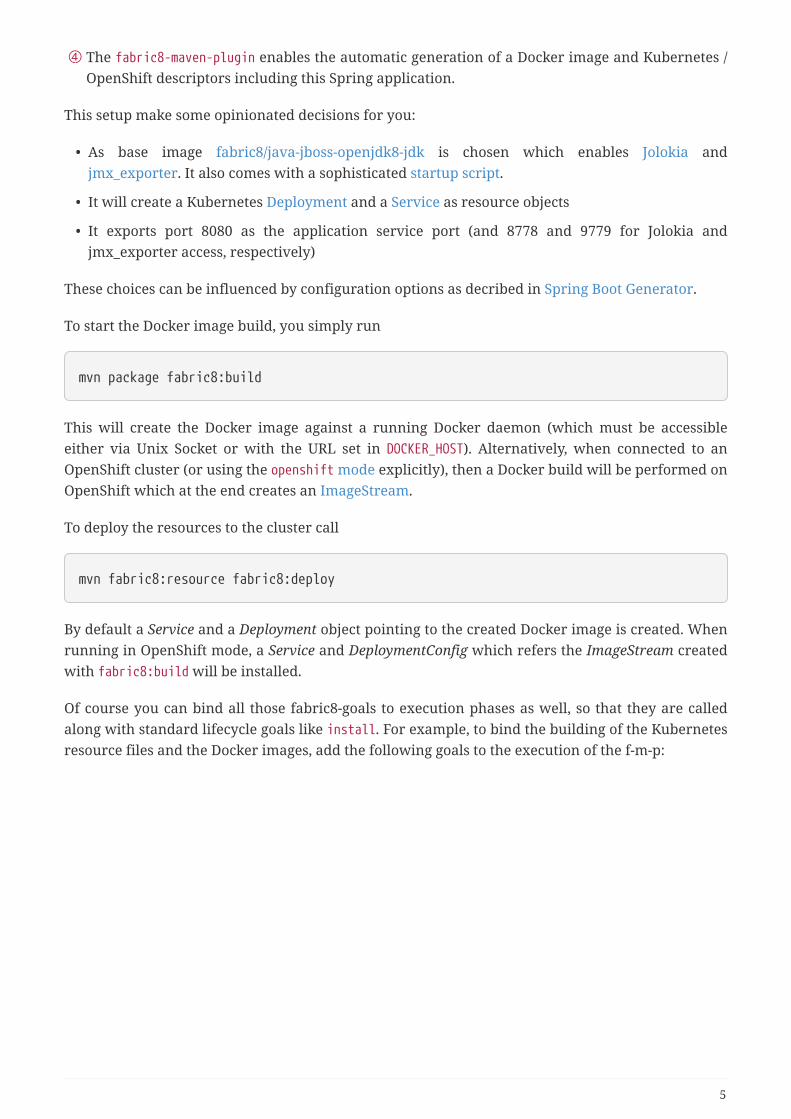
④ The fabric8-maven-plugin enables the automatic generation of a Docker image and Kubernetes /OpenShift descriptors including this Spring application.
This setup make some opinionated decisions for you:
• As base image fabric8/java-jboss-openjdk8-jdk is chosen which enables Jolokia andjmx_exporter. It also comes with a sophisticated startup script.
• It will create a Kubernetes Deployment and a Service as resource objects
• It exports port 8080 as the application service port (and 8778 and 9779 for Jolokia andjmx_exporter access, respectively)
These choices can be influenced by configuration options as decribed in Spring Boot Generator.
To start the Docker image build, you simply run
mvn package fabric8:build
This will create the Docker image against a running Docker daemon (which must be accessibleeither via Unix Socket or with the URL set in DOCKER_HOST). Alternatively, when connected to anOpenShift cluster (or using the openshift mode explicitly), then a Docker build will be performed onOpenShift which at the end creates an ImageStream.
To deploy the resources to the cluster call
mvn fabric8:resource fabric8:deploy
By default a Service and a Deployment object pointing to the created Docker image is created. Whenrunning in OpenShift mode, a Service and DeploymentConfig which refers the ImageStream createdwith fabric8:build will be installed.
Of course you can bind all those fabric8-goals to execution phases as well, so that they are calledalong with standard lifecycle goals like install. For example, to bind the building of the Kubernetesresource files and the Docker images, add the following goals to the execution of the f-m-p:
5

Example for lifecycle bindings
<plugin> <groupId>io.fabric8</groupId> <artifactId>fabric8-maven-plugin</artifactId>
<!-- ... -->
<executions> <execution> <goals> <goal>resource</goal> <goal>build</goal> </goals> </execution> </executions></plugin>
If you’d also like to automatically deploy to Kubernetes each time you do a mvn install you can addthe deploy goal:
Example for lifecycle bindings with automatic deploys for mvn install
<plugin> <groupId>io.fabric8</groupId> <artifactId>fabric8-maven-plugin</artifactId>
<!-- ... -->
<executions> <execution> <goals> <goal>resource</goal> <goal>build</goal> <goal>deploy</goal> </goals> </execution> </executions></plugin>
1.4.2. XML Configuration
XML based configuration is only partially implemented and is not recommendedfor use right now.
Although the Zero-config mode and its generators can be tweaked with options up to a certaindegree, many cases require more flexibility. For such instances, an XML-based plugin configurationcan be used, in a way similar to the XML configuration used by docker-maven-plugin.
6

The plugin configuration can be roughly divided into the following sections:
• Global configuration options are responsible for tuning the behaviour of plugin goals
• <images> defines which Docker images are used and configured. This section is similar to theimage configuration of the docker-maven-plugin, except that <run> and <external> sub-elementsare ignored)
• <resource> defines the resource descriptors for deploying on an OpenShift or Kubernerescluster.
• <generator> configures generators which are responsible for creating images. Generators areused as an alternative to a dedicated <images> section.
• <enricher> configures various aspects of enrichers for creating or enhancing resourcedescriptors.
A working example can be found in the samples/xml-config directory. An extract of the pluginconfiguration is shown below:
Example for an XML configuration
<configuration> <namespace>test-ns</namespace> <images> ① <image> <name>xml-config-demo:1.0.0</name> <!-- "alias" is used to correlate to the containers in the pod spec --> <alias>camel-app</alias> <build> <from>fabric8/java</from> <assembly> <basedir>/deployments</basedir> <descriptorRef>artifact-with-dependencies</descriptorRef> </assembly> <env> <JAVA_LIB_DIR>/deployments</JAVA_LIB_DIR> <JAVA_MAIN_CLASS>org.apache.camel.cdi.Main</JAVA_MAIN_CLASS> </env> </build> </image> </images>
<resources> ② <labels> ③ <all> <group>quickstarts</group> </all> </labels>
<deployment> ④ <name>${project.artifactId}</name> <replicas>1</replicas>
7

<containers> ⑤ <container> <alias>camel-app</alias> ⑥ <ports> <port>8778</port> </ports> <mounts> <scratch>/var/scratch</scratch> </mounts> </container> </containers>
<volumes> ⑦ <volume> <name>scratch</name> <type>emptyDir</type> </volume> </volumes> </deployment>
<services> ⑧ <service> <name>camel-service</name> <headless>true</headless> </service> </services>
<serviceAccounts> <serviceAccount> <name>build-robot</name> </serviceAccount> </serviceAccounts> </resources></configuration>
① Standard docker-maven-plugin configuration for building one single Docker image
② Kubernetes / OpenShift resources to create
③ Labels which should be applied globally to all resource objects
④ Definition of a Deployment to create
⑤ Containers to include in the deployment
⑥ An alias is used to correlate a container’s image with the image definition in the <images> sectionwhere each image carry an alias. Can be omitted if only a single image is used
⑦ Volume definitions used in a Deployment’s ReplicaSet
⑧ One or more Service definitions.
The XML resource configuration is based on plain Kubernetes resource objects. When targetingOpenShift, Kubernetes resource descriptors will be automatically converted to their OpenShift
8
counterparts, e.g. a Kubernetes Deployment will be converted to an OpenShift DeploymentConfig.
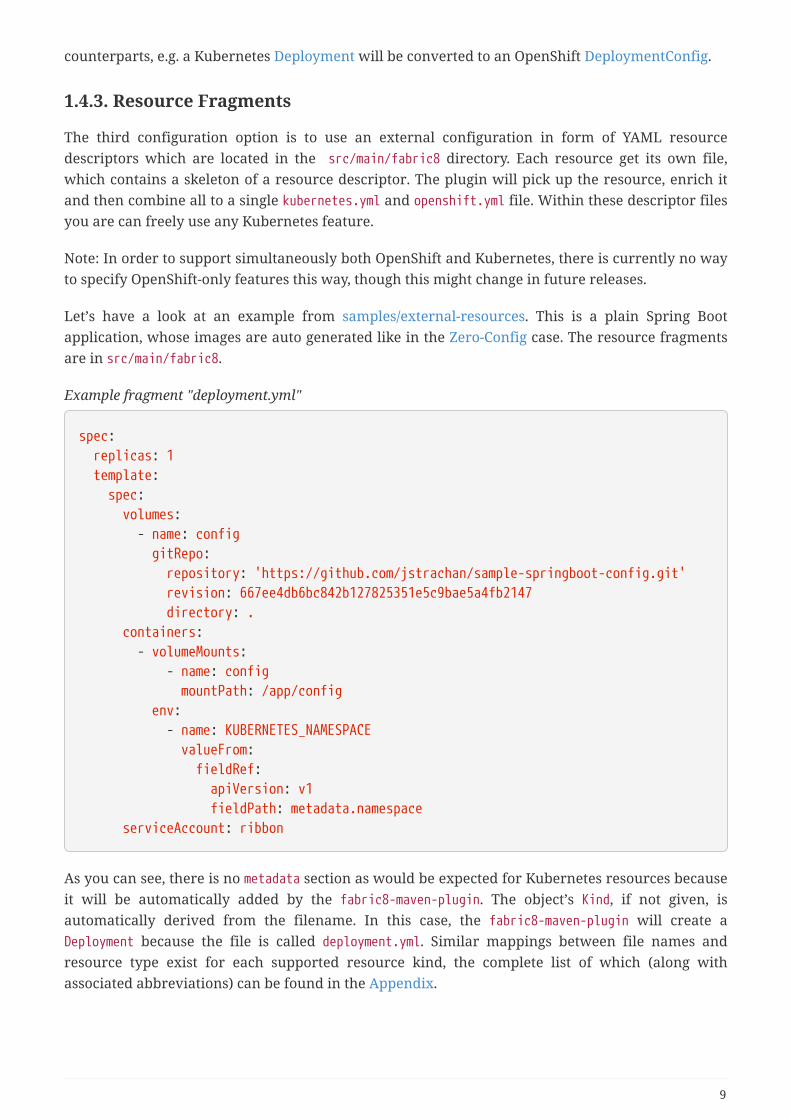
1.4.3. Resource Fragments
The third configuration option is to use an external configuration in form of YAML resourcedescriptors which are located in the src/main/fabric8 directory. Each resource get its own file,which contains a skeleton of a resource descriptor. The plugin will pick up the resource, enrich itand then combine all to a single kubernetes.yml and openshift.yml file. Within these descriptor filesyou are can freely use any Kubernetes feature.
Note: In order to support simultaneously both OpenShift and Kubernetes, there is currently no wayto specify OpenShift-only features this way, though this might change in future releases.
Let’s have a look at an example from samples/external-resources. This is a plain Spring Bootapplication, whose images are auto generated like in the Zero-Config case. The resource fragmentsare in src/main/fabric8.
Example fragment "deployment.yml"
spec: replicas: 1 template: spec: volumes: - name: config gitRepo: repository: 'https://github.com/jstrachan/sample-springboot-config.git' revision: 667ee4db6bc842b127825351e5c9bae5a4fb2147 directory: . containers: - volumeMounts: - name: config mountPath: /app/config env: - name: KUBERNETES_NAMESPACE valueFrom: fieldRef: apiVersion: v1 fieldPath: metadata.namespace serviceAccount: ribbon
As you can see, there is no metadata section as would be expected for Kubernetes resources becauseit will be automatically added by the fabric8-maven-plugin. The object’s Kind, if not given, isautomatically derived from the filename. In this case, the fabric8-maven-plugin will create aDeployment because the file is called deployment.yml. Similar mappings between file names andresource type exist for each supported resource kind, the complete list of which (along withassociated abbreviations) can be found in the Appendix.
9

Now that sidecar containers are supported in this plugin, be careful wheneveryou’re supplying container name in the resource fragment. If container specifiedin resource fragment doesn’t have a name or it’s name is equal to default fmpgenerated application’s container name; it would not be treated as sidecar and itwould be merged into main container. However, You can override plugin’sdefault name for main container via fabric8.generator.alias property.
Additionally, if you name your fragment using a name prefix followed by a dash and the mappedfile name, the plugin will automatically use that name for your resource. So, for example, if youname your deployment fragment myapp-deployment.yml, the plugin will name your resource myapp.In the absence of such provided name for your resource, a name will be automatically derivedfrom your project’s metadata (in particular, its artifactId as specified in your POM).
No image is also referenced in this example because the plugin also fills in the image details basedon the configured image you are building with (either from a generator or from a dedicated imageplugin configuration, as seen before).
For building images there is also an alternative mode using external Dockerfiles,in addition to the XML based configuration. Refer to fabric8:build for details.
Enrichment of resource fragments can be fine-tuned by using profile sub-directories. For moredetails see Profiles.
Now that we have seen some examples for the various ways how this plugin can be used, thefollowing sections will describe the plugin goals and extension points in detail.
10

Chapter 2. Compatibility with OpenShift andKubernetes
2.1. OpenShift CompatibilityTable 2. OpenShift Comptatibility
FMP OpenShift3.9.0
OpenShift3.7.0
OpenShift3.6.0
OpenShift3.5.0
OpenShift1.4.1
FMP 3.5.38 ✓ ✓ ✓ x x
FMP 3.5.37 ✓ ✓ ✓ x x
FMP 3.5.36 ✓ ✓ ✓ x x
FMP 3.5.35 ✓ ✓ ✓ x x
FMP 3.5.34 ✓ ✓ ✓ x x
FMP 3.5.33 ✓ ✓ ✓ x x
FMP 3.5.32 ✓ ✓ ✓ ✓ ✓
2.2. Kubernetes CompatibilityTable 3. Kubernetes Compatibility
FMP Kubernetes1.9.0
Kubernetes1.8.0
Kubernetes1.7.0
Kubernetes1.6.0
Kubernetes1.5.1
Kubernetes1.4.0
FMP 3.5.38 ✓ ✓ ✓ ✓ ✓ ✓
FMP 3.5.37 ✓ ✓ ✓ ✓ ✓ ✓
FMP 3.5.36 ✓ ✓ ✓ ✓ ✓ ✓
FMP 3.5.35 ✓ ✓ ✓ ✓ ✓ ✓
FMP 3.5.34 ✓ ✓ ✓ ✓ ✓ ✓
FMP 3.5.33 ✓ ✓ ✓ ✓ ✓ ✓
FMP 3.5.32 ✓ ✓ ✓ ✓ ✓ ✓
11

Chapter 3. InstallationThis plugin is available from Maven central and can be connected to pre- and post-integrationphase as seen below. The configuration and available goals are described below.
By default, Maven will only search for plugins in the org.apache.maven.plugins andorg.codehaus.mojo packages. In order to resolve the provider for the Fabric8 plugin goals, you needto edit ~/.m2/settings.xml and add the io.fabric8 namespace so the <pluginGroups> configuration.
<settings> ...
<pluginGroups> <pluginGroup>io.fabric8</pluginGroup> </pluginGroups>
...</settings>
12

<plugin> <groupId>io.fabric8</groupId> <artifactId>fabric8-maven-plugin</artifactId> <version>4.1.0</version>
<configuration> .... <images> <!-- A single's image configuration --> <image> ... <build> .... </build> </image> .... </images> </configuration>
<!-- Connect fabric8:resource, fabric8:build and fabric8:helm to lifecycle phases--> <executions> <execution> <id>fabric8</id> <goals> <goal>resource</goal> <goal>build</goal> <goal>helm</goal> </goals> </execution> </executions></plugin>
13

Chapter 4. Goals OverviewThis plugin supports a rich set for providing a smooth Java developer experience. These goals canbe categorized in multiple groups:
• Build goals are all about creating and managing Kubernetes and OpenShift build artifacts likeDocker images or S2I builds.
• Development goals target help not only in deploying resource descriptors to the developmentcluster but also to manage the lifecycle of the development cluster as well.
Table 4. Build Goals
Goal Description
fabric8:build Build images
fabric8:push Push images to a registry
fabric8:resource Create Kubernetes or OpenShift resource descriptors
fabric8:apply Apply resources to a running cluster
fabric8:resource-apply
Run fabric8:resource ➜ fabric8:apply
Table 5. Development Goals
Goal Description
fabric8:deploy Deploy resources decriptors to a cluster after creating them and buildingthe app. Same as [fabric8:run] except that it runs in the backgorund.
fabric8:undeploy Undeploy and remove resources decriptors from a cluster.
fabric8:watch Watch for file changes and perform rebuilds and redeployments
fabric8:log Show the logs of the running application
fabric8:debug Enable remote debugging
Depending on whether the OpenShift or Kubernetes operational mode is used, the workflow andthe performed actions differs :
Table 6. Workflows
Use Case Kubernetes OpenShift
Build fabric8:build fabric8:push * Creates aimage against an exposed Docker daemon(with a docker.tar) * Pushes the image to aregistry which is then referenced from theconfiguration
fabric8:build * Creates or uses aBuildConfig * Creates or uses anImageStream which can be referenced bythe deployment descriptors in aDeploymenConfig * Starts an OpenShift buildwith a docker.tar as input
Deploy fabric8:deploy * Applies a Kubernetesresource descriptor to cluster
fabric8:deploy * Applies an OpenShiftresource descriptor to a cluster
14

Chapter 5. Build Goals
5.1. fabric8:resource
This is chapter is incomplete, but there is work in progress.
5.1.1. Labels and Annotations
Labels and annotations can be easily added to any resource object. This is best explained by anexample.
15
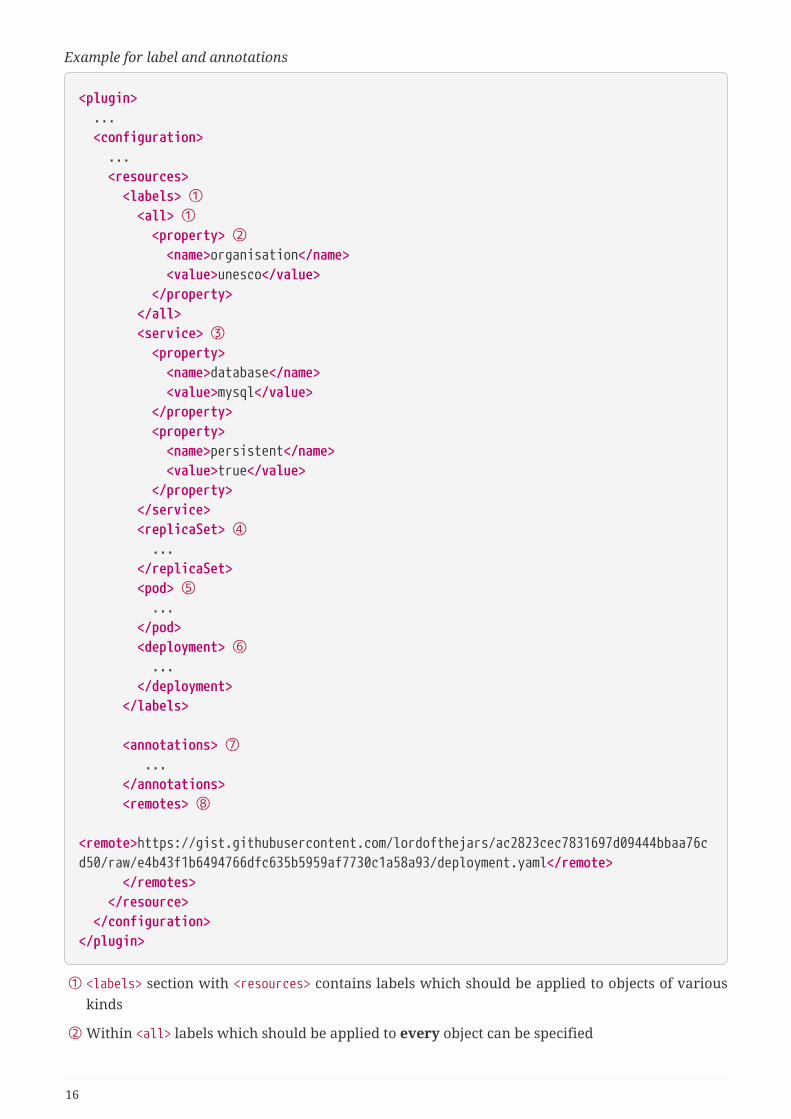
Example for label and annotations
<plugin> ... <configuration> ... <resources> <labels> ① <all> ① <property> ② <name>organisation</name> <value>unesco</value> </property> </all> <service> ③ <property> <name>database</name> <value>mysql</value> </property> <property> <name>persistent</name> <value>true</value> </property> </service> <replicaSet> ④ ... </replicaSet> <pod> ⑤ ... </pod> <deployment> ⑥ ... </deployment> </labels>
<annotations> ⑦ ... </annotations> <remotes> ⑧ <remote>https://gist.githubusercontent.com/lordofthejars/ac2823cec7831697d09444bbaa76cd50/raw/e4b43f1b6494766dfc635b5959af7730c1a58a93/deployment.yaml</remote> </remotes> </resource> </configuration></plugin>
① <labels> section with <resources> contains labels which should be applied to objects of variouskinds
② Within <all> labels which should be applied to every object can be specified
16

③ <service> labels are used to label services
④ <replicaSet> labels are for replica set and replication controller
⑤ <pod> holds labels for pod specifications in replication controller, replica sets and deployments
⑥ <deployment> is for labels on deployments (kubernetes) and deployment configs (openshift)
⑦ The subelements are also available for specifying annotations.
⑧ <remotes> you can set location of fragments as URL.
Labels and annotations can be specified in free form as a map. In this map the element name is thename of the label or annotation respectively, whereas the content is the value to set.
The following subelements are possible for <labels> and <annotations> :
Table 7. Label and annotation configuration
Element Description
all All entries specified in the <all> sections are applied to all resource objects created.This also implies build object like image stream and build configs which are createimplicitely for an OpenShift build.
deployment Labels and annotations applied to Deployment (for Kubernetes) and DeploymentConfig(for OpenShift) objects
pod Labels and annotations applied pod specification as used in ReplicationController,ReplicaSets, Deployments and DeploymentConfigs objects.
replicaSet Labels and annotations applied to ReplicaSet and ReplicationController objects.
service Labels and annotations applied to Service objects.
5.1.2. Secrets
Once you’ve configured some docker registry credentials into ~/.m2/setting.xml, as explained in theAuthentication section, you can create Kubernetes secrets from a server declaration.
XML configuration
You can create a secret using xml configuration in the pom.xml file. It should contain the followingfields:
key required description
dockerServerId
true the server id which is configured in ~/.m2/setting.xml
name true this will be used as name of the kubernetes secret resource
namespace
false the secret resource will be applied to the specific namespace, if provided
This is best explained by an example.
17

Example for XML configuration
<properties> <docker.registry>docker.io</docker.registry></properties>...<configuration> <resources> <secrets> <secret> <dockerServerId>${docker.registry}</dockerServerId> <name>mydockerkey</name> </secret> </secrets> </resources></configuration>
Yaml fragment with annotation
You can create a secret using a yaml fragment. You can reference the docker server id with anannotation maven.fabric8.io/dockerServerId. The yaml fragment file should be put under thesrc/main/fabric8/ folder.
Example
apiVersion: v1kind: Secretmetadata: name: mydockerkey namespace: default annotations: maven.fabric8.io/dockerServerId: ${docker.registry}type: kubernetes.io/dockercfg
5.1.3. Resource Validation
Resource goal also validates the generated resource descriptors using API specification ofKubernetes and OpenShift.
Table 8. Validation Configuration
Configuration
Description Default
fabric8.skipResourceValidation
If value is set to true then resource validation is skipped. This may beuseful if resource validation is failing for some reason but you still wantto continue the deployment.
false
fabric8.failOnValidationError
If value is set to true then any validation error will block the pluginexecution. A warning will be printed otherwise.
false
18

Configuration
Description Default
fabric8.build.switchToDeployment
If value is set to true then fabric8-maven-plugin would switch toDeployments rather than DeploymentConfig when not usingImageStreams on Openshift.
false
fabric8.openshift.trimImageInContainerSpec
If value is set to true then it would set the container image reference to "",this is done to handle weird behavior of Openshift 3.7 in whichsubsequent rollouts lead to ImagePullErr
false
5.1.4. Route Generation
When the fabric8:resource goal is run, an OpenShift Route descriptor (route.yml) will also begenerated along the service if an OpenShift cluster is targeted. If you do not want to generate aRoute descriptor, you can set the fabric8.openshift.generateRoute property to false.
Table 9. Route Generation Configuration
Configuration Description Default
fabric8.openshift.generateRoute
If value is set to false then noRoute descriptor will begenerated. By default it is set totrue, which will create aroute.yml descriptor and alsoadd Route resource toopenshift.yml.
true
If you do not want to generate a Route descriptor, you can also specify so in the pluginconfiguration in your POM as seen below.
Example for not generating route resource by configuring it in pom.xml
<plugin> <groupId>io.fabric8</groupId> <artifactId>fabric8-maven-plugin</artifactId> <version>4.1.0</version> <configuration> <generateRoute>false</generateRoute> </configuration></plugin>
If you are using resource fragments, then also you can configure it in your Service resourcefragment (e.g. service.yml). You need to add an expose label to the metadata section of your serviceand set it to false.
19

Example for not generating route resource by configuring it in resource fragments
metadata: annotations: api.service.kubernetes.io/path: /hello labels: expose: "false"spec: type: LoadBalancer
In case both the label and the property have been set with conflicting values, precedence will begiven to the property value, so if you set the label to true but set the property to false then no Routedescriptor will be generated because precedence will be given to the property value.
5.1.5. Other flags
Table 10. Other options available with resource goal
Configuration Description Default
fabric8.openshift.enableAutomaticTrigger
If the value is set to false thenautomatic deployments wouldbe disabled.
true
fabric8.skipHealthCheck If the value is set to true thenno readiness/liveness checkswould be added to anycontainers.
false
fabric8.openshift.deployTimeoutSeconds
The OpenShift deploy timeoutin seconds.
3600
fabric8.openshift.imageChangeTrigger
Add ImageChange triggers toDeploymentConfigs when onopenshift.
true
5.2. fabric8:buildThis goal is for building Docker images. Images can be built in two different ways depending on themode configuration (controlled by the fabric8.mode property). By default the mode is set to auto. Inthis case the plugin tries to detect which kind of build should be performed by contacting the APIserver. If this fails or if no cluster access is configured e.g. with oc login then the mode is set tokubernetes in which case a standard Docker build is performed. It can also be forced to openshift toperform an OpenShift build.
5.2.1. Kubernetes Build
If the mode is set to kubernetes then a normal Docker build is performed. The connectionconfiguration to access the Docker daemon is described in Access Configuration.
In order to make the generated images available to the Kubernetes cluster the generated images
20

need to be pushed to a registry with the goal fabric8:push. This is not necessary for single nodeclusters, though as there is no need to distribute images.
5.2.2. OpenShift Build
For the openshift mode, OpenShift specific builds will be performed. These are so called BinarySource builds ("binary builds" in short), where the data specified with the build configuration issent directly to OpenShift as a binary archive.
There are two kind of binary builds supported by this plugin, which can be selected with thebuildStrategy configuration option (fabric8.build.strategy property)
Table 11. Build Strategies
buildStrategy
Description
s2i The Source-to-Image (S2I) build strategy uses so called builder images for creatingnew application images from binary build data. The builder image to use is takenfrom the base image configuration specified with from in the image buildconfiguration. See below for a list of builder images which can be used with thisplugin.
docker A Docker Build is similar to a normal Docker build except that it is done by theOpenShift cluster and not by a Docker daemon. In addition this build pushes thegenerated image to the OpenShift internal registry so that it is accessbile in thewhole cluster.
Both build strategies update an Image Stream after the image creation.
The Build Config and Image streams can be managed by this plugin. If they do not exist, they will beautomatically created by fabric8:build. If they do already exist, they are reused, except when thebuildRecreate configuration option (property fabric8.build.recreate) is set to a value as describedin Configuration. Also if the provided build strategy is different than the one defined in the existingbuild configuration, the Build Config is edited to reflect the new type (which in turn removes allbuild associated with the previous build).
This image stream created can then be directly referenced from Deployment Configuration objectscreated by fabric8:resource. By default, image streams are created with a local lookup policy, sothat they can be used also by other resources such as Deployments or StatefulSets. This behaviorcan be turned off by setting the fabric8.s2i.imageStreamLookupPolicyLocal property to false whenbuilding the project.
In order to be able to to create these OpenShift resource objects access to an OpenShift installationis required. The access parameters are described in Access Configuration.
Regardless of which build mode is used, the images are configured in the same way.
The configuration consists of two parts: * a global section which defines the overall behaviour ofthis plugin * and an <images> section which defines how the images should be build
Many of the options below are relevant for the Kubernetes Workflow or the OpenShift Workflow
21

with Docker builds as they influence how the Docker image is build.
For an S2I binary build, on the other hand, the most relevant section is the Assembly one becausethe build depends on which buider/base image is used and how it interprets the content of theuploaded docker.tar.
5.2.3. Configuration
The following sections describe the usual configuration, which is similar to the build configurationused in the docker-maven-plugin.
In addition a more automatic way for creating predefined build configuration can be performedwith so called Generators. Generators are very flexible and can be easily created. These aredescribed in an extra section.
Global configuration parameters specify overall behavior common for all images to build. Some ofthe configuration options are shared with other goals.
Table 12. Global configuration
Element Description Property
apiVersion Use this variable if you are using an older version of docker notcompatible with the current default use to communicate with theserver.
docker.apiVersion
authConfig Authentication information when pulling from or pushing to Dockerregistry. There is a dedicated section Authentication for how doingsecurity.
autoPull Decide how to pull missing base images or images to start: * on :Automatic download any missing images (default) * off : Automaticpulling is switched off * always : Pull images always even when theyare already exist locally * once : For multi-module builds images areonly checked once and pulled for the whole build.
docker.autoPull
buildRecreate
If the effective mode is openshift then this option decides how theOpenShift resource objects associated with the build should be treatedwhen they already exist: * buildConfig or bc : Only the BuildConfig isrecreated * imageStream or is : Only the ImageStream is recreated *all : Both, BuildConfig and ImageStream are recreated * none : NeitherBuildConfig nor ImageStream is recreated The default is none. If youprovide the property without value then all is assumed, so everythinggets recreated.
fabric8.build.recreate
buildStrategy
If the effective mode is openshift then this option sets the buildstrategy. This can be: * s2i for a Source-to-Image build with a binarysource * docker for a Docker build with a binary source By default S2Iis used.
fabric8.build.strategy
22

Element Description Property
forcePull Applicable only for OpenShift, S2I build strategy. While creating aBuildConfig, By default, if the builder image specified in the buildconfiguration is available locally on the node, that image will be used.Using forcePull will override the local image and refresh it from theregistry the image stream points to.
fabric8.build.forcePull
certPath Path to SSL certificate when SSL is used for communicating with theDocker daemon. These certificates are normally stored in ~/.docker/.With this configuration the path can be set explicitly. If not set, thefallback is first taken from the environment variable DOCKER_CERT_PATHand then as last resort ~/.docker/. The keys in this are expected with itstandard names ca.pem, cert.pem and key.pem. Please refer to theDocker documentation for more information about SSL security withDocker.
docker.certPath
dockerHost The URL of the Docker Daemon. If this configuration option is notgiven, then the optional <machine> configuration section is consulted.The scheme of the URL can be either given directly as http or httpsdepending on whether plain HTTP communication is enabled or SSLshould be used. Alternatively the scheme could be tcp in which casethe protocol is determined via the IANA assigned port: 2375 for httpand 2376 for https. Finally, Unix sockets are supported by using thescheme unix together with the filesystem path to the unix socket. Thediscovery sequence used by the docker-maven-plugin to determinethe URL is: . value of dockerHost (docker.host) . the Docker hostassociated with the docker-machine named in <machine>, i.e. theDOCKER_HOST from docker-machine env. See below for more informationabout Docker machine support. . the value of the environmentvariable DOCKER_HOST. . unix:///var/run/docker.sock if it is a readablesocket.
docker.host
image In order to temporarily restrict the operation of plugin goals thisconfiguration option can be used. Typically this will be set via thesystem property docker.image when Maven is called. The value can bea single image name (either its alias or full name) or it can be acomma separated list with multiple image names. Any name whichdoesn’t refer an image in the configuration will be ignored.
docker.image
machine Docker machine configuration. See Docker Machine for possiblevalues
mode The build mode which can be * kubernetes : A Docker image will becreated by calling a Docker daemon. See Kubernetes Build for details.* openshift : An OpenShift Build will be triggered, which can be eithera Docker binary build or a S2I binary build, depending on theconfiguration buildStrategy. See OpenShift Build for details. * auto :The plugin tries to detect the mode by contacting the configuredcluster. auto is the default. (Because of technical reasons, "kubernetes"is currently the default, but will change to "auto" eventually)
fabric8.mode
23

Element Description Property
maxConnections
Number of parallel connections are allowed to be opened to theDocker Host. For parsing log output, a connection needs to be keptopen (as well for the wait features), so don’t put that number to low.Default is 100 which should be suitable for most of the cases.
docker.maxConnections
access Group of configuration parameters to connect toKubernetes/OpenShift cluster
outputDirectory
Default output directory to be used by this plugin. The default value istarget/docker and is only used for the goal fabric8:build.
docker.target.dir
portPropertyFile
Global property file into which the mapped properties should bewritten to. The format of this file and its purpose are also described inPort Mapping.
profile Profile to which contains enricher and generators configuration. SeeProfiles for details.
fabric8.profile
pullSecret The name to use for naming pullSecret to be created to pull the baseimage in case pulling from a private registry which requiresauthentication for Openshift. The default value for pull registry willbe picked from "docker.pull.registry/docker.registry".
fabric8.build.pullSecret
registry Specify globally a registry to use for pulling and pushing images. SeeRegistry handling for details.
docker.registry
resourceDir Directory where fabric8 resources are stored. This is also thedirectory where a custom profile is looked up. Default issrc/main/fabric8.
fabric8.resourceDir
environment
Environment name where resources are placed. For example, if youset this property to dev and resourceDir is the default one, Fabric8will look at src/main/fabric8/dev. If not set then root resourceDirdirectory is used.
fabric8.environment
skip With this parameter the execution of this plugin can be skippedcompletely.
docker.skip
skipBuild If set not images will be build (which implies also skip.tag) withfabric8:build
docker.skip.build
skipBuildPom
If set the build step will be skipped for modules of type pom. If not set,then by default projects of type pom will be skipped if there are noimage configurations contained.
fabric8.skip.build.pom
skipTag If set to true this plugin won’t add any tags to images that have beenbuilt with fabric8:build
docker.skip.tag
skipMachine
Skip using docker machine in any case docker.skip.machine
sourceDirectory
Default directory that contains the assembly descriptor(s) used by theplugin. The default value is src/main/docker. This option is onlyrelevant for the fabric8:build goal.
docker.source.dir
24

Element Description Property
verbose Boolean attribute for switching on verbose output like the build stepswhen doing a Docker build. Default is false
docker.verbose
5.2.4. Access Configuration
You can configure parameters to define how Fabric8 is going to connect to Kubernetes/OpenShiftcluster instead of relaying on default parameters.
<configuration> <access> <username></username> <password></password> <masterUrl></masterUrl> <apiVersion></apiVersion> </access></configuration>
Element Description Property(Systemproperty orMavenproperty)
username Username on which to operate fabric8.username
password Password on which to operate fabric8.password
namespace Namespace on which to operate fabric8.namespace
masterUrl Master URL on which to operate fabric8.masterUrl
apiVersion Api version on which to operate fabric8.apiVersion
caCertFile CaCert File on which to operate fabric8.caCertFile
caCertData CaCert Data on which to operate fabric8.caCertData
clientCertFile
Client Cert File on which to operate fabric8.clientCertFile
clientCertData
Client Cert Data on which to operate fabric8.clientCertData
clientKeyFile
Client Key File on which to operate fabric8.clientKeyFile
clientKeyData
Client Key Data on which to operate fabric8.clientKeyData
25

Element Description Property(Systemproperty orMavenproperty)
clientKeyAlgo
Client Key Algorithm on which to operate fabric8.clientKeyAlgo
clientKeyPassphrase
Client Key Passphrase on which to operate fabric8.clientKeyPassphrase
trustStoreFile
Trust Store File on which to operate fabric8.trustStoreFile
trustStorePassphrase
Trust Store Passphrase on which to operate fabric8.trustStorePassphrase
keyStoreFile
Key Store File on which to operate fabric8.keyStoreFile
keyStorePassphrase
Key Store Passphrase on which to operate fabric8.keyStorePassphrase
5.2.5. Image Configuration
The configuration how images should be created a defined in a dedicated <images> sections. Theseare specified for each image within the <images> element of the configuration with one <image>element per image to use.
The <image> element can contain the following sub elements:
Table 13. Image Configuration
Element Description
name Each <image> configuration has a mandatory, unique docker repository name. Thiscan include registry and tag parts, but also placeholder parameters. See below fora detailed explanation.
alias Shortcut name for an image which can be used for identifying the image withinthis configuration. This is used when linking images together or for specifying itwith the global image configuration element.
registry Registry to use for this image. If the name already contains a registry this takesprecedence. See Registry handling for more details.
build Element which contains all the configuration aspects when doing a fabric8:build.This element can be omitted if the image is only pulled from a registry e.g. assupport for integration tests like database images.
The <build> section is mandatory and is explained in below.
26

Example for <image>
<configuration> .... <images> <image> ① <name>%g/docker-demo:0.1</name> ② <alias>service</alias> ③ <build>....</build> ④ </image> <image> .... </image> </images></configuration>
① One or more <image>` definitions
② The Docker image name used when creating the image.
③ An alias which can be used in other parts of the plugin to reference to this image. This aliasmust be unique.
④ A <build> section as described in Build Configuration
5.2.6. Build Configuration
There are two different modes how images can be built:
Inline plugin configuration
With an inline plugin configuration all information required to build the image is contained in theplugin configuration. By default its the standard XML based configuration for the plugin but can beswitched to a property based configuration syntax as described in the section Externalconfiguration. The XML configuration syntax is recommended because of its more structured andtyped nature.
When using this mode, the Dockerfile is created on the fly with all instructions extracted from theconfiguration given.
External Dockerfile or Docker archive
Alternatively an external Dockerfile template or Docker archive can be used. This mode is switchedon by using one of these three configuration options within
• contextDir specifies docker build context if an external dockerfile is located outside of Dockerbuild context. If not specified, Dockerfile’s parent directory is used as build context.
• dockerFile specifies a specific Dockerfile path.
• dockerArchive specifies a previously saved image archive to load directly. Such a tar archivecan be created with docker save. If a dockerArchive is provided, no dockerFile or dockerFileDirmust be given.
• dockerFileDir (deprecated, use contextDir) specifies a directory containing a Dockerfile that
27

will be used to create the image. The name of the Dockerfile is Dockerfile by default but can bealso set with the option dockerFile (see below).
All paths can be either absolute or relative paths (except when both dockerFileDir and dockerFileare provided in which case dockerFile must not be absolute). A relative path is looked up in${project.basedir}/src/main/docker by default. You can make it easily an absolute path by using${project.basedir} in your configuration.
Adding assemblies in Dockerfile mode
Any additional files located in the dockerFileDir directory will also be added to the build context aswell. You can also use an assembly if specified in an assembly configuration. However, you need toadd the files on your own in the Dockerfile with an ADD or COPY command. The files of the assemblyare stored in a build context relative directory maven/ but can be changed by changing the assemblyname with the option <name> in the assembly configuration.
E.g. the files can be added with
Example
COPY maven/ /my/target/directory
so that the assembly files will end up in /my/target/directory within the container.
If this directory contains a .maven-dockerignore (or alternatively, a .maven-dockerexclude file), then itis used for excluding files for the build. Each line in this file is treated as a FileSet exclude pattern asused by the maven-assembly-plugin. It is similar to .dockerignore when using Docker but has aslightly different syntax (hence the different name). Example .maven-dockerexclude or .maven-dockerignore is an example which excludes all compiled Java classes.
Example 1. Example .maven-dockerexclude or .maven-dockerignore
target/classes/** ①
① Exclude all compiled classes
If this directory contains a .maven-dockerinclude file, then it is used for including only those files forthe build. Each line in this file is also treated as a FileSet exclude pattern as used by the maven-assembly-plugin. Example .maven-dockerinclude shows how to include only jar file that have buildto the Docker build context.
Example 2. Example .maven-dockerinclude
target/*.jar ①
① Only add jar file to you Docker build context.
28

Except for the assembly configuration all other configuration options are ignored for now.
Simple Dockerfile build
When only a single image should be built with a Dockerfile no XML configuration is needed at all.All what need to be done is to place a Dockerfile into the top-level module directory, alongside topom.xml. You can still configure global aspects in the plugin configuration, but as soon as you add an<image> in the XML configuration, you need to configure also the build explicitly.
The image name is by default set from the Maven coordinates (%g/%a:%l, see Image Name for anexplanation of the params which are essentially the Maven GAV) This name can be set with theproperty docker.name.
If you want to add some <run> configuration to this image for starting it with docker:run then youcan add an image configuration but without a <build> section in which case the Dockerfile will bepicked up, too. This works only for a single image, though.
Filtering
fabric8-maven-plugin filters given Dockerfile with Maven properties, much like the maven-resource-plugin does. Filtering is enabled by default and can be switched off with a build config<filter>false</filter>. Properties which we want to replace are specified with the ${..} syntax.Replacement includes Maven project properties such as ${project.artifactId}, properties set in thebuild, command-line properties, and system properties. Unresolved properties remain untouched.
This partial replacement means that you can easily mix it with Docker build arguments andenvironment variable reference, but you need to be careful. If you want to be more explicit aboutthe property delimiter to clearly separate Docker properties and Maven properties you canredefine the delimiter. In general, the filter option can be specified the same way as delimiters inthe resource plugin. In particular, if this configuration contains a * then the parts left, and right ofthe asterisks are used as delimiters.
For example, the default <filter>${*}</filter> parse Maven properties in the format that we know.If you specify a single character for <filter> then this delimiter is taken for both, the start and theend. E.g a <filter>@</filter> triggers on parameters in the format @…@, much like in the maven-invoker-plugin. Use something like this if you want to clearly separate from Docker builds args. Thisform of property replacement works for Dockerfile only. For replacing other data in other filestargeted for the Docker image, please use the maven-resource-plugin or an assembly configurationwith filtering to make them available in the docker build context.
Example
The following example uses a Dockerfile in the directory src/main/docker/demo and replaces allproperties in the format @property@ within the Dockerfile.
29

<plugin> <configuration> <images> <image> <name>user/demo</name> <build> <dockerFileDir>demo</dockerFileDir> <filter>@</filter> </build> </image> </images> </configuration> ...</plugin>
Build Plugins
This plugin supports so call dmp-plugins which are used during the build phase. dmp-plugins areenabled by just declaring a dependency in the plugin declaration:
<plugin> <groupId>io.fabric8</groupId> <artifactId>docker-maven-plugin</artifactId>
<dependencies> <dependency> <groupId>io.fabric8</groupId> <artifactId>run-java-sh</artifactId> <version>1.2.2</version> </dependency> </dependencies></plugin>
These plugins contain a descriptor META-INF/maven/io.fabric8/dmp-plugin with class names, line-by-line:
io.fabric8.runsh.RunShLoader
During a build with docker:build, those classes are loaded and certain fixed method are called.
The following methods are supported:
Method Description
addExtraFiles A static method called by dmp with a single File argument. This will point to adirectory docker-extra which can be referenced easily by a Dockerfile or anassembly. A dmp plugin typically will create an own subdirectory to avoid a clashwith other dmp-plugins.
30

If a configured plugin does not provide method of this name and signature, then it will be simplyignored. Also, no interface needs to be implemented to keep the coupling low.
The following official dmp-plugins are known and supported:
Name G,A Description
run-java.sh fabric8.io,run-java
General purpose startup script fo running Java applications. The dmpplugin creates a target/docker-extra/run-java/run-java.sh which canbe included in a Dockerfile (see the example above). See the run-java.sh Documentation for more details.
Check out samples/run-java for a fully working example.
All build relevant configuration is contained in the <build> section of an image configuration. Thefollowing configuration options are supported:
Table 14. Build configuration (<image>)
Element Description
assembly specifies the assembly configuration as described in Build Assembly
args Map specifying the value of Docker build args which should be used whenbuilding the image with an external Dockerfile which uses build arguments. Thekey-value syntax is the same as when defining Maven properties (or labels orenv). This argument is ignored when no external Dockerfile is used. Build args canalso be specified as properties as described in Build Args
buildOptions Map specifying the build options to provide to the docker daemon when buildingthe image. These options map to the ones listed as query parameters in the DockerRemote API and are restricted to simple options (e.g.: memory, shmsize). If youuse the respective configuration options for build options natively supported bythe build configuration (i.e. nocache, cleanup=remove for buildoption forcerm=1 andargs for build args) then these will override any corresponding options givenhere. The key-value syntax is the same as when defining environment variablesor labels as described in Setting Environment Variables and Labels.
cleanup Cleanup dangling (untagged) images after each build (including any containerscreated from them). Default is try which tries to remove the old image, butdoesn’t fail the build if this is not possible because e.g. the image is still used by arunning container. Use remove if you want to fail the build and none if no cleanupis requested.
cmd A command to execute by default (i.e. if no command is provided when acontainer for this image is started). See Startup Arguments for details.
compression The compression mode how the build archive is transmitted to the dockerdaemon (fabric8:build) and how docker build archives are attached to this buildas sources (fabric8:source). The value can be none (default), gzip or bzip2.
dockerFile Path to a Dockerfile which also triggers Dockerfile mode. See External Dockerfilefor details.
31

Element Description
dockerFileDir Path to a directory holding a Dockerfile and switch on Dockerfile mode. SeeExternal Dockerfile for details.
dockerArchive
Path to a saved image archive which is then imported. See Docker archive fordetails.
entryPoint An entrypoint allows you to configure a container that will run as an executable.See Startup Arguments for details.
env The environments as described in Setting Environment Variables and Labels.
filter Enable and set the delimiters for property replacements. By default properties inthe format ${..} are replaced with Maven properties. You can switch off propertyreplacement by setting this property to false. When using a single char like @ thenthis is used as a delimiter (e.g @…@). See Filtering for more details.
from The base image which should be used for this image. If not given this default tobusybox:latest and is suitable for a pure data image. In case of an S2I Binary buildthis parameter specifies the S2I Builder Image to use, which by default isfabric8/s2i-java:latest. See also from-ext how to add additional properties forthe base image.
fromExt Extended definition for a base image. This field holds a map of defined in<key>value</key> format. The known keys are: * <name> : Name of the base image *<kind> : Kind of the reference to the builder image when in S2I build mode. Bydefault its ImageStreamTag but can be also ImageStream. An alternative would beDockerImage * <namespace> : Namespace where this builder image lives. A provided<from> takes precedence over the name given here. This tag is useful forextensions of this plugin like the fabric8-maven-plugin which can evaluate theadditional information given here.
healthCheck Definition of a health check as described in Healthcheck
imagePullPolicy
Specific pull policy for the base image. This overwrites any global pull policy. Seethe globale configuration option imagePullPolicy for the possible values and thedefault.
labels Labels as described in Setting Environment Variables and Labels.
maintainer The author (MAINTAINER) field for the generated image
nocache Don’t use Docker’s build cache. This can be overwritten by setting a systemproperty docker.nocache when running Maven.
optimise if set to true then it will compress all the runCmds into a single RUN directive so thatonly one image layer is created.
ports The exposed ports which is a list of <port> elements, one for each port to expose.Whitespace is trimmed from each element and empty elements are ignored. Theformat can be either pure numerical ("8080") or with the protocol attached("8080/tcp").
shell Shell to be used for the runCmds. It contains arg elements which are defining theexecutable and its params.
32

Element Description
runCmds Commands to be run during the build process. It contains run elements which arepassed to the shell. Whitespace is trimmed from each element and emptyelements are ignored. The run commands are inserted right after the assemblyand after workdir into the Dockerfile. This tag is not to be confused with the <run>section for this image which specifies the runtime behaviour when startingcontainers.
skip if set to true disables building of the image. This config option is best usedtogether with a maven property
skipTag If set to true this plugin won’t add any tags to images. Property: docker.skip.tag
tags List of additional tag elements with which an image is to be tagged after the build.Whitespace is trimmed from each element and empty elements are ignored.
user User to which the Dockerfile should switch to the end (corresponds to the USERDockerfile directive).
volumes List of volume elements to create a container volume. Whitespace is trimmed fromeach element and empty elements are ignored.
workdir Directory to change to when starting the container.
From this configuration this Plugin creates an in-memory Dockerfile, copies over the assembledfiles and calls the Docker daemon via its remote API.
33

Example
<build> <from>java:8u40</from> <maintainer>[email protected]</maintainer> <tags> <tag>latest</tag> <tag>${project.version}</tag> </tags> <ports> <port>8080</port> </ports> <volumes> <volume>/path/to/expose</volume> </volumes> <buildOptions> <shmsize>2147483648</shmsize> </buildOptions>
<shell> <exec> <arg>/bin/sh</arg> <arg>-c</arg> </exec> </shell> <runCmds> <run>groupadd -r appUser</run> <run>useradd -r -g appUser appUser</run> </runCmds>
<entryPoint> <!-- exec form for ENTRYPOINT --> <exec> <arg>java</arg> <arg>-jar</arg> <arg>/opt/demo/server.jar</arg> </exec> </entryPoint>
<assembly> <mode>dir</mode> <targetDir>/opt/demo</targetDir> <descriptor>assembly.xml</descriptor> </assembly></build>
In order to see the individual build steps you can switch on verbose mode either by setting theproperty docker.verbose or by using <verbose>true</verbose> in the Global configuration
34

5.2.7. Assembly
The <assembly> element within <build> is has an XML struture and defines how build artifacts andother files can enter the Docker image.
Table 15. Assembly Configuration (<image> : <build>)
Element Description
name Assembly name, which is maven by default. This name is used for the archives anddirectories created during the build. This directory holds the files specified by theassembly. If an external Dockerfile is used than this name is also the relativedirectory which contains the assembly files.
targetDir Directory under which the files and artifacts contained in the assembly will becopied within the container. The default value for this is /<assembly name>, so/maven if name is not set to a different value. This option has no meaning when anexternal Dockerfile is used.
inline Inlined assembly descriptor as described in Assembly Descriptor below.
descriptor Path to an assembly descriptor file, whose format is described AssemblyDescriptor below.
descriptorRef Alias to a predefined assembly descriptor. The available aliases are also describedin Assembly Descriptor below.
dockerFileDir Directory containing an external Dockerfile. This option is deprecated, please use<dockerFileDir> directly in the <build> section.
exportTargetDir
Specification whether the targetDir should be exported as a volume. This value istrue by default except in the case the targetDir is set to the container root (/). It isalso false by default when a base image is used with from since exporting makesno sense in this case and will waste disk space unnecessarily.
ignorePermissions
Specification if existing file permissions should be ignored when creating theassembly archive with a mode dir. This value is false by default. This property isdeprecated, use a permissions of ignore instead.
mode Mode how the how the assembled files should be collected: * dir : Files are simplycopied (default), * tar : Transfer via tar archive * tgz : Transfer via compressed tararchive * zip : Transfer via ZIP archive The archive formats have the advantagethat file permission can be preserved better (since the copying is independentfrom the underlying files systems), but might triggers internal bugs from theMaven assembler (as it has been reported in #171)
permissions Permission of the files to add: * ignore to use the permission as found on filesregardless on any assembly configuration * keep to respect the assembly providedpermissions, exec for setting the executable bit on all files (required for Windowswhen using an assembly mode dir) * auto to let the plugin select exec on Windowsand keep on others. keep is the default value.
tarLongFileMode
Sets the TarArchiver behaviour on file paths with more than 100 characterslength. Valid values are: "warn"(default), "fail", "truncate", "gnu", "posix","posix_warn" or "omit"
35
Element Description
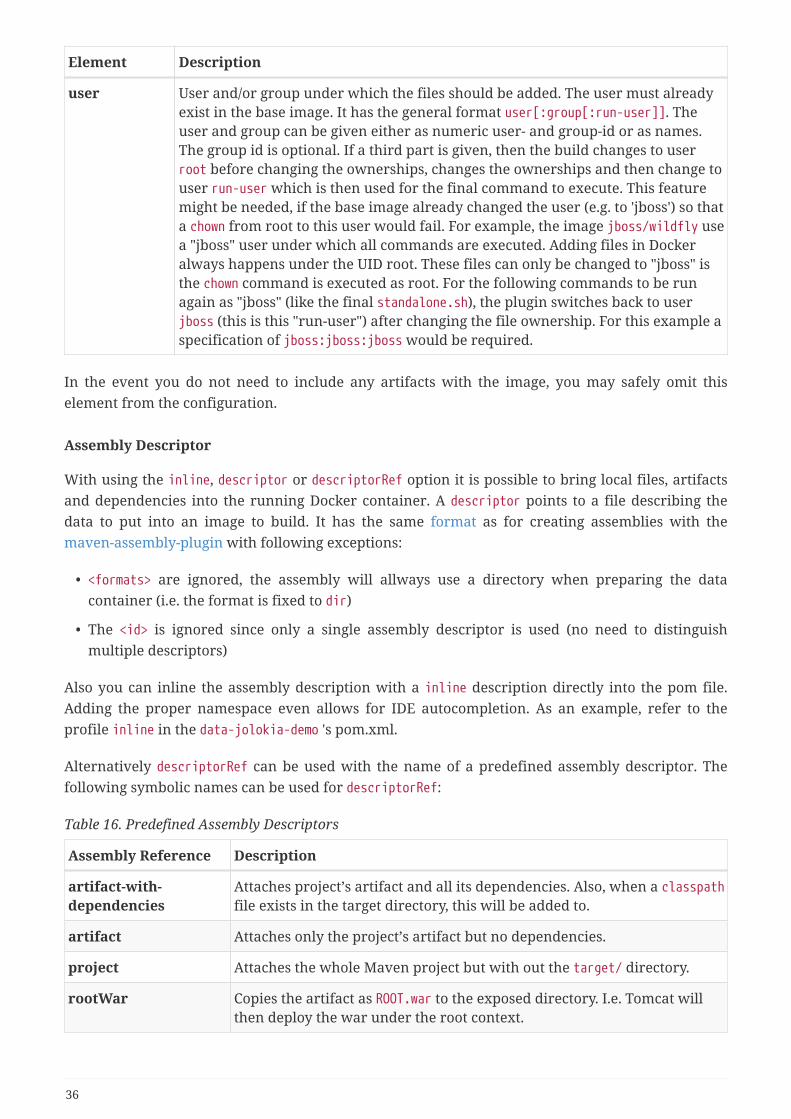
user User and/or group under which the files should be added. The user must alreadyexist in the base image. It has the general format user[:group[:run-user]]. Theuser and group can be given either as numeric user- and group-id or as names.The group id is optional. If a third part is given, then the build changes to userroot before changing the ownerships, changes the ownerships and then change touser run-user which is then used for the final command to execute. This featuremight be needed, if the base image already changed the user (e.g. to 'jboss') so thata chown from root to this user would fail. For example, the image jboss/wildfly usea "jboss" user under which all commands are executed. Adding files in Dockeralways happens under the UID root. These files can only be changed to "jboss" isthe chown command is executed as root. For the following commands to be runagain as "jboss" (like the final standalone.sh), the plugin switches back to userjboss (this is this "run-user") after changing the file ownership. For this example aspecification of jboss:jboss:jboss would be required.
In the event you do not need to include any artifacts with the image, you may safely omit thiselement from the configuration.
Assembly Descriptor
With using the inline, descriptor or descriptorRef option it is possible to bring local files, artifactsand dependencies into the running Docker container. A descriptor points to a file describing thedata to put into an image to build. It has the same format as for creating assemblies with themaven-assembly-plugin with following exceptions:
• <formats> are ignored, the assembly will allways use a directory when preparing the datacontainer (i.e. the format is fixed to dir)
• The <id> is ignored since only a single assembly descriptor is used (no need to distinguishmultiple descriptors)
Also you can inline the assembly description with a inline description directly into the pom file.Adding the proper namespace even allows for IDE autocompletion. As an example, refer to theprofile inline in the data-jolokia-demo 's pom.xml.
Alternatively descriptorRef can be used with the name of a predefined assembly descriptor. Thefollowing symbolic names can be used for descriptorRef:
Table 16. Predefined Assembly Descriptors
Assembly Reference Description
artifact-with-dependencies
Attaches project’s artifact and all its dependencies. Also, when a classpathfile exists in the target directory, this will be added to.
artifact Attaches only the project’s artifact but no dependencies.
project Attaches the whole Maven project but with out the target/ directory.
rootWar Copies the artifact as ROOT.war to the exposed directory. I.e. Tomcat willthen deploy the war under the root context.
36

Example
<images> <image> <build> <assembly> <descriptorRef>artifact-with-dependencies</descriptorRef> .....
will add the created artifact with the name ${project.build.finalName}.${artifact.extension} andall jar dependencies in the the targetDir (which is /maven by default).
All declared files end up in the configured targetDir (or /maven by default) in the created image.
Maven peculiarities when including the artifact
If the assembly references the artifact to build with this pom, it is required that the package phase isincluded in the run. Otherwise the artifact file, can’t be found by docker:build. This is an oldoutstanding issue of the assembly plugin which probably can’t be fixed because of the way howMaven works. We tried hard to workaround this issue and in 90% of all cases, you won’t experienceany problem. However, when the following warning happens which might lead to the given error:
[WARNING] Cannot include project artifact: io.fabric8:helloworld:jar:0.20.0; itdoesn't have an associated file or directory.[WARNING] The following patterns were never triggered in this artifact inclusionfilter:o 'io.fabric8:helloworld'
[ERROR] DOCKER> Failed to create assembly for docker image (with mode 'dir'): Errorcreating assembly archive docker: You must set at least one file.
then you have two options to fix this:
• Call mvn package fabric8:build to explicitly run "package" and "docker:build" in a chain.
• Bind build to an to an execution phase in the plugin’s definition. By default fabric8:build willbind to the install phase is set in an execution. Then you can use a plain mvn install forbuilding the artifact and creating the image.
<executions> <execution> <id>docker-build</id> <goals> <goal>build</goal> </goals> </execution></executions>
Example
37

In the following example a dependency from the pom.xml is included and mapped to the namejolokia.war. With this configuration you will end up with an image, based on busybox which has adirectory /maven containing a single file jolokia.war. This volume is also exported automatically.
<assembly> <inline> <dependencySets> <dependencySet> <includes> <include>org.jolokia:jolokia-war</include> </includes> <outputDirectory>.</outputDirectory> <outputFileNameMapping>jolokia.war</outputFileNameMapping> </dependencySet> </dependencySets> </inline></assembly>
Another container can now connect to the volume an 'mount' the /maven directory. A containerfrom consol/tomcat-7.0 will look into /maven and copy over everything to /opt/tomcat/webappsbefore starting Tomcat.
If you are using the artifact or artifact-with-dependencies descriptor, it is possible to change thename of the final build artifact with the following:
Example
<build> <finalName>your-desired-final-name</finalName> ...</build>
Please note, based upon the following documentation listed here, there is no guarantee the plugincreating your artifact will honor it in which case you will need to use a custom descriptor likeabove to achieve the desired naming.
Currently the jar and war plugins properly honor the usage of finalName.
5.2.8. Environment and Labels
When creating a container one or more environment variables can be set via configuration withthe env parameter
38

Example
<env> <JAVA_HOME>/opt/jdk8</JAVA_HOME> <CATALINA_OPTS>-Djava.security.egd=file:/dev/./urandom</CATALINA_OPTS></env>
If you put this configuration into profiles you can easily create various test variants with a singleimage (e.g. by switching the JDK or whatever).
It is also possible to set the environment variables from the outside of the plugin’s configurationwith the parameter envPropertyFile. If given, this property file is used to set the environmentvariables where the keys and values specify the environment variable. Environment variablesspecified in this file override any environment variables specified in the configuration.
Labels can be set inline the same way as environment variables:
Example
<labels> <com.example.label-with-value>foo</com.example.label-with-value> <version>${project.version}</version> <artifactId>${project.artifactId}</artifactId></labels>
5.2.9. Startup Arguments
Using entryPoint and cmd it is possible to specify the entry point or cmd for a container.
The difference is, that an entrypoint is the command that always be executed, with the cmd asargument. If no entryPoint is provided, it defaults to /bin/sh -c so any cmd given is executed with ashell. The arguments given to docker run are always given as arguments to the entrypoint,overriding any given cmd option. On the other hand if no extra arguments are given to docker runthe default cmd is used as argument to entrypoint.
See this stackoverflow question for a detailed explanation.
An entry point or command can be specified in two alternative formats:
Table 17. Entrypoint and Command Configuration
Mode Description
shell Shell form in which the whole line is given to shell -c for interpretation.
exec List of arguments (with inner <args>) arguments which will be given to the execcall directly without any shell interpretation.
Either shell or params should be specified.
39

Example
<entryPoint> <!-- shell form --> <shell>java -jar $HOME/server.jar</shell></entryPoint>
or
Example
<entryPoint> <!-- exec form --> <exec> <arg>java</arg> <arg>-jar</arg> <arg>/opt/demo/server.jar</arg> </exec></entryPoint>
This can be formulated also more dense with:
Example
<!-- shell form --><entryPoint>java -jar $HOME/server.jar</entryPoint>
or
Example
<entryPoint> <!-- exec form --> <arg>java</arg> <arg>-jar</arg> <arg>/opt/demo/server.jar</arg></entryPoint>
INFO
Startup arguments are not used in S2I builds
5.2.10. Build Args
As described in section Configuration for external Dockerfiles Docker build arg can be used. Inaddition to the configuration within the plugin configuration you can also use properties to specifythem:
• Set a system property when running Maven, eg.:
40

-Ddocker.buildArg.http_proxy=http://proxy:8001. This is especially useful when usingpredefined Docker arguments for setting proxies transparently.
• Set a project property within the pom.xml, eg.:
Example
<docker.buildArg.myBuildArg>myValue</docker.buildArg.myBuildArg>
Please note that the system property setting will always override the project property. Also notethat for all properties which are not Docker predefined properties, the external Dockerfile mustcontain an ARGS instruction.
5.3. fabric8:push
Section needs review and rearrangments
This goal uploads images to the registry which have a <build> configuration section. The images topush can be restricted with the global option filter (see Global Configuration for details). Theregistry to push is by default docker.io but can be specified as part of the images’s name name theDocker way. E.g. docker.test.org:5000/data:1.5 will push the image data with tag 1.5 to the registrydocker.test.org at port 5000. Security information (i.e. user and password) can be specified inmultiple ways as described in section Authentication.
By default a progress meter is printed out on the console, which is omitted when using Maven inbatch mode (option -B). A very simplified progress meter is provided when using no color output(i.e. with -Ddocker.useColor=false).
Table 18. Push options
Element Description Property
skipPush If set to true the plugin won’t push any images that have been built. docker.skip.push
skipTag If set to true this plugin won’t push any tags docker.skip.tag
pushRegistry
The registry to use when pushing the image. See Registry Handling formore details.
docker.push.registry
retries How often should a push be retried before giving up. This useful forflaky registries which tend to return 500 error codes from time totime. The default is 0 which means no retry at all.
docker.push.retries
5.4. fabric8:applyThis goals applies the resources created with fabric8:resource to a connected Kubernetes orOpenShift cluster. It’s similar to fabric8:deploy but does not the full deployment cycle of creatingthe resource, creating the application image and the sending the resource descriptors to theclusters. This goal can be easily bound to <executions> within the plugin’s configuration and binds
41

by default to the install lifecycle phase.
mvn fabric8:apply
5.5. fabric8:resource-applyThis goal will generate the kubernetes resources via the fabric8:resource goal and apply them intothe current kubernetes cluster.
mvn fabric8:resource-apply
Its usually simpler to just use the fabric8:deploy goal which performs a build, creates the dockerimage and runs fabric8:resource-apply:
mvn fabric8:deploy
However if you have built your code and docker image but find some issue with the generatedmanifests; you can update the configuration of the fabric8:resource goal in your pom.xml or modifythe YAML files in src/main/fabric8 and then run:
mvn fabric8:resource-apply
Which will skip running unit tests and generating the docker build via fabric8:build but will onlyregenerate the manifests and apply them. This can help speed up the round trip time when fixingup resource generation issues.
Note to use this goal you must have the fabric8:resource goal bound to your executions in yourpom.xml. e.g. like this:
<plugin> <groupId>io.fabric8</groupId> <artifactId>fabric8-maven-plugin</artifactId> <version>4.1.0</version>
<!-- Connect fabric8:resource to the lifecycle phases --> <executions> <execution> <id>fabric8</id> <goals> <goal>resource</goal> </goals> </execution> </executions></plugin>
42

5.6. fabric8:helm
This goal is deprecated and might vanish in version 4.0 of this plugin. It’s not yetdecided whether we fix this goal for 4.0 or drop it. Please raise your voice if youwant to keep it. Even better, if you want to support this goal, we are alwayslooking for contributions ;-)
This goal is for creating Helm charts for your Maven project so that you can install, update or deleteyour app in Kubernetes using Helm.
For creating a Helm chart you simply call fabric8:helm goal on the command line:
mvn fabric8:resource fabric8:helm
The fabric8:resource goal is required to create the resource descriptors which are included in theHelm chart. If you have already built the resource then you can ommit this goal.
The configuration happens in a <helm> section within the plugin’s configuration:
Example Helm configuration
<plugin> <configuration> <helm> <chart>Jenkins</chart> <keywords>ci,cd,server</keywords> </helm> ... </configuration></plugin>
This configuration section know the following subelements in order to configure your Helm chart.
Table 19. Helm configuration
Element Description Property
chart The Chart name, which is ${project.artifactId} if not given. fabric8.helm.chart
type For which platform to generate the chart. By default this is kubernetes,but can be also openshift for using OpenShift specific resources in thechart. Please note that there is no OpenShift support yet for charts, sothis is experimental. You can also add both values as a commaseparated list.
fabric8.helm.type
sourceDir Where to find the resource descriptors generated withfabric8:resource. By default this is ${basedir}/target/classes/META-INF/fabric8, which is also the output directory used byfabric8:resource.
fabric8.helm.sourceDir
43

Element Description Property
outputDir Where to create the the Helm chart, which is${basedir}/target/fabric8/helm by default for Kubernetes (and${basedir}/target/fabric8/helmshift for OpenShift).
fabric8.helm.outputDir
keywords Comma separated list of keywords to add to the chart
engine The template engine to use
chartExtension
The Helm chart file extension, default value is tar.gz fabric8.helm.chartExtension
In a next step you can install this via the helm command line tool as follows:
helm install target/fabric8/helm/kubernetes
To add the helm goal to your project so that it is automatically executed just add the helm goal to theexecutions section of the fabric8-maven-plugin section of your pom.xml.
Add helm goal
<plugin> <groupId>io.fabric8</groupId> <artifactId>fabric8-maven-plugin</artifactId>
<!-- ... -->
<executions> <execution> <goals> <goal>resource</goal> <goal>helm</goal> <goal>build</goal> <goal>deploy</goal> </goals> </execution> </executions></plugin>
In addition this goal will also create a tar-archive below ${basedir}/target which contains the chartwith its template. This tar is added as an aritfact with classifier helm to the build (helmshift for theOpenShift mode).
44

Chapter 6. Development Goals
6.1. fabric8:deployThis is the main goal for building your docker image, generating the kubernetes resources anddeploying them into the cluster (insofar your pom.xml is set up correct; keep reading :)).
mvn fabric8:deploy
This goal is designed to run fabric8:build and fabric8:resource before the deploy *iff you have thegoals bound in your pom.xml:
<plugin> <groupId>io.fabric8</groupId> <artifactId>fabric8-maven-plugin</artifactId> <version>4.1.0</version>
<!-- Connect fabric8:resource, fabric8:build and fabric8:helm to lifecycle phases--> <executions> <execution> <id>fabric8</id> <goals> <goal>resource</goal> <goal>build</goal> <goal>helm</goal> </goals> </execution> </executions></plugin>
Effectively this builds your project then invokes these goals:
• fabric8:build
• fabric8:resource-apply
By default the behaviour of resource goal is it generates route.yml for a service if you have not doneany configuration changes. Sometimes there may be case when you want to generate route.yml butdo not want to create route resource on OpenShift Cluster. This can be achieved by the followingconfiguration.
45

Example for not generating route resource on your cluster
<plugin> <groupId>io.fabric8</groupId> <artifactId>fabric8-maven-plugin</artifactId> <version>4.1.0</version> <configuration> <enricher> <excludes> <exclude>f8-expose</exclude> </excludes> </enricher> </configuration></plugin>
6.2. fabric8:undeployThis goal is for deleting the kubernetes resources that you deployed via the [fabric8:run] orfabric8:deploy goals
It iterates through all the resources generated by the fabric8:resource goal and deletes them fromyour current kubernetes cluster.
mvn fabric8:undeploy
6.3. fabric8:logThis goal tails the log of the app that you deployed via the fabric8:deploy goal
mvn fabric8:log
You can then terminate the output by hitting Ctrl+C
If you wish to get the log of the app and then terminate immediately then try:
mvn fabric8:log -Dfabric8.log.follow=false
This lets you pipe the output into grep or some other tool
mvn fabric8:log -Dfabric8.log.follow=false | grep Exception
If your app is running in multiple pods you can configure the pod name to log via thefabric8.log.pod property, otherwise it defaults to the latest pod:
46

mvn fabric8:log -Dfabric8.log.pod=foo
If your pod has multiple containers you can configure the container name to log via thefabric8.log.container property, otherwise it defaults to the first container:
mvn fabric8:log -Dfabric8.log.container=foo
6.4. fabric8:debugThis goal enables debugging in your Java app and then port forwards from localhost to the latestrunning pod of your app so that you can easily debug your app from your Java IDE.
mvn fabric8:debug
Then follow the on screen instructions.
The default debug port is 5005. If you wish to change the local port to use for debugging then pass inthe fabric8.debug.port parameter:
mvn fabric8:debug -Dfabric8.debug.port=8000
Then in your IDE you start a Remote debug execution using this remote port using localhost andyou should be able to set breakpoints and step through your code.
This lets you debug your apps while they are running inside a Kubernetes cluster - for example ifyou wish to debug a REST endpoint while another pod is invoking it.
Debug is enabled via the JAVA_ENABLE_DEBUG environment variable being set to true. Thisenvironment variable is used for all the standard Java docker images used by Spring Boot, flatclasspath and executable JAR projects and Wildfly Swarm. If you use your own custom docker baseimage you may wish to also respect this environment variable too to enable debugging.
6.4.1. Speeding up debugging
By default the fabric8:debug goal has to edit your Deployment to enable debugging then wait for apod to start. It might be in development you frequently want to debug things and want to speedthings up a bit.
If so you can enable debug mode for each build via the fabric8.debug.enabled property.
e.g. you can pass this property on the command line:
mvn fabric8:deploy -Dfabric8.debug.enabled=true
47

Or you can add something like this to your ~/.m2/settings.xml file so that you enable debug modefor all maven builds on your laptop by using a profile :
<?xml version="1.0"?><settings> <profiles> <profile> <id>enable-debug</id> <activation> <activeByDefault>true</activeByDefault> </activation> <properties> <fabric8.debug.enabled>true</fabric8.debug.enabled> </properties> </profile>
Then whenever you type the fabric8:debug goal there is no need for the maven goal to edit theDeployment and wait for a pod to restart; we can immediately start debugging when you type:
mvn fabric8:debug
6.4.2. Debugging with suspension
The fabric8:debug goal allows to attach a remote debugger to a running container, but theapplication is free to execute when the debugger is not attached. In some cases, you may want tohave complete control on the execution, e.g. to investigate the application behavior at startup. Thiscan be done using the fabric8.debug.suspend flag:
mvn fabric8:debug -Dfabric8.debug.suspend
The suspend flag will set the JAVA_DEBUG_SUSPEND environment variable to true andJAVA_DEBUG_SESSION to a random number in your deployment. When the JAVA_DEBUG_SUSPENDenvironment variable is set, standard docker images will use suspend=y in the JVM startup optionsfor debugging.
The JAVA_DEBUG_SESSION environment variable is always set to a random number (each time you runthe debug goal with the suspend flag) in order to tell Kubernetes to restart the pod. The remoteapplication will start only after a remote debugger is attached. You can use the remote debuggingfeature of your IDE to connect (on localhost, port 5005 by default).
The fabric8.debug.suspend flag will disable readiness probes in the Kubernetesdeployment in order to start port-forwarding during the early phases ofapplication startup
48

6.5. fabric8:watchThis goal is used to monitor the project workspace for changes and automatically trigger a redeployof the application running on Kubernetes.
In order to use fabric8:watch for spring-boot, you need to make sure that devtools is included in therepacked archive, as shown in the following listing:
<plugin> <groupId>org.springframework.boot</groupId> <artifactId>spring-boot-maven-plugin</artifactId> <configuration> <excludeDevtools>false</excludeDevtools> </configuration> </plugin>
Then you need to set a spring.devtools.remote.secret in application.properties, as shown in thefollowing example:
spring.devtools.remote.secret=mysecret
Before entering the watch mode, this goal must generate the docker image and the Kubernetesresources (optionally including some development libraries/configuration), and deploy the app onKubernetes. Lifecycle bindings should be configured as follows to allow the generation of suchresources.
Lifecycle bindings for fabric8:watch
<plugin> <groupId>io.fabric8</groupId> <artifactId>fabric8-maven-plugin</artifactId>
<!-- ... -->
<executions> <execution> <goals> <goal>resource</goal> <goal>build</goal> </goals> </execution> </executions></plugin>
For any application having resource and build goals bound to the lifecycle, the following commandcan be used to run the watch task.
49

mvn fabric8:watch
This plugin supports different watcher providers, enabled automatically if the project satisfiescertain conditions.
Watcher providers can also be configured manually. The Generator example is a good blueprint,simply replace <generator> with <watcher>. The configuration is structurally identical.
6.5.1. Spring Boot
This watcher is enabled by default for all Spring Boot projects. It performs the following actions:
• deploys your application with Spring Boot DevTools enabled
• tails the log of the latest running pod for your application
• watches the local development build of your Spring Boot based application and then triggers areload of the application when there are changes
You can try it on any spring boot application via:
mvn fabric8:watch
Once the goal starts up the spring boot RemoteSpringApplication it will watch for localdevelopment changes.
e.g. if you edit the java code of your app and then build it via something like this:
mvn package
You should see your app reload on the fly in the shell running the fabric8:watch goal!
There is also support for LiveReload as well.
6.5.2. Docker Image
This is a generic watcher that can be used in Kubernetes mode only. Once activated, it listens forchanges in the project workspace in order to trigger a redeploy of the application.
The watcher can be activated e.g. by running this command in another shell:
mvn package
The watcher will detect that the binary artifact has changed and will first rebuild the docker image,then start a redeploy of the Kubernetes pod.
It uses the watch feature of the docker-maven-plugin under the hood.
50

Chapter 7. GeneratorsThe usual way to define Docker images is with the plugin configuration as explained infabric8:build. This can either be done completely within the pom.xml or by referring to an externalDockerfile. Since fabric8-maven-plugin includes docker-maven-plugin the way by which images arebuilt is identical.
However, this plugin provides an additional route for defining image configurations. This is doneby so called Generators. A generator is a Java component providing an auto-detection mechanismfor certain build types like a Spring Boot build or a plain Java build. As soon as a Generator detectsthat it is applicable it will be called with the list of images configured in the pom.xml. Typically agenerator only creates dynamically a new image configuration if this list is empty. But a generatoris free to also add new images to an existing list or even change the current image list.
You can easily create your own generator as explained in Generator API. This section will focus onexisting generators and how you can configure them.
The included Generators are enabled by default, but you can easily disable them or only select acertain set of generators. Each generator has a name, which is unique for a generator.
The generator configuration is embedded in a <generator> configuration section:
Example for a generator configuration
<plugin> .... <configuration> .... <generator> ① <includes> ② <include>spring-boot</include> </includes> <config> ③ <spring-boot> ④ <alias>ping</alias> </spring-boot> </config> </generator> </configuration></plugin>
① Start of generators' configuration.
② Generators can be included and excluded. Includes have precedence, and the generators arecalled in the given order.
③ Configuration for individual generators.
④ The config is a map of supported config values. Each section is embedded in a tag named afterthe generator.
51
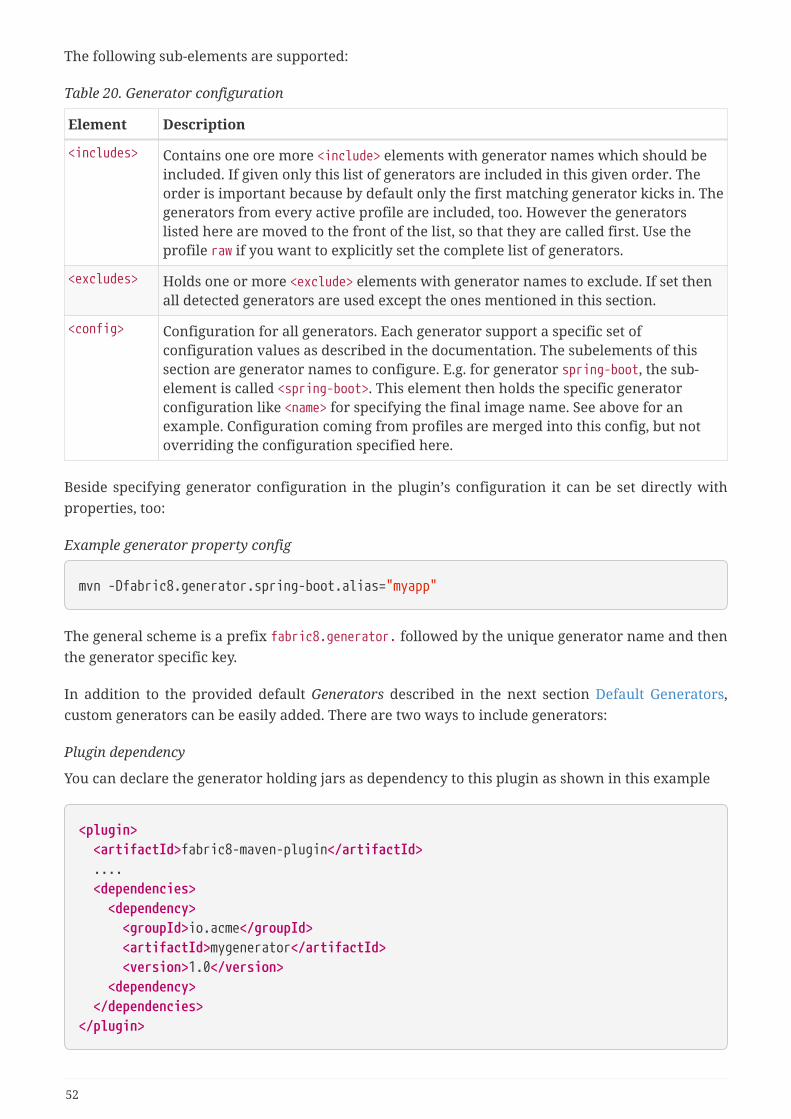
The following sub-elements are supported:
Table 20. Generator configuration
Element Description
<includes> Contains one ore more <include> elements with generator names which should beincluded. If given only this list of generators are included in this given order. Theorder is important because by default only the first matching generator kicks in. Thegenerators from every active profile are included, too. However the generatorslisted here are moved to the front of the list, so that they are called first. Use theprofile raw if you want to explicitly set the complete list of generators.
<excludes> Holds one or more <exclude> elements with generator names to exclude. If set thenall detected generators are used except the ones mentioned in this section.
<config> Configuration for all generators. Each generator support a specific set ofconfiguration values as described in the documentation. The subelements of thissection are generator names to configure. E.g. for generator spring-boot, the sub-element is called <spring-boot>. This element then holds the specific generatorconfiguration like <name> for specifying the final image name. See above for anexample. Configuration coming from profiles are merged into this config, but notoverriding the configuration specified here.
Beside specifying generator configuration in the plugin’s configuration it can be set directly withproperties, too:
Example generator property config
mvn -Dfabric8.generator.spring-boot.alias="myapp"
The general scheme is a prefix fabric8.generator. followed by the unique generator name and thenthe generator specific key.
In addition to the provided default Generators described in the next section Default Generators,custom generators can be easily added. There are two ways to include generators:
Plugin dependency
You can declare the generator holding jars as dependency to this plugin as shown in this example
<plugin> <artifactId>fabric8-maven-plugin</artifactId> .... <dependencies> <dependency> <groupId>io.acme</groupId> <artifactId>mygenerator</artifactId> <version>1.0</version> <dependency> </dependencies></plugin>
52

Compile time dependency
Alternatively and if your application code comes with a custom generator you can set the globalconfiguration option useProjectClasspath (property: fabric8.useProjectClasspath) to true. In thiscase also the project artifact and its dependencies are looked up for Generators. See Generator APIfor details how to write your own generators.
7.1. Default GeneratorsAll default generators examine the build information for certain aspects and generate a Dockerbuild configuration on the fly. They can be configured to a certain degree, where the configurationis generator specific.
Table 21. Default Generators
Generator Name Description
JavaApplications
java-exec Generic generator for flat classpath and fat-jar Java applications
Spring Boot spring-boot Spring Boot specific generator
Wildfly Swarm wildfly-swarm Generator for Wildfly Swarm apps
Thorntail v2 thorntail-v2 Generator for Thorntail v2 apps
Vert.x vertx Generator for Vert.x applications
Karaf karaf Generator for Karaf based appps
Webapplications
webapps Generator for WAR based applications supporting Tomcat, Jettyand Wildfly base images
There are some configuration options which are shared by all generators:
Table 22. Common generator options
Element Description Property
add When this set to true, then the generator adds to an existing imageconfiguration. By default this is disabled, so that a generator only kicks inwhen there are no other image configurations in the build, which areeither configured directly for a fabric8:build or already added by agenerator which has been run previously.
alias An alias name for referencing this image in various other parts of theconfiguration. This is also used in the log output. The default alias nameis the name of the generator.
fabric8.generator.alias
from This is the base image from where to start when creating the images. Bydefault the generators make an opinionated decision for the base imagewhich are described in the respective generator section.
fabric8.generator.from
53

Element Description Property
fromMode Whe using OpenShift S2I builds the base image can be either a plaindocker image (mode: docker) or a reference to an ImageStreamTag(mode: istag). In the case of an ImageStreamTag, from has to be specifiedin the form namespace/image-stream:tag. The mode takes only effect whenrunning in OpenShift mode.
fabric8.generator.fromMode
name The Docker image name used when doing Docker builds. For OpenShiftS2I builds its the name of the image stream. This can be a pattern asdescibed in Name Placeholders. The default is %g/%a:%l.
fabric8.generator.name
registry A optional Docker registry used when doing Docker builds. It has noeffect for OpenShift S2I builds.
fabric8.generator.registry
When used as properties they can be directly referenced with the property names above.
7.1.1. Java Applications
One of the most generic Generators is the java-exec generator. It is responsible for starting uparbitrary Java application. It knows how to deal with fat-jar applications where the application andall dependencies are included within a single jar and the MANIFEST.MF within the jar references amain class. But also flat classpath applications, where the dependencies are separate jar files and amain class is given.
If no main class is explicitly configured, the plugin first attempts to locate a fat jar. If the Mavenbuild creates a JAR file with a META-INF/MANIFEST.MF containing a Main-Class entry, then this isconsidered to be the fat jar to use. If there are more than one of such files then the largest one isused.
If a main class is configured (see below) then the image configuration will contain the applicationjar plus all dependency jars. If no main class is configured as well as no fat jar being detected, thenthis Generator tries to detect a single main class by searching for public static void main(Stringargs[]) among the application classes. If exactly one class is found this is considered to be the mainclass. If no or more than one is found the Generator finally does nothing.
It will use the following base image by default, but as explained above and can be changed with thefrom configuration.
Table 23. Java Base Images
Docker Build S2I Build ImageStream
Community
fabric8/java-jboss-openjdk8-jdk
fabric8/s2i-java fabric8-java
RedHat
jboss-fuse-6/fis-java-openshift
jboss-fuse-6/fis-java-openshift
fis-java-openshift
These images always refer to the latest tag. The Red Hat base images are selected, when the pluginitself is a Red Hat supported version (which is detected by the plugins version number).
54

When a fromMode of istag is used to specify an ImageStreamTag and when no from is given, then asdefault the ImageStreamTag fis-java-openshift in the namespace openshift is chosen. If you areusing a RedHat variation of this plugin (i.e. if the version is ending with -redhat), then a fromMode ofistag is the default, otherwise its fromMode = "docker" which use the a plain Docker image referencefor the S2I builder image.
Beside the common configuration parameters described in the table common generator options thefollowing additional configuration options are recognized:
Table 24. Java Application configuration options
Element Description Default
assemblyRef
If a reference to an assembly is given, then this is used without trying todetect the artifacts to include.
targetDir Directory within the generated image where to put the detected artefactsinto. Change this only if the base image is changed, too.
/deployments
jolokiaPort
Port of the Jolokia agent exposed by the base image. Set this to 0 if youdon’t want to expose the Jolokia port.
8778
mainClass Main class to call. If not given first a check is performed to detect a fat-jar(see above). Next a class is looked up by scanning target/classes for asingle class with a main method. If no such class is found or if more thanone is found, then this generator does nothing.
prometheusPort
Port of the Prometheus jmx_exporter exposed by the base image. Set thisto 0 if you don’t want to expose the Prometheus port.
9779
webPort Port to expose as service, which is supposed to be the port of a webapplication. Set this to 0 if you don’t want to expose a port.
8080
The exposed ports are typically later on use by Enrichers to create default Kubernetes or OpenShiftservices.
You can add additional files to the target image within baseDir by placing files intosrc/main/fabric8-includes. These will be added with mode 0644, while everything insrc/main/fabric8-includes/bin will be added with 0755.
7.1.2. Spring Boot
This generator is called spring-boot and gets activated when it finds a spring-boot-maven-plugin inthe pom.xml.
This generator is based on the Java Application Generator and inherits all of its configurationvalues. The generated container port is read from the server.port property application.properties,defaulting to 8080 if it is not found. It also uses the same default images as the java-exec Generator.
Beside the common generator options and the java-exec options the following additionalconfiguration is recognized:
Table 25. Spring-Boot configuration options
55

Element Description Default
color If seth force the use of color in the Spring Boot console output.
The generator adds Kubernetes liveness and readiness probes pointing to either the managementor server port as read from the application.properties. If the management.port (for Spring Boot 1) ormanagement.server.port (for Spring Boot 2) and management.ssl.key-store (for Spring Boot 1) ormanagement.server.ssl.key-store (for Spring Boot 2) properties are set in application.propertiesotherwise or server.ssl.key-store property is set in application.properties then the probes areautomatically set to use https.
The generator works differently when called together with fabric8:watch. In that case it enablessupport for Spring Boot Developer Tools which allows for hot reloading of the Spring Boot app. Inparticular, the following steps are performed:
• If a secret token is not provided within the Spring Boot application configurationapplication.properties or application.yml with the key spring.devtools.remote.secret then acustom secret token is created and added to application.properties
• Add spring-boot-devtools.jar as BOOT-INF/lib/spring-devtools.jar to the spring-boot fat jar.
Since during fabric8:watch the application itself within the target/ directory is modified forallowing easy reloading you must ensure that you do a mvn clean before building an artefact whichshould be put into production. Since the released version are typically generated with a CI systemwhich does a clean build anyway this should be only a theoretical problem.
7.1.3. Wildfly Swarm
The WildFly Swarm generator detects a WildFly Swarm build and disables the Prometheus Javaagent because of this issue.
Otherwise this generator is identical to the java-exec generator. It supports the common generatoroptions and the java-exec options.
7.1.4. Thorntail v2
The Thorntail v2 generator detects a Thorntail v2 build and disables the Prometheus Java agentbecause of this issue.
Otherwise this generator is identical to the java-exec generator. It supports the common generatoroptions and the java-exec options.
7.1.5. Vert.x
The Vert.x generator detects an application using Eclipse Vert.x. It generates the metadata to startthe application as a fat jar.
Currently, this generator is enabled if:
• you are using the Vert.x Maven Plugin (https://github.com/reactiverse/vertx-maven-plugin)
56

• you are depending on io.vertx:vertx-core and uses the Maven Shader plugin
Otherwise this generator is identical to the java-exec generator. It supports the common generatoroptions and the java-exec options.
The generator automatically:
• enable metrics and JMX publishing of the metrics when io.vertx:vertx-dropwizard-metrics is inthe project’s classpath / dependencies.
• enable clustering when a Vert.x cluster manager is available in the project’s classpath /dependencies. this is done by appending -cluster to the command line.
• Force IPv4 stack when vertx-infinispan is used.
• Disable the async DNS resolver to fallback to the regular JVM DNS resolver.
You can pass application parameter by setting the JAVA_ARGS env variable. You can pass systemproperties either using the same variable or using JAVA_OPTIONS. For instance, createsrc/main/fabric8/deployment.yml with the following content to configure JAVA_ARGS:
spec: template: spec: containers: - env: - name: JAVA_ARGS value: "-Dfoo=bar -cluster -instances=2"
7.1.6. Karaf
This generator named karaf kicks in when the build uses a karaf-maven-plugin. By default thefollowing base images are used:
Table 26. Karaf Base Images
Docker Build S2I Build
Community
fabric8/s2i-karaf fabric8/s2i-karaf
Red Hat jboss-fuse-6/fis-karaf-openshift jboss-fuse-6/fis-karaf-openshift
When a fromMode of istag is used to specify an ImageStreamTag and when no from is given, then asdefault the ImageStreamTag fis-karaf-openshift:2.0 in the namespace openshift is chosen.
In addition to the common generator options this generator can be configured with the followingoptions:
Table 27. Karaf configuration options
57

Element Description Default
baseDir Directory within the generated image where to put the detected artefactsinto. Change this only if the base image is changed, too.
/deployments
jolokiaPort
Port of the Jolokia agent exposed by the base image. Set this to 0 if youdon’t want to expose the Jolokia port.
8778
mainClass Main class to call. If not given first a check is performed to detect a fat-jar(see above). Next a class is tried to be found by scanning target/classesfor a single class with a main method. If no if found or more than one isfound, then this generator does nothing.
user User and/or group under which the files should be added. The syntax ofthis options is descriped in Assembly Configuration.
jboss:jboss:jboss
webPort Port to expose as service, which is supposed to be the port of a webapplication. Set this to 0 if you don’t want to expose a port.
8080
7.1.7. Web Applications
The webapp generator tries to detect WAR builds and selects a base servlet container image based onthe configuration found in the pom.xml:
• A Tomcat base image is selected when a tomcat6-maven-plugin or tomcat7-maven-plugin ispresent or when a META-INF/context.xml could be found in the classes directory.
• A Jetty base image is selected when a jetty-maven-plugin is present or one of the files WEB-INF/jetty-web.xml or WEB-INF/jetty-logging.properties is found.
• A Wildfly base image is chosen for a given jboss-as-maven-plugin or wildfly-maven-plugin orwhen a Wildfly specific deployment descriptor like jboss-web.xml is found.
The base images chosen are:
Table 28. Webapp Base Images
Docker Build S2I Build
Tomcat fabric8/tomcat-8 ---
Jetty fabric8/jetty-9 ---
Wildfly jboss/wildfly ---
S2I builds are currently not yet supported for the webapp generator.
In addition to the common generator options this generator can be configured with the followingoptions:
Table 29. Webapp configuration options
Element Description Default
server Fix server to use in the base image. Can be either tomcat, jetty or wildfly
58

Element Description Default
targetDir Where to put the war file into the target image. By default its selected bythe base image chosen but can be overwritten with this option.
user User and/or group under which the files should be added. The syntax ofthis options is descriped in Assembly Configuration.
path Context path with which the application can be reached by default / (rootcontext)
cmd Command to use to start the container. By default the base images startupcommand is used.
ports Comma separated list of ports to expose in the image and whicheventually are translated later to Kubernertes services. The ports dependon the base image and are selecte automatically. But they can beoverwritten here.
7.2. Generator API
The API is still a bit in flux and will be documented later. Please refer to theGenerator Interface in the meantime.
59
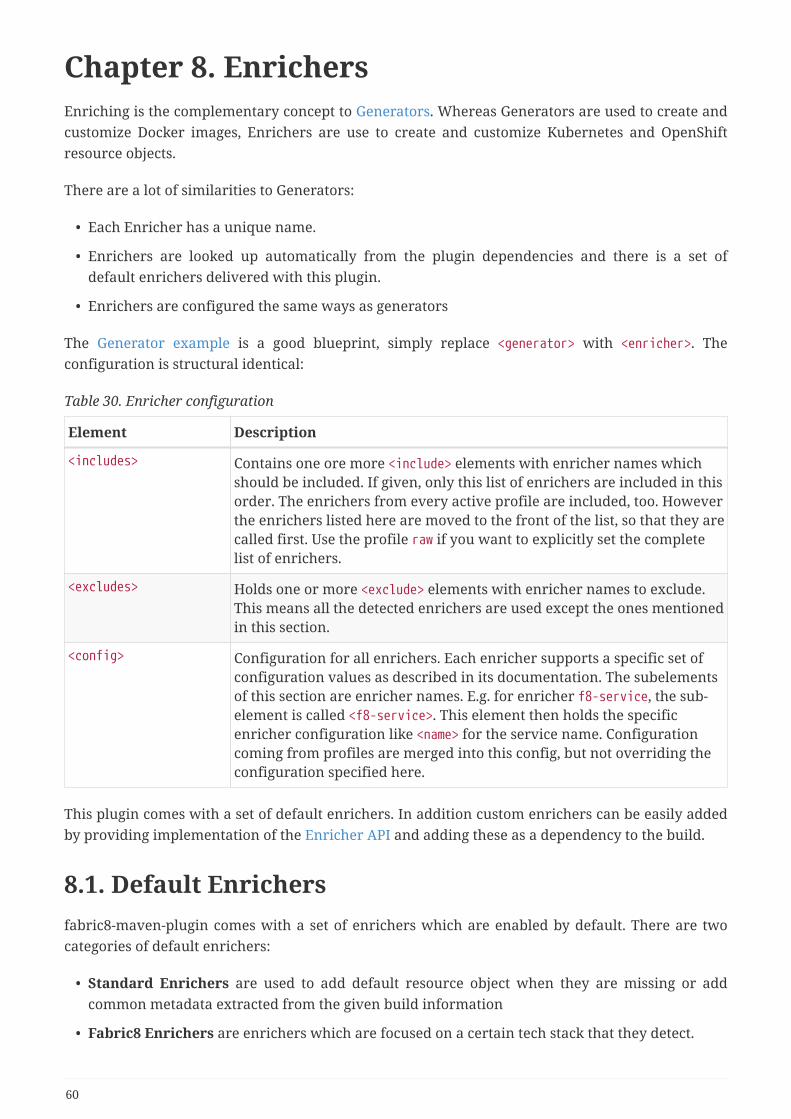
Chapter 8. EnrichersEnriching is the complementary concept to Generators. Whereas Generators are used to create andcustomize Docker images, Enrichers are use to create and customize Kubernetes and OpenShiftresource objects.
There are a lot of similarities to Generators:
• Each Enricher has a unique name.
• Enrichers are looked up automatically from the plugin dependencies and there is a set ofdefault enrichers delivered with this plugin.
• Enrichers are configured the same ways as generators
The Generator example is a good blueprint, simply replace <generator> with <enricher>. Theconfiguration is structural identical:
Table 30. Enricher configuration
Element Description
<includes> Contains one ore more <include> elements with enricher names whichshould be included. If given, only this list of enrichers are included in thisorder. The enrichers from every active profile are included, too. Howeverthe enrichers listed here are moved to the front of the list, so that they arecalled first. Use the profile raw if you want to explicitly set the completelist of enrichers.
<excludes> Holds one or more <exclude> elements with enricher names to exclude.This means all the detected enrichers are used except the ones mentionedin this section.
<config> Configuration for all enrichers. Each enricher supports a specific set ofconfiguration values as described in its documentation. The subelementsof this section are enricher names. E.g. for enricher f8-service, the sub-element is called <f8-service>. This element then holds the specificenricher configuration like <name> for the service name. Configurationcoming from profiles are merged into this config, but not overriding theconfiguration specified here.
This plugin comes with a set of default enrichers. In addition custom enrichers can be easily addedby providing implementation of the Enricher API and adding these as a dependency to the build.
8.1. Default Enrichersfabric8-maven-plugin comes with a set of enrichers which are enabled by default. There are twocategories of default enrichers:
• Standard Enrichers are used to add default resource object when they are missing or addcommon metadata extracted from the given build information
• Fabric8 Enrichers are enrichers which are focused on a certain tech stack that they detect.
60

1. Default Enrichers Overview
Enricher Description
f8-prometheus Add Prometheus annotations.
fmp-maven-scm-enricher Add Maven SCM information as annotations tothe kubernetes/openshift resources
fmp-controller Create default controller (replication controller,replica set or deployment) if missing.
fmp-dependency Examine build dependencies for kubernetes.ymland add the objects found therein.
fmp-git Check local .git directory and add buildinformation as annotations.
fmp-image Add the image name into a PodSpec of replicationcontroller, replication sets and deployments, ifmissing.
fmp-name Add a default name to every object which missesa name.
fmp-pod-annotation Copy over annotations from a Deployment to a Pod
fmp-portname Add a default portname for commonly knownservice.
fmp-project Add Maven coordinates as labels to all objects.
fmp-service Create a default service if missing and extracports from the Docker image configuration.
fmp-maven-issue-mgmt Add Maven Issue Management information asannotations to the kubernetes/openshiftresources
fmp-revision-history Add revision history limit (Kubernetes doc) as adeployment spec property to theKubernetes/OpenShift resources.
fmp-triggers-annotation Add ImageStreamTag change triggers onKubernetes resources such as StatefulSets,ReplicaSets and DaemonSets using theimage.openshift.io/triggers annotation.
fmp-configmap-file Add ConfigMap elements defined as XML or asannotation.
fmp-secret-file Add Secret elements defined as annotation.
[fmp-fmp-serviceaccount] Add a ServiceAccount defined as XML ormentioned in resource fragement.
61

8.1.1. Standard Enrichers
Default enrichers are used for adding missing resources or adding metadata to given resourceobjects. The following default enhancers are available out of the box
fmp-controller
fmp-service
This enricher is used to ensure that a service is present. This can be either directly configured withfragments or with the XML configuration, but it can be also automatically inferred by looking at theports exposed by an image configuration. An explicit configuration always takes precedence overauto detection. For enriching an existing service this enricher actually works only on a configuredservice which matches with the configured (or inferred) service name.
The following configuration parameters can be used to influence the behaviour of this enricher:
Table 31. Default service enricher
Element Description Default
name Service name to enrich by default. If not given here or configuredelsewhere, the artifactId is used
headless whether a headless service without a port should be configured. Aheadless service has the ClusterIP set to None and will be only used if noports are exposed by the image configuration or by the configurationport.
false
expose If set to true, a label expose with value true is added which can be pickedup by the fabric8 expose-controller to expose the service to the outside byvarious means. See the documentation of expose-controller for moredetails.
false
type Kubernetes / OpenShift service type to set like LoadBalancer, NodePort orClusterIP.
port The service port to use. By default the same port as the ports exposed inthe image configuration is used, but can be changed with this parameter.See below for a detailed description of the format which can be put intothis variable.
multiPort Set this to true if you want all ports to be exposed from an imageconfiguration. Otherwise only the first port is used as a service port.
false
protocol Default protocol to use for the services. Must be tcp or udp tcp
You specify the properties like for any enricher within the enrichers configuration like in
62

Example
<configuration> .. <enricher> <config> <fmp-service> <name>my-service</name> <type>NodePort</type> <multiPort>true</multiPort> </fmp-service> </config> </enricher></configuration>
Port specification
With the option port you can influence the mapping how ports are mapped from the pod to theservice. By default and if this option is not given the ports exposed are dictated by the portsexposed from the Docker images contained in the pods. Remember, each image configured can bepart of the pod. However you can expose also completely different ports as the images meta datadeclare.
The property port can contain a comma separated list of mappings of the following format:
<servicePort1>:<targetPort1>/<protocol>,<servicePort2>:<targetPort2>/<protocol>,....
where the targetPort and <protocol> specification is optional. These ports are overlayed over theports exposed by the images, in the given order.
This is best explained by some examples.
For example if you have a pod which exposes a Microservice on port 8080 and you want to exposeit as a service on port 80 (so that it can be accessed with http://myservice) you can simply use thefollowing enricher configuration:
Example
<configuration> <enricher> <config> <fmp-service> <name>myservice</name> <port>80:8080</port> ① </fmp-service> </config> </enricher></configuration>
63

① 80 is the service port, 8080 the port opened in from the pod’s images
If your pod exposes their ports (which e.g. all generator do), then you can even omit the 8080 here(i.e. <port>80</port>). In this case the first port exposed will be mapped to port 80, all other exposedports will be omitted.
By default an automatically generated service only exposes the first port, even when more ports areexposed. When you want to map multiple ports you need to set the config option<multiPort>true</multiPort>. In this case you can also provide multiple mappings as a commaseparated list in the <port> specification where each element of the list are the mapping for thefirst, second, … port.
A more (and bit artificially constructed) specification could be <port>80,9779:9779/udp,443</port>.Assuming that the image exposes ports 8080 and 8778 (either directly or via generators) and wehave switched on multiport mode, then the following service port mappings will be performed forthe automatically generated service:
• Pod port 8080 is mapped to service port 80.
• Pod port 9779 is mapped to service port 9779 with protocol UDP. Note how this second entryoverrides the pod exposed port 8778.
• Pod port 443 is mapped to service port 443.
This example show also the mapping rules:
• Port specification in port always override the port meta data of the contained Docker images(i.e. the ports exposed)
• You can always provide a complete mapping with port on your own
• The ports exposed by the images serve as default values which are used if not specified by thisconfiguration option.
• You can map ports which are not exposed by the images by specifying them as target ports.
Multiple ports are only mapped when multiPort mode is enabled (which is switched off by default).If multiPort mode is disabled, only the first port from the list of mapped ports as calculated likeabove is taken.
When you set legacyPortMapping to true than ports 8080 to 9090 are mapped to port 80automatically if not explicitly mapped via port. I.e. when an image exposes port 8080 with a legacymapping this mapped to a service port 80, not 8080. You should not switch this on for any goodreason. In fact it might be that this option can vanish anytime.
fmp-image
fmp-name
fmp-portname
64

fmp-pod-annotation
fmp-project
Enricher that adds standard labels and selectors to generated resources (e.g. app, group, provider,version).
The fmp-project enricher supports the following configuration options:
Option Description Default
useProjectLabel Enable this flag to turn on the generation of the oldproject label in Kubernetes resources. The projectlabel has been replaced by the app label in newerversions of the plugin.
false
The project labels which are already specified in the input fragments are not overridden by theenricher.
fmp-git
Enricher that adds info from .git directory as annotations.
The git branch & latest commit on the branch are annotated as fabric8/git-branch & fabric8/git-commit. fabrci8/git-url is annotated as the url of your configured remote.
Option Description Default
gitRemote Configures the git remote name, whose url you wantto annotate as 'git-url'.
origin
fmp-dependency
fmp-volume-permission
Enricher which fixes the permission of persistent volume mount with the help of an init container.
fmp-openshift-autotls
Enricher which adds appropriate annotations and volumes to enable OpenShift’s automatic ServiceServing Certificate Secrets. This enricher adds an init container to convert the service servingcertificates from PEM (the format that OpenShift generates them in) to a JKS-format Java keystoreready for consumption in Java services.
This enricher is disabled by default. In order to use it, you must configure the Fabric8 Maven pluginto use this enricher:
65

<plugin> <groupId>io.fabric8</groupId> <artifactId>fabric8-maven-plugin</artifactId> <version>3.3.0</version> <executions> <execution> <goals> <goal>resource</goal> </goals> </execution> </executions> <configuration> <enricher> <includes> <include>fmp-openshift-autotls</include> </includes> <config> <fmp-openshift-autotls> ... </fmp-openshift-autotls> </config> </enricher> </configuration></plugin>
The auto-TLS enricher supports the following configuration options:
Option Description Default
tlsSecretName The name of the secret to be used to store thegenerated service serving certs.
<project.artifactId>-tls
tlsSecretVolumeMountPoint
Where the service serving secret should be mountedto in the pod.
/var/run/secrets/fabric8.io/tls-pem
tlsSecretVolumeName
The name of the secret volume. tls-pem
jksVolumeMountPoint
Where the generated keystore volume should bemounted to in the pod.
/var/run/secrets/fabric8.io/tls-jks
jksVolumeName The name of the keystore volume. tls-jks
pemToJKSInitContainerImage
The name of the image used as an init container toconvert PEM certificate/key to Java keystore.
jimmidyson/pemtokeystore:v0.1.0
pemToJKSInitContainerName
the name of the init container to convert PEMcertificate/key to Java keystore.
tls-jks-converter
keystoreFileName The name of the generated keystore file. keystore.jks
keystorePassword The password to use for the generated keystore. changeit
66
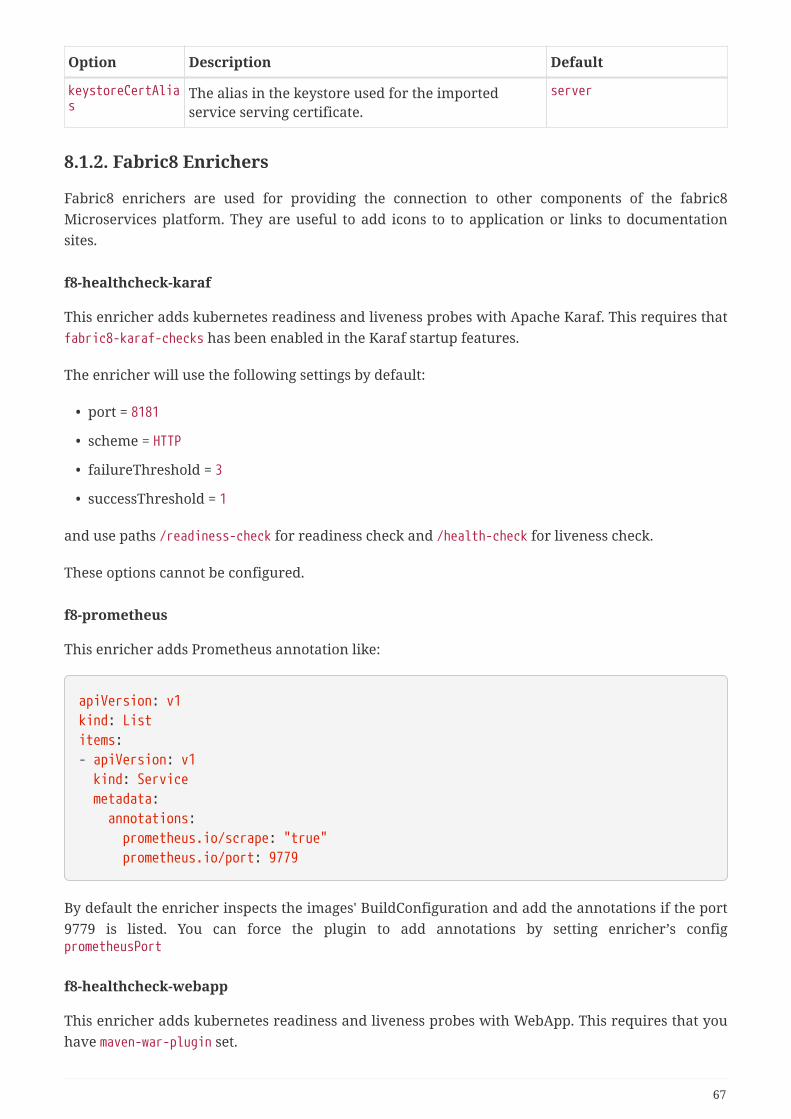
Option Description Default
keystoreCertAlias
The alias in the keystore used for the importedservice serving certificate.
server
8.1.2. Fabric8 Enrichers
Fabric8 enrichers are used for providing the connection to other components of the fabric8Microservices platform. They are useful to add icons to to application or links to documentationsites.
f8-healthcheck-karaf
This enricher adds kubernetes readiness and liveness probes with Apache Karaf. This requires thatfabric8-karaf-checks has been enabled in the Karaf startup features.
The enricher will use the following settings by default:
• port = 8181
• scheme = HTTP
• failureThreshold = 3
• successThreshold = 1
and use paths /readiness-check for readiness check and /health-check for liveness check.
These options cannot be configured.
f8-prometheus
This enricher adds Prometheus annotation like:
apiVersion: v1kind: Listitems:- apiVersion: v1 kind: Service metadata: annotations: prometheus.io/scrape: "true" prometheus.io/port: 9779
By default the enricher inspects the images' BuildConfiguration and add the annotations if the port9779 is listed. You can force the plugin to add annotations by setting enricher’s configprometheusPort
f8-healthcheck-webapp
This enricher adds kubernetes readiness and liveness probes with WebApp. This requires that youhave maven-war-plugin set.
67

The enricher will use the following settings by default:
• port = 8080
• scheme = HTTP
• path = ``
• initialReadinessDelay = 10
• initialLivenessDelay = 180
If path attribute is not set (default value) then this enricher is disabled.
These values can be configured by the enricher in the fabric8-maven-plugin configuration as shownbelow:
<plugin> <groupId>io.fabric8</groupId> <artifactId>fabric8-maven-plugin</artifactId> <version>3.3.0</version> <executions> <execution> <id>fmp</id> <goals> <goal>resource</goal> <goal>helm</goal> <goal>build</goal> </goals> </execution> </executions> <configuration> <enricher> <config> <f8-healthcheck-webapp> <path>/</path> </f8-healthcheck-webapp> </config> </enricher> </configuration> ...</plugin>
f8-healthcheck-spring-boot
This enricher adds kubernetes readiness and liveness probes with Spring Boot. This requires thefollowing dependency has been enabled in Spring Boot
68

<dependency> <groupId>org.springframework.boot</groupId> <artifactId>spring-boot-starter-actuator</artifactId> </dependency>
The enricher will try to discover the settings from the application.properties / application.yamlSpring Boot configuration file.
The port number is read from the management.port option, and will use the default value of 8080 Thescheme will use HTTPS if server.ssl.key-store option is in use, and fallback to use HTTP otherwise.
The enricher will use the following settings by default:
• readinessProbeInitialDelaySeconds : 10
• readinessProbePeriodSeconds : <kubernetes-default>
• livenessProbeInitialDelaySeconds : 180
• livenessProbePeriodSeconds : <kubernetes-default>
• timeoutSeconds : <kubernetes-default>
• failureThreshold: 3
• successThreshold: 1
These values can be configured by the enricher in the fabric8-maven-plugin configuration as shownbelow:
69

<plugin> <groupId>io.fabric8</groupId> <artifactId>fabric8-maven-plugin</artifactId> <version>3.3.0</version> <executions> <execution> <id>fmp</id> <goals> <goal>resource</goal> <goal>helm</goal> <goal>build</goal> </goals> </execution> </executions> <configuration> <enricher> <config> <f8-healthcheck-spring-boot> <timeoutSeconds>5</timeoutSeconds> <readinessProbeInitialDelaySeconds>30</readinessProbeInitialDelaySeconds> <failureThreshold>3</failureThreshold> <successThreshold>1</successThreshold> </f8-healthcheck-spring-boot> </config> </enricher> </configuration> </plugin>
f8-f8-healthcheck-wildfly-swarm
This enricher adds kubernetes readiness and liveness probes with WildFly Swarm. This requiresthe following fraction has been enabled in WildFly Swarm
<dependency> <groupId>org.wildfly.swarm</groupId> <artifactId>microprofile-health</artifactId> </dependency>
The enricher will use the following settings by default:
• port = 8080
• scheme = HTTP
• path = /health
• failureThreshold = 3
• successThreshold = 1
70

These values can be configured by the enricher in the fabric8-maven-plugin configuration as shownbelow:
<plugin> <groupId>io.fabric8</groupId> <artifactId>fabric8-maven-plugin</artifactId> <version>3.3.0</version> <executions> <execution> <id>fmp</id> <goals> <goal>resource</goal> <goal>helm</goal> <goal>build</goal> </goals> </execution> </executions> <configuration> <enricher> <config> <f8-healthcheck-wildfly-swarm> <port>4444</port> <scheme>HTTPS</scheme> <path>health/myapp</path> <failureThreshold>3</failureThreshold> <successThreshold>1</successThreshold> </f8-healthcheck-wildfly-swarm> </config> </enricher> </configuration> </plugin>
f8-healthcheck-thorntail-v2
This enricher adds kubernetes readiness and liveness probes with Thorntail v2. This requires thefollowing fraction has been enabled in Thorntail
<dependency> <groupId>io.thorntail</groupId> <artifactId>microprofile-health</artifactId> </dependency>
The enricher will use the following settings by default:
• port = 8080
• scheme = HTTP
• path = /health
71

• failureThreshold = 3
• successThreshold = 1
These values can be configured by the enricher in the fabric8-maven-plugin configuration as shownbelow:
<plugin> <groupId>io.fabric8</groupId> <artifactId>fabric8-maven-plugin</artifactId> <version>3.3.0</version> <executions> <execution> <id>fmp</id> <goals> <goal>resource</goal> <goal>helm</goal> <goal>build</goal> </goals> </execution> </executions> <configuration> <enricher> <config> <f8-healthcheck-thorntail> <port>4444</port> <scheme>HTTPS</scheme> <path>health/myapp</path> <failureThreshold>3</failureThreshold> <successThreshold>1</successThreshold> </f8-healthcheck-thorntail> </config> </enricher> </configuration> </plugin>
f8-healthcheck-vertx
This enricher adds kubernetes readiness and liveness probes with Eclipse Vert.x applications. Thereadiness probe lets Kubernetes detects when the application is ready, while the liveness probeallows Kubernetes to verify that the application is still alive.
This enricher allows configuring the readiness and liveness probes. Are supported: http (emit HTTPrequests), tcp (open a socket), exec (execute a command).
By default, this enricher uses the same configuration for liveness and readiness probes. But specificconfigurations can be provided. The configurations can be overridden using project’s properties.
72

Using the f8-healthcheck-vertx enricher
The enricher is automatically executed if your project uses the vertx-maven-plugin or depends onio.vertx:vertx-core. However, by default, no health check will be added to your deployment.
Minimal configuration
The minimal configuration to add health checks is the following:
<plugin> <groupId>io.fabric8</groupId> <artifactId>fabric8-maven-plugin</artifactId> <version>4.1.0</version> <executions> <execution> <id>fmp</id> <goals> <goal>resource</goal> <goal>helm</goal> <goal>build</goal> </goals> </execution> </executions> <configuration> <enricher> <config> <f8-healthcheck-vertx> <path>/health</path> </f8-healthcheck-vertx> </config> </enricher> </configuration></plugin>
It configures the readiness and liveness health checks using HTTP requests on the port 8080 (defaultport) and on the path /health. The defaults are:
• port = 8080 (for HTTP)
• scheme = HTTP
• path = none (disabled)
the previous configuration can also be given use project’s properties:
<properties> <vertx.health.path>/health</vertx.health.path></properties>
73

Configuring differently the readiness and liveness health checks
You can provide two different configuration for the readiness and liveness checks:
<plugin> <groupId>io.fabric8</groupId> <artifactId>fabric8-maven-plugin</artifactId> <version>4.1.0</version> <executions> <execution> <id>fmp</id> <goals> <goal>resource</goal> <goal>helm</goal> <goal>build</goal> </goals> </execution> </executions> <configuration> <enricher> <config> <f8-healthcheck-vertx> <readiness> <path>/ready</path> </readiness> <liveness> <path>/health</path> </liveness> </f8-healthcheck-vertx> </config> </enricher> </configuration></plugin>
You can also use the readiness and liveness chunks in user properties:
<properties> <vertx.health.readiness.path>/ready</vertx.health.readiness.path> <vertx.health.liveness.path>/ready</vertx.health.liveness.path></properties>
Shared (generic) configuration can be set outside of the specific configuration. For instance, to usethe port 8081:
74

<plugin> <groupId>io.fabric8</groupId> <artifactId>fabric8-maven-plugin</artifactId> <version>4.1.0</version> <executions> <execution> <id>fmp</id> <goals> <goal>resource</goal> <goal>helm</goal> <goal>build</goal> </goals> </execution> </executions> <configuration> <enricher> <config> <f8-healthcheck-vertx> <port>8081</port> <readiness> <path>/ready</path> </readiness> <liveness> <path>/health</path> </liveness> </f8-healthcheck-vertx> </config> </enricher> </configuration></plugin>
Or:
<properties> <vertx.health.port>8081</vertx.health.port> <vertx.health.readiness.path>/ready</vertx.health.readiness.path> <vertx.health.liveness.path>/ready</vertx.health.liveness.path></properties>
Configuration Structure
The configuration is structured as follows
75

<config> <f8-healthcheck-vertx> <!-- Generic configuration, applied to both liveness and readiness --> <path>/both</path> <liveness> <!-- Specific configuration for the liveness probe --> <port-name>ping</port-name> </liveness> <readiness> <!-- Specific configuration for the readiness probe --> <port-name>ready</port-name> </readiness> </f8-healthcheck-vertx></config>
The same structured is used in project’s properties:
<!-- Generic configuration given as vertx.health.$attribute --><vertx.health.path>/both</vertx.health.path><!-- Specific liveness configuration given as vertx.health.liveness.$attribute --><vertx.health.liveness.port-name>ping</vertx.health.liveness.port-name><!-- Specific readiness configuration given as vertx.health.readiness.$attribute --><vertx.health.readiness.port-name>ready</vertx.health.readiness.port-name>
Important: Project’s properties override the configuration provided in the plugin configuration.The overriding rules are: specific properties > generic properties > specific configuration > genericconfiguration.
Probe configuration
You can configure the different aspect of the probes. These attributes can be configured for both thereadiness and liveness probes or be specific to one.
Table 32. Probe configuration
Name Description
type The probe type among http (default), tcp andexec.
initial-delay Number of seconds after the container hasstarted before probes are initiated.
period How often (in seconds) to perform the probe.
timeout Number of seconds after which the probe timesout.
success-threshold Minimum consecutive successes for the probe tobe considered successful after having failed.
76

Name Description
failure-threshold Minimum consecutive failures for the probe tobe considered failed after having succeeded.
More details about probes are available on https://kubernetes.io/docs/tasks/configure-pod-container/configure-liveness-readiness-probes/.
HTTP probe configuration
When using HTTP GET requests to determine readiness or liveness, several aspects can beconfigured. HTTP probes are used by default. To be more specific set the type attribute to http.
Table 33. HTTP probes configuration
Name Description Default
scheme Scheme to use for connecting tothe host.
HTTP
path Path to access on the HTTPserver. An empty path disablethe check
headers Custom headers to set in therequest. HTTP allows repeatedheaders. Cannot be configuredusing project’s properties. Anexample is available below.
port Number of the port to access onthe container. A 0 or negativenumber disable the check.
8080
port-name Name of the port to access onthe container. If neither theport or the port-name is set, thecheck is disabled. If both are setthe configuration is consideredinvalid.
Here is an example of HTTP probe configuration:
77

<config> <f8-healthcheck-vertx> <initialDelay>3</initialDelay> <period>3</period> <liveness> <port>8081</port> <path>/ping</path> <scheme>HTTPS</scheme> <headers> <X-Custom-Header>Awesome</X-Custom-Header> </headers> </liveness> <readiness> <!-- disable the readiness probe --> <port>-1</port> </readiness> </f8-healthcheck-vertx></config>
TCP probe configuration
You can also configure the probes to just open a socket on a specific port. The type attribute must beset to tcp.
Table 34. TCP probes configuration
Name Description
port Number of the port to access on the container. A0 or negative number disable the check.
port-name Name of the port to access on the container. Ifneither the port or the port-name is set, the checkis disabled. If both are set the configuration isconsidered invalid.
For example:
78

<config> <f8-healthcheck-vertx> <initialDelay>3</initialDelay> <period>3</period> <liveness> <type>tcp</type> <port>8081</port> </liveness> <readiness> <-- use HTTP Get probe --> <path>/ping</path> <port>8080</port> </readiness> </f8-healthcheck-vertx></config>
Exec probe configuration
You can also configure the probes to execute a command. If the command succeeds, it returns 0,and Kubernetes consider the pod to be alive and healthy. If the command returns a non-zero value,Kubernetes kills the pod and restarts it. To use a command, you must set the type attribute to exec:
<config> <f8-healthcheck-vertx> <initialDelay>3</initialDelay> <period>3</period> <liveness> <type>exec</type> <command> <cmd>cat</cmd> <cmd>/tmp/healthy</cmd> </command> </liveness> <readiness> <-- use HTTP Get probe --> <path>/ping</path> <port>8080</port> </readiness> </f8-healthcheck-vertx></config>
As you can see in the snippet above the command is passed using the command attribute. Thisattribute cannot be configured using project’s properties. An empty command disables the check.
Disabling health checks
You can disables the checks by setting:
• the port to 0 or to a negative number for http and tcp probes
79

• the command to an empty list for exec
In the first case, you can use project’s properties to disable them:
<!-- Disables <code>tcp</code> and <code>http</code> probes --><vertx.health.port>-1</vertx.health.port>
For http probes, an empty or not set path also disable the probe.
fmp-maven-scm-enricher
This enricher adds additional SCM related metadata to all objects supporting annotations. Thesemetadata will be added only if SCM information is present in the maven pom.xml of the project.
The following annotations will be added to the objects that supports annotations,
Table 35. Maven SCM Enrichers Annotation Mapping
Maven SCM Info Annotation Description
scm/connection fabric8.io/scm-con-url The SCM connection that will be used toconnect to the project’s SCM
scm/developerConnection fabric8.io/scm-devcon-url The SCM Developer Connection that willbe used to connect to the project’sdeveloper SCM
scm/tag fabric8.io/scm-tag The SCM tag that will be used to checkoutthe sources, like HEAD dev-branch etc.,
scm/url fabric8.io/scm-url The SCM web url that can be used tobrowse the SCM over web browser
Lets say you have a maven pom.xml with the following scm information,
<scm> <connection>scm:git:git://github.com/fabric8io/fabric8-maven-plugin.git</connection> <developerConnection>scm:git:git://github.com/fabric8io/fabric8-maven-plugin.git</developerConnection> <url>git://github.com/fabric8io/fabric8-maven-plugin.git</url></scm>
This infomation will be enriched as annotations in the generated manifest like,
80

... kind: Service metadata: annotations fabric8.io/scm-con-url: "scm:git:git://github.com/fabric8io/fabric8-maven-plugin.git" fabric8.io/scm-devcon-url: "scm:git:git://github.com/fabric8io/fabric8-maven-plugin.git" fabric8.io/scm-tag: "HEAD" fabric8.io/scm-url: "git://github.com/fabric8io/fabric8-maven-plugin.git"...
fmp-maven-issue-mgmt
This enricher adds additional Issue Management related metadata to all objects supportingannotations. These metadata will be added only if the Issue Management information in availablein maven pom.xml of the project.
The following annotations will be added to the objects that supports annotations,
Table 36. Maven Issue Tracker Enrichers Annotation Mapping
Maven Issue Tracker Info Annotation Description
issueManagement/system fabric8.io/issue-system The Issue Management system likeBugzilla, JIRA, GitHub etc.,
issueManagement/url fabric8.io/issue-tracker-url The Issue Management url e.g. GitHubIssues Url
Lets say you have a maven pom.xml with the following issue management information,
<issueManagement> <system>GitHub</system> <url>https://github.com/reactiverse/vertx-maven-plugin/issues/</url></issueManagement>
This information will be enriched as annotations in the generated manifest like,
... kind: Service metadata: annotations: fabric8.io/issue-system: "GitHub" fabric8.io/issue-tracker-url: "https://github.com/reactiverse/vertx-maven-plugin/issues/"...
81

fmp-revision-history
This enricher adds spec.revisionHistoryLimit property to deployment spec ofKubernetes/OpenShift resources. A deployment’s revision history is stored in the replica sets, thatspecifies the number of old ReplicaSets to retain in order to allow rollback. For more informationread Kubernetes documentation.
The following configuration parameters can be used to influence the behaviour of this enricher:
Table 37. Default revision history enricher
Element Description Default
limit Number of revisionhistories to retain
2
Just as any other enricher you can specify required properties with in the enricher’s configurationas below,
...<enricher> <config> <fmp-revision-history> <limit>8</limit> </fmp-revision-history> </config></enricher>...
This information will be enriched as spec property in the generated manifest like,
...kind: Deploymentspec: revisionHistoryLimit: 8...
fmp-triggers-annotation
This enricher adds ImageStreamTag change triggers on Kubernetes resources that support theimage.openshift.io/triggers annotation, such as StatefulSets, ReplicaSets and DaemonSets.
The trigger is added to all containers that apply, but can be restricted to a limited set of containersusing the following configuration:
82

...<enricher> <config> <fmp-triggers-annotation> <containers>container-name-1,c2</containers> </fmp-triggers-annotation> </config></enricher>...
fmp-configmap-file
This enricher adds ConfigMap defined as resources in plugin configuration and/or resolves filecontent from an annotation.
As XML you can define:
pom.xml
<configuration> <resources> <configMap> <entries> <entry> <name>A</name> <value>B</value> </entry> </entries> </configMap> </resources></configuration>
This creates a ConfigMap data with key A and value B.
You can also use file tag to refer to the content of a file.
<configuration> <resources> <configMap> <entries> <entry> <file>src/test/resources/test-application.properties</file> </entry> </entries> </configMap> </resources></configuration>
83

This creates a ConfigMap with key test-application.properties and value the content of thesrc/test/resources/test-application.properties file. If you set name tag then this is used as keyinstead of the filename.
If you are defining a custom ConfigMap file, you can use an annotation to define a file name as keyand its content as the value:
metadata: name: ${project.artifactId} annotations: maven.fabric8.io/cm/application.properties: src/test/resources/test-application.properties
This creates a ConfigMap data with key application.properties (part defined after cm) and value thecontent of src/test/resources/test-application.properties file.
fmp-secret-file
This enricher adds Secret defined as file content from an annotation.
If you are defining a custom Secret file, you can use an annotation to define a file name as key andits content as the value:
metadata: name: ${project.artifactId} annotations: maven.fabric8.io/secret/application.properties: src/test/resources/test-application.properties
This creates a Secret data with the key application.properties (part defined after secret) and valuecontent of src/test/resources/test-application.properties file (base64 encoded).
8.2. Enricher APIhow to write your own enricher and install them
84

Chapter 9. ProfilesProfiles can be used to combine a set of enrichers and generators and to give this combination areferable name.
Profiles are defined in YAML. The following example shows a simple profiles which uses only theSpring Boot generator and some enrichers adding for adding default resources:
Profile Definition
- name: my-spring-boot-apps ① generator: ② includes: - spring-boot enricher: ③ includes: ④ # Default Deployment object - fmp-controller # Add a default service - fmp-service excludes: ⑤ - f8-icon config: ⑥ fmp-service: # Expose service as NodePort type: NodePort order: 10 ⑦- name: another-profile ....
① Profile’s name
② Generators to use
③ Enrichers to use
④ List of enricher to include in that given order
⑤ List of enricher to exclude
⑥ Configuration for services an enrichers
⑦ An order which influences the way how profiles with the same name are merged
Each profiles.yml has a list of profiles which are defined with these elements:
Table 38. Profile elements
Element Description
name Profile name. This plugin comes with a set of predefined profiles. Those profiles canbe extended by defining a custom profile with the same name of the profile toextend.
85

Element Description
generator List of generator definitions. See below for the format of this definitions.
enricher List of enrichers definitions. See below for the format of this definitions.
order The order of the profile which is used when profiles of the same name are merged.
9.1. Generator and Enricher definitionsThe definition of generators and enrichers in the profile follow the same format:
Table 39. Generator and Enericher definition
Element Description
includes List of generators or enrichers to include. The order in the list determines the orderin which the processors are applied.
excludes List of generators or enrichers. These have precedences over includes and willexclude a processor even when referenced in an includes sections
config Configuration for genertors or enrichers. This is a map where the keys are the nameof the processor to configure and the value is again a map with configuration keysand values specific to the processor. See the documentation of the respectivegenerator or enricher for the available configuration keys.
9.2. Lookup orderProfiles can be defined externally either directly as a build resource insrc/main/fabric8/profiles.yml or provided as part of a plugin’s dependency where it is supposed tobe included as META-INF/fabric8/profiles.yml. Multiple profiles can be include in these profiles.ymldescriptors as a list:
If a profile is used then it is looked up from various places in the following order:
• From the compile and plugin classpath from META-INF/fabric8/profiles-default.yml. These filesare reserved for profiles defined by this plugin
• From the compile and plugin classpath from META-INF/fabric8/profiles.yml. Use this locationfor defining your custom profiles which you want to include via dependencies.
• From the project in src/main/fabric8/profiles.yml. The directory can be tuned with the pluginoption resourceDir (property: fabric8.resourceDir)
When multiple profiles of the same name are found, then these profiles are merged. If profile havean order number, then the higher order takes precedences when merging profiles.
For includes of the same processors, the processor is moved to the earliest position. E.g consider thefollowing two profiles with the name my-profile
86

Profile A
name: my-profileenricher: includes: [ e1, e2 ]
Profile B
name: my-profileenricher: includes: [ e3, e1 ]order: 10
then when merged results in the following profile (when no order is given, it defaults to 0):
Profile merged
name: my-profileenricher: includes: [ e1, e2, e3 ]order: 10
Profile with the same order number are merged according to the lookup order described above,where the latter profile is supposed to have a higher order.
The configuration for enrichers and generators are merged, too, where higher order profilesoverride configuration values with the same key of lower order profile configuration.
9.3. Using ProfilesProfiles can be selected by defining them in the plugin configuration, by giving a system propertyor by using special directories in the directory holding the resource fragments.
Profile used in plugin configuration
Here is an example how the profile can be used in a plugin configuration:
<plugin> <groupId>io.fabric8</groupId> <artifactId>fabric8-maven-plugin</artifactId> <configuration> <profile>my-spring-boot-apps</profile> ① ..... </configuration></plugin>
① Name which select the profile from the profiles.yml
87

Profile as system property
Alternatively a profile can be also specified on the command line when calling Maven:
mvn -Dfabric8.profile=my-spring-boot-apps fabric8:build fabric8:deploy
If a configuration for enrichers and generators are provided as part of the plugin’s <configuration>then this takes precedence over any profile specified.
Profiles for resource fragments
Profiles are also very useful when used together with resource fragments in src/main/fabric8. Bydefault the resource objects defined here are enriched with the configured profile (if any). Adifferent profile can be selected easily by using a sub directory within src/main/fabric8. The nameof each sub directory is interpreted as a profile name and all resource definition files found in thissub directory are enhanced with the enhancers defined in this profile.
For example, consider the following directory layout:
src/main/fabric8: app-rc.yml app-svc.yml raw/ --> couchbase-rc.yml couchbase-svc.yml
Here, the resource descriptors app-rc.yml and app-svc.yml are enhanced with the enrichers definedin the main configuration. The files two files couchbase-rc.yml and couchbase-svc.yml in the subdirectory raw/ instead are enriched with the profile raw. This is a predefined profile which includesno enricher at all, so the couchbase resource objects are not enriched and taken over literally. Thisis an easy way how you can fine tune enrichment for different object set.
9.4. Predefined ProfilesThis plugin comes with a list of the following predefined profiles:
Table 40. Predefined Profiles
Profile Description
default The default profile which is active if no profile is specified. It consists of a curatedset of generator and enrichers. See below for the current definition.
minimal This profile contains no generators and only enrichers for adding default objects(controller and services). No other enrichment is included.
explicit Like default but without adding default objects like controllers and services.
aggregate Includes no generators and only the fmp-dependency enricher for picking up andcombining resources from the compile time dependencies.
88

Profile Description
internal-microservice
Do not expose a port for the service to generate. Otherwise the same as the defaultprofile.
osio Includes everything in the default profile, plus additional enrichers and generatorsrelevant only to OpenShift.io.
9.5. Extending ProfilesA profile can also extend another profile to avoid repetition e.g of generators if the profile is onlyabout including certain enrichers. For example, for a profile like:
- name: minimal extends: default enricher: includes: - fmp-name - fmp-controller - fmp-service - fmp-image - fmp-project - fmp-debug
one then would not need to repeat all generators as they are inherited from the default profile.
Default Profile
# Default profile which is always activated- name: default enricher: # The order given in "includes" is the order in which enrichers are called includes: - fmp-metadata - fmp-name - fmp-controller - fmp-controller-from-configuration - fmp-service - fmp-namespace - fmp-image - fmp-portname - fmp-project-label - fmp-dependency - fmp-pod-annotations - fmp-git - fmp-maven-scm - fmp-serviceaccount - fmp-maven-issue-mgmt # TODO: Documents and verify enrichers below
89

- fmp-debug - fmp-remove-build-annotations - fmp-volume-permission - fmp-configmap-file - fmp-secret-file
# Route exposure - fmp-openshift-service-expose - fmp-openshift-route - fmp-openshift-deploymentconfig - fmp-openshift-project
# ----------------------------------------- # TODO: Document and verify enrichers below # Health checks - f8-healthcheck-quarkus - f8-healthcheck-spring-boot - f8-healthcheck-wildfly-swarm - f8-healthcheck-thorntail-v2 - f8-healthcheck-karaf - f8-healthcheck-vertx - f8-healthcheck-docker - f8-healthcheck-webapp - f8-prometheus # Dependencies shouldn't be enriched anymore, therefor it's last in the list - fmp-dependency - fmp-revision-history - fmp-docker-registry-secret - fmp-triggers-annotation - fmp-openshift-imageChangeTrigger
generator: # The order given in "includes" is the order in which generators are called includes: - quarkus - spring-boot - wildfly-swarm - thorntail-v2 - karaf - vertx - java-exec - webapp watcher: includes: - spring-boot - docker-image
90

Chapter 10. Access configuration
10.1. Docker Access
This section is work-in-progress and not yet finished
For Kubernetes builds the fabric8-maven-plugin uses the Docker remote API so the URL of yourDocker Daemon must be specified. The URL can be specified by the dockerHost or machineconfiguration, or by the DOCKER_HOST environment variable. If not given
The Docker remote API supports communication via SSL and authentication with certificates. Thepath to the certificates can be specified by the certPath or machine configuration, or by theDOCKER_CERT_PATH environment variable.
10.2. OpenShift and Kubernetes AccessIf no DOCKER_HOST is set and no unix socket could be accessed under /var/run/docker.sock then f-m-pchecks whethe gofabric8 is in the path and uses gofabric8 docker-env to get the connectionparameter to the Docker host exposed by
91

Chapter 11. Registry handlingDocker uses registries to store images. The registry is typically specified as part of the name. I.e. ifthe first part (everything before the first /) contains a dot (.) or colon (:) this part is interpreted asan address (with an optionally port) of a remote registry. This registry (or the default docker.io if noregistry is given) is used during push and pull operations. This plugin follows the same semantics,so if an image name is specified with a registry part, this registry is contacted. Authentication isexplained in the next section.
There are some situations however where you want to have more flexibility for specifying a remoteregistry. This might be because you do not want to hard code a registry into pom.xml but provide itfrom the outside with an environment variable or a system property.
This plugin supports various ways of specifying a registry:
• If the image name contains a registry part, this registry is used unconditionally and can not beoverwritten from the outside.
• If an image name doesn’t contain a registry, then by default the default Docker registrydocker.io is used for push and pull operations. But this can be overwritten through variousmeans:
• If the <image> configuration contains a <registry> subelement this registry is used.
• Otherwise, a global configuration element <registry> is evaluated which can be alsoprovided as system property via -Ddocker.registry.
• Finally an environment variable DOCKER_REGISTRY is looked up for detecting a registry.
This registry is used for pulling (i.e. for autopull the base image when doing a fabric8:build) andpushing with fabric8:push. However, when these two goals a are combined on the command linelike in mvn -Ddocker.registry=myregistry:5000 package fabric8:build fabric8:push the sameregistry is used for both operation. For a more fine grained control, separate registries for pull andpush can be specified.
• In the plugin’s configuration with the parameters <pullRegistry> and <pushRegistry>,respectively.
• With the system properties docker.pull.registry and docker.push.registry, respectively.
92

Example
<configuration> <registry>docker.jolokia.org:443</registry> <images> <image> <!-- Without an explicit registry ... --> <name>jolokia/jolokia-java</name> <!-- ... hence use this registry --> <registry>docker.ro14nd.de</registry> .... <image> <image> <name>postgresql</name> <!-- No registry in the name, hence use the globally configured docker.jolokia.org:443 as registry --> .... </image> <image> <!-- Explicitely specified always wins --> <name>docker.example.com:5000/another/server</name> </image> </images></configuration>
There is some special behaviour when using an externally provided registry like described above:
• When pulling, the image pulled will be also tagged with a repository name without registry. Thereasoning behind this is that this image then can be referenced also by the configuration whenthe registry is not specified anymore explicitly.
• When pushing a local image, temporarily a tag including the registry is added and removedafter the push. This is required because Docker can only push registry-named images.
93

Chapter 12. AuthenticationWhen pulling (via the autoPull mode of fabric8:start) or pushing image, it might be necessary toauthenticate against a Docker registry.
There are five different locations searched for credentials. In order, these are:
• Providing system properties docker.username and docker.password from the outside.
• Using a <authConfig> section in the plugin configuration with <username> and <password>elements.
• Using OpenShift configuration in ~/.config/kube
• Using a <server> configuration in ~/.m2/settings.xml
• Login into a registry with docker login (credentials in a credential helper or in~/.docker/config.json)
Using the username and password directly in the pom.xml is not recommended since this is widelyvisible. This is easiest and transparent way, though. Using an <authConfig> is straight forward:
<plugin> <configuration> <image>consol/tomcat-7.0</image> ... <authConfig> <username>jolokia</username> <password>s!cr!t</password> </authConfig> </configuration></plugin>
The system property provided credentials are a good compromise when using CI servers likeJenkins. You simply provide the credentials from the outside:
Example
mvn -Ddocker.username=jolokia -Ddocker.password=s!cr!t fabric8:push
The most mavenish way is to add a server to the Maven settings file ~/.m2/settings.xml:
94

Example
<servers> <server> <id>docker.io</id> <username>jolokia</username> <password>s!cr!t</password> </server> ....</servers>
The server id must specify the registry to push to/pull from, which by default is central indexdocker.io (or index.docker.io / registry.hub.docker.com as fallbacks). Here you should add yourdocker.io account for your repositories. If you have multiple accounts for the same registry, thesecond user can be specified as part of the ID. In the example above, if you have a second account'fabric8io' then use an <id>docker.io/fabric8io</id> for this second entry. I.e. add the usernamewith a slash to the id name. The default without username is only taken if no server entry with ausername appended id is chosen.
The most secure way is to rely on docker’s credential store or credential helper and readconfidential information from an external credentials store, such as the native keychain of theoperating system. Follow the instruction on the docker login documentation.
As a final fallback, this plugin consults $DOCKER_CONFIG/config.json if DOCKER_CONFIG is set, or~/.docker/config.json if not, and reads credentials stored directly within this file. This unsafebehavior happened when connecting to a registry with the command docker login from thecommand line with older versions of docker (pre 1.13.0) or when docker is not configured to use acredential store.
12.1. Pull vs. Push AuthenticationThe credentials lookup described above is valid for both push and pull operations. In order tonarrow things down, credentials can be provided for pull or push operations alone:
In an <authConfig> section a sub-section <pull> and/or <push> can be added. In the example belowthe credentials provider are only used for image push operations:
95

Example
<plugin> <configuration> <image>consol/tomcat-7.0</image> ... <authConfig> <push> <username>jolokia</username> <password>s!cr!t</password> </push> </authConfig> </configuration></plugin>
When the credentials are given on the command line as system properties, then the propertiesdocker.pull.username / docker.pull.password and docker.push.username / docker.push.password areused for pull and push operations, respectively (when given). Either way, the standard lookupalgorithm as described in the previous section is used as fallback.
12.2. OpenShift AuthenticationWhen working with the default registry in OpenShift, the credentials to authenticate are theOpenShift username and access token. So, a typical interaction with the OpenShift registry from theoutside is:
oc login...mvn -Ddocker.registry=docker-registry.domain.com:80/default/myimage \ -Ddocker.username=$(oc whoami) \ -Ddocker.password=$(oc whoami -t)
(note, that the image’s username part ("default" here") must correspond to an OpenShift projectwith the same name to which you currently connected account has access).
This can be simplified by using the system property docker.useOpenShiftAuth in which case theplugin does the lookup. The equivalent to the example above is
oc login...mvn -Ddocker.registry=docker-registry.domain.com:80/default/myimage \ -Ddocker.useOpenShiftAuth
Alternatively the configuration option <useOpenShiftAuth> can be added to the <authConfig> section.
For dedicated pull and push configuration the system properties docker.pull.useOpenShiftAuth anddocker.push.useOpenShiftAuth are available as well as the configuration option <useOpenShiftAuth>
96

in an <pull> or <push> section within the <authConfig> configuration.
If useOpenShiftAuth is enabled then the OpenShift Konfiguration will be looked up in $KUBECONFIG or,if this environment variable is not set, in ~/.kube/config.
12.3. Password encryptionRegardless which mode you choose you can encrypt password as described in the Mavendocumentation. Assuming that you have setup a master password in ~/.m2/security-settings.xmlyou can create easily encrypt passwords:
Example
$ mvn --encrypt-passwordPassword:{QJ6wvuEfacMHklqsmrtrn1/ClOLqLm8hB7yUL23KOKo=}
This password then can be used in authConfig, docker.password and/or the <server> settingconfiguration. However, putting an encrypted password into authConfig in the pom.xml doesn’t makemuch sense, since this password is encrypted with an individual master password.
12.4. Extended AuthenticationSome docker registries require additional steps to authenticate. Amazon ECR requires using an IAMaccess key to obtain temporary docker login credentials. The docker:push and docker:pull goalsautomatically execute this exchange for any registry of the form <awsAccountId> .dkr.ecr.<awsRegion> .amazonaws.com, unless the skipExtendedAuth configuration(docker.skip.extendedAuth property) is set true.
Note that for an ECR repository with URI 123456789012.dkr.ecr.eu-west-
1.amazonaws.com/example/image the d-m-p’s docker.registry should be set to123456789012.dkr.ecr.eu-west-1.amazonaws.com and example/image is the <name> of the image.
You can use any IAM access key with the necessary permissions in any of the locations mentionedabove except ~/.docker/config.json. Use the IAM Access key ID as the username and the Secretaccess key as the password. In case you’re using temporary security credentials provided by theAWS Security Token Service (AWS STS), you have to provide the security token as well. To do so,either specify the docker.authToken system property or provide an <auth> element alongsideusername & password in the authConfig.
In case you are running on an EC2 instance that has an appropriate IAM role assigned (e.g. a rolethat grants the AWS built-in policy AmazonEC2ContainerRegistryPowerUser) authenticationinformation doesn’t need to be provided at all. Instead the instance meta-data service is queried fortemporary access credentials supplied by the assigned role. Unresolved directive in index.adoc -include::inc/_volumes.adoc[]
97

Chapter 13. Migration from version 2This version 3 of f8-m-p is using a completely new configuration syntax compared to version 2.
If you have a maven project with a 2.x fabric8-maven-plugin then we recommend you run the mvnfabric8:migrate goal directly on your project to do the migration:
# in a fabric8-maven-plugin 2.x projectmvn fabric8:migrate# now the project is using 3.x or later
Once the project is migrated to 3.x or later of the fabric8-maven-plugin you can then run thisfabric8:setup goal at any time to update to the latest plugin and goals.
98

Chapter 14. FAQ
14.1. General questions
14.1.1. How do I define an environment variable?
The easiest way is to add a src/main/fabric8/deployment.yml file to your project containingsomething like:
spec: template: spec: containers: -env: - name: FOO value: bar
The above will generate an environment variable $FOO of value bar
For a full list of the environments used in java base images, see this list
14.1.2. How do I define a system property?
The simplest way is to add system properties to the JAVA_OPTIONS environment variable.
For a full list of the environments used in java base images, see this list
e.g. add a src/main/fabric8/deployment.yml file to your project containing something like:
spec: template: spec: containers: - env: - name: JAVA_OPTIONS value: "-Dfoo=bar -Dxyz=abc"
The above will define the system properties foo=bar and xyz=abc
14.1.3. How do I mount a config file from a ConfigMap?
First you need to create your ConfigMap resource via a file src/main/fabric8/configmap.yml
99
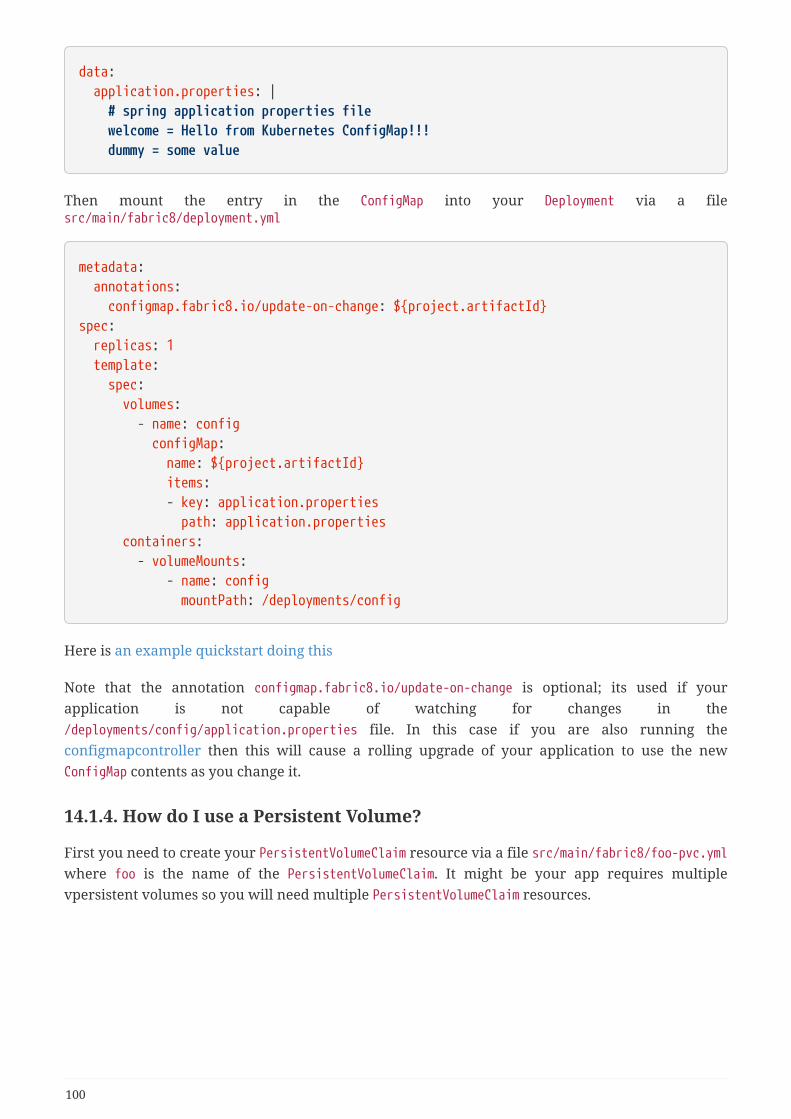
data: application.properties: | # spring application properties file welcome = Hello from Kubernetes ConfigMap!!! dummy = some value
Then mount the entry in the ConfigMap into your Deployment via a filesrc/main/fabric8/deployment.yml
metadata: annotations: configmap.fabric8.io/update-on-change: ${project.artifactId}spec: replicas: 1 template: spec: volumes: - name: config configMap: name: ${project.artifactId} items: - key: application.properties path: application.properties containers: - volumeMounts: - name: config mountPath: /deployments/config
Here is an example quickstart doing this
Note that the annotation configmap.fabric8.io/update-on-change is optional; its used if yourapplication is not capable of watching for changes in the/deployments/config/application.properties file. In this case if you are also running theconfigmapcontroller then this will cause a rolling upgrade of your application to use the newConfigMap contents as you change it.
14.1.4. How do I use a Persistent Volume?
First you need to create your PersistentVolumeClaim resource via a file src/main/fabric8/foo-pvc.ymlwhere foo is the name of the PersistentVolumeClaim. It might be your app requires multiplevpersistent volumes so you will need multiple PersistentVolumeClaim resources.
100

spec: accessModes: - ReadWriteOnce resources: requests: storage: 100Mi
Then to mount the PersistentVolumeClaim into your Deployment create a filesrc/main/fabric8/deployment.yml
spec: template: spec: volumes: - name: foo persistentVolumeClaim: claimName: foo containers: - volumeMounts: - mountPath: /whatnot name: foo
Where the above defines the PersistentVolumeClaim called foo which is then mounted into thecontainer at /whatnot
Here is an example application
101

Chapter 15. Appendix
15.1. Kind/Filename Type Mapping
Kind Filename Type
BuildConfig bc, buildconfig
ClusterRole cr, crole, clusterrole
ConfigMap cm, configmap
ClusterRoleBinding crb, clusterrb, clusterrolebinding
CronJob cj, cronjob
CustomResourceDefinition crd, customerresourcedefinition
DaemonSet ds, daemonset
Deployment deployment
DeploymentConfig dc, deploymentconfig
ImageStream is, imagestream
ImageStreamTag istag, imagestreamtag
Job job
LimitRange lr, limitrange
Namespace ns, namespace
OAuthClient oauthclient
PolicyBinding pb, policybinding
PersistentVolume pv, persistentvolume
PersistentVolumeClaim pvc, persistemtvolumeclaim
Project project
ProjectRequest pr, projectrequest
ReplicaSet rs, replicaset
ReplicationController rc, replicationcontroller
ResourceQuota rq, resourcequota
Role role
RoleBinding rb, rolebinding
RoleBindingRestriction rbr, rolebindingrestriction
Route route
Secret secret
102

Kind Filename Type
Service svc, service
ServiceAccount sa, serviceaccount
StatefulSet statefulset
Template template
Pod pd, pod
15.2. Custom Kind/Filename MappingYou can add your custom Kind/Filename mappings. To do it you have two approaches:
• Setting an environment variable or system property called fabric8.mapping pointing out to a.properties files with pairs <kind>⇒filename1>, <filename2> By default if no environmentvariable nor system property is set, scan for a file located at classpath /META-INF/fabric8/kind-filename-type-mapping-default.properties.
• By embedding in MOJO configuration the mapping:
<plugin> <groupId>io.fabric8</groupId> <artifactId>fabric8-maven-plugin</artifactId> <configuration> <mappings> <mapping> <kind>Var</kind> <filenameTypes>foo, bar</filenameTypes> </mapping> </mappings> </configuration></plugin>
103