ezrecorder 130 -...
TRANSCRIPT
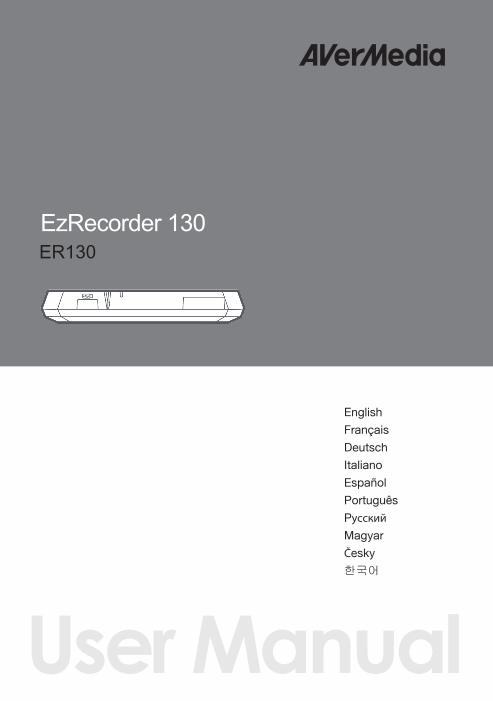
User Manual
EzRecorder 130ER130
Nederlands
English
Français
Deutsch
Italiano
Español
Português
PусскийMagyar
Česky
한국어


European Community Compliance Statement
Class B
This product is herewith confirmed to comply with the requirements set out in the
Council Directives on the approximation of the laws of the Member States relating
to Electromagnetic Compatibility Directive (EMC) 2004 / 108 / EC, Low Voltage
Directive (LVD) 2006/95/EC and Energy-related Products Directive (ErP)
2009 / 125 / EC.
Responsible manufacturer:
AVerMedia Technologies, Inc.
No. 135, Jian 1st Rd.,Zhonghe Dist., New Taipei City 23585, Taiwan
TEL: +886-2-2226-3630
European Community contact:
AVerMedia Technologies Europe B.V.
Kwartsweg 50, 2665 NN, Bleiswijk, The Netherlands
Technical Support: http://www.avermedia.com/avertv/Support/
WASTE ELECTRICAL AND ELECTRONIC EQUIPMENT (WEEE) The mark of Crossed-out wheeled bin indicates that this product must not be
disposed of with your other household waste. Instead, you need to dispose of the
waste equipment by handing it over to a designated collection point for the
recycling of waste electrical and electronic equipment. For more information about
where to drop off your waste equipment for recycling, please contact your
household waste disposal service or the shop where you purchased the product.
Battery Safety Information Use of carbon-zinc battery for remote control is strongly recommended.
Use of other types of batteries, such as alkaline or rechargeable (nickel-cadmium), may cause
battery current overload or battery leakage and corrosion which can damage the remote
control.
Store the batteries in a cool dry place.
Do not dispose of used batteries in domestic waste. Dispose of batteries at special collection
points or return to point of sale if applies.
Remove the batteries during long periods of non-use. Always remove exhausted batteries from
the remote control. Battery leakage and corrosion can damage this remote control, dispose of
batteries safely.
Do not mix old and new batteries.
Do not mix different types of batteries: alkaline, standard (carbon-zinc) or rechargeable
(nickel-cadmium).
新增製造商及當地聯絡方式

Do not dispose of batteries in a fire. The batteries may explode or leak.
Never short circuit the battery terminals.
GOST-R Certification (Russia)
Disclaimer & Copyright © 2014 by AVerMedia Technologies, Inc. All rights reserved. No part of this document may be
reproduced or transmitted in any form, or by any means (Electronic, mechanical, photocopy,
recording, or otherwise) without prior written permission of AVerMedia Technologies, Inc.
Information in this document is subject to change without notice. AVerMedia Technologies,
Inc. reserves the right to modify, change, improve or enhance its products and to make
changes in the content without obligation to notify any person or organization of such
changes. Please visit avermedia.com to get the updates of the operation and use of
AVerMedia products.
"AVerMedia" is trademark and logo of AVerMedia Technologies, Inc. Other trademarks used
herein for description purpose only belong to each of their companies.
Picture shown may vary from actual product.
This product uses Arphic Font.
This software uses libraries from the Libav project under the LGPLv2.1.
International Headquarter Office Address No.135, Jian 1st Rd., Zhonghe Dist., New Taipei City 23585, Taiwan (R.O.C.) Website www.avermedia.com Tel +886-2-2226-3630
№ РОСС TW. AB02.B09025
Срок действия с
14.02.2013 г по 13.02.2015 г
Москва
AB02

Specifications
Product Name Capture Box
Model No. ER130 (GC530)
Power
Input Rating 5V 1A
Power Consumption < 5W
Standby Power Consumption < 0.5W
Adapter Rating Input: 100-240V~, 50-60Hz 0.5A Max. Output: 5V 2A
Dimension
Size 133 mm (W) x 20.5 mm (H) x 125.1 mm (D)
Weight 176 g
Environmental Condition
Operating Temperature 5~40℃
System Requirements
TV/monitor with HDMI input TV/monitor with 720p or 1080p resolution (recommended) Video device/game console with HDMI output A NTFS-formatted hard drive with capacity greater than 500 GB is recommended.
(The supported maximum storage capacity of the hard drive is 2TB) A hard drive is highly preferred over a flash drive to minimize the risk of recording
failure.


English - 1
Chapter 1 Package Contents
Please confirm that the package contains the following items. If any of the package
contents are missing or damaged, please contact the distributor immediately.
EzRecorder 130
Capture Box
Power Adapter (5V 2A)
Power Adapter Outlet
Module
DC to Mini USB Cable
User Manual
Remote Control
(Batteries Included)
En
gli
sh
Engl
ish

English - 2
1.1 Other Device You Need
In order to fully enjoy the recording and capturing functions of the Capture Box, you
will need to have a USB hard drive.
USB Hard Drive (not included)
Recommend high-performance USB 2.0 or 3.0 hard drive
NTFS file format is required
To format your USB hard drive to NTFS file system, download the free application “HP
USB Storage Format Tool” from the FAQ of the AVerMedia website.
The accessories that come with the package may vary slightly depending on different sales
regions.
Please use the power adapter included in this box. Using other power sources can cause
damage to the device.
The Capture Box is made for recording and capturing media materials that are legally
owned or licensed by the user only. Any violation of copyrights or other intellectual property
rights is not allowed.
AVerMedia regularly releases the latest version of firmware for the Capture Box. Having
the latest firmware enhances the functionality of the Capture Box. To download the latest
firmware file, please go to www.avermedia.com and then enter the model name in Product
Search field.
If problems are encountered, refer to FAQ section at www.avermedia.com for further
troubleshooting.

English - 3
Chapter 2 The Unit Parts
2.1 Top Panel
The [REC] button is located on the top of the unit for quick access to common
functions.
Button Description
Power On/Off
Press [REC] once to turn on the device. Hold down [REC] for 4 seconds to turn off the device.
Record/Stop
When the device is on, press [REC] once to start the recording, and press [REC] again to stop the recording.
2.2 Infrared Sensor
When using the remote control, aim it at the infrared (IR) sensor located at the front
panel of the unit. The remote control must be held at an angle within 30 degrees
perpendicular to the IR sensor to function correctly. The distance between the
remote control and the sensor should not exceed 6 meters (20 feet).
Engl
ish

English - 4
2.3 LED Indicator
The LED indicator on the front of the unit shows the device’s status.
LED indicator
Condition Indication
Powered on Flashes green
Ready to
record/snapshot
Glows solid green
Recording Flashes red in breathing pace
Take a snapshot Flashes red once
Unable to
record/snapshot
Flashes red twice
No source Flashes red twice
Source is available Glows solid green
Power off in progress Flashes green
Pause recording Glows solid red
Record finish in
progress
Flashes red rapidly
Low power Flashes red and green alternately
A/V pass through Glows solid orange

English - 5
2.4 Connection Ports
USB flash drive slot
1 HDMI input 3 DC-IN
2 HDMI output
2.4.1 Front View
2.4.2 Rear View
USB slot is for flash drive storage device connection as well as for firmware upgrade
via storage device.
USB hub is not supported.
There will be no function or reply when connecting the Capture Box to the computer via
USB.
When power is low, the Capture Box will not record or take snapshot properly.

English - 6
Chapter 3 The Remote Control
The descriptions below show the deployment of the keys on the remote control.
# Buttons
Descriptions
1 Press to turn the unit on / into stand-by mode.
2 Press to access the main menu. Press again to exit.
3
Press the navigation keys to move among options. Press OK to confirm a selection. Press OK to mark/ unmark segment in post- editing.
4
Press to play the latest recorded file or view the last captured
image.

English - 7
5 Press to start/ stop recording.
6
Press to start playing the selected file. Press to play the file at normal (1x) speed when slow motion, rewind, or fast-forward is active.
7 Press to stop the playback/ recording.
8 Press to rewind (2x, 4x, 8x, 16x, 32x).
9 Press to return to the previous page.
10
Press to display the video/ snapshot quality adjustment screen. Press again to exit.
11
Press to safely remove USB disk drive in Menu.
(Follow the on-screen instruction)
12 (Follow the on-screen instruction)
13 (Follow the on-screen instruction)
14 (Not Supported)
15
Press to display onscreen information, including mode, source and audio sources.
16
Press to exit the current page and return to the previous
page.
17 Press to take a snapshot during gameplay or video playback.
18
Press to pause the playback. Press OK or to resume playback. Press to pause the recording.
19
Press to play the video in slow motion (1/2x). Press again to enter frame- by- frame mode.
20 Press to fast-forward (2x, 4x, 8x, 16x, 32x).

English - 8
21
Press to go to the next page.
22 Press to delete the selected files.
23 Press to display the disk information. Press again to hide it.
Chapter 4 Installation & First Time Setup
4.1 Supported Resolutions
The EzRecorder 130 supports HDMI input resolutions as follows:
HDMI
480i/576i
480p/576p
720p (50 & 60Hz)
1080i (50 & 60Hz)
1080p (50 & 60Hz)
The EzRecorder 130 records the exact display resolution under most circumstances.
Exceptions can only be found when the input resolution is set as 1080p:
Source
Resolutions
Display
Resolutions
Recorded
Resolutions
1080p (60fps) 1080i (60fps) 1080p (30fps)
1080p (50fps) 1080i (50fps) 1080p (25fps)

English - 9
Estimated recording duration for different video quality settings: HD 1080p
Optimal
(20 Mbps)
Good
(18 Mbps)
Maximum
Recording Length
(15 Mbps)
1TB 100 hrs 110 hrs 125 hrs
2TB 200 hrs 220hrs 250hrs
HD 720P
Optimal
(20 Mbps)
Good
(15 Mbps)
Maximum
Recording Length
(10 Mbps)
1TB 100 hrs 125hrs 200 hrs
2TB 200 hrs 250 hrs 400hrs
HD 1080i
Optimal
(15 Mbps)
Good
(12 Mbps)
Maximum
Recording Length
(10 Mbps)
1TB 125 hrs 150 hrs 200 hrs
2TB 250 hrs 300 hrs 400 hrs
SD 480i(576i)/480P(576P)
Optimal
(7.5 Mbps)
Good
(5 Mbps)
Maximum
Recording Length (3
Mbps)
1TB 250 hrs 400 hrs 650 hrs
2TB 500 hrs 800 hrs 1300 hrs
*Recording with higher video quality takes up more disk space.
Video Quality
Storage Capacity
Video Quality
Storage Capacity
Video Quality
Storage Capacity
Video Quality
Video Quality
Storage Capacity
Storage Capacity

English - 10
4.2 Hardware Installation
.
4.2.1 Connect to the Source Device and TV
When capturing from PS3, make sure the Capture Box is connected to the
HDMI-1 port on your TV to avoid a blank screen.

English - 11
‧Power on your source device FIRST.
‧Сначала выключите питание источника сигнала.
‧Quellgerät ZUERST einsch.
‧Enciende tu dispositivo PRIMERO
‧Allumez l’appareil de la source vidéo AVANT.
‧Come PRIMA cosa alimentare il dispositivo.
‧NAJPIERW włącz źródło sygnału.
‧Porniţi ÎNTÂI dispozitivul sursă.
‧NEJPRVE zapněte zdroj napájení.
‧ELŐSZÖR kapcsolja be a videó forrás eszközt.
‧Ligue o dispositivo de origem PRIMEIRO.
‧ÖNCE kaynak cihazınızı açın.
4.2.2 Power On Your Source Device First
4.2.3 Connect to A Wall Outlet for Power Supply

English - 12
4.2.4 Connect to Your USB Hard Drive
4.2.5 Turn On the Device
To prevent data loss, always press F1 (in menu) to eject USB hard drive safely.
Please use the power adapter included in the box. Using other power sources
can cause damage to the device.

English - 13
The Capture Box can pass through signal from your source device to TV even
when it is Off.
Go to Menu > Settings > A/V Management > A/V Pass Thru. to enable singal
pass through when EzRecorder 130 is Off.
*The default is set Off to meet the 2013 (erp) Lot 6 power-saving regulation.

English - 14
Chapter 5 Basic Operation
This chapter guides you to record video, capture images and instantly play files.
5.1 Record and Capture
The Capture Box allows you to capture videos. Instructions are given as follows.
OSD Menu Descriptions
Instant Recording During
Gameplay
- Press to activate instant
recording.
- Press again or to stop
recording.
Pause and resume recording
You can skip unwanted footages
and resume recording. Only the
footages you recorded will be saved
and those skipped clips will be
deleted automatically.
Press to pause recording.
- Press or to continue
recording.
The Capture Box displays video in real-time and standard mode. You can change the default
real-time mode to standard mode. Go to Menu> Settings> Display Mode. (Refer to Chapter 6.2
for details.)
All the recorded files or snapshots will be saved to the default flash drive destination
automatically. Please see Chapter 6 for details.
English - 15
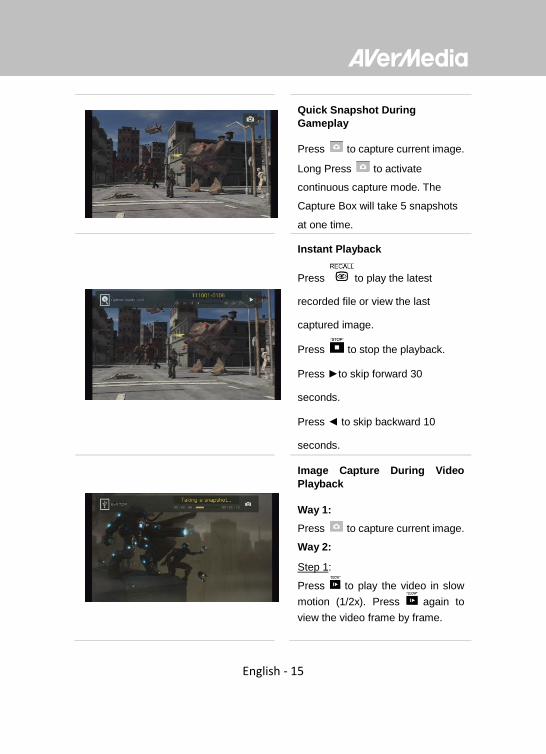
Quick Snapshot During
Gameplay
- Press to capture current image.
Long Press to activate
continuous capture mode. The
Capture Box will take 5 snapshots
at one time.
Instant Playback
- Press to play the latest
recorded file or view the last
captured image.
- Press to stop the playback.
- Press ►to skip forward 30
seconds.
- Press ◄ to skip backward 10
seconds.
Image Capture During Video
Playback
Way 1:
- Press to capture current image.
Way 2:
Step 1:
- Press to play the video in slow
motion (1/2x). Press again to
view the video frame by frame.
-

English - 16
or
- Press to pause the playback.
Press to go to previous frame;
press to go to next frame.
Step 2:
- Press to capture your desired
image.
Disk Information
Press then press OK to display
the disk information. Press again to
hide it.
Chapter 6 OSD Menu
Under the menu, you can check and manage both your recorded files and
snapshots, and customize your preferences.
1 Remaining Time for Recording 2 Current Time

English - 17
OSD Menu Descriptions
Basic Operation
- Press to bring up the menu.
- Press or to return to the
video screen.
- Use ▲/▼ to make selection on the
menu and OK to enter a submenu.
- In the submenu, use ▲/▼ to make
selection and OK to confirm. Press
to return to the previous page.
Press F1 to safely remove the
storage device..
- *The upper left corner shows your
current default storage device and
available remaining recording time.
6.1 Media Studio
You can check both recordings and snapshots captured by the Capture Box in
‘Media Studio’.
Capture Format:
Video MP4 (Codec: H.264 format with AAC audio)
Image JPEG
It is recommended that you view only videos and snapshots that are recorded by the Capture
Box. Attempt to open files taken by other equipment (such as a camera) on the Capture Box is
very likely to fail.

English - 18
OSD Menu Descriptions
Navigating
- Use the navigation keys ◄/►/▲/▼
to select among items.
- Press F1 to sort the files by file
name, file size, file format and by
modified date.
- Press F2 to switch between list
mode and thumbnail mode.
- Press to go to the next page.
- Press return to the previous
page.
Press to directly access the
main menu.
Video Playback
- Press or OK to start playing the
selected video.
- Press or OK to pause the
playback. Press or OK to
resume playback.
- Press to play the video in slow
motion (1/2x).
- Press to rewind at 2x, 4x, 8x, 16x,
32x speed.
- Press to fast forward at 2x, 4x,
8x, 16x, 32x speed.
- Press to play the file at normal

English - 19
(1x) speed when slow motion,
rewind, or fast-forward is active.
- Press to stop the playback.
- Press to display the playback
information, including storage disk,
recording resolution, duration,
elapsed and remaining time, and file
name.
* Only video files captured by the Capture
Box are supported.
Snapshots Viewing
- Press or OK to view the
selected image. Press or
to return.
* Only image files captured by the
Capture Box are supported.
6.1.1 Post- Edit Capture Box Recorded Videos
This section shows you how to cut, and recombine videos recorded by the Capture
Box.
OSD Menu Descriptions
Select a Video
- Select the file you would like to edit
by using the navigation keys
◄/►/▲/▼.

English - 20
Change File Name / Edit
Press F3 to edit or change the
selected video.
Change File Name
Input your file name by using the
navigation keys ▲/▼ to select
characters, numerals or symbols.
Use the navigations keys ◄/► to
go to the next/ last character.
Press F1 to switch between
characters, numerals and symbols.
- Press to go back to cancel the
change you made.
- Press OK to save the edited file
name.
- Press to clear all.
How to Edit
An instruction on how to edit a
video will be displayed, press OK
to start editing.

English - 21
Edit Mode
You can cut and recombine your
selected video in Edit Mode.
- To cut the video, you will need to
create one or more segments
within the video.
- Step 1:
- To locate a scene, use direction
keys or to search the scene.
You can also use navigation keys
▲/▼ to search scene by specific
hour, minute, and second on the
left hand side of the screen.
- Press OK to mark or unmark the
scene.
-
Step 2:
Repeat Step 1 so as to create a
segment.
Press OK to keep or delete the
segment.
Press F1 to switch between
Search Scene and Segment
search.
Press F2 to clear all marks you
made on the video.
Press F3 to export the video.

English - 22
Preview
- The Capture Box automatically
recombines the segments you
choose to keep during editing.
Export
- The estimated time varies by
different storage disks. Refer
export time to the actual use of
your storage disk.
- Press OK to export the video.
- Press to continue editing.
OSD Menu Descriptions
Exporting…
The bar in the middle shows the
progress of video exporting and
estimated time.
- Click on to cancel exporting.
- Click on to hide the exporting
information.

English - 23
Exit
Press OK to exit from the editing
mode.
- Press to exit
Press F1 to continue editing.
6.2 Settings
You can customize your preferences in “Settings”.
OSD Menu Descriptions
Basic Operation
- Use ▲/▼ to select a preferred
category. Press OK to make a
selection.
- Press to return to the previous
page.
Press to directly access the main menu.
- Press F1 to safely remove the
storage device.
The recommended length of each video should be less than 1 hour.
The Capture Box is made for record and capture media materials that are legally owned or
licensed by the user only.

English - 24
OSD Menu Descriptions
Language
Use ▲/▼ to select your preferred
language. Press OK to confirm.
OSD Menu Descriptions
Display Mode
The default mode is set as
real-time mode.
- Use ▲/▼ to switch between
real-time and standard mode.
Real-Time Mode
Real-time mode lets you play
games with zero delay. No
recording or snapshot status will be
shown on screen. All capture work
will run in the background.
However, if any problem occurs
during the capturing process, OSD
will automatically jumps out.
- Press to check OSD and track
capture status.

English - 25
Standard Mode
In standard mode, on-going
recordings will be shown in the
upper right corner of the screen. As
there will be slight delay in game,
standard mode is recommended
for set-top box.
OSD Menu Descriptions
Date and Time
Use ▲/▼ to select an item for
configuration. Press OK to confirm.
Date Format :
Use ▲/▼ to select a preferred date
format. Press OK to confirm.
Black screen may occur when calling for Menu in real-time mode. And the pause varies
by TV type.

English - 26
Time Zone :
STEP 1:
Use ▲/▼ to move among options
and select your area. Press OK to
confirm.
STEP 2:
Use ▲/▼ to move among options
and select your time zone. Press
OK to confirm.
Time Setup :
Use ◄/► to move among options
and ▲/▼ to adjust date and time.
Press OK to confirm.
Daylight Saving Time :
Use ▲/▼ to enable/disable
Daylight Saving Time. Press OK to
confirm.
*To use this function, a network connection is
required.
OSD Menu Descriptions
Disk Management
Storage Destination
Step 1:
Select and press OK to change
your current desired default
storage device for both recorded
files and snapshots.
* indicates normal write speed of

English - 27
selected partition; indicates low write
speed of selected partition. To make sure
recording functions properly, be sure to
select partition with normal write speed.
Step 2:
Use ▲/▼ to select the preferred
default storage device.
Step 3:
Use ▲/▼ to select a folder and
press OK to confirm.
Step 4:
Press F1 to save the setting.
OSD Menu Descriptions
A/V Management
Use ▲/▼ to move among options. Press OK to confirm.
A/V Pass Through:
Use ▲/▼ to enable/disable A/V
Pass Through. Press OK to
confirm.
*The default setting is set Off to yield to the
power-saving regulation. If this function is
enabled, Capture Box still output signal when
the Capture Box is off. If this function is
disabled, Capture Box does not output signal
when the Capture Box is off.

English - 28
Color Range:
Use ▲/▼ to toggle between off,
limited, and full. Press OK to
confirm.
OSD Menu Descriptions
Recording/ Snapshot
Video Quality:
Use ▲/▼ to toggle among various
video quality options (Optimal/
Good/ Maximum recording length).
Press OK to confirm.
Snapshot Quality:
Use ▲/▼ to toggle among various
snapshot quality options (Best
/Better / Good). Press OK to
confirm.
Auto Save:
Use ▲/▼ to switch from enable or
disable the Auto Save function.

English - 29
HDCP Mode:
Use ▲/▼ to switch from enable or
disable the HDCP Mode function.
Note: If video source is HDCP-protected,
images will NOT be shown properly.
OSD Menu Descriptions
Watermark
Add your selected watermark to
your videos. You can customize the
display of the watermark by setting
up the type, position and also
scale.
- Press to go back to last level.
Press OK to enter the next level.
Press F1 to preview the display.
Watermark Type:
Use to ▲/▼ select from the listed
watermark types.
Press OK to save the change.
- Press to go back to last level.

English - 30
Position:
Use ▲/▼ to select from the listed
watermark positions.
Press OK to save the change.
- Press to go back to last level.
Display Scale:
Use ▲/▼ to select the display
scale.
Press OK to save the change.
- Press to go back to last level.
OSD Menu Descriptions
Timer Recording
Allows you to schedule the Capture
Box to start recording at a
particular time and record only a
certain length of time.
Mode:
Use to ▲/▼ select from the listed
recording type.
Press OK to confirm.

English - 31
Recording Time:
Use ◄/► to move among options
and ▲/▼ to adjust start time and
recording length.
Press OK to save the change.
- Press to go back to last level.
OSD Menu Descriptions
Firmware Upgrade
Follow the steps below to
upgrade the firmware via USB
storage device:
Step 1:
To download the latest firmware
binary package, please go to
www.avermedia.com, and then
enter the model name in Product
Search field. Firmware file is
available on the product
information page.
Step 2:
Extract the files by unzipping the
package.
Copy the firmware files to the root
directory of your USB storage
device, and then connect it to the
Capture Box.
Step 3:
Press F1 to start the firmware
upgrade process. Press to
abort the operation and return to
the previous page.
Step 4:
The Capture Box automatically
detects whether a different

English - 32
version of firmware is available
for upgrade or rollback. Once the
firmware upgrade process has
completed, press OK to restart the
Capture Box.
Reset
Press F1 to restore to original
factory settings. Press to abort
the operation and return to the
previous page.
Product Information
This page provides information
about this product, including
product name, model no., and
firmware version.
Press F1 to edit the display name.
The firmware upgrade process takes up approximately 10-14 minutes.
Firmware upgrade requires at least 256MB free space of USB 2.0 flash drive.
If problems encountered during firmware upgrade, please clear all the data stored on your
USB storage device and repeat the process above.
NEVER power off the device or unplug the power supply or remove the USB storage
device during the firmware upgrade process. If the firmware upgrade is interrupted for any
reason, the device may crash.

English - 33
OSD Descriptions
Name your own Capture Box.
Press navigation keys Up
and Down to select characters.
Press navigation keys Left
and Right to shift to the former or later character.
Press to switch to the next
input menu.
Press to delete the
character.
Press OK to save the name.
To change product name, go to
Menu >Product Name.
* The display name will show up when you
enable watermark function.


La télécommande Les descriptions ci-dessous présentent les touches de la télécommande.
# Descriptions # Descriptions
1 Appuyez pour allumer l’appareil/le mettre en veille.
13 (Suivez les instructions à l’écran)
2 Appuyez pour accéder au menu principal. Appuyez à nouveau pour quitter.
14 (Non pris en charge)
3
Appuyez sur les touches de direction pour vous déplacer parmi les options. Appuyez sur OK pour confirmer une sélection. Appuyez sur OK pour marquer/enlever le marquage d’un segment en post-édition.
15 Appuyez pour afficher les informations à l’écran, y compris le mode, la source et les sources audio.
4 Appuyez pour lire le dernier fichier enregistré ou visualiser la dernière image capturée.
16 Appuyez pour quitter la page en cours et revenir à la page précédente.
5 Appuyez pour démarrer/arrêter l’enregistrement.
17 Appuyez pour prendre une photo durant un jeu ou la lecture d’une vidéo.
6
Appuyez pour démarrer la lecture du fichier sélectionné. Appuyez pour lire le fichier à la vitesse normale (1x) lorsque la fonction lecture au ralenti, retour ou avance rapide est active.
18
Appuyez pour mettre la lecture en pause. Appuyez sur OK ou pour reprendre la lecture. Appuyez pour mettre l’enregistrement en pause.
7 Appuyez pour arrêter la lecture. Appuyez pour arrêter l’enregistrement.
19 Appuyez pour lire la vidéo au ralenti (1/2x). Appuyez à nouveau pour passer en mode image par image.
8 Appuyez pour le retour rapide (2x, 4x, 8x, 16x, 32x).
20 Appuyez pour l’avance rapide (2x, 4x, 8x, 16x, 32x).
9 Appuyez pour revenir à la page précédente.
21 Appuyez pour passer à la page suivante.
10
Appuyez pour afficher l’écran de réglage de la qualité de la vidéo/photo. Appuyez à nouveau pour quitter.
22 Appuyez pour supprimer les fichiers sélectionnés.
11 (Suivez les instructions à l’écran) 23 Appuyez pour afficher les informations concernant le disque. Appuyer de nouveau pour les cacher.
12 (Suivez les instructions à l’écran)
Fra
nç
ais
De
uts
ch

Fernbedienung Die nachstehenden Beschreibungen zeigen die Funktionen der
Fernbedienungstasten.
# Beschreibungen # Beschreibungen
1 Schaltet das Gerät ein bzw. versetzt
es in den Bereitschaftsmodus. 13 (Folgen Sie den Bildschirmhinweisen)
2 Ruft das Hauptmenü auf. Zum
Verlassen noch einmal drücken. 14 (Nicht unterstützt)
3
Drücken Sie zum Bewegen zwischen
den Optionen die Navigationstasten.
Mit OK bestätigen Sie eine Auswahl.
Mit OK fügen Sie dem Segment in der
Nachbearbeitung eine Markierung
hinzu/entfernen sie.
15
Zeigt Bildschirminformationen,
inklusive Modus, Quelle und
Audioquelle, an.
4
Gibt die zuletzt aufgenommene Datei
bzw. das zuletzt aufgenommene Bild
wieder.
16 Verlässt die aktuelle Seite und kehrt
zur vorherigen Seite zurück.
5 Startet/beendet die Aufnahme. 17
Nimmt einen Schnappschuss
während des Spielens oder der
Videowiedergabe auf.
6
Startet die Wiedergabe der
ausgewählten Datei.
Gibt die Datei bei normaler (1facher)
Geschwindigkeit wieder, wenn
Zeitlupe, Rücklauf oder Schnellvorlauf
aktiv sind.
18
Unterbricht die Wiedergabe. Mit OK
oder setzen Sie die Wiedergabe
fort.
Unterbricht die Aufnahme.
7 Beendet die Wiedergabe.
Beendet die Aufnahme. 19
Gibt das Video in Zeitlupe (1/2fach)
wieder. Bei erneuter Betätigung
gelangen Sie in den
Bild-für-Bild-Modus.
8 Aktiviert den Rücklauf (2fach, 4fach,
8fach, 16fach, 32fach). 20
Aktiviert den Schnellvorlauf (2fach,
4fach, 8fach, 16fach, 32fach).
9 Ruft die vorherige Seite auf. 21 Ruft die nächste Seite auf.
10
Blendet den Bildschirm zur
Einstellung der
Video/Schnappschuss-Qualität ein.
Zum Verlassen noch einmal drücken.
22 Löscht die ausgewählten Dateien.
11 (Folgen Sie den Bildschirmhinweisen) 23
Zeigt Informationen zum Medium an.
Zum Ausblenden noch einmal
drücken.
12 (Folgen Sie den Bildschirmhinweisen)
Deu
tsc
h

Telecomando Le descrizioni di seguito mostrano l'utilizzo dei tasti sul telecomando.
# Descrizioni # Descrizioni
1 Premere per accendere/mettere in standby l'unità.
13 (Attenersi alle istruzioni sullo schermo)
2 Premere per accedere al menu principale. Premere di nuovo per uscire.
14 (Non supportata)
3
Premere i tasti di navigazione per spostarsi tra le opzioni. Premere OK per confermare una selezione. Premere OK per selezionare/deselezionare il segmento in fase di post-editing.
15 Premere per visualizzare le informazioni su schermo, tra cui modalità, sorgente e sorgenti audio.
4 Premere per riprodurre l'ultimo file registrato o visualizzare l'ultima immagine acquisita.
16 Premere per uscire dalla pagina attuale e tornare alla pagina precedente.
5 Premere per avviare/arrestare la registrazione.
17 Premere per scattare una instantanea durante il gioco o la riproduzione video.
6
Premere per avviare la riproduzione del file selezionato. Premere per riprodurre il file a velocità normale (1x) quando sono attivi slow motion, riavvolgimento o avanzamento rapido.
18
Premere per interrompere la riproduzione. Premere OK o per riprendere la riproduzione. Premere per interrompere la riproduzione.
7 Premere per arrestare la riproduzione. Premere per arrestare la registrazione.
19
Premere per riprodurre il video in slow motion (1/2x). Premere di nuovo per accedere alla modalità fotogramma per fotogramma.
8 Premere per riavvolgere (2x, 4x, 8x, 16x, 32x).
20 Premere per avanzare rapidamente (2x, 4x, 8x, 16x, 32x).
9 Premere per tornare alla pagina precedente.
21 Premere per andare alla pagina successiva.
10
Premere per visualizzare la schermata di regolazione della qualità video/istantanea. Premere di nuovo per uscire.
22 Premere per eliminare i file selezionati.
11 (Attenersi alle istruzioni sullo schermo)
23 Premere per visualizzare le informazioni sul disco. Premere di nuovo per nasconderle.
12 (Attenersi alle istruzioni sullo schermo)
(Attenersi alle istruzioni sullo schermo)
Ita
lia
no

El mando a distancia Las descripciones siguientes muestran el desarrollo de los botones del
mando a distancia.
# Descripciones # Descripciones
1 Presionen este botón para encender la unidad o activar el modo de espera en la misma.
13 (Siga las instrucciones que aparezcan en pantalla)
2 Presione este botón para acceder al menú principal. Presiónelo de nuevo para salir.
14 (Sin function)
3
Presione los botones de navegación para moverse por las opciones. Presione OK (Aceptar) para confirmar una selección. Presione OK (Aceptar) para marcar o anular la marca un segmento en posedición.
15
Presión este botón para mostrar la información en pantalla, incluido el modo, la fuente y las fuentes de audio.
4 Presione este botón para reproducir el último archivo grabado o ver la última imagen capturada.
16 Presione este botón para salir de la página actual y volver a la página anterior.
5 Presione este botón para iniciar y detener la grabación.
17 Presione este botón para tomar una instantánea durante el desarrollo del juego o mientras se reproduce vídeo.
6
Presione este botón para iniciar la reproducción del archivo seleccionado. Presione este botón para reproducir el archivo a velocidad normal (1x) cuando hay movimiento lento, rebobinar o cuando el avance rápido está activo.
18
Presione este botón para pausar la reproducción. Presione u OK (Aceptar) para reanudar la reproducción. Presione este botón para pausar la grabación.
7
Presione este botón para detener la reproducción. Presione este botón para detener la grabación.
19
Presione este botón para reproducir el vídeo lentamente (1/2x). Presiónelo de nuevo para entrar en el modo de fotograma a fotograma.
8 Presione este botón para rebobinar (2x, 4x, 8x, 16x y 32x).
20 Presione este botón para avanzar rápidamente (2x, 4x, 8x, 16x y 32x).
9 Presione este botón para volver a la página anterior.
21 Presione este botón para ir a la página siguiente.
10
Presione este botón para mostrar la pantalla de ajuste de la calidad de vídeo o instantánea. Presiónelo de nuevo para salir.
22 Presione este botón para eliminar los archivos seleccionados.
11 (Siga las instrucciones que aparezcan en pantalla)
23 Presione este botón para mostrar la información del disco. Presiónelo de nuevo para ocultarla.
12 (Siga las instrucciones que aparezcan en pantalla)
Es
pa
ño
l
Esp
año
l

O Controle Remoto As descrições abaixo mostram a distribuição das teclas do controle remoto.
# Descrições # Descrições
1 Pressione para ligar a unidade/entrar
em modo stand-by. 13 (Siga as instruções na tela)
2
Pressione para acessar o menu
principal. Pressione novamente para
sair.
14 (Não suportado)
3
Pressione as teclas de navegação
para se mover entre as opções.
Pressione OK para confirmar uma
seleção.
Pressione OK para marcar/desmarcar
segmento em pós-edição.
15
Pressione para exibir a informação na
tela, incluindo o modo, fonte e fontes
de áudio.
4
Pressione para reproduzir o último
arquivo gravado ou ver a última
imagem capturada.
16 Pressione para sair da página atual e
retornar à página anterior.
5 Pressione para iniciar/parar a
gravação. 17
Pressione para tirar uma foto durante
o jogo ou reprodução de vídeo.
6
Pressione para começar a reproduzir
o arquivo selecionado.
Pressione para reproduzir o arquivo
em velocidade (1x) normal quando
movimento lento, retroceder ou
avançar rapidamente está ativo.
18
Pressione para pausar a reprodução.
Pressione OK ou para retomar a
reprodução.
Pressione para pausar na gravação.
7 Pressione para parar a reprodução.
Pressione para parar a gravação. 19
Pressione para reproduzir o vídeo em
câmera lenta (1/2x). Pressione
novamente para entrar modo quadro
a quadro.
8 Pressione para retroceder (2x, 4x, 8x,
16x, 32x). 20
Pressione para avançar (2x, 4x, 8x,
16x, 32x).
9 Para retornar à página anterior. 21 Pressione para ir à próxima página.
10
Pressione para exibir a tela de ajuste
de qualidade de vídeo/instantâneo.
Pressione novamente para sair.
22 Pressione para apagar os arquivos
selecionados.
11 (Siga as instruções na tela) 23
Pressione para exibir as informações
do disco. Pressione novamente para
ocultar.
12 (Siga as instruções na tela)
Po
rtu
gu
ês

Пульт дистаниционного управления На рисунке ниже показано расположение кнопок пульта ДУ. Справа от значка кнопки
указано ее назначение.
# Описание # Описание
1 Включение устройства / переход в
режим ожидания. 13 (Следуйте экранным указаниям)
2 Доступ к главному меню. Выход из
меню при повторном нажатии. 14
(Данная функция не
поддерживается.)
3
Кнопки навигации для перехода по
пунктам меню.
Нажмите кнопку OK для
подтверждения выбора.
15 Отображение экранной
информации.
4
Воспроизведение записанного
файла или просмотр последнего
снимка.
16 Переход с текущей страницы на
предыдущую.
5 Включение / остановка записи. 17 Снимок экрана в процессе игры или
при просмотре видео.
6
Запуск воспроизведения
выбранного файла.
Воспроизведение файла с
нормальной скоростью (1x) в
режимах замедленного
воспроизведения, обратной или
прямой перемотки.
18
Пауза при воспроизведении. Для
возобновления воспроизведение
нажмите кнопку OK/ .
7 Остановка воспроизведения.
Остановка записи. 19
Воспроизведения видео с
замедленной скоростью (1/2x).
Нажмите повторно для перехода в
режим покадрового
воспроизведения.
8 Обратная перемотка (скорость 2x,
4x, 8x, 16x, 32x). 20
Ускоренная перемотка вперед
(скорость 2x, 4x, 8x, 16x, 32x).
9
Возврат на предыдущую страницу.
Воспроизведение текущей записи с
начала. При повторном нажатии
переход к предыдущему файлу .
21 Переход на следующую страницу.
Переход к следующему файлу.
10
Отображение экрана регулировки
качества записи. Выход из меню
при повторном нажатии.
22 Удаление выбранных файлов.
11 (Следуйте экранным указаниям) 23
Отображение дисковой
информации. Нажмите повторно,
чтобы скрыть информацию.
12 (Следуйте экранным указаниям)
Pус
ски
й

A Távirányító Az alábbi ábra mutatja a gombok elhelyezkedését a távirányítón.
# Leírás # Leírás
1 Nyomja meg bekapcsoláshoz/
készenléti módhoz. 13
(Kövesse a képernyőn megjelenő
instrukciókat.)
2 Főmenü előhívása. Ismételt
megnyomásával kilépés. 14 (Ez a funkció nem támogatott.)
3
Navigációs gomb az opciók közötti
mozgáshoz.
Nyomjon OK-t a választás
megerősítéséhez.
Nyomjon OK-t kijelöléshez/ kijel.
visszavonáshoz utószerkesztésben.
15 Képernyő információk
megjelenítése.
4
Utolsó rögzített videó lejátszása
vagy utolsó készített kép
megjelenítése.
16 Aktuális oldal elhagyása és
visszatérés az előző oldalra.
5 Felvétel indítása/ leállítása. 17
Pillanatkép készítés.
Nyomva tartva sorozat kép
készítés másodpercenként két
felvételes sebességgel.
6
Kiválasztott videó lejátszása.
Nyomja meg, ha normál (1x)
sebességgel szeretné nézni a
videót, amikor lassú lejátszás, előre
vagy hátra tekerés történik.
18
Lejátszás szüneteltetése. Nyomjon
OK-t vagy -t a lejátszás
folytatásához.
Nyomja meg felvétel szünethez.
7 Lejátszás megállítása.
Felvétel megállítása. 19
Videó lassú lejátszása (1/2x).
Ismételten megnyomva
kockáról-kockára lépés módba jut.
8 Visszatekerés (2x, 4x, 8x, 16x,
32x). 20 Előre tekerés (2x, 4x, 8x, 16x, 32x).
9 Visszatérés az előző oldalra. 21 Ugrás a következő oldalra.
10
Videó/kép minőség információk
megjelenítése. Ismételt
megnyomással kilépés.
22 Kiválasztott file / időzítés törlése.
11 (Kövesse a képernyőn megjelenő
instrukciókat.) 23
Lemez információk megjelenítése.
Ismét megnyomva elrejtés.
12 (Kövesse a képernyőn megjelenő
instrukciókat.)
Ma
gya
r

Dálkové ovládání Následující popis informuje o rozmístění jednotlivých tlačítek dálkového
ovládání.
# Popis # Popis
1 Stisknutím tlačítka se zařízení spustí
nebo uvede do pohotovostního režimu. 13 (Potvrzení instrukcí na obrazovce.)
2
Přechod do hlavní nabídky.
Opakované stisknutí zavře hlavní
nabídku.
14 (Tato funkce není podporována.)
3
Směrový kříž pro výběr položek v
jednotlivých nabídkách.
Stisknutím OK volbu potvrdíte.
Stisknutím tlačítka OK se označí
segment pro další editaci.
15 Vyvolání detailních informací na
obrazovce.
4
Přehrání posledního uloženého
souboru, nebo zobrazení
zachyceného snímku obrazovky.
16 Opuštění aktuální stránky a návrat na
předchozí.
5 Spuštění / ukončení nahrávání. 17
Pořízení snímku obrazovky.
Stisknutím a následným držením
stisknutého tlačítka zachycuje více
snímků obrazovky najednou při
rychlosti dvou snímků za vteřinu.
6
Přehrání zvoleného souboru.
Stisknutím v průběhu zpomaleného,
nebo zrychleného přehrávání,
změníte rychlost na standardní (1x).
18
Zastavení přehrávání. Stiskem OK,
nebo přehrávání obnovíte.
Stisknutím se pozastaví nahrávání.
7 Ukončení přehrávání záznamu.
Ukončení nahrávání. 19
Přehrávání videa ve zpomaleném
režimu (1/2x). Opakovaným
stisknutím přejdete do režimu
snímek-po-snímku.
8 Posun zpět (2x, 4x, 8x, 16x, 32x). 20 Zrychlený posun vpřed (2x, 4x, 8x,
16x, 32x).
9 Přechod na předchozí stránku. 21 Přechod na další stránku.
10
Vyvolání obrazovky pro úpravu kvality
nahrání/snímků obrazovky.
Opakovaným stisknutím obrazovku
opustítek.
22 Smazání vybraných souborů /
záznamů v plánovači nahrávání.
11 (Potvrzení instrukcí na obrazovce.) 23
Zobrazení informací o připojených
discích. Opakované stisknutí pro
skrytí informací.
12 (Potvrzení instrukcí na obrazovce.)
Čes
ky

리모컨 아래의 설명은 리모컨의 키 배치에 대한 설명입니다.
# 설명 # 설명
1 장치를 켜거나 끕니다. 13 (화면 지시사항을 따르십시오.)
2 주 메뉴에 액세스합니다. 다시
누르면 종료합니다. 14 (이 기능은 지원되지 않습니다.)
3
탐색 키를 눌러 옵션 간을
이동합니다.
OK(확인)을 눌러 선택을
확인합니다.
15 화면 정보를 표시합니다.
4 마지막 녹화된 파일을 재생하거나
마지막 캡처된 이미지를 봅니다. 16
현재 페이지를 종료하고 이전
페이지로 돌아갑니다.
5 녹화를 시작/정지합니다. 17
스냅샷을 촬영합니다.
누르고 있으면 초당 2 개의
이미지를 촬영하는 속도로 여러
장의 스냅샷을 촬영합니다.
6
선택한 파일의 재생을 시작합니다.
느린 동작, 되감기 또는 빨리 감기가
작동 중일 때 눌러 파일을 보통(1x)
속도로 재생합니다.
18
재생을 일시정지합니다. OK(확인)
또는 을 눌러 재생을 다시
시작합니다.
7 재생을 정지시킵니다.
녹화를 정지시킵니다. 19
동영상을 느린 동작(1/2x)으로
재생합니다. 다시 누르면 프레임
모드로 전환됩니다.
8 되감습니다(2x, 4x, 8x, 16x, 32x). 20 빨리 감습니다(2x, 4x, 8x, 16x, 32x).
9 이전 페이지로 돌아갑니다. 21 다음 페이지로 이동합니다.
10
동영상/스냅샷 화질 조정 화면을
표시합니다. 다시 누르면
종료합니다.
22 선택한 파일/일정을 삭제합니다.
11 (화면 지시사항을 따르십시오.) 23 디스크 정보를 표시합니다. 다시
누르면 정보가 숨겨집니다.
12 (화면 지시사항을 따르십시오.)
한국어


Mod e l No. : ER1 30 P/N: 300AER130D5P M a d e i n Ta i w a n