eviews 71 supplement
TRANSCRIPT

EViews 7.1 Supplement

EViews 7.1 SupplementCopyright © 2010 Quantitative Micro Software, LLCAll Rights ReservedPrinted in the United States of America
This software product, including program code and manual, is copyrighted, and all rights are reserved by Quantitative Micro Software, LLC. The distribution and sale of this product are intended for the use of the original purchaser only. Except as permitted under the United States Copyright Act of 1976, no part of this product may be reproduced or distributed in any form or by any means, or stored in a database or retrieval system, without the prior written permission of Quantitative Micro Software.
Disclaimer
The authors and Quantitative Micro Software assume no responsibility for any errors that may appear in this manual or the EViews program. The user assumes all responsibility for the selec-tion of the program to achieve intended results, and for the installation, use, and results obtained from the program.
Trademarks
Windows, Excel, and Access are registered trademarks of Microsoft Corporation. PostScript is a trademark of Adobe Corporation. X11.2 and X12-ARIMA Version 0.2.7 are seasonal adjustment programs developed by the U. S. Census Bureau. Tramo/Seats is copyright by Agustin Maravall and Victor Gomez. Info-ZIP is provided by the persons listed in the infozip_license.txt file. Please refer to this file in the EViews directory for more information on Info-ZIP. Zlib was writ-ten by Jean-loup Gailly and Mark Adler. More information on zlib can be found in the zlib_license.txt file in the EViews directory. All other product names mentioned in this manual may be trademarks or registered trademarks of their respective companies.
Quantitative Micro Software, LLC4521 Campus Drive, #336, Irvine CA, 92612-2621Telephone: (949) 856-3368Fax: (949) 856-2044e-mail: [email protected]: www.eviews.comApril 2, 2010

Table of Contents
EVIEWS 7.1 SUPPLEMENT . . . . . . . . . . . . . . . . . . . . . . . . . . . . . . . . . . . . . . . . . . . . . . . . . . . . . . 1What’s New in EViews 7.1 . . . . . . . . . . . . . . . . . . . . . . . . . . . . . . . . . . . . . . . . . . . . . . . . . . . . 1
CHAPTER 1. EVIEWS 7.1 ADD-INS . . . . . . . . . . . . . . . . . . . . . . . . . . . . . . . . . . . . . . . . . . . . . . . . . . . . . . 3
What is an EViews Add-in? . . . . . . . . . . . . . . . . . . . . . . . . . . . . . . . . . . . . . . . . . . . . . . . . . . . 3
Add-in Examples . . . . . . . . . . . . . . . . . . . . . . . . . . . . . . . . . . . . . . . . . . . . . . . . . . . . . . . . . . . 4
Downloading an Add-in . . . . . . . . . . . . . . . . . . . . . . . . . . . . . . . . . . . . . . . . . . . . . . . . . . . . . . 8
Managing Add-ins . . . . . . . . . . . . . . . . . . . . . . . . . . . . . . . . . . . . . . . . . . . . . . . . . . . . . . . . . 11
Add-ins Programming Language Support . . . . . . . . . . . . . . . . . . . . . . . . . . . . . . . . . . . . . . . . 15
Creating an EViews Add-in Package . . . . . . . . . . . . . . . . . . . . . . . . . . . . . . . . . . . . . . . . . . . . 20
CHAPTER 2. EVIEWS 7.1 PROGRAMMING . . . . . . . . . . . . . . . . . . . . . . . . . . . . . . . . . . . . . . . . . . . . . . . . 23
New Programming Features . . . . . . . . . . . . . . . . . . . . . . . . . . . . . . . . . . . . . . . . . . . . . . . . . . 23
Add-ins Related Programming Features . . . . . . . . . . . . . . . . . . . . . . . . . . . . . . . . . . . . . . . . . 26
INDEX . . . . . . . . . . . . . . . . . . . . . . . . . . . . . . . . . . . . . . . . . . . . . . . . . . . . . . . . . . . . . . . . . . . . . . 27

ii—Table of Contents

EViews 7.1 Supplement
EViews 7.1 is a free upgrade to EViews 7.
More than a minor update, EViews 7.1 introduces a number of important new features that greatly add to the program. These new features were in development for EViews 7, but not quite complete at the scheduled time of release. Rather than delaying the initial release or holding back these features for a future version, we chose to reward our EViews 7 custom-ers by offering the now completed features in a free upgrade.
What’s New in EViews 7.1
EViews 7.1 provides powerful new features targeted at the development and use of tools which extend the functionality of EViews. These features should be of great interest to all EViews users, not only those who write EViews programs, but also those who wish to use routines written by others.
EViews Add-ins
At the heart of EViews 7.1 upgrade is a new easy-to-use EViews Add-ins infrastructure that provides seamless access to user-defined programs using the standard EViews command, menu, and object interface. Using Add-ins, you can add user-defined features of power and sophistication that are virtually indistinguishable from built-in features.
Add-ins offer you a exciting new way of running EViews programs. You may readily define Add-ins that augment the EViews language with user-defined commands, specify new menu entries for point-and-click program interaction, and display program output in standard EViews object windows
“EViews 7.1 Add-ins” on page 3 describes in greater detail the Add-ins support provided in EViews 7.1. Of particular note are pointers to useful Add-ins that you can download and install to get you started right away.
Programming Tools
Those of you who write EViews programs will find that EViews 7.1 offers a wide range of new features for programming and program execution. Many of these tools were developed specifically to support EViews 7.1 Add-ins, but almost all should be useful to anyone who uses EViews commands.
“EViews 7.1 Programming” on page 23 offers an overview of the new features and provides links to updated documentation.

2— EViews 7.1 Supplement

Chapter 1. EViews 7.1 Add-ins
At the heart of the EViews 7.1 update is a new easy-to-use EViews Add-ins infrastructure that provides seamless access to user-defined programs using the standard EViews com-mand, menu, and object interface. Using Add-ins, you can add user-defined features of power and sophistication that are virtually indistinguishable from built-in features.
Add-ins offer you an exciting new way of running EViews programs. You may readily define Add-ins that augment the EViews language with user-defined commands, specify new menu entries for point-and-click program interaction, and display program output in standard EViews object windows.
All EViews users may benefit immediately by installing prepackaged Add-ins which add functionality to EViews. A single click is all that you need to download and install any of the Add-ins currently available on the QMS website, with the promise of more to come.
Some EViews users will use various EViews features to develop their own Add-ins. With only a little bit of effort, you may design and deploy your own Add-in programs for your own use or for sharing with others.
What is an EViews Add-in?
At a basic level, an EViews Add-in is a program which extends the functionality of EViews. In this regard, any EViews program file is a candidate to be an Add-in.
What makes an Add-in more than just an ordinary EViews program is the degree to which it may be integrated with the rest of EViews. With just a bit of effort, an EViews Add-in may be designed so it is virtually indistinguishable from a built-in feature.
In particular, the Add-in infrastructure allows you to:
• specify a user-defined single-word global or object-specific command which may be used to run the Add-in program.
• add entries to EViews main and object menus to offer point-and-click execution of the Add-in program.
• display Add-in output in standard EViews object windows.
For example an EViews Add-in to implement an econometric or statistical procedure may be run by selecting a menu item or typing a single-word command. The Add-in could then use dialogs to prompt the user for needed input. Lastly, the Add-in might display the output in the window of an existing EViews object.
Add-ins may be divided into two types: object-specific and global. As the names suggest, object-specific Add-ins are designed to work with a single object and object type, while glo-

4—Chapter 1. EViews 7.1 Add-ins
bal Add-ins are designed to work more generally, typically with more than one object or object type. For example, an Add-in that computes a spline using data in a series is likely to be object-specific, while an Add-in that copies tables, graphs, and spools into an RTF file would be global.
Object-specific Add-ins have menu entries that appear both in the main Add-ins menu and in the menu of objects of the specified object type. Furthermore, object-specific Add-in com-mands follow object command syntax
object_name.command(options) [args]
as in
series01.spline
Global Add-ins have menu entries that appear only the main Add-ins menu. Global add-in commands act like ordinary commands,
command(options) [args]
as in
rtf_out gr* tab* sp*
Add-in Examples
To illustrate, we will examine two of the EViews Add-ins that are currently available for download from on our website. (To follow along with these examples, we recommend that you first visit our Add-ins webpage, http://www.eviews.com/Addins/addins.shtml, then download and install the corresponding Add-in.)
In “Automatic Installation” on page 10, we will show you how to download and install pre-packaged Add-ins from the QMS website; in “Registering an Add-in” on page 13, we demon-strate how to turn your own EViews programs into an Add-in.
Summarize Equation Results
Our first example is a global Add-in (EqTabs) that creates a table summarizing the results from multiple equations. We employ the workfile “Demo.WF1” (which may be found in the example files subdirectory of your EViews installation directory (“.\Example Files\EViews 7 Manual Data\Chapter 2 - A Demonstration”).
To run the Add-in simply go to the main EViews menu, and select Add-ins/Equation Out-put Table (Summary form). First, EViews will display a dialog prompting you for the names of the equations you wish to summarize.

Add-in Examples—5
In this example, the default of “e*” is sufficient since we want to summarize results for the previously estimated equations EQ01 and EQ02. Click on OK to continue.
EViews will proceed to display a series of dialogs, in which you are prompted for informa-tion about the headers you wish to include in the summary table, the information you wish to display, and the display format.
For example, the latter dialog lets you choose how to format the display of standard errors and t-statistics, and lets you specify the number of significant digits for coefficients and other statistics:
In each case, you may click on OK to accept the default settings. EViews will use the set-tings in constructing a table that summarizes the results from all of the specified equations.

6—Chapter 1. EViews 7.1 Add-ins
Alternately, you may launch the Add-in from the command line or via batch execution of a program file. Simply enter the user-defined command:
eqsumtab eq*
in the command line or include it in your batch program. The command instructs EViews to display the set of dialogs prompting you for additional input, and will construct the table accordingly.
U.S. Recession Graph Shading
Our second example uses a graph-specific Add-in (RecShade) to add shading for periods of U.S. recession (as determined by the National Bureau of Economic Research).
We start by opening the graph object GT in the “Macromod.WF1” workfile (which may be found in the example files subdirectory of your EViews installation directory (“.\Example Files\EViews 7 Manual Data\Chapter 3 - Workfile Basics”).

Add-in Examples—7
Click on the Proc/Add-ins menu item in the graph toolbar to display the Add-ins we have installed that work with graph objects. In this case, there is only a single menu item Add US Recession Shading:

8—Chapter 1. EViews 7.1 Add-ins
Object menu items may also be accessed from the main menu by clicking on the Add-ins entry in the main EViews menu. In this example, when the graph object GT is the active object, the Add-ins menu shows both the global and the graph specific menu items:
If we select Add US Recession Shading from either the main or object Add-ins menu EViews will run the Add-in program which adds shading to the existing graph:
For those who prefer to use a command to apply shading, the recession shading Add-in allows you to add shading using the standard graph object syntax. Simply go to the com-mand line and enter the user-defined object command
gt.recshade
to apply the recession shading. This command may also be included in a program file for batch execution.
Downloading an Add-in
The easiest way to get started using Add-ins in EViews 7.1 is to download and install an Add-in package from the EViews website. Simply go to the main menu in EViews and select Add-ins/Download Add-ins:

Downloading an Add-in—9
to open your browser and navigate to the EViews website where you may read the descrip-tions of the various Add-ins packages. Alternately, you may manually point your browser to http://www.eviews.com/Addins/addins.shtml to display the Add-ins page:
To download an Add-in package to your computer, simply click on the corresponding “Download” links on the right-hand side of the web page. Most browsers will offer you a choice of opening the file using the default application (EViews) or saving it to your com-

10—Chapter 1. EViews 7.1 Add-ins
puter in a directory of your choice. You should choose the latter if you wish to install the Add-in manually or if you wish to inspect the contents of the package prior to automatic installation. Note that Add-ins packages are distributed in a standard ZIP compressed archive format, but with the file extension “.AIPZ”. (The AIPZ extension is, by default, reg-istered to EViews 7.1. If you wish to process the Add-in pacakge using standard ZIP file or Windows compressed folder tools, you should change the file extension to “.ZIP”.)
Automatic Installation
If you open an Add-in package file in your web browser, double-click on a downloaded file, or drag the file onto EViews, the EViews program will launch (if it is not already running), and prompt you to copy the Add-in files onto your computer.
First, you will be asked for the directory in which EViews will put the Add-in files. By default, EViews will prompt you to put the files in a sub-folder of your default Add-ins directory (see “Managing Add-ins” on page 11), but you may of course elect to place the files in a direc-tory of your choosing.
If there are conflicts with existing directory names or existing Add-ins, EViews will warn you before proceeding.
Next, EViews will prompt you to run the installation program that was included in your Add-in package. The installation pro-gram is simply a file containing EViews commands that automatically perform reg-istration, defining commands and menu entries for the Add-in. Even if you click on No in response to the installation prompt, you may examine the installation program prior to running as you would any other EViews program, or you may manually register your pro-gram as described in “Registering an Add-in” on page 13.
When finished, EViews will issue a message in the statusline indicating that installation of the package is complete. Once installed, you may go to the main menu and select Add-ins/Manage Add-ins... to examine or change the installation defaults.
We note that installing and running an EViews program file provided by an unknown indi-vidual has risks. Accordingly, we recommend that care be taken when installing packages

Managing Add-ins—11
from untrustworthy sites. All of the Add-in packages provided on the EViews website have been examined carefully to ensure that they do not include potentially harmful commands.
Manual Installation
The first step in manual installation of an EViews Add-in package is to extract the files from the package onto your computer.
You may use EViews to perform the extraction by performing the first step of automatic installation (“Automatic Installation” on page 10). Simply open an Add-in package file in your web browser, double-click on a downloaded file, or drag the downloaded file onto your EViews application. EViews will prompt you for a directory in which to extract the files.
Alternately, since the Add-in package files are specially-named standard ZIP compressed archives, you may change the file extension from “.AIPZ” to “.ZIP” and use your favorite ZIP file tools to extract the contents into the desired directory.
Once the files are extracted, you may complete the installation procedure by running the installation program as you would any other EViews program or performing manual regsi-tration as described in “Registering an Add-in” on page 13.
Managing Add-ins
To manage your Add-ins, you should select Add-ins/Manage Add-ins... from the main EViews menu:
EViews will display the Add-ins management dialog:

12—Chapter 1. EViews 7.1 Add-ins
which allows you to add, delete, edit, and reorder Add-in definitions, to view the documen-tation file for the Add-in, and to set the default Add-in directory.
Registered Add-ins
The top portion of the dialog shows settings for currently installed Add-ins. The File name column shows the name (and possibly location) of the Add-in program, and the Type col-umn indicates whether the Add-in is global or object-specific. The Proc column shows the command keyword associated with the Add-in, if any, while the Menu Text column shows the contents of user-defined menu entries.
You may use the buttons and arrows on the right-hand side of the dialog to manage your Add-ins:
• To add a new Add-in to the list, simply click on the Add button to display the Add/Edit Program dialog.
• To delete an Add-in, simply click on the name in the Add-ins management dialog and press the Remove button.
• To edit the settings of an existing Add-in, select it from the list and chick on the Edit button to display the Add/Edit Program dialog.
• To examine the documentation file associated with an Add-in, click on the name and press the Docs button.

Managing Add-ins—13
The Add/Edit Program dialog, which is used to define the settings for the Add-ins, is described in detail in the following section (“Registering an Add-in”).
Default Add-ins Directory
The bottom portion of the Add-ins dialog shows the default Add-ins directory. This is the directory in which Add-ins will search for files if an explicit directory location is not pro-vided. To change the default directory, click on the button on the right and navigate to the desired directory, or simply the desired folder name. Click on OK to accept the change.
Registering an Add-in
The process of defining a command keyword and menu entry for an Add-in program is termed registration. The Add-in registration process may also be used to associate documen-tation with the Add-in.
To register an EViews program file as an new Add-in, click on the Add button, use the result-ing file dialog to locate the pro-gram file, and click on OK to continue. EViews will display the Add/Edit Program dialog with various default settings.
The dialog allows you to spec-ify a command keyword for the Add-in, to add menu items for point-and-click access to the Add-in, and to attach docu-mentation and descriptions.
• The Program file edit field in the dialog should be used to specify the program to be used as an Add-in. You may enter the name of a file (with an absolute or Add-ins directory relative path, if necessary) or you may click on the button to the right-hand side of the edit field to navigate to the file.
• The Documentation file edit field allows you specify a PDF, Text, RTF, Microsoft Word file, or URL containing documentation for the Add-in. Note that relative paths are evaluated with respect to the directory of the Add-in program, not the default Add-in directory.
• The Menu/Procedure type combo setting detemines whether the program is a global or an object specific Add-in. (Recall that global Add-ins are those designed to work

14—Chapter 1. EViews 7.1 Add-ins
with multiple objects or object types, while object-specific Add-ins work with a single object and object type.)
• If you check Assign as Command or Proc, EViews will add the specified single-word command or proc keyword to the EViews language, so you may run the Add-in using a global or object command. Names for the keyword must follow standard EViews command naming convention. Global Add-ins should not be given the same name as built-in EViews commands. (See “Command Name Masking” below, for additional discussion.)
• If you check Include in Add-ins menu, EViews will add the specified Menu text to the appropriate menus.
• Lastly, you may use the Brief description edit field to describe the purpose of the Add-in.
In this example, we tell EViews we wish to use the file “Rtf_out.PRG” which is located in the default Add-ins directory as our Add-in program. While we do not specify a documenta-tion file, we do indicate that the program is a global Add-in that may be run from the main EViews menu by selecting Add-ins/Output to RTF or by issuing the command rtf_out.
Additional Considerations
For the most part, defining commands and menu items for Add-ins is straightforward and you should be able to add them to your system with little concern.
There are, however, three minor issues of note:
Command Name Masking
Allowing you to specify Add-in commands opens up the possibility that an Add-in will be given the name of a built-in EViews command, or that multiple Add-in programs will be assigned the same name. Sharing names will lead to command masking as some of the com-mand instances will be ignored.
If you provide a global Add-in command name that is identical to an EViews command or a previously defined global Add-in command, EViews will issue an error message, and will display the Add/Edit Program dialog so you can provide a different name. EViews will not, for example, permit you to register an Add-in with the global command copy since this con-flicts with the built-in command.
Alternately, EViews will not generate an error messages for an object-specific command name that is identical to a built-in command, but the built-in command will mask the user-defined command. EViews will, for example, permit you to register an equation command with the name resid, but if you enter “eq01.resid” EViews will display the built-in resid view of equation EQ01, instead of running the user-defined Add-in.

Add-ins Programming Language Support—15
If multiple Add-ins are assigned the same object-specific command, the first Add-in in the list of registered Add-ins will be used and the remainder will be masked. To eliminate mask-ing, you may simply rename the subsequent Add-in command definitions. If, however, you wish to retain the same command name for multiple Add-ins, you should use the main Add-ins management dialog reorder the Add-ins list so that the desired Add-in has priority.
We do emphasize that masking only occurs within like Add-ins. You may have a global, series, and group Add-in that use the same command without experience masking, but two global Add-ins or two series Add-ins with the same name will lead to masking.
Menu Congestion
While you may define as many Add-in menu items as you like, EViews does place mild default limits on the number of menu items that are displayed. If you have more than 10 global menu entries or more than 10 object-specific menus of a given type, the correspond-ing menus will display the first 10 entries, along with an 11th menu entry, More..., which you may use to display a listbox showing the full set of entries.
In the event that you have more than 10 registered Add-ins of a given type, we recommend that you reorder your Add-ins so that the most used Add-ins are given priority.
Multiple Object Add-ins
In some cases, you may wish to define object-specific Add-ins for several objects using a single program file. Note, however, that defining more than one object-specific Add-in can-not be done using a single Add-in program entry since the Add/Edit Program dialog does not permit you to specify multiple objects. You must instead create a separate entry for each object Add-in you wish to associate with the program.
Add-ins Programming Language Support
Prior to EViews 7.1, limitations in the EViews programming language made it difficult to construct general use programs that could serve as useful Add-ins. EViews 7.1 remedies the major deficiencies, freeing creative users to develop Add-ins that are useful in their own right and that may easily be used as building blocks in development of new Add-ins.
We focus here on several important extensions to the language: the new exec command, the _this keyword, support for local samples, custom output, and command support for Add-ins registration. Additional changes in the EViews programming are described in “EViews 7.1 Programming” on page 23..
The EXEC Command
EViews 7.1 provides a new command, exec, which may be used to execute the commands in a program file.

16—Chapter 1. EViews 7.1 Add-ins
To run a program, simply use the exec keyword followed by program execution options, the program file name, and any options and arguments you wish to pass to the program:
exec(exec_options) [path]prog_file(prog_options) [%0 %1 %2 ...]
Notably, exec extends the EViews 7 run syntax to allow you to pass options to the program via prog_options (the run command syntax has also been extended in this fashion in EViews 7.1). To pass program options using exec, simply enclose the options in parentheses imme-diately after the filename specification.
While exec is quite similar to the run command, there are important differences between the two commands.
First, exec allows you to write general programs that execute other programs, something that is difficult to do using run, since the run command has the unfortunate effect of ending all program execution when processing of the file is completed. In contrast, once the exec processing completed, the calling program will itself continue to run.
Second, the default directory for exec is the Add-ins directory (in contrast with both run and include which always default to use the EViews default directory). The change should make it easier to write programs that employ other Add-ins. Thus, the command
exec myprog1.prg
will run the program file “Myprog1.prg” located in the default Add-ins directory. You may specify files using relative paths in the standard fashion. The command
exec MyAddIn\myprog2.prg
runs the program “Myprog2.prg” located in the “MyAddIn” subdirectory of the Add-ins directory.
You may explicitly include the “<addins>” keyword to identify the Add-ins directory. The following commands equivalent to the two examples above:
exec <addins>\myprog1.prg
exec <addins>\MyAddIn\myprog2.prg
Note that in all cases you may use the relative path indicators “.\” and “..\” to represent the directory containing the program file, and one level above the program file directory, respectively. Thus,
exec ..\myprog3.prg
runs the program “Myprog3.prg” located in the parent directory of the containing program, while
include .\mprog4.prg
includes the program file “Myprog4.prg” located in the same directory as the program.

Add-ins Programming Language Support—17
The exec command is documented in exec (p. 239) of the Command and Programming Reference.
The “_this” Keyword
Central to the construction of an object-specific Add-in program is the ability to reference the object on which the program should act. If, for example, you wish to write an Add-in that computes a statistic based on the data in a series object, you must have a convenient method of referring to the series.
To this end, EViews 7.1 provides a new keyword, _this, which refers to the currently active object upon which a program may operate. You may think of _this as an object place-holder in the program. Typically the use of _this in an EViews program indicates that it has been designed to work with a single object.
There are three ways in which the _this object may be set. Most importantly _this will refer to the currently active object (the object whose window was last clicked on) in the workfile. When used in a program, _this will refer to the active object at the time the pro-gram was initiated. Alternately, if an Add-in has been registered as an object-specific Add-in and has been assigned a proc name, the _this object will be set to object when executing the Add-in using the object-command syntax: object.proc. Lastly the active object can be set with the “this=” option in the exec or run commands.
While the above description is a bit abstract, a simple example should illustrate the basic idea behind the three methods. Suppose we have the trivial (silly) program “Myline.prg” which consists of the command:
_this.line
First, if we register this program as a global Add-in with menu item text “Show line”, we can display a line graph of a series or group object by opening the series or graph and select-ing Show line from the Add-in menu. From the program’s point of view, the _this object is simply the opened series or graph whose menu we are using.
Alternately, if we had registered the program as a series-specific Add-in with proc name “myl”, the command:
ser01.myl
identifies SER01 as the _this object, so that the object used by the Add-in will be the series SER01, no matter what object is currently active in the workfile.
Lastly, you may specify _this explicitly when using the exec or run command to run the program by including the “this=” option to identify an object by name. The command:
exec(this=ser01) myline.prg
explicitly specifies SER01 as the _this object.

18—Chapter 1. EViews 7.1 Add-ins
Local Samples
Subroutines now allow you indicate that changes to the workfile sample are temporary, with the original sample restored when you exit the routine. This feature is useful when designing Add-in program subroutines which require working on a subset of observations in the original sample.
You may, in a subroutine, use the local statement to indicate that subsequent changes to the sample are temporary, and should be undone when exiting the subroutine. The com-mand
local smpl
makes a copy of the existing sample specification. You may then change the sample as many times as desired using the smpl statement, and the original sample specification will be reapplied when existing from the subroutine.
You may use the global statement to indicate that subsequent smpl statements will result in permanent changes to the workfile sample. Thus, the commands
global smpl
smpl 5 100
permanently change the sample.
For example, consider the following program snippet which illustrates the behavior of local and global samples:
workfile temp u 100
call foo
subroutine foo()
smpl 2 100
local smpl
smpl 10 100
endsub
Here, we create a workfile with 100 observations and an initial workfile sample of “1 100”, then call the subroutine FOO. Inside FOO, the first smpl statement changes the workfile sample to “2 100”. We then issue the local statement which backs up the existing sample. The subsequent change to the “10 100” sample is local so that when the subroutine exits, the sample is reset to “2 100”.
If instead we define FOO to be
subroutine foo()
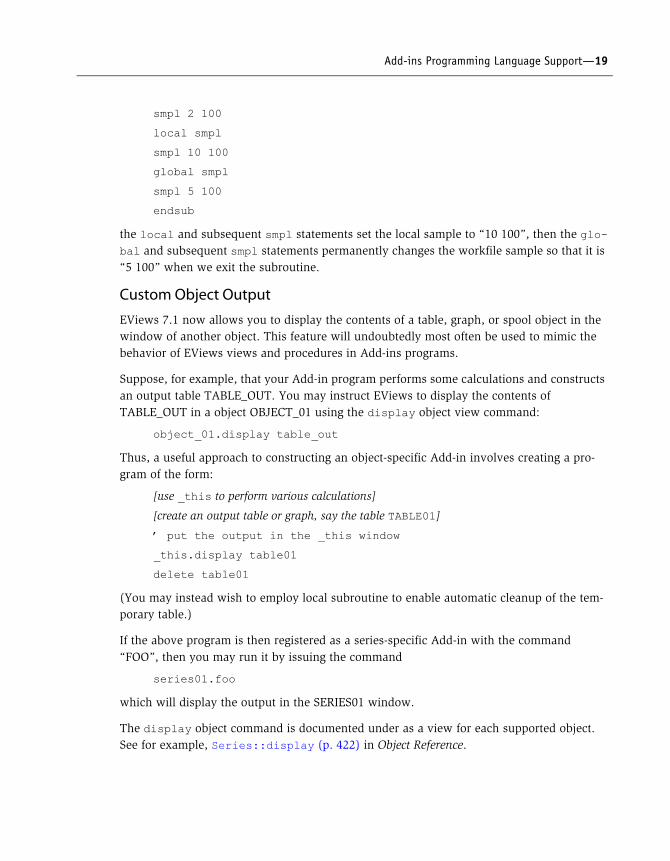
Add-ins Programming Language Support—19
smpl 2 100
local smpl
smpl 10 100
global smpl
smpl 5 100
endsub
the local and subsequent smpl statements set the local sample to “10 100”, then the glo-bal and subsequent smpl statements permanently changes the workfile sample so that it is “5 100” when we exit the subroutine.
Custom Object Output
EViews 7.1 now allows you to display the contents of a table, graph, or spool object in the window of another object. This feature will undoubtedly most often be used to mimic the behavior of EViews views and procedures in Add-ins programs.
Suppose, for example, that your Add-in program performs some calculations and constructs an output table TABLE_OUT. You may instruct EViews to display the contents of TABLE_OUT in a object OBJECT_01 using the display object view command:
object_01.display table_out
Thus, a useful approach to constructing an object-specific Add-in involves creating a pro-gram of the form:
[use _this to perform various calculations]
[create an output table or graph, say the table TABLE01]
’ put the output in the _this window
_this.display table01
delete table01
(You may instead wish to employ local subroutine to enable automatic cleanup of the tem-porary table.)
If the above program is then registered as a series-specific Add-in with the command “FOO”, then you may run it by issuing the command
series01.foo
which will display the output in the SERIES01 window.
The display object command is documented under as a view for each supported object. See for example, Series::display (p. 422) in Object Reference.

20—Chapter 1. EViews 7.1 Add-ins
Add-ins Directory Keyword
You may use the special folder name “<addins>” to refer to the default Add-ins directory. Thus, a program with the line
run <addins>\mydir\myfile.prg
will run the file “Myfile.prg” located in the “Mydir” subdirectory of the default Add-ins directory.
Add-ins Registration Command
The addin command may be used to register an EViews program as an Add-in. You may use the command to specify the Add-in file, Add-in type, menu text, user-defined command name, description, and documentation file.
See addin (p. 529) in the Command and Programming Reference for details.
Creating an EViews Add-in Package
Manually bundling your program files into a self-installing Add-in package is quite simple. (Even so, we plan to offer shortly a standalone tool that will walk you through the process described below. You should check our website for further information on availability of the packaging program.)
To create an EViews Add-in package, simply create a ZIP archive file containing all of the files for your Add-in, and rename the ZIP file so that it has the extension .AIPZ. In addition to the files required for your Add-in to function, we highly recommend that you take a few extra moments to add to your archive a couple of extra files to fully automate the installa-tion procedure.
First, if you wish to facilitiate automatic registration of the Add-ins in your package, you should create a simple EViews program that uses the addin command to registers the Add-ins with appropriate menu and command settings. For example, the graph-specific Add-in described in “U.S. Recession Graph Shading” on page 6 may be registered by including the command
addin(type="graph", menu="Add USA Recession Shading", proc="recshade", docs=".\recession shade.txt", desc="Applies US recession shading to a graph object.") ./recshade.prg
in a program file. See addin (p. 529) in the Command and Programming Reference for details.
Next, you should create a table-of-contents file named “Toc.INI”. The TOC file should con-tain setup information for the Add-in which describe the directory in which it should be installed, and the name of the EViews program, if any, that should be run to register the Add-in files. The format of the TOC file is:

Creating an EViews Add-in Package—21
[package]
installer = <name of installer file>
folder = <name of folder to create>
A TOC file should always begin with the line “[package]”. The installer keyword is used to indicate the name of the EViews program file that should be run to register the Add-in. If, for example, a registration file named “Recession shade install.prg” is included in your package, you should include the line
installer = recession shade install.prg
If you do not wish to provide for automatic installation of your Add-in, you should include the line “installer=none” in the TOC file.
The folder keyword may be used to indicate the subfolder of the default Add-ins directory into which you wish to extract the package files. Thus,
folder = RecShade
tells EViews to extract the contents of the AIPZ file into the “RecShade” folder of the Add-ins directory. If no folder is specified, the name of the AIPZ file will be used as the target folder name. Additionally, you may use the special folder name “<addins>” to indicate that the contents of the AIPZ archive should be placed in the main Add-ins directory. Note, however, that only folders in an AIPZ archive may be written to the main Add-ins directory in this fashion. Individual files in AIPZ files must be written into subdirectories.
It is worth emphasizing that providing an installer program and TOC information is not required. In the absence of a TOC file or an installer= specification, the automatic AIPZ installation routine will simply issue a warning message, reminding the user that the installed programs may be registered manually using the Add-ins management dialog. Hav-ing said that, we do strongly recommend that package distributors provide both a TOC file and installation program. Packages hosted on the EViews website will require both a TOC and an installer.
Lastly, we recommend that you provide some documentation for your Add-in. This docu-mentation could be anything from a simple text file with some syntax hints, to a lengthy PDF document that describes the Add-in features in detail. If you provide a documentation file, you should make certain to register it along with the command and menu names.

22—Chapter 1. EViews 7.1 Add-ins

Chapter 2. EViews 7.1 Programming
Those of you who write EViews programs will find that EViews 7.1 offers a wide range of new features for. Taken together, these tools aid you in designing user-defined programs of great power and sophistication.
The following sections summarize notable new features:
• “Commands and Functions” on page 23.
• “Command Prompting” on page 25.
• “Programming Logging” on page 25.
• “Miscellaneous” on page 25.
You should bear in mind that some of the more notable new programming features are described in greater detail in our discussion of Add-ins:
• “Add-ins Related Programming Features” on page 26.
New Programming Features
Commands and Functions
EViews 7.1 offers a number of new commands and functions that improve many aspects of the program language. A number of these commands and functions are targeted at those developing programs.
String Processing
The following new string processing function improves your ability to manipulate strings. You may find this function particularly useful when working with strings consisting of comma separated lists:
@stripcommas ......returns string with leading and trailing commas removed (p. 471).
Note that the above page reference may be found in the Command and Programming Refer-ence.
Object Support
The following functions provide information you related to the type, naming, and existence of objects in the workfile:
@getthistype .........returns the object type of _this (p. 538).
@isvalidname .......checks for an whether a string represents a valid EViews name (p. 540).

24—Chapter 2. EViews 7.1 Programming
@makevalidname. string containing an uppercased valid EViews name based on the input (p. 541).
All of the above page references may be found in the Command and Programming Refer-ence.
Path Information Support
Additional information about your EViews path structure is provided by the following new function:
@addinspath ........ string containing the EViews add-ins directory path (p. 533).
The above page reference may be found in the Command and Programming Reference.
Option Processing
EViews 7.1 adds the user ability to pass option strings to a program run via the exec (p. 239) or the run (p. 323) command. To facilitate processing of option strings, EViews 7.1 adds the following functions:
@equaloption....... returns the string to the right of the “=” in the specified option pro-vided in the exec or run command (p. 535).
@hasoption .......... returns 1 or 0 for whether the specified option was provided in the exec or run command (p. 538).
@option ............... returns the i-th option string provided in the exec or run command (p. 542).
All of the above page references may be found in the Command and Programming Refer-ence.
Error Handling
EViews 7.1 improves your ability to manage execution errors with new commands and functions that allow you to determine and set error counts, set maximum errors, retrieve error numbers and strings, and specify and set user-defined errors:
clearerrs ............... sets the current program error count to 0 (p. 534).
@lasterrnum ........ the error number for the previously issued command (p. 540).
@lasterrstr ........... string containing the error text for the previously issued command (p. 541).
@maxerrs ............ returns the maximum number of errors that a program may encounter before execution is halted (p. 541).
seterr.................... sets a user-specified execution error (p. 544).
seterrcount ........... sets the current program execution error count (p. 544).
setmaxerrs............ sets the maximum number of errors that a program may encounter before execution is halted (p. 545).
New Programming Features—25
All of the above page references may be found in the Command and Programming Refer-ence.
Command Prompting
In interactive command mode, when you enter an incomplete command, EViews will gener-ally display a dialog prompting you for additional input. Enter the keyword equation at the command line, for example, and the standard equation dialog will pop up so that you may complete the specification. Many users find this prompting useful in cases where you know command names, but are unfamiliar with all of the possible option settings.
Note, however, that until EViews 7.1 this type of dialog prompting has been limited to inter-active command use. When an incomplete command is encountered in a running program file, it always generates an error.
EViews 7.1 now allows you to enable dialog prompting in programs. For most general and object-specific commands where dialog prompting makes sense, you may include the “prompt” option to force EViews to display a dialog. For example, you may include the pro-gram line:
equation eq1.ls(prompt)
to display the equation estimation dialog. Once the user fills out the dialog and clicks on OK or Cancel to proceed, EViews will continue on to the next program line and resume pro-gram execution.
See the specific Command and Programming Reference and Object Reference entries to see whether a particular command supports dialog prompting.
Programming Logging
EViews 7.1 streamlines the setting of program logging using the logmode (p. 276) command (in the Command and Programming Reference). You may now choose to display or not dis-play program line numbers in error messages, to set standard program logging settings for Add-in programs using a single keyword, and to enable, using a single keyword, a debug-ging mode that overrides all other settings.
As part of the streamlining of program logging, we have removed the global options and run dialog settings for log messaging as they created difficulties in supporting the desired fea-ture-set.
Miscellaneous
New Object Data Members
EViews 7.1 offers new or modified object data members for determining object type,
• object.@detailedtype

26—Chapter 2. EViews 7.1 Programming
• object.@type
and new equation data members for classifying whether an equation has been specified by list, and obtaining the list of coefficients used in estimation,
• equation.@bylist
• equation.@coeflist
Enhanced @uidialog Function
The @uidialog function displays a dialog which may be composed of different controls, including simple text, edit boxes, list boxes, radio buttons and check boxes. The composi-tion of the dialog is determined by a list of control specifications passed into the function as arguments. Each control specification is a type keyword specifying the type of control fol-lowed by a list of parameters for that control.
In addition to the existing control specifications, EViews 7.1 offers the “colbreak” or column break control, which inserts a column break in the constructed dialog. By default, EViews will automatically choose the number of columns in the constructed dialog. There is still a maximum of only two columns allowed, but by adding a “colbreak” control, you can force a break in the dialog.
See “@uidialog” on page 146 of the Command and Programming Reference for a discussion and a complete list of controls.
Improved Program Editing
Program editing has been improved. EViews 7.1 offers additional control over tab settings and a new automatic text formatting mode. See “Programs” on page 631 of User’s Guide I.
Add-ins Related Programming Features
The following new programming features are described in greater depth in our discussion of Add-ins:
• “The EXEC Command” on page 15.
• “The “_this” Keyword” on page 17.
• “Local Samples” on page 18.
• “Custom Object Output” on page 19.
• “Add-ins Directory Keyword” on page 20.
• “Add-ins Registration Command” on page 20.

Index
Symbols_this I:17
AAdd-ins I:3
adding I:13creation I:20directory I:13downloading I:8examples I:4installation I:10management I:11naming I:14registration I:10, I:13removing I:12TOC ini I:20
AIPZ file I:20
Eexec I:15
LLocal
samples I:18
OObject
active I:17output display I:19placeholder I:17
PProgram
execution I:15log I:25running I:15
SSamples
local I:18
TTOC ini I:20

28—Index