enterprise connect™ data...
TRANSCRIPT

Installation Guide
Enterprise Connect™ Data Access12.6
[ Microsoft Windows ]

DOCUMENT ID: DC39550-01-1260-01
LAST REVISED: April 2005
Copyright © 1989-2005 by Sybase, Inc. All rights reserved.
This publication pertains to Sybase software and to any subsequent release until otherwise indicated in new editions or technical notes. Information in this document is subject to change without notice. The software described herein is furnished under a license agreement, and it may be used or copied only in accordance with the terms of that agreement.
To order additional documents, U.S. and Canadian customers should call Customer Fulfillment at (800) 685-8225, fax (617) 229-9845.
Customers in other countries with a U.S. license agreement may contact Customer Fulfillment via the above fax number. All other international customers should contact their Sybase subsidiary or local distributor. Upgrades are provided only at regularly scheduled software release dates. No part of this publication may be reproduced, transmitted, or translated in any form or by any means, electronic, mechanical, manual, optical, or otherwise, without the prior written permission of Sybase, Inc.
Sybase, the Sybase logo, ADA Workbench, Adaptable Windowing Environment, Adaptive Component Architecture, Adaptive Server, Adaptive Server Anywhere, Adaptive Server Enterprise, Adaptive Server Enterprise Monitor, Adaptive Server Enterprise Replication, Adaptive Server Everywhere, Adaptive Warehouse, Afaria, Answers Anywhere, Anywhere Studio, Application Manager, AppModeler, APT Workbench, APT-Build, APT-Edit, APT-Execute, APT-Translator, APT-Library, AvantGo Mobile Delivery, AvantGo Mobile Inspection, AvantGo Mobile Marketing Channel, AvantGo Mobile Pharma, AvantGo Mobile Sales, AvantGo Pylon, AvantGo Pylon Application Server, AvantGo Pylon Conduit, AvantGo Pylon PIM Server, AvantGo Pylon Pro, Backup Server, BizTracker, ClearConnect, Client-Library, Client Services, Convoy/DM, Copernicus, Data Pipeline, Data Workbench, DataArchitect, Database Analyzer, DataExpress, DataServer, DataWindow, DataWindow .NET, DB-Library, dbQueue, Developers Workbench, Direct Connect Anywhere, DirectConnect, Distribution Director, e-ADK, E-Anywhere, e-Biz Impact, e-Biz Integrator, E-Whatever, EC Gateway, ECMAP, ECRTP, eFulfillment Accelerator, Embedded SQL, EMS, Enterprise Application Studio, Enterprise Client/Server, Enterprise Connect, Enterprise Data Studio, Enterprise Manager, Enterprise SQL Server Manager, Enterprise Work Architecture, Enterprise Work Designer, Enterprise Work Modeler, eProcurement Accelerator, EWA, Financial Fusion, Financial Fusion Server, Gateway Manager, GlobalFIX, iAnywhere, iAnywhere Solutions, ImpactNow, Industry Warehouse Studio, InfoMaker, Information Anywhere, Information Everywhere, InformationConnect, InternetBuilder, iScript, Jaguar CTS, jConnect for JDBC, M2M Anywhere, Mach Desktop, Mail Anywhere Studio, MainframeConnect, Maintenance Express, Manage Anywhere Studio, M-Business Channel, M-Business Network, M-Business Server, MDI Access Server, MDI Database Gateway, media.splash, MetaWorks, mFolio, Mirror Activator, MySupport, Net-Gateway, Net-Library, New Era of Networks, ObjectConnect, ObjectCycle, OmniConnect, OmniSQL Access Module, OmniSQL Toolkit, Open Biz, Open Client, Open ClientConnect, Open Client/Server, Open Client/Server Interfaces, Open Gateway, Open Server, Open ServerConnect, Open Solutions, Optima++, PB-Gen, PC APT Execute, PC DB-Net, PC Net Library, PocketBuilder, Pocket PowerBuilder, Power++, power.stop, PowerAMC, PowerBuilder, PowerBuilder Foundation Class Library, PowerDesigner, PowerDimensions, PowerDynamo, PowerScript, PowerSite, PowerSocket, Powersoft, PowerStage, PowerStudio, PowerTips, Powersoft Portfolio, Powersoft Professional, PowerWare Desktop, PowerWare Enterprise, ProcessAnalyst, QAnywhere, Rapport, RemoteWare, RepConnector, Replication Agent, Replication Driver, Replication Server, Replication Server Manager, Replication Toolkit, Report-Execute, Report Workbench, Resource Manager, RFID Anywhere, RW-DisplayLib, RW-Library, S-Designor, SDF, Secure SQL Server, Secure SQL Toolset, Security Guardian, SKILS, smart.partners, smart.parts, smart.script, SQL Advantage, SQL Anywhere, SQL Anywhere Studio, SQL Code Checker, SQL Debug, SQL Edit, SQL Edit/TPU, SQL Everywhere, SQL Modeler, SQL Remote, SQL Server, SQL Server Manager, SQL SMART, SQL Toolset, SQL Server/CFT, SQL Server/DBM, SQL Server SNMP SubAgent, SQL Station, SQLJ, STEP, SupportNow, S.W.I.F.T. Message Format Libraries, Sybase Central, Sybase Client/Server Interfaces, Sybase Financial Server, Sybase Gateways, Sybase IQ, Sybase MPP, Sybase SQL Desktop, Sybase SQL Lifecycle, Sybase SQL Workgroup, Sybase User Workbench, SybaseWare, Syber Financial, SyberAssist, SybFlex, SyBooks, System 10, System 11, System XI (logo), SystemTools, Tabular Data Stream, TradeForce, Transact-SQL, Translation Toolkit, UltraLite, UltraLite.NET, UNIBOM, Unilib, Uninull, Unisep, Unistring, URK Runtime Kit for UniCode, VisualWriter, VQL, WarehouseArchitect, Warehouse Control Center, Warehouse Studio, Warehouse WORKS, Watcom, Watcom SQL, Watcom SQL Server, Web Deployment Kit, Web.PB, Web.SQL, WebSights, WebViewer, WorkGroup SQL Server, XA-Library, XA-Server, XcelleNet, and XP Server are trademarks of Sybase, Inc. 02/05
Unicode and the Unicode Logo are registered trademarks of Unicode, Inc.
All other company and product names used herein may be trademarks or registered trademarks of their respective companies.
Use, duplication, or disclosure by the government is subject to the restrictions set forth in subparagraph (c)(1)(ii) of DFARS 52.227-7013 for the DOD and as set forth in FAR 52.227-19(a)-(d) for civilian agencies.
Sybase, Inc., One Sybase Drive, Dublin, CA 94568.

Contents
Installation Guide iii
About This Book .......................................................................................................................... vii
CHAPTER 1 Introducing DirectConnect............................................................. 1Product name changes .................................................................... 1DirectConnect data access product descriptions ............................. 2
DirectConnect for DB2 UDB...................................................... 2DirectConnect for Informix......................................................... 3DirectConnect for Microsoft SQL Server ................................... 3DirectConnect for ODBC ........................................................... 3DirectConnect for Oracle ........................................................... 3DirectConnect Manager ............................................................ 4
CHAPTER 2 Sybase Software Asset Management (SySAM)............................ 5SySAM overview .............................................................................. 5
DirectConnect licenses.............................................................. 6How SySAM works........................................................................... 8Adding feature licenses ................................................................... 8SySAM administration...................................................................... 9
Verifying that the License Manager is running .......................... 9
CHAPTER 3 Installation and Configuration Overview .................................... 11Installation process overview ......................................................... 11
Using InstallShield................................................................... 12Using DirectConnect Manager ................................................ 13
Directory information ...................................................................... 14Criteria for creating directories ................................................ 14
CHAPTER 4 Getting Ready to Install ................................................................ 17Gather your installation team ......................................................... 17Prepare the environment................................................................ 18
Hardware and software requirements ..................................... 18Connectivity tasks ................................................................... 19

Contents
iv Enterprise Connect Data Access for Microsoft Windows
Critical administrative tasks..................................................... 20Complete the installation worksheet .............................................. 21Perform special connectivity tasks for AS/400 ............................... 21
Set up the AS/400 to communicate with DirectConnect access services ............................................................................ 21
CHAPTER 5 Installing DirectConnect ............................................................... 29Installing DirectConnect ................................................................. 29
Pre-installation instructions ..................................................... 30Using InstallShield for installation............................................ 30Installing DirectConnect in GUI mode ..................................... 31Installing DirectConnect in console mode ............................... 34Installing using a response file ................................................ 35Configuring the data sources to connect to targets................. 37Creating a new DirectConnect server ..................................... 48Creating a new DirectConnect access service........................ 48Starting a DirectConnect access service................................. 49Verifying a DirectConnect access service ............................... 49Stopping a DirectConnect access service............................... 51Stopping a DirectConnect server ............................................ 51Adding a new service to the sql.ini file .................................... 52Setting up service name redirection (optional) ........................ 52
Uninstalling DirectConnect............................................................. 52
CHAPTER 6 Installing DirectConnect for Oracle ............................................. 55Introducing DirectConnect for Oracle............................................. 55Getting ready to install DirectConnect for Oracle........................... 56
Hardware and software requirements ..................................... 56Disk requirements ................................................................... 56Oracle requirements................................................................ 57
Installing DirectConnect ................................................................. 57Pre-installation instructions ..................................................... 57Using InstallShield for installation............................................ 58Installing DirectConnect for Oracle.......................................... 59
Configuring DirectConnect for Oracle ............................................ 66After installation.............................................................................. 67Uninstalling DirectConnect for Oracle ............................................ 68
CHAPTER 7 Installing DirectConnect Manager................................................ 71Installing DirectConnect Manager .................................................. 71
Installation requirements ......................................................... 71Installing DirectConnect Manager ........................................... 72

Contents
Installation Guide v
Using DirectConnect Manager ....................................................... 73Configuring servers and access services................................ 73Creating a new DirectConnect access service........................ 74Starting a DirectConnect access service................................. 74Stopping a DirectConnect access service............................... 74Adding a new service .............................................................. 74Configuring servers and access services................................ 75Uninstalling DirectConnect Manager....................................... 75
CHAPTER 8 After Installation............................................................................ 77Configuring client connectivity to DirectConnect............................ 77
CHAPTER 9 Setting Up the DirectConnect TDS Driver................................... 79Description ..................................................................................... 79Configuring the data source ........................................................... 80Connecting to the data source ....................................................... 85
Using a logon dialog box ......................................................... 85Using a connection string ........................................................ 85
ODBC conformance level............................................................... 86
CHAPTER 10 Troubleshooting............................................................................ 89General problems........................................................................... 89ODBC-specific problems................................................................ 90
ODBC driver errors.................................................................. 90ODBC data source errors........................................................ 90ODBC driver manager errors .................................................. 91
DirectConnect problems................................................................. 92DirectConnect server fails to start after installation ................. 92
Connectivity problems.................................................................... 93Using the odbct tool for ODBC problems ................................ 93
APPENDIX A Installation Worksheets................................................................ 95How to use the worksheets ............................................................ 95DirectConnect for DB2 UDB worksheet ......................................... 96DirectConnect for Informix worksheet ............................................ 99DirectConnect for Microsoft SQL Server worksheet .................... 101DirectConnect for ODBC worksheet ............................................ 102DirectConnect for Oracle worksheet ............................................ 103
APPENDIX B Using DirectConnect Utilities .................................................... 105Creating and starting a DCDirector server ................................... 105

Contents
vi Enterprise Connect Data Access for Microsoft Windows
DCDirector utility ................................................................... 106Creating a new DirectConnect server .......................................... 106
AddServer utility .................................................................... 106Starting a DirectConnect server ................................................... 107
DCStart utility ........................................................................ 107
Glossary ..................................................................................................................................... 109
Index ........................................................................................................................................... 115

Installation Guide vii
About This Book
This book describes how to install Sybase® DirectConnect™ products on Microsoft Windows.
Audience This book is for System Administrators or other qualified persons familiar with their system environment, resources, and devices.
How to use this book See the following chapters for information about installing, setting up connectivity, and configuring the DirectConnect products.
See To
Chapter 1, “Introducing DirectConnect”
Learn more about the Enterprise Connect Integrated Product Set, as well as the environment and capabilities of each product.
Chapter 2, “Sybase Software Asset Management (SySAM)”
Understand the licensing concepts that you need to know before you begin installing DirectConnect.
Chapter 3, “Installation and Configuration Overview”
Learn about the installation and configuration process.
Chapter 4, “Getting Ready to Install”
Identify all the tasks required to get ready for installing DirectConnect.
Chapter 5, “Installing DirectConnect”
Install DirectConnect using the installation program called InstallShield.
Chapter 6, “Installing DirectConnect for Oracle”
Install DirectConnect for Oracle using InstallShield.
Chapter 7, “Installing DirectConnect Manager”
Install and use DirectConnect Manager.
Chapter 8, “After Installation” Perform a number of server and client post-installation tasks.
Chapter 9, “Setting Up the DirectConnect TDS Driver”
Set up related products to work with DirectConnect access service.
Chapter 9, “Setting Up the DirectConnect TDS Driver”
Set up the Sybase TDS driver.
Chapter 10, “Troubleshooting” Identify and resolve problems that can occur when you install a DirectConnect product.
Appendix A, “Installation Worksheets”
Access worksheets and instructions for recording installation information for DirectConnect products.

viii Enterprise Connect Data Access for Microsoft Windows
Related documents For more information about configuring and administering DirectConnect products, use the following guides:
• Enterprise Connect Data Access User’s Guide for Access Services
• Enterprise Connect Data Access and Mainframe Connect Server Administration Guide for DirectConnect
• Enterprise Connect Data Access Option for Oracle Server Administration and User’s Guide
For ODBC information, use the following document:
• Microsoft ODBC 3.5 Programmer’s Reference and SDK Guide
For additional references, use the following documents:
• Open Client™ Client-Library/C Reference Manual
• Open Server™ Server-Library/C Reference Manual
• Open ClientConnect™ and Open ServerConnect™ Messages and Codes
• Component Integrated Services User’s Guide for Adaptive Server® Enterprise
• Adaptive Server Enterprise Reference Manual
• Sybase Adaptive Server Reference Manual, volumes 1 and 2
To install and administer DirectConnect using DirectConnect Manager, use InstallShield and the DirectConnect Manager online help.
Other sources of information
Use the Sybase Getting Started CD, the SyBooks CD, and the Sybase Product Manuals Web site to learn more about your product:
• The Getting Started CD contains release bulletins and installation guides in PDF format, and may also contain other documents or updated information not included on the SyBooks CD. It is included with your software. To read or print documents on the Getting Started CD, you need Adobe Acrobat Reader, which you can download at no charge from the Adobe Web site using a link provided on the CD.
Appendix B, “Using DirectConnect Utilities”
Identify utilities to simplify the execution of DirectConnect on multiple platforms.
Glossary Find definitions of technical terms used in this guide.

About This Book
Installation Guide ix
• The SyBooks CD contains product manuals and is included with your software. The Eclipse-based SyBooks browser allows you to access the manuals in an easy-to-use, HTML-based format.
Some documentation may be provided in PDF format, which you can access through the PDF directory on the SyBooks CD. To read or print the PDF files, you need Adobe Acrobat Reader.
Refer to the SyBooks Installation Guide on the Getting Started CD, or the README.txt file on the SyBooks CD for instructions on installing and starting SyBooks.
• The Sybase Product Manuals Web site is an online version of the SyBooks CD that you can access using a standard Web browser. In addition to product manuals, you will find links to EBFs/Maintenance, Technical Documents, Case Management, Solved Cases, newsgroups, and the Sybase Developer Network.
To access the Sybase Product Manuals Web site, go to Product Manuals at http://www.sybase.com/support/manuals/.
Sybase certifications on the Web
Technical documentation at the Sybase Web site is updated frequently.
❖ Finding the latest information on product certifications
1 Point your Web browser to Technical Documents at http://www.sybase.com/support/techdocs/.
2 Select Products from the navigation bar on the left.
3 Select a product name from the product list and click Go.
4 Select the Certification Report filter, specify a time frame, and click Go.
5 Click a Certification Report title to display the report.
❖ Creating a personalized view of the Sybase Web site (including support pages)
Set up a MySybase profile. MySybase is a free service that allows you to create a personalized view of Sybase Web pages.
1 Point your Web browser to Technical Documents at http://www.sybase.com/support/techdocs/.
2 Click MySybase and create a MySybase profile.
x Enterprise Connect Data Access for Microsoft Windows
Sybase EBFs and software maintenance
❖ Finding the latest information on EBFs and software maintenance
1 Point your Web browser to the Sybase Support Page at http://www.sybase.com/support.
2 Select EBFs/Maintenance. If prompted, enter your MySybase user name and password.
3 Select a product.
4 Specify a time frame and click Go. A list of EBF/Maintenance releases is displayed.
Padlock icons indicate that you do not have download authorization for certain EBF/Maintenance releases because you are not registered as a Technical Support Contact. If you have not registered, but have valid information provided by your Sybase representative or through your support contract, click Edit Roles to add the “Technical Support Contact” role to your MySybase profile.
5 Click the Info icon to display the EBF/Maintenance report, or click the product description to download the software.
Syntax conventions Syntax statements that display options for a command look like this:
COMMAND [object_name, [ {TRUE | FALSE} ] ]
The following table explains the syntax conventions used in this guide.
Table 1: Syntax conventions
Style conventions The following table explains the style conventions used in this guide.
Symbol Convention
( ) Include parentheses as part of the command.
{ } Braces indicate that you must choose at least one of the enclosed options. Do not type the braces when you type the option.
[ ] Brackets indicate that you can choose one or more of the enclosed options, or none. Do not type the brackets when you type the options.
| The vertical bar indicates that you can select only one of the options shown. Do not type the bar in your command.
, The comma indicates that you can choose one or more of the options shown. Separate each choice by using a comma as part of the command.

About This Book
Installation Guide xi
Table 2: Style conventions
If you need help Each Sybase installation that has purchased a support contract has one or more designated people who are authorized to contact Sybase Technical Support. If you cannot resolve a problem using the manuals or online help, please have the designated person contact Sybase Technical Support or the Sybase subsidiary in your area.
This type of information Looks like this
Gateway-Library function names TDINIT, TDCANCEL
Client-Library™ function names CTBINIT, CTBCANCEL
Other executables (DB-Library™ routines, SQL commands) in text
the dbrpcparam routine, a select statement
Directory names, path names, and file names
/usr/bin directory, interfaces file
Variables n bytes
SQL Server® datatypes datetime, float
Sample code 01 BUFFER PIC S9(9) COMP SYNC
User input 01 BUFFER PIC X(n)
Client-Library and Gateway-Library function argument names
BUFFER, RETCODE
Names of objects stored on the mainframe
SYCTSAA5
Symbolic values used with function arguments, properties, and structure fields
CS_UNUSED, FMT_NAME, CS_SV_FATAL
Client-Library property names CS_PASSWORD, CS_USERNAME
Client-Library and Gateway-Library datatypes
CS_CHAR_TYPE

xii Enterprise Connect Data Access for Microsoft Windows

Installation Guide 1
C H A P T E R 1 Introducing DirectConnect
This chapter introduces basic DirectConnect concepts and describes the process that provides access to distributed data.
This chapter contains the following topics:
Product name changesBefore Sybase introduced Enterprise Connect Data Access 12.5, its options were sold as individual DirectConnect™ products named “DirectConnect for [target].” Other than in the installer, you will see the name “DirectConnect” used in the software and in documents. This document uses the old product names except for the title page. Past and current option names are as follows:
Table 1-1: DirectConnect and ECDA names
For more information regarding the name changes, see the Enterprise Connect Data Access Overview Guide.
Topic PageProduct name changes 1
DirectConnect data access product descriptions 2
Old product name Current option name
DirectConnect for DB2 UDB Enterprise Connect Data Access Option for DB2 UDB
DirectConnect for Informix Enterprise Connect Data Access Option for Informix
DirectConnect Manager Part of each Enterprise Connect Data Access Option and still called DC Manager
DirectConnect for Microsoft SQL Server Enterprise Connect Data Access Option for Microsoft SQL Server
DirectConnect for ODBC Enterprise Connect Data Access Option for ODBC
DirectConnect for Oracle Enterprise Connect Data Access Option for Oracle
DirectConnect data access product descriptions
2 Enterprise Connect Data Access for Microsoft Windows
DirectConnect data access product descriptionsFollowing are descriptions of the DirectConnect data access products that are covered in this guide. In particular, they provide access management, copy management, and remote systems management. Each access service product contains one or more access services that contain specific sets of configuration properties relating to the target to be accessed.
• DirectConnect for DB2 UDB
• DirectConnect for Informix
• DirectConnect for Microsoft SQL Server
• DirectConnect for ODBC
• DirectConnect for Oracle
Note For information about DirectConnect for z/OS, see the Mainframe Connect DirectConnect for z/OS Option Installation Guide.
The following subsections provide descriptions of each DirectConnect product.
DirectConnect for DB2 UDBDirectConnect for DB2 UDB provides access to DB2 UDB databases using the Distributed Relational Database Architecture (DRDA) protocol. Sybase provides a DRDA-to-ODBC driver that you can use to access the DB2 UDB target databases.
DRDA is IBM's wire protocol for access to DB2 UDB. DirectConnect for DB2 UDB supports access to DB2 UDB on z/OS, AS/400, Microsoft Windows, and UNIX platforms.
DirectConnect for DB2 UDB consists of a DirectConnect server, DirectConnect for DB2 UDB service libraries, and DirectConnect for DB2 UDB access services. The DirectConnect for DB2 UDB access service library accesses DB2 UDB databases.
CHAPTER 1 Introducing DirectConnect
Installation Guide 3
DirectConnect for InformixDirectConnect for Informix provides basic connectivity to Informix data sources. DirectConnect for Informix consists of a DirectConnect server, DirectConnect for Informix access service libraries, and DirectConnect for Informix access services.
DirectConnect for Microsoft SQL ServerDirectConnect for Microsoft SQL Server provides basic connectivity to Microsoft SQL Server data sources. It consists of a DirectConnect server, DirectConnect for Microsoft SQL Server access service libraries, and DirectConnect for Microsoft SQL Server access services.
DirectConnect for ODBCDirectConnect for ODBC provides basic connectivity to ODBC-accessible data sources. DirectConnect for ODBC consists of a DirectConnect server, DirectConnect for ODBC access service libraries, and DirectConnect for ODBC access services.
The DirectConnect for ODBC access service library accesses ODBC-accessible data.
Note The ODBC driver for DirectConnect for ODBC (the backend driver to the target) is not provided by Sybase; you must select, install, and maintain it.
For access to additional databases such as Microsoft Access, Teradata, and others, you must obtain and install the necessary ODBC driver separately, on the same server as DirectConnect for ODBC, and configure DirectConnect for ODBC to use that ODBC driver for access to the database. It is important when working with non-Sybase provided, third-party ODBC drivers to carefully integrate and test them to be sure they meet your needs.
DirectConnect for OracleDirectConnect for Oracle is a Sybase product that provides access to Oracle databases.

DirectConnect data access product descriptions
4 Enterprise Connect Data Access for Microsoft Windows
Only the initial installation of DirectConnect for Oracle is described in Chapter 6, “Installing DirectConnect for Oracle.” For more detailed information, see the DirectConnect for Oracle User’s Guide.
DirectConnect ManagerDirectConnect Manager is a graphical user interface (GUI) systems management tool that you can use to administer all DirectConnect products. DirectConnect Manager provides the capability to:
• Manage DirectConnect servers on multiple platforms.
• Change configuration properties of DirectConnect servers, service libraries, and services.
• Create and copy services by copying an existing service and giving it a unique name.
• Designate a new server using DCDirector.
• Start and stop existing servers using DCDirector.
• Start, stop, and delete services remotely.
• Test the availability of all your data sources.
• Retrieve a DirectConnect server log file or a subset of the log, and view log file messages.
• Update DirectConnect server connection information.
• View the status of a service and data source.
The interface provided by DirectConnect Manager allows you to easily configure and manage all of the data access services directly from your Windows or UNIX platform. As a result, you greatly increase your ability to respond and manage a distributed environment.
You can install DirectConnect Manager and its required components from the DC Client CD.
Note When you install a DirectConnect product on a Windows or UNIX platform or machine, you may install DirectConnect Manager on a separate platform or machine. This allows you to control any DirectConnect from any machine.
Installation Guide 5
C H A P T E R 2 Sybase Software Asset Management (SySAM)
This chapter describes licensing concepts that you need to know before you install DirectConnect. It contains the following topics:
This chapter contains the following topics:
Note Sybase recommends that you read this entire chapter before installing DirectConnect.
SySAM overviewSybase Software Asset Management (SySAM) is a licensing mechanism that:
• Provides System Administrators with a means to monitor their site’s use of Sybase products and optional features
• Records the Sybase software being used and licensed
SySAM verifies that a valid license exists for a desired DirectConnect product or feature.
Note For purposes of licensing, DirectConnect products are referred to as DirectConnect features.
The basic components of SySAM are:
Topic PageSySAM overview 5
How SySAM works 7
Adding feature licenses 8
SySAM administration 9
SySAM overview
6 Enterprise Connect Data Access for Microsoft Windows
• One or more DirectConnect features
• A license file
• The SySAM software, which consists of a license manager and management utilities
When you install DirectConnect, a SySAM license manager is automatically installed. However, after installation, you have two choices:
• You can run the license manager on your local machine.
• You can run the license manager on a remote machine and then point to it from your local machine. To accomplish this, you enter the host name and port number of the remote machine on the License Host Request window. Then, you enter the licenses on the remote machine that will be checking them. For more information about SySAM during installation, see Chapter 5, “Installing DirectConnect.”
Sybase recommends that you have one license manager and have all remote machines point to that license manager. You can have many license managers (only one for each machine) on many different machines, but you must be sure that you have connectivity pointers to the remote machines, and that the licenses are entered on whichever machine the license manager is running on.
DirectConnect licensesWhich licenses that SySAM checks depends on the DirectConnect components that are being started:
• For DirectConnect for ODBC, one license is required for any other ODBC targets when Sybase does not supply the driver.
• For DirectConnect for DB2 UDB, DirectConnect for Informix, DirectConnect for Microsoft SQL Server, and DirectConnect for Oracle, one license is required for any Sybase-supplied ODBC driver.
You must register the DirectConnect license through the license manager in SySAM.
DirectConnect license files
A license file contains a set of information that enables a set of features of a Sybase product set. The LM_LICENSE_FILE environment variable is used to point to a license file.

CHAPTER 2 Sybase Software Asset Management (SySAM)
Installation Guide 7
Following are the license identifiers for the DirectConnect features that are licensed through SySAM:
• DC_DRDA (to be used for DirectConnect for DB2 UDB)
• DC_INFORMIX
• DC_MSSQL
• DC_ODBC (to be used with any target that supports ODBC)
• DC_ORACLE
• DC_2PC (enables Global Transaction support, DirectConnect for Oracle only)
SySAM licenses
Sybase products are licensed individually as features. Individual licenses are licenses that must be purchased for each feature.
Required license information
When you purchase your DirectConnect product, Sybase provides a Sybase Software Asset Management certificate with the following information, which is required and must be entered for each license. When you configure the SySAM License Manager, it prompts you for the following information for each license:
• Order number – the order number of your software purchase.
• Feature name – the feature name from the certificate package or bundle license.
• Feature count – the number of licenses you purchased for the feature package or bundle.
• Software version – the version number specified on the license certificate.
• Authorization code – the authorization code shown on your license certificate for DirectConnect.

How SySAM works
8 Enterprise Connect Data Access for Microsoft Windows
How SySAM worksSySAM consists of two utilities, called lmgr and lmutil, which manage licensing activities, and two services: the license management service, lmgrd, and the SYBASE service. The SySAM lmgrd service contains a pointer that locates the license file for verification and can reside either on the primary server, known as the local license host, or on a remote license host. The services handle requests to validate licensed features.
Using information in the license file, DirectConnect connects to the SySAM daemon and attempts to check out a license for the base DirectConnect feature. If the DirectConnect license is checked out successfully (a license exists in the license file), DirectConnect continues to operate.
If a license does not check out successfully (a license is not found), DirectConnect continues to operate, but it does record this discrepancy in the log.
If you have not registered a license for each service, a pop-up warning will appear for each service, each time that you activate the service. You can enter your license to prevent this from occurring or select cancel, to continue.
Adding feature licenses ❖ To add features for which you have licenses
1 Start the license manager if it is not currently running:
From the Windows Start menu, select Programs | Sybase | Sybase Software Asset Management (SySAM).
2 You should see the following prompt:
Do you have Sybase Software Asset Management Certificates to register?”
3 Click Yes.
4 The SySAM License Manager window that appears prompts you for:
• Order Number
• Feature Name
• Feature Count
CHAPTER 2 Sybase Software Asset Management (SySAM)
Installation Guide 9
• Software Version
• Authorization Code
5 Click More until you have entered all available licenses. Click Done.
6 Because you are adding additional licenses to an existing configuration, you must notify the license daemons of the changes.
From a command-line prompt, enter:
%SYBASE%\SYSAM-1_0\bin\lmutil lmreread
If you encounter problems with new licenses, check the lmgrd.log file in the %SYBASE%\%SYBASE_SYSAM%\log directory to verify that they were properly appended to the license file.
SySAM administrationThis section describes how to verify the installation and how to start SySAM manually. It also provides additional information for administering SySAM.
Verifying that the License Manager is runningSybase supplies utilities with license manager to check the status of the license managerlicense manager.
❖ To verify that the license manager software is running
1 Enter the following:
%SYBASE%\SYSAM-1_0\bin\lmutil lmstat -c
2 Verify that both lmgrd and SYBASE are running before you run DirectConnect.
If the SySAM software is not running, you see a message similar to the following:
lmgrd is not running: Cannot connect to license server
If the license manager is not running, you must start the license manager manually.

SySAM administration
10 Enterprise Connect Data Access for Microsoft Windows
❖ To start the License Manager
1 From the Windows Start menu, select Select Programs | Sybase | Sybase Software Asset Management (SySAM).
2 The license manager can either run as a service or run as a process.
• To run as a service, enter the following:
%SYBASE%\%SYBASE_SYSAM%\sysam.bat
• To run as a process, enter the following:
lmgrd -c %LM_LICENSE_FILE% -l %SYBASE%\%SYBASE_SYSAM%\log\lmgrd.log
Installation Guide 11
C H A P T E R 3 Installation and Configuration Overview
This chapter presents an overview of the installation and configuration process for a DirectConnect server. It also describes DirectConnect Manager, a client application that you can use to create and configure a DirectConnect server and services.
This chapter contains the following topics:
Note This chapter pertains to all DirectConnects except DirectConnect for Oracle. See Chapter 6, “Installing DirectConnect for Oracle,” for installation information for DirectConnect for Oracle.
Installation process overviewSybase uses the InstallShield installation program to simplify the installation process, and DirectConnect Manager to manage and configure the servers and services.
The following table lists the major installation steps for DirectConnect.
Table 3-1: Installation steps for DirectConnect
Topic PageInstallation process overview 11
Directory information 14
Step Resource
1 Set up connectivity Chapter 4
2 Complete the pre-installation tasks. Chapter 4

Installation process overview
12 Enterprise Connect Data Access for Microsoft Windows
Using InstallShieldInstallShield is a Java-based installation program that uses XML input. It unloads and installs all Sybase components using a consistent installation interface across all platforms. Depending upon your platform, you can use this program to install and uninstall a DirectConnect server.
The InstallShield program performs the following functions:
3 Install DirectConnect and DirectConnect Manager using InstallShield.
• Chapter 5
• Chapter 6
• Chapter 7
• Appendix A
• ECDA CD
• PC Client CD
4 Create a new server:
• Edit the sql.ini file.
• Issue the AddServer command.
• Use DirectConnect Manager to configure the server and service.
• Chapter 5
• Chapter 6
• Chapter 7
• Appendix B
5 Create a new access service:
• Configure DSN.
• Use DirectConnect Manager to create and configure the access service.
• Chapter 5
• Chapter 6
• Chapter 7
6 Perform post-installation tasks:
• Test connectivity.
• Setup the locales files (Windows NT and Windows 2000).
• Configure client connectivity to the DirectConnect access services.
• Set up the DirectConnect TDS driver
• Start SySAM and enter product and feature licenses.
• Chapter 2
• Chapter 8
• Chapter 9
9 Install your applications. Specific documentation for your application
Step Resource
CHAPTER 3 Installation and Configuration Overview
Installation Guide 13
• Creates a directory and directory structure, including an Open Server directory
• Copies all DirectConnect programs, utilities, and support files from the distribution media to the appropriate directories
• Confirms that necessary system resources are present to install and support DirectConnect programs
• Provides a utility that you can use to remove DirectConnect servers
• Updates the Windows Registry
Using DirectConnect ManagerDirectConnect Manager is a Java program plug-in for Sybase Central (Java Edition) that provides systems management for the DirectConnect family of data access servers.
DirectConnect Manager offers several features:
• Integrated management with other Sybase products through Sybase Central (Java Edition)
• The ability to list and terminate specific user connections on any DirectConnect
• Full management of DirectConnect servers, services, and libraries
The DirectConnect Manager interface allows you to easily configure and manage all of the data access services directly from your Windows or UNIX platform. As a result, you can increase your ability to respond and manage a distributed environment.
You can install DirectConnect Manager and its required components from the DC Client CD.
Note When you install a DirectConnect product on a Windows or UNIX platform or machine, you may install DirectConnect Manager on a separate platform or machine. This allows you to control any DirectConnect from any machine.

Directory information
14 Enterprise Connect Data Access for Microsoft Windows
Directory informationIf you install more than one DirectConnect on a machine, you need to take certain precautions. See the following section for more information.
Criteria for creating directoriesDuring installation, the installation program checks the %SYBASE% environment variable for any existing Sybase directory that was created for another Sybase product. For example, this might be a directory created for Adaptive Server.
Note Sybase recommends that you install all products in the same directory.
The following rules apply:
• If the InstallShield installation program locates the Sybase directory, it installs DirectConnect subdirectories under this directory. However, before installation begins, you can specify a different location.
• If InstallShield cannot locate such a directory, it creates one. The program creates only what it needs to install the product.
• If InstallShield detects a conflict between new and existing files, you are prompted to choose whether to overwrite the file. At any point, you can cancel the installation.
If you have other Sybase products installed
If you have another Sybase product installed on the machine on which you plan to install DirectConnect, before you begin the installation, you need to know:
• How to start Sybase products with batch files
• How to set the necessary environment variables for Sybase products using batch files
CHAPTER 3 Installation and Configuration Overview
Installation Guide 15
The DCStart utility discussed in Appendix B, “Using DirectConnect Utilities,” can do most or all of the work of properly setting the required environment for DirectConnect as well as starting it.
Note The DirectConnect utilities are not used with DirectConnect for Oracle.
However, the DirectConnect installation process may change certain “system-wide” environment variables on which your present Sybase application depends, so you must set these variables back to their original values following the DirectConnect installation. To do this, you must “capture” the current system environment and save it to a file before proceeding with the installation of DirectConnect. You will refer to this file after installing DirectConnect to reset the system environment. To capture the current environment, open a DOS window and execute the following command:
set > preinstall.txt
A file named preinstall.txt will then be created in the current directory. You can view this file with Notepad or another text editor or viewer.
After you have installed DirectConnect, you execute this same command again, except this time, you redirect the output to a different file, such as postinstall.txt. For example:
set > postinstall.txt
You can now compare the two files and reset any changed system variables to their original values by selecting Start from the Windows task bar, and then choosing Control Panel|System and selecting the Environment tab.
Then, to start DirectConnect, you can use either the DCStart utility or the information in the postinstall.txt file to write your own batch file. The batch file should:
• Set the necessary environment for DirectConnect
• Execute the file
• Start DirectConnect from a command prompt using the direct DCStart -S command
Note For instructions on how to start DirectConnect for Oracle, see Chapter 6, “Installing DirectConnect for Oracle.”

Directory information
16 Enterprise Connect Data Access for Microsoft Windows

Installation Guide 17
C H A P T E R 4 Getting Ready to Install
This chapter describes the tasks you must complete before you install DirectConnect products.
This chapter covers the following topics:
Gather your installation teamTo install DirectConnect, you need a team with specific skills and experience— as well as the authority to carry out the variety of tasks in the installation process. At your site, identify the people who have the following skill sets and keep them informed of any changes.
Table 4-1: DirectConnect team skill requirements
Topic PageGather your installation team 17
Prepare the environment 18
Complete the installation worksheet 21
Perform special connectivity tasks for AS/400 21
Role Skill set
Operating system administrator
• Understanding of the operating systems for your site’s platforms
• Knowledge of standards and conventions at the installation site
Communications administrator
• Understanding of connectivity products used at your site
• Ability to design, establish, test, and troubleshoot remote physical communications between DirectConnect and the mainframe host for DB2 UDB DirectConnect access
• Understanding of your network configuration
DirectConnect Administrator
• Understanding of the DirectConnect environment
• DirectConnect Server Administrator privileges
Target database administrator
• Knowledge of the target database
• Knowledge of target environment, including security operations
• Database administrator privileges

Prepare the environment
18 Enterprise Connect Data Access for Microsoft Windows
Prepare the environmentBefore you begin, you must build the foundation that will support your DirectConnect installation and the subsequent access services that you create. If you complete these tasks first, the installation process should be successful.
This section describes the following:
• Hardware and software requirements
• Connectivity tasks
• Critical administrative tasks
Hardware and software requirementsTo use a DirectConnect product with Windows you must have, at a minimum, the system configuration shown in the following table.
LAN administrator
• Understanding of LAN communications at your site
• Ability to design, establish, test, and troubleshoot remote physical communications between the client and the DirectConnect server
• Understanding of the site’s network configuration
Role Skill set

CHAPTER 4 Getting Ready to Install
Installation Guide 19
Table 4-2: System requirements for Windows
Connectivity tasksBefore you begin installation, you must have some preliminary network connections in place and operational.
Following are some recommended tasks you should perform before you set up connectivity. This is not a complete list; your team should prepare a list that is pertinent to your site and connectivity setup.
• Set up connectivity to the target database
• Check the system requirements
• Research connectivity parameters
Set up connectivity to the target database
To set up connectivity to the target database, you need to refer to vendor documentation for connectivity protocols that your site supports.
Check the system requirements
Verify that you have the platform and operating system components listed in “Hardware and software requirements” on page 18. Also, be sure to determine whether any new release levels or bug fixes of Sybase or vendor connectivity protocol products are required.
Item Requirements
CPU Sybase recommends an Intel-compatible processor with a minimum of 500 megahertz.
RAM • 512MB of RAM to run Windows 2000 and Windows 2003 for DirectConnect products.
Software • Microsoft Windows 2000 or Windows 2003.
• Microsoft Data Access Component (MDAC) version 2.8 or later. This is required for the DirectConnect server machine and the machine running Adaptive Server.
Storage A minimum of 300MB, plus at least 500K bytes for each locale you plan to support.

Prepare the environment
20 Enterprise Connect Data Access for Microsoft Windows
Research connectivity parameters
You need the data source name (DSN) values for each ODBC target when you set up connectivity for DirectConnect.
Be sure to record the DSN values on your installation worksheet.
Note Do not continue installation until connectivity is running successfully between the machine that will host the DirectConnect server and the target database.
Critical administrative tasksComplete the following administrative tasks:
• Read the release bulletin for DirectConnect version 12.6. This document provides product information that might not be included in this DirectConnect guide, as well as information about known issues or problems.
• Make a backup copy of your current Sybase software, particularly if you plan to keep DirectConnect versions that were previously installed.
• Make a copy of the installation worksheet for your platform for each server that you will install.
• Verify that you have authority to sign in as user sybase or other user having administrative privileges on the machine on which DirectConnect is being installed.
• Verify that the host server is connected to the LAN and that network protocols are configured correctly. For instructions, see your LAN administrator documentation.
• Verify previously installed Sybase products. When you install DirectConnect into an existing directory structure, be aware of any previously installed Sybase software and the version of that software.

CHAPTER 4 Getting Ready to Install
Installation Guide 21
Complete the installation worksheetUse the installation worksheet for the target database in Appendix A, “Installation Worksheets,” to record information relating to installation and connectivity tasks for DirectConnect. The worksheet covers the following:
• Information from products that must be installed before and after installing DirectConnect, both Sybase and non-Sybase
• Information that is requested during installation, connectivity setup, and configuration of DirectConnect access service configuration files
Perform special connectivity tasks for AS/400The DirectConnect product that accesses AS/400 is DirectConnect for DB2 UDB, which uses TCP/IP for connectivity. To set up the AS/400 to communicate with these DirectConnect products, you must perform the connectivity tasks described in the following sections.
Note SNA/APPC connectivity is no longer supported.
Set up the AS/400 to communicate with DirectConnect access services
To set up the AS/400 to communicate with the DirectConnect access service you create, you must perform the following tasks after logging on to the target AS/400 server as the System Administrator:
• Enable DRDA capability of AS/400
• Set security levels
• Change the CCSID
• Create the Sybase collection on the AS/400 (DC for DB2 UDB)
Note Use the F4 key to obtain a window in which you can enter commands.
Perform special connectivity tasks for AS/400
22 Enterprise Connect Data Access for Microsoft Windows
Enable DRDA capability of AS/400
To use an AS/400 service, you must enable the Distributed Relational Database Architecture (DRDA) capability of the AS/400. The service communicates with the AS/400 through a TCP/IP connection to DB2 UDB.
To confirm that your AS/400 has DRDA capability:
• Verify that you are using OS/400 V5R2 or higher.
• Be sure that you define the local relational database using the add relational database directory entry ADDRDBDIRE command.
Enter this name on the worksheet for the appropriate platform as the Database Name. The Database Name is requested during installation and is the DatabaseName property in the service library configuration file called dcany.cfg, which is located in the ServerName\cfg subdirectory.
Set security levels
The AS/400 has four security levels, each of which is described in the following table.
Note Sybase recommends that you use AS/400 security level 20 or higher.
Table 4-3: AS/400 security levels
The access service enforces security only through level 20. It returns an error only if the user ID and password do not exist on the AS/400.
Level Description
10 Requires only a user ID. If you enter a user ID that does not exist, AS/400 automatically creates it. You can access all system resources.
20 Requires a user ID and password. The user ID must already exist in AS/400.Once you sign on to AS/400, you have access to all system resources.
30 Requires a user ID and password and includes further measures to secure objects on the system. Objects are secured by a user’s class (*SECOFR, *SECADM, *PGMR, *SYSOPR, AND *USER) by default.
40 Requires a user ID and password, and includes further measures to secure objects on the system. Objects are secured by a user’s class (*SECOFR, *SECADM, *PGMR, *SYSOPR, AND *USER) by default. Unsupported interfaces cannot access the system.

CHAPTER 4 Getting Ready to Install
Installation Guide 23
Error messages relating to higher security levels on the AS/400 are returned from the AS/400. If your AS/400 security is set at a level higher than 20 and you experience problems with the access service, please have the designated person at your site contact Sybase Technical Support or the Sybase subsidiary in your area.
❖ To check the AS/400 security settings
1 Log on to the AS/400 at the main console, a 5250 terminal, or a 5250 terminal emulator.
2 At the Main menu, enter the following:
WRKSYSVAL QSECURITY
The Work With System Value window appears.
3 Enter the following to display your security settings:
DSPSYSVAL QSECURITY
❖ To change the security settings
1 Be sure you have System Security Officer (QSECOFR) authority.
2 From the Work with System Values menu, enter the following:
CHGSYSVAL QSECURITY
3 Enter the value.
4 Restart the AS/400 to make the change effective.
Change the CCSID
The CCSID (coded character set ID) designates the binary code page in which the AS/400 returns data. The default is 65535. If you do not change the CCSID, the access service returns character data from the AS/400 in binary form. When mapped to ASCII format, this data appears as hexadecimal characters.
Changing the CCSID does not affect how the AS/400 stores data. AS/400 programs set the CCSID to a value appropriate to its function. The DirectConnect access service does not require a specific CCSID. For English installations, use code page 37 or 500.
Changing the CCSID at the User Profile level
To change the CCSID at the user profile level, your user ID must have QSECOFR authority.

Perform special connectivity tasks for AS/400
24 Enterprise Connect Data Access for Microsoft Windows
❖ To change the CCSID at the user profile level
1 Log on to the AS/400 at the main console, a 5250 terminal, or a 5250 emulator.
2 To display the Work with User Profile window, enter the following:
WRKUSRPRF USER_ID
where USER_ID is a valid user ID for the AS/400 with QSECOFR authority.
3 Select option 2.
4 Press F10 to view additional parameters. Page down until you find the CCSID setting.
5 Change the CCSID and press Enter.
Any physical file that is created with this user profile has the new CCSID assigned to the file character fields.
Create the Sybase collection on the AS/400 (DC for DB2 UDB)
The access service requires certain files on the AS/400. DirectConnect for DB2 UDB access service looks for these files in a collection called “SYBASE.” You must create this collection and name it “SYBASE” before installing the access service.
Note The owner of the SYBASE collection must have QSECOFR privileges.
The SYBASE collection contains a package for the DC DB2 UDB driver that is created when the drivers are installed. Once you create the packages, you need to grant permissions to PUBLIC for the end users to access the Sybase collection located on the target AS/400. This can be done with isql (which comes with the DirectConnect installation), or directly on the AS/400 machine.
❖ To grant permissions from isql
• Issue the following command:
GRANT EXECUTE ON PACKAGE SYBASE.DEF000x TO PUBLIC
The DirectConnect service used to issue this command must be in sybase mode for SQL transformation (SQL transformation is an access service property with one of two settings, passthrough or sybase). To ensure this, enter the following command in the isql session before you issue the GRANT EXECUTE command:

CHAPTER 4 Getting Ready to Install
Installation Guide 25
set sqltransformation sybase
Because the AS/400 allows you to change security levels and ownership of objects, you can use another user ID to create the SYBASE collection. For example, you can use one ID to create the SYBASE collection, then grant other users create and execute authorization for the collection and its objects.
You can create the SYBASE collection in one of two ways:
• If you have DB2 (or DB2/400) Query Manager and SQL Development Kit (SDK) installed on the AS/400, you can run the SQL utility using a 5250 session.
• If not, you need to use the AS/400 SEU utility program to create the SYBASE collection.
❖ To grant permissions directly on the AS/400
1 Log on to the AS/400 at the main console, a 5250 terminal, or a 5250 terminal emulator, using the user ID that will be the owner of the SYBASE collection.
2 To display the Sybase packages, on the command line, enter:
WRKOBJOWN SYBASE
3 On the Work with Object by Owner window, locate and select a package from the attribute column and in the corresponding OPT column, enter the following:
2
4 On the Edit Object Authority window, in the User column, locate *PUBLIC, and in the corresponding Object Authority column, enter:
ALL
5 Press F12 to return to the Work with Object by Owner window, and repeat steps 2 and 3 until all packages are completed. To exit, press F3 repeatedly, followed by 90.
Creating the SYBASE collection through the AS/400 SEU utility
The user ID for creating the SYBASE collection must have a valid CCSID for your language installation. For more information, see "Change the CCSID" section.
❖ To create the SYBASE collection through the AS/400 SEU utility
1 Log on to the AS/400 at the main console, a 5250 terminal, or a 5250 terminal emulator, using the user ID that is to be the owner of the SYBASE collection.

Perform special connectivity tasks for AS/400
26 Enterprise Connect Data Access for Microsoft Windows
2 Start the SEU program by entering the following command:
STRSEU
3 Press F4 to display the Work With Members Using SEU window.
4 Provide the following information:
• In the Source File field, enter:
QQMQRYSRC
• In the Source Member field, enter:
*SELECT
• In the Library File field, enter:
QGPL
If the source file does not exist, you must create it using the CRTSRCPF command.
5 Press Enter to list the members of the source file.
6 Build the query that creates the collection by creating a source member for the query:
• In the New Member field, enter:
SYBASE
• In the Type for New Member field, enter:
TXT
7 Press Enter to display the Edit window.
8 Create the query member by entering the following in the first line of the source file:
CREATE COLLECTION SYBASE
9 Press F3, and verify that the Change/Create Member field is set to Y, and the Member field is SYBASE. Press Enter to exit the editor.
Now you can work with the query you created.
10 Press F3 to exit and return to the Main menu.
❖ To build the query that creates the SYBASE collection
1 Enter the following on the command line:
CRTQMQRY QMQRY(QGPL/SYBASE) SRCFILE(QGPL/QQMQRYSRC)

CHAPTER 4 Getting Ready to Install
Installation Guide 27
2 Press Enter. The AS/400 utility creates the query.
You might receive a warning message that the source length exceeds 79 characters. Disregard this message, as it does not affect the access service.
3 To run the query that creates the SYBASE collection, enter the following on the command line:
STRQMQRY QMQRY(QGPL/SYBASE)
4 Press Enter. The SYBASE collection is created.
Building the collection might take a few minutes. During this time, you will receive messages indicating the status of the operation.
Creating the SYBASE collection through DB2 or DB2/AS400 Query Manager and SDK
The user ID for creating the SYBASE collection must have a valid CCSID for your language installation. For more information, see "Change the CCSID" section in the Installation Guide.
❖ To create the SYBASE collection through SQL/400
1 Log on to the AS/400 at the main console, a 5250 terminal, or a 5250 terminal emulator, using the ID that you want to own the collection (usually SYBASE).
2 On the command line, enter:
STRSQL
3 On the SQL command line, enter:
CREATE COLLECTION SYBASE
The collection process requires a few minutes to complete. You can create other collections by using this same syntax and substituting the name of the collection for "SYBASE."
Authorizing users for the SYBASE collection
You must have the following minimum authorizations to access the AS/400 through the access service:
• USE authorization to the service package in the SYBASE collection
• CHANGE authorization to:
• Journal object QSQJRN
• Journal receivers QSQJRN0001, QSQJRN002, and any other additional journal receivers

Perform special connectivity tasks for AS/400
28 Enterprise Connect Data Access for Microsoft Windows
❖ To confirm that authorizations are set properly
1 Verify that the *SQLPKG objects in SYBASE are set to *PUBLIC, *USE, or higher authorization level.
2 Verify that the journal objects are set to *PUBLIC, *CHANGE, or higher authorization level.
Installation Guide 29
C H A P T E R 5 Installing DirectConnect
This chapter describes how to install DirectConnect, configure one or more data source names, create a server and services, and uninstall DirectConnect. It contains the following topics:
Note Installing DirectConnect for Oracle is described in Chapter 6, “Installing DirectConnect for Oracle.”
Installing DirectConnectThis section describes the steps to install DirectConnect:
• Pre-installation instructions
• Using InstallShield for installation
• Installing DirectConnect in GUI mode
• Configuring the data sources to connect to targets
• Creating a new DirectConnect server
• Creating a new DirectConnect access service
• Starting a DirectConnect access service
• Verifying a DirectConnect access service
• Stopping a DirectConnect access service
• Stopping a DirectConnect server
• Adding a new service to the sql.ini file
• Setting up service name redirection (optional)
Topic PageInstalling DirectConnect 29
Uninstalling DirectConnect 52

Installing DirectConnect
30 Enterprise Connect Data Access for Microsoft Windows
Pre-installation instructionsBefore you attempt to install DirectConnect, you must complete the following pre-installation tasks.
❖ To perform pre-installation tasks
1 Read Chapter 4, “Getting Ready to Install,” to identify the hardware and software requirements and to perform the identified critical administrative tasks.
2 Back up the system environment before starting the installation.
Note Recording your system variables is important if you are installing DirectConnect and other Sybase products on the same machine. You can use this information to restore the environment variables to their original values, after the installation, if you ever find it necessary.
3 Complete the installation worksheet for your platform in Appendix A, “Installation Worksheets.”
Using InstallShield for installationThis section describes how to install DirectConnect using InstallShield. These procedures assume that:
• The target computer meets the requirements outlined in Chapter 4, “Getting Ready to Install.”
• You have completed the list of tasks for DirectConnect in “Pre-installation instructions.”
The installation program creates the target directory (if necessary) and loads all of the selected components into that directory.
Installation options You have three options for installing Sybase components from the distribution media using the installation program:
• GUI (graphical user interface) mode, which allows you to install the components using the InstallShield interface.
• Console mode, which allows you to install components using a command line interface.
• Response file mode, which allows you to record or create a response file. Using a response file, you can install DirectConnect two different ways:

CHAPTER 5 Installing DirectConnect
Installation Guide 31
• Silent, which lets you install the product without any interaction required on your part. This is convenient if you are performing identical installations on multiple machines.
• Interactive installation using response file, which lets you install interactively, but with all the responses already filled in, so that you can accept or change the default values and install DirectConnect according to the responses in the response file. This can be convenient if several sites are installing DirectConnect and must conform to a standard installation.
Each of these options is described in the following sections.
Note Sybase recommends that you use the GUI mode for installing DirectConnect.
Installing DirectConnect in GUI modeThe following describes the DirectConnect installation process in GUI mode.
Note If you are only installing DirectConnect for Oracle, follow the instructions in Chapter 6, “Installing DirectConnect for Oracle.”
❖ To install in GUI mode
1 Verify that the drive on which you will install the products has enough free disk space for the products being installed, and at least 10MB extra disk space for the installation program. The program frees this extra space after the installation is complete.
2 Insert the Enterprise Connect Data Access (ECDA) CD-ROM into the CD-ROM drive.
InstallShield should start automatically. If it does not, select Start | Run, and enter the following, where x: is your CD drive:
x:\setupwin32.exe
The Welcome window appears. Click Next to proceed with the installation.
You may see the following error message:
Error writing file = There may not be enough

Installing DirectConnect
32 Enterprise Connect Data Access for Microsoft Windows
temporary disk space. Try using -is:tempdir to use a temporary directory on a partition with more disk space.
If so, set the temporary directory to another directory that has more disk space by entering the following at the command line:
x:\setupwin32.exe -is:tempdir <directory_name>
where directory_name is the name of the temporary directory to which the installation program will write its temporary files.
3 Read the License and Copyright Agreement. Using the drop-down list at the top of the window, select the geographic location where you are installing DirectConnect to display the agreement appropriate to your region. Select “I agree” and click Next.
You must agree to the license and copyright agreement before you can continue.
Note In certain cases when DirectConnect is installed with other Sybase products, you may see warnings about overwriting newer versions of files. In these cases, simply instruct the installer to overwrite these files and proceed with the installation by selecting Yes to All.
4 In the installation directory window, click Next to accept the default directory for the installation, or enter a different directory where you want to install DirectConnect. One of the following occurs:
• If the installation directory you chose does not exist, InstallShield prompts:
The directory does not exist. Do you want to create it?
Click Yes.
• If the installation directory exists and contains files, the software prompts:
You have chosen to install into an existing directory. Any older versions of the products you choose to install that are detected in this directory will be replaced.
Note You will not see this message if the directory exists but is empty.

CHAPTER 5 Installing DirectConnect
Installation Guide 33
If you are prompted to overwrite any DLLs, select Yes only if the version of the new DLL is later than the one you are attempting to overwrite.
5 Select one of the two installation types:
Note Sybase recommends that you select the Custom install.
• Full, which installs all DirectConnect products and components from the CD, including DirectConnect for Oracle.
• Custom, which allows you to select the DirectConnect options and components to install.
Click Next.
6 When you select Custom install, the next window displays all the ECDA options “unchecked” and all the components “checked” or selected. You must select at least one option from the following list and “uncheck” or deselect the components that you do not want to install:
• ECDA Option for DB2 UDB
• ECDA Option for Informix
• ECDA Option for Microsoft SQL Server
• ECDA Option for ODBC
• ECDA Option for Oracle
Note Be aware that if you deselect a component that is required, it is automatically installed if it is needed to run other selected components.
After you have selected the options and selected the desired components, click Next.
7 Before proceeding to the next window, InstallShield verifies the selections, and checks for dependencies and available disk space. The Product Summary window displays every component that is to be installed and the total disk space required for all the selected components.
Note If the target directory does not have enough free space, the space-required and the space-available information is displayed. If you click Next without sufficient hard disk space, an error occurs that stops the installation.

Installing DirectConnect
34 Enterprise Connect Data Access for Microsoft Windows
Verify that you have selected the correct type of installation, and that you have enough disk space to complete the process. Click Next to continue the installation.
8 The installation program unloads all the components from the CD and displays a progress indicator. When the installation is complete, a message appears indicating that the InstallShield wizard has completed installing your product. Click Next.
If your installation does not include DirectConnect for Oracle, proceed to the next step.
However, if you selected a Full install or a Custom install that includes DirectConnect for Oracle, the next window that appears will request whether you want to configure the DirectConnect for Oracle server.
• If you choose not to configure DirectConnect for Oracle at this time, uncheck the box and proceed to the next step.
• If you choose to configure DirectConnect for Oracle at this time, follow the instructions for configuring DirectConnect for Oracle starting with step 10, located in Chapter 6, “Installing DirectConnect for Oracle.”
9 A window displays a message indicating that the installation was successful and advising you to check for software updates. You are also advised to enter Software Asset Management Certificates by running the tool, C:\%SYBASE%\%SYSAM-1_0%\bin\lmgr. Click Finish to clear the window.
Installing DirectConnect in console modeIf you want to run the installer without the graphical user interface (GUI), you can launch InstallShield in console mode. In cases where InstallShield launches automatically, click Cancel to cancel the GUI installation and then launch the setup program from a terminal or console.
❖ To install in console mode
The steps for installing components in console mode are the same as those described in “Installing DirectConnect in GUI mode” on page 31, except that you execute the InstallShield installation program from the command line using the setup -console command, and you enter text to select the installation options, as follows:
1 Enter the following at the command line:
CHAPTER 5 Installing DirectConnect
Installation Guide 35
x:\setupwin32 -console
The installation program starts and displays a Welcome message.
2 The flow of the installation is identical to a regular GUI installation, except that the display is written to a terminal window, and you enter the responses using the keyboard. Follow the remaining prompts to install DirectConnect.
Installing using a response fileA silent installation (sometimes referred to as an unattended install) is done by running InstallShield and providing a response file that contains answers to all of InstallShield’s questions.
Creating a response file
There are two methods of generating a response file for InstallShield:
• Record mode: In this mode, InstallShield performs an installation of the product, and records all of your responses and selections in the specified response file. You must complete the installation to generate a response file. To create a response file, enter the following:
x:\setupwin32.exe -options-record <responseFileName>
Note There should be no space between -options and -record.
where responseFileName is a name you choose for the response file.
The following are the results:
• An installation of DirectConnect on your computer
• A response file containing all of your responses from the installation
If this response file is used for a silent installation, the resulting installation is identical to the one from which the response file was created: the same installation location, same feature selection, and all the same remaining information. The response file is a text file that you can edit to change any responses prior to using it in any subsequent installations.
Installing DirectConnect
36 Enterprise Connect Data Access for Microsoft Windows
• Template mode: In this mode, InstallShield creates a response file containing commented-out values for all required responses and selections. However, you do not need to install the product, and you can cancel the installation after the response file has been created. To create this template file, enter the following:
x:\setupwin32Console.exe -console -options-template <responseFileName>
where responseFileName is the absolute file name you chose for the response file, for example:
C:\DC\OptionsTemplate.txt
Note In this example the directory C:\DC must already exist.
If run in console mode, as shown in the previous example, InstallShield provides a message indicating that the template creation was successful. If run in GUI mode, no message is provided.
Then, if you use this response file for a silent installation, the default values for all responses are used. Edit the template with the values you want to use during installation.
Warning! If you created a response file using a Custom installation, you need to edit the response file to allow the custom selections to be chosen correctly during installation. The following is a workaround for an installer issue when using a response file.
Use a text editor and delete the word "Custom" in the setup type in the following line
-W setupTypes.selectedSetupTypeId=Custom
The resultant line should look similar to the following:
-W setupTypes.selectedSetupTypeId=
Failure to delete the “Custom” setup type results in a Full installation of the product.
Interactive installation using a response file An interactiveinstallation using a response file allows you to accept the default valuesobtained from the response file that you have set up, or to change any of thosevalues for the specific installation. This is useful when you want multiple similar installations but with some minor differences that you want to change at installation time.

CHAPTER 5 Installing DirectConnect
Installation Guide 37
At the command line, execute the following command (enter the command all on one line):
x:\setupwin32.exe -console -options <responseFileName> -W SybaseLicense.agreeToLicense=True
Installing in silent mode A silent mode installation, sometimes referred toas an unattended installation, allows you to install the product with all responses being taken from the response file that you have set up. There is no user interaction. This is useful when you want multiple identical installations or when you want to automate the installation process.
At the command line, execute the following command (enter the command all on one line):
Note Enter the command all on one line.
x.\setupwin32Console.exe -silent -options <responseFileName> -W SybaseLicense.agreeToLicense=true
where responseFileName is the name of the file containing the installation options you chose. The -W option specifies that you agree with the Sybase License Agreement text.
Warning! Sybase recommends that you use the setupwin32Console.exe executable which runs in the foreground, when running a silent installation. The normal setupwin32.exe executable runs in the background, giving you the false impression that the installation has terminated immediately, without a completion status. This could result in duplicate installation attempts.
Except for the absence of the GUI screens, all actions of InstallShield are the same, and the result of an installation in silent mode is exactly the same as one done in GUI mode with the same responses.
Configuring the data sources to connect to targetsYou must create and configure the data source name (DSN) for each DirectConnect component to connect to the following targets:
• DirectConnect for DB2 UDB
• DirectConnect for Informix

Installing DirectConnect
38 Enterprise Connect Data Access for Microsoft Windows
• DirectConnect for Microsoft SQL Server
• DirectConnect for ODBC
Note For DirectConnect for Oracle, refer to Chapter 6, “Installing DirectConnect for Oracle.”
To configure the data sources to connect to the targets
Note DirectConnect 12.6 requires the most current MDAC. For earlier versions, MDAC must be upgraded on the machine that is running Microsoft SQL Server. This machine may or may not be the machine that is running Direct Connect.
❖ To install MDAC
• Go to the following location and follow Microsoft’s instructions for installation for the latest MDAC version at http://www.microsoft.com.
After installing MDAC, you must configure the DSN for each DirectConnect product that is described in the following sections.
For DirectConnect for DB2 UDB
❖ To add and configure a new data source name (DSN) for a DRDA service
1 From your control panel, click on the ODBC Administrator icon to start it.
2 Select the User DSN or System DSN (recommended) and click Add.
3 Select the DirectConnect DB2 DRDA driver for your installation.
4 Click Finish.
The ODBC Administrator provides three dialog boxes in which connectivity, package binding, and other options take place. Each section has a Help button, which provides detailed descriptions of each parameter.
❖ To configure a data source
1 Select the General tab and enter the connectivity parameters and test them. Be sure you have consulted your database administrator for the Collection and Package names that are required. (Packages are created in the Bind section that follows.)

CHAPTER 5 Installing DirectConnect
Installation Guide 39
The following table contains the General parameters, with the required parameters indicated by an asterisk (*), for this window:
Table 5-1: General parameters
Parameter Comments
*Data Source Name Type a string that identifies this DB2 data source configuration in the system information. If you are creating a new data source definition, type a unique name of up to 32 characters. If you specify the name of an existing data source definition, the new settings will replace the existing ones.
Description Type an optional descriptive comment for this data source definition.
*Ip address Type the IP (Internet Protocol) address of the machine where the catalog tables are stored. Specify the address using the machine's numeric address (for example, 123.456.78.90) or specify its host name. If you enter a host name, the driver must find this name (with the correct address assignment) in the HOSTS file on the workstation or in a DSN server.
*TCP Port Enter the port number that is assigned to the DB2 server on the machine where the catalog tables are stored. Specify either this port's numeric address or its service name. The default numeric port address varies depending on the OS of the DB2 server machine. For DB2, the default may be 50000. For AS/400, the default is 446.
If you specify a service name, the driver must find this name (with the correct port assignment) in the SERVICES file on the workstation.
*Location Name This field is valid only if you are connecting to a DB2 database running on OS/390 or AS/400. Type the DB2 location name, using the name defined during the local DB2 installation.
Note This field is disabled if the Database Name field is populated.
*Collection This field is valid only if you are connecting to a DB2 database running on OS/390 or AS/400. Type the name that identifies a group of packages. These packages include the DirectConnect DB2 DRDA driver packages. The default for DB2 is DATADIRECT00, and the default for AS/400 is SYBASE.
Note This field is disabled if the Database Name field is populated.
*Database Name This field is valid only if you are connecting to a DB2 database running on Windows. Type the name of the database to which you want to connect.
Note This field is disabled if the Location Name field is populated.
*Package Enter the name of the package that the driver uses to process static and dynamic SQL for applications that use this data source definition. The default name is DEFxx, where xx is the version number.
Default User ID Not used by DirectConnect.

Installing DirectConnect
40 Enterprise Connect Data Access for Microsoft Windows
2 After you enter this information, click Test Connect. If the connection fails, check your worksheet for accurate information.
3 Select the ODBC Administrator Advanced tab, which contains optional fields that can affect performance and resource use.
Note The default values for the remaining optional parameters should be sufficient for most DirectConnect for DRDA installations.
Enter values for the required parameters, indicated by an asterisk (*).
Table 5-2: Advanced parameters
4 Select the Bind tab of the DirectConnect DB2 DRDA Driver Setup window to define the package.
The Bind tab allows you to create the bind packages on the server that will be used by the driver. The Bind tab also allows you to specify the behavior of the package.
WorkArounds2 The name of the string key to allow the driver to pad the DB2 char for bit data field with spaces. The value is 131072. To add theWorkArounds2 string key, refer to the procedure “To add the WorkArounds2 String Key” on page 42.
Parameter Comments
Parameter Comments
Add to Create Table Use the Add to Create Table option if you want to append the in tablespace clause to create table commands.
Alternate ID Enter a value to be substituted at connect time for the current schema. This sets the default qualifier for unqualified object names in SQL statements. If the attempt to change the current schema fails, the connection fails with "Invalid value for Alternate ID." DB2 permissions should be set to SYSADM. (Not valid for AS/400 V4R5 and V5R1.)
*WithHold Cursors This option needs to be selected for DirectConnect. It determines whether cursors are preserved or deleted after a commit or rollback.
*Application Using Threads
This option is required for DirectConnect.

CHAPTER 5 Installing DirectConnect
Installation Guide 41
Before the DRDA driver can be used, you must create the required packages and bind them to the DB2 system. The driver will not work properly with any server that does not have the packages created. After the packages are created, you can rebind them with new bind parameters as needed.
Note Please consult your DB2 database administrator when attempting to create packages. You will need a login with sufficient authorization to create packages and grant execution privileges. DB2 database administration experience may also be needed to capture and analyze package creation errors.
Enter values for the required parameters, indicated by an asterisk (*). The default values for the remaining optional parameters should be sufficient for most DirectConnect for DRDA installations.
Table 5-3: Bind parameters
Parameters Comments
*Grant Execute Indicate whether or not to grant privileges on the package that you are creating. The default value is grant execute privileges on the package to PUBLIC. You can also specify to whom to grant execute privileges.
*Isolation Level Select the Isolation Level method by which locks are acquired and released by the system. Valid values are:
• All – prevents any other process from accessing data that your application has read or modified. All read or modified data is locked until the end of the transaction.
• Change – allows other processes to read from the database. Only modified data is locked until the end of the transaction
• Cursor Stability (the default) – allows other processes to change a row that your application has read if the cursor is not on the row you want to change. Prevents other processes from changing records that your application has changed until your program commits them or terminates. Prevents your program from reading a modified record that has not been committed by another process.
• No Commit – allows your program to read modified records even if they have not been committed by another person.
• Repeatable Read – prevents other processes from changing records that are read or changed by your application (including phantom records) until your program commits them or terminates. Prevents the application from reading modified records that have not been committed by another process. If your program opens the same query during a single unit of work under this isolation level, the results table will be identical to the previous table; however, it can contain updates made by your program.

Installing DirectConnect
42 Enterprise Connect Data Access for Microsoft Windows
5 Create a package.
When you click Create Package, a logon window appears. Enter your user ID and password. Then, click Login.
A message appears if the package is created successfully.
A separate package is not needed for each DirectConnect for DRDA access service; however, if the access service has different characteristics in its parameters that suit it for a specific solution, you can create other packages for other solutions.
Add the WorkArounds2 String Key to pad DB2 character data
For DirectConnect for DB2 only, you need to verify that a special string key is defined in the Windows Registry to allow the driver to pad DB2 char for bit data fields with spaces, instead of binary zeros.
Warning! Be cautious when using regedit.exe or regedt32.exe, you can disable your machine. Make a backup of your registry before making any changes.
❖ To add the WorkArounds2 String Key
1 Using the Windows Registry editor (regedit.exe or regedt32.exe), open one of the following sections in the Registry:
• For User DSN:HKEY_CURRENT_USER \SOFTWARE\ODBC\ODBC.INI
• For System DSN:HKEY_LOCAL_MACHINE\SOFTWARE\ODBC\ODBC.INI
In this section, locate an entry for the DSN you created.
2 If the WorkArounds2 string key is not there, select Edit | New | String Value from the Edit menu, to add a String Value named WorkArounds2 (case sensitive). After it has been created, modify the new entity and give it a value of 131072.
*Package Owner Type the AuthID assigned to the package. This DB2 AuthID must have authority to execute all the SQL in the package
*Dynamic Sections Type the number of statements that the DB2 Wire Protocol driver package can prepare for a single user. The default is 32. This value determines the maximum cursors or dynamic statements that a single connection may have open simultaneously.
Parameters Comments

CHAPTER 5 Installing DirectConnect
Installation Guide 43
3 Click OK.
Repeat this process for each DB2 UDB DSN that you are going to use with DirectConnect.
For DirectConnect for Informix (wire protocol driver)
❖ To configure a data source to the ODBC Informix driver
1 Select the General tab and enter the required information (*) for the parameters for this window, as described in the following table:
Table 5-4: Description of General parameters
2 Click Apply. At this point, you can click Test Connect. If the connection fails, check your connectivity parameters for accuracy.
3 Click the Advanced tab to display the Advanced Driver Settings dialog box, where you can configure additional, optional settings for the data source.
4 Specify values for the Application Using Threads to On.
See “Descriptions of data source parameters” on page 44 for detailed descriptions of the parameters.
5 Click OK to make the values you entered become the defaults when you connect to the data source. To change these defaults, use this procedure to reconfigure the data source.
Parameter Description
*Data Source Name String that identifies this Informix data source configuration in the system information. Examples include “dcinfx.”
Description An optional description of a data source name.
*Host Name Name of the machine on which the Informix server resides.
*Port Number Port number of the server listener.
*Server Name Name of the Informix server as it appears on the sqlhost file.
*Database Name Name of the database to which you want to connect by default.
User Name User name as specified on the Informix server.
WorkArounds (optional)
Name of the WorkArounds string key to support DirectConnect bulk transfers. The value is 536870912. To add the WorkArounds string key, refer to “To add the WorkArounds String Key” on page 44.

Installing DirectConnect
44 Enterprise Connect Data Access for Microsoft Windows
Descriptions of data source parameters
The following table provides descriptions of parameters that you can provide in the ODBC Administrator windows. The required parameters are identified by an (*).
Table 5-5: Descriptions of data source parameters
Add the WorkArounds String Key to support bulk transfers (optional)
For DirectConnect for Informix only, you need to verify that a special string key is defined in the Windows Registry, to allow the driver to support DirectConnect bulk transfers.
Warning! Be cautious when using regedit.exe or regedt32.exe, you can disable your machine. Make a backup of your Registry before making any changes.
❖ To add the WorkArounds String Key
1 Using the Windows Registry editor (regedit.exe or regedt32.exe), open one of the following sections in the Registry:
• For User DSN:HKEY_CURRENT_USER \SOFTWARE\ODBC\ODBC.INI
• For System DSN:HKEY_LOCAL_MACHINE\SOFTWARE\ODBC\ODBC.INI
In this section, locate an entry for the DSN you created.
Parameter Description
Cancel Detect Interval Allows you to cancel long-running queries in threaded applications. Select a value to determine how often the driver checks to sees whether a request has been canceled using SQLCancel. For example, if DCI=5, for every pending request, the driver checks every five seconds to see whether the user has canceled execution of the query using SQL Cancel. Default is 0, which means that requests are not canceled until the request has completed execution.
*Application Using Threads Select this check box to ensure that the driver works with multi-threaded applications. You can clear this check box when using the driver with single-threaded applications. Clearing this check box avoids the additional processing required for ODBC thread-safety standards. Always activate this check box with DirectConnect.
Trim Blank from Index Name Specifies whether the leading space should be trimmed from a system-generated index name. When checked (the default), the driver trims the leading space.
Translate When clicked, displays the Select Translator dialog box, which lists the translators specified in the ODBC Translators section of the system information. OEM to ANSI translates your data from the IBM PC character set to the ANSI character set.

CHAPTER 5 Installing DirectConnect
Installation Guide 45
2 If the WorkArounds string key is not there, select Edit | New | String Value from the Edit menu, to add a String Value named WorkArounds (case sensitive). After it has been created, modify the new entity and give it a value of 536870912.
3 Click OK.
Repeat this process for each Informix DSN that you are going to use with DirectConnect.
For DirectConnect for Microsoft SQL Server
At this time, you need to install the Microsoft Data Access Component (MDAC). The MDAC contains required ODBC components, such as the ODBC driver manager and the ODBC Administrator, as well as OLE/DB, used by Microsoft SQL Server 2000.
Creating and configuring a data source
To create a new Microsoft SQL Server data source or configure an existing data source, use the ODBC Administrator, which contains several setup boxes.
❖ To access the Driver Setup dialog boxes
1 From your control panel, click on the ODBC Administrator icon to start it.
2 Select the System DSN (recommended) or the User DSN and do one of the following:
• If you are configuring a new data source, click Add. (New DSNs are required for releases that contain driver updates.)
• If you are configuring an existing data source, select the data source name and click Configure.
3 Select the DirectConnect SQL Server wire protocol driver.
4 Click Finish.
The DirectConnect SQL Server wire protocol driver provides several dialog boxes where connectivity and other options take place.
❖ To configure a data source to the SQL Server
1 Click the General parameters tab and enter values for the required parameters, indicated by an asterisk (*).
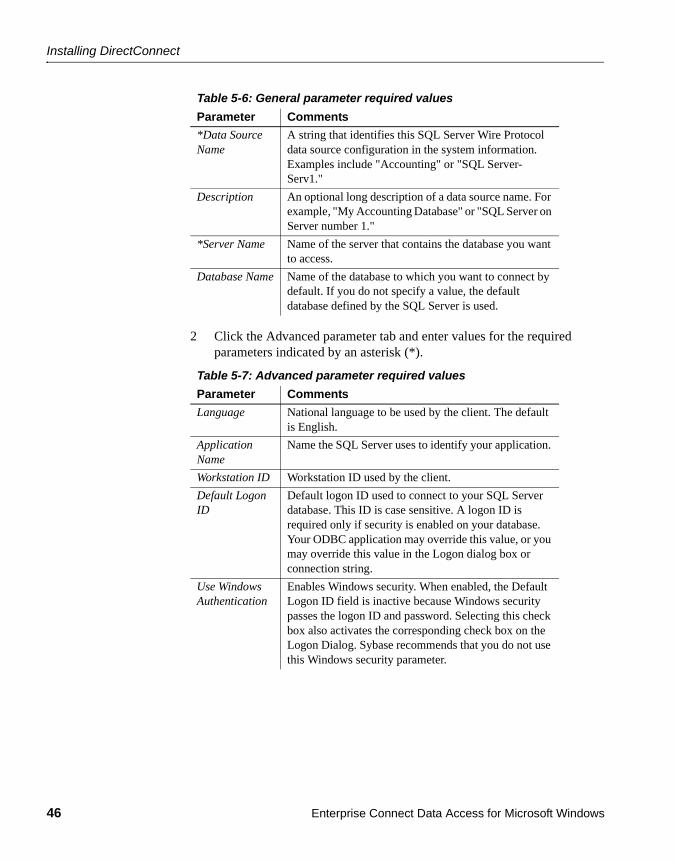
Installing DirectConnect
46 Enterprise Connect Data Access for Microsoft Windows
Table 5-6: General parameter required values
2 Click the Advanced parameter tab and enter values for the required parameters indicated by an asterisk (*).
Table 5-7: Advanced parameter required values
Parameter Comments
*Data Source Name
A string that identifies this SQL Server Wire Protocol data source configuration in the system information. Examples include "Accounting" or "SQL Server-Serv1."
Description An optional long description of a data source name. For example, "My Accounting Database" or "SQL Server on Server number 1."
*Server Name Name of the server that contains the database you want to access.
Database Name Name of the database to which you want to connect by default. If you do not specify a value, the default database defined by the SQL Server is used.
Parameter Comments
Language National language to be used by the client. The default is English.
Application Name
Name the SQL Server uses to identify your application.
Workstation ID Workstation ID used by the client.
Default Logon ID
Default logon ID used to connect to your SQL Server database. This ID is case sensitive. A logon ID is required only if security is enabled on your database. Your ODBC application may override this value, or you may override this value in the Logon dialog box or connection string.
Use Windows Authentication
Enables Windows security. When enabled, the Default Logon ID field is inactive because Windows security passes the logon ID and password. Selecting this check box also activates the corresponding check box on the Logon Dialog. Sybase recommends that you do not use this Windows security parameter.

CHAPTER 5 Installing DirectConnect
Installation Guide 47
3 After you enter this information, click Test Connect. If the connection fails, check your worksheet for accurate information.
4 If the test connection is successful, click Apply and then click OK.
For DirectConnect for ODBC
❖ To set up connectivity to the target
1 From your control panel, access your ODBC Administrator.
2 Enter information in the fields that can affect performance and resource use. For more information, see vendor documentation for your ODBC driver.
To test connections
Refer to vendor documentation for testing connections or use the odbc tool that is described in Chapter 10, “Troubleshooting.” The Sybase odbc tool verifies that your system is configured correctly by attempting to make a simple connection to the target.
*Enable Quoted Identifiers
Allows quoted identifiers; that is, identifiers in SQL Server that you can quote using a quoting character. By default, the check box is not selected.
Note Select only if using ASE/CIS client version 12.5.0.3 and later. These later versions of ASE/CIS send quoted identifiers to Microsoft SQL Server.
Translate Allows you to display the Select Translator dialog box, which lists the translators specified in the ODBC Translators section of the system information. DataDirect provides a translator named “OEM to ANSI” that translates your data from the IBM PC character set to the ANSI character set. Select a translator; then click OK to close this dialog box and perform the translation.
Parameter Comments

Installing DirectConnect
48 Enterprise Connect Data Access for Microsoft Windows
Creating a new DirectConnect serverAt this point, InstallShield has automatically created the subdirectories and files needed for DirectConnect. Now, you must perform a number of tasks to create a new server and access services.The first step is to create a new server by running the utility AddServer.bat from %SYBASE%\%DC-12_6%\bin using the syntax in the following example:
cd %SYBASE%\DC-12_6\binAddServer srvname 1234
where:
• srvname is the name of the new server.
• 1234 is the port that it will listen on.
• AddServer is the utility that will:
• Set the environment
• Create the server
• Start the server
Note You must be in the %SYBASE%\%SYBASE_ECON%\bin directory for this batch file to work properly.
Creating a new DirectConnect access serviceYou create DirectConnect access services by editing the service library configuration file in one of two ways:
• Using DirectConnect Manager
• Using a text editor
Using DirectConnect Manager
You can use DirectConnect Manager to configure, start, and stop DirectConnect servers and access services. For instructions on how to use DirectConnect Manager, refer to Chapter 7, “Installing DirectConnect Manager.”

CHAPTER 5 Installing DirectConnect
Installation Guide 49
Using a text editor
You can use a text editor to configure the access service library configuration files, which reside in the cfg subdirectory under the ServerName directory.
❖ To configure the access service using a text editor
1 Navigate to the %SYBASE%\%SYBASE_ECON%\svrname\cfg subdirectory of the ServerName directory.
2 At the end of the configuration file, enter a name for the access service in brackets, for example, for Microsoft SQL Server:
[mss_acs]
3 Enter the required parameters and their values from your worksheet, as well as other values for parameters you might need.
For more information about access service configuration properties, see the Enterprise Connect Data Access Options User’s Guide for Access Services.
Starting a DirectConnect access serviceThe only way you can start the new access service without stopping and restarting DirectConnect is by using DirectConnect Manager.
To start your new service without using DirectConnect Manager, be sure that the EnableAtStartup=Yes property is set in the service configuration (.cfg) file, which starts the service automatically when the server is started, and then restart the server.
Verifying a DirectConnect access serviceVerify that the access service is connecting to its target data source and working properly by using one of the SQL utilities.
Using isql from a command line
Note If you are using isql on the same machine on which you installed DirectConnect, you must add a access service entry to the sql.ini file that points to the access service you are testing.

Installing DirectConnect
50 Enterprise Connect Data Access for Microsoft Windows
❖ To verify the access service configuration using isql
1 On the client machine, use dsedit to create a sql.ini file entry for the access service.
Be sure to enter the access service name exactly as you defined it in the configuration file or using DirectConnect Manager.
2 Set the environment variables from a command line prompt by running one of the following environment scripts, as appropriate for your platform:
DC_SYBASE.bat
3 Run isql from the command line by entering the following:
isql -SServiceName -Uuserid -Ppassword
where:
• ServiceName is the name of the access service exactly as you defined it in the sql.ini file.
• userid is a valid user ID for the target database.
• password is a valid password for the user ID in the target database.
If the connection is successful, a 1> prompt appears.
Note If you cannot connect, the access service might not be running. Start the access service with DirectConnect Manager or edit the configuration file, and then verify that the Enable at Startup parameter is set to Yes. This starts the access service automatically when the server is started.
4 At the 1> prompt, query a table in the target database by entering a select statement and pressing Return.
5 At the 2> prompt, enter:
go
Press Return.
The query should run and return a result set, followed by a >1 prompt.
6 To exit isql, enter the following at the 1> prompt:
exit
Press Return.

CHAPTER 5 Installing DirectConnect
Installation Guide 51
A regular operating system command appears.
Note At this point, you can stop the DirectConnect server using the stopsvr utility, which shuts down the server and terminates all client connections. However, if you plan to perform post-installation tasks for the client and server, leave both the DirectConnect access service and server up and running.
Stopping a DirectConnect access serviceYou can stop the access service only through DirectConnect Manager. The procedure is described in Chapter 7, “Installing DirectConnect Manager.”
Stopping a DirectConnect serverAt this point, you can stop the DirectConnect server using the stopsrvr utility, which shuts down the server and ends all client connections.
Set the environment variables from a command line prompt by running one of the following environment scripts, as appropriate for your platform:
DC_SYBASE.bat
The stopsrvr format is as follows:
stopsrvr [-v|-?|-h] -Sserver_name [-ddelay]
where:
• -v displays the program version only.
• -? or -h displays help screen.
• -S defines the name of the server to be shut down.
• -d is the delay, in seconds, before client connections are terminated. The default is 3.

Uninstalling DirectConnect
52 Enterprise Connect Data Access for Microsoft Windows
Adding a new service to the sql.ini fileUse the dsedit utility to allow an Open Client application, such as isql, to connect to the Open Client installation that will be used by your client application. Add the new service to the sql.ini file as a Server Object using the dsedit utility, specifying the same connectivity information for this Server Object as specified in the sql.ini file for the DirectConnect server.
Setting up service name redirection (optional)If you intend to use the service name redirection feature, you must modify the snrf.tbl default file or create a new redirection file. The file is located in the %SYBASE%\%SYBASE_ECON%\(ServerName)\cfg directory. Or, you can use DirectConnect Manager to modify the file.
You must also define the configuration property called ServiceRedirectionFile=snrf.tbl that is in the server.cfg file, in the Client Interaction section. If the snrf.tbl file is not identified, then service name redirection is disabled.
For directions on setting up and using service name redirection, see the DirectConnect Server Administration Guide.
Uninstalling DirectConnectTo uninstall a DirectConnect installation, use the InstallShield uninstall feature. This removes all servers, all common files, and all required components. After the uninstall runs, you may need to delete any remaining files and directories in the directory where DirectConnect was installed.
Note You may need to stop the SySAM daemon first; otherwise, you will not be able to delete certain files and directories. Also, before uninstalling Sybase software, shut down all Sybase applications and processes.
You can invoke the uninstall procedure using either the GUI or the console method. Sybase recommends that you use the GUI method.
Log in to your machine using an account with “administrator” privileges, then shut down all other processes for the components you are uninstalling.
CHAPTER 5 Installing DirectConnect
Installation Guide 53
❖ To uninstall in GUI mode
1 Enter one of the following:
• Using Windows explorer:
a Go to the directory where your application is installed.
b Select the uninstall directory.
c Select the application you want to uninstall.
d Double-click the uninstall icon. The wizard appears.
• Using the Add/Remove program:
a Go to Start | Setting | Control panel | Add/Remove Programs dialog box
b Select the application you want to remove.
c Click on Change/Remove. The wizard appears.
2 The Welcome window appears.
3 Click Next to display the list of selected products and components that were installed.
4 All the products and components that were installed are displayed and already checked to allow you to remove the total installation. If you do not want to remove a product or component, deselect or “uncheck” that product or component. Click Next.
5 A summary of all the products and components is displayed. Click Next.
6 A message indicating that an uninstall of z/OS is in progress. When this is completed, a message is displayed indicating a successful uninstall. Click Next to end the uninstall.
❖ To uninstall in console mode
1 Go to the %SYBASE% directory, enter the following:
%SYBASE%\uninstall.exe -console
The uninstall program starts.
2 Choose the DirectConnect software product you want to uninstall.
The DirectConnect software product you chose is uninstalled.

Uninstalling DirectConnect
54 Enterprise Connect Data Access for Microsoft Windows
Installation Guide 55
C H A P T E R 6 Installing DirectConnect for Oracle
This chapter explains how to install DirectConnect for Oracle using InstallShield. For a detailed reference on configuration, refer to the Enterprise Connect Data Access Option for Oracle Server Administration and User’s Guide.
This chapter contains the following topics:
Introducing DirectConnect for OracleDirectConnect for Oracle provides Open Client access to Oracle databases. It operates in conjunction with the Adaptive Server Enterprise Component Integration Services feature (ASE/CIS) and as a standalone gateway. This combination offers clients a Transact-SQL® interface to external Oracle data.
When used with Adaptive Server, DirectConnect for Oracle transforms the Transact-SQL generated by Adaptive Server to Oracle's native SQL. DirectConnect for Oracle also handles datatype mapping between Sybase datatypes and Oracle datatypes. DirectConnect for Oracle provides many of the features of a distributed database system when used in combination with Adaptive Server. This combination allows location transparency, distributed query optimization, copy transparency, transaction transparency, and distributed joins.
Topic PageIntroducing DirectConnect for Oracle 55
Getting ready to install DirectConnect for Oracle 56
Installing DirectConnect for Oracle 59
Configuring DirectConnect for Oracle 66
After installation 67
Uninstalling DirectConnect for Oracle 68
Getting ready to install DirectConnect for Oracle
56 Enterprise Connect Data Access for Microsoft Windows
Using Adaptive Server, you can join Oracle tables with tables in Adaptive Server, DB2 UDB, or other database servers. Access to these objects through Adaptive Server is transparent to the application.
In standalone mode, DirectConnect for Oracle provides client applications with an Open Client interface to Oracle databases. To the client, DirectConnect for Oracle appears as an Open Server application that understands Oracle SQL.
Getting ready to install DirectConnect for OracleThis section contains the necessary background to prepare for installing DirectConnect for Oracle. It includes the following sections:
• Hardware and software requirements
• Disk requirements
• Oracle requirements
Hardware and software requirementsThe following hardware and software configurations are compatible with DirectConnect for Oracle version 12.6.
Table 6-1: Hardware and software requirements
Disk requirementsDirectConnect for Oracle requires approximately 377MB of disk space, depending on the platform.
Hardware Software
PC 512MB RAM Windows 2000 service pack 4, and Windows 2003

CHAPTER 6 Installing DirectConnect for Oracle
Installation Guide 57
Oracle requirementsUnlike previous versions of DirectConnect for Oracle, version 12.6 is already linked with the Oracle libraries. Therefore, it does not require any Oracle software on the machine where it is installed. However, there must be a tnsnames.ora file accessible to DirectConnect for Oracle.
The tnsnames.ora file is an Oracle connectivity file for all Oracle version 9.0.1 products. You can obtain it from the Oracle administrator for the database that you are connecting to. This file needs to be copied to a temporary location, so that it is available if you want to configure at installation time.
Installing DirectConnectThis section describes how to install DirectConnect using InstallShield:
• Pre-installation instructions
• Using InstallShield for installation
• Installing DirectConnect for Oracle
Pre-installation instructionsBefore you attempt to install DirectConnect, you must complete the following pre-installation tasks.
❖ To prepare for installation
1 Back up the system environment before starting the installation.
Note Be sure to make a copy of your environment if you are installing DirectConnect and other Sybase products on the same machine. You can use this saved copy to restore the environment variables to their original values, if needed.
2 Complete the installation worksheet for your platform in Appendix A, “Installation Worksheets.”
3 (Optional) Set the environment variable %SYBASE% to point to the desired location where DirectConnect will be installed.
Installing DirectConnect
58 Enterprise Connect Data Access for Microsoft Windows
Using InstallShield for installationThis section describes how to install DirectConnect using InstallShield. These procedures assume that:
• The target computer meets the hardware and software requirements.
• You have completed the list of tasks for DirectConnect in “Pre-installation instructions.”
The installation program creates the target directory (if necessary) and loads all the selected components into that directory.
Installation options You have three options for installing Sybase components from the distribution media using the installation program:
• GUI (graphical user interface) mode, which allows you to install the components using the InstallShield interface.
• Console mode, which allows you to install components in a command line environment.
• Response file, which allows you to record or create a response file. Using a response file, you can install DirectConnect two different ways:
• Silent, which lets you install the product without any interaction required on your part. This is convenient if you are performing identical installations on multiple machines.
• Interactive, which lets you install interactively but with all the responses already filled in, so that you can accept all the default values and install DirectConnect according to the responses in the response file. This can be convenient if several sites are installing DirectConnect and must conform to a standard installation.
Each of these options is described in the following sections.
Note If you encounter problems during installation, check the installation log file to see a record of the installation process. The file is located in %SYBASE%\log.txt, where %SYBASE% is the DirectConnect installation directory.

CHAPTER 6 Installing DirectConnect for Oracle
Installation Guide 59
Installing DirectConnect for OracleThis section describes how to use InstallShield to install DirectConnect for Oracle.
Note Sybase recommends that you use the GUI mode for installing DirectConnect for Oracle.
Installing in GUI mode
Note When installing on Windows, Sybase recommends that you exit all programs before running the InstallShield program.
❖ To install DirectConnect
1 Verify that the drive on which you install the products has enough free disk space for the products being installed, and at least 10MB extra disk space in your default temporary directory for the installation program. The program frees this space after the installation is complete.
2 Insert the Enterprise Connect Data Access (ECDA) CD-ROM into the CD-ROM drive.
InstallShield should start automatically. If it does not, select Start | Run, and enter the following, where x: is your CD drive:
x:\setupwin32.exe
The Welcome window appears. Click Next to proceed with the installation.
You might see the following error message:
Error writing file = There may not be enough temporary disk space. Try using -is:tempdir to use a temporary directory on a partition with more disk space.
If so, set the temporary directory to another directory that has more disk space by entering the following at the command line:
x:\setupwin32.exe -is:tempdir <directory_name>
where directory_name is the name of the temporary directory to which the installation program will write its temporary files.
Installing DirectConnect
60 Enterprise Connect Data Access for Microsoft Windows
3 Read the License and Copyright Agreement. Using the drop-down list at the top of the window, select the geographic location where you are installing to display the agreement appropriate to your region. Select “I agree” and click Next.
You must agree to the license and copyright agreement before you can continue.
Note In certain cases when DirectConnect is installed with other Sybase products, you may see warnings about overwriting newer versions of files. In these cases, simply instruct the installer to overwrite these files and proceed with the installation.
4 In the installation directory window, click Next to accept the default directory for the installation, or enter a different directory where you want to install DirectConnect. One of the following occurs:
• If the installation directory you chose does not exist, InstallShield prompts:
The directory does not exist. Do you want to create it?
Click Yes.
• If the installation directory exists, the software prompts:
You have chosen to install into an existing directory. Any older versions of the products you choose to install that are detected in this directory will be replaced.
If you are prompted to overwrite any files, select Yes only if the version of the new file is later than the one it is attempting to overwrite.
5 Select one of the two installation types:
Note Sybase recommends that you use the Custom install and select ECDA for Oracle from the options list.
• Full, which installs all DirectConnect products and components from the CD. The components that will be installed, and the total disk space required is displayed prior to installation.
• Custom, which allows you to select the product and components for DirectConnect to install. Select the ECDA Option for Oracle.

CHAPTER 6 Installing DirectConnect for Oracle
Installation Guide 61
Click next.
6 When you select Custom install, the next window displays all the ECDA options “unchecked” and all the components “checked” or selected. You must select ECDA for Oracle Option and “uncheck” or deselect the components that you do not want installed.
Note Be aware that if you deselect a component that is required, it is automatically installed if it is needed to run other selected components.
After you have selected the desired components, click Next.
7 Before proceeding to the next window, InstallShield verifies the selections, and checks for dependencies and available disk space. The Product Summary window displays every component that is to be installed and the total disk space required for all the selected components.
Note If the target directory does not have enough free space, the space-required and the space-available information is displayed. If you click Next without sufficient hard disk space, an error occurs that stops the installation.
8 Verify that you have selected the correct type of installation, and that you have enough disk space to complete the process. Click Next to continue the installation.
9 The installation program unloads all the components from the CD and displays a progress indicator. When the installation is complete, a message appears indicating that the InstallShield wizard has completed installing your product. Click Next.
10 Do one of the following:
• If you choose to configure the Enterprise Connect Data Access Options listed, select the servers you want to configure and click Next. Proceed to step 13.
• If you do not choose to configure the servers, deselect all servers, click Next, and proceed to step 14.
Note If you are not configuring at this time, you can use DCOConfig after the completion of the installation.
11 Enter the following options in the configuration window:

Installing DirectConnect
62 Enterprise Connect Data Access for Microsoft Windows
• Servername – the name of the server in the sql.ini file.
• Port number – an unused port number that the server will use.
• DCO Admin Account name – the name of a valid Oracle account that will be used to administer the DirectConnect for Oracle. It is usually the SYSTEM account.
• Oracle Password for DCO Admin Acct – the password for the account named previously to administer the DirectConnect for Oracle server. The password is not written into any configuration file, but it will appear in the log.txt file if the installer was invoked with the -is:debug argument.
• Confirm Oracle Password for the DCO Admin Acct – a confirmation of the password for the account named previously to administer the DirectConnect for Oracle server. The password is not written into any configuration file, but it will appear in the log.text file if the installer was invoked with the -is:debug argument.
• ORACLE Connect String – the name of the entry for the Oracle instance in the tnsnames.ora file.
• Enter location (including file name) of the existing tnsnames.ora file – usually located in the network/admin directory under the ORACLE_HOME directory. The tnsnames.ora identified must be accessible to this machine. If the file is not available locally, then it must be copied onto a local drive before configuring DirectConnect for Oracle. DirectConnect for Oracle copies the existing tnsnames.ora file into its directory.
• Create a Windows Service – Sybase recommends that you set up DirectConnect for Oracle as a service on Windows.
• Service Name – the name to be used for the Windows service.
Click Next.
12 A window displays a message indicating DirectConnect for Oracle configuration and start up was successful. Click Next.
If unsuccessful, one or more of the following needs to be verified and entered correctly, after the install and configuration process:
• DCO Admin Account Name is not an Oracle user.
• Oracle password for DCO Admin Account is not valid.
• Oracle connection string is incorrect.

CHAPTER 6 Installing DirectConnect for Oracle
Installation Guide 63
• Oracle connection string is not in the tnsnames.ora file or is invalid.
13 A window displays a message indicating that the installation was successful and advising you to check for software updates. You are also advised to enter Software Asset Management Certificates by running the following:
C:\%SYBASE%\%SYSAM-1_0%\bin\lmgr
Click Finish.
14 If you selected DirectConnect for Oracle to be installed and available as a Windows service, you will be advised to reboot your machine.
Installing in console mode
If you want to run the installer without the graphical user interface (GUI), you can launch InstallShield in console mode. In cases where InstallShield launches automatically, click Cancel to cancel the GUI installation and then launch the setup program from a terminal or console.
❖ To install in console mode
The steps for installing components in console mode are the same as those described in “Installing in GUI mode” on page 59, except that you execute the InstallShield program from the command line as follows:
1 Enter the following at the command line:
x:\setupwin32 -console
The installation program starts and displays the Welcome window.
2 The flow of the installation is identical to a regular GUI installation, except that the display is written to a terminal window, and responses are entered using the keyboard. Follow the remaining prompts to install DirectConnect for Oracle.
Installing using a response file
A silent installation (sometimes referred to as an unattended install) is done by running InstallShield and providing a response file that contains answers to all of InstallShield’s questions.
Creating a response file
There are two methods of generating a response file for InstallShield:

Installing DirectConnect
64 Enterprise Connect Data Access for Microsoft Windows
• Record mode: In this mode, InstallShield performs an installation of the product, and records all of your responses and selections in the specified response file. You must complete the installation to generate a response file. To create a response file, enter:
x:\setupwin32.exe -options-record <responseFileName>
Note There should be no space between -options and -record.
where responseFileName is a name you choose for the response file.
The following are the results:
• An installation of DirectConnect on your computer
• A response file containing all of your responses from the installation
If this response file is used for a silent installation, the resulting installation is identical to the one from which the response file was created: the same installation location, same feature selection, and all the same remaining information. The response file is a text file that you can edit to change any responses before you use it in any subsequent installations.
Note Do not put the response file in your target installation directory.
• Template mode: In this mode, InstallShield creates a response file containing commented-out values for all required responses and selections. However, you do not need to install the product, and you can cancel the installation after the response file has been created. To create this template file, enter:
x:\setupwin32Console.exe -console -options-template <responseFileName>
where responseFileName is the absolute file name you choose for the response file, for example:
C:\DC\OptionsTemplate.txt
If run in console mode, as shown in the previous example, InstallShield provides a message indicating that the template creation was successful. If run in GUI mode, no message is provided. However, you can click Cancel immediately and a response file is created.
CHAPTER 6 Installing DirectConnect for Oracle
Installation Guide 65
If you use this response file for a silent installation, the default values for all responses are used. Edit the template with the values you want to use during installation.
Warning! If you created a response file using a Custom installation, you need to edit the response file to allow the custom selections to be chosen correctly during installation. The following is a workaround for an installer issue when using a response file.
Use a text editor and delete the word "Custom" in the setup type in the following line
-W setupTypes.selectedSetupTypeId=Custom
The resultant line should look similar to the following:
-W setupTypes.selectedSetupTypeId=
Failure to delete the “Custom” setup type results in a Full installation of the product.
Interactive installation using a response file An interactiveinstallation using a response file allows you to accept the default valuesobtained from the response file that you have set up or to change any of thosevalues for the specific installation. This is useful when you want multiple similar installations but with some minor differences that you want to change at installation time.
At the command line, execute the following command (enter the command all on one line):
x:\setupwin32.exe -console -options <responseFileName. -W SybaseLicense.agreeToLicense=true
Installing in silent mode A silent mode installation, sometimes referred toas an unattended installation, allows you to install the product with all responses being taken from the response file that you have set up. There is no user interaction. This is useful when you want multiple identical installations or when you want to automate the installation process.
At the command line, execute the following command (enter the command all on one line):
setupwin32Console.exe -silent -options <responseFileName> -W SybaseLicense.agreeToLicense=true

Configuring DirectConnect for Oracle
66 Enterprise Connect Data Access for Microsoft Windows
where responseFileName is the name of the file containing the installation options you chose. The -W option specifies that you agree with the Sybase License Agreement text.
Warning! Sybase recommends that you use the setupwin32Console.exe executable which runs in the foreground, when running a silent installation. The normal setupwin32.exe executable runs in the background, giving you the impression that the installation has terminated immediately, with no completion status. This could result in duplicate installation attempts.
Except for the absence of the GUI screens, all actions of InstallShield are the same, and the result of an installation in silent mode is exactly the same as one done in GUI mode with the same responses.
Configuring DirectConnect for OracleIf DirectConnect for Oracle was not configured at installation time, you can use the DCOConfig batch file to configure and start the server. The DCOConfig batch file can be found at %SYBASE%\DCO-12_6\install\DCOConfig. Before starting the configuration, the following should be available:
• A copy of the existing tnsnames.ora file currently being used to connect to Oracle, which you will copy to a temporary file location
• The Oracle connect string
• The name for a valid Oracle account, which will be the administrator for DirectConnect for Oracle
• The number of an unused port to be used by DirectConnect for Oracle
❖ To invoke the configuration utility
1 Change directories to %SYBASE%\DCO-12_6\install.
2 Execute DCOConfig.
3 Enter the server name for DirectConnect for Oracle.
4 Enter an unused port on the machine that DirectConnect for Oracle will be listening on.
5 Enter a valid DirectConnect for Oracle Administrator Name.

CHAPTER 6 Installing DirectConnect for Oracle
Installation Guide 67
6 Enter the Oracle connection string as previously defined in the tnsnames.ora file.
7 Enter the path (including the file name) to the previously defined temporary location of the tnsnames.ora file.
8 If you want DCOConfig to add this server as a Windows service, you must select “Y”.
9 If you are adding DirectConnect for Oracle as a Windows Service, you must enter a unique Windows Service name on the machine.
10 DirectConnect for Oracle is now started in a separate window. If the DirectConnect for Oracle is set up as a Windows Service, the machine must be rebooted, after running DCOConfig.
Note In the window where the DirectConnect for Oracle is started, the following informational message appears. It appears when the DirectConnect for Oracle is started from DCOConfig and can be ignored.
Option [traceflags] not found in configuration file ‘<path to configuration file>’. Generating new configuration file.
After installationTo reconfigure DirectConnect for Oracle or make changes at a later time, refer to the DirectConnect for Oracle User’s Guide. To use DirectConnect Manager to configure or start and stop a service, refer to Chapter 7, “Installing DirectConnect Manager.”

Uninstalling DirectConnect for Oracle
68 Enterprise Connect Data Access for Microsoft Windows
Uninstalling DirectConnect for OracleTo uninstall a DirectConnect installation, use the InstallShield uninstall program. This removes all servers, all common files, and all required components. After the uninstall runs, you may need to delete any existing files and directories in the directory where DirectConnect was installed.
Note You may need to stop the SySAM service first; otherwise, you will not be able to delete certain files and directories. Also, before uninstalling Sybase software, shut down all Sybase applications and processes.
You can invoke the uninstall procedure using either the GUI or the console method. Sybase recommends that you use the GUI method.
Log in to your machine using an account with “administrator” privileges, then shut down all other processes for the components you are uninstalling.
Note If you set up DirectConnect for Oracle as a Windows service, you must remove the service using instdco.exe as described in the DirectConnect for Oracle User’s Guide.
❖ To uninstall in GUI mode
1 Enter one of the following:
• Using Windows Explorer:
a Go to the directory where your application is installed.
b Select the uninstall directory.
c Select the application you want to uninstall.
d Double-click the uninstall icon. The wizard appears.
• Using the Add/Remove program:
a Go to Start | Setting | Control panel | Add/Remove Programs dialog box
b Select the application you want to remove
c Click on Change/Remove. The Wizard appears.
2 The Welcome window appears.
3 Click Next, to display the list of selected products and components that were installed.

CHAPTER 6 Installing DirectConnect for Oracle
Installation Guide 69
4 All the products and components that were installed are displayed and already checked to allow you to remove the total installation. If you do not want to remove a product or component, deselect or “uncheck” that product or component. Click Next.
5 A summary of all the products and components is displayed. Click Next.
6 A message indicating that an uninstall is in progress. When this is completed, a message is displayed indicating a successful uninstall. Click Next to end the Uninstall.
❖ To uninstall in console mode
1 Go to the %SYBASE% directory, and enter the following:
%SYBASE%\uninstall.exe -console
The uninstall program starts.
2 Choose the DirectConnect software product you want to uninstall.
The DirectConnect software product you chose is uninstalled.

Uninstalling DirectConnect for Oracle
70 Enterprise Connect Data Access for Microsoft Windows

Installation Guide 71
C H A P T E R 7 Installing DirectConnect Manager
This chapter describes how to install and use DirectConnect Manager to create a server and service, and how to start a server and service.
This chapter contains the following topics:
Installing DirectConnect ManagerThis section describes the DirectConnect Manager installation requirements and the installation process.
Installation requirementsTo install DirectConnect Manager, you must have, at a minimum, the system requirements in the following table.
Topic PageInstalling DirectConnect Manager 71
Using DirectConnect Manager 73

Installing DirectConnect Manager
72 Enterprise Connect Data Access for Microsoft Windows
Table 7-1: DirectConnect Manager system requirements
Note If your PC does not have an existing Java Virtual Machine (JVM), one is provided with the DirectConnect Manager installation program as a Java Runtime Environment (JRE) executable (jre.exe). Exit all Windows programs before running InstallShield.
Installing DirectConnect ManagerThe following describes how to install DirectConnect Manager using InstallShield. (DirectConnect Manager is on the PC client CD.)
❖ To install DirectConnect Manager
1 Insert the PC client CD into the CD drive.
2 Go to the DirectConnect Manager directory.
3 Execute the following:
setupwin32.exe
4 The Welcome window appears. Click Next to proceed with the installation.
5 Read the License and Copyright Agreement. Using the drop-down list at the top of the window, select the geographic location where you are installing to display the agreement appropriate to your region. Select “I agree” and click Next.
6 On the Choose Directory dialog box, enter the directory path for the installation, and click Next.
You must agree to the license and copyright agreement before you can continue.
7 Select one of the two types of installation:
Item Requirements
CPU Microsoft Windows 2000 or Microsoft Windows 2003.Sybase recommends a Windows Pentium class processor with a minimum of 300 megahertz.
RAM Sybase recommends 256MB.
Storage 20MB.
Network access Network access to DirectConnect servers.

CHAPTER 7 Installing DirectConnect Manager
Installation Guide 73
• Install a new version of Sybase Central and render the other install invalid. Click Next.
This type of installation will install DirectConnect Manager as well as all the other necessary components and create a new set of icons and Registry entries.
Note This option will make your current Sybase Central installation invalid.
• Register with existing Sybase Central. Click Next.
This type of installation will install the DirectConnect Manager plug-in and register it with the existing Sybase Central Application.
8 A Summary window appears and lists all the features that you are going to install. Click Next.
9 The installation process begins and a Setup window appears.
The Setup window shows the percentage (%) of installation that is complete, and monitors the decompressing and installing of the DirectConnect Manager files. The installation will register the plug-in with Sybase Central.
10 When installation is completed, a DirectConnect Manager README file appears. After reading the file, click Finish to clear the window.
Using DirectConnect ManagerBefore you can use DirectConnect Manager to start a server, or create and start an access service, you must identify and establish a connection between the server and DirectConnect Manager.
Configuring servers and access servicesAfter you create a DirectConnect server or a DCDirector, you can configure the server through DirectConnect Manager. For a description of all the properties, refer to the following:
• For the DirectConnect server, refer to the Enterprise Connect Data Access and Mainframe Connect Server Administration Guide for DirectConnect.

Using DirectConnect Manager
74 Enterprise Connect Data Access for Microsoft Windows
• For the DirectConnect access service, refer to the Mainframe Connect DirectConnect Option User’s Guide for DB2 Access Services.
Creating a new DirectConnect access serviceFor instructions on how to use DirectConnect Manager to create a service, go to the DirectConnect Manager online Help and select Managing Access Services | Creating a New Service or Copying a Service.
Note If you use service name redirection, the connectivity parameters must match the connectivity parameters or the default, and the access service name must map through the redirection file to the DirectConnect server.
For more information about service name redirection, see Enterprise Connect Data Access Mainframe Connect System Administration Guide for DirectConnect.
Starting a DirectConnect access serviceThe only way you can start the new access service without stopping and restarting DirectConnect is by using DirectConnect Manager. For instructions on how to use DirectConnect Manager to start a service, go to the DirectConnect Manager online Help and select Managing Access Services | Starting a Service.
Stopping a DirectConnect access serviceFor instructions on how to use DirectConnect Manager to stop a service, go to the DirectConnect Manager online Help and select Managing Access Services | Stopping a Service.
Adding a new serviceTo add a new service to a DirectConnect server, use DirectConnect Manager to copy an existing service and modify it as necessary to connect to the desired target database or use the Create New Service option.
CHAPTER 7 Installing DirectConnect Manager
Installation Guide 75
Configuring servers and access servicesAfter you create a DirectConnect server or an access service, you can use DirectConnect Manager to configure them:
• To identify the configuration properties and to configure the DirectConnect server, refer to the Enterprise Connect Data Access Mainframe Connect System Administration Guide for DirectConnect.
• To identify the access service properties and to configure a service, refer to the Mainframe Connect DirectConnect z/OS Option User’s Guide for DB2 Access Services.
Uninstalling DirectConnect ManagerTo uninstall DirectConnect Manager, use the InstallShield uninstall feature.
❖ To uninstall
1 Go to Settings | Control Panel | Add/Remove Programs.
2 Select the installed program: DirectConnect Manager Version 12.6, and then select Change/Remove.
Warning! Some files will not be uninstalled during this process. Please review and delete manually.

Using DirectConnect Manager
76 Enterprise Connect Data Access for Microsoft Windows

Installation Guide 77
C H A P T E R 8 After Installation
After you install DirectConnect, you must configure the client connectivity to DirectConnect.
Note Be sure that both the DirectConnect server and the access services are running.
This chapter contains the following topics:
Configuring client connectivity to DirectConnect
Note If you verified the DirectConnect access service in the previous section using isql, you have already created an entry in the sql.ini file on that machine.
The following procedure ensures that the client environment is properly connected to the LAN and to the DirectConnect server.
❖ To add, edit or delete entries in the sql.ini and libtcl.cfg files on client machines
1 In dsedit, verify that the service name and port number match the entry for the DirectConnect access service. To add a DirectConnect server use the AddServer utility.
Note Be sure to use the DirectConnect access service name, not the DirectConnect server name.
If you use service name redirection, refer to the DirectConnect Server Administration Guide.
Topic PageConfiguring client connectivity to DirectConnect 77

Configuring client connectivity to DirectConnect
78 Enterprise Connect Data Access for Microsoft Windows
2 Configure the libtcl.cfg configuration file that contains information for each installed Net-Library driver.
Use dsedit to view a list of the drivers installed on your machine. You can view a description of any driver by selecting it from the list.
Client applications use the information in this file, along with information in the sql.ini file, to connect to a DirectConnect server using the correct file.

Installation Guide 79
C H A P T E R 9 Setting Up the DirectConnect TDS Driver
This chapter contains the following topics:
Note This chapter does not apply to DirectConnect for Oracle.
DescriptionThe client DirectConnect ODBC driver allows applications to access ODBC data using SQL. You can use it to develop, compile, and ship an application without targeting a specific type of data source. ODBC clients must use this “front-end” driver to connect with DirectConnect access services.
Note Do not confuse this driver with the target ODBC driver that sets up connections between DirectConnect and the target data source.
This ODBC driver enables ODBC-based applications to access DirectConnect services.
Topic PageDescription 79
Configuring the data source 80
Connecting to the data source 85
ODBC conformance level 86

Configuring the data source
80 Enterprise Connect Data Access for Microsoft Windows
Configuring the data sourceSybase assumes that you already have the latest MDAC version installed on your system. For issues regarding MDAC and to get the latest version, see the Microsoft Web site at http://www.microsoft.com/data/download.htm.
❖ To configure a DirectConnect ODBC data source
1 Start the ODBC Administrator by selecting the ODBC icon from the Windows control panel.
2 Do one of the following:
• If you are configuring an existing data source, select the data source name and click OK.
• If you are configuring a new data source, choose Add to view the list of installed drivers, then select DirectConnect and click OK.
3 Specify values for the data source using the information in the following table.
Table 9-1: Required data source configuration properties
4 Specify values for any optional properties that you require. The properties are listed in the following table.
Property Description
DataSourceName A string that identifies this DirectConnect data source.
Description An optional long description of a data source name, for example, “My Accounting Database.”
ServerName The name of the server containing the DirectConnect tables that you want to access.
Network address The machine name (or IP address) and port number of the DirectConnect service to which this data source name will connect, for example, <host name>,<port number>
Service name Name of the DirectConnect access service that is listening on the network address, to which this data source name will connect.

CHAPTER 9 Setting Up the DirectConnect TDS Driver
Installation Guide 81
Table 9-2: Optional data source configuration properties
Property Description
ServerList The list of servers that appear in the logon dialog box. Use commas to separate the server names.
DatabaseName The name of the database to which you want to connect by default. If you do not specify a value, the default is the default database defined for each user.
DatabaseList The databases that appear in the logon dialog box. Use commas to separate the database names.
DefaultLogonID The default logon ID used to connect to your database. This ID is case sensitive. A logon ID is required only if security is enabled for the database to which you are connecting. Your ODBC application can override this value, or you can override this value in the logon dialog box or in the connection string.
InterfacesFile The path name of the interfaces file. The default is the Sybase sql.ini file.
Initialization String A string of SQL Server commands that execute when the data source connection initializes. Use semicolons to separate multiple commands.
ModifySQL Statement An instruction to the driver to convert a single- or two-part table name to a three-part format for create table SQL statements. Valid values are:
• 0 instructs the driver to treat all SQL statements as being in passthrough transformation mode and to not modify them.
• 1 instructs the driver to modify the SQL statements, and to convert table names to three-part format and change NULL and NOT NULL statements.
Password Encryption A number that determines whether password encryption can be performed from the Open Client Library to the server. Valid values are:
• 0 prevents encryption from being performed.
• 1 allows encryption to be performed.
Charset The name of a character set corresponding to a charsets subdirectory. The default is the setting on the DirectConnect server.
WorkstationID The workstation ID used by the client.
Language The national language corresponding to a locales subdirectory. The default is U.S. English.

Configuring the data source
82 Enterprise Connect Data Access for Microsoft Windows
ApplicationName The name used by the DirectConnect server to identify your application.
YieldProc A numeric value that determines whether you can work in other applications when the DirectConnect server is busy. Valid values are:
• 0 (peek and dispatch) causes the driver to check the Microsoft Windows message queue and send any messages to the appropriate application.
• 1 (no yielding; the default) prevents you from working in other applications.
• 3 (dispatch through Windows Yield function) gives control to the Windows kernel, which checks the message queue and sends messages to the appropriate applications.
Sybase recommends that you use value 1.
OptimizePrepare A value that determines whether stored procedures are created on the Server for every call to SQLPrepare. Valid values are:
• 0 causes stored procedures to be created for every call to SQLPrepare. This setting can decrease performance.
• 1 causes the driver to create stored procedures only if the statement contains parameters. Otherwise, the statement is cached and executed directly at SQLExecute time. This is the initial default value.
• 2 prevents the driver from creating stored procedures.
ArraySize The number of rows the driver retrieves from the server for each fetch. This is not the number of rows given to the user. The default is 10 rows.
Property Description

CHAPTER 9 Setting Up the DirectConnect TDS Driver
Installation Guide 83
SelectMethod A value that determines whether database cursors are used for select statements. Valid values are:
• 0 allows database cursors to be used. This is the initial default. In some cases, performance degradation can occur when large numbers of sequential select statements execute because of the large amount of overhead associated with creating the cursors.
• 1 allows select statements to execute directly without database cursors. The data source is limited to one active statement and one active connection.
ReuseFailedCursor A value that determines whether the server attempts to reuse a cursor that contains an error. Valid values are:
• 0 causes the server to deallocate a cursor that contains an error and force the application to start over.
• 1 causes the server to attempt to reuse a cursor containing an error. This is the default value.
Property Description

Configuring the data source
84 Enterprise Connect Data Access for Microsoft Windows
5 Choose OK to write these values to the ODBC data source configuration.
The values are now the default values when you connect to this data source.
6 To change the values, do one of the following:
• Change the defaults by reconfiguring the data source
PacketSize A number that determines the number of bytes per network packet transferred from the database server to the client. The correct setting of this attribute can improve performance. Valid values are:
• 0 directs the driver to use the default packet size as specified in the DirectConnect server configuration. This is the initial default configuration.
• -1 directs the driver to compute the maximum allowable packet size on the first connect to the data source and save the value in the odbc.ini file.
• x (an integer from 1 to 10) directs the driver to set the packet size to x times 512 bytes. For example, a value of 6 sets the packet size at six times 512, or 3072 bytes.
To use this connection attribute, you must configure the DirectConnect server for a maximum network packet size greater than or equal to the value of this property.
The ODBC specification specifies a connect option sql_packet_size that offers this same functionality. To avoid conflicts with applications that can set both the connection string attribute and the ODBC connect option, both functions are defined as mutually exclusive.
If PacketSize is specified, you receive the message “Driver Not Capable” when you attempt to call sql_packet_size. If you do not set PacketSize, the driver accepts application calls to sql_packet_size.
Translate An instruction that displays the Select Translator dialog box, from which you can perform a data translation from one character set to another. Choose the INTERSOLV OEM ANSI translator to translate data from the IBM PC character set to the ANSI character set.
Property Description

CHAPTER 9 Setting Up the DirectConnect TDS Driver
Installation Guide 85
• Override the defaults by connecting to the data source using a connection string with alternate values
Connecting to the data sourceYou can use either of two methods to connect to the data source: a logon dialog box or a connection string.
Using a logon dialog boxSome ODBC applications display a logon dialog box when you attempt to connect to a data source. In such cases, the data source name already is specified.
To use the logon dialog box, enter the information shown in the following table.
Table 9-3: Logon dialog box information
Using a connection stringIf your application requires a connection string to connect to a data source, you must specify the data source name that tells the ODBC driver the ODBC data source section to use for the default connection information. Optionally, you can specify attribute=value pairs in the connection string to override the ODBC data source default values. The override values are not written to the ODBC data source file.
Entry Instructions
Server Name Enter the case-sensitive name of the server containing the DirectConnect database tables you want to access, or select the name from the Server Name drop-down list, which displays the name you specified when you configured the data source.
Login ID If required, enter your login ID (case sensitive).
Password If required, enter your system password (case sensitive).
Database Enter the name of the database you want to access (case sensitive), or select the name from the Database drop-down list, which displays the name you specified when you configured the data source.

ODBC conformance level
86 Enterprise Connect Data Access for Microsoft Windows
You can specify either long or short names in the connection string. The connection string has the following form:
DSN=data_source_name{;attribute=value [;attribute=value];...}
An example of a DirectConnect connection string is as follows:
DSN=SYBDC TABLES; SRVR=QESRVR;DB=PAYROLL;UID=JOHN;PWD=XYZZY
Long and short names for each attribute are shown in the following table.
Table 9-4: Connection string long and short names
ODBC conformance levelThe DirectConnect ODBC driver supports the minimum SQL grammar and the Level 2 API function conformance. (See the following lists.)
Core functions • SQLAllocHandle
• SQLBindCol
• SQLBindParameter
• SQLCancel
• SQLCloseCursor
Attribute long name Short name
DataSourceName DSN
ServerName SRVR
LoginID UID
Password PWD
Database DB
Language LANG
Charset CS
HostName HOST
ApplicationName APP
InterfacesFile IFILE
ArraySize AS
YieldProc YLD
InitializationString IS
ModifySQLStatement MSS

CHAPTER 9 Setting Up the DirectConnect TDS Driver
Installation Guide 87
• SQLColumnPrivileges
• SQLColAttribute
• SQLColumns
• SQLConnect
• SQLCopyDesc
• SQLDataSources
• SQLDescribeCol
• SQLDisconnect
• SQLDriverConnect
• SQLDrivers
• SQLEndTran
• SQLExecDirect
• SQLExecute
• SQLFetch
• SQLFetchScroll
• SQLFreeHandle
• SQLFreeStmt
• SQLGet ConnectAttr
• SQLGetCursorName
• SQLGetData
• SQLGetDescField
• SQLGetDescRec
• SQLGetDiagField
• SQLGetDiagRec
• SQLGetEnvAttr
• SQLGetFunctions
• SQLGetInfo
• SQLGetStmtAttr
ODBC conformance level
88 Enterprise Connect Data Access for Microsoft Windows
• SQLGetTypeInfo
• SQLNativeSql
• SQLNumParams
• SQLNumResultsCols
• SQLParamData
• SQLPrepare
• SQLPutData
• SQLRowCount
• SQLSetConnectAttr
• SQLSetCursorName
• SQLSetDescField
• SQLSetDescRec
• SQLSetEnvAttr
• SQLSetStmtAttr
• SQLSpecialColumns
• SQLStatistics
• SQLTables
Level 1 Functions • SQLBrowseConnect
• SQLBulkOperations
• SQLMoreResults
• SQLPrimaryKeys
• SQLProcedureColumns
• SQLProcedures
• SQLSetPos
Level 2 functions • SQLColumnPrivileges
• SQLDescribeParam
• SQLForeignKeys
• SQLTablePrivileges

Installation Guide 89
C H A P T E R 1 0 Troubleshooting
This chapter tells you how to identify and resolve problems that occur when you install a DirectConnect product. Also, it describes several diagnostic tools that you can use.
This chapter covers the following topics:
If you try the suggested methods described in this chapter and still have problems, notify your company’s contact person for Sybase. Each Sybase installation that has purchased a support contract has one or more designated people who are authorized to contact Sybase Technical Support or the Sybase subsidiary in your area.
General problemsIn general, there are several sources from which error messages can be generated, including:
• DirectConnect
• Open Client and Open Server
• The network
• The target database
• ODBC drivers
For problems that are connectivity-related, see the documentation for your network protocol or “Connectivity problems” on page 93 in this chapter.
For problems related to ODBC drivers, see the following section.
Topic PageGeneral problems 89
ODBC-specific problems 90
DirectConnect problems 92

ODBC-specific problems
90 Enterprise Connect Data Access for Microsoft Windows
ODBC-specific problemsThis section describes the following types of problems:
• ODBC driver errors
• ODBC data source errors
• ODBC driver manager errors
ODBC driver errorsAn error reported on an ODBC driver has the following format:
[vendor] [ODBC_component] message
where:
• vendor is the name of the ODBC vendor.
• ODBC_component is the component in which the error occurred.
• message is the content of the error message.
For example, an error message from the DataDirect SQL Server driver looks like this:
[DataDirect] [ODBC SQL Server driver] Invalid precision specified.
If you receive this type of error, check the last ODBC call made by your application for possible problems, or contact your ODBC application vendor.
ODBC data source errorsThis type of error occurs in the data source and includes the data store name, as shown in the following format:
[vendor] [ODBC_component] [data_store] message
where:
• vendor is the name of the ODBC vendor.
• ODBC_component is the component that received the message from the data store indicated.

CHAPTER 10 Troubleshooting
Installation Guide 91
• data_store is the name of the location in the data source where the error occurred.
• message is the content of the error message.
For example, you might receive the following message from an Oracle data store:
[DataDirect] [ODBC Oracle driver] [Oracle] ORA-0919: specified length too long for CHAR column.
If you receive this type of error, something is incorrect regarding the database system. Check your database system documentation for more information, or consult your database administrator. In this example, you need to check your Oracle documentation.
ODBC driver manager errorsThe driver manager is a DLL that establishes connections with drivers, submits requests to drivers, and returns results to applications. An error that occurs in the driver manager has the following format:
[vendor] [ODBC XXX] message
where:
• vendor is the name of the ODBC vendor.
• ODBC XXX is the driver manager and its version number.
• message is the content of the error message.
For example, an error from the Microsoft driver manager might look like this:
[Microsoft] [ODBC Driver Manager] Driver does not support this function.
If you receive this type of error, consult the Programmer’s Reference for the Microsoft ODBC Software Development Kit, available from Microsoft.

DirectConnect problems
92 Enterprise Connect Data Access for Microsoft Windows
DirectConnect problemsIf your system does not work properly after you install DirectConnect, and if you already performed the connection steps in Chapter 4, “Getting Ready to Install,” try the following:
• Confirm the release number of Open Server software. DirectConnect is compatible with the Open Server release and Adaptive Server release identified in the release bulletin.
• Check the log and trace files in the log file of the ServerName for more information. Following is an example of an error message that can occur:
Error: 16029 Severity: 20 State: 0 OS Error: -1: Failed to start any network listeners OS Error Text: <srv-lib>
One of the following causes is possible:
• One of the specified port numbers is in use. Change the port number to one that is not in use and try again.
• The wrong machine name or IP address was specified. Enter the machine name or the IP address running the DirectConnect server.
Refer to the DirectConnect Error Message Guide for errors that occur.
If the server fails before the log files initialize, error messages can be written to either the console or the Windows event log. If this occurs, see the DirectConnect Server Administration Guide for explanations of these “pre-log” messages.
DirectConnect server fails to start after installationIf the DirectConnect server fails to start after installation and the SNA library files are listed in error in the DirectConnect log, the following message appears:
The application has failed to start because WAPPC32.dll was not found. Re-installing the application may fix this problem.
Fix for error condition To fix the error condition, install the stub libraries for DC 12.6 on Windows by executing the following:

CHAPTER 10 Troubleshooting
Installation Guide 93
%SYBASE%\%SYBASE_ECON%\bin\DCConfig.bat.
Connectivity problemsThis section describes some tools you can use to diagnose connectivity problems.
Using the odbct tool for ODBC problemsTo help you diagnose ODBC connectivity problems, the odbct tool verifies that your system configuration is by attempting to make a simple connection to the target.
Note Be sure to run the odbct tool in the same environment in which you plan to use DirectConnect for Microsoft SQL Server, DRDA, or Informix targets by executing the DC_SYBASE.bat.
The odbct tool has three parameters: a data source name (DSN), user ID, and password. The following example shows a connection to the dcmssql DSN using the user ID ”joe” and password “joe21”.
odbct <DSN> <USERID> <PASSWORD>odbct dcmssql joe joe21> Would you also like the output saved to a file? (Y/N) : y Attempting Connection------------------------------------------------------> Allocating Environment> Allocating Connection> Attempting Connection
DSN :dcmssqlUSER : joePASSWORD: joe21
> CONNECTION SUCCEEDED
> Allocating Statement

Connectivity problems
94 Enterprise Connect Data Access for Microsoft Windows
> Connection succeeded, would you like to procede with
datasource and datatype reporting? (Y/N): n
Connection Cleanup------------------------------------------------------
> Free Statement
> Attempting Disconnection
+ Disconnection succeeded
> Free Connection
> Free Environment
belford [ 23 ]

Installation Guide 95
A P P E N D I X A Installation Worksheets
This appendix provides worksheets and instructions for recording information you will need to complete installation and connectivity tasks. You are prompted for this information during installation.
This appendix contains the following topics:
How to use the worksheetsFill out one of these worksheets for each DirectConnect server that you plan to install. Keep it with you for each step of the installation process.
The worksheets cover:
• Information from Sybase and non-Sybase products that must be installed before and after installing DirectConnect
• Information that is requested during installation, connectivity setup, and configuration of DirectConnect access service configuration files
The worksheets present the list of parameters you will be prompted for during installation, give you a place for you to write down the parameter values to use, and provide a short description of the parameter.
Topic PageHow to use the worksheets 95
DirectConnect for DB2 UDB worksheet 96
DirectConnect for Informix worksheet 99
DirectConnect for Microsoft SQL Server worksheet 101
DirectConnect for ODBC worksheet 102
DirectConnect for Oracle worksheet 103

DirectConnect for DB2 UDB worksheet
96 Enterprise Connect Data Access for Microsoft Windows
DirectConnect for DB2 UDB worksheetUse the following worksheet to identify information that you should designate and record prior to installing DirectConnect for DB2 UDB. You are prompted for this information during installation.
Much of the DirectConnect for DB2 UDB installation process is accomplished when you configure the DRDA data sources using the Windows ODBC Administrator tool. You use this tool to set up connectivity, and create and bind packages to the DRDA system. As a result, terms on the installation worksheets are identified with one of the three windows:
• The General window, where connectivity parameters are entered and tested
• The Advanced window, where parameters can affect performance and resource use.
• The Bind window, where packages are created and bound to the DRDA system
Note Be sure to have the IP address of the machine on which you are installing DirectConnect for DB2 UDB.
Table A-1: DirectConnect for DB2 UDB worksheet
Your installation information Description
DIRECTORY NAME: DirectConnect Directory Name:
Home directory for DirectConnect for DB2 UDB.
SERVER NAME: DirectConnect Server Name:
Name of the DirectConnect Server you want to create or update.
DSN(s): DSN:
Define and record the Data Source Name (DSN) value, which is ConnectionSpec1.
LOCATION NAME: Location Name:
Specify the DB2 location name defined when your local DB2 subsystem was installed on Windows, Unix, AS/400, or z/OS.

APPENDIX A Installation Worksheets
Installation Guide 97
COLLECTION: Collection:
Record the collection name, which identifies a group of packages. These packages include the DRDA driver packages. The database administrator for your site will provide this name for you.
PACKAGE: Package:
Record the name of the package that the driver uses to process static and dynamic SQL for applications that use this data source definition. The default name is DEFxx, where xx is the version number. The database administrator for your site will provide this name for you.Name that the driver uses to process static and dynamic SQL for applications that use this DSN.
IP ADDRESS:
TCP PORT:
TCP/IP Connectivity:
Record the following:
• IP Address: address of the mainframe. Record the address using the machine’s numeric address (for example, 123.456.78.90) or type its address name. If you enter an address name, the driver must find this name (with the correct address assignment) in the HOSTS file on the workstation or in a DNS server.
• TCP Port: port number assigned to the DRDA server on the machine where catalog tables reside. Record this port’s numeric address or its name (8898 is the default). If you enter a port name, the driver must find this name (with the correct port assignment) in the SERVICES file on the workstation.
MAX. NUMBER OF CLIENTS: Maximum Number of Clients:
Maximum number of clients that the service will support.
Your installation information Description

DirectConnect for DB2 UDB worksheet
98 Enterprise Connect Data Access for Microsoft Windows
DYNAMIC SECTIONS: Dynamic Sections:
Maximum concurrent cursors that can be opened.
PACKAGE OWNER: Package Owner:
AuthID of person who will execute all SQL in the package.
Your installation information Description

APPENDIX A Installation Worksheets
Installation Guide 99
DirectConnect for Informix worksheetUse the following worksheet to identify information that you should designate and record prior to installing DirectConnect for Informix. You are prompted for this information during installation.
Much of the DirectConnect for Informix installation process is accomplished when you configure Informix data sources using the Windows ODBC Administrator tool. You use this tool to set up connectivity to the Informix system. As a result, terms on the installation worksheets are identified with one of the three windows:
• The General window, where you name the DSN is named and enter the database name
• The Connection window, where you configure Informix connectivity parameters
• The Advanced window, where you configure parameters that can affect performance and resource use
Table A-2: DirectConnect for Informix worksheet
Your installation information Description
DIRECTORY NAMES:DC-12_6OCS-12_5
DirectConnect Home Directory Name:
Record the %SYBASE_ECON% and %SYBASE_OCS% home directory for DirectConnect for MSS (sets to DC-12_6 and OCS-12_5).
DSN: DSN:
Name that defines this Informix data source configuration in the system information, such as “INFXSRV2.”
DATABASE NAME: Database Name:
Name of the database to which you want to connect by default.
HOST NAME: Host Name:
Name of the machine on which the Informix server resides.

DirectConnect for Informix worksheet
100 Enterprise Connect Data Access for Microsoft Windows
PROTOCOL TYPE(S): Protocol Type:
Record the protocol used to communicate with the server. You can specify one or more of the following values, separating them with commas: olsoctcp, olsoctcp, onsocspx, onsoctcp, seipcpip, sesocspx, sesictcp.
SERVER NAME(S): Informix Server Name:
Name of the Informix server as it appears in the sqlhosts file.
Your installation information Description

APPENDIX A Installation Worksheets
Installation Guide 101
DirectConnect for Microsoft SQL Server worksheetUse the following worksheet to identify information that you should designate and record prior to installing DirectConnect for Microsoft SQL Server. You are prompted for this information during installation.
Much of the DirectConnect for Microsoft SQL Server installation process is accomplished when you configure Microsoft SQL Server data sources using the Windows ODBC Administrator tool.
Table A-3: DirectConnect for Microsoft SQL Server worksheet
Your Installation Information Description
DIRECTORY NAMES:DC-12_6OCS-12_5
DirectConnect Directory Name:
The %SYBASE_ECON% and %SYBASE_OCS% home directory for DirectConnect for Microsoft SQL Server (sets to DC-12_6 and OCS-12_5).
DSN: DSN:
The Data Source Name for Microsoft SQL Server access.
DATABASE NAME: Database Name:
Specify the name of the database to which you want to connect by default. If you do not specify a value, the default database defined by SQL Server is used.

DirectConnect for ODBC worksheet
102 Enterprise Connect Data Access for Microsoft Windows
DirectConnect for ODBC worksheetUse the following worksheet to identify information that you should designate and record prior to installing DirectConnect for ODBC. You are prompted for this information during installation.
Table A-4: DirectConnect for ODBC worksheet
Your installation information Description
DIRECTORY NAME:DC-12_6OCS-12_5
DirectConnect Directory Name:
Record the %SYBASE_ECON% and %SYBASE_OCS% home directory for DirectConnect Anywhere (sets to DC-12_6 and OCS-12_5).
DSN(s): DSN:
ODBC data source name.
CONNECTIVITY PARAMETERS: Connectivity:
Record the parameters for the connection protocol at your site. For example, if TCP/IP is the protocol, you record the IP address and port number. Check with your administrator for these parameter values

APPENDIX A Installation Worksheets
Installation Guide 103
DirectConnect for Oracle worksheetUse the following worksheet to identify information that you should designate and record prior to installing DirectConnect for Oracle. You are prompted for this information during installation.
Table A-5: DirectConnect for Oracle worksheet
Your installation information Description
DIRECTORY NAME:DCO-12_6OCS-12_5
DirectConnect Directory Name:
Record the %SYBASE_ECON% and %SYBASE_OCS% home directory for DirectConnect for Oracle (sets to DCO-12_6 and OCS-12_5).
SERVER NAME: DirectConnect Server Name:
Name of the DirectConnect server you want to create or update.
PORT NUMBER: DirectConnect Port Number:
Name of the DirectConnect port number you are using.
DCO ADMIN ACCOUNT NAME: DCO Admin Account Name:
The name of a valid Oracle account that can be used to administer DirectConnect for Oracle. It is usually the system account name.
ORACLE PASSWORD FOR DCO ADMIN ACCT:
Password for DCO account:
The Oracle password for the DCO administrative account. This password is not written into any configuration file, but appears in the config.log file if the configurator was invoked with the -trace argument. This is not be true if the configuration is done during installation
CONFIRM ORACLE PASSWORD FOR DCO ADMIN ACCT:
Confirm password for DCO account:
The same password as entered for the DCO administrative account.
ORACLE CONNECT STRING: Oracle connect string:
The entry for the Oracle instance of the tnsnames.ora file.
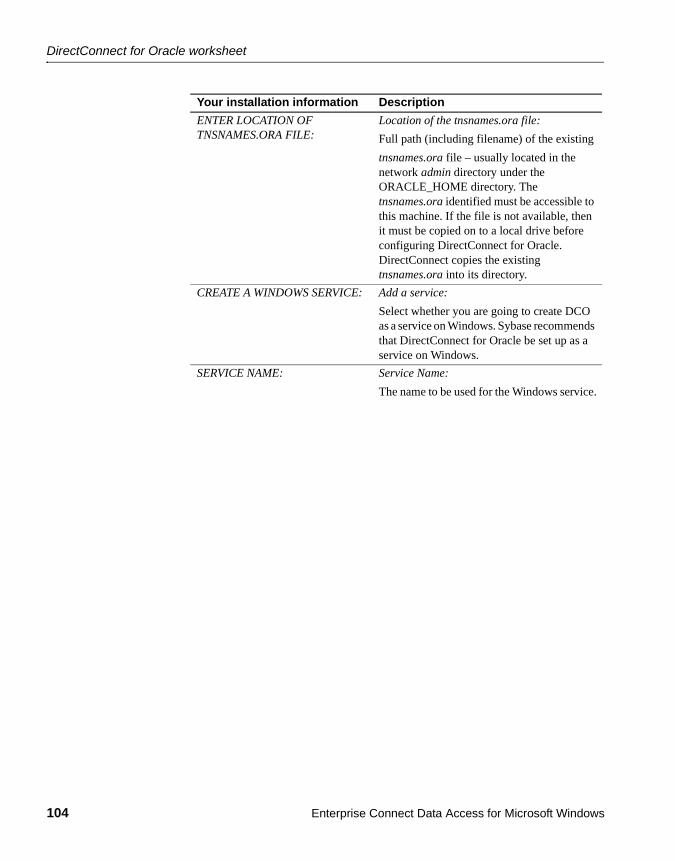
DirectConnect for Oracle worksheet
104 Enterprise Connect Data Access for Microsoft Windows
ENTER LOCATION OF TNSNAMES.ORA FILE:
Location of the tnsnames.ora file:
Full path (including filename) of the existing
tnsnames.ora file – usually located in the network admin directory under the ORACLE_HOME directory. The tnsnames.ora identified must be accessible to this machine. If the file is not available, then it must be copied on to a local drive before configuring DirectConnect for Oracle. DirectConnect copies the existing tnsnames.ora into its directory.
CREATE A WINDOWS SERVICE: Add a service:
Select whether you are going to create DCO as a service on Windows. Sybase recommends that DirectConnect for Oracle be set up as a service on Windows.
SERVICE NAME: Service Name:
The name to be used for the Windows service.
Your installation information Description

Installation Guide 105
A P P E N D I X B Using DirectConnect Utilities
To simplify the execution of DirectConnect on multiple platforms, Sybase provides utilities to start a server, create and start a new server, and migrate files from one server to another.
Note These utilities cannot be used for DirectConnect for Oracle.
These utilities are batch files that can be found in the %SYBASE%\%SYBASE_ECON%\bin directory, where they should be kept to run properly. It is from this directory that the utilities can derive the paths to the other files they need to perform their tasks.
This appendix contains the following topics:
Creating and starting a DCDirector serverDirectConnect 12.6 provides a new feature that allows DirectConnect Manager to connect to a “directing” server, called a DCDirector, that is capable of creating, starting, and stopping DirectConnect servers. To create a new DCDirector for an installation, use the DCDirector.bat batch file.
This batch file creates a new server with the default name “DCDirector” and sets the port number it listens on to a default port of 7711. The batch file then starts the server. No parameters are required or allowed, just enter:
DCDirector
Topic PageCreating and starting a DCDirector server 105
Creating a new DirectConnect server 106
Starting a DirectConnect server 107
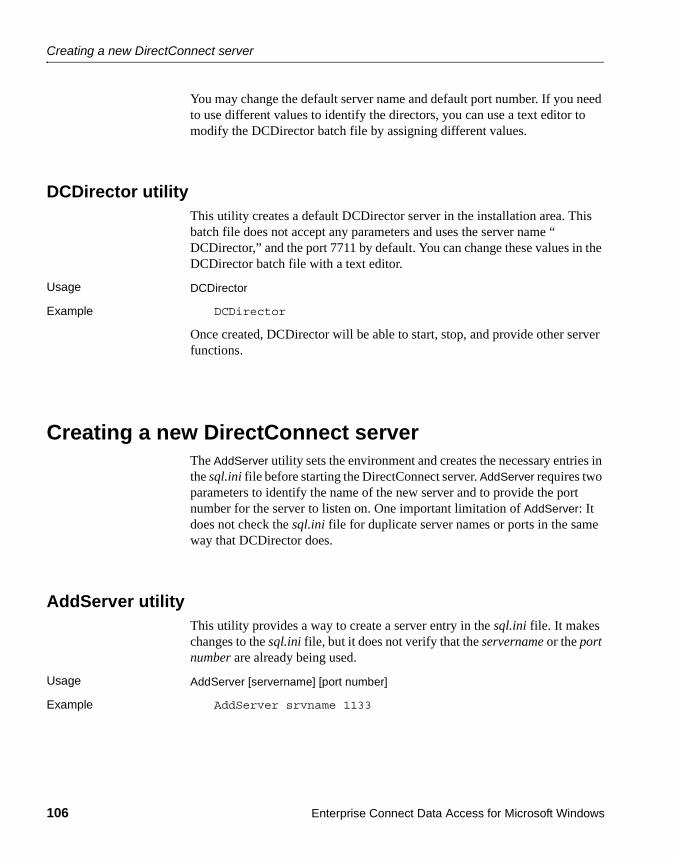
Creating a new DirectConnect server
106 Enterprise Connect Data Access for Microsoft Windows
You may change the default server name and default port number. If you need to use different values to identify the directors, you can use a text editor to modify the DCDirector batch file by assigning different values.
DCDirector utilityThis utility creates a default DCDirector server in the installation area. This batch file does not accept any parameters and uses the server name “DCDirector,” and the port 7711 by default. You can change these values in the DCDirector batch file with a text editor.
Usage DCDirector
Example DCDirector
Once created, DCDirector will be able to start, stop, and provide other server functions.
Creating a new DirectConnect serverThe AddServer utility sets the environment and creates the necessary entries in the sql.ini file before starting the DirectConnect server. AddServer requires two parameters to identify the name of the new server and to provide the port number for the server to listen on. One important limitation of AddServer: It does not check the sql.ini file for duplicate server names or ports in the same way that DCDirector does.
AddServer utilityThis utility provides a way to create a server entry in the sql.ini file. It makes changes to the sql.ini file, but it does not verify that the servername or the port number are already being used.
Usage AddServer [servername] [port number]
Example AddServer srvname 1133

APPENDIX B Using DirectConnect Utilities
Installation Guide 107
Starting a DirectConnect serverIn the past, you started a DirectConnect server using a command that used the direct executable itself. For example, the command, direct –Ssrvname, was the standard way to start an existing DirectConnect server. This method is still supported, but it has some limitations: For this command to work, all of the appropriate environment variables need to be set properly before the command is executed. Also, if multiple installations of DirectConnect exist on a single machine, each installation will need its own environment.
To provide some help with this, a batch file is provided with DirectConnect version 12.6 that sets the installation-specific variables before executing the direct –Ssrvname command. This script, called DCStart, requires that all the non-Sybase variables be set properly (such as paths to environment variables pointing to Informix specific elements), and ensures that the environment variables that are specific to a DirectConnect installation are all correctly set.
To start a server, see” Starting the DirectConnect server” section in Chapter 7, “Installing DirectConnect Manager.”
DCStart utilityThis utility is similar to using the direct executable. DCStart.bat runs the appropriate DC_SYBASE.bat file to ensure that all the appropriate Sybase-specific environment variables are set properly. This is the required method to start a DirectConnect server, for one or multiple versions, since DirectConnect no longer sets the system environment.
Usage DCStart [direct executable Parameters]
Syntax DCStart -Ssrvname

Starting a DirectConnect server
108 Enterprise Connect Data Access for Microsoft Windows

Installation Guide 109
Glossary
access service The named set of properties, used with a DirectConnect Access Service Library, to which clients connect. Each DirectConnect Server can have multiple services.
access service library A component of DirectConnect. A service library that provides access to non-Sybase data contained in a database management system or other type of repository. Each such repository is called a “target.” Each access service library interacts with exactly one target and is named accordingly. See also service library.
Adaptive Server (formerly SQL Server)
The server in the Sybase Client-Server architecture. It manages multiple databases and multiple users, tracks the actual location of data on disks, maintains mapping of logical data description to physical data storage, and maintains data and procedure caches in memory. Also called Adaptive Server Enterprise.
Any reference to Adaptive Server applies to SQL Server version 10.5 or earlier, unless otherwise specified.
administrative service library (ADMLIB)
A service library that provides remote management capabilities and server-side support. It supports a number of remote procedures (invoked as RPC requests) that enable remote DirectConnect management. See also remote procedure call, service library.
application program interface (API)
A functional interface, supplied by an operating system or other licensed program, that allows an application program written in a high-level language to use specific data, functions of the operating system, or the licensed program.
ASE/CIS The CIS component of Adaptive Server Enterprise (ASE), formerly called OmniConnect. See also Adaptive Server.
bulk copy transfer A transfer method in which multiple rows of data are inserted into a table in the target database. See also transfer. Compare with destination-template transfer.
catalog stored procedure A stored procedure that provides information about tables, columns, and authorizations. It is used in SQL generation and application development.

Glossary
110 Enterprise Connect Data Access for Microsoft Windows
character set A set of specific (usually standardized) characters with an encoding scheme that uniquely defines each character. ASCII is a common character set.
Client-Library A library of routines that is part of the Sybase Open Client product. See also Open Client.
client/server An architecture in which the client is an application that handles the user interface and local data manipulation functions, while the server provides data processing access and management for multiple clients. See also client, server, client application.
collection An AS/400 library that contains views of AS/400 global catalog tables and journals.
code page An assignment of graphic characters and control function meanings to all code points.
connection A network between two systems. For SNA, the path connects an LU on one machine to an LU on another machine. For TCP/IP, the path connects TCP modules on separate machines.
CSP See catalog stored procedure.
CT-Library See Client-Library.
database management system (DBMS)
A computer-based system for defining, creating, manipulating, controlling, managing, and using databases.
DB-Library A Sybase and Microsoft API that allows client applications to interact with ODS applications.
destination-template transfer
A transfer method in which source data is briefly put into a template where the user can specify that some action be performed on it before execution against a target database. See also transfer. Compare with bulk copy transfer.
DirectConnect A Sybase Open Server application that provides access management for non-Sybase databases, copy management, and remote systems management. Each DirectConnect consists of a server and one or more service libraries to provide access to a specific data source. DirectConnect replaces the MDI Database Gateway and OmniSQL Access Module. Compare with Enterprise Connect.
DirectConnect Manager
A Sybase Windows application that provides remote management capabilities for DirectConnect products. These capabilities include starting, stopping, creating, and copying services. Formerly called DirectConnect Configuration Tool.

Glossary
Installation Guide 111
DirectConnect Server
The component that provides general management and support functions (such as log file management) to service libraries.
DirectConnect Service
The named set of properties, used with a DirectConnect Service Library, to which clients connect. Each DirectConnect can have multiple services.
DirectConnect Service Library
The component that provides a set of functions within the DirectConnect Server environment.
dynamic link library (dll)
A file containing executable code and data bound to a program at load time or run time, rather than during linking. The code and data in a dynamic link library can be shared by several applications simultaneously.
Enterprise Connect The encompassing architecture upon which Sybase implements heterogeneous data integration. Compare with DirectConnect.
environment variable
A variable that describes how an operating system runs and the devices it recognizes.
graphical user interface (GUI)
A type of computer interface consisting of a visual metaphor of a real-world scene, often of a desktop. Within that scene are icons, representing actual objects, that the user can access and manipulate with a pointing device.
GUI See graphical user interface.
host The mainframe or other machine on which a database, an application, or a program resides. In TCP/IP, this is any system that is associated with at least one Internet address. See also Transmission Control Protocol/Internet Protocol.
interfaces file An operating system file that determines how the host client software connects to a Sybase product. The file must be available on each machine that connects to DirectConnect or other Sybase products.
library A named disk area that can contain programs and related information. A library consists of different sections, called library members.
libtcl file A file containing a list of installed Net-Library drivers. Client applications use information in this file and the sql.ini file to connect to Adaptive Servers (formerly known as SQL server) or Open Server applications. See also sql.ini.
license host Primary server on which the SySAM lmgrd and SYBASE daemons reside.

Glossary
112 Enterprise Connect Data Access for Microsoft Windows
localization The process of preparing an extracted module for a target environment, in which messages are displayed and logged in the user’s language; numbers, money, dates, and time are represented using the user’s cultural convention; and documents are displayed in the user’s language. See also globalization. Compare with internationalization.
ODBC See Open Database Connectivity.
Open Client A Sybase product that provides customer applications, third-party products, and other Sybase products with the interfaces required to communicate with Open Client and Open Server applications.
Open Server A Sybase product that provides the tools and interfaces required to create a custom server.
remote license host Remote machine or server on which SySAM license files and daemons reside.
remote procedure call (RPC)
A stored procedure executed on a different DirectConnect Server from the one onto which a user is logged or on which the initiating application resides.
RPC See remote procedure call.
server A functional unit that provides shared services to workstations over a network. See also client/server. Compare with client.
service A functionality available to DirectConnect applications. It is the pairing of a service library and a set of specific configuration properties.
service library A set of configuration properties that determine service functionality. Examples of service libraries include access service libraries, administrative service libraries, and transaction router service libraries. See also access service library, administrative service library, Transaction Router Service library, transfer service library.
service name redirection
A type of service name resolution that allows a system administrator to map alternative connections to services. See also service name resolution. Compare with direct resolution.
service name redirection file
The default name of the file used for the service name redirection feature. See also service name redirection.
SNRF See service name redirection file.
sql.ini The interfaces file containing definitions for each DirectConnect Server to which a workstation can connect. The file must be on every client machine that connects to Adaptive Servers. See also interfaces file, libtcl file.

Glossary
Installation Guide 113
system administrator
The user in charge of server system administration. For DirectConnect, the user responsible for installing and maintaining servers and service libraries.
TCP/IP See Transmission Control Protocol/Internet Protocol.
transfer A DirectConnect feature that allows users to move data or copies of data from one database to another. See also bulk copy transfer, destination-template transfer.
Transmission Control Protocol/Internet Protocol (TCP/IP)
A set of communication protocols that supports peer-to-peer connectivity functions for both local and wide area networks. See also host.

Glossary
114 Enterprise Connect Data Access for Microsoft Windows

Installation Guide 115
AAdd to Create Table parameter 40adding
license features 8additional licenses
SySAM certificate 8ADDRDBDIRE command
used to define a local relational database 22administrative tasks 20Advanced driver settings
DirectConnect for Informix 43Application Using Threads parameter 43ApplicationName attribute
names 86ArraySize attribute
names 86AS/400
connectivity tasks 21enabling DRDA 22security levels 22
Bbind parameters 41Bind tab 40
CCancel Detect Interval parameter 44changing
AS/400 security setting 23coded character set ID (CCSID) 23
charset attributenames 86
collection name 38Collection parameter 39commands
create table 40configuration checklist
holding the preliminary planning session 19configuring
connectivity for DirectConnect Anywhere to target 47
data source to ODBC Informix driver 43overview 11
connectivityparameters 20preparing for DirectConnect installation 19tasks for AS/400 21testing for DirectConnect Anywhere 47
console mode installation 34, 63conventions used in this book
style xsyntax x
create table command 40Createtable SQL statement
used with DirectConnect ODBC driver setup 81creating
package 42
Ddata source name 39Data Source Name parameter 43database attribute
names 86Database Name parameter 39, 43DatabaseName configuration property
used in AS/400 setup 22DataSourceName attribute
names 86DCDirector 4Default User ID parameter 39defining
packages 40deinstalling a DirectConnect Server 92
Index

Index
116 Enterprise Connect Data Access for Microsoft Windows
description parameter 39, 43DirectConnect Anywhere
configuring connectivity to target 47testing for connectivity to target 47
DirectConnect for InformixAdvance driver settings 43testing connectivity 43
DirectConnect license files 7DirectConnect Manager
description 4features 4, 13
DirectConnect ODBC driverApplicationName configuration property 82ArraySize configuration property 82changing configuration property values 84charset configuration property 81configuring the data source 85connecting to the data source 85, 86connecting to the data source using a connection string
85, 86core functions 86DatabaseList configuration property 81DatabaseName configuration property 81DataSourceName configuration property 80DefaultLogonID configuration property 81description configuration property 80example of a connection string 86InitializationString configuration property 81InterfacesFile configuration property 81Language configuration property 81list of connection string long and short names 86logon dialog box information 85modifySQLStatements configuration property 81ODBC conformance level 86, 88OptimizePrepare configuration property 82optional data source configuration properties 81, 84PacketSize configuration property 84PasswordEncryption configuration property 81required data source configuration properties 80ReuseFailedCursor configuration property 83SelectMethod configuration property 83ServerList configuration property 81ServerName configuration property 80starting the ODBC Administrator 80Translate configuration property 84Windows environments supported 79
WorkstationID configuration property 81YieldProc configuration property 82
DirectConnect Serverhow to deinstall 92
DirectConnect serverrules for installing subdirectories 14
DirectConnect softwareinstalling 29, 57
DRDAenabling for AS/400 22
Dynamic Sections parameter 42
Eenvironment variables
$SYBASE 14LM_LICENSE_FILE 6SYBASE 57
Ffeature licenses
adding additional licenses 8files
HOSTS 39SERVICES 39
GGlobal Transaction support 7Grant Execute parameter 41
Hhardware and software requirements 18Host name parameter 43HostName attribute
names 86HOSTS file 39

Index
Installation Guide 117
IInformix Service name parameter 43InitializationString attribute
names 86installing
administrative tasks
before 20DirectConnect server rules 14DirectConnect software 29, 57overview 11setting environment variable 57using a response file 35, 63using console mode 34, 63worksheet preparation 21
InstallShield 30, 58installing Oracle 58
InterfacesFile attributenames 86
IP address parameter 39
Llanguage attribute
names 86license features
adding 8license files
DirectConnect 7required information 7SySAM 6types 7
license management daemonslmgrd 8lmutil 8SYBASE 8
LM_LICENSE_FILEenvironment variable 6
lmgr utility 8lmgrd daemon 8lmutil utility 8Location Name parameter 39log and trace files
post-installation troubleshooting with 92LoginID attribute
names 86logon dialog box information
database 85login ID 85password 85server name 85
long and short names for DirectConnect ODBC driver connection string 86
MMFC server option
preinstallation for HP 9000(8xx) 95ModifySQLStatement attribute
names 86multiple ASE products
SySAM support 6
OODBC Administrator
Advanced tab 40DirectConnect for DB2 UDB 38General tab 39how to start 80
ODBC Informix driver 43ODBC optional data source configuration properties
ApplicationName 82ArraySize 82charset 81DatabaseList 81DatabaseName 81DefaultLogonID 81InitializationString 81InterfacesFile 81Language 81modifySQLStatement 81OptimizePrepare 82PacketSize 84PasswordEncryption 81ReuseFailedCursor 83SelectMethod 83ServerList 81Translate 84

Index
118 Enterprise Connect Data Access for Microsoft Windows
WorkstationID 81YieldProc 82
ODBC required data source configuration propertiesDataSourceName 80description 80ServerName 80
ODBC.ini fileoverriding values when connecting to the data source
85Oracle
Global Transaction support 7
Ppackage definitions 40package name 38Package parameter 39parameters
Add to Create Table 40Application Using Threads 43bind 41Cancel Detect Interval 44Collection 39Data Source Name 43data source name 39Database Name 39, 43Default User ID 39Description 39description 43Dynamic Sections 42Grant Execute 41Host name 43Informix Service name 43IP address 39Location Name 39Package 39Query Block Size 40researching for connectivity 20TCP Port 39Translate 44Trim Blank from Index Name 44
password attributenames 86
performance 40planning
administrative tasks 20pre-installation
verify previously installed Sybase products 20pre-installation checklist for HP 9000(8xx)
MFC server option 95pre-log error messages
explanation 92
QQuery Block Size parameter 40
Rrelated product documentation
Adaptive Server viiiODBC viiiOmniConnect viiiOpen Client and Open Server viii
requirementshardware and software 18installation team 17
response file installation 35, 63rules
installing DirectConnect server subdirectories 14
Ssecurity levels
AS/400 22select statements
used with DirectConnect ODBC driver SelectMethod 83
ServerName attributenames 86
SERVICES file 39setting
environment variable 57performance parameters 40
setting upAS/400 communication with DirectConnect access
services 21AS/400 security setting 23

Index
Installation Guide 119
connectivity to the target database 19settings 40sql_packet_size
used with DirectConnect ODBC driver PacketSize configuration property 84
SQLExecute commandused with DirectConnect ODBC driver
OptimizePrepare 82SQLPrepare command
used with DirectConnect ODBC driver OptimizePrepare 82
subdirectoriesrules for installing 14
supportGlobal Transaction 7
SYBASE daemon 8SySAM 5
license file environment variable 7license files 7licenses files 6multiple license files 6support for multiple ASE products 6
SySAM certificatesadding additional licenses 8
SySAM licensesrequired information 7types 7
system requirementsfor Windows 18verifying 19
Ttablespace clause 40TCP Port parameter 39testing
connections from DirectConnect Anywhere to target 47
connectivity for DirectConnect for Informix 43Translate parameter 44Trim Blank from Index Name parameter 44troubleshooting for Windows platforms 92
checking server log and trace files 92confirming the Open Server software release
number 92
Vverifying
connectivity to target for DirectConnect Anywhere 47
system requirements 19
WWindows system requirements 18worksheet 21
YYieldProc attribute
names 86

Index
120 Enterprise Connect Data Access for Microsoft Windows