emergency bag essentials: everything you need to bug out
DESCRIPTION
Thinking about how to prepare for an unanticipated crisis is overwhelming by definition. EMERGENCY BAG ESSENTIALS (Potter Style; on-sale 8/26; $14.95) is a straightforward guide to assembling a bug-out bag with basic items to cover your essential needs (food, water, shelter, first aid, communication, and more) for approximately one week. One item is featured on each card, with details about why you should have it, how to use it, and recommended brands.Included in this excerpt:- How to pack your bag- Your water supply- Fire-starting supplies- Overnight shelter- Personal health needs checklistJASON CHARLES is a professional firefighter and community organizer for the New York City Preppers Network. As a trained first-responder, he specializes in teaching preparedness from an urban perspective.TRANSCRIPT
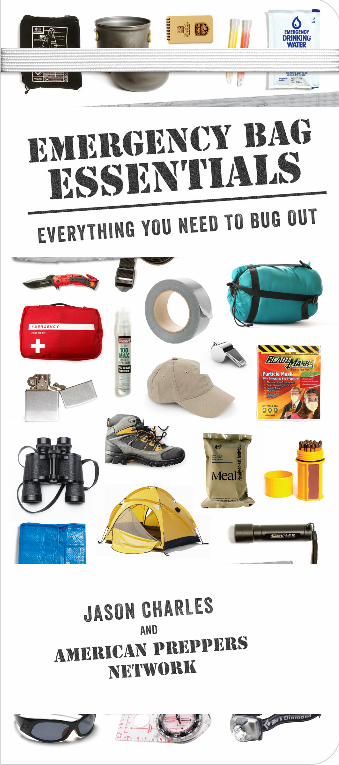
A PREPPER'S GUIDE TO 5 DAYS OF ESSENTIALSAn emergency bag packed with food, water, first- aid supplies, and other necessities will immediately improve your circumstances in any urgent situation. This guide explains exactly what you need to stash in your bag to be safe, self-sufficient, and equipped for any unexpected event.
TOPICS INCLUDE:
■ A 5-DAY FOOD PLAN THAT WEIGHS UNDER 3 POUNDS
■ WATER FILTRATION AND PURIFYING METHODS
■ STAYING WARM AND DRY WITH LIGHTWEIGHT SHELTER OPTIONS
■ CUSTOMIZING THE BAG TO SUIT YOUR FAMILY’S NEEDS
50+ EMERGENCY TOOLS AND TIPS
JASON CHARLES is a firefighter,
9/11 first responder, and
community organizer for the
New York City chapter of the
American Preppers Network.
AMERICAN PREPPERS NETWORK (APN) is a network of regional blogs
and forums dedicated to
pro viding information on
survival, preparedness, self-
sufficiency, and sustainability.
AmericanPreppersNetwork.com
Copyright © 2014 by Jason Charles and the American Preppers Network. All rights reserved. Published in the United States by Potter Style, an imprint of the Crown Publishing Group, a division of Random House LLC, a Penguin Random House Company, New York.
$14.95 (Canada: $17.95)
ISBN 978-0-7704-3516-5
Printed in China
POTTERwww.potterstyle.comCOVER DESIGN: Ken CrosslandPHOTOGRAPHY credits appear on the copyright page.
JASON CHARLES
PO
TTE
R
POTTER STYLE
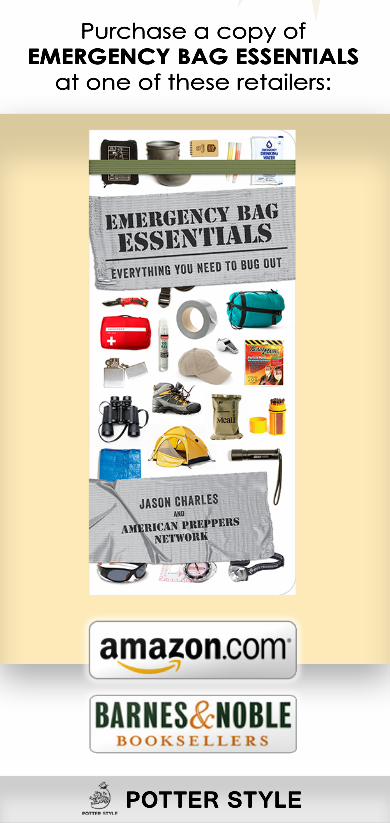
Purchase a copy ofEMERGENCY BAG ESSENTIALSat one of these retailers:
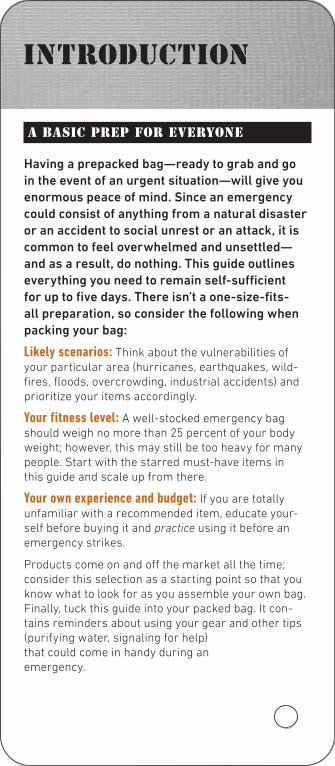
INTRODUCTION
A BASIC PREP FOR EVERYONE
Having a prepacked bag—ready to grab and go in the event of an urgent situation—will give you enormous peace of mind. Since an emergency could consist of anything from a natural disaster or an accident to social unrest or an attack, it is common to feel overwhelmed and unsettled—and as a result, do nothing. This guide outlines everything you need to remain self-sufficient for up to five days. There isn’t a one-size-fits-all preparation, so consider the following when packing your bag:
Likely scenarios: Think about the vulnerabilities of your particular area (hurricanes, earthquakes, wild-fires, floods, overcrowding, industrial accidents) and prioritize your items accordingly.
Your fitness level: A well-stocked emergency bag should weigh no more than 25 percent of your body weight; however, this may still be too heavy for many people. Start with the starred must-have items in this guide and scale up from there.
Your own experience and budget: If you are totally unfamiliar with a recommended item, educate your-self before buying it and practice using it before an emergency strikes.
Products come on and off the market all the time; consider this selection as a starting point so that you know what to look for as you assemble your own bag. Finally, tuck this guide into your packed bag. It con-tains reminders about using your gear and other tips (purifying water, signaling for help) that could come in handy during an emergency.

EMERGENCY BAG RULES
Observe these rules to ensure you are always pre-pared and ready to go.
■ NEVER “borrow” supplies from your bag: and never use your emergency bag for a backpacking trip or other outing. Purchase separate gear for recre-ational activities.
■ Put a reminder in your calendar to update your bag with season-specific gear every six months (or as the seasons change): Check the expiration dates of your food and other perishables. Use the switch-over as an opportunity to air out your sleeping bag and repack your bag with the updated gear.
■ If your weight varies, try on your evacuation clothes once a year and make sure they still fit: Upgrade your children’s emergency bags as they grow.
■ ALWAYS keep your bag in one accessible place at home: Do not move it around, put it into deep storage, or stack things on top of it. This will cause confusion and delay your evacuation.
■ NEVER go through an airport with your bag or EDC (Every Day Carry) items: (See Card 48.) Some of the contents are prohibited by the TSA and you may be detained by law enforcement.
■ Do not add things to your bag without weigh-ing them and trying the bag with the new weight first: Over time you will discover your bag is much heavier than it was initially.
■ Do not hang your bag by the shoulder straps long term: This will stretch out the straps and make the bag uncomfortable to wear.

HOW TO PACK YOUR BAG
Packing your bag is like putting together a puzzle. Group “like” items together and place them in your bag according to how frequently you’ll need to use them. Each person’s bag will be different, but the following cards outline one approach.
MAIN COMPARTMENT: 1st (Bottom) Layer
First, pack flat reference materials (maps, e-reader) that you may not need immediately along the back wall of your main compartment. Keep all documents and maps in plastic bags.
2
Important documents
Maps E-reader Survival manual
main compartment

HOW TO PACK YOUR BAG (CONT.)
MAIN COMPARTMENT: 2nd (Middle) Layer
Next, add the items that you’ll probably only use at the end of the day (in other words, things that don’t need to be readily accessible throughout the day).
Fire-starting kit Emergency blanket Travel pillow
Katadyn Toiletries
Tent Water bottle Camping pot
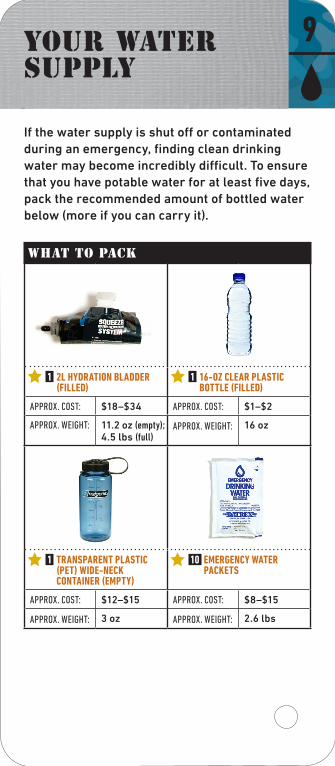
1 2L HYDRATION BLADDER (FILLED)
1 16-OZ CLEAR PLASTIC BOTTLE (FILLED)
APPROX. COST: $18–$34 APPROX. COST: $1–$2
APPROX. WEIGHT: 11.2 oz (empty); 4.5 lbs (full)
APPROX. WEIGHT: 16 oz
1 TRANSPARENT PLASTIC (PET) WIDE-NECK CONTAINER (EMPTY)
10 EMERGENCY WATER PACKETS
APPROX. COST: $12–$15 APPROX. COST: $8–$15
APPROX. WEIGHT: 3 oz APPROX. WEIGHT: 2.6 lbs
9YOUR WATER SUPPLY
If the water supply is shut off or contaminated during an emergency, finding clean drinking water may become incredibly difficult. To ensure that you have potable water for at least five days, pack the recommended amount of bottled water below (more if you can carry it).
WHAT TO PACK

YOUR WATER SUPPLY
HOW TO PACK IT
The hydration bladder fits into its own pocket— usually on the side or in the back of your bag’s main compartment. Strap one water bottle to the outside of your bag or slide it into an exterior pocket. Stow extra bottle(s) inside the main compartment. Emergency water packets can be stored anywhere in the main compartment except for the bottom of your bag.
YOUR HYDRATION NEEDS
Hydration bladder: A hydration bladder is a rubber or plastic reservoir that fits into a specially designated compartment on camping or outdoor-style backpacks. Attached to the reservoir is a hose with a capped mouth, which allows the person wearing the blad-der to drink hands-free while on the move. Look for a reservoir that is puncture resistant and easy to clean. Bleach, water, and sunlight (if the reservoir is clear) will help prevent bacterial growth.
Because it is not recommended to store water in hydration bladders long term, you should rotate out the water in your bladder and clean it every six months, or leave it empty and fill it upon evacuation. An easy way to remember to empty and clean your hydration blad-der is to do it on Thanksgiving and Easter.
Plastic bottles: Pack at least one full water bottle and one empty clear plastic container. Make sure the plastic is BPA-free, and made with food-grade polyethylene. These water bottles can be used for sterilizing and collecting additional water.
Emergency water packets: These little water pouches hold 4.2 ounces of water and are made of heavy-duty Mylar. Two packets will cover your bare-minimum hydration needs for one day, but save these as a last resort. They last about five years if properly sealed.
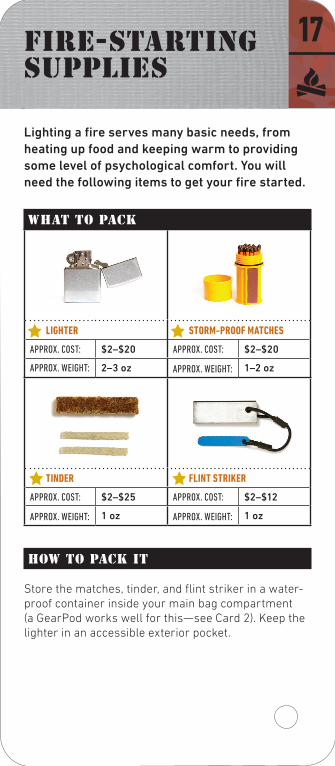
17FIRE-STARTING SUPPLIES
Lighting a fire serves many basic needs, from heating up food and keeping warm to providing some level of psychological comfort. You will need the following items to get your fire started.
WHAT TO PACK
HOW TO PACK IT
Store the matches, tinder, and flint striker in a water-proof container inside your main bag compartment (a GearPod works well for this—see Card 2). Keep the lighter in an accessible exterior pocket.
LIGHTER STORM-PROOF MATCHES
APPROX. COST: $2–$20 APPROX. COST: $2–$20
APPROX. WEIGHT: 2–3 oz APPROX. WEIGHT: 1–2 oz
TINDER FLINT STRIKER
APPROX. COST: $2–$25 APPROX. COST: $2–$12
APPROX. WEIGHT: 1 oz APPROX. WEIGHT: 1 oz
FIRE-STARTING SUPPLIES
FIRE-STARTING TOOLS
Lighters: Choose a butane lighter (also known as a storm-proof lighter, because they work in harsh weather conditions). Butane lighters burn through fluid quickly, so it doesn’t hurt to pack a standard naphtha-fueled lighter (such as a Zippo) as backup. Keep in mind that you’ll be lighting tinder to get the fire going, so you shouldn’t be using too much fuel.
Matches: Matches are a must-have item. Purchase a container of NATO Survival Matches (standard match-books are flimsy and the match heads break apart too easily). You can also make your own waterproof matches by dipping the match heads in wax and stor-ing them in a plastic container.
Tinder: Tinder can be made from dryer lint, shred-ded egg cartons, coconut oil–soaked cotton balls, and dried wood shavings. You can also purchase compact tinder sticks from camping supply sites. Slow-burning tinder (like coconut oil–soaked cotton balls) can help you get a fire going even in adverse conditions.
Flint strikers: This alternative fire-starting method takes some practice, but it is the ultimate backup solution if you run out of matches or lighter fuel. This tool has two parts: a flint and a striker. Scraping the striker against the flint creates sparks, which—when used in conjunction with tinder—will start a fire.

20OVERNIGHT SHELTER
Add an overnight shelter, such as a tent or bivy sack, to your bag in case you are forced to evacuate and can’t find shelter for the night. Practice assembling your tent in advance of an emergency.
WHAT TO PACK
HOW TO PACK IT
Heavier items, like a tent, should be packed in the main compartment of your bag (ideally toward the top and close to your spine). A smaller bivy sack may fit in your sleeping bag compartment (if your bag has one).
GORTEX BIVY COVER FREESTANDING TENT
APPROX. COST: $40–$90 APPROX. COST: $90–$160
APPROX. WEIGHT: 2.2 lbs APPROX. WEIGHT: 3.5 lbs
OR
OVERNIGHT SHELTER
CHOOSING YOUR EMERGENCY SHELTER
Ideally, every able-bodied person in a family should have an overnight shelter in his or her bag in case he or she gets separated from the group. Even if the parents each carry a heavier 2- to 3-person tent, each of the children should carry his or her own emergency bivy sack. Avoid buying one unwieldy, multiperson tent for the whole family.
Bivy sack: This extremely small, lightweight, water-proof shelter serves as an alternative to a tent. A bivy sack is essentially a waterproof fabric case that slips over your sleeping bag and traditionally covers the head and face. Simply remove the bivy from its sack and lay it out flat on the ground. Place your sleep-ing pad inside the bivy, then inflate it. Next, add your sleeping bag, and finally, crawl in yourself. Securely close the bivy, leaving a small gap for ventilation.
Tent: Although it is tempting to buy an inexpensive tent, it pays to invest in one of the higher-quality and lighter-weight models. A good emergency tent should be waterproof, durable, easy to set up, lightweight, and big enough to accommodate your size. It should also be freestanding so that you can set it up without ground stakes or tie offs. In advance of an emergency, practice assembling, breaking down, and stowing your tent in your bag.
Which one is right for you? Bivy sacks are inexpen-sive, lightweight, and very easy to set up. They are not ideal for those who suffer from claustrophobia (better to opt for a heavier, more expensive tent). Bivy sacks also tend to breath poorly and need to be vented to prevent condensation buildup.

32PERSONAL HEALTH NEEDS CHECKLIST
If you (or anyone in your family) have any under-lying health conditions, make sure that your bag is packed with medication adequate for at least five days. If your conditions or medications are not included on this card, add them to the end of the list (then use this card as a packing checklist).
❏ Spare glasses ❏ Contacts and contact lens solution ❏ Supplements ❏ Allergy medication(s) ❏ EpiPen ❏ Insulin ❏ Mental health medication(s) ❏ Blood pressure medication(s) ❏ Asthma rescue inhaler ❏ Migraine medication ❏ Extra batteries for hearing aids ❏ Epilepsy medication(s) and identification ❏ Heart condition medication(s) and identification
Other prescriptions/medications:
❏ ❏ ❏ ❏ ❏ ❏ ❏
PERSONAL HEALTH NEEDS
SPECIAL CONDITIONS
If you are deaf or hard of hearing, if you have a rare blood type, or if you are allergic to certain medications or food, be sure that important information is noted somewhere in your backpack. (You can fill in those details on this card, below.) If you have an identifica-tion bracelet detailing your condition(s), be sure to wear it when you leave home.
Health conditions:

POTTER STYLE
Purchase a copy ofEMERGENCY BAG ESSENTIALSat one of these retailers: