elements of artwork line line is a contour of an object and its parts. color is a reflection of...
TRANSCRIPT

Gallery Time
Portraits

Elements of Artwork
Line
Mary Cassatt(1844 – 1926)
Line is a contour of an object and its parts.
Color is a reflection of light; a specific color is called a hue.Texture is the physical and/or visual “feel” of paint and brushwork on canvas.
ColorTexture

LetsDiscuss
Art

What is a portrait?
George Catlin(1796 – 1872)
Pablo Picasso(1881 – 1973)
James Whistler(1834 – 1903)
A picture of a person(s) is called a portrait.
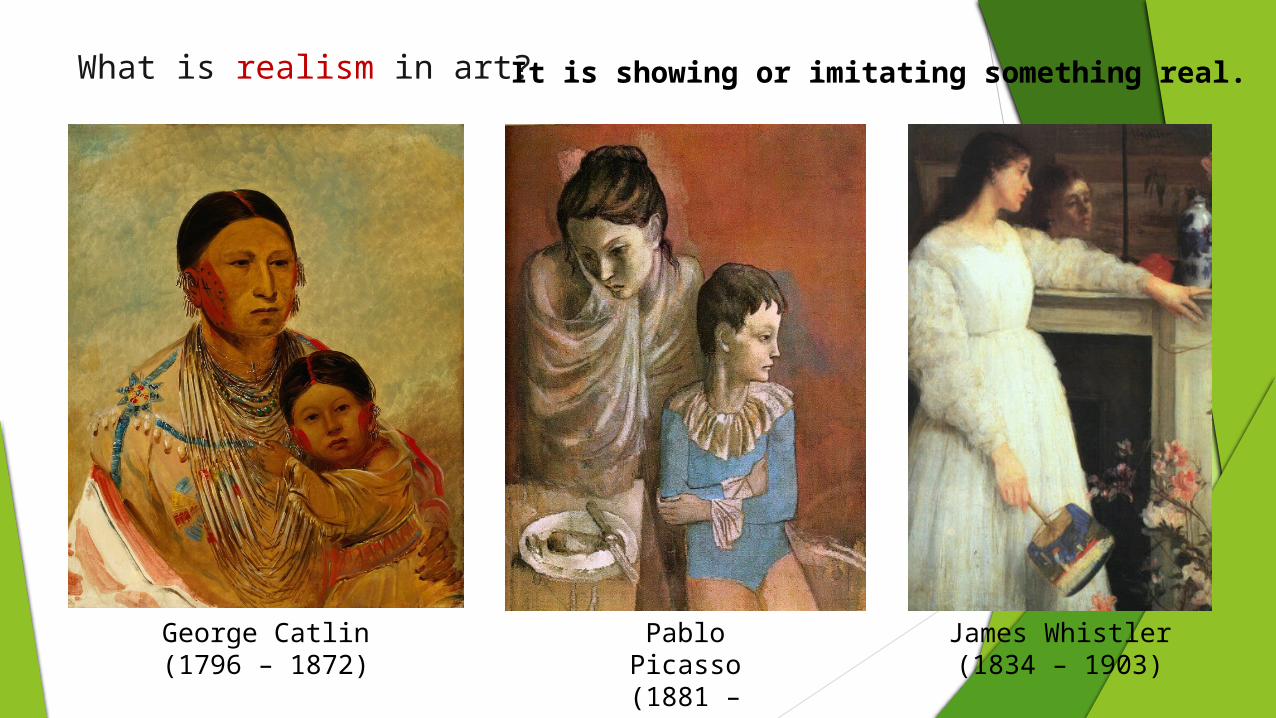
What is realism in art?
George Catlin(1796 – 1872)
Pablo Picasso(1881 – 1973)
James Whistler(1834 – 1903)
It is showing or imitating something real.

How is emotion shown in these pieces of art?
George Catlin(1796 – 1872)
Pablo Picasso(1881 – 1973)
James Whistler(1834 – 1903)

What is the artist’s style, or choices of colors, texture, detail and mood in these art pieces?
George Catlin(1796 – 1872)
Pablo Picasso(1881 – 1973)
James Whistler(1834 – 1903)

What stories do these works of art tell us?
George Catlin(1796 – 1872)
Pablo Picasso(1881 – 1973)
James Whistler(1834 – 1903)

StepByStep

Materials:•Paper•Pencil•Eraser•Soft pastels•Mirror
Hint: Look at your face in the mirror during this exercise to compare it
with what you are drawing.

Step 1: Sketching and composing •With a pencil,
lightly sketch a large oval shape. Add lines for neck and clothing.

• Before drawing eyes, lips and nose, lightly draw a vertical line of symmetry - a dividing line that runs from the top of the head to the chin, making two mirror halves of the face.

• Next, draw a horizontal line that divides the face half way between the top of the head and the chin.

• Lightly sketch in: eyes, FUN FACT: 5
equal size eyes should fit along the horizontal line!
line (half way between chin and
horizontal line) and circles for nose,
lines for lips (bottom lip line half way between chin and nose line).

• Lightly sketch in the hair and, if hair is short, ears.

• Erase unnecessary lines.

Step 2: Filling in colors • Find a soft
pastel that is close in color to your skin. Color in your face and neck.
Hint: you don’t need to be too detailed here.

• Find a soft pastel closest to your hair color, and lightly color in your hair and eyebrows.

• Color in your eyes, lips and clothing.

Step 3: Shading and highlighting • With a dark (brown,
purple or navy blue) soft pastel, lightly shade in dark areas:around the eyes,side of the nose,under the chin, lip and
nose,sides of the face,
forehead,ears.Hint: Use tips of your
fingers to softly blend colors.

• With a light (yellow or white) soft pastel, highlight the following areas: hair, cheeks, chin, bottom lip, center of the
neck, ridge and tip of
the nose. Hint: Use fingertips
to blend.

Step 4: Adding finishing touches• Look at your picture from afar.
Show it to the person next to you.
• Does it need anything more?• Finish it with your personal
touch by blending colors together.
Hint: Use black only to touch up small areas.

Step 5: Your finished masterpiece