effective django - newtekftp.newtek.com/pub/temp/effectivedjango.pdf4.2 referring to static files in...
TRANSCRIPT

Effective DjangoBuild 2013.11.19
Nathan Yergler
19 November 2013


CONTENTS
1 Getting Started 31.1 Your Development Environment . . . . . . . . . . . . . . . . . . . . . . . . . . . . . . . . . . . . . 31.2 Setting Up Your Environment . . . . . . . . . . . . . . . . . . . . . . . . . . . . . . . . . . . . . . 41.3 Beginning a Django Project . . . . . . . . . . . . . . . . . . . . . . . . . . . . . . . . . . . . . . . 5
2 Using Models 72.1 Configuring the Database . . . . . . . . . . . . . . . . . . . . . . . . . . . . . . . . . . . . . . . . 72.2 Creating a Model . . . . . . . . . . . . . . . . . . . . . . . . . . . . . . . . . . . . . . . . . . . . . 72.3 Interacting with the Model . . . . . . . . . . . . . . . . . . . . . . . . . . . . . . . . . . . . . . . . 92.4 Writing a Test . . . . . . . . . . . . . . . . . . . . . . . . . . . . . . . . . . . . . . . . . . . . . . 102.5 Review . . . . . . . . . . . . . . . . . . . . . . . . . . . . . . . . . . . . . . . . . . . . . . . . . . 10
3 Writing Views 133.1 View Basics . . . . . . . . . . . . . . . . . . . . . . . . . . . . . . . . . . . . . . . . . . . . . . . 133.2 Generic & Class Based Views . . . . . . . . . . . . . . . . . . . . . . . . . . . . . . . . . . . . . . 133.3 Class Based Views . . . . . . . . . . . . . . . . . . . . . . . . . . . . . . . . . . . . . . . . . . . . 143.4 Listing Contacts . . . . . . . . . . . . . . . . . . . . . . . . . . . . . . . . . . . . . . . . . . . . . 143.5 Defining URLs . . . . . . . . . . . . . . . . . . . . . . . . . . . . . . . . . . . . . . . . . . . . . . 153.6 Creating the Template . . . . . . . . . . . . . . . . . . . . . . . . . . . . . . . . . . . . . . . . . . 153.7 Creating Contacts . . . . . . . . . . . . . . . . . . . . . . . . . . . . . . . . . . . . . . . . . . . . 173.8 Testing Your Views . . . . . . . . . . . . . . . . . . . . . . . . . . . . . . . . . . . . . . . . . . . . 183.9 Integration Tests . . . . . . . . . . . . . . . . . . . . . . . . . . . . . . . . . . . . . . . . . . . . . 193.10 Review . . . . . . . . . . . . . . . . . . . . . . . . . . . . . . . . . . . . . . . . . . . . . . . . . . 20
4 Using Static Assets 234.1 Adding Static Files . . . . . . . . . . . . . . . . . . . . . . . . . . . . . . . . . . . . . . . . . . . . 234.2 Referring to Static Files in Templates . . . . . . . . . . . . . . . . . . . . . . . . . . . . . . . . . . 244.3 Simple Template Inclusion . . . . . . . . . . . . . . . . . . . . . . . . . . . . . . . . . . . . . . . . 244.4 Serving Static Files . . . . . . . . . . . . . . . . . . . . . . . . . . . . . . . . . . . . . . . . . . . . 254.5 Review . . . . . . . . . . . . . . . . . . . . . . . . . . . . . . . . . . . . . . . . . . . . . . . . . . 26
5 Additional Generic Views 275.1 Edit Views . . . . . . . . . . . . . . . . . . . . . . . . . . . . . . . . . . . . . . . . . . . . . . . . 275.2 Deleting Contacts . . . . . . . . . . . . . . . . . . . . . . . . . . . . . . . . . . . . . . . . . . . . 295.3 Detail View . . . . . . . . . . . . . . . . . . . . . . . . . . . . . . . . . . . . . . . . . . . . . . . . 30
6 Form Basics 316.1 Adding Fields to the Form . . . . . . . . . . . . . . . . . . . . . . . . . . . . . . . . . . . . . . . . 316.2 Overriding the Default Form . . . . . . . . . . . . . . . . . . . . . . . . . . . . . . . . . . . . . . . 326.3 Customizing Validation . . . . . . . . . . . . . . . . . . . . . . . . . . . . . . . . . . . . . . . . . 326.4 Controlling Form Rendering . . . . . . . . . . . . . . . . . . . . . . . . . . . . . . . . . . . . . . . 33
i

6.5 Testing Forms . . . . . . . . . . . . . . . . . . . . . . . . . . . . . . . . . . . . . . . . . . . . . . 356.6 Review . . . . . . . . . . . . . . . . . . . . . . . . . . . . . . . . . . . . . . . . . . . . . . . . . . 36
7 Related Models 377.1 Adding Relationships . . . . . . . . . . . . . . . . . . . . . . . . . . . . . . . . . . . . . . . . . . 377.2 Editing Related Objects . . . . . . . . . . . . . . . . . . . . . . . . . . . . . . . . . . . . . . . . . 38
8 Handling Authentication & Authorization 418.1 Authentication . . . . . . . . . . . . . . . . . . . . . . . . . . . . . . . . . . . . . . . . . . . . . . 418.2 Authorization . . . . . . . . . . . . . . . . . . . . . . . . . . . . . . . . . . . . . . . . . . . . . . . 448.3 Review . . . . . . . . . . . . . . . . . . . . . . . . . . . . . . . . . . . . . . . . . . . . . . . . . . 46
ii

Effective Django, Build 2013.11.19
Note: Video of this tutorial (https://www.youtube.com/watch?v=NfsJDPm0X54) from PyCon is available onYouTube.
Django is a popular, powerful web framework for Python. It has lots of “batteries” included, and makes it easy toget up and going. But all of the power means you can write low quality code that still seems to work. So what doesEffective Django mean? It means using Django in a way that emphasizes writing code that’s cohesive, testable, andscalable. What do each of those words mean?
Well, “cohesive” code is code that is focused on doing one thing, and one thing alone. It means that when you write afunction or a method, that it does one thing and does it well.
This is directly related to writing testable code: code that’s doing too much is often difficult to write tests for. When Ifind myself thinking, “Well, this piece of code is just too complex to write a test for, it’s not really worth all the effort,”that’s a signal that I need to step back and focus on simplifying it. Testable code is code that makes it straight-forwardto write tests for, and that’s easy to diagnose problems with.
Finally, we want to write scalable code. That doesn’t just mean it scales in terms of performance, but that it alsoscales in terms of your team and your team’s understanding. Applications that are well tested are easier for othersto understand (and easier for them to modify), which means you’re more able to improve your application by addingengineers.
My goal is to convince you of the importance of these principles, and provide examples of how to follow them to buildmore robust Django applications. I’m going to walk through building a contact management application iteratively,talking about the choices and testing strategy as I go.
The sample code for this tutorial is available in the effective-django-tutorial (https://github.com/nyergler/effective-django-tutorial/) git repository.
Slides for the tutorial are available at http://effectivedjango.com/slides/tutorial
CONTENTS 1

Effective Django, Build 2013.11.19
2 CONTENTS

CHAPTER
ONE
GETTING STARTED
1.1 Your Development Environment
When thinking about your development environment, there are three important things to keep in mind: isolation,determinism, and similarity. They’re each important, and they work in concert with one another.
Isolation means that you’re not inadvertently leveraging tools or packages installed outside the environment. This isparticularly important when it comes to something like Python packages with C extensions: if you’re using somethinginstalled at the system level and don’t know it, you can find that when you go to deploy or share your code that itdoesn’t operate the way you expect. A tool like virtualenv (http://www.virtualenv.org/) can help create that sort ofenvironment.
Your environment is deterministic if you’re confident about what versions of your dependencies you’re relying on,and can reproduce that environment reliably.
Finally, similarity to your production or deployment environment means you’re running on the same OS, preferablythe same release, and that you’re using the same tools to configure your development environment that you use toconfigure your deployment environment. This is by no means a requirement, but as you build bigger, more complexsoftware, it’s helpful to be confident that any problem you see in production is reproducable in your developmentenvironment, and limit the scope of investigation to code you wrote.
1.1.1 Isolation
• We want to avoid using unknown dependencies, or unknown versions
• virtualenv (http://www.virtualenv.org/) provides an easy way to work on a project without your system’ssite-packages
1.1.2 Determinism
• Determinism is all about dependency management
• Choose a tool, use it in development and production
– pip, specifically a requirements files (http://www.pip-installer.org/en/latest/requirements.html)
– buildout (http://www.buildout.org/)
– install_requires (http://pythonhosted.org/distribute/setuptools.html#declaring-dependencies) in setup.py
• Identify specific versions of dependencies
You can specify versions either by the version for a package on PyPI, or a specific revision (SHA in git, revisionnumber in Subversion, etc). This ensures that you’re getting the exact version you’re testing with.
3

Effective Django, Build 2013.11.19
1.1.3 Similarity
• Working in an environment similar to where you deploy eliminates variables when trying to diagnose an issue
• If you’re building something that requires additional services, this becomes even more important.
• Vagrant (http://vagrantup.com/) is a tool for managing virtual machines, lets you easily create an environmentseparate from your day to day work.
1.2 Setting Up Your Environment
1.2.1 Create a Clean Workspace
$ mkdir tutorial$ virtualenv ./tutorial/New python executable in ./tutorial/bin/pythonInstalling setuptools............done.Installing pip...............done.$ source ./tutorial/bin/activate(tutorial)$
1.2.2 Start a Requirements File
Create a requirements.txt in the tutorial directory with a single requirement in it.
Django==1.5.1
1.2.3 Installing Requirements
And then we can use pip (http://www.pip-installer.org/) to install the dependencies.
(tutorial)$ pip install -U -r requirements.txt
Downloading/unpacking Django==1.5.1Downloading Django-1.5.1.tar.gz (8.0MB): 8.0MB downloadedRunning setup.py egg_info for package Django
warning: no previously-included files matching ’__pycache__’ found under directory ’*’warning: no previously-included files matching ’*.py[co]’ found under directory ’*’
Installing collected packages: DjangoRunning setup.py install for Djangochanging mode of build/scripts-2.7/django-admin.py from 644 to 755
warning: no previously-included files matching ’__pycache__’ found under directory ’*’warning: no previously-included files matching ’*.py[co]’ found under directory ’*’changing mode of /home/nathan/p/edt/bin/django-admin.py to 755
Successfully installed DjangoCleaning up...
4 Chapter 1. Getting Started

Effective Django, Build 2013.11.19
1.3 Beginning a Django Project
When a building is under construction, scaffolding is often used to support the structure before it’s complete. Thescaffolding can be temporary, or it can serve as part of the foundation for the building, but regardless it provides somesupport when you’re just starting out.
Django, like many web frameworks, provides scaffolding for your development efforts. It does this by making deci-sions and providing a starting point for your code that lets you focus on the problem you’re trying to solve, and nothow to parse an HTTP request. Django provides HTTP, as well as file system scaffolding.
The HTTP scaffolding handles things like parsing an HTTP request into a Python object and providing tools toeasily create a response. The file system scaffolding is a little different: it’s a set of conventions for organizingyour code. These conventions make it easier to add engineers to a project, since they (hypothetically) have someidea how the code is organized. In Django parlance, a project is the final product, and it assembles one or moreapplications together. Django 1.4 made a change to the way the projects and applications are laid out on disk(https://docs.djangoproject.com/en/1.5/releases/1.4/#updated-default-project-layout-and-manage-py), which makes iteasier to decouple and reuse applications between projects.
1.3.1 Creating the Project
Django installs a django-admin.py script for handling scaffolding tasks. We’ll use startproject to createthe project files. We specify the project name and the directory to start in; we’re already in our isolated environmentso we can just say .
(tutorial)$ django-admin.py startproject addressbook .
manage.py./addressbook
__init__.pysettings.pyurls.pywsgi.py
1.3.2 Project Scaffolding
• manage.py is a pointer back to django-admin.py with an environment variable set, pointing to yourproject as the one to read settings from and operate on when needed.
• settings.py is where you’ll configure your project. It has a few sensible defaults, but no database chosenwhen you start.
• urls.py contains the URL to view mappings: we’ll talk more about that shortly.
• wsgi.py is a WSGI (https://en.wikipedia.org/wiki/Web_Server_Gateway_Interface) wrapper for your appli-cation. This is used by Django’s development servers, and possibly other containers like mod_wsgi, uwsgi, etc.in production.
1.3.3 Creating the “App”
(tutorial)$ python ./manage.py startapp contacts
./addressbook
./contacts__init__.py
1.3. Beginning a Django Project 5

Effective Django, Build 2013.11.19
models.pytests.pyviews.py
• Beginning in Django 1.4, apps are placed alongside project packages. This is a great improvement when itcomes to deployment.
• models.py will contain the Django ORM models for your app.
• views.py will contain the View code
• tests.py will contain the unit and integration tests you write.
6 Chapter 1. Getting Started

CHAPTER
TWO
USING MODELS
2.1 Configuring the Database
Django includes support out of the box for MySQL, PostgreSQL, SQLite3, and Oracle. SQLite3(http://docs.python.org/2/library/sqlite3.html) is included with Python starting with version 2.5, so we’ll use it forour project for simplicity. If you were going to use MySQL, for example, you’d need to add mysql-python(https://pypi.python.org/pypi/MySQL-python) to your requirements.txt file.
To enable SQLite as the database, edit the DATABASES definition in addressbook/settings.py. Thesettings.py file contains the Django configuration for our project. There are some settings that youmust specify – like the DATABASES configuration – and others that are optional. Django fills in somedefaults when it generates the project scaffolding, and the documentation contains a full list of settings(https://docs.djangoproject.com/en/1.5/ref/settings/). You can also add your own settings here, if needed.
For SQLite we need to set the engine and then give it a name. The SQLite backend uses the NAME as the filename forthe database.
DATABASES = {’default’: {
’ENGINE’: ’django.db.backends.sqlite3’, # ’postgresql_psycopg2’, ’mysql’, ’sqlite3’ or ’oracle’.’NAME’: ’address.db’,’USER’: ’’, # Not used with sqlite3.’PASSWORD’: ’’, # Not used with sqlite3.’HOST’: ’’, # Set to empty string for localhost. Not used with sqlite3.’PORT’: ’’, # Set to empty string for default. Not used with sqlite3.
}}
Note that the database engine is specified as a string, and not a direct reference to the Python object. This is becausethe settings file needs to be easily importable, without triggering any side effects. You should avoid adding imports tothe settings file.
You rarely need to import the settings file directly; Django imports it for you, and makes it available asdjango.conf.settings. You typically import your settings from django.conf:
from django.conf import settings
2.2 Creating a Model
Django models map (roughly) to a database table, and provide a place to encapsulate business logic. All mod-els subclass the base Model (https://docs.djangoproject.com/en/1.5/ref/models/instances/#django.db.models.Model)
7
Effective Django, Build 2013.11.19
class, and contain field definitions. Let’s start by creating a simple Contact model for our application incontacts/models.py.
from django.db import models
class Contact(models.Model):
first_name = models.CharField(max_length=255,
)last_name = models.CharField(
max_length=255,
)
email = models.EmailField()
def __str__(self):
return ’ ’.join([self.first_name,self.last_name,
])
Django provides a set of fields (https://docs.djangoproject.com/en/1.5/ref/models/fields/) that map to data types anddifferent validation rules. For example, the EmailField here maps to the same column type as the CharField,but adds validation for the data.
Once you’ve created a model, you need to update your database with the new tables. Django’s syncdb commandlooks for models that are installed and creates tables for them if needed.
(tutorial)$ python ./manage.py syncdb
Creating tables ...Creating table auth_permissionCreating table auth_group_permissionsCreating table auth_groupCreating table auth_user_user_permissionsCreating table auth_user_groupsCreating table auth_userCreating table django_content_typeCreating table django_sessionCreating table django_site
...
Our contact table isn’t anywhere to be seen. The reason is that we need to tell the Project to use the Application.
The INSTALLED_APPS setting lists the applications that the project uses. These are listed as strings that map toPython packages. Django will import each and looks for a models module there. Add our Contacts app to theproject’s INSTALLED_APPS setting:
INSTALLED_APPS = (’django.contrib.auth’,’django.contrib.contenttypes’,’django.contrib.sessions’,’django.contrib.sites’,’django.contrib.messages’,’django.contrib.staticfiles’,
8 Chapter 2. Using Models

Effective Django, Build 2013.11.19
# Uncomment the next line to enable the admin:# ’django.contrib.admin’,# Uncomment the next line to enable admin documentation:# ’django.contrib.admindocs’,’contacts’,
)
Then run syncdb again:
(tutorial)$ python ./manage.py syncdbCreating tables ...Creating table contacts_contactInstalling custom SQL ...Installing indexes ...Installed 0 object(s) from 0 fixture(s)
Note that Django created a table named contacts_contact: by default Django will name your tables us-ing a combination of the application name and model name. You can override that with the model Meta(https://docs.djangoproject.com/en/1.5/ref/models/options/) options.
2.3 Interacting with the Model
Now that the model has been synced to the database we can interact with it using the interactive shell.
(tutorial)$ python ./manage.py shellPython 2.7.3 (default, Aug 9 2012, 17:23:57)[GCC 4.7.1 20120720 (Red Hat 4.7.1-5)] on linux2Type "help", "copyright", "credits" or "license" for more information.(InteractiveConsole)>>> from contacts.models import Contact>>> Contact.objects.all()[]>>> Contact.objects.create(first_name=’Nathan’, last_name=’Yergler’)<Contact: Nathan Yergler>>>> Contact.objects.all()[<Contact: Nathan Yergler>]>>> nathan = Contact.objects.get(first_name=’Nathan’)>>> nathan<Contact: Nathan Yergler>>>> print nathanNathan Yergler>>> nathan.id1
There are a few new things here. First, the manage.py shell command gives us a interactive shell with the Pythonpath set up correctly for Django. If you try to run Python and just import your application, an Exception will be raisedbecause Django doesn’t know which settings to use, and therefore can’t map Model instances to the database.
Second, there’s this objects property on our model class. That’s the model’s Manager(https://docs.djangoproject.com/en/1.5/topics/db/managers/). If a single instance of a Model is analogous to arow in the database, the Manager is analogous to the table. The default model manager provides querying functional-ity, and can be customized. When we call all() or filter() or the Manager, a QuerySet is returned. A QuerySetis iterable, and loads data from the database as needed.
Finally, there’s this id field that we didn’t define. Django adds an id field as the primary key for your model, unlessyou specify a primary key (https://docs.djangoproject.com/en/1.5/topics/db/models/#automatic-primary-key-fields).
2.3. Interacting with the Model 9

Effective Django, Build 2013.11.19
2.4 Writing a Test
We have one method defined on our model, __str__, and this is a good time to start writing tests. The __str__method of a model will get used in quite a few places, and it’s entirely conceivable it’d be exposed to end users. It’sworth writing a test so we understand how we expect it to operate. Django creates a tests.py file when it createsthe application, so we’ll add our first test to that file in the contacts app.
from contacts.models import Contact...class ContactTests(TestCase):
"""Contact model tests."""
def test_str(self):
contact = Contact(first_name=’John’, last_name=’Smith’)
self.assertEquals(str(contact),’John Smith’,
)
You can run the tests for your application using manage.py:
(tutorial)$ python manage.py test
If you run this now, you’ll see that around 420 tests run. That’s surprising, since we’ve only written one. That’sbecause by default Django runs the tests for all installed applications. When we added the contacts app to ourproject, there were several Django apps there by default. The extra 419 tests come from those.
If you want to run the tests for a specific app, just specify the app name on the command line:
(tutorial)$ python manage.py test contactsCreating test database for alias ’default’.....----------------------------------------------------------------------Ran 2 tests in 0.000s
OKDestroying test database for alias ’default’...$
One other interesting thing to note before moving on is the first and last line of output: “Creating test database” and“Destroying test database”. Some tests need access to a database, and because we don’t want to mingle test data with“real” data (for a variety of reasons, not the least of which is determinism), Django helpfully creates a test databasefor us before running the tests. Essentially it creates a new database, and runs syncdb on it. If you subclass fromDjango’s TestCase (which we are), Django also resets any default data after running each TestCase, so that changesin one test won’t break or influence another.
2.5 Review
• Models define the fields in a table, and can contain business logic.
• The syncdb manage command creates the tables in your database from models
• The model Manager allows you to operate on the collection of instances: querying, creating, etc.
• Write unit tests for methods you add to the model
10 Chapter 2. Using Models

Effective Django, Build 2013.11.19
• The test manage command runs the unit tests
2.5. Review 11

Effective Django, Build 2013.11.19
12 Chapter 2. Using Models

CHAPTER
THREE
WRITING VIEWS
3.1 View Basics
Django Views take an HTTP Request (https://docs.djangoproject.com/en/1.5/ref/request-response/#httprequest-objects) and return an HTTP Response (https://docs.djangoproject.com/en/1.5/ref/request-response/#httpresponse-objects) to the user.
Any Python callable can be a view. The only hard and fast requirement is that it takes the request object (customarilynamed request) as its first argument. This means that a minimalist view is super simple:
from django.http import HttpResponse
def hello_world(request):return HttpResponse("Hello, World")
Of course, like most frameworks, Django also allows you to pass arguments to the view from the URL. We’ll coverthis as we build up our application.
3.2 Generic & Class Based Views
• Generic Views (https://docs.djangoproject.com/en/1.5/topics/class-based-views/generic-display/) have alwaysprovided some basic functionality: render a template, redirect, create or edit a model, etc.
• Django 1.3 introduced Class Based Views (https://docs.djangoproject.com/en/1.5/topics/class-based-views/)(CBV) for the generic views
• Provide higher levels of abstraction and composability
• Also hide a lot of complexity, which can be confusing for the newcomer
• Luckily the documentation is much better with Django 1.5
13

Effective Django, Build 2013.11.19
Django 1.3 introduced class based views, which is what we’ll be focusing on here. Class based views, or CBVs, caneliminate a lot of boilerplate from your views, especially for things like an edit view where you want to take differentaction on a GET vs POST. They give you a lot of power to compose functionality from pieces. The downside is thatthis power comes with some added complexity.
3.3 Class Based Views
The minimal class based view subclasses View (https://docs.djangoproject.com/en/1.5/ref/class-based-views/base/#view) and implements methods for the HTTP methods it supports. Here’s the class-based versionof the minimalist “Hello, World” view we previously wrote.
from django.http import HttpResponsefrom django.views.generic import View
class MyView(View):
def get(self, request, *args, **kwargs):return HttpResponse("Hello, World")
In a class based view, HTTP methods map to class method names. In this case, we’ve defined a handler for GETrequests with the get method. Just like the function implementation, it takes request as its first argument, andreturns an HTTP Response.
Permissive Signatures
You may notice that it has a couple of extra arguments in its signature, compared to the view we saw previ-ously, specifically *args and **kwargs. Class based views were first introduced as a way to make Django’s“generic” views more flexible. That meant they were used in many different contexts, with potentially differentarguments extracted from the URLs. As I’ve been writing class based views over the past year, I’ve continued towrite them with permissive signatures, as I’ve found they’re often useful in ways I didn’t initially expect.
3.4 Listing Contacts
We’ll start with a view that presents a list of contacts in the database.
The basic view implementation is shockingly brief. We can write the view in just a few lines in the views.py file inour contacts application.
from django.views.generic import ListView
from contacts.models import Contact
class ListContactView(ListView):
model = Contact
The ListView (https://docs.djangoproject.com/en/1.5/ref/class-based-views/generic-display/#listview) that we sub-class from is itself composed of several mixins that provide some behavior, and that composition gives us a lot ofpower without a lot of code. In this case we set model = Contact, which says that this view is going to list all theContacts in our database.
14 Chapter 3. Writing Views

Effective Django, Build 2013.11.19
3.5 Defining URLs
The URL configuration tells Django how to match a request’s path to your Python code. Django looks for the URLconfiguration, defined as urlpatterns, in the urls.py file in your project.
Let’s add a URL mapping for our contact list view in addressbook/urls.py.
from django.conf.urls import patterns, include, url
import contacts.views
urlpatterns = patterns(’’,url(r’^$’, contacts.views.ListContactView.as_view(),
name=’contacts-list’,),)
• Use of the url() function is not strictly required, but I like it: when you start adding more information to theURL pattern, it lets you use named parameters, making everything more clear.
• The first parameter is a regular expression. Note the trailing $; why might that be important?
• The second parameter is the view callable. It can either be the actual callable (imported manually), or a stringdescribing it. If it’s a string, Django will import the module (up to the final dot), and then calls the final segmentwhen a request matches.
• Note that when we’re using a class based view, we must use the real object here, and not the string notation.That’s because we have to call the class method as_view(), which returns a wrapper around our class thatDjango’s URL dispatch can call.
• Giving a URL pattern a name allows you to do a reverse lookup
• The URL name is useful when linking from one View to another, or redirecting, as it allows you to manage yourURL structure in one place
While the urlpatterns name must be defined, Django also allows you to define a few other values in theURL configuration for exceptional cases. These include handler403, handler404, and handler500,which tell Django what view to use when an HTTP error occurs. See the Django urlconf documentation(https://docs.djangoproject.com/en/1.5/ref/urls/#handler403) for details.
URL Configuration Import ErrorsDjango loads the URL configuration very early during startup, and will attempt to import things it finds here. If one ofthe imports fails, however, the error message can be somewhat opaque. If your project stops working with an import-related exception, try to import the URL configuration in the interactive shell. That usually makes it clear where theproblem lies.
3.6 Creating the Template
Now that we’ve defined a URL for our list view, we can try it out. Django includes a server suitable for developmentpurposes that you can use to easily test your project:
$ python manage.py runserverValidating models...
0 errors foundDjango version 1.4.3, using settings ’addressbook.settings’
3.5. Defining URLs 15

Effective Django, Build 2013.11.19
Development server is running at http://127.0.0.1:8000/Quit the server with CONTROL-C.
If you visit the http://localhost:8000/ in your browser, though, you’ll see an error:TemplateDoesNotExist.
Most of Django’s generic views (such as ListView which we’re using) have a predefined template name that theyexpect to find. We can see in this error message that this view was expecting to find contact_list.html, whichis derived from the model name. Let’s go and create that.
By default Django will look for templates in applications, as well as in directories you specify insettings.TEMPLATE_DIRS. The generic views expect that the templates will be found in a directory namedafter the application (in this case contacts), and the filename will contain the model name (in this casecontact_list.html). This works very well when you’re distributing a reusable application: the consumer cancreate templates that override the defaults, and they’re clearly stored in a directory associated with the application.
For our purposes, however, we don’t need that extra layer of directory structure, so we’ll specify the template to useexplicitly, using the template_name property. Let’s add that one line to views.py.
from django.views.generic import ListView
from contacts.models import Contact
class ListContactView(ListView):
model = Contacttemplate_name = ’contact_list.html’
Create a templates subdirectory in our contacts application, and create contact_list.html there.
<h1>Contacts</h1>
<ul>{% for contact in object_list %}
16 Chapter 3. Writing Views

Effective Django, Build 2013.11.19
<li class="contact">{{ contact }}</li>{% endfor %}
</ul>
Opening the page in the browser, we should see one contact there, the one we added earlier through the interactiveshell.
3.7 Creating Contacts
Adding information to the database through the interactive shell is going to get old fast, so let’s create a view foradding a new contact.
Just like the list view, we’ll use one of Django’s generic views. In views.py, we can add the new view:
from django.core.urlresolvers import reversefrom django.views.generic import CreateView...class CreateContactView(CreateView):
model = Contacttemplate_name = ’edit_contact.html’
def get_success_url(self):return reverse(’contacts-list’)
Most generic views that do form processing have the concept of the “success URL”: where to redirect the user whenthe form is successfully submitted. The form processing views all adhere to the practice of POST-redirect-GET forsubmitting changes, so that refreshing the final page won’t result in form re-submission. You can either define this asa class property, or override the get_success_url() method, as we’re doing here. In this case we’re using thereverse function to calculate the URL of the contact list.
Context Variables in Class Based Views
The collection of values available to a template when it’s rendered is referred to as the Context. TheContext is a combination of information supplied by the view and information from context processors(https://docs.djangoproject.com/en/1.5/ref/templates/api/#subclassing-context-requestcontext).When you’re using built in generic views, it’s not obvious what values are available to the context. With somepractice you’ll discover they’re pretty consistent – form, object, and object_list are often used – but thatdoesn’t help when you’re just starting off. Luckily, the documentation for this is much improved with Django1.5.In class based views, the get_context_data() method is used to add information to the context. If youoverride this method, you usually want to accept **kwargs, and call the super class.
The template is slightly more involved than the list template, but not much. Our edit_contact.html will looksomething like this.
<h1>Add Contact</h1>
<form action="{% url "contacts-new" %}" method="POST">{% csrf_token %}<ul>{{ form.as_ul }}
</ul><input id="save_contact" type="submit" value="Save" />
3.7. Creating Contacts 17

Effective Django, Build 2013.11.19
</form>
<a href="{% url "contacts-list" %}">back to list</a>
A few things to note:
• The form in the context is the Django Form (https://docs.djangoproject.com/en/1.5/topics/forms/) for ourmodel. Since we didn’t specify one, Django made one for us. How thoughtful.
• If we just write {{ form }} we’ll get table rows; adding .as_ul formats the inputs for an unordered list.Try .as_p instead to see what you get.
• When we output the form, it only includes our fields, not the surrounding <form> tag or the submit button, sowe have to add those.
• The {% csrf_token %} tag inserts a hidden input that Django uses to verify that the request came fromyour project, and isn’t a forged cross-site request. Try omitting it: you can still access the page, but when yougo to submit the form, you’ll get an error.
• We’re using the url template tag to generate the link back to the contact list. Note that contacts-list isthe name of our view from the URL configuration. By using url instead of an explicit path, we don’t have toworry about a link breaking. url in templates is equivalent to reverse in Python code.
Finally, let’s configure the URL by adding the following line to our urls.py file:
url(r’^new$’, contacts.views.CreateContactView.as_view(),name=’contacts-new’,),
You can go to http://localhost:8000/new to create new contacts
3.8 Testing Your Views
So far our views have been pretty minimal: they leverage Django’s generic views, and contain very little of our owncode or logic. One perspective is that this is how it should be: a view takes a request, and returns a response, delegatingthe issue of validating input to forms, and business logic to model methods. This is a perspective that I subscribe to.The less logic contained in views, the better.
However, there is code in views that should be tested, either by unit tests or integration tests. The distinction is impor-tant: unit tests are focused on testing a single unit of functionality. When you’re writing a unit test, the assumption isthat everything else has its own tests and is working properly. Integration tests attempt to test the system from end toend, so you can ensure that the points of integration are functioning properly. Most systems have both.
Django has two tools that are helpful for writing unit tests for views: the Test Client(https://docs.djangoproject.com/en/1.5/topics/testing/overview/#module-django.test.client) and the RequestFac-tory (https://docs.djangoproject.com/en/1.5/topics/testing/advanced/#django.test.client.RequestFactory). They havesimilar APIs, but approach things differently. The TestClient takes a URL to retrieve, and resolves it against yourproject’s URL configuration. It then creates a test request, and passes that request through your view, returning theResponse. The fact that it requires you to specify the URL ties your test to the URL configuration of your project.
The RequestFactory has the same API: you specify the URL you want to retrieve and any parameters or formdata. But it doesn’t actually resolve that URL: it just returns the Request object. You can then manually pass it to yourview and test the result.
In practice, RequestFactory tests are usually somewhat faster than the TestClient. This isn’t a big deal when you havefive tests, but it is when you have 500 or 5,000. Let’s look at the same test written with each tool.
from django.test.client import Clientfrom django.test.client import RequestFactory
18 Chapter 3. Writing Views

Effective Django, Build 2013.11.19
...class ContactListViewTests(TestCase):
"""Contact list view tests."""
def test_contacts_in_the_context(self):
client = Client()response = client.get(’/’)
self.assertEquals(list(response.context[’object_list’]), [])
Contact.objects.create(first_name=’foo’, last_name=’bar’)response = client.get(’/’)self.assertEquals(response.context[’object_list’].count(), 1)
def test_contacts_in_the_context_request_factory(self):
factory = RequestFactory()request = factory.get(’/’)
response = ListContactView.as_view()(request)
self.assertEquals(list(response.context_data[’object_list’]), [])
Contact.objects.create(first_name=’foo’, last_name=’bar’)response = ListContactView.as_view()(request)self.assertEquals(response.context_data[’object_list’].count(), 1)
3.9 Integration Tests
Django 1.4 adds a new TestCase base class, the LiveServerTestCase(https://docs.djangoproject.com/en/1.5/topics/testing/overview/#liveservertestcase). This is very much what itsounds like: a test case that runs against a live server. By default Django will start the development server for youwhen it runs these tests, but they can also be run against another server.
Selenium (http://seleniumhq.org/) is a tool for writing tests that drive a web browser, and that’s what we’ll use for ourintegration tests. By using Selenium, you’re able to automate different browers (Chrome, Firefox, etc), and interactwith your full application much as the user would. Before writing tests to use it, we’ll need to install the Pythonimplementation.
(tutorial)$ pip install selenium
We’re going to write a couple of tests for our views:
• one that creates a Contact and makes sure it’s listed
• one that makes sure our “add contact” link is visible and linked on the list page
• and one that actually exercises the add contact form, filling it in and submitting it.
from django.test import LiveServerTestCasefrom selenium.webdriver.firefox.webdriver import WebDriver...class ContactListIntegrationTests(LiveServerTestCase):
@classmethoddef setUpClass(cls):
cls.selenium = WebDriver()
3.9. Integration Tests 19
Effective Django, Build 2013.11.19
super(ContactListIntegrationTests, cls).setUpClass()
@classmethoddef tearDownClass(cls):
cls.selenium.quit()super(ContactListIntegrationTests, cls).tearDownClass()
def test_contact_listed(self):
# create a test contactContact.objects.create(first_name=’foo’, last_name=’bar’)
# make sure it’s listed as <first> <last> on the listself.selenium.get(’%s%s’ % (self.live_server_url, ’/’))self.assertEqual(
self.selenium.find_elements_by_css_selector(’.contact’)[0].text,’foo bar’
)
def test_add_contact_linked(self):
self.selenium.get(’%s%s’ % (self.live_server_url, ’/’))self.assert_(
self.selenium.find_element_by_link_text(’add contact’))
def test_add_contact(self):
self.selenium.get(’%s%s’ % (self.live_server_url, ’/’))self.selenium.find_element_by_link_text(’add contact’).click()
self.selenium.find_element_by_id(’id_first_name’).send_keys(’test’)self.selenium.find_element_by_id(’id_last_name’).send_keys(’contact’)self.selenium.find_element_by_id(’id_email’).send_keys(’[email protected]’)
self.selenium.find_element_by_id("save_contact").click()self.assertEqual(
self.selenium.find_elements_by_css_selector(’.contact’)[-1].text,’test contact’
)
Note that Selenium allows us to find elements in the page, inspect their state, click them, and send keystrokes. In short,it’s like we’re controlling the browser. In fact, if you run the tests now, you’ll see a browser open when the tests run.
In our example we’re using CSS Selectors to locate elements in the DOM, but you can also use Xpath. For manypeople it’s a matter of preference, but I’ve found that using CSS Selectors is often less brittle: if I change the markup,I’m likely to leave classes on important elements in place, even if their relative position in the DOM changes.
3.10 Review
• Views take an HttpRequest (https://docs.djangoproject.com/en/1.5/ref/request-response/#httprequest-objects)and turn it into an HttpResponse (https://docs.djangoproject.com/en/1.5/ref/request-response/#httpresponse-objects)
• Generic class-based views introduced with Django 1.3
• These let you create reusable, composable views
20 Chapter 3. Writing Views
Effective Django, Build 2013.11.19
• URLs are defined in urls.py in your project
• Naming URLs lets you calculate the URL to a view
• RequestFactory (https://docs.djangoproject.com/en/1.5/topics/testing/advanced/#django.test.client.RequestFactory)creates Requests for testing Views with
• LiveServerTestCase (https://docs.djangoproject.com/en/1.5/topics/testing/overview/#liveservertestcase) pro-vides basis for writing integration tests
3.10. Review 21
Effective Django, Build 2013.11.19
22 Chapter 3. Writing Views

CHAPTER
FOUR
USING STATIC ASSETS
Now that we have a basic application where we can add contacts and list them, it’s reasonable to think about how we’dmake this look more appealing. Most modern web applications are a combination of server side code/views, and clientside, static assets, such as JavaScript and CSS. Regardless of whether you choose JavaScript or CoffeeScript, CSS orSASS, Django provides support for integrating static assets into your project.
4.1 Adding Static Files
Django distinguishes between “static” and “media” files. The former are static assets included with your app orproject. The latter are files uploaded by users using one of the file storage backends. Django includes a contrib app,django.contrib.staticfiles for managing static files and, importantly, generating the URLs to them. Youcould, of course, simply hard code the URLs to your static assets, and that’d probably work for a while. But if youwant to move your static assets to their own server, or to a CDN, using generated URLs let’s you make that changewithout needing to update your templates. django.contrib.staticfiles is enabled by default when youcreate a new project, so you can just start using it.
We’re going to add Bootstrap (http://getbootstrap.com) to our project for some basic styling. You can download theBootstrap files from its website, http://getbootstrap.com.
Django supports adding static files at both the application and project level. Where you add them sort of depends onhow tied to your specific assembly of apps they are. That is, are they reusable for anyone using your app, or are theyspecific to your particular deployment?
App specific static files are stored in the static subdirectory within the app. Django will also look in any directorieslisted in the STATICFILES_DIRS setting. Let’s update our project settings to specify a static files directory.
import os.path...# Additional locations of static filesSTATICFILES_DIRS = (
# Put strings here, like "/home/html/static" or "C:/www/django/static".# Always use forward slashes, even on Windows.# Don’t forget to use absolute paths, not relative paths.os.path.join(
os.path.dirname(__file__),’static’,
),)
Note that we use os.path to construct the absolute path. This ensures Django can locate the files unambiguously.
Let’s go ahead and create the static directory in our project and unpack Bootstrap into it.
23

Effective Django, Build 2013.11.19
(tutorial)$ mkdir addressbook/static(tutorial)$ cd addressbook/static(tutorial)$ unzip ~/Downloads/bootstrap.zipArchive: /Users/nathan/Downloads/bootstrap.zip
creating: bootstrap/creating: bootstrap/css/
inflating: bootstrap/css/bootstrap-responsive.cssinflating: bootstrap/css/bootstrap-responsive.min.cssinflating: bootstrap/css/bootstrap.cssinflating: bootstrap/css/bootstrap.min.csscreating: bootstrap/img/
inflating: bootstrap/img/glyphicons-halflings-white.pnginflating: bootstrap/img/glyphicons-halflings.pngcreating: bootstrap/js/
inflating: bootstrap/js/bootstrap.jsinflating: bootstrap/js/bootstrap.min.js
4.2 Referring to Static Files in Templates
The Django staticfiles app includes a template tag (https://docs.djangoproject.com/en/1.5/ref/templates/builtins/) thatmake it easy to refer to static files within your templates. You load template tag libraries using the load tag.
{% load staticfiles %}
After loading the static files library, you can refer to the file using the static tag.
<link href="{% static ’bootstrap/css/bootstrap.min.css’ %}"rel="stylesheet" media="screen">
Note that the path we specify is relative to the static files directory. Django is going to join this path with theSTATIC_URL setting to generate the actual URL to use.
The STATIC_URL setting (https://docs.djangoproject.com/en/1.5/ref/settings/#std:setting-STATIC_URL) tellsDjango what the root URL for your static files is. By default it’s set to /static/.
4.3 Simple Template Inclusion
We want to add the Boostrap CSS to all of our templates, but we’d like to avoid repeating ourself: if we add it to eachtemplate individually, when we want to make changes (for example, to add another stylesheet) we have to make themto all the files. To solve this, we’ll create a base template that the others will inherit from.
Let’s create base.html in the templates directory of our contacts app.
{% load staticfiles %}<html>
<head><link href="{% static ’bootstrap/css/bootstrap.min.css’ %}"
rel="stylesheet" media="screen"></head>
<body>{% block content %}{% endblock %}
<script src="{% static ’bootstrap/js/bootstrap.min.js’ %}"></script>
24 Chapter 4. Using Static Assets

Effective Django, Build 2013.11.19
</body></html>
base.html defines the common structure for our pages, and includes a block tag, which other templates can fillin.
We’ll update contact_list.html to extend from base.html and fill in the content block.
{% extends "base.html" %}
{% block content %}<h1>Contacts</h1>
<ul>{% for contact in object_list %}<li class="contact">{{ contact }}</li>
{% endfor %}</ul>
<a href="{% url "contacts-new" %}">add contact</a>{% endblock %}
4.4 Serving Static Files
We’ve told Django where we store our static files, and we’ve told it what URL structure to use, but we haven’t actuallyconnected the two together. Django doesn’t serve static files by default, and for good reason: using an applicationserver to serve static resources is going to be ineffecient, at best. The Django documentation on deploying static files(https://docs.djangoproject.com/en/1.5/howto/static-files/deployment/) does a good job of walking through the optionsfor getting your static files onto your CDN or static file server.
For development, however, it’s convenient to do it all with one process, so there’s a helper. We’ll update ouraddressbook/urls.py file to include the staticfiles_urlpatterns helper.
from django.conf.urls import patterns, include, urlfrom django.contrib.staticfiles.urls import staticfiles_urlpatterns
import contacts.views
urlpatterns = patterns(’’,url(r’^$’, contacts.views.ListContactView.as_view(),
name=’contacts-list’,),url(r’^new$’, contacts.views.CreateContactView.as_view(),
name=’contacts-new’,),)
urlpatterns += staticfiles_urlpatterns()
Now we can run the server and see our newly Boostrapped templates in action.
4.4. Serving Static Files 25

Effective Django, Build 2013.11.19
4.5 Review
• Django distinguishes between static site files, and user uploaded media
• The staticfiles app is included to help manage static files and serve them during development
• Static files can be included with apps, or with the project. Choose where you put them based on whether youexpect all users of your app to need them.
• Templates can extend one another, using block tags.
26 Chapter 4. Using Static Assets

CHAPTER
FIVE
ADDITIONAL GENERIC VIEWS
5.1 Edit Views
In addition to creating Contacts, we’ll of course want to edit them. As with the List and Create views, Django has ageneric view we can use as a starting point.
from django.views.generic import UpdateView...class UpdateContactView(UpdateView):
model = Contacttemplate_name = ’edit_contact.html’
def get_success_url(self):return reverse(’contacts-list’)
• we can re-use the same template
• but how does it know which contact to load?
• we need to either: provide a pk/slug, or override get_object().
• we’ll provide pk in the URL
url(r’^edit/(?P<pk>\d+)/$’, contacts.views.UpdateContactView.as_view(),name=’contacts-edit’,),
We’ll update the contact list to include an edit link next to each contact.
{% extends "base.html" %}
{% block content %}<h1>Contacts</h1>
<ul>{% for contact in object_list %}<li class="contact">{{ contact }}
(<a href="{% url "contacts-edit" pk=contact.id %}">edit</a>)</li>
{% endfor %}</ul>
<a href="{% url "contacts-new" %}">add contact</a>{% endblock %}
Note the use of pk=contact.id in the {% url %} tag to specify the arguments to fill into the URL pattern.
27

Effective Django, Build 2013.11.19
If you run the server now, you’ll see an edit link. Go ahead and click it, and try to make a change. You’ll notice thatinstead of editing the existing record, it creates a new one. Sad face.
If we look at the source of the edit HTML, we can easily see the reason: the form targets /new, not our edit URL. Tofix this – and still allow re-using the template – we’re going to add some information to the template context.
The template context is the information available to a template when it’s rendered. This is a combination of in-formation you provide in your view – either directly or indirectly – and information added by context proces-sors (https://docs.djangoproject.com/en/1.5/ref/templates/api/#subclassing-context-requestcontext), such as the loca-tion for static media and current locale. In order to use the same template for add and edit, we’ll add information aboutwhere the form should redirect to the context.
class CreateContactView(CreateView):
model = Contacttemplate_name = ’edit_contact.html’
def get_success_url(self):return reverse(’contacts-list’)
def get_context_data(self, **kwargs):
context = super(CreateContactView, self).get_context_data(**kwargs)context[’action’] = reverse(’contacts-new’)
return context
class UpdateContactView(UpdateView):
model = Contacttemplate_name = ’edit_contact.html’
def get_success_url(self):return reverse(’contacts-list’)
def get_context_data(self, **kwargs):
context = super(UpdateContactView, self).get_context_data(**kwargs)context[’action’] = reverse(’contacts-edit’,
kwargs={’pk’: self.get_object().id})
return context
We also update the template to use that value for the action and change the title based on whether or not we’vepreviously saved.
{% if contact.id %}<h1>Edit Contact</h1>{% else %}<h1>Add Contact</h1>{% endif %}
<form action="{{ action }}" method="POST">
You may wonder where the contact value in the contact comes from: the class based views that wrap a single object(those that take a primary key or slug) expose that to the context in two different ways: as a variable named object,and as a variable named after the model class. The latter often makes your templates easier to read and understandlater. You can customize this name by overriding get_context_object_name on your view.
28 Chapter 5. Additional Generic Views

Effective Django, Build 2013.11.19
Made a Change? Run the Tests.
We’ve just made a change to our CreateContactView, which means this is a perfect time to run the tests wewrote. Do they still pass? If not, did we introduce a bug, or did the behavior change in a way that we expected?(Hint: We changed how the contact list is rendered, so our tests that just expect the name there are going to fail.This is a case where you’d need to update the test case, but it also demonstrates how integration tests can befragile.)
5.2 Deleting Contacts
The final view for our basic set of views is delete. The generic deletion view is very similar to the edit view: it wraps asingle object and requires that you provide a URL to redirect to on success. When it processes a HTTP GET request,it displays a confirmation page, and when it receives an HTTP DELETE or POST, it deletes the object and redirects tothe success URL.
We add the view definition to views.py:
from django.views.generic import DeleteView...class DeleteContactView(DeleteView):
model = Contacttemplate_name = ’delete_contact.html’
def get_success_url(self):return reverse(’contacts-list’)
And create the template, delete_contact.html, in our templates directory.
{% extends "base.html" %}
{% block content %}
<h1>Delete Contact</h1>
<p>Are you sure you want to delete the contact {{ contact }}?</p>
<form action="{% url "contacts-delete" pk=contact.id %}" method="POST">{% csrf_token %}
<input type="submit" value="Yes, delete." /><a href="{% url "contacts-list" %}">No, cancel.</a>
</form>
{% endblock %}
Of course we need to add this to the URL definitions:
url(r’^delete/(?P<pk>\d+)/$’, contacts.views.DeleteContactView.as_view(),name=’contacts-delete’,),
And we’ll add the link to delete to the edit page.
{% if contact.id %}<a href="{% url "contacts-delete" pk=contact.id %}">Delete</a>{% endif %}
5.2. Deleting Contacts 29

Effective Django, Build 2013.11.19
5.3 Detail View
Finally, let’s go ahead and add a detail view for our Contacts. This will show the details of the Contact: not muchright now, but we’ll build on this shortly. Django includes a generic DetailView: think of it as the single servingListView.
from django.views.generic import DetailView...class ContactView(DetailView):
model = Contacttemplate_name = ’contact.html’
Again, the template is pretty straight forward; we create contact.html in the templates directory.
{% extends "base.html" %}
{% block content %}
<h1>{{ contact }}</h1>
<p>Email: {{ contact.email }}</p>
{% endblock %}
And add the URL mapping:
url(r’^(?P<pk>\d+)/$’, contacts.views.ContactView.as_view(),name=’contacts-view’,),
We’re also going to add a method to our Contact model, get_absolute_url. get_absolute_url is a Djangoconvention for obtaining the URL of a single model instance. In this case it’s just going to be a call to reverse, butby providing this method, our model will play nicely with other parts of Django.
class Contact(models.Model):...
def get_absolute_url(self):
return reverse(’contacts-view’, kwargs={’pk’: self.id})
And we’ll add the link to the contact from the contact list.
{% for contact in object_list %}<li class="contact">
<a href="{{ contact.get_absolute_url }}">{{ contact }}</a>(<a href="{% url "contacts-edit" pk=contact.id %}">edit</a>)
</li>{% endfor %}
30 Chapter 5. Additional Generic Views

CHAPTER
SIX
FORM BASICS
Up until this point we’ve been using forms without really needing to be aware of it. A Django Form(https://docs.djangoproject.com/en/1.5/topics/forms/) is responsible for taking some user input, validating it, and turn-ing it into Python objects. They also have some handy rendering methods, but I consider those sugar: the real poweris in making sure that input from your users is what it says it is.
The Generic Views (https://docs.djangoproject.com/en/1.5/topics/class-based-views/), specifically the ones we’vebeen using, all operate on a particular model. Django is able to take the model definition that we’ve created andextrapolate a Form from it. Django can do this because both Models and Forms are constructed of fields that havea particular type and particular validation rules. Models use those fields to map data to types that your databaseunderstands; Forms use them to map input to Python types 1. Forms that map to a particular Model are called Mod-elForms (https://docs.djangoproject.com/en/1.5/topics/forms/modelforms); you can think of them as taking user inputand transforming it into an instance of a Model.
6.1 Adding Fields to the Form
So what if we want to add a field to our form? Say, we want to require confirmation of the email address. In that casewe can create a new form, and override the default used by our views.
First, in the contacts app directory, we’ll create a new file, forms.py.
from django import formsfrom django.core.exceptions import ValidationError
from contacts.models import Contact
class ContactForm(forms.ModelForm):
confirm_email = forms.EmailField("Confirm email",required=True,
)
class Meta:model = Contact
def __init__(self, *args, **kwargs):
if kwargs.get(’instance’):email = kwargs[’instance’].emailkwargs.setdefault(’initial’, {})[’confirm_email’] = email
1 While I’m referring to them both as fields, they’re really completely different implementations. But the analogy holds.
31

Effective Django, Build 2013.11.19
return super(ContactForm, self).__init__(*args, **kwargs)
Here we’re creating a new ModelForm; we associate the form with our model in the Meta inner class.
We’re also adding an additional field, confirm_email. This is an example of a field declaration in a model. Thefirst argument is the label, and then there are additional keyword arguments; in this case, we simply mark it required.
Finally, in the constructor we mutate the initial kwarg. initial is a dictionary of values that will be usedas the default values for an unbound form (https://docs.djangoproject.com/en/1.5/ref/forms/api/#ref-forms-api-bound-unbound). Model Forms have another kwarg, instance, that holds the instance we’re editing.
6.2 Overriding the Default Form
We’ve defined a form with the extra field, but we still need to tell our view to use it. You can do this in a coupleof ways, but the simplest is to set the form_class property on the View class. We’ll add that property to ourCreateContactView and UpdateContactView in views.py.
import forms...class CreateContactView(CreateView):
model = Contacttemplate_name = ’edit_contact.html’form_class = forms.ContactForm
class UpdateContactView(UpdateView):
model = Contacttemplate_name = ’edit_contact.html’form_class = forms.ContactForm
If we fire up the server and visit the edit or create pages, we’ll see the additional field. We can see that it’s required,but there’s no validation that the two fields match. To support that we’ll need to add some custom validation to theForm.
6.3 Customizing Validation
Forms have two different phases of validation: field and form. All the fields are validated and converted to Pythonobjects (if possible) before form validation begins.
Field validation takes place for an individual field: things like minimum and maximum length, making sure it lookslike a URL, and date range validation are all examples of field validation. Django doesn’t guarantee that field validationhappens in any order, so you can’t count on other fields being available for comparison during this phase.
Form validation, on the other hand, happens after all fields have been validated and converted to Python objects, andgives you the opportunity to do things like make sure passwords match, or in this case, email addresses.
Form validation takes place in a form’s clean() method.
class ContactForm(forms.ModelForm):...
def clean(self):
if (self.cleaned_data.get(’email’) !=self.cleaned_data.get(’confirm_email’)):
32 Chapter 6. Form Basics

Effective Django, Build 2013.11.19
raise ValidationError("Email addresses must match."
)
return self.cleaned_data
When you enter the clean method, all of the fields that validated are available in the cleaned_data dictionary.The clean method may add, remove, or modify values, but must return the dictionary of cleaned data. cleanmay also raise a ValidationError if it encounters an error. This will be available as part of the forms’ errorsproperty, and is shown by default when you render the form.
Note that I said cleaned_data contains all the fields that validated. That’s because form-level valida-tion always happens, even if no fields were successfully validated. That’s why in the clean method we usecleaned_data.get(’email’) instead of cleaned_data[’email’].
If you visit the create or update views now, we’ll see an extra field there. Try to make a change, or create a contact,without entering the email address twice.
6.4 Controlling Form Rendering
Our templates until now look pretty magical when it comes to forms: the extent of our HTML tags has been somethinglike:
<form action="{{ action }}" method="POST">{% csrf_token %}<ul>{{ form.as_ul }}
</ul><input type="submit" value="Save" />
</form>
We’re living at the whim of form.as_ul, and it’s likely we want something different.
Forms have three pre-baked output formats: as_ul, as_p, and as_table. If as_ul outputs the form elementsas the items in an unordered list, it’s not too mysterious what as_p and as_table do. Often, though, youneed more control. For those cases, you can take full control. First, a form is iterable; try replacing your call to{{form.as_ul}} with this:
{% for field in form %}{{ field }}{% endfor %}
As you can see, field renders as the input for each field in the form. When you iterate over a Form, you’re iteratingover a sequence of BoundField (https://docs.djangoproject.com/en/1.5/ref/forms/api/#django.forms.BoundField) ob-jects. A BoundField wraps the field definition from your Form (or derived from the ModelForm) along with anydata and error state it may be bound to. This means it has some properties that are handy for customizing rendering.
In addition to supporting iteration, you can access an individual BoundField directly, treating the Form like a dictio-nary:
{{ form.email }}
6.4. Controlling Form Rendering 33

Effective Django, Build 2013.11.19
Dictionary!?!
That may not look like a dictionary access, but remember that Django templates are quite restrictive in theirsyntax. Writing foo.bar will look for a property bar on foo, and if it’s callable, call it. If it doesn’t finda property, it’ll map that to something like foo[’bar’]. So when it comes to writing Django templates,dictionary elements act just like properties.
Consider the following alternative to edit_contact.html.
{% extends "base.html" %}
{% block content %}
{% if contact.id %}<h1>Edit Contact</h1>{% else %}<h1>Add Contact</h1>{% endif %}
<form action="{{ action }}" method="POST">{% csrf_token %}{% if form.non_field_errors %}<ul>
{% for error in form.non_field_errors %}<li>{{ error }}</li>
{% endfor %}</ul>
{% endif %}{% for field in form %}<div id="{{ field.auto_id }}_container">{{ field.help_text }}<div>
{{ field.label_tag }} {{ field }}</div><div id="{{ field.auto_id }}_errors">
{{ field.errors }}</div>
</div>{% endfor %}
<input id="save_contact" type="submit" value="Save" /></form>
{% if contact.id %}<a href="{% url "contacts-edit-addresses" pk=contact.id %}">
Edit Addresses</a><a href="{% url "contacts-delete" pk=contact.id %}">Delete</a>{% endif %}
<a href="{% url "contacts-list" %}">back to list</a>
{% endblock %}
In this example we see a few different things at work:
• field.auto_id to get the automatically generated field ID
• Combining that ID with _container and _errors to give our related elements names that consistently
34 Chapter 6. Form Basics
Effective Django, Build 2013.11.19
match
• Using field.label_tag to generate the label. label_tag adds the appropriate for property to the tag,too. For the last_name field, this looks like:
<label for="id_last_name">Last name</label>
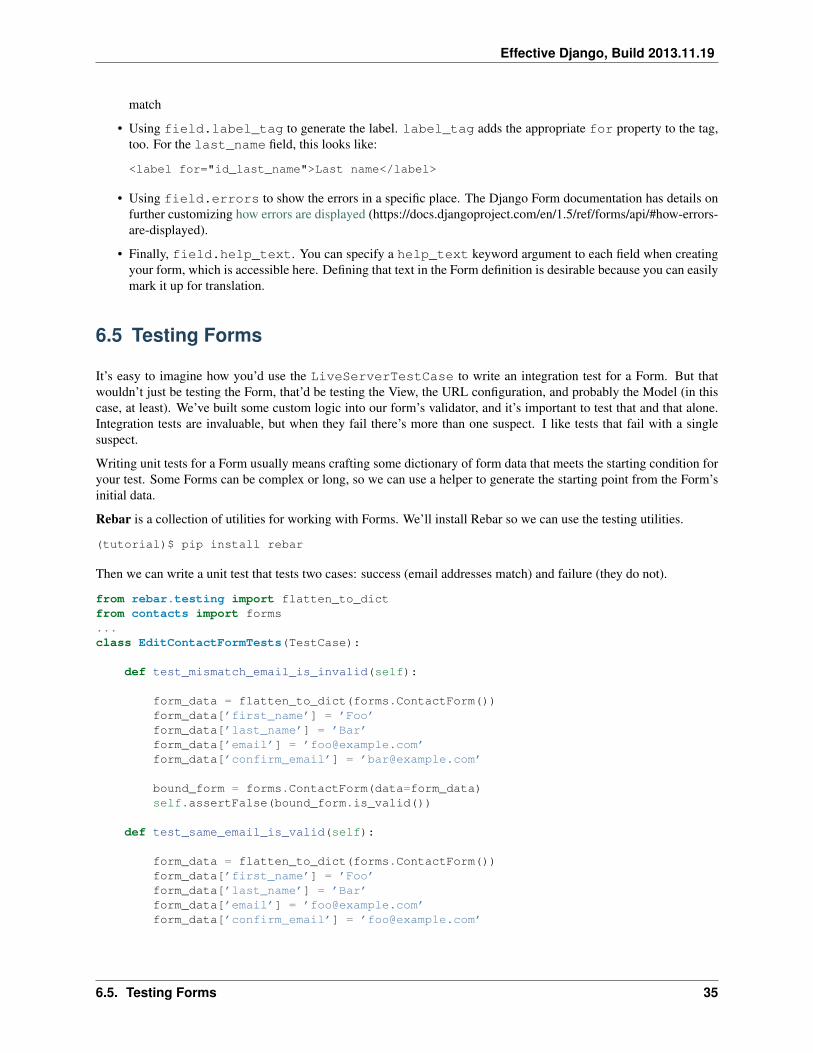
• Using field.errors to show the errors in a specific place. The Django Form documentation has details onfurther customizing how errors are displayed (https://docs.djangoproject.com/en/1.5/ref/forms/api/#how-errors-are-displayed).
• Finally, field.help_text. You can specify a help_text keyword argument to each field when creatingyour form, which is accessible here. Defining that text in the Form definition is desirable because you can easilymark it up for translation.
6.5 Testing Forms
It’s easy to imagine how you’d use the LiveServerTestCase to write an integration test for a Form. But thatwouldn’t just be testing the Form, that’d be testing the View, the URL configuration, and probably the Model (in thiscase, at least). We’ve built some custom logic into our form’s validator, and it’s important to test that and that alone.Integration tests are invaluable, but when they fail there’s more than one suspect. I like tests that fail with a singlesuspect.
Writing unit tests for a Form usually means crafting some dictionary of form data that meets the starting condition foryour test. Some Forms can be complex or long, so we can use a helper to generate the starting point from the Form’sinitial data.
Rebar is a collection of utilities for working with Forms. We’ll install Rebar so we can use the testing utilities.
(tutorial)$ pip install rebar
Then we can write a unit test that tests two cases: success (email addresses match) and failure (they do not).
from rebar.testing import flatten_to_dictfrom contacts import forms...class EditContactFormTests(TestCase):
def test_mismatch_email_is_invalid(self):
form_data = flatten_to_dict(forms.ContactForm())form_data[’first_name’] = ’Foo’form_data[’last_name’] = ’Bar’form_data[’email’] = ’[email protected]’form_data[’confirm_email’] = ’[email protected]’
bound_form = forms.ContactForm(data=form_data)self.assertFalse(bound_form.is_valid())
def test_same_email_is_valid(self):
form_data = flatten_to_dict(forms.ContactForm())form_data[’first_name’] = ’Foo’form_data[’last_name’] = ’Bar’form_data[’email’] = ’[email protected]’form_data[’confirm_email’] = ’[email protected]’
6.5. Testing Forms 35
Effective Django, Build 2013.11.19
bound_form = forms.ContactForm(data=form_data)self.assert_(bound_form.is_valid())
An interesting thing to note here is the use of the is_valid() method. We could just as easily introspect theerrors property that we used in our template above, but in this case we just need a Boolean answer: is the formvalid, or not? Note that we do need to provide a first and last name, as well, since those are required fields.
6.6 Review
• Forms take user input, validate it, and convert it to Python objects
• Forms are composed of Fields, just like Models
• Fields have validation built in
• You can customize per-field validation, as well as form validation
• If you need to compare fields to one another, you need to implement the clean method
• Forms are iterable over, and support dictionary-like access to, the bound fields
• A Bound Field has properties and methods for performing fine-grained customization of rendering.
• Forms are unit testable; Rebar has some utilities to help with testing large forms.
36 Chapter 6. Form Basics

CHAPTER
SEVEN
RELATED MODELS
7.1 Adding Relationships
We have a basic email address book at this point, but there’s other information we might want to track for our contacts.Mailing addresses, for example. A single Contact may have multiple addresses associated with them, so we’ll storethis in a separate table, allowing us to have multiple addresses for each Contact.
class Address(models.Model):
contact = models.ForeignKey(Contact)address_type = models.CharField(
max_length=10,)
address = models.CharField(max_length=255,
)city = models.CharField(
max_length=255,)state = models.CharField(
max_length=2,)postal_code = models.CharField(
max_length=20,)
class Meta:unique_together = (’contact’, ’address_type’,)
Django provides three types of fields for relating objects to each other: ForeignKey for creating one to manyrelationships, ManyToManyField for relating many to many, and OneToOneField for creating a one to onerelationship. You define the relationship in one model, but it’s accessible from the other side, as well.
Sync up the database to create the table, and then start the shell so we can explore this.
(tutorial)$ python manage.py syncdbCreating tables ...Creating table contacts_addressInstalling custom SQL ...Installing indexes ...Installed 0 object(s) from 0 fixture(s)
Now that we have the model created, we can again play with it using the interactive shell.
37

Effective Django, Build 2013.11.19
(tutorial)$ python manage.py shellPython 2.7.3 (default, Aug 9 2012, 17:23:57)[GCC 4.7.1 20120720 (Red Hat 4.7.1-5)] on linux2Type "help", "copyright", "credits" or "license" for more information.(InteractiveConsole)>>> from contacts.models import Contact, Address>>> nathan = Contact.objects.create(first_name=’Nathan’, email=’[email protected]’)>>> nathan.address_set.all()[]>>> nathan.address_set.create(address_type=’home’,... city=’San Francisco’, state=’CA’, postal_code=’94107’)<Address: Address object>>>> nathan.address_set.create(address_type=’college’,... address=’354 S. Grant St.’, city=’West Lafayette’, state=’IN’,... postal_code=’47906’)<Address: Address object>>>> nathan.address_set.all()[<Address: Address object>, <Address: Address object>]>>> nathan.address_set.filter(address_type=’college’)<Address: Address object>>>> Address.objects.filter(contact__first_name=’Nathan’)[<Address: Address object>, <Address: Address object>]
As you can see, even though we defined the relationship between Contacts and Addresses on the Address model,Django gives us a way to access things in the reverse direction. We can also use the double underscore notation tofilter Addresses or Contacts based on the related objects.
Let’s go ahead and add address display to our contacts. We’ll add the list of all Addresses to the Contact detail viewin contact.html.
{% extends "base.html" %}
{% block content %}
<h1>{{ contact }}</h1>
<p>Email: {{ contact.email }}</p>
<ul>{% for address in contact.address_set.all %}
<li>{{ address.address }}<br/>{{ address.city }} {{ address.state }}<br/>{{ address.postal_code }}
</li>{% endfor %}</ul>
{% endblock %}
7.2 Editing Related Objects
So how do we go about editing addresses for our contacts? You can imagine creating another CreateView like we didfor Contacts, but the question remains: how do we wire the new Address to our Contact? We could conceivably justpass the Contact’s ID through the the HTML, but we’d still need to validate that it hadn’t been tampered with whenwe go to create the Address.
38 Chapter 7. Related Models

Effective Django, Build 2013.11.19
To deal with this, we’ll create a form that understands the relationship between Contacts and Addresses.
The editing interface we’re going to build for Addresses is one that allows you to edit all the addresses for a Contact atonce. To do this, we’ll need to create a FormSet (https://docs.djangoproject.com/en/1.5/topics/forms/formsets/)that handles all the Addresses for a single Contact. A FormSet is an object that managesmultiple copies of the same Form (or ModelForm) in a single page. The Inline FormSet(https://docs.djangoproject.com/en/1.5/topics/forms/modelforms/#inline-formsets) does this for a set of objects(in this case Addresses) that share a common related object (in this case the Contact).
Because formsets are somewhat complex objects, Django provides factory functions that create the class for you. We’lladd a call to the factory to our forms.py file.
from django.forms.models import inlineformset_factory
from contacts.models import (Contact,Address,
)
# inlineformset_factory creates a Class from a parent model (Contact)# to a child model (Address)ContactAddressFormSet = inlineformset_factory(
Contact,Address,
)
When we create the view, we’ll need to specify that this is the form we want to use, instead of having Django createone for us.
class EditContactAddressView(UpdateView):
model = Contacttemplate_name = ’edit_addresses.html’form_class = forms.ContactAddressFormSet
def get_success_url(self):
# redirect to the Contact view.return self.get_object().get_absolute_url()
Note that even though we’re editing Addresses with this view, we still have model set to Contact. This is becausean inline formset takes the parent object as it’s starting point.
Once again, this needs to be wired up into the URL configuration.
url(r’^edit/(?P<pk>\d+)/addresses$’, contacts.views.EditContactAddressView.as_view(),name=’contacts-edit-addresses’,),
And we have a simple template.
{% extends "base.html" %}
{% block content %}
<h1>Edit Addresses</h1>
<p>Editing addresses for {{ contact }}</p>
<form action="{% url "contacts-edit-addresses" pk=contact.id %}"method="POST">
7.2. Editing Related Objects 39

Effective Django, Build 2013.11.19
{% csrf_token %}{{ form.management_form }}{% for address_form in form %}
<ul>{{ address_form.as_ul }}</ul>
{% endfor %}
<input type="submit" value="Save" /></form>
{% endblock %}
There are two new things in this template, both related to the fact we’re using a formset instead of a form. First, there’sa reference to form.management_form. This is a set of hidden fields that provide some accounting information toDjango: how many forms did we start with, how many empty ones are there, etc. If Django can’t find this informationwhen you POST the form, it will raise an exception.
Second, we’re iterating over form instead of just outputting it (for address_form in form). Again, this isbecause form here is a formset instead of a single form. When you iterate over a formset, you’re iterating over theindividual forms in it. These individual forms are just “normal” ModelForm instances for each Address, so you canapply the same output techniques you would normally use.
40 Chapter 7. Related Models

CHAPTER
EIGHT
HANDLING AUTHENTICATION & AUTHORIZATION
Warning: This page is a work in progress; errors may exist, and additional contect is forthcoming.
So far we’ve built a simple contact manager, and added support for a related model (Addresses). This has shown howto use many of the basics, but there are a few more things you’d want before exposing this to the outside world. One ofthose is authentication and authorization. Django includes support that works for many projects, which is what we’lluse.
8.1 Authentication
In order to use the included authentication support, the django.contrib.auth anddjango.contrib.sessions applications needs to be included in your project.
Django enables thes by default when you create a project, as you can see in addressbook/settings.py.
INSTALLED_APPS = (’django.contrib.auth’,’django.contrib.contenttypes’,’django.contrib.sessions’,’django.contrib.sites’,’django.contrib.messages’,’django.contrib.staticfiles’,# Uncomment the next line to enable the admin:# ’django.contrib.admin’,# Uncomment the next line to enable admin documentation:# ’django.contrib.admindocs’,’contacts’,
)
In addition to installing the application, the middleware needs to be installed, as well.
MIDDLEWARE_CLASSES = (’django.middleware.common.CommonMiddleware’,’django.contrib.sessions.middleware.SessionMiddleware’,’django.middleware.csrf.CsrfViewMiddleware’,’django.contrib.auth.middleware.AuthenticationMiddleware’,’django.contrib.messages.middleware.MessageMiddleware’,# Uncomment the next line for simple clickjacking protection:# ’django.middleware.clickjacking.XFrameOptionsMiddleware’,
)
If you’ll recall, during the first run of syncdb, Django asked if we wanted to create a superuser account. It did sobecause we had the application installed already.
41

Effective Django, Build 2013.11.19
The stock Django auth model supports Users_, Groups_, and Permissions_. This is usually sufficient unless you’reintegrating with an existing authentication backend.
django.contrib.auth provides a set of views to support the basic authentication actions such as login, logout,password reset, etc. Note that it includes views, but not templates. We’ll need to provide those for our project.
For this example we’ll just add support for login and logout views in our project. First, add the views toaddressbook/urls.py.
urlpatterns = patterns(’’,url(r’^login/$’, ’django.contrib.auth.views.login’),url(r’^logout/$’, ’django.contrib.auth.views.logout’),
Both the login_ and logout_ view have default template names (registration/login.html andregistration/logged_out.html, respectively). Because these views are specific to our project andnot our re-usable Contacts application, we’ll create a new templates/registration directory inside ofaddressbook:
$ mkdir -p addressbook/templates/registration
And tell Django to look in that directory for templates by setting TEMPLATE_DIRS inaddressbook/settings.py.
TEMPLATE_DIRS = (# Put strings here, like "/home/html/django_templates" or "C:/www/django/templates".# Always use forward slashes, even on Windows.# Don’t forget to use absolute paths, not relative paths.’addressbook/templates’,
)
Within that directory, first create login.html.
{% extends "base.html" %}
{% block content %}
{% if form.errors %}<p>Your username and password didn’t match. Please try again.</p>{% endif %}
<form method="post" action="{% url ’django.contrib.auth.views.login’ %}">{% csrf_token %}<table><tr>
<td>{{ form.username.label_tag }}</td><td>{{ form.username }}</td>
</tr><tr>
<td>{{ form.password.label_tag }}</td><td>{{ form.password }}</td>
</tr></table>
<input type="submit" value="login" /><input type="hidden" name="next" value="{{ next }}" /></form>
{% endblock %}
The login template inherits from our base.html template, and shows the login form provided by the view. The
42 Chapter 8. Handling Authentication & Authorization

Effective Django, Build 2013.11.19
hidden next field allows the view to redirect the user to the page requested, if the login request was triggered by apermission failure.
Why no name for the URL patterns?
XXX
The logout template, logged_out.html, is simpler.
{% extends "base.html" %}
{% block content %}
Logged out!
{% endblock %}
All it needs to do is provide a message to let the user know the logout was successful.
Creating an Admin User
XXX
If you run your development server now using runserver and visit http://localhost:8000/login, you’llsee the login page. If you login with bogus credentials, you should see an error message. So let’s try logging in withthe super user credential you created earlier.
Wait, what? Why is it visiitng /accounts/profile? We never typed that. The login view wants to redirect theuser to a fixed URL after a successful login, and the default is /accounts/profile. To override that, we’ll set theLOGIN_REDIRECT_URL value in addressbook/settings.py so that once a user logs in they’ll be redirectedto the list of contacts.
8.1. Authentication 43
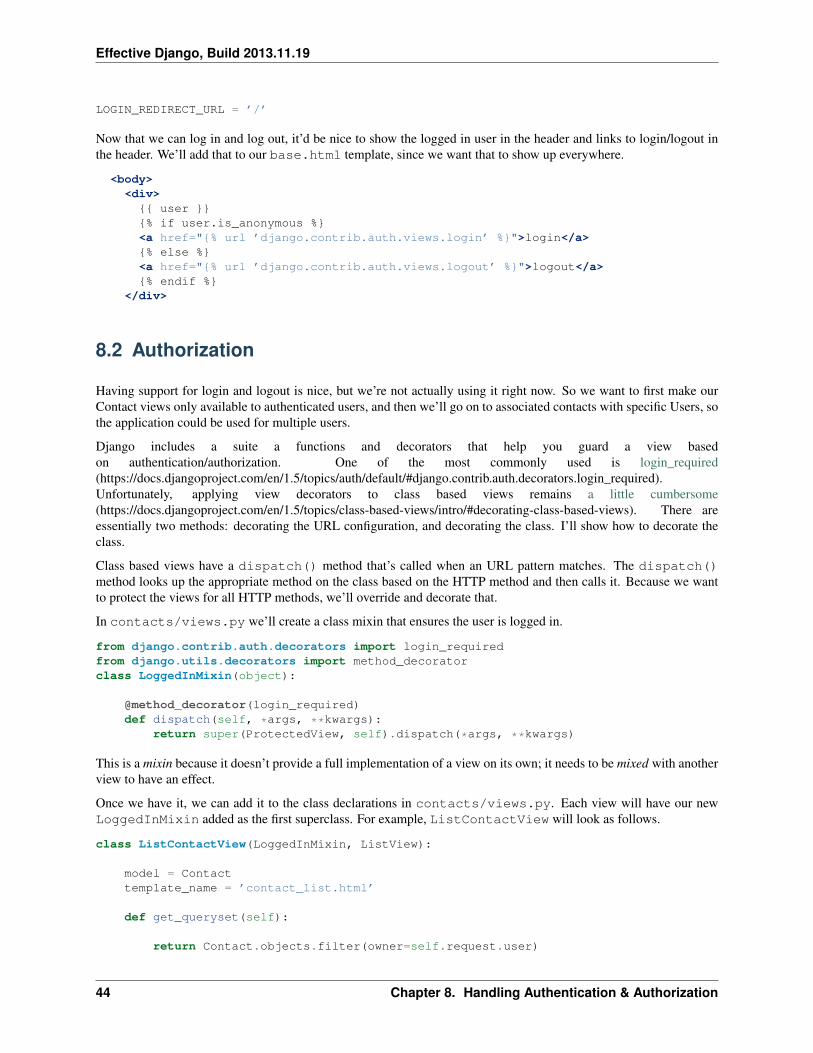
Effective Django, Build 2013.11.19
LOGIN_REDIRECT_URL = ’/’
Now that we can log in and log out, it’d be nice to show the logged in user in the header and links to login/logout inthe header. We’ll add that to our base.html template, since we want that to show up everywhere.
<body><div>
{{ user }}{% if user.is_anonymous %}<a href="{% url ’django.contrib.auth.views.login’ %}">login</a>{% else %}<a href="{% url ’django.contrib.auth.views.logout’ %}">logout</a>{% endif %}
</div>
8.2 Authorization
Having support for login and logout is nice, but we’re not actually using it right now. So we want to first make ourContact views only available to authenticated users, and then we’ll go on to associated contacts with specific Users, sothe application could be used for multiple users.
Django includes a suite a functions and decorators that help you guard a view basedon authentication/authorization. One of the most commonly used is login_required(https://docs.djangoproject.com/en/1.5/topics/auth/default/#django.contrib.auth.decorators.login_required).Unfortunately, applying view decorators to class based views remains a little cumbersome(https://docs.djangoproject.com/en/1.5/topics/class-based-views/intro/#decorating-class-based-views). There areessentially two methods: decorating the URL configuration, and decorating the class. I’ll show how to decorate theclass.
Class based views have a dispatch() method that’s called when an URL pattern matches. The dispatch()method looks up the appropriate method on the class based on the HTTP method and then calls it. Because we wantto protect the views for all HTTP methods, we’ll override and decorate that.
In contacts/views.py we’ll create a class mixin that ensures the user is logged in.
from django.contrib.auth.decorators import login_requiredfrom django.utils.decorators import method_decoratorclass LoggedInMixin(object):
@method_decorator(login_required)def dispatch(self, *args, **kwargs):
return super(ProtectedView, self).dispatch(*args, **kwargs)
This is a mixin because it doesn’t provide a full implementation of a view on its own; it needs to be mixed with anotherview to have an effect.
Once we have it, we can add it to the class declarations in contacts/views.py. Each view will have our newLoggedInMixin added as the first superclass. For example, ListContactView will look as follows.
class ListContactView(LoggedInMixin, ListView):
model = Contacttemplate_name = ’contact_list.html’
def get_queryset(self):
return Contact.objects.filter(owner=self.request.user)
44 Chapter 8. Handling Authentication & Authorization

Effective Django, Build 2013.11.19
Just as LOGIN_REDIRECT_URL tells Django where to send people after they log in, there’s a setting to controlwhere to send them when they need to login. However, this can also be a view name, so we don’t have to bake anexplicit URL into the settings.
LOGIN_URL = ’django.contrib.auth.views.login’
8.2.1 Checking Ownership
Checking that you’re logged in is well and good, but to make this suitable for multiple users we need to add the conceptof ownership. There are three steps for
1. Record the Owner of each Contact
2. Only show Contacts the logged in user owns in the list
3. Set the Owner when creating a new one
First, we’ll go ahead and add the concept of an Owner to the Contact model.
In contacts/models.py, we add an import and another field to our model.
from django.contrib.auth.models import User...class Contact(models.Model):
first_name = models.CharField(max_length=255,
)last_name = models.CharField(
max_length=255,
)
email = models.EmailField()
owner = models.ForeignKey(User)
def __str__(self):
return ’ ’.join([self.first_name,self.last_name,
])
def get_absolute_url(self):
return reverse(’contacts-view’, kwargs={’pk’: self.id})
Because Django doesn’t support migrations out of the box, we’ll need to blow away the database and re-run syncdb.
XXX Perfect segue for talking about South
Now we need to limit the contact list to only the contacts the logged in User owns. This gets us into overriding methodsthat the base view classes have been handling for us.
class ListContactView(LoggedInMixin, ListView):
model = Contacttemplate_name = ’contact_list.html’
8.2. Authorization 45

Effective Django, Build 2013.11.19
def get_queryset(self):
return Contact.objects.filter(owner=self.request.user)
8.3 Review
• XXX
46 Chapter 8. Handling Authentication & Authorization