ecc windows oracle
DESCRIPTION
ECC Windows OracleTRANSCRIPT

PUBLIC
Component Upgrade Guide
SAP ERP CentralComponent6.0 ABAPTarget Audience
n System administrators
n Technology consultants
Document version: 1.0 ‒ October 24, 2005

SAP AGDietmar-Hopp-Allee 16
69190 WalldorfGermany
T +49/18 05/34 34 34F +49/18 05/34 34 20
www.sap.com
© Copyright 2005 SAP AG. All rights reserved.
No part of this publication may be reproduced or transmittedin any form or for any purpose without the express permissionof SAP AG. The information contained herein may be changedwithout prior notice.
Some software products marketed by SAP AG and itsdistributors contain proprietary software components of othersoftware vendors.
Microsoft®, WINDOWS®, NT®, EXCEL®, Word®,PowerPoint® and SQL Server® are registered trademarks ofMicrosoft Corporation.
IBM®, DB2®, DB2 Universal Database, OS/2®, ParallelSysplex®, MVS/ESA, AIX®, S/390®, AS/400®, OS/390®,OS/400®, iSeries, pSeries, xSeries, zSeries, z/OS, AFP, IntelligentMiner, WebSphere®, Netfinity®, Tivoli®, Informix andInformix® Dynamic ServerTM are trademarks of IBM Corp. inUSA and/or other countries.
ORACLE® is a registered trademark of ORACLECorporation.UNIX®, X/Open®, OSF/1®, and Motif® are registered
trademarks of the Open Group.Citrix®, the Citrix logo, ICA®, Program Neighborhood®,
MetaFrame®, WinFrame®, VideoFrame®, MultiWin® andother Citrix product names referenced herein are trademarks ofCitrix Systems, Inc.
HTML, DHTML, XML, XHTML are trademarks orregistered trademarks of W3C®, World Wide Web Consortium,Massachusetts Institute of Technology.
JAVASCRIPT® is a registered trademark of SunMicrosystems,Inc., used under license for technology invented andimplemented by Netscape.
SAP, SAP Logo, R/2, RIVA, R/3, SAP ArchiveLink, SAPBusiness Workflow, WebFlow, SAP EarlyWatch, BAPI, SAPPHIRE,Management Cockpit, mySAP, mySAP.com, and other SAPproducts and services mentioned herein as well as theirrespective logos are trademarks or registered trademarks of SAPAG in Germany and in several other countries all over the world.MarketSet and Enterprise Buyer are jointly owned trademarks ofSAP Markets and Commerce One. All other product and servicenames mentioned are the trademarks of their respective owners.
DisclaimerSome components of this product are based on Java™. Any codechange in these components may cause unpredictable and severemalfunctions and is therefore expressively prohibited, as is anydecompilation of these components.
Any Java™ Source Code delivered with this product is onlyto be used by SAP’s Support Services and may not be modified oraltered in any way.
Documentation in the SAP Service MarketplaceYou can find this document at the following address:service.sap.com/instguides
ii PUBLIC October 24, 2005

Aspects Covered by this Guide
This guide was generated according to the following criteria:
SAP ComponentSAP ERP Central Component 6.0 ABAP
PlatformWindows
Operating SystemWindows
DatabaseOracle
Source ReleaseSAP ERP Central Component Core 5.00 with SAP ERP CentralComponent Extension Set 5.00SAP R/3 Enterprise 4.70 Extension Set 2.00SAP R/3 Enterprise 4.70 Extension Set 1.10SAP R/3 4.6CSAP R/3 4.6BSAP R/3 4.5BSAP R/3 4.0BSAP R/3 3.1I
October 24, 2005 PUBLIC iii

Typographic Conventions
Example Description
Example Text Words or characters that appear on the screen. These include field names, screen titles,pushbuttons as well as menu names, paths and options.
Example Text Emphasized words or phrases in body text, titles of graphics and tables.
EXAMPLE TEXT Names of elements in the system. These include report names, program names, transactioncodes, table names, and individual key words of a programming language, when surrounded bybody text, for example, SELECT and INCLUDE.
Example Text Screen output. This includes file and directory names and their paths, messages, names ofvariables and parameters, source code as well as names of installation, upgrade and databasetools.
Example Text Exact user entry. These are words or characters that you enter in the system exactly as theyappear in the documentation.
<ExampleText> Variable user entry. Pointed brackets indicate that you replace these words and characterswith appropriate entries.
Example Text Keys on the keyboard, for example, function keys (such as F2 ) or the ENTER key.
iv PUBLIC October 24, 2005

Document History
.Caution
Before you start the implementation, make sure you have the latest version of this document.You can find the latest version in SAP Service Marketplace at the following internet address:service.sap.com/instguides.
The following table provides an overview on the most important document changes.
Version Date Description
1.0 10/24/2005 First version ‒ no changes
October 24, 2005 PUBLIC v
Table of Contents
Chapter 1 Introduction . . . . . . . . . . . . . . . . . . . . . . . . . . . 11.1 Target Audience . . . . . . . . . . . . . . . . . . . . . . . . . . . 11.2 About this Document . . . . . . . . . . . . . . . . . . . . . . . . . 11.3 New Features . . . . . . . . . . . . . . . . . . . . . . . . . . . . 31.4 Before You Start . . . . . . . . . . . . . . . . . . . . . . . . . . . 51.4.1 Naming Conventions . . . . . . . . . . . . . . . . . . . . . . . . . 51.4.2 SAP Notes for the Upgrade . . . . . . . . . . . . . . . . . . . . . . . 7
Chapter 2 Step By Step . . . . . . . . . . . . . . . . . . . . . . . . . . . . 112.1 Upgrade ‒ Step by Step . . . . . . . . . . . . . . . . . . . . . . . . 11
Chapter 3 Planning . . . . . . . . . . . . . . . . . . . . . . . . . . . . . 213.1 Time Frame for Upgrading the Front-End Software . . . . . . . . . . . . . . 223.2 System Switch Upgrade . . . . . . . . . . . . . . . . . . . . . . . . 233.3 Upgrade Strategy Planning . . . . . . . . . . . . . . . . . . . . . . . 263.4 Database Backup . . . . . . . . . . . . . . . . . . . . . . . . . . . 293.5 Database-Specific Aspects . . . . . . . . . . . . . . . . . . . . . . . 303.6 Upgrades in an MCOD System Landscape . . . . . . . . . . . . . . . . . . 313.7 Data Management Planning . . . . . . . . . . . . . . . . . . . . . . 313.8 Incremental Table Conversion . . . . . . . . . . . . . . . . . . . . . . 323.9 Upgrade Schedule Planning . . . . . . . . . . . . . . . . . . . . . . . 333.10 Runtime for the Import of the Substitution Set . . . . . . . . . . . . . . . 363.11 Upgrade in an SAP System Group . . . . . . . . . . . . . . . . . . . . 363.12 Modification Adjustment Planning . . . . . . . . . . . . . . . . . . . . 373.13 Checking the Structural Requirements . . . . . . . . . . . . . . . . . . 393.14 Checking the Hardware Requirements . . . . . . . . . . . . . . . . . . . 403.15 Checking the Software Requirements . . . . . . . . . . . . . . . . . . . 403.15.1 Checking the Source Release of the SAP System . . . . . . . . . . . . . . . 413.15.2 Meeting the Requirements for the Upgrade Assistant . . . . . . . . . . . . . 413.15.3 Upgrade of the Operating System and Database System: Overview . . . . . . . . 423.16 Accessing Documentation Before and During the Upgrade . . . . . . . . . . . 433.17 Using the SAP Solution Manager . . . . . . . . . . . . . . . . . . . . . 433.18 Meeting the Requirements for the SAP Internet Solution . . . . . . . . . . . . 443.19 Planning the Installation or Upgrade of Java Components . . . . . . . . . . . . 453.20 Importing Additional Languages . . . . . . . . . . . . . . . . . . . . . 453.21 SAP ECC: Support Packages . . . . . . . . . . . . . . . . . . . . . . . 463.22 Component Levels Contained in the Upgrade Export . . . . . . . . . . . . . 463.23 Application-Specific Upgrade Toolbox . . . . . . . . . . . . . . . . . . . 483.24 Internet Pricing and Configurator . . . . . . . . . . . . . . . . . . . . 48
vi PUBLIC October 24, 2005

Chapter 4 Preparation . . . . . . . . . . . . . . . . . . . . . . . . . . . . 494.1 Determining the Host for the Upgrade Preparations . . . . . . . . . . . . . . 504.2 Creating the Upgrade Directory . . . . . . . . . . . . . . . . . . . . . 514.3 Checking the Database-Specific Requirements for PREPARE . . . . . . . . . . . 524.4 Unicode SAP Systems: Running Reports Before PREPARE . . . . . . . . . . . 524.5 Checking the Consistency of the Host Name . . . . . . . . . . . . . . . . 524.6 Starting PREPARE for the First Time . . . . . . . . . . . . . . . . . . . 534.7 Starting the Upgrade Assistant Server . . . . . . . . . . . . . . . . . . . 544.8 Starting the Upgrade Assistant GUI . . . . . . . . . . . . . . . . . . . . 544.9 Starting the Upgrade Assistant . . . . . . . . . . . . . . . . . . . . . . 554.10 Restarting PREPARE . . . . . . . . . . . . . . . . . . . . . . . . . 564.11 Resetting PREPARE . . . . . . . . . . . . . . . . . . . . . . . . . . 564.12 Importing Software After Starting PREPARE . . . . . . . . . . . . . . . . 574.13 Making the First Entries for PREPARE . . . . . . . . . . . . . . . . . . . 574.14 Making Entries for the Parameter Input Module . . . . . . . . . . . . . . . 584.15 Generating the SAP Solution Manager Key . . . . . . . . . . . . . . . . . 624.16 Making Entries for the Initialization Module . . . . . . . . . . . . . . . . 624.17 Making Entries for the Extension Module . . . . . . . . . . . . . . . . . 644.18 Making Entries for the Installation Module . . . . . . . . . . . . . . . . . 734.19 Making Entries for the Preprocessing Module . . . . . . . . . . . . . . . . 754.20 Making Entries for the MSCS Configuration . . . . . . . . . . . . . . . . 754.21 Evaluating the Results of PREPARE . . . . . . . . . . . . . . . . . . . . 754.22 Making Preparations at the Operating System Level . . . . . . . . . . . . . . 794.23 Making Preparations at the Database Level . . . . . . . . . . . . . . . . . 804.24 Making Preparations at the SAP System Level . . . . . . . . . . . . . . . . 814.24.1 Deleting the AUTOSTART Parameter . . . . . . . . . . . . . . . . . . . 824.24.2 Checking the User for the Upgrade . . . . . . . . . . . . . . . . . . . . 824.24.3 Checking the Requirements for the Modification Adjustment . . . . . . . . . . 824.24.4 Setting the Operation Mode for the Upgrade . . . . . . . . . . . . . . . . 834.24.5 SAP ECC: Processing Batch Input Sessions . . . . . . . . . . . . . . . . . 844.24.6 SAP ECC: Converting the Translation Proposal Pool . . . . . . . . . . . . . . 844.24.7 SAP ECC: Deleting Application Logs . . . . . . . . . . . . . . . . . . . 844.24.8 SAP ECC: Backing Up Wage Types in HR (T512W) (HR Customers) . . . . . . . . 854.24.9 SAP ECC: Processing Direct Input Error Data . . . . . . . . . . . . . . . . 854.24.10 SAP ECC: Backing Up UI Conversion Classes in ESS . . . . . . . . . . . . . . 86
Chapter 5 Upgrade Process . . . . . . . . . . . . . . . . . . . . . . . . . . 875.1 Upgrading with Microsoft Cluster Server . . . . . . . . . . . . . . . . . . 885.2 Starting the Upgrade . . . . . . . . . . . . . . . . . . . . . . . . . 885.3 Stopping the Upgrade . . . . . . . . . . . . . . . . . . . . . . . . . 895.4 Restarting the Upgrade . . . . . . . . . . . . . . . . . . . . . . . . 895.5 Phase INITPUT . . . . . . . . . . . . . . . . . . . . . . . . . . . 905.6 Phase PATCH_CHK . . . . . . . . . . . . . . . . . . . . . . . . . . 915.7 Phase ADDONKEY_CHK . . . . . . . . . . . . . . . . . . . . . . . 915.8 Phase INITSUBST . . . . . . . . . . . . . . . . . . . . . . . . . . 91
October 24, 2005 PUBLIC vii

5.9 Phase CONFCHK_X . . . . . . . . . . . . . . . . . . . . . . . . . 925.10 Phase VIEWCHK1 . . . . . . . . . . . . . . . . . . . . . . . . . . 935.11 Phase REPACHK1 . . . . . . . . . . . . . . . . . . . . . . . . . . 935.12 Phase JOB_RSVBCHCK2 . . . . . . . . . . . . . . . . . . . . . . . . 935.13 Phase FREECHK_X . . . . . . . . . . . . . . . . . . . . . . . . . . 935.14 Phase LOCKEU_PRE . . . . . . . . . . . . . . . . . . . . . . . . . 945.15 EU_IMPORT Phases . . . . . . . . . . . . . . . . . . . . . . . . . 945.16 Phase REPACHK2 . . . . . . . . . . . . . . . . . . . . . . . . . . 955.17 Phase CNV_CHK_XT . . . . . . . . . . . . . . . . . . . . . . . . . 955.18 Phase ADJUSTCHK . . . . . . . . . . . . . . . . . . . . . . . . . . 965.19 Phase ACT_<Rel> . . . . . . . . . . . . . . . . . . . . . . . . . . 965.20 Phase VIEWCHK2 . . . . . . . . . . . . . . . . . . . . . . . . . . 985.21 Phase MODPROF_TRANS . . . . . . . . . . . . . . . . . . . . . . . 985.22 Phases JOB_RSVBCHCK_R and JOB_RSVBCHCK_D . . . . . . . . . . . . . 995.23 Continuation of the Upgrade After the MODPROFP_UPG Phase . . . . . . . . . 995.24 Phase CHK_POSTUP . . . . . . . . . . . . . . . . . . . . . . . . 100
Chapter 6 Follow-Up Activities . . . . . . . . . . . . . . . . . . . . . . . 1016.1 Oracle: Performing Specific Actions . . . . . . . . . . . . . . . . . . . 1026.2 Post-Upgrade Activities for the Microsoft Cluster Server . . . . . . . . . . . 1046.3 Performing Follow-Up Activities for the SAP Kernel . . . . . . . . . . . . . 1046.4 Upgrading the Application Servers . . . . . . . . . . . . . . . . . . . 1056.5 SAP ECC: Renaming the Local System Log . . . . . . . . . . . . . . . . 1066.6 Checking the Profile Parameters with Transaction RZ10 . . . . . . . . . . . 1076.7 Installing Java Components . . . . . . . . . . . . . . . . . . . . . . 1076.8 Reimporting Additional Programs . . . . . . . . . . . . . . . . . . . 1086.9 Adjusting Repository Objects . . . . . . . . . . . . . . . . . . . . . 1086.10 Performing Follow-Up Activities for Security . . . . . . . . . . . . . . . 1086.11 Performing Follow-Up Activities for the Applications . . . . . . . . . . . . 1096.12 Performing Follow-Up Activities for the SAP Solution Manager . . . . . . . . . 1116.13 Secure Single Sign-On with Microsoft LANManager SSP . . . . . . . . . . . 1126.14 SAP ECC: Adjusting Start and Stop Procedures (Source Release Lower than 4.6A) . . 1156.15 Activating VMC for the Internet Pricing and Configurator . . . . . . . . . . 1156.16 Rescheduling Background Jobs . . . . . . . . . . . . . . . . . . . . 1166.17 SAP ECC: Rescheduling DB13 Jobs . . . . . . . . . . . . . . . . . . . 1166.18 SAP ECC: Migrating Matchcodes in Search Help Objects . . . . . . . . . . . 1176.19 Oracle: Performing Actions for the Cost-Based Optimizer . . . . . . . . . . . 1176.20 Generating ABAP Loads . . . . . . . . . . . . . . . . . . . . . . . 1196.21 Generating BSP Applications . . . . . . . . . . . . . . . . . . . . . 1206.22 Performing Actions for the SAP Online Documentation . . . . . . . . . . . 1206.23 Performing Follow-Up Activities in the Authorizations Area . . . . . . . . . . 1216.24 SAP ECC: Processing Table Clusters After the Upgrade . . . . . . . . . . . . 1236.25 Upgrading or Installing Dialog Instances . . . . . . . . . . . . . . . . . 1246.26 Importing Support Packages After the Upgrade . . . . . . . . . . . . . . 1246.27 Transport Management System: Distributing the Configuration . . . . . . . . 1246.28 Performing Follow-Up Activities for the Language Transport . . . . . . . . . 1256.29 Oracle: Deleting Tablespaces . . . . . . . . . . . . . . . . . . . . . 125
viii PUBLIC October 24, 2005

6.30 SAP ECC: Converting Batch Input Logs . . . . . . . . . . . . . . . . . 1266.31 Saving Files for Follow-Up Upgrades . . . . . . . . . . . . . . . . . . . 1276.32 Evaluating the Upgrade Runtime . . . . . . . . . . . . . . . . . . . . 127
Chapter A Appendix . . . . . . . . . . . . . . . . . . . . . . . . . . . . 129A.1 Troubleshooting . . . . . . . . . . . . . . . . . . . . . . . . . . 129A.1.1 Upgrade Logs . . . . . . . . . . . . . . . . . . . . . . . . . . . 129A.1.2 Evaluating the ELG Log Files . . . . . . . . . . . . . . . . . . . . . 131A.1.3 Correcting Errors in the RFCCHK Phase . . . . . . . . . . . . . . . . . 133A.1.4 Correcting Entries Made in the INITPUT and INITSUBST Phases . . . . . . . . 133A.1.5 Correcting Errors in the DBCHK Phase . . . . . . . . . . . . . . . . . 134A.1.6 Correcting Errors in the BATCHCHK Phase . . . . . . . . . . . . . . . . 135A.1.7 Correcting Errors in the INTCHK and INTCHK_SW . . . . . . . . . . . . . 136A.1.8 Correcting Errors in the SPACECHK_ALL Phase . . . . . . . . . . . . . . 136A.1.9 Correcting Errors in the JOB Phases . . . . . . . . . . . . . . . . . . . 136A.1.10 Cleaning Up Terminated Conversions in the DB Conversion Phases . . . . . . . 137A.1.11 Correcting Errors in the TRBATCHK_XT Phase . . . . . . . . . . . . . . 139A.1.12 Correcting Errors in the ACT_<Rel> Phase . . . . . . . . . . . . . . . . 140A.1.13 Correcting Conversion Errors in the PARCONV Phase . . . . . . . . . . . . 141A.1.14 Correcting Errors in the XPRAS Phase . . . . . . . . . . . . . . . . . . 141A.1.15 Preparing the Restart of the Upgrade After a System Failure . . . . . . . . . . 143A.1.16 Resetting the Upgrade . . . . . . . . . . . . . . . . . . . . . . . . 143A.1.17 Correcting Problems when Processing ABAP Steps . . . . . . . . . . . . . 146A.1.18 Correcting Problems when Starting the SAP System . . . . . . . . . . . . . 147A.1.19 Correcting Problems when Copying SAP Programs . . . . . . . . . . . . . 148A.1.20 Providing SAP Support with Information . . . . . . . . . . . . . . . . . 148A.2 Upgrade Administration . . . . . . . . . . . . . . . . . . . . . . . 150A.2.1 Alert Function . . . . . . . . . . . . . . . . . . . . . . . . . . 150A.2.2 Determining Versions . . . . . . . . . . . . . . . . . . . . . . . . 151A.2.3 Setting the Environment of the SAP Kernel . . . . . . . . . . . . . . . . 152A.2.4 Creating Shares and Directories and Checking Authorizations . . . . . . . . . 152A.2.5 Changing the Virtual Memory/Paging File Size . . . . . . . . . . . . . . . 153A.2.6 Isolating the Central Instance . . . . . . . . . . . . . . . . . . . . . 153A.2.7 Extending Free Space in the MS SQL Server Database . . . . . . . . . . . . 154A.2.8 Extending Free Space in the Oracle Database . . . . . . . . . . . . . . . 155A.2.9 Changing the Oracle Database Recovery Mode . . . . . . . . . . . . . . . 156A.2.10 Standalone Database Server (Oracle) . . . . . . . . . . . . . . . . . . 156A.2.11 Using a Different Upgrade Directory . . . . . . . . . . . . . . . . . . 157A.2.12 Releasing and Confirming Open Repairs and Requests . . . . . . . . . . . . 157A.2.13 Releasing and Confirming Open Repairs and Requests . . . . . . . . . . . . 158A.2.14 Sending a Message when User Action Is Required . . . . . . . . . . . . . . 159A.2.15 Using the Phase List for the Upgrade . . . . . . . . . . . . . . . . . . 159A.3 Upgrade Tools . . . . . . . . . . . . . . . . . . . . . . . . . . 161A.3.1 PREPARE . . . . . . . . . . . . . . . . . . . . . . . . . . . . 161A.3.2 SAPup . . . . . . . . . . . . . . . . . . . . . . . . . . . . . 163A.3.3 Upgrade Assistant . . . . . . . . . . . . . . . . . . . . . . . . . 163A.3.4 Using the Upgrade Assistant . . . . . . . . . . . . . . . . . . . . . 165
October 24, 2005 PUBLIC ix

Chapter B Reference . . . . . . . . . . . . . . . . . . . . . . . . . . . . 167B.1 The Main SAP Documentation Types . . . . . . . . . . . . . . . . . . 167B.2 List of Documentation . . . . . . . . . . . . . . . . . . . . . . . 170
x PUBLIC October 24, 2005

1 Introduction
1 Introduction
1.1 Target Audience
n System administratorsn Technology consultants
1.2 About this Document
Purpose
This document describes the upgrade to SAP ERP Central Component Core 6.0 (SAP ECC Core 6.0) withSAP ERP Central Component Extension Set 6.0 (SAP ECC Extension Set 6.0) from Source Release SAP R/33.1I and higher on Windows.The information in this document is intended for SAP system administrators with operating system,
database, and SAP NetWeaver Application Server knowledge.
Integration
If you want to upgrade this component in the context of the upgrade of a mySAP Business Suite solution orone of its business scenarios, it is essential that you familiarize yourself with the contents of the correspondingUpgrade Master Guide before starting to upgrade.
.Note
To find the latest version of this document and the Upgrade Master Guide, see SAP Service Marketplace atservice.sap.com/instguides.
In addition to this document, you also require other information, such as the Release Notes for the applicationsthat you implement, the SAP Implementation Guide (IMG), the SAP Notes that are specific to this upgrade,and any other documentation referred to in this document.
Constraints
You cannot upgrade from a non-Unicode to a Unicode system or vice versa. The Unicode migration isindependent from the SAP system upgrade. For more information on Unicode, see SAP Service Marketplace atservice.sap.com/Unicode@SAP.
October 24, 2005 PUBLIC 1

1 Introduction
1.2 About this Document
Only valid for: SAP R/3 4.6C
For more information on upgrading with MDMP or SAP blended code page, see SAP Note 830502.End of: SAP R/3 4.6C
How To Use This Document
.Caution
It is essential that you use the Upgrade ‒ Step by Step [page 11] checklist to guide you through the upgrade. Itcontains certain product-specific information that is not repeated in the detailed descriptions.
The document on upgrading the SAP system contains a large amount of information. Its aim is to give youboth the information you need immediately at your fingertips, as well as providing additional backgroundinformation when required.The document is structured as follows:
n Chapter 1 ‒ IntroductionThis chapter contains information on the document, the SAP Notes necessary for the upgrade, new featuresof the upgrade, and some naming conventions for the document.
n Chapter 2 ‒ Component UpgradeThis chapter contains information on how to plan, prepare, and perform the upgrade. It begins withthe Upgrade ‒ Step by Step [page 11] checklist, which lists all activities in the right order. It also containsproduct-specific information, for example, preliminary sizes for the upgrade directory or database archives,and the list of necessary DVDs. For more information on the single steps, follow the links in the checklist.
.Note
Activities that you have to perform for a specific product only are marked with the product name inthe title, for example, “<SAP component>: <Title>”.Release numbers in these texts refer to the product releases.
.Note
Activities that are not marked with a product name in the title apply to all upgrades of productsusing the relevant SAP NetWeaver Application Server Release.Release numbers in these texts refer to the underlying SAP NetWeaver Application Server.
.Note
If this document contains information for more than one source release (see Aspects Covered by this Guideon page iii), texts that apply to one or more source releases are marked with bars.These bars always show all source releases for which the text is valid, even though they may not beof interest for your specific upgrade.
n Chapter A ‒ AppendixThis chapter contains information on troubleshooting, upgrade administration, and the upgrade tools.
n Chapter B ‒ ReferencesThis chapter contains a list of the documentation referenced in this guide.
2 PUBLIC October 24, 2005

1 Introduction
1.3 New Features
1.3 New Features
New Features in the Upgrade Based on SAP NetWeaver 2004s Application Server ABAP
n Synchronization of ABAP and Java UpgradeTo minimize the overall downtime, the upgrade of the SAP NW AS Java is synchronized with the upgrade ofthe SAP NW AS ABAP system. During PREPARE, the upgrade program detects whether SAP NW AS 6.40 isrunning and asks you to check the relevant documentation.
n Upgrading dialog instancesTo further synchronize the ABAP and Java upgrade and to provide the dialog instances with the newoptimized settings, the procedure for upgrading dialog instances has changed. You now upgrade dialoginstances by performing a new installation.
n Change of Passwords for the Upgrade AssistantTo log on to the Upgrade Assistant, you no longer need the default passwords from SAP. When startingPREPARE for the first time, SAPup asks you for a password. This password is assigned to both the administratorand the observer role. You can change the password or assign a different password to each role in theUpgrade Assistant menu.
New Features in the Upgrade Based on SAP Web Application Server ABAP 6.40
n Solution Manager Key for the UpgradeAs of SAP ECC 5.00 Support Release 1, you need to run a Solution Manager in your system landscape.PREPARE asks you to enter a key generated by the Solution Manager without which it is not able to proceed.
n Consistency check for function groups in the customer namespacePhase JOB_RSTLIBG checks the consistency between tables TLIBG and TADIR for function groups in thecustomer namespace. In case of inconsistencies, the CHECKS.LOG file contains an error message.
n Delivery on DVDAs of SAP NetWeaver ´04, the data and tools needed for the upgrade are delivered partly on CD and partlyon DVD, which reduces the size of the package. One DVD comprises several of the former CDs.
New Features in the Upgrade Based on SAP Web Application Server 6.20
n Upgrade of a Unicode systemAs of SAP Web Application Server Release 6.20, you can perform an upgrade from a Unicode system to aUnicode system.
n Oracle: Early creation of secondary indexesWith strategy downtime-minimized, some of the secondary indexes will already be created during uptime. Thisapplies to secondary indexes that are new in the target release and whose fields already exist in the sourcerelease. The background job that creates the indexes will not lock the tables concerned.
n Phase list for the upgrade in HTML formatThe phase list [page 159] is no longer part of the upgrade documentation. Instead, it is contained in thehtdoc subdirectory of the upgrade directory in the form of HTML files. You can also create the phase listyourself by using the htmlphl option to call SAPup.
n ModificationsThe procedure for copying modifications to the standard SAP system has changed. Modified objects thatbelong to software components whose release does not change during the upgrade are copied automaticallyand therefore do not need to be adjusted again. Modified objects that belong to software components that
October 24, 2005 PUBLIC 3

1 Introduction
1.3 New Features
are being upgraded are no longer copied automatically. Instead, all of these modifications are offered foradjustment, including modifications to objects that are deleted by the upgrade and that are not shippedby SAP in a more up-to-date version.This new procedure may cause more objects to be offered in the modification adjustment than waspreviously the case. Customer objects are not affected by this change and are retained as usual.
n
Only valid for: SAP R/3 3.1I
New functions for including Support PackagesTo import Support Packages in the BIND_PATCH phase, the “minimum required Support Package level” isdetermined and taken into consideration for each component.This Support Package level is required by the included add-ons of the target release as an importprerequisite. The add-on queue calculation determines the minimum required Support Package level.You are not allowed to select a Support Package level that is lower than the minimum level.The minimum required Support Package level for each component is displayed on the dialog box (wizard).End of: SAP R/3 3.1I
n
Only valid for: SAP Web AS 6.40;SAP Web AS 6.20;SAP Web AS 6.10;SAP Basis 4.6C;SAP Basis 4.6D;SAP R/3 4.6B;SAP R/3 4.5B;SAP
R/3 4.0B
New functions for including Support PackagesTo import Support Packages in the BIND_PATCH phase, the following Support Package levels are determinedand taken into consideration for each component:l Minimum required Support Package level
Support Package level that the included add-ons of the target release require as an import prerequisite.The add-on queue calculation determines the minimum required Support Package level.You are not allowed to select a Support Package level that is lower than the minimum level.
l Equivalence Support Package levelYou can define attributes for the Support Packages of the source release that determine which SupportPackage in a higher release corresponds to the one in the source release. This Support Package must beincluded so that no data is lost in the upgrade.PREPARE determines this equivalence Support Package level in the PATCHK_EQUI phase.
The minimum and the equivalence Support Package level for each component are displayed on the dialogbox (wizard).End of: SAP Web AS 6.40;SAP Web AS 6.20;SAP Web AS 6.10;SAP Basis 4.6C;SAP Basis 4.6D;SAP R/3 4.6B;SAP R/3 4.5B;SAP R/3 4.0B
n New procedure for dealing with add-onsIn the IS_SELECT phase, you can also include SAINT packages in the upgrade that you put in the transportdirectory before the upgrade.
n Calculating an add-on queueIf you made a decision for all add-ons in the IS_SELECT phase, a new queue calculation is triggered. Thiscalculation checks whether the import prerequisites can be met for the add-ons, and determines thesequence in which the corresponding requests are imported.
n Including a SPAM updateIn the BIND_PATCH phase you can include a SPAM update for the target release.
n Conflict checkTo check whether the add-on requests and CRTs are complete, PREPARE triggers a conflict check. You arethen prompted to include the corresponding CRTs for the included add-ons, if necessary.
4 PUBLIC October 24, 2005

1 Introduction
1.4 Before You Start
New Features in the Upgrade Based on SAP Web Application Server 6.10
n New upgrade procedureThe new System Switch Upgrade installs an instance of the target release, the shadow system, in parallelwith the current source release system in the same database. This parallel system contains all the softwareof the target release and is used to integrate Support Packages that are included in the upgrade, add-ons,and customer modifications into the target release.In the production database, the tables of the target release that contain both the descriptions of the ABAPDictionary and the ABAP programs are imported as shadow tables under an alternative name. The shadowsystem enables you to access these tables. Depending on the upgrade strategy you choose, you can performupgrade actions before downtime starts that previously had to be performed during downtime.You can choose between two upgrade strategies in the System Switch Upgrade. The downtime-minimizedstrategy enables you to run the production system and shadow system in parallel. This requires extrasystem resources, but reduces downtime. The resource-minimized strategy only enables you to run either theproduction system or the shadow system. This strategy requires no extra system resources. However, thedowntime is longer, since you can only run the shadow instance during downtime.In the new procedure, the archiving strategy for the database is no longer coupled with the upgradestrategy. However, you should use the recommended archiving strategies except in certain cases.
n New command for starting and stopping the SAP systemThe command for the SAP system start and stop procedure has changed in SAP Web Application Server6.10. Up until the ENVCHK phase, the SAP system is started and stopped with the old commands. As of theKX_SWITCH phase, you can start the SAP system with command startsap r3 DVEBMGS<instance number>,and stop it with command stopsap r3 DVEBMGS<instance number>. To activate the changed environment,you have to log off the operating system as user <sapsid>adm and log on again.
n Load generation transaction SGEN completely revisedTransaction SGEN is used to generate ABAP loads for programs, function groups, classes, or Business ServerPages applications (BSP applications). You can select clearly defined generation tasks. The progress displayenables you to monitor the generation and see its forecast duration. The new parallel procedure used bythe new transaction shortens the duration of the generation significantly.For a detailed description of the transaction, use the information button on its screens.
1.4 Before You Start
1.4.1 Naming Conventions
SAP R/3 Enterprise and SAP ERP Central Component
SAP ERP Central Component is the successor of SAP R/3 Enterprise. It consists of the SAP ERP CentralComponent Core 6.0 with SAP ERP Central Component Extension Set 6.0. In this document, the followingshort forms are used:
n “SAP ECC” for “SAP ERP Central Component”n “SAP ECC Core” for “SAP ERP Central Component Core”n “SAP ECC Extension Set ”for “SAP ERP Central Component Extension Set”
October 24, 2005 PUBLIC 5

1 Introduction
1.4 Before You Start
SAP NetWeaver Application Server, SAP Web Application Server, and SAP Basis
SAP NetWeaver 2004s renames SAP Web Application Server as SAP NetWeaver Application Server. In releasesbefore 6.10, the component had been called SAP Basis Component. In this document, the terms are usedas follows:
n The term “SAP NetWeaver Application Server” (or the short form “SAP NW AS”) is used when referring toSAP NetWeaver 2004s and higher.
n The term “SAP Web Application Server” (or the short form “SAP Web AS”) is used when referring toReleases between 6.10 and 6.40.
n The term “SAP Basis” (or the short form “Basis”) is used when referring to Release 4.6D and lower.
Release
Unless otherwise specified, the term “release” is used in the product-specific sections of this document to referto the release of the SAP ECC system. The titles of product-specific sections start with the name of the product,for example, “SAP ECC: Backing Up Wage Types in HR”.In the general sections of the document, “release” is used to refer to the release of the SAP Basis or SAP
Web Application Server system.The following table explains which release of SAP Basis, SAP Web Application Server, and SAP NetWeaver
Application Server corresponds to which release of SAP R/3 and SAP ECC:
SAP Basis / SAP Web Application Server / SAPNetWeaver Application Server
SAP R/3 / SAP ECC
SAP Basis 4.6C SAP R/3 4.6C
SAP Web Application Server 6.20 SAP R/3 Enterprise 4.70 with SAP R/3 Enterprise ExtensionSet 1.10 or SAP R/3 Enterprise Extension Set 2.00
SAP Web Application Server 6.40 SAP ECC 5.00
SAP NetWeaver Application Server 7.0 SAP ECC 6.0
SAP ECC System and SAP System
In this document, the term “SAP system” is the same as “SAP ECC system”. “SAP” is also used as a synonym for“SAP ECC” in terms such as “SAP start profile” or “SAP system language”.
SAP System ID
In this document, the SAP system ID is abbreviated as “SAPSID” or “sapsid”. If “<sapsid>” is used, yourSAP system ID must be in lowercase letters, for example “prd”. If “<SAPSID>” is used, you must write inuppercase letters, for example “PRD”.
ID for the SAP System Release
In this document, “<rel>” stands for the relevant SAP system release, without a decimal point, such as “700”.
6 PUBLIC October 24, 2005

1 Introduction
1.4 Before You Start
1.4.2 SAP Notes for the Upgrade
Definition
To prepare and perform the upgrade of your SAP system, you require some additional information that isnot included in this document. This information is in a range of SAP Notes on SAP Service Marketplace,some of which you must read before you prepare the upgrade. The general Upgrade Note contains currentcross-database information on preparing the upgrade. There are separate SAP Notes for the database-specificsections. When you actually upgrade the SAP system, you need information from some additional SAP Notes.These SAP Notes are named at the appropriate places in this document.
SAP Notes for Preparing the Upgrade
You must request the general Upgrade Note and the SAP Notes for your database from SAP ServiceMarketplace before you start your upgrade. Since these SAP Notes are updated regularly, make sure that youalways use the newest version. The following list contains the SAP Notes you need to prepare for the upgrade:
SAP Notes for Preparing the Upgrade on Oracle
SAP Note Number Description SAP Note Type
826092 Additional information on upgradingto SAP ERP Central Component 6.0
Specific to this upgrade
819655 Oracle Oracle-specific/specific to this upgrade
Keyword for the Upgrade
When you start the upgrade, you are asked to enter a keyword, which you can get from the current generalUpgrade Note 826092. You cannot start the upgrade until you have entered the keyword.
Other SAP Notes
As well as the SAP Notes you need for preparing the upgrade, this document also refers you to other SAP Notesthat contain additional information. The following lists contain these SAP Notes:
SAP Notes for All Databases
SAP Note Number Description SAP Note Type
778774 Resource requirements for ECC 5.0 Performance
752532 Resource requirements for R/3Enterprise 4.70 x 2.00
Performance
517085 Resource requirements for R/3Enterprise 4.70 x 1.10
Performance
323263 Resource requirements for Release4.6C
Performance
178616 Resource requirements for Release4.6B
Performance
151508 Resource requirements for Release4.6A
Performance
October 24, 2005 PUBLIC 7

1 Introduction
1.4 Before You Start
SAP Note Number Description SAP Note Type
113795 Resource requirements for Release 4.5 Performance
89305 Resource requirements for Release4.0A and 4.0B
Performance
156387 Composite Note on upgrade problemsfor the SAP component HR (HumanResources)
HR-specific
26417 SAP GUI resources: Hardware andsoftware
Front end/SAP GUI
102445 Installation of a 3.1I_COM kernel SAP kernel
102461 Installation of a 4.0B_COM kernel SAP kernel
318846 Installation of a 4.6D kernel SAP kernel
502999 Installing SAP kernel 6.20 into a systemusing SAP Web AS 6.10
SAP kernel
664679 Installing SAP kernel 6.40 into a systemusing SAP Web AS 6.20
SAP kernel
211077 Exchanging the target release kernelduring the upgrade
SAP kernel
19466 Downloading SAP kernel patches SAP kernel
19227 Getting the latest saposcol saposcol
816806 SAP ECC 5.00 Extension Set:Activation switch
SAP ECC Extensions
86985 SAP release for add-ons (IS) SAP add-ons
83458 Downloading Support Packages fromSAP Service Marketplace
SAP Support Packages
125971 Service connection in UpgradeAssistant in SAP Service Marketplace
Remote support for upgrade
133402 Using the Upgrade Assistant withSAProuter
Upgrade Assistant
62519 Correction locks do not belong tosystem
Workbench Organizer
51046 Copying the modification adjustmentwithout a central transport directory
Change and Transport System
96905 Error message TG063 in the upgradephase JOB_RADDRCHK
ABAP Dictionary
867521 Upgrading an MSCS SAP system toSAP NetWeaver 2004s
MSCS
97032 Conversion of address tables, runtime Address management
82167 Conversion of address tables, runtime Address management
24864 No conversion of table BSEG ABAP Dictionary/phase PARCONV_UPG
8 PUBLIC October 24, 2005

1 Introduction
1.4 Before You Start
SAP Note Number Description SAP Note Type
10187 User buffer too small User administration
197746 Maintenance Strategy InternetTransaction Server (ITS)
SAP@Web
399578 Publishing IAC objects on the ITS afterthe upgrade
SAP@Web
86627 Transaction types: Customizing forrelease upgrades
Customizing
352941 Language import and SupportPackages
Language transport
322982 Install language during upgrade Language transport
485741 Dealing with customer translations inthe upgrade
Language transport
813658 Repairs for Upgrades to productsbased on SAP NW AS 7.0
General upgrade
821032 Corrections for SAPup release 700 General upgrade
177680 Correcting conversion problems inthe PARCONV_UPG phase
General upgrade
417670 Additional information aboutresetting the upgrade
General upgrade
186066 Increased free space requirementsduring the upgrade
General upgrade
430318 Shadow instance on another operatingsystem
General upgrade
94998 Requesting a license key for a system General upgrade
29972 Instance numbers in a distributedsystem
General upgrade
175596 Switch to a new batch input log General upgrade
808790 ERP 2004: Optimizing the upgradephase XPRAS_UPG
General upgrade
122597 Ignore errors in the XPRAS_UPG phase General upgrade
195157 Deleting application logs General upgrade
623723 Upgrade: Application-specificproblems
General upgrade
493387 Potential effects of changes to tableand structure extensions
Activation
490788 ICNV in the upgrade to SAP Web AS6.20 and higher
ICNV
178482 Upgrade from 3.0 to 4.0 for customerprograms
Adjusting customer developments
October 24, 2005 PUBLIC 9

1 Introduction
1.4 Before You Start
SAP Note Number Description SAP Note Type
178452 Upgrade from 4.0 to 4.5 for customerprograms
Adjusting customer developments
178725 Upgrade from 4.5 to 4.6 for customerprograms
Adjusting customer developments
367676 Upgrade from 4.6 to 6.10 for customerprograms
Adjusting customer developments
452229 Upgrade from 6.10 to 6.20 for customerprograms
Adjusting customer developments
689951 Upgrade from 6.20 to 6.40 for customerprograms
Adjusting customer developments
857904 Upgrade from 6.40 to 7.0 for customerprograms
Adjusting customer developments
805390 Preparation: ERP 2004 installationonly with SAP Solution Manager
SAP Solution Manager
SAP Notes for Oracle
SAP Note Number Description SAP Note Type
11777 Changing the storage parametersNEXT and MAX EXTENTS
Oracle-specific
3807 Error messages regarding rollbacksegments
Oracle-specific
829483 Oracle upgrade to 10g on Windows Oracle-specific
833766 Oracle Database 10g: SoftwareInstallation Problems
Oracle-specific
Optional SAP Notes for Windows
SAP Note Number Description SAP Note Type
690432 Windows 2003 support Windows 2003-specific
28781 Central transport directory NT/UNIX Mixed systems
65761 Configuration problems underWindows NT
System configuration
430992 Shadow instance on another host:Windows
Upgrade under Windows
33772 Configuring Dr. Watson Correctly System administration
138498 Single Sign-On Solutions Single Sign-On
10 PUBLIC October 24, 2005

2 Step By Step
2 Step By Step
2.1 Upgrade ‒ Step by Step
PurposeThis section contains a checklist with all the actions you need to perform:
n Find SAP Notes
n Plan the upgraden Prepare the upgraden Upgrade the SAP systemn Perform follow-up activities
The actions are placed in chronological order, so that you can work through them just like a checklist. Formore information, use the links to the descriptions of the actions.
SAP Notes for the Upgrade
This upgrade documentation is enhanced and updated by SAP Notes on SAP Service Marketplace. These SAPNotes are an important source of information when you plan and prepare your upgrade, and also help youperform the actual upgrade.
o 1. You request the current SAP Notes for the Upgrade [page 7]. You require at least the following SAP Notes:n General Upgrade Note 826092n The relevant database-specific SAP Note 819655
Upgrade Planning
Before you start the actual upgrade, youmust plan it carefully so that downtime is reduced to a minimum, andthe upgrade runs as efficiently as possible.
.Caution
Start planning your upgrade at least two to three weeks before you want to begin with the upgrade.
o 1. You can upgrade the front-end software [page 22] as soon as you receive the software package.
o 2. You familiarize yourself with the features of the System Switch Upgrade [page 23] and its effect on the wayyou upgrade the system.
o 3. You decide on an upgrade strategy [page 26], taking into account your operating system and databaseupgrade.
o 4. You define an archiving strategy [page 29] for your database.Archive Sizes: 35 GB up to the MODPROF_TRANS phase and 43 GB to the end of the upgrade. These
sizes are an estimation based on sample data.
o 5. Before you start the upgrade, you check the database-specific aspects [page 30] and include them in yourupgrade schedule, if necessary.
October 24, 2005 PUBLIC 11

2 Step By Step
2.1 Upgrade ‒ Step by Step
o 6. You check whether your system is anMCOD system [page 31].
o 7. You plan data management measures [page 31] to reduce the amount of data, if necessary.
o 8. You plan the incremental table conversion [page 32], if necessary.
o 9. You plan the upgrade schedule [page 33].Start your preparations for the upgrade at the latest one week before you upgrade your system.Each language that you import increases the minimum duration of the import by about 30 minutes.
o 10. Depending on your chosen upgrade strategy, you plan the runtime for the import of the substitution set[page 36].The import of the substitution set takes about 1 to 3 hours, depending on your hardware.
o 11. You decide on the sequence of upgrades in your SAP system group [page 36].
o 12. You plan the modification adjustment [page 37], if necessary.
o 13. You check the structural requirements [page 39]: You call transaction RZ10 to check the values of the profileparameters rdisp/mshost and rdisp/wp_no_vb.
o 14. You check the hardware requirements [page 40]:n CPU, main memory, and page file ‒ see SAP Service Marketplace at service.sap.com/sizingn Disk space in the file system for the upgrade directory
Make sure that you have about 7000 MB of temporary disk space in the file system for the upgradedirectory.This size is based on sample data.
n Space requirements in the database (estimation): 50 GB during the upgrade.
o 15. You check the software requirements.n Source release [page 41] of the SAP system:l SAP R/3 3.1Il SAP R/3 4.0Bl SAP R/3 4.5Bl SAP R/3 4.6Bl SAP R/3 4.6Cl SAP R/3 Enterprise Core 4.70 with SAP R/3 Enterprise Extension Set 1.10l SAP R/3 Enterprise Core 4.70 with SAP R/3 Enterprise Extension Set 2.00l SAP ERP Central Component 5.00 with SAP ERP Central Component Extension Set 5.00
n Upgrade Assistant [page 41]: Java Virtual Machine (at least Version 1.4.x)n You plan or perform the upgrade of the operating system and database system [page 42], if necessary:
For detailed information on which operating system and database versions are currently supported,see SAP Service Marketplace at service.sap.com/platforms.On the same page, you can find a link to the general Product Availability Matrix.Database version: At least Version 10.1.0 for the upgrade; you can run PREPARE with Version 9.2.0or higher.
o 16. You meet the requirements for installing the online documentation [page 43] as described in the documentInstalling the SAP Library.
o 17. You plan the use of an SAP Solution Manager [page 43] in your system landscape.
o 18. You meet the requirements for the SAP Internet Transaction Server [page 44] as described in the SAP@WebInstallation Guide, if necessary.See the corresponding Upgrade Master Guide to find out whether you require the SAP Internet
Transaction Server for your business scenario.
12 PUBLIC October 24, 2005

2 Step By Step
2.1 Upgrade ‒ Step by Step
o 19. You plan the upgrade to or installation of the Java components [page 45].
o 20. You meet the requirements for importing additional languages [page 45], if necessary.
o 21.
Only valid for: SAP R/3 4.6B;SAP R/3 4.6C;SAP R/3 4.5B;SAP R/3 4.0B;SAP R/3 3.1I
You note the changes in SAP Support Package structure [page 46] as of Release 4.6.End of: SAP R/3 4.6B;SAP R/3 4.6C;SAP R/3 4.5B;SAP R/3 4.0B;SAP R/3 3.1I
o 22. You check the Support Package or patch level [page 46] of the components included in the upgrade export.
o 23. You check whether the application-specific upgrade toolbox [page 48] (ASU toolbox) contains informationnecessary for your upgrade.
o 24. You check the architectural changes for the Internet Pricing and Configurator [page 48].
Upgrade Preparations
You can prepare for the upgrade while the system is in production operation. The PREPARE program supportsyou here by making most of the necessary checks automatically. Start PREPARE as soon as possible before theupgrade so that you can initiate or perform the necessary preparations in time.Preparations for PREPARE
o 1. You choose the host [page 50] for PREPARE and the Upgrade Assistant.
o 2. You create an empty upgrade directory [page 51] on the host with the central instance:n With a total of 7000 MB free disk spacen If you have made a lot of customer developments, include approximately 20% extra space in the file
system. Also do this if you want to include Support Packages and add-ons.n If you want to import languages other than English and German, provide an extra 350 MB of
memory in the file system for each language.
o 3. You check the database-specific prerequisites [page 52] for PREPARE. Among other things, the following freespace must be available:500 MB
o 4.
Only valid for: SAP Web AS 6.40;SAP Web AS 6.20
Unicode SAP systems with source release SAP Web AS 6.20 and 6.40: You run reports RUTTYPACT andUMG_POOL_TABLE [page 52], if necessary.End of: SAP Web AS 6.40;SAP Web AS 6.20
o 5. You check the consistency of the host name [page 52]
Actions for Starting PREPAREWhen you start PREPARE for the first time, you must start it from the DVD.
o 1. You start PREPARE [page 53] from the Upgrade Master DVD as user <SAPSID>ADM on the host withthe central instance.
o 2. You start the Upgrade Assistant server [page 54].
o 3. You start the GUI of the Upgrade Assistant [page 54].
o 4. You start the Upgrade Assistant [page 55] .If you want to restart PREPARE [page 56], for example, if the results of its first run make you want to
repeat some checks, you can execute it directly.You can reset PREPARE [page 56] at any time.If you need extra software after starting PREPARE, you import it now [page 57].
User Actions During PREPARE
October 24, 2005 PUBLIC 13

2 Step By Step
2.1 Upgrade ‒ Step by Step
PREPARE needs certain information from you so that it can run the modules. If possible, default valuesappear that you can confirm or change. For a complete list of all PREPAREmodules and phases, see Using thePhase List for the Upgrade [page 159].
o 1. You make the first entries [page 57] for PREPARE.
o 2. You make the entries for the Parameter Input [page 58] module.This includes entering a keyword from the current general Upgrade Note 826092.It also includes entering mount directories. You require the following data carriers:
Data Carriers Required by PREPARE
DVD Contents Needed
Upgrade Master DVD for SAP NetWeaver /<your SAP solution> and your database
Start DVD with upgrade tools
SAP Kernel DVD for SAP NetWeaver / <yourSAP solution> and your database
Programs and configuration files for the upgrade
DVD containing the upgrade export Transport requests imported during the upgrade
DVD containing the languages All supported languages
DVDs Required by SAPup
DVD Contents Needed
DVD containing the upgrade export Transport requests imported during the upgrade
DVD containing the languages All supported languages
For the correct labels of the data carriers, see theMedia List which is included in the Master Guideof you SAP solution.It also includes entering a key which is generated by the SAP Solution Manager [page 62].
o 3. You make the entries for the Initialization module [page 62].n You check the version of the SAP kernel, tp, and R3trans.n You check the SAP Notes for the add-ons.
o 4. You make the entries for the Extension module [page 64], such as including Support Packages.For the SAP ECC Extension Add-Ons listed in phase IS_SELECT, you can use the standard settings.
o 5. You make the entries for the Installation module [page 73], such as the instance number and the portnumbers for the shadow system.
o 6.
Only valid for: SAP Web AS 6.40;SAP Web AS 6.20;SAP Web AS 6.10;SAP Basis 4.6C;SAP Basis 4.6D;SAP R/3 4.6B;SAP R/3
4.5B;SAP R/3 4.0B
You make the entries for the Preprocessing module [page 75].End of: SAP Web AS 6.40;SAP Web AS 6.20;SAP Web AS 6.10;SAP Basis 4.6C;SAP Basis 4.6D;SAP R/3 4.6B;SAP R/3 4.5B;SAP
R/3 4.0B
o 7. Microsoft Cluster Server (MSCS): You make the entries for theMSCS Configuration [page 75].
Checks Not Supported by PREPAREYou have to perform the following checks which are not supported by PREPARE:
14 PUBLIC October 24, 2005
2 Step By Step
2.1 Upgrade ‒ Step by Step
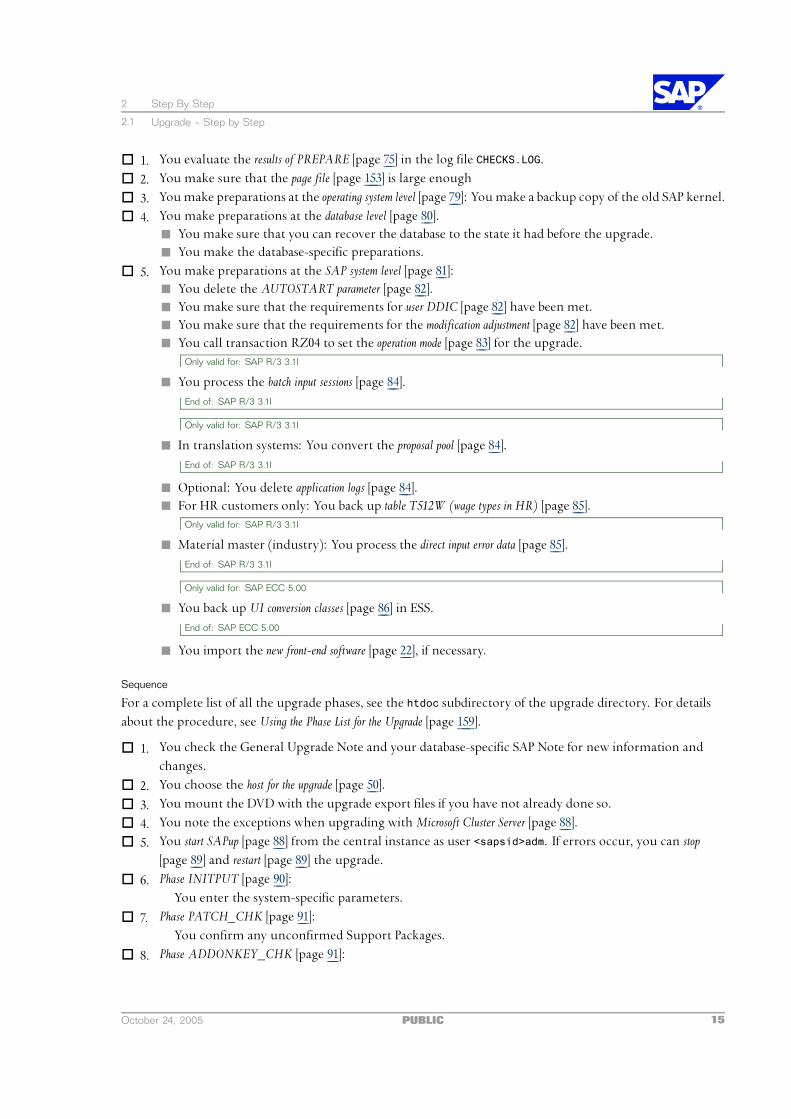
o 1. You evaluate the results of PREPARE [page 75] in the log file CHECKS.LOG.
o 2. You make sure that the page file [page 153] is large enough
o 3. Youmake preparations at the operating system level [page 79]: Youmake a backup copy of the old SAP kernel.
o 4. You make preparations at the database level [page 80].n You make sure that you can recover the database to the state it had before the upgrade.n You make the database-specific preparations.
o 5. You make preparations at the SAP system level [page 81]:n You delete the AUTOSTART parameter [page 82].n You make sure that the requirements for user DDIC [page 82] have been met.n You make sure that the requirements for the modification adjustment [page 82] have been met.n You call transaction RZ04 to set the operation mode [page 83] for the upgrade.
n
Only valid for: SAP R/3 3.1I
You process the batch input sessions [page 84].End of: SAP R/3 3.1I
n
Only valid for: SAP R/3 3.1I
In translation systems: You convert the proposal pool [page 84].End of: SAP R/3 3.1I
n Optional: You delete application logs [page 84].n For HR customers only: You back up table T512W (wage types in HR) [page 85].
n
Only valid for: SAP R/3 3.1I
Material master (industry): You process the direct input error data [page 85].End of: SAP R/3 3.1I
n
Only valid for: SAP ECC 5.00
You back up UI conversion classes [page 86] in ESS.End of: SAP ECC 5.00
n You import the new front-end software [page 22], if necessary.
Sequence
For a complete list of all the upgrade phases, see the htdoc subdirectory of the upgrade directory. For detailsabout the procedure, see Using the Phase List for the Upgrade [page 159].
o 1. You check the General Upgrade Note and your database-specific SAP Note for new information andchanges.
o 2. You choose the host for the upgrade [page 50].
o 3. You mount the DVD with the upgrade export files if you have not already done so.
o 4. You note the exceptions when upgrading withMicrosoft Cluster Server [page 88].
o 5. You start SAPup [page 88] from the central instance as user <sapsid>adm. If errors occur, you can stop[page 89] and restart [page 89] the upgrade.
o 6. Phase INITPUT [page 90]:You enter the system-specific parameters.
o 7. Phase PATCH_CHK [page 91]:You confirm any unconfirmed Support Packages.
o 8. Phase ADDONKEY_CHK [page 91]:
October 24, 2005 PUBLIC 15

2 Step By Step
2.1 Upgrade ‒ Step by Step
You enter keywords for add-ons, if necessary.
o 9. Phase INITSUBST [page 91]:n You choose your upgrade strategy.
If you choose strategy downtime-minimized, you determine the runtime for the import of thesubstitution set (approximately 24 hours).If you choose strategy resource-minimized, you determine the number of parallel processes for importingthe substitution set.
n You choose the time when you want database archiving to be switched off.n You determine the number of parallel background processes.
o 10. Phase CONFCHK_X [page 92]:You update your operating system or database to the required version now at the latest, or you
import any software you still need.
o 11. Phase VIEWCHK1 [page 93]:You can begin to remove conflicts between customer tables and new views by deleting the customer
tables in this phase.
o 12. Phase REPACHK1 [page 93]:You release the locked objects and confirm repairs. You must do this in the REPACHK2 phase at
the latest.
o 13. Phase JOB_RSVBCHCK2 [page 93]:You clean up outstanding updates. You must do this in the JOB_RSVBCHCK_R or JOB_RSVBCHCK_D
phases at the latest.
o 14. Phase FREECHK_X [page 93]:You make sure that you can recover the old kernel if this becomes necessary.
o 15. Phase LOCKEU_PRE [page 94]:For downtime-minimized: You lock the ABAP Workbench. You must do this in the REPACHK2 phase at
the latest.
o 16. Phase EU_IMPORT1 [page 94]:For resource-minimized: You isolate the central instance, stop the application servers and change the
database recovery mode, if necessary.
o 17. EU_IMPORT phases [page 94]:If the relevant DVD with the CD contents is not mounted on one of the specified directories, you are
prompted to enter a mount directory.
o 18. Phase REPACHK2 [page 95]:n You release and confirm all open repairs in this phase at the latest.n For downtime-minimized: You lock the ABAP Workbench in this phase at the latest.
o 19. Phase CNV_CHK_XT [page 95]:You process any uncompleted conversion requests and restart logs.
o 20. Phase ADJUSTCHK [page 96]:Modifications: You confirm the request, if necessary.
o 21. Phase START_SHDI_FIRST:As of this phase you can only log on with front-end software [page 22] that is compatible with the target
release.
o 22. Phase ACT_<Rel> [page 96]:Modifications: You adjust modified SAP objects with the SAP standard versions.
16 PUBLIC October 24, 2005

2 Step By Step
2.1 Upgrade ‒ Step by Step
o 23. Phase VIEWCHK2 [page 98]:You remove conflicts between customer tables and new views by deleting the customer tables in
this phase at the latest.
o 24. Phase MODPROF_TRANS [page 98]:n For downtime-minimized: You isolate the central instance, stop the application servers and change
the database recovery mode, if necessary. Also make sure that you can recover the database toits current state.
n You back up the upgrade directory.n You check the percentage of tables converted in transaction ICNV, if necessary.
o 25. Phases JOB_RSVBCHCK_R and JOB_RSVBCHCK_D [page 99]:You clean up outstanding updates in these phases at the latest.
o 26. Phase MODPROFP_UPG [page 99]:In the phases MODPROFP_UPG, STARTR3_PUPG, and CHK_POSTUP, you perform the following actionsn You back up the database.n You determine P errors.
n You change the database recovery moden You start the secondary application servers.
o 27. Phase CHK_POSTUP [page 100]:You remove the P errors.
Follow-Up Activities
SAPup stops at the latest in the MODPROFP_UPG phase and prompts you to start the follow-up activities. SAPupthen executes the last phases and completes the upgrade. At the same time you can perform the follow-upactivities specified by SAPup.Activities Before Restarting Production Operation
o 1. You perform the database-specific actions [page 102]: You create or update the SAPDBA role, check theenvironment variables for BR*Tools, add new parameters to the profiles init<DBSID>.sap andinit<DBSID>.ora (for source releases lower than 4.5A), and back up the database.
o 2. Microsoft Cluster Server (MSCS): You perform the follow-up activities [page 104].
o 3. You perform follow-up activities for the SAP kernel [page 104]:n You install the current SAP kernel.
n You check the saposcol version.
o 4.
Only valid for: SAP R/3 3.1I
If remote application servers exist, you rename the local system log [page 106].End of: SAP R/3 3.1I
o 5. You upgrade the application servers [page 105].
o 6.
Only valid for: SAP R/3 3.1I
You rename the local system log [external document].End of: SAP R/3 3.1I
o 7. You call transaction RZ10 to check the profile parameters [page 107] and reset them to their default values, ifnecessary.
o 8. You install the Java components [page 107], if necessary.
October 24, 2005 PUBLIC 17
2 Step By Step
2.1 Upgrade ‒ Step by Step
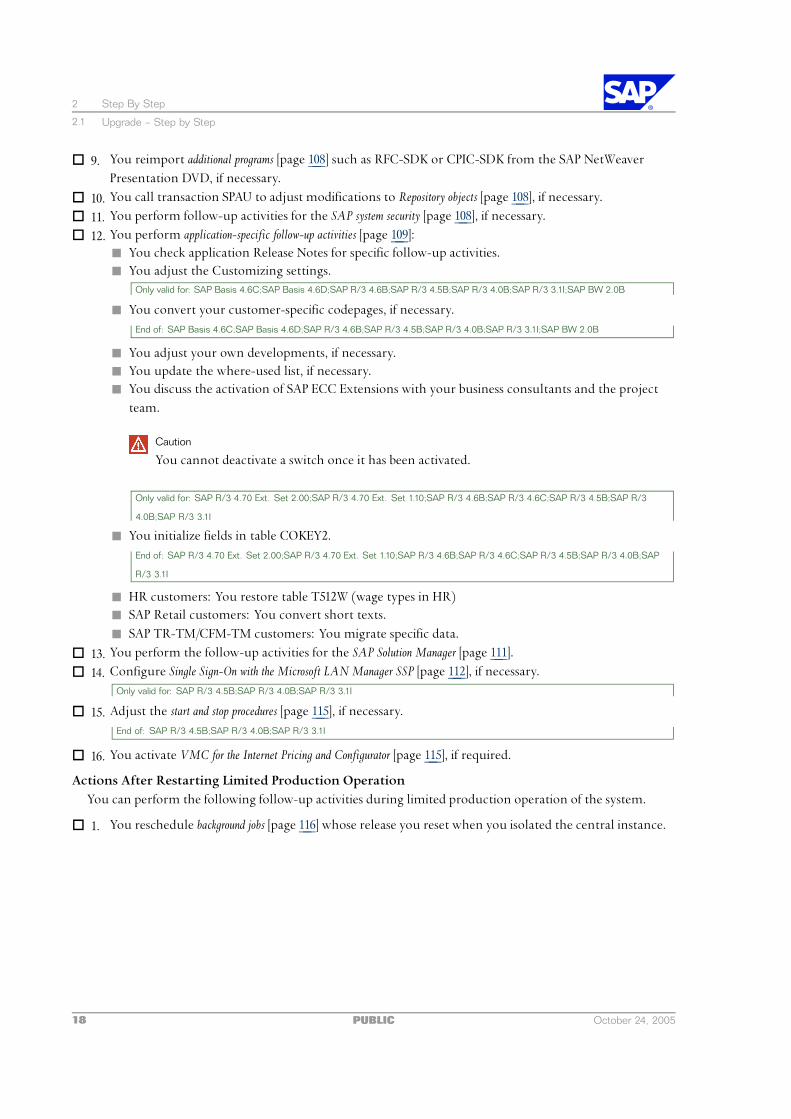
o 9. You reimport additional programs [page 108] such as RFC-SDK or CPIC-SDK from the SAP NetWeaverPresentation DVD, if necessary.
o 10. You call transaction SPAU to adjust modifications to Repository objects [page 108], if necessary.
o 11. You perform follow-up activities for the SAP system security [page 108], if necessary.
o 12. You perform application-specific follow-up activities [page 109]:n You check application Release Notes for specific follow-up activities.n You adjust the Customizing settings.
n
Only valid for: SAP Basis 4.6C;SAP Basis 4.6D;SAP R/3 4.6B;SAP R/3 4.5B;SAP R/3 4.0B;SAP R/3 3.1I;SAP BW 2.0B
You convert your customer-specific codepages, if necessary.End of: SAP Basis 4.6C;SAP Basis 4.6D;SAP R/3 4.6B;SAP R/3 4.5B;SAP R/3 4.0B;SAP R/3 3.1I;SAP BW 2.0B
n You adjust your own developments, if necessary.n You update the where-used list, if necessary.n You discuss the activation of SAP ECC Extensions with your business consultants and the project
team.
.Caution
You cannot deactivate a switch once it has been activated.
n
Only valid for: SAP R/3 4.70 Ext. Set 2.00;SAP R/3 4.70 Ext. Set 1.10;SAP R/3 4.6B;SAP R/3 4.6C;SAP R/3 4.5B;SAP R/3
4.0B;SAP R/3 3.1I
You initialize fields in table COKEY2.End of: SAP R/3 4.70 Ext. Set 2.00;SAP R/3 4.70 Ext. Set 1.10;SAP R/3 4.6B;SAP R/3 4.6C;SAP R/3 4.5B;SAP R/3 4.0B;SAP
R/3 3.1I
n HR customers: You restore table T512W (wage types in HR)n SAP Retail customers: You convert short texts.
n SAP TR-TM/CFM-TM customers: You migrate specific data.
o 13. You perform the follow-up activities for the SAP Solution Manager [page 111].
o 14. Configure Single Sign-On with the Microsoft LAN Manager SSP [page 112], if necessary.
o 15.
Only valid for: SAP R/3 4.5B;SAP R/3 4.0B;SAP R/3 3.1I
Adjust the start and stop procedures [page 115], if necessary.End of: SAP R/3 4.5B;SAP R/3 4.0B;SAP R/3 3.1I
o 16. You activate VMC for the Internet Pricing and Configurator [page 115], if required.
Actions After Restarting Limited Production OperationYou can perform the following follow-up activities during limited production operation of the system.
o 1. You reschedule background jobs [page 116] whose release you reset when you isolated the central instance.
18 PUBLIC October 24, 2005

2 Step By Step
2.1 Upgrade ‒ Step by Step
o 2.
Only valid for: SAP R/3 3.1I
You call transaction DB13 to reschedule jobs [page 116].End of: SAP R/3 3.1I
o 3.
Only valid for: SAP R/3 3.1I
You migrate matchcodes to search helps [page 117], if necessary.End of: SAP R/3 3.1I
o 4. You perform actions for the Cost-Based Optimizer [page 117].
o 5. You call transaction SGEN to generate ABAP loads [page 119].
o 6. You call transaction SGEN to generate the BSP applications [page 120], if necessary.
o 7. You perform actions for the online documentation [page 120] as described in the document Installing the SAPLibrary.
o 8. You install the SAP Internet Transaction Server [page 44] and the SAP@Web Studio as described in thedocumentation SAP@Web Installation, if necessary.
o 9. You perform follow-up activities in the authorizations area [page 121].n You adjust the assignments between check flags and transactions.n Upward compatibility for authorization checks: You adjust SAP_NEW.n You handle problems with user buffers.
o 10.
Only valid for: SAP R/3 3.1I
You process the table clusters EDIDOC and CDCLS [page 123].End of: SAP R/3 3.1I
o 11. You use SAPinst to upgrade or install dialog instances [page 124].
Actions After Starting Production OperationYou can perform the following follow-up activities during normal production operation of the system.
o 1. You import Support Packages [page 124], if necessary. If you want to install additional languages, you importthem before you import the Support Packages as described in the language transport documentation.For more information on SAP ERP Support Packages, see the Release Information Note 760874.
o 2. Transport Management System (TMS) [page 124]: You distribute the configuration to all systems in thetransport domain.
o 3. Language transport [page 125]: You copy glossary and terminology data from container tables to databasetables.
o 4. You delete old tablespaces [page 125].
o 5.
Only valid for: SAP R/3 4.5B;SAP R/3 4.0B;SAP R/3 3.1I
You convert old batch input logs [page 126] to the new procedure in all clients, if necessary.End of: SAP R/3 4.5B;SAP R/3 4.0B;SAP R/3 3.1I
o 6. You make a backup of the subdirectory that contains the shadow instance profiles [page 127], if necessary.
o 7. Optional: You send the evaluation of the runtime of the upgrade [page 127] to SAP.
October 24, 2005 PUBLIC 19

This page is intentionally left blank.

3 Planning
3 Planning
This part of the document contains information on planning your upgrade.Before you begin the actual upgrade, you must first plan it carefully. This includes requesting all the SAP
Notes you need. Careful planning is a prerequisite for a successful SAP system upgrade.The following information helps you plan your upgrade so that downtime is reduced to a minimum, and
the upgrade runs as efficiently as possible.
.Note
TeamSAP offers the free upgrade service SAP GoingLive Functional Upgrade Check. A team of expertschecks the parameter settings of your system in one session before the upgrade, and gives you detailedrecommendations on the configuration. After the upgrade, the parameters and the entire system statusare checked again in a second session. For information on the service and on ordering it, see SAP ServiceMarketplace at service.sap.com ® SAP Support Portal ® Maintenance & Services ® Support Services ® SAPSafeguarding.
When you plan your upgrade, note the following information in addition to the information in Upgrade ‒Step by Step [page 11]:
n All the times specified in this document are based on hardware with medium performance levels.n Do not perform any additional actions during the upgrade that could cause it to run less smoothly.n Start planning your upgrade in good time.n To make sure that all requirements are met, run the PREPARE [page 161] program as soon as possible. You
can reset and repeat the program as often as you need before you start the actual upgrade. The successfulexecution of PREPARE is a prerequisite for starting the upgrade.
n If you are upgrading a modified system where changes have been made to the standard system, you muststart by upgrading a development or quality assurance system that has the same SAP system release(including Support Package level), and contains the same modifications. The adjustments you performmanually for the new standard in this system can be automatically exported to the global transportdirectory and are integrated into the production system upgrade from there. This procedure eliminatesthe need for time-consuming adjustments to the production system.
n If it is technically possible, or unless otherwise specified, we recommend that you upgrade the operatingand database system and your SAP system at different times.
n Before you start the upgrade, check the upgrade strategy of the add-on producer of the add-ons thatexist for your source release. You must do this to make sure that the installed add-ons are compatiblewith your upgrade.
ActionsThe following sections are important for planning the upgrade:
n Time Frame for Upgrading the Front-End Software [page 22]n System Switch Upgrade [page 23]
October 24, 2005 PUBLIC 21

3 Planning
3.1 Time Frame for Upgrading the Front-End Software
n Upgrade Strategy Planning [page 26]n Database Backup [page 29]n Database-Specific Aspects [page 30]n Upgrades in an MCOD System Landscape [page 31]n Data Management Planning [page 31]n Incremental Table Conversion [page 32]n Upgrade Schedule Planning [page 33]n Runtime for the Import of the Substitution Set [page 36]n Upgrade in an SAP System Group [page 36]n Modification Adjustment Planning [page 37]n Checking the Structural Requirements [page 39]n Checking the Hardware Requirements [page 40]n Checking the Software Requirements
l Checking the Source Release of the SAP System [page 41]l Meeting the Requirements for the Upgrade Assistant [page 41]l Upgrading the Operating System and Database System: Overview [page 42]
n Accessing Documentation Before and During the Upgrade [page 43]n Using the SAP Solution Manager [page 43]n Meeting the Requirements for the SAP Internet Solution [page 44]n Planing the Installation or Upgrade of Java Components [page 45]n Importing Additional Languages [page 45]
n
Only valid for: SAP R/3 4.6B;SAP R/3 4.6C;SAP R/3 4.5B;SAP R/3 4.0B;SAP R/3 3.1I
SAP ECC: Support Packages [page 46]End of: SAP R/3 4.6B;SAP R/3 4.6C;SAP R/3 4.5B;SAP R/3 4.0B;SAP R/3 3.1I
n Component Levels Contained in the Upgrade Export [page 46]n Application-Specific Upgrade Toolbox [page 48]n Internet Pricing and Configurator [page 48]
3.1 Time Frame for Upgrading the Front-End Software
The new SAP system release cannot run until a compatible version of the front-end software (SAP GUI) hasbeen installed. However, as the front-end software is compatible with several SAP system releases, you may nothave to upgrade to a new front-end software release.For more information about which front-end software to use, see SAP Note 147519. For more information
about using the SAP GUI for HTML, see SAP Note 178788 and sectionMeeting the Requirements for the SAP InternetSolution [page 44].If you need or want to use a different front-end software, you can import it as soon as you receive the
software package. If the front-end software you are using on the source release is not compatible with thetarget release, the latest possible time for upgrading the front-end software is before you start the shadowsystem for the first time in the START_SHDI_FIRST phase. This graphic shows the time period during whichyou can upgrade the front-end software:
22 PUBLIC October 24, 2005

3 Planning
3.2 System Switch Upgrade
Figure 1: Time Frame for Upgrading the Front-End Software
The front-end software is upgraded directly from a data carrier or from a file server.
.Note
You can use the SAP Front-End installation software, SAPSetup, to optimize the deployment of SAP GUI tothousands of clients. You can tailor installation packages to match your requirements, distribute patches,and set up automatic update processes for your clients.
For more information on installing the front-end software and using SAPSetup, see the SAP Front End InstallationGuide.
3.2 System Switch Upgrade
SAP systems are upgraded to SAP Web Application Server 6.10 and higher with the new System Switch Upgradeprocedure. This procedure installs an instance of the target release, the shadow system, in parallel with thecurrent source release system in the same database. This parallel system contains all the software of the targetrelease and is used to integrate Support Packages that are included in the upgrade, add-ons, and customermodifications into the target release.In the production database, the tables of the target release that contain both the descriptions of the ABAP
Dictionary and the ABAP programs are imported as shadow tables under an alternative name. The shadow
October 24, 2005 PUBLIC 23

3 Planning
3.2 System Switch Upgrade
system enables you to access these tables. If you choose upgrade strategy downtime-minimized, you can performupgrade actions before downtime starts, which previously had to be performed during downtime.During the EU_SWITCH phase in downtime, the switch is made to the new system, and any remaining data is
imported. Any parts of the source release system that are no longer needed are deleted.
Figure 2: Process Flow of a System Switch Upgrade
Features
n Planning the upgradeNo precise guidelines can be given for the duration of an upgrade. The duration of the individual actionsdepends to a great extent on the individual system, the number of modifications, and the number ofincluded Support Packages and add-ons.
n Increased space and resource requirementsOperating two instances in parallel places increased demands on free space in the file system, in thedatabase, and, according to the upgrade strategy, on the system resources. If necessary, some parametersin the production system might need to be adjusted to enable you to operate the production and theshadow systems in parallel.
n Extended free space checkThe PREPARE program also checks the free space needed for tables created in the shadow system.
n Creating the shadow systemThe Installationmodule of the PREPARE program is used to prepare for the shadow instance. PREPARE firstcreates profiles, directories, as well as an extra database user, and copies programs and files needed by the
24 PUBLIC October 24, 2005

3 Planning
3.2 System Switch Upgrade
shadow instance. All tables of the SAP NetWeaver Application Server are needed as shadow tables to operatethe shadow system. As well as all substitution tables already imported, and the newly created tables, theSAPup program also creates all remaining SAP NetWeaver Application Server tables and fills them.When all the required tables are in the shadow system, aliases, synonyms or views are created for them.Additional table contents are copied into the shadow system to enable adjustment, activation anddistribution functions in the shadow system.
n Operating the shadow systemYou can now use the shadow system to perform the modification adjustment of the ABAP Dictionaryobjects and activate and distribute the requests included in the upgrade. After you have operated theshadow system, you have a consistent inactive nametab with the descriptions of the table structures of thetarget release, including Support Packages and add-ons.While it is running, the shadow system writes to a number of tables whose contents are required for theremainder of the upgrade, and for operating the system afterwards. These tables are renamed with theiroriginal names in the EU_SWITCH phase.
n Table conversionAll tables of the SAP NetWeaver Application Server whose contents need to be copied from the shadowsystem can be adjusted to the target release structure in the shadow system during production operation.Even the tables into which control data is imported already exist in the shadow system and only need tobe renamed. The tables that need to be converted are those for which the original versions of the SAPNetWeaver Application Server will continue to be used. These tables can be converted during productionoperation by being copied to the shadow system, or converted externally.External conversion no longer needs the ABAP conversion program of the source release, which meansthat the activation and conversion of the SAP NetWeaver Application Server only uses target release tools.This removes the restrictions of the previous procedure, such as no modifications to the SAP NetWeaverApplication Server in Support Packages and add-ons.As before, the application tables are converted during downtime in the PARCONV_UPG phase. They can bedistributed during production operation. If you use the ICNV, the tables are converted during productionoperation.
n After operating the shadow systemAny tables that receive entries are created as copies with new formats in the shadow system. The upgradethen performs the shadow import. Modifications to the contents of the original tables are indicated bytriggers. These tables must be copied and imported during downtime.
n During downtimeAfter SAPup has converted the data and made all preparations, it completes the copy import action duringdowntime for all tables with triggers set. The EU_SWITCH phase completes the switch to the new system.All tables prepared in the shadow system are copied to the target release. The KX_SWITCH phase switchesthe kernel. The PARCONV_UPG phase converts the application table and the phase TABIM_UPG imports theremaining data. Finally, the XPRAS_UPG phase starts the XPRAs required by the system.
October 24, 2005 PUBLIC 25

3 Planning
3.3 Upgrade Strategy Planning
3.3 Upgrade Strategy Planning
If you are upgrading with the System Switch Upgrade procedure, SAP provides you with two upgrade strategies:downtime-minimized and resource-minimized. Choose the strategy that is best suited to your SAP system and to yourrequirements concerning system availability. Your decision depends on two factors:
n Maximum permitted downtimen System resources
Features of Upgrade Strategy Downtime-Minimized
n Parallel operation of production system and shadow systemn Higher demand on system resourcesn Shorter downtime
n Import of the substitution set into the shadow tables during production operationn Modification adjustment of the ABAP Dictionary objects during production operationn Activation and distribution during production operation
Features of Upgrade Strategy Resource-Minimized
n Operation of production and shadow system only possible independently of each othern Production operation stops before import of substitution set into shadow tables or, at the latest, before
shadow instance is started for first time.n Increased downtime
n No ICNV
Benefits of the System Switch Upgrade Procedure
If you choose the downtime-minimized strategy, the new System Switch Upgrade procedure offers you the followingbenefits:
n Modification adjustment during production operationThe modification adjustment of the ABAP Dictionary objects is performed before downtime. This ispossible since the complete version management is available in the shadow system.
n Activation and distribution during production operationYou need to activate and distribute all ABAP Dictionary objects (including their dependent objects) thatSupport Packages modify in the delivered release, as well as objects that are modified or created by thecustomer. Where a large number of included Support Packages or add-ons are concerned, or where systemshave been modified greatly, this procedure may take several hours.
n Specific use of the incremental table conversion function (transaction ICNV)You can also increase the number of candidates for transaction ICNV, since the amount and targetstructure of the tables can be calculated at the customer site. Transaction ICNV can therefore be used fortables modified by customers, add-ons, and Support Packages. This is particularly noticeable in the shorterdowntime for upgrades that include one or more add-ons.
Since these processes occur during production operation, downtime is reduced considerably, and some phasesduring downtime are much shorter. This mainly affects the phases PARCONV_UPG and TABIM_UPG. This meansthat in comparison to the Repository Switch Upgrade procedure downtime is reduced further by including theSupport Packages and add-ons.
26 PUBLIC October 24, 2005

3 Planning
3.3 Upgrade Strategy Planning
Other benefits of the System Switch Upgrade for both upgrade strategies include:
n Use of target release tools for the upgradeTo upgrade from the source release structure to the target release structure, activation and distributionactions need to be specified and executed. This is now done by tools of the target release, which removesrestrictions caused by using source release tools.
n Extended shadow importThe shadow system is used to calculate the target release state of a table before downtime starts. Becausethe shadow tables are created in their final structure during production operation, the amount of tablesinto which data can be imported in advance can be increased. Until now, this was only possible for newtables and substituted tables.
Comparison of Upgrade Strategies
Strategy Advantages Disadvantages
Downtime-minimized n Short downtimen Medium amount of space required
to be able to recover the database
n Increased demand on systemresources due to parallel operationof production and shadow system
n Offline backup required afterupgrade if archiving deactivated atsome stage
n Disk capacity for a possibledatabase recovery is monitored
Resource-minimized n No additional system resourcesduring upgrade
n No additional space requirementsto be able to recover the database
n Disk capacity for a possibledatabase recovery is notmonitored
n Long downtimen Offline backup required after
upgrade
The upgrade strategy is one of the main factors in determining howmuch downtime is involved.The following graphic shows the course of the upgrade for the various strategies. It does not show the
differences in the duration of the upgrade. The upgrade is divided into phases. EU_IMPORT1, REQSTOPPROD, andMODPROF_TRANS are important phases, since they mark the start of downtime (depending on the chosenupgrade and archiving strategy).The course of the upgrade is identical in all strategies up to the EU_IMPORT1 phase. For the resource-minimized
strategy, the downtime either begins in the EU_IMPORT1 phase or the REQSTOPPROD phase. For thedowntime-minimized strategy, downtime begins in the MODPROF_TRANS phase.
October 24, 2005 PUBLIC 27

3 Planning
3.3 Upgrade Strategy Planning
Figure 3: Course of the Upgrade
Upgrade Runtime
The following factors influence the total runtime of SAPup:
n Hardware used
n Import runtime for the substitution setn Languages installedn Number of clients
n Extensive customer developmentsn Modifications to standard SAP tables
n Add-on software
n Integration of Support Packages
The upgrade runtime and the downtime depend on the upgrade strategy you choose, the hardware, and theamount of time required to create the database archives. With strategy downtime-minimized, the shadow systemruns in parallel with the production system, which increases the overall runtime, but shortens downtime. Thesize of your database only has a secondary role in determining the runtime of the upgrade. Your source releasecan influence the runtime and downtime of the upgrade by up to approximately 25%.
28 PUBLIC October 24, 2005

3 Planning
3.4 Database Backup
3.4 Database Backup
Database Archiving
The archiving strategy determines the time intervals in which database mechanisms save actions to thedatabase. This determines whether the database system can recover lost data.If the archiving mode is on, you will receive the message Database is operated in ARCHIVELOG mode.The SAPup program prompts you in the INITSUBST phase to select when you want to deactivate archiving.The following options are available:
Archiving Strategy and Upgrade Strategy
Archiving Strategy Downtime-Minimized Resource-Minimized
Archiving is activated during theentire upgrade.
Possible Possible
Archiving is deactivated in theEU_IMPORT1 phase.
‒ Recommended
Archiving is deactivated before youstart the shadow instance for the firsttime in the REQSTOPPROD phase.
Not recommended Recommended
Archiving is deactivated in theMODPROF_TRANS phase.
Recommended ‒
.Caution
Once you have deactivated archiving, you can no longer use the SAP system in production operation.
.Note
The archiving strategies that are marked as “recommended” ensure that you can run your SAP system inproduction mode as long as possible. The archiving strategies that are marked as “possible” are only usefulin certain cases. In the following, only the “recommended” archiving strategies are described.
At the selected time, you are then prompted by SAPup to deactivate archiving. After you have deactivatedarchiving, you can no longer use your system in production operation.
.Caution
MCOD systems: If you specified during PREPARE that you are performing the upgrade in a MultipleComponents in One Database System (MCOD), which means that multiple SAP systems are installed inyour database, you are not prompted about archiving. Archiving is automatically activated during theentire upgrade.For more information on MCOD systems, see SAP Service Marketplace at service.sap.com/mcod.
Sizes for comparing the archives up to the MODPROF_TRANS phase and to the end of the upgrade can be found insection Upgrade ‒ Step by Step. These sizes are based on sample data. They can vary considerably, depending onthe amount of customer data.
October 24, 2005 PUBLIC 29

3 Planning
3.5 Database-Specific Aspects
Full Backup
If you deactivate archiving at some stage during the upgrade, you have to make a full backup of the databasebefore you switch archiving back on.The archiving strategy that you choose also determines when you need tomake a full backup of the database.
n If you choose the downtime-minimized upgrade strategy, the full backup is made at the beginning of downtime,before the MODPROF_TRANS phase.
n If you choose the resource-minimized upgrade strategy, the full backup is made before the substitution set isimported, either during production operation or during downtime.
.Caution
At the same time, make a backup of the upgrade directory and its subdirectories.
After the upgrade you need to make another backup of the database.
3.5 Database-Specific Aspects
Oracle
At the beginning of downtime, (we recommend [page 26] that you start this in the phase MODPROF_TRANS for thedowntime-minimized strategy, and in the EU_IMPORT1 phase for the resource-minimized strategy), you are prompted tostop all work in the SAP system. SAPup waits for confirmation before stopping your central instance.
.Caution
You must be able to recover the database to the state it has at this point in time. Therefore, you must nowmake a full backup of your database so that, in case of a recovery, you need not import all the archivescreated so far, including those written during the previous import. You can choose between an onlinebackup, which you must perform before you stop the central instance, and an offline backup, which youmust perform before you confirm the deactivation of archiving.Back up the upgrade directory as well.
SAPup waits for your confirmation before it stops the central instance. Proceed as follows:
1. If you have opted forn an online backup:
a) Perform the online backup before you stop the central instance.b) Confirm that you want to stop the central instance.
n an offline backup, perform it before you deactivate archiving.2. Deactivate archiving of the database.
For a detailed description, see Changing the Oracle Database Recovery Mode [page 156].3. Confirm the SAPup prompt about database archiving.4. Back up the upgrade directory now at the latest.5. Confirm the SAPup prompt about database archiving.
30 PUBLIC October 24, 2005

3 Planning
3.6 Upgrades in an MCOD System Landscape
3.6 Upgrades in an MCOD System Landscape
As of SAP Web Application Server 6.10, you can upgrade systems in a Multiple Components in One Database(MCOD) system landscape. Note the following when you upgrade an MCOD system:
n The database user, tablespaces, dbspaces, or devspaces of an MCOD system have different names to those ofan MCOD system without an MCOD layout or a non-MCOD system. The names you need to enter forsystems with normal or MCOD layouts are listed at the appropriate place in the text.
n Do not switch off archiving when upgrading in an MCOD system landscape.All SAP systems in the database are affected if you need to reset the upgrade.PREPARE asks you at the start of the upgrade whether there is more than one SAP system installed inthe database. If there is more than one SAP system installed in the database, do not switch off archivingduring the upgrade.
.Recommendation
Do not perform parallel upgrades of MCOD systems.
For more information onMCOD systems, see SAP Service Marketplace at service.sap.com/platforms ® SAPNetWeaver in Detail ® Application Platform ® DB and OS Abstraction ® Multiple Components in One Database.
3.7 Data Management Planning
The upgrade runtime ‒ and in particular the system downtime ‒ is extended when dealing with large databasetables. Table conversions during the upgrade and data adjustments at the end of the upgrade performed by, forexample, XPRAs or other after import methods, are the most time consuming actions and can result in longupgrade runtimes. To avoid these problems, you should minimize the quantity of table entries that have to beconverted prior to the upgrade. The best way to achieve this is to carry out Data Management measures, suchas archiving or deleting data records from the tables.Data Management is vital for maintaining a “healthy” live system because it helps to keep system
performance high and to make optimal use of existing hardware resources. One of the most effective DataManagement methods is Data Archiving. It allows administrators to remove data that is no longer neededin everyday operations from the database and store it in archive files. These files can then be passed on to astorage system for long-term storage. After archiving, the data can still be accessed in read-only mode whenthe need arises, for example, during an audit.Formore information onDataArchiving, see SAP ServiceMarketplace at service.sap.com/data-archiving.
ProcedureBefore the upgrade, analyze the database to find out which database tables can be reduced in size, and how thiscan be achieved.For more information, see the document Archive-Quickwins for Upgrade on SAP Service Marketplace at
service.sap.com/dao ® Media Library ® Archive-Quickwins for Upgrade. It provides a list of database tables thattend to grow rapidly, but whose size can be reduced quite easily without an extensive and time-consumingapproval process involving the business process owners. The tables are not analyzed from a standalone point
October 24, 2005 PUBLIC 31

3 Planning
3.8 Incremental Table Conversion
of view but by taking into account the entire business context in which they are embedded. The documentalso describes how to analyze the content of each table and gives detailed recommendations about how toreduce the table size by archiving or deleting data.
3.8 Incremental Table Conversion
.Caution
You can use incremental table conversion only if you use upgrade strategy downtime-minimized.
The structure of some of the tables in your database changes each time you upgrade your system to a newrelease. In some cases you need to convert these tables. This involves completely restructuring them andconverting each individual data record. These conversions are usually made during the upgrade downtime(phase PARCONV_UPG).The incremental conversion function enables many of these tables to be converted before the upgrade. The
data is converted during production operation of the system.This approach has the following benefits:
n Reduced downtime during the upgrade, especially for systems with one or more add-onsn Simple return to the SAP standard for modified tables
PrerequisitesThe System Switch Upgrade only determines the candidates for transaction ICNV after the target structure ofthe tables has been defined. The candidates are determined in the ICNVREQ phase. SAPup checks whether thesystem contains tables for which an incremental conversion is an advantage. These include tables that need tobe converted, and that contain large volumes of data, and therefore would increase the downtime significantlyduring a conversion. The System Switch Upgrade also enables you to use transaction ICNV for tables that havebeen modified by Support Packages, add-ons, or customer developments.If the above applies, SAPup prompts you to start the incremental conversion.Use of the incremental conversion function is optional. If you do not want to use incremental conversion,
the tables are converted during downtime.
FeaturesIncremental conversion is performed using transaction ICNV. This transaction offers the following functions:
n Displays the tables determined by SAPup (candidates for incremental conversion)n Decides which candidates should be converted incrementallyn Starts the conversion
n Monitors the conversion
n Estimates the runtime of the conversion
For up-to-date information, see SAP Note 490788. For more information, call transaction ICNV and chooseF1 or Information.Note the following:
32 PUBLIC October 24, 2005

3 Planning
3.9 Upgrade Schedule Planning
n Transaction ICNV makes modifications to the database tables that you want to convert during theInitialization step. You cannot reset these modifications by resetting the upgrade. In particular, you cannotdirectly upgrade these modifications.
n If you use incremental table conversion, do not start an SAP archiving program for these tables at thesame time, since this can lead to performance bottlenecks. Therefore, archive as much data as possiblebefore you start the conversion.
n After the incremental conversion starts, you cannot change any more ABAP Dictionary definitions forthe relevant tables until the upgrade is complete. This means you cannot change, delete or add fielddefinitions. Transaction SE11 is locked for these tables.
n Pay special attention to the resource usage of your database management system to detect bottlenecksearly on. Incremental conversion requires double the space in the relevant database memory area(tablespace, dbspace, and so on) for each table affected during the conversion. The continuous transferof data results in more transactions being performed. Therefore, also monitor the space available for therollback information.
n Do not begin the upgrade downtime before at least 95% of the total data has been converted. SAPup checksthis at the beginning of downtime. If this percentage has not been reached, SAPup displays an appropriatemessage.This gives you the advantage of reducing critical downtime. To monitor the progress of the conversion,you can call transaction ICNV.You can start downtime even if the 95% minimum has not been reached. However, the remaining datais transferred entirely during downtime. If this process is not finished before the PARCONV_UPG phase, thedowntime increases depending on the remaining conversion set.
n Incremental conversion requires a sufficient number of background work processes. Ideally, there shouldbe one process for each table that needs to be converted. If you cannot have one process for each tablebecause there are too many of them, you can still convert them since transaction ICNV automaticallydistributes the tables to the available background processes. However, the incremental conversion thentakes longer to complete, and the time for beginning downtime is pushed back.
3.9 Upgrade Schedule Planning
Create an exact schedule for your SAP system upgrade.
PrerequisitesYou have chosen one of the two upgrade strategies, downtime-minimized or resource-minimized.
Process
1. You decide when to begin preparing for the upgrade.When you start the upgrade preparations does not depend only on the length of the preparations butalso on the length of the upgrade itself. To determine the expected total length of the upgrade of yourproduction system, perform a test upgrade of an SAP system with a similar set of data (a system copy ofyour production system is ideal).
2. You decide when to start the upgrade.
October 24, 2005 PUBLIC 33

3 Planning
3.9 Upgrade Schedule Planning
If you have special requirements regarding the availability of your SAP system, adjust the process and thelength of the upgrade to fit the expected amount of downtime.If you decide to use upgrade strategy resource-minimized, start the upgrade on the last day of productionoperation of the old release. In the evening of this day you can start the import of the substitution set. Ifyou decide to use upgrade strategy downtime-minimized, start the upgrade in good time before the scheduledstart of downtime. This ensures that all activities that can be performed during production operationare completed in time.
.Caution
If you did not enter any mount directories during PREPARE, you are prompted at the beginning ofsome of the EU_IMPORT phases to change the DVD. If you miss this prompt, your time schedule couldbe seriously disrupted.
During the upgrade, various actions are performed by and in the shadow system. The runtime of theseactions depends on various factors and is therefore specific to each SAP system:n Creating the Shadow Repository (EU_IMPORT phases)n Importing the additional software packages such as languages, Support Packages, and add-ons (phase
SHD_IMP)The minimum runtime of the import in the SHADOW_IMPORT_ALL phase increases with every SupportPackage, add-on, and language that is included.
n Adjusting modifications to the ABAP Dictionary objects (transaction SPDD)n Mass activation and distribution
n Incremental conversion of tables (transaction ICNV)The runtime of these phases depends on the upgrade strategy that you choose.If you have chosen upgrade strategy resource-minimized, these phases take place during downtime. You caninfluence, among other things, how long they take by the number of import processes.If you have chosen upgrade strategy downtime-minimized, you can continue to use your SAP system inproduction operation during these activities. You can reduce downtime if you make sure that all theactivities that the shadow instance performs to deal with objects are finished before the scheduled start ofdowntime (phase MODPROF_TRANS). Therefore start the upgrade in good time. If you finish the activitiesbefore the scheduled start of downtime, you can stop the upgrade before the MODPROF_TRANS phase.
34 PUBLIC October 24, 2005
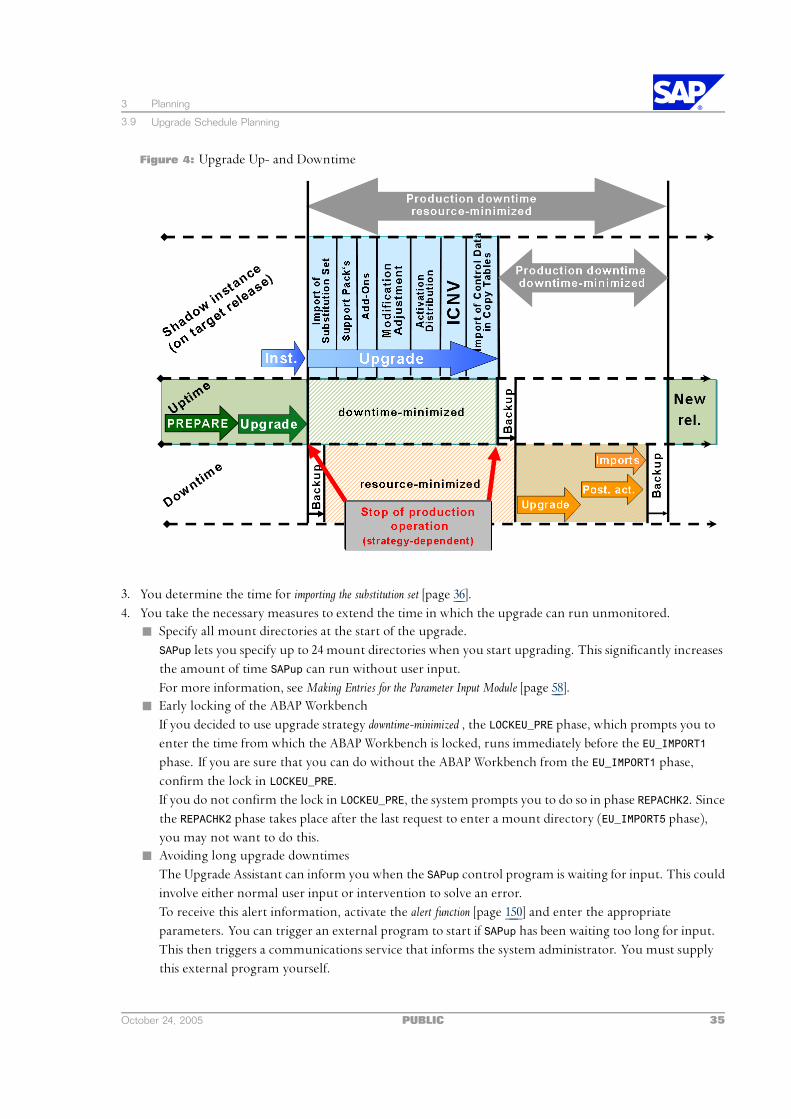
3 Planning
3.9 Upgrade Schedule Planning
Figure 4: Upgrade Up- and Downtime
3. You determine the time for importing the substitution set [page 36].4. You take the necessary measures to extend the time in which the upgrade can run unmonitored.n Specify all mount directories at the start of the upgrade.
SAPup lets you specify up to 24 mount directories when you start upgrading. This significantly increasesthe amount of time SAPup can run without user input.For more information, seeMaking Entries for the Parameter Input Module [page 58].
n Early locking of the ABAP WorkbenchIf you decided to use upgrade strategy downtime-minimized , the LOCKEU_PRE phase, which prompts you toenter the time from which the ABAP Workbench is locked, runs immediately before the EU_IMPORT1phase. If you are sure that you can do without the ABAP Workbench from the EU_IMPORT1 phase,confirm the lock in LOCKEU_PRE.If you do not confirm the lock in LOCKEU_PRE, the system prompts you to do so in phase REPACHK2. Sincethe REPACHK2 phase takes place after the last request to enter a mount directory (EU_IMPORT5 phase),you may not want to do this.
n Avoiding long upgrade downtimesThe Upgrade Assistant can inform you when the SAPup control program is waiting for input. This couldinvolve either normal user input or intervention to solve an error.To receive this alert information, activate the alert function [page 150] and enter the appropriateparameters. You can trigger an external program to start if SAPup has been waiting too long for input.This then triggers a communications service that informs the system administrator. You must supplythis external program yourself.
October 24, 2005 PUBLIC 35

3 Planning
3.10 Runtime for the Import of the Substitution Set
For more information on the alert function, see the online help of the Upgrade Assistant in section SetAlert window. To access the online help, choose Help ® Introduction.Regardless of whether you use the Upgrade Assistant or not, the SAPup control program always stopsthe upgrade when errors occur so that you can intervene. SAPup tells you to intervene as follows:l A message appears on the screen.l An upalert.log file is created in subdirectory tmp of the upgrade directory.If you fail to notice these errors, your upgrade schedule may be delayed significantly.To avoid these delays, you can arrange to be notified automatically by telephone, for example, that theupgrade has stopped. You can use the alert file to do this. You must provide the appropriate softwarefor using the alert file.
5. You decide when a full backup is performed after the upgrade.The full database backup, which is a prerequisite for resuming production operation of your system whenarchiving is deactivated, must be made after you have performed all necessary follow-up activities. This hasthe advantage that all database changes resulting from follow-up activities are included in the full backup.
6. You decide when production operation resumes.If possible, resume production operation only after you have performed all required follow-up activities.At the latest, system downtime begins in the MODPROF_TRANS phase. The earliest possible time for resumingproduction operation is theMODPROFP_UPG phase [page 99].
3.10 Runtime for the Import of the Substitution Set
The net total runtime of SAPup depends on the amount of time required to import the substitution set.When you use the resource-minimized strategy, you can indirectly influence the length of the import runtime
by the number of the processes that are used for this.When you use the downtime-minimized strategy, you determine the runtime for the import yourself.Set the time required for the import so that it ends at least 5 hours before the planned shutdown of
production operation. Depending on the start time of the upgrade, specify total runtimes of about 24 hours.The longer you make the runtime, the better the performance in your production system will be. A longerruntime also means that fewer archives are created each hour, which then need to be backed up.To determine the expected total runtime of the relevant upgrade phases for your production system, performa test upgrade of an SAP system with a similar set of data (a system copy of your production system is ideal).If this is not possible, you can start the upgrade a few days before downtime is due to begin, and stop the
upgrade process until the scheduled time.
3.11 Upgrade in an SAP System Group
If you have more than one SAP system, for example, a production system and a development system, youmust consider the entire system group when you upgrade. Upgrade your systems in the same sequence inwhich you transport your modifications.
Process
n If you have a development system and a production system, upgrade the systems as follows:
36 PUBLIC October 24, 2005

3 Planning
3.12 Modification Adjustment Planning
1. Development system2. Production system
n If your system group consists of three SAP systems and includes a quality assurance system that has been setup between the development and production system, upgrade your systems as follows:1. Development system2. Quality assurance system3. Production system
If you have made modifications to SAP objects that you want to retain, you must proceed with the upgrades inthe above sequence. The version management functions of the SAP system record all the changes you makeonly in the system in which you made the modifications (the development system). Only this SAP systemoffers you optimal support when you adjust modifications.Changes made in the development system after the upgrade can be transported automatically to your other
SAP systems. If you use this procedure, you no longer need to perform time-consuming adjustments inthe production system.
.Caution
If you have modified SAP objects, make sure that you keep your development system. Do not copy yourproduction system to your development system to test the upgrade.
To test the upgrade with realistic production data, set up a quality assurance system between the developmentsystem and production system. This system can be a copy of the production system.
3.12 Modification Adjustment Planning
.Caution
If you are sure that your SAP system corresponds exactly to the standard SAP system, you can skip thissection.
Modifications are changes to objects of the SAP standard. There are two types of modifications: ones that makechanges to the translation of an object text, and ones that make changes to the object itself.
Changes to the Translation of an Object Text
The changes are made in the translation environment (transaction SE63) or in the ABAP Workbench. AnSSCR key is not required.
.Caution
Changes to translations of SAP objects are not retained when you perform an upgrade. They areoverwritten by a new version or deleted. For more information about retaining these changes, see SAPNote 485741.
Modifications to the Object
You may need an SSCR key to perform the modification adjustment. Get the key before you upgrade thesystem. For more information, see SAP Service Marketplace at service.sap.com/sscr.
October 24, 2005 PUBLIC 37

3 Planning
3.12 Modification Adjustment Planning
All modified standard SAP objects are displayed for adjustment in transaction SPDD or SPAU. Objects thatSAP no longer delivers are deleted. If you want to keep these objects, you have to accept the modificationsin transaction SPDD or SPAU.
.Caution
Make sure that before the upgrade there is at least one package in the customer namespace (Z*). Youneed this package if you have to create objects during the modification adjustment, for example, for anappend structure for customer fields of an SAP table.You cannot create packages during the upgrade.
If you choose upgrade strategy downtime-minimized, the modification adjustment of ABAP Dictionary objectsoccurs during production operation. This is possible since the complete version management is available in theshadow system. The remaining Repository objects are still adjusted at the end of the upgrade.For more information about the modification adjustment, see SAP Service Marketplace at
service.sap.com/abapwb ® Modification & Enhancement.
Process
Modification Adjustment in the First System (Development System)
.Note
Since all modifications to standard SAP objects are displayed during the upgrade, and you have to adjustall the displayed objects, you must schedule enough time for the modification adjustment.
You must test the modification adjustment in a development system that has the same SAP system release andthat has been modified in the same way as the production system. If the development system contains moremodifications, including the Support Package level, then contact an experienced SAP consultant for help. Thefollowing explanation assumes that the levels of modification are identical.
1. The list of objects that must be adjusted in your SAP system is determined in the ADJUSTCHK phase. Thisphase is executed in the PREPAREmoduleModification Support and runs in the upgrade between the importof the substitution set and the end of the production period. The list is in the UMODPROT<SAPSID> login the log subdirectory of the upgrade directory.
2. If you choose strategy downtime-minimized, the ABAP Dictionary objects (tables, data elements, domains, andso on) are adjusted during production operation. If you choose strategy resource-minimized, they are adjustedduring downtime before the ABAP Dictionary is activated. The adjusted objects are collected in a repairthat is released to a transport request. You cannot release this transport request; instead you must flagit for transport in transaction SPDD.Towards the end of the upgrade, SAPup exports the request to the transport directory\\$(SAPGLOBALHOST)\sapmnt\trans and registers it for transport in the umodauto.lst file.
3. Repository objects (reports, screens, and so on) are adjusted towards the end of the upgrade. At this stagethe import of SAP objects has already been completed. However, the old modified version is still available inthe version database. As with ABAP Dictionary objects, all changes are released to a transport request that isflagged and then exported and registered by SAPup.
38 PUBLIC October 24, 2005
3 Planning
3.13 Checking the Structural Requirements
Modification Adjustment in Subsequent Systems
For the quality assurance and production system, we recommend that instead of adjusting modificationsmanually, you automatically transfer both the transport requests exported from the first system, as describedin “Modification Adjustment in the First System (Development System)” above.
.Note
If you have not set up a central transport directory, you must perform some more steps before thetransport requests can be transferred automatically. These steps are described in SAP Note 51046.
The ADJUSTPRP phase in the PREPAREmodule Extension prepares the requests from the development system to betransferred. If you confirm the transport requests, they are integrated into the upgrade. The phase also checkswhether all the modifications identified in the system are handled by transport requests. If this is the case, youdo not need to perform a modification adjustment.
.Caution
The number of objects in the adjustment transport requests might exceed the number of modificationsin the receiving system. In this case, the upgrade will import changes that previously did not exist inthe receiving system.
For a detailed description of the modification adjustment function, see the current online documentationunder Help ® SAP NetWeaver Library ® SAP NetWeaver by Key Capability ® Application Platform ® ABAPTechnology ® ABAP Workbench ® Changing the SAP Standard ® Upgrade Procedure /Support Packages.
3.13 Checking the Structural Requirements
You must meet the following structural requirements before you upgrade your system:
n The message server must run on the host with the central instance.During the upgrade, the upgrade control program SAPup uses Remote Function Call (RFC) to call functionmodules and temporarily schedules ABAP report programs for background processing. For this reason, themessage server must still be running after the secondary instances are stopped. You can only guarantee thisif the message server is located on the same host as the central instance.
n Update processes must run on the central instance when you make modifications to the standard SAPsystem.If you have made modifications to the standard SAP system, versions of the modified objects are created bythe version management functions during the upgrade. The update program writes these versions. Thismeans that an update process must be running on the central instance.
A standard installation meets the specified structural requirements.If you are not sure whether you have a standard installation, you can use the following procedure to check
the structural requirements.
Procedure
1. Call transaction RZ10.
October 24, 2005 PUBLIC 39

3 Planning
3.14 Checking the Hardware Requirements
Choose Goto ® Profile values ® Of a server.2. Choose the server (host) where the central instance is running.
The profile parameters for this server are displayed with their values.3. Check the profile parameter rdisp/mshost.
This parameter contains the host name where the message server is running. It must run on the same hostas the central instance. This makes sure that the message server is active during downtime, because onlythe central instance runs during downtime, while the secondary instances are stopped.
4. If you have made changes to the standard SAP system, check the profile parameter rdisp/wp_no_vb. Thisparameter displays the number of update processes for the central instance. The number must be greaterthan 0.
3.14 Checking the Hardware Requirements
CPU, Main Memory, Disk, and Swap SpaceBefore the upgrade, check whether you have sufficient hardware resources, such as CPU, main memory,disk space, and swap space. For more information about sizing, see SAP Service Marketplace atservice.sap.com/sizing.To plan technical upgrades (without functional extensions), see the information on how to perform a delta
sizing for upgrades on SAP Service Marketplace at service.sap.com/sizing ® Sizing Guidelines.
Space Requirements in the File SystemMake sure that there is enough temporary disk space available in the file system for the upgrade. You need thisfree space to create the upgrade directory.
Space Requirements in the DatabaseMake sure that enough temporary and permanent free space is available in your database.The PREPARE program takes the status of your database into account and calculates the exact space
requirements.For preliminary information about extending the database, see section Upgrade ‒ Step by Step.
.Note
For Unicode systems, the amount of free space needed is higher than for non-Unicode systems. It maygrow by up to a factor of 2.
You can recover the difference between the minimum disk space requirements and the permanent disk spacerequirements by deleting the old substitution tablespaces.
3.15 Checking the Software Requirements
You must meet certain software requirements before you upgrade the SAP system.
1. Check the source release of the SAP system [page 41].2. If you want to use the Upgrade Assistant, meet the requirements [page 41].
40 PUBLIC October 24, 2005

3 Planning
3.15 Checking the Software Requirements
3. If necessary, upgrade the operating system and database system [page 42].
3.15.1 Checking the Source Release of the SAP System
Before the upgrade, your SAP system must have one of the source releases, which have been released for thisupgrade and which apply to all databases. For more information, see Upgrade ‒ Step by Step [page 11].
ProcedureTo determine the source release of the SAP system, log on to the system and choose System ® Status.
Only valid for: SAP R/3 4.5B;SAP R/3 4.0B;SAP R/3 3.1I
The release appears in the SAP Release field.End of: SAP R/3 4.5B;SAP R/3 4.0B;SAP R/3 3.1I
Only valid for: SAP Web AS 6.40;SAP Web AS 6.20;SAP Web AS 6.10;SAP Basis 4.6C;SAP Basis 4.6D;SAP R/3 4.6B
The release appears in the Component version field.End of: SAP Web AS 6.40;SAP Web AS 6.20;SAP Web AS 6.10;SAP Basis 4.6C;SAP Basis 4.6D;SAP R/3 4.6B
.Note
PREPARE also checks whether your source release has been released for the upgrade.
3.15.2 Meeting the Requirements for the Upgrade Assistant
NetworkIf you do not operate the GUI and server on the same host, you must be able to set up a TCP/IP connectionbetween the GUI host and the server host.
Java Virtual MachineThe Upgrade Assistant (Server and GUI) is implemented in Java. This means that it requires a Java VirtualMachine.If you have any doubts about your operating system, find out about its Java porting from your Competence
Center.Procedure for the Upgrade Assistant ServerYou can run the Upgrade Assistant Server on version 1.4.x or higher of the Java Software Development
Kit (SDK).To install the J2EE Engine on the central instance, however, you require at least Version 1.4.x of the SDK. For
information on whether the scenario you are upgrading to is using the J2EE Engine, see theUpgrade Master Guide.For information about which versions of the SDK are released for particular database and operating systemcombinations, see SAP Service Marketplace at service.sap.com/platforms ® Availability of SAP Components inDetail ® SAP Web AS / R/3 / Kernel.Procedure for the Upgrade Assistant GUIIf the Upgrade Assistant GUI is not called on the central instance, you also require on each host at least
Version 1.1.x of the Java Virtual Machine. You can provide this version in one of the following ways:
October 24, 2005 PUBLIC 41

3 Planning
3.15 Checking the Software Requirements
n Internet browser with integrated Java Virtual MachineYou can use an Internet browser to call the Upgrade Assistant GUI as a Java applet. To do this, the Internetbrowser must contain a Java Virtual Machine, or be able to call it as a plug-in. In addition, you have to makecertain security settings to enable the browser to start Java applets.At present, SAP supports the following browsers:l Microsoft Internet Explorer as of Version 5
As of Microsoft Internet Explorer Version 6 or on Windows XP, you may have to install a Java VirtualMachine. The software package for the Windows 2003 operating system contains a Java Virtual Machine.
l Netscape Communicator as of Version 4.04 (Java AWT 1.1.4 or higher)n Java Runtime Environment (JRE)
Includes porting for all relevant platforms. You can also use a Java Development Kit (JDK) which includesthe JRE.
Under Windows Server 2003, the Microsoft Virtual Machine is part of the operating system and can be usedto upgrade the system with the Upgrade Assistant.
3.15.3 Upgrade of the Operating System and Database System:Overview
When you upgrade the SAP system, you may have to update your operating system and database to a newversion.For detailed information on which versions are currently supported, see SAP Service Marketplace at
service.sap.com/platforms. PREPARE only checks the minimum versions required for the PREPARE runand the upgrade.If you need to upgrade an operating system or database, or migrate a database, then the timing and the
sequence of the individual upgrades is of great importance. The procedure differs according to the databaseyou use. The following text provides an overview of the main process steps for upgrading the operating systemand database system for each database.
Process
Oracle
For information about the required version, see section Upgrade ‒ Step by Step.Proceed as follows:
1. Install the Oracle client software for the target release. For more information about this procedure, seeSAP Note 833766.
2. If necessary, upgrade the operating system.3. Start PREPARE and analyze the results.4. If you have not already done so, migrate the Oracle database to at least the minimum required version as
described in the document Upgrade to Oracle Database <Version>: <Platform>.5. Upgrade the system with your choice of upgrade strategy. Both strategies (downtime-minimized and
resource-minimized) are supported.
42 PUBLIC October 24, 2005

3 Planning
3.16 Accessing Documentation Before and During the Upgrade
3.16 Accessing Documentation Before and During the Upgrade
Before and during the upgrade you require documentation from the DVD SAP Online Documentation thatcontains the latest online documentation (for example, to modify adjustments). The documentation is notavailable online in your system until you have completed the upgrade and the installation procedure forthe online documentation (SAP Library). However, you can make sure that you can read the DVD offlinebefore the upgrade.
ProcedureThe instructions for installing the documentation are on the SAP Online Documentation DVD in file Onldoc_e.pdfor Onldoc_e.htm. This upgrade documentation includes the paths to specific information in the appropriatesections. After the installation, you can use the same paths to find the documents online in the SAP systemchoosing Help ® SAP Library. If you are upgrading from Release 4.x , you can find most of the documentationonline in the system before and during your upgrade to the new release.
3.17 Using the SAP Solution Manager
Using the SAP Solution Manager throughout the life cycle of your mySAP solution leads to a fasterimplementation and more efficient operation by providing all implementation and upgrade content forcommonly used standard processes. In addition, projects become more transparent, having up-to-date centralproject documentation all in one place at any point in time. To ensure the availability of this applicationmanagement platform, for technical reasons, an SAP Solution Manager system (minimum requirementRelease 3.2, Support Package level 4) is required to perform any upgrade or installation of your mySAP solution.For more information, see SAP Note 805390.
Procedure
1. If you are not using SAP Solution Manager yet, install it as described in the documentation InstallationGuide ‒ SAP Solution Manager. You can find the documentation on SAP Service Marketplace atservice.sap.com/instguides ® SAP Components ® SAP Solution Manager ® Release <x>.
2. Make sure that the SAP system for which you want to perform an upgrade is known to your SAP SolutionManager.To create your SAP system in the Solution Manager System Landscape transaction, proceed as follows:a) Log on to your SAP Solution Manager system.b) Call transaction Solution Manager System Landscape (SMSY).c) Select the landscape component Systems and choose Create from the context menu.d) In the subsequent dialog box, enter the SAP system ID as the system name .e) Choose a product and a product version from the input help.f) Save your entries.
October 24, 2005 PUBLIC 43
3 Planning
3.18 Meeting the Requirements for the SAP Internet Solution
3.18 Meeting the Requirements for the SAP Internet Solution
As of SAP NetWeaver '04, the SAP Internet Transaction Server (SAP ITS) is integrated into the SAP NetWeavercomponent SAP Web Application Server as an Internet Communication Framework (ICF) service, which youcan access, like other services, through the Internet Communication Manager (ICM). With the SAP ITSintegrated in the SAP Web Application Server, the Web browser now communicates directly with the SAPsystem. Furthermore, all SAP ITS-related sources, such as service files, HTML templates, or MIME files, arenow stored in the database of the system.The SAP integrated ITS supports the following functions:
n SAP GUI for HTML
n Internet Application Component (IAC) runtime or Web Transaction technology
The SAP integrated ITS does not support the following functions:
n SAP ITS Flowlogic runtimen WebRFC
n Web Reportingn GUI XT
As of SAP NetWeaver 2004s, these functions are no longer supported at all. Applications based on any of theno longer supported functions must be migrated.SAP ITS 6.20 is compatible with SAP systems up to and including SAP systems based on SAP NetWeaver '04.
However, it is not compatible with SAP systems based on SAP NetWeaver 2004s or higher. This means that as ofSAP NetWeaver 2004s, each application based on ITS technology can only be used via SAP integrated ITS.
.Note
You can use the ABAP Workbench of the SAP system to develop your own Internet applications ormodify the applications delivered with the standard SAP system. Any modification you make to Internetapplications delivered in the standard SAP system are recorded by the Modification Assistant and can beadjusted with transaction SPAU during the upgrade.
ProcedureIf you want to use the SAP integrated ITS 7.0, proceed as follows:
1. Perform the upgrade of the SAP system.2. Configure the SAP integrated ITS.
For information on how to configure the SAP integrated ITS, see the online documentation under SAPNetWeaver by Key Capability ® Application Platform ® ABAP Technology ® UI Technology ® Web UI Technology ®ITS/SAP@Web Studio ® SAP ITS in the SAP Web Application Server ® Configuration.
3. Migrate the applications. For information on how to migrate SAP ITS-based Internet services, see theonline help or SAP Service Marketplace at SAP NetWeaver by Key Capability ® Application Platform ® ABAPTechnology ® UI Technology ® Web UI Technology ® ITS/SAP@Web Studio ® SAP ITS in the SAP Web ApplicationServer ® Developing IACs with the SAP integrated ITS ® Migration of Existing ITS Services.
44 PUBLIC October 24, 2005

3 Planning
3.19 Planning the Installation or Upgrade of Java Components
3.19 Planning the Installation or Upgrade of Java Components
.Caution
Whether you use Java components in your system landscape or not highly depends on the scenario youhave implemented or are planning to implement. For more information, see theMaster Guide and UpgradeMaster Guide for SAP NetWeaver or your Business Suite solution.If your scenario does not use Java components, you can skip this section.
ProcedureIf your scenario uses Java components, the following situations are possible:
n You have not used Java components before but have to install them for the scenario you are upgrading to.For information on when and how to install the Java components [page 107] needed for your scenario, see theMaster Guide and Upgrade Master Guide for SAP NetWeaver or your Business Suite solution.
n You have installed Java components based on Releases older than SAP NetWeaver '04 and have to upgradeto the new release.For information on when and how to install the Java components needed for your scenario, see the UpgradeMaster Guide for SAP NetWeaver or your Business Suite solution.
n You have installed Java components based on SAP NetWeaver ´04 and have to upgrade to the new release.To minimize the overall downtime, the upgrade of Java components based on SAP NetWeaver '04 issynchronized with the upgrade of the ABAP SAP system. During PREPARE, the upgrade program detectswhether Java components are running in the same system. If so, you are prompted to refer to thedocument Upgrade Guide ‒ <SAP NetWeaver / SAP solution> Java for more information on how to prepareand perform the upgrade of the Java components.Both upgrade programs contain synchronization phases that check the status of the other program. Inphase MODPROF_TRANS, SAPup waits for the Java upgrade program to reach the phase where the downtimecan begin so that both programs start the upgrade downtime together.
3.20 Importing Additional Languages
After the upgrade you have the option of importing new languages into the SAP system. We recommend thatyou only use this option if the system contains the Support Packages for the language DVD you are using.This is the case if you did not include any additional Support Packages in the upgrade, or did not import anyadditional Support Packages after the upgrade. For more information, see the Language Transport documentation,or SAP Note 352941.The upgrade procedure itself only offers to update existing languages. You cannot install any new languages
during the upgrade. However, you do have the option of classifying new languages in the SAP system beforethe upgrade with transaction SMLT, and importing them during the upgrade. For more information about thisprocedure, see SAP Note 322982.If you intend to use additional languages in your system in the future, import them during the upgrade. In
this way you can avoid any sequencing problems arising from Support Packages included in the upgrade, orSupport Packages you need to import after the upgrade.
October 24, 2005 PUBLIC 45
3 Planning
3.21 SAP ECC: Support Packages
.Recommendation
Importing new languages during an upgrade is a highly efficient process and is preferable to importing alanguage into a production system after an upgrade.
Only valid for: SAP R/3 4.6B;SAP R/3 4.6C;SAP R/3 4.5B;SAP R/3 4.0B;SAP R/3 3.1I
3.21 SAP ECC: Support Packages
As of Release 4.6, Hot Packages and Legal Change Patches (LCPs) are divided into several subpackages:
n Hot Packages:l Support Packages (for technical component SAP_BASIS)l Support Packages (for technical component SAP_ABA)l Support Packages (for technical component SAP_APPL)
n Legal Change Patches:l Support Packages (for technical component SAP_BASIS)l Support Packages (for technical component SAP_ABA)l Support Packages (for technical component SAP_APPL)l Support Packages (for technical component SAP_HR)
.Caution
If you use SAP HR, you must include the Support Packages for the technical component SAP_HR. If youupgrade your system without doing this, the Support Packages for technical component SAP_HR alreadyimported into your SAP system are canceled and data is lost. Reimporting the Support Packages in thetarget release does not solve this problem. We recommend that you include all existing Support Packagesfor technical component SAP_HR in the BIND_PATCH phase of the upgrade. For more information, seeSAP Service Marketplace at service.sap.com/hrsp.
End of: SAP R/3 4.6B;SAP R/3 4.6C;SAP R/3 4.5B;SAP R/3 4.0B;SAP R/3 3.1I
3.22 Component Levels Contained in the Upgrade Export
The transport requests that are imported during the upgrade from the Upgrade Export DVD contain data for themain SAP system components and for add-on components that are included in the standard SAP delivery ofSAP NetWeaver or your SAP solution. For Support Releases, the component levels on the DVDs are usuallyquite high.In the IS_SELECT phase of the Extension Module, PREPARE only prompts you for add-ons contained on theDVD for which we may deliver another update. Add-ons from the standard delivery for which we will notship updates until the next release are not offered on the screen. You do not have to make a decision aboutthem as they are updated automatically:
46 PUBLIC October 24, 2005

3 Planning
3.22 Component Levels Contained in the Upgrade Export
Add-On Components
Add-On Component Appears in IS-Phase
EA-APPL
EA-DFPS
EA-GLTRADE
EA-HR
EA-IPPE X
EA-PS
EA-RETAIL
EA-FINSERV
ECC-DIMP
ERECRUIT
FI-CA
FI-CAX
FINBASIS
INSURANCE
IS-CWM
IS-H
IS-H
IS-M
IS-Oil
IS-PS-CA
IS-UT
LSOFE
PI_BASIS X
SEM-BW
ST-PI X
In the BIND_PATCH phase of the Extension Module, PREPARE asks you to include Support Packages in the upgrade. Ifthe Upgrade Export DVD already contains a Support Package level higher than 0, only include Support Packagesabove this level.For information on the component levels of the Upgrade Export DVD and on the minimum Support Package
levels, see SAP Note 774615.
October 24, 2005 PUBLIC 47
3 Planning
3.23 Application-Specific Upgrade Toolbox
3.23 Application-Specific Upgrade Toolbox
The application-specific upgrade toolbox (ASU toolbox) provides you with application-related upgradeguides and tools:
n Application-specific upgrade guidesThese upgrade guides contain collections of known application-specific upgrade problems together withthe related SAP Notes, which saves you the time for searching the SAP Notes on SAP Service Marketplace.
n Automatic repair toolboxThis tool automatically starts application-specific repair and conversion programs.
n Additional repair toolboxThis program contains tools that assist you in adjusting customer data to the new release. Particularlyuseful is the variant restore tool that can adjust the report variants to the new interfaces of the reports. Inthe past, a lot of variants had to be created again, without giving you the option to display the old values.
For more information, see SAP Note 623723.
3.24 Internet Pricing and Configurator
As of mySAP Business Suite 2005, the Internet Pricing and Configurator (IPC) is part of the software layer SAPApplication Platform (SAP AP). IPC 7.0 is no longer a separate server, instead it is processed on the ABAPapplication servers using the Virtual Machine Container (VMC) as runtime environment. Both the IPCand the VMC exist in your system after the upgrade.For information on whether you need the IPC for your business processes, see the Upgrade Master Guide
for your solution.To be able to use the IPC, you must activate the VMC after the upgrade. For more information, see SAP
Note 854170.For more information about the architectural changes, see SAP Note 844817. For information about the
upgrade from previous releases to IPC 7.0, see SAP Note 844816.
48 PUBLIC October 24, 2005

4 Preparation
4 Preparation
This part of the document contains information on the preparations that you need to make before youupgrade your system.You can prepare for the upgrade while the system is in production operation. Careful preparation of the
upgrade is the best guarantee that it will run without errors. The PREPARE [page 161] program supports youhere by making most of the necessary checks automatically. Start PREPARE as soon as possible before theupgrade so that you can perform the necessary preparations in time.ActionsYou perform the following actions before you start PREPARE:
n Determining the Host for the Upgrade Preparations [page 50]n Creating the Upgrade Directory [page 51]n Checking the Database-Specific Requirements for PREPARE [page 52]
n
Only valid for: SAP Web AS 6.40;SAP Web AS 6.20
Unicode SAP Systems: Running Reports RUTTTYPACT and UMG_POOL_TABLE [page 52]End of: SAP Web AS 6.40;SAP Web AS 6.20
n Windows NT 4.0: Checking the Consistency of the Host Name [page 52]
The following actions describe how to start and use the Upgrade Assistant:
n Starting PREPARE for the First Time [page 53]n Starting the Upgrade Assistant Server [page 54]n Starting the Upgrade Assistant GUI [page 54]n Starting the Upgrade Assistant [page 55]n Restarting PREPARE [page 56]n Resetting PREPARE [page 56]n Importing Software After Starting PREPARE [page 57]
You perform the following actions during PREPARE:
n Making the First Entries for PREPARE [page 57]n Making Entries for the Parameter Input Module [page 58]n Generating the SAP Solution Manager Key [page 62]n Making Entries for the Initialization Module [page 62]n Making Entries for the Extension Module [page 64]n Making Entries for the Installation Module [page 73]
n
Only valid for: SAP Web AS 6.40;SAP Web AS 6.20;SAP Web AS 6.10;SAP Basis 4.6C;SAP Basis 4.6D;SAP R/3 4.6B;SAP R/3 4.5B;SAP
R/3 4.0B
Making Entries for the Preprocessing Module [page 75]End of: SAP Web AS 6.40;SAP Web AS 6.20;SAP Web AS 6.10;SAP Basis 4.6C;SAP Basis 4.6D;SAP R/3 4.6B;SAP R/3 4.5B;SAP R/3 4.0B
n If you have an MSCS configuration [page 75], you need to make entries in the General Checksmodule.
October 24, 2005 PUBLIC 49

4 Preparation
4.1 Determining the Host for the Upgrade Preparations
You perform the following actions after you have executed PREPARE:
n Evaluating the Results of PREPARE [page 75]n Making Preparations at the Operating System Level [page 79]n Making Preparations at the Database Level [page 80]n Making Preparations at the SAP System Level
l Deleting the AUTOSTART Parameter [page 82]l Checking the User for the Upgrade [page 82]l Checking the Requirements for the Modification Adjustment [page 82]l Setting the Operation Mode for the Upgrade [page 83]
l
Only valid for: SAP R/3 3.1I
SAP ECC: Processing Batch Input Sessions [page 84]End of: SAP R/3 3.1I
l
Only valid for: SAP R/3 3.1I
SAP ECC: Converting the Translation Proposal Pool [page 84]End of: SAP R/3 3.1I
l SAP ECC: Deleting Application Logs [page 84]l SAP ECC: Backing Up Wage Types in HR [page 85]
l
Only valid for: SAP R/3 3.1I
SAP ECC: Processing Direct Input Error Data [page 85]End of: SAP R/3 3.1I
l
Only valid for: SAP ECC 5.00
SAP ECC: Backing Up UI Conversion Classes in ESS [page 86]End of: SAP ECC 5.00
4.1 Determining the Host for the Upgrade Preparations
You need to prepare for the upgrade on the host with the central instance. Depending on your configuration,you may later also need or want to use your database host or another host.
ProcedureDecide which hosts you need for the upgrade preparation and the actual upgrade of the SAP system:
n Host with the central instanceYou must execute the upgrade process and PREPARE on the host where the central instance is running. TheUpgrade Assistant Server also runs on this host.
n Other hostsThe graphical user interfaces (GUIs) provided by the Upgrade Assistant can run on any hosts that meetthe necessary requirements.
n Database hostYou must perform the actions that affect the database on the database host. For a description of theseactions, seeMaking Preparations at the Database Level [page 80].
50 PUBLIC October 24, 2005

4 Preparation
4.2 Creating the Upgrade Directory
4.2 Creating the Upgrade Directory
The SAP system is upgraded using the upgrade directory, which can be a softlink to another physical directory.It is divided into subdirectories that can also be softlinks.The standard path for the upgrade directory is \usr\sap\put on the host with the central instance, however,you can also give it a different name.For more information, see Using a Different Upgrade Directory [page 157]. The PREPARE program needs the
upgrade directory before the actual upgrade, since it copies data and programs into this directory.
.Caution
Before you start the new upgrade the directory must exist, but be empty.
Prerequisites
n The upgrade directory must be installed on the host with the central instance.n Make sure that there is enough free disk space for the upgrade directory. This space is required for the
upgrade and the logs and is distributed among several subdirectories.For an estimation of the disk space needed for the upgrade directory, see Upgrade ‒ Step by Step [page 11]. Thesize may vary by up to 25%, depending on your database and source release.
.Note
With the System Switch Upgrade, there are dynamic percentages in the subdirectories data and log inthe upgrade directory. We recommend that you create the directory with more space, if your systemsinclude extensive customer developments or large amounts of individual documentation. If you wantto include Support Packages and add-ons in the upgrade, you also need tomake these directories larger.You also require additional disk space in the upgrade directory for each language other than English orGerman. For more information, see section Upgrade ‒ Step by Step [page 11].
Upgrade Directory Does Not Exist
1. On the host with the central instance create the subdirectory put in the file structure\\$(SAPGLOBALHOST)\sapmnt.If you cannot create the upgrade directory under the share sapmnt, or you can not use the default path\usr\sap\put, see Using a Different Upgrade Directory [page 157]
.Caution
In an MSCS configuration the directory \usr\sap\putmust be on a local disk. This means that youcannot use the released drive that contains the directory \usr\sap\<SAPSID>.
User <sapsid>adm needs Full Control permission for the folder.2. Make sure that the \usr\sap\put directory is empty before you start PREPARE.
Upgrade Directory Already ExistsIf the \usr\sap\put directory already exists, check whether it still contains data from the previous upgrade. Ifthis is the case we recommend that you back up at least \usr\sap\put\log for documentation purposes.
October 24, 2005 PUBLIC 51

4 Preparation
4.3 Checking the Database-Specific Requirements for PREPARE
4.3 Checking the Database-Specific Requirements for PREPARE
You must meet the following database-specific requirements before you start PREPARE for the first time.
Free SpaceThere must be 500 MB of free space for PREPARE in the database. The space requirements for each tablespace arecalculated by PREPARE.
Only valid for: SAP Web AS 6.40;SAP Web AS 6.20
4.4 Unicode SAP Systems: Running Reports Before PREPARE
If your SAP system is a Unicode system, reports RUTTTYPACT and UMG_POOL_TABLE must have runbefore you start PREPARE. As of source release SAP NetWeaver 2004s AS Java, the reports are run automaticallyafter the SAP system installation.
Prerequisites
n You are running a Unicode SAP system.n Your source release is SAP Web AS 6.20 or SAP Web AS 6.40.
n You have not run reports RUTTTYPACT and UMG_POOL_TABLE on your Unicode SAP system yet.
ProcedureRun reports RUTTTYPACT and UMG_POOL_TABLE as described in SAP Note 544623.For more information on report UMG_POOL_TABLE, see SAP Note 813445.
End of: SAP Web AS 6.40;SAP Web AS 6.20
4.5 Checking the Consistency of the Host Name
For all references to the host names in the SAP system, you need to check whether you need to enter the hostname in uppercase or lowercase letters. If the host name is inconsistent, problems occur in the phases PROFCHKand RFCCHK. When you enter the host name, you must use the TCP/IP host name.
ProcedureExecute the following steps to check how host names are used:
1. Determine the TCP/IP name, by choosing:Start ® Settings ® Control Panel ® Network ® Protocols ® TCP/IP Protocol ® Properties ® DNS ® Host Name
2. Check the SAP profiles:All references to the host name in SAP profiles (for example, rdisp/btcname, SAPDBHOST, SAPLOCALHOST)must contain the TCP/IP name. The only place where uppercase and lowercase letters are not important isthe SAPGLOBALHOST parameter.If you have made corrections to the SAP profiles, stop the SAP system and the SAP Service and start themboth again.
52 PUBLIC October 24, 2005

4 Preparation
4.6 Starting PREPARE for the First Time
3. Check the entries in the file \etc\hosts:Edit the file %WINDIR%\system32\drivers\etc\hosts
.Recommendation
We recommend that you maintain all the addresses and host names of all the SAP servers in thegrouping in the local file hosts.
Also insert an entry for the IP address and the TCP/IP name of your computer according to the followingconvention:<IP address> <TCP/IP host names>
Delete any ALIAS entries that assign the host names in a different case lettering than the ALIAS for yourIP address.Example of what you should not use:155.56.172.17 pccpq1 PCCPQ1
4. Use transaction SM51 to check the host name. The host names in the first and second columns must beidentical and must match the TCP/IP host name.The output could appear as follows:pn0014_KKK_10 pn0014 Dialog Update Enqueue Batch
If the first parameter is not correct, check step 2 again (Check the SAP profiles). If the second parameter isnot correct, check the entries made under step 3 (Check the entries in the file \etc\hosts).
5. Check the operation mode definition:Check the case lettering of your host name in the definition of your operating types. To do this, calltransaction RZ04 and make sure that the TCP/IP name is always referenced.
4.6 Starting PREPARE for the First Time
You can execute PREPARE with the Upgrade Assistant or in scroll mode. We recommend that you use theUpgrade Assistant. To copy and unpack the Upgrade Assistant from the DVD directory, youmust start PREPAREonce directly from the DVD.
Prerequisites
n You have met the requirements for PREPARE.n You have made the database-specific preparations [page 52] for PREPARE.n The database and the SAP system have been started.
Procedure
1. Mount the Upgrade Master DVD.2. Log on to the host on which the central instance is running as user <SAPSID>ADM.3. In the Windows Explorer, change to the root directory on the DVD drive. Start PREPARE.BAT.
For a detailed description on the actions of PREPARE.BAT, see SAP Note 816211.4. Decide how you want to continue.
October 24, 2005 PUBLIC 53

4 Preparation
4.7 Starting the Upgrade Assistant Server
n EXIT (default value): This ends the PREPARE program. You can restart PREPARE [page 56] using theUpgrade Assistant or the scroll mode.
n SERVER: Use this option if you want to continue with the PREPARE program using the Upgrade Assistant.To start the Upgrade Assistant, proceed as follows:a) Start the Upgrade Assistant Server [page 54].b) Start the Upgrade Assistant GUI [page 54].c) Start the Upgrade Assistant [page 55].d) In the Upgrade Assistant menu, choose Administrator ® Connect UA Server to SAPup.
n SCROLL: You continue with the PREPARE program using the scroll mode.
4.7 Starting the Upgrade Assistant Server
PrerequisitesYou must have started the PREPARE program once from the DVD. This creates the ua subdirectory in theupgrade directory and unpacks the Upgrade Assistant in this directory.
Procedure
1. Open a new window at the operating system level as user <SAPSID>ADM.2. Enter the following command:
java –cp <upgrade directory>\UA\ua.jar UaServer
.Note
Depending on your Java installation, you have to replace the jview character string with java in thecommand.
3. Enter one password that is used for both the administrator and the observer role.You can change the password or assign different passwords to the roles in the Upgrade Assistant menu bychoosing Administrator ® Change passwords.
4.8 Starting the Upgrade Assistant GUI
PrerequisitesThe Upgrade Assistant Server [page 54] is active.
.Note
The procedure depends on the host on which you are starting the Upgrade Assistant GUI. We recommendthat you call the GUI from an Internet browser.If, for example, you have to use the SAProuter to pass a firewall, call the GUI by using the Java runtime
environment. In this case, you can specify the required routing string.
Starting the GUI from the Internet Browser
n To start the GUI from a browser, proceed as follows:
54 PUBLIC October 24, 2005

4 Preparation
4.9 Starting the Upgrade Assistant
1. Enter the following Internet address:http://<host name>:4239
Replace <host name> with the name of the host on which the Upgrade Assistant Server is running.2. On the following screen, choose Start Upgrade Assistant.
n To display the phase list, upgrade documentation, and additional information about the upgrade, enterthe following URL:http://<host name>:4239
Starting the GUI on Windows Hosts
1. So that the GUI can also be executed on other hosts, copy the uagui.jar file from directory <upgradedirectory>\ua on this host to any <UaGuiDir> directory.
2. Start the GUI in a command prompt with the following command:java -cp <UaGuiDir>\uagui.jar UaGui
4.9 Starting the Upgrade Assistant
PrerequisitesThe Upgrade Assistant Server and the Upgrade Assistant GUI have already been started.
Procedure
1. If you did not start the GUI from an Internet browser, a connection screen appears.a) In the Host name field, enter the name of the host where the central instance is running.
.Example
Example of the format for the host name:hw1156
hw1156.wdf.sap-ag.de
155.56.202.33
If you want to start the Upgrade Assistant GUI and the Upgrade Assistant Server on the same host,you can leave the Host name field empty.
b) In the Port number field, do not change the default value 4241.c) Choose Log on.
A logon screen appears.2. Enter the information requested on the logon screen:
a) In the fields User name and Phone number, enter your personal information.b) Choose the Role with which you want to monitor the upgrade.c) In the Password field, you must enter the password you specified for the role of administrator or observer.d) Choose Login.
After you log on, the main menu window appears.
October 24, 2005 PUBLIC 55

4 Preparation
4.10 Restarting PREPARE
4.10 Restarting PREPARE
If you want to execute PREPARE again, you must restart it.If you cannot use the Upgrade Assistant for some reason, or you do not want to, you can execute PREPARE in
scroll mode. The commands for starting PREPARE for the first time [page 53] are the same for display mode Server(Upgrade Assistant) and display mode Scroll, since PREPARE is started from the DVD. When you restart PREPARE,the commands for using the Upgrade Assistant and the scroll mode are different.
Using the Upgrade Assistant
1. Make sure that the Upgrade Assistant Server is active.2. Start an Upgrade Assistant GUI [page 54].3. Log on to the Upgrade Assistant GUI.4. Choose Administrator ® Start PREPARE.
The Select the PREPARE modules screen appears.
Using the Scroll Mode
1. Log on to the host on which the central instance is running as user <sapsid>adm.2. Go to directory \usr\sap\put\bin.3. Enter the following commands:
prepare
4.11 Resetting PREPARE
If you have already executed PREPARE once or more than once, but do not want to upgrade the system, thenyou must reset PREPARE.
.Caution
Between the phases TOOLIMPD1 and NPREPCRE0 in the Importmodule, you cannot reset PREPARE. In this case,you must execute the remaining phases up to at least phase NPREPCRE0 before you reset PREPARE.
PrerequisitesYou are logged on as user <SAPSID>ADM.
Procedure
1. Go to the subdirectory bin of the upgrade directory.2. Enter the following commands:
SAPup reset prepare
From the kernel directory of the source release, enter the following command: sapstartsrv.exe -t
3. Delete the contents of the upgrade directory so that it has the same state it had the first time PREPAREwas started [page 53].
56 PUBLIC October 24, 2005

4 Preparation
4.12 Importing Software After Starting PREPARE
4.12 Importing Software After Starting PREPARE
After you have started PREPARE, you may need to import software such as SAP Support Packages, languages, oradd-ons (and add-on updates).
Procedure
1. Reset PREPARE [page 56].2. Import the required software.3. Start PREPARE again from the DVD [page 53] and repeat the mandatory and optional modules.
4.13 Making the First Entries for PREPARE
PREPARE needs certain information from you so that it can run the PREPAREmodules. Default values appearwhere possible. Confirm or change the default values. Certain data carriers are also required. For a list ofthe necessary values for the individual PREPAREmodules, see below. For a complete list of the modules, seethe PREPARE phase list [page 159].
Procedure
1. Enter the path to your upgrade directory.2. Enter the database on which the SAP system is running.3. If you ended the PREPARE program with EXIT after starting it for the first time, choose whether you want to
run PREPARE in scroll mode or use the Upgrade Assistant.4. Enter the SAP system ID.5. Start the import of upgrade control data from the DVD.
If you ended the PREPARE program with EXIT after starting it for the first time, you are also prompted toenter the directory on which you have mounted the Upgrade Master DVD.After the import has completed, the screen for selecting the PREPAREmodules is displayed.
.Recommendation
We recommend that you replace the SAPup that has been delivered on DVD with the latest SAPup fromSAP Service Marketplace now. For more information, see SAP Note 821032.You have to copy the correction package FIX_<product name>.SAR to the upgrade directory now. Formore information, see SAP Note 813658.
6. On the screen for selecting PREPAREmodules, select which modules you want PREPARE to run through.Some modules are mandatory, some are optional. PREPAREmust run through all mandatory modulesbefore you start the actual upgrade. A successfully executed module has the status succeeded.
October 24, 2005 PUBLIC 57

4 Preparation
4.14 Making Entries for the Parameter Input Module
Figure 5: Selection Screen for PREPARE Modules
4.14 Making Entries for the Parameter Input Module
PREPARE needs certain information from you so that it can run the Parameter Inputmodule. Default values appearwhere possible. Confirm or change the default value. For a list of the necessary entries for this PREPAREmodule, see below.
ProcedureEnter the following information or confirm the existing values when prompted to by PREPARE:
n Upgrade correction packageTo ensure the stability and high performance of the upgrade tools, we provide upgrade correctionpackages for all upgrades. If you have not already done so, you are prompted to copy correction packageFIX_<product name>.sar to the upgrade directory in this phase.Proceed as follows:1. Make sure that you have the latest version of the correction package. You can download the correction
package from SAP Service Marketplace at service.sap.com/swdc ® Download ® Support Packages andPatches ® Entry by Application Group ® Additional Components ® Upgrade Tools ® Corrections for Upgrade ®Corrections for Upgrade 7.00
2. Copy the correction package to your upgrade directory.3. Choose Continue.
58 PUBLIC October 24, 2005

4 Preparation
4.14 Making Entries for the Parameter Input Module
SAPup extracts the correction package.For more information about the procedure and the availability of correction packages, see SAP Note 813658.
n Keyword specified in the current SAP Upgrade NoteThe keyword, SAPup, and the correction package belong together. An error can occur if SAPup or thecorrection package are outdated. In this case, download the latest correction package or SAPup from SAPService Marketplace and replace them. If necessary, restart SAPup.If you have not already done so, request the latest SAP Notes now. SAP Notes are continually being updated.For a list of the SAP Notes you need for the upgrade, see SAP Notes for the Upgrade [page 7].
n Name of the SAP system (<SAPSID>)n Host name of the central SAP server
n Number of the instance, for example, 00n Path to the active SAP kernel
n Mount directories for the data carriersYou will be prompted to enter mount directories for all the data carriers required during the upgrade.As of Release 6.40, some of the data formerly contained on CDs are now grouped on DVDs to reduce theamount of data carriers. For more information on which data carriers are required for the upgrade, seeUpgrade ‒ Step by Step [page 11].The other data carriers in the upgrade package are not required by PREPARE or SAPup. They are used byother programs related to the upgrade, for example, for importing a new version of the database system.
.Note
For a system that is based on SAP NetWeaver '04 and higher, the package with the DVDs and CDsneeded for the upgrade contains the following boxes:l Box with the DVDs and CDs for your SAP business system components
l Box with the DVDs and CDs for SAP NetWeaverIf the upgrade requires you to install or upgrade a component that is part of the SAP NetWeaverdelivery, for example, SAP kernel or SAP GUI, use the DVDs from the SAP NetWeaver box.
If you have only one DVD drive, you do not have to enter any other mount directories. Whenevernecessary, SAPup prompts you to specify a mount directory or to change the data carrier. If you are workingin scroll mode, choose ENTER to skip the prompts for extra mount directories.If you havemore than one DVD drive or if you are able to copy the contents of the DVDs and CDs to disk,enter all the mount directories used. You can enter up to 24 mount directories and change your entrieseach time you start PREPARE or SAPup.The prompt for the mount directories occurs during the EXTRACTKRN_PRE phase, which runs duringPREPARE and during the INITPUT phase, which runs during the upgrade. You are only prompted for themount directories, which means that it does not matter where the data carriers are mounted.
.Note
When you enter the mount directories, you can use a wildcard in the last part of the mount directorypath, for example, \mnt\*dvd*. SAPup fills the mount directory entry fields with all directories that thewildcard matches. Any duplicate entries found by the wildcard are removed automatically.
October 24, 2005 PUBLIC 59

4 Preparation
4.14 Making Entries for the Parameter Input Module
If you entered mount directories for all data carriers required by the upgrade, and the program finds theright directory, you are not prompted to enter mount directories. If you do this, you can ignore all furtherinstructions to enter mount directories in this document.If you do not have enough DVD disk drives, you can copy the contents of each DVD and CD to separatedirectories on your hard disk (providing you have sufficient disk space). Specify the names of thesedirectories when the program prompts you to enter the mount directories.
.Caution
PREPARE cannot detect the language DVDs if you have mounted them from a Windows TerminalServer session. Instead, mount the DVDs in one of the following ways:l as user <SAPSID>adm using the console
l using PCAnywhere or VCN
l copy the DVDs on your local hard disk
n System identifier of the databasen Host name of the database server
n Password for Oracle user SYSTEMSAPup needs this password to create the schema for the shadow instance.
n Password of user DDIC in the system, client 000This password is needed for the RFC connection to the SAP system. Check whether the password is correctby logging on to the SAP system. SAPup asks you to verify the password by entering it a second time.During the upgrade, you must unlock the user. After the upgrade, the user will not be locked againautomatically.Usually, it is not necessary to change the password of user DDIC [page 133] during the upgrade. If you do changethe password, you have to change it in the original system, the shadow system, and the SAPup parameter.
n Path and name of the profile of the central instanceSAPup displays this question if the name of the profile of the central instance does not meet the followingnaming conventions:If for some reason you cannot meet the naming conventions, enter your name of the profile of thecentral instance.
.Caution
If a profile following the correct naming convention exists on the server, SAPup will use it. If you wantto use a different name, make sure that no profile following the correct naming convention exists onthe server.
n Name of the SAP start profileSAPup displays this question if the name of the SAP start profile does not meet the following namingconventions:START_<instance name><instance number>_<host name>
If for some reason you cannot meet the naming conventions, enter your name of the SAP start profile.
60 PUBLIC October 24, 2005

4 Preparation
4.14 Making Entries for the Parameter Input Module
.Caution
If a profile following the correct naming convention exists on the server, SAPup will use it. If you wantto use a different name, make sure that no profile following the correct naming convention exists onthe server.
n Host name of the background serverThere is usually a background service available on the central instance. You can check this with transactionSM51.However, in larger systems, the background service may be elsewhere to improve load distribution. Inthis case, enter the host name and the name of the relevant application server. Also make sure that theupgrade directory is mounted on the host with the background service, and that the background servercan process background jobs of class C.The server you select must be available for background operations round the clock. Check the activeoperation modes with transaction SM63 to find out if it satisfies this requirement.
n Number of parallel processes during production operationThis is the number of background and activator processes that can run in the system during productionoperation. We recommend a value of 1. If you have enough main memory, you can use up to threeprocesses.
n Number of parallel import processesThe number of parallel processes used by R3trans to import data into the database. We recommend3 processes for machines with 512 MB (and greater) main memory. Up to 8 parallel import processes arepossible for multiprocessor hosts with sufficient main memory.
n Longest synchronization time of the buffers on all application serversUsually, 120 seconds is entered for the bufreftime parameter in the instance profiles of the servers.
.Caution
If you have installed multiple instances, you must specify the largest value of all the profiles. SAPupmust wait for this length of time at certain points during the upgrade so that all the instances aresynchronized. If the time entered is too short, time intervals might occur in which users can makeunchecked changes.
n Path to the EPS inboxThe default value appears. It must be identical with the value of profile parameter DIR_EPS_ROOT. Checkthe value and correct it, if necessary.
n Password of the operating system user for installing the shadow instanceThe SAP<SAPSID>_<shadow instance no.> service is created during PREPARE for locally installing theshadow instance. This service is started by the same operating system user as the central instance.
Only valid for: SAP R/3 4.5B;SAP R/3 4.0B;SAP R/3 3.1I
For source releases lower than 4.6A, the SAP service is replaced by the new service with the DCOM interfaceduring the upgrade.End of: SAP R/3 4.5B;SAP R/3 4.0B;SAP R/3 3.1I
Enter the password for the operating system user. SAPup then asks you to verify the password by enteringit a second time.
October 24, 2005 PUBLIC 61
4 Preparation
4.15 Generating the SAP Solution Manager Key
.Caution
If you change the password for the operating system user, remember that in a standard installation,the SAP service or the SAPOSCOL service run under the same user. This means that you also haveto change this logon data accordingly. Otherwise problems occur when the SAP service is startedafter the kernel switch.
n Path to the SAP system start and stop procedure (the default value is the home directory of user<sapsid>adm.
n The MCOD_CHK_INI phase asks you whether more than one SAP system is installed in your database, whichmeans that you are upgrading an MCOD system [page 31].
n Synchronized ABAP and Java upgradeIf there is an SAP NW AS Java running, you will be prompted to remember that both upgrades aresynchronized and to see the document Upgrade Guide ‒ <SAP NetWeaver / SAP solution> Java for moreinformation.
4.15 Generating the SAP Solution Manager Key
In the Parameter Inputmodule, phase SOLMAN_CHK, you have to enter a key generated by the Solution Managerto be able to proceed with the upgrade.
PrerequisitesThe minimum release and Support Package level of the Solution Manager is Solution Manager 3.1 SP 20.
Procedure
1. In your Solution Manager system, call transaction SMSY (Solution Manager System Landscape).2. Choose Other object.3. Set the System indicator.4. From the input help, choose the system for which you want to perform the upgrade.5. Choose Generate Installation/Upgrade Key.6. Enter the requested information.
If necessary, change the default values.7. Choose Generate Key.
The system displays the key.
4.16 Making Entries for the Initialization Module
Phase TOOLVERSION_INIBefore you can perform the upgrade, the tools in the SAP kernel directory \usr\sap\<SAPSID>\SYS\exe\runof your Basis source release must have a version [page 151] and patch level released for the upgrade.In the TOOLVERSION_INI phase of the Initializationmodule, PREPARE checks the SAP kernel patch level, the tpversion, and the date of R3trans. If necessary, it prompts you to switch the SAP kernel or tools to a versionand patch level released for the upgrade.
62 PUBLIC October 24, 2005
4 Preparation
4.16 Making Entries for the Initialization Module
The subsequent PREPAREmodules require the version of the SAP kernel released for the upgrade, since olderversions contain errors that cause problems in PREPARE.
.Caution
Apart from the disp+work package, you also need the corresponding database library for the SAP kernel.
Only valid for: SAP R/3 4.0B;SAP R/3 3.1I
For Basis Source Releases 3.1I and 4.0B, you only need the disp+work package.End of: SAP R/3 4.0B;SAP R/3 3.1I
.Caution
Do not replace programs in the preexe, tools and exe subdirectories of the upgrade directory. You mayonly do this if you get approval from SAP Support.
Proceed as follows:
SAP KernelIf your current SAP kernel does not fulfill the requirements of PREPARE, proceed as follows:
1. Before switching the SAP kernel, back up the existing kernel directory.
.Caution
When you switch the SAP kernel, you overwrite all files and subdirectories in directory\usr\sap\<SAPSID>\SYS\exe\run.For more information, see the PREPARE log CHECKS.LOG.
2.
Only valid for: SAP R/3 3.1I
Switch the SAP kernel as described in SAP Note 102445.End of: SAP R/3 3.1I
Only valid for: SAP R/3 4.0B
Switch the SAP kernel as described in SAP Note 102461.End of: SAP R/3 4.0B
Only valid for: SAP Basis 4.6C;SAP R/3 4.6B
Switch the SAP kernel as described in SAP Note 318846.End of: SAP Basis 4.6C;SAP R/3 4.6B
Only valid for: SAP Web AS 6.20;SAP Web AS 6.10
Switch the SAP kernel as described in SAP Note 664679.End of: SAP Web AS 6.20;SAP Web AS 6.10
.Caution
Before continuing the upgrade, make sure that the SAP kernel has at least the minimum requiredpatch level.
3. After you have switched the SAP kernel, repeat the Initializationmodule to change its status to succeeded.
October 24, 2005 PUBLIC 63

4 Preparation
4.17 Making Entries for the Extension Module
Tools R3trans and tpThe upgrade may require a certain version for tools R3trans and tp. For the required versions of these tools,
see SAP Service Marketplace at service.sap.com/sdwc ® Download ® Support Packages and Patches.You can also use the SAP kernel programs that are on the SAP Kernel DVD. For more information about thefolders they are stored in, see the CHECKS.LOG file.For more information on how to install the tools, see SAP Note 19466.After you have replaced the tools, repeat the Initializationmodule to change its status to succeeded.
Phase ADDON_INFOFor most of the add-ons produced by SAP, there are special SAP Notes containing information on the upgradestrategy. In the ADDON_INFO phase, SAPup writes the SAP Note numbers for your upgrade into the CHECKS.LOGfile. SAPup lists the general add-on Note as well as, if possible, specific add-on upgrade Notes to the add-onsinstalled.Before the upgrade, check all SAP Notes listed in the CHECKS.LOG file. If there are add-ons installed in your
SAP system for which there is no information in one of the listed SAP Notes, refer to the add-on producerfor information.
4.17 Making Entries for the Extension Module
Phase LANG_SELECTWhen you are prompted by PREPARE, mount the necessary directories of the languages DVD. You need to dothis even if only the standard languages English and German are installed in your system.If you have installed languages other than the standard languages, you have the option of excluding some of
these languages from the upgrade. The standard languages are always imported.
.Caution
If you exclude a language, you cannot work in this language after the upgrade.
.Caution
If you perform the upgrade in a Terminal Server Session, you also have to mount the language DVD foraccessing the SAP Kernel outside of the Terminal Server Session.To do this, mount the language DVD with the console as user <SID>ADM, or use PCAnywhere. You can
also copy the contents locally to the hard drive, and specify the path of the local directories to SAPup.
In principle, it is possible to install additional languages during the upgrade. For more information, seeImporting Additional Languages [page 45].
Only valid for: SAP Web AS 6.40;SAP Web AS 6.20;SAP Web AS 6.10;SAP Basis 4.6C;SAP Basis 4.6D;SAP R/3 4.6B;SAP R/3 4.5B;SAP
R/3 4.0B
Phase SPAM_CHK_INIPREPARE calls functions of the SAP Support Package Manager (transaction SPAM) to include add-on updatesand Support Packages in the upgrade. PREPARE checks if the level of the SPAM version on your source release
64 PUBLIC October 24, 2005

4 Preparation
4.17 Making Entries for the Extension Module
is sufficient for the upgrade. If your SPAM version is not high enough, PREPARE prompts you to import thelatest SPAM update for your source release.For more information about importing a SPAM update, see the online help in transaction SPAM, or the
online documentation for the corresponding Basis source release.
Only valid for: SAP Basis 4.6C;SAP R/3 4.6B;SAP R/3 4.5B;SAP R/3 4.0B
Choose SAP Library ® Basis Components ® Upgrade ‒ General ® Online Correction Support ® Support Package Manager ®Importing Support Packages with the Support Package Manager ® Importing a SPAM/SAINT Update.End of: SAP Basis 4.6C;SAP R/3 4.6B;SAP R/3 4.5B;SAP R/3 4.0B
Only valid for: SAP Web AS 6.20;SAP Web AS 6.10;SAP Basis 4.6D
Choose SAP Library ® mySAP Technology Components ® SAP Web Application Server ® Upgrade ‒ General ® OnlineCorrection Support ® Support Package Manager ® Importing Support Packages with the Support Package Manager ® Importinga SPAM/SAINT Update.End of: SAP Web AS 6.20;SAP Web AS 6.10;SAP Basis 4.6D
Only valid for: SAP Web AS 6.40
Choose SAP Library ® SAP NetWeaver ® Solution Life Cycle Manager ® Software Change Management ® Support PackageManager ® Importing Support Packages with the Support Package Manager ® Importing a SPAM/SAINT Update.End of: SAP Web AS 6.40
End of: SAP Web AS 6.40;SAP Web AS 6.20;SAP Web AS 6.10;SAP Basis 4.6C;SAP Basis 4.6D;SAP R/3 4.6B;SAP R/3 4.5B;SAP R/3 4.0B
Phase UPLOAD_REQUESTPREPARE prompts you to make all packages such as add-on upgrade packages (SAINT packages) or SupportPackages that are required for the upgrade available in the specified directory. If corresponding add-on CDs areavailable, you can add them now. The upgrade program searches for packages on the CD and copies them tothe EPS directory. For more information on available add-on CDs, see the add-on specific upgrade Notes.
October 24, 2005 PUBLIC 65

4 Preparation
4.17 Making Entries for the Extension Module
Figure 6: Selection Screen for Selecting Add-on CDs
If you want to include additional add-on upgrade packages (SAINT packages), Support Packages, or a SPAMupdate in the upgrade, proceed as follows
1. Download the Support Packages and the SPAM update of the target release.You can download the Support Packages in one of the following ways:n From SAP Service Marketplace, following the instructions in SAP Note 83458n From a Support Package or add-on CD, following the instructions on each CD
2. Log on as user <SAPSID>ADM.3. Go to directory \usr\sap\trans.4. Unpack the archive that contains the Support Packages with the following command:
SAPCAR -xvf <CD_DIR>\<PATH>\<ARCHIVE>.SAR.If you want to download the archives from a Support Package or add-on CD, you can find details about thearchives and their paths in the README file on the CD.
5. Check whether the unpacked Support Packages are in the EPS inbox of your transport directory(\usr\sap\trans\EPS\in).
66 PUBLIC October 24, 2005

4 Preparation
4.17 Making Entries for the Extension Module
Figure 7: Selection Screen for Uploading Add-On Upgrade and Support Packages
.Caution
If you want to include Conflict Resolution Transports as well as Add-On Support Packages for add-oncomponents, make sure that these packages are also in the EPS inbox.
When you select add-ons in the IS_SELECT phase, or when you select Support Packages in the BIND_PATCHphase, the corresponding packages appear as the default value.
Phase IS_SELECTPREPARE determines all the add-ons that are contained in the SAP system and prompts you to decide howto proceed.
October 24, 2005 PUBLIC 67

4 Preparation
4.17 Making Entries for the Extension Module
Figure 8: Selection Screen for Decision on Add-Ons
All add-ons that are included on the Upgrade Export DVDs and that you can update to a new release appear onthe selection screen with default status INST/UPGWITH STD CD. For these add-ons, there is no need to make anew decision, unless you want to include a newer version of the add-on in the upgrade.For add-ons with status UNDECIDED, you have to decide how to proceed.Depending on the add-on status, there are two different ways to proceed:
n Add-on with status INST/UPG WITH STD CD:The add-on is included on the upgrade DVDs. Depending on whether the software components requiredby the add-on must be kept the same or must be updated, the add-on can also remain unchanged ormay have to be updated. If you decide to update the add-on during the upgrade, the following selectionscreen appears:
68 PUBLIC October 24, 2005

4 Preparation
4.17 Making Entries for the Extension Module
Figure 9: Selection Screen for Single Add-On
You have the following alternatives:l Upgrade with an add-on-specific CD (Upgrade with Add-On CD)
When you choose this alternative, you are asked to insert the corresponding CD. The data is copied tothe upgrade directory.
l Upgrade to the version on the Upgrade Export DVD (Upgrade to version on std. Upgrade CD)This alternative is valid only if there is an add-on on the Upgrade Export DVD. Once you have chosen thisalternative, you do not need any additional CDs or packages for the add-on.
l
Only valid for: SAP Web AS 6.40;SAP Web AS 6.20;SAP Web AS 6.10;SAP Basis 4.6C;SAP Basis 4.6D;SAP R/3 4.6B;SAP R/3
4.6C;SAP R/3 4.5B;SAP R/3 4.0B
Upgrade with SAINT packages (Upgrade with SAINT package)The packages must be in transport directory \usr\sap\trans\EPS\in.End of: SAP Web AS 6.40;SAP Web AS 6.20;SAP Web AS 6.10;SAP Basis 4.6C;SAP Basis 4.6D;SAP R/3 4.6B;SAP R/3 4.6C;SAP
R/3 4.5B;SAP R/3 4.0B
n Add-on with status UNDECIDED:These are optional add-ons that were installed on the source system.
.Caution
Your software vendor has predefined the strategy to choose for each add-on. For more information,see the SAP Note displayed by SAPup or contact your software vendor.
October 24, 2005 PUBLIC 69

4 Preparation
4.17 Making Entries for the Extension Module
When you decide about the add-on, the following selection screen appears:
Figure 10: Selection Screen for Add-On with Status UNDECIDED
For this type of add-on, there are some additional options:l Keep the present version of the add-on (Keep (with vendor key)).
The add-on is transferred unchanged to the new release.
.Caution
You must enter a password if you choose this alternative.
l Delete the add-on (Delete).l Delete the add-on with CD (Delete with CD).
To complete phase IS_SELECT successfully, none of the add-ons may have status UNDECIDED.
Phase PATCH_CHK3This phase tests whether all Support Packages have been confirmed.Unconfirmed Support Packages are displayed on the screen and in the PATCHOUT.LOG file in the log
subdirectory of the upgrade directory. Confirm these Support Packages with transaction SPAM.If the source release contains Support Packages that are more recent than those in the delivered target
release, a warning appears that informs you which Support Packages these are. All software components
70 PUBLIC October 24, 2005

4 Preparation
4.17 Making Entries for the Extension Module
appear whose Support Package level is more up-to-date than the status of the software components on theUpgrade Export DVDs.
.Recommendation
Always include all available Support Packages for the target release, and all available Basis SupportPackages. This means that your system is completely up-to-date after the upgrade.
If you use an add-on component, you can find information about including the corresponding Add-OnSupport Packages or Conflict Resolution Transports in the SAP Note for the add-on supplement CD.If SAPup displays a warning that your Support Package level of the source release is too up-to-date and you
want to include the corresponding Support Packages of the target release, you must do this in the next phaseBIND_PATCH. You can include the Support Packages for multiple software components in this phase.
Phase BIND_PATCHYou can include the Support Packages for the target release in this phase.
Only valid for: SAP R/3 3.1I
You can only include Support Packages for the main software components (SAP_BASIS, for example).End of: SAP R/3 3.1I
If the release of a component does not change during the upgrade, the Support Packages previously installedfor this component are automatically kept and do not have to be included again. Even another adjustment ofthe modifications contained within using transaction SPDD or SPAU is not required. You can also includeadditional Support Packages for this component.To include Support Packages, proceed as follows:
1. If you want to include Support Packages for your various software components, answer Yes to the promptabout including Support Packages in the BIND_PATCH phase.If you did not download the Support Packages for the target release during the UPLOAD_REQUEST phase, dothis now. Proceed as described in steps 1 to 5 in the description of phase UPLOAD_REQUEST above.
2. In the column Support Package Level select, enter the Support Package level you want for your various softwarecomponents.
.Note
When the BIND_PATCH phase is started for the first time, PREPARE tries to find a default Support Packagequeue. It first searches for a package inclusion file of a previous upgrade. If it can find one in the savesubdirectory of the upgrade directory, PREPARE checks whether this package inclusion file contains aselection valid for the current upgrade. If the selection is valid, you can use it as default.If there is no package inclusion file from a previous upgrade, PREPARE calls the SPAM Patch QueueCalculator. It tries to generate a Support Package queue of all Support Packages that you haveuploaded. If it can generate a valid queue, you can use it as default.
October 24, 2005 PUBLIC 71

4 Preparation
4.17 Making Entries for the Extension Module
Figure 11: Selection Screen for Support Package Level
Column Support Package Level min contains the minimum Support Package level required for a component tomeet the import prerequisites of the add-ons in the IS_SELECT phase.Column Support Package Level equi contains the equivalence Support Package level. This is the SupportPackage level of the target release, which corresponds to the Support Package level of the source release.To avoid data loss, the Support Package level of the target release must not be lower than the equivalenceSupport Package level.
.Note
You no longer need to reset PREPARE to reduce the number of Support Packages that you want toinclude. All you need to do is overwrite the default Support Package level.If you want to cancel the selection for a software component completely, delete the relevant entry ifyou are using the Upgrade Assistant, or enter NONE if you are using scroll mode.
Column Support Package Level current contains the highest Support Package level that is currently included.To find out the current state of the SAP system, PREPARE checks the following Support Package levelinformation:a) Support Package level that has already been installed in the source system. This only applies when the
release of the SAP component does not change during the upgrade (component upgrade procedure).b) Support Package level that is delivered with the upgrade DVDs (for example, a Support Release level)c) Support Package level that has already been selected and confirmed by the customer
72 PUBLIC October 24, 2005

4 Preparation
4.18 Making Entries for the Installation Module
3. Apart from including Support Packages, you can also include the latest SPAM update for the target release.This prevents any error messages resulting from the fact that your SPAM update in the source release isnewer than the SPAM version on the upgrade DVD. It can also save you from having to import the latestSPAM update immediately after the upgrade. PREPARE automatically looks in the EPS inbox for a currentSPAM update and offers it for inclusion.
4. In addition, you can include a single change request. In certain situations, you can use a single changerequest to avoid losing data. The modification adjustment function ignores this request.
.Caution
Using the single change request function is risky. Only use this function if the owner of the request canguarantee that it is compatible with the upgrade.
.Note
Apart from the single change request and the requests for the modification adjustment, there is noother way of importing a request into the system before activation, or during the adjustment ofthe ABAP Dictionary objects.
5. When you confirm the confirmation prompt, you integrate all Support Packages up to the specified levelinto the upgrade for this component.
It may take a few minutes to unpack the Support Package data.You can include any necessary Conflict Resolution Transports (CRTs) in the upgrade. Any Support Packages
that you cannot include in the upgrade must be imported into the system after the upgrade.
Phase ADJUSTPRPIf you want to execute PREPARE in a target system and you made preparations for an automatic modificationadjustment in the first system, you are prompted to choose a request.
4.18 Making Entries for the Installation Module
All tables of the SAP Web Application Server are needed as shadow tables to operate the shadow system.The Installationmodule prepares the shadow instance.
.Caution
If the database user already exists from a former upgrade, PREPARE uses the existing user. In this case, checkthat the password of this user for the database is the same as for the SAP system. Otherwise, SAPup cannotconnect with the shadow user to the database.
You decide whether to run the central instance and the shadow instance on the same host or on different ones.If you install the shadow instance locally, PREPARE automatically creates the SAP Service, required profiles, anddirectories, and copies programs and files for the shadow instance in the Installationmodule. If you run theshadow instance remotely, the dialog instance that already exists is adjusted for use as the shadow instance.
October 24, 2005 PUBLIC 73

4 Preparation
4.18 Making Entries for the Installation Module
.Caution
SAP recommends that you install the shadow instance locally, provided that this does not cause abottleneck of resources when you run both instances at the same time.
If you want to run the shadow instance on a separate host, follow the instructions in SAP Note 430992 beforeyou start the Installationmodule.
Phase INITSHDEnter the following information or confirm the default value when prompted by PREPARE:
n If you install the shadow instance locally using SAPup, you have to enter an instance number that has notyet been used in your system landscape.
n If you run the shadow instance remotely, you can determine another host for the shadow instance inthis phase.Proceed as follows:1. Enter the host name of the server for the shadow instance.2. Determine the path of the upgrade directory for remote access from the application server of the
shadow instance. For example, enter the UNC path to the upgrade directory: \\<HOST>\SHARE_PUT.3. Install a license for the shadow instance.
a) To do this, use saplicense -get on the other (remote) application server to get the hardwarekey. For more information, see SAP Note 94998.
4. Continue PREPARE.
Phase SHDINST_OSPREPARE performs operating system-specific actions in this phase:
1. SAPup maintains the ports that are required for the shadow system in the file%WINDIR%\system32\drivers\etc\services.
2. If it is a local shadow instance, the SAP service is installed and started for the shadow instance.If it is a remote shadow instance, the existing SAP service is adjusted and started for the shadow instance.
.Caution
If the SAP service for the shadow instance cannot be started, there may be a problem with the logondata in the INITPUT phase.If you change the password for the operating system user, remember that in a standard installation,the SAP service or the SAPOSCOL service run under the same user. This means that you also have tochange this logon data accordingly.
Phase SHDINST_CPYIf you have made a backup of the save directory from a previous upgrade, you can now use the profiles for theshadow instance [page 127] that have been stored in the directory.
.Caution
Only use the profiles if both upgrades have the same environment and use the same upgrade strategy.
74 PUBLIC October 24, 2005

4 Preparation
4.19 Making Entries for the Preprocessing Module
If you want to use the shadow instance profiles, make sure that the save directory has been copied to theupgrade directory and confirm the prompt with Yes.
Only valid for: SAP Web AS 6.40;SAP Web AS 6.20;SAP Web AS 6.10;SAP Basis 4.6C;SAP Basis 4.6D;SAP R/3 4.6B;SAP R/3 4.5B
4.19 Making Entries for the Preprocessing Module
Phase SAVE_VAR_CHKAfter the upgrade, many of your variants can no longer be used because the relevant selection screens havechanged. If your Basis Source Release is 4.5B or higher, the SAP system offers two reports to save the variants:
n RASUVAR1 saves your variants on the source system.n RASUVAR2 restores the variants in the target system.
During phase SAVE_VAR_CHK you can decide whether you want the upgrade tool to run report RASUVAR1. Thereport is started in phase JOB_RASUVAR1. If you have decided to run report RASUVAR1, phase JOB_RASUVAR2automatically starts report RASUVAR2 towards the end of the upgrade.For more information about the reports, see SAP Note 712297.
End of: SAP Web AS 6.40;SAP Web AS 6.20;SAP Web AS 6.10;SAP Basis 4.6C;SAP Basis 4.6D;SAP R/3 4.6B;SAP R/3 4.5B
4.20 Making Entries for the MSCS Configuration
In an MSCS configuration, the CONFCHK phase determines that the database and central instance are runningon different servers and prompts you for the operating system of the database host. This prompt also appears ifboth are running on the same cluster server because, in a cluster, the database and the SAP System are assigneddifferent logical host names.
ProcedureEnter the operating system for the database.
4.21 Evaluating the Results of PREPARE
PREPARE [page 161] writes its results to the CHECKS.LOG file. This file is located in the log subdirectory of theupgrade directory. Each time you run PREPARE, it generates a header entry containing the text Starting new
execution of PREPARE modules <module name> at <timestamp>. This is followed by the PREPARE results.To make sure that all the requirements are met, you can choose certain PREPAREmodules more than once.
If the CHECKS.LOG file already exists, it is overwritten each time you execute a module again. Its contents aresaved in the CHECKS.SAV file.The entries in the CHECKS.LOG file can be error messages, information, or prompts for user action.
October 24, 2005 PUBLIC 75

4 Preparation
4.21 Evaluating the Results of PREPARE
ProcedureCheck the CHECKS.LOG file and perform any measures required by the information it contains. Most of theentries are self-explanatory. You can find information and troubleshooting procedures for entries that are notself-explanatory below:
n Your Windows dlls have been updated.
Reboot your operating system before starting the upgrade.PREPARE has updated several Dynamic Link Libraries of Windows that contain SAP-specific corrections. Youmust restart the host before you start the upgrade so that the current DLLs are used.
n The buffers of your SAP system instance are not automatically validated.
1. Make sure that parameter rdisp/bufrefmode has one of the following values in the DEFAULT.PFL profileof directory \usr\sap\<SAPSID>\SYS\profile:
Values in DEFAULT.PFL Profile
Value Meaning
sendon,exeauto Your SAP system (<SAPSID>) has multipleinstances.
sendoff,exeauto Your SAP system (<SAPSID>) has only oneinstance.
2. Also make sure that parameter rdisp/bufrefmode is not set in the instance profile.If you have distributed application servers that do not use NFS to share access to the profile of thecentral instance, follow the procedure described above for each server.
.Caution
After making changes to the DEFAULT profile and the START profile you must start up the SAPservice to activate the changes. It is not enough to just start the SAP system.
n Insufficient freespace in the database as follows:
The new release needs more space in the database. The existing space in your database is not sufficient toimport the data for the new release. For information on the extensions that you need to make, see thetable that follows the message in CHECKS.LOG. Also add the space you need for any extra data that is createdbefore you actually upgrade your system.The procedure is described in the section Extending Free Space in the Oracle Database [page 155].
n In Release <rel> you applied the following unconfirmed patches to your system.
There are unconfirmed Support Packages in your SAP system (such as Support Packages for technicalcomponents SAP_BASIS, or SAP_BW). To confirm these Support Packages before the upgrade, calltransaction SPAM.
n There are dependencies between Basis Support Packages included in phase BIND_PATCH and the
patch level of the target release kernel in directory \<upgrade directoy>\bin.
The disp+work needs at least patch level <number> or higher.
Please proceed as described in note 211077.
76 PUBLIC October 24, 2005

4 Preparation
4.21 Evaluating the Results of PREPARE
A Support Package included in the upgrade requires a different patch level for the SAP kernel. Proceed asdescribed in SAP Note 211077.
n The following function groups (FUGR) are inconsistent. The TADIR entry (and the frame
program) have no corresponding entry in the master table TLIBG.
Your SAP system contains customer function groups that have not been entered in table TLIBG. To enterthe function groups in table TLIBG, call transaction SE80. If you do not fix the problem, the customerfunction groups will be lost during the upgrade. In case of questions or problems, open a customer messageon component BC-DWB-TOO-FUB.
n no write permission on <file name>:
The specified file in the directory of user <sapsid>adm cannot be overwritten because the authorizationshave not been set correctly or the owner of the file is not <sapsid>adm. Correct this by changing theauthorizations or the owner.
n Release these open transport requests and repairs:
.Caution
If you ignore open repairs, you could lose modifications.
Your SAP system contains locked SAP objects in open repairs or requests. The numbers of these repairsor requests are listed.Before you start the upgrade, you must release and confirm all the open repairs and requests listed byPREPARE, since the objects in them are locked.
Only valid for: SAP Web AS 6.40;SAP Web AS 6.20;SAP Web AS 6.10;SAP Basis 4.6C;SAP Basis 4.6D;SAP R/3 4.6B;SAP R/3 4.5B;SAP
R/3 4.0B
For more information, see Releasing and Confirming Open Repairs and Requests [page 157].End of: SAP Web AS 6.40;SAP Web AS 6.20;SAP Web AS 6.10;SAP Basis 4.6C;SAP Basis 4.6D;SAP R/3 4.6B;SAP R/3 4.5B;SAP R/3 4.0B
Only valid for: SAP R/3 3.1I
For more information, see Releasing and Confirming Open Repairs and Requests [page 158].End of: SAP R/3 3.1I
.Note
If open repairs that do not belong to this system appear, then this system was created by a databasecopy. You cannot release these repairs in the normal way. For more information on releasing theserepairs, see SAP Note 62519.
To release and confirm these open repairs, you must log on to the system with the name of their owner.The list in CHECKS.LOG contains these names.
n Restart logs of DB conversions found. Outstanding DB conversions found.
Your SAP system contains outstanding conversions and restart logs of terminated conversions. Clean theseup as described under Cleaning Up Terminated Conversions in the DB Conversion Phases [page 137].
n Unresolved request found in TRBAT.
.......
TRBAT entry indicates that a batch job is running.
.......
October 24, 2005 PUBLIC 77

4 Preparation
4.21 Evaluating the Results of PREPARE
TRBAT entry indicates that a batch job has finished.
.......
Corrupted TRBAT entry found.
.......
The transport control program tp uses the table TRBAT to communicate with the SAP system. Entriesfound in this table by SAPupmay be the remains of a terminated or running imports or exports.When you prepare the upgrade, locate any entries left over from imports or exports that terminated andclean them up. Do not delete entries made by running imports or exports during production operation.First try to process the TRBAT entries from \usr\sap\trans\bin with the following command:tp getprots <SAPSID>
This does not affect any imports or exports that are still running.tp informs you about possible processingproblems in the file \usr\sap\trans\log\SLOG<rel>. You can monitor this file using the commandtype or tail (MKS tools), but do not use an editor.where <YY> is the year (two digits) and <WW> is the calendar week (two digits).To delete any entries in TRBAT that cannot be processed and that are no longer needed, call transactionSM31.For more information on the transport control program tp, see the online documentation for the SAPBasis or SAP Web AS of the source release:
Only valid for: SAP R/3 3.1I
Help ® R/3 Library ® BC ‒ Basis ® Administration ® System ® Transport Control ® Transport Control Program tpEnd of: SAP R/3 3.1I
Only valid for: SAP Basis 4.6C;SAP Basis 4.6D;SAP R/3 4.6B;SAP R/3 4.5B;SAP R/3 4.0B
Help ® SAP Library ® BC ‒ Basis Components ® Change and Transport System ® BC ‒ Transport Tools ® TransportControl Program tpEnd of: SAP Basis 4.6C;SAP Basis 4.6D;SAP R/3 4.6B;SAP R/3 4.5B;SAP R/3 4.0B
Only valid for: SAP Web AS 6.20;SAP Web AS 6.10
Help ® SAP Library ® mySAP Technology Components ® SAP Web Application Server ® Change and Transport System ®Transport Tools ® Transport Control Program tpEnd of: SAP Web AS 6.20;SAP Web AS 6.10
Only valid for: SAP Web AS 6.40
Help ® SAP Library ® SAP NetWeaver Library ® SAP NetWeaver by Key Capability ® Solution Life CycleManagement ® Software Change Management ® Change and Transport System ® Transport Tools ® Transport ControlProgram tpEnd of: SAP Web AS 6.40
n The following indexes <number> were read:
Indexes whose names are identical up to the 14th character were found in a table belonging to thesubstitution set. The 14th character is an 'X' in one of the two names and is empty in the other. This is aninconsistency and would result in an error during the import of the substitution set.The index with the 'X' as the 14th character can only have occurred in a previous upgrade or have beencreated outside the SAP system. For more information, contact your SAP consultant.
n The following database tables have names that are identical to names of Basis views. The
views will be created in this upgrade. Therefore ...
78 PUBLIC October 24, 2005

4 Preparation
4.22 Making Preparations at the Operating System Level
Delivered views may have names identical to the names of customer tables in the SAP namespace. Youmust delete these tables. If you need the table data, you must make a backup before deleting the tables.
n Update records still exist - please process
Make sure that you have cleaned up all outstanding updates.
Only valid for: SAP Web AS 6.40;SAP Web AS 6.20;SAP Web AS 6.10;SAP Basis 4.6C;SAP Basis 4.6D;SAP R/3 4.5B;SAP R/3 4.0B
Make sure that you have cleaned up all outbound queue RFC calls by the JOB_RSVBCHCK_R orJOB_RSVBCHCK_D phase (during downtime) at the latest.End of: SAP Web AS 6.40;SAP Web AS 6.20;SAP Web AS 6.10;SAP Basis 4.6C;SAP Basis 4.6D;SAP R/3 4.5B;SAP R/3 4.0B
If you are still in the preparation phase (PREPARE) and therefore in production operation, you must onlydelete the terminated updates.
.Recommendation
We recommend that you clean up as many updates and RFC calls as possible. Otherwise, you will haveto clean them up during downtime.
To find terminated or outstanding updates, proceed as follows:1. Call transaction SM13.2. Delete the default values for the client, user, and time.3. Select all the update requests.To find outstanding outbound queue RFC calls, proceed as follows:1. Call transaction SMQ1.2. Delete the default values for the client.3. Make sure that the list of outbound queue RFC calls is empty.
Otherwise you might lose data in other systems (for example, in SAP BW).Repeat these checks when production operation ends. For more information, see Isolating the Central Instance[page 153].
.Caution
If you have installed the PI plug-in, SAPup will display more information.
n Your database and central instance are running on different hosts. Executables have to be
transferred to the database host.
MSCS Configuration: If the database and the SAP system are running on different nodes in a clusterinstallation, ignore the above warning.
4.22 Making Preparations at the Operating System Level
Backing Up the SAP KernelDuring the upgrade, all files and subdirectories of the directory \usr\sap\<SAPSID>\SYS\exe\run are deleted.Make sure that you can restore the contents of the old directories, if necessary. Make a backup copy of theseprograms to guarantee this.
October 24, 2005 PUBLIC 79

4 Preparation
4.23 Making Preparations at the Database Level
.Caution
The directory \usr\sap\<SAPSID>\sys\exe\runmust not be write-protected. Otherwise problems occurwhen the SAP Kernel is started after the Kernel substitution (phase STARTR3_NBAS).
4.23 Making Preparations at the Database Level
Backing Up the DatabaseMake sure that you can reset the database to the state it had before the upgrade by using an existing databasebackup. For more information on timing and performing database backups, see Upgrade Strategy Planning [page26], Database Backup [page 29], and Database-Specific Aspects [page 30].
.Caution
At the same time, make a backup of the upgrade directory and its subdirectories.
For detailed information about making backups as well as about the programs brbackup and brarchive, seethe SAP online documentation on database administration for Oracle.
Only valid for: SAP Web AS 6.40;SAP Web AS 6.20;SAP Web AS 6.10;SAP Basis 4.6C;SAP Basis 4.6D;SAP R/3 4.6B;SAP R/3 4.5B;SAP
R/3 4.0B
As of Basis Source Release 4.0B: Make sure that the statistics are up-to-date for all tables. Out-of-date statisticscan increase the runtime of the upgrade significantly. Proceed as described in Oracle: Performing Actions for theCost-Based Optimizer [page 117].End of: SAP Web AS 6.40;SAP Web AS 6.20;SAP Web AS 6.10;SAP Basis 4.6C;SAP Basis 4.6D;SAP R/3 4.6B;SAP R/3 4.5B;SAP R/3 4.0B
Making Database-Specific Preparations for Oracle
1. Check the value of parameter shared_pool_size:n Oracle 9.2:
Check the value in file %ORACLE_HOME%\dbs\init<DBSID>.ora.n Oracle 10.1 and higher:
select NAME, VALUE from v$parameter where name='shared_pool_size';
select NAME, VALUE from v$parameter where name='shared_pool_reserved_size';
If the value is lower than 150 MB, increase it to at least 150 MB (400 MB is better), and restart the database.2. Log on as user <SAPSID>ADM at the operating system level.3. Log on to the database as the Oracle user system with sqlplus (default password is manager).4. Check the resource quotas of the database user SAPR3 or SAP<SAPSID>:
Oracle error 1536 can occur during the upgrade if the resource quotas of database user SAPR3 orSAP<SAPSID>are limited. Make sure that these quotas are unlimited. Check whether the table DBA_SYS_PRIVS containsone of the following entries:grantee='SAPR3/SAP<SAPSID>',privilege='UNLIMITED TABLESPACE',adm='YES'
grantee='SAPR3/SAP<SAPSID>',privilege='UNLIMITED TABLESPACE',adm='NO'
To do this, enter the following SQLPLUS statement:select * from dba_sys_privs where grantee = 'SAPR3/SAP<SAPSID>';
If this entry does not exist, enter the SQLPLUS statement:
80 PUBLIC October 24, 2005

4 Preparation
4.24 Making Preparations at the SAP System Level
grant unlimited tablespace to sapr3/SAP<SAPSID>;
5. Log off from the database with the command exit.6. Only if using the dictionary managed tablespaces function:
Make sure that the storage parameters MAXEXTENTS and NEXT have the correct values for certain tablesand indexes. Otherwise, they may overflow during the upgrade. The Oracle-specific upgrade SAP Notecontains the tables and the required minimum values.You can display the current settings with BRSPACE. The index names are not constant. However, you canalso determine these names with BRSPACE.SAP Note 11777 describes how to change the parameters NEXT and MAXEXTENTS.
7.
Only valid for: SAP R/3 3.1I
Make sure that parameter OPTIMIZER_MODE is set to OPTIMIZER_MODE=RULE.n For Oracle 9.2, check and, if necessary, edit the following Oracle profile:
%ORACLE_HOME%\dbs\init<SAPSID>.ora
n For Oracle 10.1. and higher, use the following statements:Sqlplus /nolog
Connect /as sysdba
Alter system set OPTIMIZER_MODE='RULE' scope=spfile;
If you have to change the parameter, restart the database afterwards.End of: SAP R/3 3.1I
8. Check the value of storage parameter MAXEXTENTS for tablespace PSAPTEMP. If you are not sure, executethe psaptemp.sql script as the database administrator. This script sets the value of MAXEXTENTS for thetablespace PSAPTEMP to UNLIMITED.The psaptemp.sql script is located in the bin subdirectory of the upgrade directory.
9. If your database version is already higher than the minimum version for the new release, we recommendthat you exchange the DBA tools (such as BRSPACE) for the upgrade. The Database Software Oracle DVD forthe database contains the up-to-date tools that you unpacked on the current kernel when you migratedthe database. After you execute PREPARE, unpack this archive again into the exe subdirectory of theupgrade directory.This overwrites the DBA tools optimized for the minimum required database version with the tools bestsuited to your database version.
4.24 Making Preparations at the SAP System Level
In addition to the preparations at the operating system level and the database level, you also need to makepreparations at the SAP system level:
n Deleting the AUTOSTART Parameter [page 82]n Checking the User for the Upgrade [page 82]n Checking the Requirements for the Modification Adjustment [page 82]n Setting the Operation Mode for the Upgrade [page 83]
October 24, 2005 PUBLIC 81

4 Preparation
4.24 Making Preparations at the SAP System Level
n
Only valid for: SAP R/3 3.1I
SAP ECC: Processing Batch Input Sessions [page 84]End of: SAP R/3 3.1I
n
Only valid for: SAP R/3 3.1I
SAP ECC: Converting the Translation Proposal Pool [page 84]End of: SAP R/3 3.1I
n SAP ECC: Deleting Application Logs [page 84]n SAP ECC: Backing Up Wage Types in HR [page 85]
n
Only valid for: SAP R/3 3.1I
SAP ECC: Processing Direct Input Error Data [page 85]End of: SAP R/3 3.1I
n
Only valid for: SAP ECC 5.00
SAP ECC: Backing Up UI Conversion Classes in ESS [page 86]End of: SAP ECC 5.00
4.24.1 Deleting the AUTOSTART Parameter
Delete the parameter AUTOSTART = 1, if it is set, in the start profile(START_<SPECIFICATION><INSTANCE_NO>_<HOSTNAME>).Setting the parameter Autostart = 1 causes the SAP service and the SAP system to start when the Windows
system is booted. This mechanism must be switched off during the upgrade.You can set the parameter again if required once the upgrade has been successfully completed. Note that
this parameter may not be set in a MSCS cluster configuration.
4.24.2 Checking the User for the Upgrade
Make sure that you can log on to the system in client 000 as user DDIC. The initial password for DDIC is 19920706in a newly installed system.To be able to perform all necessary actions for the upgrade, user DDIC needs the authorization SAP_ALL.
4.24.3 Checking the Requirements for the Modification Adjustment
If you modified SAP objects in your SAP system, make sure that you meet the requirements for the modificationadjustment [page 37].
.Caution
In particular, make sure that changes to the Repository are allowed in the client in which you want toperform the modification adjustment. To check this, call transaction SCC4.
82 PUBLIC October 24, 2005

4 Preparation
4.24 Making Preparations at the SAP System Level
For more information on the requirements for the modification adjustment, see the online documentation forthe target release under SAP NetWeaver Library ® SAP NetWeaver by Key Capability ® Application Platform ® ABAPTechnology ® ABAP Workbench ® Changing the SAP Standard ® The Modification Assistant.
.Caution
If you do not make sure that you have met the requirements for the modification adjustment, we cannotguarantee complete support during the adjustment. You also risk losing the data for ABAP Dictionaryobjects.
4.24.4 Setting the Operation Mode for the Upgrade
Various background jobs are started during the upgrade. When you schedule jobs, a check is made to seewhether the SAP instance on which you want them to run is defined in an operation mode. The operationmode specifies which services are offered by the work processes (dialog, update, background processing,enqueue, spool, and so on).
PrerequisitesNo operation modes must exist that contain servers other than those belonging to the current system.
Procedure
1. Before you start the upgrade, call transaction RZ04 to check the definition of your operation modes. Alsocheck the DUMMY operation mode. The DUMMY operation mode may have <host name>_<SAPSID>
entered as the server name. Change this entry to <host name>_<SAPSID>_<instance number>.2. Delete the invalid operation modes. If operation modes contain names of servers other than those
belonging to the system, problems may arise in the background interface in some phases. The jobs maybe released, but not set as active (in theory, this affects all jobs scheduled to start on a specific server andtriggered by an event).
3. If the SAP instance on which you want to upgrade the system is not entered in an operation mode, createthe operation mode for the upgrade as follows:a) Call transaction RZ04.b) Choose Operation mode ® Create.
Enter a name for the operation mode, for example, Upgrade. Enter a short description and then savethe operation mode.
c) Make sure that the instance required for the upgrade has been started up.d) Position the cursor on the new operation mode and choose Operation mode ® Maintain instances ®
Instances/OP modes.e) Choose Settings ® Based on act. status ® New Instances ® Create.
This displays all instances and their current configuration.f) Choose Save.g) Call transaction SM63 to enter the operation mode you have defined as an active operation mode for 24
hours (select Normal operation (24 hours)).
October 24, 2005 PUBLIC 83

4 Preparation
4.24 Making Preparations at the SAP System Level
Only valid for: SAP R/3 3.1I
4.24.5 SAP ECC: Processing Batch Input Sessions
Due to a change in the data structure, old sessions cannot be processed after the upgrade.
PrerequisitesYour source release is 3.1I.
ProcedureMake sure that you have finished processing all your batch input sessions before the upgrade.End of: SAP R/3 3.1I
Only valid for: SAP R/3 3.1I
4.24.6 SAP ECC: Converting the Translation Proposal Pool
If you have a production system for translation in your SAP system, you must convert the existing proposalpool before the upgrade. If you do not, the existing proposal pool will be lost.
PrerequisitesYour source release is 3.1I.
ProcedureUse report RSTRMINI for the conversion.For more information, see the documentation on the report in the system.
End of: SAP R/3 3.1I
4.24.7 SAP ECC: Deleting Application Logs
As of Release 4.6C, application logs are stored in a new format. To be able to read the old application logs,the SAP system has to convert them into the new format. Depending on the amount of application logs, theconversion may be time-consuming. In order to avoid performance problems, you can delete application logscreated in releases below 4.6C before upgrading to the new release.
.Caution
Only delete application logs that you no longer need.
ProcedureFor more information on how to delete application logs, see SAP Note 195157.
84 PUBLIC October 24, 2005

4 Preparation
4.24 Making Preparations at the SAP System Level
4.24.8 SAP ECC: Backing Up Wage Types in HR (T512W) (HRCustomers)
We recommend that you back up the wage type table T512W before the upgrade. You must back up this tablein the following cases:
n You have modified technical wage types, that is wage types beginning with '/' (adjustment of processingclass, evaluation class, and so on).
n You are using SAP model wage types, that is wage types beginning with a letter, and have modified thesewage types.
n You have defined wage types that do not lie within the customer name range. To find out if this applies,check in table TRESC by entering T512W as the table name and TABU as the object.
PrerequisitesYou use the SAP component Human Resources (SAP HR).
Procedure
1. Before the upgrade, back up table T512W or selected areas of this table. To do this, use report RPU12W0S.The documentation on the report includes instructions on how to proceed.
.Note
Table T512W is client-specific. Make sure that you back up the data in all the SAP HR clients in thesystem.
2. Document exactly which wage types you have modified.3. After the upgrade, you can restore your backup copy. To do this, you can use report RPU12W0C. It reloads
selected parts of table T512W. This method is particularly suitable if you have exact documentation aboutthe wage types you have modified.
.Note
If you are not sure whether you have to reload the table data, contact your HR application consultant.
For more information about upgrading the mySAP Business Suite component SAP HR, see SAP ServiceMarketplace at service.sap.com/hrupgrade.
Only valid for: SAP R/3 3.1I
4.24.9 SAP ECC: Processing Direct Input Error Data
In Release 4.0 there are changes to the way error data, which occurs during the transfer of data by direct input(material master industry), is stored. These changes are primarily intended to ensure upward compatibility inthe future.
October 24, 2005 PUBLIC 85

4 Preparation
4.24 Making Preparations at the SAP System Level
As a result, you can no longer use standard functions (direct input administration, program RMDATINF)to process any error data remaining from a direct input run performed with Release 3.x. You can use theRMDATINF_3X program to display the messages of previous direct input runs after the upgrade to Release 4.x.
PrerequisitesYour source release is 3.1I
Procedure
1. Before the upgrade, check whether there are any direct input jobs that have terminated abnormally or thathave been completed with logical errors.
2. If jobs of this type exist, remove the errors and run the jobs again.
End of: SAP R/3 3.1I
Only valid for: SAP ECC 5.00
4.24.10 SAP ECC: Backing Up UI Conversion Classes in ESS
The following only applies if your source release is SAP ECC 5.0 and you are running an ESS Personal Infoscenario. For SAP ECC 6.0, the UI conversion classes have been redesigned. If you have modified existing orcreated new UI conversion classes, your changes will be lost during the upgrade.
Procedure
n If you have modified existing UI conversion classes, proceed as follows:1. Before the upgrade, make a backup copy of the modified UI conversion classes.2. After the upgrade, enhance the new UI conversion classes in you target release system using the BADI
concept.n If you have created UI conversion classes in SAP ECC 5.0, migrate you conversion classes.
For more information, see SAP Note 835625.End of: SAP ECC 5.00
86 PUBLIC October 24, 2005

5 Upgrade Process
5 Upgrade Process
This part of the document provides information on upgrading your system.When you upgrade your system, note the following:
n Before you begin the upgrade, you must have completed all required planning and preparation actions.n SAPup [page 163] controls the entire upgrade of the SAP system, from checking the requirements and
importing the necessary programs through stopping production operation until production operationis resumed. The upgrade procedure is divided up into a number of different phases with the successfulcompletion of a phase being a precondition for the success of all subsequent phases. This section describesall the required user input and actions, as well as critical points during the upgrade. For a complete list of allphases [page 159], see the htdoc subdirectory of the upgrade directory.
n SAPupmust run on the application server of the central instance.n If your central instance and database are running on different hosts, you must perform the actions that
affect the database on the database host.n You can use the upgrade logs and the alert function to monitor the upgrade.l SAPup [page 163] logs all actions in the upgrade logs, which you can use as your starting point for
troubleshooting.l You can use the alert function [page 150] to gather information if the upgrade has stopped.
n Many phases of the upgrade require no user input. In the following, you can find a description of allphases that do require user input.
n User actions are also required when problems occur. If an error occurs, correct it and repeat the phase inwhich the error occurred. Once the phase has been repeated successfully, you can continue the upgrade.For more information about troubleshooting, see the Troubleshooting [page 129] part of this document.
n During the upgrade, you are prompted to enter a mount directory for a specific data carrier at theappropriate times. To avoid having to manually enter the mount directory during the upgrade, you canspecify several mount directories in the INITPUT phase. In this document, we assume that you only haveone DVD drive. If you have multiple DVD drives, you can ignore instructions to enter mount directories.
ActionsThe following sections are important for performing the upgrade:
n Upgrading with Microsoft Cluster Server [page 88]n Starting the Upgrade [page 88]n Stopping the Upgrade [page 89]n Restarting the Upgrade [page 89]n Phase INITPUT [page 90]n Phase PATCH_CHK [page 91]n Phase ADDONKEY_CHK [page 91]n Phase INITSUBST [page 91]n Phase CONFCHK_X [page 92]n Phase VIEWCHK1 [page 93]
October 24, 2005 PUBLIC 87

5 Upgrade Process
5.1 Upgrading with Microsoft Cluster Server
n Phase REPACHK1 [page 93]n Phase JOB_RSVBCHCK2 [page 93]n Phase FREECHK_X [page 93]n Phase LOCKEU_PRE [page 94]n EU_IMPORT Phases [page 94]n Phase REPACHK2 [page 95]n Phase CNV_CHK_XT [page 95]n Phase ADJUSTCHK [page 96]n Phase ACT_<Rel> [page 96]n Phase VIEWCHK2 [page 98]n Phase MODPROF_TRANS [page 98]n Phases JOB_RSVBCHCK_R and JOB_RSVBCHCK_D [page 99]n Continuation of the Upgrade After the MOFPROFP_UPG Phase [page 99]n Phase CHK_POSTUP [page 100]
5.1 Upgrading with Microsoft Cluster Server
The SAP system is stopped and started repeatedly during the upgrade. To make sure that the configuration forSAPup is unchanged during the upgrade, the resource SAP-R/3<SAPSID> is set offline the first time that the SAPsystem is stopped. This occurs with the resource minimized upgrade strategy in the EU_IMPORT1 phase, andwith the downtime-minimized strategy in the MODPROF_TRANS phase.Before you set the resource SAP-R/3 <SAPSID> online again in the cluster administrator, follow the
instructions in the section Post-Upgrade Activities for the Microsoft Cluster Server [page 104].
5.2 Starting the Upgrade
Prerequisites
n You are logged on to the central instance as user <SAPSID>ADM.n You have completed the mandatory PREPAREmodules.n You have not deleted any files in the upgrade directory. Deleting these files could cause unpredictable
inconsistencies.n You have made the preparations that are not supported by PREPARE.n You have decided on whether to use the Upgrade Assistant or scroll mode. We recommend that you use
the Upgrade Assistant.
Using the Upgrade Assistant
1. Check that the Upgrade Assistant Server is active on the host on which the central instance is running.2. Start the Upgrade Assistant GUI [page 54] and log on as administrator.3. In the main menu, choose Administrator ® Start SAPup.
SAPup displays the initial screen of the upgrade. It displays the SAPup version, the target release, the SAPsystem ID and the database you use. This screen appears in each future restart.
4. If the entries are correct, confirm this screen with Continue.
88 PUBLIC October 24, 2005

5 Upgrade Process
5.3 Stopping the Upgrade
Using the Scroll Mode
1. Log on to the host on which the central instance is running.2. Go to the directory \<upgrade directory>\bin.3. Enter the following command:
SAPup.exe
5.3 Stopping the Upgrade
You can stop SAPup at the beginning of a specific phase or at the end of a phase that is currently running. Forexample, you need to do this if an SAP Note tells you to correct a program before you execute it.
Stopping the Upgrade at the End of the Current PhaseTo stop the upgrade at the end of the current phase, you have the following options:
n In the main menu of the Upgrade Assistant, choose Administrator ® Stop SAPup after current phase.n Enter the following command in a second window at the operating system level:
SAPup stop
Stopping the Upgrade at the Start of a PhaseEnter the following command in a separate window at the operating system level:SAPup stop <phase name>
.Example
SAPup stop XPRAS_UPG
5.4 Restarting the Upgrade
You usually only have to restart the upgrade when errors have occurred or an upgrade phase has terminated.If a phase terminates, SAPup stops and suggests that you repeat the phase by choosing repeat.If you have exited SAPup by choosing exit, other start modes are offered.
n repeatIf nothing else is specified in this document, always use start mode repeat to restart SAPup. This is the onlyway to make sure that all upgrade phases have been completed correctly.
.Note
The repeat start mode restarts the upgrade at the exact point where it was interrupted. SAPup runsthrough the phase and checks where it has to be restarted. This means that the repeat start mode doesnot necessarily restart from the beginning of the phase.
n initWhen you choose the init start mode, the phase in which the upgrade was interrupted is repeated from thebeginning.
October 24, 2005 PUBLIC 89
5 Upgrade Process
5.5 Phase INITPUT
n resetThe reset start mode is used to restart the upgrade from the beginning. This is only possible up to theSUBSTNT_INS phase. After this you can restart the upgrade only by resetting the database.This mode resets the upgrade to the INITPUT phase. If the system is already in downtime, it must berestarted once manually if reset is chosen.Alternatively, you can also correct the entries with SAPup set stdpar or SAPup set DDICpwd. For moreinformation, see Correcting Entries Made in the INITPUT and INITSUBST Phases [page 133].
.Caution
Other start modes can cause errors. SAP must confirm their use for your specific situation.
Prerequisites
n If you need to restart due to an error or termination during the upgrade, the cause of the error must beclear and you must correct the error first.For more information on finding and correcting errors, see Troubleshooting [page 129]. If you are not surehow to proceed, contact SAP Support.
n A password is generally necessary if you want to ignore an error, or jump to a phase other than the onecurrently being executed. Only enter this password when your troubleshooting has clearly identified thesource of the error and you have checked with SAP. Support cannot be guaranteed if you do not consultSAP. In only a very few cases is it a good idea to ignore an error with a password. A large number of casesare known where ignoring an error resulted in serious inconsistencies, at worst making a recovery ofthe database necessary. Only in exceptional cases, such as in phases ACT_<rel> and XPRAS_UPG, can youignore errors with repair severe errors.For more information on finding and correcting errors, see Troubleshooting [page 129] and underHelp in SAPup.
If you do not exit SAPup after it has terminated
1. If a phase terminates, choose start mode repeat.SAPup continues the phase from the point where it terminated. This checks whether the error repeatsitself. If the error is not repeated, the upgrade continues after the phase has been completed. If the erroroccurs again, you must correct it.
2. If an error occurred, choose exit to leave SAPup and correct the error.
If you exited SAPup with exit
1. Start the Upgrade [page 88].2. If possible, choose start mode repeat.
SAPup repeats the terminated phase and continues the upgrade.
5.5 Phase INITPUT
In the Parameter Input [page 58] PREPAREmodule you are prompted to enter values for certain system-specificparameters needed by the upgrade, for example, names, paths, and passwords. You can modify the entries youmade in PREPARE in the INITPUT phase.
90 PUBLIC October 24, 2005

5 Upgrade Process
5.6 Phase PATCH_CHK
ProcedureAt the start of this phase SAPup asks you whether you want to change any parameters.
n If you confirm this, you are prompted for all the parameters. If the default values are correct, confirm them.n If you skip this phase and realize in the following phases that you made an incorrect entry, correct it as
described in Correcting Entries Made in the INITPUT and INITSUBST Phases [page 133].
5.6 Phase PATCH_CHK
This phase checks that the following prerequisites are met:
n All Support Packages have to be confirmed for the source release. Unconfirmed Support Packages aredisplayed on the screen and in the PATCHOUT.LOG file in the log subdirectory of the upgrade directory.
n The source release does not contain Support Packages that are more recent than those in the deliveredtarget release.
PREPARE phase PATCH_CHK3 has already made these checks. For more information, see the description of thePATCH_CHK3 phase inMaking Entries for the Extension Module [page 64].
Procedure
1. If you still have to confirm Support Packages for the source release, call transaction SPAM and confirm theSupport Packages that are proposed there.
2. If a warning appears that the Support Package level of your source release is too high, proceed as follows:n If you have already included Support Packages in the BIND_PATCH phase of PREPARE, you can ignore
this warning.n If you have not included any Support Packages in the BIND_PATCH phase of PREPARE, you will lose data if
you continue with the upgrade. In this case, you must reset the upgrade [page 143], repeat PREPARE, andinclude the necessary Support Packages.
5.7 Phase ADDONKEY_CHK
This phase prompts you for the keyword(s) for add-ons integrated in your SAP system.
ProcedureIf you use SAP add-on components in your system (such as IS components), you are prompted for keywords.SAP systems that have other software components (add-ons) installed must wait until the upgrade has beenreleased by the relevant add-on software vendor.
5.8 Phase INITSUBST
You must specify the following in this phase:
n Upgrade strategy
October 24, 2005 PUBLIC 91

5 Upgrade Process
5.9 Phase CONFCHK_X
n Import time for the substitution setn Number of parallel processes available to import the substitution setn Archiving strategyn Number of parallel background processes
Process
n Upgrade strategyChoose between the strategies downtime-minimized and resource-minimized described in Upgrade Strategy Planning[page 26].l If you decide to use downtime-minimized, the system now prompts you to enter your runtime for the
total import of the substitution set.For information on which factors you must consider when you choose a runtime, see Runtime forthe Import of the Substitution Set [page 36].
l If you decide to use resource-minimized, you are asked for the number of parallel processes for importing thesubstitution set.We recommend up to three parallel R3load processes.
n Archiving strategyChoose a time when you want database archiving to be switched off. The archiving strategy [page 29] is notlinked to the chosen upgrade strategy. However, if you choose upgrade strategy downtime-minimized, werecommend the MODPROF_TRANS phase; if you choose upgrade strategy resource-minimized, we recommend theEU_IMPORT1 phase or before the first start of the shadow instance in the REQSTOPPROD phase.
n Number of parallel background processesDuring downtime, the SAP system is started with a modified number of background processes so thatoperations can be processed in parallel. To enable this, the profile of the central instance is modifiedtemporarily. The default value is three background processes. Depending on the size of you hardware,however, you can choose more processes.
If you realize in the following phases that you made an incorrect entry, correct it as described in Correcting EntriesMade in the INITPUT and INITSUBST Phases [page 133].
5.9 Phase CONFCHK_X
This target release is released for certain combinations of operating system and database versions only.This phase checks that the operating system and database versions installed on your computer satisfy therequirements for the upgrade.
ProcedureIf the version check determines that the operating systemmust be upgraded to a new version, or that you needto import additional software, you can interrupt SAPup at this point.
.Caution
Do not make any changes in the upgrade directory.
92 PUBLIC October 24, 2005

5 Upgrade Process
5.10 Phase VIEWCHK1
5.10 Phase VIEWCHK1
This phase displays conflicts between customer tables in the SAP namespace and views that are newly delivered.It also writes this information to the VIEWCHK1.LOG file.
ProcedureYou can ignore the messages at this point. You must, however, rename or delete the tables in the VIEWCHK2phase at the latest. First save any data that you need in these tables.
5.11 Phase REPACHK1
This phase displays all repairs and requests containing objects locked by SAP, and writes them to theREPACHK1.LOG file.
ProcedureYou can ignore the messages at this point. These objects must be released and the repairs confirmed at thelatest by the REPACHK2 phase.
5.12 Phase JOB_RSVBCHCK2
If there are any outstanding or incomplete updates, the upgrade stops in this phase with a message.
ProcedureIf errors occur in this phase and you have not stopped production operation yet, you can skip these errors withignore without entering a password. However, we recommend that you check for these updates and clean themup. For more information, see Evaluating the Results of PREPARE [page 75]. The PREPAREmessage is:
Update records still exist - Please process
5.13 Phase FREECHK_X
This phase checks whether there is enough free space in the log subdirectory of the upgrade directory duringthe upgrade. Youmust have enough free space in the log directory so that the upgrade can run without errors.During downtime, the SAP programs are substituted in the kernel directory \usr\sap\<SAPSID>\SYS\exe\run.This phase also compares the free disk space in the kernel directory with the space requirements of the newSAP kernel.
ProcedureAt this point, make sure that you are able to restore the old kernel, if this becomes necessary.
October 24, 2005 PUBLIC 93

5 Upgrade Process
5.14 Phase LOCKEU_PRE
.Caution
All files and subdirectories in directory \usr\sap\<SAPSID>\SYS\exe\run are overwritten during theupgrade when the kernel is switched. For more information, see the PREPARE log CHECKS.LOG.
5.14 Phase LOCKEU_PRE
If you have chosen upgrade strategy downtime-minimized, SAPup asks you in this phase if you want the ABAPWorkbench to be locked on all SAP instances now or in phase REPACHK2.This lock is needed to prevent development objects (for example, ABAP reports, table definitions, and so on)
from being changed during the upgrade, since these modifications would be lost.
ProcedureIf you have chosen strategy downtime-minimized, you can continue to use your SAP system in productionoperation, even if you confirm that the ABAP Workbench can be locked.If you confirm the lock now:
n SAPup does not stop in the REPACHK2 phase to allow you to confirm the lock on the ABAP Workbench. Thisincreases the time in which SAPup does not need user input after the last request for a mount directory.
n You may not perform any more transports into or out of the SAP system.n SAPup waits until the time entered in the INITPUT phase as the maximum synchronization time for all the
instances has expired (see Phase INITPUT [page 90]).
5.15 EU_IMPORT Phases
The total runtime of the import is distributed unevenly over the various import phases. If you have extendedthe runtime for the import of the substitution set [page 36], this also extends the duration of the individual phases.If an error causes the import to terminate in one of the phases, you have the option of speeding up the
import when you restart it.
Phase EU_IMPORT1At the start of this phase, the upgrade control program SAPup stops and waits for user input.If you have chosen the resource-minimized upgrade strategy, you are prompted at the beginning of this phase to
do the following:
n Isolate the central instance [page 153].n Verify that all secondary application servers are shut down.n If necessary, verify that you can recover the database to its current state at this point.n Disable the capability of the database to continually restore data [page 156].
Then confirm that you want to continue with the upgrade.
94 PUBLIC October 24, 2005

5 Upgrade Process
5.16 Phase REPACHK2
5.16 Phase REPACHK2
This phase displays all the repairs and corrections that are not released andwrites them to the REPACHK2.LOG file.
Procedure
n Before you continue with the upgrade, you must release and confirm all the open repairs; otherwisethe objects in them are locked.
Only valid for: SAP Web AS 6.40;SAP Web AS 6.20;SAP Web AS 6.10;SAP Basis 4.6C;SAP Basis 4.6D;SAP R/3 4.6B;SAP R/3 4.5B;SAP
R/3 4.0B
For a description of this procedure, see Releasing and Confirming Open Repairs and Requests [page 157].End of: SAP Web AS 6.40;SAP Web AS 6.20;SAP Web AS 6.10;SAP Basis 4.6C;SAP Basis 4.6D;SAP R/3 4.6B;SAP R/3 4.5B;SAP R/3 4.0B
Only valid for: SAP R/3 3.1I
For a description of this procedure, see Releasing and Confirming Open Repairs and Requests [page 158].End of: SAP R/3 3.1I
.Caution
If you ignore open repairs, you could lose modifications.
Once you have released and confirmed all the open repairs, you must repeat the REPACHK2 phase. Anymodifications made to SAP objects in your repairs might be overwritten during the upgrade.For information on how modifications are copied to the new SAP standard during the upgrade, see thedocumentation DVD for the target release under SAP NetWeaver Library ® SAP NetWeaver by Key Capability ®Application Platform ® ABAP Technology ® ABAP Workbench ® Changing the SAP Standard ® Upgrade Procedure/Support Packages.
n Upgrade strategy downtime-minimized: If you did not confirm the ABAP Workbench lock in theLOCKEU_PRE phase, do this now.
.Note
After you have confirmed the ABAP Workbench lock, no more transports can be made into or out ofthe SAP system.
SAPup waits until the time entered in the INITPUT phase as the maximum synchronization time for allinstances has expired (see Phase INITPUT [page 90]).This phase displays all the repairs that are still in open transport requests. They are also written to theREPACHK2.LOG file. Release these transport requests so that you can continue; otherwise the objectscontained in the repairs will be locked.
5.17 Phase CNV_CHK_XT
This phase checks whether the following still exist:
n Unprocessed conversion requests
October 24, 2005 PUBLIC 95

5 Upgrade Process
5.18 Phase ADJUSTCHK
n Restart logs
ProcedureIf you find errors, proceed as described in Cleaning Up Terminated Conversions in the DB Conversion Phases [page 137].
5.18 Phase ADJUSTCHK
If you chose to copy a request in the ADJUSTPRP phase, the modifications it contains are now compared withthe modifications in the system. The result of this comparison appears.
ProcedureYou are prompted to confirm that the request was copied. If this request contains all the modifications foundin the system, SAPup does not stop before the activation of the ABAP Dictionary objects. However, you can stillspecify that you want SAPup to stop in this phase.
5.19 Phase ACT_<Rel>
Depending on the results of the ADJUSTCHK phase, you may be asked at the beginning of this phase to adjustyour modifications to ABAP Dictionary objects so that they correspond to the new SAP standard version ofthe objects.
.Caution
The objects are adjusted on the shadow instance.
The ACT_<rel> phase can take very long, particularly when you include a lot of Support Packages. Thisis because for all ABAP Dictionary objects that need to be activated, report RADMASDSC calculates thedependent objects and the activation sequence. For example, structures must be activated before they canbe used in tables or table types. These dependencies between a set of ABAP Dictionary objects are oftencomplicated. Therefore, the same kind of dependencies might have to be calculated several times with differentinput sets. During this calculation phase, the mass activator does not write a log. Nevertheless, you can checkin the process overview (transaction SM50) that report RADMASDSC is running.
Procedure
.Caution
Do not attempt to import adjustment transport requests into the system manually in this phase. Thisleads to the loss of data in customer fields.Any requests for automatic adjustment from previous upgrades can be included in this upgrade in the
PREPARE phase ADJUSTPRP only.
You must make adjustments in the ACT_<rel> phase if you have made structural changes to tables. Otherwise,data will be lost.
96 PUBLIC October 24, 2005

5 Upgrade Process
5.19 Phase ACT_<Rel>
1. In SAPup, confirm that you want to perform a modification adjustment.2. Add an entry for the shadow instance to the SAP Logon.
Take the values from the original system for the server and system ID; for the instance number, takethe value you specified in PREPARE for the shadow instance. The default value in PREPARE is the instancenumber of the original system plus one.Since the original system is still running if you use the downtime-minimized strategy, you can also log on to theshadow instance in transaction SM59 with the RFC connection SAP_UPGRADE_SHADOW_SYSTEM.
3. Log on to the shadow instance with the user DDIC and the DDIC password of the original system.Only the users DDIC and SAP* exist in the shadow instance.
4. Call transaction SE06 to set the system change option. Set:n the global setting toModifiable.n the change option for the software components toModifiable or Restricted modifiable.n the SAP namespace toModifiable.
5. Call transaction SU01 to create one or more users to perform the modification adjustment. To do this,copy the DDIC user.
.Note
In some cases, the error message Error occurred in address management appears. You can ignorethis error message.
.Caution
If you directly create new users, this may cause terminations.
The new users exist only on the shadow instance and are not copied to the original system.6. Log on to the shadow instance with one of the new users.
.Caution
Modification adjustment of ABAP Dictionary objects must be performed in client 000.
7. Use transaction SPDD to determine the ABAP Dictionary objects that need to be adjusted.For more information about transaction SPDD, see the online documentation for the target release underHelp ® SAP NetWeaver Library ® SAP NetWeaver by Key Capability ® Application Platform ® ABAP Technology ®ABAP Workbench ® Changing the SAP Standard ® Upgrade Procedure /Support Packages ® Adjusting ABAP DictionaryObjects.For an FAQ on SPDD and more information about the Modification Assistant, see SAP Service Marketplaceat service.sap.com/spau.
If errors appear when you activate your own developments after executing this phase, you can correctthese here, since SAPup stops when errors occur. However, you also have the option of choosing ignore totemporarily ignore these errors. You do not need a password to do this. If you chose ignore here, you mustactivate these objects after the upgrade.
.Caution
Only choose ignore if you are sure that this does not affect SAP objects.
October 24, 2005 PUBLIC 97

5 Upgrade Process
5.20 Phase VIEWCHK2
If you are prompted for a password anyway, this means that the activation has been terminated and you mustnot continue with the next phase. You first have to remove the cause of the termination.
.Caution
While you are upgrading on the shadow system, adjust only objects of the ABAP Dictionary. You canmake changes to the SAP Repository (changing and creating programs or packages, for example), but wedo not recommend this since it may make the system inconsistent.
5.20 Phase VIEWCHK2
This phase displays conflicts between customer tables in the SAP name range and views delivered for the firsttime. It also writes the information to the VIEWCHK2.LOG file.
ProcedureYou must delete these customer tables now, at the latest. You can use SAPup to do this if the tables aretransparent. You must delete pooled or cluster tables manually in the SAP system. First save any data thatyou need in these tables.
5.21 Phase MODPROF_TRANS
The SAPup program stops the SAP system in this phase and modifies the instance profile for the duration ofthe upgrade. SAPup prompts you to perform several actions, depending on your database and the upgradestrategy you have chosen.
Procedure
n If you chose upgrade strategy downtime-minimized, make sure that the following prerequisites are met:l All production work in the SAP system is stopped and no users are logged on to the SAP system.l The central instance is isolated [page 153].l All secondary application servers are shut down.l The capability of the database to continually restore data is disabled.
n If you called transaction ICNV during the upgrade, SAPup checks whether you have already converted therecommended percentage of the selected data (see Incremental Table Conversion [page 32]). SAPup informs you ifyou have not. If you ignore the information from SAPup, the rest of the data is converted in the conventionalmanner during downtime. For details on the status of the incremental conversion, call transaction ICNV.
.Caution
So that you can recover your SAP system after errors, perform the following actions:l Strategy downtime-minimized: Make sure that you can recover the database to its current state.
l Both upgrade strategies: Back up the upgrade directory now, so that you can reset the upgradeto this state at a later point.
98 PUBLIC October 24, 2005
5 Upgrade Process
5.22 Phases JOB_RSVBCHCK_R and JOB_RSVBCHCK_D
ResultOnce you have performed all activities, SAPup automatically shuts down the central instance and modifies theinstance profile in directory \usr\sap\<SAPSID>\SYS\profile for the duration of the upgrade. All changesto the profile are written to the ALPXPOOL.LOG file.
.Note
If you want to use transaction RZ10 to adjust the instance profile during the upgrade, start by reimportingthe current version of the profile into your SAP system.If you do not do this, the changes made by the upgrade are reset, which can cause the upgrade to
stop running.
5.22 Phases JOB_RSVBCHCK_R and JOB_RSVBCHCK_D
If some updates have not been performed yet, the upgrade stops in phase JOB_RSVBCHCK_R (if you use strategyresource-minimized), or in phase JOB_RSVBCHCK_D (if you use strategy downtime-minimized).
ProcedureIn this phase you must clean up all outstanding updates. Proceed as follows:
1. Make sure that the release for all background jobs was canceled, except for RDDIMPDP.For more information, see Isolating the Central Instance [page 153].
2. Clean up the outstanding updates as described in Evaluating the Results of PREPARE [page 75].The PREPAREmessage is:Update records still exist - Please process
3. Repeat this phase.
5.23 Continuation of the Upgrade After the MODPROFP_UPG Phase
Up to the MODPROFP_UPG phase, SAPup does not expect any further user input unless an error occurs. In this andthe following phases, SAPupmakes preparations for restarting production operation and prompts you to takesome actions. You can restart production operation after these actions have been completed.
ProcedureSAPup performs the following actions in the MODPROFP_UPG phase and the STARTR3_PUPG, REQGENLD, andCHK_POSTUP phases. SAPup
n Displays the P errors (see Phase CHK_POSTUP [page 100]).n Stops the system for the last time and recovers the state of the system profiles before the upgrade.n Prompts you to set the database so that it can be recovered.n Prompts you to make a full backup of your database.n Prompts you to start the secondary application servers.n Prompts you to start transaction SGEN to generate ABAP loads [page 119].
You can then resume production operation again or begin the follow-up activities.
October 24, 2005 PUBLIC 99

5 Upgrade Process
5.24 Phase CHK_POSTUP
5.24 Phase CHK_POSTUP
You can solve some of the problems that occur during an upgrade after you have completed the upgrade. Thistype of problem is indicated by a P in the second column of the .ELG logs.
SAPup displays a complete list of these P messages in this phase in the LONGPOST.LOG file. You must usuallyremove the cause of these problems before you start using your SAP applications again.
.Example
Some of the secondary indexes may not have been created because they were not unique. Use the ABAPDictionary tools (transaction SE14) to create these indexes in the database.
ProcedureTo remove an error, proceed as described in the long text of the message.Any messages that you do not handle immediately need to be handled at the next possible opportunity.
.Note
If you receive an error message stating that a table with the naming convention M_<four-charactermatchcode object><one-character ID> does not have an ABAP Dictionary reference, you can delete thistable without informing SAP Support.
100 PUBLIC October 24, 2005

6 Follow-Up Activities
6 Follow-Up Activities
This part of the document contains information on the follow-up activities that you need to perform after youhave upgraded your SAP system.When you perform post-upgrade activities, note the following information (in addition to the information
in Upgrade ‒ Step by Step [page 11]):
n Perform the actions in section Upgrade ‒ Step by Step [page 11] in the specified order.n Before you start the follow-up activities, you must have run the upgrade up to and including the
MODPROFP_UPG phase.n SAPup stops in the MODPROFP_UPG phase and prompts you to start several follow-up activities. SAPup then
executes the last phases and completes the upgrade. At the same time, you can already perform thespecified follow-up activities.
The follow-up activities are divided into three blocks:
n Actions needed before resuming production operationThese actions ensure that all the processes that are relevant to system operation are available again. You canstart these actions while SAPup is finishing the upgrade.
n Actions during limited production operationDuring this time, your SAP system is already consistent and all the processes that are relevant to systemoperation are available. However, this system state does not yet contain measures for optimizingperformance, or actions for resuming standard operation (resuming background processing, or adjustingauthorizations, for example). Check the actions that are listed in this block and perform them before yourestart production operation, if necessary.
n Actions during production operationYou can also perform these actions when the system is back to production operation.
ActionsYou must perform the following actions before you resume production operation of your system:
n Oracle: Performing Specific Actions [page 102]n Follow-Up Activities for Microsoft Cluster Server [page 104]n Performing Follow-Up Activities for the SAP Kernel [page 104]
n
Only valid for: SAP R/3 3.1I
SAP ECC: Renaming the Local System Log [page 106]End of: SAP R/3 3.1I
n Checking the Profile Parameters with Transaction RZ10 [page 107]n Installing Java Components [page 107]n Reimporting Additional Programs [page 108]n Adjusting Repository Objects [page 108]n Performing Follow-Up Activities for Security [page 108]n Performing Follow-Up Activities for the Applications [page 109]
October 24, 2005 PUBLIC 101

6 Follow-Up Activities
6.1 Oracle: Performing Specific Actions
n Performing Follow-Up Activities for the SAP Solution Manager [page 111]n Single Sign-On with the Microsoft NT LAN Manager SSP [page 112]
n
Only valid for: SAP R/3 4.5B;SAP R/3 4.0B;SAP R/3 3.1I
SAP ECC: Adjusting Start and Stop Procedures [page 115]End of: SAP R/3 4.5B;SAP R/3 4.0B;SAP R/3 3.1I
n Activating VMC for the Internet Pricing and Configurator [page 115]
You can perform the following actions during limited production operation of your system:
n Rescheduling Background Jobs [page 116]n SAP ECC: Rescheduling DB13 Jobs [page 116]n SAP ECC: Migrating Matchcodes to Search Help Objects [page 117]n Oracle: Performing Actions for the Cost-Based Optimizer [page 117]n Generating ABAP Loads [page 119]n Generating BSP Applications [page 120]n Performing Actions for the SAP Online Documentation [page 120]n Performing Follow-Up Activities in the Authorizations Area [page 121]n SAP ECC: Processing Table Clusters After the Upgrade [page 123]n Upgrading or Installing Dialog Instances [page 124]
You can perform the following actions during production operation of your system:
n Importing Support Packages After the Upgrade [page 124]n Transport Management System: Distributing the Configuration [page 124]n Performing Follow-Up Activities for the Language Transport [page 125]n Oracle: Deleting Tablespaces [page 125]
n
Only valid for: SAP R/3 4.5B;SAP R/3 4.0B;SAP R/3 3.1I
SAP ECC: Converting Batch Input Logs [page 126]End of: SAP R/3 4.5B;SAP R/3 4.0B;SAP R/3 3.1I
n Saving Files for Follow-Up Upgrades [page 127]n Evaluating the Upgrade Runtime [page 127]
6.1 Oracle: Performing Specific Actions
PrerequisitesYou have not yet resumed production operation of the system.
Creating and Updating the SAPDBA RoleTo increase the security of your system, do not assign the DBA role to the OPS$ database users as of SAP BasisRelease 4.x. You have already performed most of the required manual changes when you migrated Oracle tothe required version (see the guide Upgrade to Oracle Database <Version>: <Platform>).The upgrade imports additional objects that you need to adjust. This means that you must execute the SQL
script sapdba_role.sqlagain.Proceed as follows:
102 PUBLIC October 24, 2005

6 Follow-Up Activities
6.1 Oracle: Performing Specific Actions
1. Log on as user <SAPSID>ADM at the Windows level.2. Start the SQL script with:
cd %ORACLE_HOME%/database
copy <DRIVE>:\usr\sap\<SAPSID>\SYS\exe\run\sapdba_role.sql sapdba_role.sql
sqlplus /nolog @sapdba_role <SAPSCHEMA-ID> NT
Where <SAPSCHEMA-ID> is R3 for SAPR3 and <SID> for SAP<SID>.If the following error message appears, you can ignore it:Error accessing PRODUCT_USER_PROFILE
Warning: Product user profile information not loaded!
You may need to run PUBLD.SQL as SYSTEM.
Checking the Environment Variables for the BR*Tools ProgramTo check whether all the environment variables have been set correctly for BR*Tools at the Windows level,see the online documentation under:
SAP NetWeaver Library ® SAP NetWeaver by Key Capability ® Application Platform ® Platformwide Services ®Databases ® Oracle ® SAP Database Guide: Oracle ® Getting Started with Oracle and the SAP System ® Database SystemConfiguration ® Environment Variables (Windows).
.Note
As of SAP Web AS 6.40, SAP no longer delivers SAPDBA. To help you administer your Oracle database, SAPnow provides you with the BR*Tools. The tools can be used for all SAP Releases running on Oracle 9iand higher.For more information about the BR*Tools, see the SAP Library under SAP NetWeaver Library ® SAP
NetWeaver by Key Capability ® Application Platform ® Platformwide Services ® Databases ® Oracle ® SAP DatabaseGuide: Oracle ® BR*Tools for Oracle DBA.
Only valid for: SAP R/3 4.0B;SAP R/3 3.1I
Adding New Parameters to the init<DBSID>.sap ProfileAs of Basis Release 4.5, new parameters are used for creating backups with the brbackup, brarchive, andbrrestore programs.If you want to use the new functions of these programs, you must use an editor to enter them in the profile<ORACLE_HOME>\database\init<DBSID>.sap.If you make backups to a remote tape device (backup_dev_type = pipe | pipe_auto | pipe_box), replacethe parameter read_fifo_cmd (no longer supported as of Release 4.5A) with the following parameters:
remote_host = <remote host name>
remote_user = <remote user name>
For detailed information, see the online documentation about database administration for Oracle.In particular, you must adjust the compress_cmd parameter in init<DBSID>.sap as follows:
n If you use tape device hardware compression for backups (software compression is only used to determinethe compression rate)compress_cmd = “<DRIVE>:\usr\sap\<SAPSID>\sys\exe\run\mkszip -l 0 -c $ > $”
n If you use software compression for backups (brbackup option brbackup -k yes)
October 24, 2005 PUBLIC 103

6 Follow-Up Activities
6.2 Post-Upgrade Activities for the Microsoft Cluster Server
compress_cmd = “<DRIVE>:\usr\sap\<SAPSID>\sys\exe\run\mkszip -c $ > $”
End of: SAP R/3 4.0B;SAP R/3 3.1I
Backing Up the DatabaseThe procedure for backing up the database depends on the mode with which you operated the databaseduring the upgrade.Backup: Database Was Operated in NOARCHIVELOGModeActivate ARCHIVELOG mode again and create a full backup of the database. This must be executed as
an offline backup.Proceed as follows:
1. Stop your SAP system.2. Use BRSPACE to activate the ARCHIVELOG mode again.
To do this, execute the ARCHIVE_ON.BAT script from the directory \usr\sap\<SAPSID>\sys\exe\run.This stops and starts the database again.
3. Use the brbackup program to start the offline backup of the database.4. When you have made the backup, you can start up your SAP system again
For more information about offline backups and brbackup, see the SAP online documentation on databaseadministration for Oracle.Backup: Database Was Operated in ARCHIVELOGModeSince a large number of archives was created during the upgrade, make a full offline or online backup of the
database as quickly as possible. Otherwise restoring the database may be very time-consuming.
6.2 Post-Upgrade Activities for the Microsoft Cluster Server
Some post-upgrade activities are necessary for an MSCS configuration. For more information, see SAP Note544988.
Procedure
1. Stop the SAP system and the SAP service.2. Perform the steps listed in SAP Note 544988.3. Set the resource SAP-R/3<SAPSID> online in the cluster administrator.
6.3 Performing Follow-Up Activities for the SAP Kernel
Installing the SAP KernelFor production operation, you must replace the kernel that was installed during the upgrade with the currentkernel from SAP Service Marketplace.For more information about how to install the current kernel, see SAP Note 19466.
104 PUBLIC October 24, 2005

6 Follow-Up Activities
6.4 Upgrading the Application Servers
Checking the saposcol VersionMake sure that your saposcol version matches your operating system, especially with respect to the 32-bitand 64-bit distinction.For more information on how to get the latest saposcol, see SAP Note 19227.
6.4 Upgrading the Application Servers
You upgrade the application server in a series of steps. You may need to perform the following steps:
n Upgrade the operating systemUpgrade your operating system to Windows Server 2003 with the latest Service Pack.
n Migrate/Upgrade the database softwareYou can find information on this in your database-specific upgrade guide or migration guide.
n
Only valid for: SAP R/3 4.5B;SAP R/3 4.0B;SAP R/3 3.1I
Source Release 4.6A and lower: Change the instance profile of the application serverSAPup never adjusts instance profiles of the application servers, even if software is stored centrally.Therefore, make the following changes in the instance profile of the application server. Theinstance profile <SAPSID> <SPECIFICATION><INSTANCE NO.>_<HOST NAME> is located in the directory\usr\sap\<SAPSID>\sys\profile.l Profile parameters ipc/shm_psize_40 and ipc/shm_psize_10
The following messages may appear in the developer trace (trace file dev_disp in the directory\usr\sap\<SAPSID>\<INSTANCE NAME><INSTANCE NO.>\work):I Profile configuration error detected, use temporary corrected setupI Shared Pool 40: ipc/shm_psize_40 = 22000000 (too small)
I Shared Pool 40: (smaller than min requirement 39832400)
I Shared Pool 40: (estimated size assumed 44000000)
(The same messages may appear for ipc/shm_psize_10.)You do not have to process these messages, since the SAP system automatically uses correct values.
l Increase the parameter value rsdb/cua/buffersize by 2400.l Profile parameter rdisp/elem_per_queue
You can only set the parameter rdisp/elem_per_queue in the instance profile of an application server ifit is also set in the start profile of this server at the same time.If the parameter is set to the same value for all instances, it can also be set in the default profile (andyou do not need to set it a second time in the start profile). If you do not stick to this restriction, theconfiguration will be inconsistent when you start the SAP service.
End of: SAP R/3 4.5B;SAP R/3 4.0B;SAP R/3 3.1I
n Switch administration to the Microsoft Management ConsoleThe actions in this section are executed automatically when you run SAPup.In this step:l The snap-in for the Microsoft Management Console is configured.l The environment variable dbms_type=<dbtype> is set.l Various Windows Dynamic Link Libraries (DLL) are updated, if they do not match the version required
by SAP. If SAPup has updated DLLs, you must restart your computer and run SAPup again.
October 24, 2005 PUBLIC 105

6 Follow-Up Activities
6.5 SAP ECC: Renaming the Local System Log
ProcedureProceed as follows:
1. Insert the DVD SAP Kernel in the DVD drive.2. On a 32-bit Windows Server execute R3dllins.exe program from theUpgrade MasterDVD. It is located in the
directory UMN_WINDOWS_I386\DBINDEP\NTPATCH for non-unicode and UMU_WINDOWS_I386\DBINDEP\NTPATCH
for unicode systems.3. Switch to a local directory on your hard disk and copy the SAPup.exe program from one of the following
DVD directories to the local directory:n UMN_WINDOWS_I386\DBINDEP for non-unicode 32-bit Windowsn UMN_WINDOWS_IA64\DBINDEP for non-unicode 64-bit Windowsn UMU_WINDOWS_I386\DBINDEP for unicode 32-bit Windowsn UMU_WINDOWS_IA64\DBINDEP for unicode 64-bit WindowsOn unicode systems you will also have to copy the content of the DVD subdirectory UCDLLS to the samelocal directory where you placed SAPup.exe.
4. Start SAPup.exe to upgrade the application server with the following command:SAPup.exe upg_applserver
5. Restart the application server
Only valid for: SAP R/3 3.1I
6.5 SAP ECC: Renaming the Local System Log
The format of the system log was changed for Release 4.0. The SAP kernel cannot correctly interpret entries inthe old format. This means that you must have an empty system log when you start the system with Release4.x for the first time. You can create an empty system log by renaming the old system log. If a log does notexist, a new one is created when you start the system.
R3up already renamed the central and local system logs on the host with the central instance.This is not done automatically on the remote application servers. If you use the SAP system with multiple
application servers then you have to rename the local system log on these remote servers.
PrerequisitesYour source release is 3.1I.
ProcedureRename the SLOG<INSTANCE NO.> in directory \usr\sap\<SAPSID>\<instance name>\log.
106 PUBLIC October 24, 2005

6 Follow-Up Activities
6.6 Checking the Profile Parameters with Transaction RZ10
.Example
SLOG<INSTANCE NO.>.OLD
End of: SAP R/3 3.1I
6.6 Checking the Profile Parameters with Transaction RZ10
After the upgrade, use transaction RZ10 to check the settings in your system profiles. This transaction checksthe profiles of all servers.
Procedure
1. Make sure that all active servers (SAP instances) are started.2. Make sure that you have the authorization S_RZL_ADM in the SAP system.3. Call transaction RZ10.4. Choose Utilities ® Import profiles ® Of active servers.5. Choose Utilities ® Check all profiles ® Of active servers.
If parameters are set incorrectly, a warning appears.6. Check the parameters whose values differ from the default.
You can use transaction RZ10 to display the parameters with their current settings and their default value.a) On the initial screen of the transaction, choose Goto ® Profile values ® Of a server.b) Double-click a server to display its settings.
.Note
Whenever possible, return the parameter values to the default values.
For more information about changing the profile parameters, choose SAP NetWeaver Library ® SAP NetWeaverby Key Capability ® Solution Life Cycle Management ® System Management ® Configuration ® Profiles in the onlinedocumentation for the target release.
6.7 Installing Java Components
Prerequisites
1. You have upgraded the central instance successfully.2. If your SAP system is a non-Unicode system, make sure that the database you are using for the SAP
NetWeaver Application Server Java supports Unicode. For more information, see the Product AvailabilityMatrix (PAM) on SAP Service Marketplace at service.sap.com/PAM.
ProcedureYou can now install Java components as required by sour scenario. For more information, see the documentUpgrade Master Guide ‒ <SAP NetWeaver / SAP solution>.
October 24, 2005 PUBLIC 107

6 Follow-Up Activities
6.8 Reimporting Additional Programs
6.8 Reimporting Additional Programs
During the upgrade, the contents of directory \usr\sap\<SAPSID>\SYS\exe\run are completely deleted beforethe new SAP kernel is imported. If you installed additional programs in this directory, such as the RFC library,the CPIC library, or ArchiveLink, you must install them again from the Presentation DVD.
ProcedureEnter the following commands:
1. cd \usr\sap\<SAPSID>\sys\exe\run
2. <drive>:\SDK\NT\I386\SAPCAR.EXE -xvf
<drive>:\SDK\NT\I386\<additional package>.SAR
Windows Server 2003 for 64 bit:<drive>:\SDK\NT\IA64\SAPCAR.EXE -xvf
<drive>:\SDK\NT\IA64\<additional package>.SAR
6.9 Adjusting Repository Objects
If you have made modifications to programs, screens or interfaces (GUIs), you must adjust them withtransaction SPAU.Until now, customer exits were used to enhance the standard SAP system without modifying it. To exploit
the advantages of the new Business Add-In technology, and to unify enhancement techniques, some of thecustomer exit definitions you use might have been migrated to Business Add-Ins by SAP. You can migrate thecustomer exits you have implemented to Business Add-In implementations at the touch of a button. Theimplementations that need migrating are displayed by the modification adjustment functions.
ProcedureFor more information on the modification adjustment, see the online documentation for the target releaseunder SAP NetWeaver Library ® SAP NetWeaver by Key Capability ® Application Platform ® ABAP Technology ® ABAPWorkbench ® Changing the SAP Standard ® Upgrade Procedure / Support Packages ® Adjustment of Repository Objects.For an FAQ on SPAU and more information about Business Add-Ins, see SAP Service Marketplace at
service.sap.com/spau.
.Note
After you have completed the upgrade you have a maximum of 14 days to execute transaction SPAUwithout the key being checked (SAP Software Change Registration) for the objects that you modified.
6.10 Performing Follow-Up Activities for Security
As of SAP NetWeaver 2004s, there are more settings with which you can increase the security level of yourmessage server. For example, you can decide whether external monitors like msmon can connect to the messageserver or you can separate external and internal communication.
108 PUBLIC October 24, 2005

6 Follow-Up Activities
6.11 Performing Follow-Up Activities for the Applications
.Note
These settings are optional.
ProcedureIf you want to increase the security of you message server, proceed as described in SAP Note 821875.
6.11 Performing Follow-Up Activities for the Applications
Application-Specific ActivitiesSome applications require you to perform some application-specific follow-up activities, without whichthe applications cannot run. These application-specific activities are described in the Release Notes for theparticular application. If you need to display Release Notes in your SAP system, proceed as follows:
n In the IMG structure, choose Additional Information ® Release Notes.n If you want to display the Release Notes independently from the IMG, choose Help ® Release Notes.
When you choose this option for the first time, you are prompted to generate the Release Notes beforeyou can display them.
Adjusting Customizing SettingsCheck whether you have to adjust your Customizing settings.
.Caution
Adjusting the Customizing settings is done in close cooperation with the business consultants and otherupgrade project team members.
To adjust the Customizing settings for changed and new functions in your SAP system, proceed as follows:
1. Call transaction SPRO_ADMIN.2. Select your existing project IMG or create a new Customizing project.3. Create one or more release-specific project views of your project IMG by selecting the activities for delta
Customizing and upgrade Customizing.4. Call transaction SPRO.5. Choose Add to work list and add the project view.6. Make the necessary Customizing settings in your release-specific project views.
For more information on how to create project views and make Customizing settings, see the onlinedocumentation for the transactions.
October 24, 2005 PUBLIC 109

6 Follow-Up Activities
6.11 Performing Follow-Up Activities for the Applications
Only valid for: SAP Basis 4.6C;SAP Basis 4.6D;SAP R/3 4.6B;SAP R/3 4.5B;SAP R/3 4.0B;SAP R/3 3.1I
Converting CodepagesIn SAP Basis Release 6.10, the codepage administration has changed considerably. If you have createdcustomer-specific codepages starting with “9”, and you want to continue using them after the upgrade, convertthe codepages with report RSCP0126. For more information, see SAP Notes 485455, 413396, and 511732.End of: SAP Basis 4.6C;SAP Basis 4.6D;SAP R/3 4.6B;SAP R/3 4.5B;SAP R/3 4.0B;SAP R/3 3.1I
Adjusting Customer DevelopmentsThe programs and applications that you have written, which run without errors on the source release, maycontain syntax or runtime errors after the upgrade. These may be caused by additional developments of theABAP Workbench, changes to the ABAP syntax, or stronger syntax checks when you upgrade from one releaseof SAP Basis, SAP Web AS, or SAP NW AS to the next one.For information about recommendations for adjustments and instructions, see the following SAP Notes:
SAP Note SAP Basis/SAP Web AS/SAP NW AS Release
178482 3.1 to 4.0
178452 4.0 to 4.5
178725 4.5 to 4.6
367676 4.6 to 6.10
452229 6.10 to 6.20
689951 6.20 to 6.40
857904 6.40 to 7.0
Optional: Update of Where-Used List in the ABAP WorkbenchAs of Release 6.10, the where-used list for ABAP Dictionary objects and object types has changed. It now has anindex of its own. If you need a complete display of the where-used list in you SAP system, this index has tobe recreated after the upgrade.To create the index, you need to run report SAPRSEUB in the background.
.Note
As the runtime of the report may be quite long, we recommend that you run it in the developmentsystem only.
For detailed information on this report, see SAP Note 28022.
SAP ECC ExtensionsSAP Enterprise Core Competence Extension functions are activated by setting the activation switches.
.Caution
You cannot deactivate a switch once it has been activated.
110 PUBLIC October 24, 2005

6 Follow-Up Activities
6.12 Performing Follow-Up Activities for the SAP Solution Manager
The activation of the switches highly depends on the later use of the SAP system. Before you activate a switch,you must discuss this with your business consultants and the project team. For more information, see SAPNote 816806.
Only valid for: SAP R/3 4.70 Ext. Set 2.00;SAP R/3 4.70 Ext. Set 1.10;SAP R/3 4.6B;SAP R/3 4.6C;SAP R/3 4.5B;SAP R/3 4.0B;SAP R/3 3.1I
Initialize Fields in Table COKEY2For SAP ERP 2004, table COKEY2 has been extended by two fields. As the upgrade does not initialize thefields, you need to run report Z_873466_REPAIR_AFTER_UPGRADE before you use your SAP system inproduction operation.For more information, see SAP Note 873466.
End of: SAP R/3 4.70 Ext. Set 2.00;SAP R/3 4.70 Ext. Set 1.10;SAP R/3 4.6B;SAP R/3 4.6C;SAP R/3 4.5B;SAP R/3 4.0B;SAP R/3 3.1I
For HR Customers Only: Reloading Table T512W (Wage Types in HR)If you saved table T512W before the upgrade, reload it now. For the exact procedure, see Backing Up WageTypes in HR (T512W) [page 85].
For SAP Retail Customers Only: Converting Short TextsYoumust replace the short texts for some languages. Formore information, see the SAP online documentationunderHelp ® SAP Library ® SAP R/3 Enterprise Application Components ® Logistics ® SAP Retail ® Basic Principles ®Retail Terminology.
Only valid for: SAP R/3 4.70 Ext. Set 1.10;SAP R/3 4.6B;SAP R/3 4.6C;SAP R/3 4.5B;SAP R/3 4.0B;SAP R/3 3.1I
For SAP TR-TM Customers and SAP CFM-TM Customers only: Data MigrationFor SAP R/3 Enterprise 4.70 with SAP R/3 Enterprise Extension Set 2.00, there have been major changes in thedata model. If your source release is lower than this, you must perform a data migration after the upgradeusing transaction TPM_MIGRATION. For more information, see SAP Note 706952.End of: SAP R/3 4.70 Ext. Set 1.10;SAP R/3 4.6B;SAP R/3 4.6C;SAP R/3 4.5B;SAP R/3 4.0B;SAP R/3 3.1I
6.12 Performing Follow-Up Activities for the SAP Solution Manager
1. Connect the newly-upgraded SAP system to the SAP Solution Manager.For more information, see the Configuration Guide: SAP Solution Manager, section “Solution Monitoring:Setting Up the SAP Solution Manager” and “Solution Monitoring: Setting Up the Service Data ControlCenter” on SAP Service Marketplace at service.sap.com/instguides ® SAP Components ® SAP SolutionManager ® Release <x>.
2. Activate the EarlyWatch alert.For more information, see the SAP Solution Manager online documentation at SAP Solution Manager ®Solution Monitoring ® Using SAP EarlyWatch Alert.
October 24, 2005 PUBLIC 111

6 Follow-Up Activities
6.13 Secure Single Sign-On with Microsoft LAN Manager SSP
6.13 Secure Single Sign-On with Microsoft LAN Manager SSP
Single Sign-On (SSO) is a secure method of logging on to the SAP system that simplifies the logon procedurewithout reducing security. When your system is configured for SSO, an authorized user who has logged on tothe operating system can access the SAP system simply by selecting it in the SAP logon window or clickingthe shortcut. No SAP system user name or password is necessary. SSO makes it significantly easier for youto manage SAP system users.In this section, we describe the option that is the easiest to implement when using a full 32-bit Microsoft
Windows landscape (Windows 9x, Windows ME, Windows NT, Windows 2000 and higher). It is a tailoredversion for SSO with Secure Network Communications (SNC), which uses Microsoft’s domain authentication,LAN Manager Security Service Provider (NTLM SSP).For more information on SNC, see the SNC User's Guide in the SAP Service Marketplace at
service.sap.com/security
Prerequisites
n Typically, SNC requires an external security product that adheres to the Generic Security Service API V2(GSS-API V2) interface and that has been certified by the SAP Software Partner Program. However, in thisscenario, we provide a library that adheres to the GSS-API V2 interface on one side and that communicateswith Microsoft’s NTLM SSP on the other. Since NTLM SSP is already built into Microsoft Windows 32-bitplatforms, you do not need to purchase an additional security product to use SSO.
.Note
The Microsoft NTLM SSP only provides authentication based on a challenge-response authenticationscheme. It does not provide data integrity or data confidentiality protection for the authenticatednetwork connection. All third-party SNC certified security products offer data integrity and privacyprotection. If you want to use these security features, you have to obtain a certified security product.If you use Windows 2000 and higher, we offer an alternative library (gsskrb5.dll) that uses theMicrosoft Kerberos SSP instead of the NTLM SSP for authentication.We distribute two different versions of the wrapper library for Microsoft's NTLM SSP. The olderversion is called gssapi32.dll and the newer version is called gssntlm.dll. For more informationabout how to get the gssntlm.dll file, see SAP Note 595341.
n A pure Microsoft Win32 environment is required (Windows 9x, Windows ME, Windows NT, Windows 2000and higher). The Microsoft NTLM SSP is not available for UNIX or any other operating system.
n Bi-directional trust between Windows domains is required if there are separate domains for users, front-endPCs, and SAP application servers.
n The GSS-API V2 library wrapper (gssntlm.dll) must be installed on every application server.n The GSS-API V2 library wrapper must also be installed on every front-end PC.n We recommend that you use the 7-bit ASCII character set for all Windows user IDs.n When the code page of the SAP system is different from the code page on the Windows machines, it is not
possible to enter Windows user IDs that contain 8-bit characters into the USRACL table (for example, bycalling transaction SU01). The combination of Windows ANSI (=ISO Latin 1) and the default SAP code page1100 provides the same encoding of 8-bit characters and permits the use of 8-bit characters with gssntlm.dll.
n For more information on how to improve the security of your system with third-party products, see:
112 PUBLIC October 24, 2005

6 Follow-Up Activities
6.13 Secure Single Sign-On with Microsoft LAN Manager SSP
help.sap.com/nw2004s ® SAP NetWeaver Library ® SAP NetWeaver by Key Capability ® Security ® Network andTransport Layer Security ® Secure Network Communications
Procedure
1. Prepare the application server for Single Sign-on.a) Start the service NT LM Security Support Provider:
A) Choose Start ® Programs ® Administrative Tools ® Services.B) Select the service NT LM Security Support Provider.C) Choose General.D) Change the startup type from manual to automatic.
b) Copy the gssntlm.dll file to the following directory on your global host:<DRIVE>:\USR\SAP\<SAPSID>\SYS\EXE\<codepage>\<platform>
For more information about how to get the gssntlm.dll file see SAP Note 595341.c) Set the environment variable SNC_LIB to the location of the library.d) In the central instance profile, set the following SNC parameters:
snc/data_protection/max =1
snc/data_protection/min =1
snc/data_protection/use =1
snc/enable =1
snc/gssapi_lib =
(<DRIVE>:\USR\SAP\<SAPSID>\SYS\EXE\<codepage>\<platform>\<gssntlm.dll>)
snc/identity/as =p:<DOMAIN_NAME>\SAPService<SAPSID>
SAPService<SAPSID> is the user who runs the SAP system.<DOMAIN_NAME> is the Windows domain of this user.
.Note
If you use a local account for SAPService<SAPSID>, most operations are successful. However, anyoperations or communications where the SAP system initiates SNC-protected communicationto a remote machine, do not work with a local account for SAPService<SAPSID>. Therefore,use a domain account.
Additional SNC ParametersThe following profile parameters let you continue with password-based access to the SAP system whenSNC has been enabled. To log on to the SAP system as an administrator to maintain the mapping ofWindows user accounts to SAP system user IDs (user and client), you have to use these additionalparameters at least once after enabling SNC. Once the mapping (at least for the administrator) has beenentered, you can disable further password-based logons by removing the respective profile parameters.snc/accept_insecure_cpic =1
snc/accept_insecure_gui =1
snc/accept_insecure_rfc =1
snc/permit_insecure_start =1
snc/permit_insecure_comm =1
e) Stop and restart the SAP system to activate the profile parameters. Changes to SNC profile parametersalways require an application server restart to take effect.
October 24, 2005 PUBLIC 113

6 Follow-Up Activities
6.13 Secure Single Sign-On with Microsoft LAN Manager SSP
2. Prepare SAP GUI and SAP Logon for Single Sign-on.a) Copy the gssntlm.dll file to the SAP GUI directory.
For downloading the gssntlm.dll file, see SAP Note 352295.b) Set the Windows environment variable SNC_LIB on the PC where your SAP GUI runs.
The variable specifies the path to the gssntlm.dll file. You can do this using one of the followingmethods:n Copy gssntlm.dll to a location of your choice and set the environment variable SNC_LIB to that
location, for example,<DRIVE>:\<SAPGUI_PATH>\gssntlm.dll
A) Right-clickMy Computer and choose Properties ® Advanced ® Environment Variables.B) In User Variables for <user> enter the following:
Variable: SNC_LIBValue: <DRIVE>:\<SAPGUI_PATH>\gssntlm.dll
C) Confirm your entries with OK.D) To activate the new environment variable setting, log off and log on to your Windows system
again as the same user.n Copy gssntlm.dll to a directory of the default search path, for example, %SystemRoot%\system32
and rename the file to sncgss32.dll This is the default file name that SNC uses when SNC_LIB isneither entered on the command line nor available in the environment.
c) Set the required logon options to activate SSO:A) In the SAP logon window, right-click an entry and choose Properties.B) Select the Network tab and activate Activate Secure Network Communication.C) In the SNC name field, enter:
p:<DOMAIN_NAME>\SAPService<SAPSID>
<DOMAIN_NAME> is the Windows domain that the user SAPService<SAPSID> belongs to.
.Example
If the system HWA is running on account SAPServiceHWA of the DEC_NT domain, you enter:p:DEC_NT\SAPServiceHWA
The SAP Logon window now displays an icon with a small yellow key beside the system entry. Thisindicates that SSO is active.When the SAP administrator has entered the mapping between a user's Windows Account and theuser’s SAP system user ID, the next time this SAP system user logs on to the system, the application isopened without requiring the user to enter a user name and password.If only one possible match exists between the Windows account and the SAP system user ID, the logonscreen is skipped, unless the profile parameter snc/force_login_screen = 1 is present in the instanceprofile of the application server.
3. Map SAP system users to Windows users for Single Sign-On.a) Log on to the SAP system.b) Choose Tools ® Administration ® User Maintenance ® Users or call transaction SU01.
The User Maintenance window appears.c) Enter the name of the SAP system user and choose User names ® Change.d) Choose SNC.
114 PUBLIC October 24, 2005

6 Follow-Up Activities
6.14 SAP ECC: Adjusting Start and Stop Procedures (Source Release Lower than 4.6A)
e) In SNC name, use uppercase to enter the name of the Windows user that is to be assigned to the SAPsystem user:p:<DOMAIN_NAME>\<NT_USERNAME>
<DOMAIN_NAME> is the Windows domain that the Windows user belongs to <NT_USERNAME> is the logonID of the Windows user.p is a prefix that all SNC names require.
.Example
For the Windows user Kissnerj, belonging to the domain SAP_ALL, enter:p:SAP_ALL\Kissnerj
f) Select Insecure communication permitted.This lets the user work in a different domain because it permits the user to access the system withoutSSO.
g) Save your entries.
Only valid for: SAP R/3 4.5B;SAP R/3 4.0B;SAP R/3 3.1I
6.14 SAP ECC: Adjusting Start and Stop Procedures (SourceRelease Lower than 4.6A)
The parameters of the programs stopsap.exe and startsap.exe changed in Release 4.6A.
ProcedureCheck all scripts that use the tools for stopping and starting the SAP System, as well as the transportconfiguration file TPPARAM.The following values are expected as parameters as of Release 4.6A:name=<SAPSID> nr=<instance number> SAPDIAHOST=<HOST>
End of: SAP R/3 4.5B;SAP R/3 4.0B;SAP R/3 3.1I
6.15 Activating VMC for the Internet Pricing and Configurator
If you want to use the Internet Pricing and Configurator 7.0, you have to activate the Virtual MachineContainer (VMC). For information whether you require the IPC for your business processes, see the UpgradeMaster Guide for your solution.
ProcedureActivate the VMC as described in SAP Note 854170.
October 24, 2005 PUBLIC 115

6 Follow-Up Activities
6.16 Rescheduling Background Jobs
6.16 Rescheduling Background Jobs
Use this procedure to release all background jobs that were locked when you isolated the central instance.
Procedure
Only valid for: SAP R/3 4.0B;SAP R/3 3.1I
1. Log on in client 000 as user DDIC.2. Call transaction SM37.3. Find all the relevant jobs.4. To release the jobs, choose Job ® Schedule ® Release.
End of: SAP R/3 4.0B;SAP R/3 3.1I
Only valid for: SAP Web AS 6.40;SAP Web AS 6.20;SAP Web AS 6.10;SAP Basis 4.6C;SAP Basis 4.6D;SAP R/3 4.6B;SAP R/3 4.5B
1. Log on in client 000 as user DDIC.2. Execute report BTCTRNS2.
End of: SAP Web AS 6.40;SAP Web AS 6.20;SAP Web AS 6.10;SAP Basis 4.6C;SAP Basis 4.6D;SAP R/3 4.6B;SAP R/3 4.5B
Errors may occur if a background report was changed by the upgrade, since the report variants will no longerbe correct. If this is the case, you must reschedule the job.
Only valid for: SAP R/3 3.1I
6.17 SAP ECC: Rescheduling DB13 Jobs
At the start of downtime, you deleted all scheduled jobs. You can now reschedule these jobs with transactionDB13 (see also Isolating the Central Instance [page 153]).
Prerequisites
n Your source release is 3.1I.
n You have already checked that all old DB13 jobs were deleted properly.
Procedure
1. Call transaction SM37 in the SAP system.2. Select the following jobs:
Selection Criteria for DB13 Jobs
Selection Item Entry
Job name DBA*
User name *
Start date from No entry
116 PUBLIC October 24, 2005

6 Follow-Up Activities
6.18 SAP ECC: Migrating Matchcodes in Search Help Objects
Selection Item Entry
Start date to No entry
Only jobs with status scheduled, released, ready, active
3. Delete all the jobs displayed.4. Call transaction DB13 and reschedule your jobs.
End of: SAP R/3 3.1I
Only valid for: SAP R/3 3.1I
6.18 SAP ECC: Migrating Matchcodes in Search Help Objects
As of Release 4.0 the ABAP Dictionary objects help views and matchcodes are replaced by the new ABAP Dictionaryobject Search Help. The upgrade migrates most matchcodes to search helps automatically. Only in exceptionalcases do you need to follow up these actions manually. These exceptions are listed in the Release NoteDDIC40_MC_MIGR Migration of Matchcodes to Search Helps.
PrerequisitesYour source release is 3.1I.
ProcessUse the Release NoteMigration of Matchcodes to Search Helps to check if manual post-upgrade activities are necessary.You can find this Release Note offline on the documentation DVD. If you have already installed the currentonline documentation, the Release Note is in the SAP system. Choose Help ® Release Notes ® Complete list fromRel. 4.0® 40A® Basis Components® ABAPWorkbench ® ABAP Dictionary® Activation Program® Conversion Program,DB Utility, MC, SPDD ® Migration of Matchcodes in Search Helps.End of: SAP R/3 3.1I
6.19 Oracle: Performing Actions for the Cost-Based Optimizer
The following text only describes those actions that you need to perform for the Cost-Based Optimizer (CBO)directly after the upgrade. For more information on this topic, see the following documents in the targetrelease online documentation:
n SAP NetWeaver Library ® SAP NetWeaver by Key Capability ® Application Platform ® Platformwide Services ®Databases ® Oracle ® SAP Database Guide: Oracle ® BR*Tools for Oracle DBA ® BRCONNECT ® Update Statisticswith BRCONNECT
October 24, 2005 PUBLIC 117
6 Follow-Up Activities
6.19 Oracle: Performing Actions for the Cost-Based Optimizer
.Note
As of SAP Web AS 6.40, SAP no longer delivers SAPDBA. To help you administer your Oracle database,SAP now provides you with the BR*Tools. The tools can be used for all SAP Releases running onOracle 9i and higher.For more information about the BR*Tools, see the SAP library under SAP NetWeaver Library ® SAPNetWeaver by Key Capability ® Application Platform ® Platformwide Services ® Databases ® Oracle ® SAPDatabase Guide: Oracle ® BR*Tools for Oracle DBA
n SAP NetWeaver Library ® SAP NetWeaver by Key Capability ® Application Platform ® Platformwide Services ®Databases ® Oracle ® CCMS: Oracle ® Update Statistics for Cost-Based Optimizer in CCMS (Oracle)
Only valid for: SAP R/3 3.1I
Switching the Optimizer ModeYou must switch the database optimizer to cost-based optimizer mode after the upgrade. You can makethis switch during production operation.
.Note
When you run the database in rule-based mode you significantly reduce the performance of the system.SAP no longer supports the parameter setting optimizer_mode = rule after the upgrade to SAP Basis 4.xand higher.
Proceed as follows:
1. The cost-based optimizer requires table statistics to be created.
.Note
Use the following command to call the brconnect program:brconnect -c -f stats -t all
If the user system does not have the default password manager, you need to add the followingcommand option in front of the –f option:-u system/<password>
You can do this during production operation. The runtime depends strongly on the size of your databaseand can take several hours. System performance is reduced considerably during this time.Check the success of the action with one of the following options:n In the SAP system, make sure that the return code is either 0 or 1 by choosing Administration ® CCMS ®
DB Administration ® Operations Monitor.n Check the logs in the file system if necessary: <SAPDATA_HOME\sapcheck\*.staIf there are errors, you can analyze the cause by double-clicking the log line and pushbutton Detail Log in themenu above. If you cannot solve the problem yourself, send a problemmessage and the log file to SAP.Correctly created optimizer statistics are essential for the performance of your system.
2. The Optimizer must be set to cost-based mode.Make sure that the following parameters are set in the file %ORACLE_HOME%\database\init<SAPSID>.ora:
118 PUBLIC October 24, 2005

6 Follow-Up Activities
6.20 Generating ABAP Loads
optimizer_mode = choose
db_file_multiblock_read_count = 8
3. Restart the database to activate the parameters.
End of: SAP R/3 3.1I
Only valid for: SAP Basis 4.6C;SAP Basis 4.6D;SAP R/3 4.6B;SAP R/3 4.5B;SAP R/3 4.0B
Updating the StatisticsIf your system had Basis Release 4.x before the upgrade, your database is already running in cost-basedoptimizer mode. After the upgrade you only need to update the statistics.
.Note
Use the following command to call the brconnect program:brconnect -c -f stats -t all
If the user system does not have the default passwordmanager you need to add the following commandoption in front of the –f option:
-u system/<password>
You can do this during production operation. System performance is reduced considerably during this time.End of: SAP Basis 4.6C;SAP Basis 4.6D;SAP R/3 4.6B;SAP R/3 4.5B;SAP R/3 4.0B
Scheduling Periodic Statistics UpdatesMake sure that the statistics are updated at regular intervals. After the database has been in use for one dayafter the upgrade, schedule the next call periodically (every Saturday or Sunday night, for example).
brconnect -u / -c -f stats -t all
You can schedule these actions with transaction DB13. For more information on transaction DB13, see theonline documentation under Help ® Application help.
6.20 Generating ABAP Loads
After an upgrade, the ABAP loads for the SAP system programs do not yet exist. When you call a program,a load is automatically generated, if it does not already exist. This may, however, reduce production systemperformance. To avoid this, you can use transaction SGEN to generate the missing loads.Transaction SGEN offers the following functions:
n Selection of predefined generation tasks. Choose Regenerate after an SAP System upgrade.n Selection of software components to restrict the amount of objects being generated (SAP_ABA, SAP_BASIS
and so on)n Selection of the application servers for parallel generationn Generation in the backgroundn Job Monitor for checking the progress of the generation in the background
October 24, 2005 PUBLIC 119

6 Follow-Up Activities
6.21 Generating BSP Applications
Procedure
.Caution
After the upgrade, do not start the load generation until after you have installed the new SAP kernel.Kernel parameters introduced with the new kernel might invalidate the loads.
If possible, generate the loads directly after the upgrade. Load generation requires a large amount of systemresources.For a detailed description of the features, see the online documentation in transaction SGEN by choosing
Information on the SAP Load Generator, or in the Job Monitor by choosing Job Monitor.For more information on the free space requirements in the load tables, see SAP Note 186066.
6.21 Generating BSP Applications
After an upgrade, the Business Server Page applications (BSP applications) do not yet exist. If you plan toimplement BSP applications in your SAP system, you can generate them with transaction SGEN.Transaction SGEN offers the following functions:
n Selection of predefined generation tasks. Choose Generation of BSP Applications.n Selection of software components to restrict the amount of objects being generated (SAP_ABA, SAP_BASIS
and so on)n Selection of the application servers for parallel generationn Generation in the backgroundn Job Monitor for checking the progress of the generation in the background
ProcedureStart to generate the BSP applications as soon as possible after the upgrade. The generation requires a largeamount of system resources.For a detailed description of the features, see the online documentation in transaction SGEN by choosing
Information on the SAP Load Generator, or in the Job Monitor by choosing Job Monitor.
6.22 Performing Actions for the SAP Online Documentation
You must perform the following actions before you can display the online documentation (SAP Library) inyour SAP system:
n Install the files for the online documentation.
n For help type PlainHtmlHttp: Set up the Web server.n Maintain the settings variants for the Online Help in the IMG.n Install a Web browser/viewer. For the exact procedure, see the documentation Installing the SAP Library.
120 PUBLIC October 24, 2005

6 Follow-Up Activities
6.23 Performing Follow-Up Activities in the Authorizations Area
6.23 Performing Follow-Up Activities in the Authorizations Area
Adjusting the Assignments Between Check Flags and TransactionsYou can use transaction SU24 to do the following:
n Deactivate checks within a transaction.
n Define proposals for the profile generator for activated checks.
Both the check flags and the default values are based on SAP default values. To change these, call transactionSU24.To copy the latest SAP default values while retaining your own modifications, call transaction SU25 (steps 2
and 3):
n This transaction displays the differences between your own check flags or authorization default values andthe new SAP default values for all the changes by SAP.
n It also defines all the roles which will have to be generated later on with the profile generator, so thatauthorizations can be generated for all the current checks.
For more information, see the online documentation for transaction SU25.
Upward Compatibility for Authorization Checks
Only valid for: SAP R/3 4.5B;SAP R/3 4.0B;SAP R/3 3.1I
Some functions are protected in more detail by new authorization objects in the new release. Theauthorizations for these new objects are in the single profiles SAP_NEW_<rel> , where <rel> is the releasefor which the new authorization check was delivered. The composite profile SAP_NEW contains all singleprofiles SAP_NEW_<rel>End of: SAP R/3 4.5B;SAP R/3 4.0B;SAP R/3 3.1I
Only valid for: SAP Web AS 6.40;SAP Web AS 6.20;SAP Web AS 6.10;SAP Basis 4.6C;SAP Basis 4.6D
Some functions are protected in more detail by new authorization objects in the new release. Theauthorizations for these new objects are in the single profiles S_NEW_<rel><number> , where <rel> is therelease for which the new authorization check was delivered. The composite profile SAP_NEW contains allsingle profiles S_NEW_<rel><number>.End of: SAP Web AS 6.40;SAP Web AS 6.20;SAP Web AS 6.10;SAP Basis 4.6C;SAP Basis 4.6D
.Caution
Only valid for: SAP R/3 4.5B;SAP R/3 4.0B;SAP R/3 3.1I
The SAP_NEW composite profile contains all the individual SAP_NEW_<rel> profiles. This means thatthe composite role also contains the overall authorization for the S_TCODE check.End of: SAP R/3 4.5B;SAP R/3 4.0B;SAP R/3 3.1I
Only valid for: SAP Web AS 6.40;SAP Web AS 6.20;SAP Web AS 6.10;SAP Basis 4.6C;SAP Basis 4.6D
The SAP_NEW composite profile contains all the individual S_NEW_<rel><number> profiles. Thismeans that the composite role also contains the overall authorization for the S_TCODE check.End of: SAP Web AS 6.40;SAP Web AS 6.20;SAP Web AS 6.10;SAP Basis 4.6C;SAP Basis 4.6D
October 24, 2005 PUBLIC 121

6 Follow-Up Activities
6.23 Performing Follow-Up Activities in the Authorizations Area
Every user should have the profile SAP_NEW in his or her master record. This guarantees that after an upgradeusers can still perform the same functions that they were able to perform previously without an authorizationcheck. Before this, delete all the individual profiles from SAP_NEW that refer to releases that are lower thanthe source release for the upgrade.After the upgrade the user administrator must go through the profile SAP_NEW and decide for each
authorization object, into which customer profile the authorizations need to be copied. This defines whichusers can continue to perform the corresponding functions.
Only valid for: SAP R/3 4.5B;SAP R/3 4.0B;SAP R/3 3.1I
Empty and activate the SAP_NEW profile after completing these actions. To do this, remove the singleprofile SAP_NEW_<rel> from the composite profile SAP_NEW. Keep the single profiles SAP_NEW_<rel>, sothat you can find out later which authorization appeared in which release.End of: SAP R/3 4.5B;SAP R/3 4.0B;SAP R/3 3.1I
Only valid for: SAP Web AS 6.40;SAP Web AS 6.20;SAP Web AS 6.10;SAP Basis 4.6C;SAP Basis 4.6D
Empty and activate the SAP_NEW profile after completing these actions. To do this, remove thesingle profile S_NEW_<rel><number> from the composite profile SAP_NEW. Keep the single profilesS_NEW_<rel><number>, so that you can find out later which authorization appeared in which release.End of: SAP Web AS 6.40;SAP Web AS 6.20;SAP Web AS 6.10;SAP Basis 4.6C;SAP Basis 4.6D
.Caution
The SAP_NEW profile does not contain the authorizations for functions delivered in the upgrade. It onlycontains the authorizations for new checks in functions that have already been delivered.
Handling Problems with User BuffersIf the user master records were already very large before the upgrade, the predefined buffer size might notbe large enough for the newly delivered profiles. If you encounter authorization problems after the upgradewhere authorizations are missing for users although they are included in themaster record, see SAP Note 10187.
Add Additional UsersIf you are planning to use your SAP system together with a newly installed SAP NetWeaver Application ServerJava 2004s or higher, you need to set up the following additional users to avoid communications errors betweenthe systems:
n ADS_AGENTn ADSUSER
.Caution
Do not maintain roles for these users.
122 PUBLIC October 24, 2005

6 Follow-Up Activities
6.24 SAP ECC: Processing Table Clusters After the Upgrade
Only valid for: SAP R/3 3.1I
6.24 SAP ECC: Processing Table Clusters After the Upgrade
The table clusters EDIDOC and CDCLS are converted after the upgrade from Basis Release 3.1I to Basis Release4.x and higher. Since there is often a large amount of data to handle, you can use transaction ICNV to convertthe table clusters during production operation of the system. This considerably reduces the downtime duringthe upgrade.
.Note
The time when you process the table clusters is not critical, but it must be done before you begin thenext upgrade. If you have not, PREPARE warns you about any outstanding conversions. You will notbe able to start the upgrade.
PrerequisitesYour Basis source release is 3.1I.
Procedure
1. Call transaction ICNV.Read the online documentation. For more information on the individual fields, choose F1 .Directly after the upgrade, the tables EDIDOC and CDCLS must have the status Conversion. If they donot, create a problem message under the component BC-UPG-TLS.
2. To start the data transfer, choose Control ® Data transfer ® Start.3. Monitor the progress of the action. After a while, the estimated time for the remaining data transfer
appears automatically.4. When at least 95% of the data has been converted, switch to the new tables.
To do this, choose Control ® Switch ( (STRG+F2) ). You now have the option of selecting tables and startingthe process in the background. Any data that has not yet been transferred is included in the process.
5. End the conversion.As soon as the tables have the status Done, you can delete them from the list. To do this, choose Control ®Delete entry ( (STRG+F3) ). You can then select the tables you want to delete and remove them from the list.
October 24, 2005 PUBLIC 123

6 Follow-Up Activities
6.25 Upgrading or Installing Dialog Instances
.Caution
You must complete step 5 before you start the next upgrade.
End of: SAP R/3 3.1I
6.25 Upgrading or Installing Dialog Instances
After the upgrade of the central instance, you need to upgrade the dialog instance to the new release. To dothis, you install the new dialog instance on top of the old dialog instance using the tool SAPinst.You can now also install additional dialog instances, if necessary.
ProcedureProceed as described in the document Installation Guide ‒ <SAP NetWeaver / SAP solution> <Technology> on <OperatingSystem>: <Database>.
6.26 Importing Support Packages After the Upgrade
To avoid problems with your SAP software, we recommend importing new Support Packages into your systemas soon as they become available. This also applies after the upgrade, in order to avoid potential problems inyour system before they occur.If you have not included all the necessary Support Packages during the upgrade, you can also import
them after the upgrade.
ProcedureImport the newest Support Packages. Always start with the newest SPAM update.
.Note
If you want to install additional languages in your SAP system, perform the language import before youimport the Support Packages. The Support Packages always contain the current language version fortext-relevant objects. For information on importing a language, see the online documentation underHelp ® SAP NetWeaver Library ® SAP NetWeaver by Key Capability ® Solution Life Cycle Management ® SoftwareChange Management ® Change and Transport System ® Language Transport.
6.27 Transport Management System: Distributing the Configuration
After an upgrade, you must distribute the information about the new release to all systems in the transportdomain.
ProcedureIf your Transport Management System has already been set up, proceed as follows:
1. Log on to the system that is configured as the domain controller.
124 PUBLIC October 24, 2005

6 Follow-Up Activities
6.28 Performing Follow-Up Activities for the Language Transport
2. Call transaction STMS and choose Overview ® Systems.3. Select the system that has been upgraded and choose SAP System ® Update Configuration.4. Choose Extras ® Distribute TMS Configuration.
6.28 Performing Follow-Up Activities for the Language Transport
To reduce downtime during the upgrade, some data from the Languages DVD was only imported into containertables, and not yet imported into the actual database tables of the system. This data includes glossary andterminology data. If you want to use a glossary or terminology in your system, use the following procedure tocopy the data from the container tables to the database tables.
Prerequisites
n You have imported a language during the upgrade.n You are using a glossary or terminology in your system.
ProcedureCall transaction SMLT.The transaction automatically recognizes that follow-up activities are necessary, and schedules a background
job for this purpose.
.Caution
For languages that have been supplemented before the upgrade, you have to repeat the supplementationafter the upgrade with transaction SMLT.
6.29 Oracle: Deleting Tablespaces
After the upgrade, several tablespaces are empty and are no longer used. You can delete these tablespaces.This applies to the following tablespaces in a System Switch Upgrade (<source release> is the source releasefor the current upgrade:For a non-MCOD system:
n PSAPES<source release>D
n PSAPES<source release>I
n PSAPEL<source release>D
n PSAPEL<source release>I
For a system with MCOD layout:PSAP<SAPSID><source release>
October 24, 2005 PUBLIC 125

6 Follow-Up Activities
6.30 SAP ECC: Converting Batch Input Logs
.Note
If the source release is the same as the target release, SAPup cannot use the normal naming conventions.To distinguish the old tablespace from the new tablespace, SAPup adds an X to the name of the newtablespace: PSAPES<source/target release>DX. In this case, you can delete the old tablespacePSAPES<source/target release>D.
To delete tablespaces, use the program BRSPACE. This program checks whether the following prerequisitesare met:
n The tablespace is empty.n The space has actually been released.
You may be asked whether you want to wait until Oracle releases the files.
.Note
Make sure that no other application has access to the files.
Procedure
1. Start the program BRSPACE at the operating system level as user <SAPSID>ADM with the following command:brspace –f tsdrop
2. Choose Drop tablespace.3. Select the tablespace you want to delete.4. Choose Continue to drop the tablespace.
If the tablespace is empty, BRSPACE executes the drop command on the database and deletes the data filesat the operating system level.
Only valid for: SAP R/3 4.5B;SAP R/3 4.0B;SAP R/3 3.1I
6.30 SAP ECC: Converting Batch Input Logs
As of Release 4.6C, the system only supports the new batch input log procedure. All old batch input logs mustbe converted with program RSBDCLCH in all clients, otherwise the system cannot read them. The old log filesare deleted after they have been converted successfully.
PrerequisitesYou have not yet converted your logs from a Basis release lower than 4.6C.
126 PUBLIC October 24, 2005

6 Follow-Up Activities
6.31 Saving Files for Follow-Up Upgrades
ProcedureFor the procedure and additional information, see SAP Note 175596.End of: SAP R/3 4.5B;SAP R/3 4.0B;SAP R/3 3.1I
6.31 Saving Files for Follow-Up Upgrades
In phase SAVEPRO, several upgrade files are saved in the save subdirectory of the upgrade directory. If youperform a follow-up upgrade with the same environment and the same upgrade strategy, you can reusethese files.
PrerequisitesYou are planning a follow-up upgrade with the same environment and the same upgrade strategy.
Procedure
1. After the upgrade, make a backup of the save subdirectory of the current upgrade directory.2. When you start with the new upgrade, copy the save subdirectory to the new upgrade directory.
.Note
You can copy the subdirectory as soon as you have created the new upgrade directory.
The following files are saved in the directory and can be used in a follow-up upgrade:n Shadow system profile
In PREPARE phase SHDINST_CPY, you can reuse the shadow system profiles.n Results from phase BIND_PATCH (file patbind.lst)
If suitable, you can use the Support Package selection as default selection.
6.32 Evaluating the Upgrade Runtime
Our aim is to provide you with a fast and efficient upgrade procedure. In phase EXIT, SAPup extracts statisticaldata and evaluates the upgrade, for example, calculates the runtimes of the individual phases. Evaluating thisinformation helps us to improve both the current upgrade procedure and new upgrades. We would alsoappreciate feedback on your experience with the SAP system upgrade. Therefore, we have designed the SAPSystem Upgrade Evaluation. It contains the following:
n Upgrade Evaluation FormThis form consists of a simple questionnaire on your experiences with the upgrade and an upgrade logfile generated by SAPup.
.Note
Your feedback from the Upgrade Evaluation Form is mainly used to identify areas in need of improvement.If you have specific questions on the upgrade and need an answer soon, open a customer messageon SAP Service Marketplace.
October 24, 2005 PUBLIC 127

6 Follow-Up Activities
6.32 Evaluating the Upgrade Runtime
n Upgrade InformationUsing the corresponding link in the text, you can open the file upana.htm. It is designed to help youevaluate your upgrade and to better plan follow-up upgrades. It contains detailed information on thesystem, the overall upgrade and the individual phases. You can add your own comments to this file.
If you are using the Upgrade Assistant, the SAP System Upgrade Evaluation is displayed automatically in a browserwindow.
Prerequisites
n A browser has been installed on the machine from which you are monitoring the upgrade.n The machine has an e-mail connection.
n The upgrade has finished.
ProcedureTo send the Upgrade Evaluation Form to SAP, proceed as follows:
1. Wait until phase EXIT has finished.n If the Upgrade Assistant is running, a browser window appears displaying the SAP System Upgrade Evaluation.n If the Upgrade Assistant is not running, you are prompted to enter the following address:
http://<host name>:4239/htdoc/eval/index.htm
n If you are using scroll mode, open file index.htm in the following folder:<upgrade directory>\htdoc\eval
2. Answer the questions under Upgrade Evaluation Form.
.Note
Answering the questions is optional.
3. Choose Send to SAP.This submits the Upgrade Evaluation Form to SAP.
.Note
After the upgrade has finished, you can return to the SAP System Upgrade Evaluation either bydirectly opening file index.htm in subdirectory \htdoc\eval of the upgrade directory or by enteringthe following path:http://<host name>:4239 ® Upgrade Evaluation
128 PUBLIC October 24, 2005

A Appendix
A Appendix
A.1 Troubleshooting
This part of the document contains additional information on how to proceed when you want to correctknown problems that have occurred during the upgrade.
n Logsl Upgrade Logs [page 129]l Evaluating the ELG Log Files [page 131]
n Correcting Errors After Phasesl Correcting Errors in the RFCCHK Phase [page 133]l Correcting Entries Made in the INITPUT and INITSUBST Phases [page 133]l Correcting Errors in the DBCHK Phase [page 134]l Correcting Errors in the BATCHCHK Phase [page 135]l Correcting Errors in the INTCHK and INTCHK_SW Phases [page 136]l Correcting Errors in the SPACECHK_ALL Phase [page 136]l Correcting Errors in the JOB Phases [page 136]l Cleaning Up Terminated Conversions in the DB Conversion Phases [page 137]l Correcting Errors in the TRBATCHK_XT Phase [page 139]l Correcting Errors in the ACT_<Rel> Phase [page 140]l Correcting Conversion Errors in the PARCONV Phase [page 141]l Correcting Errors in the XPRAS Phase [page 141]
n General Problemsl Preparing the Restart of the Upgrade After a System Failure [page 143]l Resetting the Upgrade [page 143]l Correcting Problems when Processing ABAP Steps [page 146]l Correcting Problems when Starting the SAP System [page 147]l Correcting Problems when Copying SAP Programs [page 148]l Providing SAP Support with Information [page 148]
As well as the problems listed here, also read the SAP Notes that are relevant to this upgrade.
A.1.1 Upgrade Logs
SAPup logs all actions in log files. You can use these log files to monitor your upgrade. If you encounter anyerrors, you can analyze them to help you find a solution.
FeaturesSAPup records all actions in log file SAPup.log in the log subdirectory of the upgrade directory.Temporary logs are located in the directory \usr\sap\put\tmp.
October 24, 2005 PUBLIC 129
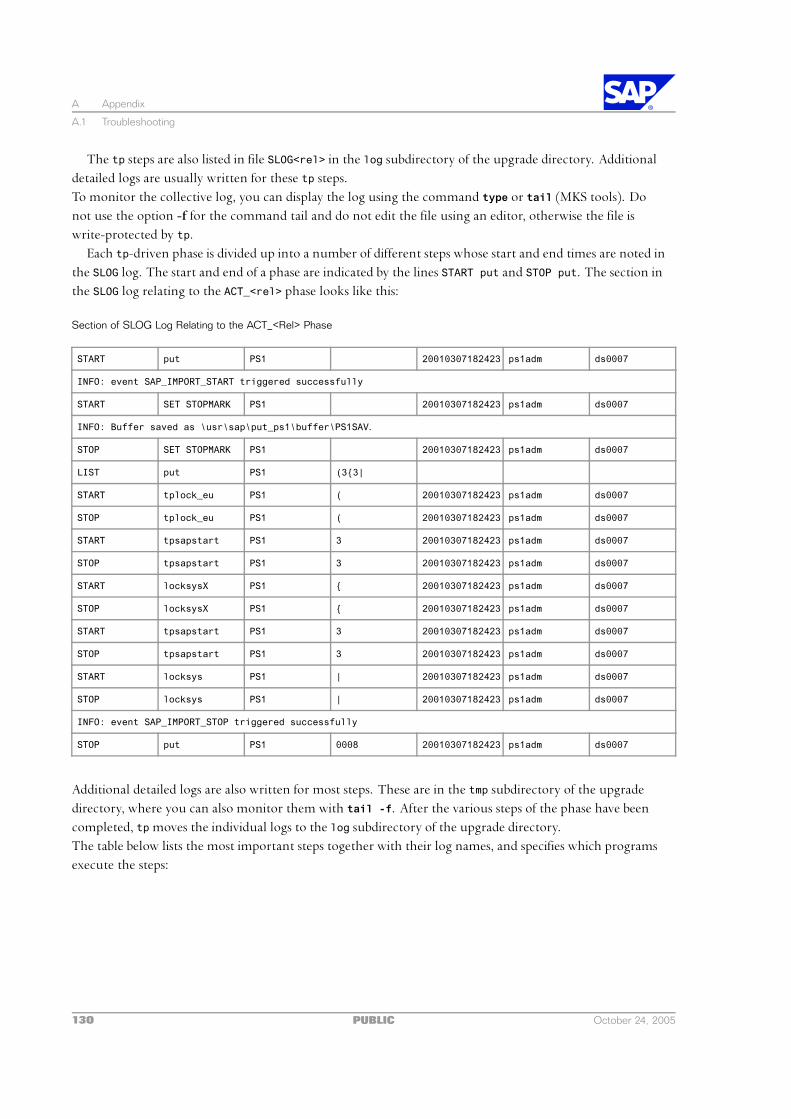
A Appendix
A.1 Troubleshooting
The tp steps are also listed in file SLOG<rel> in the log subdirectory of the upgrade directory. Additionaldetailed logs are usually written for these tp steps.To monitor the collective log, you can display the log using the command type or tail (MKS tools). Donot use the option -f for the command tail and do not edit the file using an editor, otherwise the file iswrite-protected by tp.Each tp-driven phase is divided up into a number of different steps whose start and end times are noted in
the SLOG log. The start and end of a phase are indicated by the lines START put and STOP put. The section inthe SLOG log relating to the ACT_<rel> phase looks like this:
Section of SLOG Log Relating to the ACT_<Rel> Phase
START put PS1 20010307182423 ps1adm ds0007
INFO: event SAP_IMPORT_START triggered successfully
START SET STOPMARK PS1 20010307182423 ps1adm ds0007
INFO: Buffer saved as \usr\sap\put_ps1\buffer\PS1SAV.
STOP SET STOPMARK PS1 20010307182423 ps1adm ds0007
LIST put PS1 (3{3|
START tplock_eu PS1 ( 20010307182423 ps1adm ds0007
STOP tplock_eu PS1 ( 20010307182423 ps1adm ds0007
START tpsapstart PS1 3 20010307182423 ps1adm ds0007
STOP tpsapstart PS1 3 20010307182423 ps1adm ds0007
START locksysX PS1 { 20010307182423 ps1adm ds0007
STOP locksysX PS1 { 20010307182423 ps1adm ds0007
START tpsapstart PS1 3 20010307182423 ps1adm ds0007
STOP tpsapstart PS1 3 20010307182423 ps1adm ds0007
START locksys PS1 | 20010307182423 ps1adm ds0007
STOP locksys PS1 | 20010307182423 ps1adm ds0007
INFO: event SAP_IMPORT_STOP triggered successfully
STOP put PS1 0008 20010307182423 ps1adm ds0007
Additional detailed logs are also written for most steps. These are in the tmp subdirectory of the upgradedirectory, where you can also monitor them with tail -f. After the various steps of the phase have beencompleted, tpmoves the individual logs to the log subdirectory of the upgrade directory.The table below lists the most important steps together with their log names, and specifies which programsexecute the steps:
130 PUBLIC October 24, 2005

A Appendix
A.1 Troubleshooting
Log Files of Most Important Upgrade Steps
Step Log Name Program Executing the Step
SHADOW_IMPORT SAPK??????.<SAPSID> R3trans
DD IMPORT (H) SAPH??????.<SAPSID> R3trans
DD ACTIVATION (A) SAPA??????.<SAPSID> ABAP program (RDDMASGL)
DISTRIBUTION OF DD OBJECTS (S) DS<DATE>.<SAPSID> ABAP program (RDDDIS0L)
TBATG CONVERSION OF DDOBJECTS (N)
N<DATE>.<SAPSID> ABAP program (RDDGEN0L)
tpmvntabs P<DATE>.<SAPSID>
PA<DATE>.<SAPSID>
PD<DATE>.<SAPSID>
PL<DATE>.<SAPSID>
tp
MAIN IMPORT (I) SAPI??????.<SAPSID> R3trans
tpmvkernel (C) C<DATE>.<SAPSID> tp
TBATG CONVERSION OF MCOBJECTS (N)
N<DATE>.<SAPSID> ABAP program (RDDGEN0L)
IMPORT OF SELFDEFINED OBJECTS(D)
SAPD??????.<SAPSID> ABAP program (RDDDIC1L)
VERSION UPDATE (V) SAPV??????.<SAPSID> ABAP program (RDDVERSL)
EXECUTION OF REPORTS AFTERPUT (R)
SAPR??????.<SAPSID> ABAP program (RDDEXECL)
Once the logs are located in the log subdirectory of the upgrade directory, you can also display them in theSAP system. You can do this by executing program RDDPROTT with transaction SE38. RDDPROTT displaysall the logs for a specific transport request. In the Transport Request field, enter the name of the transport request(for example, SAPK<rel>D01) and then choose Execute.A brief overview of all the logs existing for this transport request appears. Double-click a line to display a log
for this step. The logs are broken down into several levels. Level 1 only displays the return code for the step.Check at least level 2 to display any error messages. Double-click an error to see its long text.After completing each tp-driven phase, SAPup creates a summary of all individual logs in this phase. The
names of the summaries usually comprise the phase name (without underscores) and the extension .ELG (forexample, DDIC<rel>.ELG). The summary contains the names of the individual logs, any errors that occurredand the return codes. If no errors have occurred, you need to check these summaries only.
A.1.2 Evaluating the ELG Log Files
The <PHASE>.ELG log files are summary log files that contain a list of all the errors that occurred during aspecific phase of the upgrade. From these files, you can call up detailed log files that contain more information.When errors are detected during a phase, SAPup displays an appropriate message and prompts you to repeatthat phase. First check the <PHASE>.ELG log to find out why the step terminated:
October 24, 2005 PUBLIC 131

A Appendix
A.1 Troubleshooting
n No errors have occurred if a return code less than 8 appears in the log at the end of a step, and no errormessages appear for that step.
n Errors have occurred if the return code is 8 and error messages appear before it, or if the return codeis greater than 8.
Procedure
1. Analyze the errors, using the detailed log file if necessary. The name of this log is listed in the header ofeach phase step.If a return code is greater than or equal to 12, then tp or a program called by tp has terminated.
2. Determine when the program terminated from the last two lines of the SLOG log. If tp or R3trans haveterminated, analyze the last log that was written. For a chronological list of the files in both log directories,enter the following commands:DIR /OD \usr\sap\put\log
DIR /OD \usr\sap\put\tmp
3. If a background step in the SAP system terminates, you must analyze the job log in the SAP system todetermine the cause of the error.a) Log on as user DDIC and call transaction SM37. Enter the job name as the name of the report that usually
processes the terminated step (RDDMASGL for DD ACTIVATION, for example).Make sure that the date on the SM37 input screen is correct and that an asterisk (*) appears in the orafter event field. The job overview normally displays one canceled job and one background job thatcompleted normally.
b) Double-click the canceled job to display the job log.c) Double-click the error line to display the long text for the error.
.Note
If you use a user ID other than DDIC to log on to the SAP system and correct the error, the SAPsystem may prevent you from logging on.In this case, proceed as follows:A) Enter the following commands to unlock the SAP system (here <transport_profile> is the
transport profile of the transport domain to which the system is connected):cd \<upgrade directoy>\bin
tp.exe unlocksys <SAPSID> pf=<transport profile>
tp.exe unlock_eu <SAPSID> pf=<transport profile>
B) Log on to the SAP system and correct the error.C) Enter the following commands to lock the SAP system again:
cd \<upgrade directory>\bin
tp.exe unlocksys <SAPSID> pf=<transport profile>
tp.exe unlock_eu <SAPSID> pf=<transport profile>
4. Once you have found and corrected the error, repeat the phase by selecting repeat in SAPup. The repeatedphase is usually completed quickly, since the transport control program tp automatically starts from thepoint at which it terminated.
132 PUBLIC October 24, 2005

A Appendix
A.1 Troubleshooting
ResultIn some cases, you can choose ignore in SAPup to continue with the upgrade and avoid repeating the failed phase.Generally, you must always remove the cause of the error. When you choose ignore, SAPup prompts you to entera password if the errors are serious. In this case, you must get approval to ignore the error from SAP Support.
.Caution
A return code of 8 indicates that some individual objects have not been processed or not been processedcompletely.
Remove all errors to avoid the risk of follow-on errors. If you are not sure how to proceed, contact SAP Support.
A.1.3 Correcting Errors in the RFCCHK Phase
This phase tests the RFC connection to your SAP system.
PrerequisitesAn error message appears. This can be caused by the following:
n Your SAP system has not been started.n Your SAP system cannot be reached with the gateway and password you have specified.
Procedure
1. Check whether your system is started and that you have specified the correct gateway.2. If you need to correct the gateway information, proceed as described in Correcting Entries Made in the INITPUT
and INITSUBST Phases [page 133].
A.1.4 Correcting Entries Made in the INITPUT and INITSUBST Phases
If in later phases you find that entries you made in the INITPUT and INITSUBST phases were incorrect, youcan correct them.Frequently, the password of user DDIC is changed during the upgrade. For this reason, background jobs
could not be started in the JOB<name> phases or the RUN_<name> phases. So that you do not have to reconfirmall the entries you made in the INITPUT phase, you have the option of only changing the password of user DDIC.
If you are using the Upgrade Assistant
1. In the main menu of the Upgrade Assistant, choose Administrator ® Start SAPup with option.2. If you need to correct entries made in phase INITPUT, enter the following command:
set stdpar
Usually, it is not necessary to change the password of the user DDIC during the upgrade. After theinstallation of the shadow system, the password of user DDIC in client 000 is the same as on the originalsystem. If you change the password on the original instance afterwards, you also have to change thepassword on the shadow instance and in the SAPup parameter.
October 24, 2005 PUBLIC 133

A Appendix
A.1 Troubleshooting
To make the new password of user DDIC known to SAPup, enter the following command:set DDICpwd (original system)set shdDDICpwd (shadow system)
3. If you need to correct entries made in phase INITSUBST, enter the following command:set rswpar
4. Choose exit to exit SAPup and then restart the upgrade [page 89], otherwise the changes will not take effect.To do this, use start mode init.
If you are using scroll mode
1. If you need to correct entries made in phase INITPUT, enter the following command:SAPup set stdpar
Usually, it is not necessary to change the password of user DDIC during the upgrade. After the installationof the shadow system, the password of user DDIC in client 000 is the same as on the original system. Ifyou change the password on the original instance afterwards, you also have to change the password onthe shadow instance and in the SAPup parameter.To make the new password of user DDIC known to SAPup, enter the following command:SAPup set DDICpwd (original system)SAPup set shdDDICpwd (shadow system)
2. If you need to correct entries made in phase INITSUBST, enter the following command:SAPup set rswpar
3. Restart SAPup, otherwise the changes will not take effect. To start the current phase, use start mode init.
A.1.5 Correcting Errors in the DBCHK Phase
This phase determines the database version and the release of the SAP system. To do this, SAPup runs thetransport control program tp, which logs on to the database and reads the necessary information from there.Any problems in this phase are usually due to a failed database connection.
PrerequisitesThe system has displayed the error message No information received from the database.
Only valid for: SAP R/3 4.5B;SAP R/3 4.0B;SAP R/3 3.1I
Procedure
1. Check the SLOG<rel> file in the log subdirectory of the upgrade directory. Any problems with tp areusually due to a non-initialized Workbench Organizer.
2. If the Workbench Organizer has not been initialized, call transaction SE06 in the SAP system as user DDIC.3. In the initial screen of transaction SE06, select New installation as the system status and then the correct
System configuration.4. Choose Set up.5. Choose Yes or Continue in the dialog boxes that follow until all the system settings have been made. Exit
the transaction.
134 PUBLIC October 24, 2005
A Appendix
A.1 Troubleshooting
Information on transaction SE06 is in the online documentation. To display the documentation, chooseHelp ® Application helpin transaction SE06. This takes you to the documentation Setting up the WorkbenchOrganizer and the Transport System. Choose Configuring the Workbench Organizer with Transaction SE06 .
End of: SAP R/3 4.5B;SAP R/3 4.0B;SAP R/3 3.1I
Only valid for: SAP Web AS 6.40;SAP Web AS 6.20;SAP Web AS 6.10;SAP Basis 4.6C;SAP Basis 4.6D;SAP R/3 4.6B
Procedure
1. Check the SLOG<rel> file in the log subdirectory of the upgrade directory. Any problems with tp areusually due to a non-initialized Transport Organizer.
2. To initialize the Change and Transport System, call transaction STMS from the Transport ManagementSystem (TMS).For more information, see the TMS online documentation. To display the documentation, chooseInformation in transaction STMS, or the following:
Only valid for: SAP Basis 4.6C;SAP Basis 4.6D;SAP R/3 4.6B
Help ® SAP Library ® Basis Components ® Change and Transport System ® Transport Management SystemEnd of: SAP Basis 4.6C;SAP Basis 4.6D;SAP R/3 4.6B
Only valid for: SAP Web AS 6.20;SAP Web AS 6.10
Help ® SAP Library ® mySAP Technology Components ® SAPWeb Application Server ® Change and Transport System ®Transport Management SystemEnd of: SAP Web AS 6.20;SAP Web AS 6.10
Only valid for: SAP Web AS 6.40
Help ® SAP Library ® SAP NetWeaver Library ® SAP NetWeaver by Key Capability ® Solution Life CycleManagement ® Software Change Management ® Change and Transport System ® Transport Management SystemEnd of: SAP Web AS 6.40
End of: SAP Web AS 6.40;SAP Web AS 6.20;SAP Web AS 6.10;SAP Basis 4.6C;SAP Basis 4.6D;SAP R/3 4.6B
A.1.6 Correcting Errors in the BATCHCHK Phase
This phase tests whether the background server can access the upgrade directory. To do this, the backgroundjob RDDIT008 is started on the specified background server. This job writes a test log in the tmp subdirectory ofthe upgrade directory.
Procedure
1. If errors occur, call transaction SM37 to check whether the background job has run.n If the background job cannot be started, this is generally due to a problem with the name of the
background server.a) Check whether the host specified in phase INITPUT is included in the list with a running background
service.To do this, perform a test call of function module TH_SERVER_LIST in transaction SE37. To displaythe list, double-click the table parameter LIST after executing the function module.
October 24, 2005 PUBLIC 135

A Appendix
A.1 Troubleshooting
b) Depending on the problem, you either have to change the network configuration or change theentries made in the INITPUT phase.To change the entries, proceed as described in Correcting Entries Made in the INITPUT and INITSUBSTPhases [page 133].
n If the job terminates, call transaction SM21 to check the system log of the SAP system.n If the job is successful, however SAPup cannot find the log, make sure of the following:
a) The file system of the upgrade directory must be mounted on the background server.b) The value of the SAP profile parameter DIR_PUTmust match the current upgrade directory.
2. To repeat the phase, choose repeat.
A.1.7 Correcting Errors in the INTCHK and INTCHK_SW
These phases check whether the inactive nametab is empty. If not, an error occurs.
Procedure
1. To find the affected objects, analyze the DDXTTCHK.LOG file.2. Activate these objects using transaction SE11.
The inactive nametab is then empty.3. Call SAPup again with repeat.
A.1.8 Correcting Errors in the SPACECHK_ALL Phase
This release requires more space in the database than the previous releases. This phase compares the free spacecurrently available in the database with the minimum requirements for the total amount of imported data. Ifmore space is required in the database, this is shown on screen and in the file DBFPLUSD.LOG.
PrerequisitesIn the PREPARE log file CHECKS.LOG, the error message Insufficient freespace in the database as
follows appears.
ProcedureFor a description of the required actions, see Evaluating the Results of PREPARE [page 75], since PREPARE has alreadymade these checks.
A.1.9 Correcting Errors in the JOB Phases
A JOB phase starts a background job in the SAP system and waits for it to be completed. If problems occurduring execution of the background job, you receive an error message.
136 PUBLIC October 24, 2005

A Appendix
A.1 Troubleshooting
.Note
The naming convention for the JOB phases is JOB_<name> or RUN_<name>, where <name> is the name ofthe job or report.
Procedure
1. Log on to the SAP system as user DDIC.2. Call transaction SM37 and restrict the start time and start date of the background job as much as possible.n If no background job was started, this is generally due to a syntax error in the calling program. If there is
no SAP Note explaining this error, contact SAP Support.n If the background job was started, there are two possible situations:l The job was terminated.
Check whether the error can be reproduced by selecting repeat in SAPup. If the error occurs again,contact SAP Support. In this case, proceed as described in Providing SAP Support with Information [page 148].
l The job was completed normally, but with error messages.In certain situations, you can ignore these error messages. In this case SAPup does not require apassword if you choose ignore. If you are not sure how to proceed, contact SAP Support.
A.1.10 Cleaning Up Terminated Conversions in the DB ConversionPhases
These conversion errors are indicated by the following PREPARE and SAPup error messages:
n Restart logs of DB conversions found
n Outstanding DB conversions found
These errors can occur in the phases CNV_CHK_GEN, CNV_CHK_IMP and CNV_CHK_XT.
.Note
If both messages appear, process the message Restart logs of DB conversions found first.
Procedure for Restart Logs of DB Conversions FoundTo clean up terminated conversions indicated by the message Restart logs of DB conversions found,proceed as follows:
1. To find the terminated conversions, call the database utility transaction (transaction SE14).2. Choose DB Requests ® Terminated.
A list of the terminated conversions appears.3. Double-click a table name to see its details.4. Check the meaning and status of the table.
a) Find out whether the table is still needed. Sometimes the tables are test tables that are no longer needed.b) Ask the last person who changed the table, or the table owner, to find out its status.
Only valid for: SAP R/3 4.0B;SAP R/3 3.1I
If the table is no longer needed, choose Cancel adjustment in the detailed display. This prevents theconversion being continued automatically. The table itself does not return to a consistent state. Any
October 24, 2005 PUBLIC 137

A Appendix
A.1 Troubleshooting
data that is still in the temporary table is lost during the next conversion. In some cases, however,the table was already corrected without the reset log being deleted. The function Cancel adjustment isharmless in this case.End of: SAP R/3 4.0B;SAP R/3 3.1I
Only valid for: SAP Web AS 6.40;SAP Web AS 6.20;SAP Web AS 6.10;SAP Basis 4.6C;SAP Basis 4.6D;SAP R/3 4.6B;SAP R/3 4.5B
If the table is no longer needed, choose Unlock table in the detailed display. This prevents the conversionbeing continued automatically. The table itself does not return to a consistent state. Any data that isstill in the temporary table is lost during the next conversion. In some cases, however, the table wasalready corrected without the reset log being deleted. The function Unlock table is harmless in this case.End of: SAP Web AS 6.40;SAP Web AS 6.20;SAP Web AS 6.10;SAP Basis 4.6C;SAP Basis 4.6D;SAP R/3 4.6B;SAP R/3 4.5B
c) You can determine the state of the table with Check ® Database object and Check ® Runtime object.d) Also check if the table contains the data you expect. You can do this with transaction SE16, for example.
If the data does not exist, it could still be in the temporary table. Contact your SAP consultant or SAPSupport for help in saving this data.
5. Determine the cause of the error.If you find out that the table is still needed, choose Object log. Look for error messages that explain why theconversions were terminated. You could encounter the following problems here:n You cannot find a log because it was deleted at some time in the past. Continue with step 6 (continue
the conversion to the end).n The log does not contain an error message, but ends abruptly. This indicates that the conversion was
stopped by an external event. Call transaction SM21 to read the system log and find out the approximatetime the conversion was terminated, and to look for the cause of the error.
n If the log clearly gives a reason for the error, you must correct it.6. Continue the conversion to the end.
In the detailed display, choose Continue adjustment. Since you do not know how long this will take, chooseprocessing type Background.The situation can be as follows:n The conversion finished successfully. You can see this because the error message disappears, the Check
function does not display any further problems, and there is a success message in the object log.n The conversion terminates again. A log now exists. Repeat the analysis from step 5 (Determine the cause
of the error).
If you still cannot complete the conversion after several attempts, contact an SAP consultant or SAP Support.
Procedure for Outstanding DB conversions foundTo clean up terminated conversions indicated by the message Outstanding DB conversions found, proceed
as follows, proceed as follows:
.Caution
Process this message after you have processed the message Restart logs of DB conversions found.
1. Determine the objects that are affected.a) Start the database utility transaction (transaction SE14) and choose DB Requests ® Mass Processing.
138 PUBLIC October 24, 2005

A Appendix
A.1 Troubleshooting
b) Choose All requests.The worklist of the conversion program appears. This worklist was generated by developments ormodifications in your SAP system, but has not yet been processed.
c) Choose DB requests ® Created with import.The worklist that was not processed correctly during the last upgrade appears.
2. Check the meaning and status of the requests.In contrast to the procedure for the message Restart logs of DB conversions found, this procedure canalso include requests for indexes, views and matchcode objects. The requests that are found are not alwaysterminated. They might not even have been started.a) Ask the last person who changed the object if the request should still be processed.b) If the user does not want it to be processed, select the request and choose Delete selected.
This removes the objects from the worklist of the conversion program.Do not remove requests from the last upgrade.
3. Process the outstanding requests.You can select the requests from the list of mass processing requests and schedule a job for execution withthe function Schedule selections.a) Go to the detailed display of the object by double-clicking it in the list of requests created by the import.b) Schedule the request, or continue it. Since you do not know how long this will take, choose processing
type Background.
A.1.11 Correcting Errors in the TRBATCHK_XT Phase
The tp program uses table TRBAT to communicate with the SAP system. If this table contains entries, theycould be the remains of an import or export that either terminated or is still running. PREPARE already madethis check.
ProcedureClean up table TRBAT. For information on this, see Evaluating the Results of PREPARE [page 75] under thefollowing PREPAREmessages:
Unresolved request found in TRBAT.
...
TRBAT entry indicates that a batch job is running.
...
TRBAT entry indicates that a batch job has finished.
...
Corrupted TRBAT entry found.
...
October 24, 2005 PUBLIC 139

A Appendix
A.1 Troubleshooting
A.1.12 Correcting Errors in the ACT_<Rel> Phase
Depending on the results of the ADJUSTCHK phase, you may be asked in the ACT_<rel> phase to adjust yourmodifications to SAP objects so that they correspond to the latest SAP standard version of the objects. If yourSAP system has been modified, error messages with return code 8might occur during the ACT_<rel> phase.The errors are listed in the ACTLOG.ELG log file. It shows the same return code for all requests, no matter
in which request the errors occurred. Check the error messages in the log file. Errors occurring severaltimes for different objects can have the same cause. In this case, only the object that causes the original errormust be corrected and the activation must be restarted. For example, a missing data element leads to errormessages for all objects using it.
PrerequisitesBefore you can correct ABAP Dictionary objects that cannot be activated, you may need to unlock the shadowinstance of the SAP system. Proceed as follows:
1. Log on as user <SAPSID>adm.2. Enter the following command:
cd <upgrade directory>\bin
.\SAPup.exe unlockshd <SAPSID>
Procedure
1. Log on to the shadow instance as a user other than DDIC.If you have not yet created users on the shadow instance, do so now as described in Phase ACT_<Rel>[page 96].
2. Make the required corrections.
.Caution
To make the corrections, use only the maintenance transaction of the ABAP Dictionary (SE11).Do not try to repair the objects with the Database Utility transaction (SE14). This can cause seriousinconsistencies.
3. If you had to unlock the SAP system, as described under “Prerequisites”, lock it again with the followingcommand:cd <upgrade directory>\bin
.\SAPup.exe lockshd <SAPSID>
ResultOnce you have corrected all the errors, you can proceed with the upgrade where it terminated in theACT_<rel> phases by selecting repeat in SAPup.If you choose ignore severe errors, all error messages with return code 8 are ignored.
140 PUBLIC October 24, 2005

A Appendix
A.1 Troubleshooting
A.1.13 Correcting Conversion Errors in the PARCONV Phase
This procedure enables you to correct problems that occur in the PARCONV_UPG phase. The errors can roughlybe divided into two classes:
n Technical problems on the databaseYou can recognize these in the system log (transaction SM21), where they are marked with SQL-ERROR
followed by an abbreviation with an error number. The problem is often called by a lack of space.n Logical errors in the object definition
These could also appear in the form of SQL errors. Some of them, however, are already detected by thesystem before a command can be given to the database. This type of error frequently occurs if you decideto revert to the SAP standard when you use the modification adjustment functions in transaction SPDD(ACT_<rel> phase).
.Example
A field was added to an SAP table. This field was also used in an index or view. In the ACT_<rel> phase,however, you decided to return to the standard definition of the table (using transaction SPDD) andthis additional field was removed. The index or view definition is now incorrect since the relevant tablefield is missing. If the index definition is not corrected, and the ACT_<rel> phase was completed withignore, there will be errors when the objects are created.
Procedure
1. Analyze the PARCONV.ELG log.2. Remove the cause of the error.n Technical problems on the database
Read the documentation in the database system about how to correct the error. If necessary, extendthe database.
n Logical errors in the object definitionCorrect the objects. To do this, you can use transaction SE11. In the above example, you could, forinstance, remove the deleted field from the index or view definition or re-insert the deleted field intothe table. Also check whether the objects that are not contained in the standard system and that arenow incorrect can be deleted completely.
3. Repeat the PARCONV_UPG phase.
For more information on alternative procedures, see SAP Note 177680.
A.1.14 Correcting Errors in the XPRAS Phase
If errors occur in the XPRAS_UPG phase during the execution of XPRA reports, SAPup stops and refers to theXPRASUPG.ELG log, which contains error messages with the following header:
~~~~~~~~~~~~~~~~~~~~~~~~~~~~~~~~~~~~~~~~~~~~~~~~~~~~~~~~~~~
XPRA ERRORS and RETURN CODE in <file name>
~~~~~~~~~~~~~~~~~~~~~~~~~~~~~~~~~~~~~~~~~~~~~~~~~~~~~~~~~~~
October 24, 2005 PUBLIC 141

A Appendix
A.1 Troubleshooting
If this header is followed by lines other than the return code, then errors have occurred while the reportswere being executed. In addition to the actual error lines, a separate line indicates the names of the reports thatgenerated the preceding error messages.You can display a detailed help text for each of these error messages in the SAP system. These texts usually
contain all the information you need to correct the error.
Finding Help Texts for Error Messages
1. Search the XPRASUPG.ELG log to find the file name specified in the header.
.Note
The file name that appears in the header of XPRASUPG.ELG is important for finding the help text.The file name always has the following format:SAPR<ID>.<SAPSID>
<ID> can be any string of six characters.The name of the relevant transport request can be derived from the two names. Replace the R with a Kand delete the period and all characters that follow it.You now have SAPK<ID> as the name of the transport request.
2. Log on to the SAP system.3. Call transaction SE09.4. Choose Request/task ® Display individually and enter the name of the transport request SAPK<ID>.5. To display the individual transport logs, choose Goto ® Transport logs.6. To navigate to the log display for this step, double-click the line Exec after put.
You can expand the log to view it in more detail. The error messages will generally be visible as of thesecond level. To display a help text, position the cursor on the error message and choose Long text.
Correcting Errors
1. Follow the instructions in the help text precisely. The help text helps you correct the error.2. When you have corrected all the errors, repeat the upgrade phase with SAPup.3. If you need more information or if the report still results in errors when you repeat the XPRAS_UPG phase,
read the documentation of the report in question. To access this information, log on to the SAP system.Call transaction SE38 and display the documentation for the report that is named in the error log. Thisdocumentation is always available in English and German.
4. If you choose ignore, SAPup gives you two options for continuing the upgrade:n repair severe errors
n ignore all errorsChoose repair severe errors. SAPup repeats the phase and ignores all error messages with the return code 8.The errors must be removed after the upgrade.You require a password for ignore all errors. SAPup then continues with the next phase, without executing thefollowing XPRAs. Before you can choose ignore, you must have approval from SAP Support.
142 PUBLIC October 24, 2005

A Appendix
A.1 Troubleshooting
Correcting Errors After the UpgradeIf possible, correct errors immediately. However, you can correct some errors that occur during the executionof XPRA reports after you have completed the upgrade. This option makes sense, for example, when specialmeasures in the SAP application areas are necessary to correct the errors, and the corresponding specialistsare not available right now. To do this, you must suppress the execution of the corresponding report beforeyou repeat the upgrade phase. After the upgrade, correct the error and run the report manually usingtransaction SE38.For technical instructions on skipping an XPRA, see SAP Note 122597.
.Caution
Only skip an XPRA report program if you are sure you can execute it later (for example, if an SAP Notetells you that this is allowed).If you cannot execute an XPRA later and still want to skip it, contact SAP.
A.1.15 Preparing the Restart of the Upgrade After a System Failure
If the system fails (due to power failure, for example) SAPup, tp, and R3trans can no longer perform certaincleanup actions. Before you restart the upgrade after a system failure, you must make sure that you meet therequirements for restarting the system successfully.
Procedure
1. Start the SAP system.2. Log on to the SAP system as user DDIC and call transaction SM31 to delete all the entries from table TRBAT.3. Call transaction SM37 to delete all the released background jobs related to the processing of a phase with
the exception of RDDIMPDP.4. To change the status of all the current or active background jobs to canceled, run report RSBTCRPR, and
then call transaction SM37 to delete these jobs.5. Call transaction SM50 to cancel any background jobs that have already been restarted.6. Move all the logs contained in the tmp subdirectory of the upgrade directory to the log subdirectory.7. Restart the upgrade [page 89].
A.1.16 Resetting the Upgrade
You need to take different measures to reset the upgrade (because of hardware problems, for example),depending on what stage the upgrade has reached. In addition to resetting the database, you might alsohave to reset the SAP kernel and the SAP profiles.You need to distinguish between the following cases:
n The MODPROF_TRANS phase has not yet been completed, which means that the important databaseconversions have not yet started.
n The MODPROF_TRANS phase has been completed, which means that the database conversions have started.
October 24, 2005 PUBLIC 143

A Appendix
A.1 Troubleshooting
.Caution
Information for the database conversion is stored in the upgrade directory. This means that losing theupgrade directory has the same consequences as losing the database.It is important that the database state and the state of the upgrade directory are always consistent.
The actions you need to take are listed in the following depending on the chosen upgrade strategy and theprogress of the upgrade. Some of the actions are flagged with comments from 1) to n). To perform theseactions, see the end of this section under “Detailed Description of the Individual Actions”. For information onthe progress of the upgrade, see log file SAPup.log.
.Caution
For additional information on resetting an upgrade, see SAP Notes 417670 and 539903. If you have anyquestions, contact SAP Support.
.Note
If you want to reset the upgrade after you have upgraded the operating system or database system, youmight need to downgrade these software components. For downgrading options, see the vendor’sspecifications. The safest method is to reload a full backup of the whole system, including the operatingsystem.
Before Reaching the MODPROF_TRANS PhaseRegardless of the upgrade strategy you choose, no irreversible database changes are made up to this phase.Proceed as follows:
1. Only if the database fails: Import the database backup.n Strategy resource-minimized:
Use the backup you made before the EU_IMPORT1 phase.n Strategy downtime-minimized:
The system was in production operation up to the database failure, so make a point-in-time recoveryup to the last database state.
2. Perform these follow-up actions:a) Stop SAPup.b) If necessary, stop the shadow instance 5).c) Strategy resource-minimized:
Start the central instance.d) Execute report RSUPGRES.
This report deletes all shadow tables, which enables you to restart the upgrade. For more information,see SAP Note 417670.
e) If necessary, save the upgrade directory to another directory for troubleshooting.f) Delete the upgrade directory 3).
3. Restart the upgrade with PREPARE.
After Reaching the MODPROF_TRANS PhaseUpgrade Strategy Downtime-Minimized
144 PUBLIC October 24, 2005

A Appendix
A.1 Troubleshooting
1. Reset the database.Use the backup you made before the MODPROF_TRANS phase.
.Caution
You also need to do this if you lose the upgrade directory.
2. Reset the upgrade directory 4).3. Reset the SAP profiles 1).4. If the KX_SWITCH phase has already been completed, reset the SAP Kernel2).5. Restart the upgrade in the MODPROF_TRANS phase.
Upgrade Strategy Resource-Minimized
1. Reset the database.Use the backup you made before the EU_IMPORT1 phase.
.Caution
You also need to do this if you lose the upgrade directory.
2. If any of the following SAPup phases have already been completed, perform the relevant action:n Phase EU_IMPORT1: Reset the SAP profiles 1)
n Phase KX_SWITCH: Reset the SAP kernel 2)
3. Perform the follow-up actions as described above in step 2 under “Procedure Before Reaching theMODPROF_TRANS Phase”.
4. Restart the upgrade with PREPARE
Detailed Description of the Individual Actions
n Reset the SAP profiles 1)
After the MODPROF_TRANS phase (for upgrade strategy resource-minimized after the EU_IMPORT1 or REQSTOPPRODphase), the instance profile and the default profile of the SAP system are changed by SAPup. If this phase hasbeen completed, you must retrieve these two files from the sapnames subdirectory of the upgrade directory.The instance profile is saved in PROFX.BCK, the default profile in DEFPROF.BCK.
n Reset the SAP kernel 2)
The new kernel is active after the KX_SWITCH phase. You must reimport the old kernel when you makethe recovery. You can recover the kernel directory from a backup created before the upgrade or from theSAP Kernel DVD of the source release. You must unpack the packages SAPEXE.SAR and SAPEXEDB.SAR
from the DVD.n Delete the upgrade directory 3)
We recommend that you archive all the subdirectories before you delete the contents of the upgradedirectory.
.Note
You can exclude the data directory if you have space problems.
n Reset the upgrade directory 4)
October 24, 2005 PUBLIC 145

A Appendix
A.1 Troubleshooting
You must recover the whole upgrade directory with all its subdirectories. You must have backed up theupgrade directory when you isolated the central instance [page 153] if you want to do this.
n Stop the shadow instance 5).Proceed as follows:1. Switch to the subdirectory exe of the upgrade directory and execute stopsap.exe with the following
syntax:stopsap.exe. name=<SAPSID> nr=<instance number> SAPDIAHOST=<HOST>
<instance number>: Instance number of the shadow system2. Stop the service of the shadow system.
If the shadow system is in operation, the TCP/IP ports of the message server, gateway, and dispatcher maybe occupied and cannot be used again. If you perform an upgrade again, you cannot use the previousinstance number to start a shadow instance. You can solve this problem by rebooting the system, or bychoosing a new instance number for the shadow system.
A.1.17 Correcting Problems when Processing ABAP Steps
Some of the ABAP steps are performed in the SAP system. These are:
n ABAP Dictionary activation (A)n Distribution of ABAP Dictionary objects (S)n Table conversion (N)n Matchcode activation (M)n Import of application objects (D)n Update of version management (U)n Execution of XPRAs (R)
The TRBAT table forms the interface between the transport control program tp and the SAP system. Totrigger an ABAP step, tp writes control information to this table.The JOB_RDDNEWPP phase schedules the event-driven background job.
Procedure
1. Check that the SAP system was started correctly. Log on in client 000 as user DDIC.2. Call transaction SM37 and check whether the background job RDDIMPDP has been scheduled.
In the or after event field, enter an asterisk (*), so that event-driven jobs are also displayed.3. Check when RDDIMPDP last ran and whether it ran without errors.4. Check whether the control information in table TRBAT has been entered correctly.
The table must have one HEADER entry and should contain one entry for each transport request. While theABAP Dictionary objects are being distributed (S) and the tables converted (N), table TRBATmay containonly one HEADER entry, since these steps are not carried out by transport request.
5. Call transactions SM37 and SM50 to check whether RDDIMPDP has already started the background jobthat processes the ABAP step.
For more information on the transport control program tp, and the communication between tp and the SAPsystem, see the online documentation for Basis or SAP Web AS of the source release under:
146 PUBLIC October 24, 2005

A Appendix
A.1 Troubleshooting
n
Only valid for: SAP R/3 3.1I
Help ® R/3 Library ® BC ‒ Basis Components ® System Administration ® Transport Control ® Transport ControlProgram tpEnd of: SAP R/3 3.1I
n
Only valid for: SAP Basis 4.6C;SAP Basis 4.6D;SAP R/3 4.6B;SAP R/3 4.5B;SAP R/3 4.0B
Help ® SAP Library ® Basis Components ® Change and Transport System ® BC ‒ Transport Tools ® Transport ControlProgram tpEnd of: SAP Basis 4.6C;SAP Basis 4.6D;SAP R/3 4.6B;SAP R/3 4.5B;SAP R/3 4.0B
n
Only valid for: SAP Web AS 6.20;SAP Web AS 6.10
Help ® SAP Library ® mySAP Technology Components ® SAPWeb Application Server ® Change and Transport System ®Transport Tools ® Transport Control Program tpEnd of: SAP Web AS 6.20;SAP Web AS 6.10
n
Only valid for: SAP Web AS 6.40
Help ® SAP Library ® SAP NetWeaver Library ® SAP NetWeaver by Key Capability ® Solutions Life CycleManagement ® Software Change Management ® Change and Transport System ® Transport Tools ® Transport ControlProgram tpEnd of: SAP Web AS 6.40
A.1.18 Correcting Problems when Starting the SAP System
tp, the transport control program, automatically restarts the SAP system several times during the individualphases. If the startup attempt fails and the next step requires processing within the SAP system (such as atable conversion), then tp waits for this step to end without result. You might then not be able to start theSAP system during the upgrade.
Procedure for Processes Not Ended
1. Check the SLOG log (SLOG<rel>) to see whether the SAP system is supposed to be started or stopped at thispoint. Starting at the end of the log, search upwards for the latest entry marked tpsapstop or tpsapstart.
2. If the SAP system is supposed to be started, according to the SLOG log, but you cannot log on as user DDIC,enter the following command to stop any SAP processes that are running:
3. Check whether all the processes of the SAP system have really been stopped. To do this, enter the followingcommand:
4. Enter the following command to try to start the SAP system:
If you cannot start the SAP system manually, then this is usually due to changes in the SAP profile in theMODPROF_TRANS, MODPROF_BAS and MODPROFP_UPG phases, or due to a switch of the SAP programs in theKX_SWITCH phase. In both cases, the increased demands on computer resources may have caused the problems.In this case, try to run the SAP system with fewer dialog processes.
1. Check whether the system is running. Log on to the SAP system.2. Use the Windows Task Manager to check if all if the SAP system processes were stopped when the system
was stopped.
October 24, 2005 PUBLIC 147
A Appendix
A.1 Troubleshooting
The display must not contain the processes disp+work and msg_server.If these processes do exist, proceed as follows:n Make sure that the processes do not belong to a second SAP system on this host.n Use the Windows Task Manager to end the processes.
3. Attempt to start the SAP System manually.If you cannot start the system manually, this is probably caused by changes to the SAP profile made inthe phases MODPROF_TRANS, MODPROF_BAS and MODPROFP_UPG or by SAP programs being switched in theKX_SWITCH phase. In both cases, the increased demands made on computer resources may have caused theproblems. If this is the case, try to run the SAP system with fewer dialog processes
4. If the work processes fail, check the trace files in the directory \usr\sap\<SAPSID>\<INSTANCE>\work forany entries.In particular, monitor the files stderrxxx and dev_w0.
A.1.19 Correcting Problems when Copying SAP Programs
In the KX_SWITCH phase, the SAP programs in directory \usr\sap\<SAPSID>\sys\exe\run are switched. Do notstart the SAP system and the SAP services during this period; otherwise, SAPup cannot overwrite the old files.
Procedure
1. Analyze the log of the copy process. It is located in the log subdirectory of the upgrade directory andis called C<DATE>.<SAPSID>.
2. Repeat the phase or copy the program manually from the exe subdirectory of the upgrade directory tothe directory \usr\sap\<SAPSID>\sys\exe\run.
A.1.20 Providing SAP Support with Information
If none of the measures described in Troubleshooting [page 129] solves your problem, contact SAP Support. Toenable us to help you as quickly and efficiently as possible, follow the procedure given here.
ProcedureIf you encounter problems that are specific to the upgrade, create an error message on SAP Service Marketplaceand assign it to component BC-UPG. Answer the following questions and put these answers in your customermessage:
1. For which SAP component do you want to perform the upgrade?2. Which release are you upgrading from? Which release are you upgrading to?3. Which operating system version are you using?4. What was the original release of your SAP system?5. In which SAPup phase does the error occur?
This information is listed at the end of the of the SAPup.log file located in the upgrade directory.6. Did you have problems with the SAP system before upgrading?
148 PUBLIC October 24, 2005

A Appendix
A.1 Troubleshooting
.Note
If an online connection is set up to a defective SAP system, we can find the cause of the error moreeasily, and can therefore correct it more quickly.
If the program aborts due to an Access violation and Dr. Watson responds, then add the last pages of the logfile written by Dr. Watson to your message. The log file is called drwtsn32.log and is located in your mainWindows directory, for instance C:\WINNT\drwtsn32.log.For tips on the correct configuration of Dr. Watson, see SAP Note 33772.If you are certain that the problem is not an upgrade-specific one but a product-specific one, assign your
error message to the appropriate product-specific component. The following table gives you information onthe different components to which you can assign your message on SAP Service Marketplace.
Components for Error Messages
SAP Product Component
SAP Solution Manager SV-SMG
Index Management Server BC-SRV-TRX
OLTP R/3 System BC-UPG
R/3 Standalone Gateway BC-UPG
SAP Add-On BC-UPG-ADDON
SAP Supply Chain Management APO-BAS
SAP Business Connector BC-MID-BUS
SAP Business Information Warehouse BW-SYS
SAP Business-to-Business Procurement BBP-SAD
SAP Customer Relationship Management:n Communication Station and Mobile Development
Workstationn CRM Servern Internet Pricing and Configurator (IPC)n Mobile Client Componentn SAP R/3, SAP R/3 Enterprise, SAP ECC
n CRM-MW
n BC-MID-INT-SRVn CRM-MT-IU-SPEn CRM-WBT-IUn BC-UPG
SAP TREX Search Engine (SAP DrFuzzy Search Engine) BC-SRV-TRX
SAP Front End BC-INS
SAP Internet Transaction Server BC-FES-ITS
SAP Knowledge Management KM-KW
SAP Enterprise Core Component BC-UPG
SAP Strategic Enterprise Management BC-UPG-ADDON
SAP NetWeaver Application Server ABAP BC-UPG
SMART Installation BC-UPG
October 24, 2005 PUBLIC 149

A Appendix
A.2 Upgrade Administration
A.2 Upgrade Administration
This part of the document contains additional information on the various administrative tasks that you needto perform before and during the SAP system upgrade.
n Alert Function [page 150]n Determining Versions [page 151]n Setting the Environment of the SAP Kernel [page 152]n Creating Shares and Directories and Checking Authorizations [page 152]n Changing the Virtual Memory/Paging File Size [page 153]n Isolating the Central Instance [page 153]n Extending Free Space in the Oracle Database [page 155]n Changing the Oracle Database Recovery Mode [page 156]n Standalone Database Server (Oracle) [page 156]n Using a Different Upgrade Directory [page 157]
n
Only valid for: SAP Web AS 6.40;SAP Web AS 6.20;SAP Web AS 6.10;SAP Basis 4.6C;SAP Basis 4.6D;SAP R/3 4.6B;SAP R/3 4.5B;SAP
R/3 4.0B
Releasing and Confirming Open Repairs and Requests [page 157]End of: SAP Web AS 6.40;SAP Web AS 6.20;SAP Web AS 6.10;SAP Basis 4.6C;SAP Basis 4.6D;SAP R/3 4.6B;SAP R/3 4.5B;SAP R/3 4.0B
n
Only valid for: SAP R/3 3.1I
Releasing and Confirming Open Repairs and Requests [page 158]End of: SAP R/3 3.1I
n Sending a Message when User Action Is Required [page 159]n Using the Phase List for the Upgrade [page 159]
A.2.1 Alert Function
Use the alert function to inform yourself if the upgrade waits for a long time, of if the upgrade terminates(for example, due to an error).
Alert File
If the upgrade stops, an appropriate message appears. An alert file upalert.log is also created in the tmpsubdirectory of the upgrade directory to indicate that you need to take action. You can use this to notify thesystem administrator, for example by telephone, and minimize downtime. For starting a communicationservice, however, you must provide the external software. The alert file is deleted when the upgrade iscontinued.SAPup can also send a dialog box to a specified PC if the upgrade waits longer than 60 seconds for user input. Formore information, see Sending a Message When User Action Is Required [page 159]
Alert Function of the Upgrade Assistant
When you use the Upgrade Assistant for your upgrade, you can use an alert function, instead of analyzing thealert file. You can then be informed if the control program SAPup waits longer than a predefined period of timefor input. As with the alert file, you must also provide the external software for starting a communicationservice.
150 PUBLIC October 24, 2005

A Appendix
A.2 Upgrade Administration
ProcedureTo activate the alert functions of the Upgrade Assistant, go to the main menu of the Upgrade Assistant andchoose Administrator ® Set Alert. You see the following screen:
Figure a: Entry Screen for Setting the Alert
You can get more information online in the Upgrade Assistant. Choose Help ® Introduction and look for thesection “‘Set Alert’ Window”.
A.2.2 Determining Versions
Determining the Operating System VersionChooseWindows Explorer ® Help ® About Windows.
Determining the Database Version for OracleEnter the following SQL statement:
SELECT BANNER FROM V$VERSION;
The first line of the display contains the Oracle server release.
Determining the SAP System ReleaseTo find out what SAP source release you have, choose System ® Status in your SAP system.The release appears in the SAP Release field.
October 24, 2005 PUBLIC 151
A Appendix
A.2 Upgrade Administration
Determining the SAP Kernel VersionTo determine the version of the SAP kernel you are using and its patch level, proceed as follows:
1. In the SAP system, choose Tools ® Administration ® Monitor ® System Monitoring ® Servers.2. Select a server and choose Release info.
Determining the Date of R3transCall R3trans without options.The program displays the date and the version number.
Determining the Version of tpCall tp with the following command:tp –V
The last line displays the highest patch level.
A.2.3 Setting the Environment of the SAP Kernel
Setting the Environment of the SAP KernelThe runtime environment of the SAP kernel consists of the following:
n system environment variables set when the system is started.n environment variables listed in Registry under the keyHKEY_LOCAL_ MACHINE ® SOFTWARE ®
SAP ® <SAPSID> ® Environment.These environment variables correspond to the user environment of the user entered in the Registry underthe key HKEY_LOCAL_ MACHINE ® SOFTWARE ® SAP ® <SAPSID> ® AdmUser.Each time the SAP System is started, the user-specific environment for this user is copied to the subkeyEnvironment, so that manual changes in this subkey do not have any effects.
A.2.4 Creating Shares and Directories and Checking Authorizations
You must check the authorizations on a shared directory, or create a share.
ProcedureCreating a share
1. Open the Windows Explorer and position the cursor on directory that you want to share.2. Choose File ® Properties ® Sharing ® Shared As.
Checking the permissions of a share
1. In the Windows Explorer, position the cursor on directory that you have released.2. Choose File ® Properties.
In the Share Name field, you can see all shares that are set for this directory. Select your share nameand choose Permissions.
Creating a directory
152 PUBLIC October 24, 2005

A Appendix
A.2 Upgrade Administration
1. In the Windows Explorer, position the cursor on directory under which you want to create a subdirectory.2. Choose File ® New ® Folder.3. Replace the name New Folder of new subdirectory with the new directory name.
Checking the permissions for a directory
1. In the Windows Explorer, position the cursor on directory that you want to check for a permission.2. Choose File ® Properties.
Displaying attributes of an executable
1. In the Windows Explorer, position the cursor on file where you want to check or set the attributes.2. Choose File ® Properties.
A.2.5 Changing the Virtual Memory/Paging File Size
n For Windows 2000, choose Start ® Settings ® Control Panel ® System ® Advanced ® Performance ® Options ®Virtual Memory ® Change.
n For Windows 2003, choose Start ® Settings ® Control Panel ® System ® Advanced ® Performance Settings ®Advanced ® Virtual Memory ® Change.
A.2.6 Isolating the Central Instance
You need to isolate the central instance so that only the upgrade program can work with the system duringdowntime. This means that you can use the central instance exclusively for the upgrade. SAPup asks you toisolate the central instance when downtime begins.During downtime, all users must have logged off the system. You can use transaction SM02 to inform the
users logged on to the system.
Procedure
1. Make sure that no job is scheduled in the NT Scheduler that affects the SAP system, such as starting andstopping the SAP system, backing up the database, or similar actions. This could impair the full controlof SAPup over the SAP system.
2.
Only valid for: SAP R/3 3.1I
Applies to Basis Source Release 3.1I only: Delete scheduled jobs in transaction DB13As of SAP Basis Release 4.0B, transaction DB13 uses different internal job formats. Since transaction DB13can no longer read the old job formats after the upgrade, you must delete all jobs scheduled for the future.Proceed as follows:a) Call transaction DB13.b) Double-click a day header to see its job overview.c) Position the cursor on the job that you want to delete and choose Delete.
October 24, 2005 PUBLIC 153

A Appendix
A.2 Upgrade Administration
d) Repeat steps b. and c. until you have deleted all jobs that have not yet been executed.End of: SAP R/3 3.1I
3. No background job other than RDDIMPDP may be active during the upgrade.As of Basis Source Release 4.5B, these jobs are automatically descheduled by SAPup.For all other Basis source releases, you must cancel the release of all background jobs except RDDIMPDPbefore the upgrade in all clients. To do this, proceed as follows for each client:a) Log on to the client as user DDIC.b) Call transaction SM37.c) Determine the jobs involved.
Fill in the necessary information on the screen Select background jobs as described in the examplebelow. In the Start date field, make sure that the from date is in the past. The To date must be farenough in the future to include all the background jobs that could become active during the upgrade.
d) Choose Execute.e) Cancel the release by choosing Job ® Schedule job ® Cancelf) Special feature in client 000
The background job RDDIMPDPmust be scheduled in client 000. If it is not, schedule it by executing thereport RDDNEWPP (transaction SE38).
The upgrade is not affected if RDDIMPDP is also scheduled in other clients.4. Make sure that no change of operation mode is defined on the central instance during the upgrade. If this
is the case in normal operation, call transaction SM63 to either choose a single operation mode for alltime spans or delete all the assignments.
5. Clean up all outstanding updates as described in Evaluating the Results of PREPARE [page 75] when the messageUpdate records still exist - Please process appears.
6. Shut down all application servers, if necessary (secondary SAP instances).7. Make sure that you can recover the database to its current state.8. If you have chosen strategy downtime-minimized, back up the upgrade directory now.
If a hardware problem occurs during downtime, youmay need to reset the upgrade to the state it had whenthe SAP system was isolated. So that SAPup has the correct control information, the upgrade directory musthave the same state as at the beginning of the MODPROF_TRANS phase.
9. If the central instance and the database server are on the same host, you can lock the database againstremote access. Contact the database administrator.
.Caution
Make sure that no transport requests are imported into the system during downtime. Otherwise youmay lose data. For example, by manually importing requests for the automatic adjustment, you maylose all your modifications to the SAP system.
A.2.7 Extending Free Space in the MS SQL Server Database
If you are asked to extend the database, it may be due to the following reasons:
n The default option Automatically grow file is not active.n There is not enough disk space on the drives where the SQL Server data files are located.
154 PUBLIC October 24, 2005

A Appendix
A.2 Upgrade Administration
n The maximum size of the data files for the Automatically grow file option is restricted.
Extend the available disk space by at least the values determined by PREPARE.
A.2.8 Extending Free Space in the Oracle Database
Extend and create tablespaces as requested by PREPARE.
.Caution
If you use tablespaces where the AUTOEXTEND feature is turned on, the PREPARE or SAPup free spacecheck includes this in its calculation. However, you may still have to create the new tablespaces.
.Note
Avoid fragmenting the database too strongly.Be generous when you extend existing tablespaces.Choose a low degree of fragmentation when you create tablespaces.
PrerequisitesFor performance reasons, you must take the following restrictions into consideration when creating thenew tablespaces:
n Index tablespaces and data tablespaces that belong together must not be on the same disk, and mustnot be in the same sapdata directory.
n PSAPES<REL>D and PSAPEL<REL>D should not be on the same disk.
.Recommendation
We recommend the following combination:Disk 1: PSAPES<Rel>D and PSAPEL<Rel>I
Disk 2: PSAPEL<Rel>D and PSAPES<Rel>I
ProcedureBRSPACE proposes other values for the extension than those specified in the list. You can overwrite these valueswith the minimum values from PREPARE or SAPup.Proceed as follows:
1. Extend the listed tablespaces by at least the specified values.2. Create the new tablespaces as prompted by PREPARE. This applies to the following tablespaces in a System
Switch Upgrade:
For a system with old layout For a system with new layout
PSAPES<Rel>D
PSAPES<Rel>I
PSAPEL<Rel>D
PSAPEL<Rel>I
PSAP<SAPSID><Rel>
October 24, 2005 PUBLIC 155

A Appendix
A.2 Upgrade Administration
where <Rel> stands for the current target release.
.Caution
For the tablespace PSAPES<Rel>D, create a data file with at least 2 GB, otherwise the import of thesubstitution set terminates.If you have to create a tablespace in more than two fragments, add (n - 2) * 100 MB to the total size of
the tablespace, where n is the number of fragments.
A.2.9 Changing the Oracle Database Recovery Mode
If you use the upgrade strategies downtime-minimized and resource-minimized, you need to change the recovery modeof the database at the beginning and end of downtime.
PrerequisitesMake sure that you can recover the current state of the database before you deactivate database archiving.
.Recommendation
If the last full backup was a long time ago and the number of archives collected up to that point is large,SAP recommends that you make a full backup before you deactivate archiving.
ProcedureDeactivate archiving with program ARCHIVE_OFF.BAT.You can activate archiving again with program ARCHIVE_ON.BAT. The programs ARCHIVE_OFF.BAT and
ARCHIVE_ON.BAT are in the directory \<upgrade directoy>\bin.
A.2.10 Standalone Database Server (Oracle)
The following database commands are used together with mode ARCHIVELOG:
1. Check the mode ARCHIVELOG as user ORA<SAPSID>Enter the following commands in SQLPLUS:SQL> connect / as sysdba
SQL> archive log list;
SQL> exit
If NOARCHIVELOG is displayed, then mode ARCHIVELOG has been deactivated.2. Deactivate mode ARCHIVELOG
To do this, the database must be shut down. Enter the following commands in SQLPLUS:SQL> connect / as sysdba
SQL> startup mount
SQL> alter database noarchivelog;
SQL> alter database open;
SQL> exit
3. Activate mode ARCHIVELOG
156 PUBLIC October 24, 2005

A Appendix
A.2 Upgrade Administration
To do this, the database must be shut down. Enter the following commands in SQLPLUS:SQL> connect / as sysdba
SQL> startup mount
SQL> alter database archivelog;
SQL> alter database open;
SQL> exit
A.2.11 Using a Different Upgrade Directory
You can use an upgrade directory other than \usr\sap\put\. This is useful if you have multiple SAP systemson a single host and you want to upgrade them all to a new release.
.Caution
If you want to use a different upgrade directory, make sure that no \usr\sap\put\ directory exists on thishost.
Procedure
1. In the instance profile of the SAP system, set the parameter DIR_PUT to the upgrade directory that youwant to use:DIR_PUT = <upgrade directory>
The name of the directory must include the whole directory path. The name cannot be longer than30 characters in total.
.Note
The parameter does not become effective until you restart the SAP system. Alternatively, as it is adynamic parameter, you can use transaction RZ11 to set it without restarting the SAP system.
2. After you have changed the profile, restart the SAP system to activate the changes.When the system starts, SAPup checks whether the value in the instance profile matches the specifiedupgrade directory.
Only valid for: SAP Web AS 6.40;SAP Web AS 6.20;SAP Web AS 6.10;SAP Basis 4.6C;SAP Basis 4.6D;SAP R/3 4.6B;SAP R/3 4.5B;SAP
R/3 4.0B
A.2.12 Releasing and Confirming Open Repairs and Requests
Before you start the upgrade, you must release and confirm all the open repairs and requests that conflictwith the SAP delivery. PREPARE determines a list of these repairs and requests. If you ignore open repairs,you could lose modifications.
October 24, 2005 PUBLIC 157

A Appendix
A.2 Upgrade Administration
Procedure
1. Log on to the SAP system as the owner of the open repair. You can find the user names of the owners inCHECKS.LOG.
.Note
If you cannot log on with a specific user ID, you can change the owner of the repair in transactionSE09 as follows:a) In the list of open repairs, position the cursor on the repair.b) Choose Change owner.To be able to change an owner in transaction SE09, you need project authorization for the WorkbenchOrganizer (S_CTS_PROJEC).
2. Call transaction SE09.3. Choose Request/task ® Find requests.4. For Request type, only select Repair.5. For Request status, select everything except Released.6. Choose Execute.
A list of all open repairs for the selected user appears.7. Position the cursor on the request that you want to release.8. Choose Release.9. Release the request to which the repair is assigned.
End of: SAP Web AS 6.40;SAP Web AS 6.20;SAP Web AS 6.10;SAP Basis 4.6C;SAP Basis 4.6D;SAP R/3 4.6B;SAP R/3 4.5B;SAP R/3 4.0B
Only valid for: SAP R/3 3.1I
A.2.13 Releasing and Confirming Open Repairs and Requests
Before you start the upgrade, you must release and confirm all the open repairs and requests that conflictwith the SAP delivery. PREPARE determines a list of these repairs and requests. If you ignore open repairs,you could lose modifications.
Procedure
1. Log on to the SAP system as the owner of an open repair. You can find the user names of the owners inCHECKS.LOG.
2. Call transaction SE01.3. Choose Find.
.Note
You can also release the repairs from the Workbench Organizer (transaction SE09).
4. Make sure that the field User name contains the correct name.5. In the Type field, enter REPA.
158 PUBLIC October 24, 2005

A Appendix
A.2 Upgrade Administration
Do not change any other default values.6. Choose Execute.
A list of all the open repairs for this owner appears.7. Select the repair that you want to release.8. Choose Repair ® Release repair.9. If the repair is assigned to a superordinate transport request, this transport request must also be released.
.Note
If you are cannot log on with a specific user ID, you can change the owner of the repair in transactionSE01 as follows:a) In the list of open repairs, position the cursor on the repair.b) Choose Edit ® Change owner.To be able to change an owner in transaction SE01, you need project authorization for the WorkbenchOrganizer (S_CTS_PROJEC).
End of: SAP R/3 3.1I
A.2.14 Sending a Message when User Action Is Required
If a user entry is not made within 60 seconds during the upgrade, you can send a message to another computer.
PrerequisitesAmessage informing you that the upgrade has stopped can be sent from the upgrade host if:
n You are not permanently monitoring the upgrade during its runtime but still want to avoid long delays.n Your workstation host can be reached from the upgrade host with the NETBIOS protocol.n You have started the workstation service on the upgrade host.n You have started the messenger service on your workstation host.
ProcedureCall SAPup with the option messagehost=<host>. As <host>, specify the workstation host on which you wantto be informed about the upgrade delay.
SAPup sends a dialog box to the specified workstation host if no user entries are made for 60 seconds andSAPup is waiting for an entry.
A.2.15 Using the Phase List for the Upgrade
The phase list for the upgrade contains phases for PREPARE and for the upgrade itself. The phase list consists oftwo HTML files:
n The phaselist.htm file contains a table with all of the phases.
October 24, 2005 PUBLIC 159

A Appendix
A.2 Upgrade Administration
The phases that are listed in the tables run in the specified sequence. The SAPup tool does not stop at theend of each of these sections. It stops only for user actions, if there are errors, or if you manually stop theupgrade at a particular phase. The table contains the following columns:l Phase
Table fields of phases that run while the shadow system is in operation are indicated by a graybackground.
l PREPARE / SAPup ActionsGives a brief explanation of the tool actions. Constraints are printed in bold.
l DurationIndicates the percentage of the total runtime of SAPup required for this phase. The runtime depends onthe following criteria:
u Amount of customer data
u Number of SAP components implemented
u Quantity and type of modifications and customer developments involved
u Number of clients
u Number of included packagesThe duration of some of the phases depends on the gap between the source and target release of the SAPsystem. The smaller the gap, all the shorter the duration of the phase.
l Log FilesLists the log files that are generated by SAPup for each phase.
l User ActionsIf there is no entry in this column, SAPup does not require an operator at this point. Otherwise SAPupprompts you to make the entries described.
Some phases have comments next to them in the various columns. These are as follows:
Comment Meaning
(var) The runtime of the phase depends on your data.The percentage duration of these phases can be verydifferent in your upgrade.
(log) Not all logs can be included in the Log Files column.For more information, see Upgrade Logs [page 129].
n The phase_toc.htm file contains a list of all the phases with links to the corresponding short description inthe phaselist.htm file.
ProcedureThe files for the phase list are in the htdoc subdirectory of the upgrade directory. The phase list files containedin the upgrade package are dummy files. After you have started the first PREPAREmodule, PREPARE updatesthese files so that they match your upgrade.You can also create the phase lists yourself by using the htmlphl option to call SAPup. The files are then saved inthe current directory, or ‒ if you are calling SAPup from the Upgrade Assistant ‒ in the tmp directory.
160 PUBLIC October 24, 2005
A Appendix
A.3 Upgrade Tools
A.3 Upgrade Tools
The following tools are provided for the upgrade of the SAP System:
n PREPARE [page 161]n SAPup [page 163]n Upgrade Assistant [page 163]
A.3.1 PREPARE
Use the PREPARE program to prepare your SAP system for the upgrade. The PREPARE program:
n Can be executed while the system is running.n Checks whether or not the requirements for the upgrade are met and gives you extra information when
you are executing the optional modules.n Imports a number of tools into your database.n Copies data and programs required for the upgrade into the upgrade directory.
PREPARE performs the majority of the required checks automatically. However, you must also check theoperating system, database and SAP system manually.
.Recommendation
Start PREPARE as soon as possible before the upgrade so that you can perform the necessary preparations intime.
PrerequisitesYou must meet a number of prerequisites before you run the PREPARE program, including the following:
n Determine a host for the upgrade preparations.n Create an upgrade directory.n Make sure that there is enough free space in the database.n Check the database-specific requirements.n Import the latest SPAM update.
For more information about the prerequisites for PREPARE, see the sections about upgrade preparations.
FeaturesPREPARE executes all its actions in phases. These phases are combined into PREPAREmodules. For a completelist of the modules and the phases which execute in these modules, seeUsing the Phase List for the Upgrade [page 159].The PREPAREmodules have the following features:
n They can be mandatory or optional.n They may be dependent on a predecessor module that must be executed first.
.Example
You must import the analysis tools before you can execute them.
October 24, 2005 PUBLIC 161

A Appendix
A.3 Upgrade Tools
n Youmust execute the PREPAREmodules up to and including the Installationmodule once only. If you wantto execute these modules once more, you must first reset PREPARE.
n You can execute all modules after the Installationmodule as often as you want.n You can execute PREPAREmodules individually.
The following graphic is an overview of all the PREPAREmodules and the order in which you need to executethem.
Figure b: PREPARE Modules
For more information about the contents and features of the PREPAREmodules, see the online help forPREPARE. To call up the online help, choose Help when selecting a module.
IntegrationWhen you start the upgrade, SAPup assumes that the mandatory PREPAREmodules have been completedsuccessfully. SAPup then repeats a number of the checks (not all of them), since production operation ofthe SAP system could have created a new situation.
PREPAREwrites the results for the executedmodules to the CHECKS.LOG file. This file is in the log subdirectoryof the upgrade directory. View this file and perform any measures required by the information it contains.You can execute certain PREPAREmodules repeatedly to make sure that all requirements are met. If the
CHECKS.LOG file already exists, it is overwritten each time you execute a module again. Its contents are savedin the CHECKS.SAV file.
162 PUBLIC October 24, 2005

A Appendix
A.3 Upgrade Tools
A.3.2 SAPup
SAPup controls the entire upgrade of the SAP system, from checking the requirements and importing thenecessary programs, to restarting production operation of the system. SAPup controls the upgrade sequentiallyin phases, where one phase must end successfully before the next one can begin. For a complete list of allphases, see Using the Phase List for the Upgrade [page 159].When started, SAPup repeats all the important checks made by PREPARE. During the checks, you can still use
the SAP system in production operation. When downtime begins and how long it lasts depends on the upgradestrategy [page 26] you choose. The upgrade strategies are also differentiated by the disk space requirements,and when production operation of the system stops.In the individual phases, SAPup starts various tools, checks the results and creates a series of logs. These
logs are stored in the log subdirectory of the upgrade directory. This subdirectory also contains the mainlog file SAPup.log.
PrerequisitesThe mandatory PREPAREmodules have run successfully.
Features
n You start SAPup.n You can stop [page 89] SAPup at the beginning of a specific phase or at the beginning of the next phase.
For example, you need to do this if an SAP Note tells you to correct a program before you execute it.n You can continue the upgrade by restarting [page 89] SAPup.
You usually only have to restart the upgrade when errors have occurred or an upgrade phase hasterminated. In this case, SAPup stops and offers you several modes for restarting the upgrade. If you choosethe default value repeat, SAPupmakes the necessary checks and then starts at the point in the phase wherethe program terminated.
A.3.3 Upgrade Assistant
The Upgrade Assistant is the front end for the upgrade process. It provides one or more graphic user interfaces(GUIs) for controlling and monitoring the upgrade. The Upgrade Assistant simplifies the upgrade procedure.
Features
n You can control and monitor the progress of the upgrade from a number of different places.n The front end and the upgrade process are divided into separate components so that the entire upgrade
does not terminate if a connection fails.This provides optimal support for a remote upgrade.
n You have an alert mechanism that lets you start an external program.n You can view all files and their contents in the upgrade directory.n Provided you have access to the Internet, you can access the SAP Notes database on the SAP Service
Marketplace from a GUI.
October 24, 2005 PUBLIC 163

A Appendix
A.3 Upgrade Tools
n The Upgrade Assistant Server and the Upgrade Assistant GUI can be connected using one or moreSAProuters, but only if you used the Java Runtime Environment to start the Upgrade Assistant GUI. Formore information, see SAP Note 133402.
The Upgrade Assistant is implemented in Java. A scroll mode is provided for the upgrade for platforms thatdo not support Java. We recommend that you use the Upgrade Assistant, since scroll mode does not providethe above features.
IntegrationThe Upgrade Assistant is a distributed program consisting of a server component and several GUI components.Only one person can control the upgrade from the GUI components.
n Server componentThe server controls communications between the upgrade control program SAPup and the GUIs of theUpgrade Assistant. It must be started on the host on which you want the upgrade process to run.
n GUI componentsThe GUI components can be executed on any other hosts.
.Caution
If you use the Upgrade Assistant on another host, make sure that you use a secure connection to theupgrade host, for example, a Virtual Private Network connection.
You can log on to the server as the observer or the administrator. The observer role only authorizes you tomonitor an upgrade. An administrator is authorized to take actions affecting the progress of the upgrade,for example, an administrator can start or stop the upgrade and can enter any necessary commands.Only one GUI can assume the role of administrator. However, the GUI with this role can change in thecourse of the upgrade.
The graphic below illustrates the architecture of the Upgrade Assistant and the interaction between theUpgrade Assistant and the SAPup upgrade control program.
164 PUBLIC October 24, 2005

A Appendix
A.3 Upgrade Tools
Figure c: Interaction between Upgrade Assistant and SAPup
A.3.4 Using the Upgrade Assistant
The Upgrade Assistant offers you a number of functions. You can change the passwords for the roles, changeroles, use and monitor PREPARE, or look for SAP Notes.
Changing PasswordsYou can change the passwords for the two roles from the administrator GUI only. To do this, chooseAdministrator ® Change passwords from the main menu.
Changing the RoleTo change the role dynamically, choose File ® Change role.The following dialog box appears:
October 24, 2005 PUBLIC 165

A Appendix
A.3 Upgrade Tools
Figure d: Upgrade Assistant Logon Screen
If, for example, you are in the role of the observer and enter the password for the administrator, you change tothe administrator role. If an administrator already exists, the administrator role is removed from this user.If you only want to change the User name or the Phone number, enter the password of the role you are in. In this
case only the data you enter is updated.
File ServiceYou can use the File Service to view all files and their contents in the upgrade directory. This is, for example,helpful for a quick scan of the log files. To access the service, choose Services ® Online Services ® File Service.
Searching for Notes from the GUIIf you have an Internet connection, you can access SAP Notes on the SAP Service Marketplace from the GUI. Inthe main menu, choose Services ® Online Services ® SAP Notes.
More Information on the Upgrade AssistantTo display a description of the Upgrade Assistant with all its functions, choose Help ® Introduction from themain menu.
166 PUBLIC October 24, 2005

B Reference
B Reference
B.1 The Main SAP Documentation Types
The following is an overview of themost important documentation types that you need in the variousphases in the life cycle of an SAP solution.
Figure e: Documentation types in the software life cycle
Cross-Phase Documentation
SAPterm—SAPterm is SAP’s terminology database. It contains SAP-specific vocabulary in over 30 languages,as well as many glossary entries in English and German.
n Target group:l Relevant for all target groups
n Current version:l Located in the SAP Service Marketplace at service.sap.com/sapterm
SAP Library—The SAP Library is a collection of function- and process-oriented documentation for SAPcomponents. The SAP Library also contains the Business Scenario Descriptions.
October 24, 2005 PUBLIC 167

B Reference
B.1 The Main SAP Documentation Types
n Target group:l Consultants
l System administratorsl Project teams for implementations or upgrades
n Current version:l Located in the SAP Help Portal at help.sap.com (also available as documentation CD)l Located in the SAP Service Marketplace at service.sap.com/ibc (only the Business Scenario
Descriptions)
Implementation Guide (IMG)—The Implementation Guide is a tool for configuring the SAP system to meetcustomer requirements. Its structure and documentation are component-oriented.
n Target group:l Solution consultants
l Project teams for implementations or upgradesn Current version:l In the SAP menu of the SAP system under Tools ® Customizing ® IMG
Security Guide—The Security Guide describes the settings for a medium security level and offers suggestionsfor raising security levels. A collective security guide is available for the SAP NetWeaver technologies, such asthe SAP Web Application Server (SAP Web AS). This document contains general guidelines and suggestionsabout system security. Other technologies and individual applications have a Security Guide of their own.
n Target group:l Technology consultantsl Solution consultants
l Project teams for implementations or upgradesn Current version:l Located in the SAP Service Marketplace at service.sap.com/securityguide
Implementation
Master Guide—The Master Guide is the starting point for implementing an SAP solution. It lists the requiredSAP components, and third-party applications that are required for each Business Scenario. It providesscenario-specific descriptions of preparation, execution, and follow-up of an implementation. It also offersreferences to other documents, such as Component Installation Guides and SAP Notes.
n Target group:l Technology consultantsl System administratorsl Project teams for implementations
n Current version:l Located in the SAP Service Marketplace at service.sap.com/instguides
Component Installation Guide—The Component Installation Guide describes the technicalimplementation of an SAP component, taking into account the combinations of operating systems anddatabases. It does not describe any business-related configuration.
n Target group:l Technology consultants
168 PUBLIC October 24, 2005

B Reference
B.1 The Main SAP Documentation Types
l Project teams for implementationsn Current version:l Located in the SAP Service Marketplace at service.sap.com/instguides
Configuration Documentation in SAP Solution Manager—SAP Solution Manager is a tool with variousfunctions, one of its main functions being the configuration of SAP solutions and Business Scenarios. Itcontains IMG activities, transactions, and so on, as well as documentation. Instead of the configurationdocumentation in SAP Solution Manager, there may be separate Business Scenario Configuration Guides inthe SAP Service Marketplace for previous shipments of the Business Scenarios.
n Target group:l Solution consultants
l Project teams for implementationsn Current version:l In SAP Solution Managerl Located in the SAP Service Marketplace at service.sap.com/ibc
Production Operation
Solution Management Guide—The Solution Management Guide is the starting point for operating an SAPsolution. The guide refers users to the tools and documentation that are needed to carry out various tasks,such as monitoring, backup / restore, master data maintenance, transports, and tests. It also refers users toother documents, for example the SAP Library, the Master Guide, and the Component Management Guides.
n Target group:l System administratorsl Technology consultantsl Solution consultants
l Project teams for implementations or upgradesn Current version:l Located in the SAP Service Marketplace at service.sap.com/instguides
Upgrade
Upgrade Master Guide—The Upgrade Master Guide is the starting point for upgrading the BusinessScenarios of an SAP solution. It provides scenario-specific descriptions of preparation, execution, and follow-upof an upgrade. It also refers to other documents, such as the Component Upgrade Guides and SAP Notes.Instead of an Upgrade Master Guide, there may be several Business Scenario Upgrade Guides or a SolutionUpgrade Guide for previous shipments of the Business Scenarios of an SAP solution.
n Target group:l Technology consultantsl Project teams for upgrades
n Current version:l Located in the SAP Service Marketplace at service.sap.com/instguides
Component Upgrade Guide—The Component Upgrade Guide describes the technical upgrade of an SAPcomponent, taking into account the combinations of operating systems and databases. It does not describe anybusiness-related configuration.
n Target group:
October 24, 2005 PUBLIC 169

B Reference
B.2 List of Documentation
l Technology consultantsl Project teams for upgrades
n Current version:l Located in the SAP Service Marketplace at service.sap.com/instguides
Release Notes—Release Notes are documents that contain short descriptions of new features or changesin an SAP component since the previous release. Release Notes about ABAP developments enable the SAPsystem to generate delta and upgrade IMGs
n Target group:l Consultants
l Project teams for upgradesn Current version:l Located in the SAP Service Marketplace at service.sap.com/releasenotesl In the SAP menu of the SAP system under Help ® Release Notes (only ABAP developments)
B.2 List of Documentation
.Note
You can find the documentation on SAP Service Marketplace at service.sap.com/instguides.
n Upgrade Master Guide for SAP NetWeaver or your SAP solutionn Master Guide for SAP NetWeaver or your SAP solutionn Media List for SAP NetWeaver or your SAP solutionn SAP Frontend Installation Guide
n Installing the SAP Library
n Upgrade Guide ‒ <SAP NetWeaver / SAP solution> Java
n Installation Guide ‒ <SAP NetWeaver / SAP solution> <Technology> on <Operating System>: <Database>
n Upgrading to Oracle Version <x>: <Platform>
n Configuration Guide: SAP Solution Manager
n SAP@Web Installation
n SNC User Guide
170 PUBLIC October 24, 2005

This page is intentionally left blank.

SAP AGDietmar-Hopp-Allee 1669190 WalldorfGermanyT +49/18 05/34 34 34F +49/18 05/34 34 20www.sap.com
© Copyright 2005 SAP AG. All rights reserved.No part of this publication may be reproduced or transmitted in any form or for any purpose without the express permission of SAP AG. The information contained herein may bechanged without prior notice.