e30 device user manual - philips
TRANSCRIPT
1146562 R00KGP 04/10/2020
EN-INTL User manual
E30
Ventilation solution
REF 1146562
Respironics Inc.1001 Murry Ridge LaneMurrysville, PA 15668 USA
Respironics Deutschland GmbH & Co. KGGewerbestrasse 1782211 Herrsching, Germany

© 2020 Koninklijke Philips N.V. All rights reserved.
Emergency Use AuthorizationThe Philips Respironics E30 Ventilator is provided globally for use under local emergency use authorizations, such as the US Food and Drug Administration (FDA) Emergency Use Authorization (EUA) for ventilators, Health Canada Interim Order for use in relation to COVID-19, and waiver of CE marking, which authorize its use for the duration of the COVID-19 public health emergency, unless terminated or revoked (after which the products may no longer be used).
Read Before UsingIf device is to be used invasively, at minimum, a rigorous external monitoring system needs to be in place, including all of the functionality and alarms that are required for monitoring critically ill and mechanically ventilated patients.
The Philips Respironics E30 device is compatible with all DreamStation oximetry capable accessory modules. See the DreamStation Oximetry Installation and Operation Guide for more information.
Please refer to all warnings in the Introduction of this manual. Below are critical warnings that the healthcare provider should be aware of.
Warnings
Device usageThe Philips Respironics E30 ventilator is a multi-patient use device, but should only be used on a single patient at any given time.
Patient monitoringPrior to placing a patient on the ventilator, a clinical assessment should be performed to determine:• The device alarm settings• Needed alternative ventilation equipment• If an alternative monitor (i.e. an alarming Pulse Oximeter or Respiratory Monitor) should be used
Alternative VentilationFor ventilator dependent patients, always have alternate ventilation equipment, such as a back-up ventilator, manual resuscitator, or similar device available. Ventilator dependent patients should be continuously monitored by qualified personnel. These personnel should be prepared to provide alternate therapy in the event of ventilator failure or inoperative equipment.
OxygenWhen using supplemental oxygen with this system, turn the device on before turning on the oxygen. Turn the oxygen off before turning the device off. This will prevent oxygen accumulation in the device. Explanation of the Warning: When the device is not in operation and the oxygen flow is left on, oxygen delivered into the tubing may accumulate within the device’s enclosure. Oxygen accumulated in the device enclosure will create a risk of fire.
2 Read Before Using
Philips Respironics E30 User Manual
Viral bacteria filterA viral bacteria filter must be installed in the patient circuit (between outlet of device and patient) to prevent contamination.
Loss of PowerThe external alarm module or Uninterruptible Power Supply (UPS) must be used. If your device comes with an external alarm module, the device should be plugged into the facility’s emergency backup power outlet (orange outlet), or a UPS should be used to provide battery back-up in the event of loss of AC mains power.
Alarm indicatorsThe high priority and medium priority alarms have the same auditory indication. These two alarm priorities are differentiated by visual indications. Red signals a high priority alarm and yellow signals a medium priority alarm. Please refer to Chapter 4 for additional alarm information.
Humidification If the device is used invasively, a separate external humidifer is required.
Table of contents
1. Introduction ......................................................................................................................................................... 1
1.1 Package contents .............................................................................................................................................. 1
1.2 Intended use ....................................................................................................................................................... 1
1.3 Safety information ............................................................................................................................................2
1.4 Symbols glossary ..............................................................................................................................................7
1.5 System overview ............................................................................................................................................. 10
1.6 How to contact Philips Respironics ............................................................................................................ 11
2. Therapy modes ................................................................................................................................................. 13
2.1 Device therapy modes ................................................................................................................................... 13
2.2 Triggering ........................................................................................................................................................... 13
3. Device setup ...................................................................................................................................................... 15
3.1 Installing and replacing the air filters ........................................................................................................ 15
3.2 Positioning the device ................................................................................................................................... 16
3.3 Supplying power to the device ....................................................................................................................17
3.4 Connecting the external alarm module kit or uninterruptible power supply (UPS) .................... 18
3.5 Connecting the breathing circuit ................................................................................................................ 19
3.6 Installing the O2 inlet port ............................................................................................................................. 19
3.7 Starting the device .......................................................................................................................................... 19
3.8 Navigating the device screens ....................................................................................................................20
3.9 Menu navigation (with therapy on) and optional humidification settings .....................................20
3.10 Provider mode (with therapy off) ...............................................................................................................22
3.11 Patient mode (with therapy off)..................................................................................................................26
3.12 Altitude compensation ..................................................................................................................................28
4. Alarms, alerts, and troubleshooting .............................................................................................................29
4.1 Device alarms ...................................................................................................................................................29
4.2 Device alerts .....................................................................................................................................................29
4.3 Alarm and alert audible indicators ............................................................................................................29
4.4 Alarm message screens................................................................................................................................ 30
4.5 What to do when an alarm occurs ............................................................................................................. 31
4.6 External power fail alarm ............................................................................................................................. 31
4.7 Alarm summary table ................................................................................................................................... 31
4.8 Alert summary table .......................................................................................................................................34
4.9 Troubleshooting ..............................................................................................................................................37
4.10 System checkout procedure ........................................................................................................................39
ii Table of contents
Philips Respironics E30 User Manual
5. Accessories ........................................................................................................................................................43
5.1 DreamStation humidifier ...............................................................................................................................43
5.2 Link module ......................................................................................................................................................43
5.3 Oximeter ............................................................................................................................................................44
5.4 DreamStation roll stand ................................................................................................................................44
5.5 Supplemental oxygen ....................................................................................................................................44
5.6 SD card ...............................................................................................................................................................44
6. Cleaning .............................................................................................................................................................45
6.1 Cleaning and replacing the device filters .................................................................................................45
6.2 Hospital and institution cleaning: device and O2 inlet port exterior ................................................45
6.3 Hospital and institution disinfection: device and O2 inlet port exterior .........................................46
6.4 Service ................................................................................................................................................................ 47
7. Specifications, end of use, and EMC ............................................................................................................49
7.1 Specifications ...................................................................................................................................................49
7.2 End of use ..........................................................................................................................................................51
7.3 Disposal ..............................................................................................................................................................51
7.4 EMC information ............................................................................................................................................. 52
Limited warranty .....................................................................................................................................................55
This chapter provides an overview of the Philips Respironics E30 device. Take time to read the entire manual before using your device for the first time. This chapter includes:
• Package contents
• Intended use
• Safety information
• Symbols
• System overview
1.1 Package contentsYour Philips Respironics E30 system may include the following components. Some components are optional accessories that may not be packaged with the device.
• Device • Reusable blue pollen filter
• Humidifier • Disposable light-blue ultra-fine filter (optional)
• User manual • Flexible tubing
• Power cord • Power cord cable clamp and screw
• Power supply
• O2 inlet port
• External alarm module kit or uninterruptible power supply (UPS)
1.2 Intended useThe Philips Respironics E30 ventilator is intended to provide invasive and non-invasive ventilatory support for individuals with Respiratory Insufficiency. It is specifically for the care of adult and pediatric patients >7 years of age and >18kgs. It is intended to be used in the hospital or other institutional healthcare environments, as well as spaces converted for the care of large numbers of COVID-19 patients (e.g. convention centers, university dormitories, motels). The Philips Respironics E30 ventilator is intended for use by qualified, trained personnel under the direction of a physician.
1. Introduction
2 Introduction
Philips Respironics E30 User Manual
1.3 Safety information
1.3.1 Warnings
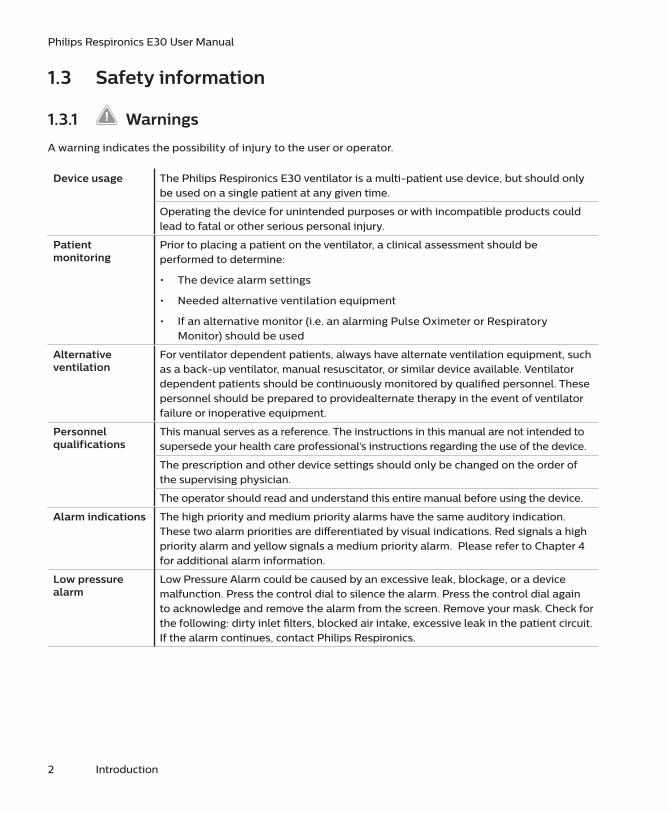
A warning indicates the possibility of injury to the user or operator.
Device usage The Philips Respironics E30 ventilator is a multi-patient use device, but should only be used on a single patient at any given time.
Operating the device for unintended purposes or with incompatible products could lead to fatal or other serious personal injury.
Patient monitoring
Prior to placing a patient on the ventilator, a clinical assessment should be performed to determine:
• The device alarm settings
• Needed alternative ventilation equipment
• If an alternative monitor (i.e. an alarming Pulse Oximeter or Respiratory Monitor) should be used
Alternative ventilation
For ventilator dependent patients, always have alternate ventilation equipment, such as a back-up ventilator, manual resuscitator, or similar device available. Ventilator dependent patients should be continuously monitored by qualified personnel. These personnel should be prepared to providealternate therapy in the event of ventilator failure or inoperative equipment.
Personnel qualifications
This manual serves as a reference. The instructions in this manual are not intended to supersede your health care professional’s instructions regarding the use of the device.
The prescription and other device settings should only be changed on the order of the supervising physician.
The operator should read and understand this entire manual before using the device.
Alarm indications The high priority and medium priority alarms have the same auditory indication. These two alarm priorities are differentiated by visual indications. Red signals a high priority alarm and yellow signals a medium priority alarm. Please refer to Chapter 4 for additional alarm information.
Low pressure alarm
Low Pressure Alarm could be caused by an excessive leak, blockage, or a device malfunction. Press the control dial to silence the alarm. Press the control dial again to acknowledge and remove the alarm from the screen. Remove your mask. Check for the following: dirty inlet filters, blocked air intake, excessive leak in the patient circuit. If the alarm continues, contact Philips Respironics.
Introduction 3
Philips Respironics E30 User Manual
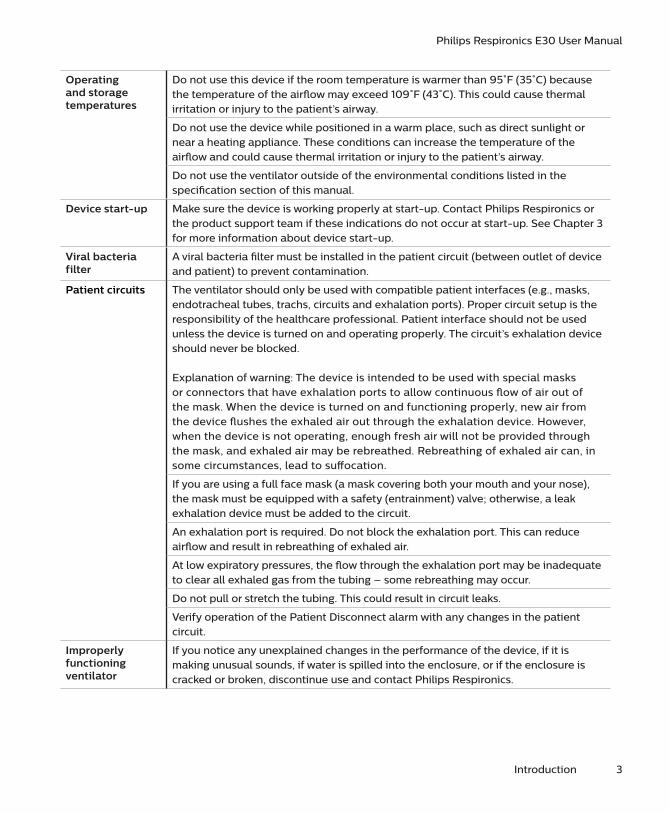
Operating and storage temperatures
Do not use this device if the room temperature is warmer than 95˚F (35˚C) because the temperature of the airflow may exceed 109˚F (43˚C). This could cause thermal irritation or injury to the patient’s airway.
Do not use the device while positioned in a warm place, such as direct sunlight or near a heating appliance. These conditions can increase the temperature of the airflow and could cause thermal irritation or injury to the patient’s airway.
Do not use the ventilator outside of the environmental conditions listed in the specification section of this manual.
Device start-up Make sure the device is working properly at start-up. Contact Philips Respironics or the product support team if these indications do not occur at start-up. See Chapter 3 for more information about device start-up.
Viral bacteria filter
A viral bacteria filter must be installed in the patient circuit (between outlet of device and patient) to prevent contamination.
Patient circuits The ventilator should only be used with compatible patient interfaces (e.g., masks, endotracheal tubes, trachs, circuits and exhalation ports). Proper circuit setup is the responsibility of the healthcare professional. Patient interface should not be used unless the device is turned on and operating properly. The circuit’s exhalation device should never be blocked.
Explanation of warning: The device is intended to be used with special masks or connectors that have exhalation ports to allow continuous flow of air out of the mask. When the device is turned on and functioning properly, new air from the device flushes the exhaled air out through the exhalation device. However, when the device is not operating, enough fresh air will not be provided through the mask, and exhaled air may be rebreathed. Rebreathing of exhaled air can, in some circumstances, lead to suffocation.
If you are using a full face mask (a mask covering both your mouth and your nose), the mask must be equipped with a safety (entrainment) valve; otherwise, a leak exhalation device must be added to the circuit.
An exhalation port is required. Do not block the exhalation port. This can reduce airflow and result in rebreathing of exhaled air.
At low expiratory pressures, the flow through the exhalation port may be inadequate to clear all exhaled gas from the tubing – some rebreathing may occur.
Do not pull or stretch the tubing. This could result in circuit leaks.
Verify operation of the Patient Disconnect alarm with any changes in the patient circuit.
Improperly functioning ventilator
If you notice any unexplained changes in the performance of the device, if it is making unusual sounds, if water is spilled into the enclosure, or if the enclosure is cracked or broken, discontinue use and contact Philips Respironics.
4 Introduction
Philips Respironics E30 User Manual
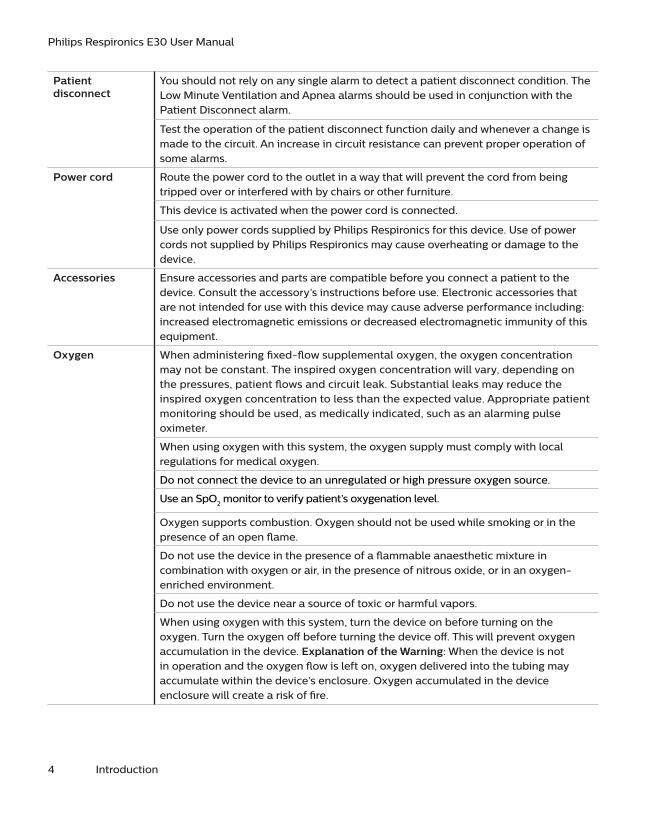
Patient disconnect
You should not rely on any single alarm to detect a patient disconnect condition. The Low Minute Ventilation and Apnea alarms should be used in conjunction with the Patient Disconnect alarm.
Test the operation of the patient disconnect function daily and whenever a change is made to the circuit. An increase in circuit resistance can prevent proper operation of some alarms.
Power cord Route the power cord to the outlet in a way that will prevent the cord from being tripped over or interfered with by chairs or other furniture.
This device is activated when the power cord is connected.
Use only power cords supplied by Philips Respironics for this device. Use of power cords not supplied by Philips Respironics may cause overheating or damage to the device.
Accessories Ensure accessories and parts are compatible before you connect a patient to the device. Consult the accessory’s instructions before use. Electronic accessories that are not intended for use with this device may cause adverse performance including: increased electromagnetic emissions or decreased electromagnetic immunity of this equipment.
Oxygen When administering fixed-flow supplemental oxygen, the oxygen concentration may not be constant. The inspired oxygen concentration will vary, depending on the pressures, patient flows and circuit leak. Substantial leaks may reduce the inspired oxygen concentration to less than the expected value. Appropriate patient monitoring should be used, as medically indicated, such as an alarming pulse oximeter.
When using oxygen with this system, the oxygen supply must comply with local regulations for medical oxygen.
Do not connect the device to an unregulated or high pressure oxygen source.
Use an SpO2 monitor to verify patient’s oxygenation level.
Oxygen supports combustion. Oxygen should not be used while smoking or in the presence of an open flame.
Do not use the device in the presence of a flammable anaesthetic mixture in combination with oxygen or air, in the presence of nitrous oxide, or in an oxygen-enriched environment.
Do not use the device near a source of toxic or harmful vapors.
When using oxygen with this system, turn the device on before turning on the oxygen. Turn the oxygen off before turning the device off. This will prevent oxygen accumulation in the device. Explanation of the Warning: When the device is not in operation and the oxygen flow is left on, oxygen delivered into the tubing may accumulate within the device’s enclosure. Oxygen accumulated in the device enclosure will create a risk of fire.

Introduction 5
Philips Respironics E30 User Manual
EMC Medical Electrical Equipment needs special precautions regarding EMC and needs to be installed and put into service according to the EMC information provided in this manual. The device should not be used adjacent to or stacked with other equipment. For more information, contact Philips Respironics or the product support team.
Portable and Mobile RF Communications Equipment can affect Medical Electrical Equipment. See the EMC section of this manual for distances to observe between RF Generators and the ventilator to avoid interference.
The Health Industry Manufacturers Association recommends that a minimum separation of six inches be maintained between a wireless phone and a pacemaker to avoid potential interference with the pacemaker.
Maintenance Never operate the device if any parts are damaged or if it is not working properly. Replace damaged parts before continuing use.
Periodically inspect electrical cords, cables, tubing, and accessories for damage or signs of wear. Discontinue use and replace if damaged.
Cleaning To avoid electrical shock, always unplug the power cord from the wall outlet and/or external power supply module before cleaning the device.
Do not immerse the device in any fluids or spray the device with water or cleaners. Clean the device with a cloth dampened with an approved cleaner.
Humidifier For safe operation when using a humidifier, the humidifier must always be positioned below the breathing circuit connection at the mask. The humidifier must be level for proper operation.
Humidification Humidification can increase the resistance of breathing system filters, and the operator must monitor the breathing system filter frequently for increased resistance and blockage to ensure the delivery of the therapeutic pressure. If the device is used invasively, a separate external humidifer is required.
Not MR safe This device is not intended for MR environments.
6 Introduction
Philips Respironics E30 User Manual
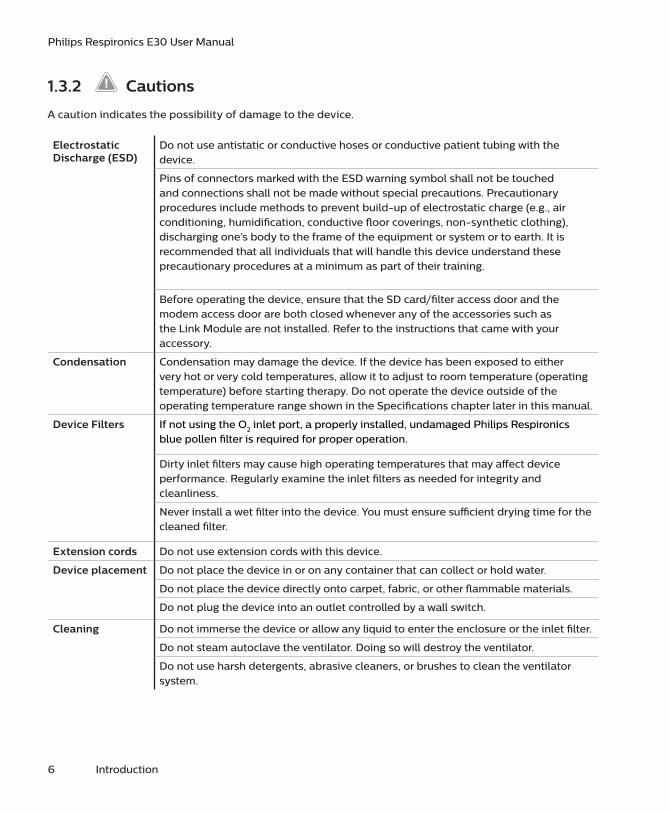
1.3.2 Cautions
A caution indicates the possibility of damage to the device.
Electrostatic Discharge (ESD)
Do not use antistatic or conductive hoses or conductive patient tubing with the device.
Pins of connectors marked with the ESD warning symbol shall not be touched and connections shall not be made without special precautions. Precautionary procedures include methods to prevent build-up of electrostatic charge (e.g., air conditioning, humidification, conductive floor coverings, non-synthetic clothing), discharging one’s body to the frame of the equipment or system or to earth. It is recommended that all individuals that will handle this device understand these precautionary procedures at a minimum as part of their training.
Before operating the device, ensure that the SD card/filter access door and the modem access door are both closed whenever any of the accessories such as the Link Module are not installed. Refer to the instructions that came with your accessory.
Condensation Condensation may damage the device. If the device has been exposed to either very hot or very cold temperatures, allow it to adjust to room temperature (operating temperature) before starting therapy. Do not operate the device outside of the operating temperature range shown in the Specifications chapter later in this manual.
Device Filters If not using the O2 inlet port, a properly installed, undamaged Philips Respironics blue pollen filter is required for proper operation.
Dirty inlet filters may cause high operating temperatures that may affect device performance. Regularly examine the inlet filters as needed for integrity and cleanliness.
Never install a wet filter into the device. You must ensure sufficient drying time for the cleaned filter.
Extension cords Do not use extension cords with this device.
Device placement Do not place the device in or on any container that can collect or hold water.
Do not place the device directly onto carpet, fabric, or other flammable materials.
Do not plug the device into an outlet controlled by a wall switch.
Cleaning Do not immerse the device or allow any liquid to enter the enclosure or the inlet filter.
Do not steam autoclave the ventilator. Doing so will destroy the ventilator.
Do not use harsh detergents, abrasive cleaners, or brushes to clean the ventilator system.
Introduction 7
Philips Respironics E30 User Manual
1.3.3 Notes
• This product is not made with DEHP, natural latex rubber or dry natural rubber in patient or operator accessible areas or in the air path or breathing circuit.
• See the Limited Warranty section of this manual for information warranty coverage.
1.3.4 Contraindications
If the patient has any of the following conditions, consult their health care professional before using the device:
• Inability to maintain a patent airway or adequately clear secretions
• At risk for aspiration of gastric contents
• Diagnosed with acute sinusitis or otitis media
• Allergy or hypersensitivity to the mask materials where the risk from allergic reaction outweighs the benefit of ventilatory assistance
• Epistaxis, causing pulmonary aspiration of blood
• Hypotension
When assessing the relative risks and benefits of using this equipment, the health care professional should understand that this device can deliver the pressure ranges indicated in the Control Accuracy table in Chapter 7. In the event of certain fault conditions, a maximum pressure of 60 cm H2O is possible.
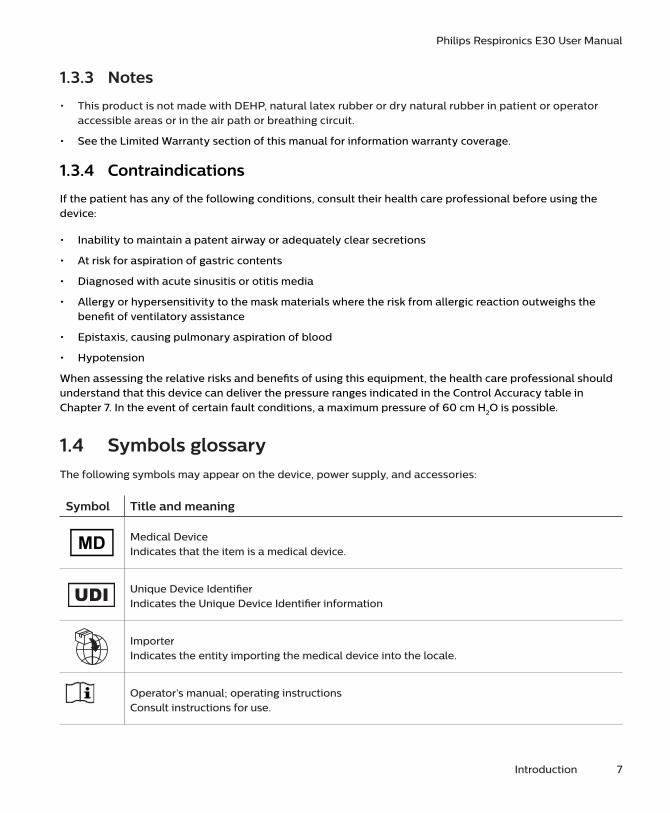
1.4 Symbols glossaryThe following symbols may appear on the device, power supply, and accessories:
Symbol Title and meaning
Medical DeviceIndicates that the item is a medical device.
Unique Device IdentifierIndicates the Unique Device Identifier information
ImporterIndicates the entity importing the medical device into the locale.
Operator’s manual; operating instructionsConsult instructions for use.
8 Introduction
Philips Respironics E30 User Manual
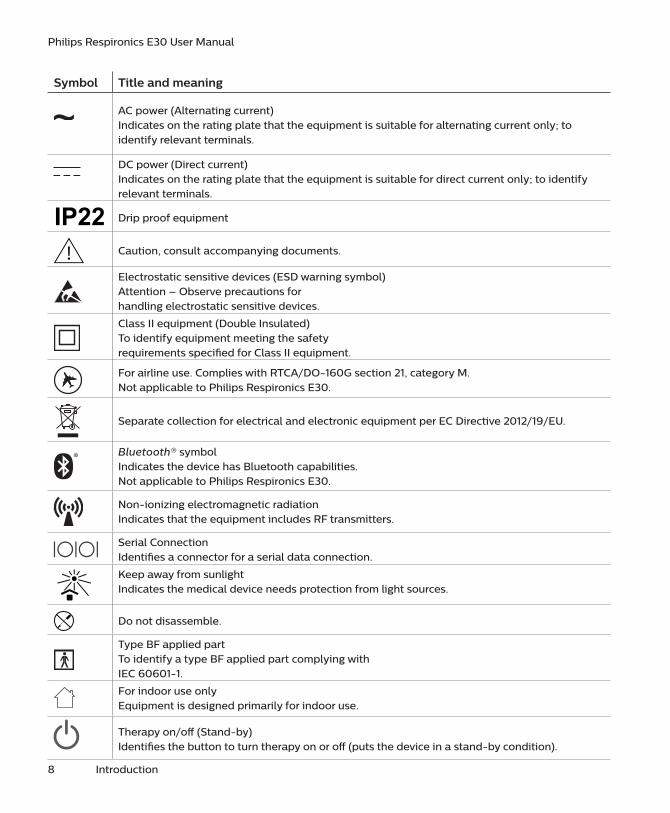
Symbol Title and meaning
AC power (Alternating current)Indicates on the rating plate that the equipment is suitable for alternating current only; to identify relevant terminals.
DC power (Direct current)Indicates on the rating plate that the equipment is suitable for direct current only; to identify relevant terminals.
Drip proof equipment
Caution, consult accompanying documents.
Electrostatic sensitive devices (ESD warning symbol)Attention – Observe precautions forhandling electrostatic sensitive devices.
Class II equipment (Double Insulated)To identify equipment meeting the safetyrequirements specified for Class II equipment.
For airline use. Complies with RTCA/DO-160G section 21, category M. Not applicable to Philips Respironics E30.
Separate collection for electrical and electronic equipment per EC Directive 2012/19/EU.
Bluetooth® symbolIndicates the device has Bluetooth capabilities.Not applicable to Philips Respironics E30.
Non-ionizing electromagnetic radiationIndicates that the equipment includes RF transmitters.
Serial ConnectionIdentifies a connector for a serial data connection.
Keep away from sunlight Indicates the medical device needs protection from light sources.
Do not disassemble.
Type BF applied partTo identify a type BF applied part complying with IEC 60601-1.
For indoor use onlyEquipment is designed primarily for indoor use.
Therapy on/off (Stand-by)Identifies the button to turn therapy on or off (puts the device in a stand-by condition).
Introduction 9
Philips Respironics E30 User Manual
Symbol Title and meaning
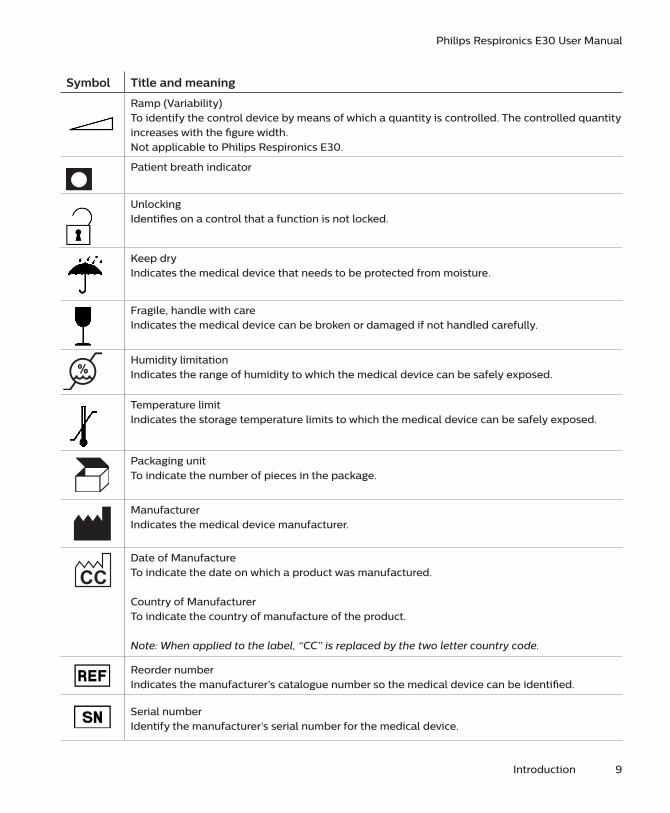
Ramp (Variability)To identify the control device by means of which a quantity is controlled. The controlled quantity increases with the figure width.Not applicable to Philips Respironics E30.
Patient breath indicator
UnlockingIdentifies on a control that a function is not locked.
Keep dryIndicates the medical device that needs to be protected from moisture.
Fragile, handle with careIndicates the medical device can be broken or damaged if not handled carefully.
Humidity limitationIndicates the range of humidity to which the medical device can be safely exposed.
Temperature limitIndicates the storage temperature limits to which the medical device can be safely exposed.
Packaging unitTo indicate the number of pieces in the package.
ManufacturerIndicates the medical device manufacturer.
CCDate of ManufactureTo indicate the date on which a product was manufactured.
Country of ManufacturerTo indicate the country of manufacture of the product.
Note: When applied to the label, “CC” is replaced by the two letter country code.
Reorder numberIndicates the manufacturer’s catalogue number so the medical device can be identified.
Serial numberIdentify the manufacturer’s serial number for the medical device.

10 Introduction
Philips Respironics E30 User Manual
1.5 System overview
1.5.1 Device features
The figure above illustrates some of the device features, described in the following table.
# Feature Description
1 Therapy on/off button Starts and stops the airflow for therapy.
2 Ambient light sensorDetects room light levels and adjusts brightness of LCD display screen.Not applicable to Philips Respironics E30.
3 Ramp button Activates the ramp feature during therapy. Not applicable to Philips Respironics E30.
4 Door, SD card & filter accessThis door lifts open for access to the SD card and filter area.
5 LCD display screen This is the User Interface for the therapy device.
6 Control dialTurn the dial to scroll between options on the screen. Press the dial to choose an option and silence and acknowledge alarms.
7 Door, accessory accessThis door lifts open for access to the (optional) accessories.
8 Humidifier connectorHumidifier connects to the back of the therapy device. The humidifier pin connector will attach here.
9 Air outlet port Connect the tubing here.
10 Power inlet Connect the power cord here.
Introduction 11
Philips Respironics E30 User Manual
1.6 How to contact Philips RespironicsShould you experience trouble with this equipment or require assistance setting up, using, or maintaining the device or accessories, please contact Philips Respironics. To contact Philips Respironics directly, call +1-724-387-4000, or go to www.respironics.com to find your local customer service contact information. You can also use the following address:
1001 Murry Ridge LaneMurrysville, Pennsylvania 15668-85501-724-387-4000
DeutschlandGewerbestrasse 1782211 Herrsching, Germany+49 8152 93060

12 Introduction
Philips Respironics E30 User Manual
This chapter describes the therapy modes and features available on the device.
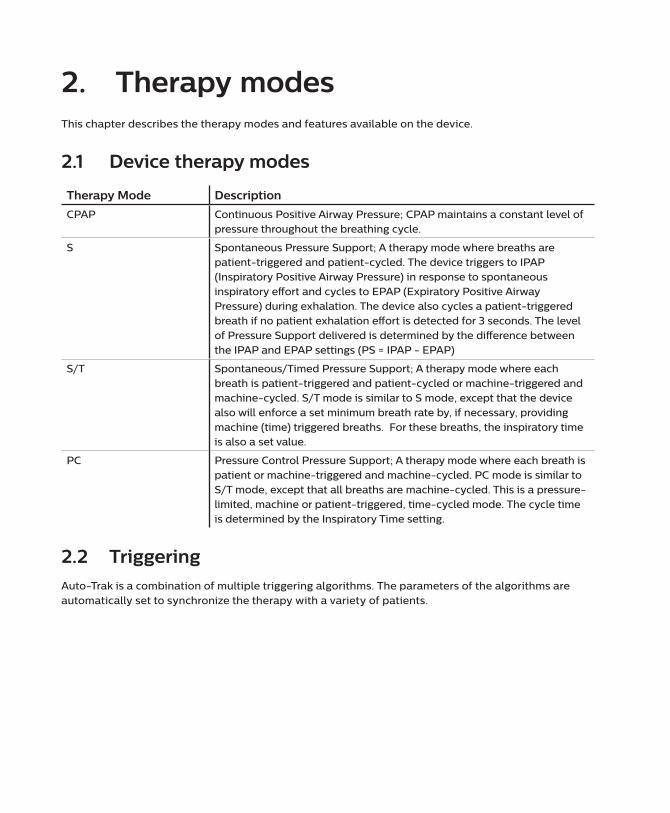
2.1 Device therapy modes
Therapy Mode Description
CPAP Continuous Positive Airway Pressure; CPAP maintains a constant level of pressure throughout the breathing cycle.
S Spontaneous Pressure Support; A therapy mode where breaths are patient-triggered and patient-cycled. The device triggers to IPAP (Inspiratory Positive Airway Pressure) in response to spontaneous inspiratory effort and cycles to EPAP (Expiratory Positive Airway Pressure) during exhalation. The device also cycles a patient-triggered breath if no patient exhalation effort is detected for 3 seconds. The level of Pressure Support delivered is determined by the difference between the IPAP and EPAP settings (PS = IPAP - EPAP)
S/T Spontaneous/Timed Pressure Support; A therapy mode where each breath is patient-triggered and patient-cycled or machine-triggered and machine-cycled. S/T mode is similar to S mode, except that the device also will enforce a set minimum breath rate by, if necessary, providing machine (time) triggered breaths. For these breaths, the inspiratory time is also a set value.
PC Pressure Control Pressure Support; A therapy mode where each breath is patient or machine-triggered and machine-cycled. PC mode is similar to S/T mode, except that all breaths are machine-cycled. This is a pressure-limited, machine or patient-triggered, time-cycled mode. The cycle time is determined by the Inspiratory Time setting.
2.2 TriggeringAuto-Trak is a combination of multiple triggering algorithms. The parameters of the algorithms are automatically set to synchronize the therapy with a variety of patients.
2. Therapy modes

14 Therapy modes
Philips Respironics E30 User Manual
This chapter details how to set up the device. This chapter includes:
• Installing and replacing the air filters
• Positioning the device
• Supplying AC power to the device
• Connecting the external alarm module kit or uninterruptible power supply (UPS)
• Connecting the breathing circuit
• Installing the O2 inlet port
• Starting the device
• Menu and screen navigation
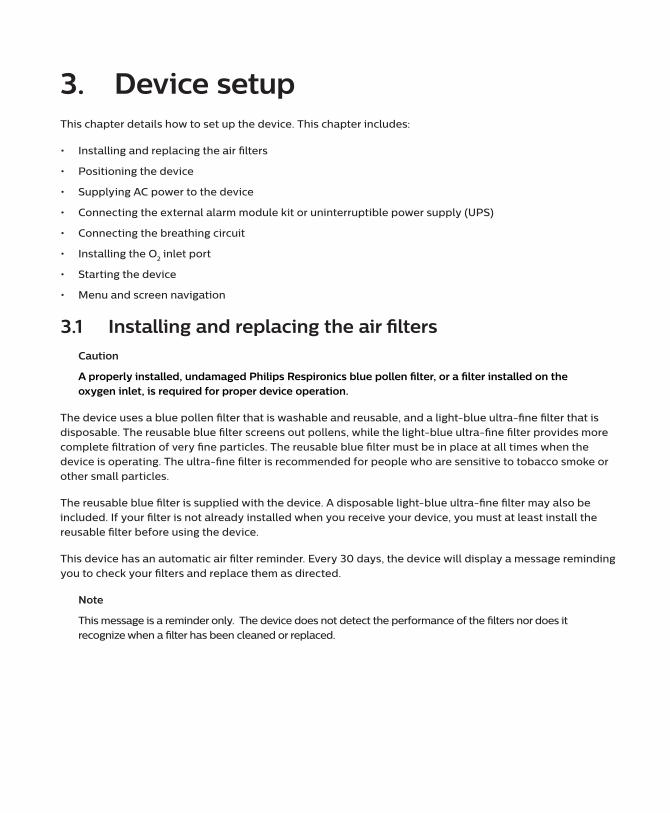
3.1 Installing and replacing the air filtersCaution
A properly installed, undamaged Philips Respironics blue pollen filter, or a filter installed on the oxygen inlet, is required for proper device operation.
The device uses a blue pollen filter that is washable and reusable, and a light-blue ultra-fine filter that is disposable. The reusable blue filter screens out pollens, while the light-blue ultra-fine filter provides more complete filtration of very fine particles. The reusable blue filter must be in place at all times when the device is operating. The ultra-fine filter is recommended for people who are sensitive to tobacco smoke or other small particles.
The reusable blue filter is supplied with the device. A disposable light-blue ultra-fine filter may also be included. If your filter is not already installed when you receive your device, you must at least install the reusable filter before using the device.
This device has an automatic air filter reminder. Every 30 days, the device will display a message reminding you to check your filters and replace them as directed.
Note
This message is a reminder only. The device does not detect the performance of the filters nor does it recognize when a filter has been cleaned or replaced.
3. Device setup
16 Device setup
Philips Respironics E30 User Manual
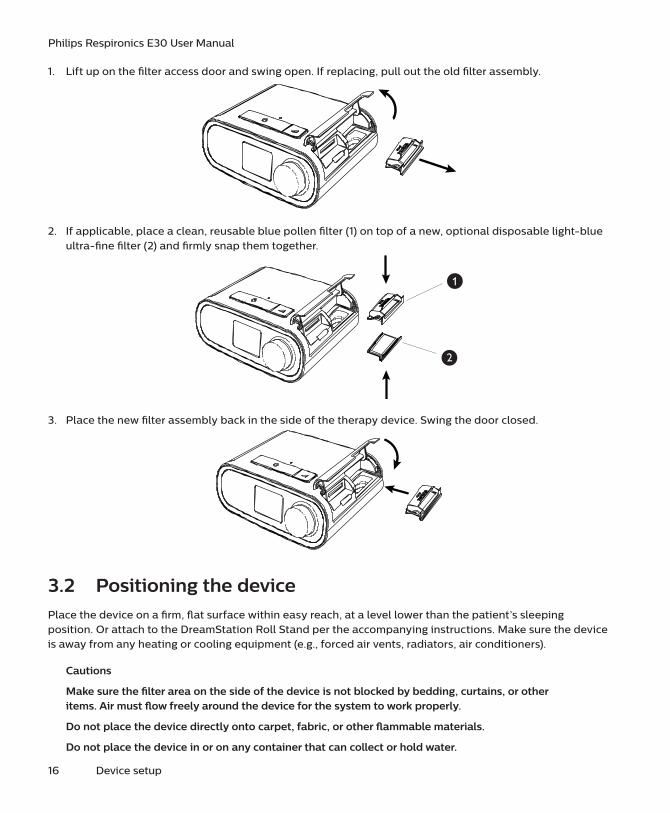
1. Lift up on the filter access door and swing open. If replacing, pull out the old filter assembly.
2. If applicable, place a clean, reusable blue pollen filter (1) on top of a new, optional disposable light-blue ultra-fine filter (2) and firmly snap them together.
3. Place the new filter assembly back in the side of the therapy device. Swing the door closed.
3.2 Positioning the devicePlace the device on a firm, flat surface within easy reach, at a level lower than the patient’s sleeping position. Or attach to the DreamStation Roll Stand per the accompanying instructions. Make sure the device is away from any heating or cooling equipment (e.g., forced air vents, radiators, air conditioners).
Cautions
Make sure the filter area on the side of the device is not blocked by bedding, curtains, or other items. Air must flow freely around the device for the system to work properly.
Do not place the device directly onto carpet, fabric, or other flammable materials.
Do not place the device in or on any container that can collect or hold water.
Device setup 17
Philips Respironics E30 User Manual
Note
When positioning the device, make sure that the power cable is accessible because removing power is the only way to turn off the device.
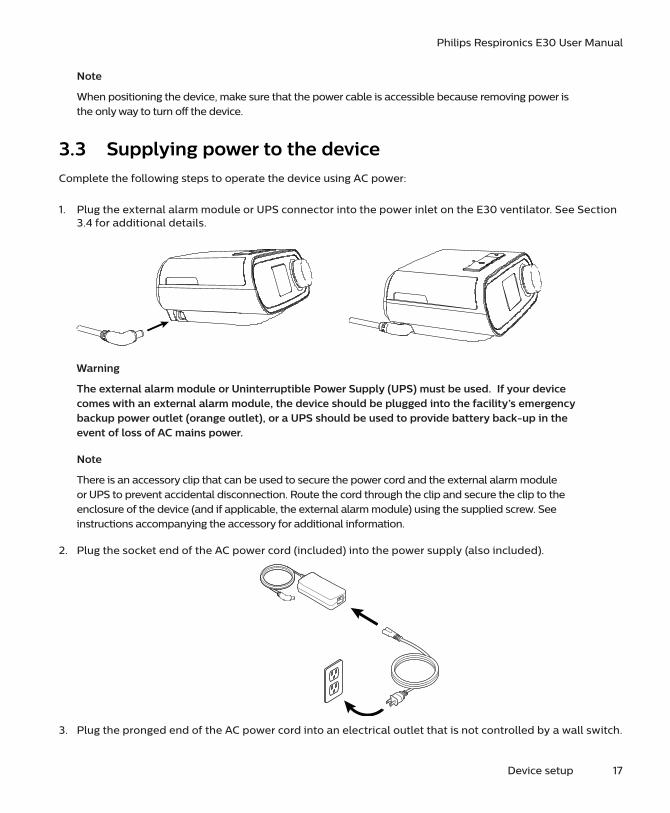
3.3 Supplying power to the deviceComplete the following steps to operate the device using AC power:
1. Plug the external alarm module or UPS connector into the power inlet on the E30 ventilator. See Section 3.4 for additional details.
Warning
The external alarm module or Uninterruptible Power Supply (UPS) must be used. If your device comes with an external alarm module, the device should be plugged into the facility’s emergency backup power outlet (orange outlet), or a UPS should be used to provide battery back-up in the event of loss of AC mains power.
Note
There is an accessory clip that can be used to secure the power cord and the external alarm module or UPS to prevent accidental disconnection. Route the cord through the clip and secure the clip to the enclosure of the device (and if applicable, the external alarm module) using the supplied screw. See instructions accompanying the accessory for additional information.
2. Plug the socket end of the AC power cord (included) into the power supply (also included).
3. Plug the pronged end of the AC power cord into an electrical outlet that is not controlled by a wall switch.

18 Device setup
Philips Respironics E30 User Manual
4. Plug the power supply cord’s connector into the external alarm module or UPS connector.
5. Verify that the all connections are fully inserted. This will help to ensure that a secure, reliable electrical connection has been made.
Warning
Periodically inspect electrical cords and cables for damage or signs of wear. Discontinue use and replace if damaged.
Caution
Do not use extension cords with this device.
Important
To remove AC power, disconnect the power supply cord from the electrical outlet.
Note
If the Incorrect Power Supply icon appears on the screen, please repeat step 5.
3.4 Connecting the external alarm module kit or uninterruptible power supply (UPS)
See instructions accompanying the external alarm module or UPS for setup and other additional details. For information when this accessory alarms, see Chapter 4.
Note
The UPS is not intended to be used to power your E30 ventilator, but for backup power purposes in the event of an unexpected loss of power.
The UPS must be placed at least 2 m (6.5 ft) away from the Philips Respironics E30 ventilator and patient.
Be certain to plug the UPS power cord directly into a wall outlet and not into a surge protector. The UPS outlets are powered whenever the UPS is switched ON. During a power outage, the UPS outlets will be powered for a limited time. Charging the UPS for at least 20 minutes before use will support back-up of a 2 minute alarm. The UPS may take up to 24 hours to complete a full charge.
If using an off-the-shelf UPS, below are instructions for how to set it up with the Philips Respironics E30 Ventilator:
1. Ensure the therapy device is turned off.
2. Plug the UPS into the wall outlet.
3. Plug the E30 ventilator power supply ( 1118499) into the UPS, ensuring that you plug into the UPS battery backup outlets. Press the power button on the UPS to turn it on.
4. Verify that the E30 ventilator and UPS are operating properly.
Device setup 19
Philips Respironics E30 User Manual
Specifications
• Uninterruptible Power Supply: 110 to 240 v• Operation time: > 1.5 hours
3.5 Connecting the breathing circuitWarnings
Do not pull or stretch the tubing. This could result in circuit leaks.
Inspect the tubing for damage or wear. Discard and replace the tubing as necessary.
To use the system, connect the tubing to the air outlet on the back of the therapy device. Configure the breathing circuit based on patient needs.
3.6 Installing the O2 inlet portSee instructions accompanying the O2 inlet port for setup and other additional details.
3.7 Starting the device
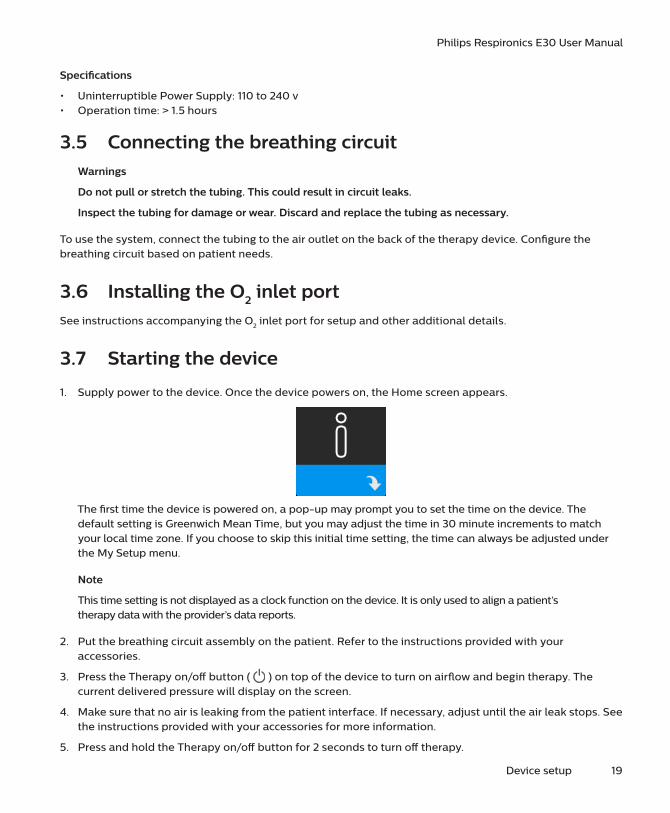
1. Supply power to the device. Once the device powers on, the Home screen appears.
The first time the device is powered on, a pop-up may prompt you to set the time on the device. The default setting is Greenwich Mean Time, but you may adjust the time in 30 minute increments to match your local time zone. If you choose to skip this initial time setting, the time can always be adjusted under the My Setup menu.
Note
This time setting is not displayed as a clock function on the device. It is only used to align a patient’s therapy data with the provider’s data reports.
2. Put the breathing circuit assembly on the patient. Refer to the instructions provided with your accessories.
3. Press the Therapy on/off button ( ) on top of the device to turn on airflow and begin therapy. The current delivered pressure will display on the screen.
4. Make sure that no air is leaking from the patient interface. If necessary, adjust until the air leak stops. See the instructions provided with your accessories for more information.
5. Press and hold the Therapy on/off button for 2 seconds to turn off therapy.
20 Device setup
Philips Respironics E30 User Manual
Note
During therapy, if there is a mains interruption (i.e., power loss), therapy will resume once power is restored if power loss is shorter than 10 minutes. If power loss is greater than 10 minutes, the device will return to the Home screen once power is restored. From there, you may resume therapy as needed.
3.8 Navigating the device screensThe User Interface (UI) on this device allows you to adjust the device settings and view information about your therapy. The UI is composed of the display screen and the control dial. Rotate the control dial in either direction to scroll through the menus on the display screen. Press the control dial to open a menu.
To adjust a setting:
1. Rotate the control dial to your desired setting.
2. Press the control dial to select that setting.
3. Rotate the control dial to change the setting. The rotate dial icon on any screen indicates to rotate the dial to perform an action.
4. Press the control dial again to save the setting change. The click dial icon on any screen indicates to press the dial to perform an action.
Notes
Pressing the dial when the down arrow appears on any screen will take you to a sub-menu with more menu options. Pressing the dial when the up arrow appears on any sub-menu will return you back to the main menu.
The screens shown throughout this guide are examples for reference only. Actual screens may vary based upon device model and provider settings.
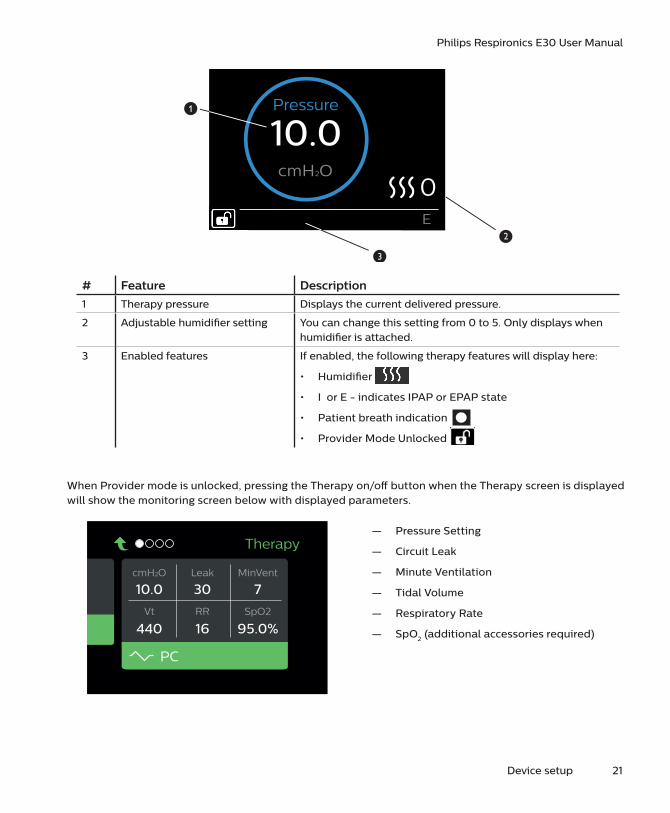
3.9 Menu navigation (with therapy on) and optional humidification settings
The following screen is displayed while therapy is turned on. The table below describes the different features that may appear on your screen. If an accessory is attached to the therapy device, additional symbols may appear. Refer to the instructions provided with the accessory for more information.
Device setup 21
Philips Respironics E30 User Manual
10.0
E
# Feature Description
1 Therapy pressure Displays the current delivered pressure.
2 Adjustable humidifier setting You can change this setting from 0 to 5. Only displays when humidifier is attached.
3 Enabled features If enabled, the following therapy features will display here:
• Humidifier
• I or E - indicates IPAP or EPAP state
• Patient breath indication
• Provider Mode Unlocked
When Provider mode is unlocked, pressing the Therapy on/off button when the Therapy screen is displayed will show the monitoring screen below with displayed parameters.
Therapy
PC
Leak
10.0 30 7
440 16 95.0%RR SpO2Vt
cmH2O MinVent
— Pressure Setting
— Circuit Leak
— Minute Ventilation
— Tidal Volume
— Respiratory Rate
— SpO2 (additional accessories required)

22 Device setup
Philips Respironics E30 User Manual
3.9.1 Adjusting the humidifier settings
If you have a humidifier, you can adjust humidifier settings while the device is delivering therapy by following these steps:
1. Turn the control dial in any direction to activate the humidifier setting.
2. Press the control dial to edit the setting.
3. Turn the control dial until you reach the desired setting. The setting increments when you turn the dial clockwise and decrements when your turn the dial counter-clockwise.
4. Press the control dial to save the setting.
3.10 Provider mode (with therapy off)When turned on, the device is automatically set in Provider mode to allow for modification of device settings. You can choose between the following Provider mode screens, in addition to My Provider and My Setup (not shown below).
If locked, Provider mode can be accessed by following these steps:
1. Supply power to the device (if not already).
2. Once the device is powered, press and hold both the control dial and the Ramp button on the device for at least 5 seconds.
3. You are now in Provider mode.
3.10.1 Provider settings
The following sections will describe the options available from the Provider screens.
Therapy settings
Choosing this screen will take you to a sub-menu where you can adjust the device therapy modes and pressure settings. These settings are described here.
Note
Not all settings shown here will display on the device. The display will vary based on therapy device model and device settings.
Device setup 23
Philips Respironics E30 User Manual
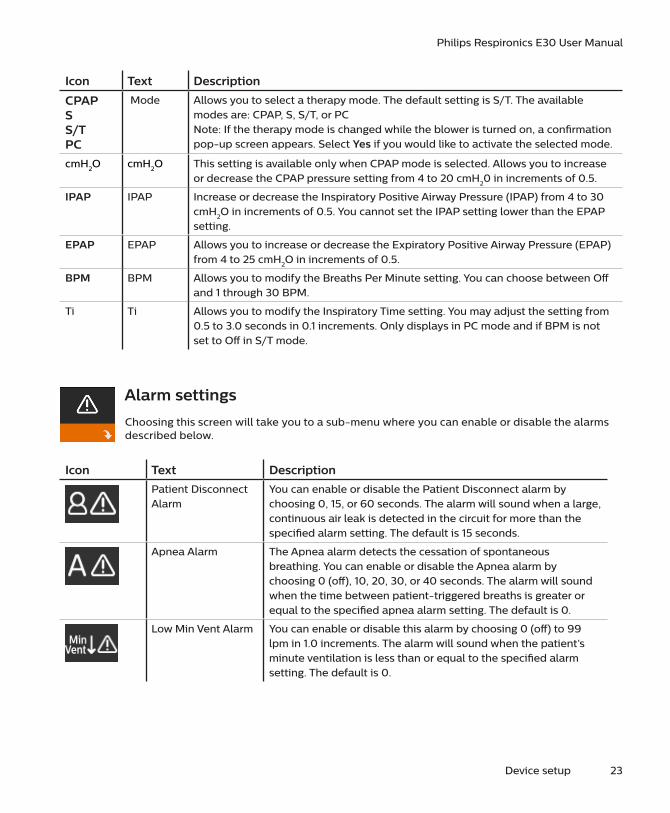
Icon Text Description
CPAPSS/TPC
Mode Allows you to select a therapy mode. The default setting is S/T. The available modes are: CPAP, S, S/T, or PC Note: If the therapy mode is changed while the blower is turned on, a confirmation pop-up screen appears. Select Yes if you would like to activate the selected mode.
cmH2O cmH2O This setting is available only when CPAP mode is selected. Allows you to increase or decrease the CPAP pressure setting from 4 to 20 cmH20 in increments of 0.5.
IPAP IPAP Increase or decrease the Inspiratory Positive Airway Pressure (IPAP) from 4 to 30 cmH2O in increments of 0.5. You cannot set the IPAP setting lower than the EPAP setting.
EPAP EPAP Allows you to increase or decrease the Expiratory Positive Airway Pressure (EPAP) from 4 to 25 cmH2O in increments of 0.5.
BPM BPM Allows you to modify the Breaths Per Minute setting. You can choose between Off and 1 through 30 BPM.
Ti Ti Allows you to modify the Inspiratory Time setting. You may adjust the setting from 0.5 to 3.0 seconds in 0.1 increments. Only displays in PC mode and if BPM is not set to Off in S/T mode.
Alarm settings
Choosing this screen will take you to a sub-menu where you can enable or disable the alarms described below.
Icon Text Description
Patient Disconnect Alarm
You can enable or disable the Patient Disconnect alarm by choosing 0, 15, or 60 seconds. The alarm will sound when a large, continuous air leak is detected in the circuit for more than the specified alarm setting. The default is 15 seconds.
Apnea Alarm The Apnea alarm detects the cessation of spontaneous breathing. You can enable or disable the Apnea alarm by choosing 0 (off), 10, 20, 30, or 40 seconds. The alarm will sound when the time between patient-triggered breaths is greater or equal to the specified apnea alarm setting. The default is 0.
Low Min Vent Alarm You can enable or disable this alarm by choosing 0 (off) to 99 lpm in 1.0 increments. The alarm will sound when the patient’s minute ventilation is less than or equal to the specified alarm setting. The default is 0.
24 Device setup
Philips Respironics E30 User Manual
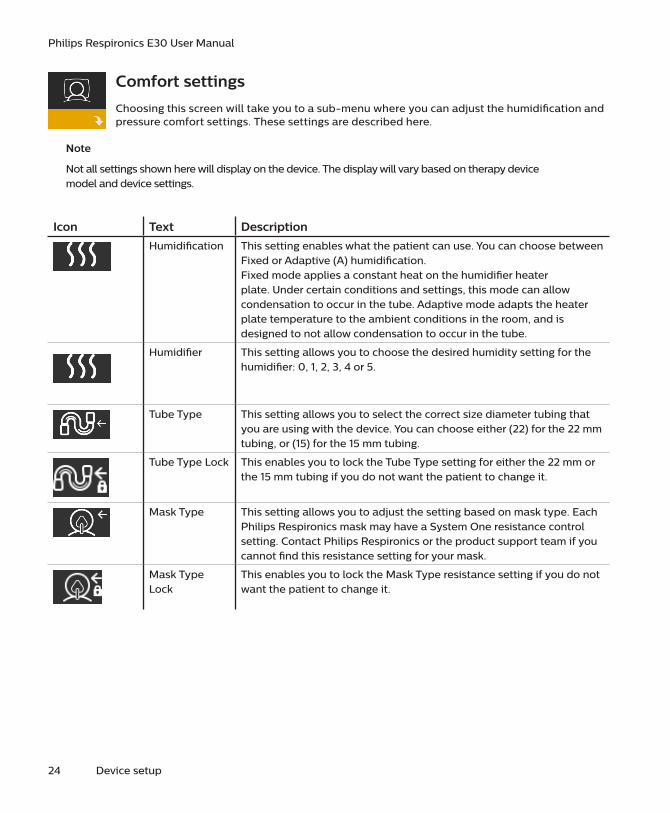
Comfort settings
Choosing this screen will take you to a sub-menu where you can adjust the humidification and pressure comfort settings. These settings are described here.
Note
Not all settings shown here will display on the device. The display will vary based on therapy device model and device settings.
Icon Text Description
Humidification This setting enables what the patient can use. You can choose between Fixed or Adaptive (A) humidification.Fixed mode applies a constant heat on the humidifier heater plate. Under certain conditions and settings, this mode can allow condensation to occur in the tube. Adaptive mode adapts the heater plate temperature to the ambient conditions in the room, and is designed to not allow condensation to occur in the tube.
Humidifier This setting allows you to choose the desired humidity setting for the humidifier: 0, 1, 2, 3, 4 or 5.
Tube Type This setting allows you to select the correct size diameter tubing that you are using with the device. You can choose either (22) for the 22 mm tubing, or (15) for the 15 mm tubing.
Tube Type Lock This enables you to lock the Tube Type setting for either the 22 mm or the 15 mm tubing if you do not want the patient to change it.
Mask Type This setting allows you to adjust the setting based on mask type. Each Philips Respironics mask may have a System One resistance control setting. Contact Philips Respironics or the product support team if you cannot find this resistance setting for your mask.
Mask Type Lock
This enables you to lock the Mask Type resistance setting if you do not want the patient to change it.
Device setup 25
Philips Respironics E30 User Manual
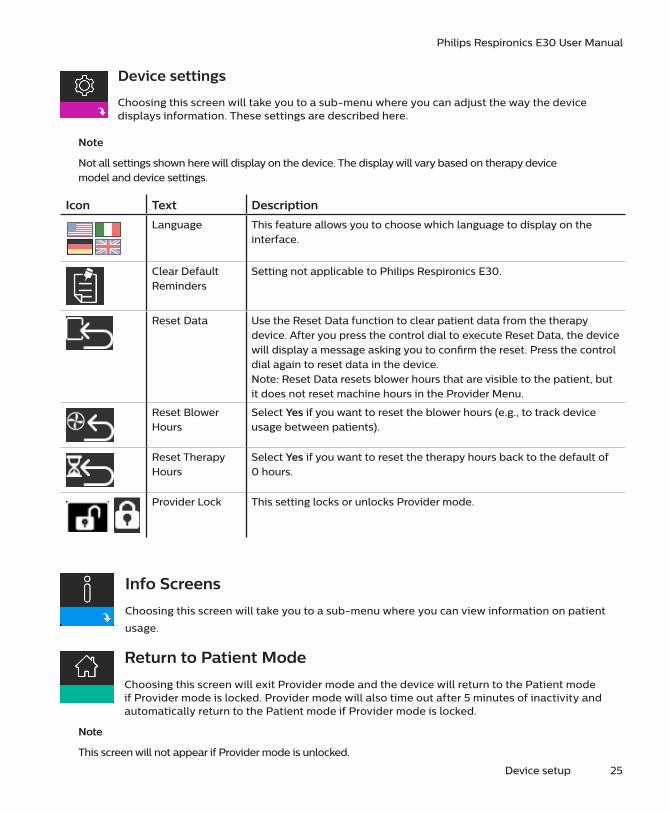
Device settings
Choosing this screen will take you to a sub-menu where you can adjust the way the device displays information. These settings are described here.
Note
Not all settings shown here will display on the device. The display will vary based on therapy device model and device settings.
Icon Text Description
Language This feature allows you to choose which language to display on the interface.
Clear Default Reminders
Setting not applicable to Philips Respironics E30.
Reset Data Use the Reset Data function to clear patient data from the therapy device. After you press the control dial to execute Reset Data, the device will display a message asking you to confirm the reset. Press the control dial again to reset data in the device.Note: Reset Data resets blower hours that are visible to the patient, but it does not reset machine hours in the Provider Menu.
Reset Blower Hours
Select Yes if you want to reset the blower hours (e.g., to track device usage between patients).
Reset Therapy Hours
Select Yes if you want to reset the therapy hours back to the default of 0 hours.
Provider Lock This setting locks or unlocks Provider mode.
Info Screens
Choosing this screen will take you to a sub-menu where you can view information on patient
usage.
Return to Patient Mode
Choosing this screen will exit Provider mode and the device will return to the Patient mode if Provider mode is locked. Provider mode will also time out after 5 minutes of inactivity and automatically return to the Patient mode if Provider mode is locked.
Note
This screen will not appear if Provider mode is unlocked.
26 Device setup
Philips Respironics E30 User Manual
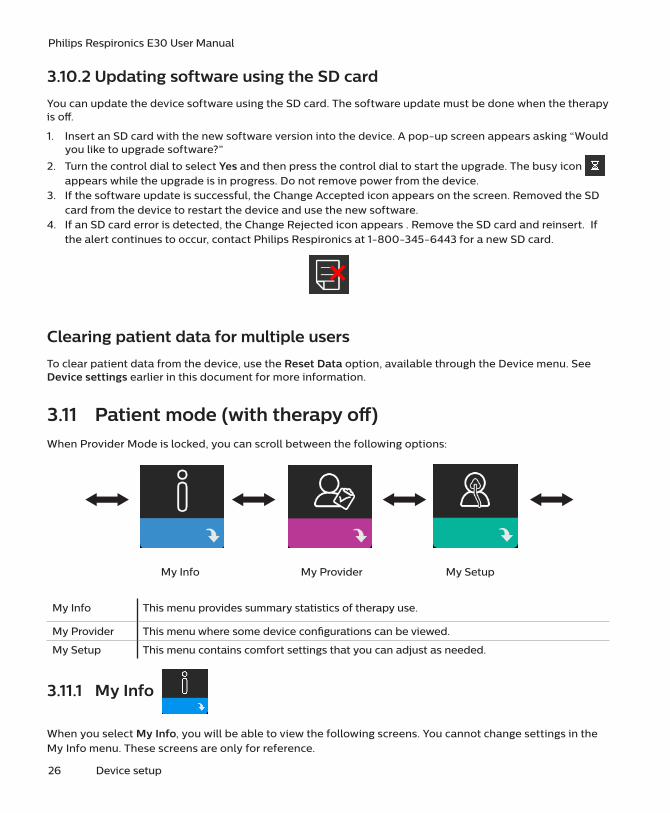
3.10.2 Updating software using the SD card
You can update the device software using the SD card. The software update must be done when the therapy is off.
1. Insert an SD card with the new software version into the device. A pop-up screen appears asking “Would you like to upgrade software?”
2. Turn the control dial to select Yes and then press the control dial to start the upgrade. The busy icon appears while the upgrade is in progress. Do not remove power from the device.
3. If the software update is successful, the Change Accepted icon appears on the screen. Removed the SD card from the device to restart the device and use the new software.
4. If an SD card error is detected, the Change Rejected icon appears . Remove the SD card and reinsert. If the alert continues to occur, contact Philips Respironics at 1-800-345-6443 for a new SD card.
Clearing patient data for multiple users
To clear patient data from the device, use the Reset Data option, available through the Device menu. See Device settings earlier in this document for more information.
3.11 Patient mode (with therapy off)When Provider Mode is locked, you can scroll between the following options:
My Info My Provider My Setup
My Info This menu provides summary statistics of therapy use.
My Provider This menu where some device configurations can be viewed.
My Setup This menu contains comfort settings that you can adjust as needed.
3.11.1 My Info
When you select My Info, you will be able to view the following screens. You cannot change settings in the My Info menu. These screens are only for reference.
Device setup 27
Philips Respironics E30 User Manual
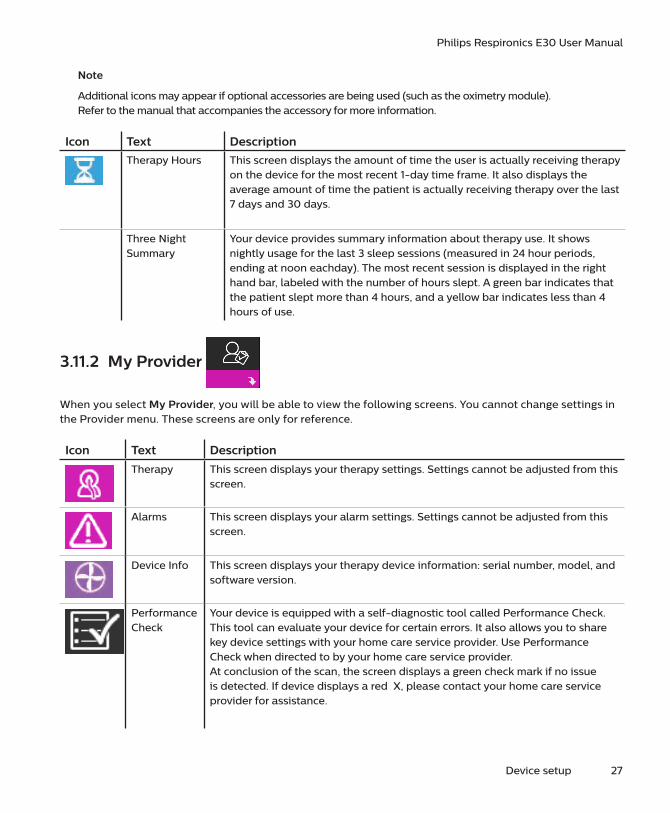
Note
Additional icons may appear if optional accessories are being used (such as the oximetry module). Refer to the manual that accompanies the accessory for more information.
Icon Text Description
Therapy Hours This screen displays the amount of time the user is actually receiving therapy on the device for the most recent 1-day time frame. It also displays the average amount of time the patient is actually receiving therapy over the last 7 days and 30 days.
Three Night Summary
Your device provides summary information about therapy use. It shows nightly usage for the last 3 sleep sessions (measured in 24 hour periods, ending at noon eachday). The most recent session is displayed in the right hand bar, labeled with the number of hours slept. A green bar indicates that the patient slept more than 4 hours, and a yellow bar indicates less than 4 hours of use.
3.11.2 My Provider
When you select My Provider, you will be able to view the following screens. You cannot change settings in the Provider menu. These screens are only for reference.
Icon Text Description
Therapy This screen displays your therapy settings. Settings cannot be adjusted from this screen.
Alarms This screen displays your alarm settings. Settings cannot be adjusted from this screen.
Device Info This screen displays your therapy device information: serial number, model, and software version.
Performance Check
Your device is equipped with a self-diagnostic tool called Performance Check. This tool can evaluate your device for certain errors. It also allows you to share key device settings with your home care service provider. Use Performance Check when directed to by your home care service provider. At conclusion of the scan, the screen displays a green check mark if no issue is detected. If device displays a red X, please contact your home care service provider for assistance.
28 Device setup
Philips Respironics E30 User Manual
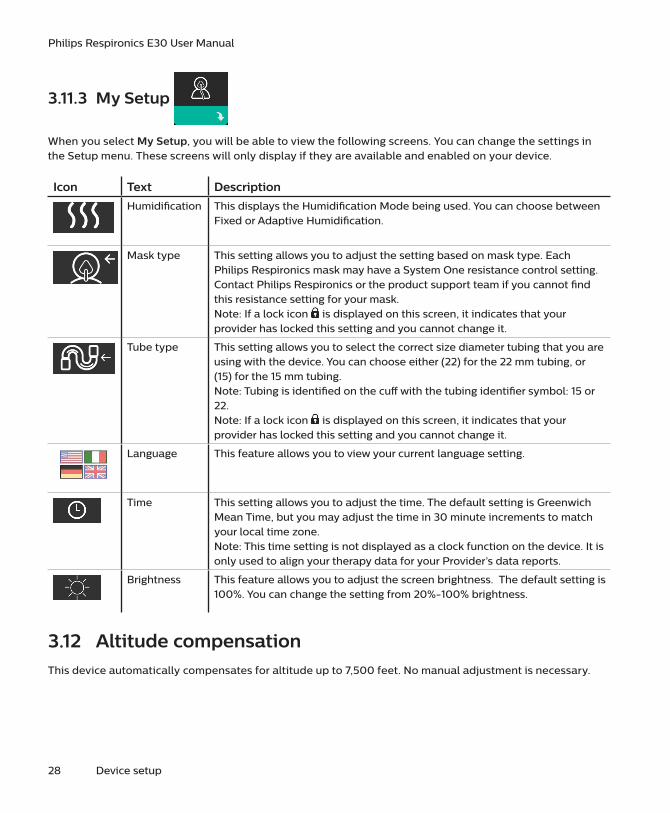
3.11.3 My Setup
When you select My Setup, you will be able to view the following screens. You can change the settings in the Setup menu. These screens will only display if they are available and enabled on your device.
Icon Text Description
Humidification This displays the Humidification Mode being used. You can choose between Fixed or Adaptive Humidification.
Mask type This setting allows you to adjust the setting based on mask type. Each Philips Respironics mask may have a System One resistance control setting. Contact Philips Respironics or the product support team if you cannot find this resistance setting for your mask.Note: If a lock icon is displayed on this screen, it indicates that your provider has locked this setting and you cannot change it.
Tube type This setting allows you to select the correct size diameter tubing that you are using with the device. You can choose either (22) for the 22 mm tubing, or (15) for the 15 mm tubing. Note: Tubing is identified on the cuff with the tubing identifier symbol: 15 or 22.Note: If a lock icon is displayed on this screen, it indicates that your provider has locked this setting and you cannot change it.
Language This feature allows you to view your current language setting.
Time This setting allows you to adjust the time. The default setting is Greenwich Mean Time, but you may adjust the time in 30 minute increments to match your local time zone.Note: This time setting is not displayed as a clock function on the device. It is only used to align your therapy data for your Provider’s data reports.
Brightness This feature allows you to adjust the screen brightness. The default setting is 100%. You can change the setting from 20%-100% brightness.
3.12 Altitude compensationThis device automatically compensates for altitude up to 7,500 feet. No manual adjustment is necessary.
This chapter describes the alarms and alerts and what you should do if an alarm or alert occurs. Reference the Troubleshooting section if you experience any problems while using the device.
4.1 Device alarmsThere are two types of alarms:
• High priority - Require immediate response by the operator.
• Medium priority - Require prompt response by the operator.
When an alarm condition occurs:
• The audible alarm sounds.
• A message appears on the screen describing the type of alarm.
4.2 Device alertsAlerts are informational and confirmation messages that notify you of conditions that require attention but are not alarm conditions. Most alerts do not appear while therapy is being delivered. The different types of alerts are:
• Status - Message appears on the screen.
• Notification - Message appears on the screen.
• Alert - Message appears on the screen, and audible sound beeps once while alert is displayed.
4.3 Alarm and alert audible indicatorsAn audible indicator sounds when any of the following occurs:
• A device inoperative condition occurs
• An alarm condition occurs
• An alert message appears on the screen
• Warning!
Warning
The high priority and medium priority alarms have the same auditory indication. These two alarm priorities are differentiated by visual indications. Red signals a high priority alarm and yellow signals a medium priority alarm.
4. Alarms, alerts, and troubleshooting
30 Alarms, alerts, and troubleshooting
Philips Respironics E30 User Manual
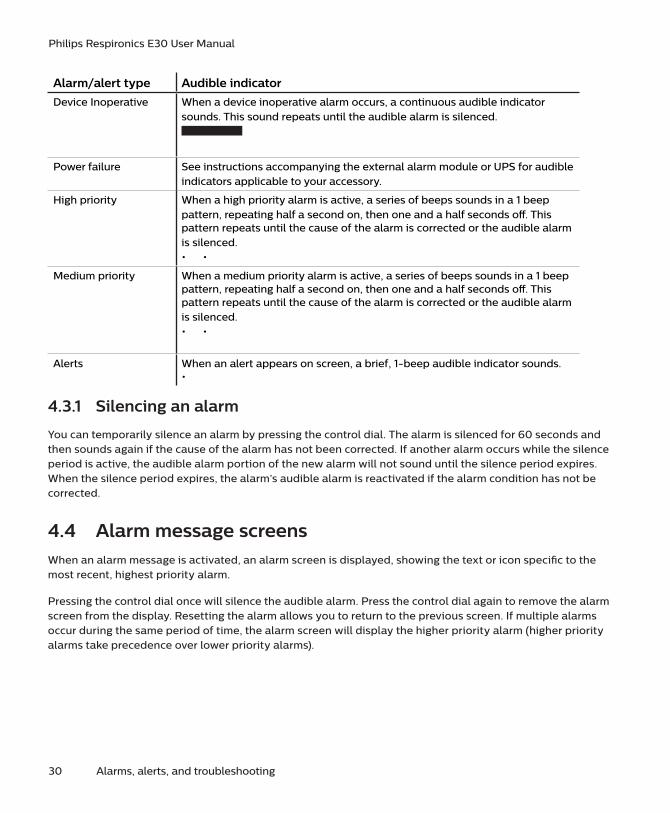
Alarm/alert type Audible indicator
Device Inoperative When a device inoperative alarm occurs, a continuous audible indicator sounds. This sound repeats until the audible alarm is silenced.
Power failure See instructions accompanying the external alarm module or UPS for audible indicators applicable to your accessory.
High priority When a high priority alarm is active, a series of beeps sounds in a 1 beep pattern, repeating half a second on, then one and a half seconds off. This pattern repeats until the cause of the alarm is corrected or the audible alarm is silenced.• •
Medium priority When a medium priority alarm is active, a series of beeps sounds in a 1 beep pattern, repeating half a second on, then one and a half seconds off. This pattern repeats until the cause of the alarm is corrected or the audible alarm is silenced.• •
Alerts When an alert appears on screen, a brief, 1-beep audible indicator sounds. •
4.3.1 Silencing an alarm
You can temporarily silence an alarm by pressing the control dial. The alarm is silenced for 60 seconds and then sounds again if the cause of the alarm has not been corrected. If another alarm occurs while the silence period is active, the audible alarm portion of the new alarm will not sound until the silence period expires. When the silence period expires, the alarm’s audible alarm is reactivated if the alarm condition has not be corrected.
4.4 Alarm message screensWhen an alarm message is activated, an alarm screen is displayed, showing the text or icon specific to the most recent, highest priority alarm.
Pressing the control dial once will silence the audible alarm. Press the control dial again to remove the alarm screen from the display. Resetting the alarm allows you to return to the previous screen. If multiple alarms occur during the same period of time, the alarm screen will display the higher priority alarm (higher priority alarms take precedence over lower priority alarms).
Alarms, alerts, and troubleshooting 31
Philips Respironics E30 User Manual
4.5 What to do when an alarm occursComplete the following steps when an alarm occurs:
1. Observe the patient and ensure that adequate ventilation and oxygenation (if appropriate) are available.
2. Listen to the audible alarm and look at the alarm indicators.
3. Look at the display to check the alarm message that appears on-screen and whether it is red or yellow.
4. Press the control dial to temporarily silence the audible alarm. Or, press the control dial twice to ac-knowledge and remove the alarm from the screen.
5. Look up the alarm in the alarm descriptions in this chapter to determine the source of the alarm and the appropriate action.
4.6 External power fail alarmWhen connected to the device, the external alarm module or UPS will provide an alarm when there is a power failure.
If this alarm is triggered on the external alarm module, first ensure that power supply is plugged into outlet, and that power failure alarm is connected to device and power supply. If using an UPS, ensure that it is connected and plugged in.
See instructions accompanying your accessory for further information.
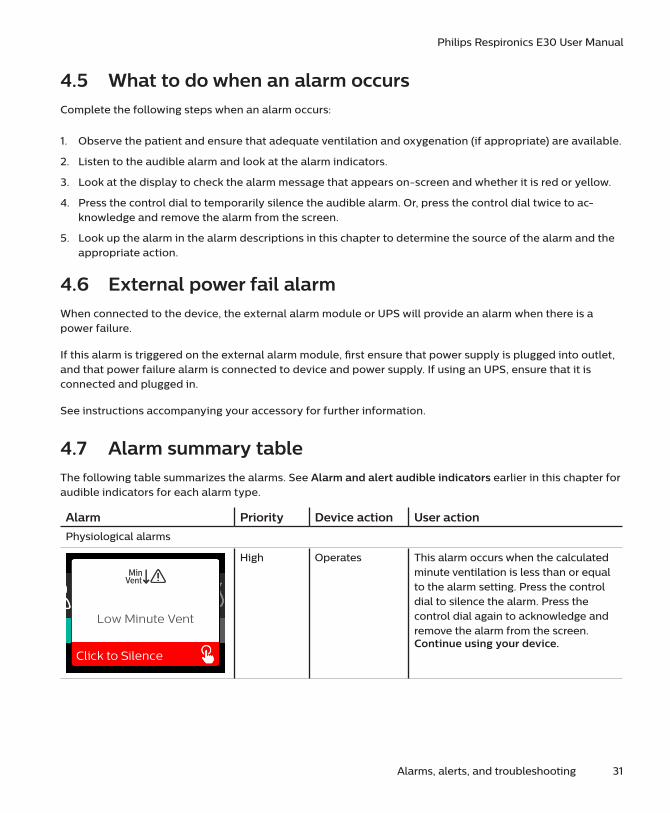
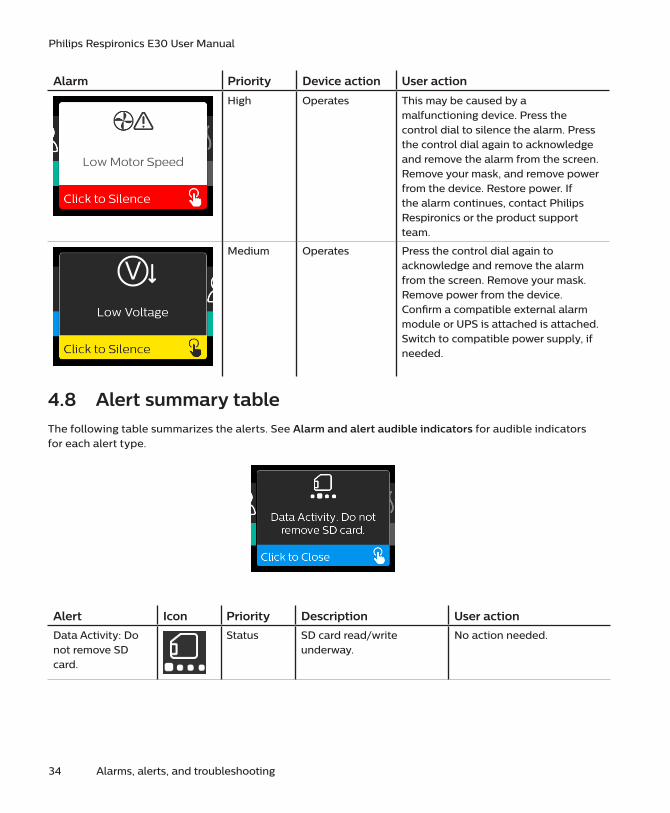
4.7 Alarm summary table The following table summarizes the alarms. See Alarm and alert audible indicators earlier in this chapter for audible indicators for each alarm type.
Alarm Priority Device action User action
Physiological alarms
High Operates This alarm occurs when the calculated minute ventilation is less than or equal to the alarm setting. Press the control dial to silence the alarm. Press the control dial again to acknowledge and remove the alarm from the screen. Continue using your device.
32 Alarms, alerts, and troubleshooting
Philips Respironics E30 User Manual
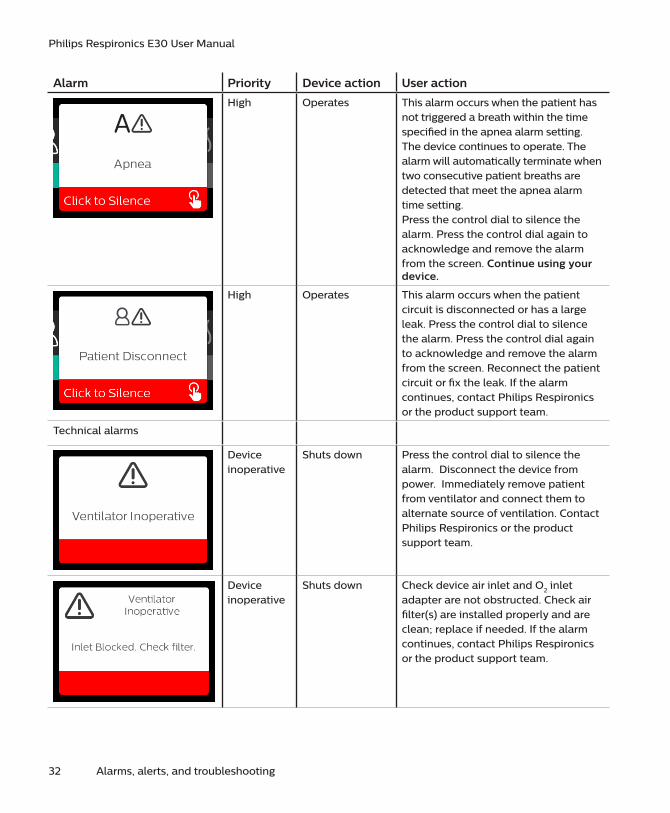
Alarm Priority Device action User action
High Operates This alarm occurs when the patient has not triggered a breath within the time specified in the apnea alarm setting. The device continues to operate. The alarm will automatically terminate when two consecutive patient breaths are detected that meet the apnea alarm time setting. Press the control dial to silence the alarm. Press the control dial again to acknowledge and remove the alarm from the screen. Continue using your device.
High Operates This alarm occurs when the patient circuit is disconnected or has a large leak. Press the control dial to silence the alarm. Press the control dial again to acknowledge and remove the alarm from the screen. Reconnect the patient circuit or fix the leak. If the alarm continues, contact Philips Respironics or the product support team.
Technical alarms
Device inoperative
Shuts down Press the control dial to silence the alarm. Disconnect the device from power. Immediately remove patient from ventilator and connect them to alternate source of ventilation. Contact Philips Respironics or the product support team.
Device inoperative
Shuts down Check device air inlet and O2 inlet adapter are not obstructed. Check air filter(s) are installed properly and are clean; replace if needed. If the alarm continues, contact Philips Respironics or the product support team.
Alarms, alerts, and troubleshooting 33
Philips Respironics E30 User Manual
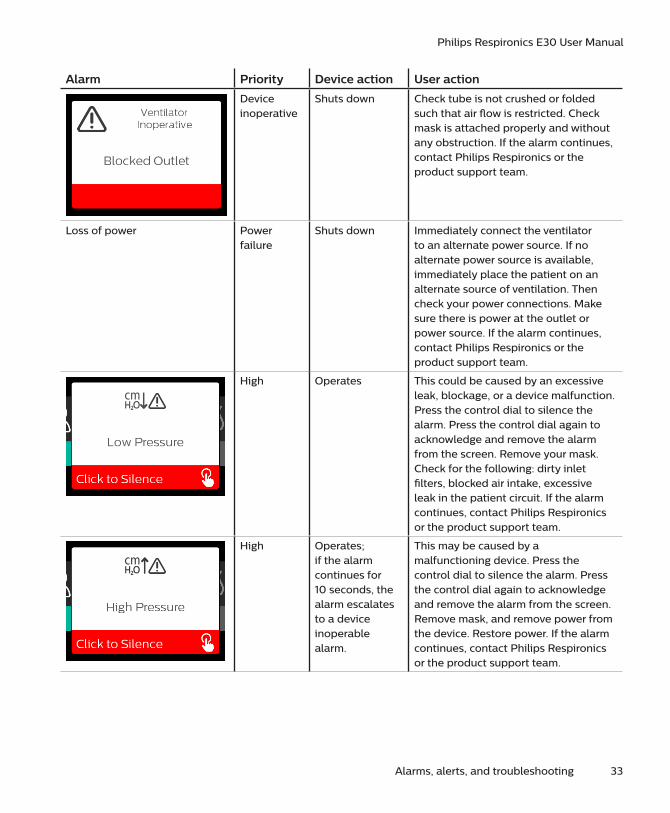
Alarm Priority Device action User action
Device inoperative
Shuts down Check tube is not crushed or folded such that air flow is restricted. Check mask is attached properly and without any obstruction. If the alarm continues, contact Philips Respironics or the product support team.
Loss of power Power failure
Shuts down Immediately connect the ventilator to an alternate power source. If no alternate power source is available, immediately place the patient on an alternate source of ventilation. Then check your power connections. Make sure there is power at the outlet or power source. If the alarm continues, contact Philips Respironics or the product support team.
High Operates This could be caused by an excessive leak, blockage, or a device malfunction. Press the control dial to silence the alarm. Press the control dial again to acknowledge and remove the alarm from the screen. Remove your mask. Check for the following: dirty inlet filters, blocked air intake, excessive leak in the patient circuit. If the alarm continues, contact Philips Respironics or the product support team.
High Operates; if the alarm continues for 10 seconds, the alarm escalates to a device inoperable alarm.
This may be caused by a malfunctioning device. Press the control dial to silence the alarm. Press the control dial again to acknowledge and remove the alarm from the screen. Remove mask, and remove power from the device. Restore power. If the alarm continues, contact Philips Respironics or the product support team.
34 Alarms, alerts, and troubleshooting
Philips Respironics E30 User Manual
Alarm Priority Device action User action
High Operates This may be caused by a malfunctioning device. Press the control dial to silence the alarm. Press the control dial again to acknowledge and remove the alarm from the screen. Remove your mask, and remove power from the device. Restore power. If the alarm continues, contact Philips Respironics or the product support team.
Medium Operates Press the control dial again to acknowledge and remove the alarm from the screen. Remove your mask. Remove power from the device. Confirm a compatible external alarm module or UPS is attached is attached. Switch to compatible power supply, if needed.
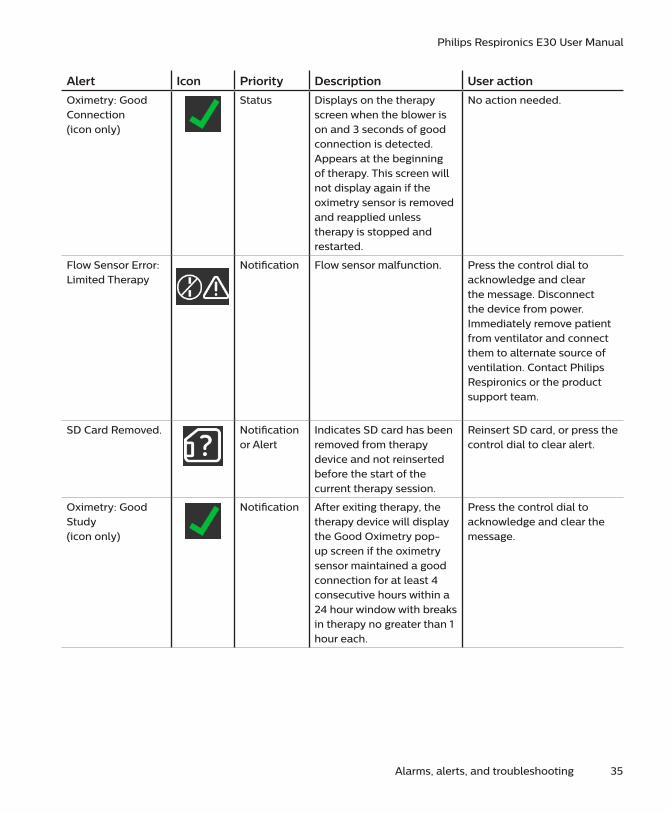
4.8 Alert summary tableThe following table summarizes the alerts. See Alarm and alert audible indicators for audible indicators for each alert type.
Alert Icon Priority Description User action
Data Activity: Do not remove SD card.
Status SD card read/write underway.
No action needed.
Alarms, alerts, and troubleshooting 35
Philips Respironics E30 User Manual
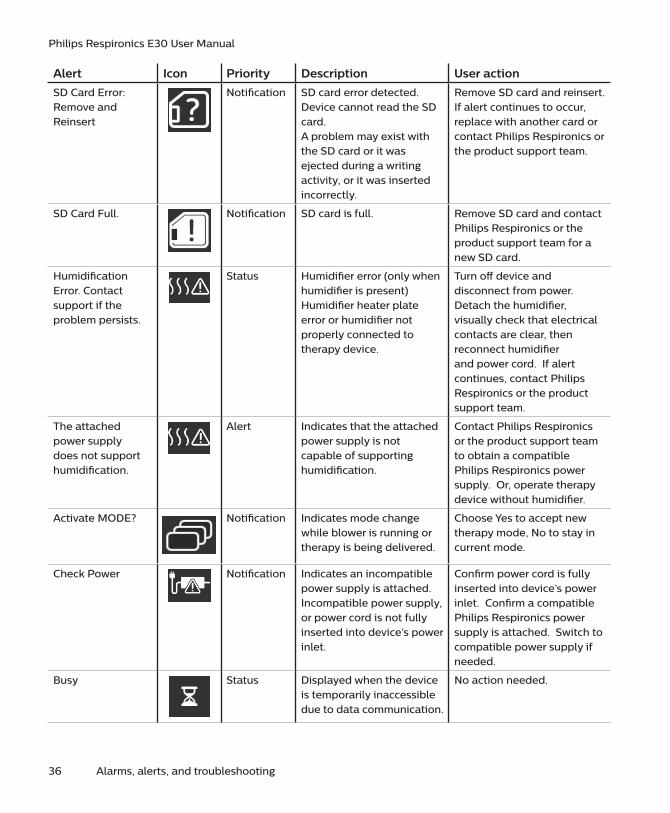
Alert Icon Priority Description User action
Oximetry: Good Connection(icon only)
Status Displays on the therapy screen when the blower is on and 3 seconds of good connection is detected. Appears at the beginning of therapy. This screen will not display again if the oximetry sensor is removed and reapplied unless therapy is stopped and restarted.
No action needed.
Flow Sensor Error:Limited Therapy
Notification Flow sensor malfunction. Press the control dial to acknowledge and clear the message. Disconnect the device from power. Immediately remove patient from ventilator and connect them to alternate source of ventilation. Contact Philips Respironics or the product support team.
SD Card Removed. Notificationor Alert
Indicates SD card has been removed from therapy device and not reinserted before the start of the current therapy session.
Reinsert SD card, or press the control dial to clear alert.
Oximetry: Good Study (icon only)
Notification After exiting therapy, the therapy device will display the Good Oximetry pop-up screen if the oximetry sensor maintained a good connection for at least 4 consecutive hours within a 24 hour window with breaks in therapy no greater than 1 hour each.
Press the control dial to acknowledge and clear the message.
36 Alarms, alerts, and troubleshooting
Philips Respironics E30 User Manual
Alert Icon Priority Description User action
SD Card Error: Remove and Reinsert
Notification SD card error detected.Device cannot read the SD card. A problem may exist with the SD card or it was ejected during a writing activity, or it was inserted incorrectly.
Remove SD card and reinsert. If alert continues to occur, replace with another card or contact Philips Respironics or the product support team.
SD Card Full. Notification SD card is full. Remove SD card and contact Philips Respironics or the product support team for a new SD card.
Humidification Error. Contact support if the problem persists.
Status Humidifier error (only when humidifier is present)Humidifier heater plate error or humidifier not properly connected to therapy device.
Turn off device and disconnect from power. Detach the humidifier, visually check that electrical contacts are clear, then reconnect humidifier and power cord. If alert continues, contact Philips Respironics or the product support team.
The attached power supply does not support humidification.
Alert Indicates that the attached power supply is not capable of supporting humidification.
Contact Philips Respironics or the product support team to obtain a compatible Philips Respironics power supply. Or, operate therapy device without humidifier.
Activate MODE? Notification Indicates mode change while blower is running or therapy is being delivered.
Choose Yes to accept new therapy mode, No to stay in current mode.
Check Power Notification Indicates an incompatible power supply is attached.Incompatible power supply, or power cord is not fully inserted into device’s power inlet.
Confirm power cord is fully inserted into device’s power inlet. Confirm a compatible Philips Respironics power supply is attached. Switch to compatible power supply if needed.
Busy Status Displayed when the device is temporarily inaccessible due to data communication.
No action needed.

Alarms, alerts, and troubleshooting 37
Philips Respironics E30 User Manual
Alert Icon Priority Description User action
Loading Language and Rebooting
Status Displayed when a new language is selected from the menu.
No action needed.
4.9 TroubleshootingYour device is equipped with a self-diagnostic tool called Performance Check. This tool can evaluate your device for certain errors. Use Performance Check when directed by Philips Respironics customer service.
The table below lists some of the problems you may experience with your device and possible solutions to those problems.
Problem Why it happened What to do
Nothing happens when you apply power to the device. The backlights on the buttons do not light.
There’s no power at the outlet or the device is unplugged.
Ensure the device is properly plugged into an AC power source. If using a UPS, ensure the UPS is properly plugged into an AC power source and the UPS is turned ON. Make sure there is power available at the outlet. Make sure the AC power cord is connected correctly to the power supply and the power supply cord is securely connected to the device’s power inlet. If the problem continues to occur, contact Philips Respironics or the product support team. Return both the device and power supply so they can determine if the problem is with the device or power supply.
The airflow does not turn on.
There may be a problem with the blower.
Make sure the device is powered correctly. Make sure the Home screen appears on the user interface. Press the Therapy button on top of the device to start airflow. If the airflow does not turn on, there may be a problem with your device. Contact Philips Respironics or the product support team.
The device’s display is erratic.
The device has been dropped or mishandled, or the device is in an area with high Electromagnetic Interference (EMI) emissions.
Unplug the device. Reapply power to the device. If the problem continues, relocate the device to an area with lower EMI emissions (away from electronic equipment such as cellular phones, cordless phones, computers, TVs, electronic games, hair dryers, etc.). If the problem still occurs, contact Philips Respironics or the product support team.
38 Alarms, alerts, and troubleshooting
Philips Respironics E30 User Manual
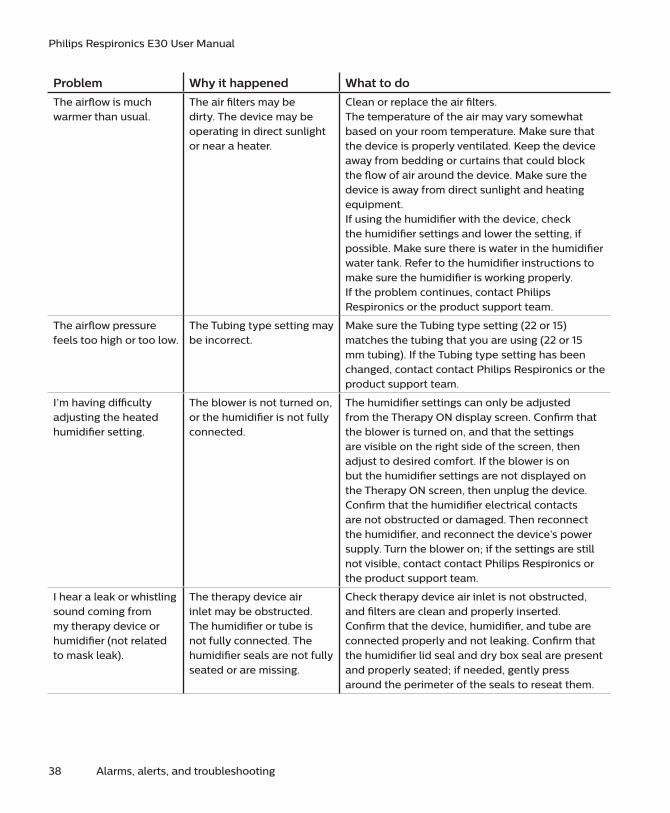
Problem Why it happened What to do
The airflow is much warmer than usual.
The air filters may be dirty. The device may be operating in direct sunlight or near a heater.
Clean or replace the air filters.The temperature of the air may vary somewhat based on your room temperature. Make sure that the device is properly ventilated. Keep the device away from bedding or curtains that could block the flow of air around the device. Make sure the device is away from direct sunlight and heating equipment.If using the humidifier with the device, check the humidifier settings and lower the setting, if possible. Make sure there is water in the humidifier water tank. Refer to the humidifier instructions to make sure the humidifier is working properly.If the problem continues, contact Philips Respironics or the product support team.
The airflow pressure feels too high or too low.
The Tubing type setting may be incorrect.
Make sure the Tubing type setting (22 or 15) matches the tubing that you are using (22 or 15 mm tubing). If the Tubing type setting has been changed, contact contact Philips Respironics or the product support team.
I’m having difficulty adjusting the heated humidifier setting.
The blower is not turned on, or the humidifier is not fully connected.
The humidifier settings can only be adjusted from the Therapy ON display screen. Confirm that the blower is turned on, and that the settings are visible on the right side of the screen, then adjust to desired comfort. If the blower is on but the humidifier settings are not displayed on the Therapy ON screen, then unplug the device. Confirm that the humidifier electrical contacts are not obstructed or damaged. Then reconnect the humidifier, and reconnect the device’s power supply. Turn the blower on; if the settings are still not visible, contact contact Philips Respironics or the product support team.
I hear a leak or whistling sound coming from my therapy device or humidifier (not related to mask leak).
The therapy device air inlet may be obstructed. The humidifier or tube is not fully connected. The humidifier seals are not fully seated or are missing.
Check therapy device air inlet is not obstructed, and filters are clean and properly inserted. Confirm that the device, humidifier, and tube are connected properly and not leaking. Confirm that the humidifier lid seal and dry box seal are present and properly seated; if needed, gently press around the perimeter of the seals to reseat them.
Alarms, alerts, and troubleshooting 39
Philips Respironics E30 User Manual
Problem Why it happened What to do
I accidentally spilled water into my humidifier basin.
The water chamber has been filled beyond the maximum fill line.
A small amount of water spilled in the basin of the humidifier will not harm your device. A small spill in the humidifier will evaporate under normal humidifier use. However, too much water in the humidifier basin could spill over the humidifier lid hinge and might damage your furniture. Disconnect power from the device. Remove the water chamber, pour out any excess water until the water level is at or below the maximum fill line and set the chamber aside. Separate the humidifier from the therapy device, and pour out the spilled water. Once the heater plate has cooled, wipe the inside of the humidifier with a paper towel or soft cloth. If needed, dry the underside of the humidifier and confirm that your table top is dry. Reconnect the humidifier and power supply, and reinstall the water chamber.
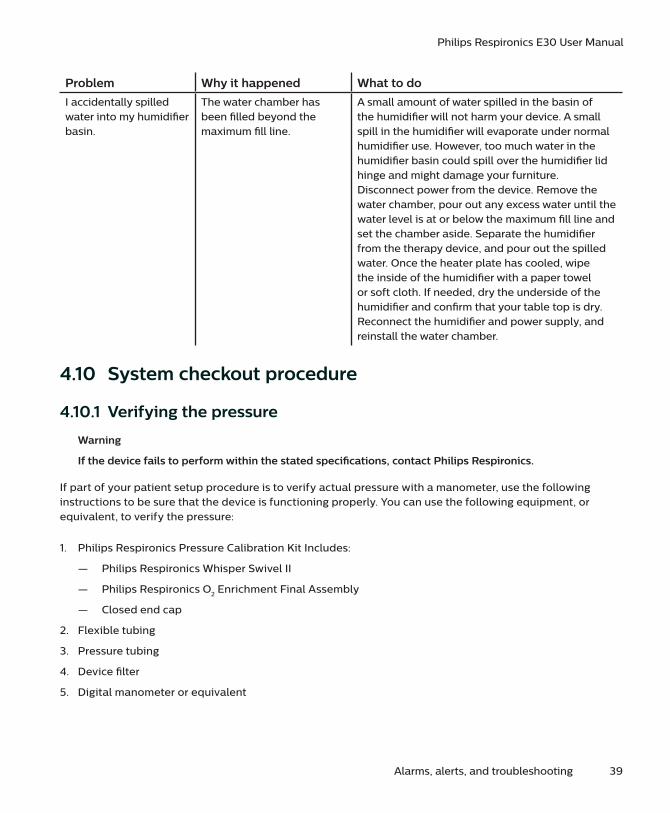
4.10 System checkout procedure
4.10.1 Verifying the pressure
Warning
If the device fails to perform within the stated specifications, contact Philips Respironics.
If part of your patient setup procedure is to verify actual pressure with a manometer, use the following instructions to be sure that the device is functioning properly. You can use the following equipment, or equivalent, to verify the pressure:
1. Philips Respironics Pressure Calibration Kit Includes:
— Philips Respironics Whisper Swivel II
— Philips Respironics O2 Enrichment Final Assembly
— Closed end cap
2. Flexible tubing
3. Pressure tubing
4. Device filter
5. Digital manometer or equivalent
40 Alarms, alerts, and troubleshooting
Philips Respironics E30 User Manual
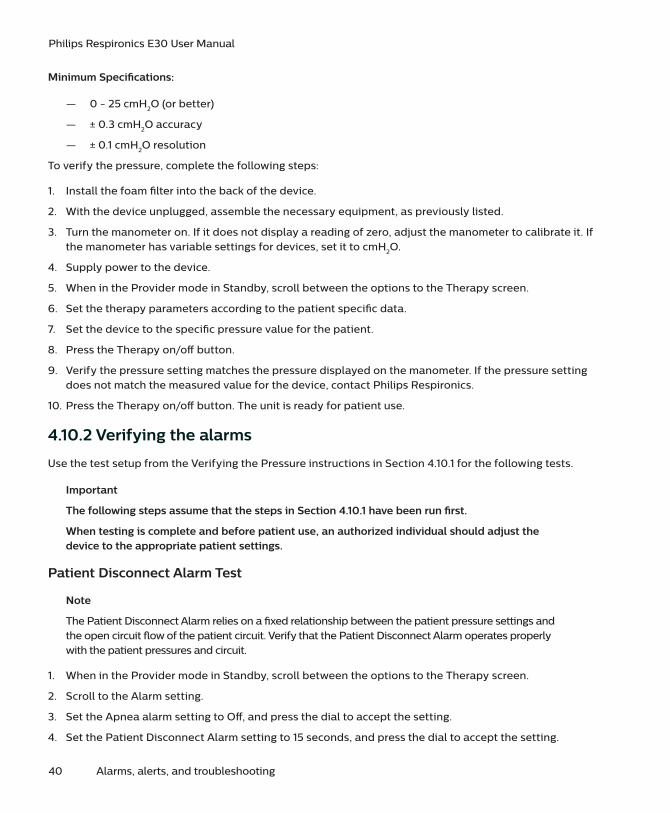
Minimum Specifications:
— 0 - 25 cmH2O (or better)
— ± 0.3 cmH2O accuracy
— ± 0.1 cmH2O resolution
To verify the pressure, complete the following steps:
1. Install the foam filter into the back of the device.
2. With the device unplugged, assemble the necessary equipment, as previously listed.
3. Turn the manometer on. If it does not display a reading of zero, adjust the manometer to calibrate it. If the manometer has variable settings for devices, set it to cmH2O.
4. Supply power to the device.
5. When in the Provider mode in Standby, scroll between the options to the Therapy screen.
6. Set the therapy parameters according to the patient specific data.
7. Set the device to the specific pressure value for the patient.
8. Press the Therapy on/off button.
9. Verify the pressure setting matches the pressure displayed on the manometer. If the pressure setting does not match the measured value for the device, contact Philips Respironics.
10. Press the Therapy on/off button. The unit is ready for patient use.
4.10.2 Verifying the alarms
Use the test setup from the Verifying the Pressure instructions in Section 4.10.1 for the following tests.
Important
The following steps assume that the steps in Section 4.10.1 have been run first.
When testing is complete and before patient use, an authorized individual should adjust the device to the appropriate patient settings.
Patient Disconnect Alarm Test
Note
The Patient Disconnect Alarm relies on a fixed relationship between the patient pressure settings and the open circuit flow of the patient circuit. Verify that the Patient Disconnect Alarm operates properly with the patient pressures and circuit.
1. When in the Provider mode in Standby, scroll between the options to the Therapy screen.
2. Scroll to the Alarm setting.
3. Set the Apnea alarm setting to Off, and press the dial to accept the setting.
4. Set the Patient Disconnect Alarm setting to 15 seconds, and press the dial to accept the setting.
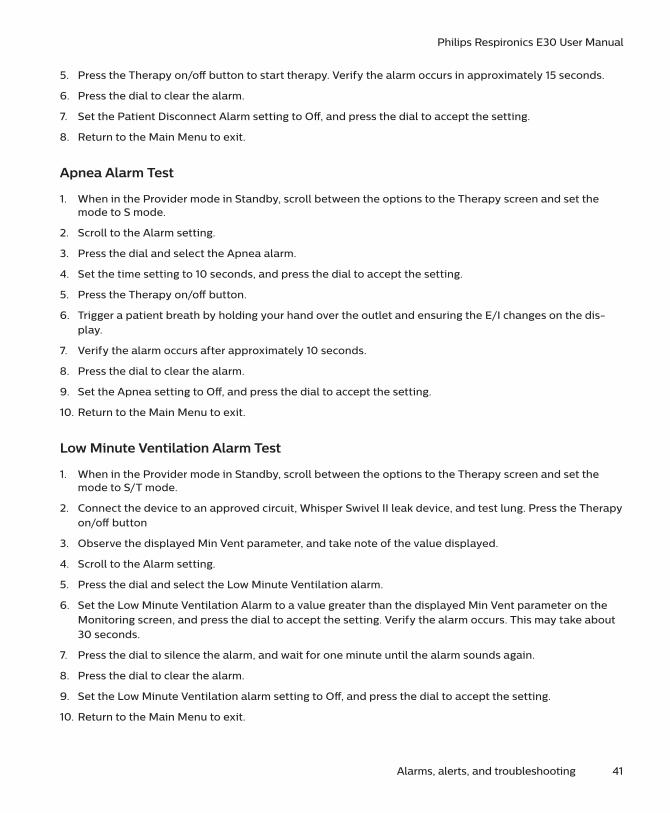
Alarms, alerts, and troubleshooting 41
Philips Respironics E30 User Manual
5. Press the Therapy on/off button to start therapy. Verify the alarm occurs in approximately 15 seconds.
6. Press the dial to clear the alarm.
7. Set the Patient Disconnect Alarm setting to Off, and press the dial to accept the setting.
8. Return to the Main Menu to exit.
Apnea Alarm Test
1. When in the Provider mode in Standby, scroll between the options to the Therapy screen and set the mode to S mode.
2. Scroll to the Alarm setting.
3. Press the dial and select the Apnea alarm.
4. Set the time setting to 10 seconds, and press the dial to accept the setting.
5. Press the Therapy on/off button.
6. Trigger a patient breath by holding your hand over the outlet and ensuring the E/I changes on the dis-play.
7. Verify the alarm occurs after approximately 10 seconds.
8. Press the dial to clear the alarm.
9. Set the Apnea setting to Off, and press the dial to accept the setting.
10. Return to the Main Menu to exit.
Low Minute Ventilation Alarm Test
1. When in the Provider mode in Standby, scroll between the options to the Therapy screen and set the mode to S/T mode.
2. Connect the device to an approved circuit, Whisper Swivel II leak device, and test lung. Press the Therapy on/off button
3. Observe the displayed Min Vent parameter, and take note of the value displayed.
4. Scroll to the Alarm setting.
5. Press the dial and select the Low Minute Ventilation alarm.
6. Set the Low Minute Ventilation Alarm to a value greater than the displayed Min Vent parameter on the Monitoring screen, and press the dial to accept the setting. Verify the alarm occurs. This may take about 30 seconds.
7. Press the dial to silence the alarm, and wait for one minute until the alarm sounds again.
8. Press the dial to clear the alarm.
9. Set the Low Minute Ventilation alarm setting to Off, and press the dial to accept the setting.
10. Return to the Main Menu to exit.
42 Alarms, alerts, and troubleshooting
Philips Respironics E30 User Manual
Loss of Power Alarm Test
1. While the device is providing therapy, unplug the power cord and verify that an alarm is triggered on the external alarm module or UPS.
2. Reconnect power and verify that the device resumes providing therapy.
There are several optional accessories available for the Philips Respironics E30 device. Contact Philips Respironics or the product support team for additional information on the available accessories. When using optional accessories, always follow the instructions enclosed with the accessories.
5.1 DreamStation humidifierYou can use the heated humidifier with your device. A humidifier may reduce nasal dryness and irritation by adding moisture to the airflow.
Warning
The DreamStation Humidifier is not for use with intubated patients. For intubated patients, please use an external humidifier.
For safe operation, the humidifier must always be positioned below the breathing circuit connection at the mask. The humidifier must be level for proper operation.
Note
Refer to the DreamStation Heated Humidifier Manual and the Philips Respironics E30 Humidifier Addendum to complete setup information.
5.2 Link moduleThe Link Module is able to receive oximetry data and transfer it to the therapy device. For use in a laboratory setting, the Link Module also includes an RS-232 (or “DB9”) port to allow remote control of the device by a personal computer.
Warnings
If you notice any unexplained changes in the performance of this device, if it has been dropped or mishandled, if water is spilled into the enclosure, or if the enclosure is broken, discontinue use. Contact Philips Respironics or the product support team.
Repairs and adjustments must be performed by Philips Respironics-authorized service personnel only. Unauthorized service could cause injury, invalidate the warranty, or result in costly damage.
Do not use any accessories, detachable parts, and materials not recommended by Philips Respironics. Incompatible parts or accessories can result in degraded performance.
Notes
Please consult the instructions that accompany the Link Module for installation and removal.
There are no SpO2 alarms available.
5. Accessories
44 Accessories
Philips Respironics E30 User Manual
To clean the module, remove the module from the therapy device. Wipe the outside of the device with a cloth slightly dampened with water and a mild detergent. Let the device dry completely before reinstalling into the therapy device.
Dispose of the module following the same disposal instructions for your therapy device.
5.3 OximeterThe DreamStation oximetry system, when part of the Philips Respironics E30 device, measures and displays %SpO2 and heart rate in adult and pediatric patients.
Warning
Use only Philips Respironics recommended SpO2 cables and pulse oximeter sensors. Use of incompatible sensors can result in inaccurate pulse oximeter performance.
5.4 DreamStation roll standThere is a roll stand available for use with your device. Please see the instructions included with your roll stand for more information.
5.5 Supplemental oxygenOxygen may be added anywhere in the patient circuit up to 30 LPM of low flow oxygen into the patient circuit, and up to 60 LPM of low flow oxygen into the inlet of the device.
Please note the warnings in Chapter 1 when using oxygen with the device.
5.6 SD cardThe device does not come with an SD card, but does have an SD card slot on the side of the device. If inserted, an SD card can record information.
This chapter details how to clean and disinfect the device, O2 inlet port, and filters in the hospital or institutional environment.
6.1 Cleaning and replacing the device filtersUnder normal usage, you should clean the reusable blue pollen filter at least once every two weeks and replace it with a new one every six months. The light-blue ultra-fine filter is disposable and should be replaced after 30 nights of use or sooner if it appears dirty. DO NOT clean the ultra-fine filter.
Caution
Dirty inlet filters may cause high operating temperatures that may affect device performance. Regularly examine the inlet filters as needed for integrity and cleanliness.
1. Turn the device off and disconnect from the power source before cleaning.
2. Remove the filter(s) from the device. Refer to the Installing and replacing the air filters section of this manual.
3. Examine the filter(s) for cleanliness and integrity.
4. To clean the reusable blue pollen filter, first detach the light-blue ultra-fine filter if applicable, and set aside or dispose of as needed. Then take the reusable filter to the sink, turn it upside down, and run warm tap water through the white filter media to rinse away any debris. Next, lightly shake the filter to remove as much water as possible. Allow the filter to air dry completely before reinstalling it. If the reusable blue pol-len filter is torn, replace it. (Only Philips Respironics-supplied filters should be used as replacement filters.)
5. If the light-blue ultra-fine filter is dirty or torn, replace it.
6. Reinstall the filters. Refer to the Installing and replacing the air filters section of this manual.
Caution
Never install a wet filter into the device. You must ensure sufficient drying time for the cleaned filter.
6.2 Hospital and institution cleaning: device and O2 inlet port exterior
Warning
If you are using the device on multiple users, discard and replace the viral bacteria filter between patients.
To avoid electrical shock, always unplug the power cord from the wall outlet before cleaning the device. DO NOT immerse the device in any fluids.
6. Cleaning
46 Cleaning
Philips Respironics E30 User Manual
Note
Refer to the DreamStation Heated Humidifier user manual for cleaning the humidifier between patient use.
If you are using the device and O2 inlet port on multiple users, complete the following steps to clean between patient use:
1. Turn the device off and disconnect from the power source.
2. Remove the blue pollen filter and light-blue disposable ultra-fine filter (if using).
3. Clean the device and and the O2 inlet port exterior using a mild liquid dishwashing detergent. Use a mix-ture of 1 teaspoon (5 milliliters) dishwashing detergent/1 gallon (3.8 liters) of water.
4. Allow to air dry.
6.3 Hospital and institution disinfection: device and O2 inlet port exterior
Warning
If you are using the device on multiple users, discard and replace the viral bacteria filter between patients.
Cautions
Only the hospital and institution cleaning and disinfection procedure listed in this guide is recommended by Respironics. Use of other cleaning and disinfecting processes, not specified by Respironics, may affect the performance of the product.
Follow all instructions from the manufacturer of the disinfectant product. Any deviation from these instructions, the manufacturer’s instructions, or agents not listed in this guide may impact the performance of the product. Review all applicable instructions for additional warnings and cautions.
Note
Refer to the DreamStation Heated Humidifier user manual for disinfecting the humidifier between patient use.
If you are using the device and O2 inlet port on multiple users, complete the following steps to disinfect between patient use:
1. Turn the device off and disconnect from the power source.
2. Remove the blue pollen filter and light-blue disposable ultra-fine filter (if using).
3. Clean the outside of the device and O2 inlet port only. Use a cloth soaked with water and a mild detergent to clean only the exterior of the device and of the O2 inlet port.
Cleaning 47
Philips Respironics E30 User Manual
4. Use one of the following to disinfect all exterior surfaces of the device and O2 inlet port:
— 70% Isopropyl Alcohol (Device and O2 Inlet Port)
— DisCide Towelettes (Device ONLY)
— 10% Chlorine Bleach solution (Device ONLY)
5. Pay close attention to all corners and crevices.
6. Allow the device to dry completely before plugging in the power cord and re-inserting the filter(s).
6.4 ServiceThe device does not require routine servicing or preventative maintenance other than inspection for normal wear or damage and device cleaning.
Warning
If you notice any unexplained changes in the performance of this device, if it is making unusual or harsh sounds, if it has been dropped or mishandled, if water is spilled into the enclosure, or if the enclosure is broken, disconnect the power cord and discontinue use. Contact Philips Respironics.

48 Cleaning
Philips Respironics E30 User Manual
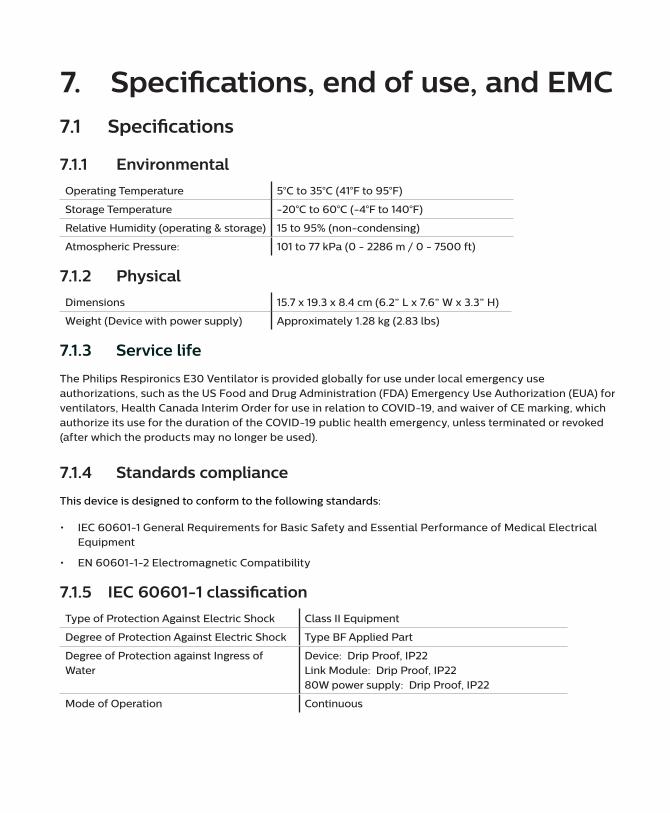
7.1 Specifications
7.1.1 Environmental
Operating Temperature 5°C to 35°C (41°F to 95°F)
Storage Temperature -20°C to 60°C (-4°F to 140°F)
Relative Humidity (operating & storage) 15 to 95% (non-condensing)
Atmospheric Pressure: 101 to 77 kPa (0 - 2286 m / 0 - 7500 ft)
7.1.2 Physical
Dimensions 15.7 x 19.3 x 8.4 cm (6.2” L x 7.6” W x 3.3” H)
Weight (Device with power supply) Approximately 1.28 kg (2.83 lbs)
7.1.3 Service life
The Philips Respironics E30 Ventilator is provided globally for use under local emergency use authorizations, such as the US Food and Drug Administration (FDA) Emergency Use Authorization (EUA) for ventilators, Health Canada Interim Order for use in relation to COVID-19, and waiver of CE marking, which authorize its use for the duration of the COVID-19 public health emergency, unless terminated or revoked (after which the products may no longer be used).
7.1.4 Standards compliance
This device is designed to conform to the following standards:
• IEC 60601-1 General Requirements for Basic Safety and Essential Performance of Medical Electrical Equipment
• EN 60601-1-2 Electromagnetic Compatibility
7.1.5 IEC 60601-1 classification
Type of Protection Against Electric Shock Class II Equipment
Degree of Protection Against Electric Shock Type BF Applied Part
Degree of Protection against Ingress of Water
Device: Drip Proof, IP22Link Module: Drip Proof, IP2280W power supply: Drip Proof, IP22
Mode of Operation Continuous
7. Specifications, end of use, and EMC
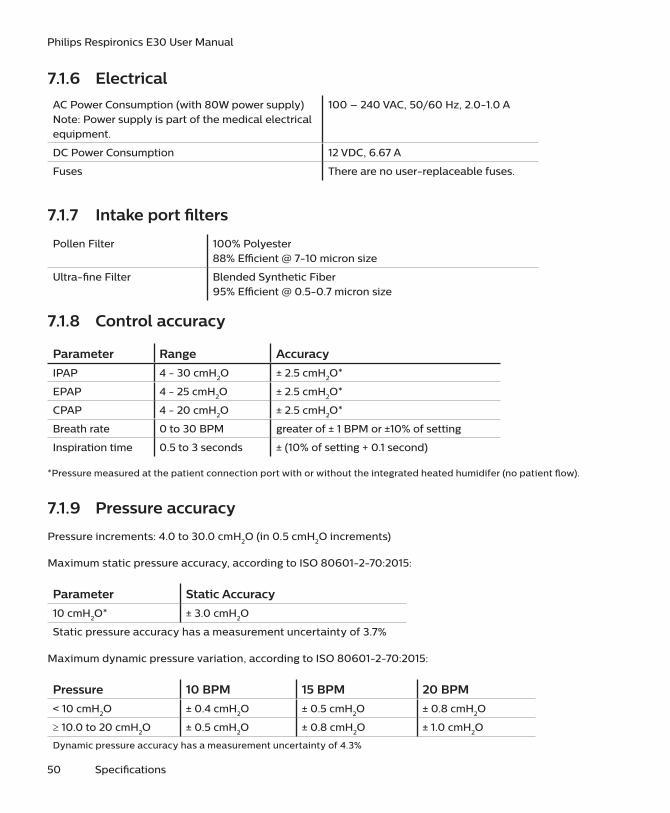
50 Specifications
Philips Respironics E30 User Manual
7.1.6 Electrical
AC Power Consumption (with 80W power supply) Note: Power supply is part of the medical electrical equipment.
100 – 240 VAC, 50/60 Hz, 2.0-1.0 A
DC Power Consumption 12 VDC, 6.67 A
Fuses There are no user-replaceable fuses.
7.1.7 Intake port filters
Pollen Filter 100% Polyester88% Efficient @ 7-10 micron size
Ultra-fine Filter Blended Synthetic Fiber95% Efficient @ 0.5-0.7 micron size
7.1.8 Control accuracy
Parameter Range Accuracy
IPAP 4 - 30 cmH2O ± 2.5 cmH2O*
EPAP 4 - 25 cmH2O ± 2.5 cmH2O*
CPAP 4 - 20 cmH2O ± 2.5 cmH2O*
Breath rate 0 to 30 BPM greater of ± 1 BPM or ±10% of setting
Inspiration time 0.5 to 3 seconds ± (10% of setting + 0.1 second)
*Pressure measured at the patient connection port with or without the integrated heated humidifer (no patient flow).
7.1.9 Pressure accuracy
Pressure increments: 4.0 to 30.0 cmH2O (in 0.5 cmH2O increments)
Maximum static pressure accuracy, according to ISO 80601-2-70:2015:
Parameter Static Accuracy
10 cmH2O* ± 3.0 cmH2O
Static pressure accuracy has a measurement uncertainty of 3.7%
Maximum dynamic pressure variation, according to ISO 80601-2-70:2015:
Pressure 10 BPM 15 BPM 20 BPM
< 10 cmH2O ± 0.4 cmH2O ± 0.5 cmH2O ± 0.8 cmH2O
≥ 10.0 to 20 cmH2O ± 0.5 cmH2O ± 0.8 cmH2O ± 1.0 cmH2O
Dynamic pressure accuracy has a measurement uncertainty of 4.3%

Specifications 51
Philips Respironics E30 User Manual
7.1.10 Displayed parameter accuracy
Parameter Accuracy Resolution RangeEstimated Leak Rate ± (5 + 15% of reading) LPM 1 LPM 0 to 200 LPM
Tidal Volume* ± (25 + 15% of reading) mL 1 mL 0 to 2000 mL
Respiratory Rate greater of ± 1 BPM or ± 10% of reading 1 BPM 0 to 60 BPM
Minute Ventilation* ± (1 + 15% of reading) LPM 1 LPM 0 to 99 LPM
* Accuracies apply with no/low O2 bleed (less than 10 LPM) in the patient circuit. If higher than, use the correction volume graph listed below. No tidal volume correction is required when using the inlet O2 port.
Tidal Volume Adjustment for O2 FlowRate in Patient Circuit
0 lpm 10 lpm 20 lpm 25 lpm 30 lpm
Ad
just
ed
fo
r O
2 F
low
Ra
te (
mL)
Device Reading (mL)
200 300 400 500 600 700 800 900 1000 1100
200
400
600
800
1000
1200
1400
1600
7.2 End of useThe Philips Respironics E30 Ventilator is provided globally for use under local emergency use authorizations, such as the US Food and Drug Administration (FDA) Emergency Use Authorization (EUA) for ventilators, Health Canada Interim Order for use in relation to COVID-19, and waiver of CE marking, which authorize its use for the duration of the COVID-19 public health emergency, unless terminated or revoked (after which the products may no longer be used).
7.3 DisposalSeparate collection for electrical and electronic equipment per EC Directive 2012/19/EU. Dispose of this device in accordance with local regulations.
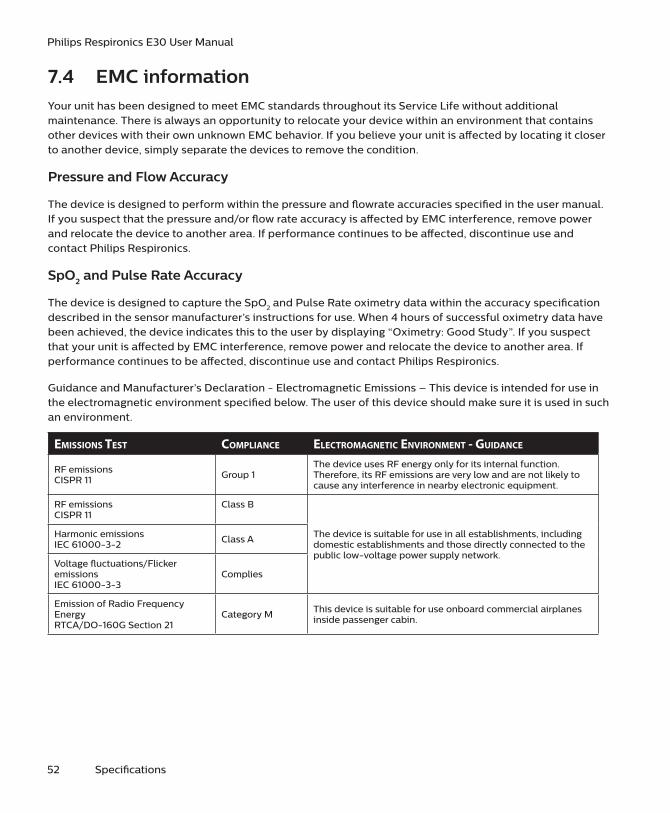
52 Specifications
Philips Respironics E30 User Manual
7.4 EMC informationYour unit has been designed to meet EMC standards throughout its Service Life without additional maintenance. There is always an opportunity to relocate your device within an environment that contains other devices with their own unknown EMC behavior. If you believe your unit is affected by locating it closer to another device, simply separate the devices to remove the condition.
Pressure and Flow Accuracy
The device is designed to perform within the pressure and flowrate accuracies specified in the user manual. If you suspect that the pressure and/or flow rate accuracy is affected by EMC interference, remove power and relocate the device to another area. If performance continues to be affected, discontinue use and contact Philips Respironics.
SpO2 and Pulse Rate Accuracy
The device is designed to capture the SpO2 and Pulse Rate oximetry data within the accuracy specification described in the sensor manufacturer’s instructions for use. When 4 hours of successful oximetry data have been achieved, the device indicates this to the user by displaying “Oximetry: Good Study”. If you suspect that your unit is affected by EMC interference, remove power and relocate the device to another area. If performance continues to be affected, discontinue use and contact Philips Respironics.
Guidance and Manufacturer’s Declaration - Electromagnetic Emissions – This device is intended for use in the electromagnetic environment specified below. The user of this device should make sure it is used in such an environment.
Emissions TEsT ComplianCE ElECTromagnETiC EnvironmEnT - guidanCE
RF emissionsCISPR 11 Group 1
The device uses RF energy only for its internal function. Therefore, its RF emissions are very low and are not likely to cause any interference in nearby electronic equipment.
RF emissionsCISPR 11
Class B
The device is suitable for use in all establishments, including domestic establishments and those directly connected to the public low-voltage power supply network.
Harmonic emissionsIEC 61000-3-2 Class A
Voltage fluctuations/Flicker emissionsIEC 61000-3-3
Complies
Emission of Radio Frequency EnergyRTCA/DO-160G Section 21
Category M This device is suitable for use onboard commercial airplanes inside passenger cabin.
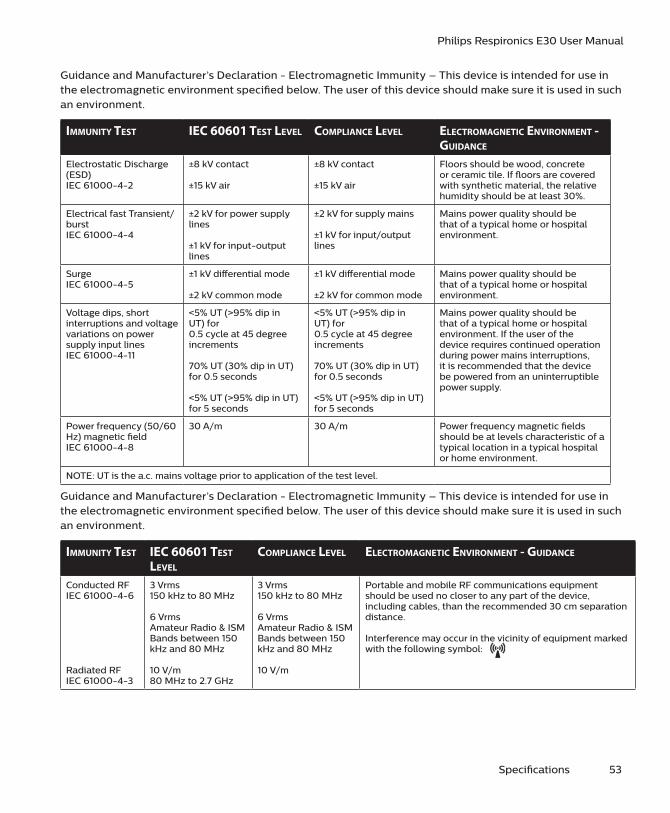
Specifications 53
Philips Respironics E30 User Manual
Guidance and Manufacturer’s Declaration - Electromagnetic Immunity – This device is intended for use in the electromagnetic environment specified below. The user of this device should make sure it is used in such an environment.
immuniTy TEsT iEC 60601 TEsT lEvEl ComplianCE lEvEl ElECTromagnETiC EnvironmEnT - guidanCE
Electrostatic Discharge (ESD)IEC 61000-4-2
±8 kV contact
±15 kV air
±8 kV contact
±15 kV air
Floors should be wood, concrete or ceramic tile. If floors are covered with synthetic material, the relative humidity should be at least 30%.
Electrical fast Transient/burstIEC 61000-4-4
±2 kV for power supply lines
±1 kV for input-output lines
±2 kV for supply mains
±1 kV for input/output lines
Mains power quality should be that of a typical home or hospital environment.
SurgeIEC 61000-4-5
±1 kV differential mode
±2 kV common mode
±1 kV differential mode
±2 kV for common mode
Mains power quality should be that of a typical home or hospital environment.
Voltage dips, short interruptions and voltage variations on power supply input linesIEC 61000-4-11
<5% UT (>95% dip in UT) for 0.5 cycle at 45 degree increments
70% UT (30% dip in UT) for 0.5 seconds <5% UT (>95% dip in UT) for 5 seconds
<5% UT (>95% dip in UT) for 0.5 cycle at 45 degree increments
70% UT (30% dip in UT) for 0.5 seconds
<5% UT (>95% dip in UT) for 5 seconds
Mains power quality should be that of a typical home or hospital environment. If the user of the device requires continued operation during power mains interruptions, it is recommended that the device be powered from an uninterruptible power supply.
Power frequency (50/60 Hz) magnetic fieldIEC 61000-4-8
30 A/m 30 A/m Power frequency magnetic fields should be at levels characteristic of a typical location in a typical hospital or home environment.
NOTE: UT is the a.c. mains voltage prior to application of the test level.
Guidance and Manufacturer’s Declaration - Electromagnetic Immunity – This device is intended for use in the electromagnetic environment specified below. The user of this device should make sure it is used in such an environment.
immuniTy TEsT iEC 60601 TEsT lEvEl
ComplianCE lEvEl ElECTromagnETiC EnvironmEnT - guidanCE
Conducted RFIEC 61000-4-6
Radiated RFIEC 61000-4-3
3 Vrms150 kHz to 80 MHz
6 VrmsAmateur Radio & ISM Bands between 150 kHz and 80 MHz
10 V/m80 MHz to 2.7 GHz
3 Vrms150 kHz to 80 MHz
6 VrmsAmateur Radio & ISM Bands between 150 kHz and 80 MHz
10 V/m
Portable and mobile RF communications equipment should be used no closer to any part of the device, including cables, than the recommended 30 cm separation distance.
Interference may occur in the vicinity of equipment marked with the following symbol:

54 Specifications
Philips Respironics E30 User Manual
Limited warrantyRespironics, Inc., a Philips company (“Philips Respironics”), warrants that the Philips Respironics E30 Ventilator will be free from defects of workmanship and materials and will perform in accordance with the product specifications for a period of one (1) year from the date of shipment by Philips Respironics to the customer. If the product fails to perform in accordance with the product specifications, Philips Respironics will repair or replace - at its option - the defective product, material or part. Philips Respironics will pay customary freight charges from Philips Respironics to the dealer location only. This warranty does not cover damage caused by accident, misuse, abuse, alteration, water ingress, and other defects not related to material or workmanship. The Philips Respironics Service department shall examine any devices returned for service, and Philips Respironics reserves the right to charge an evaluation fee for any returned device as to which no problem is found after investigation by Philips Respironics Service.
This warranty is non-transferable and Philips Respironics reserves the right to charge for warranty service of failed product not purchased directly from Philips Respironics or authorized distributors.
Philips Respironics disclaims all liability for economic loss, loss of profits, overhead, or consequential damages which may be claimed to arise from any sale or use of this product. Some states do not allow the exclusion or limitation of incidental or consequential damages, so the above limitation or exclusion may not apply to you. The Department of Health and Human Services Declaration Under the Public Readiness Act for Medical Countermeasures Against COVID-19 applies to the Philips Respironics E30 Ventilator in the United States.
This warranty is given in lieu of all other express warranties. In addition, any implied warranties - including any warranty of merchantability or fitness for the particular purpose - are limited to two years. Some states do not allow limitations on how long an implied warranty lasts, so the above limitation may not apply to you. This warranty gives you specific legal rights, and you may also have other rights which vary by jurisdiction.
To exercise your rights under this warranty, contact Respironics, Inc. at:
1001 Murry Ridge LaneMurrysville, Pennsylvania 15668-85501-724-387-4000
DeutschlandGewerbestrasse 1782211 Herrsching, Germany+49 8152 93060
Note: For Australian and New Zealand customers, this warranty replaces the warranty contained above.
1. Respironics, Inc., a Philips company (“Philips Respironics”), warrants that the Products shall be free from defects of workmanship and materials and will perform in accordance with the Product specifications.
2. This warranty is valid for a period of one (1) year from the date of purchase from Philips Respironics or an authorized Philips Respironics dealer.
3. If the Product is found to contain a defect of workmanship or materials or fails to perform in accordance with the Product specifications during the applicable warranty period, Philips Respironics will repair or replace, at its option, the defective material or part.
56 Limited warranty
Philips Respironics E30 User Manual
4. The customer is responsible for returning the product to an authorised Philips Respironics dealer, and collecting the product from the authorised Philips Respironics dealer after repair or replacement, at its own cost. Philips Respironics is responsible only for the freight cost of transporting the product between the authorised Philips Respironics dealer and Philips Respironics. Philips Respironics reserves the right to charge an evaluation and postage fee for any returned Product where no problem is found following investigation.
5. This warranty does not cover:
a. products purchased outside of Australia or New Zealand;
b. damage caused by accident, misuse, abuse, alteration, pest infestation, liquid ingress, and other defects not related to materials or workmanship.
3. The warranty provided by Philips Respironics herein is not transferrable by the Buyer in the event of any sale or transfer of Products purchased by the Buyer from an authorized Philips Respironics dealer.
4. To the extent permitted by law, where the Buyer has the benefit of an implied guarantee under the Australian Consumer Law, but the Product is not of a kind ordinarily acquired for personal, domestic or household use or consumption Philips Respironics’ liability shall be limited, at the option of Philips Respironics, to the replacement or repair of the Product or the supply of an equivalent Product.
5. To exercise your rights under this warranty, contact your local authorised Philips Respironics dealer. A list of all authorised dealers is available at the following link: http://www.philips.com.au/healthcare. Alternatively, you can make a claim under this warranty by contacting Philips Respironics directly at: Philips Electronics Australia Limited, 65 Epping Road, North Ryde NSW 2113, Australia. Tel: 1300 766 488, Email: [email protected].
6. The following statement is provided to a Buyer who is a “consumer” under the Australian Consumer Law: Our goods come with guarantees that cannot be excluded under the Australian Consumer Law. You are entitled to a replacement or refund for a major failure and for compensation for any other reasonably foreseeable loss or damage. You are also entitled to have the good repaired or replaced if the goods fail to be of acceptable quality and the failure does not amount to a major failure.
7. The following statement is provided to a Buyer who is a “consumer” under the Consumer Guarantees Act 1993, New Zealand: Our goods come with guarantees that cannot be excluded under the Consumer Guarantees Act 1993. This guarantee applies in addition to the conditions and guarantees implied by that legislation.
AUSTRALIAN SPONSOR DETAILS:
Philips Electronics Australia Ltd.65 Epping Road, North Ryde, NSW 2113Australia

Limited warranty 57
Philips Respironics E30 User Manual

58 Limited warranty
Philips Respironics E30 User Manual