dsp pure tone audiometer (dsppta) - owner's manual · 5 batteries the only step necessary to...
TRANSCRIPT

Owner's Manual
Micro Audiometrics Corp. 655 Keller Road
Murphy, NC 28906-5890 USA Phone: (828) 644-0771 Fax: (828) 644-0772
www.microaud.com ©1993-2004
Information furnished in this manual is believed to be accurate; however, no responsibility is assumed by Micro Audiometrics Corp.
for its use. No part of this manual may be reproduced without written permission from Micro Audiometrics Corp.

1
TABLE of CONTENTS Contents of Package .................................................... 2 Warranty Registration ................................................... 2 Headset......................................................................... 3 Key Entry Notations ...................................................... 3 Keypad Interpretation ................................................... 4 Batteries........................................................................ 5 Tone Presentation Mode .............................................. 6 Patient Set-Up .............................................................. 6 Modes of Operation ...................................................... 7
Manual Audiometry Mode........................................ 7 Frequency Selection........................................... 7 Presentation of Test Signal ................................ 8 Level Selection ................................................... 8 Recording Test Results...................................... 8
Automatic Sequencing Mode .................................. 9 Description of Mode ........................................... 9 Starting Test ..................................................... 10
Maintenance ............................................................... 10 Error Codes ................................................................ 11 Scale of Hearing Loss................................................. 12 Operating Mode Functions ......................................... 13 Set-Up Mode Functions .............................................. 14 Set Signal Options ...................................................... 15 Set Frequency Selection............................................. 17 Set Level Selection ..................................................... 18 Warranty ..................................................................... 19

2
CONTENTS of PACKAGE Your shipping box should contain:
Custom Carrying Case DSP Pure Tone Audiometer® with Headset Calibration Certificate Instrument Return Sheet
Your shrink wrap package should contain: Owner's Manual Hearing Test Results Pad Warranty Registration Card Calibration Sheet 4 AA Batteries
Contact Micro Audiometrics immediately if you do not have all of these items.
WARRANTY REGISTRATION Please complete your Warranty Registration Card and mail immediately. Returning your Warranty Registration Card will ensure prompt response to warranty issues and product updates.
3
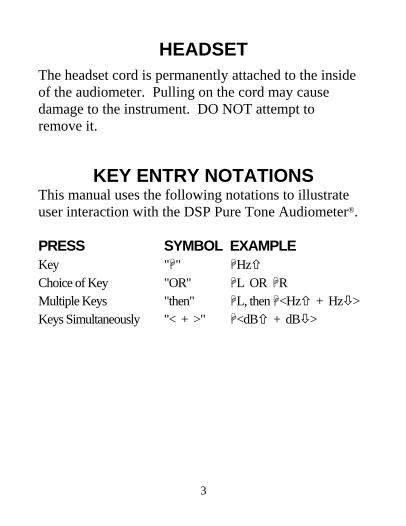
HEADSET
The headset cord is permanently attached to the inside of the audiometer. Pulling on the cord may cause damage to the instrument. DO NOT attempt to remove it.
KEY ENTRY NOTATIONS This manual uses the following notations to illustrate user interaction with the DSP Pure Tone Audiometer®. PRESS SYMBOL EXAMPLE Key " " Hz Choice of Key "OR" L OR R Multiple Keys "then" L, then <Hz + Hz > Keys Simultaneously "< + >" <dB + dB >

4
KEYPAD INTERPRETATION Frequency and hearing level LEDs have two modes of light intensity to designate the tone presentation: either a continuous light or a blinking light. A continuous LED indicates the outside "Bold Lettered" columns. A blinking LED indicates the inside "Light Lettered" columns.
5
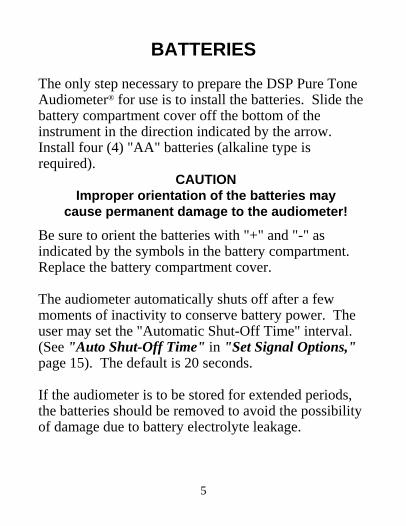
BATTERIES
The only step necessary to prepare the DSP Pure Tone Audiometer® for use is to install the batteries. Slide the battery compartment cover off the bottom of the instrument in the direction indicated by the arrow. Install four (4) "AA" batteries (alkaline type is required).
CAUTION Improper orientation of the batteries may
cause permanent damage to the audiometer!
Be sure to orient the batteries with "+" and "-" as indicated by the symbols in the battery compartment. Replace the battery compartment cover. The audiometer automatically shuts off after a few moments of inactivity to conserve battery power. The user may set the "Automatic Shut-Off Time" interval. (See "Auto Shut-Off Time" in "Set Signal Options," page 15). The default is 20 seconds. If the audiometer is to be stored for extended periods, the batteries should be removed to avoid the possibility of damage due to battery electrolyte leakage.

6
Low battery voltage is indicated when the 1000 Hz and 0 dB LEDs are illuminated and the L and R LEDs alternately flash on and off. This is easily remedied by installing fresh batteries.
TONE PRESENTATION MODE The signal mode may be pulsed or continuous, and of a pure tone or frequency modulated type. The continuous tone is presented for as long as the operator L or R. If the presentation mode is pulsed, pressing L or R will present at least the selected number of pulses. See "Set Signal Options" on page 15 for instructions on setting signal mode (pulsed or continuous), signal type (pure tone or frequency modulated), and the number of pulses per signal in pulsed mode.
PATIENT SET-UP Prior to testing, instruct the patient to raise his left hand when a tone is heard in his left ear, or his right hand when a tone is heard in his right ear. Position headphones over the patient's ears (red phone over right ear and blue phone over left ear). Begin testing.

7
MODES of OPERATION
MANUAL AUDIOMETRY MODE In this mode the selection and presentation of tones is under operator control. The following control functions are accessible while in manual testing mode: Frequency Selection: Hz OR Hz Level Selection: dB OR dB Tone Presentation: L OR R
Frequency Selection Testing may be performed at selected frequencies of 250, 500, 750, 1000, 1500, 2000, 3000, 4000, 6000, and 8000 Hz. Hz will increase frequency and Hz will decrease frequency. If you advance past 8000 Hz "wrap-around" will take you to the beginning at 250 Hz, or if you go backward past 250 Hz "wrap-around" will take you to the end at 8000 Hz.

8
Presentation of Test Signal R or L will present a tone to the right ear or left ear,
respectively, at the frequency and level currently selected.
<R + L> will present a tone to both ears simultaneously at the frequency and level currently selected.
Level Selection dB will increment or dB will decrement the
stimulus presentation level through a list of selected values (default range is -10 dB to 80 dB for frequencies 500 to 6000 Hz, and -10 to 70 dB for 250 and 8000 Hz).
dB will increase the level by 5 dB per press and dB will decrease the level by either 5 or 10 dB per
press. The dB level selection is user definable. (See "dB Step Size" in "Set Signal Options," page 15).
Recording Test Results When recording an audiogram graph on the "Hearing Test Results Pad," an "O" is plotted for the right ear, and a "X" for the left ear.
9
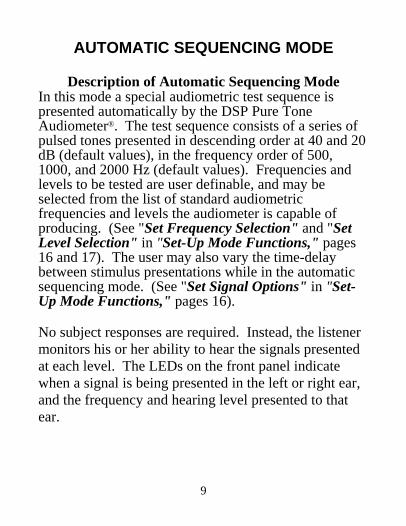
AUTOMATIC SEQUENCING MODE
Description of Automatic Sequencing Mode In this mode a special audiometric test sequence is presented automatically by the DSP Pure Tone Audiometer®. The test sequence consists of a series of pulsed tones presented in descending order at 40 and 20 dB (default values), in the frequency order of 500, 1000, and 2000 Hz (default values). Frequencies and levels to be tested are user definable, and may be selected from the list of standard audiometric frequencies and levels the audiometer is capable of producing. (See "Set Frequency Selection" and "Set Level Selection" in "Set-Up Mode Functions," pages 16 and 17). The user may also vary the time-delay between stimulus presentations while in the automatic sequencing mode. (See "Set Signal Options" in "Set-Up Mode Functions," pages 16). No subject responses are required. Instead, the listener monitors his or her ability to hear the signals presented at each level. The LEDs on the front panel indicate when a signal is being presented in the left or right ear, and the frequency and hearing level presented to that ear.

10
After the pulsed tones have been presented at all selected frequencies and levels, the DSP Pure Tone Audiometer® will return to manual mode. The listener may then be queried as to signals which were not audible, and audiometric testing may be conducted in manual mode as desired.
Starting Automatic Sequencing Test To start the automatic sequencing test <Hz +dB >. To stop the test in progress, <Hz +dB >. The instrument will return to the manual audiometry mode. If automatic sequencing is re-selected, the sequence will start again from the beginning.
MAINTENANCE The headphone cushions may be cleaned with mild, soapy water, taking care not to get the internal mechanism wet. Disposable sanitary audiometric headphone cushion covers are becoming popular. Contact your local sales representative for availability. A yearly sound pressure level calibration, by an authorized service center or the factory, in accordance with ANSI S3.6-1989, is recommended.

11
ERROR CODES There are several situations for which the DSP Pure Tone Audiometer® will indicate an error. Low battery voltage is indicated when the 1000 Hz and 0 dB LEDs are lit and the L and R LEDs alternately flash on and off. This is easily remedied by replacing the batteries. (See "Batteries," page 5 for battery installation instructions.) An error condition is indicated when the L and R LEDs alternately flash on and off. An error code indicating the exact error condition will be displayed on the frequency and level LEDs for 2 seconds, then the instrument will power down. These errors may indicate hardware failure and should be referred to the factory or to an authorized service representative.

12
SCALE of HEARING LOSS Reporting the degree of hearing loss is somewhat subjective in that not all hearing tests are conducted in the same manner. Test results vary from person to person depending on ambient noise levels present while testing. If testing conditions are optimal, the following scale may be helpful in understanding or reporting results. Lowest Level Heard Within Indication
0 dB - 20 dB Hearing within normal limits 25 dB - 40 dB Slight to mild hearing loss 45 dB - 55 dB Moderate hearing loss 60 dB - 70 dB Moderately severe hearing loss 75 dB - 90 dB Severe hearing loss 90 dB + Profound hearing loss

13
OPERATING MODE FUNCTIONS
Manual Mode
Function Key Operation
Select Frequency Hz OR Hz Select Level dB OR dB Present Signal R Ear R Present Signal L Ear L
Automatic SequencingTM Mode
Function Key Operation To Start <Hz + dB > To Exit <Hz + dB >

14
SET-UP MODE FUNCTIONS
User-selectable options are grouped within the three menus: (Set Signal Options, Set Frequency Selection, and Set Level Selection) and are accessible by <Hz + Hz + dB >. Below is a list of these user-selectable items that your DSP Pure Tone Audiometer® was set with at the factory.
FACTORY DEFAULTS FOR REFERENCE:
Signal Mode: Pulsed Signal Type: Pure Tone dB Step Size: +5dB/-5dB steps # of Pulses/Signal: 3 Auto Shut-Off Time: 20 seconds
Manual Mode Frequencies: 250, 500, 750, 1K, 1.5K, 2K, 3K, 4K, 6K, 8K Hz Hearing Levels: -10 dB HTL to 80 dB HTL (except 70 dB at 250 & 8K)
Automatic Sequencing Mode Frequencies: 500, 1K, 2K Hz Hearing Levels: 20, 40 dB HTL Sequence: descending Time Delay: .75 second
15
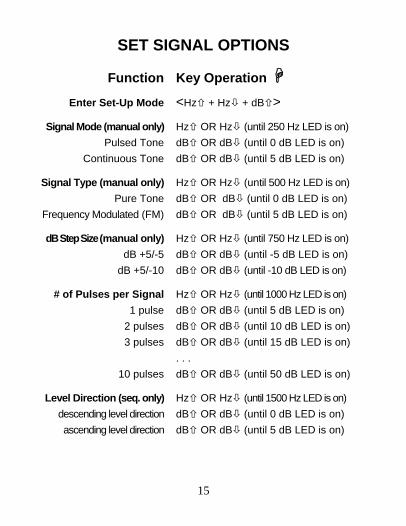
SET SIGNAL OPTIONS Function Key Operation
Enter Set-Up Mode <Hz + Hz + dB >
Signal Mode (manual only) Hz OR Hz (until 250 Hz LED is on) Pulsed Tone dB OR dB (until 0 dB LED is on) Continuous Tone dB OR dB (until 5 dB LED is on)
Signal Type (manual only) Hz OR Hz (until 500 Hz LED is on) Pure Tone dB OR dB (until 0 dB LED is on) Frequency Modulated (FM) dB OR dB (until 5 dB LED is on)
dB Step Size (manual only) Hz OR Hz (until 750 Hz LED is on) dB +5/-5 dB OR dB (until -5 dB LED is on) dB +5/-10 dB OR dB (until -10 dB LED is on)
# of Pulses per Signal Hz OR Hz (until 1000 Hz LED is on) 1 pulse dB OR dB (until 5 dB LED is on) 2 pulses dB OR dB (until 10 dB LED is on) 3 pulses dB OR dB (until 15 dB LED is on) . . . 10 pulses dB OR dB (until 50 dB LED is on)
Level Direction (seq. only) Hz OR Hz (until 1500 Hz LED is on) descending level direction dB OR dB (until 0 dB LED is on) ascending level direction dB OR dB (until 5 dB LED is on)

16
Time-Delay (seq. only) Hz OR Hz (until 3000 Hz LED is on) .05 sec. dB OR dB (until 10 dB LED is on) 1.0 sec. dB OR dB (until 20 dB LED is on) 1.5 sec. dB OR dB (until 30 dB LED is on) 2.0 sec. dB OR dB (until 60 dB LED is on) . . . 4.0 sec. dB OR dB (until 80 dB LED is on)
Auto Shut-Off Time Hz OR Hz (until 2000 Hz LED is on) 20 sec. dB OR dB (until 10 dB LED is on) 40 sec. dB OR dB (until 20 dB LED is on) 60 sec. dB OR dB (until 30 dB LED is on) 120 sec. dB OR dB (until 60 dB LED is on)
EXIT & SAVE <Hz + L> EXIT Temporary Save <Hz + L> (Saves till power goes off.)
NOTE: "< + >" = Simultaneous Key Press. Repeatedly pressing Hz OR Hz cycles through the seven items on the Signal Options menu (Signal Mode, Signal Type, dB Step Size, # of Pulses per Signal, Level Direction, Time-Delay, and Auto Shut-Off Time) in sequence. The illuminated Hz LED corresponds to the Signal Option you are in.

17
SET FREQUENCY SELECTION Function Key Operation Enter Set-Up Mode <Hz + Hz + dB > Enter Frequency Selection <Hz + Hz > Hz OR Hz to scroll Hz
Toggle L - to select/deselect frequency for Manual Audiometry Test Mode
L LED on = frequency selected L LED off = frequency deselected Toggle R - to select/deselect frequency
for Automatic Sequencing Test Mode R LED on = frequency selected R LED off = frequency deselected
EXIT & SAVE <Hz + L> EXIT Temporary Save <Hz + L> (Saves till power goes off.)

18
SET LEVEL SELECTION Function Key Operation
Enter Set-Up Mode <Hz + Hz + dB >
Enter Frequency Selection <Hz + Hz >
Enter Level Selection <Hz + Hz > dB OR dB to scroll levels
Toggle L to select/deselect level for Manual Audiometry Test Mode L LED on = level selected LED off = level deselected
Toggle R to select/deselect level for Automatic Sequencing Test Mode R LED on = level selected R LED off = level deselected
EXIT & SAVE <Hz + L> EXIT Temporary Save <Hz + L> (Saves till power goes off.)
19
MICRO AUDIOMETRICS CORPORATION LIMITED WARRANTY
DSP Pure Tone Audiometer®
1. This is a "LIMITED WARRANTY" as defined in the Consumer Product Warranty and Federal Trade Commission Improvement Act. This WARRANTY gives you specific legal rights and you may also have other rights that vary from state to state.
2. Micro Audiometrics warrants this DSP Pure Tone Audiometer® to be free from defects in materials and workmanship for three (3) years and headset for one (1) year under normal use. This warranty applies only to the original customer, and only on units purchased and used solely in the United States. Micro Audiometrics may, at its sole and exclusive option, replace this product.
3. This WARRANTY does not apply to any product damaged by accident, misuse, alteration or abnormal condition of operation, or if the products were altered or repaired by anyone other than Micro Audiometrics or one of its Authorized Equipment Service Centers.
4. This WARRANTY does not cover cartons, carrying cases, noise reducing enclosures, cables, batteries, broken or marred cabinets, or any other accessories used in connection with the product, or consequential damages due to a defect in the product.
5. This WARRANTY begins on the date of purchase. For your convenience, keep the dated bill of sale or packing list as evidence of the purchase date.

20
6. In the event of any claim of a defect covered by this WARRANTY, the customer should take the following steps:
• Contact Micro Audiometrics for Customer Assistance regarding the nature of the claim and obtaining a Return Authorization Number (see Instrument Return sheet).
• The returned audiometer and headset should be packed in a Micro Audiometrics' shipping carton and properly padded. Any instrument not shipped to the factory in its original carton will be returned to the customer in a new carton, at the customer's expense.
• Return the instrument to the nearest Micro Audiometrics Authorized Equipment Service Center, or to Micro Audiometrics.
• The customer is responsible for shipping expenses. 7. All correspondence regarding WARRANTY service should be
directed to:
Micro Audiometrics Corporation 655 Keller Road
Murphy, NC 28906-5890 USA Voice: (828) 644-0771 Fax: (828) 644-0772
www.microaud.com
© Micro Audiometrics Corp. 1993-2004