drupal 6 modules and jquery
TRANSCRIPT
Introduction to Drupal modules
When developing Drupal it became clear that we wanted to have a system which is as modular as possible. A modular design will provide flexibility, adaptability, and continuity which in turn allows people to customize the site to their needs and likings.
A Drupal module is simply a file containing a set of routines written in PHP. When used, the module code executes entirely within the context of the site. Hence it can use all the functions and access all variables and structures of the main engine. In fact, a module is not any different from a regular PHP file: it is more of a notion that automatically leads to good design principles and a good development model. Modularity better suits the open-source development model, because otherwise you can't easily have people working in parallel without risk of interference.
The idea is to be able to run random code at given places in the engine. This random code should then be able to do whatever needed to enhance the functionality. The places where code can be executed are called "hooks" and are defined by a fixed interface.
In places where hooks are made available, the engine calls each module's exported functions. This is done by iterating through the modules directory where all modules must reside. Say your module is named foo (i.e. modules/foo.module) and if there was a hook called bar, the engine will call foo_bar() if this was exported by your module.
See also the overview of module hooks, which is generated from the Drupal source code.
This tutorial describes how to create a module for Drupal 6. It is an update to the tutorial for Drupal 5. Please see comments there, also. Much of this tutorial is valid for Drupal 5 as well, but you should check the API documentation, as well as the documentation on how to update your modules from one version of Drupal to another.
A module is a collection of functions that link into Drupal, providing additional functionality to your Drupal installation. After reading this tutorial, you will be able
to create a basic block module and use it as a template for more advanced modules and node modules.
This tutorial will not necessarily prepare you to write modules for release into the wild. It does not cover caching, nor does it elaborate on permissions or security issues. Use this tutorial as a starting point, and review other modules and the Drupal handbook, the documentation on writing secure code and the Coding standards for more information.
This tutorial assumes the following about you:
• Basic PHP knowledge, including syntax and the concept of PHP objects • Basic understanding of database tables, fields, records and SQL
statements • A working Drupal installation • Drupal administration access • Webserver access
This tutorial does not assume you have any knowledge about the inner workings of a Drupal module. This tutorial will not help you write modules for versions of Drupal earlier than 5.
01. Getting Started
Drupal 6.x
To focus this tutorial, we'll start by creating a block module that lists links to content such as blog entries or forum discussions that were created one week ago. The full tutorial will teach us how to create block content, write links, and retrieve information from Drupal nodes.
Start your module by creating a folder in your Drupal installation at the path: sites/all/modules/onthisdate. You may need to create the sites/all/modules directory first. Create a PHP file and save it as onthisdate.module in the directory sites/all/modules/onthisdate. As of Drupal 6.x, sites/all/modules is the preferred place for non-core modules (and sites/all/themes for non-core themes), since this places all site-specific files in the sites directory. This allows you to more easily update the core files and modules without erasing your customizations.
<?php// $Id$

The module is not operational yet: it hasn't been activated. We'll activate the module later in the tutorial.
Coding Standards
As per the Coding standards, omit the closing ?> tag and use the longhand <?php tag. (Note that the examples in the handbook will show the closing tag for formatting reasons only and you should not include it in your real code.) The $Id$ string will help keep track of the revision number and date when you commit the file to CVS.
All functions in your module that will be used by Drupal are named {modulename}_{hook}, where "hook" is a pre-defined function name suffix. Drupal will call these functions to get specific data, so having these well-defined names means Drupal knows where to look. We will come to hooks in a while.
02. Telling Drupal about your module
Drupal 6.x
Main topic described: Let Drupal know your module existsDrupal hook described: hook_helpAll modules must have a modulename.info file, which contains meta information about the module. For our example, this file would be named "onthisdate.info".
The general format is:
; $Id$name = Module Namedescription = A description of what your module does.core = 6.x
Without this file, your module will not show up in the module listing. For our example, it could contain the following:
; $Id$name = On this datedescription = A block module that lists links to content such as blog entries or forum discussions that were created one week ago.core = 6.x
Add the source above to a file named to onthisdate.info and save it into your module's directory at sites/all/modules/onthisdate.
Detailsname (Required)
The displayed name of your module. It should follow the Drupal 5 capitalization standard: only the first letter of the first word is capitalized ("Example module", not "example module" or "Example Module").name = On this date
description (Required) A short, preferably one line description that will tell the administrator what this module does on the module administration page. Remember, overly long descriptions can make this page difficult to work with, so please try to be concise. This field is limited to 255 characters.
description = A block module that lists links to content such as blog entries or forum discussions that were created one week ago.
Note that if you're using special characters in this description, like quotes, you'll have to substitute them with the HTML entity values. For example, use description = This is my "[email protected]" email address instead of description = This is my "[email protected]" email address
core (Required) As of version 6.x, Drupal core will refuse to enable or run modules that aren't explicitly ported to the right version of core. The .info file must specify which Drupal core compatiblity any module or theme has been ported to. This is accomplished by means of the new core attribute in the .info files. core = 6.x
Please note that the drupal.org packaging script automatically sets this value based on the Drupal core compatibility setting on each release node, so people downloading packaged releases from drupal.org will always get the right thing. However, for sites that deploy Drupal directly from CVS, it helps if you commit this change to the .info files for your modules. This is also a good way to indicate to users of each module what version of core the HEAD of CVS is compatibile with at any given time.
dependencies (Optional)

There are a couple of extra options that may appear in the .info file, one of which are module dependencies. If your module requires another module to be enabled, list each module (filename) required in the following syntax:dependencies[] = taxonomydependencies[] = comment
For our example module, these don't apply and we will simply omit them. If you assign dependencies for your module, Drupal will not allow it to be activated until the required dependencies are met.
package (Optional) If you assign a package string for your module, on the admin/build/modules page it will be listed with other modules with the same category. If you do not assign one, it will simply be listed as 'Uncategorized'. Not assigning a package for your module is perfectly ok; in general packages are best used for modules that are distributed together or are meant to be used together. If you have any doubt, leave this field blank. package = "Your arbitrary grouping string"
Suggested examples of appropriate items for the package field:
• Audio • Bot • CCK • Chat • E-Commerce • Event • Feed Parser • Organic groups • Station • Video • Views • Voting (if it uses/requires VotingAPI)
The files use the ini format and can include a ; $Id$ to have CVS insert the file ID information.
For more information on ini file formatting, see the PHP.net parse_ini_file documentation.

Help Hook
We can also provide help and additional information about our module. Because of the use of the .info file described above, this hook is now optional. However, it is a good idea to implement it. The hook name for this function is 'help', so start with the onthisdate_help function:
<?phpfunction onthisdate_help($path, $arg) {
}?>
The $path variable provides context for the help: where in Drupal or the module are we looking for help. The recommended way to process this variable is with a switch statement. You'll see this code pattern in other modules.
<?php/*** Display help and module information* @param path which path of the site we're displaying help* @param arg array that holds the current path as would be returned from arg() function* @return help text for the path*/function onthisdate_help($path, $arg) { $output = ''; switch ($path) { case "admin/help#onthisdate": $output = '<p>'. t("Displays links to nodes created on this date") .'</p>'; break; } return $output;} // function onthisdate_help?>
The admin/help#modulename case is used by the Drupal core to linked from the main help page (/admin/help or ?q=admin/help). You will eventually want to add more text to provide a better help message to the user.

Add the source above to a file named to onthisdate.module before saving in your Drupal installation.
See Also
• hook_help
03. Telling Drupal who can use your module
Drupal 6.x
Main topic described: PermissionsDrupal hook described: hook_perm
The next function to write is the permissions function, using the _perm hook. This is where you will define the names of the permissions of your module. This function doesn't grant permission, it just specifies what permissions are available for this module. Access based on these permissions is defined later in the {module}_access function, later in the tutorial.
<?php/*** Valid permissions for this module* @return array An array of valid permissions for the onthisdate module*/
function onthisdate_perm() { return array('access onthisdate content');} // function onthisdate_perm()?>
If you are going to write a module that needs to have finer control over the permissions, and you're going to do permission control (by checking permissions), you should expand this permission set. For example:
<?phpfunction onthisdate_perm() {
return array('access onthisdate content', 'administer onthisdate');

} // function onthisdate_perm?>
For this tutorial, start with the first one. We'll later move to the second version.
You'll need to adjust who has permission to view your module on the Administer » User management » Permissions page. We'll use the user_access function to check access permissions later (whoa, so many "laters!").
Your permission strings are arbitrary, but each must be unique among all installed modules. Otherwise, one occurrence of the name will take the permissions of the other. The permission strings should each usually contain your module name, since this helps avoid name space conflicts with other modules.
The suggested naming convention for permissions is "action_verb modulename". For example:
<?phpfunction newmodule_perm() {
return array('access newmodule', 'create newmodule', 'administer newmodule');
} // function newmodule_perm?>
The setup of the module is now done. You can add the code above to your module file. Next, we'll start generating content.
See Also
• hook_perm
04. Declare we have block content
Drupal 6.x
There are several types of modules: block modules and node modules are two. Block modules create abbreviated content that is typically (but not always, and not required to be) displayed along the left or right side of a page. Node modules generate full page content (such as blog, forum, or book pages).

We'll create a block content to start, and later discuss node content, as well as filtering content. A module can generate content for blocks and also for a full page (the blogs module is a good example of this). The hook for a block module is appropriately called "block", so let's start our next function:
<?php/*** Generate HTML for the onthisdate block* @param op the operation from the URL* @param delta offset* @returns block HTML */function onthisdate_block($op = 'list', $delta = 0) { } // end function onthisdate_block?>
The block function takes two parameters: the operation and the offset, or delta. The offset allows you to create different content for different blocks, all within the same block function. We'll just worry about the operation at this point. In particular, we care about the specific case where the block is being listed in the blocks page. In all other situations, we'll display the block content.
When the module will be listed on the blocks page, the $op parameter's value will be 'list':
<?php/*** Generate HTML for the onthisdate block* @param op the operation from the URL* @param delta offset* @returns block HTML */function onthisdate_block($op='list', $delta=0) { // listing of blocks, such as on the admin/block page if ($op == "list") { $block[0]["info"] = t('On This Date'); return $block; }} // end onthisdate_block?>
Next, we'll generate the block content.
See Also
• hook_block • block_example.module
05. Generate the block content
Drupal 6.x
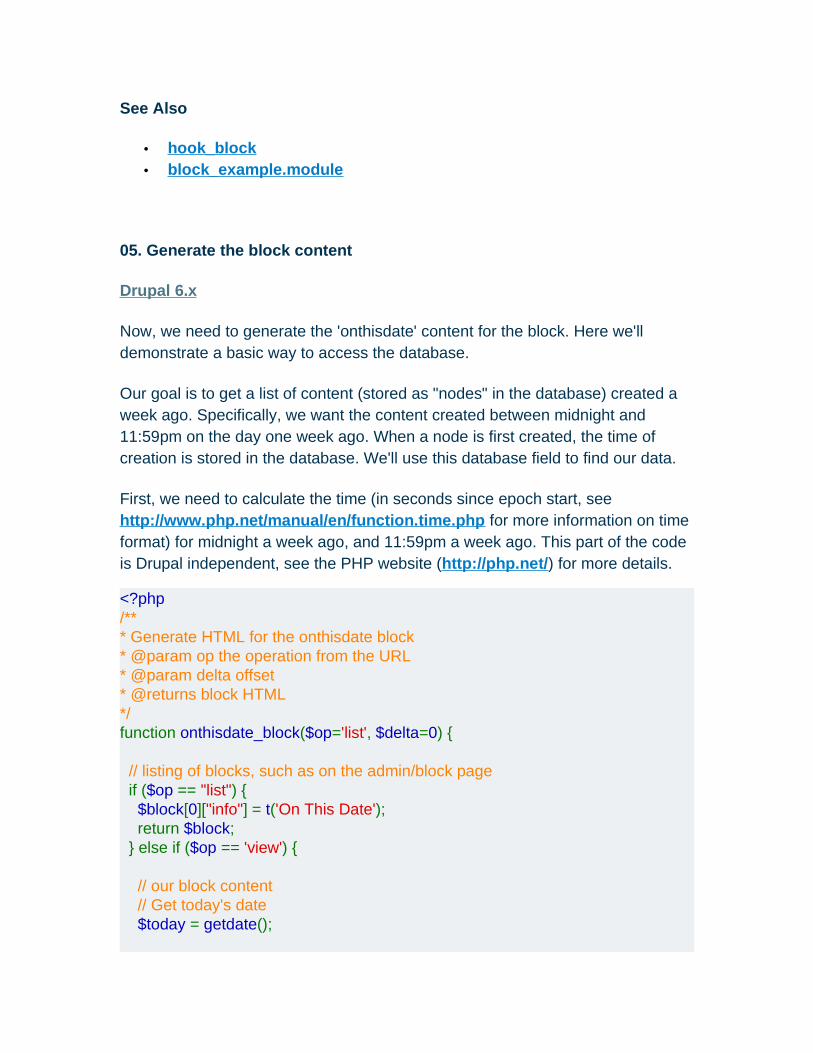
Now, we need to generate the 'onthisdate' content for the block. Here we'll demonstrate a basic way to access the database.
Our goal is to get a list of content (stored as "nodes" in the database) created a week ago. Specifically, we want the content created between midnight and 11:59pm on the day one week ago. When a node is first created, the time of creation is stored in the database. We'll use this database field to find our data.
First, we need to calculate the time (in seconds since epoch start, see http://www.php.net/manual/en/function.time.php for more information on time format) for midnight a week ago, and 11:59pm a week ago. This part of the code is Drupal independent, see the PHP website (http://php.net/) for more details.
<?php/*** Generate HTML for the onthisdate block* @param op the operation from the URL* @param delta offset* @returns block HTML */function onthisdate_block($op='list', $delta=0) {
// listing of blocks, such as on the admin/block page if ($op == "list") { $block[0]["info"] = t('On This Date'); return $block; } else if ($op == 'view') {
// our block content // Get today's date $today = getdate();

// calculate midnight one week ago $start_time = mktime(0, 0, 0, $today['mon'], ($today['mday'] - 7), $today['year']);
// we want items that occur only on the day in question, so // calculate 1 day $end_time = $start_time + 86400; // 60 * 60 * 24 = 86400 seconds in a day ... }}?>
The next step is the SQL statement that will retrieve the content we'd like to display from the database. We're selecting content from the node table, which is the central table for Drupal content. We'll get all sorts of content type with this query: blog entries, forum posts, etc. For this tutorial, this is okay. For a real module, you would adjust the SQL statement to select specific types of content (by adding the 'type' column and a WHERE clause checking the 'type' column).
Note: the table name is enclosed in curly braces: {node}. This is necessary so that your module will support database table name prefixes. You can find more information on the Drupal website by reading the Table Prefix (and sharing tables across instances) page in the Drupal handbook.
We'll use db_query() to get the records (i.e. the database rows) with our SQL query
<?php$result = db_query("SELECT nid, title, created FROM {node} WHERE created >= '%s' AND created <= '%s'", $start_time, $end_time);?>
Drupal uses database helper functions to perform database queries. This means that, for the most part, you can write your database SQL statement and not worry about the backend connections.
We use db_fetch_object() to look at the individual records:
<?php // content variable that will be returned for display $block_content = ''; while ($links = db_fetch_object($result)) {

$block_content .= l($links->title, 'node/'. $links->nid) .'<br />'; }
// check to see if there was any content before setting up // the block if ($block_content == '') { /* No content from a week ago. If we return nothing, the block * doesn't show, which is what we want. */ return; }
// set up the block $block['subject'] = 'On This Date'; $block['content'] = $block_content; return $block;}?>
Notice the actual URL is enclosed in the l() function. l generates <a href="link"> links, adjusting the URL to the installation's URL configuration of either clean URLS: http://(sitename)/node/2 or not http://(sitename)/?q=node/2.
Also, we return an array that has 'subject' and 'content' elements. This is what Drupal expects from a block function. If you do not include both of these, the block will not render properly.
You may also notice the bad coding practice of combining content with layout. If you are writing a module for others to use, you will want to provide an easy way for others (in particular, non-programmers) to adjust the content's layout. An easy way to do this is to include a class attribute in your link, or surround the HTML with a <div> tag with a module specific CSS class and not necessarily include the <br /> at the end of the link. Let's ignore this for now, but be aware of this issue when writing modules that others will use.
Putting it all together, our block function at this point looks like this:
<?phpfunction onthisdate_block($op='list', $delta=0) { // listing of blocks, such as on the admin/block page if ($op == "list") { $block[0]["info"] = t("On This Date"); return $block; } else if ($op == 'view') {

// our block content // content variable that will be returned for display $block_content = '';
// Get today's date $today = getdate();
// calculate midnight one week ago $start_time = mktime(0, 0, 0,$today['mon'], ($today['mday'] - 7), $today['year']);
// we want items that occur only on the day in question, so //calculate 1 day $end_time = $start_time + 86400; // 60 * 60 * 24 = 86400 seconds in a day
$result = db_query("SELECT nid, title, created FROM {node} WHERE created >= '%s' AND created <= '%s'", $start_time, $end_time); while ($links = db_fetch_object($result)) { $block_content .= l($links->title, 'node/'.$links->nid) . '<br />'; } // check to see if there was any content before setting up the block if ($block_content == '') { // no content from a week ago, return nothing. return; } // set up the block $block['subject'] = 'On This Date'; $block['content'] = $block_content; return $block; }}?>
Our module is now functional - we can install, enable and test it.
See Also
• db_fetch_object()
06. Installing, enabling and testing the module
Drupal 6.x

At this point, you can install your module and it'll work. Let's do that, and see where we need to improve the module.
Install
To install the module, you'll need to copy your onthisdate.module file to the modules directory of your Drupal installation (which itself can be a subdirectory of your Drupal install or a subdirectory of sites/all or if you are coding a site specific module for a multisite install then sites/hostname). The file must be installed in this directory or a subdirectory of the modules directory, and must have the .module name extension and must have a correspoding .info file.
Enable
Log in as your site administrator, and navigate to the modules administration page to get an alphabetical list of modules. In the menus: Administer » Site building » Modules, or via URL:
• http://example.com/admin/build/modules • http://example.com/?q=admin/build/modules
When you scroll down, you'll see the onthisdate module listed with the description next to it. Enable the module by selecting the checkbox and save your configuration.
Configure
Because the module is a blocks module, we'll need to also enable it in the blocks administration menu and specify a location for it to display. Node modules may or may not need further configuration depending on the module. Any module can have settings, which affect the functionality/display of a module. We'll discuss settings later. For now, navigate to the blocks administration page: admin/build/block or Administer » Site building » Blocks in the menus.
Enable the module by selecting the enabled checkbox for the 'On This Date' block and save your blocks. Be sure to adjust the location (left/right) if you are using a theme that limits where blocks are displayed.
Now, head to another page, say, select the modules menu. In some themes, the blocks are displayed after the page has rendered the content, and you won't see the change until you go to new page.
Test
If you have content that was created a week ago, the block will display with links to the content. If you don't have content, you'll need to fake some data. You can do this by creating a blog, forum topic or book page, and adjust the "Authored on:" date to be a week ago.
Alternately, if your site has been around for a while, you may have a lot of content created on the day one week ago, and you'll see a large number of links in the block.
07. Create a module configuration (settings) page
• View • Revisions
Drupal 6.x
Main topic described: Module settingsDrupal hook used: hook_menu
Now that we have a working module, we'd like to make it better. If we have a site that has been around for a while, content from a week ago might not be as interesting as content from a year ago. Similarly, if we have a busy site, we might not want to display all the links to content created last week. So, let's create a configuration page for the administrator to adjust this information.
Create the configuration function
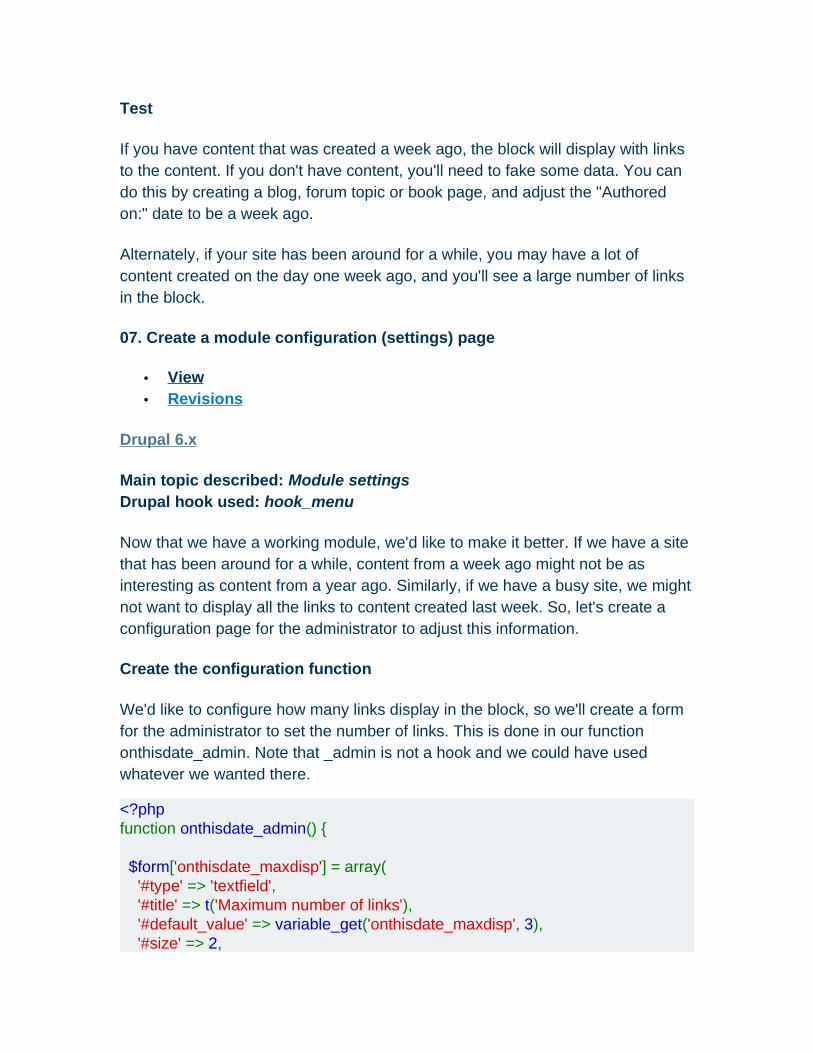
We'd like to configure how many links display in the block, so we'll create a form for the administrator to set the number of links. This is done in our function onthisdate_admin. Note that _admin is not a hook and we could have used whatever we wanted there.
<?phpfunction onthisdate_admin() {
$form['onthisdate_maxdisp'] = array( '#type' => 'textfield', '#title' => t('Maximum number of links'), '#default_value' => variable_get('onthisdate_maxdisp', 3), '#size' => 2,
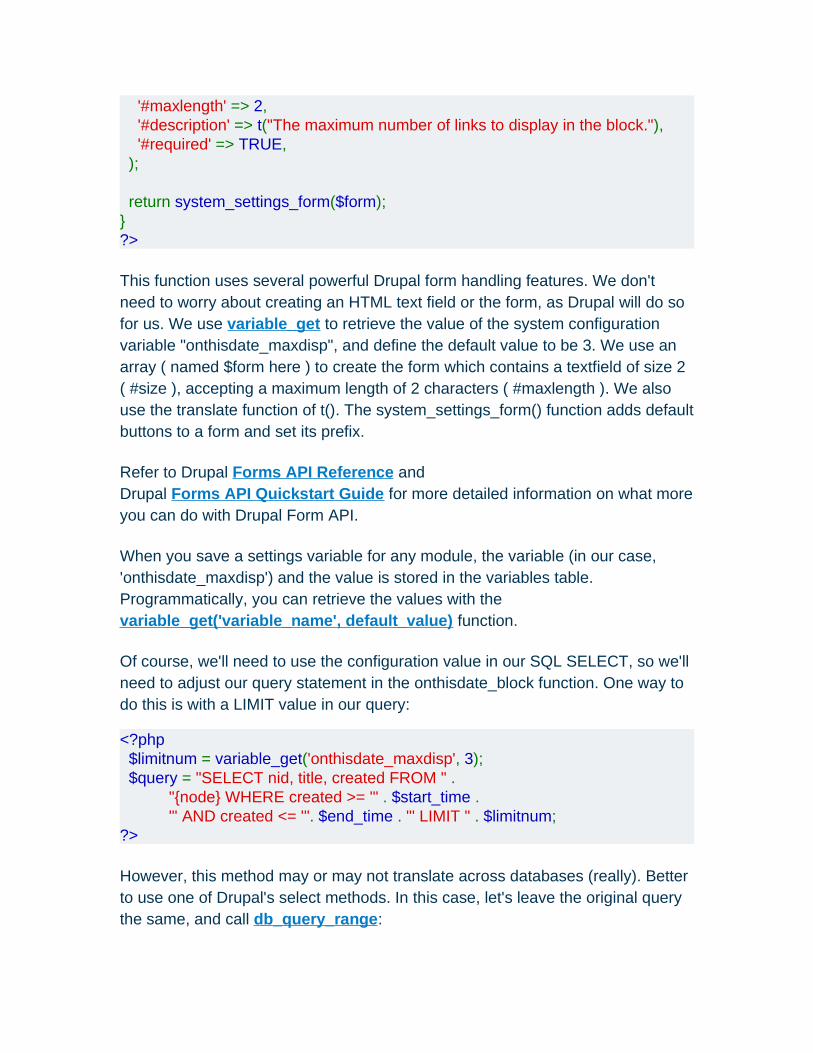
'#maxlength' => 2, '#description' => t("The maximum number of links to display in the block."), '#required' => TRUE, );
return system_settings_form($form);}?>
This function uses several powerful Drupal form handling features. We don't need to worry about creating an HTML text field or the form, as Drupal will do so for us. We use variable_get to retrieve the value of the system configuration variable "onthisdate_maxdisp", and define the default value to be 3. We use an array ( named $form here ) to create the form which contains a textfield of size 2 ( #size ), accepting a maximum length of 2 characters ( #maxlength ). We also use the translate function of t(). The system_settings_form() function adds default buttons to a form and set its prefix.
Refer to Drupal Forms API Reference andDrupal Forms API Quickstart Guide for more detailed information on what more you can do with Drupal Form API.
When you save a settings variable for any module, the variable (in our case, 'onthisdate_maxdisp') and the value is stored in the variables table. Programmatically, you can retrieve the values with the variable_get('variable_name', default_value) function.
Of course, we'll need to use the configuration value in our SQL SELECT, so we'll need to adjust our query statement in the onthisdate_block function. One way to do this is with a LIMIT value in our query:
<?php $limitnum = variable_get('onthisdate_maxdisp', 3); $query = "SELECT nid, title, created FROM " . "{node} WHERE created >= '" . $start_time . "' AND created <= '". $end_time . "' LIMIT " . $limitnum;?>
However, this method may or may not translate across databases (really). Better to use one of Drupal's select methods. In this case, let's leave the original query the same, and call db_query_range:

<?php $limitnum = variable_get("onthisdate_maxdisp", 3);
$query = "SELECT nid, title, created FROM " . "{node} WHERE created >= %d " . "AND created <= %d";
$queryResult = db_query_range($query, $start_time, $end_time, 0, $limitnum);?>
Add the page to hook_menu
Once you have created the function with your settings, the page is added with a callback to the function which you specify in hook_menu. In hook_menu we will return an array which describes to Drupal which URL path to use, the title to display, the function to use and the permissions required.
We would like only administrators to be able to access this page, so we'll place the permissions check for the module here in hook_menu so that Drupal can itself check the appropriate permission. To minimize the number of permissions an administrator has to deal with, we're going to use the global administration permission for administrating our module instead of creating a new custom permission.
<?phpfunction onthisdate_menu() {
$items = array();
$items['admin/settings/onthisdate'] = array( 'title' => 'On this date module settings', 'description' => 'Description of your On this date settings control', 'page callback' => 'drupal_get_form', 'page arguments' => array('onthisdate_admin'), 'access arguments' => array('access administration pages'), 'type' => MENU_NORMAL_ITEM, );
return $items;}?>
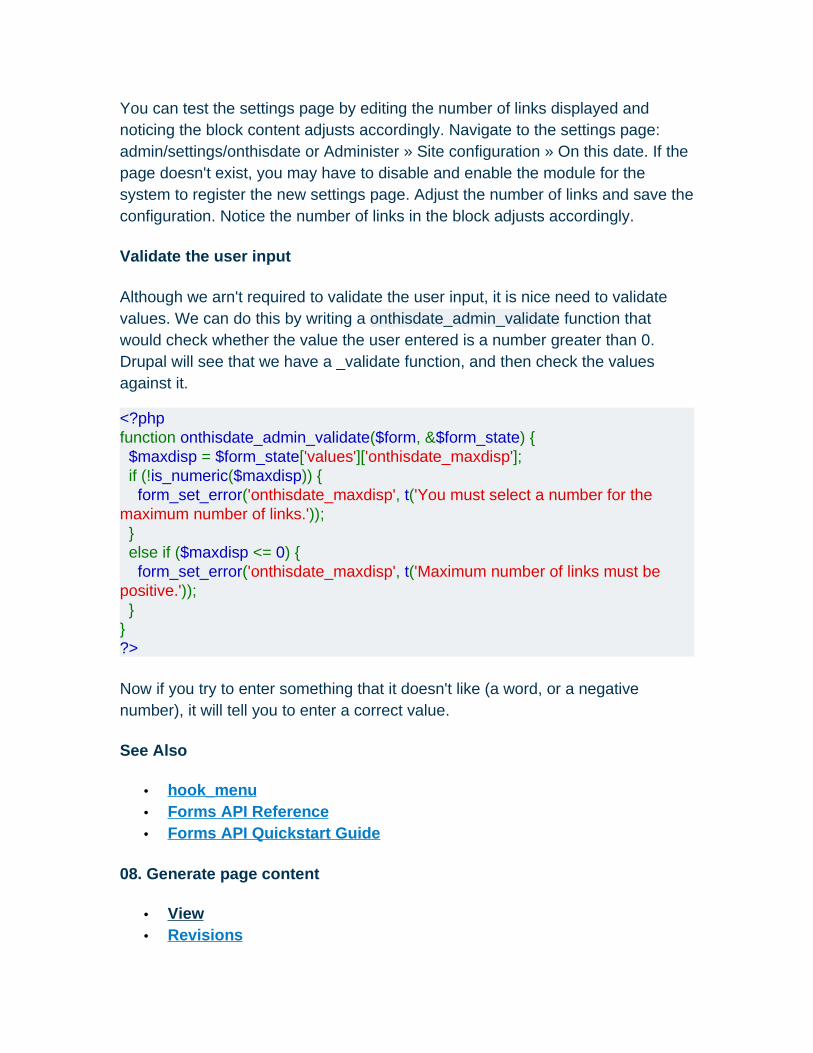
You can test the settings page by editing the number of links displayed and noticing the block content adjusts accordingly. Navigate to the settings page: admin/settings/onthisdate or Administer » Site configuration » On this date. If the page doesn't exist, you may have to disable and enable the module for the system to register the new settings page. Adjust the number of links and save the configuration. Notice the number of links in the block adjusts accordingly.
Validate the user input
Although we arn't required to validate the user input, it is nice need to validate values. We can do this by writing a onthisdate_admin_validate function that would check whether the value the user entered is a number greater than 0. Drupal will see that we have a _validate function, and then check the values against it.
<?phpfunction onthisdate_admin_validate($form, &$form_state) { $maxdisp = $form_state['values']['onthisdate_maxdisp']; if (!is_numeric($maxdisp)) { form_set_error('onthisdate_maxdisp', t('You must select a number for the maximum number of links.')); } else if ($maxdisp <= 0) { form_set_error('onthisdate_maxdisp', t('Maximum number of links must be positive.')); }}?>
Now if you try to enter something that it doesn't like (a word, or a negative number), it will tell you to enter a correct value.
See Also
• hook_menu • Forms API Reference • Forms API Quickstart Guide
08. Generate page content
• View • Revisions

Drupal 6.x
Main topic described: Displaying content
So far we have our working block and a settings page. The block displays a maximum number of links. However, there may be more links than the maximum we show. So, let's create a page that lists all the content that was created a week ago.
<?phpfunction onthisdate_all() { }?>
We're going to use much of the code from the block function. We'll write this ExtremeProgramming style, and duplicate the code. If we need to use it in a third place, we'll refactor it into a separate function. For now, copy the code to the new function onthisdate_all(). Contrary to all our other functions, 'all', in this case, is not a Drupal hook.
If you want to call this function from another module, use the standard naming scheme we've been using: modulename_action. It can be called using the function module_invoke function. If you want the function to remain private (because, say, it's merely a helper function in your module) and easily accessible by only your module, prefix the function name with an underscore. We want the former.
<?phpfunction onthisdate_all() { // content variable that will be returned for display $page_content = '';
// Get today's date $today = getdate();
// calculate midnight one week ago $start_time = mktime(0, 0, 0, $today['mon'], ($today['mday'] - 7), $today['year']);
// we want items that occur only on the day in question, // so calculate 1 day $end_time = $start_time + 86400; // 60 * 60 * 24 = 86400 seconds in a day
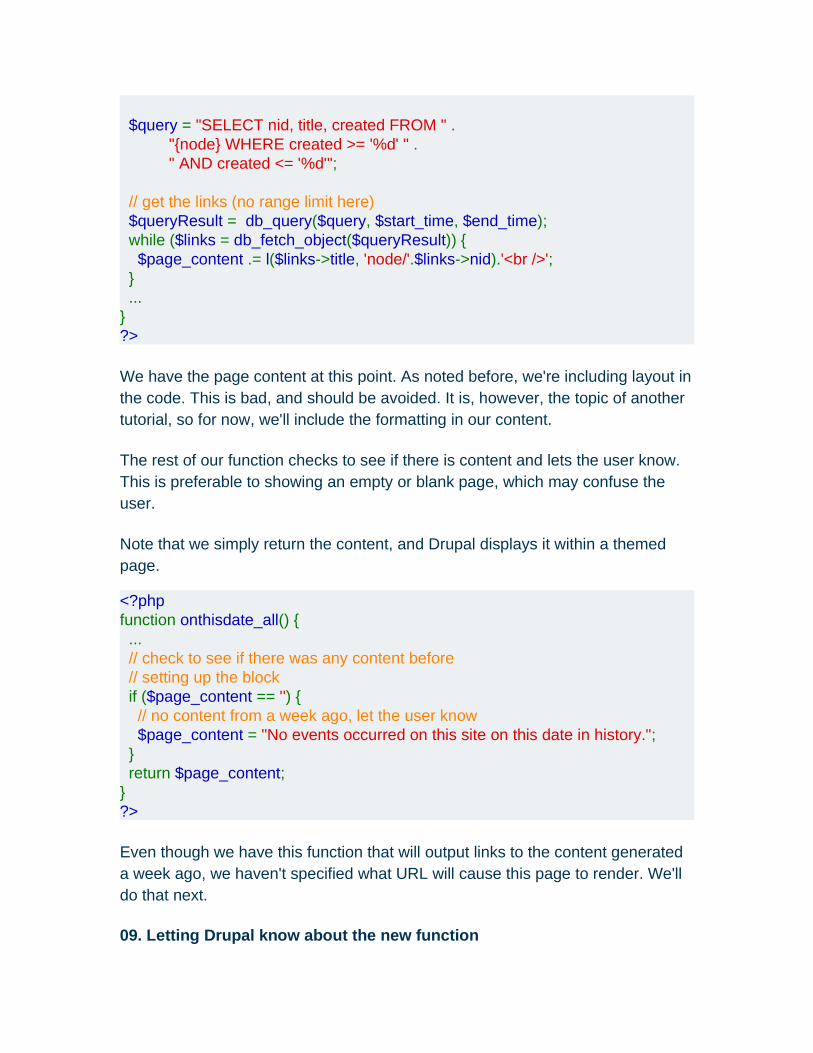
$query = "SELECT nid, title, created FROM " . "{node} WHERE created >= '%d' " . " AND created <= '%d'";
// get the links (no range limit here) $queryResult = db_query($query, $start_time, $end_time); while ($links = db_fetch_object($queryResult)) { $page_content .= l($links->title, 'node/'.$links->nid).'<br />'; } ...}?>
We have the page content at this point. As noted before, we're including layout in the code. This is bad, and should be avoided. It is, however, the topic of another tutorial, so for now, we'll include the formatting in our content.
The rest of our function checks to see if there is content and lets the user know. This is preferable to showing an empty or blank page, which may confuse the user.
Note that we simply return the content, and Drupal displays it within a themed page.
<?phpfunction onthisdate_all() { ... // check to see if there was any content before // setting up the block if ($page_content == '') { // no content from a week ago, let the user know $page_content = "No events occurred on this site on this date in history."; } return $page_content;}?>
Even though we have this function that will output links to the content generated a week ago, we haven't specified what URL will cause this page to render. We'll do that next.
09. Letting Drupal know about the new function
• View • Revisions
Drupal 6.x
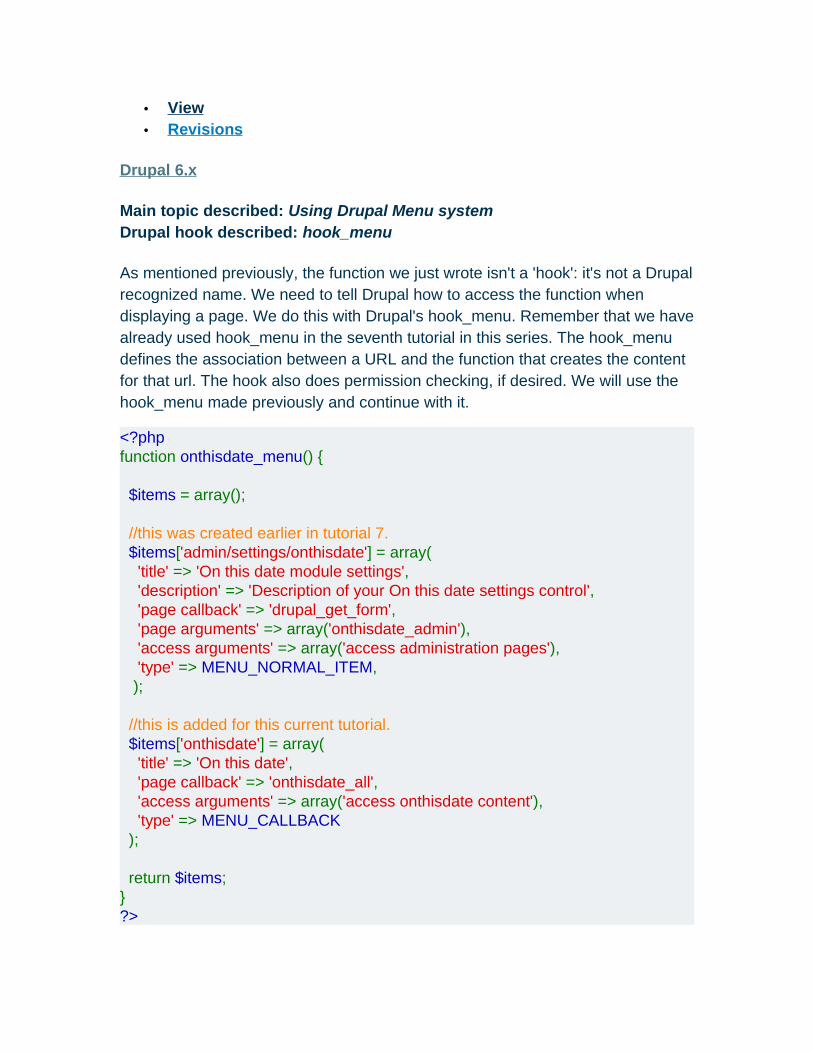
Main topic described: Using Drupal Menu systemDrupal hook described: hook_menu
As mentioned previously, the function we just wrote isn't a 'hook': it's not a Drupal recognized name. We need to tell Drupal how to access the function when displaying a page. We do this with Drupal's hook_menu. Remember that we have already used hook_menu in the seventh tutorial in this series. The hook_menu defines the association between a URL and the function that creates the content for that url. The hook also does permission checking, if desired. We will use the hook_menu made previously and continue with it.
<?phpfunction onthisdate_menu() {
$items = array();
//this was created earlier in tutorial 7. $items['admin/settings/onthisdate'] = array( 'title' => 'On this date module settings', 'description' => 'Description of your On this date settings control', 'page callback' => 'drupal_get_form', 'page arguments' => array('onthisdate_admin'), 'access arguments' => array('access administration pages'), 'type' => MENU_NORMAL_ITEM, );
//this is added for this current tutorial. $items['onthisdate'] = array( 'title' => 'On this date', 'page callback' => 'onthisdate_all', 'access arguments' => array('access onthisdate content'), 'type' => MENU_CALLBACK );
return $items;}?>
Basically, we're saying if the user goes to "onthisdate" (either via ?q=onthisdate or http://example.com/onthisdate), the content generated by onthisdate_all will be displayed. The title of the page will be "On this date". The type MENU_CALLBACK tells Drupal to not display the link in the user's menu, just use this function when the URL is accessed. Use MENU_NORMAL_ITEM if you want the user to see the link in the side navigation block.
Permissions
As mentioned before in the seventh tutorial, the menu hook can handle permission checking before rendering the page. The 'access argument' entry in the menu item array is where this check is done. If you added a value in your permissions array in the perm hook function, you can use that string as a parameter in the user_access function. If the user isn't in a role that has that permission, the page will not render for the user.
Try It Out
If the module has not been enabled, enable it as outlined in tutorial six. If you have already enabled it, in order to reset the menu definitions in the system, you'll need to disable, then reenable it.
Now, navigate to /onthisdate (or ?q=onthisdate) and see what you get.
See Also
• Menu system • hook_menu
10. Adding a 'more' link and showing all entries
Drupal 6.x
We now have a function that creates a page with all the content created a week ago. Let's link to it from the block with a "more" link.
Add these lines just before that $block['subject'] line. These lines will add the more link to the end of the $block_content variable before saving it to the $block['content'] variable:
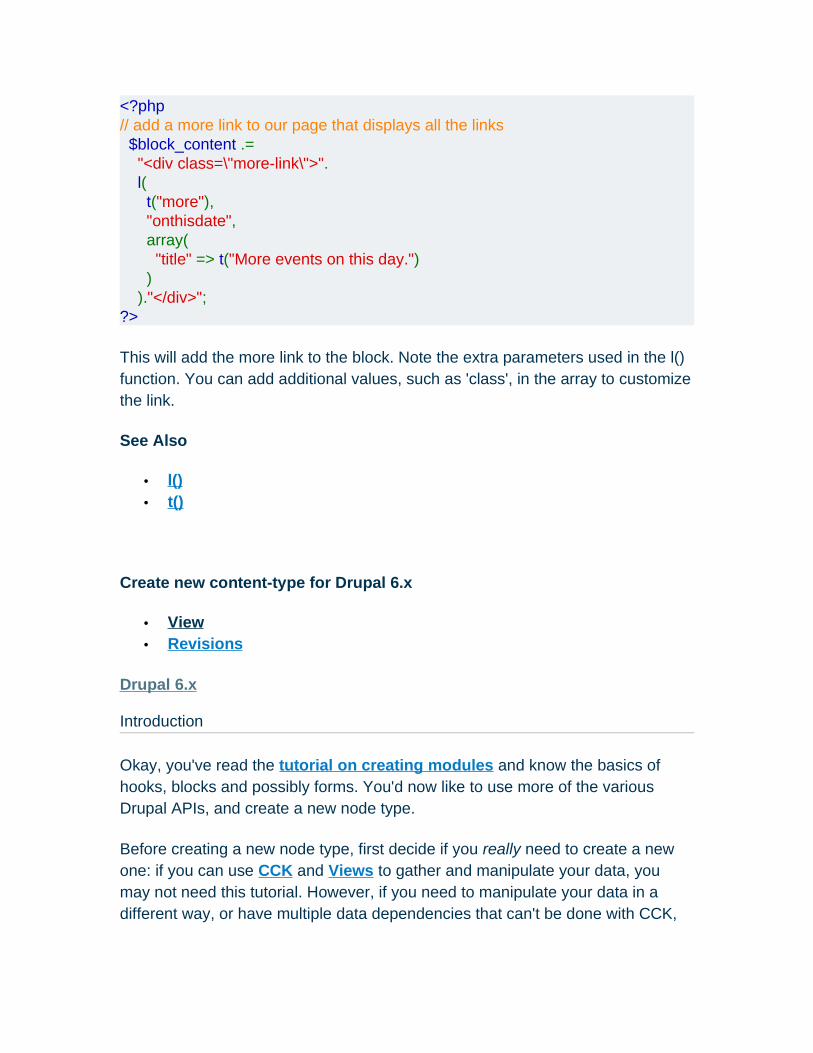
<?php// add a more link to our page that displays all the links $block_content .= "<div class=\"more-link\">". l( t("more"), "onthisdate", array( "title" => t("More events on this day.") ) )."</div>";?>
This will add the more link to the block. Note the extra parameters used in the l() function. You can add additional values, such as 'class', in the array to customize the link.
See Also
• l() • t()
Create new content-type for Drupal 6.x
• View • Revisions
Drupal 6.x
Introduction
Okay, you've read the tutorial on creating modules and know the basics of hooks, blocks and possibly forms. You'd now like to use more of the various Drupal APIs, and create a new node type.
Before creating a new node type, first decide if you really need to create a new one: if you can use CCK and Views to gather and manipulate your data, you may not need this tutorial. However, if you need to manipulate your data in a different way, or have multiple data dependencies that can't be done with CCK,
or if you just want to learn more about Drupal internals, then this tutorial may just be for you.
Note that you can probably still use CCK+Views if the custom parts of your node just includes variations of the built-in commenting system, paths, publishing information and other built-in Drupal goodies.
A simple node-type (or content type) such as "page" or "story" is the most elemental aspect of a Drupal site. In it's most basic form it is nothing more than a Title, Body, and an optional Teaser. You can easily build your own node-type programmatically by following these step-by-step directions. Learn this, and you will begin to understand how flexible Drupal can be with it's content.
Why would you need to know this?
Drupal 6.x allows you to easily create these "simple" node-types using the admin interface, doesn't it? The answer is a resounding YES, and everyone is absolutely thrilled with that. Thanks, Drupal developers!!! Then CCK came along, and made our lives even easier! However, it does not teach you the basics of module programming and that's why this tutorial was written.
There is a great tutorial at Creating Modules 6.x Tutorial. There is also a great example of creating your own node-type in the API at node_example. We will be using this as the code reference point (and you should definitely read that).
There will be no database changes or hacking of code, the result will be a new module that you will need to upload into its own module directory.
What you need
• means to download/upload files to your modules directory • a text editor • a little php knowledge is helpful, but not required • some information about your node type
o a TECHNICAL-NAME for your node type - don't use the name of an existing module - no spaces, numbers or punctuation unless you know what you're doing
o a USER-FRIENDLY-NAME for your node type (and a plural version of this name) (this is how your node type will appear in most places on your site) - spaces and numbers are ok but again no punctuation
unless you know what you're doing, note: you can use the same name as your TECHNICAL-NAME above
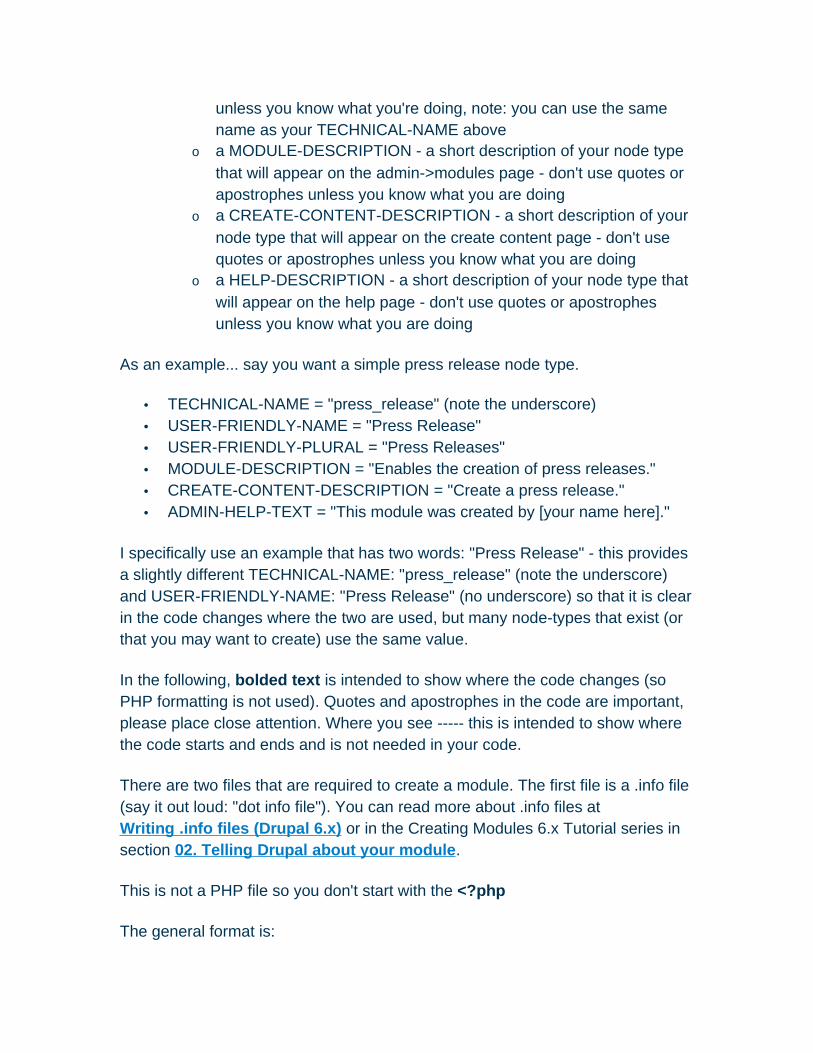
o a MODULE-DESCRIPTION - a short description of your node type that will appear on the admin->modules page - don't use quotes or apostrophes unless you know what you are doing
o a CREATE-CONTENT-DESCRIPTION - a short description of your node type that will appear on the create content page - don't use quotes or apostrophes unless you know what you are doing
o a HELP-DESCRIPTION - a short description of your node type that will appear on the help page - don't use quotes or apostrophes unless you know what you are doing
As an example... say you want a simple press release node type.
• TECHNICAL-NAME = "press_release" (note the underscore) • USER-FRIENDLY-NAME = "Press Release" • USER-FRIENDLY-PLURAL = "Press Releases" • MODULE-DESCRIPTION = "Enables the creation of press releases." • CREATE-CONTENT-DESCRIPTION = "Create a press release." • ADMIN-HELP-TEXT = "This module was created by [your name here]."
I specifically use an example that has two words: "Press Release" - this provides a slightly different TECHNICAL-NAME: "press_release" (note the underscore) and USER-FRIENDLY-NAME: "Press Release" (no underscore) so that it is clear in the code changes where the two are used, but many node-types that exist (or that you may want to create) use the same value.
In the following, bolded text is intended to show where the code changes (so PHP formatting is not used). Quotes and apostrophes in the code are important, please place close attention. Where you see ----- this is intended to show where the code starts and ends and is not needed in your code.
There are two files that are required to create a module. The first file is a .info file (say it out loud: "dot info file"). You can read more about .info files at Writing .info files (Drupal 6.x) or in the Creating Modules 6.x Tutorial series in section 02. Telling Drupal about your module.
This is not a PHP file so you don't start with the <?php
The general format is:

; $Id$name = <strong>USER-FRIENDLY-NAME</strong>description = "<strong>MODULE-DESCRIPTION</strong>"core = 6.x
In our example:
; $Id$name = <strong>Press Release</strong>description = "<strong>Enables the creation of press releases.</strong>"core = 6.x
Yes, you only need those 4 lines (minimally)
Save this file as "TECHNICAL-NAME.info" (in our example: "press_release.info")
The second file needed is the .module file (say it out loud "dot module file"). This is the file that does all the heavy lifting.
In the node_example there are a number of hooks listed and exampled. The node_example is one where the node-type has its own additional fields. This how-to does not address that need, but is a only a primer to get you started. If you need additional fields, you will want to learn about those hooks and node_example is a great place to start that.
The .module file is where all the "hooks" appear. Hooks are pretty easy to understand. All functions in your module that will be used by Drupal are named {modulename}_{hook}, where "hook" is a pre-defined function name suffix. Drupal will call these functions to get specific data, so having these well-defined names means Drupal knows where to look.
Each of the following hooks are outlined in node_example in the API
- these hooks should be implemented in every node-type module. This example will implement these 4 hooks.
• hook_node_info() • hook_perm() • hook_access() • hook_form()
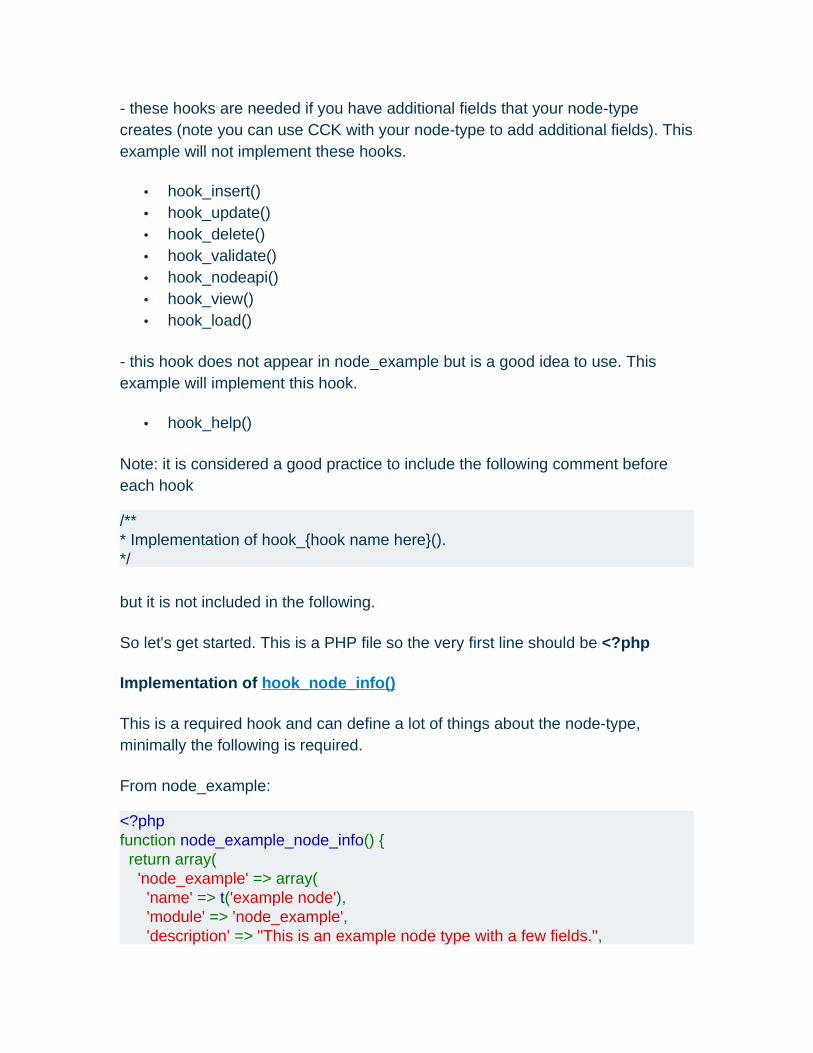
- these hooks are needed if you have additional fields that your node-type creates (note you can use CCK with your node-type to add additional fields). This example will not implement these hooks.
• hook_insert() • hook_update() • hook_delete() • hook_validate() • hook_nodeapi() • hook_view() • hook_load()
- this hook does not appear in node_example but is a good idea to use. This example will implement this hook.
• hook_help()
Note: it is considered a good practice to include the following comment before each hook
/*** Implementation of hook_{hook name here}().*/
but it is not included in the following.
So let's get started. This is a PHP file so the very first line should be <?php
Implementation of hook_node_info()
This is a required hook and can define a lot of things about the node-type, minimally the following is required.
From node_example:
<?phpfunction node_example_node_info() { return array( 'node_example' => array( 'name' => t('example node'), 'module' => 'node_example', 'description' => "This is an example node type with a few fields.",

) );} ?>
This breaks down to:-----function TECHNICAL-NAME_node_info() { return array( 'TECHNICAL-NAME' => array( 'name' => t('USER-FRIENDLY-NAME'), 'module' => 'TECHNICAL-NAME', 'description' => "CREATE-CONTENT-DESCRIPTION", ) );}-----
In our example:-----function press_release_node_info() { return array( 'press_release' => array( 'name' => t('Press Release'), 'module' => 'press_release', 'description' => "Create a press release.", ) );}-----
Implementation of hook_perm()
Since we are limiting the ability to create new nodes to certain users, we need to define what those permissions are here. We also define a permission to allow users to edit the nodes they created.
The permissions you define will be referenced by the next hook (hook_access) in the example.
from node_example:
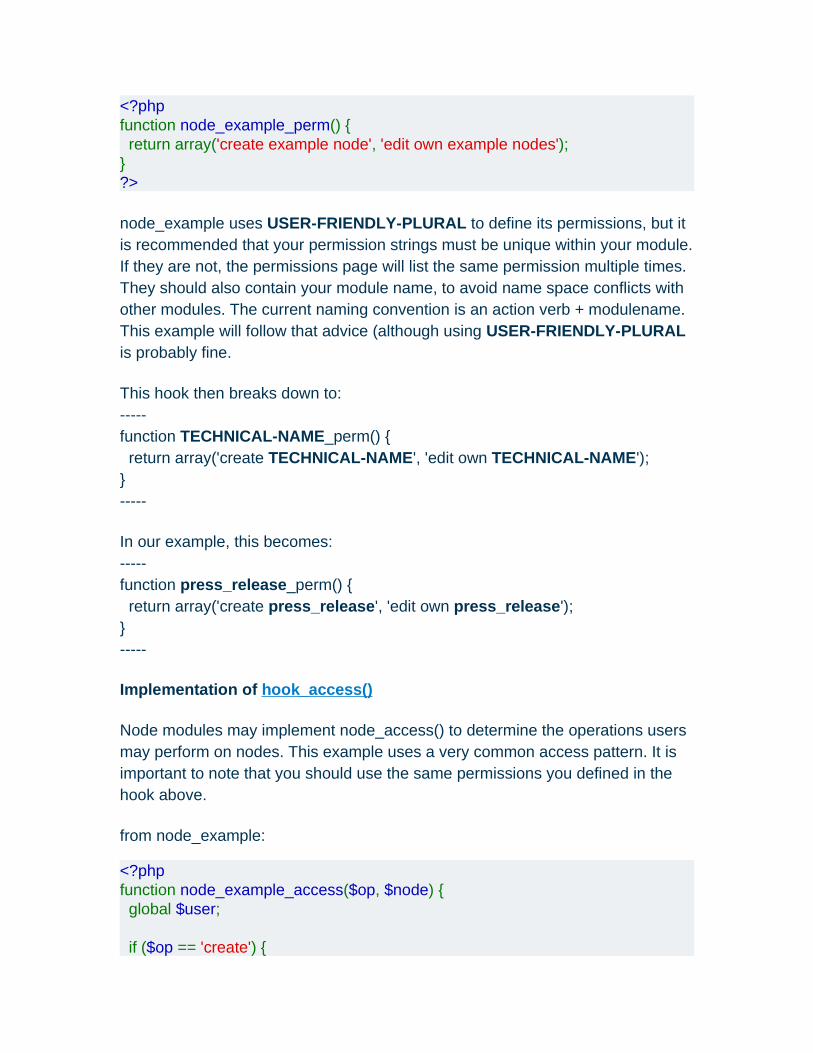
<?phpfunction node_example_perm() { return array('create example node', 'edit own example nodes');} ?>
node_example uses USER-FRIENDLY-PLURAL to define its permissions, but it is recommended that your permission strings must be unique within your module. If they are not, the permissions page will list the same permission multiple times. They should also contain your module name, to avoid name space conflicts with other modules. The current naming convention is an action verb + modulename. This example will follow that advice (although using USER-FRIENDLY-PLURAL is probably fine.
This hook then breaks down to:-----function TECHNICAL-NAME_perm() { return array('create TECHNICAL-NAME', 'edit own TECHNICAL-NAME');}-----
In our example, this becomes:-----function press_release_perm() { return array('create press_release', 'edit own press_release');}-----
Implementation of hook_access()
Node modules may implement node_access() to determine the operations users may perform on nodes. This example uses a very common access pattern. It is important to note that you should use the same permissions you defined in the hook above.
from node_example:
<?phpfunction node_example_access($op, $node) { global $user;
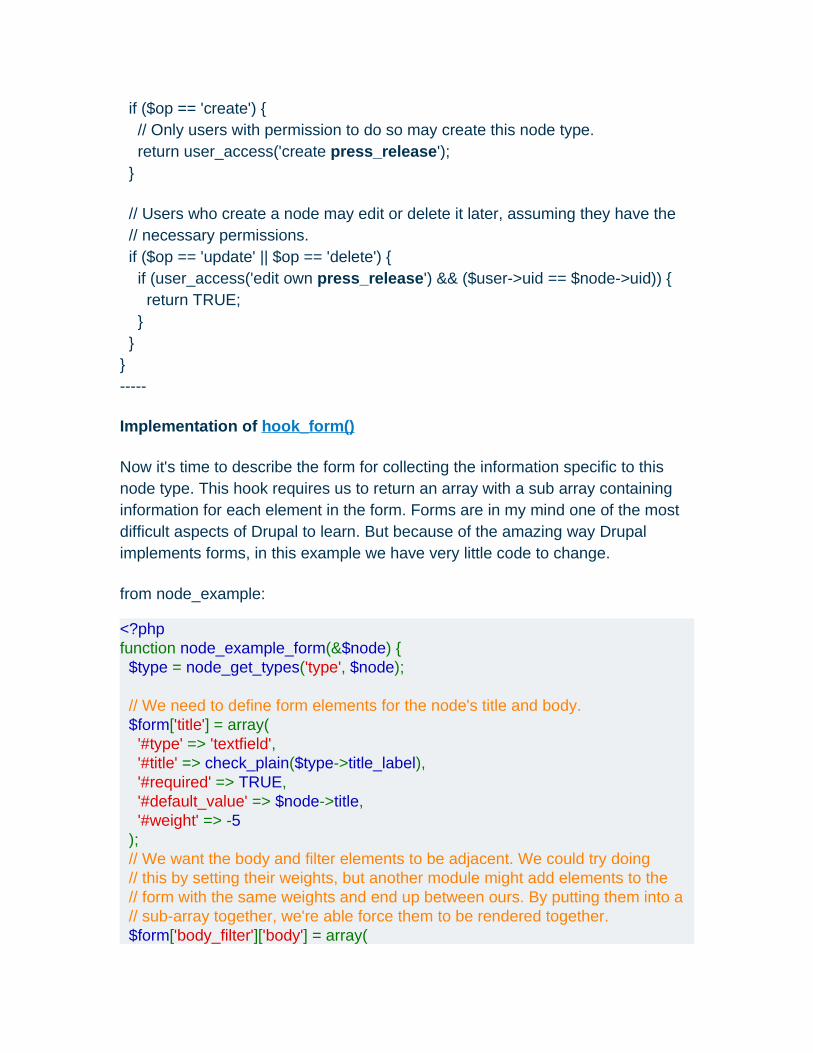
if ($op == 'create') {
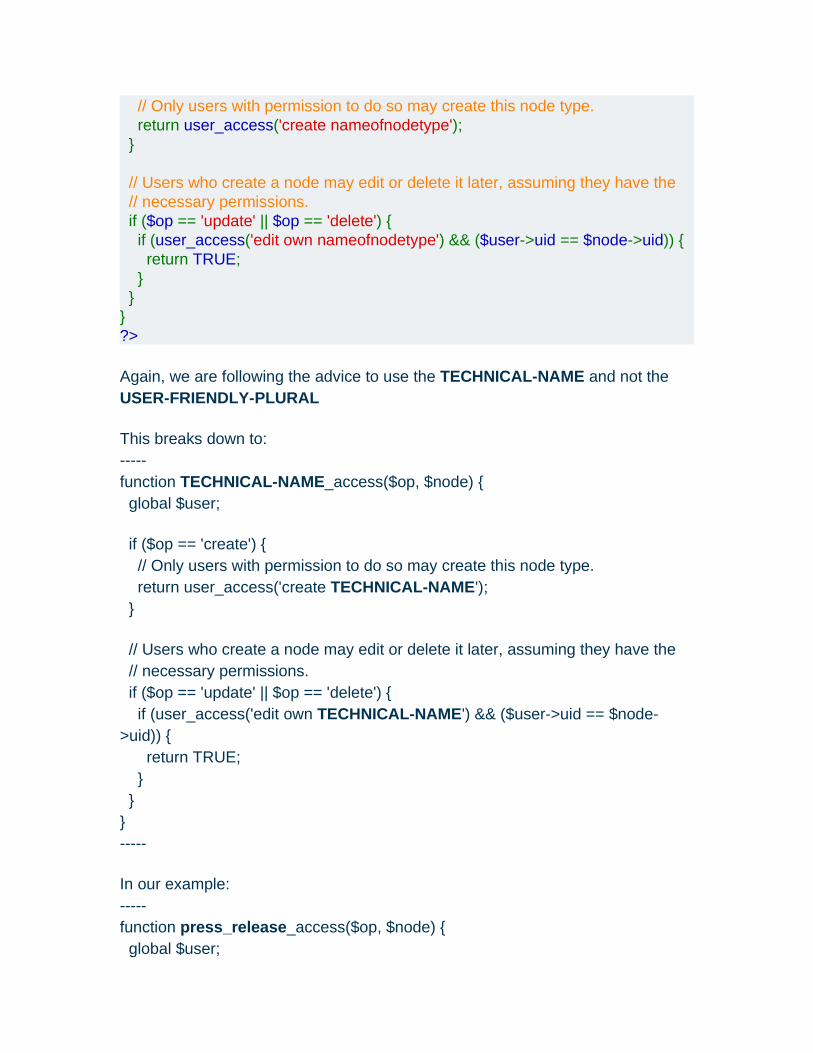
// Only users with permission to do so may create this node type. return user_access('create nameofnodetype'); }
// Users who create a node may edit or delete it later, assuming they have the // necessary permissions. if ($op == 'update' || $op == 'delete') { if (user_access('edit own nameofnodetype') && ($user->uid == $node->uid)) { return TRUE; } }} ?>
Again, we are following the advice to use the TECHNICAL-NAME and not the USER-FRIENDLY-PLURAL
This breaks down to:-----function TECHNICAL-NAME_access($op, $node) { global $user;
if ($op == 'create') { // Only users with permission to do so may create this node type. return user_access('create TECHNICAL-NAME'); }
// Users who create a node may edit or delete it later, assuming they have the // necessary permissions. if ($op == 'update' || $op == 'delete') { if (user_access('edit own TECHNICAL-NAME') && ($user->uid == $node->uid)) { return TRUE; } }}-----
In our example:-----function press_release_access($op, $node) { global $user;
if ($op == 'create') { // Only users with permission to do so may create this node type. return user_access('create press_release'); }
// Users who create a node may edit or delete it later, assuming they have the // necessary permissions. if ($op == 'update' || $op == 'delete') { if (user_access('edit own press_release') && ($user->uid == $node->uid)) { return TRUE; } }}-----
Implementation of hook_form()
Now it's time to describe the form for collecting the information specific to this node type. This hook requires us to return an array with a sub array containing information for each element in the form. Forms are in my mind one of the most difficult aspects of Drupal to learn. But because of the amazing way Drupal implements forms, in this example we have very little code to change.
from node_example:
<?phpfunction node_example_form(&$node) { $type = node_get_types('type', $node);
// We need to define form elements for the node's title and body. $form['title'] = array( '#type' => 'textfield', '#title' => check_plain($type->title_label), '#required' => TRUE, '#default_value' => $node->title, '#weight' => -5 ); // We want the body and filter elements to be adjacent. We could try doing // this by setting their weights, but another module might add elements to the // form with the same weights and end up between ours. By putting them into a // sub-array together, we're able force them to be rendered together. $form['body_filter']['body'] = array(
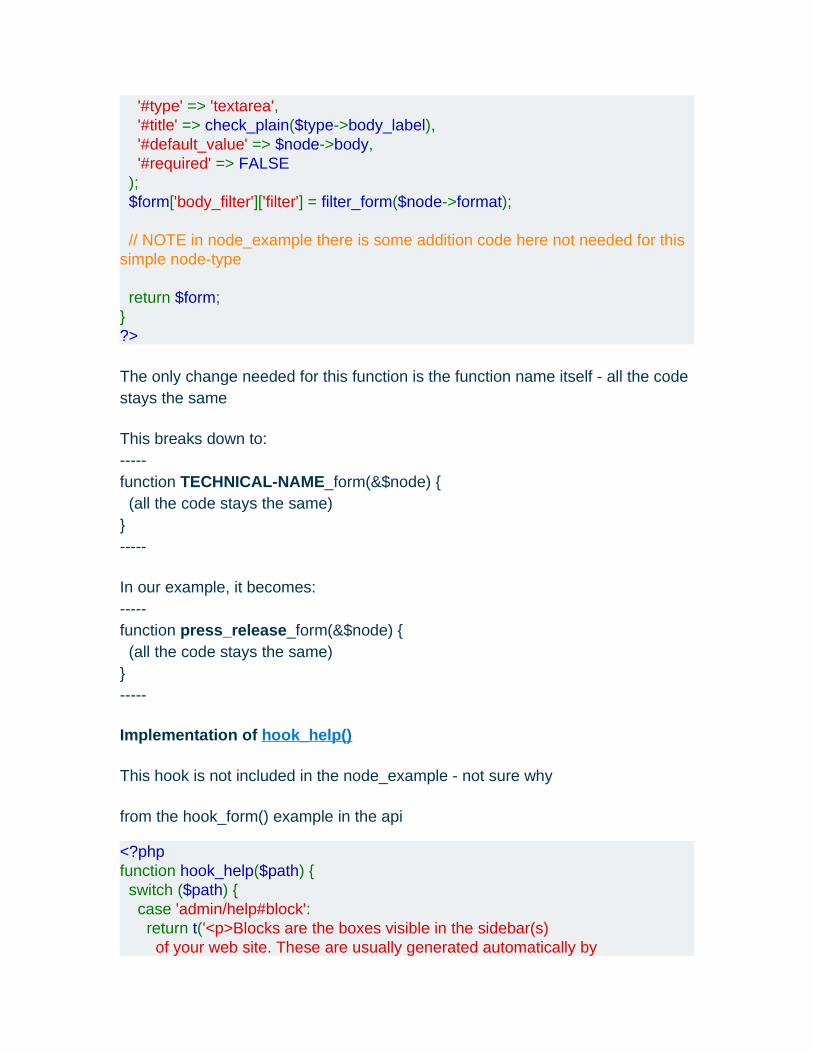
'#type' => 'textarea', '#title' => check_plain($type->body_label), '#default_value' => $node->body, '#required' => FALSE ); $form['body_filter']['filter'] = filter_form($node->format);
// NOTE in node_example there is some addition code here not needed for this simple node-type
return $form;}?>
The only change needed for this function is the function name itself - all the code stays the same
This breaks down to:-----function TECHNICAL-NAME_form(&$node) { (all the code stays the same)}-----
In our example, it becomes:-----function press_release_form(&$node) { (all the code stays the same)}-----
Implementation of hook_help()
This hook is not included in the node_example - not sure why
from the hook_form() example in the api
<?phpfunction hook_help($path) { switch ($path) { case 'admin/help#block': return t('<p>Blocks are the boxes visible in the sidebar(s) of your web site. These are usually generated automatically by
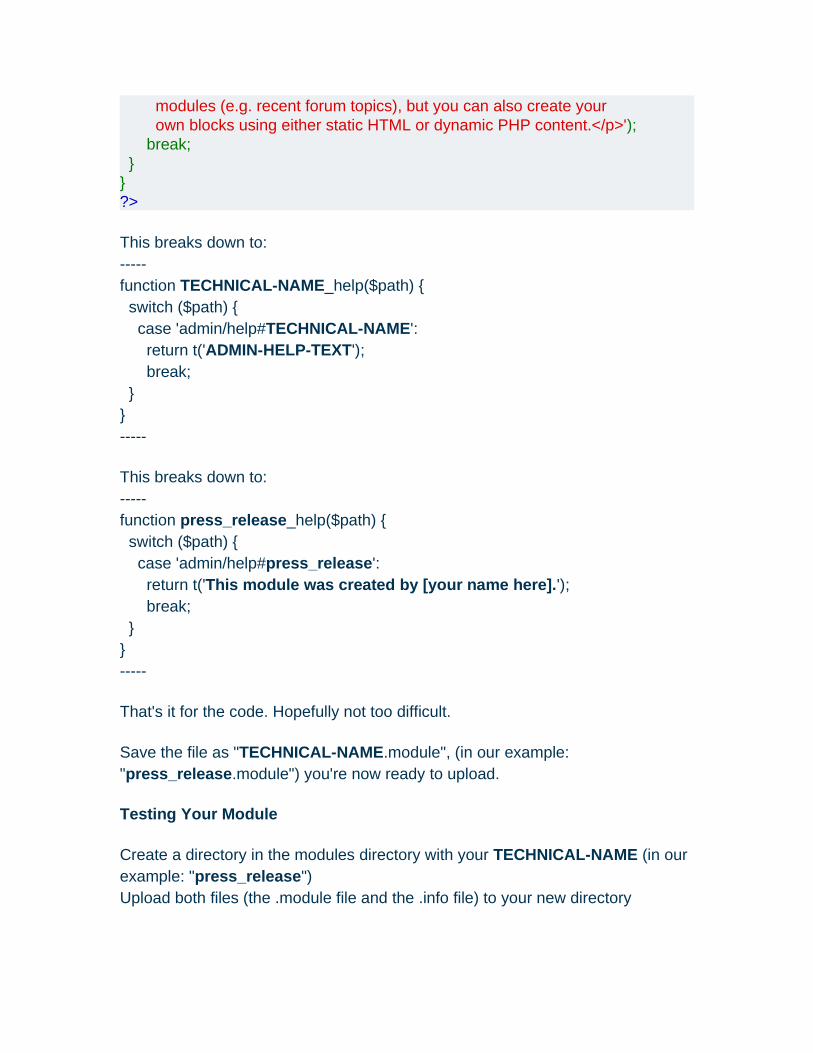
modules (e.g. recent forum topics), but you can also create your own blocks using either static HTML or dynamic PHP content.</p>'); break; }} ?>
This breaks down to:-----function TECHNICAL-NAME_help($path) { switch ($path) { case 'admin/help#TECHNICAL-NAME': return t('ADMIN-HELP-TEXT'); break; }}-----
This breaks down to:-----function press_release_help($path) { switch ($path) { case 'admin/help#press_release': return t('This module was created by [your name here].'); break; }}-----
That's it for the code. Hopefully not too difficult.
Save the file as "TECHNICAL-NAME.module", (in our example: "press_release.module") you're now ready to upload.
Testing Your Module
Create a directory in the modules directory with your TECHNICAL-NAME (in our example: "press_release")Upload both files (the .module file and the .info file) to your new directory
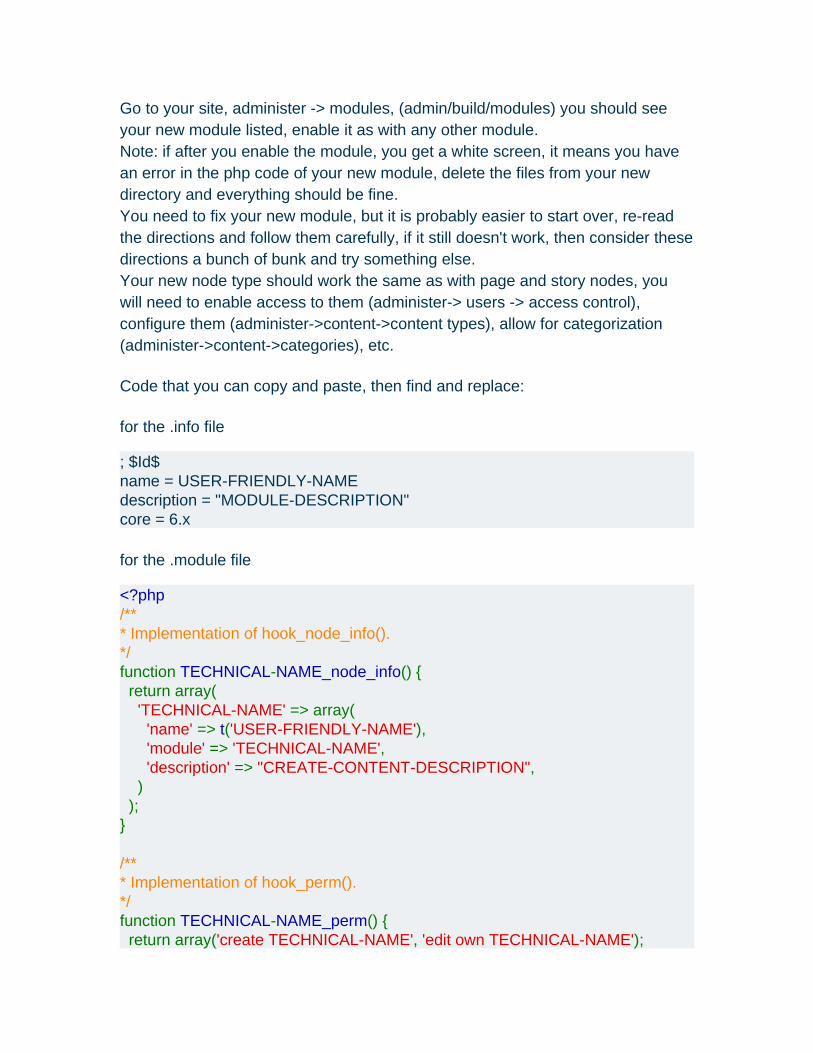
Go to your site, administer -> modules, (admin/build/modules) you should see your new module listed, enable it as with any other module.Note: if after you enable the module, you get a white screen, it means you have an error in the php code of your new module, delete the files from your new directory and everything should be fine.You need to fix your new module, but it is probably easier to start over, re-read the directions and follow them carefully, if it still doesn't work, then consider these directions a bunch of bunk and try something else.Your new node type should work the same as with page and story nodes, you will need to enable access to them (administer-> users -> access control), configure them (administer->content->content types), allow for categorization (administer->content->categories), etc.
Code that you can copy and paste, then find and replace:
for the .info file
; $Id$name = USER-FRIENDLY-NAMEdescription = "MODULE-DESCRIPTION"core = 6.x
for the .module file
<?php/*** Implementation of hook_node_info().*/function TECHNICAL-NAME_node_info() { return array( 'TECHNICAL-NAME' => array( 'name' => t('USER-FRIENDLY-NAME'), 'module' => 'TECHNICAL-NAME', 'description' => "CREATE-CONTENT-DESCRIPTION", ) );}
/*** Implementation of hook_perm().*/function TECHNICAL-NAME_perm() { return array('create TECHNICAL-NAME', 'edit own TECHNICAL-NAME');

}
/*** Implementation of hook_access().*/function TECHNICAL-NAME_access($op, $node) { global $user;
if ($op == 'create') { // Only users with permission to do so may create this node type. return user_access('create TECHNICAL-NAME'); }
// Users who create a node may edit or delete it later, assuming they have the // necessary permissions. if ($op == 'update' || $op == 'delete') { if (user_access('edit own TECHNICAL-NAME') && ($user->uid == $node->uid)) { return TRUE; } }}
/*** Implementation of hook_form().*/function TECHNICAL-NAME_form(&$node) { $type = node_get_types('type', $node);
// We need to define form elements for the node's title and body. $form['title'] = array( '#type' => 'textfield', '#title' => check_plain($type->title_label), '#required' => TRUE, '#default_value' => $node->title, '#weight' => -5 ); // We want the body and filter elements to be adjacent. We could try doing // this by setting their weights, but another module might add elements to the // form with the same weights and end up between ours. By putting them into a // sub-array together, we're able force them to be rendered together. $form['body_filter']['body'] = array( '#type' => 'textarea', '#title' => check_plain($type->body_label), '#default_value' => $node->body,

'#required' => FALSE ); $form['body_filter']['filter'] = filter_form($node->format);
// NOTE in node_example there is some addition code here not needed for this simple node-type
return $form;}
/*** Implementation of hook_help().*/function TECHNICAL-NAME_help($section) { switch ($section) { case 'admin/help#TECHNICAL-NAME': return t('ADMIN-HELP-TEXT'); break; }} ?>
Using the theme layer (Drupal 6.x)
• View • Revisions
Drupal 6.x
See also: Theme handbook (D6)
Modules in Drupal have the capability to allow presentation to be overridden for use on individual sites; this capability is called theming. In order for the theme layer to be usable, a module must be written properly in order to take advantage of it. To do this, logic must be separated as much as possible from presentation.
To accomplish this, modules do as much of the work on the data as possible, and hand that data off to the presentation layer. Modules then provide default implementations that provide the basic presentation and serve as a basis for themes that wish to provide an alternate presentation. This is handled through the theme() function. Every chunk of output that is themed through the theme()
function is called a theme hook. There are two ways to provide a default implementation. The easier but less recommend way is to provide a function, and the recommended way is to provide a template and a corresponding preprocessor function. We'll expand on this in a little bit.
Ideally, your module won't produce a single line of HTML output that is not in a theme implementation. In reality, administrative pages and very small items may not necessarily be themable, but a sign of a well written module includes easily utilized themables.
Registering theme hooks
In order to utilize a theme hook, your module first has to register that this exists. This is a change starting in Drupal 6; this registration is necessary due to the amount of time automatic discovery of alternate implementations takes; by registering, this discovery can be done only when needed, and then is always available. In the end, the theming layer is actually just a little bit faster, even though it is now doing more work.
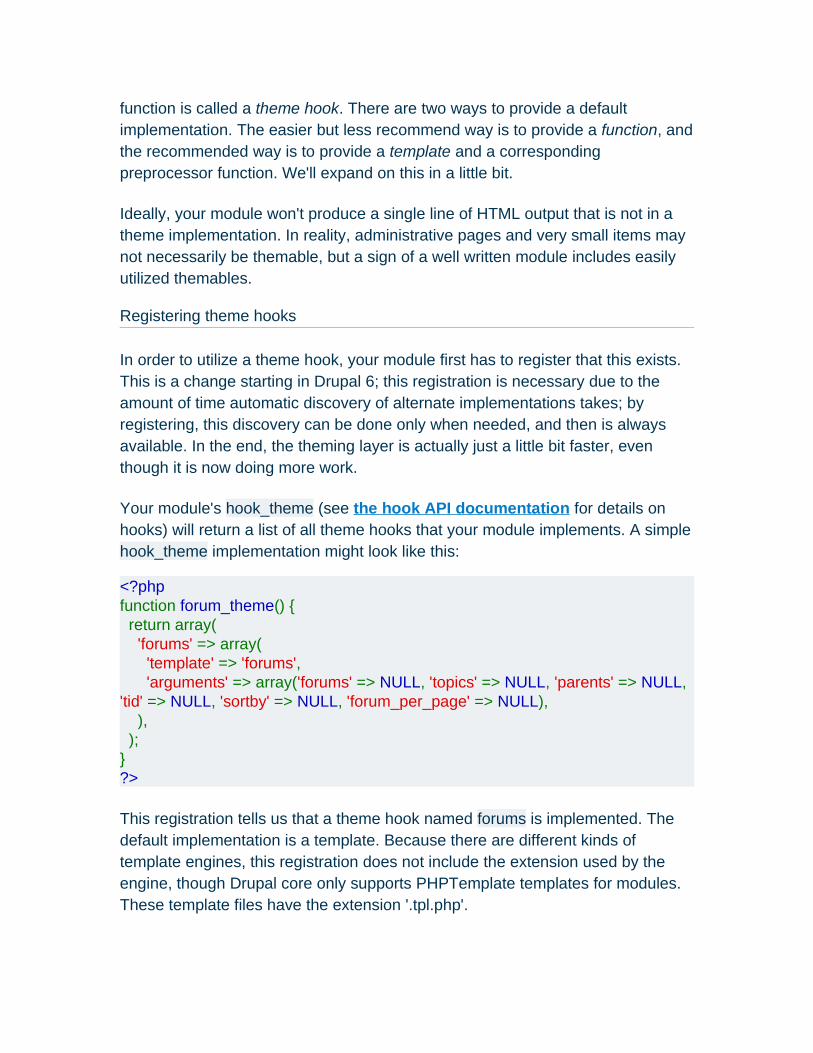
Your module's hook_theme (see the hook API documentation for details on hooks) will return a list of all theme hooks that your module implements. A simple hook_theme implementation might look like this:
<?phpfunction forum_theme() { return array( 'forums' => array( 'template' => 'forums', 'arguments' => array('forums' => NULL, 'topics' => NULL, 'parents' => NULL, 'tid' => NULL, 'sortby' => NULL, 'forum_per_page' => NULL), ), );}?>
This registration tells us that a theme hook named forums is implemented. The default implementation is a template. Because there are different kinds of template engines, this registration does not include the extension used by the engine, though Drupal core only supports PHPTemplate templates for modules. These template files have the extension '.tpl.php'.
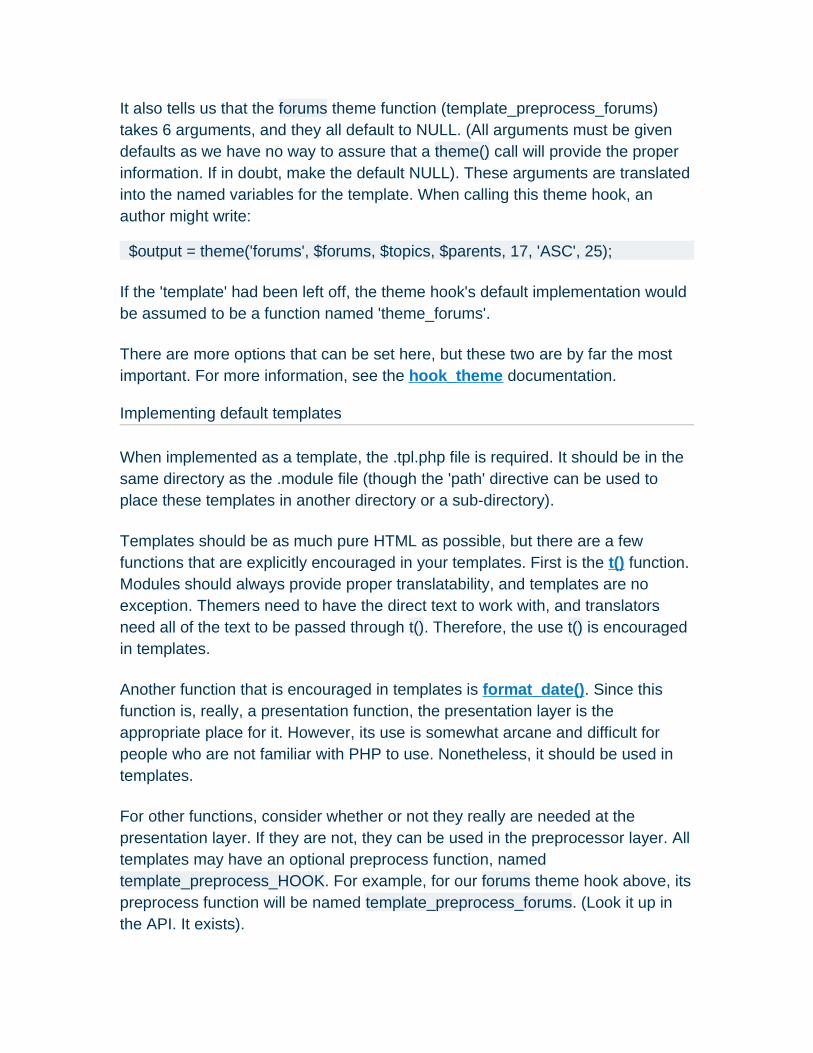
It also tells us that the forums theme function (template_preprocess_forums) takes 6 arguments, and they all default to NULL. (All arguments must be given defaults as we have no way to assure that a theme() call will provide the proper information. If in doubt, make the default NULL). These arguments are translated into the named variables for the template. When calling this theme hook, an author might write:
$output = theme('forums', $forums, $topics, $parents, 17, 'ASC', 25);
If the 'template' had been left off, the theme hook's default implementation would be assumed to be a function named 'theme_forums'.
There are more options that can be set here, but these two are by far the most important. For more information, see the hook_theme documentation.
Implementing default templates
When implemented as a template, the .tpl.php file is required. It should be in the same directory as the .module file (though the 'path' directive can be used to place these templates in another directory or a sub-directory).
Templates should be as much pure HTML as possible, but there are a few functions that are explicitly encouraged in your templates. First is the t() function. Modules should always provide proper translatability, and templates are no exception. Themers need to have the direct text to work with, and translators need all of the text to be passed through t(). Therefore, the use t() is encouraged in templates.
Another function that is encouraged in templates is format_date(). Since this function is, really, a presentation function, the presentation layer is the appropriate place for it. However, its use is somewhat arcane and difficult for people who are not familiar with PHP to use. Nonetheless, it should be used in templates.
For other functions, consider whether or not they really are needed at the presentation layer. If they are not, they can be used in the preprocessor layer. All templates may have an optional preprocess function, named template_preprocess_HOOK. For example, for our forums theme hook above, its preprocess function will be named template_preprocess_forums. (Look it up in the API. It exists).

The purpose of the preprocess function is to perform any logic that needs to be performed to make data presentable, and to sanitize any data so that it is safe to output. It is critically important that your output be secure and not contain XSS (Cross Site Scripting) vulnerabilities. And since data that is output often comes from users, this data must be sanitized before it is output. Since we assume that themers are not necessarily developers, we must assume that they are not going to fully understand how to do this; but that's ok, because we can sanitize data in the preprocess function by running it through check_plain, check_markup, filter_xss_admin or other output sanitizing functions.
Here is a simple example:
<?phpfunction template_preprocess_poll_bar(&$variables) { if ($variables['block']) { $variables['template_files'][] = 'poll-bar-block'; } $variables['title'] = check_plain($variables['title']); $variables['percentage'] = round($variables['votes'] * 100 / max($variables['total_votes'], 1));} ?>
First, note that the preprocessor function takes a reference to an array of variables. This array will be seeded with the arguments that were sent via the theme() and named by the 'arguments' section of the hook registration. Since this is a reference, simply modifying this array is enough to transport those changes to the template that accompanies it.
This example illustrates three important concepts:
1. The 'title' field is unsafe, because it comes from user input. It is run through check_plain so that the template may safely output it.
2. The theme hook receives the total number of votes and the number of votes for just that item, but the template wants to display a percentage. That kind of work shouldn't be done in a template; instead, the math is performed here. The variables still exist, though; a themer overriding this could easily choose to display something other than a percentage.
3. The special variable 'template_files' can be used to provide alternative templates to use. This is an array of template files, and it is last in, first out, which means the last item added to the array will be the first one
used. If that template doesn't exist, it will use the next one in the list. This method can be quite useful to use an array of different templates, but be warned that it is limited to just templates.
Devel.module includes a template log feature which outputs at bottom of page all the template files which could have been used to theme the current page. This may be handy while building your module, but even more so when themeing a site.
Quick note: Template files should be named with hyphens instead of underscores. If the theme hook is 'forum_list', the template file should be named 'forum-list.tpl.php'.
Implementing theme functions
Drupal allows you to use functions for your default theme implementations. There is one benefit to this, which is that it is somewhat faster, because there is no checking for alternative templates (since there aren't any), and there isn't a preprocess function for it.
The downside is that there isn't a preprocess function. This makes it harder for themers to really override your theme function unless they're developers. This is especially true if your theme function really is more code than presentation. In general, please try to use templates wherever it is possible.
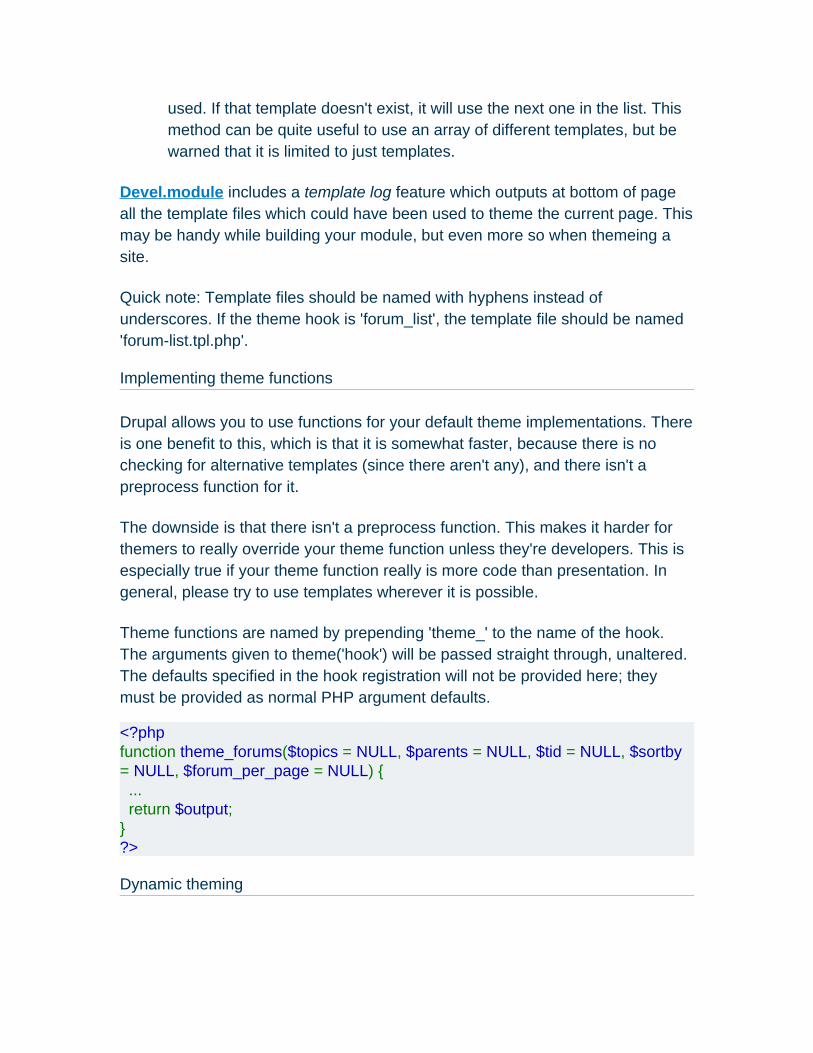
Theme functions are named by prepending 'theme_' to the name of the hook. The arguments given to theme('hook') will be passed straight through, unaltered. The defaults specified in the hook registration will not be provided here; they must be provided as normal PHP argument defaults.
<?phpfunction theme_forums($topics = NULL, $parents = NULL, $tid = NULL, $sortby = NULL, $forum_per_page = NULL) { ... return $output;}?>
Dynamic theming
In addition to being able to specify alternate templates in a preprocess function, Drupal can also help create dynamic theming implemenations which use wildcards to allow creating 'more specific' theming implementations.
This is accomplished in two parts. First, in hook_theme, you can specify a pattern. Patterns are simple regular expressions. ^ (beginning of line) is assumed, but $ (end of line) is not. To signify the dynamic portion of the pattern, a double underscore is the general convention; this is not required but it is highly recommended.
Second, when calling the theme() function, instead of a string for the first argument you may pass an array. This array is much like template_files above, but this one is first in, first out so the first one seen will be used.
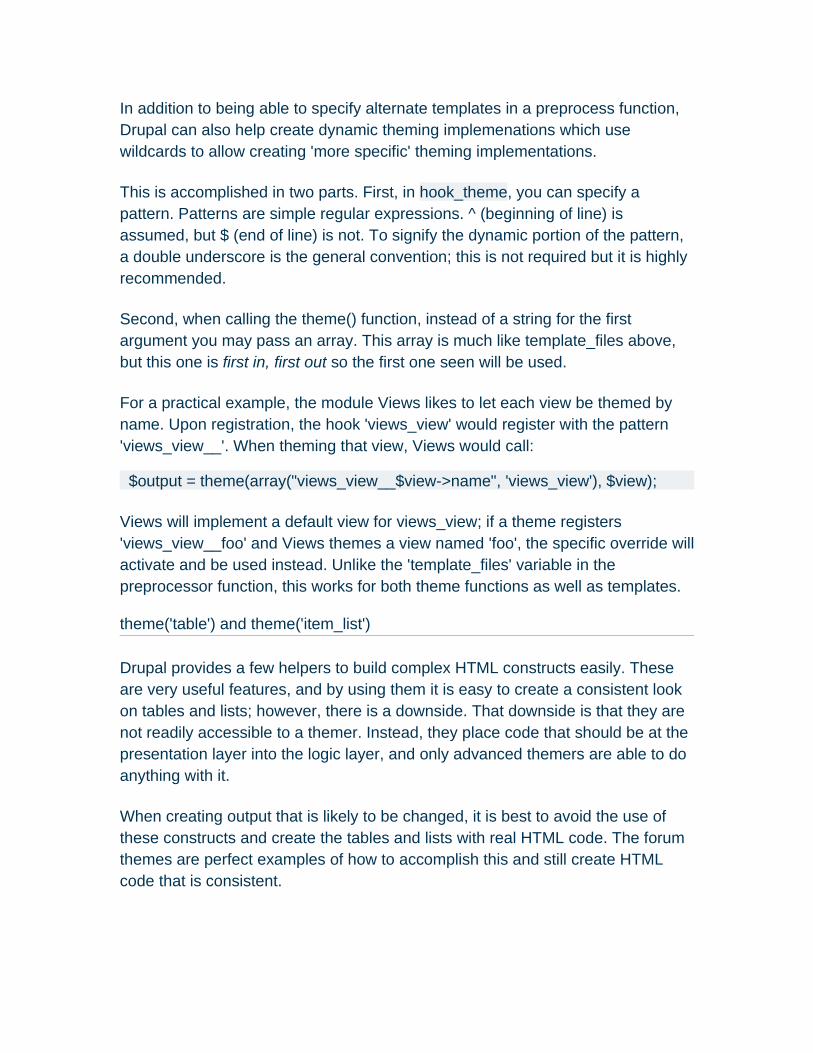
For a practical example, the module Views likes to let each view be themed by name. Upon registration, the hook 'views_view' would register with the pattern 'views_view__'. When theming that view, Views would call:
$output = theme(array("views_view__$view->name", 'views_view'), $view);
Views will implement a default view for views_view; if a theme registers 'views_view__foo' and Views themes a view named 'foo', the specific override will activate and be used instead. Unlike the 'template_files' variable in the preprocessor function, this works for both theme functions as well as templates.
theme('table') and theme('item_list')
Drupal provides a few helpers to build complex HTML constructs easily. These are very useful features, and by using them it is easy to create a consistent look on tables and lists; however, there is a downside. That downside is that they are not readily accessible to a themer. Instead, they place code that should be at the presentation layer into the logic layer, and only advanced themers are able to do anything with it.
When creating output that is likely to be changed, it is best to avoid the use of these constructs and create the tables and lists with real HTML code. The forum themes are perfect examples of how to accomplish this and still create HTML code that is consistent.
Writing .info files (Drupal 6.x)
• View • Revisions
Drupal 6.x
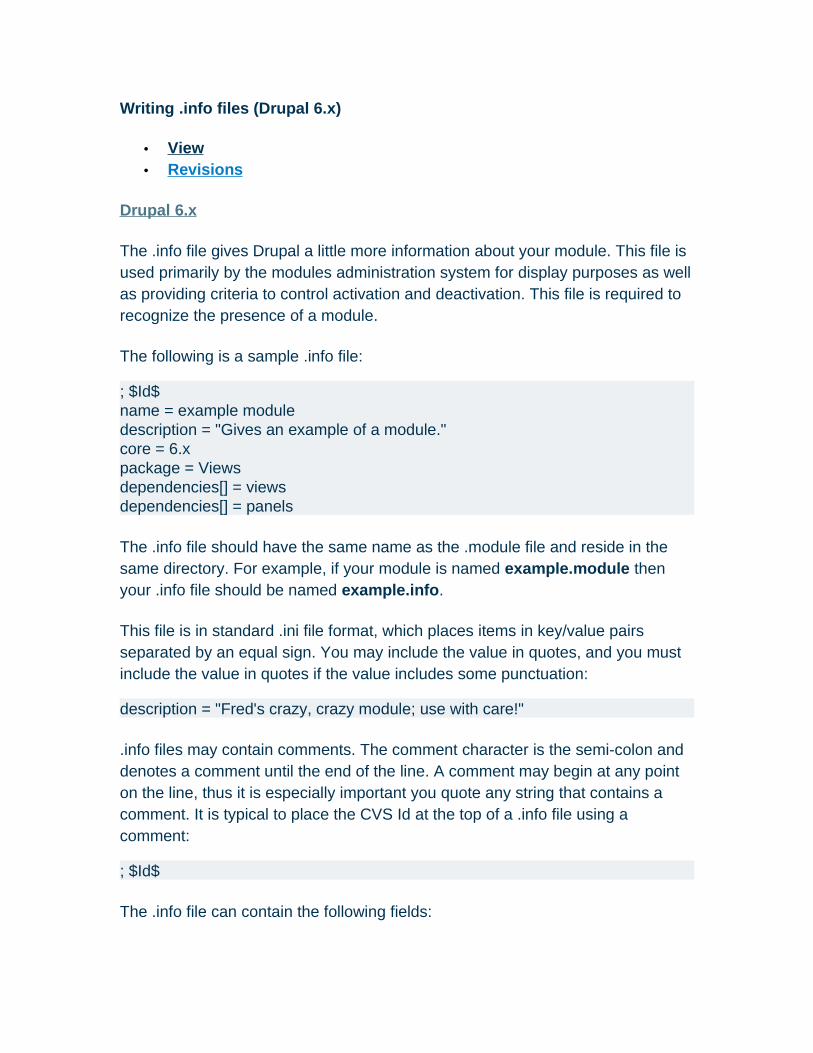
The .info file gives Drupal a little more information about your module. This file is used primarily by the modules administration system for display purposes as well as providing criteria to control activation and deactivation. This file is required to recognize the presence of a module.
The following is a sample .info file:
; $Id$name = example moduledescription = "Gives an example of a module."core = 6.xpackage = Viewsdependencies[] = viewsdependencies[] = panels
The .info file should have the same name as the .module file and reside in the same directory. For example, if your module is named example.module then your .info file should be named example.info.
This file is in standard .ini file format, which places items in key/value pairs separated by an equal sign. You may include the value in quotes, and you must include the value in quotes if the value includes some punctuation:
description = "Fred's crazy, crazy module; use with care!"
.info files may contain comments. The comment character is the semi-colon and denotes a comment until the end of the line. A comment may begin at any point on the line, thus it is especially important you quote any string that contains a comment. It is typical to place the CVS Id at the top of a .info file using a comment:
; $Id$
The .info file can contain the following fields:
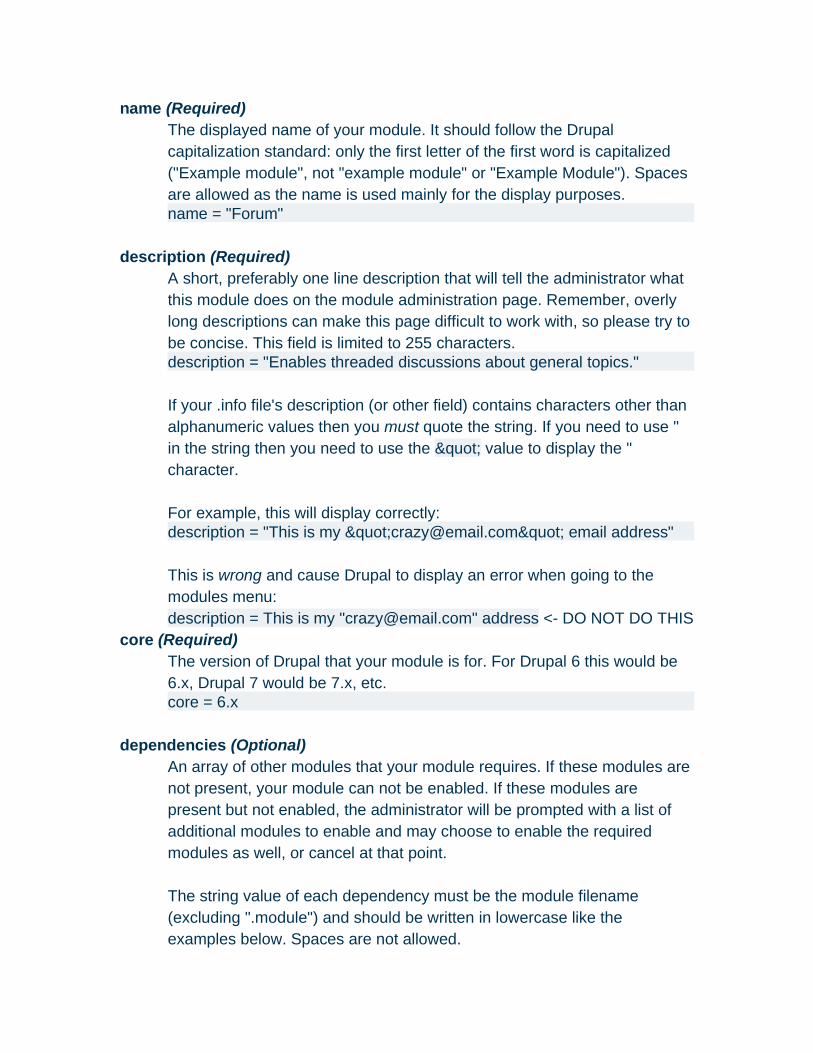
name (Required) The displayed name of your module. It should follow the Drupal capitalization standard: only the first letter of the first word is capitalized ("Example module", not "example module" or "Example Module"). Spaces are allowed as the name is used mainly for the display purposes.name = "Forum"
description (Required) A short, preferably one line description that will tell the administrator what this module does on the module administration page. Remember, overly long descriptions can make this page difficult to work with, so please try to be concise. This field is limited to 255 characters.description = "Enables threaded discussions about general topics."
If your .info file's description (or other field) contains characters other than alphanumeric values then you must quote the string. If you need to use " in the string then you need to use the " value to display the " character.
For example, this will display correctly:description = "This is my "[email protected]" email address"
This is wrong and cause Drupal to display an error when going to the modules menu:description = This is my "[email protected]" address <- DO NOT DO THIS
core (Required) The version of Drupal that your module is for. For Drupal 6 this would be 6.x, Drupal 7 would be 7.x, etc.core = 6.x
dependencies (Optional) An array of other modules that your module requires. If these modules are not present, your module can not be enabled. If these modules are present but not enabled, the administrator will be prompted with a list of additional modules to enable and may choose to enable the required modules as well, or cancel at that point.
The string value of each dependency must be the module filename (excluding ".module") and should be written in lowercase like the examples below. Spaces are not allowed.
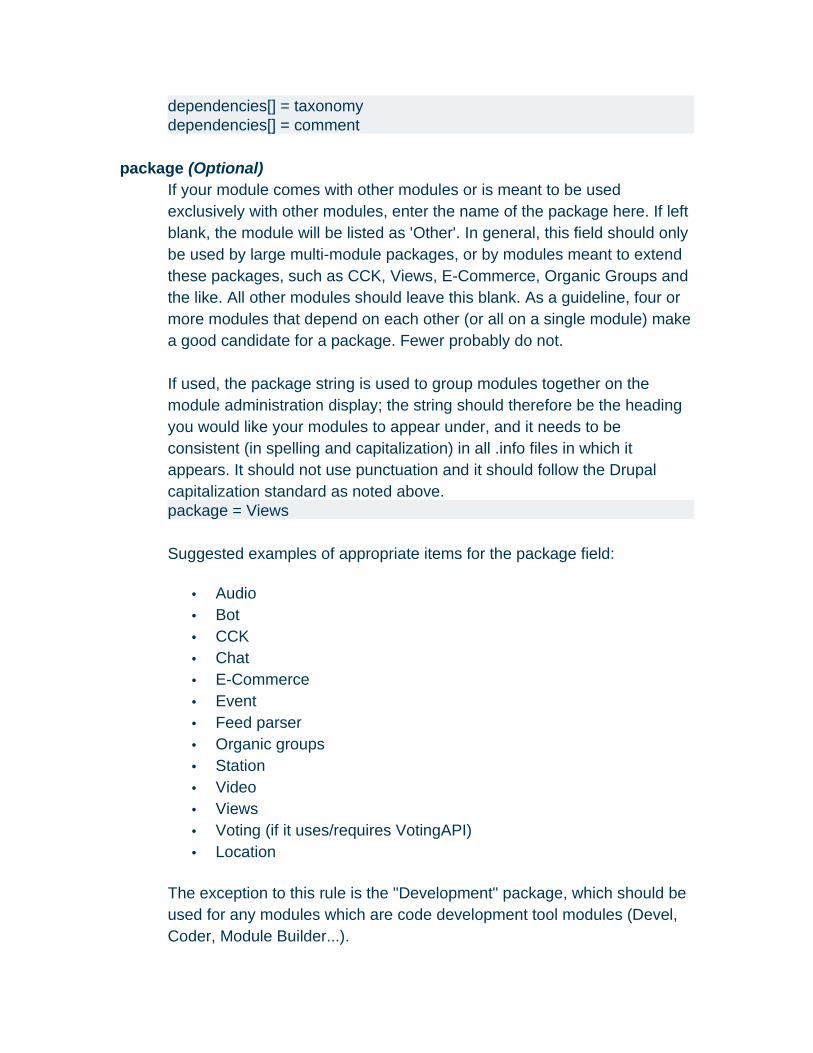
dependencies[] = taxonomydependencies[] = comment
package (Optional) If your module comes with other modules or is meant to be used exclusively with other modules, enter the name of the package here. If left blank, the module will be listed as 'Other'. In general, this field should only be used by large multi-module packages, or by modules meant to extend these packages, such as CCK, Views, E-Commerce, Organic Groups and the like. All other modules should leave this blank. As a guideline, four or more modules that depend on each other (or all on a single module) make a good candidate for a package. Fewer probably do not.
If used, the package string is used to group modules together on the module administration display; the string should therefore be the heading you would like your modules to appear under, and it needs to be consistent (in spelling and capitalization) in all .info files in which it appears. It should not use punctuation and it should follow the Drupal capitalization standard as noted above.package = Views
Suggested examples of appropriate items for the package field:
• Audio • Bot • CCK • Chat • E-Commerce • Event • Feed parser • Organic groups • Station • Video • Views • Voting (if it uses/requires VotingAPI) • Location
The exception to this rule is the "Development" package, which should be used for any modules which are code development tool modules (Devel, Coder, Module Builder...).
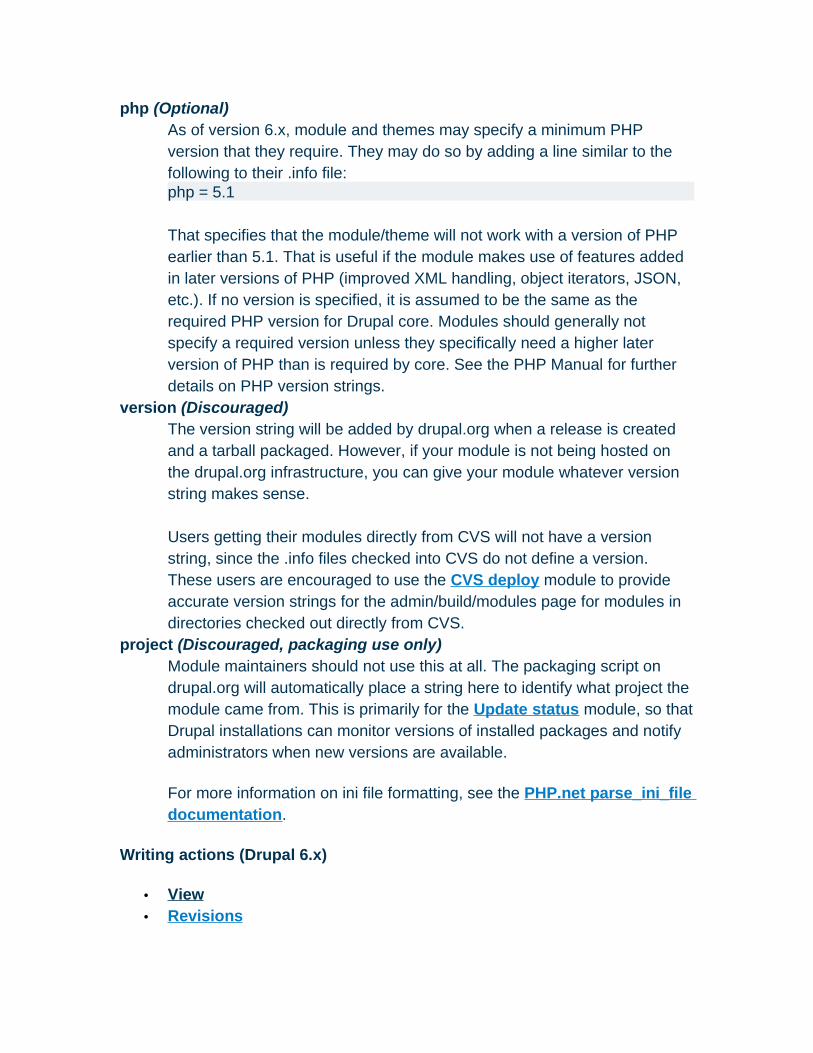
php (Optional) As of version 6.x, module and themes may specify a minimum PHP version that they require. They may do so by adding a line similar to the following to their .info file:php = 5.1
That specifies that the module/theme will not work with a version of PHP earlier than 5.1. That is useful if the module makes use of features added in later versions of PHP (improved XML handling, object iterators, JSON, etc.). If no version is specified, it is assumed to be the same as the required PHP version for Drupal core. Modules should generally not specify a required version unless they specifically need a higher later version of PHP than is required by core. See the PHP Manual for further details on PHP version strings.
version (Discouraged) The version string will be added by drupal.org when a release is created and a tarball packaged. However, if your module is not being hosted on the drupal.org infrastructure, you can give your module whatever version string makes sense.
Users getting their modules directly from CVS will not have a version string, since the .info files checked into CVS do not define a version. These users are encouraged to use the CVS deploy module to provide accurate version strings for the admin/build/modules page for modules in directories checked out directly from CVS.
project (Discouraged, packaging use only)Module maintainers should not use this at all. The packaging script on drupal.org will automatically place a string here to identify what project the module came from. This is primarily for the Update status module, so that Drupal installations can monitor versions of installed packages and notify administrators when new versions are available.
For more information on ini file formatting, see the PHP.net parse_ini_file documentation.
Writing actions (Drupal 6.x)
• View • Revisions
Drupal 6.x
Drupal actions are best understood using an appropriate definition.
For Drupal site administrators: actions are individual "things that Drupal can do." Some examples of actions are sending an email, publishing a node, banning a user or promoting a node to the front page of a website. Typically you will encounter actions in Drupal's configuration screens.
For developers: an action is a function that operates like a stored procedure. The function's parameters, if any, are stored in the database and the function is executed by retrieving these stored parameters and calling the function.
Can you give me an example of where an action might be useful?
Actions are usually used to configure Drupal's response to an event. For example, suppose a Drupal site administrator wants to be notified by email whenever a new user signs up. She would configure a "Send email" action and use the trigger module to assign that action to execute when a new user joins the site. (Technically, that would be when the user hook's 'insert' op runs.)
Where does the actions code actually live?
The actions engine, which executes actions, lives in includes/actions.inc. The dispatcher for actions is in modules/trigger.module.
The configuration screens for adding, removing, and configuring individual actions are part of system.module.
The interface for assigning actions to events (that is, hooks) is provided by modules/trigger.module.
The hook that describes actions (hook_actions_info()) and the actions themselves live in individual modules. Actions that affect nodes, like the "Publish node" action, live in node.module.
How do I create a new action?
There are two steps. First, we must describe the action to Drupal using hook_action_info(). Then, we must actually write the code that will execute.
Describing an action with hook_action_info()
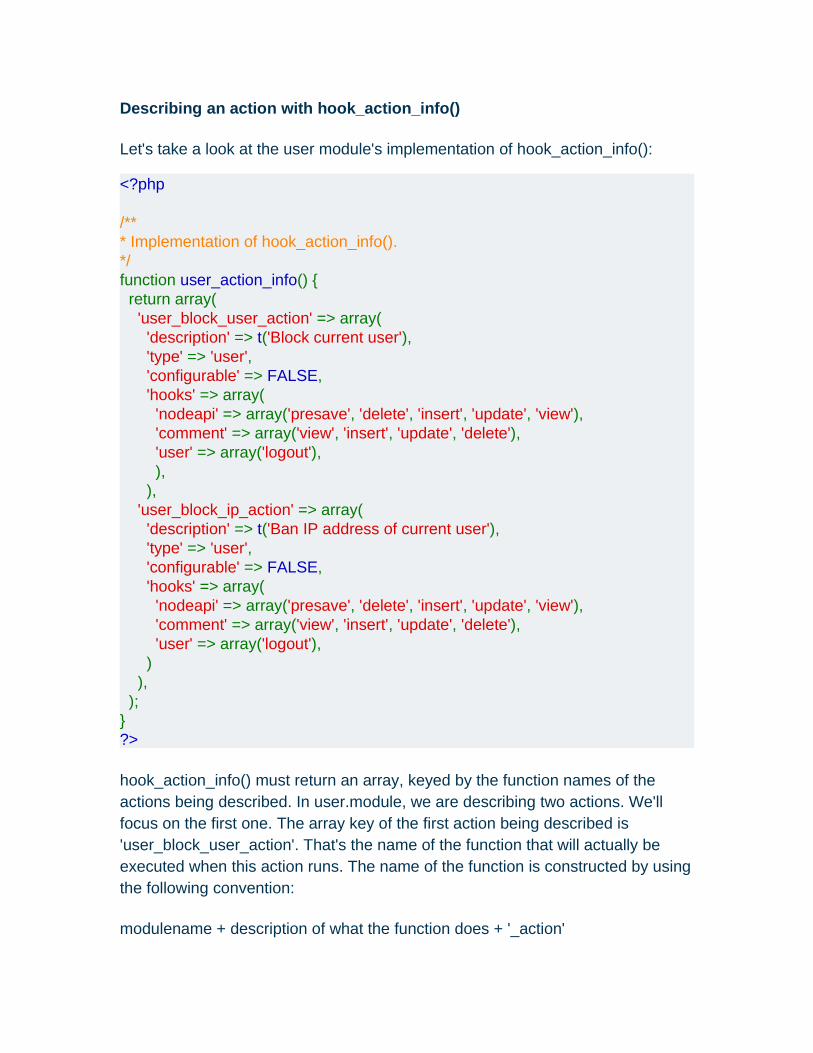
Let's take a look at the user module's implementation of hook_action_info():
<?php
/*** Implementation of hook_action_info().*/function user_action_info() { return array( 'user_block_user_action' => array( 'description' => t('Block current user'), 'type' => 'user', 'configurable' => FALSE, 'hooks' => array( 'nodeapi' => array('presave', 'delete', 'insert', 'update', 'view'), 'comment' => array('view', 'insert', 'update', 'delete'), 'user' => array('logout'), ), ), 'user_block_ip_action' => array( 'description' => t('Ban IP address of current user'), 'type' => 'user', 'configurable' => FALSE, 'hooks' => array( 'nodeapi' => array('presave', 'delete', 'insert', 'update', 'view'), 'comment' => array('view', 'insert', 'update', 'delete'), 'user' => array('logout'), ) ), );}?>
hook_action_info() must return an array, keyed by the function names of the actions being described. In user.module, we are describing two actions. We'll focus on the first one. The array key of the first action being described is 'user_block_user_action'. That's the name of the function that will actually be executed when this action runs. The name of the function is constructed by using the following convention:
modulename + description of what the function does + '_action'
In this case it is
user + block user + action
which gives us 'user_block_user_action'.
Next, we need to provide some information in the array using the following keys:
description: an easy-to-understand description of what the action does
type: the type is determined by what object the action acts on. Possible choices are node, user, comment, and system. Or your own custom type.
configurable: TRUE or FALSE. This determines the interface that Drupal will use when configuring actions. When set to FALSE we have the simplest case, where there is no interface to configure the action. In our example, the "Block current user" action does not need any additional information since the current user can be easily determined by Drupal at runtime. A more complicated action, such as a "Send email" action, would need to know things like who to send the email to, what to put in the subject line and the body of the email, etc.
hooks: this is an array of all of the operations this action is appropriate for, keyed by hook name. The actions module uses this to filter out inappropriate actions when presenting the interface for assigning actions to events. For example, the "Block current user" action defines the 'logout' operation of the 'user' hook, but not the 'login' operation. That's because it would be kind of silly to block a user as soon as the user logged in. It should be noted that this is an interface issue only; Drupal does not enforce these restrictions on execution of actions. Note: if you are writing actions in your own modules and you simply want to declare support for all possible hooks, you can set 'hooks' => array('any' => TRUE).
Writing an action
Now that we've described the action to Drupal, we can write the actual code that runs when the action is executed. Let's look at the code for the "Block current user" action:
<?php/*** Implementation of a Drupal action.* Blocks the current user.

*/function user_block_user_action(&$object, $context = array()) { if (isset($object->uid)) { $uid = $object->uid; } elseif (isset($context['uid'])) { $uid = $context['uid']; } else { global $user; $uid = $user->uid; } db_query("UPDATE {users} SET status = 0 WHERE uid = %d", $uid); sess_destroy_uid($uid); watchdog('action', 'Blocked user %name.', array('%name' => check_plain($user->name)));}?>
First, let's look at the function signature for the action. Two parameters are passed, an object and an array.
$object: this is the object on which the action expects to act. It corresponds with the 'type' that was declared for this action in hook_action_info(). For example, if the type 'user' was declared, the action will be passed a user object.
$context: this is an array that contains additional information that may be helpful for the action to look at to determine the context under which the action is currently running. For example, the actions module sets the 'hook' and 'op' keys of the context array (e.g., 'hook' may be 'nodeapi' and 'op' may be 'insert') so that the action can examine them and make various decisions if necessary.
Next, let's look at the action itself. It really has two parts. First, it determines the user to block by first looking at the user object it has been passed; failing that, it looks in the context array for the uid; failing that, it uses the global $user to determine the uid to block itself. Some of you may be curious about this. Why have these fallback positions? Why not require the passage of the "correct" first parameter? The answer is twofold. First, with actions we want a function signature that is universal so the underlying actions engine has to do less work, so we can have better performance. Second, suppose you want to block 50 users. Doing a full user_load() on each one just to get an object you can pass to

an action is not performant when you can hand over the uid in the context array instead.
The second part of the action is where the user is actually blocked and a watchdog entry recorded.
Now you know how to make a nonconfigurable action. A configurable action must also provide form handlers in order for the administrator to set the action's stored parameters. Look at the "Unpublish comment containing keyword(s)" action in comment.module for an example, specifically at the functions comment_unpublish_by_keyword_action_form(), comment_unpublish_by_keyword_action_submit(), and comment_unpublish_by_keyword_action().
I've written a module that provides hooks. How can I assign actions to run when those hooks run?
Use hook_hook_info() to describe your hooks to Drupal. This hook associates hook-op combinations with easy-to-read descriptions. See node_hook_info() or comment_hook_info() or user_hook_info() for examples.
I want to execute an action but I don't want to use actions.module.
OK. You can run any action directly from code by using the actions_do() function, which lives in includes/actions.inc.
Drupal menu system (Drupal 6.x)
• View • Revisions
Drupal 6.x
The Drupal menu system was always much more than what the name suggests. It's not only used to display visible navigation menus but also to map Drupal paths to their callbacks with proper access checking. This second task is called dispatching. The likely rationale behind this; once you define a link to a page, you might want to define what happens when you click that link.
This eventually led to a very complex data structure which is stored as a serialized array in the database -- per user. Unserializing this on every non-

cached page load uses tons of memory. Altering this either on build or run time needs dirty hacks.
Some misunderstandings about how access to an element applies to their children led to grave security holes with some contributed modules. This stresses the need for thought out, cleanly defined inheritance rules.
We have a new menu system in Drupal 6.x. The data is divided between two tables: {menu_router} and {menu_links}. The {menu_router} table is built based on the callbacks defined by implementations of hook_menu, and Drupal now looks in this table to determine access and the appropriate callback function when a site visitor tries to navigate to a particular path. Everything belonging to one path is one row in a database table, so the memory footprint is significantly smaller. The inheritance rules for access, etc. are cleanly laid out in the documentation. The {menu_links} table contains the links that are displayed in the Navigation and other menu blocks. Some of these items are derived automatically from {menu_router}, but others may be added by the site administrator using the menu module or other modules.
New hooks: hook_menu_alter() and hook_menu_link_alter()
Wildcard Loader Arguments
Wildcard usage and core's wildcards
Wildcard, ancestors and fitness
Inheritance rules
Access control
Dynamic argument replacement (wildcard)
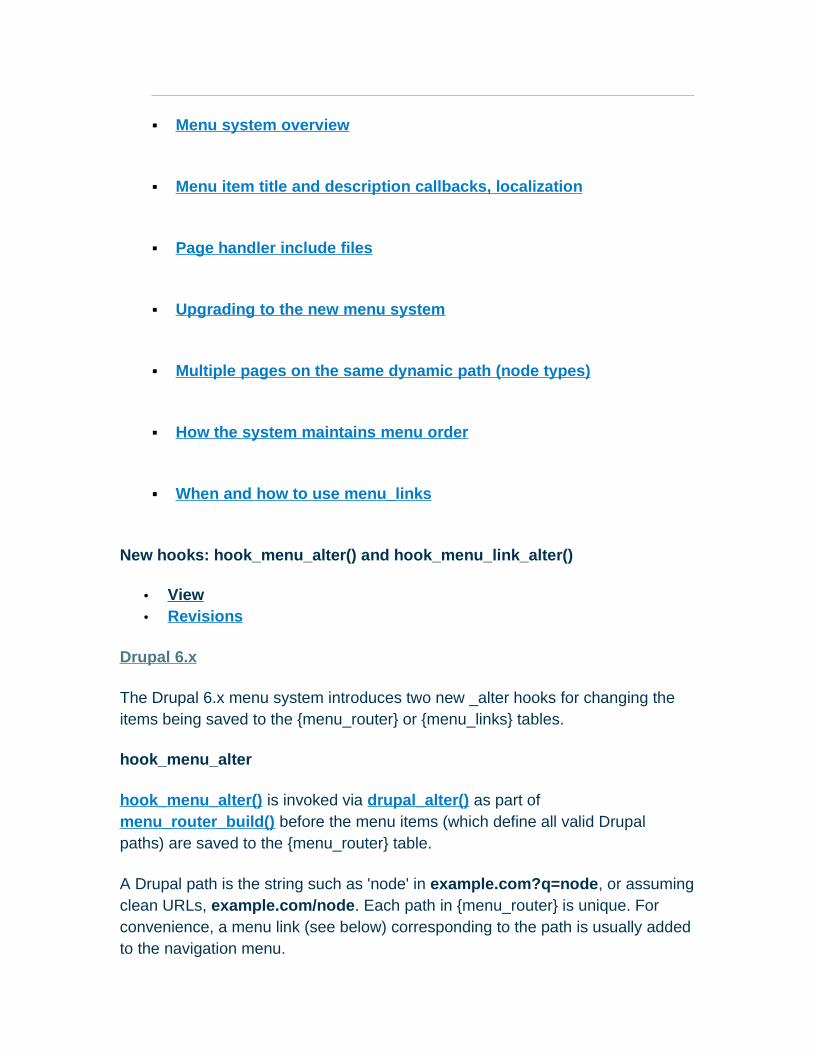
Menu system overview
Menu item title and description callbacks, localization
Page handler include files
Upgrading to the new menu system
Multiple pages on the same dynamic path (node types)
How the system maintains menu order
When and how to use menu_links
New hooks: hook_menu_alter() and hook_menu_link_alter()
• View • Revisions
Drupal 6.x
The Drupal 6.x menu system introduces two new _alter hooks for changing the items being saved to the {menu_router} or {menu_links} tables.
hook_menu_alter
hook_menu_alter() is invoked via drupal_alter() as part of menu_router_build() before the menu items (which define all valid Drupal paths) are saved to the {menu_router} table.
A Drupal path is the string such as 'node' in example.com?q=node, or assuming clean URLs, example.com/node. Each path in {menu_router} is unique. For convenience, a menu link (see below) corresponding to the path is usually added to the navigation menu.
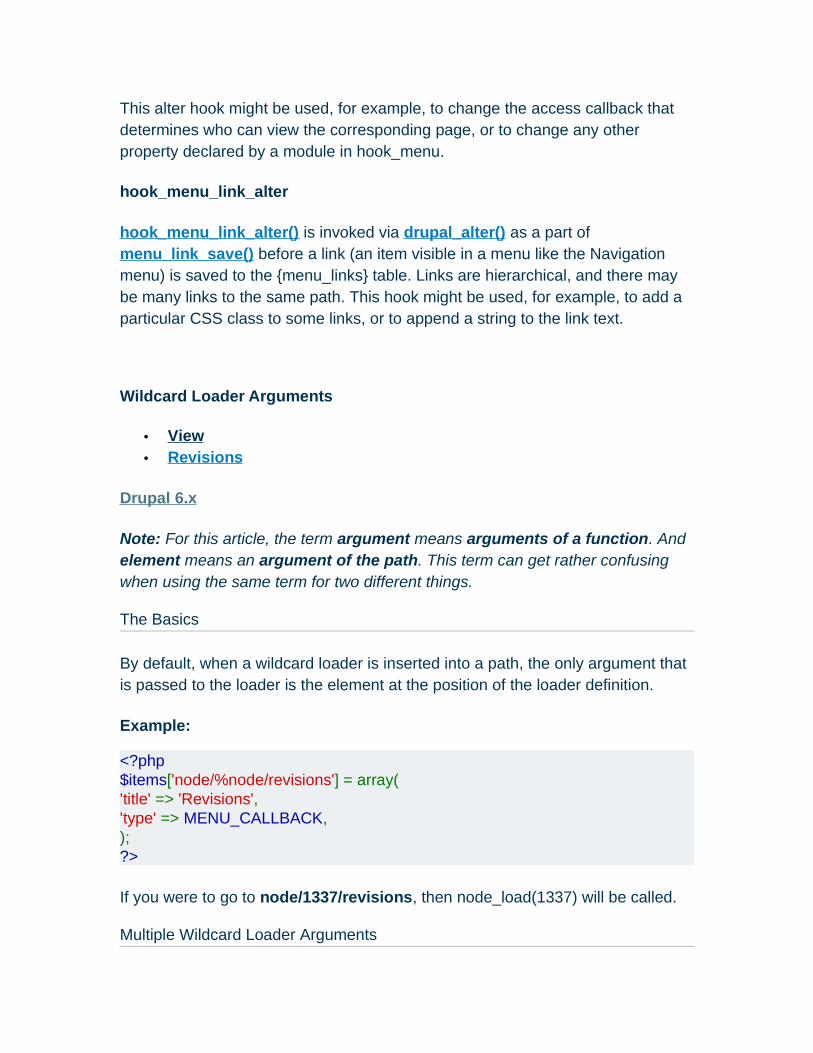
This alter hook might be used, for example, to change the access callback that determines who can view the corresponding page, or to change any other property declared by a module in hook_menu.
hook_menu_link_alter
hook_menu_link_alter() is invoked via drupal_alter() as a part of menu_link_save() before a link (an item visible in a menu like the Navigation menu) is saved to the {menu_links} table. Links are hierarchical, and there may be many links to the same path. This hook might be used, for example, to add a particular CSS class to some links, or to append a string to the link text.
Wildcard Loader Arguments
• View • Revisions
Drupal 6.x
Note: For this article, the term argument means arguments of a function. And element means an argument of the path. This term can get rather confusing when using the same term for two different things.
The Basics
By default, when a wildcard loader is inserted into a path, the only argument that is passed to the loader is the element at the position of the loader definition.
Example:
<?php$items['node/%node/revisions'] = array('title' => 'Revisions','type' => MENU_CALLBACK,);?>
If you were to go to node/1337/revisions, then node_load(1337) will be called.
Multiple Wildcard Loader Arguments
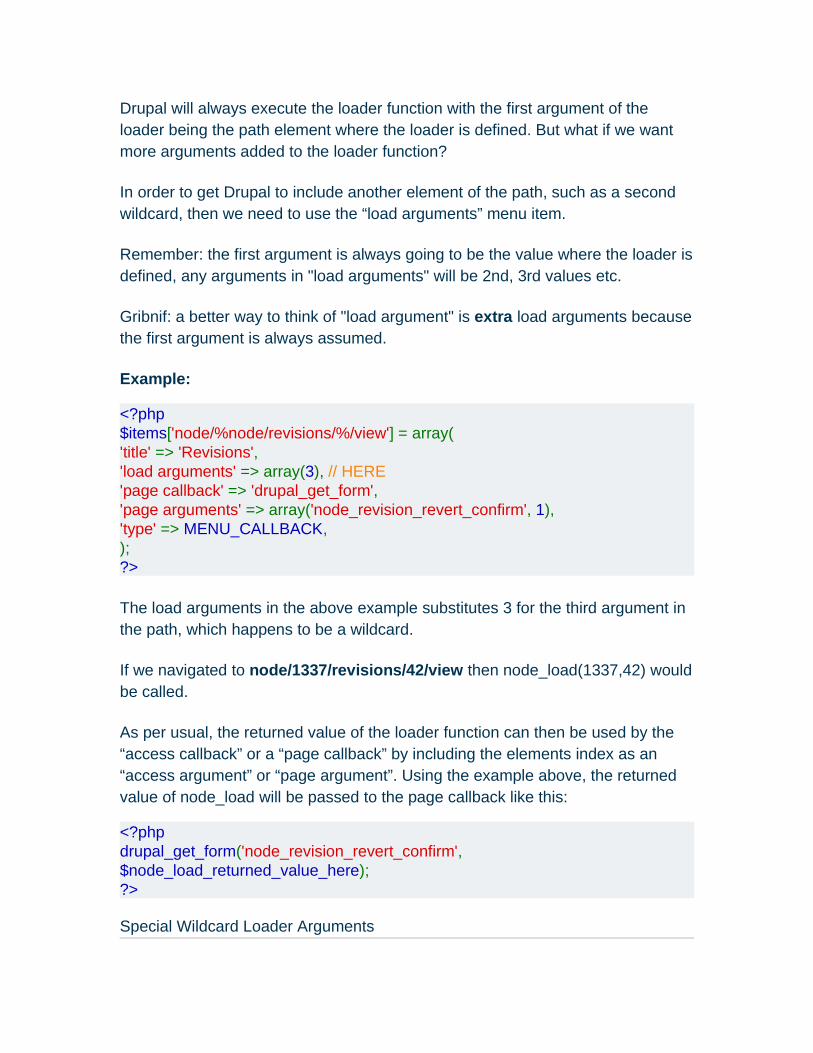
Drupal will always execute the loader function with the first argument of the loader being the path element where the loader is defined. But what if we want more arguments added to the loader function?
In order to get Drupal to include another element of the path, such as a second wildcard, then we need to use the “load arguments” menu item.
Remember: the first argument is always going to be the value where the loader is defined, any arguments in "load arguments" will be 2nd, 3rd values etc.
Gribnif: a better way to think of "load argument" is extra load arguments because the first argument is always assumed.
Example:
<?php$items['node/%node/revisions/%/view'] = array('title' => 'Revisions','load arguments' => array(3), // HERE'page callback' => 'drupal_get_form','page arguments' => array('node_revision_revert_confirm', 1),'type' => MENU_CALLBACK,);?>
The load arguments in the above example substitutes 3 for the third argument in the path, which happens to be a wildcard.
If we navigated to node/1337/revisions/42/view then node_load(1337,42) would be called.
As per usual, the returned value of the loader function can then be used by the “access callback” or a “page callback” by including the elements index as an “access argument” or “page argument”. Using the example above, the returned value of node_load will be passed to the page callback like this:
<?phpdrupal_get_form('node_revision_revert_confirm', $node_load_returned_value_here); ?>
Special Wildcard Loader Arguments

Using integers to get the path element substitute is very useful, but there are also ways to get even more information.
%map and %index
• %map: All elements of the path are converted to a keyed array. This is also a variable reference
• %index: The element of the path where the wildcard loader is defined in.
Example:
<?php$items['user/%user_category/edit'] = array('title' => 'Edit','page callback' => 'user_edit','page arguments' => array(1),'access callback' => 'user_edit_access','access arguments' => array(1),'type' => MENU_LOCAL_TASK,'load arguments' => array('%map', '%index'),'file' => 'user.pages.inc',); ?>
If we navigated to user/55/edit then user_category_load($map_array, $index) would be called.
The first argument of the loader would be
<?phparray( [0] => “user”, [1] => 55, [2] => “edit”,)?>
The second argument of the loader would be the integer 1, because that is the position of the path that the loader was defined in.
More Information
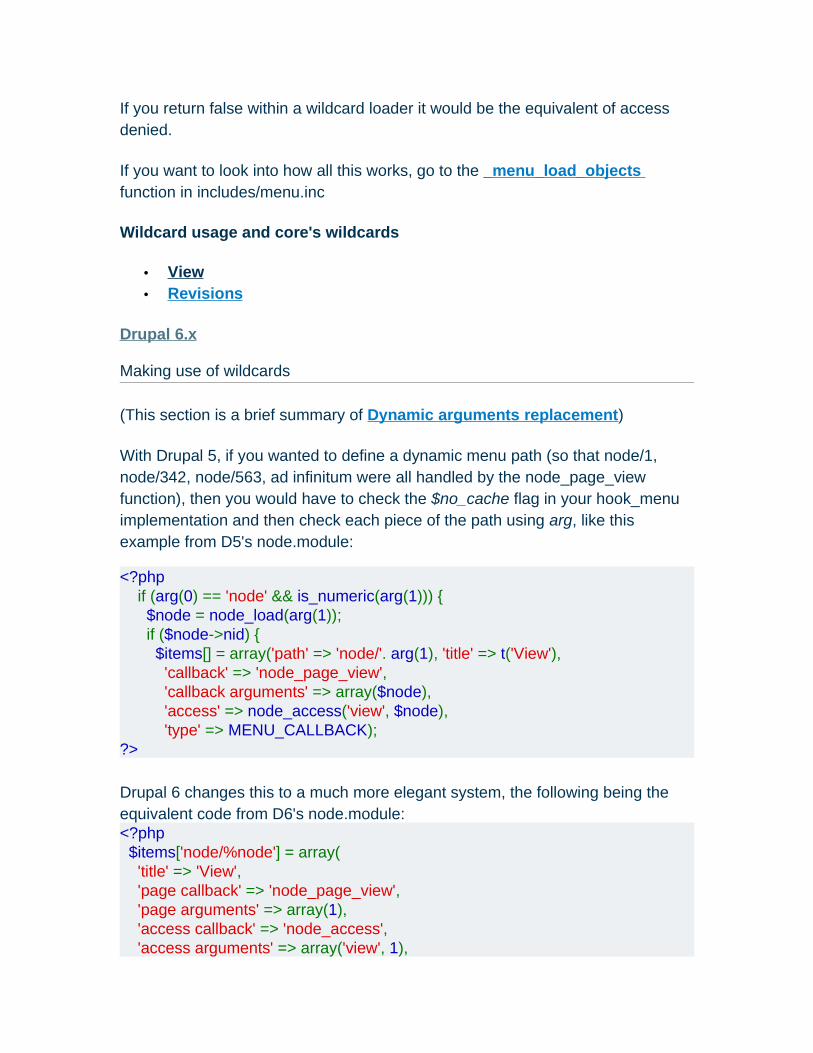
If you return false within a wildcard loader it would be the equivalent of access denied.
If you want to look into how all this works, go to the _menu_load_objects function in includes/menu.inc
Wildcard usage and core's wildcards
• View • Revisions
Drupal 6.x
Making use of wildcards
(This section is a brief summary of Dynamic arguments replacement)
With Drupal 5, if you wanted to define a dynamic menu path (so that node/1, node/342, node/563, ad infinitum were all handled by the node_page_view function), then you would have to check the $no_cache flag in your hook_menu implementation and then check each piece of the path using arg, like this example from D5's node.module:
<?php if (arg(0) == 'node' && is_numeric(arg(1))) { $node = node_load(arg(1)); if ($node->nid) { $items[] = array('path' => 'node/'. arg(1), 'title' => t('View'), 'callback' => 'node_page_view', 'callback arguments' => array($node), 'access' => node_access('view', $node), 'type' => MENU_CALLBACK); ?>
Drupal 6 changes this to a much more elegant system, the following being the equivalent code from D6's node.module: <?php $items['node/%node'] = array( 'title' => 'View', 'page callback' => 'node_page_view', 'page arguments' => array(1), 'access callback' => 'node_access', 'access arguments' => array('view', 1),

'type' => MENU_CALLBACK); ?>
Instead of checking if arg(0) was 'node' and arg(1) was a valid node ID, the %node wildcard is given in the menu path (% is the actual wildcard, the rest simply names a load function). The menu system itself will call node_load and check that the node ID is valid, and then instead of specifying $node in the callback arguments, 1 is used, as %node is the 1st part of the path (counting from 0, using / as a separator). To use wildcards in your hook_menu, use %loader_name as one of the parts of the path, and place the number corresponding to the position of the wildcard into the appropriate callback argument arrays. This will cause the result of loader_name_load to be passed to the callback. The core modules in Drupal 6 provide some wildcard loaders that you can use in your menu hook, or you can define your own.
Defining your own wildcard loader
As with any other wildcard loader, place %your_loader_name into the menu path (again, the % is the wildcard, the rest is the name of the loader function), and then implement a function called your_loader_name_load. If you used %flexifilter in a menu path, you might then implement the following:
<?php/*** Menu callback; loads a flexifilter object*/function flexifilter_load($fid) { if (!is_numeric($fid)) { return FALSE; } $filters = flexifilter_get_filters(); if (!isset($filters[$fid])) { return FALSE; } return $filters[$fid];}?>
The load function takes a single argument, which is the part of the URL that matched the wildcard (if the URL was "admin/flexifilter/34/edit", then the argument would be "34"). Remember that this argument came from the URL, which was in turn provided by the user. Remember to be very careful when using
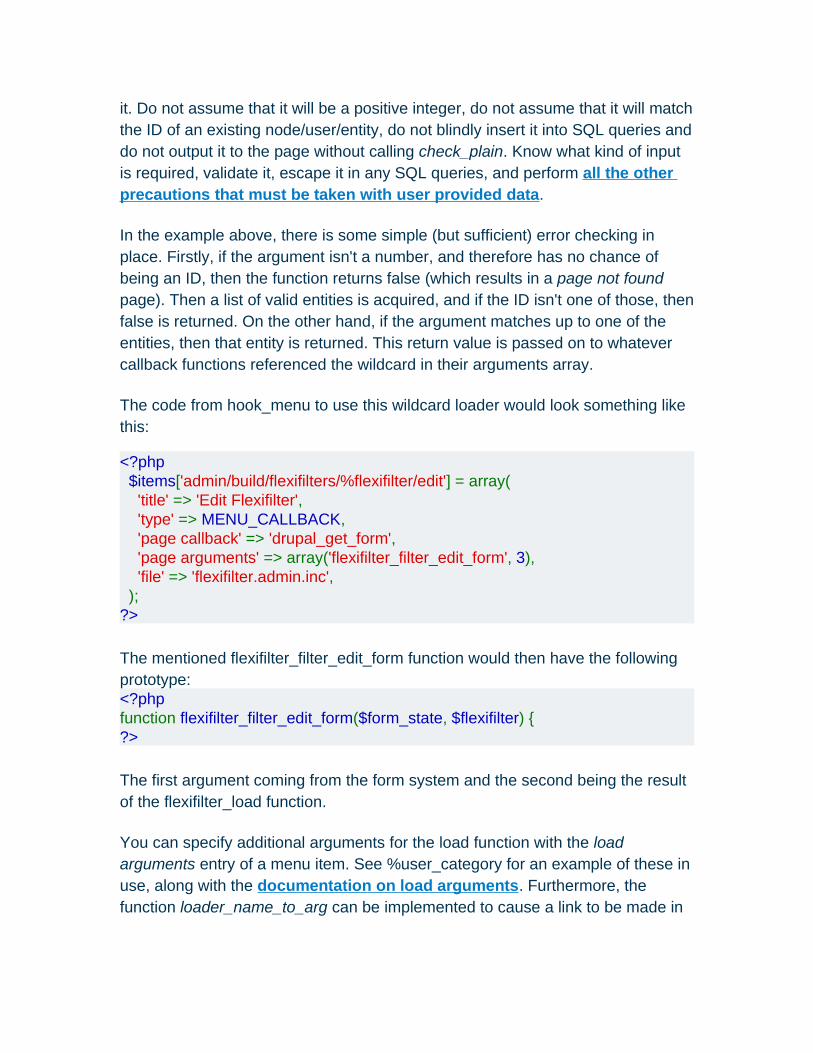
it. Do not assume that it will be a positive integer, do not assume that it will match the ID of an existing node/user/entity, do not blindly insert it into SQL queries and do not output it to the page without calling check_plain. Know what kind of input is required, validate it, escape it in any SQL queries, and perform all the other precautions that must be taken with user provided data.
In the example above, there is some simple (but sufficient) error checking in place. Firstly, if the argument isn't a number, and therefore has no chance of being an ID, then the function returns false (which results in a page not found page). Then a list of valid entities is acquired, and if the ID isn't one of those, then false is returned. On the other hand, if the argument matches up to one of the entities, then that entity is returned. This return value is passed on to whatever callback functions referenced the wildcard in their arguments array.
The code from hook_menu to use this wildcard loader would look something like this:
<?php $items['admin/build/flexifilters/%flexifilter/edit'] = array( 'title' => 'Edit Flexifilter', 'type' => MENU_CALLBACK, 'page callback' => 'drupal_get_form', 'page arguments' => array('flexifilter_filter_edit_form', 3), 'file' => 'flexifilter.admin.inc', ); ?>
The mentioned flexifilter_filter_edit_form function would then have the following prototype: <?phpfunction flexifilter_filter_edit_form($form_state, $flexifilter) { ?>
The first argument coming from the form system and the second being the result of the flexifilter_load function.
You can specify additional arguments for the load function with the load arguments entry of a menu item. See %user_category for an example of these in use, along with the documentation on load arguments. Furthermore, the function loader_name_to_arg can be implemented to cause a link to be made in

the menu when the loader is specified in a menu path. See %user_uid_optional for a practical example of this, or the _to_arg documentation.
Existing wildcard loaders provided in D6 core
%actions
Load function: actions_loadUsed by: System module from D6 coreExample usage (from system.module):
<?php $items['admin/settings/actions/delete/%actions'] = array( 'title' => 'Delete action', 'description' => 'Delete an action.', 'page callback' => 'drupal_get_form', 'page arguments' => array('system_actions_delete_form', 4), 'type' => MENU_CALLBACK, );?>
Note that %actions is the 4th part of the path (counting from 0, using / as a separator), hence the 4 in the page arguments array.
%aggregator_category
Load function: aggregator_category_loadUsed by: Aggregator module from D6 coreExample usage (from aggregator.module):
<?php $items['aggregator/categories/%aggregator_category'] = array( 'title callback' => '_aggregator_category_title', 'title arguments' => array(2), 'page callback' => 'aggregator_page_category', 'page arguments' => array(2), 'access callback' => 'user_access', 'access arguments' => array('access news feeds'), 'file' => 'aggregator.pages.inc', );?>
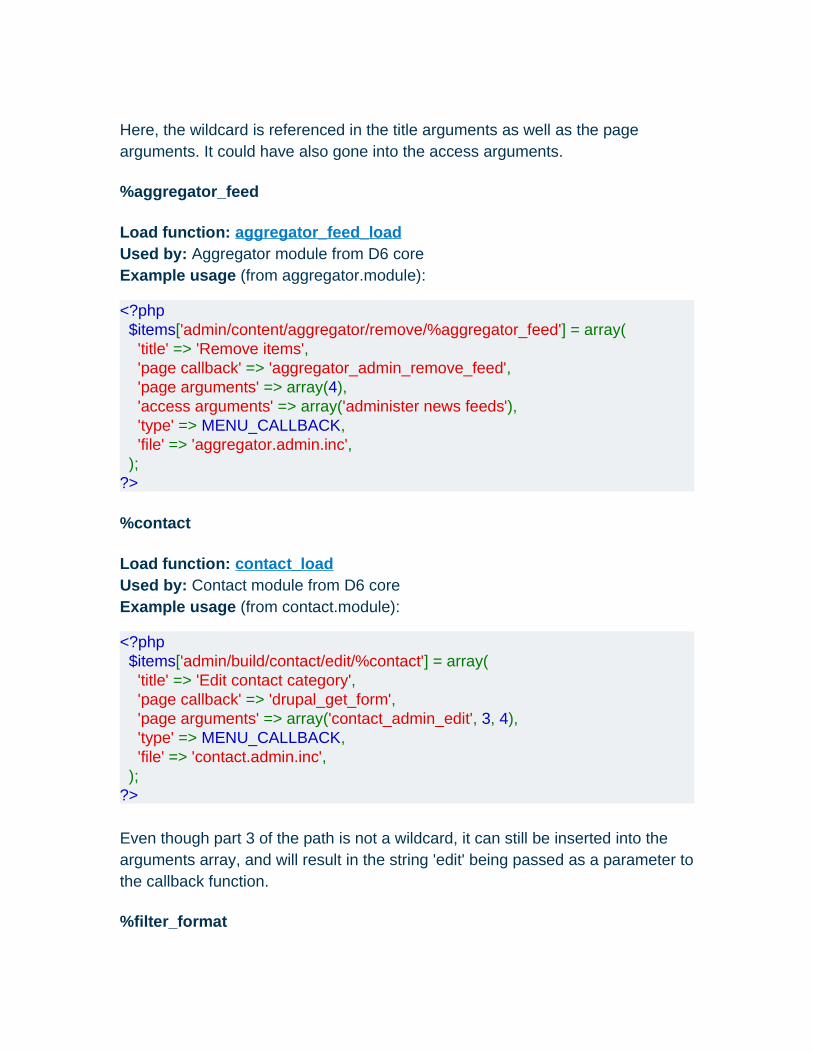
Here, the wildcard is referenced in the title arguments as well as the page arguments. It could have also gone into the access arguments.
%aggregator_feed
Load function: aggregator_feed_loadUsed by: Aggregator module from D6 coreExample usage (from aggregator.module):
<?php $items['admin/content/aggregator/remove/%aggregator_feed'] = array( 'title' => 'Remove items', 'page callback' => 'aggregator_admin_remove_feed', 'page arguments' => array(4), 'access arguments' => array('administer news feeds'), 'type' => MENU_CALLBACK, 'file' => 'aggregator.admin.inc', );?>
%contact
Load function: contact_loadUsed by: Contact module from D6 coreExample usage (from contact.module):
<?php $items['admin/build/contact/edit/%contact'] = array( 'title' => 'Edit contact category', 'page callback' => 'drupal_get_form', 'page arguments' => array('contact_admin_edit', 3, 4), 'type' => MENU_CALLBACK, 'file' => 'contact.admin.inc', );?>
Even though part 3 of the path is not a wildcard, it can still be inserted into the arguments array, and will result in the string 'edit' being passed as a parameter to the callback function.
%filter_format
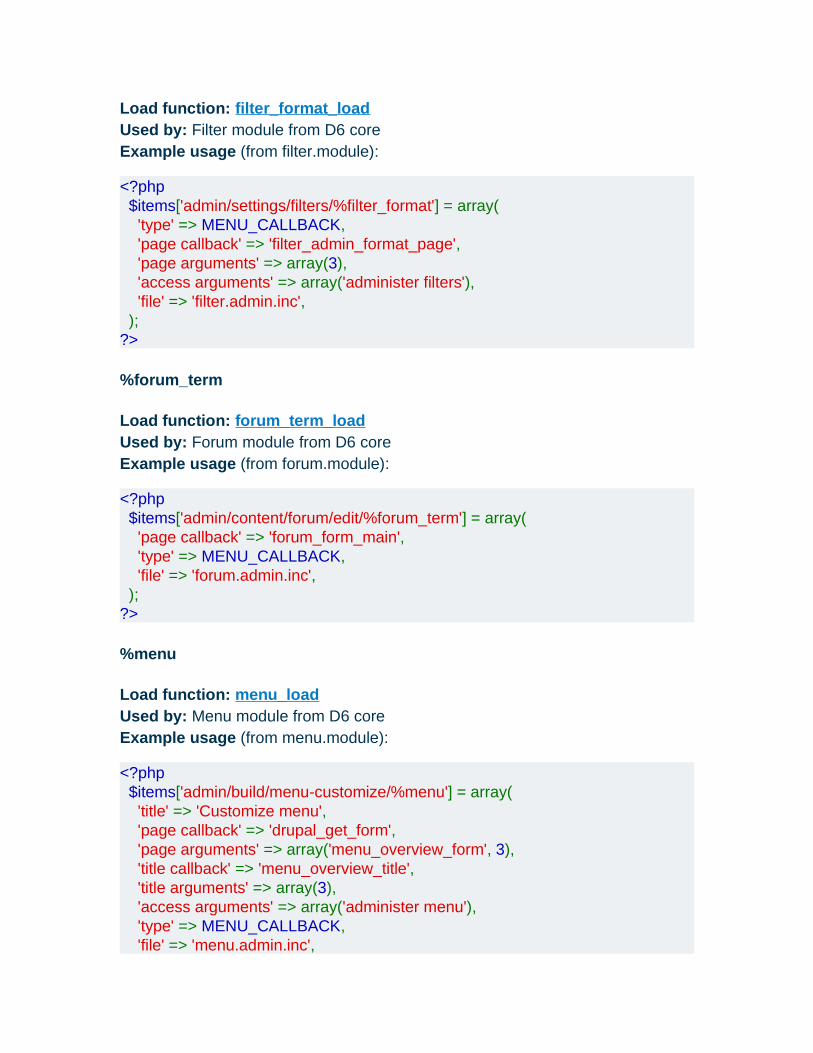
Load function: filter_format_loadUsed by: Filter module from D6 coreExample usage (from filter.module):
<?php $items['admin/settings/filters/%filter_format'] = array( 'type' => MENU_CALLBACK, 'page callback' => 'filter_admin_format_page', 'page arguments' => array(3), 'access arguments' => array('administer filters'), 'file' => 'filter.admin.inc', );?>
%forum_term
Load function: forum_term_loadUsed by: Forum module from D6 coreExample usage (from forum.module):
<?php $items['admin/content/forum/edit/%forum_term'] = array( 'page callback' => 'forum_form_main', 'type' => MENU_CALLBACK, 'file' => 'forum.admin.inc', );?>
%menu
Load function: menu_loadUsed by: Menu module from D6 coreExample usage (from menu.module):
<?php $items['admin/build/menu-customize/%menu'] = array( 'title' => 'Customize menu', 'page callback' => 'drupal_get_form', 'page arguments' => array('menu_overview_form', 3), 'title callback' => 'menu_overview_title', 'title arguments' => array(3), 'access arguments' => array('administer menu'), 'type' => MENU_CALLBACK, 'file' => 'menu.admin.inc',
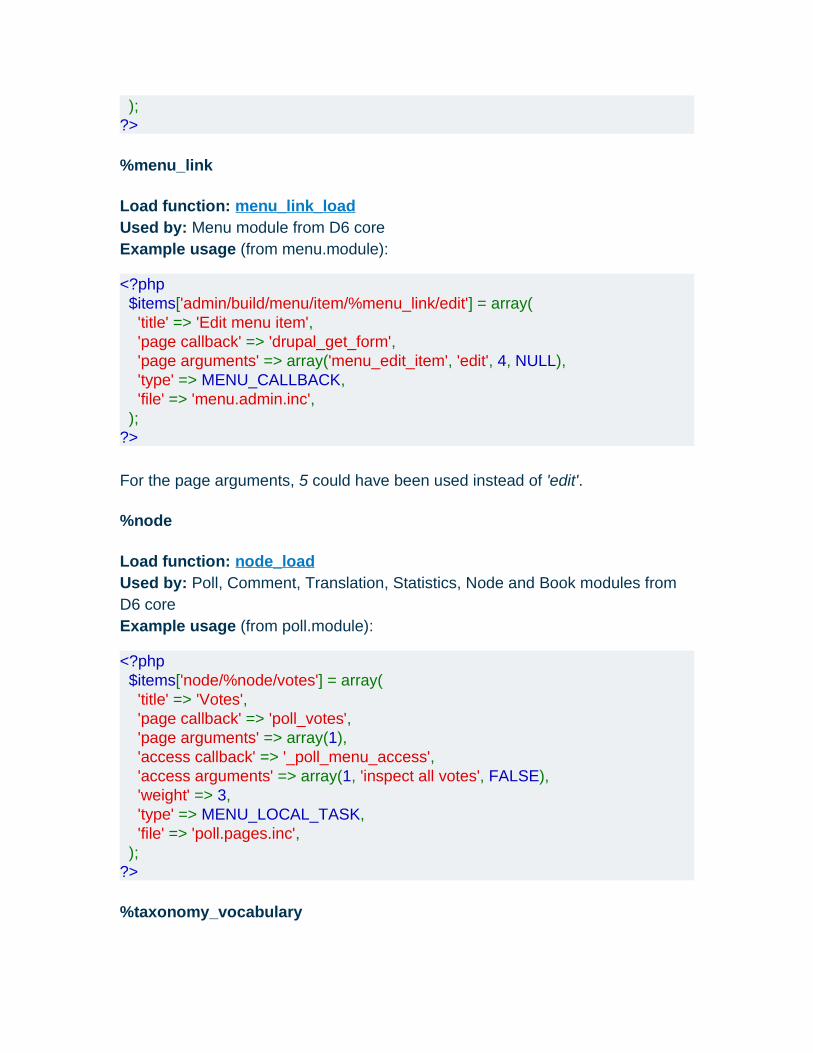
);?>
%menu_link
Load function: menu_link_loadUsed by: Menu module from D6 coreExample usage (from menu.module):
<?php $items['admin/build/menu/item/%menu_link/edit'] = array( 'title' => 'Edit menu item', 'page callback' => 'drupal_get_form', 'page arguments' => array('menu_edit_item', 'edit', 4, NULL), 'type' => MENU_CALLBACK, 'file' => 'menu.admin.inc', );?>
For the page arguments, 5 could have been used instead of 'edit'.
%node
Load function: node_loadUsed by: Poll, Comment, Translation, Statistics, Node and Book modules from D6 coreExample usage (from poll.module):
<?php $items['node/%node/votes'] = array( 'title' => 'Votes', 'page callback' => 'poll_votes', 'page arguments' => array(1), 'access callback' => '_poll_menu_access', 'access arguments' => array(1, 'inspect all votes', FALSE), 'weight' => 3, 'type' => MENU_LOCAL_TASK, 'file' => 'poll.pages.inc', );?>
%taxonomy_vocabulary
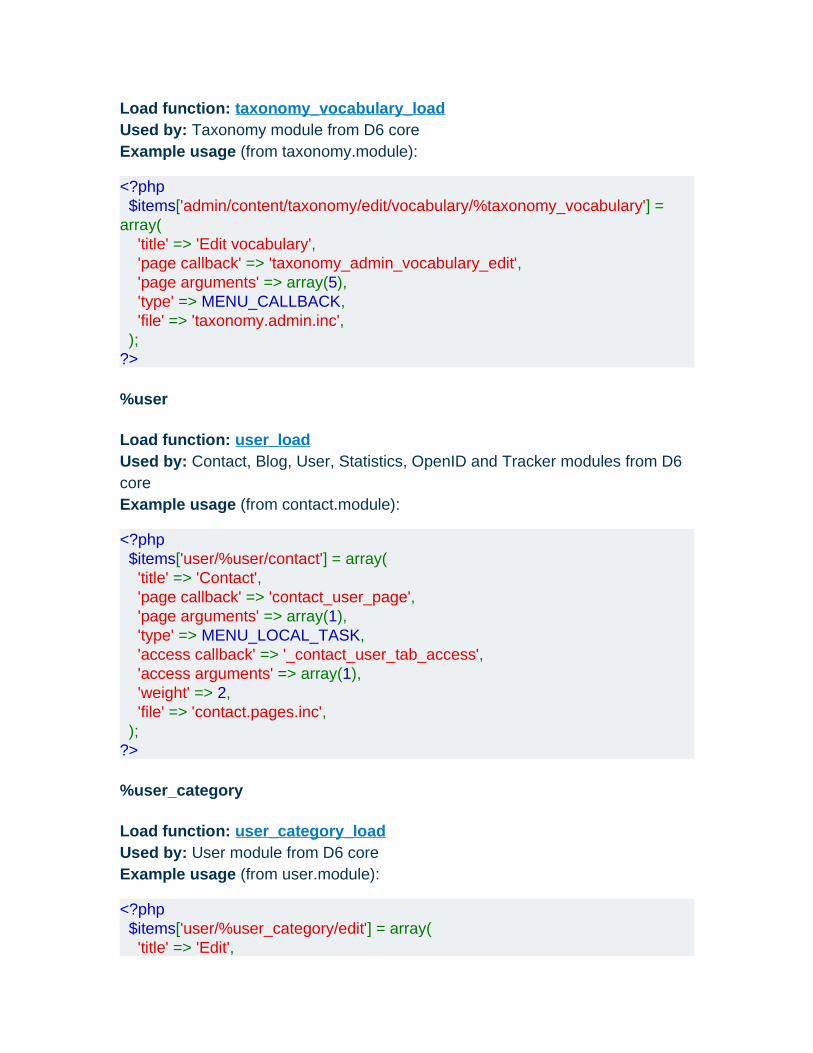
Load function: taxonomy_vocabulary_loadUsed by: Taxonomy module from D6 coreExample usage (from taxonomy.module):
<?php $items['admin/content/taxonomy/edit/vocabulary/%taxonomy_vocabulary'] = array( 'title' => 'Edit vocabulary', 'page callback' => 'taxonomy_admin_vocabulary_edit', 'page arguments' => array(5), 'type' => MENU_CALLBACK, 'file' => 'taxonomy.admin.inc', );?>
%user
Load function: user_loadUsed by: Contact, Blog, User, Statistics, OpenID and Tracker modules from D6 coreExample usage (from contact.module):
<?php $items['user/%user/contact'] = array( 'title' => 'Contact', 'page callback' => 'contact_user_page', 'page arguments' => array(1), 'type' => MENU_LOCAL_TASK, 'access callback' => '_contact_user_tab_access', 'access arguments' => array(1), 'weight' => 2, 'file' => 'contact.pages.inc', );?>
%user_category
Load function: user_category_loadUsed by: User module from D6 coreExample usage (from user.module):
<?php $items['user/%user_category/edit'] = array( 'title' => 'Edit',

'page callback' => 'user_edit', 'page arguments' => array(1), 'access callback' => 'user_edit_access', 'access arguments' => array(1), 'type' => MENU_LOCAL_TASK, 'load arguments' => array('%map', '%index'), 'file' => 'user.pages.inc', );?>
Note the use of load arguments, which must be present (as shown) in order to use %user_category. See the documentation on load arguments for more information.
%user_uid_optional (was %user_current in 6.0 and 6.1)
Load function: user_uid_optional_loadUsed by: Tracker, User and Blog modules from D6 coreExample usage (from tracker.module):
<?php $items['tracker/%user_uid_optional'] = array( 'title' => 'My recent posts', 'access callback' => '_tracker_myrecent_access', 'access arguments' => array(1), 'page arguments' => array(1), 'type' => MENU_LOCAL_TASK, );?>
%user_uid_optional behaves identically to %user (user_uid_optional_load directly calls user_load), however, %user_uid_optional creates a menu link as well. Hence there is a "My recent posts" link in the Drupal 6 menu which leads to tracker/(your user id), but you can also go to tracker/(any user id) to see recent posts from other people. See _to_arg for more information on this.
Wildcard, ancestors and fitness
• View • Revisions

Drupal 6.x
Our big problem is that there are paths like node/12345/edit. To handle these and others, we use a wildcard: the percent sign. So, when the system tries to find which {menu_router} entry specifies node/12345/edit it will look at the menu definitions of the following paths:
• node/12345/edit • node/12345/% • node/%/edit • node/%/% • node/12345 • node/% • node
These we call the ancestors of node/12345/edit.
Fit
As a wildcard is less specific than the path itself -- for example, if we defined a {menu_router} entry for node/12345/edit it will only deal with this one node only but node/%/edit deals with all nodes. We can say that node/12345/edit is a better fit than node/%/edit.
So let's add fitness number to these paths:
Path Fitness Fitness in binary
node/12345/edit 7 111
node/12345/% 6 110
node/%/edit 5 101
node/%/% 4 100
node/12345 3 11
node/% 2 10
node 1 1

I think it's quite visible that if we replace the % wildcard with 0 and the specific part with 1 then we get the binary number. We will use this both ways: we can calculate the value fitness of any path easily and also we can generate the ancestors of any given path by generating these binary numbers and replacing backwards.
Ancestors and fitness are used only on run time, not on build time.
Note- an additional optimization has been implemented, so that only the ancestors which correspond to the binary patterns of paths that actually exist in {menu_router} are checked. This is important because the number of possible ancestors increases exponentially with the number of parts in the path. The patterns that are known to exist are called the "masks".
Inheritance rules
• View • Revisions
Before divulging into the various callbacks, we shall know the simple but very powerful inheritance rule. We are using the parents of a given path for this, for example the parents of node/%/view are node/% and node.
If a page callback is not defined then we look at the closest parent which has one and use it. If the current item does not have arguments for this callback but the parent does have one, it will be used as well. In other words, a page callback and its arguments are inherited as a whole but the arguments can be overwritten. So,
<?php $items['admin/user/roles'] = array( 'title' => 'Roles', 'page callback' => 'drupal_get_form', 'page arguments' => array('user_admin_new_role'), ); $items['admin/user/roles/edit'] = array( 'title' => 'Edit role', 'page arguments' => array('user_admin_role'),
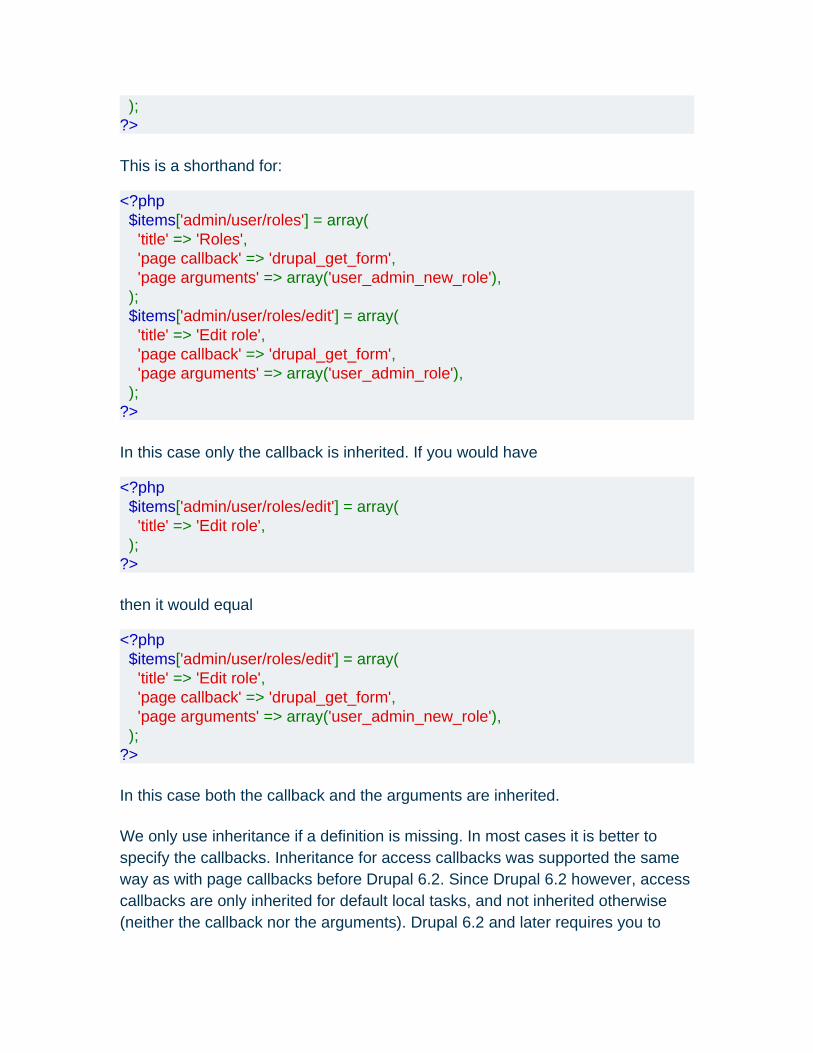
);?>
This is a shorthand for:
<?php $items['admin/user/roles'] = array( 'title' => 'Roles', 'page callback' => 'drupal_get_form', 'page arguments' => array('user_admin_new_role'), ); $items['admin/user/roles/edit'] = array( 'title' => 'Edit role', 'page callback' => 'drupal_get_form', 'page arguments' => array('user_admin_role'), );?>
In this case only the callback is inherited. If you would have
<?php $items['admin/user/roles/edit'] = array( 'title' => 'Edit role', );?>
then it would equal
<?php $items['admin/user/roles/edit'] = array( 'title' => 'Edit role', 'page callback' => 'drupal_get_form', 'page arguments' => array('user_admin_new_role'), );?>
In this case both the callback and the arguments are inherited.
We only use inheritance if a definition is missing. In most cases it is better to specify the callbacks. Inheritance for access callbacks was supported the same way as with page callbacks before Drupal 6.2. Since Drupal 6.2 however, access callbacks are only inherited for default local tasks, and not inherited otherwise (neither the callback nor the arguments). Drupal 6.2 and later requires you to
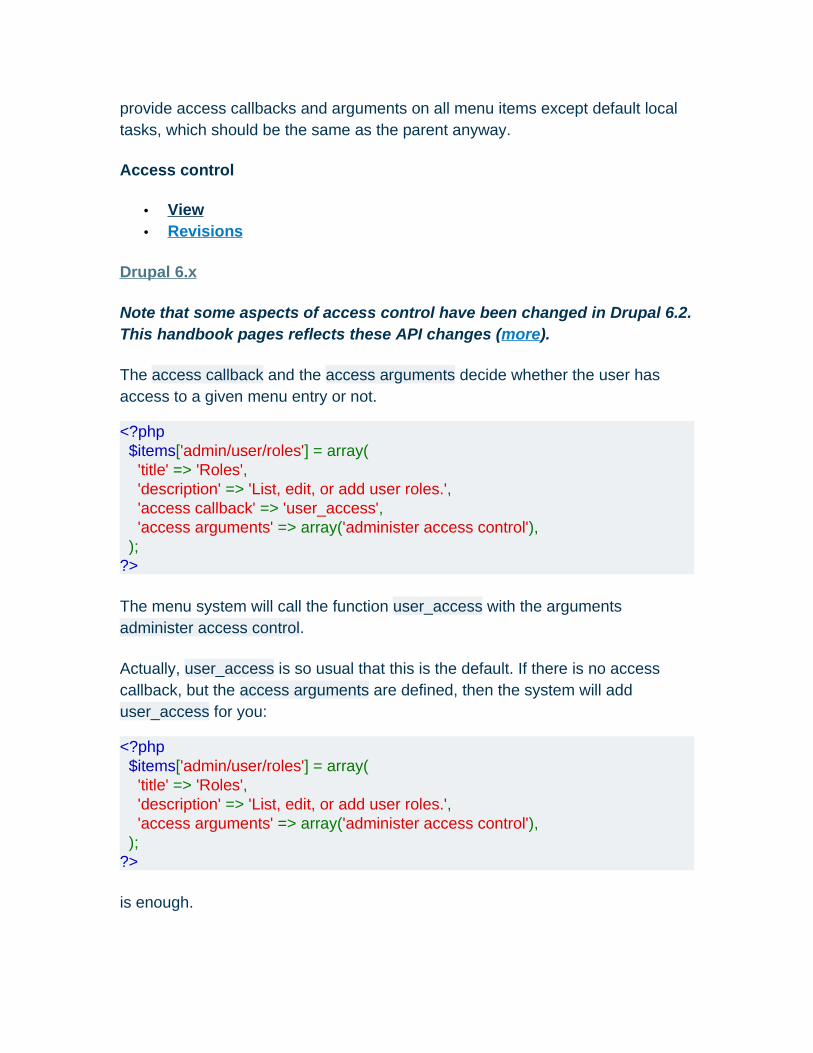
provide access callbacks and arguments on all menu items except default local tasks, which should be the same as the parent anyway.
Access control
• View • Revisions
Drupal 6.x
Note that some aspects of access control have been changed in Drupal 6.2. This handbook pages reflects these API changes (more).
The access callback and the access arguments decide whether the user has access to a given menu entry or not.
<?php $items['admin/user/roles'] = array( 'title' => 'Roles', 'description' => 'List, edit, or add user roles.', 'access callback' => 'user_access', 'access arguments' => array('administer access control'), );?>
The menu system will call the function user_access with the arguments administer access control.
Actually, user_access is so usual that this is the default. If there is no access callback, but the access arguments are defined, then the system will add user_access for you:
<?php $items['admin/user/roles'] = array( 'title' => 'Roles', 'description' => 'List, edit, or add user roles.', 'access arguments' => array('administer access control'), );?>
is enough.
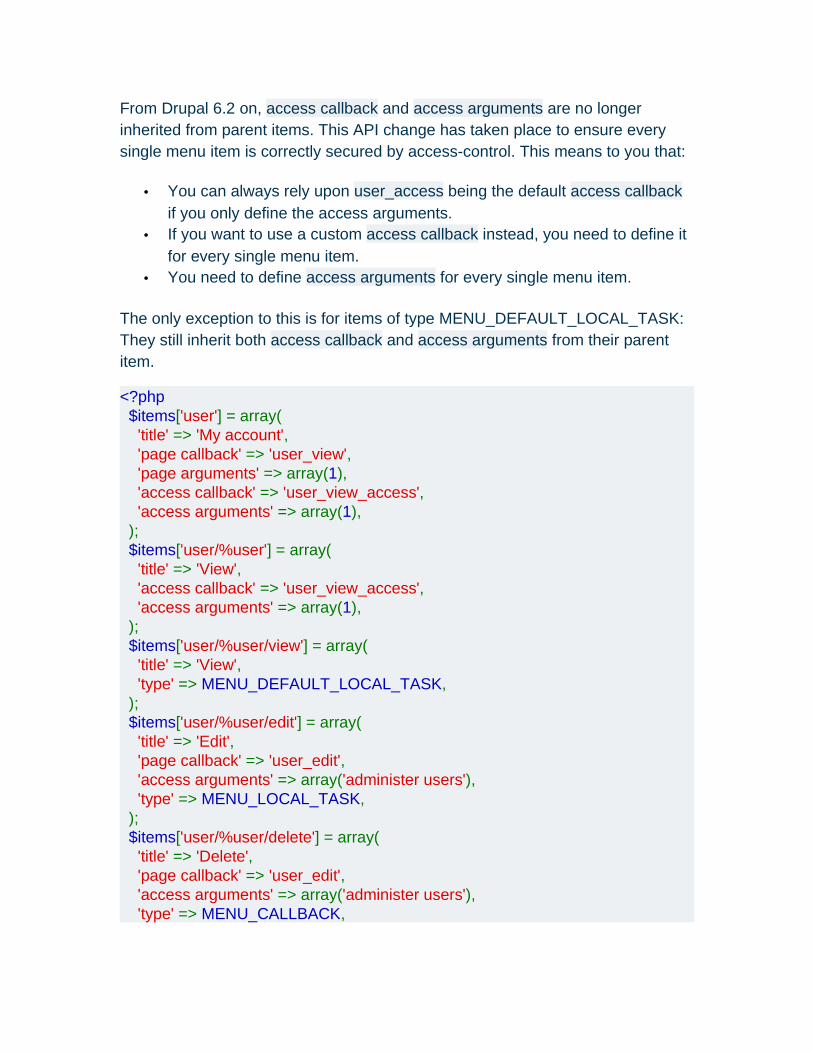
From Drupal 6.2 on, access callback and access arguments are no longer inherited from parent items. This API change has taken place to ensure every single menu item is correctly secured by access-control. This means to you that:
• You can always rely upon user_access being the default access callback if you only define the access arguments.
• If you want to use a custom access callback instead, you need to define it for every single menu item.
• You need to define access arguments for every single menu item.
The only exception to this is for items of type MENU_DEFAULT_LOCAL_TASK: They still inherit both access callback and access arguments from their parent item.
<?php $items['user'] = array( 'title' => 'My account', 'page callback' => 'user_view', 'page arguments' => array(1), 'access callback' => 'user_view_access', 'access arguments' => array(1), ); $items['user/%user'] = array( 'title' => 'View', 'access callback' => 'user_view_access', 'access arguments' => array(1), ); $items['user/%user/view'] = array( 'title' => 'View', 'type' => MENU_DEFAULT_LOCAL_TASK, ); $items['user/%user/edit'] = array( 'title' => 'Edit', 'page callback' => 'user_edit', 'access arguments' => array('administer users'), 'type' => MENU_LOCAL_TASK, ); $items['user/%user/delete'] = array( 'title' => 'Delete', 'page callback' => 'user_edit', 'access arguments' => array('administer users'), 'type' => MENU_CALLBACK,
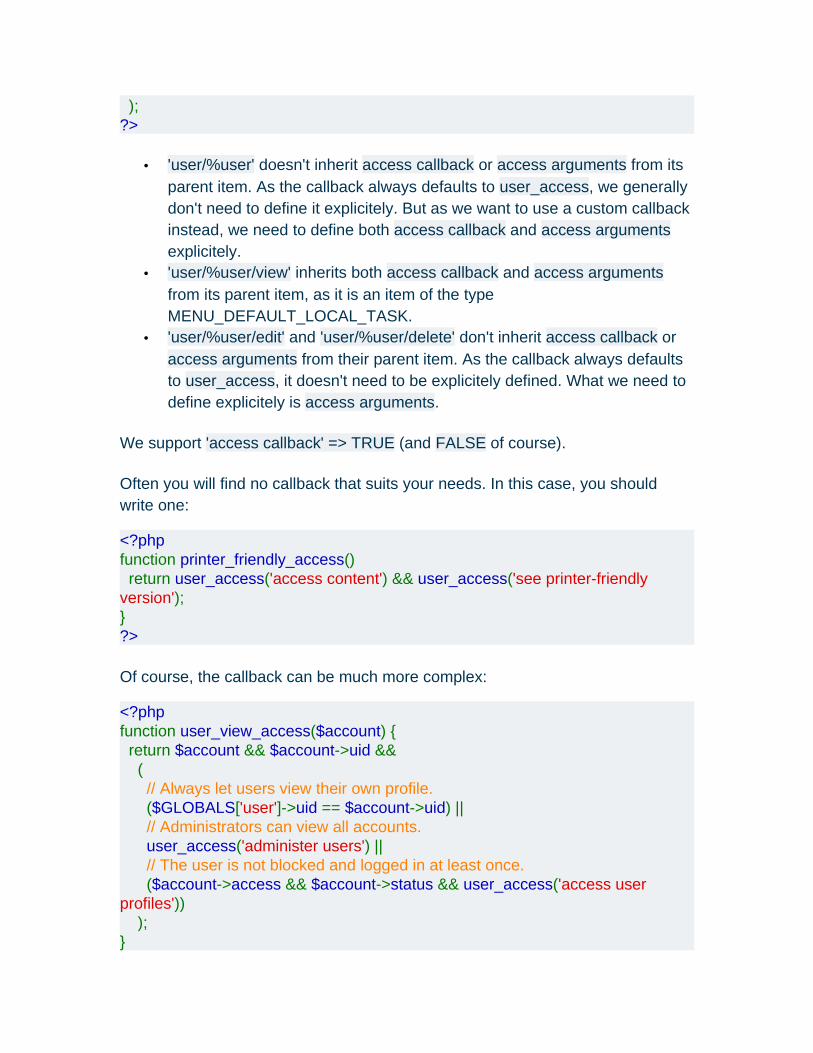
);?>
• 'user/%user' doesn't inherit access callback or access arguments from its parent item. As the callback always defaults to user_access, we generally don't need to define it explicitely. But as we want to use a custom callback instead, we need to define both access callback and access arguments explicitely.
• 'user/%user/view' inherits both access callback and access arguments from its parent item, as it is an item of the type MENU_DEFAULT_LOCAL_TASK.
• 'user/%user/edit' and 'user/%user/delete' don't inherit access callback or access arguments from their parent item. As the callback always defaults to user_access, it doesn't need to be explicitely defined. What we need to define explicitely is access arguments.
We support 'access callback' => TRUE (and FALSE of course).
Often you will find no callback that suits your needs. In this case, you should write one:
<?phpfunction printer_friendly_access() return user_access('access content') && user_access('see printer-friendly version');}?>
Of course, the callback can be much more complex:
<?phpfunction user_view_access($account) { return $account && $account->uid && ( // Always let users view their own profile. ($GLOBALS['user']->uid == $account->uid) || // Administrators can view all accounts. user_access('administer users') || // The user is not blocked and logged in at least once. ($account->access && $account->status && user_access('access user profiles')) );}

... $items['user/%user_current'] = array( 'access callback' => 'user_view_access', 'access arguments' => array(1), );?>
Dynamic argument replacement (wildcard)
• View • Revisions
Drupal 6.x
This part is easiest to understand if we begin from the old menu system.
In the past we had code that run on every page request:
<?phpif (arg(0) == 'node' && arg(1) && is_numeric(arg(1)) && ($node = node_load(arg(1)))) { $items[] = array( 'path' => 'node/'. $node->nid, 'access' => node_access('view', $node), 'callback' => 'node_view_page', 'callback arguments' => array($node), );}?>
And then for comment module:
<?phpif (arg(0) == 'comment' && arg(1) == 'reply' && arg(2) && is_numeric(arg(2)) && ($node = node_load(arg(2)))) { $items[] = array( 'path' => 'comment/reply/'. $node->nid, 'access' => node_access('view', $node), 'callback' => 'comment_reply', 'callback arguments' => array($node), );}?>
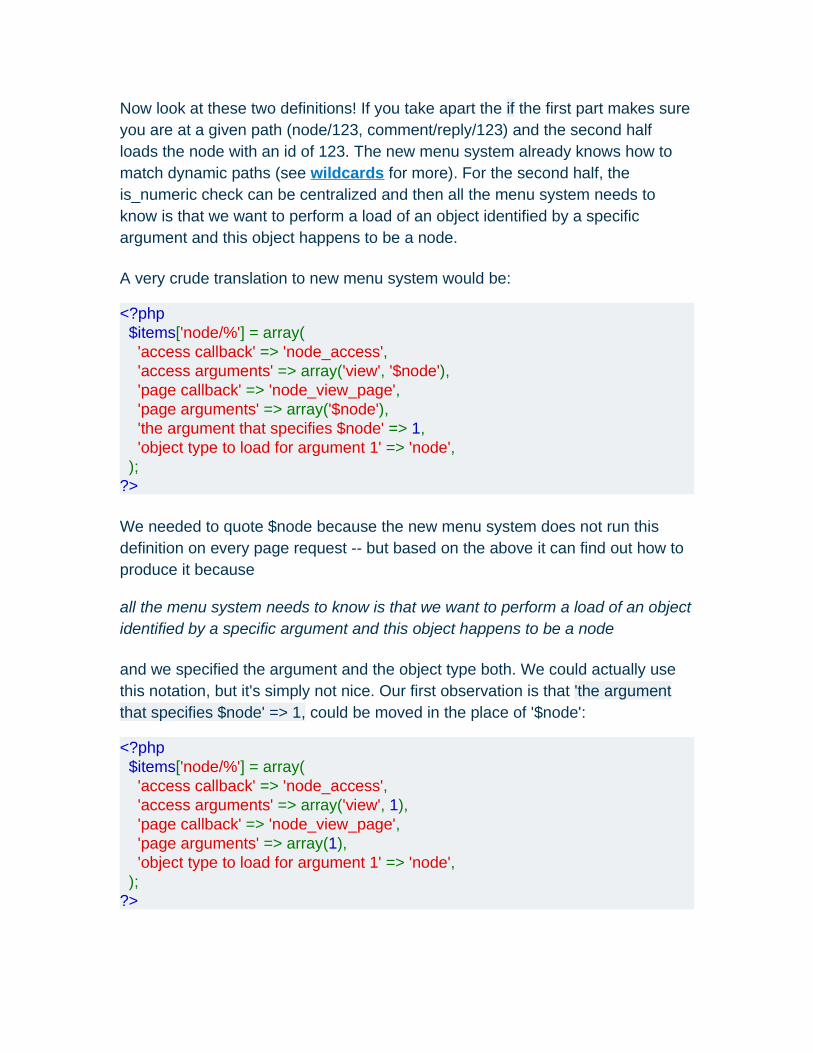
Now look at these two definitions! If you take apart the if the first part makes sure you are at a given path (node/123, comment/reply/123) and the second half loads the node with an id of 123. The new menu system already knows how to match dynamic paths (see wildcards for more). For the second half, the is_numeric check can be centralized and then all the menu system needs to know is that we want to perform a load of an object identified by a specific argument and this object happens to be a node.
A very crude translation to new menu system would be:
<?php $items['node/%'] = array( 'access callback' => 'node_access', 'access arguments' => array('view', '$node'), 'page callback' => 'node_view_page', 'page arguments' => array('$node'), 'the argument that specifies $node' => 1, 'object type to load for argument 1' => 'node', );?>
We needed to quote $node because the new menu system does not run this definition on every page request -- but based on the above it can find out how to produce it because
all the menu system needs to know is that we want to perform a load of an object identified by a specific argument and this object happens to be a node
and we specified the argument and the object type both. We could actually use this notation, but it's simply not nice. Our first observation is that 'the argument that specifies $node' => 1, could be moved in the place of '$node':
<?php $items['node/%'] = array( 'access callback' => 'node_access', 'access arguments' => array('view', 1), 'page callback' => 'node_view_page', 'page arguments' => array(1), 'object type to load for argument 1' => 'node', );?>
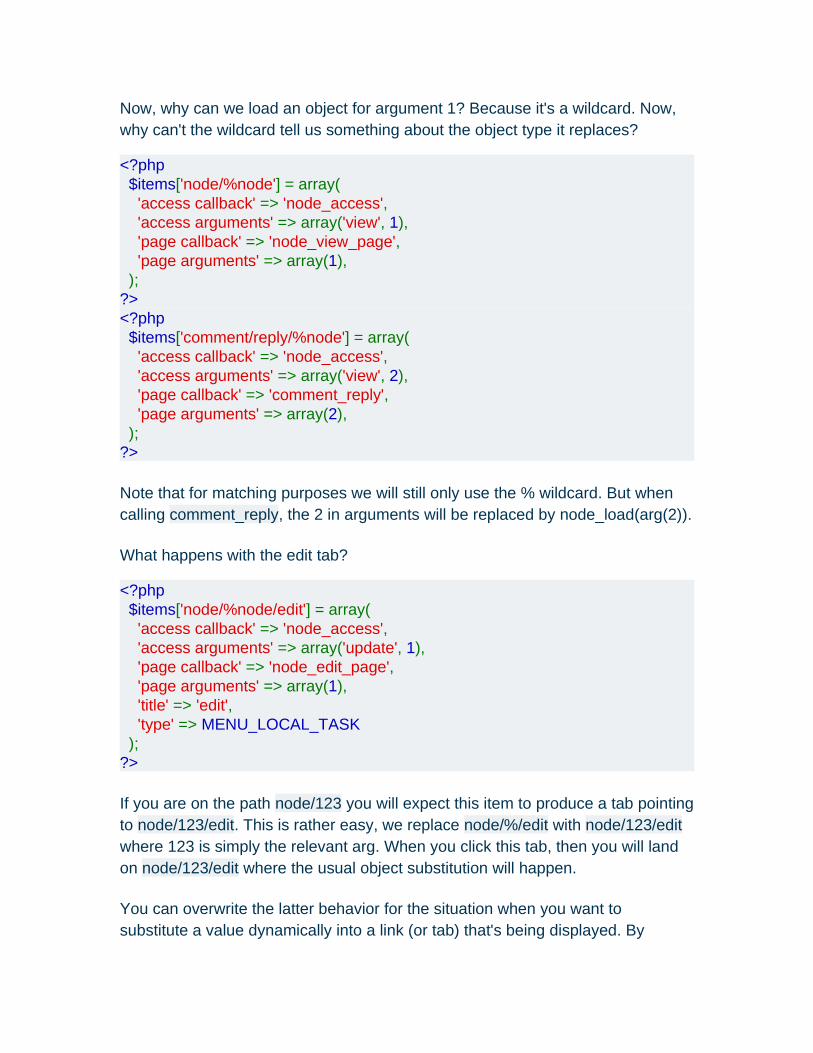
Now, why can we load an object for argument 1? Because it's a wildcard. Now, why can't the wildcard tell us something about the object type it replaces?
<?php $items['node/%node'] = array( 'access callback' => 'node_access', 'access arguments' => array('view', 1), 'page callback' => 'node_view_page', 'page arguments' => array(1), );?><?php $items['comment/reply/%node'] = array( 'access callback' => 'node_access', 'access arguments' => array('view', 2), 'page callback' => 'comment_reply', 'page arguments' => array(2), );?>
Note that for matching purposes we will still only use the % wildcard. But when calling comment_reply, the 2 in arguments will be replaced by node_load(arg(2)).
What happens with the edit tab?
<?php $items['node/%node/edit'] = array( 'access callback' => 'node_access', 'access arguments' => array('update', 1), 'page callback' => 'node_edit_page', 'page arguments' => array(1), 'title' => 'edit', 'type' => MENU_LOCAL_TASK );?>
If you are on the path node/123 you will expect this item to produce a tab pointing to node/123/edit. This is rather easy, we replace node/%/edit with node/123/edit where 123 is simply the relevant arg. When you click this tab, then you will land on node/123/edit where the usual object substitution will happen.
You can overwrite the latter behavior for the situation when you want to substitute a value dynamically into a link (or tab) that's being displayed. By
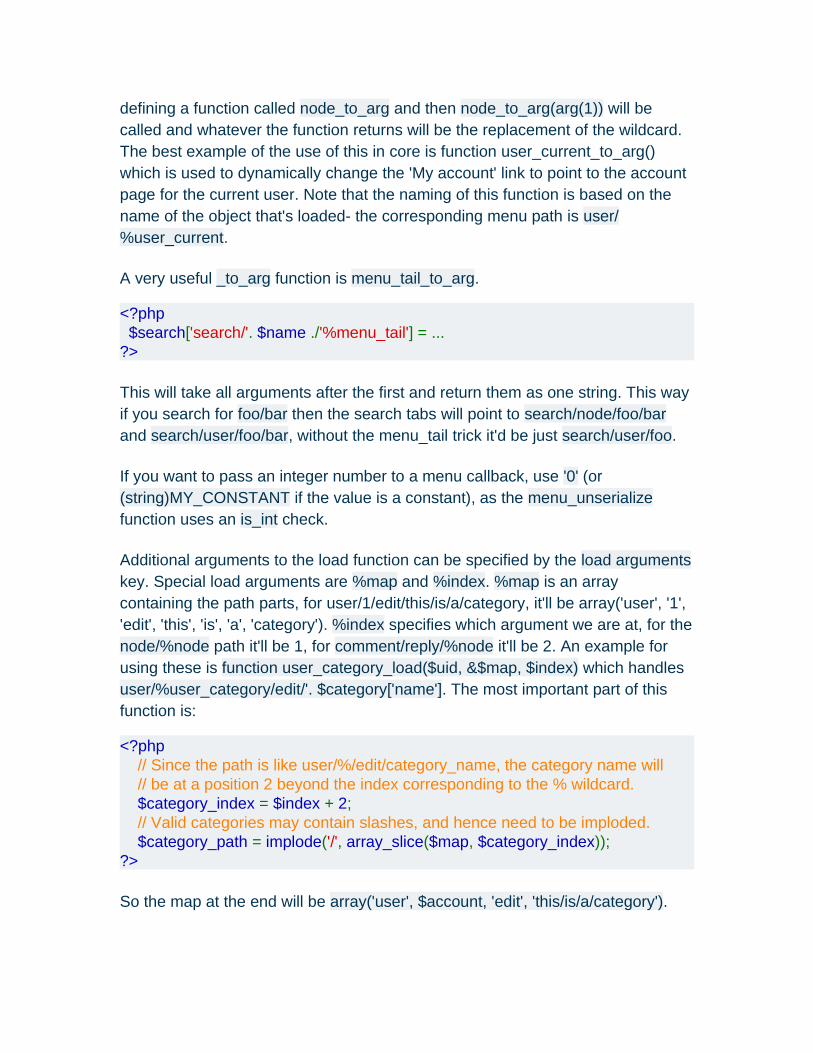
defining a function called node_to_arg and then node_to_arg(arg(1)) will be called and whatever the function returns will be the replacement of the wildcard. The best example of the use of this in core is function user_current_to_arg() which is used to dynamically change the 'My account' link to point to the account page for the current user. Note that the naming of this function is based on the name of the object that's loaded- the corresponding menu path is user/%user_current.
A very useful _to_arg function is menu_tail_to_arg.
<?php $search['search/'. $name ./'%menu_tail'] = ...?>
This will take all arguments after the first and return them as one string. This way if you search for foo/bar then the search tabs will point to search/node/foo/bar and search/user/foo/bar, without the menu_tail trick it'd be just search/user/foo.
If you want to pass an integer number to a menu callback, use '0' (or (string)MY_CONSTANT if the value is a constant), as the menu_unserialize function uses an is_int check.
Additional arguments to the load function can be specified by the load arguments key. Special load arguments are %map and %index. %map is an array containing the path parts, for user/1/edit/this/is/a/category, it'll be array('user', '1', 'edit', 'this', 'is', 'a', 'category'). %index specifies which argument we are at, for the node/%node path it'll be 1, for comment/reply/%node it'll be 2. An example for using these is function user_category_load($uid, &$map, $index) which handles user/%user_category/edit/'. $category['name']. The most important part of this function is:
<?php // Since the path is like user/%/edit/category_name, the category name will // be at a position 2 beyond the index corresponding to the % wildcard. $category_index = $index + 2; // Valid categories may contain slashes, and hence need to be imploded. $category_path = implode('/', array_slice($map, $category_index));?>
So the map at the end will be array('user', $account, 'edit', 'this/is/a/category').

Menu system overview
• View • Revisions
In hook_menu, you define a huge menu array which is an associative array. The keys are Drupal paths (with a twist, see the wildcard page for more), the values are menu entries. One menu entry is again an associative array. A typical entry is:
<?php $items['node/%node'] = array( 'title' => 'View', 'page callback' => 'node_page_view', 'page arguments' => array(1), 'access callback' => 'node_access', 'access arguments' => array('view', 1), 'type' => MENU_CALLBACK, );?>
The menu builder collects these, applies inheritance rules and saves each entry in its row in the menu tables.
When you open a page, then the system will generate the ancestors of the given path, and ask the database for the menu entry of the ancestor which best fits this path. Then it calls the access callback to determine access. If it's given, then it hands over execution to the page callback.
The system determines that it has not found a path if no item can be retrieved from the database or if the node can not be loaded (see dynamic arguments replacements). Access denied is solely determined by the access callback/arguments.
Menu item title and description callbacks, localization
• View • Revisions
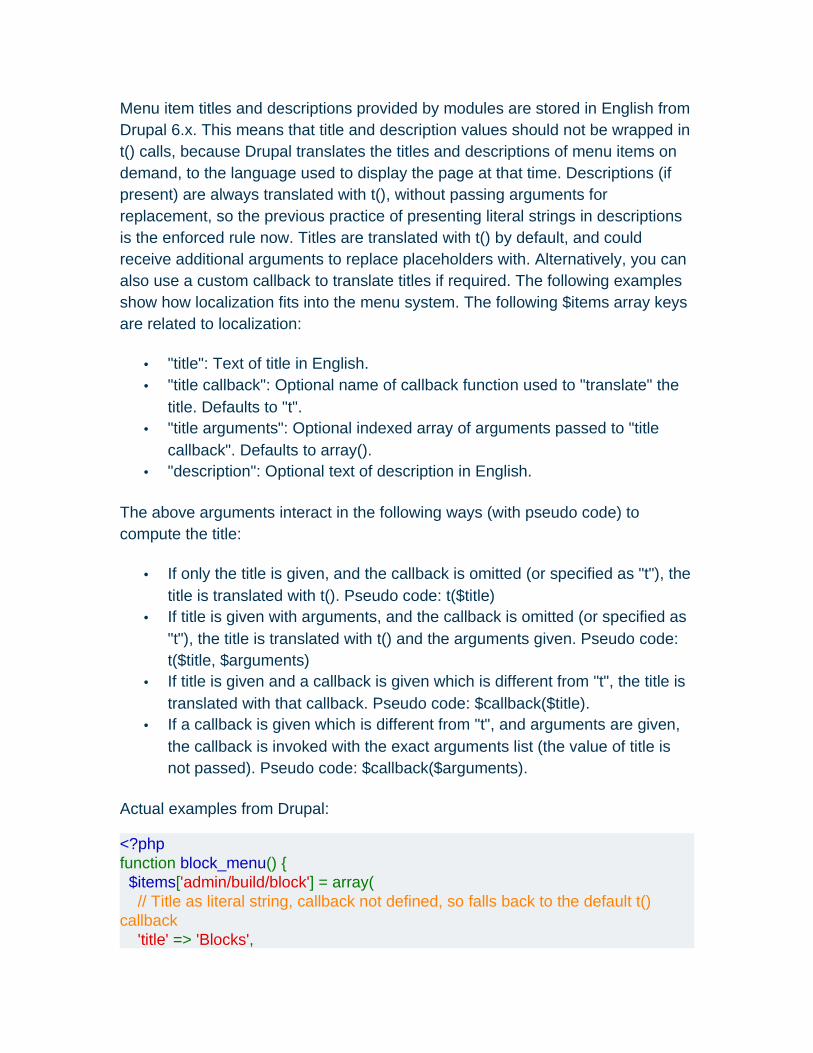
Menu item titles and descriptions provided by modules are stored in English from Drupal 6.x. This means that title and description values should not be wrapped in t() calls, because Drupal translates the titles and descriptions of menu items on demand, to the language used to display the page at that time. Descriptions (if present) are always translated with t(), without passing arguments for replacement, so the previous practice of presenting literal strings in descriptions is the enforced rule now. Titles are translated with t() by default, and could receive additional arguments to replace placeholders with. Alternatively, you can also use a custom callback to translate titles if required. The following examples show how localization fits into the menu system. The following $items array keys are related to localization:
• "title": Text of title in English. • "title callback": Optional name of callback function used to "translate" the
title. Defaults to "t". • "title arguments": Optional indexed array of arguments passed to "title
callback". Defaults to array(). • "description": Optional text of description in English.
The above arguments interact in the following ways (with pseudo code) to compute the title:
• If only the title is given, and the callback is omitted (or specified as "t"), the title is translated with t(). Pseudo code: t($title)
• If title is given with arguments, and the callback is omitted (or specified as "t"), the title is translated with t() and the arguments given. Pseudo code: t($title, $arguments)
• If title is given and a callback is given which is different from "t", the title is translated with that callback. Pseudo code: $callback($title).
• If a callback is given which is different from "t", and arguments are given, the callback is invoked with the exact arguments list (the value of title is not passed). Pseudo code: $callback($arguments).
Actual examples from Drupal:
<?phpfunction block_menu() { $items['admin/build/block'] = array( // Title as literal string, callback not defined, so falls back to the default t() callback 'title' => 'Blocks',
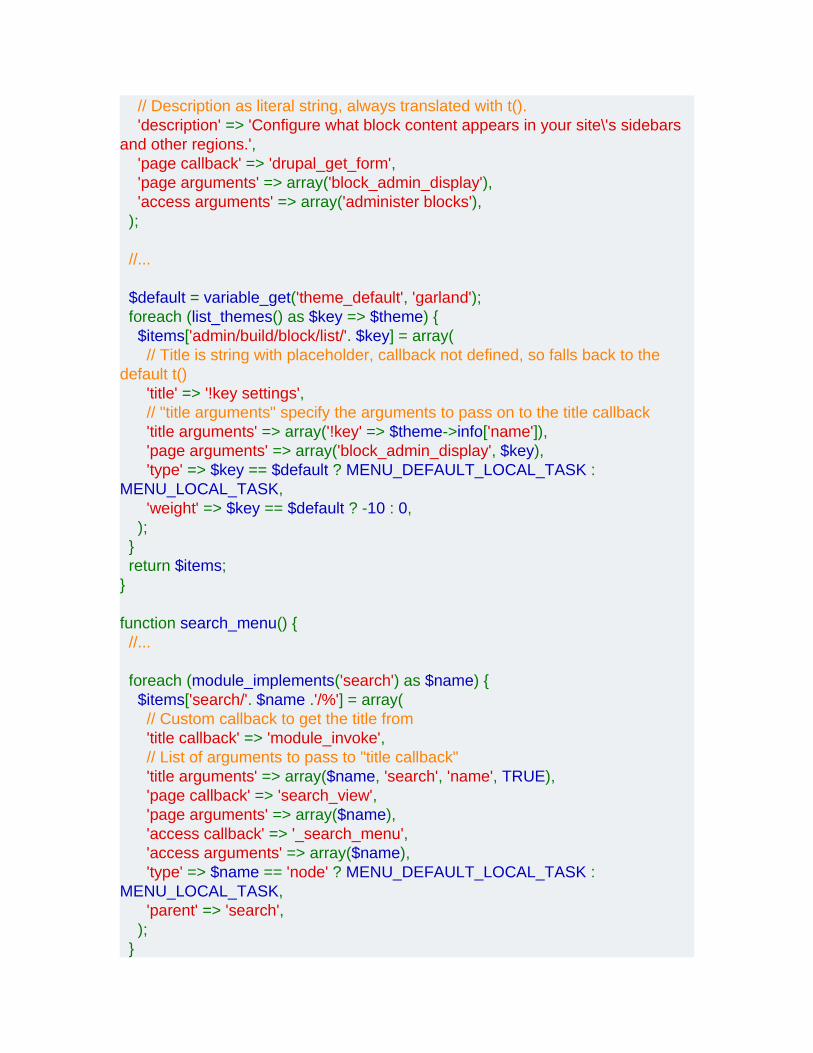
// Description as literal string, always translated with t(). 'description' => 'Configure what block content appears in your site\'s sidebars and other regions.', 'page callback' => 'drupal_get_form', 'page arguments' => array('block_admin_display'), 'access arguments' => array('administer blocks'), );
//...
$default = variable_get('theme_default', 'garland'); foreach (list_themes() as $key => $theme) { $items['admin/build/block/list/'. $key] = array( // Title is string with placeholder, callback not defined, so falls back to the default t() 'title' => '!key settings', // "title arguments" specify the arguments to pass on to the title callback 'title arguments' => array('!key' => $theme->info['name']), 'page arguments' => array('block_admin_display', $key), 'type' => $key == $default ? MENU_DEFAULT_LOCAL_TASK : MENU_LOCAL_TASK, 'weight' => $key == $default ? -10 : 0, ); } return $items;}
function search_menu() { //...
foreach (module_implements('search') as $name) { $items['search/'. $name .'/%'] = array( // Custom callback to get the title from 'title callback' => 'module_invoke', // List of arguments to pass to "title callback" 'title arguments' => array($name, 'search', 'name', TRUE), 'page callback' => 'search_view', 'page arguments' => array($name), 'access callback' => '_search_menu', 'access arguments' => array($name), 'type' => $name == 'node' ? MENU_DEFAULT_LOCAL_TASK : MENU_LOCAL_TASK, 'parent' => 'search', ); }

return $items}?>
Page handler include files
• View • Revisions
The menu system introduced in Drupal 6 also supports conditional loading of an extra include file for each menu entry. That allows module developers to separate off their page handler functions to separate files that are loaded only as-needed. In many modules the majority of the code is page handlers, but on any given page request only one page handler is called in all of Drupal. Separating those functions out to conditional files can save a great deal of overhead from parsing functions that will never be used.
Page handler includes
To tell Drupal that a page handler lives in a separate include file, use the "file" array key. For example:
<?php $items['admin'] = array( 'title' => 'Administer', 'access arguments' => array('access administration pages'), 'page callback' => 'system_main_admin_page', 'weight' => 9, 'file' => 'system.admin.inc', );?>
The above directive, taken from system_menu(), tells Drupal to include the file "system.admin.inc", located in the same directory as the system.module file, before calling system_main_admin_page(). system_main_admin_page() can then be placed in system.admin.inc, so it never has to be parsed unless it is needed.
Form page handlers

A great many page handlers are actually just calls to drupal_get_form(), with the ID of the form for that page as a callback argument. That is especially true for system configuration pages. drupal_get_form() is always available, of course, but the form callback function can then be placed in a separate include file. Remember to move the form definition function as well as its validate and submit handlers, since they will only be needed if the page for that form is loaded.
Page handlers provided by other modules
In some cases, you will want to use a page callback provided by a different module. In that case, you will need to also specify a "file path" key, like so (taken from node_menu()):
<?php $items['admin/content'] = array( 'title' => 'Content management', 'description' => "Manage your site's content.", 'position' => 'left', 'weight' => -10, 'page callback' => 'system_admin_menu_block_page', 'access arguments' => array('administer site configuration'), 'file' => 'system.admin.inc', 'file path' => drupal_get_path('module', 'system'), );?>
Drupal will include the file located at "file path"/"file", with the file path based on the Drupal base directory. If no file path is specified, the path of the module defining the callback is used. That is:
<?phpexample_menu() { $items['example/path'] = array( 'page callback' => 'example_page', 'file' => 'example.pages.inc', 'file path' => drupal_get_path('module', 'example'), );}?>
The "file path" key in the above example is unnecessary, as that is what Drupal does by default.
Inheritance
If a menu item does not define a page callback, then it will inherit the callback from its parent. If it does so, it will also inherit the file directives from its parent. Since they define how Drupal should access the callback function, that should make intuitive sense.
Best practices
Module developers are free to split off page handlers for their modules however they choose. However, the following guidelines and standards are recommended:
• Any module that has more than ~50 lines of code for page handler functions (including form handling functions if applicable) should split them off into a separate file. That reduces the overhead for PHP when loading modules, and therefore speeds up every single request on the site.
• Page include files should be named in the form modulename.key.inc, where "modulename" is the name of the module and "key" is a one-word descriptive term for the types of page handlers it includes.
• For most modules, splitting page handlers into two files -- example.admin.inc (for administrator-only pages) and example.pages.inc (for pages accessible by non-administrator users) -- is sufficient, and is the recommended practice. If a module has no non-administrator pages, it should just have a single example.admin.inc file. If a module has no administrator-only pages, it should just have a single example.pages.inc file.
• Modules that have a large number of page handlers may choose to separate out page handlers even further. If so, each file should be grouped logically by function (for instance, admin pages related to theming, admin pages related to logging, other admin pages, and user-accessible pages) and clearly marked. Remember that splitting the module's page handlers up too far makes maintenance more difficult, and only one page handler include file is ever loaded regardless of how finely-grained the handler functions are separated.
Upgrading to the new menu system
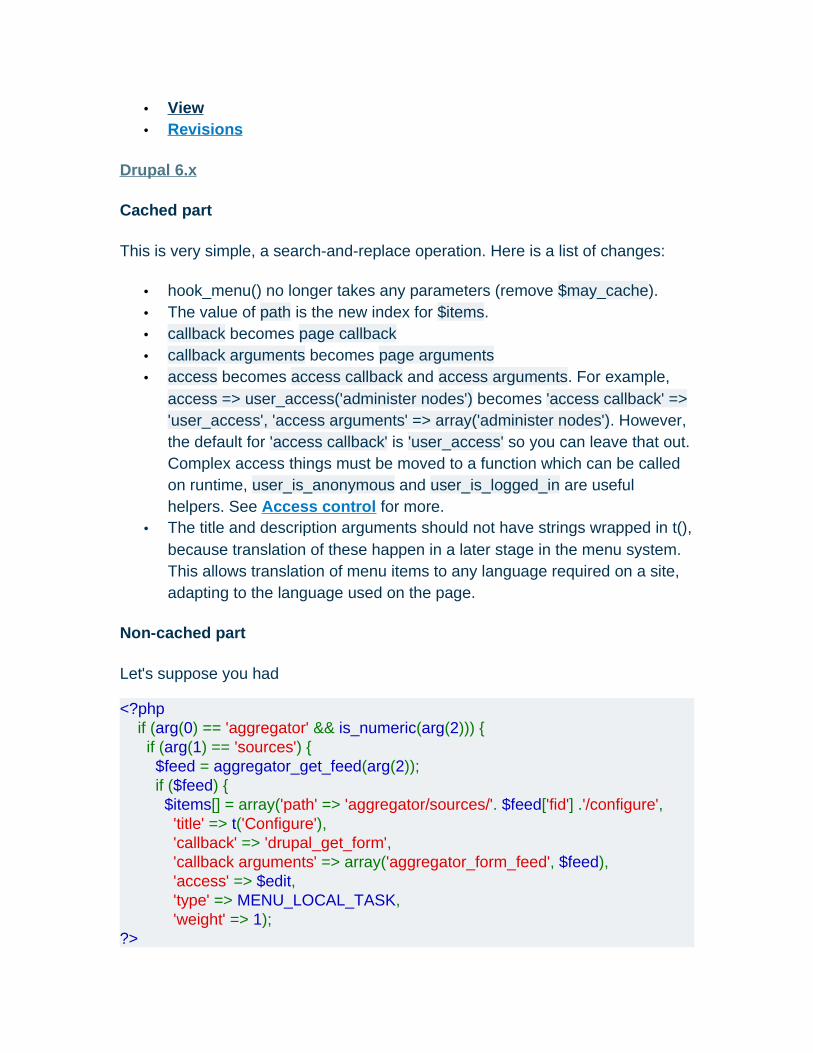
• View • Revisions
Drupal 6.x
Cached part
This is very simple, a search-and-replace operation. Here is a list of changes:
• hook_menu() no longer takes any parameters (remove $may_cache). • The value of path is the new index for $items. • callback becomes page callback • callback arguments becomes page arguments • access becomes access callback and access arguments. For example,
access => user_access('administer nodes') becomes 'access callback' => 'user_access', 'access arguments' => array('administer nodes'). However, the default for 'access callback' is 'user_access' so you can leave that out. Complex access things must be moved to a function which can be called on runtime, user_is_anonymous and user_is_logged_in are useful helpers. See Access control for more.
• The title and description arguments should not have strings wrapped in t(), because translation of these happen in a later stage in the menu system. This allows translation of menu items to any language required on a site, adapting to the language used on the page.
Non-cached part
Let's suppose you had
<?php if (arg(0) == 'aggregator' && is_numeric(arg(2))) { if (arg(1) == 'sources') { $feed = aggregator_get_feed(arg(2)); if ($feed) { $items[] = array('path' => 'aggregator/sources/'. $feed['fid'] .'/configure', 'title' => t('Configure'), 'callback' => 'drupal_get_form', 'callback arguments' => array('aggregator_form_feed', $feed), 'access' => $edit, 'type' => MENU_LOCAL_TASK, 'weight' => 1);?>
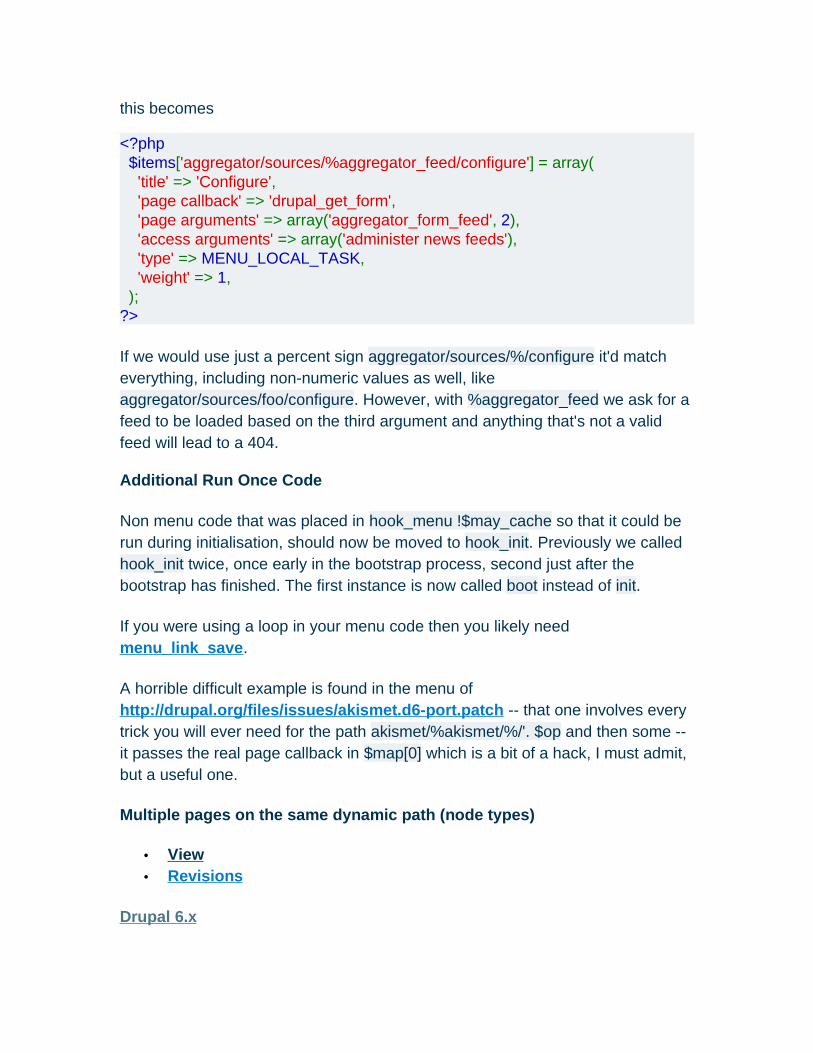
this becomes
<?php $items['aggregator/sources/%aggregator_feed/configure'] = array( 'title' => 'Configure', 'page callback' => 'drupal_get_form', 'page arguments' => array('aggregator_form_feed', 2), 'access arguments' => array('administer news feeds'), 'type' => MENU_LOCAL_TASK, 'weight' => 1, );?>
If we would use just a percent sign aggregator/sources/%/configure it'd match everything, including non-numeric values as well, like aggregator/sources/foo/configure. However, with %aggregator_feed we ask for a feed to be loaded based on the third argument and anything that's not a valid feed will lead to a 404.
Additional Run Once Code
Non menu code that was placed in hook_menu !$may_cache so that it could be run during initialisation, should now be moved to hook_init. Previously we called hook_init twice, once early in the bootstrap process, second just after the bootstrap has finished. The first instance is now called boot instead of init.
If you were using a loop in your menu code then you likely need menu_link_save.
A horrible difficult example is found in the menu of http://drupal.org/files/issues/akismet.d6-port.patch -- that one involves every trick you will ever need for the path akismet/%akismet/%/'. $op and then some -- it passes the real page callback in $map[0] which is a bit of a hack, I must admit, but a useful one.
Multiple pages on the same dynamic path (node types)
• View • Revisions
Drupal 6.x
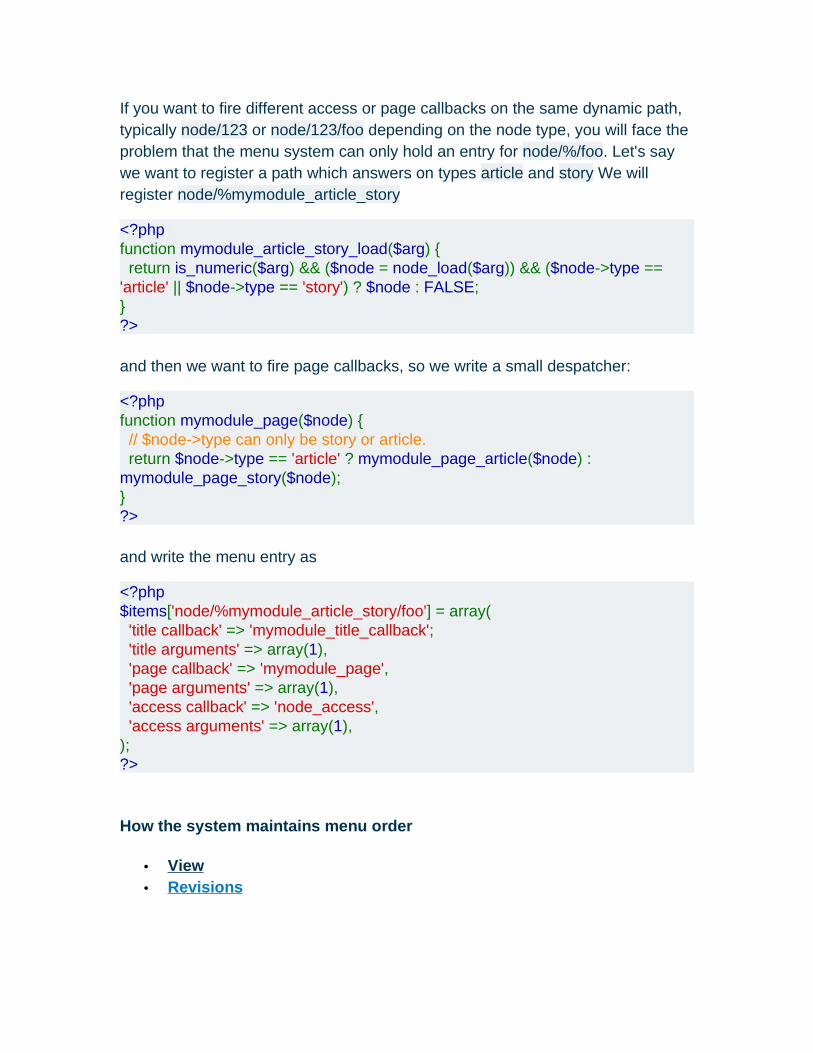
If you want to fire different access or page callbacks on the same dynamic path, typically node/123 or node/123/foo depending on the node type, you will face the problem that the menu system can only hold an entry for node/%/foo. Let's say we want to register a path which answers on types article and story We will register node/%mymodule_article_story
<?phpfunction mymodule_article_story_load($arg) { return is_numeric($arg) && ($node = node_load($arg)) && ($node->type == 'article' || $node->type == 'story') ? $node : FALSE;}?>
and then we want to fire page callbacks, so we write a small despatcher:
<?phpfunction mymodule_page($node) { // $node->type can only be story or article. return $node->type == 'article' ? mymodule_page_article($node) : mymodule_page_story($node);}?>
and write the menu entry as
<?php$items['node/%mymodule_article_story/foo'] = array( 'title callback' => 'mymodule_title_callback'; 'title arguments' => array(1), 'page callback' => 'mymodule_page', 'page arguments' => array(1), 'access callback' => 'node_access', 'access arguments' => array(1),);?>
How the system maintains menu order
• View • Revisions
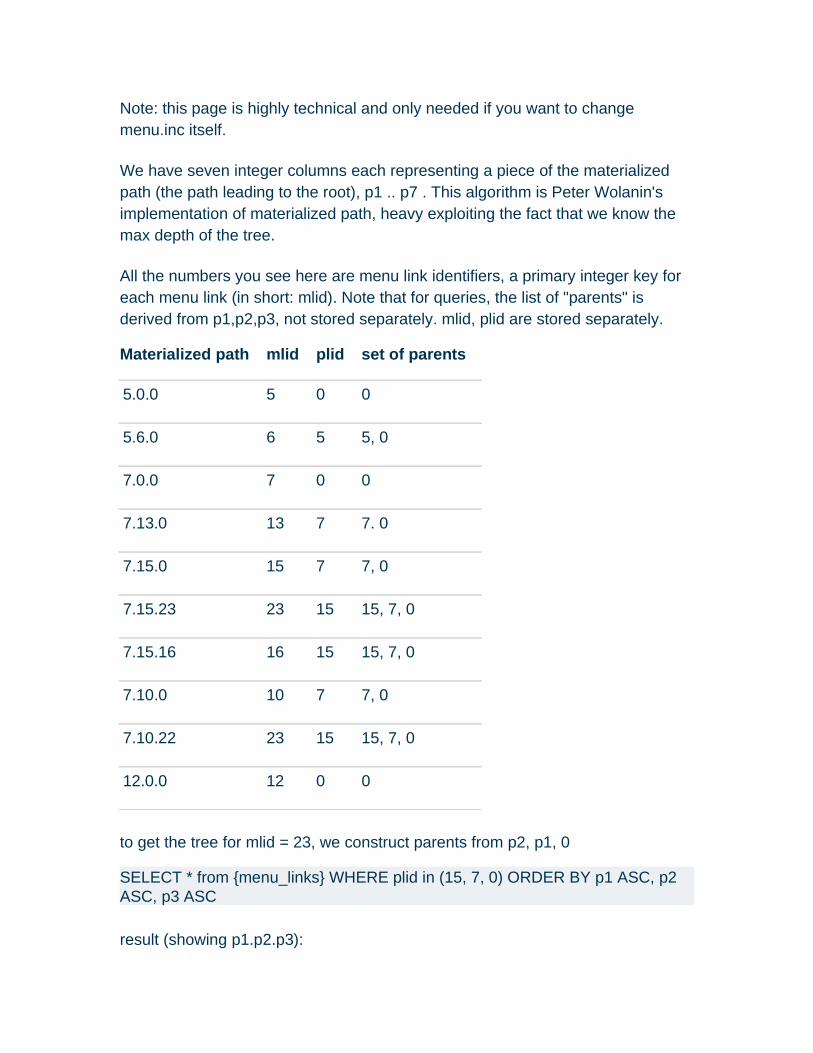
Note: this page is highly technical and only needed if you want to change menu.inc itself.
We have seven integer columns each representing a piece of the materialized path (the path leading to the root), p1 .. p7 . This algorithm is Peter Wolanin's implementation of materialized path, heavy exploiting the fact that we know the max depth of the tree.
All the numbers you see here are menu link identifiers, a primary integer key for each menu link (in short: mlid). Note that for queries, the list of "parents" is derived from p1,p2,p3, not stored separately. mlid, plid are stored separately.
Materialized path mlid plid set of parents
5.0.0 5 0 0
5.6.0 6 5 5, 0
7.0.0 7 0 0
7.13.0 13 7 7. 0
7.15.0 15 7 7, 0
7.15.23 23 15 15, 7, 0
7.15.16 16 15 15, 7, 0
7.10.0 10 7 7, 0
7.10.22 23 15 15, 7, 0
12.0.0 12 0 0
to get the tree for mlid = 23, we construct parents from p2, p1, 0
SELECT * from {menu_links} WHERE plid in (15, 7, 0) ORDER BY p1 ASC, p2 ASC, p3 ASC
result (showing p1.p2.p3):

5.0.07.0.07.10.07.13.07.15.07.15.167.15.2312.0.0
We need to sort each subtree by weight, title in PHP but that's an accetable compromise otherwise each edit would need heavy renumbering.
If we did the a select on the whole table to get the full tree:
5.0.05.6.07.0.07.10.07.10.227.13.07.15.07.15.167.15.2312.0.0
Now inserting is simple and so is reparenting. For example, if wereparent 5.0.0 under 7.0.0 we get: Materialized path mlid plid set of parents
7.0.0 7 0 0
7.5.0 5 7 7, 0
7.5.6 6 5 7, 5, 0
7.13.0 13 7 7. 0
7.15.0 15 7 7, 0
7.15.23 23 15 15, 7, 0
7.15.16 16 15 15, 7, 0

7.10.0 10 7 7, 0
7.10.22 23 15 15, 7, 0
12.0.0 12 0 0
note- plid only changed for one item (mlid = 5, plid was 0, now 7)- like the current book module.
All the children get updated with a single query like
SET p1 = 7, p2 = p1, p3 = p2 WHERE p1 = 5 and p2 != 0
Thus, in general, reparenting involves two steps:
1) Put in the new value in the 'plid' column and p1...p6 columns for the repareted item (involves one UPDATE query)
2) run an update for the materialized path columns for all children of the reparented item to reflect the path that their list of parents (path to root or materialzed path) has changed.
When and how to use menu_links
• View • Revisions
Drupal 6.x
The menu_links contains the links as they appear in the navigation block (or any other menu block). This is in contrast to the menu_router table which contains information about callbacks.
In general, only put an entry in hook_menu if said entry has different callbacks. Because of this, if you put a loop in there with just the title changing but the same access and page callbacks, it's very likely that you wanted to use menu_link_save instead (maybe with a title callback and/or a load function).
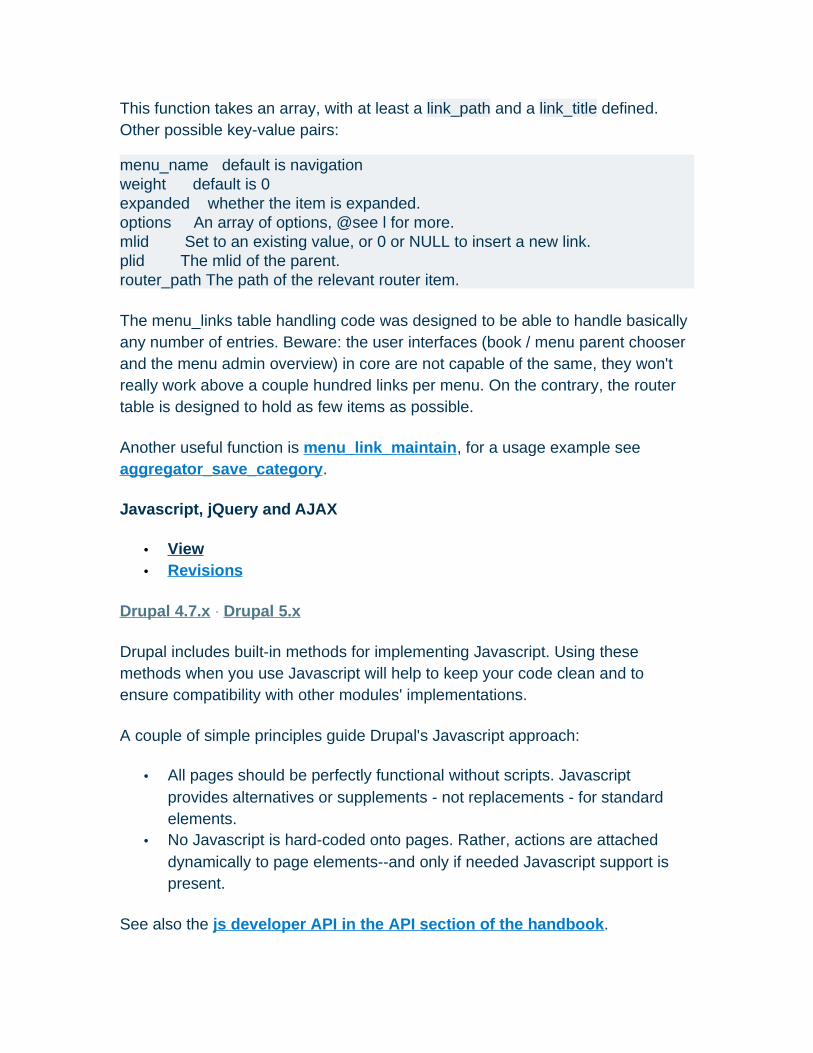
This function takes an array, with at least a link_path and a link_title defined. Other possible key-value pairs:
menu_name default is navigationweight default is 0expanded whether the item is expanded.options An array of options, @see l for more.mlid Set to an existing value, or 0 or NULL to insert a new link.plid The mlid of the parent.router_path The path of the relevant router item.
The menu_links table handling code was designed to be able to handle basically any number of entries. Beware: the user interfaces (book / menu parent chooser and the menu admin overview) in core are not capable of the same, they won't really work above a couple hundred links per menu. On the contrary, the router table is designed to hold as few items as possible.
Another useful function is menu_link_maintain, for a usage example see aggregator_save_category.
Javascript, jQuery and AJAX
• View • Revisions
Drupal 4.7.x · Drupal 5.x
Drupal includes built-in methods for implementing Javascript. Using these methods when you use Javascript will help to keep your code clean and to ensure compatibility with other modules' implementations.
A couple of simple principles guide Drupal's Javascript approach:
• All pages should be perfectly functional without scripts. Javascript provides alternatives or supplements - not replacements - for standard elements.
• No Javascript is hard-coded onto pages. Rather, actions are attached dynamically to page elements--and only if needed Javascript support is present.
See also the js developer API in the API section of the handbook.

• Javascript page snippets
javascript utility modules
• jQuery Hints and Snippets
• Using jQuery
Javascript page snippets
• View • Revisions
Drupal pages can contain javascript code as well as PHP. Utility modules are available to help you in developing Javascript on your site. More info on using Javascript with Drupal here. The pages below contain javascript that you may find useful.
Getting any content as JSON
Input Validator
Make sidebar blocks collapseable.
Two columns on pages with lists of nodes
Valid XHTML Link Popups using jQuery
If you want to make your pages dynamically loaded via AJAX and do not want to rewrite everything to be converted to JSON, there is a way to get any content you
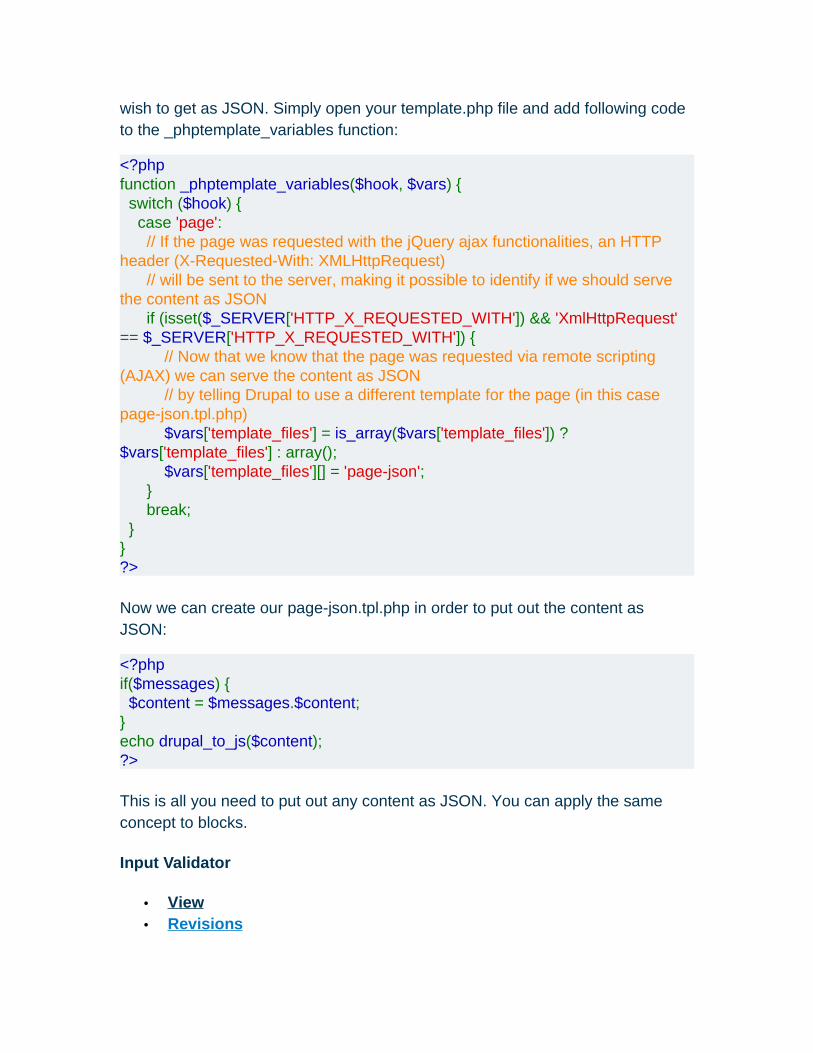
wish to get as JSON. Simply open your template.php file and add following code to the _phptemplate_variables function:
<?phpfunction _phptemplate_variables($hook, $vars) { switch ($hook) { case 'page': // If the page was requested with the jQuery ajax functionalities, an HTTP header (X-Requested-With: XMLHttpRequest) // will be sent to the server, making it possible to identify if we should serve the content as JSON if (isset($_SERVER['HTTP_X_REQUESTED_WITH']) && 'XmlHttpRequest' == $_SERVER['HTTP_X_REQUESTED_WITH']) { // Now that we know that the page was requested via remote scripting (AJAX) we can serve the content as JSON // by telling Drupal to use a different template for the page (in this case page-json.tpl.php) $vars['template_files'] = is_array($vars['template_files']) ? $vars['template_files'] : array(); $vars['template_files'][] = 'page-json'; } break; }}?>
Now we can create our page-json.tpl.php in order to put out the content as JSON:
<?phpif($messages) { $content = $messages.$content;}echo drupal_to_js($content);?>
This is all you need to put out any content as JSON. You can apply the same concept to blocks.
Input Validator
• View • Revisions
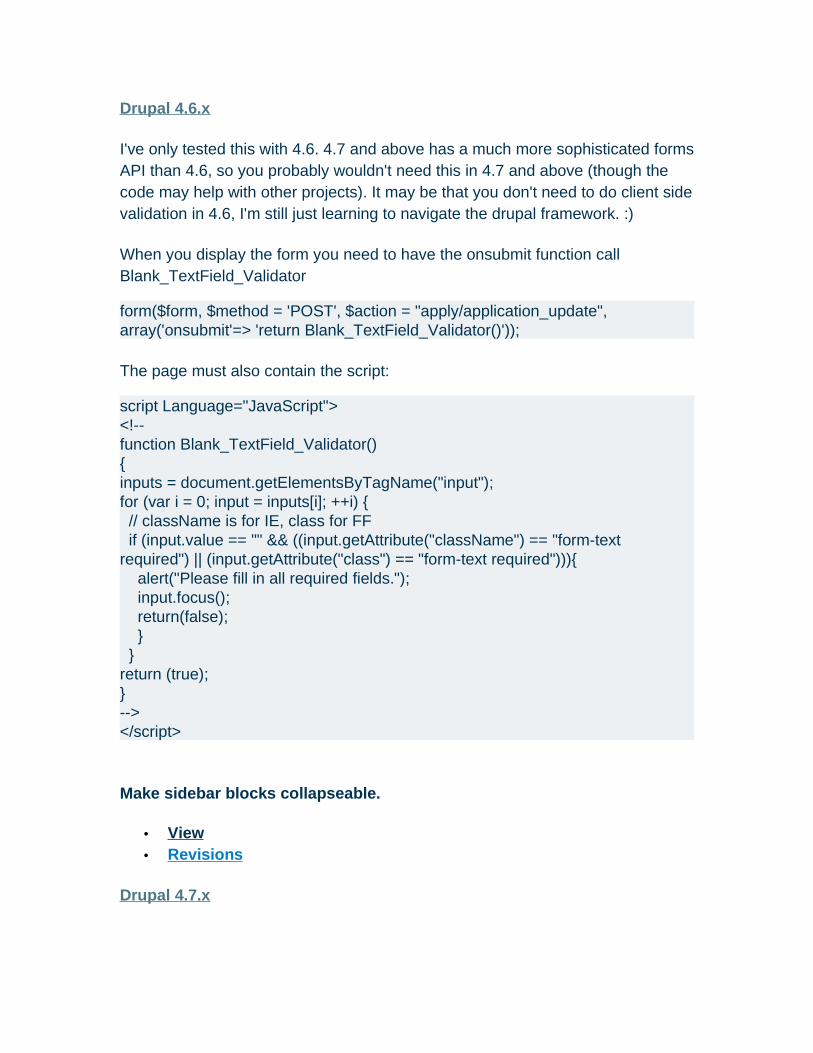
Drupal 4.6.x
I've only tested this with 4.6. 4.7 and above has a much more sophisticated forms API than 4.6, so you probably wouldn't need this in 4.7 and above (though the code may help with other projects). It may be that you don't need to do client side validation in 4.6, I'm still just learning to navigate the drupal framework. :)
When you display the form you need to have the onsubmit function call Blank_TextField_Validator
form($form, $method = 'POST', $action = "apply/application_update", array('onsubmit'=> 'return Blank_TextField_Validator()'));
The page must also contain the script:
script Language="JavaScript"><!-- function Blank_TextField_Validator(){inputs = document.getElementsByTagName("input");for (var i = 0; input = inputs[i]; ++i) { // className is for IE, class for FF if (input.value == "" && ((input.getAttribute("className") == "form-text required") || (input.getAttribute("class") == "form-text required"))){ alert("Please fill in all required fields."); input.focus(); return(false); } }return (true);}--></script>
Make sidebar blocks collapseable.
• View • Revisions
Drupal 4.7.x
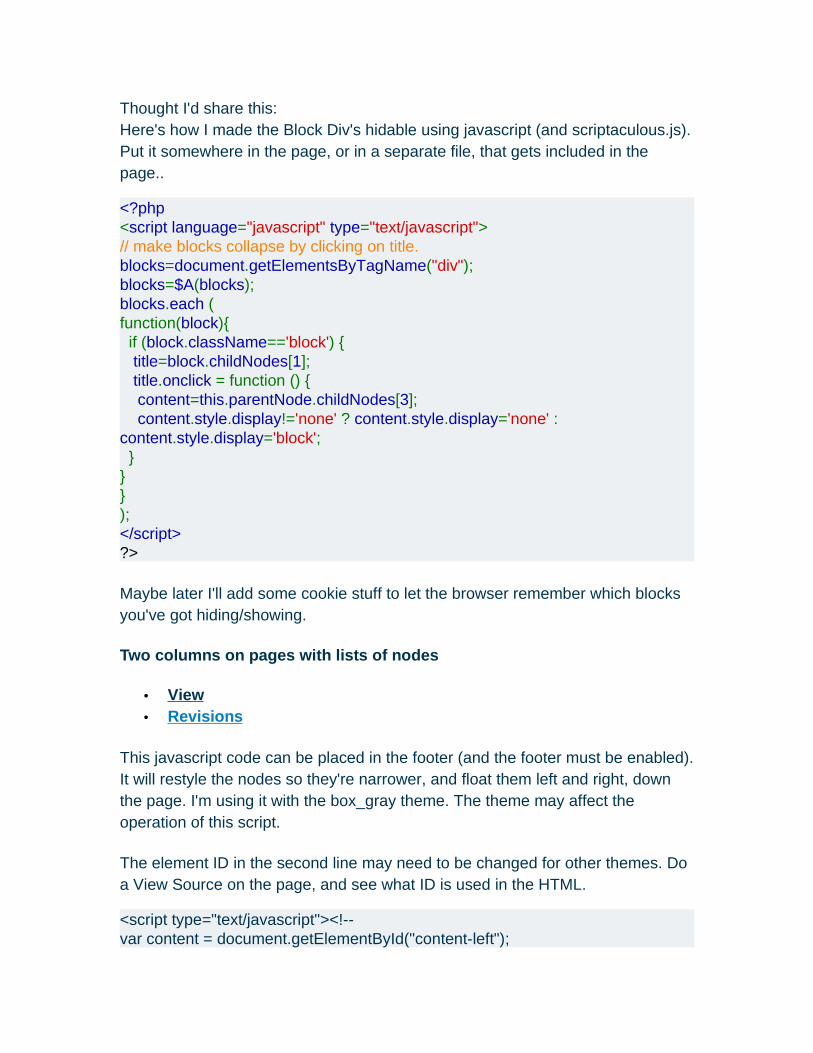
Thought I'd share this:Here's how I made the Block Div's hidable using javascript (and scriptaculous.js). Put it somewhere in the page, or in a separate file, that gets included in the page..
<?php<script language="javascript" type="text/javascript">// make blocks collapse by clicking on title.blocks=document.getElementsByTagName("div");blocks=$A(blocks);blocks.each (function(block){ if (block.className=='block') { title=block.childNodes[1]; title.onclick = function () { content=this.parentNode.childNodes[3]; content.style.display!='none' ? content.style.display='none' : content.style.display='block'; }}});</script>?>
Maybe later I'll add some cookie stuff to let the browser remember which blocks you've got hiding/showing.
Two columns on pages with lists of nodes
• View • Revisions
This javascript code can be placed in the footer (and the footer must be enabled). It will restyle the nodes so they're narrower, and float them left and right, down the page. I'm using it with the box_gray theme. The theme may affect the operation of this script.
The element ID in the second line may need to be changed for other themes. Do a View Source on the page, and see what ID is used in the HTML.
<script type="text/javascript"><!-- var content = document.getElementById("content-left");

var nodes = content.getElementsByTagName("div");var nodeNodes = new Array();for(i=j=0;i<nodes.length;i++){ if (nodes[i].className=='node') nodeNodes[j++] = nodes[i];}if (nodeNodes.length > 1){ for(i=0;i<nodeNodes.length;i++) { theNode = nodeNodes[i]; theStyle = theNode.style;if ( (i%2)==0 ){theStyle.cssFloat = theStyle.styleFloat = "left";theStyle.width = "45%";theStyle.clear = "both";}else{theStyle.cssFloat = theStyle.styleFloat = "right";theStyle.width = "45%";} }}// --></script>
Valid XHTML Link Popups using jQuery
• View • Revisions
Drupal 4.7.x · Drupal 5.x
Instead of using a Link Target which breaks XHTML 1.1 validity, you can create a popup link using jQuery.
To do this, you can use XPATH in jQuery functions
Now, in your template file (e.g. node.tpl.php) insert this code:
<?phpdrupal_add_js ('$(document).ready(function(){$("a[@href^=http:]").click(function()
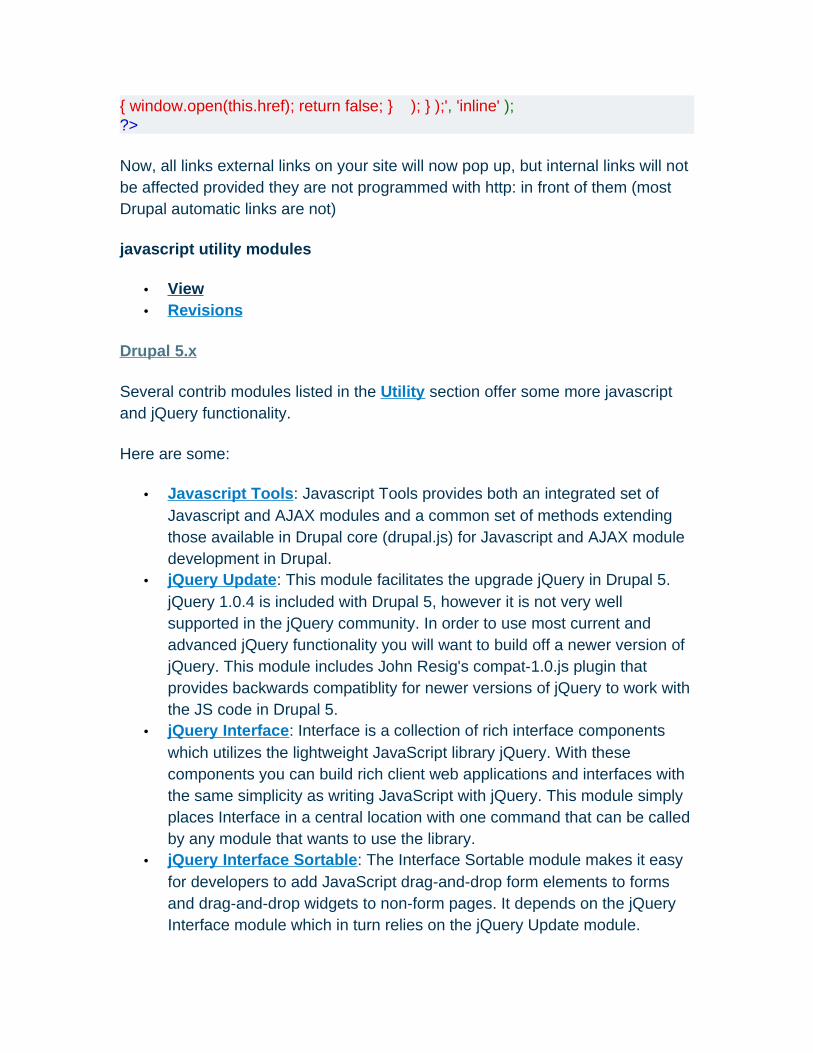
{ window.open(this.href); return false; } ); } );', 'inline' );?>
Now, all links external links on your site will now pop up, but internal links will not be affected provided they are not programmed with http: in front of them (most Drupal automatic links are not)
javascript utility modules
• View • Revisions
Drupal 5.x
Several contrib modules listed in the Utility section offer some more javascript and jQuery functionality.
Here are some:
• Javascript Tools : Javascript Tools provides both an integrated set of Javascript and AJAX modules and a common set of methods extending those available in Drupal core (drupal.js) for Javascript and AJAX module development in Drupal.
• jQuery Update : This module facilitates the upgrade jQuery in Drupal 5. jQuery 1.0.4 is included with Drupal 5, however it is not very well supported in the jQuery community. In order to use most current and advanced jQuery functionality you will want to build off a newer version of jQuery. This module includes John Resig's compat-1.0.js plugin that provides backwards compatiblity for newer versions of jQuery to work with the JS code in Drupal 5.
• jQuery Interface : Interface is a collection of rich interface components which utilizes the lightweight JavaScript library jQuery. With these components you can build rich client web applications and interfaces with the same simplicity as writing JavaScript with jQuery. This module simply places Interface in a central location with one command that can be called by any module that wants to use the library.
• jQuery Interface Sortable : The Interface Sortable module makes it easy for developers to add JavaScript drag-and-drop form elements to forms and drag-and-drop widgets to non-form pages. It depends on the jQuery Interface module which in turn relies on the jQuery Update module.

• S/P Ajax : this module introduces effects using the increasingly popular Scriptaculous library, built on Prototype. S/P Ajax includes numerous effects, including draggable page elements, pulsing message, and even expanding menus (through the helper module S/P Magic Menus).
• AHAH Forms Framework : Ahah forms is a utility module, for adding Ajax/javascript driven incremental page reloading, without needing to write any Javascript.
• Spry Framework : Adobe JavaScript library for web designers that provides functionality that allows designers to build pages that provide a richer experience for their users. It is designed to bring Ajax to the web design community who can benefit from Ajax, but are not well served by other frameworks.
• : and more to come...
jQuery Hints and Snippets
• View • Revisions
Drupal 5.x
Developing sites that use Javascript has been made even easier with the inclusion of jQuery into core as of Drupal 5.0. jQuery syntax is easy and powerful, and a robust library of plug-ins means a lot of the effects you could ever dream to include in your modules and sites are already supported.
Manipulating the Document Object Model (DOM) with jQuery is as simple as knowing a little bit of CSS and a little bit of Javascript. Using a selector function that works using CSS selectors, you tell jQuery you plan to act on a certain set of elements from the DOM. You then chain jQuery methods to the selector to manipulate or query the data in any way imaginable.
To see a list of jQuery methods, keep the documentation site, Visual jQuery, on hand.
The child pages in this section should be related to understanding jQuery syntax in relation to Drupal class and ID naming conventions, providing example code for various jQuery methods, and offering code tips that answer the question, "But how do I do this with jQuery?"
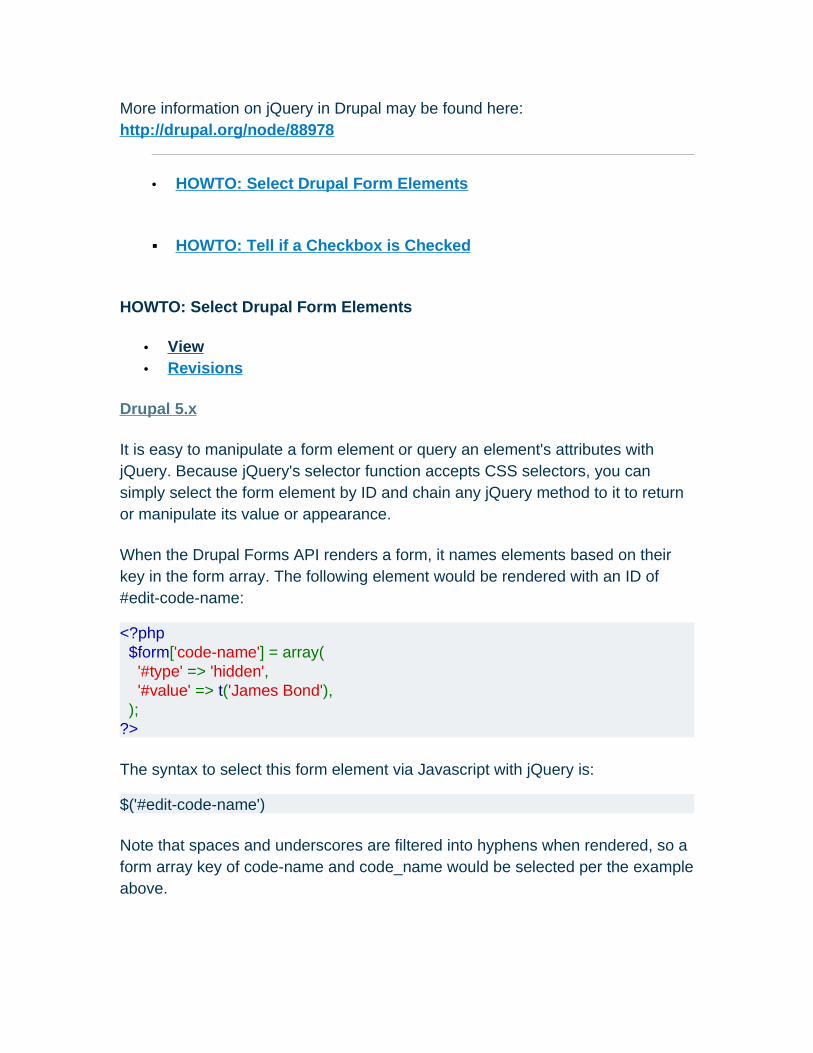
More information on jQuery in Drupal may be found here: http://drupal.org/node/88978
• HOWTO: Select Drupal Form Elements
HOWTO: Tell if a Checkbox is Checked
HOWTO: Select Drupal Form Elements
• View • Revisions
Drupal 5.x
It is easy to manipulate a form element or query an element's attributes with jQuery. Because jQuery's selector function accepts CSS selectors, you can simply select the form element by ID and chain any jQuery method to it to return or manipulate its value or appearance.
When the Drupal Forms API renders a form, it names elements based on their key in the form array. The following element would be rendered with an ID of #edit-code-name:
<?php $form['code-name'] = array( '#type' => 'hidden', '#value' => t('James Bond'), );?>
The syntax to select this form element via Javascript with jQuery is:
$('#edit-code-name')
Note that spaces and underscores are filtered into hyphens when rendered, so a form array key of code-name and code_name would be selected per the example above.
So, if you want to use Javascript to display to the user the value of the hidden code name field, you would use the following:
alert($('#edit-code-name').val());
Trigger fields to be displayed
Trigger fields to be displayed
You can also use jQuery to trigger additional fields to display when one is selected, e.g. form field A gets a value entered by the user, and once that happens fields B and C are displayed.
You can use jQuery's $(document).ready() method to add an onchange event to a form field.
Select it per the example above and chain a .change() method to it that defines a function to select and .show() the additional form fields. You may want to use CSS or jQuery in the .ready() function to add display: none; to the fields to be shown. Anything can be done with a CCK form, you just need to know the IDs of the divs created for the form fields.
Pseudo-example:
$(document).ready( function() { $('#form-field-a').change( function() { $('#form-div-b').show(); $('#form-div-c').show(); } ); $('#form-div-b').hide(0); $('#form-div-c').hide(0); });
HOWTO: Tell if a Checkbox is Checked
• View • Revisions
Drupal 5.x
A simple way to tell if a checkbox has been checked using jQuery is with the :checked CSS "pseudo class." Your selector should use the following syntax:
$('#edit-checkbox-id:checked')
Obviously, you need to replace checkbox-id with the actual name of the form element. This will attempt to grab any checked checkbox with that ID. If none are found, the result set will be null. So, combining this with jQuery's .val() method, you can use the following conditional statement to execute code if a checkbox has been checked:
if ($('#edit-checkbox-id:checked').val() !== null) { // Insert code here.}
(Note: the checkboxes element in the Forms API produces unique IDs for each option. View the source to see what I mean.)
Using jQuery
• View • Revisions
Drupal 5.x
As of Drupal version 5.0, most of what can be achieved with Javascript will be made possible by the jQuery Javascript library. To quote from the jQuery website:
jQuery is a new type of Javascript library. It is not a huge, bloated framework promising the best in AJAX - nor is it just a set of needlessly complex enhancements - jQuery is designed to change the way that you write Javascript.
Note: Most information about jQuery can and should be obtained from the jQuery website, this section of the handbook will avoid duplicating information better maintained there.
Resources on the web:
• jQuery : the official jQuery web site. See in particular: o jQuery documentation o jQuery tutorials
• visual jquery : a graphically organized jquery reference • Learning jQuery : a multi-author weblog with the aim of sharing
information about jQuery • Other more Drupal specific resources:
o Dojo Lesson #12 - jQuery Resurrected : their mission? To show how easy it is to take your Drupal site to the cutting edge of User Interface with jQuery, talk about the tools and resources that make this easy, and outline some best-practices for security. See also the drupal group discussion.
HOWTO: Pass php variables to the javascript
HOWTO: jQuery with Drupal 4.7
some simple jquery examples
HOWTO: Add a jQuery effect
History of jQuery in Drupal
HOWTO: Pass php variables to the javascript
• View • Revisions
Drupal 5.x
Before starting this I'd suggest you at least walk through the HOWTO: Add a jQuery effect tutorial. This will give you some basic ground to stand on before moving forward. Additionally it would be of some benefit if you at least understood the syntax for variable_get and what it does. Docs for the various functions we will be using can be found here:
• variable_get • drupal_add_js • drupal_to_js
The Problem:The problem is that we'd like to be able to create and store variables in our drupal database that the javascript ultimately uses. The problem with this is that javascript doesn't directly talk to a database, and so we need an intermediate step. Most of the time this would be done with XML in an AJAX style approach, but a typical AJAX implementation is a little bit of overkill for what we're trying to achieve. We don't want to modify the DOM, we just want to pull a variable from the variables table and use it in our javascript.
The Solution:Drupal has some built in functions that make doing this rather easy: namely drupal_add_js & drupal_to_js.
We're going to start with the assumption that you already have a variable in your variables table named "my_variable". In your module or whatever sort of code you happen to be writing that needs this you almost certainly have a line that calls your .js file. For the purposes of this example, I'll be using a file called "my_js_file.js". $path is a variable that contains the path to my module.
<?phpdrupal_add_js("var my_js_variable = " . drupal_to_js(variable_get('my_variable', '')) . ";", 'inline');drupal_add_js("$path/my_js_file.js");?>
Drupal_add_js is doing a number of things for us here, not only is it adding our .js file to the page, but it's also allowing us to format a javascript style variable and add it inline to the page, making it available to our other javascript files. drupal_to_js is taking a variable (retrieved by variable_get) and formatting it for use in javascript. The ";" ends our line of javascript for us, and then the "inline" explicitly states that the script should be placed inline.
The resulting code should look something like this:
<script type="text/javascript" src="/sites/all/modules/my_module/my_js_file.js"></script><script type="text/javascript">var my_js_variable = "variable_value";</script>
Hopefully this should enable you to make your modules more dynamic and enable you to start some interactions between your jQuery and the drupal database.
HOWTO: jQuery with Drupal 4.7
• View • Revisions
Drupal 4.7.x
Update: There is now a jquery47 module
While jQuery has been incorporated in the lastest version of Drupal, which will soon become Drupal 5.0. However, you may like to incorporate jQuery effects in your 4.7 installation. This is not recommended if you are not able to patch code and troubleshoot your Drupal installation PHP and Javascript. Much of the information for this tutorial is taken from using jQuery in a 4.7 module on Drupal Groups and jQuery + new drupal_add_js for 4.7 in the Drupal issues queue.
Warning: Backup your database and codebase first. It is likely that following these instructions will break your upgrade path to Drupal 5.0. Proceed at your own risk!
These are the steps I have taken most recently. These instructions will go stale and need to be improved over time.
1. Grab a copy of the current Drupal 4.7 codebase. 2. Apply the this patch add jQuery which changes some Drupal core
functions and adds jQuery library in the /misc directory
Currently the patch does not apply fully, be prepared for some manual patch of the drupal.js part
Go through each of the *.js files in /misc (other than jquery.js) and replace all instances of $( with $id(. This will restore standard drupal effects where the "$" namespace was overwritten by jQuery.
You should now have jquery.js output in your webpages, without sacrificing the existing Drupal javascript effects.

some simple jquery examples
• View • Revisions
Drupal 5.x
Hello,there are not many jquery examples on this site yet, so I thought I'd post a couple. Bare in mind, that I am new at jquery. This is aimed at people confortable developing drupal modules/forms but have no/limited experience with jquery. I can see that jquery is a powerful tool and it would be nice to have more drupal specific examples/tutorials available to the drupal community. Constructive criticism and suggestions are welcome.
Note that the jQuery code in the examples below are being saved as a file called foobar.js. You can name the file whatever you like, jut make sure you change 'foobar' in the code to whatever you've named the file.
example 1) checking/unchecking a checkbox to modify a textfield
sample drupal form code
<?php
drupal_add_js('foobar.js');
$form['foobar_A_check'] = array( '#type' => 'checkbox', '#prefix' => '<div class="foobar_A_group">', ); $form['foobar_A_text'] = array( '#type' => 'textfield', '#suffix' => '</div>' );?>
Drupal will generate html like the following
<div class="foobar_A_group"> <div class="form_item">
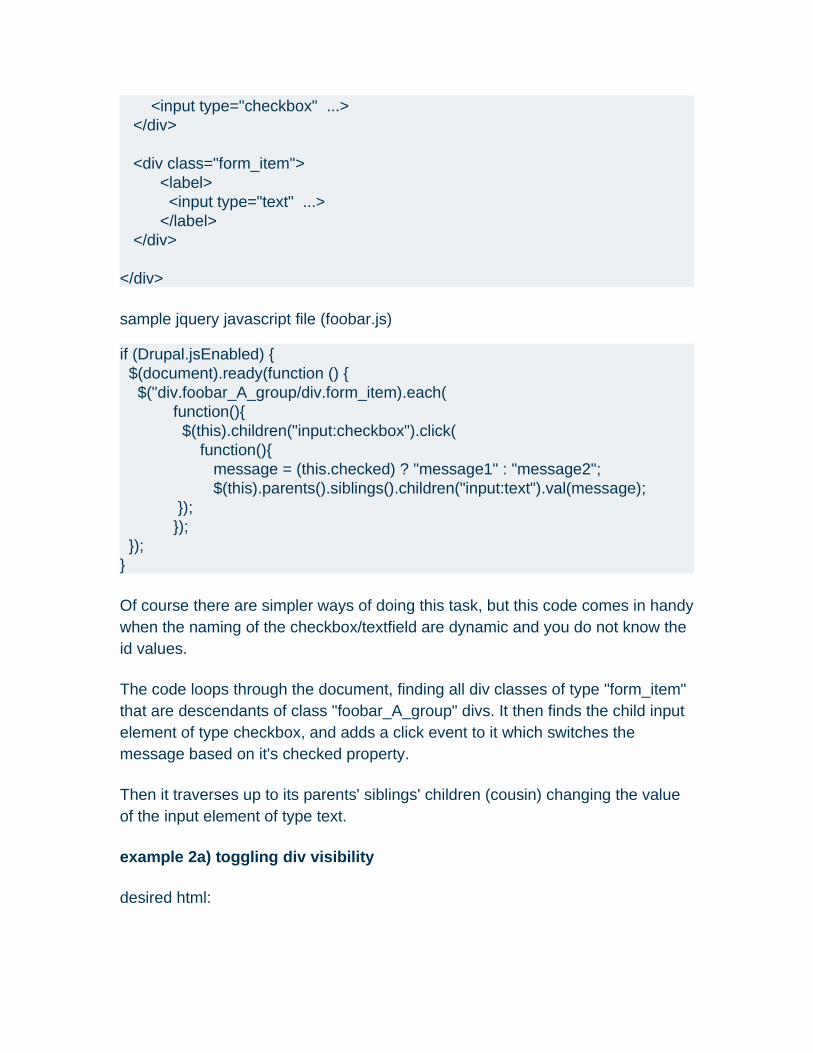
<input type="checkbox" ...> </div>
<div class="form_item"> <label> <input type="text" ...> </label> </div>
</div>
sample jquery javascript file (foobar.js)
if (Drupal.jsEnabled) { $(document).ready(function () { $("div.foobar_A_group/div.form_item).each( function(){ $(this).children("input:checkbox").click( function(){ message = (this.checked) ? "message1" : "message2"; $(this).parents().siblings().children("input:text").val(message); }); }); }); }
Of course there are simpler ways of doing this task, but this code comes in handy when the naming of the checkbox/textfield are dynamic and you do not know the id values.
The code loops through the document, finding all div classes of type "form_item" that are descendants of class "foobar_A_group" divs. It then finds the child input element of type checkbox, and adds a click event to it which switches the message based on it's checked property.
Then it traverses up to its parents' siblings' children (cousin) changing the value of the input element of type text.
example 2a) toggling div visibility
desired html:
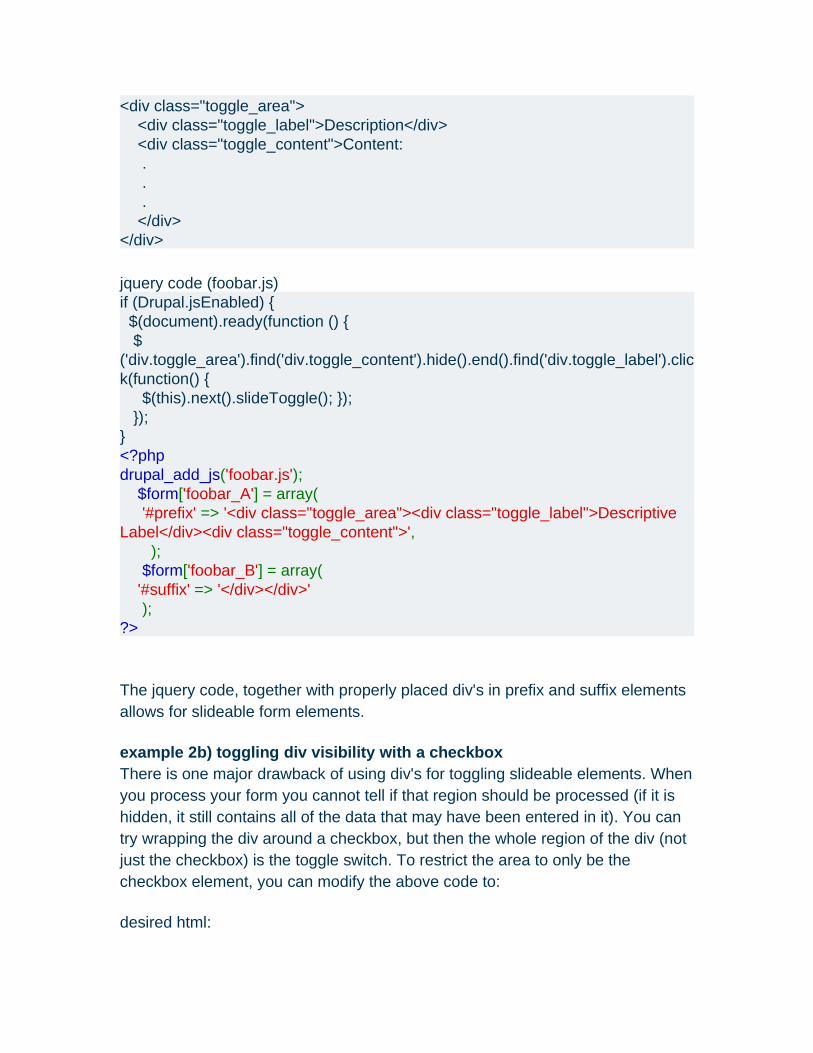
<div class="toggle_area"> <div class="toggle_label">Description</div> <div class="toggle_content">Content: . . . </div></div>
jquery code (foobar.js) if (Drupal.jsEnabled) { $(document).ready(function () { $('div.toggle_area').find('div.toggle_content').hide().end().find('div.toggle_label').click(function() { $(this).next().slideToggle(); }); });}<?phpdrupal_add_js('foobar.js'); $form['foobar_A'] = array( '#prefix' => '<div class="toggle_area"><div class="toggle_label">Descriptive Label</div><div class="toggle_content">', ); $form['foobar_B'] = array( '#suffix' => '</div></div>' );?>
The jquery code, together with properly placed div's in prefix and suffix elements allows for slideable form elements.
example 2b) toggling div visibility with a checkbox There is one major drawback of using div's for toggling slideable elements. When you process your form you cannot tell if that region should be processed (if it is hidden, it still contains all of the data that may have been entered in it). You can try wrapping the div around a checkbox, but then the whole region of the div (not just the checkbox) is the toggle switch. To restrict the area to only be the checkbox element, you can modify the above code to:
desired html:
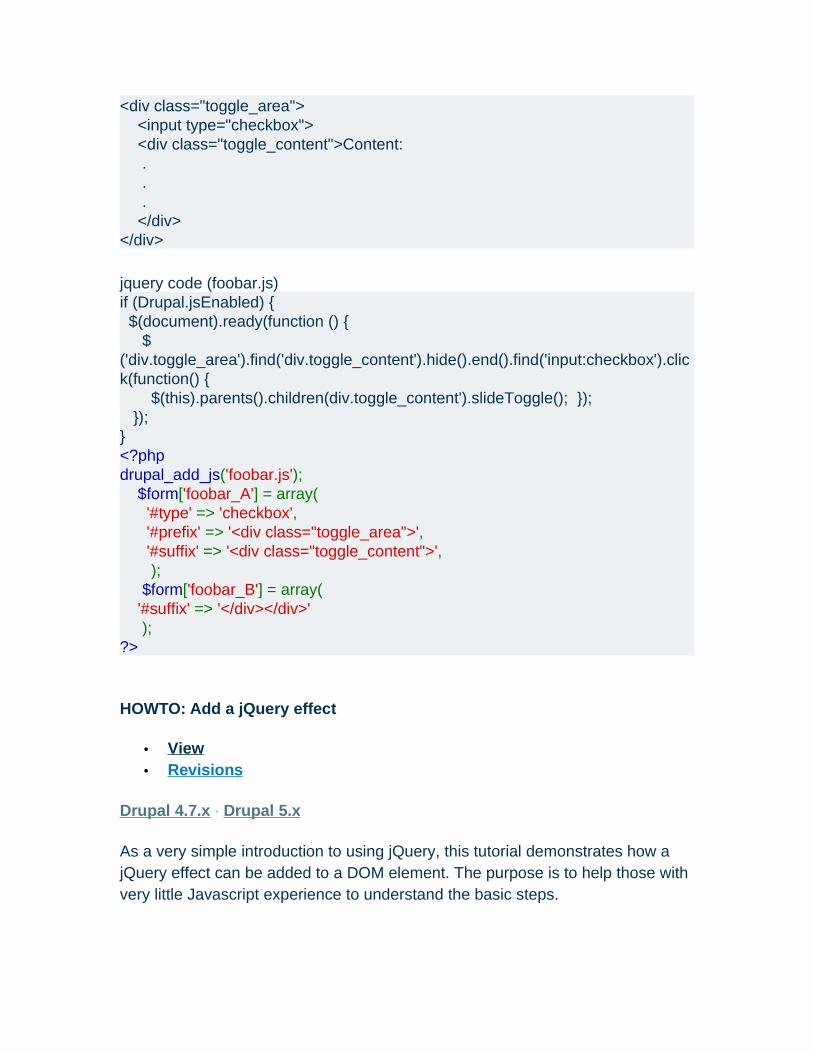
<div class="toggle_area"> <input type="checkbox"> <div class="toggle_content">Content: . . . </div></div>
jquery code (foobar.js) if (Drupal.jsEnabled) { $(document).ready(function () { $('div.toggle_area').find('div.toggle_content').hide().end().find('input:checkbox').click(function() { $(this).parents().children(div.toggle_content').slideToggle(); }); });}<?phpdrupal_add_js('foobar.js'); $form['foobar_A'] = array( '#type' => 'checkbox', '#prefix' => '<div class="toggle_area">', '#suffix' => '<div class="toggle_content">', ); $form['foobar_B'] = array( '#suffix' => '</div></div>' );?>
HOWTO: Add a jQuery effect
• View • Revisions
Drupal 4.7.x · Drupal 5.x
As a very simple introduction to using jQuery, this tutorial demonstrates how a jQuery effect can be added to a DOM element. The purpose is to help those with very little Javascript experience to understand the basic steps.

To start, your Drupal installation needs to have a functioning jQuery library. jQuery is included in Drupal 5.x. Alternatively, you can following these instructions to enable jQuery in 4.7.x (not recommended for production websites).
Once jQuery is loading into every page header, create a new node with the Input Format PHP Code and the following content.
<?php
drupal_add_js ( '$(document).ready(function(){$("p.jtest").fadeIn(6000);}); ', 'inline');?>
<p class="jtest" style="background-color: palegreen; width: 30em;">
This is an example of an effect which is built into the core jQuerylibrary. This text should fade in after the DOM is loaded. <ahref="http://api.drupal.org/api/HEAD/function/drupal_add_js">drupal_add_js()</a> was used to add the <a href="http://jquery.com/api/"> fadeIn</a> effect to any paragraph with the class <b>jtest</b>.
</p>
The actual code to attach the fadeIn effect is one line. The usage of all the jQuery functions are documented in these jQuery API docs.
Plug-ins can be added anywhere in your Drupal installation (eg. /sites/default/plugins/) and inserted into the web page using drupal_add_js(). The plugin will then be referenced in the head of the web page.
The plug-in authors usually provide examples to help you use their plug-ins. Be careful to note the licence of each plug-in you use (look in the .js file) as some may not be licenced under an open-source licence like GPL, and therefore you cannot use them in a production website without agreement from the author.
History of jQuery in Drupal
• View • Revisions
In versions prior to Drupal 5.0, javascript effects are made possible through a decent library of functions in /misc/drupal.js. Effects were achieved with additional aptly named files like collapse.js and autocomplete.js.
One limitation of drupal.js was the fact that its development would never match the pace of dedicated javascript libraries.
At the same time, module developers were starting to incorporate advanced effects libraries like Dojo, moo.fx, and prototype to achieve nice effects in their own modules. Aside from the lack of consistency, there were technical issues whereby implementing a couple of cool modules would cause name-space conflicts between the javascript libraries that they implemented.
Shortly after the birth of Drupal Groups, the AJAX developers group began looking for agreement about which library should be used. After a few threads like this one, jQuery was identified as the best candidate, especially after active support by John Resig, the jQuery project lead, who agreed to dual-licence jQuery as GPL so it could be distributed with Drupal.
Other important benefits of jQuery:
• The core jQuery library is very small (about 15kb). • jQuery has a clean, modular approach to plugins. • The core library will stable, being in perpetual feature freeze from version
1.0.
jQuery is currently incorporated into Drupal 5.0 and work continues to remove dependencies on drupal.js and friends.