
Working with ArcGIS Mobile A brief introduction to the Mobile mapping application for FWC DLE.

Choose Folder for Install
Select the folder located in the user’s documents and settings.

Download Data Click Yes to start the download of map content data. This is only required
on the initial setup and is not required later unless the mapping application is having issues or data has been updated.

Project Exists
This window indicates the project has been open before . After the first time using the application this window will allow the user to bypass the initial data download page. Select Open Existing Project to go directly to view the mapping interface.

Get Data
The page shows a list of available data to download to the map.
Click Select All

Get Data
After selecting the data for download.
Click Next

Get Data
This page allows you to select the geographic extent.
Select Full Extent (Statewide), and click the Get Data
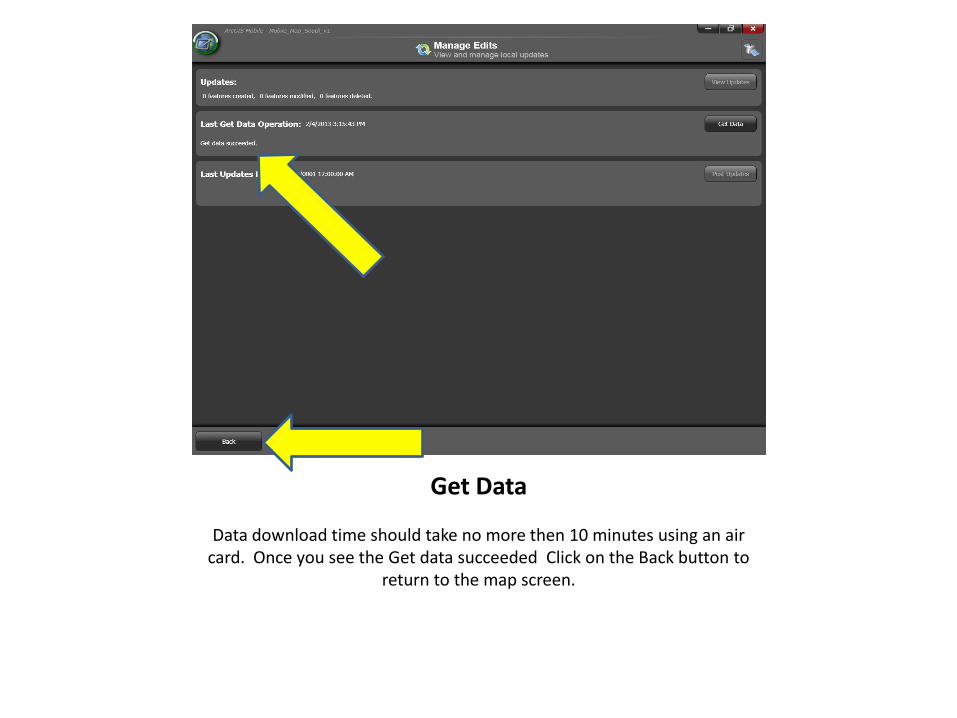
Get Data
Data download time should take no more then 10 minutes using an air card. Once you see the Get data succeeded Click on the Back button to
return to the map screen.

View Map
On the View Map page, you can explore the map and launch task.
To view map options click on the caret button

View Map Options
Pan: There are two map panning modes: Drag or Recenter. By default, the map is set to use Drag mode, which allows you to drag the map to pan; In Recenter mode, the map re-centers on where you tap. The panning mode can be changed from the Map Settings page.
Zoom To Full Extent : Will zoom out to Globe scale.
Zoom To Initial Extent: Will zoom out to show the State of Florida.
Keep GPS in View: With this option enabled, the map will automatically pan when the GPS position reaches the edge of the map. When this option is enabled, the application will connect to GPS automatically if it's not already connected.
Layer Visibility: Presents a dialog box with a list of layers in the map; you can turn on or off layers.
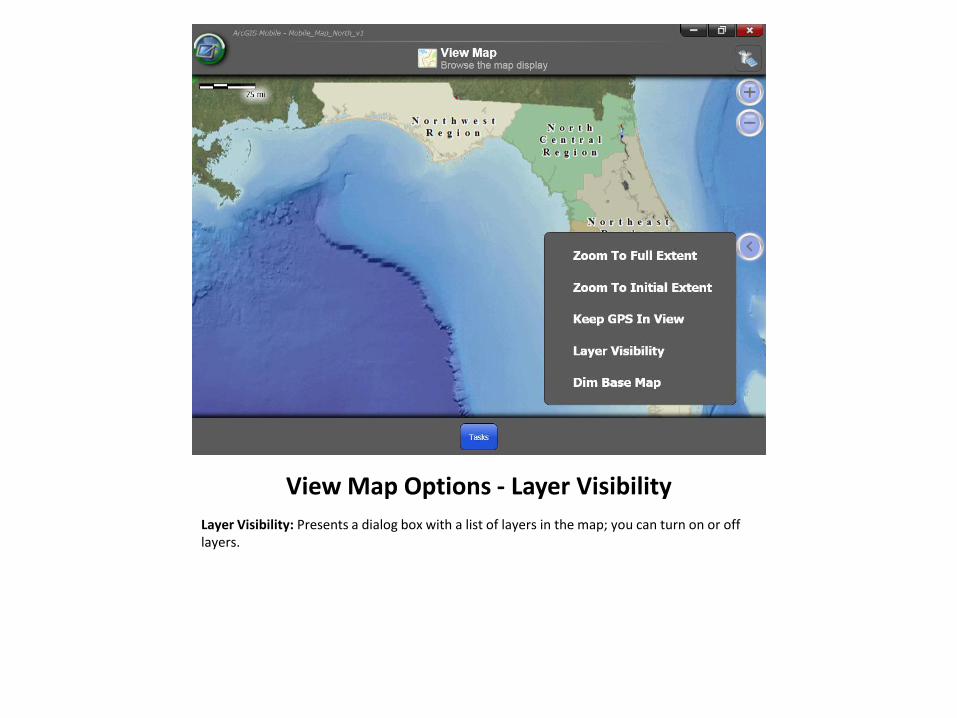
View Map Options - Layer Visibility
Layer Visibility: Presents a dialog box with a list of layers in the map; you can turn on or off layers.

Layer Visibility
Checking the box next to the layer name turns that layer on in the map. By default the map has the following layers on BaseMap (FWC Facilities, WMA and Aquatic Preserves), Streets and Imagery. When the layer named is grayed out that means the features are not visible at the current scale and will require zooming in on the map to an appropriate scale. When a layer is on the identify tool can be used to identify the feature on the map.
Layer is on and visible

Working with Tasks Collect Features Task: Manual and automated feature collection.(Currently Disabled)
Search Features Task: Finding features by defining search criteria.
View Work List Task: Managing and organizing features in your project.
Manage Edits Task: Managing features on local device that had been created, modified, or deleted.
Synchronize Task: Sending and receiving feature updates to/from the server.
Identify: Tap the map or drag a rectangle to identify features on the map.
Measure: Measure length, perimeter, or area by sketching on the map; or measure length, perimeter and area for existing features.

Working with Tasks - Search Tool
Search Features Task: Finding features by defining search criteria.

On Search Features page, you can start a new search or execute an existing saved search.
New Search: Start a new search.
Last Search: If you want to start a search as you did last time, tap the Last Search button to see the results on Search Results page (you can refine search if needed).
Saved Searches: If you have search saved with the project before, they will be listed here. You can tap a saved search to execute and see the results. Tap the Edit button to delete one or more saved searches.
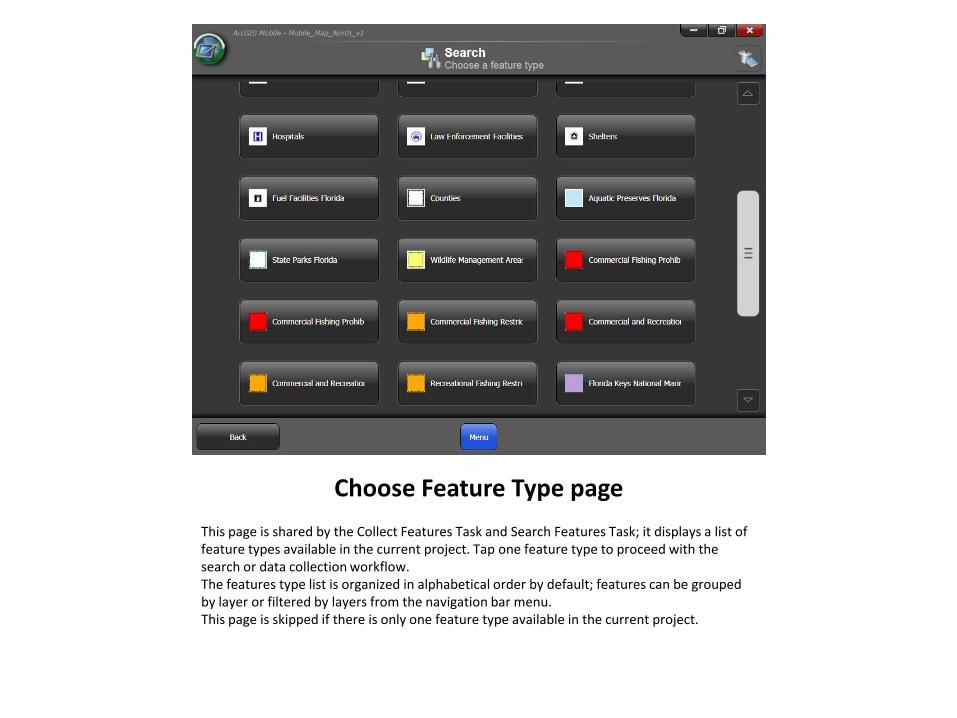
Choose Feature Type page
This page is shared by the Collect Features Task and Search Features Task; it displays a list of feature types available in the current project. Tap one feature type to proceed with the search or data collection workflow. The features type list is organized in alphabetical order by default; features can be grouped by layer or filtered by layers from the navigation bar menu. This page is skipped if there is only one feature type available in the current project.

Search Area
Three option are available to select the geographic extent of the search.

After you have chosen a feature type you want to search for, you can define more details about the search criteria on this page.
Change Search Area: Click the Search Area button; you can pick the search area from among current map extent, entire map, or custom extent defined using the map.
Add Criteria: Click the Add Criteria button; you can add more criteria.
Edit Criteria: Click the Edit button; you can delete one or more existing criteria for the current search.
From the navigation menu, you can
New Search: Discard current search criteria and start a new search from scratch.
Save Search: Save the current search; you will be prompted to enter a name for the search.
After all criteria are set, you can click the Show Results button to execute the search and view the search results on the Search Results page.

On the left of the page is a list of features found in the search; the right part shows a map tab and a feature attributes tab. Once you tap a feature from the list, it will be highlighted on the
map, and you can view its attributes through Attributes tab.
On Search Results page, you can browse the features found in a search.

From the on the navigation bar, you can do the following:
New Search: Start a new search.
Save Search: Save the current search for later use. The saved search can be accessed from the Search Task page.
Refresh results: If you choose Current Map extent as the search area for the current search, when the map's current extent changes, you can refresh results to reflect this change.
Add All to Work List: Add all features found to the application work list for later use by View Work List task.
Sort Features: Sort the feature list by Name, Feature type, Edit State, or Distance in an ascending or descending order.
Filter Features: Filter the feature list by Edit state or Feature type.

Unlike search tool Identify only works on visible data layers
Identify: Tap the map or drag a rectangle to identify features on the map.
Working with Tasks - Identify tool

Check Layer Visibility is On Locate the feature in the layer list that you want to identify on the map

Select the Identify tool from the Tasks panel

Using the Identify Tool
Identify: Tap the map or drag a rectangle to identify features on the map.

Identify Results page On Identify Results page, you can identify features by tapping or dragging a rectangle on the map.
Tapping or dragging on the map again will refresh the search result list.
On the left of the page is a list of features identified; on the right is a map tab and a feature attributes tab. For a selected feature in the list, you can browse its location on the map or review its attributes from the attributes tab.
Manage the feature list
From the menu on the navigation bar, you can do the following:
•Add all features to the application work list for later review from the View Work List page.
•Sort the feature list by name, feature type, edit state, or distance in ascending or descending order.
•Filter the feature list by edit state or feature type.

Identify Results
View the information about feature by clicking on the Attribute tab.

Working with Tasks - Measure Tool
Measure: Measure length, perimeter, or area by sketching on the map; or measure length, perimeter and area for existing features.

Measure Page Measure length or area
On Measure page, you can sketch a line or area depending on what you choose to measure. The shape measurements (length for a line; perimeter and area for an area) are presented just above the navigation bar, and the unit can be changed from the combo box. Sketching will honor snapping settings.
Start over
To start a new sketch (line or area), tap on the navigation bar menu > Start Over, and the old sketch will be cleared out. You can then sketch a new line or area to measure.
Measure visible features
To measure a feature, you need to select it first by tapping on the map or dragging a rectangle; the selected features are populated in the feature list. Tap a feature from the list, and its measurement will be presented just above the navigation bar. The measurement unit can be changed from the unit combo box.

The Map Settings screen allows for setting of Map Display and navigation options.
Map Settings

This settings page presents a list of settings you can modify for the application or the current project. Tap a setting button to a corresponding setting page.
Application Settings
From the Application Settings page, you can manage project and basemap storage locations and adjust application appearance (application skin, brightness and animations).
GPS Settings & Status
From the GPS Settings & Status page, you can connect to/disconnect from GPS, change GPS settings, and check GPS status when connected.
Map Settings
From the Map Settings page, you can change snapping settings and choose the settings for map panning and zooming.
Synchronization Settings
From the Synchronization Settings page, you can specify the option for when to automatically post updates. This setting is only available when a project is open.

Map Settings Under the navigation portion you can set the Panning Mode ( Drag, Recenter) & Zooming Mode (Pen Draw Rectangle, Finger Tap)
Pan: There are two map panning modes: Drag or Recenter. By default, the map is set to use Drag mode, which allows you to drag the map to pan; In Recenter mode, the map re-centers on where you tap. The panning mode can be changed from the Map Settings page.
Zoom : There are two zooming modes: Draw Rectangle with pen or Finger Tap. In Pen mode, you can draw a zoom rectangle on the map; in Finger mode, the map zooms in at the spot you tap, and the map keeps zooming if you keep tapping the Zoom In button multiple times. The zooming mode can be changed from the Map Settings page.

Zooming Mode – Pen
There are two zooming modes: Draw Rectangle with pen or Finger Tap. In Pen mode, you can draw a zoom rectangle on the map; The zooming mode can be changed from the Map Settings page.

Zooming Mode - Finger
In Finger mode, the map zooms in at the spot you tap, and the map keeps zooming if you keep tapping the Zoom In button multiple times. The zooming mode can be changed from the Map Settings page.

View GPS information GPS Status
From this page, you can connect or disconnect the GPS, change GPS settings, and view GPS status.
GPS Connected
You can enforce the map to keep the GPS location in view by tapping the caret button
on the right side of the map view, then tap Keep GPS In View, as shown in the image at the bottom of this page.

GPS Settings & Status When the GPS is connected, disconnected, or connecting, the GPS icon in the right corner of the application changes correspondingly to show the current GPS status.

As always please don't hesitate to contact me if you have any questions or comments at (727) 502-4877
Jacob Tustison DLE GIS & Mapping Homepage FWC LE GIS Specialist http://atoll.floridamarine.org/DLE_GISdocs


