VW 1998 Jetta GLX or VR6 GTI PCV valve Modification Disclaimer: This is how I ended up modifying my stock PCV so I did not have to buy a complete intake hose (+/- $150). Don’t blame me if this does not work or if it makes it worse… You are doing this at your own risk. Materials:
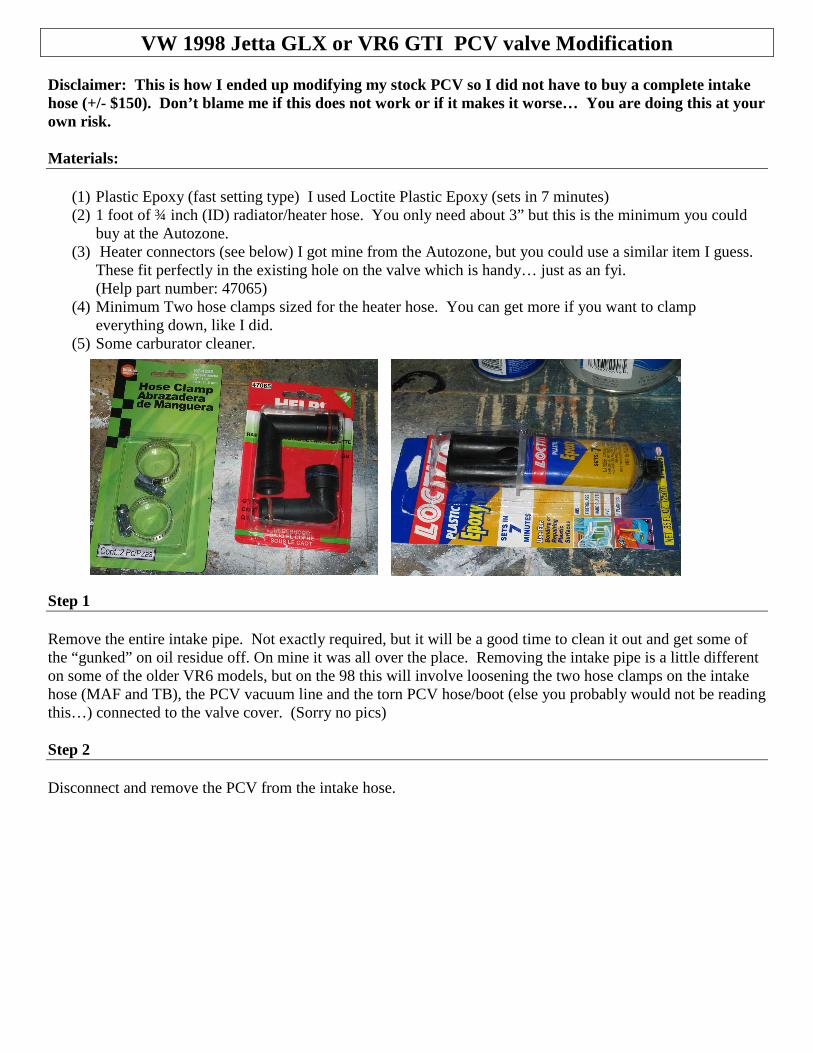
(1) Plastic Epoxy (fast setting type) I used Loctite Plastic Epoxy (sets in 7 minutes) (2) 1 foot of ¾ inch (ID) radiator/heater hose. You only need about 3” but this is the minimum you could
buy at the Autozone. (3) Heater connectors (see below) I got mine from the Autozone, but you could use a similar item I guess.
These fit perfectly in the existing hole on the valve which is handy… just as an fyi. (Help part number: 47065)
(4) Minimum Two hose clamps sized for the heater hose. You can get more if you want to clamp everything down, like I did.
(5) Some carburator cleaner. Step 1 Remove the entire intake pipe. Not exactly required, but it will be a good time to clean it out and get some of the “gunked” on oil residue off. On mine it was all over the place. Removing the intake pipe is a little different on some of the older VR6 models, but on the 98 this will involve loosening the two hose clamps on the intake hose (MAF and TB), the PCV vacuum line and the torn PCV hose/boot (else you probably would not be reading this…) connected to the valve cover. (Sorry no pics) Step 2 Disconnect and remove the PCV from the intake hose.
VW 1998 Jetta GLX or VR6 GTI PCV valve Modification
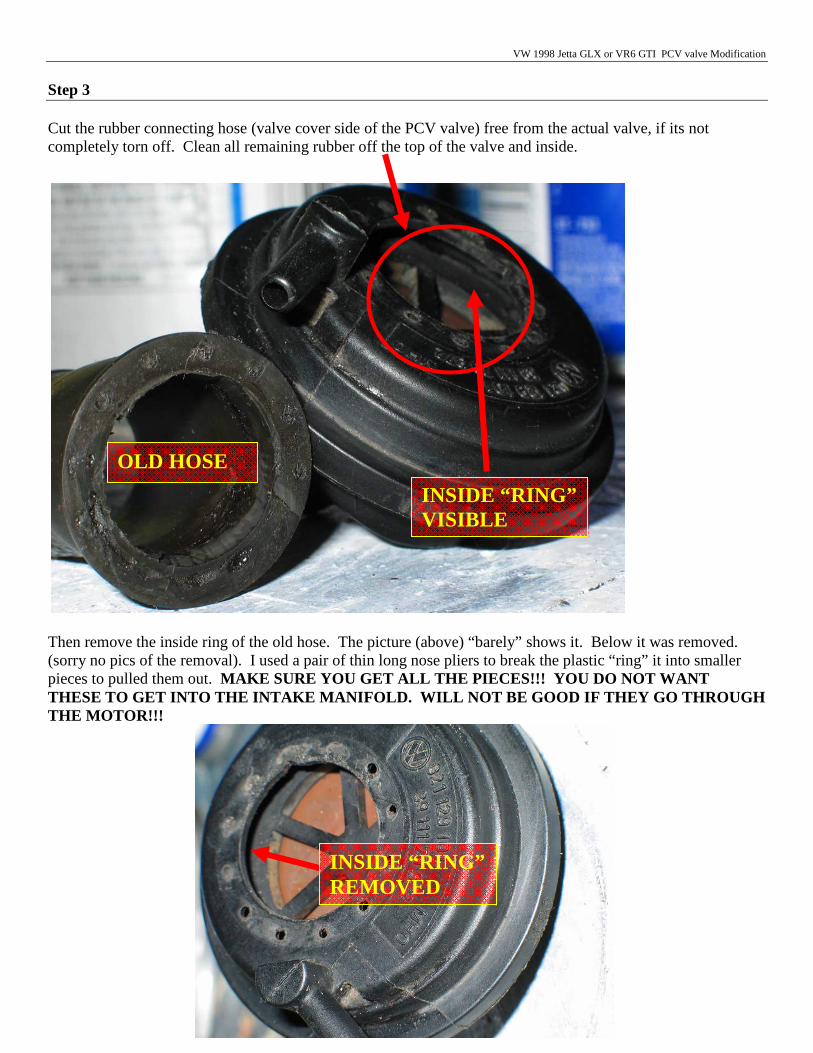
Step 3 Cut the rubber connecting hose (valve cover side of the PCV valve) free from the actual valve, if its not completely torn off. Clean all remaining rubber off the top of the valve and inside. Then remove the inside ring of the old hose. The picture (above) “barely” shows it. Below it was removed. (sorry no pics of the removal). I used a pair of thin long nose pliers to break the plastic “ring” it into smaller pieces to pulled them out. MAKE SURE YOU GET ALL THE PIECES!!! YOU DO NOT WAN T THESE TO GET INTO THE INTAKE MANIFOLD. WILL NOT BE GOOD IF THEY GO THROUGH THE MOTOR!!!
INSIDE “RING” REMOVED
INSIDE “RING” VISIBLE
OLD HOSE
VW 1998 Jetta GLX or VR6 GTI PCV valve Modification
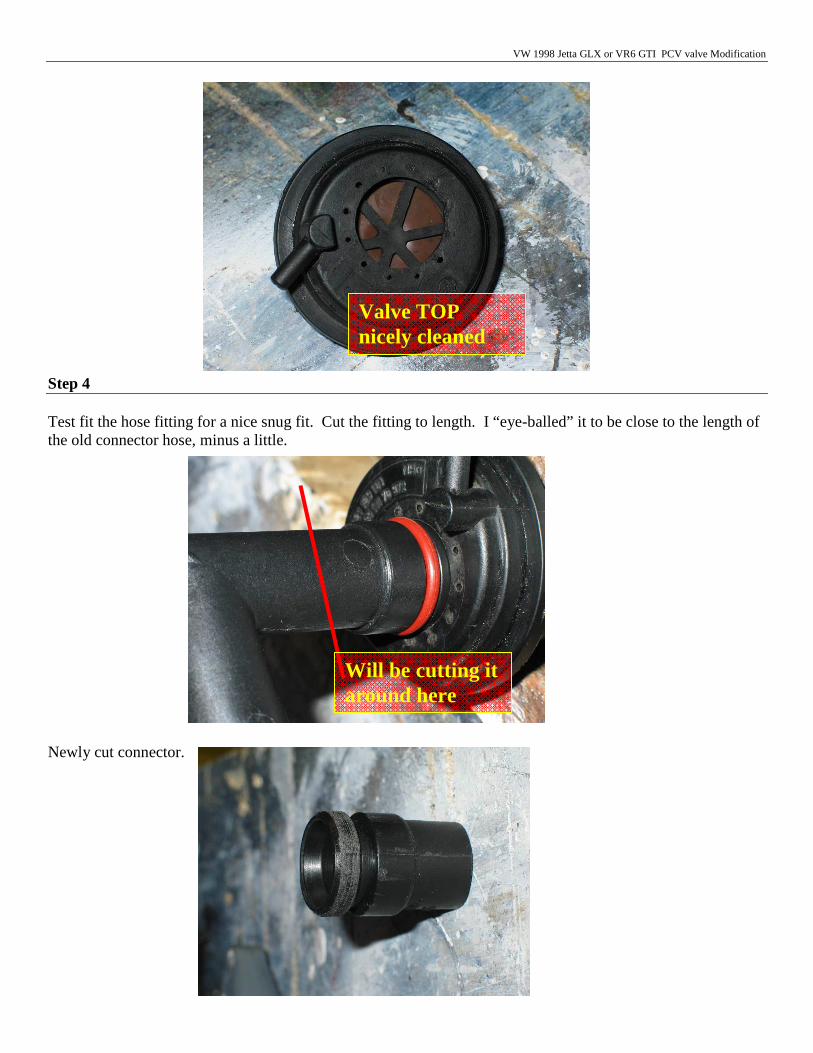
Step 4 Test fit the hose fitting for a nice snug fit. Cut the fitting to length. I “eye-balled” it to be close to the length of the old connector hose, minus a little. Newly cut connector.
Valve TOP nicely cleaned
Will be cutting it around here
VW 1998 Jetta GLX or VR6 GTI PCV valve Modification
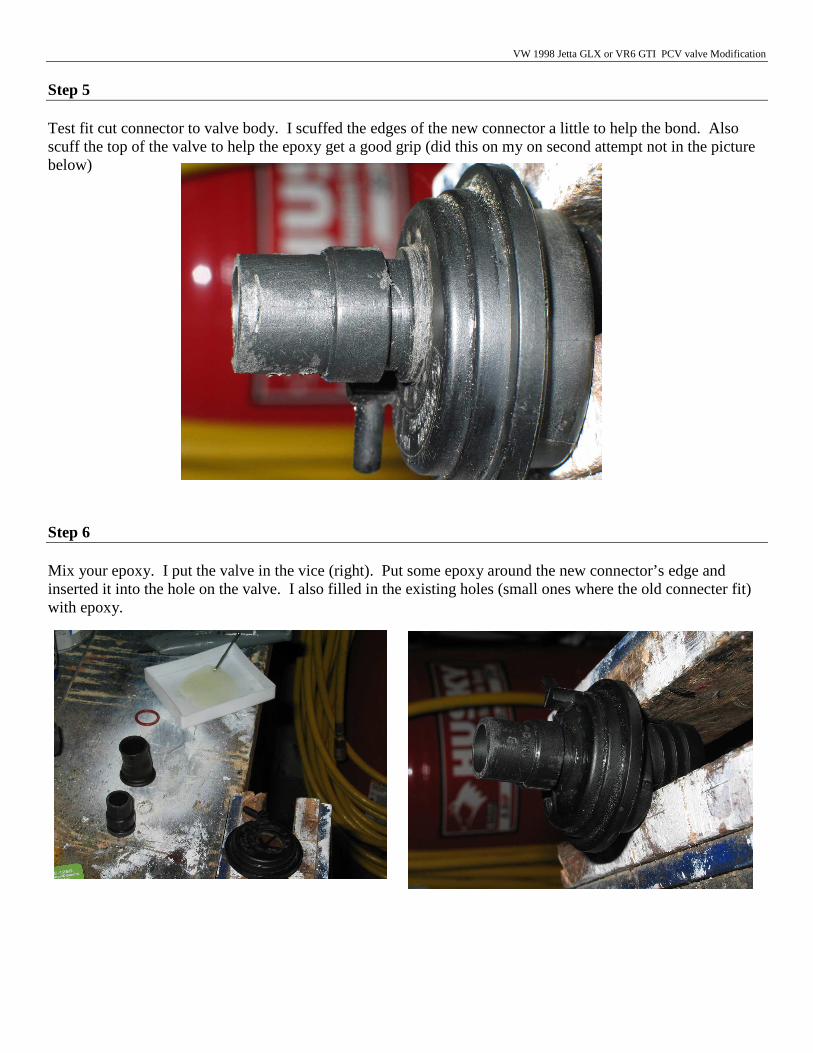
Step 5 Test fit cut connector to valve body. I scuffed the edges of the new connector a little to help the bond. Also scuff the top of the valve to help the epoxy get a good grip (did this on my on second attempt not in the picture below) Step 6 Mix your epoxy. I put the valve in the vice (right). Put some epoxy around the new connector’s edge and inserted it into the hole on the valve. I also filled in the existing holes (small ones where the old connecter fit) with epoxy.
VW 1998 Jetta GLX or VR6 GTI PCV valve Modification
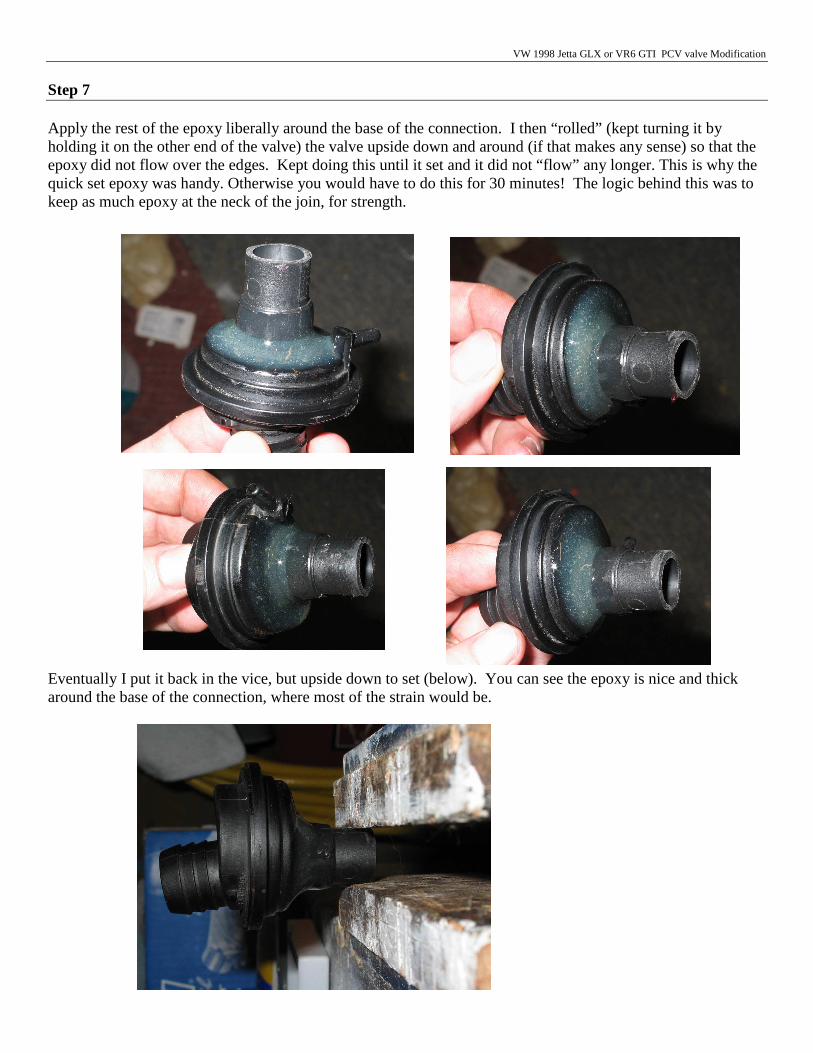
Step 7 Apply the rest of the epoxy liberally around the base of the connection. I then “rolled” (kept turning it by holding it on the other end of the valve) the valve upside down and around (if that makes any sense) so that the epoxy did not flow over the edges. Kept doing this until it set and it did not “flow” any longer. This is why the quick set epoxy was handy. Otherwise you would have to do this for 30 minutes! The logic behind this was to keep as much epoxy at the neck of the join, for strength. Eventually I put it back in the vice, but upside down to set (below). You can see the epoxy is nice and thick around the base of the connection, where most of the strain would be.
VW 1998 Jetta GLX or VR6 GTI PCV valve Modification
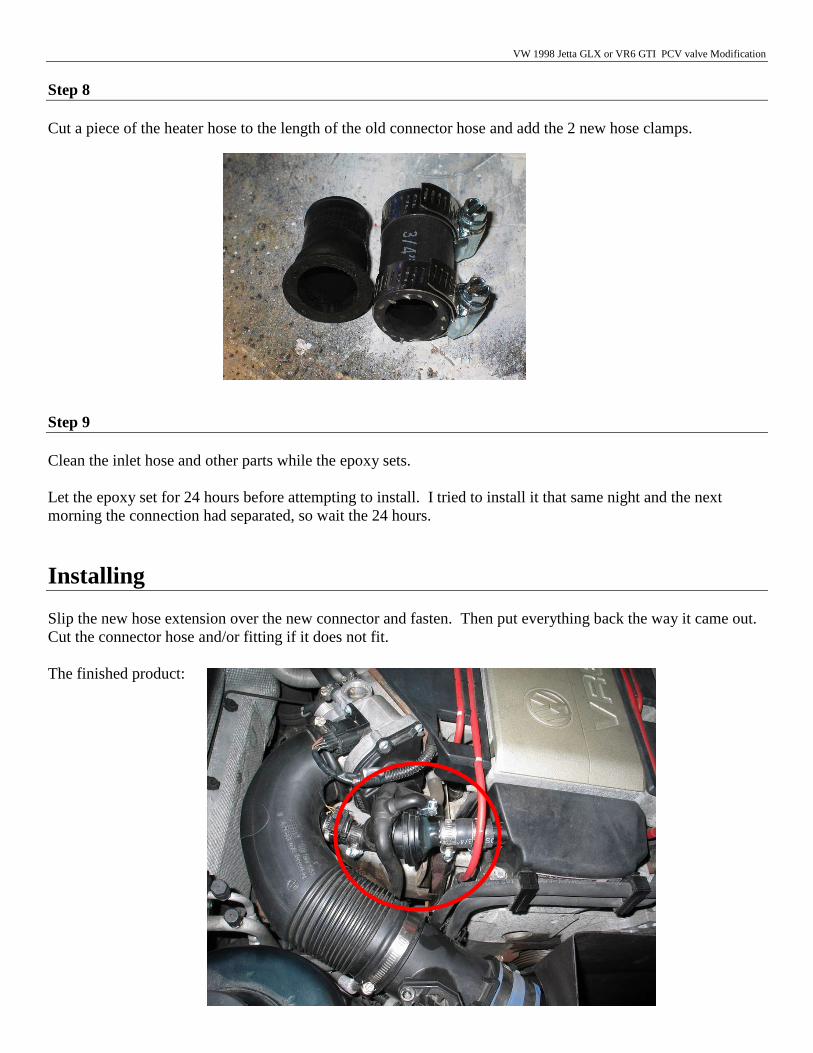
Step 8 Cut a piece of the heater hose to the length of the old connector hose and add the 2 new hose clamps. Step 9 Clean the inlet hose and other parts while the epoxy sets. Let the epoxy set for 24 hours before attempting to install. I tried to install it that same night and the next morning the connection had separated, so wait the 24 hours.
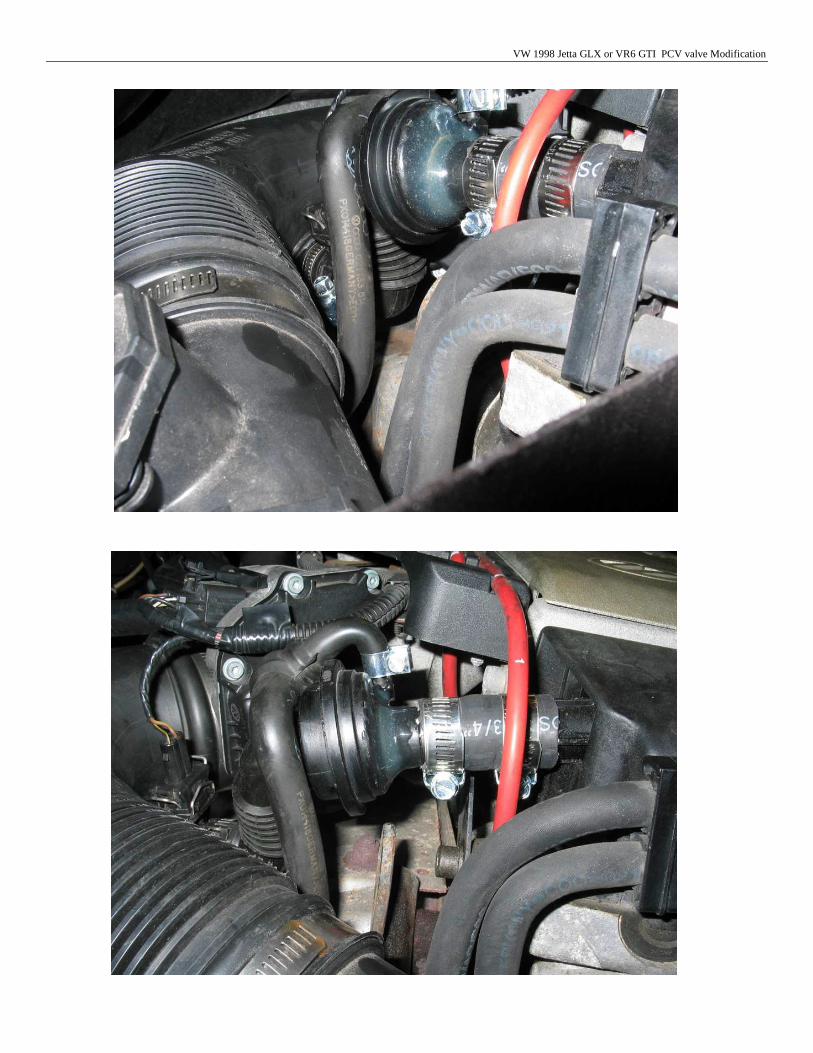
Installing Slip the new hose extension over the new connector and fasten. Then put everything back the way it came out. Cut the connector hose and/or fitting if it does not fit. The finished product:
VW 1998 Jetta GLX or VR6 GTI PCV valve Modification
VW 1998 Jetta GLX or VR6 GTI PCV valve Modification
SUB MODIFICATION…
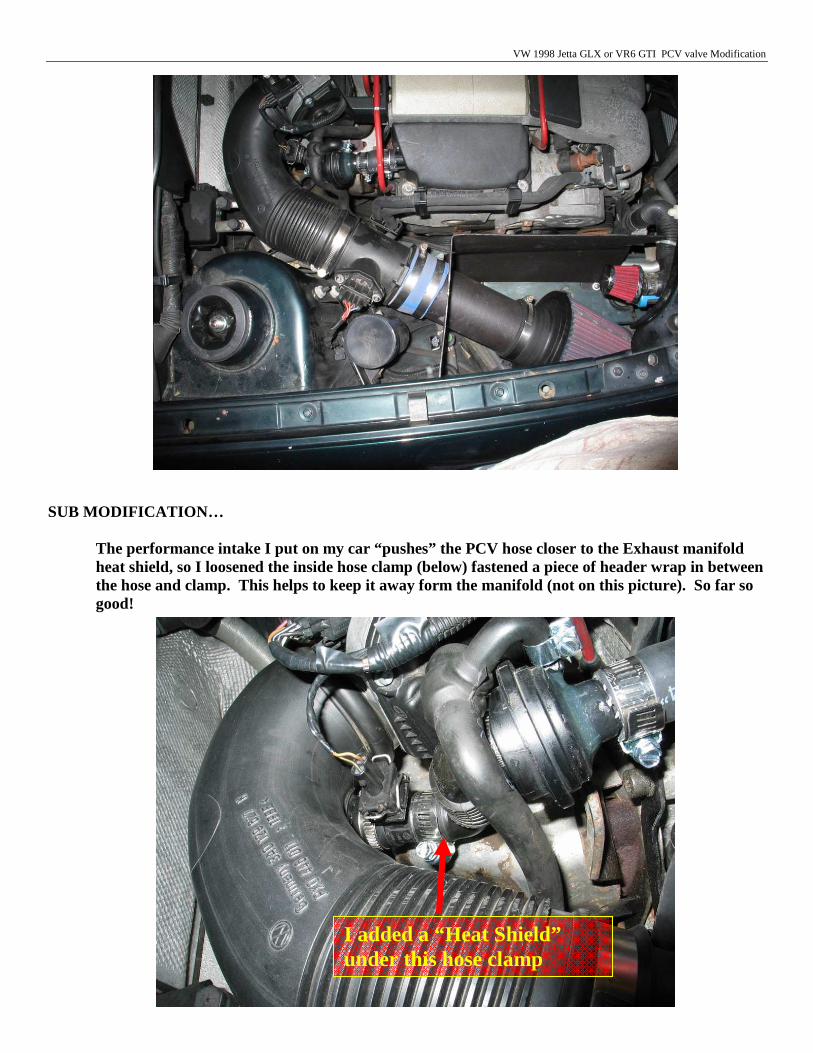
The performance intake I put on my car “pushes” the PCV hose closer to the Exhaust manifold heat shield, so I loosened the inside hose clamp (below) fastened a piece of header wrap in between the hose and clamp. This helps to keep it away form the manifold (not on this picture). So far so good!
I added a “Heat Shield” under this hose clamp


