Download - Tutors Guide
8/6/2019 Tutors Guide
http://slidepdf.com/reader/full/tutors-guide 1/36
For the tutor
A comprehensive guide to help teach new drivers to be safe drivers.
Howtosteerthemto
safedriving.PUB 385 (10-07)
8/6/2019 Tutors Guide
http://slidepdf.com/reader/full/tutors-guide 2/36
1
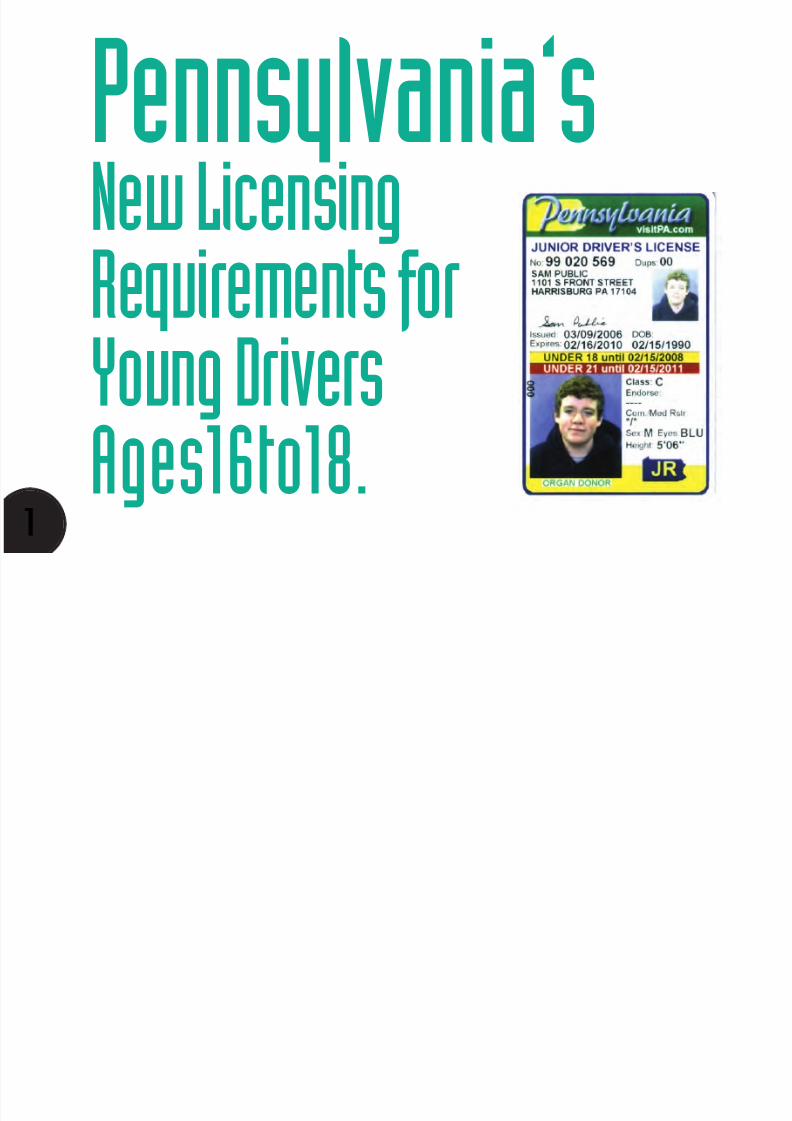
Pennsylvania’sNew Licensing
Requirements for
Young DriversAges16to18.
8/6/2019 Tutors Guide
http://slidepdf.com/reader/full/tutors-guide 3/36
2
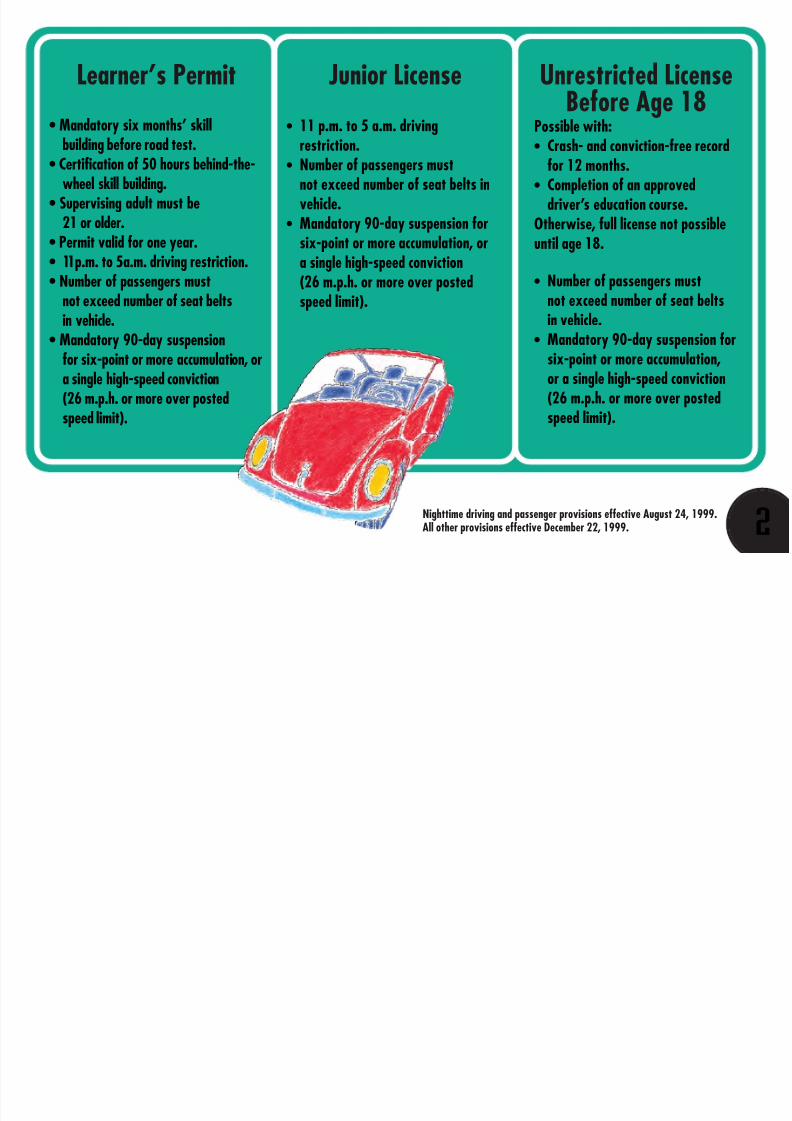
Unrestricted LicenseBefore Age 18
Junior LicenseLearner’s Permit
• Mandatory six months’ skillbuilding before road test.
• Certification of 50 hours behind-the-wheel skill building.
• Supervising adult must be21 or older.
• Permit valid for one year.• 11p.m. to 5a.m. driving restriction.
• Number of passengers mustnot exceed number of seat beltsin vehicle.
• Mandatory 90-day suspensionfor six-point or more accumulation, ora single high-speed conviction(26 m.p.h. or more over posted
speed limit).
• 11 p.m. to 5 a.m. drivingrestriction.
• Number of passengers mustnot exceed number of seat belts invehicle.
• Mandatory 90-day suspension forsix-point or more accumulation, ora single high-speed conviction
(26 m.p.h. or more over postedspeed limit).
Possible with:• Crash- and conviction-free record
for 12 months.• Completion of an approved
driver’s education course.Otherwise, full license not possibleuntil age 18.
• Number of passengers mustnot exceed number of seat beltsin vehicle.
• Mandatory 90-day suspension forsix-point or more accumulation,or a single high-speed conviction(26 m.p.h. or more over posted
speed limit).
Nighttime driving and passenger provisions effective August 24, 1999.All other provisions effective December 22, 1999.
8/6/2019 Tutors Guide
http://slidepdf.com/reader/full/tutors-guide 4/36
3
WhTeaching teenagers to drive takes time and
patience. Not because they don’t want to
learn. They want that license as soon as
they can get it. But to get them familiar with
all the situations they might face – and give
them enough on-the-road experience to
deal with each situation confidently and
safely – takes many hours of instruction
and practice.
That’s why Pennsylvania now requires at least
50 hours of adult-supervised, behind-the-
wheel training over a six-month period
before taking the road test to qualify for
a license.
If you’ve accepted the responsibility to be
one of those supervising adults, you’ll want
to put those 50 hours to good use. This
guide will help you organize that time –
a suggested lesson-by-lesson approach to
teaching your student how to handle a vehicle safely in a wide variety of situations.
When more than one adult is providing
instruction, each can use the guide to track
what lessons have already been covered and
decide what to review or cover next.
Throughout this guide are references to
pages in the Pennsylvania Driver’s Manual
that give more detailed information and
instructions. Much of this material was
covered in your student’s Learner’s Permit
Knowledge Test. Reviewing these sections
will also benefit you, as the supervising
adult, by reminding you of actions that now
come naturally to you and helping you
communicate them. You and the student
should review these pages in the
Pennsylvania Driver’s Manual beforebeginning that lesson.
You’ll see a suggested minimum total time
for covering the material in each lesson.
But you have to be the judge of when your
student is fairly skilled in what’s covered, so
you may decide to add additional practicetime before moving on to the next lesson.
While the suggested total time for a
lesson may be as long as five hours,
actual practice sessions should not
last more than about an hour.
Longer sessions can result in fatigue, which
reduces the effectiveness of the instruction
and increases the risks to you and your
student driver.
WhyYou’llWant to UseThis Guide.
8/6/2019 Tutors Guide
http://slidepdf.com/reader/full/tutors-guide 5/36
4
y After you’ve completed Lesson 6 (Driving on
Limited-Access Highways), you should begin
giving the student opportunities to practice
driving with you in general
situations not devoted to specific new
situations or skills. This practice helps thestudent gain confidence before tackling
later lessons devoted to driving at night
and in bad weather.
In the back of this booklet is a log to record
the date, amount of time spent, and what
you practiced on each day. It also has a column to write in the hours you’ve logged
so far, so you’ll know how far along you are
on the 50-hour requirement. You should
include any time the student has driven with
you on simple practice runs and trips
between actual instruction sessions.
Once the total of 50 hours is reached, you
need to ask yourself not just whether you
think the student can pass the official road
test but whether you honestly believe he or
she has the skills and attitude to drive safely
without supervision. Only when you canconfidently answer “yes” to both questions
should you allow your student driver to take
the road test.
8/6/2019 Tutors Guide
http://slidepdf.com/reader/full/tutors-guide 6/36
5
How well the training goes will have a lot to
do with the way you communicate. Here
are some basic guidelines for a positive
learning relationship:
Stay calm, patient, and positive. Don’t overreact, shout, or criticize.
Don’t assume that your student knows what
you want done or how to do it. Describe
the action to be taken as simply and clearly
as you can. In some cases, you may need to
demonstrate by taking the wheel yourself.
In the early lessons, as you approach
intersections or deal with traffic, have the
student tell you in advance what action
should be taken. This lets you know if he or
she is thinking ahead and planning the
correct response.
Keep a sharp eye on what’s happening on
the road so that you can warn the student of
potentially dangerous situations and explain
what to do.
Emphasize the importance of constantly
scanning the road for anything that willaffect how you should be driving or reacting.
When you are driving, set a good example.
Practice what you preach.
Throughout the training, constantly
emphasize what makes a good driver:
• Have a serious attitude toward driving.
• Understand the risks and how
to avoid them.
• Know and follow the rules of the road.
• Respect the power of vehicles.
• Always drive safely and responsibly.
• Always wear the seat belt.
• Look out for what other drivers are doing.
• Stay within speed limits, and drive at a
speed that is safe for conditions.
• Follow other vehicles at a safe distance.
• Know when and how to move safely
into traffic.
• Communicate intentions to other drivers.
• Show courtesy to other drivers.
• Never drive while under the influence of
alcohol or drugs.
Whatto remind
yourself.
Theprinciples
of good driving.
8/6/2019 Tutors Guide
http://slidepdf.com/reader/full/tutors-guide 7/36
6
Don’t take it for granted that your student
knows how to operate all the pedals,
switches, buttons, and other things that control the vehicle ... or how to read the
instrument panel.
With the student sitting in the driver’s seat,
explain how it all works – from adjusting
the seat and mirrors to operating the
gearshift, brakes, headlights, hazard lights,
defroster, and wipers. Have the student
actually operate everything, including
those controls that only work when the
motor’s running.
Remind your student to always use the seat
belt, even if the car has an air bag. They are
meant to work together, since an air bag
alone won’t keep you in the seat if there’s a
crash. Have the student adjust the seat so
he or she is as far as possible from the airbag to avoid injury, but still able to comfortably
reach the pedals and other controls.
To protect against whiplash, the adjustable
headrest should be moved so that the top of
the restraint is slightly above the driver’s
ears or at the back of the head – not at thebase or curve of the neck.
Teach your student how to adjust the
sideview mirrors to minimize blind spots.
The best way to do this is to tilt your body
toward the mirror being adjusted and adjust
it so that the side of the car is just visible
when you look into the mirror.
Go over the instrument panel and what each
gauge means. You may want to refer to the
vehicle’s owner’s manual to be sure you’ve
covered everything.
At a service station, demonstrate how to fillthe gas tank and add air to the tires. Show
how to open the hood and where to check
the oil and other fluid levels. Point out the
location of the spare tire and the tools for
changing a tire. Even though your student
might be asking a service attendant to do
these things, it’s important that he or sheknows where everything is and how it’s used.
Controls, Gauges, and
Maintenance
Minimum total time for
all sessions – 2 hours
LESSON
1Pennsylvania Driver’s Manual Review
Chapter III –Vehicle Checks
8/6/2019 Tutors Guide
http://slidepdf.com/reader/full/tutors-guide 8/36
7
The best place to begin teaching the student
how to drive is a big, empty parking lot.
The lines on the lot can be used to represent
roads, curbs, and parking spaces as you go
over these basic moves:
• Coordinating brakes and gearshift whilestarting the engine.
• Operating the gearshift once the engine
is started. (With stick-shift vehicles, it
will take more practice time to learn
how to use the clutch and shift gears
without stalling.)
• Holding the steering wheel properly.
• Slowing the car by using the foot brake
or just taking the foot off the gas pedal.
• Moving the car forward and stopping.
• Making partial turns.
• Driving in reverse (turning the body tothe right to look behind while steering
with the left hand).
• Making left- and right-hand turns.
(Get them in the habit of using the
turn signal for all turns.)
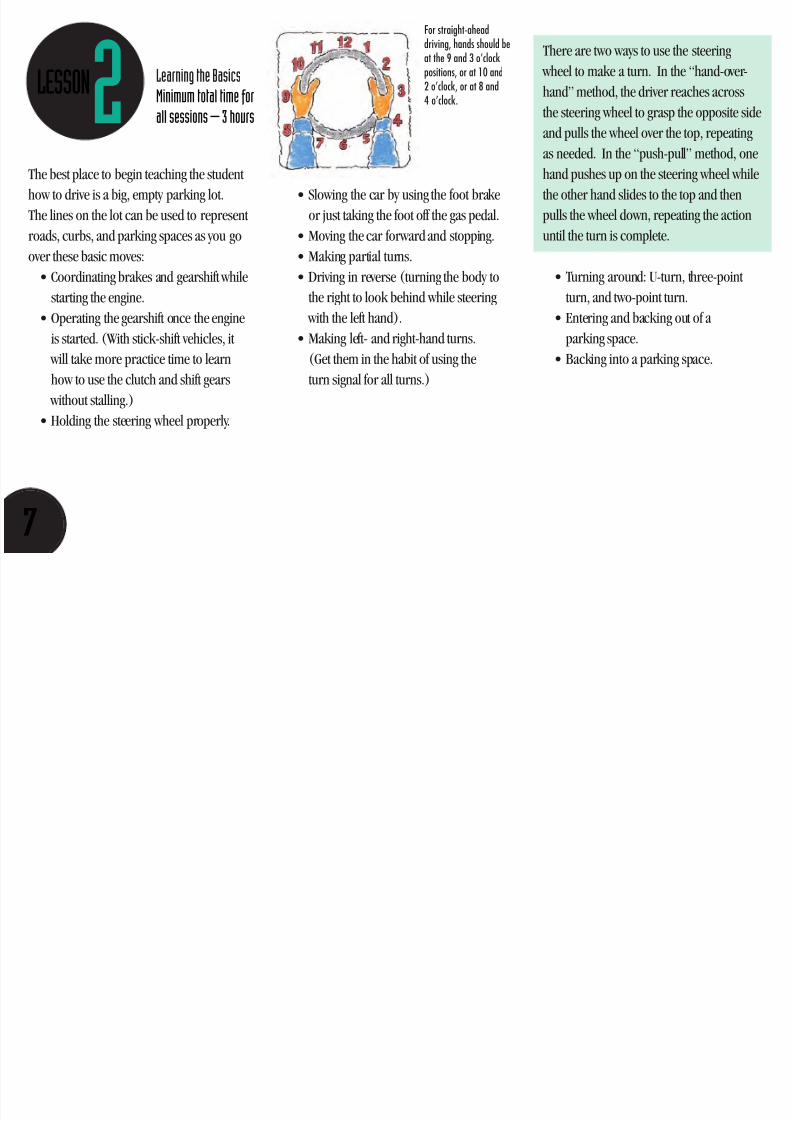
There are two ways to use the steering
wheel to make a turn. In the “hand-over-
hand” method, the driver reaches across
the steering wheel to grasp the opposite side
and pulls the wheel over the top, repeatingas needed. In the “push-pull” method, one
hand pushes up on the steering wheel while
the other hand slides to the top and then
pulls the wheel down, repeating the action
until the turn is complete.
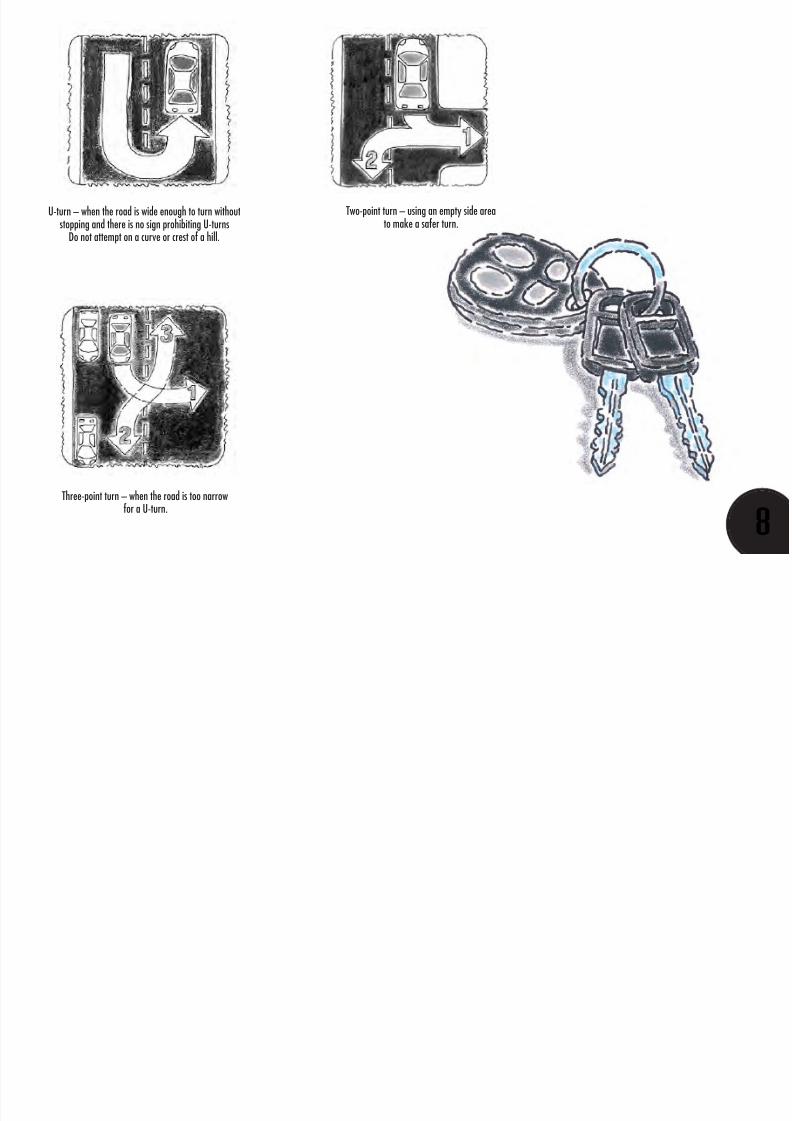
• Turning around: U-turn, three-point turn, and two-point turn.
• Entering and backing out of a
parking space.
• Backing into a parking space.
LESSON
2
Learning the Basics
Minimum total time for
all sessions – 3 hours
For straight-aheaddriving, hands should beat the 9 and 3 o’clockpositions, or at 10 and2 o’clock, or at 8 and4 o’clock.
8/6/2019 Tutors Guide
http://slidepdf.com/reader/full/tutors-guide 9/36
8
U-turn – when the road is wide enough to turn withoutstopping and there is no sign prohibiting U-turns
Do not attempt on a curve or crest of a hill.
Three-point turn – when the road is too narrowfor a U-turn.
Two-point turn – using an empty side areato make a safer turn.
8/6/2019 Tutors Guide
http://slidepdf.com/reader/full/tutors-guide 10/36
9
Once the student has gained skills in the
basic maneuvers in a parking lot, move tolightly traveled, two-lane residential streets
or country roads where the speed limit is
no more than 35 mph. Choose roads
where there are intersections with and
without stop signs, with and without traffic
lights, and where there will be oncoming
traffic and cars parked along the street. A list of instructions for each of these
situations follows.
In these early lessons, it’s important to teach
effective search and scanning habits: where
and when to look, what to look for, and
keeping attention focused.
Driving down the road.• Check in all directions before driving
out onto the road.
• Move steadily down the road, keeping a
“cushion” of space around the car.
• To keep a safe distance from the
car ahead, practice using the “four-
second rule” described in the Driver’s
Manual in Chapter III – Keeping a
Cushion Ahead.
• Steer as though following an imaginary
line down the middle of the lane you’re
driving in. (Using the center line or
right side of the road as a reference
point can cause bad positioning in
the lane.)• Keep eyes mostly on the lane ahead,
but pay attention to what any oncoming
vehicles in the other lane are doing.
• Keep looking about 12 seconds down
the road (the distance of one city
block) to give yourself time to make
decisions and control your car. Look out for cars braking ahead, pedestrians
near the curb, and children playing
nearby. Check ahead for upcoming
traffic signals or signs and anything
blocking your view so you can brake
or change lanes if necessary.
LESSON
3
Driving in Limited Traffic
Minimum total time for
all sessions – 6 hours
Pennsylvania Driver’sManual Review
Chapter II – Signals, Signs, and Pavement Markings.
Chapter III – Everyday Driving Skills.
The top two causes of crashes involving 16-year-oldPennsylvania drivers bothoccur at intersections –
making improper or careless turns, and proceeding
without enough clearance from other cars.
Other major causes are failing to obey stop
signs and traffic lights, turning from the wrong lane,
and driving on the wrong side of the road.
8/6/2019 Tutors Guide
http://slidepdf.com/reader/full/tutors-guide 11/36
10
Approaching intersections with and without stop signs.
• Slow down when approaching the
intersection and be prepared to stop.
• Respond to a stop sign by slowing
down and making a complete stop.• Look left, right, and left again for cars
approaching on the side streets.
• Watch out for pedestrians and yield to
those on crosswalks.
• Yield the right-of-way to cars or cyclists
already in the intersection.
• Look to be sure the intersection is clearof pedestrians and cross traffic before
proceeding through it. If the view is
obstructed, pull forward until it’s
not – then go ahead when the
intersection is clear.
Approaching intersections with traffic lights.• Approach the intersection ready to
brake – even if the signal is green.
If it’s yellow or red, gradually come
to a stop.• Look for signs such as “No Turn on
Red,” “No Turns,” “Wrong Way,” and
“One Way.”
• Keep a safe distance behind the
car ahead.
• Look left, right, and left again before
proceeding through the intersection when the light turns green.
• Yield if necessary to oncoming cars
making left-hand turns in front of you
and pedestrians crossing the street.
• Be sure there’s enough room for your
car at the other side of the intersection
if traffic is stopped up ahead.
• Be sure there’s an open path for the car
when making a left- or right-hand turn.
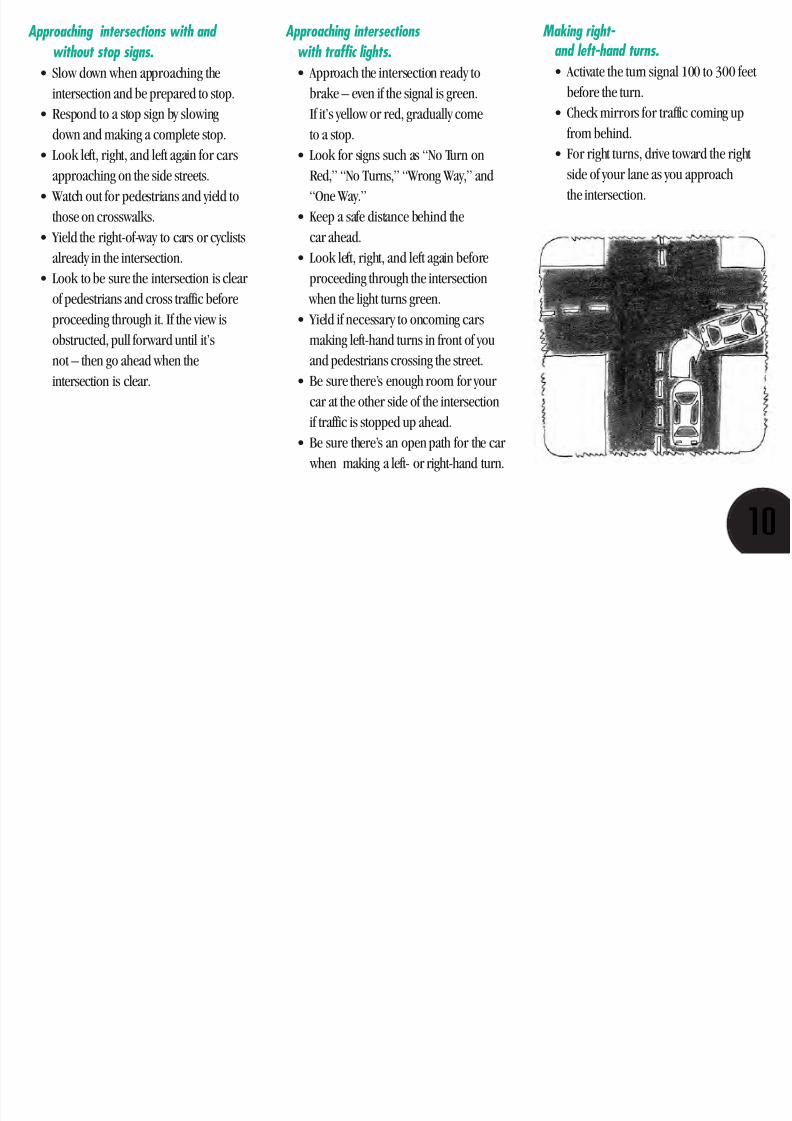
Making right- and left-hand turns.• Activate the turn signal 100 to 300 feet
before the turn.
• Check mirrors for traffic coming up
from behind.• For right turns, drive toward the right
side of your lane as you approach
the intersection.
8/6/2019 Tutors Guide
http://slidepdf.com/reader/full/tutors-guide 12/36
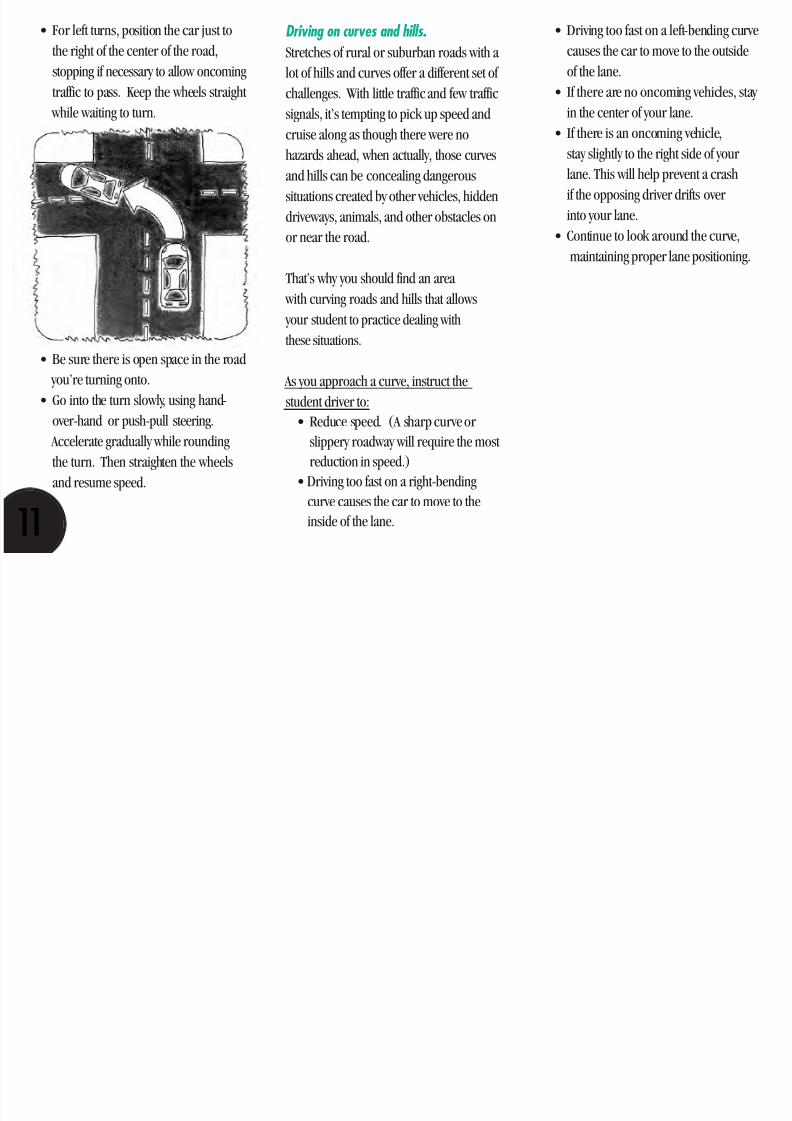
• For left turns, position the car just to
the right of the center of the road,
stopping if necessary to allow oncoming
traffic to pass. Keep the wheels straight
while waiting to turn.
• Be sure there is open space in the road
you’re turning onto.
• Go into the turn slowly, using hand-
over-hand or push-pull steering.
Accelerate gradually while rounding
the turn. Then straighten the wheels
and resume speed.
Driving on curves and hills.Stretches of rural or suburban roads with a
lot of hills and curves offer a different set of
challenges. With little traffic and few traffic
signals, it’s tempting to pick up speed and
cruise along as though there were nohazards ahead, when actually, those curves
and hills can be concealing dangerous
situations created by other vehicles, hidden
driveways, animals, and other obstacles on
or near the road.
That’s why you should find an area with curving roads and hills that allows
your student to practice dealing with
these situations.
As you approach a curve, instruct the
student driver to:
• Reduce speed. (A sharp curve or
slippery roadway will require the most
reduction in speed.)
• Driving too fast on a right-bending
curve causes the car to move to the
inside of the lane.
• Driving too fast on a left-bending curve
causes the car to move to the outside
of the lane.
• If there are no oncoming vehicles, stay
in the center of your lane.
• If there is an oncoming vehicle,stay slightly to the right side of your
lane. This will help prevent a crash
if the opposing driver drifts over
into your lane.
• Continue to look around the curve,
maintaining proper lane positioning.
11
8/6/2019 Tutors Guide
http://slidepdf.com/reader/full/tutors-guide 13/36
12
As you approach a hill, instruct your student
driver to:
• Keep close to the right edge of
your lane.
• Accelerate gently to maintain speed.
• At the top of the hill, search overthe crest to see if you have an open
path of travel.
• Upon reaching the top of the hill, look
for hazards such as pedestrians on the
road or shoulder and vehicles entering
the road from driveways, backed up
at a traffic light, or stopped for someother reason.
When there’s a traffic signal or stop sign on
the other side of the hill, there may be a
yellow or flashing sign to warn you. If so,
put your foot up to the brake pedal when
you reach the top of the hill so that you’re
prepared to stop quickly.
Review sessions. As you have additional sessions on lightly
traveled roads, reinforce good driving skills
by reminding your student driver to:
• Keep head up and eyes looking ahead.
• Scan the roadway far ahead and tothe sides.
• Continually check the rearview and
side mirrors.
• Make smooth starts and stops.
• Drive within the speed limit.
• Keep the speed consistent.
• Keep the car correctly positionedin the lane.
• Make turns properly by :
* Signaling in advance,
* Checking mirrors,
* Starting turns at the correct point,
* Not turning too wide or cutting
into the wrong lane, and
* Maintaining the proper speed.
• Respect the potential dangers of
driving around curves and over hills.
8/6/2019 Tutors Guide
http://slidepdf.com/reader/full/tutors-guide 14/36
13
Now you’re moving on to routes with a
mixture of neighborhood streets andcommercial areas, including roads that
have four lanes and designated turning
lanes. Speed limits should be no higher
than 40 mph.
Here are the basics you’ll be talking about
and practicing on these roads.
Speed control. You should emphasize to your student
driver again and again that driving within
the posted speed limit is not just to avoid
being stopped by the police, but to avoid
creating dangerous situations. They alsoneed to understand that driving safely
often requires driving below the posted
speed limit to adjust for road, traffic, or
weather conditions.
Driving too fast can cause you to:
• Not have time to react to an unexpectedaction by another vehicle, cyclist,
pedestrian or animal, or ...
• Lose control of the car because of a
sudden change in the road.
As you take these drives in traffic, have the
student concentrate on maintaining a safe,
consistent speed; thinking about when he
or she should be accelerating, braking, or
allowing the car to coast. New drivers tend
to lose speed going up hills and race going
down, so hills are a good place to practice
speed control. Instruct the student to slow
down when going through an intersection,
coming to a sharp curve, or getting ready to
turn onto another road. (But be sure not to
slow down too much before turning off a high-speed road since this can cause trouble
with a vehicle traveling full speed behind you.)
Yielding the right-of-way.Remind your student that a yield sign tells
you to stop or slow down to give the right-
of-way to other vehicles or pedestrians.
When approaching a yield sign, the
driver should:
• Put on the turn signal.
• Slow down.
• Check for traffic or people and, if
necessary, stop.• Turn to look behind and use the sideview
mirrors to check blind spots.
• Wait for a long, safe break in the traffic.
• Merge into the correct lane.
LESSON
4
Handling the Vehicle
in Traffic
Minimum total time for
all sessions – 8 hours
Pennsylvania Driver’s Manual Review
Chapter III – Turning, Merging, and Passing.
8/6/2019 Tutors Guide
http://slidepdf.com/reader/full/tutors-guide 15/36
14
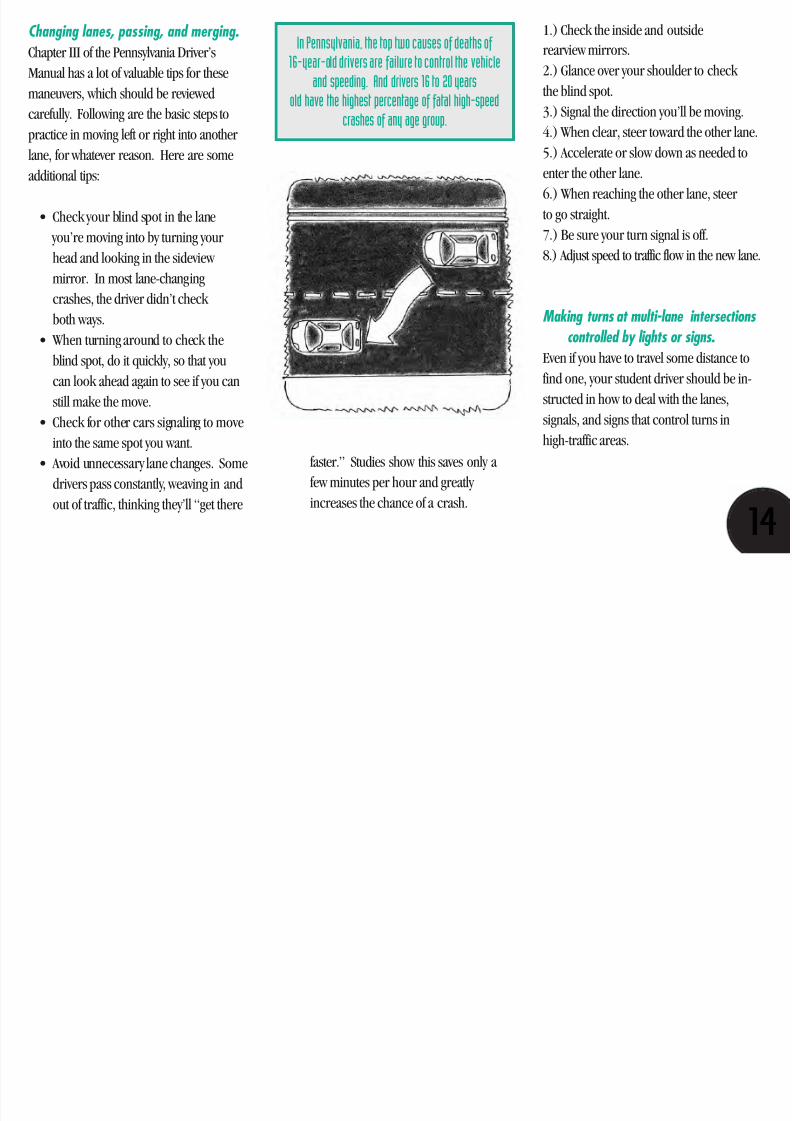
Changing lanes, passing, and merging.Chapter III of the Pennsylvania Driver’s
Manual has a lot of valuable tips for these
maneuvers, which should be reviewed
carefully. Following are the basic steps to
practice in moving left or right into anotherlane, for whatever reason. Here are some
additional tips:
• Check your blind spot in the lane
you’re moving into by turning your
head and looking in the sideview
mirror. In most lane-changingcrashes, the driver didn’t check
both ways.
• When turning around to check the
blind spot, do it quickly, so that you
can look ahead again to see if you can
still make the move.
• Check for other cars signaling to move
into the same spot you want.
• Avoid unnecessary lane changes. Some
drivers pass constantly, weaving in and
out of traffic, thinking they’ll “get there
faster.” Studies show this saves only a
few minutes per hour and greatly
increases the chance of a crash.
1.) Check the inside and outside
rearview mirrors.
2.) Glance over your shoulder to check
the blind spot.
3.) Signal the direction you’ll be moving.
4.) When clear, steer toward the other lane.5.) Accelerate or slow down as needed to
enter the other lane.
6.) When reaching the other lane, steer
to go straight.
7.) Be sure your turn signal is off.
8.) Adjust speed to traffic flow in the new lane.
Making turns at multi-lane intersections controlled by lights or signs.
Even if you have to travel some distance to
find one, your student driver should be in-
structed in how to deal with the lanes,
signals, and signs that control turns inhigh-traffic areas.
In Pennsylvania, the top two causesof deaths of
16-year-old drivers are failure to control the vehicle
and speeding. And drivers 16 to 20 years
old have the highest percentage of fatal high-speed
crashes of any age group.
8/6/2019 Tutors Guide
http://slidepdf.com/reader/full/tutors-guide 16/36
15
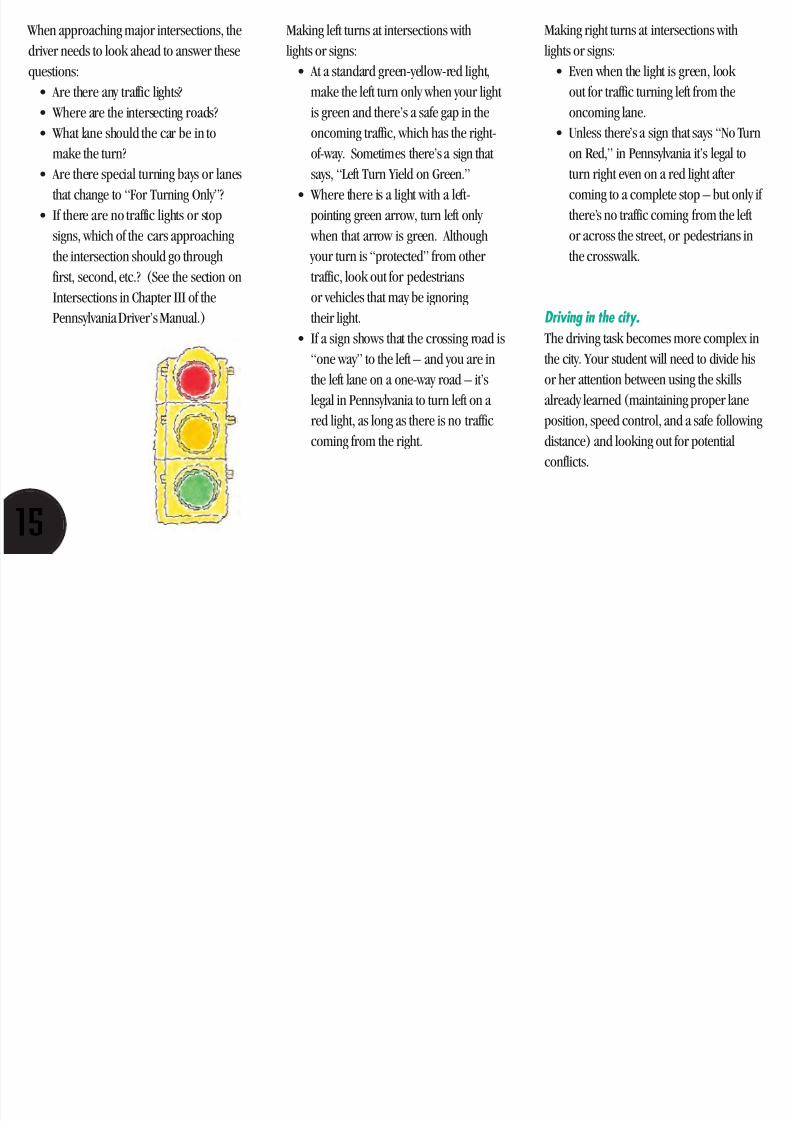
When approaching major intersections, the
driver needs to look ahead to answer these
questions:
• Are there any traffic lights?
• Where are the intersecting roads?
• What lane should the car be in tomake the turn?
• Are there special turning bays or lanes
that change to “For Turning Only”?
• If there are no traffic lights or stop
signs, which of the cars approaching
the intersection should go through
first, second, etc.? (See the section onIntersections in Chapter III of the
Pennsylvania Driver’s Manual.)
Making left turns at intersections with
lights or signs:
• At a standard green-yellow-red light,
make the left turn only when your light
is green and there’s a safe gap in the
oncoming traffic, which has the right-of-way. Sometimes there’s a sign that
says, “Left Turn Yield on Green.”
• Where there is a light with a left-
pointing green arrow, turn left only
when that arrow is green. Although
your turn is “protected” from other
traffic, look out for pedestriansor vehicles that may be ignoring
their light.
• If a sign shows that the crossing road is
“one way” to the left – and you are in
the left lane on a one-way road – it’s
legal in Pennsylvania to turn left on a
red light, as long as there is no trafficcoming from the right.
Making right turns at intersections with
lights or signs:
• Even when the light is green, look
out for traffic turning left from the
oncoming lane.
• Unless there’s a sign that says “No Turnon Red,” in Pennsylvania it’s legal to
turn right even on a red light after
coming to a complete stop – but only if
there’s no traffic coming from the left
or across the street, or pedestrians in
the crosswalk.
Driving in the city.The driving task becomes more complex in
the city. Your student will need to divide his
or her attention between using the skills
already learned (maintaining proper lane
position, speed control, and a safe followingdistance) and looking out for potential
conflicts.
8/6/2019 Tutors Guide
http://slidepdf.com/reader/full/tutors-guide 17/36
16
These could include:
• Slow-moving traffic with unexpected
braking.
• Crowding from buses and other
oversized vehicles.
• Pedestrians coming out betweenparked cars or crossing at mid-block.
• Doors opening from parked cars.
• Stopped traffic blocking intersections.
• Drivers trying to turn through
congested lanes.
• Drivers running a red traffic-
signal light.• Uneven pavement and sudden changes
in street conditions.
• One-way streets.
• Center lanes used for left turns by
traffic going in both directions.
• Oncoming left-turning vehicles
that block your view of through traffic when you
want to make a left turn.
Parking in a lot or garage with
marked spaces.By this time, basic car control and backing
skills should be well-established, so the
student is ready to practice parking skills in
a lot with other cars parked and moving
around. During this lesson, remind
your student to:
• Use the turn signals and watch forpedestrians and cars backing out of
parking spaces.
• Be especially cautious around children,
whose behavior is unpredictable.
• Pay attention to stop signs posted in the
parking lot and painted stop bars on
the pavement.
Here are the situations you should practice:
• Driving straight ahead intoa parking stall.
• Turning into a marked space, both
to the left and to the right. Keep as
centered as possible between the lines.
• Backing out of the stall, turning to the
right, and also turning to the left.
• Backing into a parking stall. (Sincethis is not easy, begin practice where
the adjacent spaces are empty.)
• Repeat these maneuvers until you
feel your student’s driving is smooth
and controlled.
LESSON5 Parking
Minimum total time for
all sessions – 2 hours
Pennsylvania Driver’s Manual Review
Chapter III – Parking.
8/6/2019 Tutors Guide
http://slidepdf.com/reader/full/tutors-guide 18/36
17
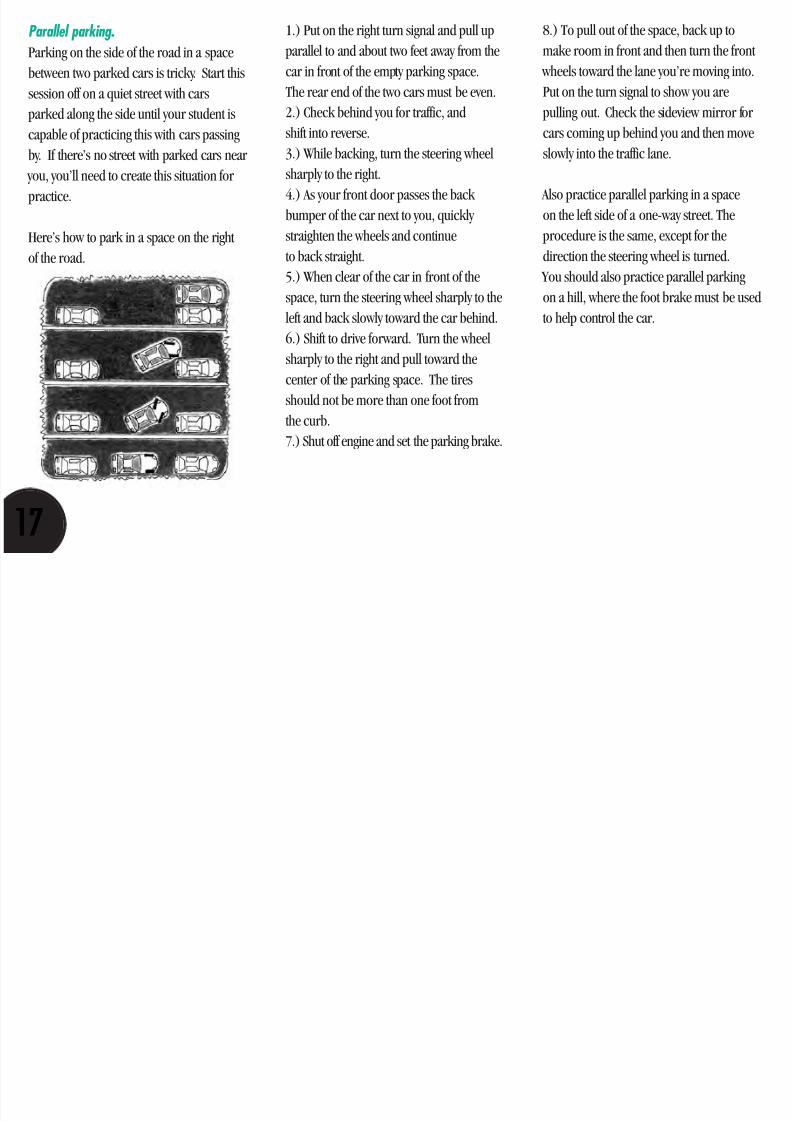
Parallel parking.Parking on the side of the road in a space
between two parked cars is tricky. Start this
session off on a quiet street with cars
parked along the side until your student is
capable of practicing this with cars passingby. If there’s no street with parked cars near
you, you’ll need to create this situation for
practice.
Here’s how to park in a space on the right
of the road.
1.) Put on the right turn signal and pull up
parallel to and about two feet away from the
car in front of the empty parking space.
The rear end of the two cars must be even.
2.) Check behind you for traffic, and
shift into reverse.3.) While backing, turn the steering wheel
sharply to the right.
4.) As your front door passes the back
bumper of the car next to you, quickly
straighten the wheels and continue
to back straight.
5.) When clear of the car in front of thespace, turn the steering wheel sharply to the
left and back slowly toward the car behind.
6.) Shift to drive forward. Turn the wheel
sharply to the right and pull toward the
center of the parking space. The tires
should not be more than one foot from
the curb.7.) Shut off engine and set the parking brake.
8.) To pull out of the space, back up to
make room in front and then turn the front
wheels toward the lane you’re moving into.
Put on the turn signal to show you are
pulling out. Check the sideview mirror for
cars coming up behind you and then moveslowly into the traffic lane.
Also practice parallel parking in a space
on the left side of a one-way street. The
procedure is the same, except for the
direction the steering wheel is turned.
You should also practice parallel parkingon a hill, where the foot brake must be used
to help control the car.
8/6/2019 Tutors Guide
http://slidepdf.com/reader/full/tutors-guide 19/36
18
Entering and exiting a highway.The first sessions should be during a non-
rush hour time. This allows the young
driver to get used to highways with entrance
and exit ramps without having to deal with
the heavy traffic that requires quicker
reactions. Plan a route that allows getting
on and off these ramps several times.
Your instructions for entering the highway
should center on making full use of the en-
trance ramp in order to join the traffic at
close to the same speed that it’s moving on
the highway.
1.) While moving along the entrance ramp,
turn on the turn signal.
2.) Check the sideview mirror and turn
your head to look over your shoulder at
the traffic coming up in the lane you’ll
be entering.
3.) Look for a gap in the traffic while
adjusting your speed to match that of carson the highway. (Remember that the
highway traffic has the right-of-way. Most
entrance ramps have a yield sign to remind
you of that.)
4.) When you reach the middle of the ramp,
look over your shoulder to see if there’s
enough room for you to move into the first lane of the highway without causing the
vehicles there to slow down.
5.) If there’s no safe gap open, slow down
or come to a stop until there’s enough
room to enter the first highway lane safely.
Safety Tip: When following another car on
the ramp, pay close attention to its braking
behavior. While you’re looking behind for a
safe gap to merge into, the car ahead might
slow down or stop abruptly and cause
a collision.
LESSON6 Driving on Limited-
Access Highways.
Minimum total time for
all sessions – 6 hours
Pennsylvania Driver’s Manual Review
Chapter III – Trucks & Buses.
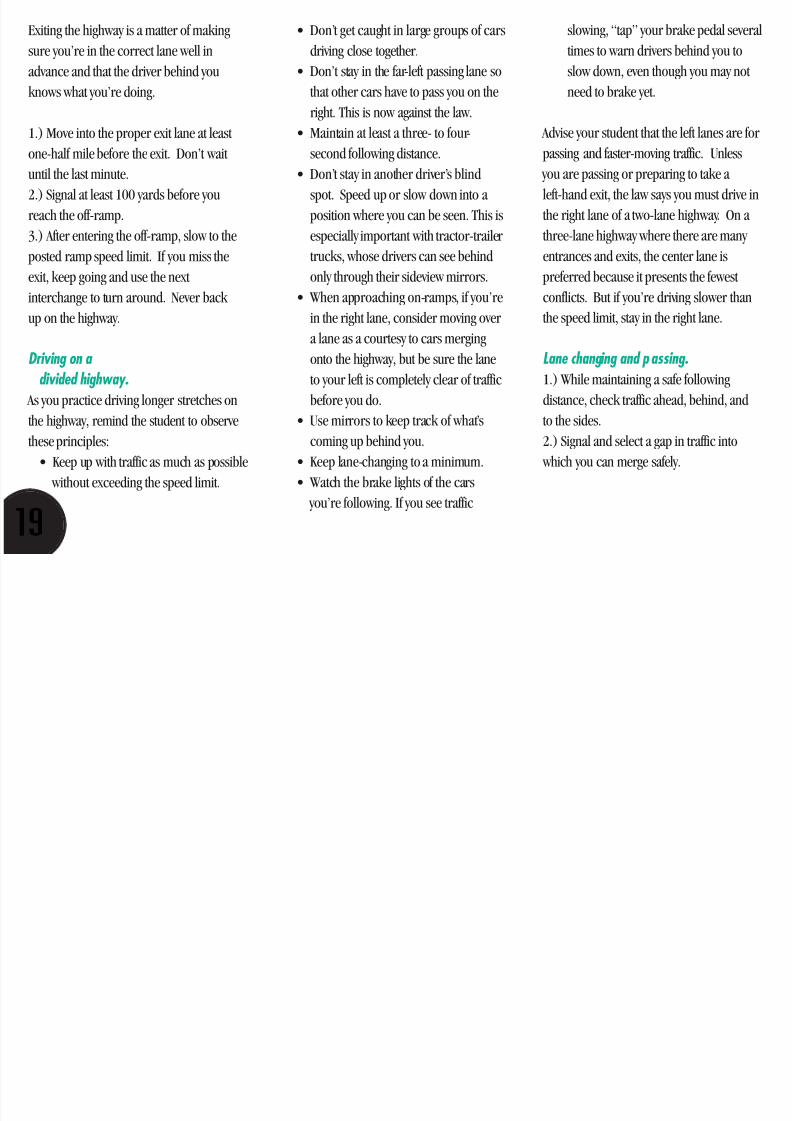
When coming from a highway entrance ramp, don’t pull
directly onto the highway. Use the ramp to adjust yourspeed in order to find a safe opening in the traffic.
8/6/2019 Tutors Guide
http://slidepdf.com/reader/full/tutors-guide 20/36
19
Exiting the highway is a matter of making
sure you’re in the correct lane well in
advance and that the driver behind you
knows what you’re doing.
1.) Move into the proper exit lane at least one-half mile before the exit. Don’t wait
until the last minute.
2.) Signal at least 100 yards before you
reach the off-ramp.
3.) After entering the off-ramp, slow to the
posted ramp speed limit. If you miss the
exit, keep going and use the next interchange to turn around. Never back
up on the highway.
Driving on a divided highway.
As you practice driving longer stretches on
the highway, remind the student to observethese principles:
• Keep up with traffic as much as possible
without exceeding the speed limit.
• Don’t get caught in large groups of cars
driving close together.
• Don’t stay in the far-left passing lane so
that other cars have to pass you on the
right. This is now against the law.
• Maintain at least a three- to four-second following distance.
• Don’t stay in another driver’s blind
spot. Speed up or slow down into a
position where you can be seen. This is
especially important with tractor-trailer
trucks, whose drivers can see behind
only through their sideview mirrors.• When approaching on-ramps, if you’re
in the right lane, consider moving over
a lane as a courtesy to cars merging
onto the highway, but be sure the lane
to your left is completely clear of traffic
before you do.
• Use mirrors to keep track of what’scoming up behind you.
• Keep lane-changing to a minimum.
• Watch the brake lights of the cars
you’re following. If you see traffic
slowing, “tap” your brake pedal several
times to warn drivers behind you to
slow down, even though you may not
need to brake yet.
Advise your student that the left lanes are forpassing and faster-moving traffic. Unless
you are passing or preparing to take a
left-hand exit, the law says you must drive in
the right lane of a two-lane highway. On a
three-lane highway where there are many
entrances and exits, the center lane is
preferred because it presents the fewest conflicts. But if you’re driving slower than
the speed limit, stay in the right lane.
Lane changing and passing.1.) While maintaining a safe following
distance, check traffic ahead, behind, and
to the sides.2.) Signal and select a gap in traffic into
which you can merge safely.
8/6/2019 Tutors Guide
http://slidepdf.com/reader/full/tutors-guide 21/36
20
3.) Check mirrors and turn your head to
check the blind spot.
4.) Adjust speed if necessary and steer into
the other lane.
5.) When passing, speed up only to pass
the other vehicle.6.) Signal to advise the driver you just
passed that you’re moving back into
that lane.
7.) Check mirrors and turn your head to be
sure you’re not cutting off the vehicle you
just passed.
8.) Maneuver your vehicle into the lane while maintaining speed. After you’ve
changed lanes, be sure your turn signal
is off.
Trucks and buses.Knowing how to share the highway with
large vehicles is critical. Briefly:
• Always be aware of the larger vehicle’s
blind spots. If you can’t see a truck’s
mirror, the truck driver can’t see you.• When possible, pass the larger vehicle
on an upgrade, when it usually is
losing speed.
• Move over to the right slightly when it’s
passing you.
• Don’t “tailgate” (following the vehicle
in front of you too closely).• Be alert to their turning and the space
they need to do it.
• Be aware of the extra distance they
need when braking. (Never cut
sharply in front of a truck or bus).
• When approaching a school bus, drive
with extra care, since children may run
out of the bus or across the street.
When a school bus is preparing to stop
and its amber (yellow) lights begin
flashing, you must prepare to stop. When the bus stops and its red lights
are flashing and its stop arm is
extended, you must stop at least 10 feet
away from the bus, whether you are
behind it, coming toward it on the
same road, orapproaching an
intersection at which the bus isstopped. Remain stopped until the red
lights stop flashing, the stop arm has
been withdrawn, and the children have
reached a safe place.Two of the 10 most common causes of deaths
involving 16-year-old drivers are driving over
the speed limit and not compensating for a curve.Others are following another vehicle too
closely and losing control of the vehicle.
8/6/2019 Tutors Guide
http://slidepdf.com/reader/full/tutors-guide 22/36
21
The dangers of nighttime driving.
Explain to your student that there are threemain reasons why driving at night is more
dangerous:
1.) Ninety percent of a driver’s reaction
depends on vision, which is severely limited
at night. It’s harder to make safe-gap
judgments; notice pedestrians and bicyclists;
and see curbs, medians, and roadway edgesand markings.
2.) Glare from oncoming headlights makes
it difficult to see and temporarily blinds
some people.
3.) Most people are more tired at night,
which slows their reaction time
and concentration.
During the first night practice sessions,
return to the streets you drove on during the
early daytime lessons. Review these points:
• Headlights should be turned on before
the sun goes down. Even if they don’t
light up the road, they help to make
your car more visible to other drivers.
• Use high beams only when oncoming
drivers or a driver you’re following
won’t see them.
• To compensate for reduced visibility,
drive a little slower and at a greater
following distance.
• Take extra care when judging distances
at night. Landmarks used during the
day are hidden after dark, and oncoming
vehicles are just two points of light.
• Although headlights from oncoming
cars help light up the road, the glarecan reduce your ability to see for a few
seconds. Teach your student to reduce
the glare by looking toward the right
side of the road as the other car passes.
• Show the student how to reduce
headlight glare from cars behind you
by flipping the rearview mirror.
• Watch for things that reflect the
headlights, such as:
* Road signs that should be read.
* Reflective striping or lane
markings on the road.
* A piece of metal or glass on theroad that should be avoided.
* Reflective striping on a bicyclist
or pedestrian.
* The eyes of an animal.
Night driving in neighborhoods and the city.
LESSON7 Driving at Night
Minimum total time for
all sessions – 5 hours
Pennsylvania Driver’s Manual Review
Chapter III – Driving at Night, Using Your Headlights.
8/6/2019 Tutors Guide
http://slidepdf.com/reader/full/tutors-guide 23/36
22
• Watch for unusual movement or
changes in contrast, such as:
* A vehicle with its headlights off.
* A pedestrian wearing dark clothes.
* A dark spot in the road that might
be a pothole.
* A stop line painted across the road.
In commercial areas and in the city, traffic
signs and signals are harder to see against a
background of signs, store windows, and
street lights. Have the student tell you when
he or she sees traffic signs and signals.
Night driving on country roads.Try to find a country road (preferably one
you practiced on during the daytime) that
allows the student to experience
real darkness.
• Remind the student that headlights donot follow curves, hills, and dips in the
road. To compensate, reduce speed
and pay special attention to the curve
warning signs.
• Use high beams as much as possible,
dimming them when approaching or
following another vehicle.
• Since many country roads are marked
only with a center line, the student will
need to judge the edge of the roadway
by noticing the difference in contrast
between the pavement and the grass.
• Watch for pedestrians or animals on or
near the road.
Night driving on limited-access highways.In practicing on these roads at night, point
out these differences to your student:
• Entering and exiting the highway will be
similar to the daytime environment
since most of these areas have bright
lighting. But watch for “Wrong Way”
and “Do Not Enter” signs near these
ramps, where many driving mistakes
occur at night.
• In the non-lit areas of the highway, the
white line is always on the right side of a
lane, and the yellow line is on the left side.
• Maintain a safe following distance.
• Don’t drive “beyond the headlights;”
that is, don’t drive so fast that you
can’t stop in time to avoid what the
headlights show up ahead.• Don’t drive faster than the posted
speed limit.
• Practice courteous use of high- and
low-beam headlights.
• Glare from oncoming vehicles is a
problem on highways not divided by a
large grassy area or where there isnothing on the median to block the
lights. The only way to reduce this
glare is to drive in the right lane
of the multi-lane highway.
Traffic death rates are three times greater at night
than during the day. Recent data shows that34 percent of 16-year-old licensed Pennsylvania
drivers were involved in crashes at night.
Male drivers ages 16 to 19 have the highest night
fatality rate – three times that of all drivers.
8/6/2019 Tutors Guide
http://slidepdf.com/reader/full/tutors-guide 24/36
When the weather is bad, additional hazards
are created by slick roads – visibility ispoor, and there are other drivers who don’t
compensate for the poor driving conditions.
Once your student has mastered previous
lessons, you should have him or her
practice driving in bad weather conditions
whenever possible. At the minimum, you
should thoroughly review these tips on how to drive in these conditions.
You should also go over the points in the
Pennsylvania Driver’s Manual for dealing
with emergency situations that occur on the
road and with the vehicle itself.
Driving on wet roads.• Turn on the wipers after the windshield
is wet, selecting an intermittent, low, or
high setting to keep the windshield clear.
• Turn on the low-beam headlights. This
is the law, and it’s also good common
sense since it helps others see you.
• Drive 5 to 10 mph slower than normal.• Increase the following distance to five
or six seconds.
• Be more cautious and slow down
on curves.
• Wet leaves can cause loss of traction, so
use caution when accelerating or braking.
• Avoid quick stops. “Pump” the brakesto slow or stop, unless the vehicle has
an anti-lock braking system (ABS),
which requires only steady pressure on
the brake pedal.
• Keep the defroster on to clear steamed
windows. If you must make
adjustments while on the move, make
sure the road ahead is clear far ahead
before looking down at the dashboard,
and look away for only a second or two.
• When it’s foggy, if your vehicle has fog
lights, use them in addition to the low
beams. (Don’t use high beams
because they reflect off the fog back
into your eyes, causing glare and
reduced visibility.) Slow down until
your speed matches your ability to see,even if it means slowing to a crawl.
• In heavy rains, trucks produce splashing
water that can completely obscure your
vision, even when the wipers are at
maximum speed. If you are passing or
about to be passed by a truck, look far
ahead and know exactly which way theroad turns, since you’ll be temporarily
blinded for a few seconds. If you are
doing the passing, accelerate gently,
because too much power can cause
you to skid.23
LESSON8 Handling Bad Weather
and Emergencies
Minimum total time for
all sessions – 3 hours.
Pennsylvania Driver’s Manual Review
Chapter III – Emergency Driving Skills
8/6/2019 Tutors Guide
http://slidepdf.com/reader/full/tutors-guide 25/36
24
If the truck is passing you, ease off of the gas
until the splash is gone.
• If the water on the road is deeper than
the tread of the tires, your vehicle may
glide over the water. This is called
hydroplaning. If you can see heavy
water on the road and can’t steer
around it, slow down.
• If the road appears to be flooded, don’t
drive through it. As little as six inches
of water can float some small cars, and
two feet will carry away most vehicles.
Driving in snow.
• Make sure the entire vehicle is clearedof snow and ice, since movement can
cause snow to slide from the roof onto
the windshields and obscure your view.
• With automatic shift, use the shift
positions that are provided to move the
car slowly without spinning the wheels.
(See the car’s operating manual.)
• With stick shift, use first or second gear.
• When starting in the snow, keep the
wheels straight ahead and accelerate
gently to avoid spinning tires.
• Decrease speed to make up for a loss
of traction. On packed snow, decrease
speed by half. On ice, slow to a crawl.
• Always accelerate and decelerate gently
in snowy conditions.• Be extra careful with braking. Stopping
distances are about 10 times greater in
ice and snow.
• Slow down the vehicle long before
coming to an intersection or turn.
• Brake only when traveling in a
straight line.• Apply the brakes gently and release just
before the brakes lock. Repeat this
process with short pauses in between,
to avoid skidding. (If your car has an
anti-lock braking system (ABS)– see
the instructions for braking under
“Driving On Wet Roads.”)
• Keep a safe distance between your
vehicle and those around you.
• Watch ahead for danger spots, such as
shaded areas and bridge surfaces that
may be icy when the rest of the road is
clear, or patches of “black ice” (where
the road can be seen through a
thin layer of ice.)
• When going uphill, stay far behind a car
ahead of you so that you will not needto come to a stop or slow down, which
can cause skidding.
• When going downhill, shift to a lower
gear (even in an automatic transmission).
Do this slowly to avoid skidding.
• If the vehicle skids out of control, take
your foot off the accelerator and turnthe steering wheel in the direction you
want to go (toward the center of the
lane) until you regain control.
One of the top 10 contributing factors in crashes
involving 16-year-old drivers is driving too fast for
conditions in rain, sleet, or snow.
8/6/2019 Tutors Guide
http://slidepdf.com/reader/full/tutors-guide 26/36
25
Review what has to be done if stuck in a
snowdrift. A shovel and a small bag of
abrasive material (cat litter, sand, or salt)
should always be kept in the car for such
emergencies.
1.) With the front wheels pointed ahead,
shovel out the snow in front of and behind
each wheel, and from under the car.
2.) Put the abrasive material under the tires
for traction.
3.) Put standard transmissions in second
gear; automatics in low or drive.4.) “Rock and Roll.”
• First, make sure no one is near your
car.
• With a standard shift, roll forward a
little, step on the clutch, and roll back.
Keep doing this, going a little farther
each time, until the car is out.
• With an automatic transmission, start in
low gear and go forward as far as you
can. Shift rapidly into reverse and back
slowly as far as you can, but don’t let your
wheels spin. Shift back to low to go
forward. Repeat these maneuvers in
rapid succession, rocking the vehicle
backward and forward until the car is free.
5.) Once you get the car out of the drift,
don’t stop – but be sure the road is clear
of oncoming traffic.
Recovering from a “drop -off.” Drop-offs occur when the front wheel
suddenly leaves the pavement and drops
onto the shoulder and the shoulder is lower
than the roadway by two inches or more.
Braking hard or turning sharply to re-enter
the roadway can cause your vehicle to whip
across the road, into oncoming traffic.
Since it’s not advisable to practice an actual
drop-off situation, you’ll have to talk
through what to do. These are the steps to
follow if the front wheel drops off onto a low
shoulder:
1.) Ease off the gas pedal to slow down.
Don’t use the brakes unless you’re headed
for some obstacle, such as a bridge.
2.) Steer parallel to the road and slightly to
the right to keep the tires from scraping the
edge of the pavement and throwing the car
back across the road.
3.) Continue to slow gradually to anextremely slow speed (less than 25 mph),
until the vehicle is under control.
4.) Check for traffic approaching in the lane
you will re-enter and signal.
5.) Gently ease the right wheels onto
the pavement.
6.) Straighten into the first lane and speedup to the flow of traffic.
8/6/2019 Tutors Guide
http://slidepdf.com/reader/full/tutors-guide 27/36
26
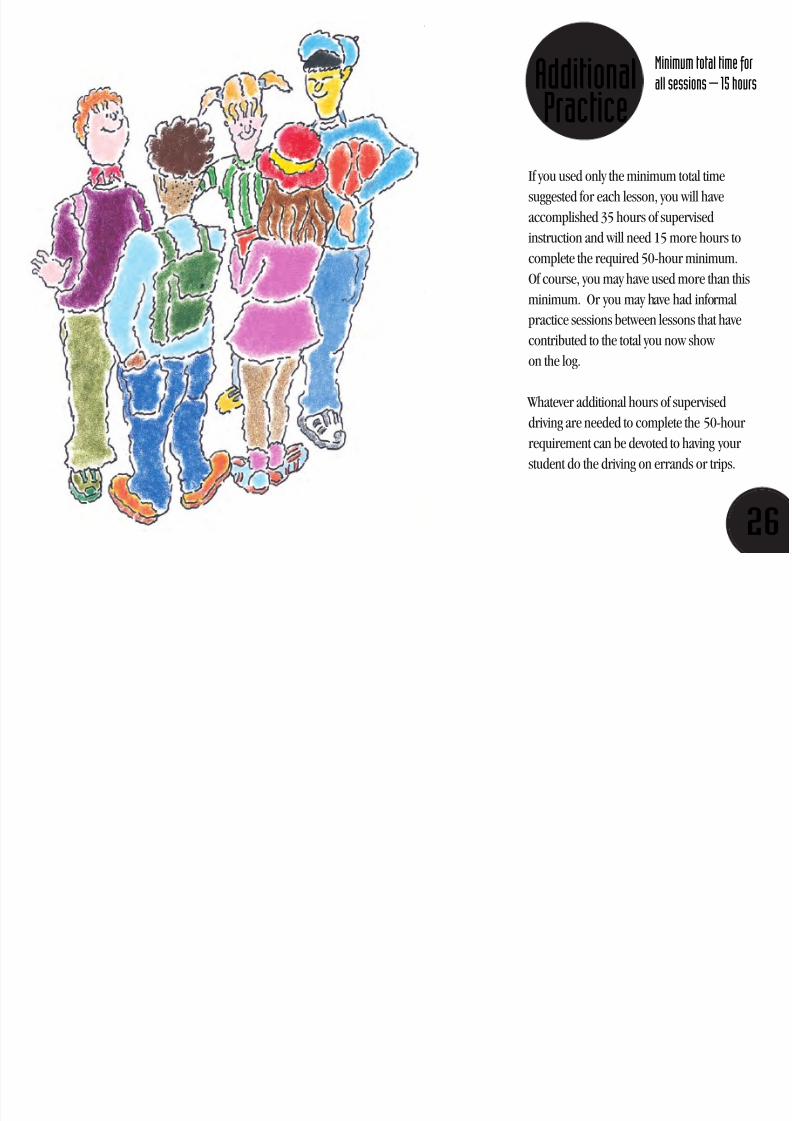
If you used only the minimum total time
suggested for each lesson, you will have
accomplished 35 hours of supervised
instruction and will need 15 more hours to
complete the required 50-hour minimum.
Of course, you may have used more than thisminimum. Or you may have had informal
practice sessions between lessons that have
contributed to the total you now show
on the log.
Whatever additional hours of supervised
driving are needed to complete the 50-hourrequirement can be devoted to having your
student do the driving on errands or trips.
Minimum total time for
all sessions – 15 hoursAdditionalPractice
8/6/2019 Tutors Guide
http://slidepdf.com/reader/full/tutors-guide 28/36
27
This is when you can observe how the
student handles a variety of traffic situations,
some of which he or she may not have
encountered before. These might include:
• Dealing with aggressive drivers by get-
ting out of their way and staying calm.
• Sharing the road with tractor-trailers,
bicycles, and motorcycles.
• Stopping for school buses.
• Avoiding pedestrians walking onto
the road.
• Driving through work zones
and tunnels.• Handling rush-hour traffic.
• Passing on two-lane roads.
Remind your student that it’s against the law
for anyone under 21 to drink alcohol. Of
course, any use of alcohol or drugs can
create a dangerous situation for a driver and
others. And if someone under 21 is caught
with any measurable amount of alcohol in
hisor her system, it is considered “driving
under the influence” and penalized severely.
Express your personal feelings about
drinking and using drugs and what you
expect. Tell your student that you’re willing
to help in any situation that might involve
the risk of him or her either driving
impaired or being driven home by
someone who is.
Pennsylvania Driver’s Manual Review
Chapter IV – Driving Under the Influence of Alcohol
or a Controlled Substance, Underage Drinking.
8/6/2019 Tutors Guide
http://slidepdf.com/reader/full/tutors-guide 29/36
28
“Straight Talk”By the time you have reached the end of the instruction period, you should be
feeling comfortable with your student’s ability to drive a vehicle. But you know
that young drivers have a history of getting involved in crashes because of
adolescent-related attitudes, high-risk behavior, and lack of experience.
Pick a time when you and your student driver can talk about these issues.
Point out that competitiveness, aggression, inexperience, a sense of power
and invincibility, and the temptations of independence are all influencesthat cause young drivers to drive dangerously.
For example, compared to other drivers, a larger proportion of teen fatal
crashes involve going too fast for road conditions.
Many of these involve only one vehicle, where the car leaves the
road and overturns, or hits a tree or a pole.
In many cases, distraction caused by other teenage passengers is a key factor.
And only a very small percentage of teens wear their
seat belts compared to other drivers.
At night, crashes involving newly licensed drivers are mainly caused by alcohol,
peer group pressure, lack of night driving experience, and fatigue.
8/6/2019 Tutors Guide
http://slidepdf.com/reader/full/tutors-guide 30/36
29
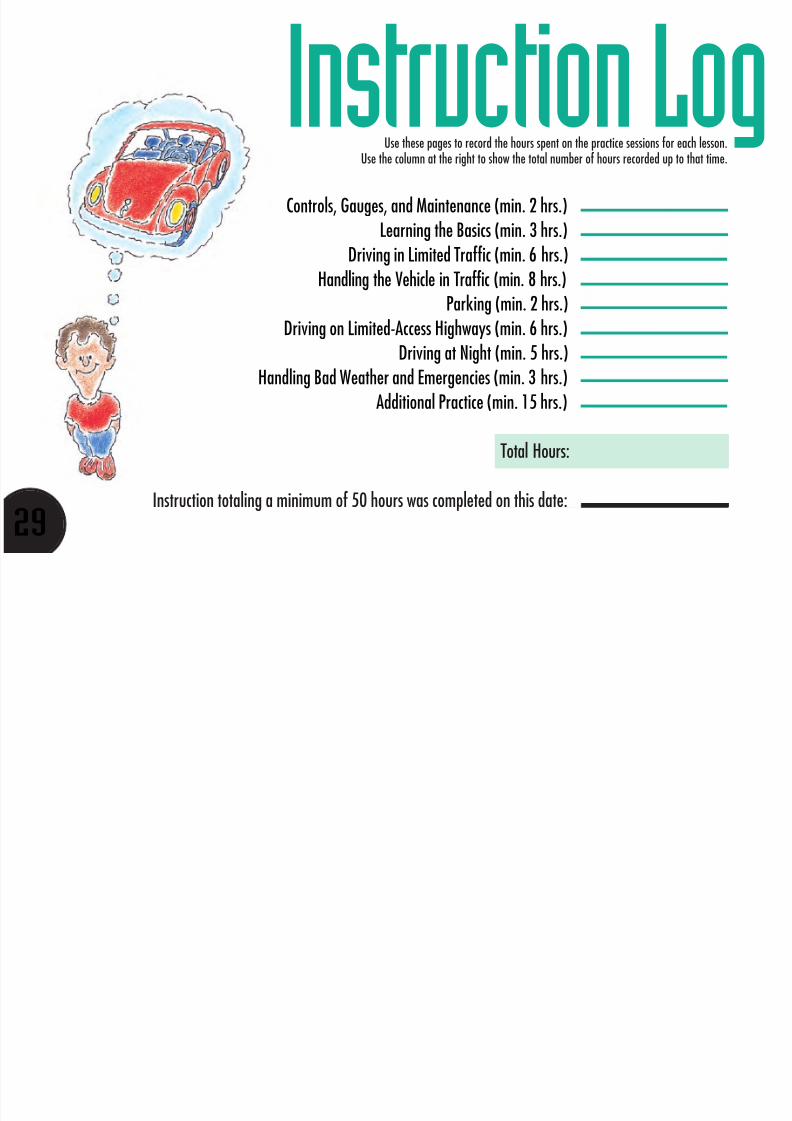
Controls, Gauges, and Maintenance (min. 2 hrs.)Learning the Basics (min. 3 hrs.)
Driving in Limited Traffic (min. 6 hrs.)
Handling the Vehicle in Traffic (min. 8 hrs.)Parking (min. 2 hrs.)
Driving on Limited-Access Highways (min. 6 hrs.)Driving at Night (min. 5 hrs.)
Handling Bad Weather and Emergencies (min. 3 hrs.)Additional Practice (min. 15 hrs.)
Total Hours:
Instruction totaling a minimum of 50 hours was completed on this date:
Instruction LogUse these pages to record the hours spent on the practice sessions for each lesson.
Use the column at the right to show the total number of hours recorded up to that time.

8/6/2019 Tutors Guide
http://slidepdf.com/reader/full/tutors-guide 31/36
Date Tutor What Practiced Amount of Time Hours to Date
30

8/6/2019 Tutors Guide
http://slidepdf.com/reader/full/tutors-guide 32/36
Date Tutor What Practiced Amount of Time Hours to Date
31
8/6/2019 Tutors Guide
http://slidepdf.com/reader/full/tutors-guide 33/36
Date Tutor What Practiced Amount of Time Hours to Date
32
8/6/2019 Tutors Guide
http://slidepdf.com/reader/full/tutors-guide 34/36
Date Tutor What Practiced Amount of Time Hours to Date
33

8/6/2019 Tutors Guide
http://slidepdf.com/reader/full/tutors-guide 35/36
Date Tutor What Practiced Amount of Time Hours to Date
34

8/6/2019 Tutors Guide
http://slidepdf.com/reader/full/tutors-guide 36/36
PENNDOT


