
beginning string orchestratips for teaching
contentsIntroduction 3
Violin & Viola: Back to School Tips 5
Recruiting & Developing Violists in 8your School Orchestra
Cello & Bass: Back to School Tips 10
What Band Directors Need to Know 14 about Teaching Orchestra
A Basic Approach to Sizing String 17Instruments
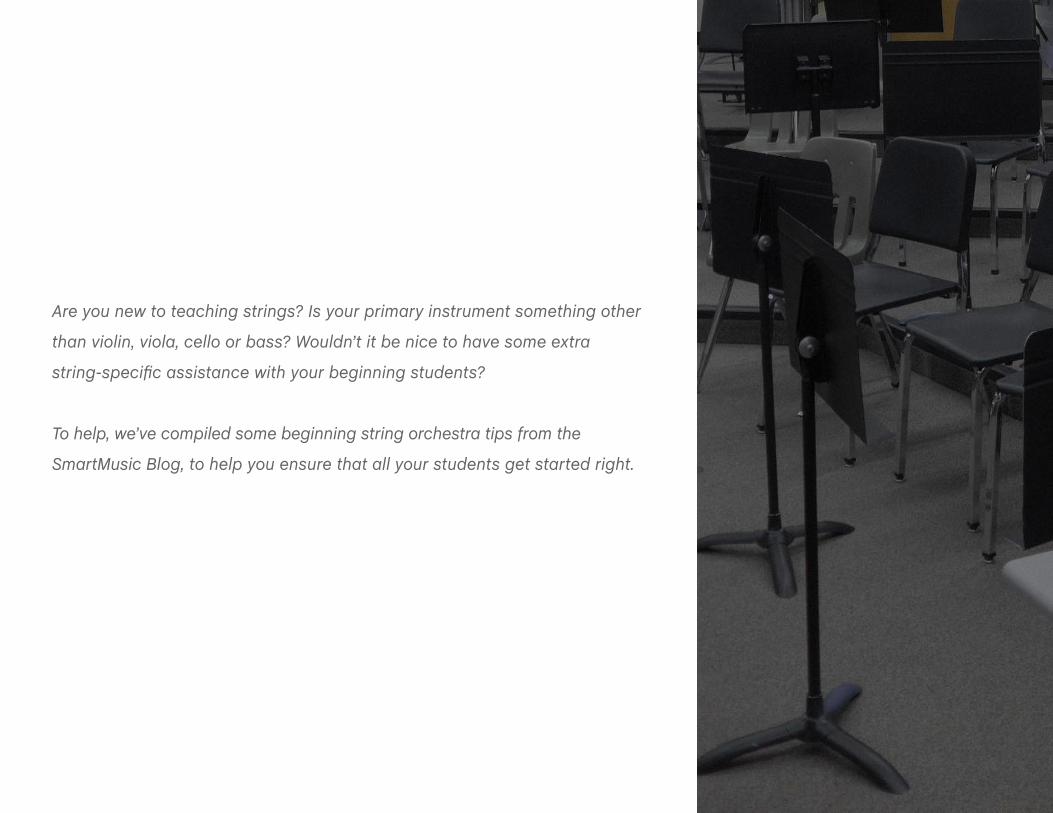
Are you new to teaching strings? Is your primary instrument something other
than violin, viola, cello or bass? Wouldn’t it be nice to have some extra
string-specific assistance with your beginning students?
To help, we’ve compiled some beginning string orchestra tips from the
SmartMusic Blog, to help you ensure that all your students get started right.
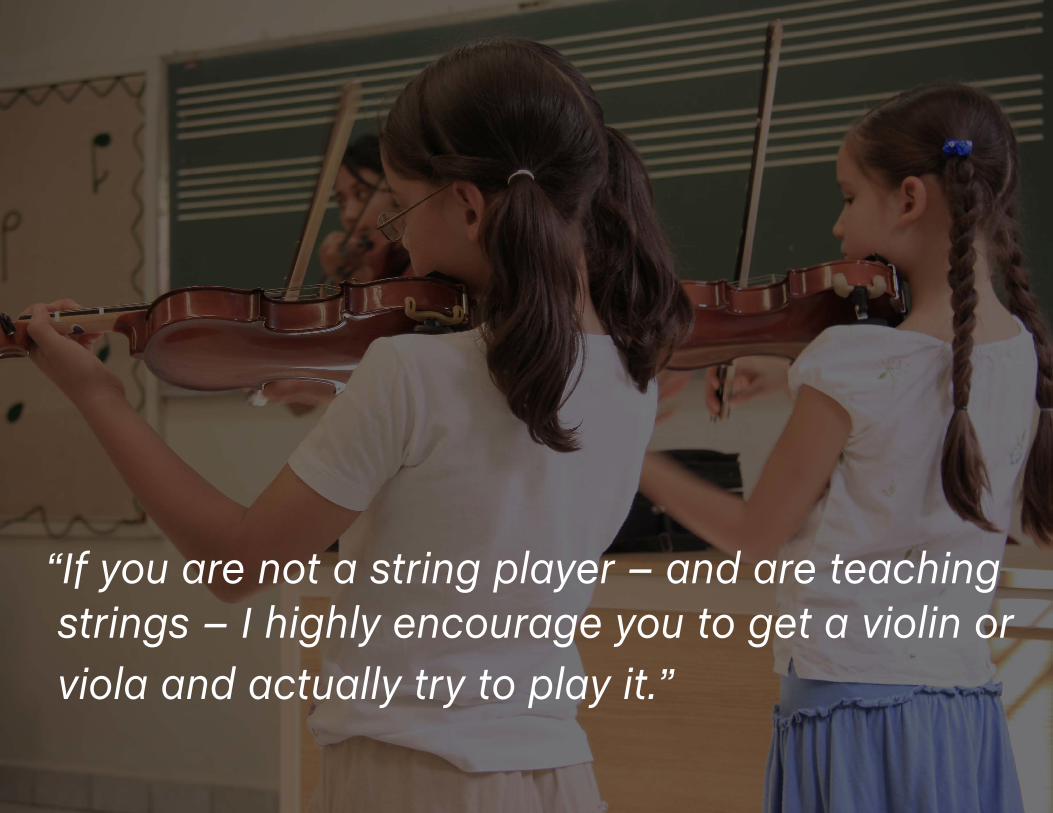
“If you are not a string player – and are teaching strings – I highly encourage you to get a violin or viola and actually try to play it.”
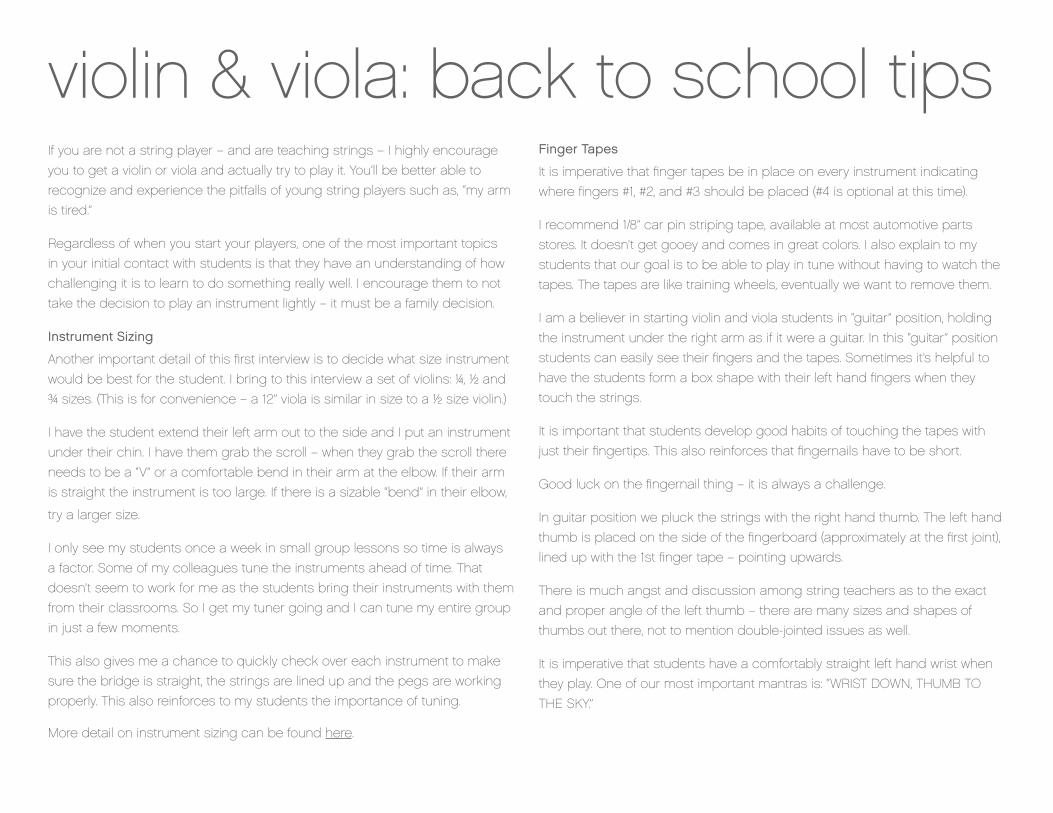
violin & viola: back to school tipsIf you are not a string player – and are teaching strings – I highly encourage
you to get a violin or viola and actually try to play it. You’ll be better able to
recognize and experience the pitfalls of young string players such as, “my arm
is tired.”
Regardless of when you start your players, one of the most important topics
in your initial contact with students is that they have an understanding of how
challenging it is to learn to do something really well. I encourage them to not
take the decision to play an instrument lightly – it must be a family decision.
Instrument Sizing
Another important detail of this first interview is to decide what size instrument
would be best for the student. I bring to this interview a set of violins: ¼, ½ and
¾ sizes. (This is for convenience – a 12” viola is similar in size to a ½ size violin.)
I have the student extend their left arm out to the side and I put an instrument
under their chin. I have them grab the scroll – when they grab the scroll there
needs to be a “V” or a comfortable bend in their arm at the elbow. If their arm
is straight the instrument is too large. If there is a sizable “bend” in their elbow,
try a larger size.
I only see my students once a week in small group lessons so time is always
a factor. Some of my colleagues tune the instruments ahead of time. That
doesn’t seem to work for me as the students bring their instruments with them
from their classrooms. So I get my tuner going and I can tune my entire group
in just a few moments.
This also gives me a chance to quickly check over each instrument to make
sure the bridge is straight, the strings are lined up and the pegs are working
properly. This also reinforces to my students the importance of tuning.
More detail on instrument sizing can be found here.
Finger Tapes
It is imperative that finger tapes be in place on every instrument indicating
where fingers #1, #2, and #3 should be placed (#4 is optional at this time).
I recommend 1/8” car pin striping tape, available at most automotive parts
stores. It doesn’t get gooey and comes in great colors. I also explain to my
students that our goal is to be able to play in tune without having to watch the
tapes. The tapes are like training wheels, eventually we want to remove them.
I am a believer in starting violin and viola students in “guitar” position, holding
the instrument under the right arm as if it were a guitar. In this “guitar” position
students can easily see their fingers and the tapes. Sometimes it’s helpful to
have the students form a box shape with their left hand fingers when they
touch the strings.
It is important that students develop good habits of touching the tapes with
just their fingertips. This also reinforces that fingernails have to be short.
Good luck on the fingernail thing – it is always a challenge.
In guitar position we pluck the strings with the right hand thumb. The left hand
thumb is placed on the side of the fingerboard (approximately at the first joint),
lined up with the 1st finger tape – pointing upwards.
There is much angst and discussion among string teachers as to the exact
and proper angle of the left thumb – there are many sizes and shapes of
thumbs out there, not to mention double-jointed issues as well.
It is imperative that students have a comfortably straight left hand wrist when
they play. One of our most important mantras is: “WRIST DOWN, THUMB TO
THE SKY.”

At Least a “Two Banana” Sound
One morning a diligent young cello student and I were working on making his
sound bigger. When I asked what he’d had for breakfast he replied, “A banana.”
Next I asked what he’d sound like if he’d had the energy and power of two ba-
nanas. His smile indicated he got what I meant. Then talked about three ways
to produce more sound:
1. Use more bow – physically pull more of the bow across the string.
2. Use more weight on the bow. Weight on the bow comes from the arm. It must
be accompanied by more bow speed or else you just get a scratchy sound.
3. Play closer to the bridge. Move the bow away from the end of the finger-
board. There will be a “sweet” spot closer to the bridge that will produce
the clearest sound. Make it a game to find the sweet spot between the
end of the fingerboard and the bridge.
We shared the banana story with the whole ensemble. Now I just say that we
want at least a “two banana” sound – or maybe even a “three banana” sound –
it always gets smiles and a bigger sound.
Best of luck with the upcoming school year. What we do is important. You
never know which of our students may become the next Itzhak Perlman.
Have a great year!
Jim Schulz enjoys working with 4th – 6th grade students in the Lincoln Public Schools in Lincoln, NE. Read his blog posts and full bio on the SmartMusic Blog.
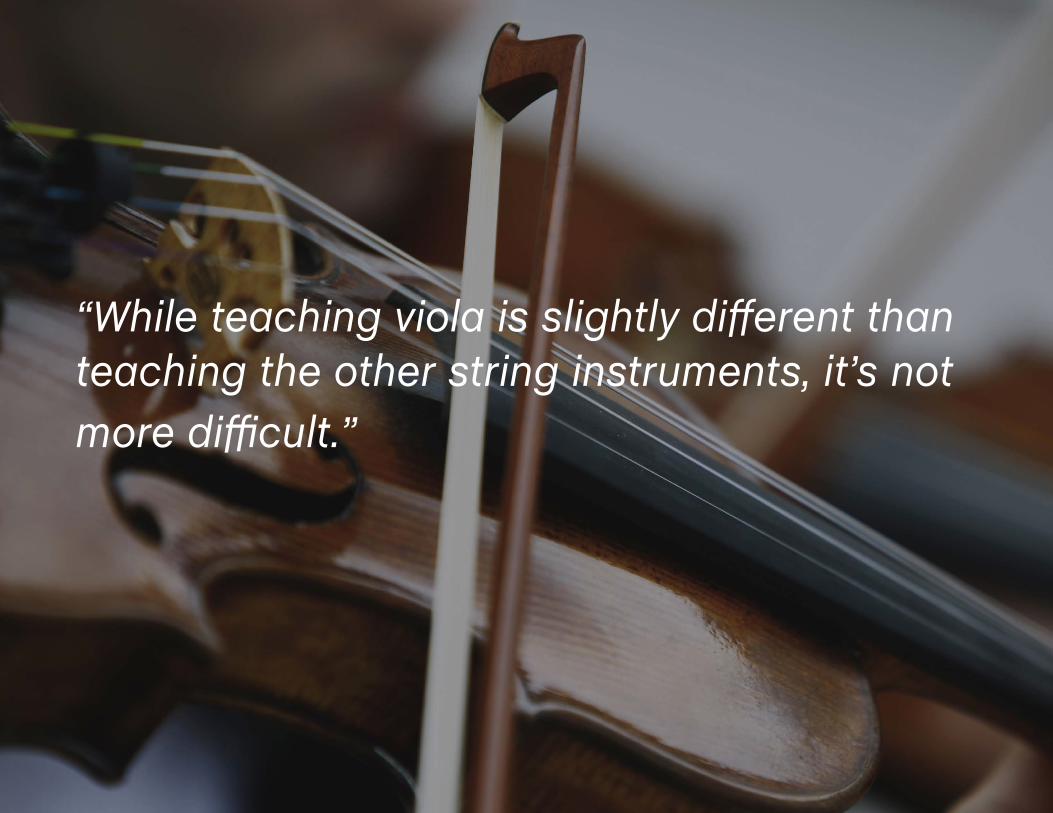
“While teaching viola is slightly different than teaching the other string instruments, it’s not more difficult.”

recruiting & developing violists in your school orchestraWhile teaching viola is slightly different than teaching the other string
instruments, it’s not more difficult. I’d like to share a few suggestions for
helping the school orchestra teacher develop violists, including recruitment
ideas, technical assistance, and ways to fully engage violists in rehearsals –
and your program.
Setup and Positioning
Technique considerations are where the instruction on the viola typically differs
from other string instruments in the school orchestra. Regarding instrument
set-up, using a shoulder rest is a must. Sponges do not provide the support
that the size of the viola necessitates. As the student grows, the shoulder rest
may need to be “built up” by adding extra layers to the vertical rise to help
support the level of the viola as the neck has lengthened. The size and shape
of the shoulder shelf will also affect the type and angle of the shoulder rest.
Chin rest height and shape should be adjusted to fit each viola student. Make
considerations for a center chin rest as the student gets closer to their adult
sized instrument to balance the growing instrument body if necessary.
The angle of the instrument can be slightly forward and slightly down. Typical
violin placement, which can angle up and further to the left, can cause tension
in the left arm and it causes tension in the right arm as it is forced to reach
across the body to place the bow on the string.
Regarding left hand shape, the left arm must have more swing from right to
left because of the need to reach back towards the C string and to maneuver
around the upper bout when playing in position. To focus on the dexterity of
the left hand fingers, focus on the “lift” of the finger. A player should be able to
comfortably place their fourth finger on the C string in 1st position and 3rd
position. If this is not comfortable, then the viola may be too large for the student
.
Technique
Regarding pronation and supination of the bow hand, you’ll want to encourage
students to use natural arm weight rather than applying pressure. You will find
that many violists use more supination than pronation to achieve their desired
tone. Therefore, there is minimal wrist motion and more rotary motion from the
forearm.
Encourage students to use full right arm weight. They should feel the hang of
the right arm all the way from the lower back. Also encourage students to use
a slower speed and heavier weight of the bow. Give feedback and instruction
about adjusting the speed of the bow FIRST before addressing the weight.
Most times, in doing so, the weight will correct itself.
Stress the importance of bowing lanes as a factor towards achieving a greater
palette of dynamics and tone colors; 5 at bridge, 1 at fingerboard. In general,
violists focus much less of their performance in the upper half of the bow than
their violin colleagues. Balance point and lower half playing allows greater control
and contact with the string. Instead, change the weight of the bow stroke and
the lane placement of the bow.
Finally, encourage students to approach articulations more like cello and bass
players. This includes:
• Compact usage of the bow
• Anticipate the beat
• Stay closer to the string
• Start from the string
Blair Williams is the Assistant Professor of String Music Education at Texas Tech University. Read her complete articles and bio on the SmartMusic Blog.
“The natural tendency will be to have low elbows (especially in the left arm) when playing the cello or bass, so remind students to keep their chicken wing up.”
cello & bass: back to school tipsThe beginning of the school year is a time full of many new things: new teachers,
classes, friends, and even schools. For music students, it can also be a time
of learning new skills for the first time. Here are some basic tips for setting up
new cellists and bassists for success.
Be a Tree
Without guidance, many cello and bass students will revert to a slouched
posture with casual, crossed feet. Not only does it look unprofessional to sit
or stand in such a manner, it also affects the quality of playing. I share with
students that they are like strong trees when they are playing their cello or
bass: their feet are roots that are spread out and firmly planted in the ground
in front of them; their legs and torso are the straight, tall trunk; and their arms
are branches.
Basic Setup Tips
Cellists should sit on the edge of their chair with their feet placed far apart
enough that the corner edges of the lower bout of the cello touch the insides
of their legs. Cellists have three points of contact with their instrument: both
knees “hug” the cello, and their instrument rests on their sternum at the point
where their rib cage meets. We play a game called “cello robber,” where the
teacher tries to grab the instrument away from the student by placing their
hand on the neck and tugging it. If students are firmly holding onto their
instrument with their knees, it will stay secure.
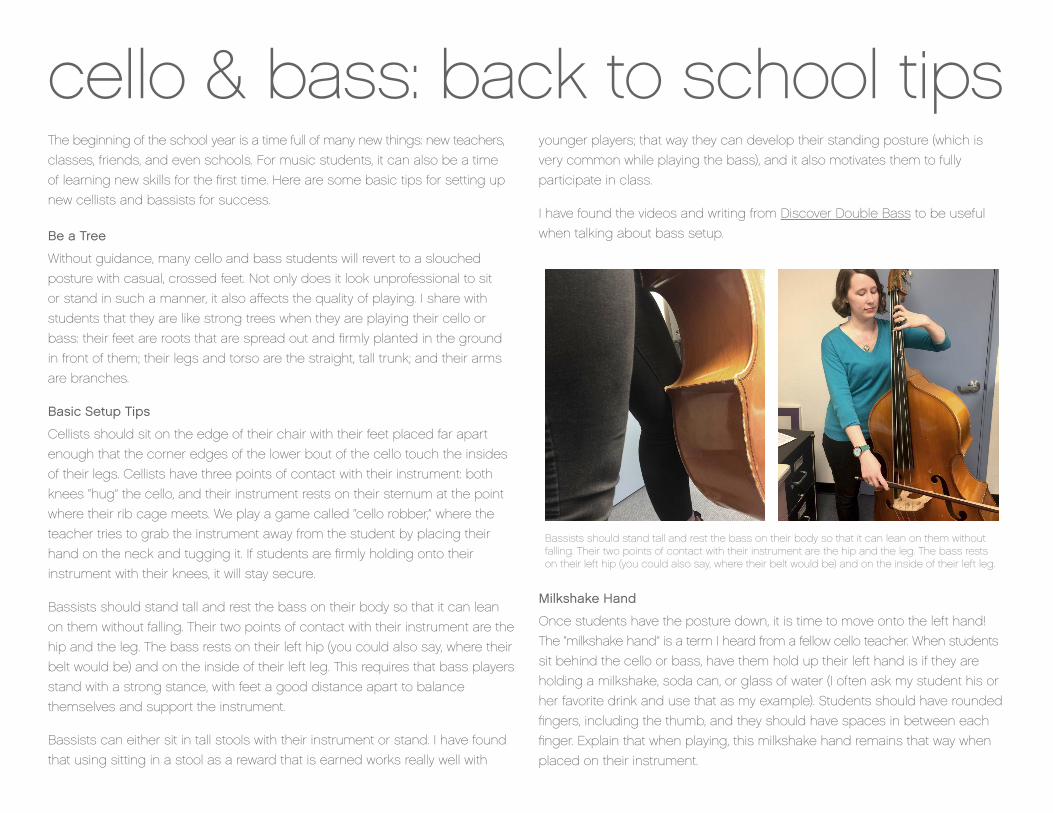
Bassists should stand tall and rest the bass on their body so that it can lean
on them without falling. Their two points of contact with their instrument are the
hip and the leg. The bass rests on their left hip (you could also say, where their
belt would be) and on the inside of their left leg. This requires that bass players
stand with a strong stance, with feet a good distance apart to balance
themselves and support the instrument.
Bassists can either sit in tall stools with their instrument or stand. I have found
that using sitting in a stool as a reward that is earned works really well with
younger players; that way they can develop their standing posture (which is
very common while playing the bass), and it also motivates them to fully
participate in class.
I have found the videos and writing from Discover Double Bass to be useful
when talking about bass setup.
Bassists should stand tall and rest the bass on their body so that it can lean on them without falling. Their two points of contact with their instrument are the hip and the leg. The bass rests on their left hip (you could also say, where their belt would be) and on the inside of their left leg.
Milkshake Hand
Once students have the posture down, it is time to move onto the left hand!
The “milkshake hand” is a term I heard from a fellow cello teacher. When students
sit behind the cello or bass, have them hold up their left hand is if they are
holding a milkshake, soda can, or glass of water (I often ask my student his or
her favorite drink and use that as my example). Students should have rounded
fingers, including the thumb, and they should have spaces in between each
finger. Explain that when playing, this milkshake hand remains that way when
placed on their instrument.

Have the student place his or her hand with rounded, tall fingers on the
fingerboard, with their thumb behind the second finger (the middle finger) on
the back of the neck. This relationship between second finger and thumb is
very important. I tell my students that the thumb and second finger are travel
buddies; they go everywhere together.
Make up a game where students make their milkshake hand, put it on the
bass or cello, check it, and take it away to do it again. Students may want to
play with flat or dented-in fingers when pressing into the string, so remind
them to keep their rounded milkshake shape while using gravity to push into
the string with their fingertips.
The String Pedagogy Notebook has some great content on the cello left hand.
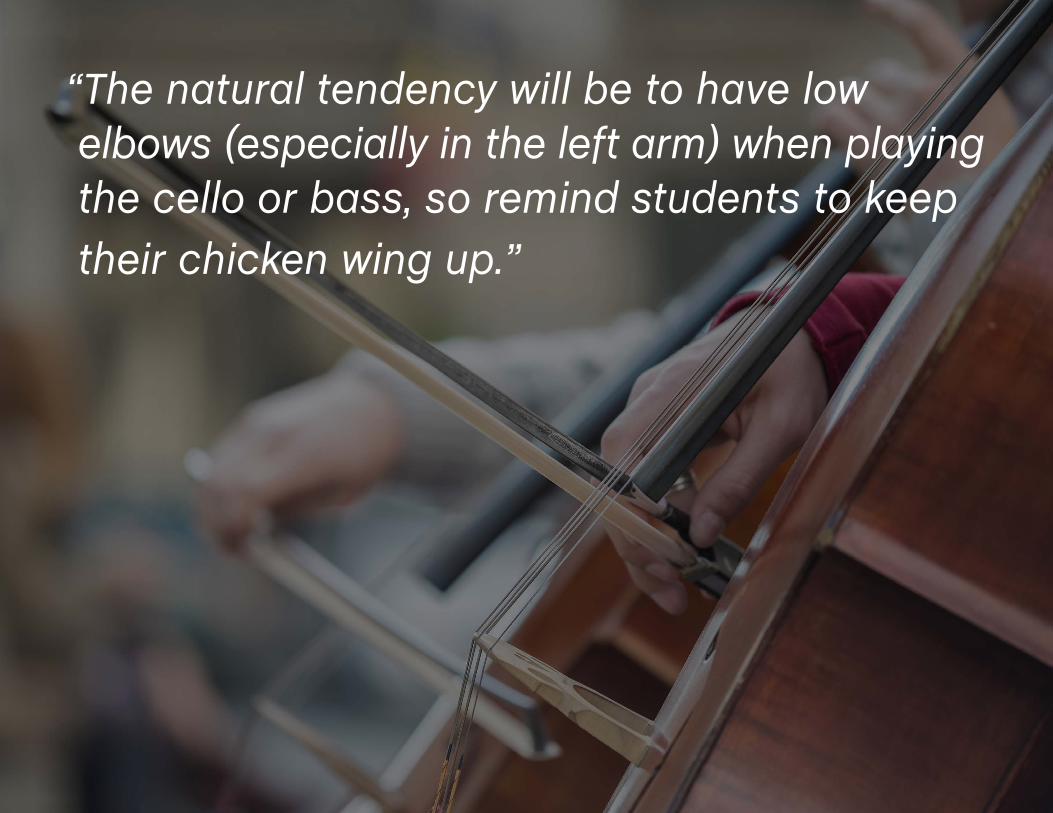
Chicken Wing
One way a player can keep their tall fingers while playing with their left hand is
by keeping their elbow up. I refer to this concept as the “chicken wing” with my
students. I ask them to imagine a chicken trying to lift its wings to get airborne.
The natural tendency will be to have low elbows (especially in the left arm) when
playing the cello or bass, so remind students to keep their chicken wing up.
A good way to check is to have students lay their bow across their left hand
and arm. If the bow lays flat and touches every part of the hand and arm, the
elbow is high enough. If the elbow is too high or low, the bow will not lay flat on
every part of the hand and arm. It will take endurance and muscle to keep that
elbow up, so allow students to rest their arms when needed.
The Flop Bow HoldIt may not feel like it when first starting out, but in my opinion, playing the cello
and bass uses many natural motions. Emphasize to students that playing their
instrument is much like being a ballet dancer – every movement should be
relaxed and graceful, using only the muscles necessary.
After having students play pizzicato for a while, it will come time to regularly
use the bow. The first thing I have students do is “flop” out their hand, which is
just a slight shake in front of them. When their hand has stilled and their palm
is facing down and their wrist is bent, I show students that their hand tends to
naturally have spaces in between the fingers with a slight bend to them.
Milkshake Hand Chicken Wing
The Flop Bow Hold The Flop Bow Hold

By placing the bow under those bottom knuckles of the hand and bringing
the thumb to where the stick meets the frog, you can show students how
simple the bow hold is.
The trick, though, is maintaining that hold. Students need to feel the stick
under their fingers and push into the bow with the weight of their arm while
keeping spread out, long fingers. Eventually students need to transition from
having their fingers stand straight up on the bow (completely perpendicular
to the stick) to having them lean into their first finger. This leaning into the bow,
called pronation, is what creates a solid core sound. Allow students to practice
setting their bow holds up by themselves and playing open strings, practicing
their pronation into the stick.
The key is to keep them repeating this practice and being aware of when they
need to readjust their grip so their muscles remember it correctly. Students will
also need to make sure that there is a nice space in between the palm of their
hand and the bow. They should actually be able to look through their hand like
a telescope when holding the bow.
Additional details can be found on the Artist Works blog as well as from Music
Right from the Start.
Peer MentorshipLeading an ensemble of students with differing playing abilities can present a
significant challenge. This is the perfect time, though, to build in peer
mentorship. Allow the more advanced students to become teachers to their
less experienced peers. As long as those students have a solid foundation for
their own technique, they can be a great resource to cello and bass players
who are just starting out.
Ruth Hogle teaches beginning string orchestra to sixth graders in Anchorage, Alaska.
Read her articles and full bio on the SmartMusic Blog.
Students will also need to make sure that there is a nice space in between the palm of their hand and the bow. They should actually be able to look through their hand like a telescope when holding the bow.

“It is increasingly common for a ‘band person’ to be teaching strings in today’s public schools.”

what band directors need to know about teaching orchestraIt is increasingly common for a “band person” to be teaching strings in today’s
public schools. For those who find themselves in this situation for the first time,
or for those who are looking for a refresher, I’ve listed a few tipa and tricks that
I have picked up in eight years of teaching strings.
Instruments
If your school provides instruments for students, it’s a good idea to check
them for some common problems that will need attention:
• Open seams – Using a bent knuckle, lightly tap around the entire perimeter
of the top and back of the instrument. If you hear a ‘slap’ sound, there is
an open seam that will get worse if not repaired right away. Do not repair
this on your own; a special type of glue is required. An open seam is
usually an inexpensive fix at a reputable repair shop.
• Cracks – Visually inspect the top, back, sides and neck for any cracks. Like
open seams, these will get worse if not repaired.
• Sound post – Peer inside the right F-hole, and make sure the sound post
is present and standing. If not, a repair shop will set it for you, often free of
charge. You can purchase a tool and learn to set a sound post yourself
by watching videos on YouTube, from an experienced repair tech, or an
experienced teacher.
• Bridge height – the strings should not be difficult to hold against the
fingerboard. If they are, the bridge may not fit the instrument correctly. A
repair shop should correct this. Conversely, if the bridge is too low, the
strings will make a rattling sound when notes are plucked or bowed.
Poor quality, inexpensive instruments are even more common in the string
world than in the band world. It’s a good idea to direct parents to a reputable
local music store, or online retailers that specialize in strings, such as Shar
Music or Southwest Strings.
Similar to reeds on a woodwind instrument, a good quality string will make a
significant impact on sound quality. While steel core strings are less expensive,
they have a more shrill sound, especially on upper string instruments. The
most cost-effective way to upgrade the sound of your school-owned
instruments is to change to synthetic core strings.
Another note on strings: when changing a string, make sure the length of the
string matches the size of the instrument. The package will indicate the string
length. If you are unsure of the size of the instrument, you can measure it to
find out. A quick Google search will direct you to a number of websites with
measurements.
Bow Advice
Like strings, bow quality has a significant impact on sound. Cheap wooden
bows will warp and break easily. Many teachers use fiberglass for beginners.
Carbon fiber is much more expensive and will aid the more advanced student
in producing a quality tone. Here are some additional bow-specific tips:
• Students should avoid touching the hair with their fingers; the oils in the
hand will cause the hair to deteriorate quickly.
• Bows should be loosened when put away. Hair will stretch and wooden
bows will warp if stowed under tension.
• Ensure that students are bowing parallel to the bridge. Students must
keep their wrists flexible in order to produce the correct bow angle.
• Bowing technique is a monumental subject. Check the resources section
below for places to look for more information.

Randy Runyan teaches orchestra, piano, guitar, and vocal music at Hill Campus of Arts and Sciences in Denver, Colorado.
Read his entire article and bio on the SmartMusic Blog.
Additional Resources
• American String Teachers Association – the ASTA website and publications
contain a wealth of knowledge. ASTA also publishes a curriculum docu-
ment with Alfred Publications that will aid teachers in creating a scope and
sequence.
• School Orchestra and String Teachers Facebook group – a great place
to ask questions and find other resources. There are currently over 5,600
members. It is a closed group, but any music teacher is welcome.
• Strategies for Teaching Strings, by Donald L. Hamann and Robert
Gillespie – intended as a college methods textbook, this concise volume
is my go-to guidebook when I need an idea for teaching any skill or
technique. Great illustrations and charts, too.
• The SmartMusic blog – articles include an instrument rental guide, video
resources for parents, and tips on sizing string instruments.
Good luck with your string students this fall!

“Proper sizing of string instruments can, at first, seem mysterious.”

a basic approach to sizing string instrumentsProper sizing of string instruments can at first seem mysterious. Much of this
mystery comes from the different sizing terms and sizing needs used for each
member of the string family. Below is a discussion of each instrument’s
terminology and sizing considerations, intended as a resource for educators
and parents. This is not intended to replace the knowledge of an expert in
sizing string instruments, however, who should always be physically present to
assist in measuring.
Violins
Violins are available in quarter increments from 4/4 down to 1/4th; as well as
smaller 1/8th, 1/10th, 1/16th, and 1/32nd sizes. Most teens should be able to play on
a full-sized instrument. Generally speaking, students should expect to move to
a larger-sized instrument every other year, with 8-year-olds often playing on 1/2
size, and 10-year-olds often playing on 3/4 size instruments. These are rough
guides though, and much depends on the size of the player, and especially the
length of the student’s arms and shoulders.
Because of variations in each student’s size at a given age, there are more
accurate ways of sizing violins. These require the student to be present during
sizing. One is to hold the violin in playing position, and have the student cup
the palm around the very tip of the scroll. If the student has a natural 95-
degree bend at the elbow in this position, then the violin is likely a playable size.
Another sizing method is to measure the arm length from the player’s base
of the neck to the cup of the palm. Generally, there is a two-inch arm length
range for each fractional size: 18.5” will require a 1/4 size, 20.5” will be in the
range of 1/2 size, 22.5” will require 3/4 size, and a student over 23.5” can be
ready for a full-sized instrument.
Violas
Violas, unlike violins, are sized by the length of the instrument’s body. The “junior”
size viola is sized between a 3/4 and a full sized violin, with a 12 – 13” length.
This size is often used by students who would otherwise be playing on a 3/4
violin, which means that a viola may be sized larger than a violin would be for
the same player. In these case be certain the student does not overstrain the
hand and arm while playing.
The “intermediate” viola is an additional inch or two longer in body size, and
often lasts the player up until the teenage years, once their arm length is
generally over 23.5.” When the student has a playing arm length of 25,” then a
15” instrument theoretically becomes usable. For each inch that the player’s
arm grows, an additional 1/2” of instrument body size can generally be added in
the equation, at the teacher’s discretion and of course considering the
student’s comfort.
Cellos
Cellos, like violins, come in fractional sizes. But where the size of the violin is often
based on arm length, on the cello the student’s finger span is a primary
consideration. Generally, a cellist who can comfortably extend 6” or more between
the tips of the index and pinkie fingers should be able to play on a 4/4 instrument.
Some adults still play on a 7/8 instrument, so not every student will play a full-sized
instrument. For each inch less in playing span between the two outer fingertips,
a smaller fraction should be assigned. So a 5” span generally means a 3/4 sized
instrument, and a 4” span a 1/2 sized one. The arm length is also a consideration
though, as students with long fingers but shorter arms may not be able to place
the bow in a good sounding place on a larger instrument’s string.
Richard Niezen oversees the strings program at Colorado Christian University.
Read his blog post and full bio on the SmartMusic Blog.
Basses
Double basses are also listed in fractional sizes, but in their case the fraction
refers to string length and does not refer to instrument size. Basses labeled
as 4/4 are very rarely used, and should never be used by students: Most
professional players play on a 3/4 sized instrument. Students in middle school
generally play on a 1/2 sized instrument, whereas beginning players in 4th or
5th grade should generally play on a 1/4 size.
When sizing bassists, a combination of finger span, arm length, and body size
should be considered. To assess finger span, have the student make their
hand into a comfortable playing position. More than a 5” span between the
tips of the outer fingers will be needed to comfortably play the lowest notes on
the E string of a 3/4 sized bass. The bow arm should be long enough to touch
the bridge while in playing position, and physically the student should be able
to span the entire range of the instrument without strain.
ConclusionThis chart summarizes the information presented above.
In general, do not size a student with a larger instrument and expect that he or
she will grow into it. This makes playing very difficult, and is certainly more
dangerous physically. In fact, the student may not even be able to reach all
notes if the instrument is too large for the player. As mentioned before, work
with a capable string instrument specialist, and consider and confirm that any
string rental program allows the student to move in size as part the
rental agreement.
Each student grows differently, and therefore the teacher needs to evaluate
the needs of each student individually on a consistent basis – including
instrument size, shoulder rest needs with upper strings instruments, and
endpin length with lower strings. Finally, be sure to match the bow size to the
instrument size, and be sure that the bow is balanced, well weighted, and
matched to the instrument.
Numerous print and digital resources exist to assist with proper sizing. Any
resource, including this one, is meant to be a guide, and authors of this or any
guide are never responsible for problems, including injury, from following the
information contained herein. With proper sizing however, the risk of discomfort
and injury is lessened; and the teacher’s work can be focused on making
great music, because of – not in spite of – each student’s instrumental setup.
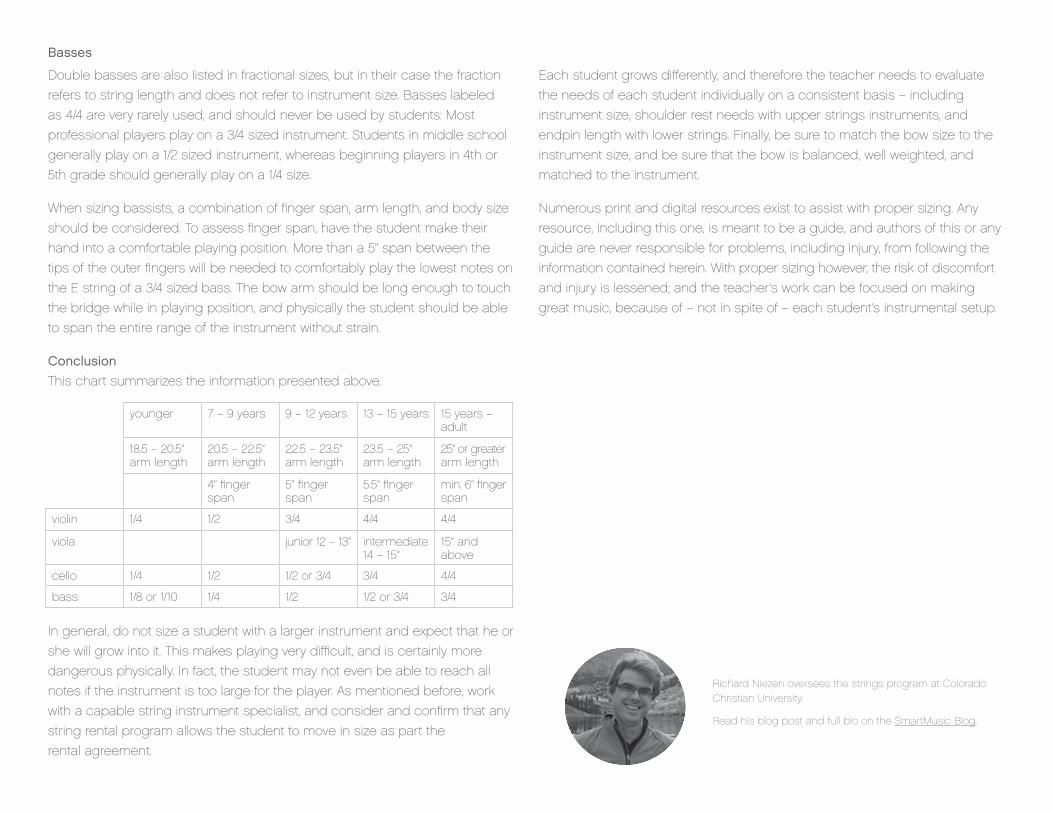
younger 7 – 9 years 9 – 12 years 13 – 15 years 15 years – adult
18.5 – 20.5” arm length
20.5 – 22.5” arm length
22.5 – 23.5” arm length
23.5 – 25” arm length
25” or greater arm length
4” finger span
5” finger span
5.5” finger span
min. 6” finger span
violin 1/4 1/2 3/4 4/4 4/4
viola junior 12 – 13” intermediate 14 – 15”
15” and above
cello 1/4 1/2 1/2 or 3/4 3/4 4/4
bass 1/8 or 1/10 1/4 1/2 1/2 or 3/4 3/4

We hope you’ve enjoyed these tips for starting your beginning students out right.
Learn more on the SmartMusic Blog.
Not using SmartMusic with your students? Try it for free today and see the
SmartMusic difference first hand.


