
Ken Ward
REFERENCE: PCB-NES-16-050
MODEL: Qashqai (J11) Juke (F15) Pulsar (C13)
SUBJECT: PCB J11 - PG6BP PS6B8 PR6B6 - Oil Usage ECU Reprogram
_____________________________________________________________________________
Product Campaign
Bulletin
Nissan Ireland
Cedar House
Park West Business Park
Nangor Road, Dublin 12

Ken Ward
This procedure is relevant to left hand drive and right hand drive vehicles.
DEALER RESPONSIBILITY
The dealer shall identify all outstanding vehicles using the eNEWS campaign enquiry function and perform the repair according to the
procedure provided within this bulletin.
Mandatory Requirements
• Confirm all outstanding campaigns on the affected vehicles irrespective of the reason the vehicle has entered the dealership using
the eNEWS campaign VIN enquiry function.
• Ensure all outstanding recall and service campaigns (excluding warranty extensions) are completed on a vehicle’s first visit to the
dealer.
• Rectify any vehicles identified as outstanding that are in inventory stock.
• This campaign includes vehicles purchased from private parties or presented by transient (tourist) owners.
IMPORTANT INFORMATION
Ensure that adequate personal protection is used during the repair activities.
No special tooling is required for this repair operation
REPAIR PROCESS
REPAIR PROCESS - Engine Control Module (ECM)
Dealer confirms if vehicle is affected by
campaign PR6B6 PG6BP PS6B8
Dealer checks VIN in eNEWS
Dealer performs repair procedure No further action
required
Dealer submits claimPR6B6 PG6BP PS6B8
YES NO

Ken Ward
• Make sure the relevant Consult IIIplus patch for this activity is installed.
Precautions
<Condition of the vehicle>
• Erase all recorded DTC in the vehicle before reprogramming.
• Turn off all the electric loads.
• Do NOT use mobile phone or devices that emit electromagnetic waves, such as radio transceivers etc., near the
vehicle.
• Connect battery charger/stabilizer to the 12V battery and control the output to maintain the voltage always within
12V to 13.5V.
• Ensure all doors are closed and the driver's window is in the fully down position.
• During the reprogramming do not switch OFF the ignition.
• If the engine has been running, ensure the ignition is OFF for at least 30 seconds to allow time for the ECM to reset
before conducting the rework.
<Condition of Consult IIIplus>
• Be sure to have the AC Adapter to your Consult IIIplus connected, during the reprogramming.
• Switch off screen saver of your Consult IIIplus
• Connect VI with USB cable, and do not disconnect during the reprogramming.
• If further reprogram is to be conducted for another vehicle after completion of the reprogram, turn off Consult
IIIplus completely before continuing.
• Make sure to use Ver.64.1 or later version of Consult IIIplus software.
Ken Ward
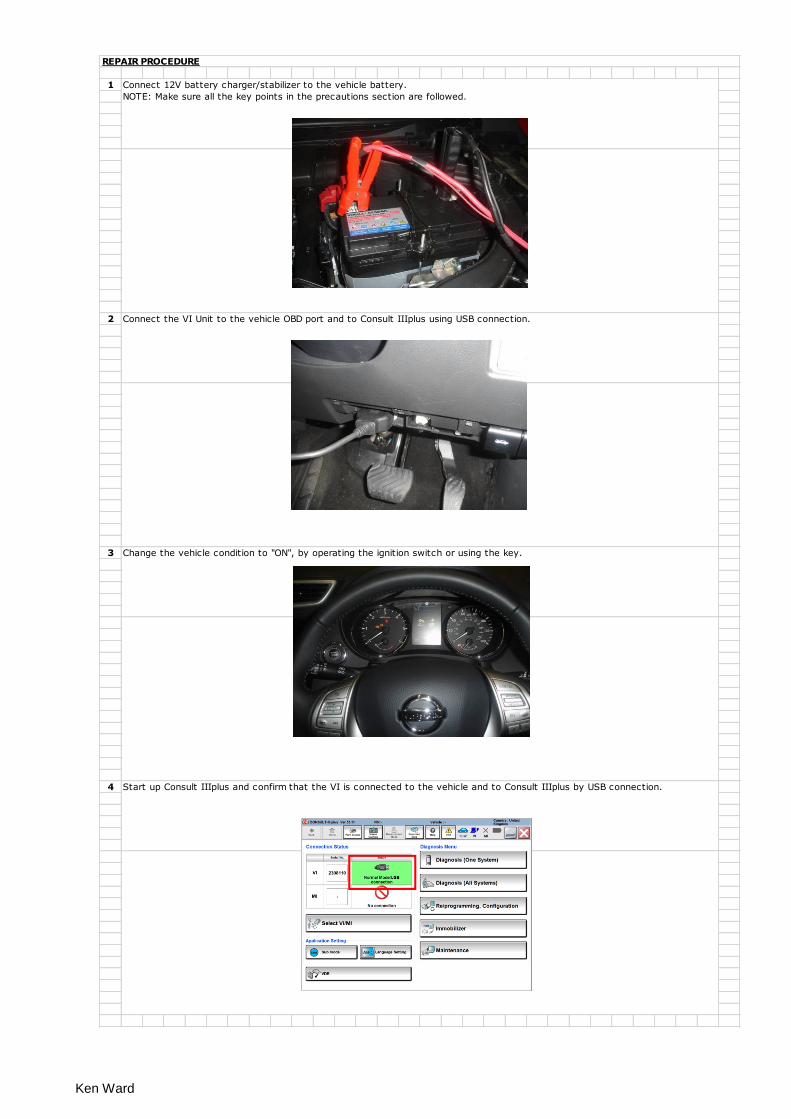
1
2
3
4
Connect the VI Unit to the vehicle OBD port and to Consult IIIplus using USB connection.
Change the vehicle condition to "ON", by operating the ignition switch or using the key.
Start up Consult IIIplus and confirm that the VI is connected to the vehicle and to Consult IIIplus by USB connection.
REPAIR PROCEDURE
Connect 12V battery charger/stabilizer to the vehicle battery.
NOTE: Make sure all the key points in the precautions section are followed.

Ken Ward
5
6
7
8
Click on "Diagnosis (All Systems)" and select the appropriate vehicle to be reprogrammed.
Check that there are no DTCs recorded or solve/erase all recorded DTCs before continuing.
Click on "Home" button and then "Diagnosis (One System)"
Click on "Engine" button and check there are no DTCs recorded.
c

Ken Ward
9
10
11
Select "ECU Identification" tab.
NOTE: find below table with affected ECU IDs, if the vehicle is within the affected VIN list but the ECU Identification is
not included in this table, contact Technical Support Department.
Click on "Home" button and then "Re/programming, Configuration"
Read and follow the precautions and tick the confirmation check box, then click on "Next".
NOTE: Any precautions added in Consult IIIplus after the release of this bulletin must also be followed.
23701 HY04C23701 HX54D
23701
23701 4ED7E
23701 4ED8B
23701 4ED8C
23701 4ED8D
23701 4ED1D
23701 4ED1E
23701 4ED4A
23701 4ED4B
23701 4ED3D
23701
23701 BV89C
23701
23701
23701
23701
23701
4ED3E 23701 HY06C23701 HX55B
23701 4ED4E 23701
F15J11
23701 4ED2D 23701 BV87C23701 3ZU3B
23701 4ED2E 23701 BV87D23701 HX54A
23701 4ED4D 23701 BV87E23701 HX54E
23701 HX48C
23701
23701 HY07C23701 HX55C
23701 HY01D23701 HX56E
HY00D23701 HX55E
23701 4ED5C 23701 HY05C23701 HX54C
23701 HX55A
23701 4ED5E 23701 BV89D
BV89E
23701
23701 HX49E 23701 3ZU3A HX57A
23701 HX45C
23701 HX55D
23701 4ED0E
23701 23701 3ZU1D HX54B
23701 3ZU1E HX56B
23701
23701 4ED8E
23701 HX53E
23701 HX46D
23701 4ED5B
23701
23701 4ED9B
23701
23701 4ED9C
23701
4ED9E
23701 4ED7E
23701
4ED4C
4ED5A
4ED5D
4ED0D
HX45D
3ZU2D
3ZU2E
3ZU4A
3ZU4B
23701
23701
23701
23701
23701
23701
23701
23701 4ED9D
Affected ECU Part Numbers
C13
3ZL1D
3ZL1E
3ZL3A
3ZL3B
3ZL0D
3ZL0E
3ZL2A
3ZL2B
23701
cc
c

Ken Ward
12
13
14
15
Enter the VIN number and click on "Confirm".
NOTE: VIN should be automatically identified, insert it manually otherwise.
Click on "Engine" button. Then click on the "Reprogramming" button.
Check that the part number shown is included in the table in step 9 and touch the “Save” button. Then click on "Next" button.
Select the appropriate vehicle to be reprogrammed, click on "Select" and then click "Confirm".
c c
c
c
cc
c
c

Ken Ward
16
17
Read both precaution pages, tick the confirmation check box and click on "Next".
NOTE: Any precautions added in Consult IIIplus after the release of this bulletin must also be followed.
Confirm that the Part number after reprogramming is according to the table below and click "Next".
NOTE: table below shows compatibility at the release of the campaign, any later ECM Part Number update (unrelated
to the campaign) will not be included in this table.
23701
23701
23701
23701 4ED7E 23701 HW90C
ECU part number
before reprogramming
ECU part number
after reprogramming
23701 BV80C
23701
23701
23701
23701
4ED8B
4ED8C
23701 HW90C
23701 HW90C
23701
23701
23701 BV80C
23701
23701
23701
23701
23701
3ZL2A
3ZL2B
3ZU2D
3ZU2E
3ZU4A
3ZU4B
3ZU1D
HY01D
23701
23701
23701
4ED8D
4ED1D
23701 HW90C
23701 4ED1A
23701
23701
23701
23701
23701
23701
23701
23701
4ED1E
4ED4A
23701 4ED1A
23701 4ED1A
23701
23701
HY07B
HY07B
23701
23701
23701
23701
23701
HY07A
23701 HY07A
HY07B
23701
23701
23701
23701
23701
23701
23701
23701
23701
23701
23701
HX55E
23701
23701
23701
4ED4B
4ED4C
23701 4ED1A
23701 4ED1A
23701
23701
23701
23701
23701
23701
4ED5A
4ED5D
23701 4ED1A
23701 4ED1A
23701
23701
HX54B
HX59A
HX59A
HX58C
HX58C
23701
23701
23701
23701
HX58C
23701
23701
23701
23701
4ED0D
HX45D
23701 4ED1A
23701 HY90D
23701
23701
23701
23701
23701
23701
23701
23701
23701
23701
23701
23701
23701
23701
23701
23701
23701
23701
23701
23701
23701
23701
23701
23701
HX46D 23701 HY90D
23701 4ED2A
23701 4ED2A
23701 4ED3A
23701 4ED3A
23701 4ED3A
23701 4ED3A
HX54C
HX55C
HX56E
4ED3E
4ED4E
4ED5C
4ED3D
23701
3ZU1E
3ZU3A
3ZU3B
HX54A
HX54E
HX55A
4ED8E
4ED9E
23701 HY90E
23701 4ED9A
23701 4ED9A
23701 4ED9A
23701
23701
23701
23701
HX49E 23701 HY90D
23701 4ED9A
23701 4ED2A
23701 4ED2A
23701 4ED2A
23701 4ED2A
23701 4ED3A
23701 4ED3A23701
ECU part number
before reprogramming
ECU part number
after reprogramming
ECU part number
before reprogramming
ECU part number
after reprogramming
J11 C13 F15
23701
23701
23701
HX48C
4ED7E
4ED9B
4ED9C
4ED9D
4ED2D
4ED2E
4ED4D
4ED5B
4ED5E
4ED0E
23701 HY90E
23701
23701
HX45C
3ZL1D
3ZL1E
3ZL3A
3ZL3B
3ZL0D
3ZL0E
HX55D
HX53E
HX54D
HX55B
HY05C
23701
HX56B
HX57A
3ZL2E
3ZL2E
3ZL2E
3ZL2E
3ZL3C
3ZL3C
3ZL3C
3ZL3C
3ZU4C
3ZU4C
3ZU4C
3ZU4C
3ZU3C
3ZU3C
3ZU3C
3ZU3C
HX58E
HX58E
HX58E
HX58E
HX59A
HX59A
HY07C
23701
BV80C
23701 BV80D
23701 BV80D
23701 BV80D
23701 HY07A
HX58D
HX58D
HX58D
23701 BV87C
23701 BV87D
23701 BV87E
23701 BV89C
23701 BV89D
23701 BV89E
23701 HY04C
23701 HY06C
23701 HY00D
23701
Important: Part number after reprogramming is correct at the time of bulletin release but may change as subsequent software versions
are released.
c
c
Ken Ward
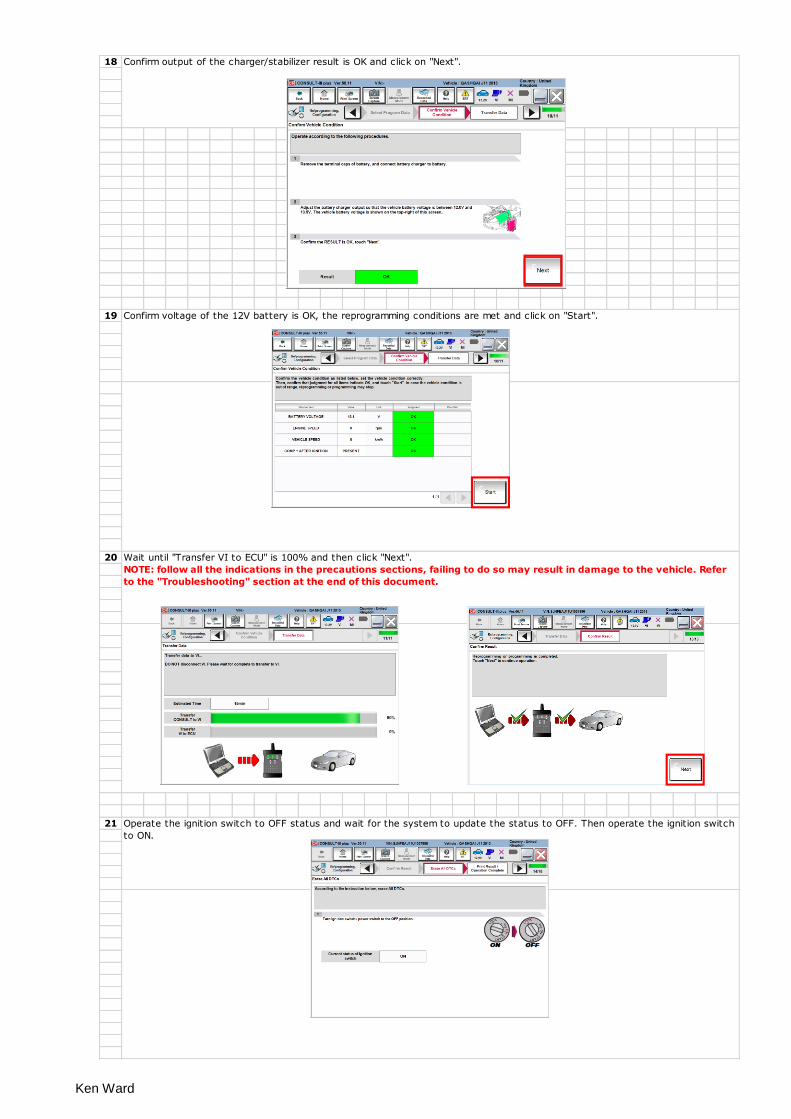
18
19
20
21
Confirm output of the charger/stabilizer result is OK and click on "Next".
Confirm voltage of the 12V battery is OK, the reprogramming conditions are met and click on "Start".
Wait until "Transfer VI to ECU" is 100% and then click "Next".
NOTE: follow all the indications in the precautions sections, failing to do so may result in damage to the vehicle. Refer
to the "Troubleshooting" section at the end of this document.
Operate the ignition switch to OFF status and wait for the system to update the status to OFF. Then operate the ignition switch
to ON.
c
c
c

Ken Ward
22
23
NOTE: It may be necessary to start the engine to erase some of the DTCs.
END OF REPAIR PROCEDURE
Confirm the performed reprogramming.
Erase all DTCs and check that no DTC are present. Quit Consult IIIplus and disconnect VI. Then disconnect the 12V battery
charger/stabilizer.
Check that the keys work correctly, start the engine and that there is no warning light.
c

Ken Ward
NOTE: if the control unit is no longer detected by Consult IIIplus permanent damage may have been caused to the
control unit and replacement may be necessary.
Use Part Number after reprogramming and Other information to select the correct option for the affected vehicle. Tables are
given within the repair procedure to ensure PN information is available.
No option is shown for reprogramming or the reprogramming button is not active
Make sure the reprogramming patch has been correctly installed following the instructions at the end of the procedure. Make
sure the Part Number of the unit is affected by the activity.
An error message is shown when transfering data to the control unit
TROUBLESHOOTING
More than one Part Number option is shown for reprogramming
Make sure all items in the precaution section are followed. Failing to do so may result in permanent damage to the control unit.
Contact your NSC Technical Assistance Department.

Ken Ward
1
2
3
HOW TO CHECK Consult IIIplus VERSION
Select PG6BP_PR6B6_PS6B8_ECM_J11_F15_C13_HRA2DDT and download the files within titled
'Reprogramming_J11_C13_F15_ECM_HRA2DDT', or navigate to Global Reprogramming patch version 12 or later.
The software version can be checked on the top left corner of the screen of Consult IIIplus.
HOW TO DOWNLOAD & INSTALL THE REPROGRAMMING PATCH
Log into N-FIT on the B2B portal, then select the Programming data search option in the left window pane .
Select vehicle as appropriate and click on "Search"

Ken Ward
4
5
6
w/oVDC Without VDC (ESP) / VDCS
Inj.PumpDFP3.4/Inj.
PumpDFP1.15 High pressure fuel pump type (3.4, 1.15)
Single mass/double
mass F/W Single mass/double mass flywheel
wVDC With VDC (ESP) / VDCS ICC Intelligent cruise control
ISS Intelligent Start Stop H/Usw Heat up switch
3row/2row 7 seats /5 seats
E5 EURO 5 emission standard 4WD 4 wheels drive
KOR Koreea SL Speed limiter
ASR (AUS) Australia XXXkw Engine power XXXKW
T/C Turbocharger
LCV 4 /5 Light commercial vehicle ASCD With cruise control and with speed limiter
LT Light Truck tire ( e.g. D40 YD25 model) oASCD
Optional ASCD ( can be present or not , or installed
after)
JPN Japan AT Automatic transmission
NAM North America M/T (MT) Manual transmission
GOM General Overseas Market STD Standard version
SAF South Africa ECO Eco version
XXMY ( MYXX ) Model year 20XX 2WD 2 wheels drive
Select the preferred language then click OK, Next and Install.
Click on finish when installed.
COMMON ACRONYMS USED IN THE REPROGRAMMING PATCH
Acronym Explanation Acronym Explanation
UKR Ukraine wDPF With DieselParticulateFilter
MOR Morocco w/oDPF Without DieselParticulateFilter
EU /EUR Europe BLNK Blank
RUS Russia REPR Reprogramming
Save and execute the files with Consult IIIplus closed.


