
FLOATING-POINT MATRIX-VECTOR MULTIPLICATION USING
RECONFIGURABLE SYSTEM
A Project for the
Master of Science
The University of Tennessee, Knoxville
Tik-Hing Choi May 2003

Abstract
The purpose of this project is to design and implement a digital system onto a
reconfigurable system to perform matrix-vector multiplications and to demonstrate the
potential of such configuration can be used for scientific computations. The procedures
for implementing and verifying the design are documented in this report.
A matrix-vector multiplication system is implemented in this project. The design
contains one floating-point multiplier and one floating-point adder, with eight and six
pipeline stages respectively. The system was implemented and tested successfully.
Experimental results from these implementations indicate that for a stable system
to work on the Pilchard, careful attention must be exercised to minimize the possible
timing delay that occurs during place-and-route and to design a stable software
environment.

Table of Contents
1 Introduction
1.1 Reconfigurable System (Pilchard)
1.2 Motivations and Project Goal
2 Pilchard Platform and Design Package
2.1 Pilchard Overview
2.2 Xilinx VirtexE Chip
2.3 Pilchard Design Files – VHDL
2.4 Pilchard Design Files - C Codes
2.5 Pilchard Host Interface
3 Floating-Point Number and Operations
3.1 Floating-Point Representations
3.2 Floating-Point Multiplication
3.3 Floating-Point Addition
4 Design and Implementation
4.1 Pilchard Design Flow
4.2 Matrix-Vector multiplication
4.3 Design Entry
4.4 Design Verification – Pre-synthesis Simulation
4.5 Design Synthesis
4.6 Design Implementation
4.7 Downloading to Pilchard

5 Results & Discussion
5.1 Implemented Matrix-Vector Multiplication System
5.2 Difficulties Encountered
6 Conclusions
6.1 Objectives Achieved
6.2 Future Work
Bibliography
Appendix
A. Data Format and Test Data Generation
B. Matrix-Vector System Implementation – VHDL AND C Codes

Chapter 1
Introduction
1.1 Reconfigurable System (Pilchard)
A reconfigurable system (RC) is a computer employing a field programmable gate array
(FPGA) that can, by modifying its confiuration, change the function of the digital circuits
of which it is composed. This is unlike an application specific integrated circuits, which
cannot be reconfigured after the ASIC is integrated into a system. In a RC system,
software programs are used to interface with the FPGA after it is configured.
Furthermore, RC systems give the ability to dynamically change their
configuration with changing data sets and algorithm needs. Such flexibility is beneficial
in order to support a variety of different user applications or support improvements in
system features. By utilizing the reprogrammable nature of FPGA, a RC system enables
easy re-design. Hence system functionality can be extended or modified, which reduces
design time.
In this project, a reconfigurable system called Pilchard is used. This high
performance reconfigurable computing (HPRC) platform has a FPGA device interface
with the dual in-line memory modules (DIMM) and can operate at either 100 MHz or 133
MHz giving a maximum bandwidth of 1064 MB/s. The clock rate is set to be 100 MHz,
on the Pilchard platform available in the Electrical and Computer Engineering (ECE)
Department at the University of Tennessee, Knoxville (UTK). The FPGA device on
Pilchard is a Xilinx VirtexE1000 chip, which has roughly 1.5 million programmable
gates on the chip. Such gate capacity allows larger designs to be implemented.

The idea of using a reconfigurable system in this project is to accelerate the
intensive computational workload within a software program. A matrix-vector
multiplication program is considered in this project for implementation onto the Pilchard
high performance reconfigurable computing (HPRC) platform.
1.2 Motivations and Project Goal
Matrix-vector multiplications often play an important role in many engineering and
scientific computing problems, such as solving a linear system. The multiplication
process can be time consuming as it is performed on a large set of data or in an iterative
method. For many years, engineers and scientists have used parallel computing schemes,
such as MPI and PVM, to optimize this problem [6].
The emergence of the HPRC platform is igniting a revolution in general-
purpose processing and computational applications. As the question remains whether the
performance of the floating-point matrix-vector multiplication can be improved using a
HPRC platform, the motivation of this project is to demonstrate the performance of
matrix-vector multiplication on a HPRC platform and compare with the matrix-vector
multiplication that is perform on a single computer.
The task of this project is to implement a single-precision floating-point matrix-
vector multiplication system on a FPGA platform. The main goal of this project is to
develop a stable functional system to perform floating-point matrix-vector multiplication
with a matrix of arbitrary size, measure the performance of such operations on the
Pilchard platform, and compare with the performance on a single CPU.

Chapter 2
Pilchard Platforms and Design Package
2.1 Pilchard Overview
The Pilchard is a high performance reconfigurable computing (HPRC) platform with a
memory slot interface developed by the Computer Science and Engineering Department
of the Chinese University of Hong Kong. The Pilchard has achieved a very high data
transfer rate by using the dual in-line memory module (DIMM) bus as the
interconnecting bus between the host processor and the FPGA board. The Pilchard board
is shown in Figure 2.1.
Figure 2.1: Photograph of the Pilchard board. [1]
The on board FPGA component that is shown in Figure 2.1 can be substituted by any of
the Xilinx Virtex or Virtex-E device family in PQ240 or HQ240 packages. This gives the
choice of FPGA devices range from the XCV150 to XCV1000E. The current Pilchard

configuration for this project is using Xilinx Virtex-E FPGA, XCV1000EHQ240. A
block diagram of the Pilchard board is shown in Figure 2.2.
The Pilchard is currently mounted on an ASUS CUSL2-C motherboard and
operating under the Linux environment. The Xchecker interface is necessary for
downloading the configuration bit-stream to the Pilchard platform. In Table 1, a list of
major features of Pilchard reconfigurable computing platform is shown.
Figure 2.2 Block diagram of the Pilchard board. [1]

Features Description Host Interface DIMM interface
64-bit Data I/O 12-bit Address bus
External (Debug) Interface 27 bits I/O Configuration Interface X-Checker, MultiLink and JTAG Maximum System Clock Rate 133 MHz Maximum External Clock Rate 240 MHz FPGA Device XCV1000E-HQ240-6 Dimension 133mm x 65mm x 1mm OS Supported GNU/Linux
Table 1 Features of Pilchard platform. [3] 2.2 Xilinx VirtexE Chip
The architecture of VirtexE chip is composed of an array of configurable logic blocks
(CLBs), programmable input/output blocks (IOBs) and interconnects. The CLBs provide
the functional element for constructing the user’s logic. The IOBs provide the interface
between the package pins and the internal signal lines. Interconnects are the routing paths
that connects the inputs and outputs of the CLBs and IOBs. Table 2 shows a summary of
features that are available on the XCV1000E-HQ240 used on the Pilchard board.
Device System Gates
Logic Gates
CLB Array
Logic Cells
Differential I/O Pairs
User I/O
BlockRAM bits
Distributed RAM Bits
XCV100E 1,569,178 331,776 64 x 96 27,648 281 660 393,216 393,216
Table 2: Features of XCV1000E-HQ240. [2]
The VirtexE FPGA has four Global Clock Buffers (GCLKs) for global clock distribution
and eight digital Delay-Locked Loops (DLLs) to deal with clock distribution problems,

and tristate buffers (BUFTs) for driving on-chip busses. A clock divider can be
generating by using the DLLs.
One essential element for this project is the Block SelectRAM+, which is a dual port
BlockRAM. There are total 96 blocks and each block can hold 4096 bits data, which
allow it to store a total of 393,216 bits of data. Figure 2.3 shows the configuration of the
dual port BlockRAM. The block can be configured to different bit width as shown in
Table 3, depending on the design requirements. The configuration of the block can be
determined and changed by using the Xilinx Core Generator, in this project the enable
port for both port A and port B are not in use. The SelectRAM+ is a True Dual-Port.
RAM, meaning that every read/write request can be fulfilled in two clock cycles. It also
allows simultaneously read and write on both ports at different memory address
locations.
Figure 2.3: Dual Port BlockRAM [2]

Table 3: Configuration for the BlockRAM. [2]
2.3 Pilchard Design Files – VHDL
The VHSIC Hardware Description Language (VHDL) is used in this project as a primary
developing tool. A set of design files are provide with the Pilchard platform. This set of
design files contains two VHDL files, one user constraint file (UCF) and a set of netlist
files (EDIF). The necessary VHDL files that are needed for designing a system targeting
to the Pilchard board are:
1) pilchard.vhd
2) pcore.vhd
The “pilchard.vhd” file is the top level VHDL code that interfaces the Pilchard
board to the host DIMM slot directly, which configures the global clock signal, clock
divider, I/O buffer, and startup reset of the FPGA component on the Pilchard. Unless new
sources, such as a new clock signal, are added to the interface it is unnecessary to modify
“pilchard.vhd”. All user design logic should be placed in the “pcore.vhd” file. This
VHDL file contains a set of predefined ports that can be used for accessing the host
interface. Both “pilchard.vhd” and “pcore.vhd” can be found in the appendix.

Furthermore, the UCF file contains information of all the pin assignments and default
clock frequency of the FPGA VirtexE chip on the Pilchard board. The EDIF library
contains the pre-synthesized components used by the “pilchard.vhd” code.
2.4 Pilchard Design Files - C Codes
In the stage of designing software to test the implementation, a set of C files is needed.
The “iflib.c” and “iflib.h” are the essential C code source file and header file, which
enable the host computer to access the Pilchard board.
The “iflib.h” is the header file that provides the read and write API function prototypes
for Pilchard. The “iflib.c” file contains the implementations of the API functions. All C
source files are included in the Appendix.
There are four API functions defined in the “iflib.h” header file to handle the data transfer
between the host and the Pilchard. The “write32” and “read32” API functions handle the
32-bit data transfer when this function is called, data is written to the lower 32 bit of the
data bus on the Pilchard board. The 64-bit data transfer is handle by the “write64” and
“read64” API functions. It is preferred to use only the 64-bit data transfer function call,
because it is a more efficient and fast scheme. The 64-bit API functions use a structure
with two integers to store the 64-bit data as two 32-bit data. The original “iflib.c” is
designed to handle integers; therefore to allow floating-point numbers designers need to
add an “EMMS” instruction in the “iflib.c” file to restore the floating-point unit (FPU)
status on the CPU so that it can begin processing FPU instructions again after an MMX
instruction sequence [4]. All API functions use character pointers for addressing
purpose, thus the character pointer to the memory should be increased or decreased in
unit of eight when addressing a 64-bit data in the software.

2.5 Pilchard Host Interface
The most important feature of the host interface is for host-Pilchard data transfer. All data
transfers should be performed in the “pcore.vhd” by using either the “din” or “dout” port.
When the host program issues a write, the input data “DIN” and address bus
“addr” must be read at the same time. The cycle for a host write in “pcore.vhd” is shown
as Figure 2.4. When the host read is initiated for a certain memory address in Pilchard,
both the read signal and address bus are triggered at the same time. However, the value at
the specified memory address will be ready at the “dout” port at the next clock cycle. The
host read cycle in “pcore.vhd” is shown as Figure 2.5.
Figure 2.4: Pilchard write cycle. [3]
Figure 2.5: Pilchard read cycle. [3]

Chapter 3
Floating-Point Number and Operations
3.1 Floating-Point Representations
There are two different types of number representations that are commonly used in digital
system, fixed-point and floating-point. Floating-point has some advantages over fixed-
point. A floating-point representation does not have a fixed window of representation,
which does not limit it from representing very large or very small numbers. However,
floating-point number arithmetic is slower than fixed-point, as additional circuity is
needed.
The IEEE standard 754 single-precision floating-point numbers are used in this
project. IEEE floating-point numbers have three basic components: the sign bit, the
exponent, and the mantissa. The following table shows the layout for single and double
precision floating point numbers, which are 32-bit and 64-bit respectively. The allocation
of bits for each component is shown below:
Sign Exponent Mantissa (fraction bits)
Bias
Single Precision 1 8 23 127 Double Precision 1 11 52 1023
Table 4: Bit distribution for floating-point numbers
The sign bit indicates whether the number is positive. A value of 0 at the sign bit
denotes a positive number, and 1 denotes a negative number.

To represent both positive and negative exponents, a bias is added to the actual
exponent in order to get the stored exponent. Without the bias the exponent has a range of
0 to 255 for the machine representation. However the range of actual values is -128 to
+127, therefore, a bias value of 127 is used for showing a negative exponent. The
following example illustrates the process to encode a binary number into the floating-
point representation.
Example 3.1:
To encode the binary number 111.10101:
Step1 The sign bit is 0 for positive numbers.
Step2 Move the point 2 decimal places to the left: 1.1110101 the digits after the point
are the mantissa. All trailing bits are 0.
Step3 The point was moved 2 decimal places to the left. The exponent now has a value
of 2. As a bias value of 127 is used, the final exponent will be 2 + 127 = 129. This
final exponent can effectively return the mantissa to its original size by applying it
to equation 3.1.
The mantissa, also known as the significand, represents the precision bits of the
number. Practically, mantissa has 24 bits of resolution for single precision floating-point
numbers, however, as the first bit of the mantissa is typically assumed to be 1, therefore,
only the fraction bits are needed to be stored. A floating-point number x can be expressed
by the following formula:
)127(2)1( −∗∗−= es mx (3.1)
Where s is the sign bit, m is the mantissa, and e is the exponent.

3.2 Floating-Point Multiplication
Floating-point multiplication is one of essential steps in matrix-vector multiplication, in
this project a single precision floating-point multiplier is used. The floating-point
multiplier performs calculations based on the algorithm described below [5]:
1. Multiply mantissas.
2. Add exponents.
3. Test for special case of the mantissa. Set exponent to –128 if the mantissa equal to
zero. If normalization is needed, the mantissa is shifted right and exponent is
increased accordingly.
4. Check for exponent overflow or underflow.
5. Check the sign bit, if both sign bit equal to 1 the result of the multiplication is
positive. If one of the sign bit is 1 and the other is 0 then the result of the
operation is negative.
3.3 Floating-Point Addition
Floating-point addition is another essential step in matrix-vector multiplication. To
perform the accumulation for matrix-vector multiplication a single precision floating-
point adder is used in this project. The algorithm for floating-point number addition is
more complex than multiplication, as it involves more bit shifting and comparison. The
floating-point adder performs calculations based on the algorithm described below [5]:
1. Compare two numbers’ exponent and keep the largest exponent.
2. Subtract exponents. Let d be the difference between two exponents

3. Align mantissas. Shift the mantissa to right by d bits. (Here the number that has a
smaller exponent is the one that need to be shifted)
4. Add mantissas.
5. Test special case of the mantissa from the result. The exponent is set to -128 if the
mantissa is zero.
6. Check for overflows and underflows.
7. Let k be the number of leading non-significant sign bits. The mantissa is left-
shifted k bits. The exponent is subtracted by k.
This chapter provides the necessary information on floating-point number representation
and operations for the matrix-vector multiplication system. A detail description of the
complete system implementation is provided in next chapter.

Chapter 4
Design and Implementation
4.1 Pilchard Design Flow
In order to obtain a functional system efficiently, several steps are required in the design
cycle. The Pilchard design flow diagram shown in Figure 4.1, illustrates all the necessary
steps for this project. These steps are iteratively entered, implemented, and verified until
a stable functioning system is produced. Two design verification steps are needed during
this design cycle. The first verification is a functional simulation of the design logic,
which is done before synthesizing the design. The second verification is an in-circuit
verification, which is performed by downloading the bit-stream onto the Pilchard board
and using a software program to verify the system behave correctly. In-circuit
verification is preferred over post-layout simulation in this project, because post-layout
simulation requires taking the back-annotation of a fully routed design and applying
timing information to perform a functional simulation, which requires a longer design
time.

Design Verification • In-circuit
verification
Download bit-stream to FPGA (Pilchard)
Design Implementation
Design Synthesis
Completed
Design Verification • Pre-Synthesis
simulation
Design Entry • VHDL files
Figure 4.1: Pilchard Design flow

4.2 Matrix-Vector Multiplication
A floating-point matrix-vector multiplication system is designed and implemented in this
project. The basic operation to be perform is AX=Y, where A is an arbitrary size of
matrix, X and Y are vectors with size of matrix A’s column number.
=
∗
2
1
0
2
1
0
222120
121110
020100
YYY
XXX
AAAAAAAAA
(4.1)
An example of matrix-vector multiplication is shown in Equation 4.1. The matrix-vector
multiplication involves both floating-point multiplication and addition, which is
implemented onto the Pilchard platform in this project. The obtain the result vector Y,
taking one row from matrix A at a time, multiply it with vector X element-by-element,
hence accumulate the partial results to get the final result, Equation 4.2 shown the process
of calculating Y . 0
0202101000 YXAXAXA =∗+∗+∗ (4.2)
In this project, the matrix-vector multiplication is performed, incorporate with
both software and hardware design. The hardware design on FPGA for this application is
to perform one row multiply with one column at a time, the complete matrix-vector
multiplication can be performed by iteratively apply one row and one column to the
FPGA. The detail of the hardware design can be found in the following subsections in
this chapter.

4.3 Design Entry
4.3.1 System Components and Structure
Design entry is the first step in implementing a digital system to the Pilchard platform.
VHDL is used in this project to develop the matrix-vector multiplication system. Editing,
modifications and debugging of the VHDL codes are performed in both Mentor
Graphics ModelSim SE VHDL5.5c GUI interface. The VHDL file “pcore.vhd”
mentioned in previous chapter is used as a wrapper file that allows user designs and other
IP cores to interface with the Pilchard board. Figure 4.2 shows the user design and IP
cores are set in a hierarchical order with the top-level file being the “pcore.vhd” file.
Figure 4.2 Hierarchical structure of “pcore.vhd”.
The matrix-vector multiplication system of this project consists of four components
“parith.vhd”, “dpram256_64.vhd”, “fpmult.vhd” and “fpadd3.vhd”. The “parith.vhd” and
“dpram256_64.vhd” directly interface with the “pcore.vhd”. The “fpmult.vhd” and

“fpadd3.vhd” are the floating-point components that interface with the “parith.vhd” only.
The Figure 4.3 is the top-level block diagram of the system, which shown the port
connections between components. The VHDL file “parith.vhd” is the user design file in
this project to interface with the “pcore.vhd”. The “parith.vhd” consists of three
components; a single precision floating-point multiplier (fpmult.vhd), adder (fpadd3.vhd)
and a state machine to control the floating-point units to perform multiplications and
accumulations on incoming data. The “dpram256_64.vhd” is the source file of a dual-port
BlockRAM generated in Xilinx Core Generator. In this project the port A from the dual-
port BlockRAM is used to interface with the “pcore.vhd” and the port B is used to
interface with the “parith.vhd” as indicated in Figure 4.3.
Figure 4.3: Top-level block diagram.

The BlockRAM used in this project has a data width of 64-bit and depth of 256,
which allows to store 512 single precision floating-point numbers. To fully utilize the 64-
bit data bus on the Pilchard, two floating-point numbers is written to the BlockRAM each
time. Considering the matrix-vector multiplication, the 64-bit data bus allows sending
one number from the row elements and one from the corresponding vector elements,
which means a floating-point multiplication can be performed as the data from
BlockRAM become available to the “parith.vhd”.
The source codes for the floating-point components (fpmult.vhd and fpadd3.vhd)
are obtained from Chinese University in Hong Kong. The “fpmult.vhd” is a floating-point
multiplier with eight pipeline stages implemented based on the algorithm described in
Chapter 3. The “fpadd3.vhd” is a floating-point adder with three pipeline stages
implemented based on the floating-point adder algorithm in Chapter 3. In this project,
modifications are made to “fpadd3.vhd”, and the modified version of “fpadd3.vhd” has
six pipeline stages.
4.3.2 Functional Behavior
In the “pcore.vhd” two concurrent processes determine the functional behavior. Several
important tasks are performed in the “pcore.vhd”. One important task is to reset the
“parith.vhd” module; the “parith.vhd” is reset when the “write” signal in “pcore.vhd” is
set to high through the C interface. This process is demonstrated by a flow chart in Figure
4.4. This reset and start counter feature gives the ability to iteratively use the
implemented design at run-time without re-download the bit-stream to the Pilchard board.
Another important task is to start a counter to count the number of input data and use the
data counter as address bus when writing data to the BlockRAM. The data counter is
reset when a “finish” signal is issued from the “parith.vhd”. In figure 4.5 the data count

process is illustrated, the start_count signal is equivalent to the write signal. This feature
allows arbitrary number of input data, thus increase the flexibility of the system. Finally,
the “pcore.vhd” handle the input and write the data onto the BlockRAM, which allows
the data to be retrieved in other module. During the write process, data are always written
to the BlockRAM start from address zero and the input address bus of the Pilchard
interface is not in used. The address bus of the Pilchard interface is only used when a read
signal is issued from the C interface, which allows designers to read from any location of
the BlockRAM to verify if the data is written to the BlockRAM correctly. Figure 4.6
shown the conditions that determine which signal should be used as address bus.
Figure 4.4 Flow chart of reset and start counter process.

Figure 4.5: Flow chart of the data count process in the “pcore.vhd”.
Figure 4.6 Flow chart of address bus decision.

The output data bus of the “pcore.vhd” has a static connection to the output data bus of
the port A on BlockRAM in this design.
The “parith.vhd” is the module that handles the data retrieval, floating-point
multiplication and addition. This module is operating under the clock-divider clock that is
generated from the delay lock loop on Xilinx Virtex1000E. The behavior of the
“parith.vhd” is determined by a counter, the overall behavior can be found in Figure 4.7.
The counter is triggered to start counting, when no more data are being written to the
BlockRAM in the “pcore.vhd” and a read is issued from the C interface. In other words,
the read/write signal from the C interface is used as a reset signal in the “parith.vhd”.
Another counter is in used to counter the number of input data that is read from
the BlockRAM. To read a data from the BlockRAM, an address location is sent to port B
of the BlockRAM; hence the data will become available at the second clock cycle. In this
project the address location sent to the BlockRAM is a data count, which has an initial
value of zero. As the data are retrieved from the BlockRAM start from the memory
location of zero, for every six clock-cycles the retrieved data is sent to the floating-point
multiplier and a start signal is sent to trigger the multiplier. Upon the completion of the
multiplication a signal is sent out from the floating-point multiplier to trigger the floating-
point adder. The reason that choose to start the multiplication every six clock-cycle is
because in doing matrix-vector multiplication, results from the floating-point
multiplication needed to be accumulated, which floating-point addition is involve in the
accumulation process. To accumulate the result upon finishing the floating-point
addition, the result from the addition component has to send to one of the input buffer of
itself directly. Moreover, the floating-point adder that used in this project requires six
clock cycle to complete the addition, therefore, it can only accumulate the results only if

the calculations are started every six clock-cycles. When all the calculations are finished
and write enable is issued and the answer is written to the lower 32-bit input bus of the
BlockRAM at address location of zero. The lower 32-bit of the input bus at address
location zero is used as a handshaking scheme to the software, an one is written to this
bus if the calculation is completed and answer becomes available.
Figure 4.7: Overall behavior of the “parith.vhd”.
4.4 Design Verification – Pre-synthesis Simulation
Similar to editing the compilation process is performed in both Mentor Graphics
ModelSim SE VHDL5.6a GUI interface, all the VHDL files are compiled in a
hierarchical order. Pre-synthesis simulation is the first of two design verifications in the

Pilchard design process. In this stage, the functional simulation of the design is being
tested to verify the logic in the design behave correctly. Since the design has not been
implemented on any device, timing information is unavailable at this stage. To perform
the functional simulation, a testbench is applied to the design to obtain the simulation
waveform for signals in the design. As IP cores generated using Xilinx Core Generator,
the XilinCoreLib and Unisim libraries are required to run the simulation.
Figure 4.8 shows the hierarchy for the input testbench files with “tb.vhd” being the top-
level. This testbench is only used by the simulator and is not to be synthesized. The
testbench used in this project has a set of 16 floating-point numbers that represented in
IEEE 754 representation.
Figure 4.8: Pilchard Testbench files.
The simulation result shown that the logic in the design is functioning correctly.
Two simulation waveform captured on the workstation are included in this project.
Figure 4.9 shown that a reset is issue to the “parith.vhd” from the “pcore.vhd” and behave
correct to reinitialize the data counter, accumulation buffer and other highlighted signals.

Another waveform for the “parith.vhd” is shown in Figure 4.10, which shows the logic
behavior when writing the answer to the BlockRAM. From this figure, it shows that the
write enable and address bus for the BlockRAM is issued correctly. Inspection of the
whole wave has been done in this project and all the logics in the design are verified to be
correct from the simulation waveform.
Figure 4.9: Reset the “parith.vhd”.

Figure 4.10: Writing answer to address zero.
4.5 Synthesis
FPGA Compiler II GUI from Synopsys tools was used in the synthesis process. As the
design in this project is targeting to the XilinxVirtexE chip, XCV1000E-HQ240 several
options need to be set when creating a new project. When creating a new project, no
VHDL or EDIF files for the IP Cores, that are generated using XilinxCoreGeneration,
are needed.
Figure 4.11 shows the options that can be set when creating an implementation of a chip.
When creating an implementation for the Pilchard, the check box “Do not insert I/O
pads” should be checked as the pilchard already has the I/O pads. The synthesis tools will

then optimize this newly created implementation. Finally, to prepare for the place and
route process a netlist of the design is needed. To export the netlist, right click on the
optimized implementation icon and choose “Export Netlist”, another window will appear
on the screen and a directory path is needed to specify where the netlist should export to,
in this project, the final output netlist file will be always be “pilchard.edf.”
Figure 4.11 Create implementation options in FPGA Compiler II GUI.
4.6 Design Implementation
Xilinx Design manager is used in this project for the place and route process.
Several files are needed for the place and route process in this project. The “iob_fdc.edif”
which is a netlist (EDIF) for I/O blocks used in the “pilchard.vhd”. The netlist file for the
dual port BlockRAM and a 32-bit unsigned integer multiplier are needed. The 32-bit
unsigned integer multiplier is an IP core that used in the floating-point multiplier.

Moreover, a User Constraint File that contains information of pin connection and timing
specification is required.
During the place and route process, information of usage of the device resources
used is displayed in the log file. For this project, the resources information is presented in
Table 5, the implementation of this project used nearly 8% of the available resources of
the FPGA device.
Resource Number Used Total Number Slices 1056 12288
Input LUTs 1588 24576 Bonded IOBs 104 158 Block RAMs 4 96
GCLKs 2 4 GCLKIOBs 1 4
DLLs 1 8 Startups 1 1
Table 5: Resources used in the design.
The timing constraint information can be obtained after the place and route
process, the minimum period for the design of this project is 28.458ns, which gives a
maximum frequency of 35.140MHz.
After place and route, bit-stream of the design is generated by BITGEN. In this
project, the bit-stream filename is always be “pilchard.bit”, this is the file that can be used
to configure the FPGA on the Pilchard platform.
4.7 Downloading to Pilchard
To configure the FPGA on the Pilchard platform, a bit-stream file generated from the
place and route process is needed. After the bit-stream is downloaded to the Pilchard, a C
program is used to perform in-circuit verification, for this project the in-circuit

verification is handle by a C program that performs a matrix-vector multiplication of
arbitrary size. The library file “iflib.c” has a set of APIs to handle the data transfer from
software to the FPGA. This library file compiled along with the C code design files.
To interface with the Pilchard board, a memory map to the Pilchard board is
created at the beginning. Special care is taken to design the algorithm to perform matrix-
vector multiplication. In the software, the first number that write to the Pilchard board,
which is sent to address location of zero, must be zero, as the matrix-vector multiplication
system use the lower 32-bit of the address zero to store the answer and the upper 32-bit is
the handshaking scheme for the system. When reading from the address zero, if the upper
32-bit is equal to one, which means the calculation on the Pilchard has completed and the
software starts to transfer a new set of data to the Pilchard. In the software, the matrix-
vector multiplication is performed in a nested for loop, the handshaking scheme is
achieved by placing a while loop to read the address location of zero until a value of zero
is return at that location. Furthermore, in developing a scheme to measure the
performance, the time of completion is recorded in the software. The C program is
compiled successfully, and tested with sets of matrix and vector data that is randomly
generated, and all the testing result is discussed in the next chapter.
The block diagram in Figure 4.12 shows the C interface incorporating with the
Pilchard and the infrastructure of the complete system. After the complete
implementation is downloaded to the Pilchard, several experiments are performed to
verify the correctness of the result and evaluate the performance of the matrix-vector
multiplication system. The detail of the experimental results is discussed in next chapter.

Figure 4.12 Block diagram of the C interface and Pilchard.

Chapter 5
Results & Discussion
A set of C files is described to verify the functionality of the matrix-vector multiplication
system after it is configured on the Pilchard board. A set of C programs is developed to
generate all the test data. A test data file consists of all the elements in a matrix and a
column of zeros, the format of the test data file can be found in appendix A. The reason
to have all the value at the first column is because the first data that write to the
BlockRAM is placed at the address location zero, which is used for result storage and
handshaking of the system. Therefore, it is desired to have the data being placed in this
location to be zero for each calculation cycle. The C program to test the system for this
project takes a matrix data file, vector data file and the dimension of the matrix at
command line to execute the software.
5.1 Implemented Matrix-Vector Multiplication System
5.1.1 Results from inner-product operations
All in-circuit verifications were performed on pilchard4.engr.utk.edu. The first set of tests
performed in this project use the matrix-vector multiplication system to calculate a row-
vector and column-vector multiplication (also known as an inner-product) using the
program “mv_fpga2”. To compare the performance of the system the program
“mv_cpu1” is used to perform the exact same calculation on the CPU; the time of
completion for the calculations are recorded for both programs.
In both “mv_cpu1” and “mv_fpga2”, a loop is used to allow repeating the
calculation in one execution. This provides a better overall timing statistic and resolution.

Different vector sizes are used in the inner-product calculation. For each vector size, the
test is conducted with five runs, which the calculation is repeated for different number of
times. Figure 5.2 shows the screen capture of the test being performed with a vector size
of 10. As shown in Figure 5.2, both “mv_fpga2” and “mv_cpu1” return the same answer,
and the time of completion for “mv_fpga2” is almost the same as using “mv_cpu1” when
the calculation is repeated one time, which shows that the performance of both platforms
are similar for a small data set.
Figure 5.2 Results from multiple executions of the C program.
As the number of repeating times increase the time of completion for the matrix-
vector system increased 3 µsec in average, and a 1.5 µsec improvement on the CPU. The
decrease of performance on the FPGA is due to the data transfer latency, as for each of

the iteration the program is attempting to retrieve data from address zero until the answer
is available. This data retrieve process is the bottleneck of the system, as it is required to
verify that the calculation result is on the BlockRAM. The increase in performance for
the CPU might due to the cache on the CPU, as all the data is stored in the cache the time
for accessing the data is decreased.
Other tests are performed using the vector size of 30, 50, 75, 100, 150 and 200;
the time of completion is record and organized in a tabular format, which is shown in
Table 6. From this table, it shows that as the data size increases the overall performance
of using the CPU is better than using the Pilchard. The Floating-point operation per
second (FLOPS) is calculated from dividing the number of floating-point operations by
the time of completion. To calculate FLOPS the number of floating-point operations are
needed, for an n-by-n inner product problem the total number of floating-point operations
is 2n. For examples, the calculation that has a vector size of 10, the total number of
floating-point operations for the inner product is 20. The clock rate for this
implementation is 35.140 MHz, and the system can perform one multiplication and one
addition in 14 clock-cycles which indicates that ideally the maximum FLOPS that the
matrix-vector multiplication system can achieve is approximately 25 MFLOPS, however
the performance might be affected by many factors such as latency of data transfer on the
FPGA. From Table 6, the FLOPS for the matrix-vector multiplication system on the
Pilchard ranges from four MFLOPS to twenty MFLOPS, Table 6 also indicates that as
the size of the vector increases the FLOPS decreases, this might due to the latency of the
data transfer on the FPGA. The CPU has a maximum 50 MFLOPS in this experiment.
This inner product experiment shows that the overall performance for CPU is better than
the Pilchard Platform.

Size of Vector = 10 Number of runs 1 10 30 50 100
Time on Pilchard (µSec) 1.00 3.90 4.20 4.08 4.26 Time on CPU (µSec) 2.00 0.60 0.50 0.50 0.47
Size of Vector = 30 Number of runs 1 10 30 50 100
Time on Pilchard (µSec) 7.00 11.10 11.33 11.32 11.37 Time on CPU (µSec) 3.00 1.40 1.30 1.28 1.27
Size of Vector = 50 Number of runs 1 10 30 50 100
Time on Pilchard (µSec) 14.00 18.10 18.30 18.48 18.51 Time on CPU (µSec) 3.00 2.10 2.07 2.06 2.05
Size of Vector = 75 Number of runs 1 10 30 50 100
Time on Pilchard (µSec) 23.00 27.20 27.37 27.50 27.51 Time on CPU (µSec) 4.00 3.20 3.07 3.06 3.06
Size of Vector = 100 Number of runs 1 10 30 50 100
Time on Pilchard (µSec) 32.00 36.2 36.13 36.9 37.26 Time on CPU (µSec) 5.00 4.10 4.07 4.04 4.03
Size of Vector = 150 Number of runs 1 10 30 50 100
Time on Pilchard (µSec) 51.00 53.90 54.40 54.40 54.50 Time on CPU (µSec) 7.00 6.10 6.03 6.04 6.02
Size of Vector = 200 Number of runs 1 10 30 50 100
Time on Pilchard (µSec) 68.00 72.30 72.37 72.40 72.41 Time on CPU (µSec) 10.00 8.10 8.00 8.00 7.99
Table 6: Time of completion with different size of vectors.
Another important aspect of the system is the precision of the floating-point units
implemented on the FPGA. Loss of precision might occur as the size of data set
increases. The result of the inner-product calculation with a vector size of 100 is shown in
Figure 5.3. It shows that the result obtained from the Pilchard preserves 7 digits of
precision, which indicates that the simplified version of floating-point units in this project

meets the requirement of the IEEE standard 754 single precision of floating-point number
representation.
Figure 5.3: Precision of the calculation
5.1.2 Results from Matrix-vector Multiplications
A set of matrix-vector multiplications are performed on the Pilchard with the system
developed in this project. The programs that developed for this verification process are
“mv_fpga”, “mv_cpu” and “mv_cpu2”, which calculations are performed on the Pilchard
and CPU respectively. The difference between “mv_cpu” and “mv_cpu2” is that
“mv_cpu” uses direct addressing to access the array, while indirect addressing is used in
“mv_cpu2”. The performance for indirect addressing is interesting because this
addressing scheme is often used in solving sparse matrix problems.
The matrix-vector multiplication is performed by iteratively applying the inner-
product operations on the data. For each iteration one row of the matrix and the column
vector is sent to the Pilchard to perform calculations, after the result is available and
obtained, a new iteration is started. The screen capture of the output from the software is
in Figure 5.4, which shows a 10 by 10 matrix-vector multiplication problem. The

correctness of the answers is verified with the “mv_cpu” program, and time of
completion is recorded.
Figure 5.4: Screen capture of matrix-vector multiplication.
The experiment is conducted by applying different sizes of square matrix on the
Pilchard and CPU, time of completion is recorded to use as a scheme to compare the
performance of the matrix-vector multiplication system implemented in this project. The
sizes of matrix that are used in this experiment are 10x10, 20x20, 50x50, 100x100 and
200x200. For each platform and size of matrix the experiment two program runs are
performed and the time of completion is recorded. The first run is to perform one matrix-
vector multiplication in one program execution, the second run is to perform the same
calculations 100 times to get a better resolution of the time of completion. The average of
the time of completion is calculated and organized into a tabular format as shown in
Table 7. A plot in Figure 5.5 is generated using the data from Table 7 to show the

tendency of the time of completion as the size of the input matrix increases on both CPU
and the Pilchard.
From Table 7, it shown that the performance of the CPU in doing matrix-vector
multiplication is better than the Pilchard. When the direct addressing is in used, the CPU
can achieve up to 73.5 MFLOPS. For indirect addressing, the CPU can achieve up to 47.6
MFLOPS, which shown the affect of indirect addressing in the calculation. For the
Pilchard platform, the maximum FLOPS that the system can reach are approximately 5.6
MFLOPS.
Time of Completion to a matrix-vector multiplication problem
Size of Matrix
Time on FPGA (µSec) Direct addressing
Time of CPU (µSec) Direct addressing
Time of CPU (µSec) Indirect addressing
10x10 37 4 4 20x20 151 13 18 50x50 915 68 106
100x100 3644 275 420 200x200 14424 1391 2589
Table 7: Time of completion with different size of matrix. (Single calculation)
Time of Completion to a matrix-vector multiplication problem
Size of Matrix
Time on FPGA (µSec) Direct addressing
Time of CPU (µSec) Direct addressing
Time of CPU (µSec) Indirect addressing
10x10 41.40 3.30 3.40 20x20 155.10 11.90 16.90 50x50 936.10 67.50 104.60
100x100 3653.90 265.60 400.10 200x200 14449.50 1178.50 2509.64
Table 8: Time of completion with different size of matrix. (Repeat calculation 100 times)

Time of Completion for Different Sizes of Matrix
0
2000
4000
6000
8000
10000
12000
14000
16000
0 50 100 150 200 250
Number of Rows in a Square Matrix
Tim
e (m
icro
-sec
onds
)
FPGACPU (Direct addressing)CPU (Indirect addressing)
Figure 5.5: Time of completion vs. size of the input matrix (Data from Table 7)
Time of Completion for Different Size of Matrix
0
2000
4000
6000
8000
10000
12000
14000
16000
0 50 100 150 200 250
Number of Rows in Square Matrix
Tim
e (m
icro
-sec
ond)
FPGA (Direct addressing)
CPU (Direct addressing)
CPU (Indirect addressing)
Figure 5.6: Time of completion vs. size of the input matrix (Data from Table 8)

The time of completion is calculated and organized into a tabular format as shown
in Table 8. A plot in Figure 5.6 is generated using the data from Table 8 to show the
tendency of the time of completion as the size of the input matrix increases on both CPU
and the Pilchard. From Table 8 when the direct addressing is in used, the CPU can
achieve up to 74.1 MFLOPS. For indirect addressing, the CPU can achieve up to 49.9
MFLOPS. For the Pilchard platform, the maximum FLOPS that the system can reach are
approximately 5.5 MFLOPS. As previously discussed, the data transfer latency is the
major factor that affecting the performance of the matrix-vector system implemented on
the Pilchard. As the result from this set of experiments show that the performance of
matrix-vector multiplication on the Pilchard does not exceed the CPU, another
experiment is performed to study whether the matrix-vector multiplication system can
assist the CPU in the computational process and increase the overall performance.
An experiment is conducted to evaluate the computational performance when
both CPU and FPGA are involved in the calculation. In this experiment, a 250x250
matrix is used and approximately 10% of the calculations are done on the Pilchard.
Indirect addressing is involved in both test programs. The time of completion is record
and shown in Table 9 below.
Time of Completion for Matrix-vector Multiplication Size of 250x250 (Time in µSec)
Test Run # #1 #2 #3 #4 #5 AverageTime on CPU with Pilchard
(Indirect addressing) 3794 3808 3841 3817 3824 3816.8
Time on CPU alone (Indirect addressing)
4387 4420 4366 4434 4399 4401.2
Table 9: Time of completion with multiple run and average.

In Table 9, the results shown that when the CPU is incorporating with the
Pilchard, gives a performance improvement of approximately 13.3% in the 250x250
matrix-vector multiplication problem. The experimental result indicates that the
performance of CPU on the matrix-vector multiplication is better than the matrix-vector
multiplication system implemented on the Pilchard when both systems are working
individually. However, the performance shown improvement when the software is
incorporating with the hardware in the computation process, which shows a potential that
the Pilchard can be used to improve the overall performance of scientific computations.
Moreover, there are still several improvements that can be made to increase the
performance of the matrix-vector multiplication system on the Pilchard. The reason that
the time of completion for the FPGA implementation increases dramatically as the size of
the input matrix increases is because the matrix-vector multiplication system in this
project is designed to handle one row of data from the matrix for each iteration, and the
calculation does not start until all the data are written to the Pilchard. Therefore this data
transfer scheme increases the latency of the calculation and thus increases the time of
completion dramatically. One possible solution to remedy this latency is to design the
system to store all rows of the matrix to the BlockRAM on the Pilchard instead of only
storing one row, and applying pipelining techniques to the data. However, storing one
row at a time is more flexible as the system can handle not only matrix-vector
multiplication but also matrix-matrix multiplications.
To improve the original matrix-vector multiplication system, another
implementation is created based on the architecture described in chapter 4. Another set of
floating-point units is added to the new implementation that allows parallel floating-point
operations within the FPGA, and an extra adder is used to combine the partial results.

The new implementation is tested on inner product and matrix-vector multiplication
problem with different sizes of input, the time of completion for inner product and
matrix-vector multiplication is shown in Table10 and 11 respectively. Comparing the
results from Table 6 and 10, for an inner product problem with vector size of 200, the
new implementation improved the performance by a factor of 4. A plot in Figure 5.7 is
generated from Table 10, which shows a narrow difference in performance between the
FPGA and CPU on the inner product compare to the original implementation.
Time of Completion to a inner-product problem
Size of Vector Time on FPGA (µSec) Direct addressing
Time on CPU (µSec) Indirect addressing
10 1.65 0.52 50 5.21 2.09 100 9.59 4.08 200 18.56 8.03 250 23.15 10.40
Table 10: Time of completion with different vector size. (Repeat calculation 100 times)
Time of Completion to a matrix-vector multiplication problem
Size of Matrix Time on FPGA (µSec) Direct addressing
Time on CPU (µSec) Indirect addressing
10x10 16.15 3.43 50x50 261.88 104.70
100x100 975.61 405.58 200x200 3725.15 2551.24 250x250 5768.47 4448.98
Table 11: Time of completion with different matrix size. (Repeat calculation 100 times)

Time of Completion for Inner-product
0
5
10
15
20
25
0 50 100 150 200 250 300
Size of Vector
Tim
e (m
irco-
seco
nds)
FPGA direct addressing
CPU indirect addressing
Figure 5.7: Time of completion vs. size of the input vector (Data from Table 10)
Time of Completion for Matrix-vector Multiplication
0
1000
2000
3000
4000
5000
6000
7000
0 50 100 150 200 250 300
Number of Rows in the Square Matrix
Tim
e (m
irco-
seco
nds)
FPGA direct addressing
CPU indirect addressing
Figure 5.8: Time of completion vs. size of the input matrix (Data from Table 11)

The matrix-vector multiplication problem also tested on the new implementation,
Table 11 shows the time of completion of different sizes of matrix problem that
performed on the new implementation. Comparing the results with Table 8, for a 200 by
200 matrix-vector multiplication problem, the performance for the new implementation
increased approximately 3.8. The plot in Figure 5.8 shows a narrow difference in
performance between the FPGA and CPU on matrix-vector multiplication problem
compare to the previous implementation.
5.1 Difficulties Encountered
Several difficulties are encountered throughout this project. One problem occurred at the
synthesis stage is when exporting the netlist of the implementation an “.ncf” file is also
created along with the “.edf” file. It is found that if this “.ncf” file is presented in the
implementation directory, a timing specification error will occur during the place and
route process, this problem can be corrected by deleting the “.ncf” after exporting the
netlist or selecting the option to specify not to export the “.ncf” file.
A major problem that encountered in this project is to implement a design that
meets the timing constraints. During the early design stage of this project, the system is
designed to start the calculation if a “write” is issue to the address location of 255.
However, this scheme causes delays to the hardware and thus the design does not meet
the timing constraint. Therefore, the “write” signal is used as a trigger to reset or start the
calculation in this system. Another reason that the design did not meet the timing
constraint is because of the state machine in the “parith.vhd”, which has eight states. This
state machine is replaced by two process, in one of the processes a counter is presented
and counts from zero to seven when a “start” is issued, the other process is to handle the

data transfer at a specified counter value. Furthermore, the floating-point units limit the
maximum frequency of the design as the original floating-point adder has a maximum
frequency of 15.8 MHz. The original floating-point adder is a three pipeline-stage adder,
which can complete the calculation in three clock-cycles, but it can only operate under a
slow clock. To remedy this problem the floating-point adder is further pipelined into a six
pipeline-stage adder that it can operate under a clock rate of 35.14 MHz. Another timing
related problem is that in some occasions the logic in the “pcore.vhd” does not meet the
timing constraint requirement. It is found that this problem is related to the address bus,
by observing at the design floor plan after the place and route process, it is shown that the
data path from the address bus to the BlockRAM has a long delay, which fails the
specified timing constraints. Using higher effort level during the place and route process
can resolve this problem, the best way is to perform an automatic multiple place and
route process and keep the implementation with the best optimization score, to create the
bit-stream to download to the Pilchard.
Other problems were also encountered during the software design process; the in-
circuit verification of the design shows that occasionally the data is not being written to
the BlockRAM correctly. This problem is caused the data counter in the “pcore.vhd”,
which is driven by the default clock rate at 100 MHz. The data counter is placed in a
sequential process and is updated when a “write” signal is issued, however the data bus is
concurrently updated with the “write” signal, therefore in some occasions the data that is
presented in the data bus might be written to a wrong memory location. To remedy this
problem a concurrent statement is used to connect the data count with the address bus of
the BlockRAM.

Chapter 6
Conclusions
6.1 Objectives Achieved
The goal of this project was to implement a digital system to perform matrix-vector
multiplication using the HPRC Pilchard platform and to demonstrate the potential of
performance improvements using such platforms for scientific computing. This goal was
achieved by the successful Pilchard implementations of the “parith.vhd”.
The software-hardware verification shows that the matrix-vector multiplication
system is functioning correctly and the time of completion is recorded for performance
comparisons. For both the inner product and matrix-vector multiplication, the
experimental results show that the performance for the “parith.vhd” implementation is
lower than the CPU in doing the floating-point inner product and matrix-vector
multiplication. The major factor of the low performance is due to the data transfer
latency, as the handshaking scheme requires accessing the BlockRAM continuously until
the result from the calculation is available. It shows a 13% improvement in performance
when incorporating both software and hardware in the calculation, also improvements
can be made to the system to boost the performance, such as further pipeline the design
or add more floating-point units to accelerate the calculation process.
The implementation with additional multiplication and accumulation floating-
point units shows dramatically improvements, which indicates that if more floating-point
units are added the performance of the FPGA might exceed the CPU. Furthermore, the
implementation used approximately 20% of the resources on the FPGA device; therefore

more floating-point unit still can be added to the design and further boost the
performance. As using the test result to address the question whether the FPGA can be
used to improve the performance of the floating-point matrix-vector multiplication, the
experimental results show that using FPGA for floating-point operation is comparable
with the CPU and potentially can exceed the CPU with more floating-point units.
Furthermore, the successful implementation of the “parith.vhd” core also
demonstrated that the Pilchard could be used to implement multiple IPs from different
sources. Implementation of these cores also shows the possible problems that a user using
the Pilchard platform would encounter.
6.2 Future Work
This project only provided the basic demonstration on implementing a floating-point
matrix-vector multiplication and evaluates the performance on the Pilchard platform.
This project also shown that the Pilchard can be used to handle intensive calculations for
scientific computing. With this project as the foundation for future work, more advanced
design of the matrix-vector multiplication system can be done.
There are several ways that might possibly improve the overall performance
matrix-vector multiplication. One possible solution is to redesign the whole system that
instead of storing one row of the matrix and one vector at each calculation, the system
will store all the matrix and vector data onto the BlockRAM and perform the calculation
by accessing the data within the FPGA.
The current design can be speedup by adding multiple set of floating-point and
memory units. Another set of BlockRAM, floating-point multiplier and adder can be
added to the system to improve the performance. The basic idea is to perform a parallel

computation within the FPGA, such that each BlockRAM has an individual set of
floating-point unit to interface with. This allows two BlockRAM to retrieval the data in
parallel and the data can be sent to the floating-point units in parallel. Finally the results
from both floating-point adders can be sent to another adder to obtain the finally answer.
Bibliography
[1] P.H.W. Leong, M.P. Leong, O.Y.H. Cheung, T. Tung, C.M. Kwok, and K.H.
Lee, “Pilchard – A Reconfigurable Computing Platform with Memory Slot
Interface”, Proceedings of the IEEE Symposium on Field-Programmable
Custom Computing Machines (FCCM), Rohnert Park, CA, April 2001.
[2] Xilinx, “Virtex-E 1.8 V Field Programmable Gate Arrays”, Datasheet
(DS022), March 2003. http://www.xilinx.com/partinfo/ds022.htm
[3] K.H. Tsoi, Pilchard User Reference (V0.1), Department of Computer Science
and Engineering, The Chinese University of Hong Kong, Shatin, NT Hong
Kong, January 2002.
[4] Randall Hyde, "The Art of Assembly Language Programming", January 200.
http://webster.cs.ucr.edu/Page_AoALinux/HTML/AoATOC.html
[5] K.C. Chang, “Digital Systems Design with VHDL and Synthesis, An Integrated
Approach”, Matt Loeb, May 1999.
[6] JICS, “Introduction to Parallel Processing”, Lecture Notes.
http://www.jics.utk.edu/documentation.html

Appendix
A. Data Format and Test Data Generation
A1. Data Format
A 10 by 10 matrix with an additional column with zeros.
0.0 1.23 0.92 5.85 1.81 1.47 8.68 5.87 7.78 0.37 6.90
0.0 3.35 1.68 9.04 2.67 4.20 0.24 3.96 6.38 8.29 3.99
0.0 9.22 6.88 4.35 0.58 4.43 3.70 3.75 4.54 6.80 7.46
0.0 9.91 8.03 8.37 5.75 9.84 9.84 4.43 5.71 7.62 4.80
0.0 2.61 0.97 6.48 1.65 3.64 0.68 1.88 7.61 7.06 0.18
0.0 1.60 6.28 7.06 5.95 6.86 1.49 9.64 0.61 6.03 6.45
0.0 8.07 5.94 4.48 6.44 1.69 4.32 6.28 6.12 0.04 3.90
0.0 0.92 2.65 4.88 7.40 4.29 8.52 8.08 6.18 6.13 5.13
0.0 6.36 7.73 1.41 3.41 3.68 8.27 4.91 3.32 8.88 0.93
0.0 9.77 6.94 6.87 4.25 3.38 8.56 8.57 9.66 4.68 8.60

A2. Test Data Generateion
/**************************************** Author: Tik-Hing Choi Date: 3-22-2003 Program Description: To generate vector with size X numbers and write to a file ***************************************/ #include <stdio.h> #include <stdlib.h> #include <time.h> int main (int argc, char *argv[]) { FILE *fp; float r_num; int i,j, stime, mat_size; long ltime; if ( argc != 3) { printf("genvec filename size.\n"); exit(1); } if( (fp = fopen(argv[1], "w")) == NULL) { printf(" cannot open file.\n"); exit(1); } mat_size = atoi( argv[2]); ltime = time(NULL); stime = (unsigned) ltime / 2 ; srand(stime); for( i=0; i<=mat_size; i++){ if( i ==0){ fprintf(fp, "0.0 "); } else { r_num = ( (float)rand() ) / ((float) RAND_MAX) * 10 ; fprintf(fp, "%3.2f ", r_num); } } fclose(fp); } /* end main */

/**************************************** Author: Tik-Hing Choi Date: 3-22-2003 Program Description: To generate X by X random numbers and write to a file ***************************************/ #include <stdio.h> #include <stdlib.h> #include <time.h> int main (int argc, char *argv[]) { FILE *fp; float r_num; int i,j, stime, mat_size; long ltime; if ( argc != 3) { printf("genmat filename size.\n"); exit(1); } if( (fp = fopen(argv[1], "w")) == NULL) { printf(" cannot open file.\n"); exit(1); } mat_size = atoi( argv[2]); ltime = time(NULL); stime = (unsigned) ltime / 2 ; srand(stime); for( i=0; i<mat_size; i++){ for( j=0; j<=mat_size; j++){ if ( j==0){ fprintf(fp, "0.0 "); } else { r_num = ( (float)rand() ) / ((float) RAND_MAX) * 10 ; fprintf(fp, "%3.2f ", r_num); } } fprintf(fp, "\n"); } fclose(fp); } /* end main */

B. Matrix-Vector System Implementation – VHDL AND C Codes
-- -- TOP LEVEL pilchard.vhd -- library ieee; use ieee.std_logic_1164.all; entity pilchard is port ( PADS_exchecker_reset: in std_logic; PADS_dimm_ck: in std_logic; PADS_dimm_cke: in std_logic_vector(1 downto 0); PADS_dimm_ras: in std_logic; PADS_dimm_cas: in std_logic; PADS_dimm_we: in std_logic; PADS_dimm_s: std_logic_vector(3 downto 0); PADS_dimm_a: in std_logic_vector(13 downto 0); PADS_dimm_ba: in std_logic_vector(1 downto 0); PADS_dimm_rege: in std_logic; PADS_dimm_d: inout std_logic_vector(63 downto 0); PADS_dimm_cb: inout std_logic_vector(7 downto 0); PADS_dimm_dqmb: in std_logic_vector(7 downto 0); PADS_dimm_scl: in std_logic; PADS_dimm_sda: inout std_logic; PADS_dimm_sa: in std_logic_vector(2 downto 0); PADS_dimm_wp: in std_logic; PADS_io_conn: inout std_logic_vector(27 downto 0) ); end pilchard; architecture syn of pilchard is component INV port ( O: out std_logic; I: in std_logic ); end component; component BUF port ( I: in std_logic; O: out std_logic ); end component; component BUFG port ( I: in std_logic; O: out std_logic ); end component; component CLKDLLHF --is port ( CLKIN: in std_logic; CLKFB: in std_logic; RST: in std_logic; CLK0: out std_logic;

CLK180: out std_logic; CLKDV: out std_logic; LOCKED: out std_logic ); end component; component FDC --is port ( C: in std_logic; CLR: in std_logic; D: in std_logic; Q: out std_logic ); end component; component IBUF port ( I: in std_logic; O: out std_logic ); end component; component IBUFG port ( I: in std_logic; O: out std_logic ); end component; component IOB_FDC --is port ( C: in std_logic; CLR: in std_logic; D: in std_logic; Q: out std_logic ); end component; component IOBUF port ( I: in std_logic; O: out std_logic; T: in std_logic; IO: inout std_logic ); end component; component OBUF port ( I: in std_logic; O: out std_logic ); end component; component STARTUP_VIRTEX port ( GSR: in std_logic; GTS: in std_logic; CLK: in std_logic ); end component; component pcore port ( clk: in std_logic;
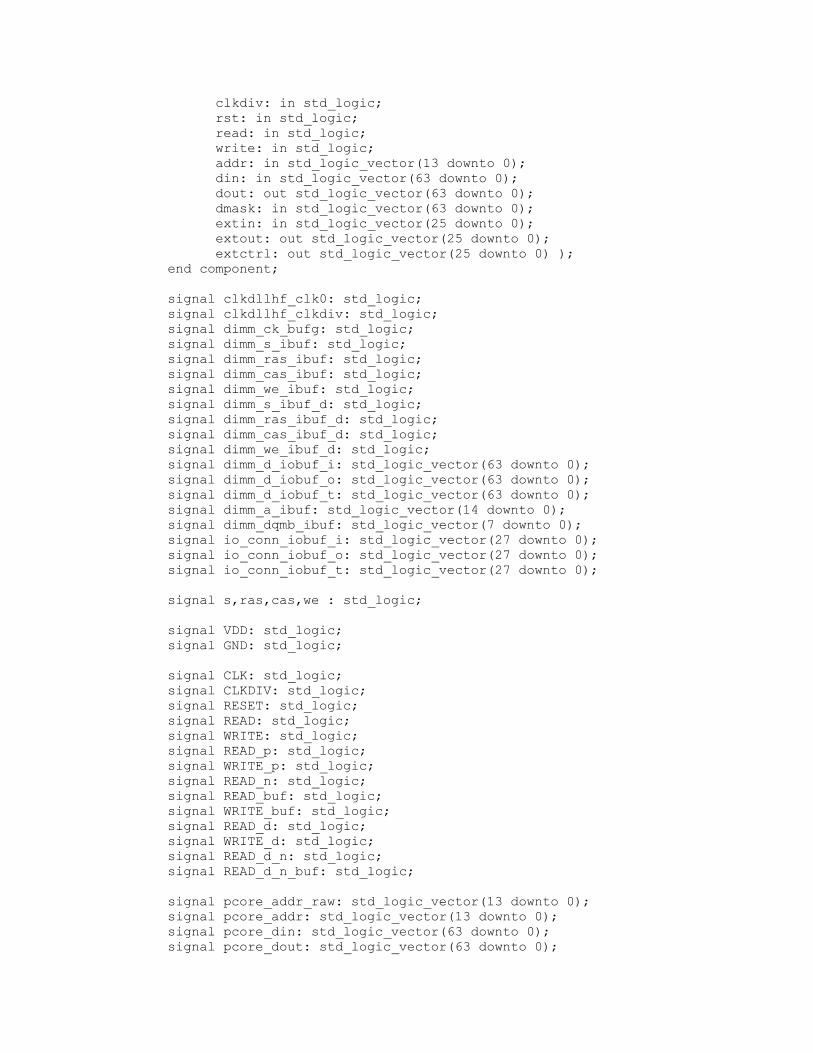
clkdiv: in std_logic; rst: in std_logic; read: in std_logic; write: in std_logic; addr: in std_logic_vector(13 downto 0); din: in std_logic_vector(63 downto 0); dout: out std_logic_vector(63 downto 0); dmask: in std_logic_vector(63 downto 0); extin: in std_logic_vector(25 downto 0); extout: out std_logic_vector(25 downto 0); extctrl: out std_logic_vector(25 downto 0) ); end component; signal clkdllhf_clk0: std_logic; signal clkdllhf_clkdiv: std_logic; signal dimm_ck_bufg: std_logic; signal dimm_s_ibuf: std_logic; signal dimm_ras_ibuf: std_logic; signal dimm_cas_ibuf: std_logic; signal dimm_we_ibuf: std_logic; signal dimm_s_ibuf_d: std_logic; signal dimm_ras_ibuf_d: std_logic; signal dimm_cas_ibuf_d: std_logic; signal dimm_we_ibuf_d: std_logic; signal dimm_d_iobuf_i: std_logic_vector(63 downto 0); signal dimm_d_iobuf_o: std_logic_vector(63 downto 0); signal dimm_d_iobuf_t: std_logic_vector(63 downto 0); signal dimm_a_ibuf: std_logic_vector(14 downto 0); signal dimm_dqmb_ibuf: std_logic_vector(7 downto 0); signal io_conn_iobuf_i: std_logic_vector(27 downto 0); signal io_conn_iobuf_o: std_logic_vector(27 downto 0); signal io_conn_iobuf_t: std_logic_vector(27 downto 0); signal s,ras,cas,we : std_logic; signal VDD: std_logic; signal GND: std_logic; signal CLK: std_logic; signal CLKDIV: std_logic; signal RESET: std_logic; signal READ: std_logic; signal WRITE: std_logic; signal READ_p: std_logic; signal WRITE_p: std_logic; signal READ_n: std_logic; signal READ_buf: std_logic; signal WRITE_buf: std_logic; signal READ_d: std_logic; signal WRITE_d: std_logic; signal READ_d_n: std_logic; signal READ_d_n_buf: std_logic; signal pcore_addr_raw: std_logic_vector(13 downto 0); signal pcore_addr: std_logic_vector(13 downto 0); signal pcore_din: std_logic_vector(63 downto 0); signal pcore_dout: std_logic_vector(63 downto 0);

signal pcore_dmask: std_logic_vector(63 downto 0); signal pcore_extin: std_logic_vector(25 downto 0); signal pcore_extout: std_logic_vector(25 downto 0); signal pcore_extctrl: std_logic_vector(25 downto 0); signal pcore_dqmb: std_logic_vector(7 downto 0); -- CLKDIV frequency control, default is 2 -- uncomment the following lines so as to redefined the clock rate -- given by clkdiv attribute CLKDV_DIVIDE: string; attribute CLKDV_DIVIDE of U_clkdllhf: label is "3"; -- attribute CLKDV_DIVIDE2: string; -- attribute CLKDV_DIVIDE2 of U_clkdllhf2: label is "2"; begin VDD <= '1'; GND <= '0'; U_ck_bufg: IBUFG port map ( I => PADS_dimm_ck, O => dimm_ck_bufg ); U_reset_ibuf: IBUF port map ( I => PADS_exchecker_reset, O => RESET ); U_clkdllhf: CLKDLLHF port map ( CLKIN => dimm_ck_bufg, CLKFB => CLK, RST => RESET, CLK0 => clkdllhf_clk0, CLK180 => open, CLKDV => clkdllhf_clkdiv, LOCKED => open ); U_clkdllhf_clk0_bufg: BUFG port map ( I => clkdllhf_clk0, O => CLK ); U_clkdllhf_clkdiv_bufg: BUFG port map ( I => clkdllhf_clkdiv, O => CLKDIV ); U_startup: STARTUP_VIRTEX port map ( GSR => RESET, GTS => GND, CLK => CLK ); U_dimm_s_ibuf: IBUF port map ( I => PADS_dimm_s(0), O => dimm_s_ibuf ); U_dimm_ras_ibuf: IBUF port map ( I => PADS_dimm_ras,

O => dimm_ras_ibuf ); U_dimm_cas_ibuf: IBUF port map ( I => PADS_dimm_cas, O => dimm_cas_ibuf ); U_dimm_we_ibuf: IBUF port map ( I => PADS_dimm_we, O => dimm_we_ibuf ); G_dimm_d: for i in integer range 0 to 63 generate U_dimm_d_iobuf: IOBUF port map ( I => dimm_d_iobuf_i(i), O => dimm_d_iobuf_o(i), T => dimm_d_iobuf_t(i), IO => PADS_dimm_d(i) ); U_dimm_d_iobuf_o: IOB_FDC port map ( C => CLK, CLR => RESET, D => dimm_d_iobuf_o(i), Q => pcore_din(i) ); U_dimm_d_iobuf_i: IOB_FDC port map ( C => CLK, CLR => RESET, D => pcore_dout(i), Q => dimm_d_iobuf_i(i) ); U_dimm_d_iobuf_t: IOB_FDC port map ( C => CLK, CLR => RESET, D => READ_d_n_buf, Q => dimm_d_iobuf_t(i) ); end generate; G_dimm_a: for i in integer range 0 to 13 generate U_dimm_a_ibuf: IBUF port map ( I => PADS_dimm_a(i), O => dimm_a_ibuf(i) ); U_dimm_a_ibuf_o: IOB_FDC port map ( C => CLK, CLR => RESET, D => dimm_a_ibuf(i), Q => pcore_addr_raw(i) ); end generate; pcore_addr(3 downto 0) <= pcore_addr_raw(3 downto 0); addr_correct: for i in integer range 4 to 7 generate ADDR_INV: INV port map ( O => pcore_addr(i), I => pcore_addr_raw(i) );

end generate; pcore_addr(13 downto 8) <= pcore_addr_raw(13 downto 8); G_dimm_dqmb: for i in integer range 0 to 7 generate U_dimm_dqmb_ibuf: IBUF port map ( I => PADS_dimm_dqmb(i), O => dimm_dqmb_ibuf(i) ); U_dimm_dqmb_ibuf_o: IOB_FDC port map ( C => CLK, CLR => RESET, D => dimm_dqmb_ibuf(i), Q => pcore_dqmb(i) ); end generate; pcore_dmask(7 downto 0) <= (others => (not pcore_dqmb(0))); pcore_dmask(15 downto 8) <= (others => (not pcore_dqmb(1))); pcore_dmask(23 downto 16) <= (others => (not pcore_dqmb(2))); pcore_dmask(31 downto 24) <= (others => (not pcore_dqmb(3))); pcore_dmask(39 downto 32) <= (others => (not pcore_dqmb(4))); pcore_dmask(47 downto 40) <= (others => (not pcore_dqmb(5))); pcore_dmask(55 downto 48) <= (others => (not pcore_dqmb(6))); pcore_dmask(63 downto 56) <= (others => (not pcore_dqmb(7))); G_io_conn: for i in integer range 2 to 27 generate U_io_conn_iobuf: IOBUF port map ( I => io_conn_iobuf_i(i), O => io_conn_iobuf_o(i), T => io_conn_iobuf_t(i), IO => PADS_io_conn(i) ); U_io_conn_iobuf_o: IOB_FDC port map ( C => CLK, CLR => RESET, D => io_conn_iobuf_o(i), Q => pcore_extin(i - 2) ); U_io_conn_iobuf_i: IOB_FDC port map ( C => CLK, CLR => RESET, D => pcore_extout(i - 2), Q => io_conn_iobuf_i(i) ); U_io_conn_iobuf_t: IOB_FDC port map ( C => CLK, CLR => RESET, D => pcore_extctrl(i - 2), Q => io_conn_iobuf_t(i) ); end generate; U_io_conn_0_iobuf: IOBUF port map ( I => dimm_ck_bufg, O => open,

T => GND, IO => PADS_io_conn(0) ); U_io_conn_1_iobuf: IOBUF port map ( I => GND, O => open, T => VDD, IO => PADS_io_conn(1) ); READ_p <= (not dimm_s_ibuf) and (dimm_ras_ibuf) and (not dimm_cas_ibuf) and (dimm_we_ibuf); U_read: FDC port map ( C => CLK, CLR => RESET, D => READ_p, Q => READ ); U_buf_read: BUF port map ( I => READ, O => READ_buf ); U_read_d: FDC port map ( C => CLK, CLR => RESET, D => READ, Q => READ_d ); WRITE_p <= (not dimm_s_ibuf) and (dimm_ras_ibuf) and (not dimm_cas_ibuf) and (not dimm_we_ibuf); U_write: FDC port map ( C => CLK, CLR => RESET, D => WRITE_p, Q => WRITE ); U_buf_write: BUF port map ( I => WRITE, O => WRITE_buf ); U_write_d: FDC port map ( C => CLK, CLR => RESET, D => WRITE, Q => WRITE_d ); READ_n <= not READ; U_read_d_n: FDC port map ( C => CLK,

CLR => RESET, D => READ_n, Q => READ_d_n ); U_buf_read_d_n: BUF port map ( I => READ_d_n, O => READ_d_n_buf ); -- User logic should be placed inside pcore U_pcore: pcore port map ( clk => CLK, clkdiv => CLKDIV, rst => RESET, read => READ, write => WRITE, addr => pcore_addr, din => pcore_din, dout => pcore_dout, dmask => pcore_dmask, extin => pcore_extin, extout => pcore_extout, extctrl => pcore_extctrl ); end syn;

-- pcore interface -- author: Tik-Hing Choi -- graduate student -- email: [email protected] -- this interace extend the pcore by providing the block ram -- and register capability to the existing pilchard framework -- it encapsulate the parith where the designer can wrap the -- design with it. -- the address 0 is used to store the answer from parith.vhd library ieee; use ieee.std_logic_1164.all; use ieee.std_logic_unsigned.all; entity pcore is port ( clk: in std_logic; clkdiv: in std_logic; rst: in std_logic; read: in std_logic; write: in std_logic; addr: in std_logic_vector(13 downto 0); din: in std_logic_vector(63 downto 0); dout: out std_logic_vector(63 downto 0); dmask: in std_logic_vector(63 downto 0); extin: in std_logic_vector(25 downto 0); extout: out std_logic_vector(25 downto 0); extctrl: out std_logic_vector(25 downto 0) ); end pcore; architecture syn of pcore is component dpram256_64 port ( addra: IN std_logic_VECTOR(7 downto 0); clka: IN std_logic; dina: IN std_logic_VECTOR(63 downto 0); douta: OUT std_logic_VECTOR(63 downto 0); wea: IN std_logic; addrb: IN std_logic_VECTOR(7 downto 0); clkb: IN std_logic; dinb: IN std_logic_VECTOR(63 downto 0); doutb: OUT std_logic_VECTOR(63 downto 0); web: IN std_logic); end component; component parith port ( clk: in std_logic; rst: in std_logic; addr: out std_logic_vector(7 downto 0); din: out std_logic_vector(63 downto 0); dout: in std_logic_vector(63 downto 0);

we: out std_logic; dc_in: in std_logic_vector(7 downto 0); finish: out std_logic ); end component; signal addrb, num_data, ddcount :std_logic_VECTOR(7 downto 0); signal clkb: std_logic; signal dinb: std_logic_VECTOR(63 downto 0); signal doutb: std_logic_VECTOR(63 downto 0); signal web : std_logic; signal rst1, stcount: std_logic; signal addr_buf: std_logic_vector(7 downto 0); signal finish: std_logic; signal bram_dout: std_logic_VECTOR(63 downto 0); --debug signal signal start_debug:std_logic; signal web_debug:std_logic; begin ram0:dpram256_64 port map ( addra => addr_buf, --reg_addr, --addr( 7 downto 0), clka => clk, dina => din, douta => bram_dout, wea => write, addrb => addrb, clkb => clkb, dinb => dinb, doutb => doutb, web => web -- this portb is only perform read function ); core0: parith port map ( clk => clkb, --clkm => clkm, rst => rst1, addr => addrb, din => dinb, dout => doutb, we => web, dc_in => num_data, finish => finish ); process(clk,rst) begin if (rst = '1') then rst1 <= '1';

stcount <= '0'; elsif (clk'event and clk ='1') then if ( write = '1' ) then rst1 <= '1'; stcount <= '1'; else rst1 <= '0'; stcount <= '0'; end if; end if; end process; process(clk,rst) begin if (rst = '1') then ddcount <= "00000000"; elsif (clk'event and clk ='1') then if ( stcount = '1' ) then num_data <= ddcount; ddcount <= ddcount + 1; elsif ( finish = '1') then ddcount <= "00000000"; end if; end if; end process; addr_buf <= ddcount when (stcount = '1') else addr( 7 downto 0); dout <= bram_dout; -- define the core clock clkb <= clkdiv; end syn;

-- Author: Tik-Hing Choi -- parith.vhd -- Description: the main module to handle data transfer and floating-point operations -- library ieee; use ieee.std_logic_1164.all; use ieee.std_logic_unsigned.all; entity parith is port ( clk: in std_logic; rst: in std_logic; addr: out std_logic_vector(7 downto 0); din: out std_logic_vector(63 downto 0); -- write to block ram dout: in std_logic_vector(63 downto 0); -- read to block ram we: out std_logic; -- write enable ram dc_in: in std_logic_vector( 7 downto 0); finish: out std_logic ); end parith; architecture rtl of parith is -- fpmults component fpmult port ( CLK : in std_logic; FA : in std_logic_vector(23 + 8 downto 0); FB : in std_logic_vector(23 + 8 downto 0); Q : out std_logic_vector(23 + 8 downto 0); start: in std_logic; finish: out std_logic ); end component; -- fpadder component fpadd3 port ( CLK : in std_logic; FA : in std_logic_vector(31 downto 0); FB : in std_logic_vector(31 downto 0); Q : out std_logic_vector(31 downto 0); start: in std_logic; finish: out std_logic); end component; signal countd: std_logic_vector(7 downto 0); signal finish_rd, finisha, finishm, fa: std_logic; signal startm, starta, startx, frd: std_logic; signal counta : std_logic_vector(2 downto 0); signal buf_ans, bufin_m: std_logic_vector(63 downto 0); signal bufa, buf_acum, bufb, acumb: std_logic_vector(31 downto 0); signal bufin_a: std_logic_vector(31 downto 0); begin fpmult1: fpmult port map (

CLK => clk, FA => bufin_m(31 downto 0), --dout(31 downto 0), FB => bufin_m(63 downto 32), --dout(63 downto 32), Q => bufa, start => startm, finish => finishm ); fpadd1: fpadd3 port map ( CLK => clk, FA => bufin_a, FB => acumb, Q => bufb, start => starta, --finishm, --starta, finish => finisha ); -- read from block ram every 6 clock cycle process (clk, rst) begin if (rst = '1') then counta <= "000"; elsif (clk = '1' and clk'event) then if (finish_rd = '0') then if (counta < "111") then counta <= counta + 1; else counta <= "000"; end if; end if; end if; end process; process (clk, rst) begin if (rst = '1') then finish_rd <= '0'; frd <='0'; countd <= "00000000"; elsif (clk = '1' and clk'event) then if(counta = "001" )then addr <= countd; if ( countd > dc_in ) then finish_rd <= '1'; frd <= '1';

addr <= "00000000"; end if; elsif (counta = "110" ) then bufin_m <= dout; startm <= '1'; elsif (counta = "111" ) then countd <= countd + 1; startm <= '0'; else startm <= '0'; end if; end if; end process; process (clk, rst) begin if (rst = '1') then buf_acum <= (others => '0'); finish <= '0'; elsif (clk = '1' and clk'event) then if(finisha = '1') then buf_acum <= bufb; if(finish_rd = '1' ) then finish <= '1'; end if; else finish <= '0'; end if; end if; end process; process (clk, rst) begin if (rst = '1') then startx <= '0'; elsif (clk = '1' and clk'event) then if(finishm = '1') then bufin_a <= bufa; startx <= '1'; else startx <= '0'; end if; end if; end process; process (clk, rst) begin

if (rst = '1') then starta <= '0'; elsif (clk = '1' and clk'event) then starta <= startx; end if; end process; acumb <= buf_acum; we <= '1' when (finisha = '1' and finish_rd = '1') else '0'; buf_ans(63 downto 32)<= "0000000000000000000000000000000" & finish_rd ; buf_ans(31 downto 0) <= bufb; din <= buf_ans; end rtl;

/**************************************** Author: Tik-Hing Choi Date: 3-22-2003 Program Description: matrix-vector multiplication using the Pilchard board ***************************************/ #include <stdio.h> #include <stdlib.h> #include <time.h> #include <sys/time.h> #include <fcntl.h> #include <unistd.h> #include <sys/types.h> #include <sys/stat.h> #include <sys/mman.h> #include "iflib.h" int main (int argc, char *argv[]) { FILE *datain, *vecin; int64 *data, z_data, v_data; float r_num, *m_num, *v_num, *acum, *num1, *num2; float *ans1, *num3, *num4, ltime2; char *memp; int i,j,k, stime,wt, mat_size, tot_data, fd; int myver1, col; long ltime; struct timeval t_start, t_finish; if ( argc != 5) { printf("mv_fpga matrixfile vectorfile size loop .\n"); exit(1); } if( (datain = fopen(argv[1], "r")) == NULL) { printf(" cannot open file.\n"); exit(1); } if( (vecin = fopen(argv[2], "r")) == NULL) { printf(" cannot open file.\n"); exit(1); }

fd = open(DEVICE, O_RDWR); memp = (char *)mmap(NULL, MTRRZ, PROT_READ, MAP_PRIVATE, fd, 0); if (memp == MAP_FAILED) { perror(DEVICE); exit(1); } z_data.w[1] = 0; z_data.w[0] = 0; mat_size = atoi( argv[3]); col = mat_size + 1; wt = atoi( argv[4]); tot_data = mat_size * col; data = malloc(tot_data * sizeof(int64) ); m_num = malloc( tot_data * sizeof(float) ); v_num = malloc( col * sizeof(float) ); ans1 = malloc( mat_size * sizeof(float) ); /* read in data */ i=0; while ( i < tot_data ){ fscanf(datain, "%f ", &m_num[i] ) ; if ( i < col ) { fscanf(vecin, "%f ", &v_num[i] ) ; } i++; } for( i=0; i<mat_size; i++){ for( j=0; j< col; j++){ num1 = (float *)&data[j+i*col].w[0]; num2 = (float *)&data[j+i*col].w[1]; *num1 = m_num[j + i*col]; *num2 = v_num[j]; } } ltime = 0; for ( k=0; k<wt; k++) { for( i=0; i< mat_size ; i++){ for( j=0; j< col; j++){

write64(data[j+i*col], memp+(j << 3) ); } read64(&v_data, memp+( 0 << 3)); gettimeofday(&t_start, NULL); myver1 = v_data.w[1]; while ( myver1 != 1){ read64(&v_data, memp+( 0 << 3)); myver1 = v_data.w[1]; } gettimeofday(&t_finish, NULL); ltime = ltime + (t_finish.tv_sec-t_start.tv_sec) * 1000000 + (t_finish.tv_usec-
t_start.tv_usec); printf(""); read64(&v_data, memp+( 0 << 3)); num3 = (float *)&v_data.w[0]; ans1[i] = *num3; } } ltime2 = (float) ltime / wt; printf("CPU : calculation completed in %3.2f usec\n", ltime2); for( i=0; i<10; i++){ printf("%3.3f ", ans1[i]); printf("\n"); } fclose(datain); fclose(vecin); } /* end main */


