
Introduction
So what you are holding now is a compilation report. It contains the most essential
information on, as I call it, the Rough Strength Triad. No, it is not connected to
Eastern criminal underground community (what a shame!). The Rough Strength
Triad is a mix of three training implements I found the most useful while being the
cheapest and/or the easiest to obtain – bodyweight, sandbags and kettlebells.
Why Not a Barbell?
While the barbell is the king of all the training tools, it has some serious flaws. The
main disadvantage is that to train with a barbell, you need either to attend a gym,
or to live in your own house, preferably with a garage (to store the barbell itself
and all the plates). The first option can be REALLY ANNOYING. Just imagine:
shitty music that is so loud that you cannot concentrate on the set;
all the mentally deficient people that will surround you and ask moronic
questions in the middle of your set;
all the narcissistic men and women who will probably die if they do not check
themselves out in mirrors EVERY second;
always occupied benches and treadmill insanity;
and loads of other crap.
I would not like to spend even a second my time in such a place. Training there is
way harder than in the deep woods, believe me, I tried both.
[NOTE: of course, I am talking about commercial gyms a.k.a. fitness clubs. You
CAN find great gyms, but they are as rare here as sober people on New Year’s
Eve]
In the second case, you will need some serious money to buy not only a full barbell
set, but also a house because I find it impossible to train with a barbell in an
apartment (especially in a rented one).
So what should you do if you crave strength training, but do not have the willpower
to withstand the commercial gym (not killing someone) and money for your own
gym?
Use the Rough Strength Triad. Read this report to find out how.

Calisthenics
Despite all the efforts to popularize them, calisthenics are still one of the most
under-appreciated strength training tools out there. I think this fact is connected
to the common thought that to obtain strength, you must attend a gym. As
experience shows, this thought is wrong, and you can get results even with as little
as your own bodyweight.
Number one benefit of calisthenics is the fact that you are your own gym. It is very
convenient, huh? Additionally, most of the time you do not use any external
resistance. It feels much different and opens new horizons for you.
The Main Difference
Let’s face it. Barbells, dumbbells, kettlebells, sandbags. They all are different, but
the rules remain the same. You lift weights. With bodyweight training, you lift your
own body. It is a bit tricky at first because you project the force not against some
external object but your own body. In addition, there are lots of bodyweight
exercises that require understanding of your position in space. You have to get used
to this.
Working weight in pure calisthenics is always fixed. So what to do when exercise
becomes too easy? Progress to more difficult variation and/or decrease the
leverage, and/or add weight. Here comes the fun. Once regular Push-Ups become
easy, work on Close-Grip Push-Ups. Once Close-Grip Push-Ups become easy, work
on Handstand Push-Ups etc. Strategies vary slightly from individual to individual,
but you should always strive for the most difficult exercise.
Hand Balancing and Static Exercises
Handstand and various levers (Back Lever, Planche, Front Lever, etc.) are unique
bodyweight exercises. No weighted drills can provide analogues of this specific
static load. Once you try them, you will be amazed how weak you really are. I am
sure that if you add these positions to your training routine, you will experience
solid gains in strength and muscle.
In addition, I believe that you MUST become proficient with your bodyweight for
complete strength and muscle development. It is a no-brainer, but some people
are still obsessed with their Bench Press numbers, while struggling to perform even
5-10 push-ups. This is ridiculous.
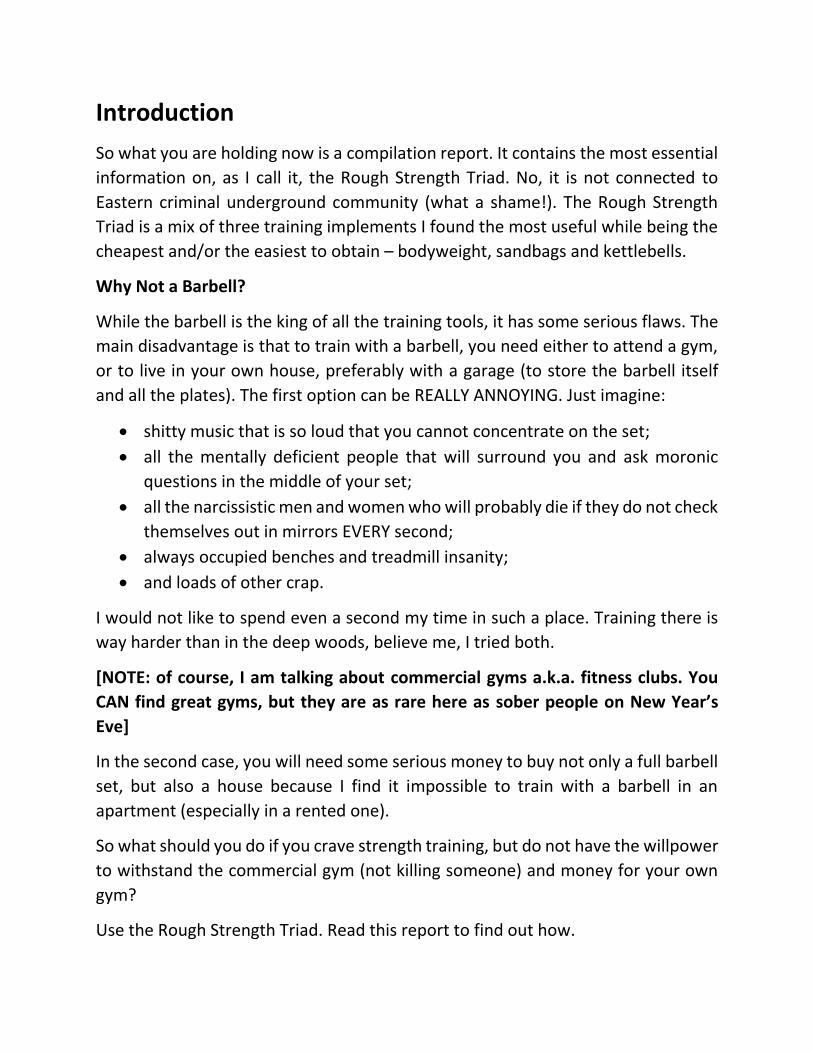
The Environment
The environment can help you big time in your bodyweight training. Playgrounds,
schoolyards, tree branches, steps, whatever you can find. With their help, you can
do Dips, Pull-Ups, Muscle-Ups, Human Flags etc. Use anything helpful.
This was my ghetto dipping station when I lived in Cherkassy. A table to the right
and a stack of boxes to the left.

Bodyweight Training and Joints
Despite what other people say, bodyweight training is easier on joints. It can be a
fair alternative to weight training if you have an existing injury. A couple of weeks
of exclusively calisthenics can give you a break from weights, and can be some sort
of a de-load. You will feel fresher and more powerful when you return weights to
your training regimen.
Rings
Gymnastic rings are the easiest way to supercharge your bodyweight training. Their
potential is huge. I am brave enough to state that you will never outgrow the rings.
There will ALWAYS be a harder exercise. When you reach decent proficiency with
gymnastic rings, you will have serious upper body strength and muscular
development to match it. I will go even further and say that if you are committed
enough, then you will need no more training implements to develop your upper
body to its limit.
How such a simple training tool has so much potential? Rings are very unstable by
their nature, so it is much harder to perform same movements on them comparing
to the floor, bar or parallel bars. For example, the first time I tried ring training, I
was able to do approximately 30 bodyweight dips on parallel bars. On the rings, I
was able to do only 5. That’s the potential.
Sustainability
Finally, what is really cool about calisthenics is the fact that you need literally
nothing to sustain this type of training to your old age. Just imagine that all the
gyms are closed and all the iron is gone. If you know how to use your own body as
a gym, then you simply do not give a shit about such situation. Additionally, there
will be no need in constant gym-search if you travel or move a lot.

Basic Bodyweight Exercises
I divided them into categories:
1. Upper Body Push
Push-Ups
Get into push-up position. Dip down until chest touches the floor. Push back up.
Handstand Push-Ups
Get into a handstand. Dip down until head touches the floor. Push back up.

Dips
Get on the dip bars, rings or any sturdy objects. Dip down at least until your upper
arm is parallel to the ground. Push back up.
2. Upper Body Pull
Pull-Ups
Grab the bar, rings, a tree branch, or any similar object. Pull yourself up. Keep your
shoulders in their sockets.

Horizontal Rows
This is a little bit easier variation of the Pull-Up. In Ukraine, it is called “pull-ups for
girls”.
3. Legs and Lower Back
Squats
Squat down. Stand up. Push through your heels, not toes.

Single-Leg Squats
Squat down and stand up, but with one leg only. Push through your heels, not toes.
Bridges
Lie down on the floor on your back. Push up with your hands and legs. Hold.

4. Levers
Elbow Lever
Hold your body on your elbows only. The body should be parallel to the ground.
Planche
Hold your body parallel to the ground with straight arms.

Back Lever
Get on the bar (or rings) and hold yourself parallel to the ground with your hands
behind you.
Front Lever
Get on the bar (or rings) and hold yourself parallel to the ground with your hands
in front of you.

5. Core
Hanging Leg Raises
Get on the bar. Raise your legs without bending them.
Sit-Ups
This exercise is so old that you should probably know it.
NOTE: this is just a brief description of exercises, not an actual instruction. You
should consult a professional for the proper technique.

Example Calisthenics Routine
Here is an example bodyweight-only full-body routine:
Monday
A) Handstand Push-Ups – 3 x 6
B) Pull-Ups – 3 x 6
C) Single-Leg Squat – 3 x 6
Tuesday
Off.
Wednesday
A) Dips – 3 x 8
B) Horizontal Rows – 3 x 8
C) Bridges – 3 x 8
Thursday
Off.
Friday
A) Push-Ups – 3 x 12
B) Back Levers – 3 x 15 sec
C) Leg Raises – 3 x 12
Saturday & Sunday
Off.
NOTE: this routine is presented here only for example purposes. It may or may not
work for you depending on your individual capabilities and conditions.

Closing Thoughts
Some people can find it hard to gain muscle with bodyweight training, especially
skinny guys. However, with a right approach and a calorie surplus, it is possible. In
addition, strength gained with calisthenics will definitely carry over to the real life
and any sport you participate in.
Bodyweight is not the ultimate training tool, but it is so different, natural and fun
that it would be a big mistake to neglect this unique training approach.
Sandbags
Sandbag is one of the most simple and yet the most effective strength training
implements out there. Sandbag strength training is still highly underappreciated
nowadays despite all the attempts to popularize it. I think there are two reasons
for this:
1. It is not fancy;
2. It is brutally hard.
Any exercise performed with heavy sandbag is a test of willpower, and it is so
ferocious that will leave you lying in the puddle of your own sweat. If you still doubt
that sandbag is one of the manliest training tools out there, I challenge you to try
it.
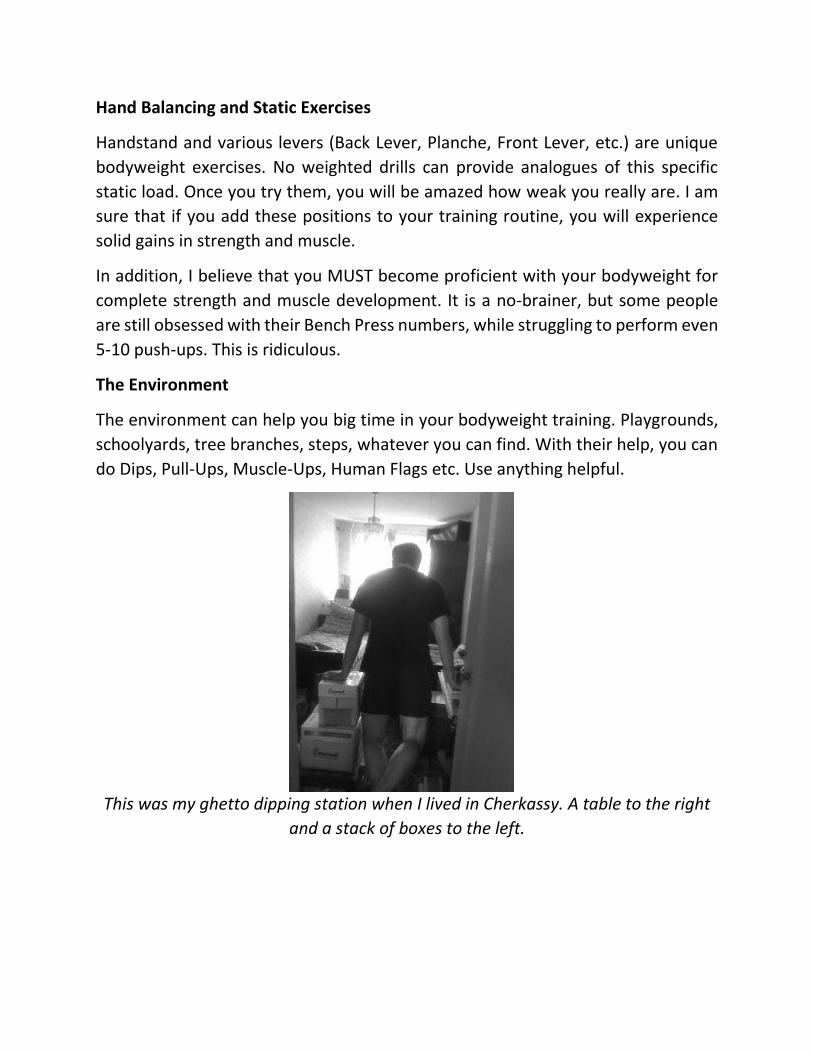
Not long time ago, there were some efforts to revive sandbags. For example, the
first person to attract my attention to them was Brooks Kubik.
On the photo to the right, the author of
Dinosaur Training playing with 200 lbs.
sandbag

His “Dinosaur Training” is the classic read that devotes some attention to heavy
sandbag training. However, he uses sandbags as a supplement to conventional
barbell and dumbbell training. In my opinion, it is not enough for such a great tool.
And even not close enough to describe its tremendous potential.
Here Is Why
1. Sandbags work your stabilizers in the most brutal way possible. Even after the
first sandbag workout, you will be sore as hell in places you have not even thought
about earlier. Guaranteed. Barbells will feel like a walk in the park after sandbag
brutality.
2. Sandbags work your grip big time. Isn’t it a pleasant bonus? Even more. Actually
there is a strong correlation between your grip strength and size of your muscles,
so do not neglect this benefit.
3. There is a lot of setup work with sandbags. Not good? Think again, man. It’s like
a workout in a workout. You will build incredible work capacity after all those cleans
and shouldering.
4. You will be sweating after the first work set with sandbags. Talking about fat loss
and conditioning.
You can read more about the benefits of sandbag strength training here.
The benefits are indisputable. What is next?
Where to Get a Sandbag?
I can answer this question easily. There are two viable ways. Either has pros and
cons.
1. You can order a commercial one (for example, here). They are great for fat loss
and conditioning but they definitely lack the weight you can stuff in if your goal is
rough strength and size.
2. If you want to build some serious strength and muscle, you will need a ‘monster’
sandbag. You should be able to stuff into it at least 300 lbs (135 kg) of sand.
There are two different ways to make it. Both methods begin identically. At first,
take a bag, preferably army duffel one or any bag made of tight material (for
example, made of canvas). It is cheap, heavy duty and you can find something like

this almost everywhere. If you are so ghetto that you find even this expensive, then
you can use construction-style bags. Here in Ukraine they cost approximately $2.
To tell you the truth, my first sandbag was made of couple of such construction-
style bags and I was not complaining. Ok, the outer bag is ready. The next step will
be buying a couple of huge trash-bags and stuffing them inside of the outer bag.
This will ensure that you will not be cleaning your home gym after every session (of
course, if you train indoors) and it will cost you a couple cents. The inner bag is
ready too.
It may look something like this.
Finally, we made it to the part where I will explain you the difference between the
two ways of making the sandbag. The first one is the simplest and the least time-
consuming. Get sand – stuff it inside the bag – lace it up – train! You can either buy
sand, or go to the beach with a shovel and get it for free. When you put sand inside
the bag, just tie it with a lace or something similar. Sandbag is ready. Weigh it if you
want. You can start training. When the sandbag becomes light, add more sand
inside. Pros of this method: easy, time efficient. Cons: sandbag will be non-
adjustable, which is not so good if you plan using one sandbag for several exercises.
The second way will allow you to make your sandbag adjustable. What is the major
difference? When you get the sand, you should divide it and stuff into smaller bags.
They could be, for example, small trash-bags or something else of such size. After
stuffing sand inside just duct-tape them (or scotch-tape them) thickly. You don’t

want them to tear, right? Weigh and mark every small bag. For example, I have
small bags of such weight (in kilos): 16.5, 14, 12, 13.5, 11, 7, 5 etc.
A 13 kg small bag.
So now you can use these small bags similar to barbell plates. Just put them inside
the sandbag and lace it. Here we go. Now you have an adjustable sandbag, which
can be used effectively as a supplement to your current training implements or
amazing standalone tool.
Some tips:
1. You can use any filler you want. You can try rice or cement. However, sand
remains the safest while the heaviest. You can drop a sandbag on your feet and
remain uninjured.
2. If you live in country where it snows in winter, you might want to get a little bit
more sand than you need during the warm period. I live in such climate. And I went
to the beach to get some sand from under the snow while it was -10C. Such activity
is definitely rough, but not for everyone.
3. If you are going to make adjustable sandbag, try to make small bags in pairs. For
example, 2.5, 2.5, 5, 5, 10, 10 etc. You will need this when you progress to advanced
two-handed sandbag exercises such as double sandbag deadlift. You need to weigh
small bags precisely and accurately also.
Basic Sandbag Exercises
I divided them into categories:
1. Upper Body Push
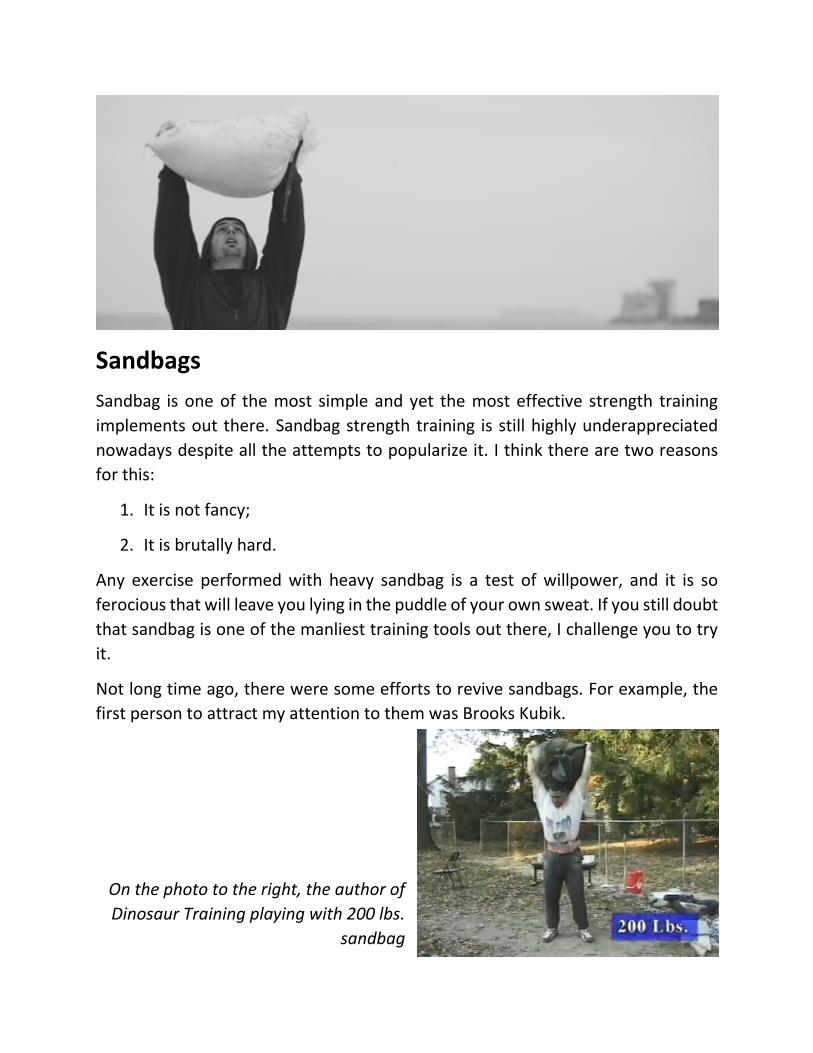
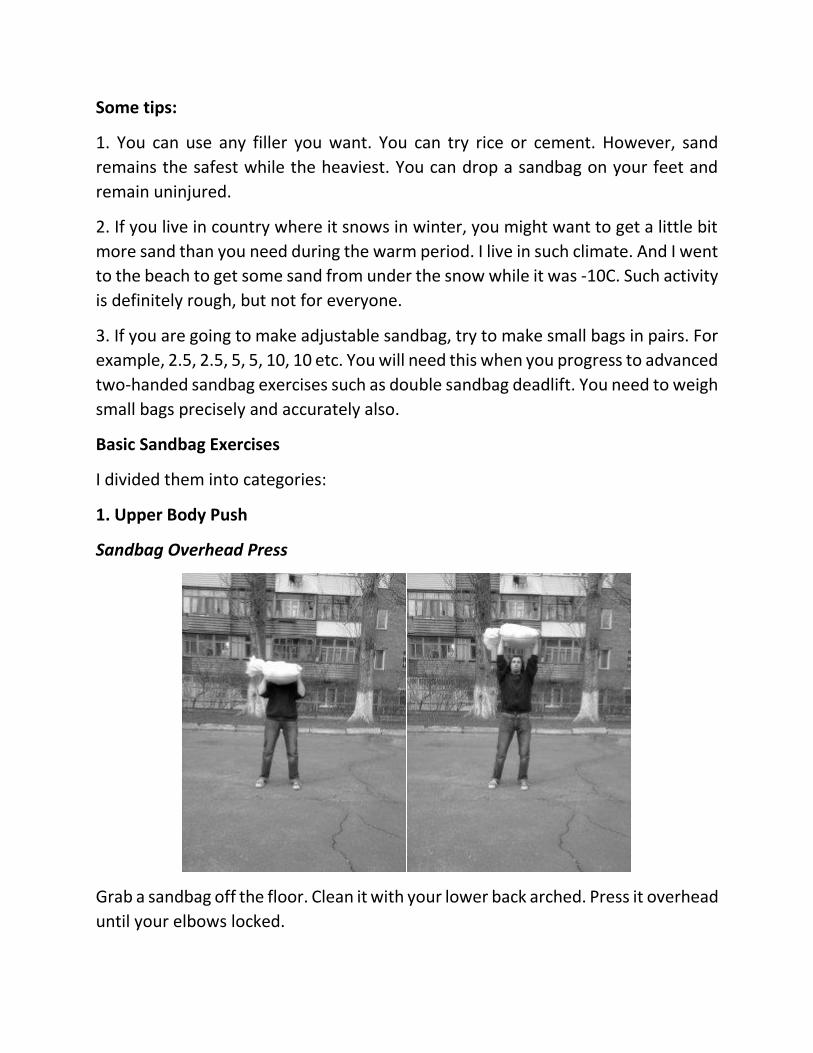
Sandbag Overhead Press
Grab a sandbag off the floor. Clean it with your lower back arched. Press it overhead
until your elbows locked.

Sandbag Floor Press
Lie down on the floor near a sandbag. Drag it forcefully across your body. Set it up
in your hands. Press.
2. Upper Body Pull
Sandbag Bent-Over Row
Grab a sandbag off the floor. Bend over. Row. Keep your lower back arched.
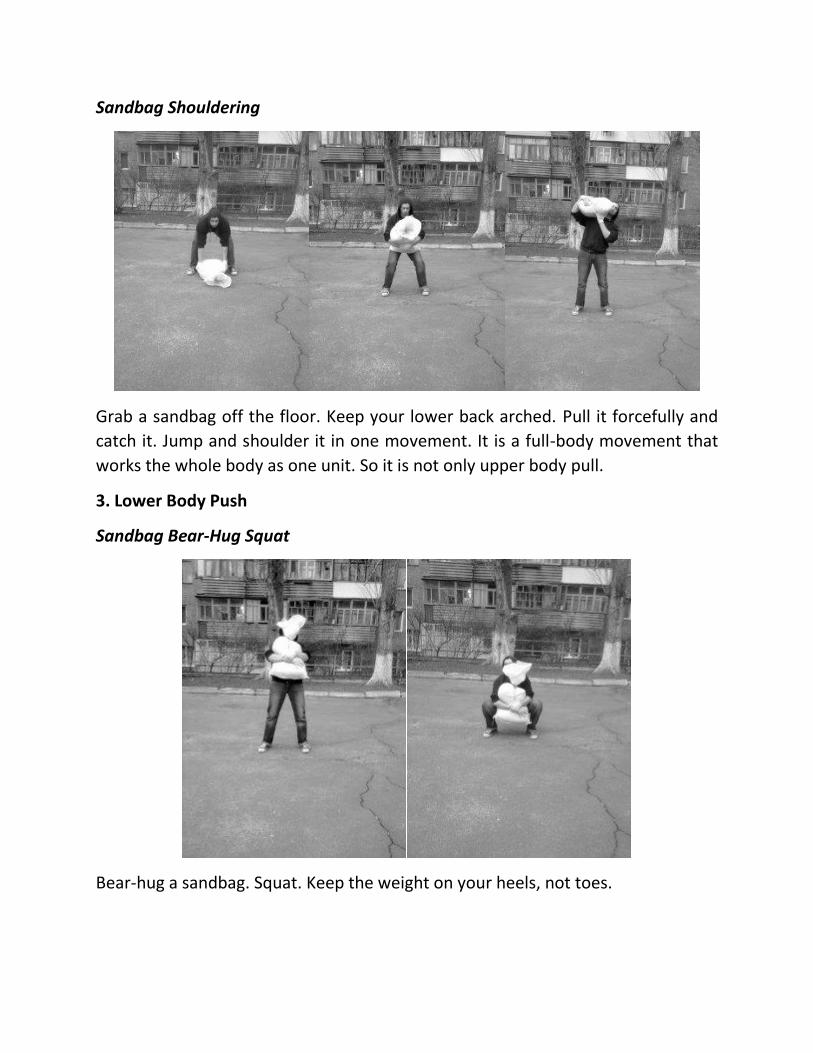
Sandbag Shouldering
Grab a sandbag off the floor. Keep your lower back arched. Pull it forcefully and
catch it. Jump and shoulder it in one movement. It is a full-body movement that
works the whole body as one unit. So it is not only upper body pull.
3. Lower Body Push
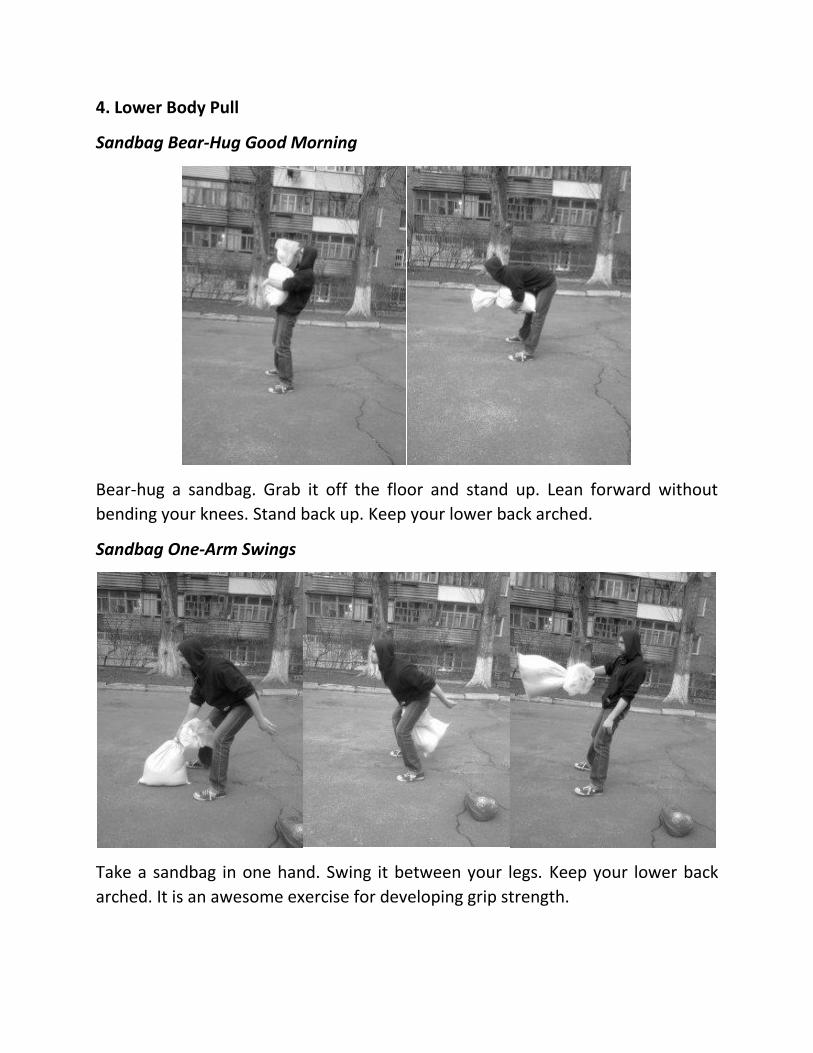
Sandbag Bear-Hug Squat
Bear-hug a sandbag. Squat. Keep the weight on your heels, not toes.

Sandbag Zercher Squat
Grab a sandbag off the floor. Jump with it and catch it in Zercher position.
Squat. Keep the weight on your heels, not toes. Check out this article for more tips
on this exercise.
Sandbag Shoulder Squat
Shoulder a sandbag. Squat. Keep the weight on your heels, not toes.
4. Lower Body Pull
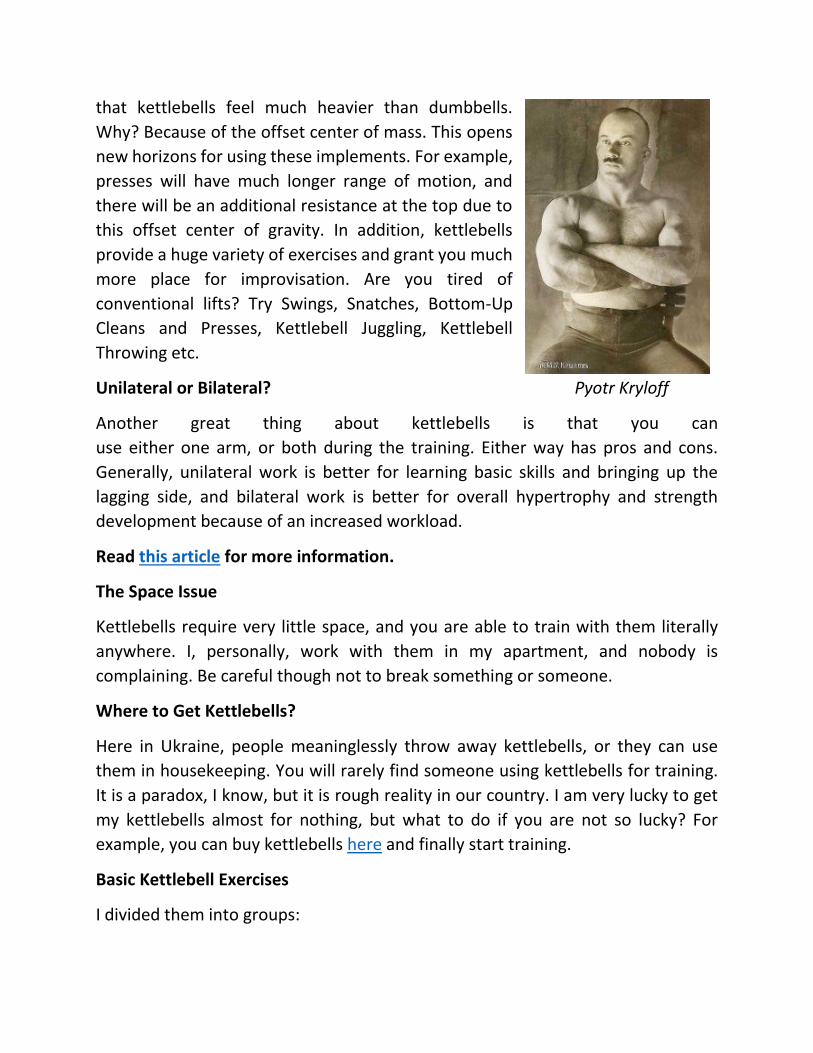
Sandbag Bear-Hug Good Morning
Bear-hug a sandbag. Grab it off the floor and stand up. Lean forward without
bending your knees. Stand back up. Keep your lower back arched.
Sandbag One-Arm Swings
Take a sandbag in one hand. Swing it between your legs. Keep your lower back
arched. It is an awesome exercise for developing grip strength.

5. Carries
Zercher Carry
Grab a sandbag off the floor. Jump with it and catch it in Zercher position. Carry it
around.
Shoulder Carry
Shoulder a sandbag. Carry it around.
NOTE: this is just a description of exercises, not an actual instruction. You should
consult a professional for proper technique.

Example Sandbag Routine
Here is an example sandbag-only full-body routine:
Monday
A) Overhead Press – 3 x 5
B) Shouldering – 3 x 4 (per side)
C) Zercher Squat – 3 x 6
Tuesday
Off.
Wednesday
A) Floor Press – 3 x 8
B) One-Arm Swing – 3 x 8 (per side)
C) Shoulder Carry – 2 x as far as possible
Thursday
Off.
Friday
A) Bent-Over Row – 3 x 12
B) Bear-Hug Squat – 3 x 12
Saturday & Sunday
Off.
NOTE: this routine is presented here only for example purposes. It may or may not
work for you depending on your individual capabilities and conditions.
Closing Thoughts
Is sandbag the ultimate tool in building strength and muscle? Probably not, but it
is pretty close to it. If you ask me would I stop working out with sandbags, my
answer would be: “Nope”. Try it and you will understand why.

Kettlebells
The kettlebell, or ‘girya’, is my native strength training implement. Years ago,
everybody here in Ukraine knew what kettlebell is (now it is rare to find a person
who can differentiate a kettlebell from a dumbbell). A lot of men trained with
kettlebells, and it was not only a matter of strength, but a matter of respect too.
The man who could lift a 32 kg kettlebell overhead was highly respected in society.
Every man sought this status. Every man sought strength. It is a big shame that such
a great implement is forgotten nowadays in favor of fancy machines and other
‘toning up’ devices.
So What Is the Kettlebell?
The kettlebell is a cast iron weight that looks like a
cannonball with a handle. This implement is very old
and was used by Ukrainians and Russians for ages. Ivan
Piddubny, Pyotr Kryloff, Moor Znamensky, and Arthur
Saxon are famous old-time kettlebell users. However,
there were lots of others.
What Is the Uniqueness?
So why not to use dumbbells? It is the same thing, right?
Actually, no. The uniqueness of kettlebell is in its
construction. You will notice right from the first time Ivan Piddubny
that kettlebells feel much heavier than dumbbells.
Why? Because of the offset center of mass. This opens
new horizons for using these implements. For example,
presses will have much longer range of motion, and
there will be an additional resistance at the top due to
this offset center of gravity. In addition, kettlebells
provide a huge variety of exercises and grant you much
more place for improvisation. Are you tired of
conventional lifts? Try Swings, Snatches, Bottom-Up
Cleans and Presses, Kettlebell Juggling, Kettlebell
Throwing etc.
Unilateral or Bilateral? Pyotr Kryloff
Another great thing about kettlebells is that you can
use either one arm, or both during the training. Either way has pros and cons.
Generally, unilateral work is better for learning basic skills and bringing up the
lagging side, and bilateral work is better for overall hypertrophy and strength
development because of an increased workload.
Read this article for more information.
The Space Issue
Kettlebells require very little space, and you are able to train with them literally
anywhere. I, personally, work with them in my apartment, and nobody is
complaining. Be careful though not to break something or someone.
Where to Get Kettlebells?
Here in Ukraine, people meaninglessly throw away kettlebells, or they can use
them in housekeeping. You will rarely find someone using kettlebells for training.
It is a paradox, I know, but it is rough reality in our country. I am very lucky to get
my kettlebells almost for nothing, but what to do if you are not so lucky? For
example, you can buy kettlebells here and finally start training.
Basic Kettlebell Exercises
I divided them into groups:

1. Upper Body Push
Kettlebell One-Arm Military Press
Clean the kettlebell. Keep your lower back arched during the clean. Press it
overhead until your elbow is locked.
Kettlebell Double Military Press
Clean two kettlebells. Keep your lower back arched during the clean. Press them
overhead until your elbows are locked.
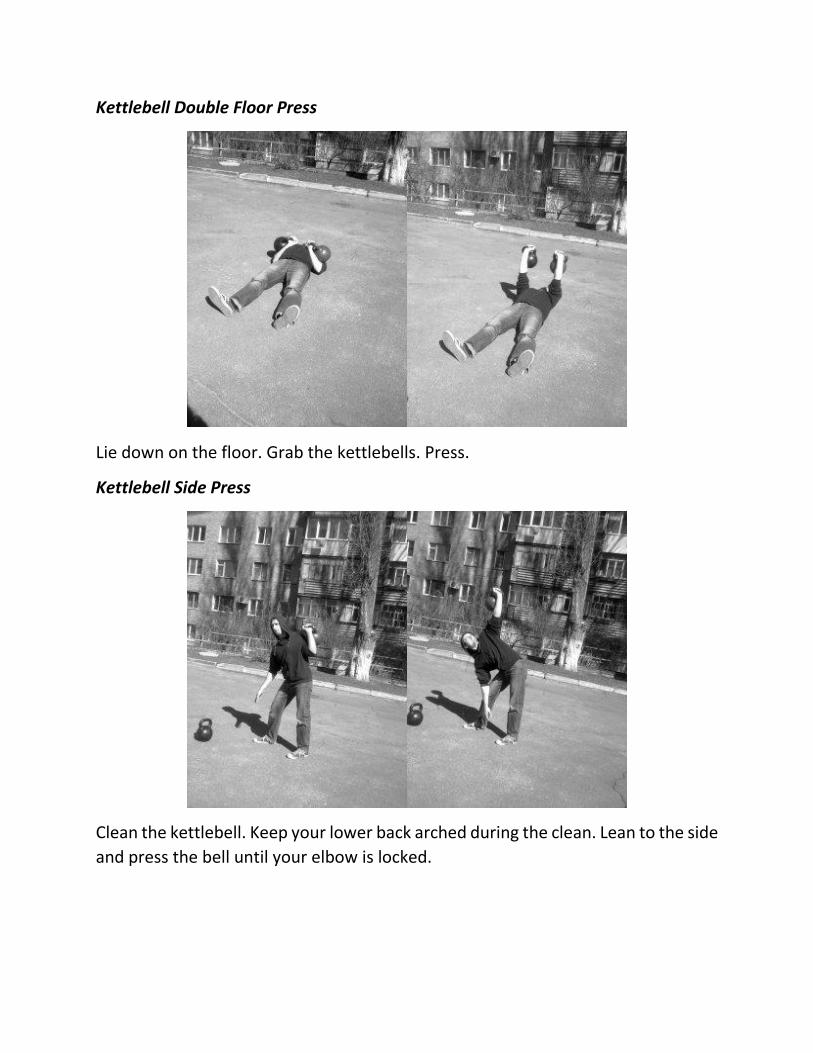
Kettlebell Double Floor Press
Lie down on the floor. Grab the kettlebells. Press.
Kettlebell Side Press
Clean the kettlebell. Keep your lower back arched during the clean. Lean to the side
and press the bell until your elbow is locked.

2. Upper Body Pull
Kettlebell One-Arm Bent-Over Row
Grab the kettlebell. Bend over. Keep your lower back arched. Row.
Kettlebell Double Bent-Over Row
Grab two kettlebells. Bend over. Keep your lower back arched. Row.

Kettlebell Alternating Renegade Row
Get into the push-up position on two kettlebells. Row one to your waistline while
pressing the other. Keep the shoulders parallel to the ground. Prepare for the VERY
sore midsection the next day.
3. Lower Body Push
Kettlebell Double Front Squat
Clean two kettlebells. Keep your lower back arched during the clean. Squat as low
as possible. Keep your weight on the heels, not the toes.

Kettlebell Double Lunge
Clean two kettlebells. Keep your lower back arched during the clean. Take a step
forward and squat down.
Kettlebell One-Arm Overhead Squat
Snatch or clean and press the kettlebell overhead. Squat as low as possible. Keep
your weight on the heels, not the toes.

4. Lower Body Pull
Kettlebell Double Swing
Grab two kettlebells. Swing them between your legs. Flex the hips forcefully while
reversing the movement of the bells. Keep your lower back arched throughout the
move.
Kettlebell One-Arm Snatch
Grab the kettlebell. Swing it between your legs. Flex the hips and pull the kettlebell
forcefully while reversing its movement. Finish with your arm straight with the
kettlebell overhead. Keep your lower back arched throughout the move.

5. Core
Kettlebell One-Arm Windmill
Snatch or clean and press the kettlebell overhead. Stand with your feet pointing 45
degrees to the opposite side of the working arm. Arch your back. Lean forward and
down while twisting your torso until you touch the floor.

Kettlebell Turkish Get-Up
Lie down on the floor. Press one bell. Stand up with the bell pressed. Now reverse
the movement and get down on the floor. That is one rep.
NOTE: this is just a brief description of exercises, not an actual instruction. You
should consult a professional for proper technique.
Example Kettlebell Routine
Here is an example kettlebell-only full-body routine:
Monday
A) Double Military Press – 3 x 5
B) Double Bent-Over Row – 3 x 6
C) Double Front Squat – 3 x 6
Tuesday
Off.
Wednesday
A) Double Floor Press – 3 x 8
B) Double Swing – 3 x 8
C) Turkish Get-Up – 2 x 5 (per side)
Thursday
Off.
Friday
A) One-Arm Snatch – 3 x 12
B) Double Lunge – 3 x 12
C) One-Arm Windmill – 3 x 12 (per side)
Saturday & Sunday
Off.
NOTE: this routine is presented here only for example purposes. It may or may not
work for you depending on your individual capabilities and conditions.
Closing Thoughts
The greatest thing about the kettlebells is that they never lie. You cannot decrease
the weight just a little bit. You cannot train not recovered. You are on your own.
You have to be honest with yourself or the kettlebell will force you to be such. Egos
are out. True rough strength is in. You have to be serious about strength to master
the kettlebell. And be ready to reap the benefits.

The Rough Strength Triad Challenges
Here is the fun part of this report. I would like to present you 12 challenges/goals
for exercises demonstrated earlier. I want you to accomplish all of them. Use these
goals as your improvised milestones. You will be stronger and bigger when you
finish them.
So, without further ado, let me introduce the Rough Strength Triad Challenges:
1. 10 Handstand Push-Ups;
2. 20 Pull-Ups;
3. 20 Single-Leg Squats (per leg);
4. 10-second Full Back Lever;
5. 3 Sandbag Zercher Squats with a bag that equals your bodyweight;
6. 10 Floor Presses with a bag that equals your bodyweight;
7. 3 Sandbag Shoulderings with a bag that equals your bodyweight;
8. 60-second Shoulder Carry with a bag that equals your bodyweight;
9. 15 Double Kettlebell Swings with 32 kg bells;
10. 10 Double Kettlebell Military Presses with 32 kg bells;
11. 12 Alternating Renegade Rows with 32 kg bells;
12. 6 Turkish Get-Ups with 32 kg kettlebell (per side).
I would like you to understand that these goals are totally in reach of anybody.
Some challenges will be harder than others, but you should persevere and
accomplish them anyway. Good luck!
Play rough!
Alex Zinchenko
Subscribe to my RSS Feed, e-mail newsletter, Facebook page and Twitter for more
awesome training information. If you need help, check out this page.
If you like this report, share it with 5 friends. Make this world better.


