Download - CommerCial Drawings
Lesson Plans for Module 27201-13
CommerCial Drawings
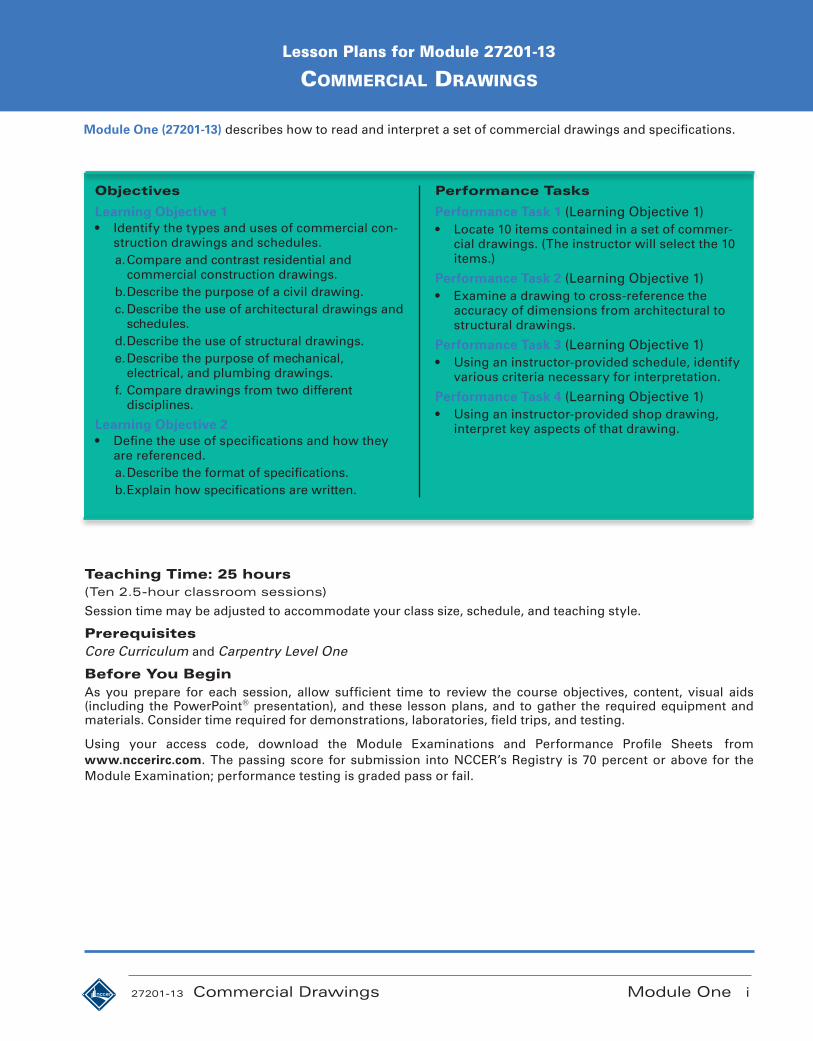
Module One (27201-13) describes how to read and interpret a set of commercial drawings and specifications.
Teaching Time: 25 hours(Ten 2.5-hour classroom sessions)
Session time may be adjusted to accommodate your class size, schedule, and teaching style.
PrerequisitesCore Curriculum and Carpentry Level One
Before You BeginAs you prepare for each session, allow sufficient time to review the course objectives, content, visual aids (including the PowerPoint® presentation), and these lesson plans, and to gather the required equipment and materials. Consider time required for demonstrations, laboratories, field trips, and testing.
Using your access code, download the Module Examinations and Performance Profile Sheets from www.nccerirc.com. The passing score for submission into NCCER’s Registry is 70 percent or above for the Module Examination; performance testing is graded pass or fail.
Objectives
Learning Objective 1• Identify the types and uses of commercial con-
struction drawings and schedules. a. Compare and contrast residential and
commercial construction drawings. b. Describe the purpose of a civil drawing. c. Describe the use of architectural drawings and
schedules. d. Describe the use of structural drawings. e. Describe the purpose of mechanical,
electrical, and plumbing drawings. f. Compare drawings from two different
disciplines.
Learning Objective 2• Define the use of specifications and how they
are referenced. a. Describe the format of specifications. b. Explain how specifications are written.
Performance Tasks
Performance Task 1 (Learning Objective 1)• Locate 10 items contained in a set of commer-
cial drawings. (The instructor will select the 10 items.)
Performance Task 2 (Learning Objective 1)• Examine a drawing to cross-reference the
accuracy of dimensions from architectural to structural drawings.
Performance Task 3 (Learning Objective 1)• Using an instructor-provided schedule, identify
various criteria necessary for interpretation.
Performance Task 4 (Learning Objective 1)• Using an instructor-provided shop drawing,
interpret key aspects of that drawing.
27201-13 Commercial Drawings Module One i
Classroom Equipment and Materials
Whiteboard/chalkboardMarkers/chalkPencils and paperCarpentry Level Two PowerPoint® Presentation Slides
Computer
Copies of the Module Examination and Performance Profile Sheets
Vendor-supplied videos/DVDs showing commercial drawings (optional)
TV/DVD player
Architectural drawings
Examples of BIM images
Examples of schedules
Framing plans
MEP drawings
Photographs of commercial roofs
Photographs of different framing methods
Photographs of residential and commercial construction projects
Roof plans
Set of specifications for the commercial drawings
Sets of residential drawings
Site plans
Structural drawings
Equipment and Materials for Laboratories and Performance Testing
Safety ConsiderationsSafety is paramount in the carpentry trade and safe habits and practices must be emphasized whenever possible. Performance Tasks must be completed under your supervision. Each trainee must use required PPE and follow safe tool practices and procedures.
Additional Resources and ReferencesThis module presents thorough resources for task training. The following resource material is suggested for further study:
Architectural Graphic Standards, Eighth Edition. 1988. American Institute of Architects. New York: John Wiley & Sons.
Basics for Builders: Plan Reading & Material Takeoff. 1994. Wayne J. DelPico. Kingston, MA: R.S. Means Company, Inc.
There are a number of online resources available for trainees who would like more information on commercial drawings. A search for additional information may be assigned as homework to interested trainees.
Instructors should view any videos that may be identified in the lesson plan before using them to ensure their suitability. The videos can provide teachable moments in both proper and improper work processes and behaviors. Be prepared to stop the videos at appropriate times to point out and discuss both proper and improper conduct and techniques.
Instructors are encouraged to locate additional audiovisual aids available on the Internet, make personal videos, and take photos related to the subject matter and add them to the PowerPoint® presentations throughout the program.
ii NCCER – Carpentry Level Two 27201-13

27201-13 Commercial Drawings Module One iii
The lesson plan for this module is divided into ten 2.5-hour sessions.Each session includes 10 minutes for administrative tasks and one 10-minute break.
CommerCial Drawings
Session Outline for 27201-13
SeSSion one
Session One reviews residential drawings and introduces commercial drawings, noting the differences between them.
1. Show Session One PowerPoint® presentation slides.
2. Discuss the differences between residential and commercial drawings.
3. Compare and contrast residential and commercial drawings.
SeSSion Two
Session Two introduces the different types of drawings included in a set of commercial drawings.
1. Show Session Two PowerPoint® presentation slides.
2. Discuss how sets of commercial drawings are organized.
3. Review the line types used on commercial drawings.
4. Discuss the systematic approach for reviewing a set of drawings.
SeSSion Three
Session Three introduces civil drawings and schedules.
1. Show Session Three PowerPoint® presentation slides.
2. Discuss the purpose of site plans for commercial construction.
3. Discuss the use of control points on a construction site.
4. Review a set of site plans and have trainees note the type of information included on the plans.
SeSSion Four
Session Four introduces architectural drawings and schedules.
1. Show Session Four PowerPoint® presentation slides.
2. Discuss the types of information included on architectural drawings.
3. Identify types of commercial roofs and show how they are described in architectural drawings.
4. Introduce schedules and have trainees obtain information from them.
5. Have trainees read and interpret architectural drawings.
SeSSion Five
Session Five introduces structural drawings and foundation plans.
1. Show Session Five PowerPoint® presentation slides.
2. Discuss the types of information typically located on structural drawings.
3. Discuss the information needed to set foundation forms, and identify the types of foundations commonly used for commercial structures.
4. Have trainees read and interpret structural drawings.
SeSSion Six
Session Six introduces framing plans and shop drawings.
1. Show Session Six PowerPoint® presentation slides.
2. Compare and contrast residential and commercial framing methods.
3. Have trainees read and interpret framing plans.
4. Discuss the use of shop drawings for commercial construction.
iv NCCER – Carpentry Level Two 27201-13
Session Outline for 27201-13
CommerCial Drawings
SeSSion Seven
Session Seven introduces mechanical, electrical, and plumbing (MEP) drawings.
1. Show Session Seven PowerPoint® presentation slides.
2. Introduce mechanical drawings and the types of information shown on them.
3. Have trainees read and interpret mechanical drawings.
4. Introduce electrical drawings and the types of information shown on them.
5. Have trainees read and interpret electrical drawings.
6. Introduce plumbing drawings and the types of information shown on them.
7. Have trainees read and interpret plumbing drawings.
SeSSion eighT
Session Eight introduces trainees to comparing drawings from different disciplines.
1. Show Session Eight PowerPoint® presentation slides.
2. Discuss how coordination drawings are used on commercial construction projects.
3. Review BIM images and explain how this technology has allowed fewer system conflicts on commercial construction projects.
SeSSion nine
Session Nine introduces commercial specifications.
1. Show Session Nine PowerPoint® presentation slides.
2. Discuss the importance of MasterFormat™ on commercial construction projects.
3. Have trainees read and interpret specifications.
SeSSion Ten
Session Ten is a review and testing session. Have trainees complete the module Review Questions and Trade Terms Quiz. (Alternatively, these may be assigned as homework at the end of Session Nine.) Answer any questions that trainees may have.
1. Have trainees complete the Module Examination. Any outstanding performance testing must be completed during this session.
2. Record the testing results on Training Report Form 200, and submit the report to your Training Program Sponsor.
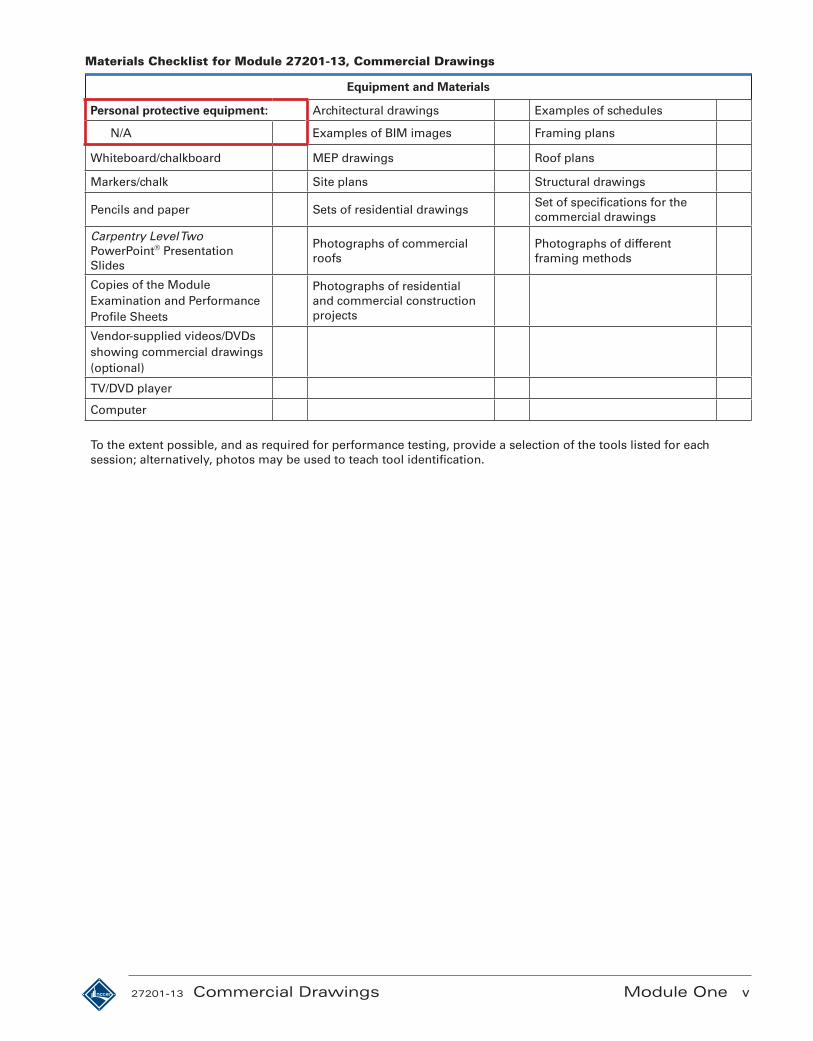
Materials Checklist for Module 27201-13, Commercial Drawings
Equipment and Materials
Personal protective equipment: Architectural drawings Examples of schedules
N/A Examples of BIM images Framing plans
Whiteboard/chalkboard MEP drawings Roof plans
Markers/chalk Site plans Structural drawings
Pencils and paper Sets of residential drawingsSet of specifications for the commercial drawings
Carpentry Level Two PowerPoint® Presentation Slides
Photographs of commercial roofs
Photographs of different framing methods
Copies of the Module Examination and Performance Profile Sheets
Photographs of residential and commercial construction projects
Vendor-supplied videos/DVDs showing commercial drawings (optional)
TV/DVD player
Computer
To the extent possible, and as required for performance testing, provide a selection of the tools listed for each session; alternatively, photos may be used to teach tool identification.
27201-13 Commercial Drawings Module One v


Lesson Plans for Module 27205-13
Cold-Formed Steel Framing
Module Two (27205-13) describes the types and grades of steel framing materials, and includes instructions for selecting and installing metal framing for interior and exterior walls, loadbearing and nonbearing walls, parti-tions, and other applications.
Teaching Time: 15 hours(Six 2.5-hour classroom sessions)
Session time may be adjusted to accommodate your class size, schedule, and teaching style.
PrerequisitesCore Curriculum and Carpentry Level One
Before You BeginAs you prepare for each session, allow sufficient time to review the course objectives, content, visual aids (including the PowerPoint® presentation), and these lesson plans, and to gather the required equipment and materials. Consider time required for demonstrations, laboratories, field trips, and testing.
Using your access code, download the Module Examinations and Performance Profile Sheets from www.nccerirc.com. The passing score for submission into NCCER’s Registry is 70 percent or above for the Module Examination; performance testing is graded pass or fail.
Objectives
Learning Objective 1• Identify the tools and components of cold-
formed steel framing systems and their safe use.
a. Identify the safety guidelines that should be followed when working with cold-formed steel.
b. Identify steel framing materials. c. List the steel framing tools and fasteners. d. Explain how to perform a material takeoff for
a steel frame project.
Learning Objective 2• Identify the steps to lay out and install a steel
stud wall. a. Describe the basic steel construction
methods. b. Explain how to frame nonstructural steel
walls. c. Explain how to frame structural steel walls.
Learning Objective 3• Identify other steel framing applications.
a. Explain how steel framing members are used in floor and roof construction.
b. Explain how steel framing members are used in ceiling construction.
Performance Tasks
Performance Task 1 (Learning Objective 1)• Estimate the amount of materials to complete
an instructor-specified steel framing project.
Performance Task 2 (Learning Objective 2)• Lay out a steel stud wall with openings to in-
clude bracing and blocking.
Performance Task 3 (Learning Objective 2)• Demonstrate the ability to build headers (back-
to-back, box, and L-header).
27205-13 Cold-Formed Steel Framing Module Two i

Classroom Equipment and Materials
Whiteboard/chalkboardMarkers/chalkPencils and paperCarpentry Level Two PowerPoint® Presentation SlidesComputerCopies of the Module Examination and Performance Profile SheetsVendor-supplied videos/DVDs showing cold-formed steel framing (optional)TV/DVD player
Personal protective equipment (PPE):Hard hatEye protectionCut-resistant glovesHearing protectionRespiratory protection
Assortment of powder-actuated fastenersAssortment of powder-actuated loadsAssortment of sheet metal screwsAviation snipsChop sawDrive pinsFraming squareFurring membersHammerHammer drillHole punches
Hole sawsLocking C-clampsPneumatic clinching toolPowder-actuated toolRadius trackSamples of bridging, blocking, or built-up shapesScrewgunSections of framing members with S-T-U-F designator intactSelection of steel framing membersSet of construction drawingsSimple floor planSlip connectorsSteel-framing fastenersSwivel-head shearsTape measureVarious steel-framing hardware (angles, braces, clips, and tracks)
Equipment and Materials for Laboratories and Performance Testing
Safety ConsiderationsThis module requires that trainees work with cold-formed steel framing members, which involves inherent dangers. Safety is paramount in the carpentry trade and safe habits and practices must be emphasized whenever possible. Performance Tasks must be completed under your supervision. Each trainee must use required PPE and follow safe tool practices and procedures.
Additional Resources and ReferencesThis module presents thorough resources for task training. The following resource material is suggested for further study:
American Iron and Steel Institute (AISI). Provides a variety of resources related to the use of cold-formed steel for construction applications, http://www.steel.org
ASTM A370, Standard Test Methods and Definitions for Mechanical Testing of Steel Products. 2012. ASTM International.
National Electrical Code®. 2011. National Fire Protection Association.
National Fire Protection Association (NFPA). Works to reduce the worldwide burden of fire and other hazards by providing and advocating codes and standards, research, training, and education, http://www.nfpa.org
Product Technical Guide. 2012. Steel Stud Manufacturers Association.
Standard for Cold-Formed Steel—General Provisions. 2001. American Iron and Steel Institute.
Steel Framing Alliance (SFA). An advocate of cold-formed steel structures, http://www.steelframing.org
Steel Stud Manufacturers Association (SSMA). A manufacturers’ trade group that promotes the use of steel framing members in structures, http://www.ssma.com
Thermal Design and Code Compliance for Cold-Formed Steel Walls. 2008. Steel Framing Alliance.
There are a number of online resources available for trainees who would like more information on cold-formed steel framing. A search for additional information may be assigned as homework to interested trainees.
Instructors should view any videos that may be identified in the lesson plan before using them to ensure their suitability. The videos can provide teachable moments in both proper and improper work processes and behaviors. Be prepared to stop the videos at appropriate times to point out and discuss both proper and improper conduct and techniques.
Instructors are encouraged to locate additional audiovisual aids available on the Internet, make personal videos, and take photos related to the subject matter and add them to the PowerPoint® presentations throughout the program.
ii NCCER – Carpentry Level Two 27205-13
27205-13 Cold-Formed Steel Framing Module Two iii
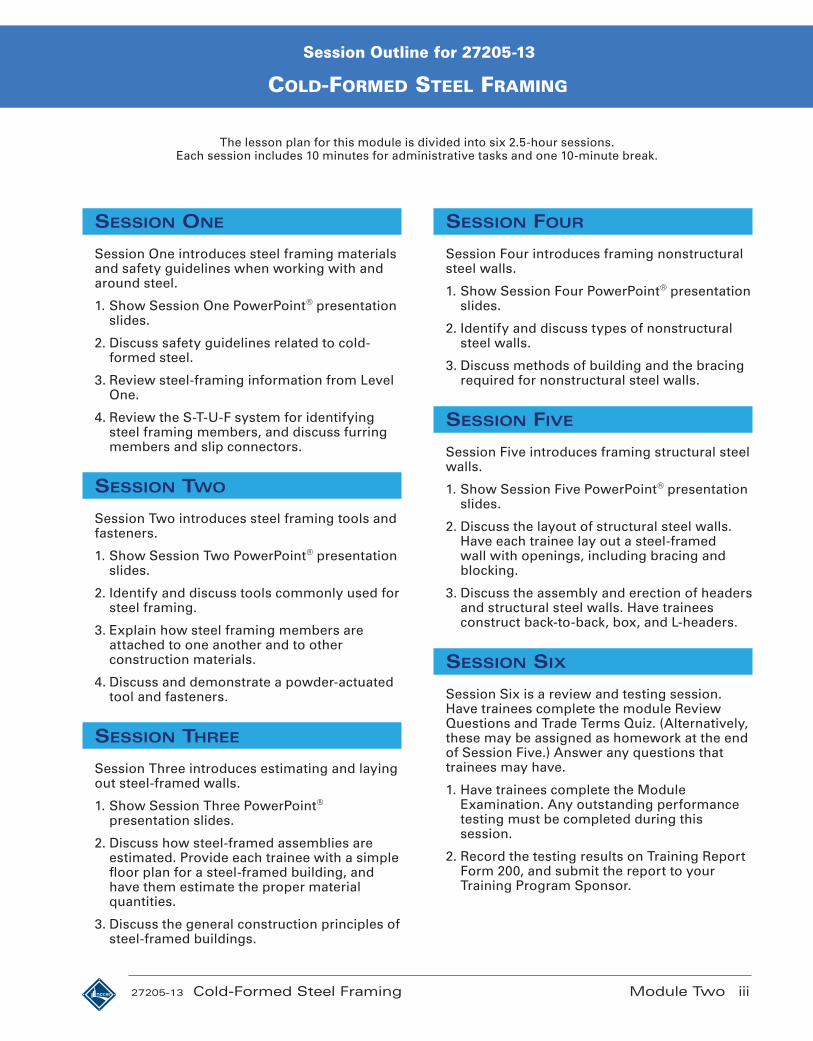
The lesson plan for this module is divided into six 2.5-hour sessions.Each session includes 10 minutes for administrative tasks and one 10-minute break.
Cold-Formed Steel Framing
Session Outline for 27205-13
SeSSion one
Session One introduces steel framing materials and safety guidelines when working with and around steel.
1. Show Session One PowerPoint® presentation slides.
2. Discuss safety guidelines related to cold-formed steel.
3. Review steel-framing information from Level One.
4. Review the S-T-U-F system for identifying steel framing members, and discuss furring members and slip connectors.
SeSSion Two
Session Two introduces steel framing tools and fasteners.
1. Show Session Two PowerPoint® presentation slides.
2. Identify and discuss tools commonly used for steel framing.
3. Explain how steel framing members are attached to one another and to other construction materials.
4. Discuss and demonstrate a powder-actuated tool and fasteners.
SeSSion Three
Session Three introduces estimating and laying out steel-framed walls.
1. Show Session Three PowerPoint® presentation slides.
2. Discuss how steel-framed assemblies are estimated. Provide each trainee with a simple floor plan for a steel-framed building, and have them estimate the proper material quantities.
3. Discuss the general construction principles of steel-framed buildings.
SeSSion Four
Session Four introduces framing nonstructural steel walls.
1. Show Session Four PowerPoint® presentation slides.
2. Identify and discuss types of nonstructural steel walls.
3. Discuss methods of building and the bracing required for nonstructural steel walls.
SeSSion Five
Session Five introduces framing structural steel walls.
1. Show Session Five PowerPoint® presentation slides.
2. Discuss the layout of structural steel walls. Have each trainee lay out a steel-framed wall with openings, including bracing and blocking.
3. Discuss the assembly and erection of headers and structural steel walls. Have trainees construct back-to-back, box, and L-headers.
SeSSion Six
Session Six is a review and testing session. Have trainees complete the module Review Questions and Trade Terms Quiz. (Alternatively, these may be assigned as homework at the end of Session Five.) Answer any questions that trainees may have.
1. Have trainees complete the Module Examination. Any outstanding performance testing must be completed during this session.
2. Record the testing results on Training Report Form 200, and submit the report to your Training Program Sponsor.
iv NCCER – Carpentry Level Two 27205-13
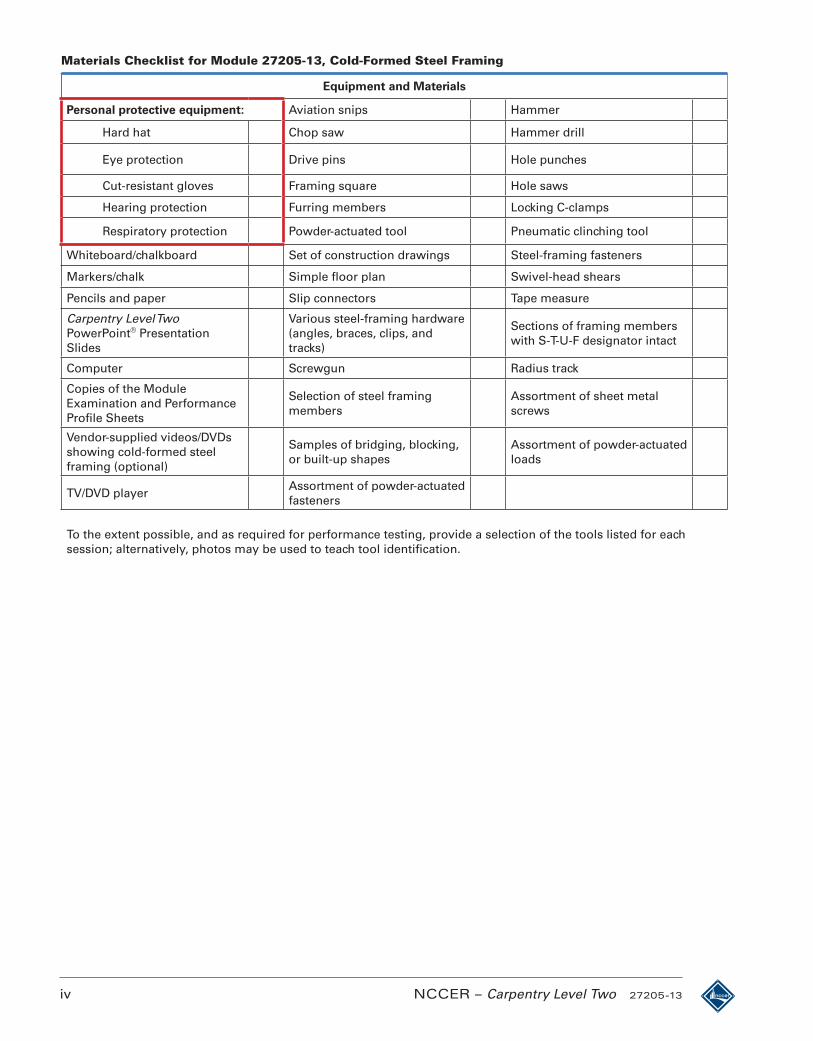
Materials Checklist for Module 27205-13, Cold-Formed Steel Framing
Equipment and Materials
Personal protective equipment: Aviation snips Hammer
Hard hat Chop saw Hammer drill
Eye protection Drive pins Hole punches
Cut-resistant gloves Framing square Hole saws
Hearing protection Furring members Locking C-clamps
Respiratory protection Powder-actuated tool Pneumatic clinching tool
Whiteboard/chalkboard Set of construction drawings Steel-framing fasteners
Markers/chalk Simple floor plan Swivel-head shears
Pencils and paper Slip connectors Tape measure
Carpentry Level Two PowerPoint® Presentation Slides
Various steel-framing hardware (angles, braces, clips, and tracks)
Sections of framing members with S-T-U-F designator intact
Computer Screwgun Radius track
Copies of the Module Examination and Performance Profile Sheets
Selection of steel framing members
Assortment of sheet metal screws
Vendor-supplied videos/DVDs showing cold-formed steel framing (optional)
Samples of bridging, blocking, or built-up shapes
Assortment of powder-actuated loads
TV/DVD playerAssortment of powder-actuated fasteners
To the extent possible, and as required for performance testing, provide a selection of the tools listed for each session; alternatively, photos may be used to teach tool identification.
Lesson Plans for Module 27204-13
ExtErior Finishing
Module Three (27204-13) covers the various types of exterior finish materials and their installation procedures, including wood, metal, vinyl, and fiber-cement siding.
Teaching Time: 35 hours(Fourteen 2.5-hour classroom sessions)
Session time may be adjusted to accommodate your class size, schedule, and teaching style.
PrerequisitesCore Curriculum and Carpentry Level One
Before You BeginAs you prepare for each session, allow sufficient time to review the course objectives, content, visual aids (including the PowerPoint® presentation), and these lesson plans, and to gather the required equipment and materials. Consider time required for demonstrations, laboratories, field trips, and testing.
Using your access code, download the Module Examinations and Performance Profile Sheets from www.nccerirc.com. The passing score for submission into NCCER’s Registry is 70 percent or above for the Module Examination; performance testing is graded pass or fail.
Objectives
Learning Objective 1• Describe the safety hazards when working with
exterior finish materials. a. Identify safety hazards that are present when
working at elevations. b. Describe safety hazards when working with
hand and power tools, equipment, and exterior finish materials.
Learning Objective 2• Describe the various types and applications of
exterior finish materials. a. Identify the types of wood siding. b. Identify vinyl and metal siding materials and
components. c. List applications for fiber-cement siding. d. Discuss the types of veneer finishes. e. List specialty exterior finishes. f. Explain the purpose of flashing.
Learning Objective 3• Explain how to install exterior finish materials.
a. Describe surface preparation that must be performed prior to installing exterior finish materials.
b. Discuss the types of furring and insulation that might be applied to exterior walls.
c. Explain how to establish a straight reference line.
d. Describe how to install wood siding. e. Describe how to install vinyl and metal siding. f. Describe how to install fiber-cement siding. g. Explain how to install cornices.
Learning Objective 4• Describe the estimating procedure for exterior
finish projects. a. Explain how to perform a takeoff on panel
and board siding.
Performance Tasks
Performance Task 1 (Learning Objective 3)• Install three of the most common siding types
in your area.
Performance Task 2 (Learning Objective 4)• Estimate the amount of lap or panel siding
required for a structure.
27204-13 Exterior Finishing Module Three i
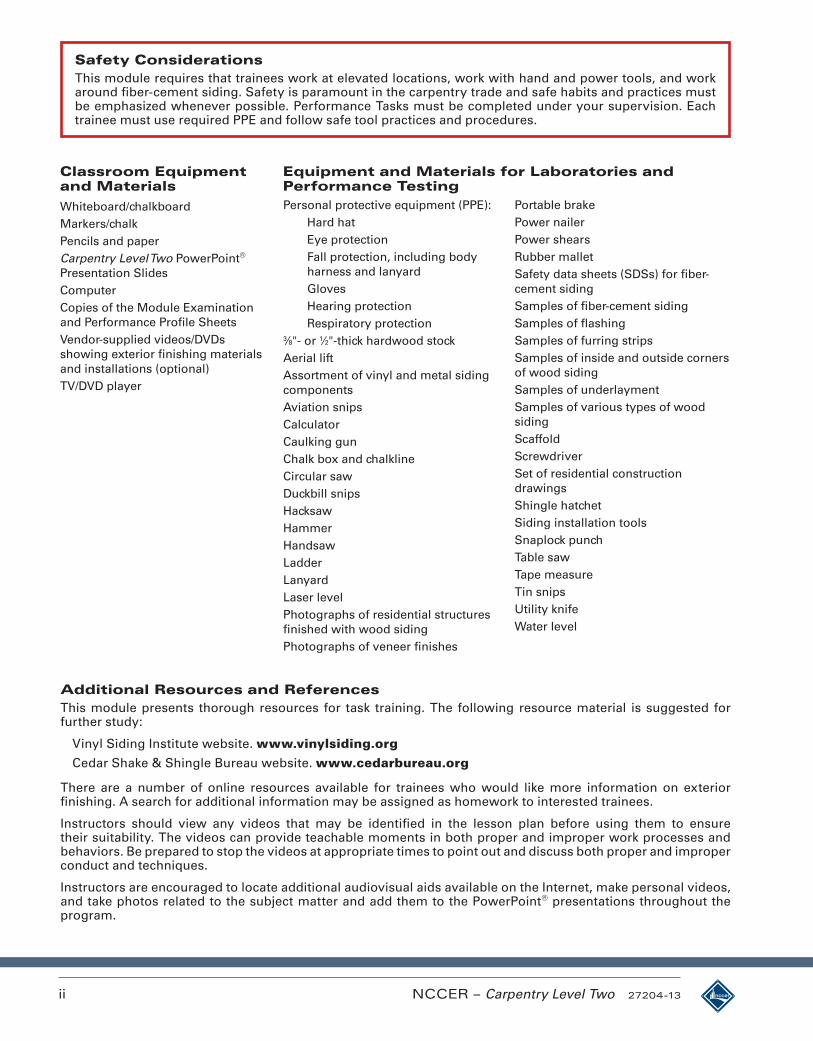
Classroom Equipment and Materials
Whiteboard/chalkboardMarkers/chalkPencils and paperCarpentry Level Two PowerPoint® Presentation SlidesComputerCopies of the Module Examination and Performance Profile SheetsVendor-supplied videos/DVDs showing exterior finishing materials and installations (optional)TV/DVD player
Personal protective equipment (PPE):Hard hatEye protectionFall protection, including body harness and lanyard GlovesHearing protectionRespiratory protection
3⁄8"- or 1⁄2"-thick hardwood stockAerial liftAssortment of vinyl and metal siding componentsAviation snipsCalculatorCaulking gunChalk box and chalklineCircular sawDuckbill snipsHacksawHammerHandsawLadderLanyardLaser levelPhotographs of residential structures finished with wood sidingPhotographs of veneer finishes
Portable brakePower nailerPower shearsRubber malletSafety data sheets (SDSs) for fiber-cement sidingSamples of fiber-cement sidingSamples of flashingSamples of furring stripsSamples of inside and outside corners of wood sidingSamples of underlaymentSamples of various types of wood sidingScaffoldScrewdriverSet of residential construction drawingsShingle hatchetSiding installation toolsSnaplock punchTable sawTape measureTin snipsUtility knifeWater level
Equipment and Materials for Laboratories and Performance Testing
Safety ConsiderationsThis module requires that trainees work at elevated locations, work with hand and power tools, and work around fiber-cement siding. Safety is paramount in the carpentry trade and safe habits and practices must be emphasized whenever possible. Performance Tasks must be completed under your supervision. Each trainee must use required PPE and follow safe tool practices and procedures.
Additional Resources and ReferencesThis module presents thorough resources for task training. The following resource material is suggested for further study:
Vinyl Siding Institute website. www.vinylsiding.orgCedar Shake & Shingle Bureau website. www.cedarbureau.org
There are a number of online resources available for trainees who would like more information on exterior finishing. A search for additional information may be assigned as homework to interested trainees.
Instructors should view any videos that may be identified in the lesson plan before using them to ensure their suitability. The videos can provide teachable moments in both proper and improper work processes and behaviors. Be prepared to stop the videos at appropriate times to point out and discuss both proper and improper conduct and techniques.
Instructors are encouraged to locate additional audiovisual aids available on the Internet, make personal videos, and take photos related to the subject matter and add them to the PowerPoint® presentations throughout the program.
ii NCCER – Carpentry Level Two 27204-13
27204-13 Exterior Finishing Module Three iii
The lesson plan for this module is divided into fourteen 2.5-hour sessions.Each session includes 10 minutes for administrative tasks and one 10-minute break.
ExtErior Finishing
Session Outline for 27204-13
SeSSion one
Session One introduces exterior finishing safety.
1. Show Session One PowerPoint® presentation slides.
2. Identify safety hazards that are present when working at elevations, and review the use of personal fall arrest equipment.
3. Describe safety hazards when working with hand and power tools, equipment, and exterior finishing materials. Review the use of safety data sheets (SDSs).
SeSSion Two
Session Two introduces types of wood siding.
1. Show Session Two PowerPoint® presentation slides.
2. Discuss the use of beveled, board-and-batten, reverse batten, board-on-board, tongue-and-groove, shiplap, shingle, shake, and plywood siding.
SeSSion Three
Session Three introduces types of siding other than wood, including vinyl and metal siding, fiber-cement siding, veneer finishes, and specialty finishes.
1. Show Session Three PowerPoint® presentation slides.
2. Discuss the use of types of siding other than wood, including vinyl and metal siding, fiber-cement siding, veneer finishes, and specialty finishes.
3. Discuss the use of flashing for vertical surfaces.
SeSSion Four
Session Four introduces surface preparation and furring and insulation techniques.
1. Show Session Four PowerPoint® presentation slides.
2. Identify items to consider when preparing a surface for exterior finishing materials.
3. Discuss the purpose of furring strips for exterior finish and the importance of properly installing furring members and insulation.
SeSSion Five
Session Five introduces establishing a straight reference line and installing beveled siding.
1. Show Session Five PowerPoint® presentation slides.
2. Discuss the importance of establishing a straight reference line.
3. Show how beveled siding is installed and have trainees do it.
SeSSion Six
Session Six introduces installing board-and-batten siding, tongue-and-groove siding, shiplap siding, shakes and shingles, and plywood siding.
1. Show Session Six PowerPoint® presentation slides.
2. Discuss the proper procedure for installing board-and-batten siding, tongue-and-groove siding, shiplap siding, shakes, shingles, and plywood siding.
3. Have trainees properly install board-and-batten siding, tongue-and-groove siding, shiplap siding, shakes, shingles, and plywood siding are installed.
iv NCCER – Carpentry Level Two 27204-13
Session Outline for 27204-13
ExtErior Finishing
SeSSion Seven
Session Seven introduces installing vinyl and metal siding components.
1. Show Session Seven PowerPoint® presentation slides.
2. Review tools and equipment needed when installing vinyl and metal siding.
3. Discuss and show the installation of corner posts and starter strips.
SeSSion eighT
Session Eight introduces trimming out gable ends and around doors and windows, and cutting vinyl and metal siding.
1. Show Session Eight PowerPoint® presentation slides.
2. Discuss and show how gable ends and doors and windows are trimmed out prior to installing siding.
3. Discuss and show how to cut vinyl and metal siding.
SeSSion nine
Session Nine introduces installing vinyl and metal siding.
1. Show Session Nine PowerPoint® presentation slides.
2. Discuss and show how to install vinyl and metal siding.
3. Demonstrate how to install siding around windows and doors.
4. Have trainees properly install vinyl and metal siding.
SeSSion Ten
Session Ten introduces installing vinyl and metal siding at gable ends and under the eaves. The session concludes with caulking and cleanup.
1. Show Session Ten PowerPoint® presentation slides.
2. Discuss and show how vinyl and metal siding are installed at gable ends and under the eaves.
3. Discuss the proper procedure for caulking and cleaning up vinyl and metal siding.
SeSSion eleven
Session Eleven introduces installing fiber-cement siding.
1. Show Session Eleven PowerPoint® presentation slides.
2. Discuss PPE that should be worn when working with fiber-cement siding.
3. Discuss and show the proper method for cutting and installing fiber-cement siding.
4. Have trainees properly install fiber-cement siding.
SeSSion Twelve
Session Twelve introduces installing cornices, fascia, and soffits.
1. Show Session Twelve PowerPoint® presentation slides.
2. Discuss the types of cornices.
3. Explain how the fascia and soffits are installed.
4. Discuss and show how to construct a box cornice.
27204-13 Exterior Finishing Module Three v
Session Outline for 27204-13
ExtErior Finishing
SeSSion ThirTeen
Session Thirteen introduces estimating exterior finish materials.
1. Show Session Thirteen PowerPoint® presentation slides.
2. Review the formulas for calculating area.
3. Discuss and show how to determine the amount of siding required for a building.
4. Have trainees determine the amount of siding required for a residential structure.
SeSSion FourTeen
Session Fourteen is a review and testing session. Have trainees complete the module Review Questions and Trade Terms Quiz. (Alternatively, these may be assigned as homework at the end of Session Thirteen.) Answer any questions that trainees may have.
1. Have trainees complete the Module Examination. Any outstanding performance testing must be completed during this session.
2. Record the testing results on Training Report Form 200, and submit the report to your Training Program Sponsor.
vi NCCER – Carpentry Level Two 27204-13
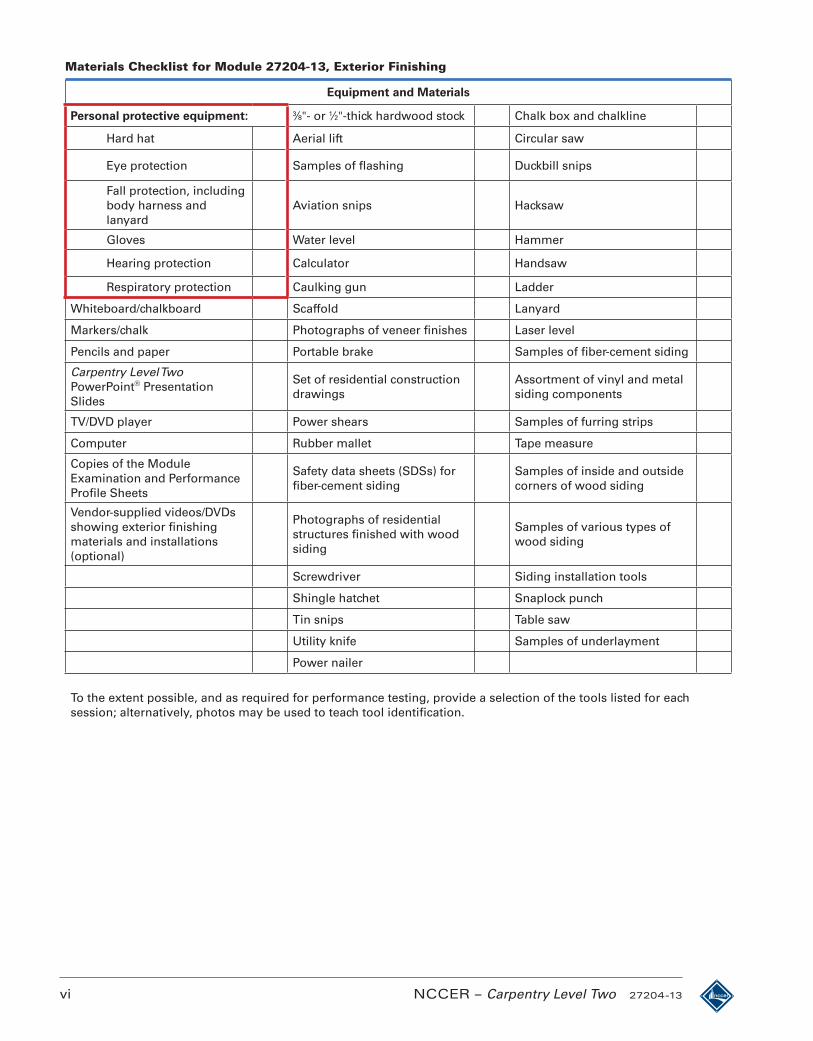
Materials Checklist for Module 27204-13, Exterior Finishing
Equipment and Materials
Personal protective equipment: 3⁄8"- or 1⁄2"-thick hardwood stock Chalk box and chalkline
Hard hat Aerial lift Circular saw
Eye protection Samples of flashing Duckbill snips
Fall protection, including body harness and lanyard
Aviation snips Hacksaw
Gloves Water level Hammer
Hearing protection Calculator Handsaw
Respiratory protection Caulking gun Ladder
Whiteboard/chalkboard Scaffold Lanyard
Markers/chalk Photographs of veneer finishes Laser level
Pencils and paper Portable brake Samples of fiber-cement siding
Carpentry Level Two PowerPoint® Presentation Slides
Set of residential construction drawings
Assortment of vinyl and metal siding components
TV/DVD player Power shears Samples of furring strips
Computer Rubber mallet Tape measure
Copies of the Module Examination and Performance Profile Sheets
Safety data sheets (SDSs) for fiber-cement siding
Samples of inside and outside corners of wood siding
Vendor-supplied videos/DVDs showing exterior finishing materials and installations (optional)
Photographs of residential structures finished with wood siding
Samples of various types of wood siding
Screwdriver Siding installation tools
Shingle hatchet Snaplock punch
Tin snips Table saw
Utility knife Samples of underlayment
Power nailer
To the extent possible, and as required for performance testing, provide a selection of the tools listed for each session; alternatively, photos may be used to teach tool identification.
Lesson Plans for Module 27203-13
Thermal and moisTure ProTecTion
Module Four (27203-13) covers the selection and installation of various types of insulating materials in walls, floors, and attics. It also covers the uses and installation practices for vapor barriers and waterproofing materials.
Teaching Time: 7.5 hours(Three 2.5-hour classroom sessions)
Session time may be adjusted to accommodate your class size, schedule, and teaching style.
PrerequisitesCore Curriculum and Carpentry Level One
Before You BeginAs you prepare for each session, allow sufficient time to review the course objectives, content, visual aids (including the PowerPoint® presentation), and these lesson plans, and to gather the required equipment and materials. Consider time required for demonstrations, laboratories, field trips, and testing.
Using your access code, download the Module Examinations and Performance Profile Sheets from www.nccerirc.com. The passing score for submission into NCCER’s Registry is 70 percent or above for the Module Examination; performance testing is graded pass or fail.
Objectives
Learning Objective 1• Describe the safety and health hazards when
working with insulation. a. List the personal protective equipment (PPE)
that is required when working with insulation. b. Describe how to safely handle insulation.
Learning Objective 2• Describe the various types of insulation and
their characteristics. a. Explain how to determine R-value
requirements. b. Describe flexible insulation and list its
characteristics. c. Describe loose-fill insulation and list its
characteristics. d. Describe rigid or semirigid insulation and list
its characteristics. e. Describe reflective insulation and list its
characteristics. f. List miscellaneous types of insulation.
Learning Objective 3• Describe the various installation methods for
insulation. a. Explain how to install flexible insulation. b. Explain how to install loose-fill insulation. c. Explain how to install rigid or semirigid
insulation. d. Explain how to install reflective insulation.
Learning Objective 4• Identify the requirements for moisture control,
waterproofing, and ventilation, and describe the related installation methods.
a. List various methods to control moisture in a structure.
b. Identify methods to waterproof a structure.
Learning Objective 5• Describe the estimating procedure for thermal
and moisture projects.
Performance Tasks
Performance Task 1 (Learning Objective 3)• Install blanket insulation in a wall.
Performance Task 2 (Learning Objective 3)• Install a vapor barrier on a wall.
Performance Task 3 (Learning Objective 4)• Install selected building wraps.
27203-13 Thermal and Moisture Protection Module Four i

Classroom Equipment and Materials
Whiteboard/chalkboardMarkers/chalkPencils and paperCarpentry Level Two PowerPoint® Presentation SlidesComputerCopies of the Module Examination and Performance Profile SheetsVendor-supplied videos/DVDs showing thermal and moisture protection applications (optional)TV/DVD player
Personal protective equipment (PPE):Eye protectionGlovesRespiratory protection
Building wrapHand staplerHeat boxHeat lampMeasuring tapePhotographs of mold- or mildew-damaged buildings
Photographs of water-damaged buildingsPower staplerSafety data sheets (SDSs) for various types of insulationSamples of various types of insulation, including flexible, loose-fill, rigid or semirigid, and reflective insulationUtility knifeVarious types of vapor barriers
Equipment and Materials for Laboratories and Performance Testing
Safety ConsiderationsThis module requires that trainees work with insulation, which may require special PPE. Safety is paramount in the carpentry trade and safe habits and practices must be emphasized whenever possible. Performance Tasks must be completed under your supervision. Each trainee must use required PPE and follow safe tool practices and procedures.
Additional Resources and ReferencesThis module presents thorough resources for task training. The following resource material is suggested for further study:
International Energy Conservation Code®. 2006. International Code Council.
US Department of Energy website, Office of Energy Efficiency. www.eere.energy.gov.
There are a number of online resources available for trainees who would like more information on thermal and moisture protection. A search for additional information may be assigned as homework to interested trainees.
Instructors should view any videos that may be identified in the lesson plan before using them to ensure their suitability. The videos can provide teachable moments in both proper and improper work processes and behaviors. Be prepared to stop the videos at appropriate times to point out and discuss both proper and improper conduct and techniques.
Instructors are encouraged to locate additional audiovisual aids available on the Internet, make personal videos, and take photos related to the subject matter and add them to the PowerPoint® presentations throughout the program.
ii NCCER – Carpentry Level Two 27203-13
27203-13 Thermal and Moisture Protection Module Four iii
The lesson plan for this module is divided into three 2.5-hour sessions.Each session includes 10 minutes for administrative tasks and one 10-minute break.
Thermal and moisTure ProTecTion
Session Outline for 27203-13
SeSSion one
Session One introduces types of insulation, insulation safety and health hazards and installation methods for various types of insulation.
1. Show Session One PowerPoint® presentation slides.
2. Discuss PPE required for insulation installation and safety data sheets (SDSs).
3. Identify various types of insulation, their properties and characteristics, and the methods of installation. Have trainees demonstrate insulation installation.
SeSSion Two
Session Two introduces moisture control, waterproofing, and estimating insulation needs.
1. Show Session Two PowerPoint® presentation slides.
2. Identify and discuss sources of water infiltration. Demonstrate how vapor barriers are installed and have trainees do it.
3. Identify and discuss sources of air infiltration, and discuss building wrap.
4. Demonstrate how building wrap is installed and have trainees do it.
5. Discuss how to estimate the amount of insulation required.
SeSSion Three
Session Three is a review and testing session. Have trainees complete the module Review Questions and Trade Terms Quiz. (Alternatively, these may be assigned as homework at the end of Session Two.) Answer any questions that trainees may have.
1. Have trainees complete the Module Examination. Any outstanding performance testing must be completed during this session.
2. Record the testing results on Training Report Form 200, and submit the report to your Training Program Sponsor.
iv NCCER – Carpentry Level Two 27203-13
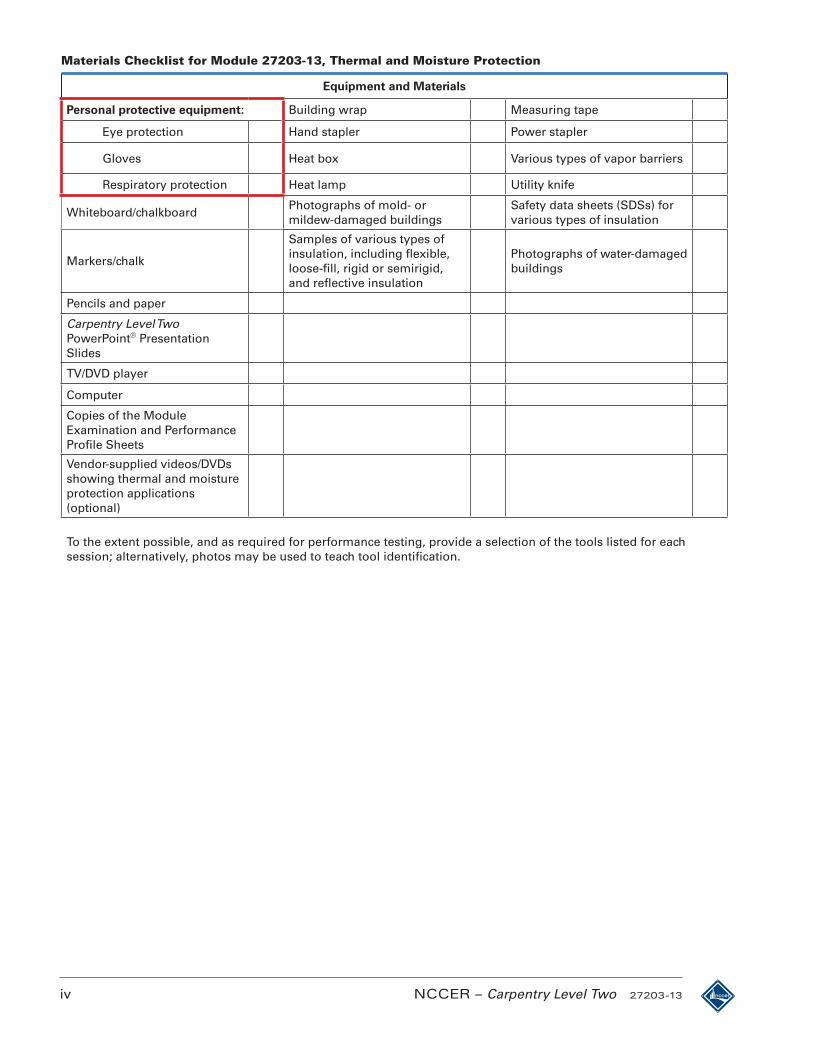
Materials Checklist for Module 27203-13, Thermal and Moisture Protection
Equipment and Materials
Personal protective equipment: Building wrap Measuring tape
Eye protection Hand stapler Power stapler
Gloves Heat box Various types of vapor barriers
Respiratory protection Heat lamp Utility knife
Whiteboard/chalkboardPhotographs of mold- or mildew-damaged buildings
Safety data sheets (SDSs) for various types of insulation
Markers/chalk
Samples of various types of insulation, including flexible, loose-fill, rigid or semirigid, and reflective insulation
Photographs of water-damaged buildings
Pencils and paper
Carpentry Level Two PowerPoint® Presentation Slides
TV/DVD player
Computer
Copies of the Module Examination and Performance Profile Sheets
Vendor-supplied videos/DVDs showing thermal and moisture protection applications (optional)
To the extent possible, and as required for performance testing, provide a selection of the tools listed for each session; alternatively, photos may be used to teach tool identification.
Lesson Plans for Module 27202-13
Roofing ApplicAtions
Module Five (27202-13) describes how to properly prepare the roof deck and install roofing for residential and commercial buildings.
Teaching Time: 25 hours(Ten 2.5-hour classroom sessions)
Session time may be adjusted to accommodate your class size, schedule, and teaching style.
PrerequisitesCore Curriculum and Carpentry Level One
Before You BeginAs you prepare for each session, allow sufficient time to review the course objectives, content, visual aids (including the PowerPoint® presentation), and these lesson plans, and to gather the required equipment and materials. Consider time required for demonstrations, laboratories, field trips, and testing.
Using your access code, download the Module Examinations and Performance Profile Sheets from www.nccerirc.com. The passing score for submission into NCCER’s Registry is 70 percent or above for the Module Examination; performance testing is graded pass or fail.
Objectives
Learning Objective 1• Explain the safety requirements for roofing
projects. a. Identify potential hazards when working on
roofs. b. Discuss the fall protection equipment required
when working on roofs. c. Identify proper personal protective equipment
(PPE) and hazard control devices used when working on roofs.
Learning Objective 2• Identify the tools and fasteners used in roofing.
a. Identify the hand tools used when working on roofing projects.
b. Identify the power tools used when working on roofing projects.
c. Identify fasteners used on roofing projects.
Learning Objective 3• Identify the different roofing systems and their
associated materials. a. Identify composition shingles and their
applications. b. Identify roll-roofing applications. c. Identify wood shakes and shingles and their
applications. d. Identify tile/slate roofing materials and their
applications. e. Identify metal roofing and its applications. f. Identify built-up roofing and its applications. g. Identify single-ply roofing and its applications.
h. Explain the purpose of underlayment and waterproof membrane.
i. Discuss the purpose of drip edge, flashing, and roof ventilation.
Learning Objective 4• Describe the installation techniques for com-
mon roofing systems. a. Describe how to properly prepare a roof deck. b. Explain how to install composition shingles. c. Explain how to install metal roofing. d. Describe how to install roll roofing. e. Discuss roof projections, flashing, and
ventilation.
Learning Objective 5• Describe the estimating procedure for roofing
projects.
Performance Tasks
Performance Task 1 (Learning Objective 4)• Demonstrate how to install composition
shingles on a specified roof and valley.
Performance Task 2 (Learning Objective 4)• Demonstrate the method to properly cut and in-
stall the ridge cap using composition shingles.
Performance Task 3 (Learning Objective 4)• Lay out, cut, and install a cricket or saddle.
Performance Task 4 (Learning Objective 4)• Demonstrate the techniques for installing other
selected types of roofing materials.
27202-13 Roofing Applications Module Five i
Classroom Equipment and Materials
Whiteboard/chalkboardMarkers/chalkPencils and paperCarpentry Level Two PowerPoint® Presentation SlidesComputerCopies of the Module Examination and Performance Profile SheetsVendor-supplied videos/DVDs showing roofing applications (optional)TV/DVD player
Personal protective equipment (PPE):Hard hatEye protectionHearing protectionFall protection, including body harness and lanyardGloves
Assortment of fasteners used for roofingAssortment of flashingAssortment of hand and power roofing toolsAssortment of ventsAviation snipsBody harnessCalculatorComposition shinglesExtension ladderFrame scaffoldFraming squareHammerLadderMeasuring tape
Metal roofingPhotographs of various commercial roofsPhotographs of various residential roofing systemsRoll roofingRoof plan for a hip roofRoofing bracketsRoofing nailsSamples of built-up roofingSamples of composition shinglesSamples of drip edges, flashing, and roof ventsSamples of metal roofingSamples of roll roofingSamples of tile/slate roofingSamples of underlayment and waterproof membranesSamples of wood shakes and shinglesSets of constructions drawings, including residential and commercial drawingsTin shipsUtility knife
Equipment and Materials for Laboratories and Performance Testing
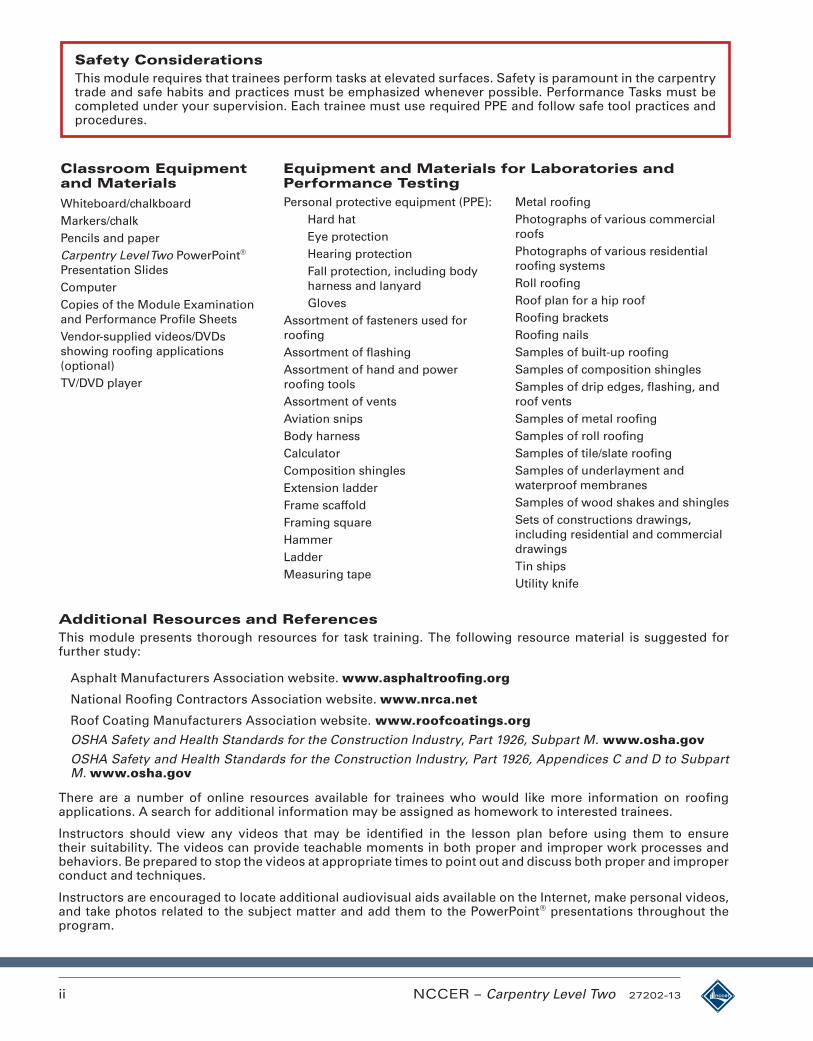
Safety ConsiderationsThis module requires that trainees perform tasks at elevated surfaces. Safety is paramount in the carpentry trade and safe habits and practices must be emphasized whenever possible. Performance Tasks must be completed under your supervision. Each trainee must use required PPE and follow safe tool practices and procedures.
Additional Resources and ReferencesThis module presents thorough resources for task training. The following resource material is suggested for further study:
Asphalt Manufacturers Association website. www.asphaltroofing.org
National Roofing Contractors Association website. www.nrca.net
Roof Coating Manufacturers Association website. www.roofcoatings.orgOSHA Safety and Health Standards for the Construction Industry, Part 1926, Subpart M. www.osha.govOSHA Safety and Health Standards for the Construction Industry, Part 1926, Appendices C and D to Subpart M. www.osha.gov
There are a number of online resources available for trainees who would like more information on roofing applications. A search for additional information may be assigned as homework to interested trainees.
Instructors should view any videos that may be identified in the lesson plan before using them to ensure their suitability. The videos can provide teachable moments in both proper and improper work processes and behaviors. Be prepared to stop the videos at appropriate times to point out and discuss both proper and improper conduct and techniques.
Instructors are encouraged to locate additional audiovisual aids available on the Internet, make personal videos, and take photos related to the subject matter and add them to the PowerPoint® presentations throughout the program.
ii NCCER – Carpentry Level Two 27202-13

27202-13 Roofing Applications Module Five iii
The lesson plan for this module is divided into ten 2.5-hour sessions.Each session includes 10 minutes for administrative tasks and one 10-minute break.
Roofing ApplicAtions
Session Outline for 27202-13
SeSSion one
Session One introduces roofing safety.
1. Show Session One PowerPoint® presentation slides.
2. Identify safety hazards associated with roofing projects.
3. Review OSHA regulations regarding working at elevations.
4. Review fall protection and personal fall arrest equipment used for roofing.
SeSSion Two
Session Two introduces roofing tools and fasteners.
1. Show Session Two PowerPoint® presentation slides.
2. Review general safety guidelines and introduce safety guidelines pertaining to roofing projects.
3. Demonstrate the safe use of hand and power tools.
SeSSion Three
Session Three introduces roofing systems and materials.
1. Show Session Three PowerPoint® presentation slides.
2. Discuss the various types of roofing systems and roofing materials that may be used for each.
3. Show trainees different types of roofing materials.
SeSSion Four
Session Four introduces roof deck preparation and installation of composition shingles on gable roofs.
1. Show Session Four PowerPoint® presentation slides.
2. Discuss and demonstrate how to properly prepare a roof deck for various types of roofing materials.
3. Discuss the proper installation of composition shingles on various types of roofs.
4. Demonstrate how composition shingles are installed on various types of roofs. Have trainees properly install composition shingles on gable roofs.
SeSSion Five
Session Five introduces installation of composition shingles on hip roofs.
1. Show Session Five PowerPoint® presentation slides.
2. Discuss the proper installation of composition shingles on hip roofs.
3. Demonstrate how composition shingles are installed on hip roofs. Have trainees properly install composition shingles on hip roofs.
SeSSion Six
Session Six introduces installation of metal roofing.
1. Show Session Six PowerPoint® presentation slides.
2. Discuss the proper installation of metal roofing.
3. Demonstrate how metal roofing is installed. Have trainees properly install metal roofing on gable and hip roofs.
iv NCCER – Carpentry Level Two 27202-13
Session Outline for 27202-13
SeSSion Seven
Session Seven introduces installation of roll roofing.
1. Show Session Seven PowerPoint® presentation slides.
2. Discuss the proper installation of roll roofing.
3. Demonstrate how roll roofing is installed. Have trainees properly install roll roofing on gable and hip roofs.
SeSSion eighT
Session Eight introduces roofing projections, ridge rows, flashing, and ventilation.
1. Show Session Eight PowerPoint® presentation slides.
2. Discuss chimney projections through roofs, and demonstrate how to properly install saddles (crickets) for a chimney projection. Have trainees properly install saddles.
3. Discuss and demonstrate how to properly install ridge rows on gable and hip roofs.
4. Explain the importance of properly flashing a roof.
5. Discuss and demonstrate how to properly install box and ridge vents. Have trainees demonstrate the proper method of installing box and ridge vents.
SeSSion nine
Session Nine introduces trainees to estimating roofing materials.
1. Show Session Nine PowerPoint® presentation slides.
2. Demonstrate how to calculate the roof area.
3. Demonstrate how to calculate the roofing material required for a given roof. Have trainees estimate the amount of roofing material required for a simple gable roof.
SeSSion Ten
Session Ten is a review and testing session. Have trainees complete the module Review Questions and Trade Terms Quiz. (Alternatively, these may be assigned as homework at the end of Session Nine.) Answer any questions that trainees may have.
1. Have trainees complete the Module Examination. Any outstanding performance testing must be completed during this session.
2. Record the testing results on Training Report Form 200, and submit the report to your Training Program Sponsor.
Roofing ApplicAtions
27202-13 Roofing Applications Module Five v
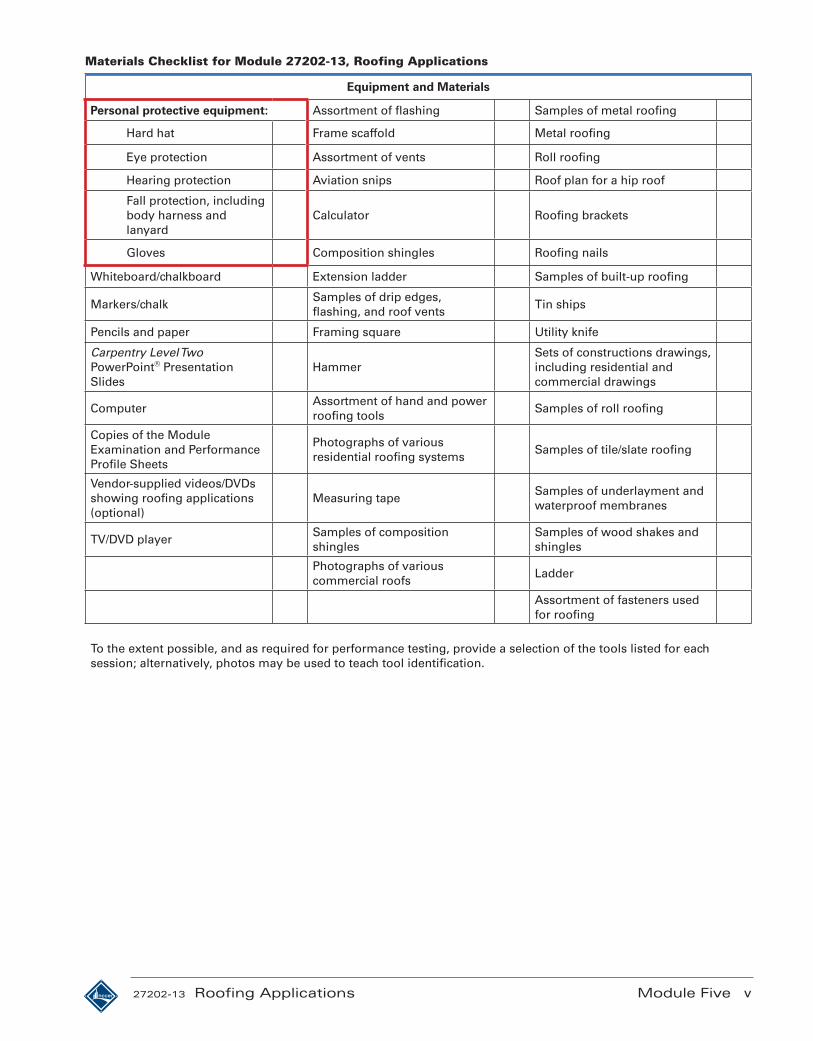
Materials Checklist for Module 27202-13, Roofing Applications
Equipment and Materials
Personal protective equipment: Assortment of flashing Samples of metal roofing
Hard hat Frame scaffold Metal roofing
Eye protection Assortment of vents Roll roofing
Hearing protection Aviation snips Roof plan for a hip roof
Fall protection, including body harness and lanyard
Calculator Roofing brackets
Gloves Composition shingles Roofing nails
Whiteboard/chalkboard Extension ladder Samples of built-up roofing
Markers/chalkSamples of drip edges, flashing, and roof vents
Tin ships
Pencils and paper Framing square Utility knife
Carpentry Level Two PowerPoint® Presentation Slides
HammerSets of constructions drawings, including residential and commercial drawings
ComputerAssortment of hand and power roofing tools
Samples of roll roofing
Copies of the Module Examination and Performance Profile Sheets
Photographs of various residential roofing systems
Samples of tile/slate roofing
Vendor-supplied videos/DVDs showing roofing applications (optional)
Measuring tapeSamples of underlayment and waterproof membranes
TV/DVD playerSamples of composition shingles
Samples of wood shakes and shingles
Photographs of various commercial roofs
Ladder
Assortment of fasteners used for roofing
To the extent possible, and as required for performance testing, provide a selection of the tools listed for each session; alternatively, photos may be used to teach tool identification.

Lesson Plans for Module 27208-13
Doors anD Door HarDware
Module Six (27208-13) describes the installation of metal doors and related hardware in steel-framed, wood-framed, and masonry walls, along with their related hardware, such as locksets and door closers. A discussion on the installation of wood doors, folding doors, and pocket doors is also presented.
Teaching Time: 20 hours(Eight 2.5-hour classroom sessions)
Session time may be adjusted to accommodate your class size, schedule, and teaching style.
PrerequisitesCore Curriculum and Carpentry Level One.
Before You BeginAs you prepare for each session, allow sufficient time to review the course objectives, content, visual aids (including the PowerPoint® presentation), and these lesson plans, and to gather the required equipment and materials. Consider time required for demonstrations, laboratories, field trips, and testing.
Using your access code, download the Module Examinations and Performance Profile Sheets from www.nccerirc.com. The passing score for submission into NCCER’s Registry is 70 percent or above for the Module Examination; performance testing is graded pass or fail.
Objectives
Learning Objective 1• Describe the safety hazards related to working
with doors.Learning Objective 2• Identify the different types and composition of
residential and commercial doors. a. Identify the different types and composition of
residential doors. b. Identify the different types and composition of
commercial doors.
Learning Objective 3• Identify the various types of door jambs and
frames. a. Describe the uses and benefits of wood door
jambs and frames. b. Describe the uses and benefits of metal door
jambs and frames.
Learning Objective 4• Identify the different types of door hardware.
a. Identify the different types of door hardware used in residential applications.
b. Identify the different types of door hardware used in commercial applications.
Learning Objective 5• Describe the various installation techniques for
doors and hardware. a. Describe the various installation techniques
for residential doors and hardware. b. Describe the various installation techniques
for commercial doors and hardware.
Learning Objective 6• List and identify specific items included on a
typical door schedule. a. Describe the hardware finish classifications. b. Describe the information included in a typical
door schedule.
Performance Tasks
Performance Task 1 (Learning Objective 5)• Demonstrate the proper installation of a hollow
metal frame and door using the proper safety precautions.
Performance Task 2 (Learning Objective 5)• Install a prehung door unit or door hanging
system using the proper safety precautions.
Performance Task 3 (Learning Objective 5)• Lay out and cut hinges in an instructor-selected
project.
Performance Task 4 (Learning Objective 5)• Install a door closer using the proper safety
precautions.
27208-13 Doors and Door Hardware Module Six i
Classroom Equipment and Materials
Whiteboard/chalkboardMarkers/chalkPencils and paperCarpentry Level Two PowerPoint® Presentation Slides
Computer
Copies of the Module Examination and Performance Profile SheetsVendor-supplied videos/DVDs showing doors and door hardware (optional)TV/DVD player
Personal protective equipment (PPE):Hard hatEye protectionGloves
Assortment of commercial door hingesAssortment of commercial locksetsAssortment of external door stops, door holders, and door closersAssortment of finish nailsAssortment of residential door hingesAssortment of residential locksetsAssortment of screwsAssortment of security hardwareAssortment of touch-bar or crossbar hardwareAssortment of weather stripping and thresholdsButt-hinge templateCarpet samplesChiselCircular sawCommercial doorsDoor closers
Door cutawaysDoor-stop stripsDrillDrill bitsFinish nailsHingesLocksetsMasking tapeNailsPhotographs of rough-framed buildingsPhotographs of various types of residential doorsPrehung doorsResidential doorsRouter and bitsSamples of metal door jambsSamples of wood door jambsScrap lumber (2 3 4s, 2 3 6s, etc.)Set of commercial construction drawings with a door scheduleUnassembled metal door framesWelded metal door framesWood door jambs
Equipment and Materials for Laboratories and Performance Testing
Safety ConsiderationsThis module requires that trainees lift doors and work with sharp cutting tools. Safety is paramount in the carpentry trade and safe habits and practices must be emphasized whenever possible. Performance Tasks must be completed under your supervision. Each trainee must use required PPE and follow safe tool practices and procedures.
Additional Resources and ReferencesThis module presents thorough resources for task training. The following resource material is suggested for further study:
Finish Carpentry. 1997. Newtown, CT: Taunton Press.
There are a number of online resources available for trainees who would like more information on doors and door hardware. A search for additional information may be assigned as homework to interested trainees.
Instructors should view any videos that may be identified in the lesson plan before using them to ensure their suitability. The videos can provide teachable moments in both proper and improper work processes and behaviors. Be prepared to stop the videos at appropriate times to point out and discuss both proper and improper conduct and techniques.
Instructors are encouraged to locate additional audiovisual aids available on the Internet, make personal videos, and take photos related to the subject matter and add them to the PowerPoint® presentations throughout the program.
ii NCCER – Carpentry Level Two 27208-13
27208-13 Doors and Door Hardware Module Six iii
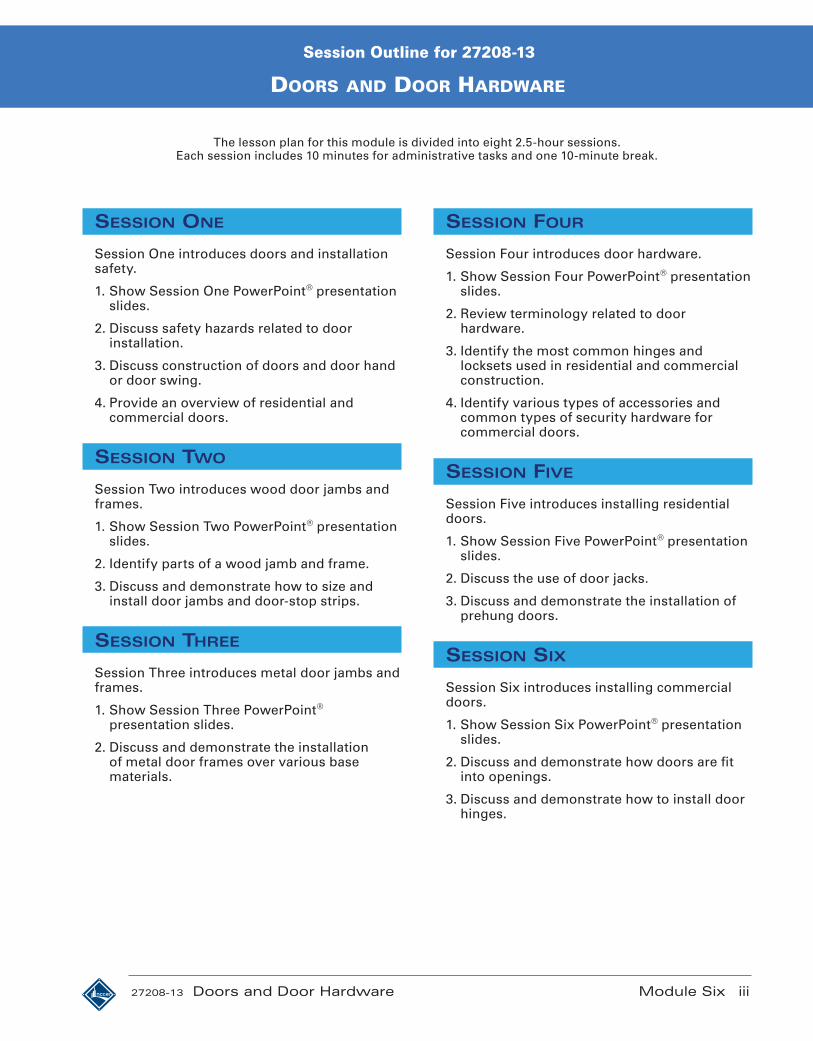
The lesson plan for this module is divided into eight 2.5-hour sessions.Each session includes 10 minutes for administrative tasks and one 10-minute break.
Doors anD Door HarDware
Session Outline for 27208-13
SeSSion one
Session One introduces doors and installation safety.
1. Show Session One PowerPoint® presentation slides.
2. Discuss safety hazards related to door installation.
3. Discuss construction of doors and door hand or door swing.
4. Provide an overview of residential and commercial doors.
SeSSion Two
Session Two introduces wood door jambs and frames.
1. Show Session Two PowerPoint® presentation slides.
2. Identify parts of a wood jamb and frame.
3. Discuss and demonstrate how to size and install door jambs and door-stop strips.
SeSSion Three
Session Three introduces metal door jambs and frames.
1. Show Session Three PowerPoint® presentation slides.
2. Discuss and demonstrate the installation of metal door frames over various base materials.
SeSSion Four
Session Four introduces door hardware.
1. Show Session Four PowerPoint® presentation slides.
2. Review terminology related to door hardware.
3. Identify the most common hinges and locksets used in residential and commercial construction.
4. Identify various types of accessories and common types of security hardware for commercial doors.
SeSSion Five
Session Five introduces installing residential doors.
1. Show Session Five PowerPoint® presentation slides.
2. Discuss the use of door jacks.
3. Discuss and demonstrate the installation of prehung doors.
SeSSion Six
Session Six introduces installing commercial doors.
1. Show Session Six PowerPoint® presentation slides.
2. Discuss and demonstrate how doors are fit into openings.
3. Discuss and demonstrate how to install door hinges.

iv NCCER – Carpentry Level Two 27208-13
Session Outline for 27208-13
SeSSion Seven
Session Seven introduces installing commercial doors.
1. Show Session Seven PowerPoint® presentation slides.
2. Discuss and demonstrate the use of butt-hinge templates.
3. Discuss and demonstrate the installation of locksets and door closers.
4. Discuss the use of door schedules in commercial construction drawings.
SeSSion eighT
Session Eight is a review and testing session. Have trainees complete the module Review Questions and Trade Terms Quiz. (Alternatively, these may be assigned as homework at the end of Session Seven.) Answer any questions that trainees may have.
1. Have trainees complete the Module Examination. Any outstanding performance testing must be completed during this session.
2. Record the testing results on Training Report Form 200, and submit the report to your Training Program Sponsor.
Doors anD Door HarDware

27208-13 Doors and Door Hardware Module Six v
Materials Checklist for Module 27208-13, Doors and Door Hardware,
Equipment and Materials
Personal protective equipment: Assortment of finish nails Door cutaways
Hard hat Assortment of screws Door-stop strips
Eye protection Carpet samples Drill
Gloves Chisel Drill bits
Whiteboard/chalkboard Masking tape Finish nails
Markers/chalk Prehung doors Hinges
Pencils and paper Nails Locksets
Carpentry Level Two PowerPoint® Presentation Slides
Assortment of external door stops, door holders, and door closers
Photographs of rough-framed buildings
TV/DVD playerAssortment of residential door hinges
Photographs of various types of residential doors
Computer Residential doors Router and bits
Copies of the Module Examination and Performance Profile Sheets
Assortment of commercial locksets
Set of commercial construction drawings with a door schedule
Vendor-supplied videos/DVDs showing doors and door hardware (optional)
Assortment of security hardware
Assortment of commercial door hinges
Assortment of touch-bar or crossbar hardware
Scrap lumber (2 3 4s, 2 3 6s, etc.)
Assortment of weather stripping and thresholds
Assortment of residential locksets
Butt-hinge template Samples of metal door jambs
Circular saw Samples of wood door jambs
Commercial doorsUnassembled metal door frames
Door closers Welded metal door frames
Wood door jambs
To the extent possible, and as required for performance testing, provide a selection of the tools listed for each session; alternatively, photos may be used to teach tool identification.

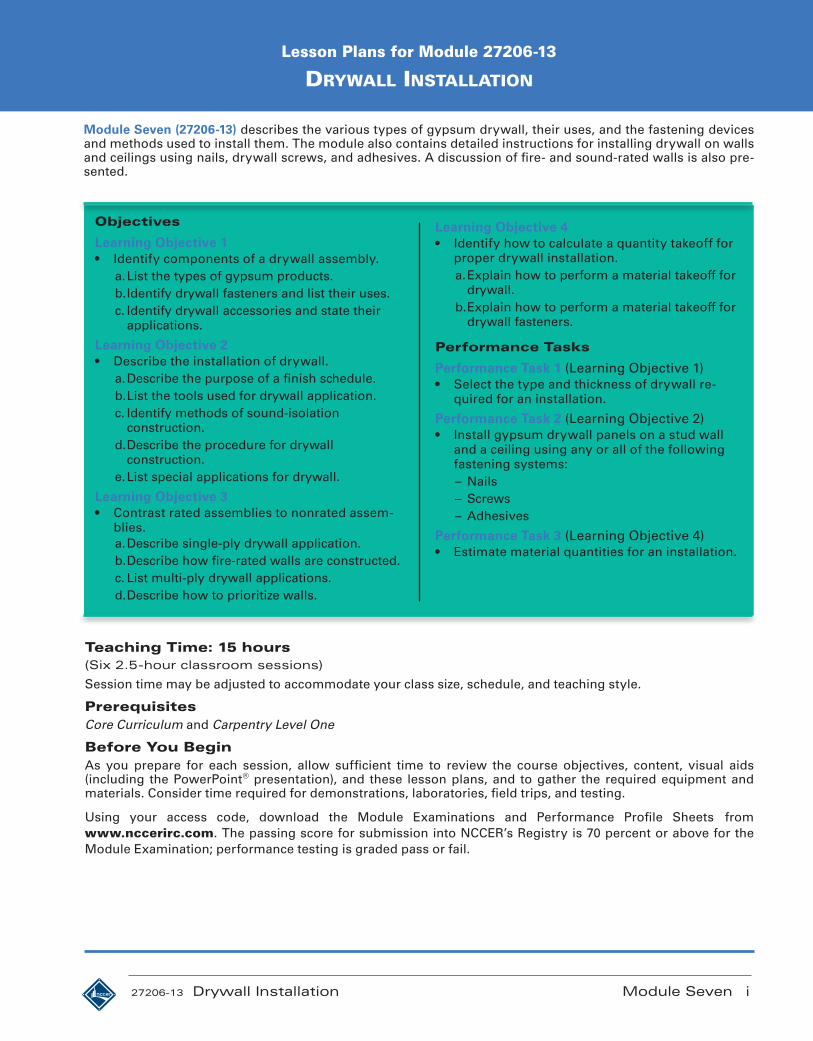
Lesson Plans for Module 27206-13
Drywall InstallatIon
Module Seven (27206-13) describes the various types of gypsum drywall, their uses, and the fastening devices and methods used to install them. The module also contains detailed instructions for installing drywall on walls and ceilings using nails, drywall screws, and adhesives. A discussion of fire- and sound-rated walls is also pre-sented.
Teaching Time: 15 hours(Six 2.5-hour classroom sessions)
Session time may be adjusted to accommodate your class size, schedule, and teaching style.
PrerequisitesCore Curriculum and Carpentry Level One
Before You BeginAs you prepare for each session, allow sufficient time to review the course objectives, content, visual aids (including the PowerPoint® presentation), and these lesson plans, and to gather the required equipment and materials. Consider time required for demonstrations, laboratories, field trips, and testing.
Using your access code, download the Module Examinations and Performance Profile Sheets from www.nccerirc.com. The passing score for submission into NCCER’s Registry is 70 percent or above for the Module Examination; performance testing is graded pass or fail.
Objectives
Learning Objective 1• Identify components of a drywall assembly.
a. List the types of gypsum products. b. Identify drywall fasteners and list their uses. c. Identify drywall accessories and state their
applications.
Learning Objective 2• Describe the installation of drywall.
a. Describe the purpose of a finish schedule. b. List the tools used for drywall application. c. Identify methods of sound-isolation
construction. d. Describe the procedure for drywall
construction. e. List special applications for drywall.
Learning Objective 3• Contrast rated assemblies to nonrated assem-
blies. a. Describe single-ply drywall application. b. Describe how fire-rated walls are constructed. c. List multi-ply drywall applications. d. Describe how to prioritize walls.
Learning Objective 4• Identify how to calculate a quantity takeoff for
proper drywall installation. a. Explain how to perform a material takeoff for
drywall. b. Explain how to perform a material takeoff for
drywall fasteners.
Performance Tasks
Performance Task 1 (Learning Objective 1)• Select the type and thickness of drywall re-
quired for an installation.
Performance Task 2 (Learning Objective 2)• Install gypsum drywall panels on a stud wall
and a ceiling using any or all of the following fastening systems:
– Nails – Screws – Adhesives
Performance Task 3 (Learning Objective 4)• Estimate material quantities for an installation.
27206-13 Drywall Installation Module Seven i

Classroom Equipment and Materials
Whiteboard/chalkboardMarkers/chalkPencils and paperCarpentry Level Two PowerPoint® Presentation Slides
Computer
Copies of the Module Examination and Performance Profile SheetsVendor-supplied videos/DVDs showing drywall installation (optional)TV/DVD player
Personal protective equipment (PPE):Hard hatEye protectionGlovesHearing protectionRespiratory protection
4' T-squareAdhesive applicatorAssortment of drywall adhesivesAssortment of drywall nailsAssortment of drywall screwsAssortment of fire-stopping materialsAssortment of furring channelsAssortment of gypsum product samplesCalculatorCarbide cutterCircle cutterDrywall adhesiveDrywall hammer
Drywall lifterDrywall nailsDrywall panelsDrywall sawDrywall screwsHammerHook-bill knifeInternational Building Code®
International Residential Code®
Jab sawLight box cutterLocal building codeRaspScrewgunSet of commercial construction drawings containing a fastening scheduleSet of residential construction drawingsT-braceUtility knife
Equipment and Materials for Laboratories and Performance Testing
Safety ConsiderationsThis module requires that trainees work with sharp cutting tools. In addition, sharp metal edges of furring channels and steel framing members may be encountered. Safety is paramount in the carpentry trade and safe habits and practices must be emphasized whenever possible. Performance Tasks must be completed under your supervision. Each trainee must use required PPE and follow safe tool practices and procedures.
Additional Resources and ReferencesThis module presents thorough resources for task training. The following resource material is suggested for further study:
Installing and Finishing Drywall. 2008. William Spence. New York: Sterling Publishing Company, Inc.
The Gypsum Construction Handbook. 2009. Chicago, IL: R.S. Means.
There are a number of online resources available for trainees who would like more information on drywall installation. A search for additional information may be assigned as homework to interested trainees.
Instructors should view any videos that may be identified in the lesson plan before using them to ensure their suitability. The videos can provide teachable moments in both proper and improper work processes and behaviors. Be prepared to stop the videos at appropriate times to point out and discuss both proper and improper conduct and techniques.
Instructors are encouraged to locate additional audiovisual aids available on the Internet, make personal videos, and take photos related to the subject matter and add them to the PowerPoint® presentations throughout the program.
ii NCCER – Carpentry Level Two 27206-13
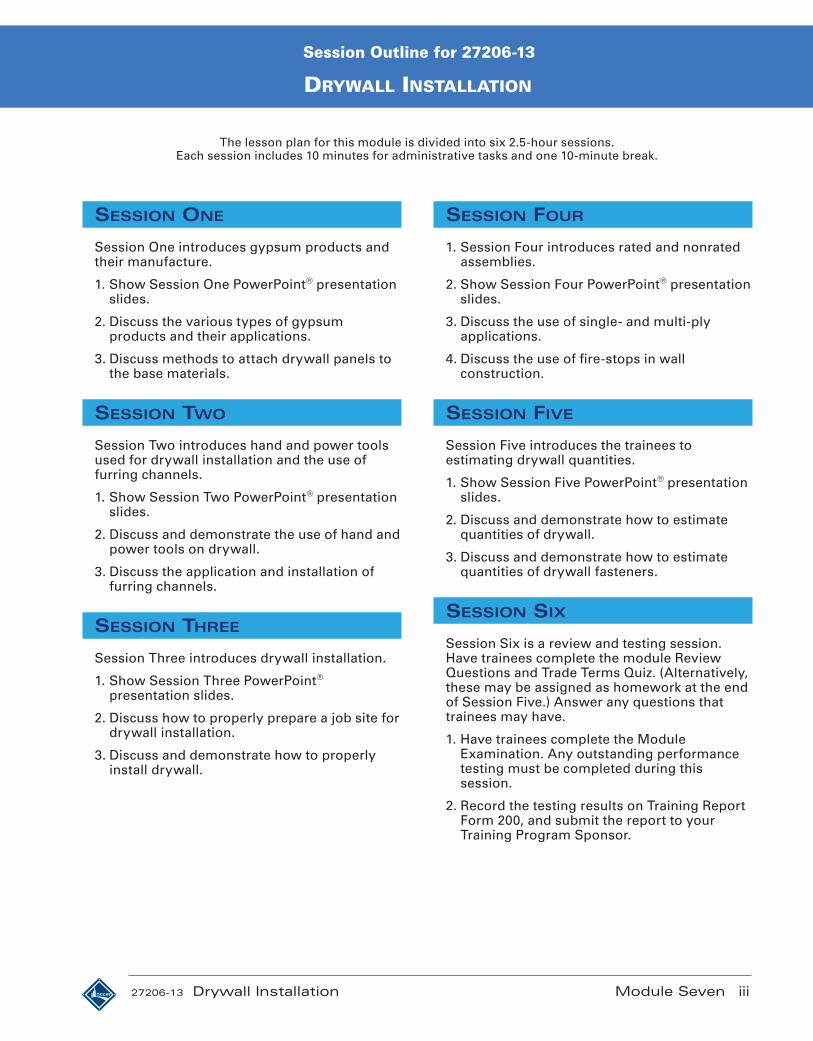
27206-13 Drywall Installation Module Seven iii
The lesson plan for this module is divided into six 2.5-hour sessions.Each session includes 10 minutes for administrative tasks and one 10-minute break.
Drywall InstallatIon
Session Outline for 27206-13
SeSSion one
Session One introduces gypsum products and their manufacture.
1. Show Session One PowerPoint® presentation slides.
2. Discuss the various types of gypsum products and their applications.
3. Discuss methods to attach drywall panels to the base materials.
SeSSion Two
Session Two introduces hand and power tools used for drywall installation and the use of furring channels.
1. Show Session Two PowerPoint® presentation slides.
2. Discuss and demonstrate the use of hand and power tools on drywall.
3. Discuss the application and installation of furring channels.
SeSSion Three
Session Three introduces drywall installation.
1. Show Session Three PowerPoint® presentation slides.
2. Discuss how to properly prepare a job site for drywall installation.
3. Discuss and demonstrate how to properly install drywall.
SeSSion Four
1. Session Four introduces rated and nonrated assemblies.
2. Show Session Four PowerPoint® presentation slides.
3. Discuss the use of single- and multi-ply applications.
4. Discuss the use of fire-stops in wall construction.
SeSSion Five
Session Five introduces the trainees to estimating drywall quantities.
1. Show Session Five PowerPoint® presentation slides.
2. Discuss and demonstrate how to estimate quantities of drywall.
3. Discuss and demonstrate how to estimate quantities of drywall fasteners.
SeSSion Six
Session Six is a review and testing session. Have trainees complete the module Review Questions and Trade Terms Quiz. (Alternatively, these may be assigned as homework at the end of Session Five.) Answer any questions that trainees may have.
1. Have trainees complete the Module Examination. Any outstanding performance testing must be completed during this session.
2. Record the testing results on Training Report Form 200, and submit the report to your Training Program Sponsor.
iv NCCER – Carpentry Level Two 27206-13
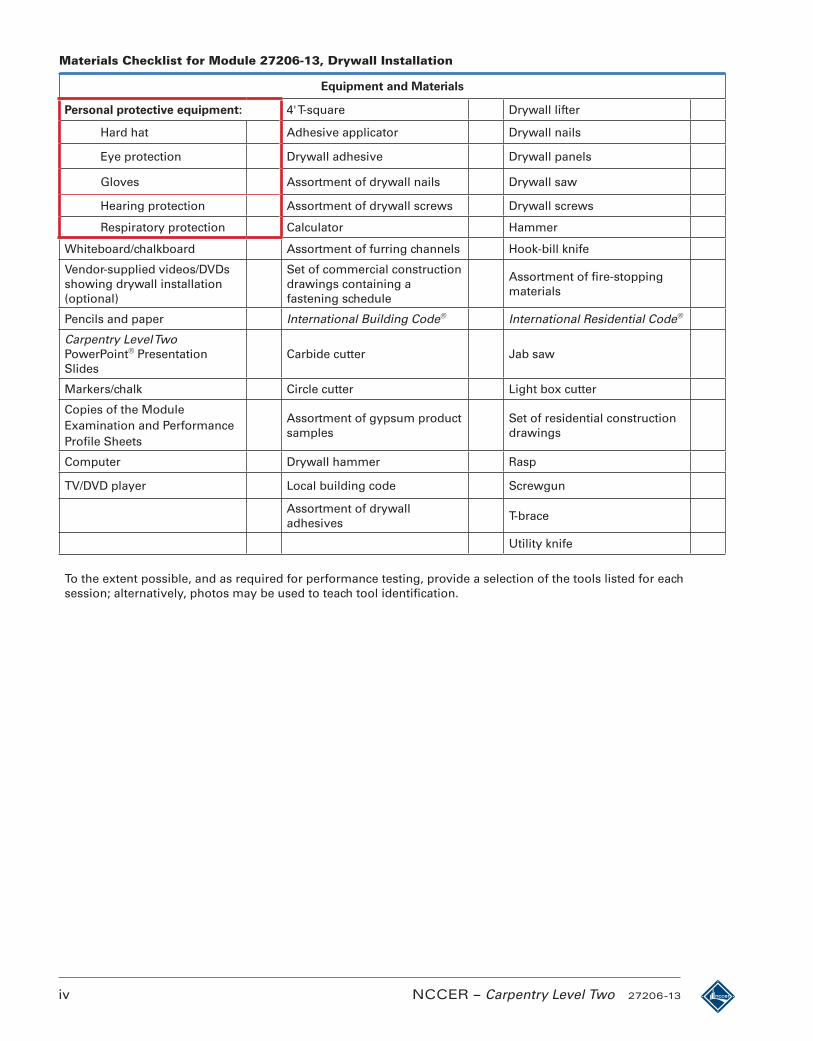
Materials Checklist for Module 27206-13, Drywall Installation
Equipment and Materials
Personal protective equipment: 4' T-square Drywall lifter
Hard hat Adhesive applicator Drywall nails
Eye protection Drywall adhesive Drywall panels
Gloves Assortment of drywall nails Drywall saw
Hearing protection Assortment of drywall screws Drywall screws
Respiratory protection Calculator Hammer
Whiteboard/chalkboard Assortment of furring channels Hook-bill knife
Vendor-supplied videos/DVDs showing drywall installation (optional)
Set of commercial construction drawings containing a fastening schedule
Assortment of fire-stopping materials
Pencils and paper International Building Code® International Residential Code®
Carpentry Level Two PowerPoint® Presentation Slides
Carbide cutter Jab saw
Markers/chalk Circle cutter Light box cutter
Copies of the Module Examination and Performance Profile Sheets
Assortment of gypsum product samples
Set of residential construction drawings
Computer Drywall hammer Rasp
TV/DVD player Local building code Screwgun
Assortment of drywall adhesives
T-brace
Utility knife
To the extent possible, and as required for performance testing, provide a selection of the tools listed for each session; alternatively, photos may be used to teach tool identification.
Lesson Plans for Module 27207-13
Drywall Finishing
Module Eight (27207-13) describes the materials, tools, and methods used to finish and patch gypsum drywall. A discussion of both automatic and manual taping and finishing tools is presented.
Teaching Time: 17.5 hours(Seven 2.5-hour classroom sessions)
Session time may be adjusted to accommodate your class size, schedule, and teaching style.
PrerequisitesCore Curriculum and Carpentry Level One
Before You BeginAs you prepare for each session, allow sufficient time to review the course objectives, content, visual aids (including the PowerPoint® presentation), and these lesson plans, and to gather the required equipment and materials. Consider time required for demonstrations, laboratories, field trips, and testing.
Using your access code, download the Module Examinations and Performance Profile Sheets from www.nccerirc.com. The passing score for submission into NCCER’s Registry is 70 percent or above for the Module Examination; performance testing is graded pass or fail.
Objectives
Learning Objective 1• Identify differences between the six levels of
finish established by industry standards.Learning Objective 2• Identify the different materials for proper dry-
wall finishing. a. Describe how to select the proper trim. b. Describe the purposes of tapes, compounds,
coatings, and sanding materials.
Learning Objective 3• Identify the proper tools used in drywall finish-
ing. a. Identify the hand tools used in drywall
finishing. b. Identify the automatic tools used in drywall
finishing.
Learning Objective 4• Describe proper drywall finishing procedures.
a. Identify ideal site conditions for drywall finishing.
b. Describe the process for finishing drywall. c. Describe the hand-finishing procedures
involved in drywall finishing.
d. Describe the automatic taping and finishing procedures involved in drywall finishing.
e. Identify common joint problems when finishing drywall.
f. Identify common compound problems when finishing drywall.
g. Identify common fastener problems when finishing drywall.
h. Identify common problems when finishing drywall.
Learning Objective 5• Explain how to estimate the proper amount of
drywall finishing materials.
Performance Tasks
Performance Task 1 (Learning Objective 1)• State the differences between the six levels of
finish established by industry standards and distinguish a finish level by observation.
Performance Task 2 (Learning Objective 4)• Properly apply a corner bead, tape, and finish
to a drywall panel.
Performance Task 3 (Learning Objective 4)• Patch damaged drywall.
27207-13 Drywall Finishing Module Eight i

Classroom Equipment and Materials
Whiteboard/chalkboardMarkers/chalkPencils and paperCarpentry Level Two PowerPoint® Presentation Slides
Computer
Copies of the Module Examination and Performance Profile SheetsVendor-supplied videos/DVDs showing drywall finishing (optional)TV/DVD player
Personal protective equipment (PPE):Hard hatEye protectionGlovesHearing protectionRespiratory protection
4' T-squareAutomatic loading pumpAutomatic taping toolBroad knifeCalculatorCaulking gunCircle cutterCorner applicators and finishersCorner toolDrywall hammerDrywall panelsDrywall sawFlat finisher
Joint compoundJoint tapeJoint trowelMud pan or hawkNail spotterNails and/or screwsPhotographs of drywall finishesSamples of joint tapeSamples of trim materialsSanding block, pole sander, or electric sanderSandpaper/drywall screenScrewdriverSet of commercial drawingsSet of residential drawingsSponge sanderTrim materialsUtility knife with plenty of bladesVacuum sander
Equipment and Materials for Laboratories and Performance Testing
Safety ConsiderationsThis module requires that trainees work with dry joint compound powder. Based on the manufacturer’s SDS, respiratory protection may be required. Safety is paramount in the carpentry trade and safe habits and practices must be emphasized whenever possible. Performance Tasks must be completed under your supervision. Each trainee must use required PPE and follow safe tool practices and procedures.
Additional Resources and ReferencesThis module presents thorough resources for task training. The following resource material is suggested for further study:
A Recommended Specification for Levels of Gypsum Board. 2010. Gypsum Association.
Gypsum Construction Guide. 2011. Charlotte, NC: National Gypsum Company.
The Gypsum Construction Handbook. 2009. Chicago, IL: R.S. Means.
Installing and Finishing Drywall. 2008. William Spence. New York: Sterling Publishing Company.
Painting and Decorating Craftsman’s Manual and Textbook. 1995. Fairfax, VA: Painting and Decorating Contractors of America.
There are a number of online resources available for trainees who would like more information on drywall finishing. A search for additional information may be assigned as homework to interested trainees.
Instructors should view any videos that may be identified in the lesson plan before using them to ensure their suitability. The videos can provide teachable moments in both proper and improper work processes and behaviors. Be prepared to stop the videos at appropriate times to point out and discuss both proper and improper conduct and techniques.
Instructors are encouraged to locate additional audiovisual aids available on the Internet, make personal videos, and take photos related to the subject matter and add them to the PowerPoint® presentations throughout the program.
ii NCCER – Carpentry Level Two 27207-13
27207-13 Drywall Finishing Module Eight iii
The lesson plan for this module is divided into seven 2.5-hour sessions.Each session includes 10 minutes for administrative tasks and one 10-minute break.
Drywall Finishing
Session Outline for 27207-13
SeSSion one
Session One introduces drywall finishing standards, materials, and tools.
1. Show Session One PowerPoint® presentation slides.
2. Discuss the six levels of drywall finish.
3. Identify the types of trim materials and their applications.
4. Discuss the various types of tape and joint compounds and their applications.
5. Identify and demonstrate the hand tools used to cut, install, and finish drywall. Ensure trainees understand proper safety guidelines.
6. Identify and demonstrate the automatic tools used to finish drywall. Ensure trainees understand proper safety guidelines.
SeSSion Two
Session Two introduces trainees to site conditions and hand-finishing procedures.
1. Show Session Two PowerPoint® presentation slides.
2. Discuss how to properly ready a site for drywall installation.
3. Provide an overview of the taping and finishing process.
4. Discuss and demonstrate the proper procedure for finishing drywall using hand tools.
5. Discuss and demonstrate the proper procedure for sanding drywall using hand tools.
SeSSion Three
Session Three introduces automatic taping and finishing procedures.
1. Show Session Three PowerPoint® presentation slides.
2. Discuss and demonstrate the proper procedure for loading a pump for automatic taping and finishing tools.
3. Discuss and demonstrate how to use an automatic taping tool.
4. Discuss and demonstrate how to use an automatic finishing tool.
5. Discuss and demonstrate how to use a nail spotter.
6. Discuss and demonstrate how to use a corner tool.
7. Discuss and demonstrate how to use a flat finisher.
SeSSion Four
Session Four introduces finished joint and compound problems.
1. Show Session Four PowerPoint® presentation slides.
2. Discuss problems that may be encountered with finished joints.
3. Discuss problems that may be encountered with finished compound.
iv NCCER – Carpentry Level Two 27207-13
Session Outline for 27207-13
SeSSion Five
Session Five introduces fastener and wallboard problems.
1. Show Session Five PowerPoint® presentation slides.
2. Identify and discuss common fastener problems encountered with drywall.
3. Demonstrate how to fix nail pops.
4. Discuss other drywall problems and demonstrate how they are repaired.
SeSSion Six
Session Six introduces trainees to estimating drywall finishing.
1. Show Session Six PowerPoint® presentation slides.
2. Discuss the rules of thumb for estimating joint tape and joint compound.
3. Demonstrate how to properly estimate drywall finishing materials.
SeSSion Seven
Session Seven is a review and testing session. Have trainees complete the module Review Questions and Trade Terms Quiz. (Alternatively, these may be assigned as homework at the end of Session Six.) Answer any questions that trainees may have.
1. Have trainees complete the Module Examination. Any outstanding performance testing must be completed during this session.
2. Record the testing results on Training Report Form 200, and submit the report to your Training Program Sponsor.
Drywall Finishing

27207-13 Drywall Finishing Module Eight v
Materials Checklist for Module 27207-13, Drywall Finishing
Equipment and Materials
Personal protective equipment: 4' T-square Joint compound
Hard hat Automatic loading pump Joint tape
Eye protection Automatic taping tool Joint trowel
Gloves Broad knife Mud pan or hawk
Hearing protection Calculator Nail spotter
Respiratory protection Caulking gun Nails and/or screws
Whiteboard/chalkboard Circle cutter Drywall hammer
Markers/chalkCorner applicators and finishers
Samples of joint tape
Pencils and paper Corner tool Samples of trim materials
Carpentry Level Two PowerPoint® Presentation Slides
Utility knife with plenty of blades
Sanding block, pole sander, or electric sander
Computer Drywall panels Sandpaper/drywall screen
Copies of the Module Examination and Performance Profile Sheets
Drywall saw Screwdriver
Vendor-supplied videos/DVDs showing drywall finishing (optional)
Photographs of drywall finishes
Set of commercial drawings
TV/DVD player Flat finisher Set of residential drawings
Sponge sander Vacuum sander
Trim materials
To the extent possible, and as required for performance testing, provide a selection of the tools listed for each session; alternatively, photos may be used to teach tool identification.


Lesson Plans for Module 27209-13
SuSpended CeilingS
Module Nine (27209-13) describes the materials, layout, and installation procedures for many types of suspended ceilings used in commercial construction, as well as ceiling tiles, drywall suspension systems, and pan-type ceil-ings.
Teaching Time: 15 hours(Six 2.5-hour classroom sessions)
Session time may be adjusted to accommodate your class size, schedule, and teaching style.
PrerequisitesCore Curriculum and Carpentry Level One
Before You BeginAs you prepare for each session, allow sufficient time to review the course objectives, content, visual aids (including the PowerPoint® presentation), and these lesson plans, and to gather the required equipment and materials. Consider time required for demonstrations, laboratories, field trips, and testing.
Using your access code, download the Module Examinations and Performance Profile Sheets from www.nccerirc.com. The passing score for submission into NCCER’s Registry is 70 percent or above for the Module Examination; performance testing is graded pass or fail.
Objectives
Learning Objective 1• Identify the components necessary to properly
install a suspended ceiling system. a. Identify the system components necessary to
properly frame a suspended ceiling system. b. Identify the suspension systems and
hardware necessary to properly install a suspended ceiling system.
c. Identify the safe material handling and storage procedures required when installing a suspended ceiling system.
Learning Objective 2• Interpret a reflected ceiling plan.
a. Interpret the layout information. b. Interpret the MEP locations.
Learning Objective 3• Identify the procedures to lay out and install a
suspended ceiling system. a. Identify the layout and takeoff procedures
to procure materials to lay out and install a suspended ceiling system.
b. Identify the tools and equipment to lay out and install a suspended ceiling system.
c. Identify the installation methods and procedures for a suspended ceiling system.
Performance Tasks
Performance Task 1 (Learning Objective 2)• Estimate the quantities of materials needed to
install a lay-in suspended ceiling system in a typical room from an instructor-supplied draw-ing.
Performance Task 2 (Learning Objective 3)• Establish a level line at ceiling level such as is
required when installing the wall angle for a suspended ceiling.
Performance Task 3 (Learning Objective 3)• Lay out and install a lay-in suspended ceiling
system according to an instructor-supplied drawing.
27209-13 Suspended Ceilings Module Nine i
Classroom Equipment and Materials
Whiteboard/chalkboardMarkers/chalkPencils and paperCarpentry Level Two PowerPoint® Presentation Slides
Computer
Copies of the Module Examination and Performance Profile SheetsVendor-supplied videos/DVDs showing suspended ceilings (optional)TV/DVD player
Personal protective equipment (PPE): Hard hat Eye protection Gloves Respiratory protection50' or 100' tape6' folding ruleAcoustical panelsAssortment of nails and screwsAviation snips (tin snips)AwlBaker’s scaffoldBoardCalculatorCeiling tilesChalk box and chalklineClamping pliers or vise grips with plastic or rubber cornersCross runnersDirect-hung concealed grid system componentsDry lineSuspended drywall ceiling componentsEye pinsFurring channelsGraph paper and pencilHammerHanger inserts and clipsHanger wireHangersHold-down clips
Keyhole sawLaddersLaser levelLath nippersLevelMagnetic punchMain runnersMetal pan system componentsPhotographs of poorly installed suspended ceilingsPlumb bobPop rivetsPop-rivet gunPowder-actuated toolReflective ceiling planSamples of suspended ceiling system tiles and panelsScaffoldScribe or compassSet of commercial construction drawingsShop drawings for a nonstandard luminous systemSpecial dies for cutting suspension membersStandard luminaire system componentsStraightedge for cuttingTile knifeWall anglesWater levelWhitney punch
Equipment and Materials for Laboratories and Performance Testing
Safety ConsiderationsThis module requires that trainees work at elevated locations and with metal trim members, which may have sharp edges. Safety is paramount in the carpentry trade and safe habits and practices must be emphasized whenever possible. Performance Tasks must be completed under your supervision. Each trainee must use required PPE and follow safe tool practices and procedures.
Additional Resources and ReferencesThis module presents thorough resources for task training. The following resource material is suggested for further study:
CISCA Ceiling Systems Handbook. 1999. St. Charles, IL: The Ceiling and Interior Systems Contractors’ Association.
The Gypsum Construction Handbook. 2009. Chicago, IL: R.S. Means.
There are a number of online resources available for trainees who would like more information on suspended ceilings. A search for additional information may be assigned as homework to interested trainees.
Instructors should view any videos that may be identified in the lesson plan before using them to ensure their suitability. The videos can provide teachable moments in both proper and improper work processes and behaviors. Be prepared to stop the videos at appropriate times to point out and discuss both proper and improper conduct and techniques.
Instructors are encouraged to locate additional audiovisual aids available on the Internet, make personal videos, and take photos related to the subject matter and add them to the PowerPoint® presentations throughout the program.
ii NCCER – Carpentry Level Two 27209-13
27209-13 Suspended Ceilings Module Nine iii
The lesson plan for this module is divided into six 2.5-hour sessions.Each session includes 10 minutes for administrative tasks and one 10-minute break.
SuSpended CeilingS
Session Outline for 27209-13
SeSSion one
Session One introduces suspended ceiling system components.
1. Show Session One PowerPoint® presentation slides.
2. Identify and discuss the various types of suspended ceiling systems.
3. Discuss the safety hazards associated with suspended ceiling installation.
SeSSion Two
Session Two introduces reflected ceiling plans, and laying out and estimating suspended ceiling systems.
1. Show Session Two PowerPoint® presentation slides.
2. Discuss the use of reflected ceiling plans when installing suspended ceilings.
3. Discuss and demonstrate how to sketch a ceiling plan.
4. Discuss and demonstrate how to establish room center lines.
SeSSion Three
Session Three introduces suspended ceiling system tools, equipment, and installation.
1. Show Session Three PowerPoint® presentation slides.
2. Identify tools that may be unfamiliar to trainees and focus instruction on these tools.
3. Discuss and demonstrate the use of water levels and laser levels when leveling the ceiling grids.
4. Discuss and demonstrate the proper procedure for installing an exposed grid system.
SeSSion Four
Session Four introduces the installation of other suspended ceiling systems.
1. Show Session Four PowerPoint® presentation slides.
2. Discuss and demonstrate the installation of the following suspended ceiling systems:
• Metal pan systems
• Direct-hung concealed grid system
• Standard and nonstandard luminous systems
SeSSion Five
Session Five introduces the installation of suspended drywall ceilings, acoustical panels, and furring channels.
1. Show Session Five PowerPoint® presentation slides.
2. Discuss and demonstrate the installation of suspended drywall ceilings, acoustical panels, and furring channels.
3. Discuss the proper methods to clean ceiling tile.
SeSSion Six
Session Six is a review and testing session. Have trainees complete the module Review Questions and Trade Terms Quiz. (Alternatively, these may be assigned as homework at the end of Session Five.) Answer any questions that trainees may have.
1. Have trainees complete the Module Examination. Any outstanding performance testing must be completed during this session.
2. Record the testing results on Training Report Form 200, and submit the report to your Training Program Sponsor.

iv NCCER – Carpentry Level Two 27209-13
Materials Checklist for Module 27209-13, Suspended Ceilings
Equipment and Materials
Personal protective equipment: 50' or 100' tape Keyhole saw
Hard hat 6' folding rule Ladders
Eye protection Acoustical panels Laser level
Gloves Assortment of nails and screws Lath nippers
Respiratory protection Aviation snips (tin snips) Level
Whiteboard/chalkboard Awl Magnetic punch
Markers/chalk Baker’s scaffold Main runners
Pencils and paper Board Metal pan system components
Carpentry Level Two PowerPoint® Presentation Slides
Samples of suspended ceiling system tiles and panels
Photographs of poorly installed suspended ceilings
Computer Ceiling tiles Plumb bob
Copies of the Module Examination and Performance Profile Sheets
Chalk box and chalkline Pop rivets
Vendor-supplied videos/DVDs showing suspended ceilings (optional)
Clamping pliers or vise grips with plastic or rubber corners
Shop drawings for a nonstandard luminous system
TV/DVD playerSpecial dies for cutting suspension members
Set of commercial construction drawings
Calculator Whitney punch
Dry line Pop-rivet gun
Suspended drywall ceiling components
Scaffold
Eye pins Scribe or compass
Furring channels Reflective ceiling plan
Graph paper and pencil Straightedge for cutting
Hammer Powder-actuated tool
Direct-hung concealed grid system components
Standard luminaire system components
Hanger wire Hanger inserts and clips
Hangers Tile knife
Hold-down clips Wall angles
Cross runners Water level
To the extent possible, and as required for performance testing, provide a selection of the tools listed for each session; alternatively, photos may be used to teach tool identification.

Lesson Plans for Module 27210-13
WindoW, door, Floor, and Ceiling Trim
Module Ten (27210-13) describes the different types of trim used in finish work and focuses on the proper meth-ods for selecting, cutting, and fastening trim to provide a professional finished appearance.
Teaching Time: 25 hours(Ten 2.5-hour classroom sessions)
Session time may be adjusted to accommodate your class size, schedule, and teaching style.
PrerequisitesCore Curriculum and Carpentry Level One
Before You BeginAs you prepare for each session, allow sufficient time to review the course objectives, content, visual aids (including the PowerPoint® presentation), and these lesson plans, and to gather the required equipment and materials. Consider time required for demonstrations, laboratories, field trips, and testing.
Using your access code, download the Module Examinations and Performance Profile Sheets from www.nccerirc.com. The passing score for submission into NCCER’s Registry is 70 percent or above for the Module Examination; performance testing is graded pass or fail.
Objectives
Learning Objective 1• Describe the safety hazards related to working
with window, door, floor, and ceiling trim. a. Identify the proper personal protection
equipment required when working with window, door, floor, and ceiling trim.
b. Identify tool and equipment safety guidelines when working with window, door, floor, and ceiling trim tools.
Learning Objective 2• Identify the different types of standard mold-
ings and materials. a. Identify the different types of base moldings. b. Identify the different types of wall moldings. c. Identify the different types of ceiling
moldings. d. Identify the different types of window and
door trim.
Learning Objective 3• Explain how to install different types of mold-
ing. a. Explain how to properly cut trim. b. Explain how to properly fasten trim. c. Explain how to properly install base molding. d. Explain how to properly install ceiling
molding. e. Explain how to properly install door trim. f. Explain how to properly install window trim.
Learning Objective 4• Explain how to estimate window, door, floor,
and ceiling trim.
Performance Tasks
Performance Task 1 (Learning Objective 3)• Make square and miter cuts to selected mold-
ings using a hand miter box.
Performance Task 2 (Learning Objective 3)• Make square and miter cuts to selected mold-
ings using a power miter/compound miter saw.
Performance Task 3 (Learning Objective 3)• Make a coped joint using a coping saw.
Performance Task 4 (Learning Objective 3)• Install interior trim using a finish nailer and
hand nailing methods. • Door trim • Window trim • Base trim • Ceiling trim
Performance Task 5 (Learning Objective 4)• Estimate the quantities of different trim
materials required for selected rooms.
27210-13 Window, Door, Floor, and Ceiling Trim Module Ten i

Classroom Equipment and Materials
Whiteboard/chalkboardMarkers/chalkPencils and paperCarpentry Level Two PowerPoint® Presentation SlidesComputerCopies of the Module Examination and Performance Profile SheetsVendor-supplied videos/DVDs showing window, door, floor, and ceiling trim (optional)TV/DVD player
Personal protective equipment (PPE):Hard hatEye protectionGlovesHearing protection
BaseboardBed moldingCalculatorCatalogs from molding manufacturersCompound miter sawCompressor and hoseCoping sawCove moldingCrosscut sawCrown moldingDoor trimDust maskFinish nails (for nailer)Finish nails (std.)Floor planHalf-mask respiratorHammerHand miter box
Jamb extensionsMiter boxMiter sawPhotographs of various job sites with safety infractionsPieces of trimPneumatic finish nailer and operator’s manualPower miter boxQuarter roundRipsawRouter and bitsSample floor planSamples of coped jointsSamples of various types of moldingsSamples of wood and nonwood finish materialsSection of uneven floorSet of residential construction drawingsStock molding shapesStoolsTrim specificationsWindow trim
Equipment and Materials for Laboratories and Performance Testing
Safety ConsiderationsThis module requires that trainees use power miter boxes and power nailers. Safety is paramount in the carpentry trade and safe habits and practices must be emphasized whenever possible. Performance Tasks must be completed under your supervision. Each trainee must use required PPE and follow safe tool practices and procedures.
Additional Resources and ReferencesThis module presents thorough resources for task training. The following resource material is suggested for further study:
Finish Carpentry. 1997. Newtown, CT: Taunton Press.
There are a number of online resources available for trainees who would like more information on window, door, floor, and ceiling trim. A search for additional information may be assigned as homework to interested trainees.
Instructors should view any videos that may be identified in the lesson plan before using them to ensure their suitability. The videos can provide teachable moments in both proper and improper work processes and behaviors. Be prepared to stop the videos at appropriate times to point out and discuss both proper and improper conduct and techniques.
Instructors are encouraged to locate additional audiovisual aids available on the Internet, make personal videos, and take photos related to the subject matter and add them to the PowerPoint® presentations throughout the program.
ii NCCER – Carpentry Level Two 27210-13

27210-13 Window, Door, Floor, and Ceiling Trim Module Ten iii
The lesson plan for this module is divided into ten 2.5-hour sessions.Each session includes 10 minutes for administrative tasks and one 10-minute break.
WindoW, door, Floor, and Ceiling Trim
Session Outline for 27210-13
SeSSion one
Session One introduces safety when installing trim.
1. Show Session One PowerPoint® presentation slides.
2. Discuss safety hazards and proper personal protective equipment (PPE) to be worn when installing trim.
3. Review the use and safety guidelines related to power miter saws, routers, and pneumatic finish nailers.
SeSSion Two
Session Two introduces types of molding and trim materials.
1. Show Session Two PowerPoint® presentation slides.
2. Identify types of moldings used for interior trim and their applications.
SeSSion Three
Session Three introduces how to cut trim.
1. Show Session Three PowerPoint® presentation slides.
2. Discuss the importance of making accurate finish cuts.
3. Discuss and demonstrate the safe use of power miter saws and compound miter saws.
4. Discuss and demonstrate how to cut flat miters and crown, bed, and cove moldings using a hand miter box and power miter saws.
5. Discuss and demonstrate how to cut a coped joint.
SeSSion Four
Session Four introduces how to fasten trim.
1. Show Session Four PowerPoint® presentation slides.
2. Review and demonstrate the safe use of a pneumatic finish nailer.
SeSSion Five
Session Five introduces how to install base molding using the hand-nailing method.
1. Show Session Five PowerPoint® presentation slides.
2. Discuss the proper sequence in which to install base molding.
3 Discuss and demonstrate how to install base molding using the hand-nailing method.
SeSSion Six
Session Six introduces how to install base molding using a pneumatic finish nailer.
1. Show Session Six PowerPoint® presentation slides.
2. Discuss and demonstrate how to install base molding using a pneumatic finish nailer.
SeSSion Seven
Session Seven introduces installing ceiling molding and door trim.
1. Show Session Seven PowerPoint® presentation slides.
2. Discuss and demonstrate how to install ceiling molding using the hand-nailing method and a pneumatic finish nailer.
3. Discuss and demonstrate how to install door trim using the hand-nailing method and a pneumatic finish nailer.
iv NCCER – Carpentry Level Two 27210-13
Session Outline for 27210-13
SeSSion eighT
Session Eight introduces installing window trim.
1. Show Session Eight PowerPoint® presentation slides.
2. Identify the two methods used to trim windows.
3. Discuss and demonstrate how to cut and install a stool.
4. Discuss and demonstrate how to trim out a window.
SeSSion nine
Session Nine introduces estimating trim quantities.
1. Show Session Nine PowerPoint® presentation slides.
2. Identify the two general categories of trim for estimating purposes.
3. Discuss and demonstrate how to estimate the amount of running trim.
4. Discuss and demonstrate how to estimate the amount of standing trim.
SeSSion Ten
Session Ten is a review and testing session. Have trainees complete the module Review Questions and Trade Terms Quiz. (Alternatively, these may be assigned as homework at the end of Session Nine.) Answer any questions that trainees may have.
1. Have trainees complete the Module Examination. Any outstanding performance testing must be completed during this session.
2. Record the testing results on Training Report Form 200, and submit the report to your Training Program Sponsor.
WindoW, door, Floor, and Ceiling Trim

27210-13 Window, Door, Floor, and Ceiling Trim Module Ten v
Materials Checklist for Module 27210-13, Window, Door, Floor, and Ceiling Trim
Equipment and Materials
Personal protective equipment: Baseboard Jamb extensions
Hard hat Bed molding Miter box
Eye protection Calculator Miter saw
Gloves Samples of coped joints Ripsaw
Hearing protection Compound miter saw Pieces of trim
Whiteboard/chalkboard Compressor and hose Dust mask
Markers/chalk Coping saw Power miter box
Pencils and paper Cove molding Quarter round
Carpentry Level Two PowerPoint® Presentation Slides
Pneumatic finish nailer and operator’s manual
Set of residential construction drawings
Computer Crown molding Router and bits
Copies of the Module Examination and Performance Profile Sheets
Door trim Sample floor plan
Vendor-supplied videos/DVDs showing window, door, floor, and ceiling trim (optional)
Photographs of various job sites with safety infractions
Samples of wood and nonwood finish materials
TV/DVD playerCatalogs from molding manufacturers
Samples of various types of moldings
Finish nails (std.) Finish nails (for nailer)
Floor plan Section of uneven floor
Half-mask respirator Stock molding shapes
Hammer Stools
Hand miter box Trim specifications
Crosscut saw Window trim
To the extent possible, and as required for performance testing, provide a selection of the tools listed for each session; alternatively, photos may be used to teach tool identification.

Lesson Plans for Module 27211-13
Cabinet installation
Module Eleven (27211-13) provides detailed instructions for the selection and installation of base and wall cabi-nets and countertops.
Teaching Time: 10 hours(Four 2.5-hour classroom sessions)
Session time may be adjusted to accommodate your class size, schedule, and teaching style.
PrerequisitesCore Curriculum and Carpentry Level One
Before You BeginAs you prepare for each session, allow sufficient time to review the course objectives, content, visual aids (including the PowerPoint® presentation), and these lesson plans, and to gather the required equipment and materials. Consider time required for demonstrations, laboratories, field trips, and testing.
Using your access code, download the Module Examinations and Performance Profile Sheets from www.nccerirc.com. The passing score for submission into NCCER’s Registry is 70 percent or above for the Mod-ule Examination; performance testing is graded pass or fail.
Objectives
Learning Objective 1• Describe the safety hazards when installing
cabinets. a. Identify tool and material hazards that may be
present when installing cabinets. b. Explain how to prevent back injuries through
proper ergonomics.
Learning Objective 2• Identify the different types of cabinets.
a. Identify wall cabinets. b. Identify base cabinets. c. Describe the purpose of a countertop.
Learning Objective 3• Identify cabinet components and hardware and
describe their purpose. a. Identify cabinet components. b. Describe various types of hardware used on
cabinets.
Learning Objective 4• Explain how to lay out and install a basic set of
cabinets. a. Describe the surface preparation needed
before cabinet installation. b. Explain how to install wall cabinets. c. Explain how to install base cabinets and
countertops.
Performance Tasks
Performance Task 1 (Learning Objective 4)• Lay out and identify various types of base and
wall units following a specified layout scheme.
27211-13 Cabinet Installation Module Eleven i
Classroom Equipment and MaterialsWhiteboard/chalkboardMarkers/chalkPencils and paperCarpentry Level Two PowerPoint® Presentation SlidesComputerCopies of the Module Examination and Performance Profile SheetsVendor-supplied videos/DVDs showing cabinet installation (optional)TV/DVD player
Personal protective equipment (PPE): Hard hat Eye protection4' levelBar clampsBase cabinetsBelt sanderBroom and dustpanCabinet manufacturers’ catalogsChalk box and chalklineChiselCompass or dividersCountertopDrill and drill bitsFraming squareLaser levelPhotographs of base cabinetsPhotographs of countertopsPhotographs of wall cabinets
Plumb bobPower planerPower screwdriverSamples of cabinet doorsSamples of cabinet drawersSamples of drawer guidesSamples of hinges, catches, knobs, and pullsScrewsSet of construction drawingsShimsSpring-loaded clampsStory poleStraightedgeTape measureT-bracesUtility knifeWall cabinetsWater level
Equipment and Materials for Laboratories and Performance Testing
Safety ConsiderationsThis module requires that trainees lift cabinets, which may be heavy. Safety is paramount in the carpentry trade and safe habits and practices must be emphasized whenever possible. Performance Tasks must be completed under your supervision. Each trainee must use required PPE and follow safe tool practices and procedures.
Additional Resources and ReferencesThis module presents thorough resources for task training. The following resource material is suggested for further study:
Cabinet Makers Association website. www.cabinetmakers.org
Kitchen Cabinet Makers Association website. www.kcma.org
Mill’s Pride Cabinetry website. www.millspridekitchens.com
There are a number of online resources available for trainees who would like more information on cabinet installation. A search for additional information may be assigned as homework to interested trainees.
Instructors should view any videos that may be identified in the lesson plan before using them to ensure their suitability. The videos can provide teachable moments in both proper and improper work processes and behaviors. Be prepared to stop the videos at appropriate times to point out and discuss both proper and improper conduct and techniques.
Instructors are encouraged to locate additional audiovisual aids available on the Internet, make personal videos, and take photos related to the subject matter and add them to the PowerPoint® presentations throughout the program.
ii NCCER – Carpentry Level Two 27211-13
27211-13 Cabinet Installation Module Eleven iii
The lesson plan for this module is divided into four 2.5-hour sessions.Each session includes 10 minutes for administrative tasks and one 10-minute break.
Cabinet installation
Session Outline for 27211-13
SeSSion one
Session One introduces the types of cabinets and installation safety.
1. Show Session One PowerPoint® presentation slides.
2. Review general tool and equipment safety.
3. Discuss the types of base and wall cabinets that are available and applications for each.
4. Discuss countertops and the types of materials used in their manufacture.
SeSSion Two
Session Two introduces cabinet components and hardware.
1. Show Session Two PowerPoint® presentation slides.
2. Discuss two types of cabinet construction.
3. Discuss cabinet components, including doors, drawers, and hardware.
SeSSion Three
Session Three introduces cabinet installation.
1. Show Session Three PowerPoint® presentation slides.
2. Discuss surface preparation that is needed prior to cabinet installation.
3. Discuss and demonstrate the procedure for laying out and installing wall cabinets.
4. Discuss and demonstrate the procedure for laying out and installing base cabinets.
5. Demonstrate the proper method for scribing adjoining pieces.
SeSSion Four
Session Four is a review and testing session. Have trainees complete the module Review Questions and Trade Terms Quiz. (Alternatively, these may be assigned as homework at the end of Session Three.) Answer any questions that trainees may have.
1. Have trainees complete the Module Examination. Any outstanding performance testing must be completed during this session.
2. Record the testing results on Training Report Form 200, and submit the report to your Training Program Sponsor.
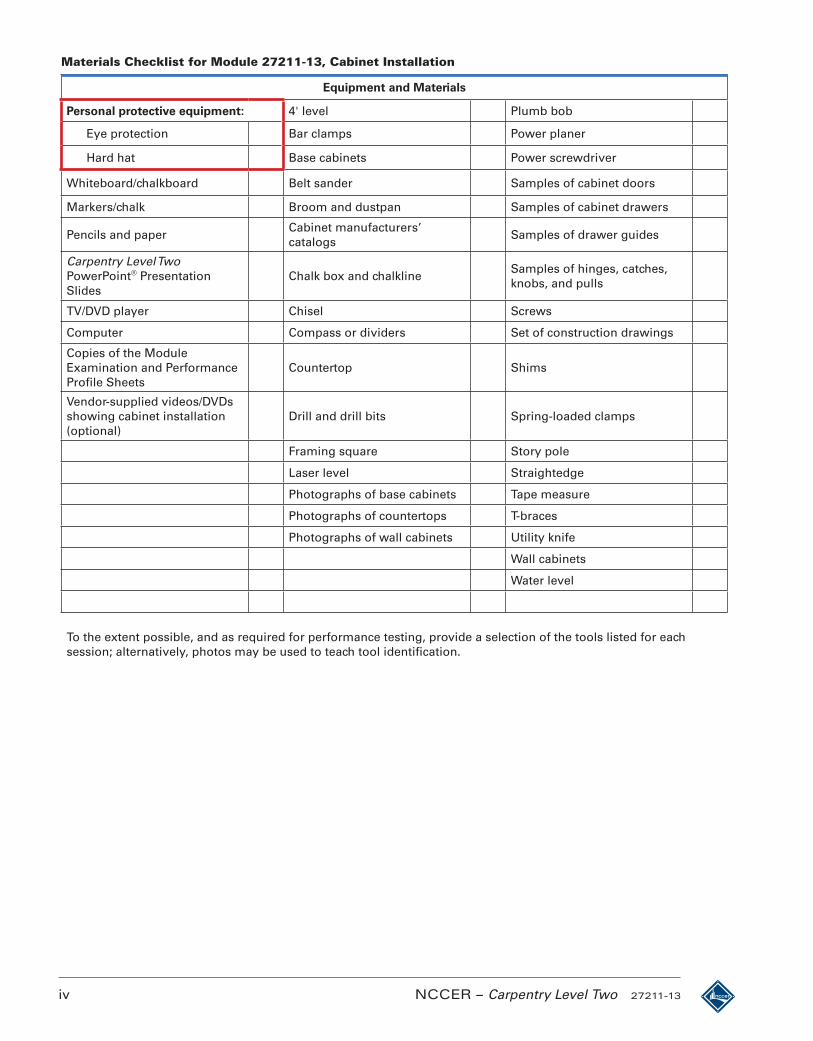
iv NCCER – Carpentry Level Two 27211-13
Materials Checklist for Module 27211-13, Cabinet Installation
Equipment and Materials
Personal protective equipment: 4' level Plumb bob
Eye protection Bar clamps Power planer
Hard hat Base cabinets Power screwdriver
Whiteboard/chalkboard Belt sander Samples of cabinet doors
Markers/chalk Broom and dustpan Samples of cabinet drawers
Pencils and paperCabinet manufacturers’ catalogs
Samples of drawer guides
Carpentry Level Two PowerPoint® Presentation Slides
Chalk box and chalklineSamples of hinges, catches, knobs, and pulls
TV/DVD player Chisel Screws
Computer Compass or dividers Set of construction drawings
Copies of the Module Examination and Performance Profile Sheets
Countertop Shims
Vendor-supplied videos/DVDs showing cabinet installation (optional)
Drill and drill bits Spring-loaded clamps
Framing square Story pole
Laser level Straightedge
Photographs of base cabinets Tape measure
Photographs of countertops T-braces
Photographs of wall cabinets Utility knife
Wall cabinets
Water level
To the extent possible, and as required for performance testing, provide a selection of the tools listed for each session; alternatively, photos may be used to teach tool identification.


