mathematics grade prototype curriculum · web viewto function and survive, plants need...
TRANSCRIPT

SCIENCE STANDARDS OF LEARNING
ENHANCED SCOPE & SEQUENCE
GRADE 4
Commonwealth of VirginiaDepartment of Education

Richmond, Virginia2005

Copyright © 2005
by the
Virginia Department of EducationP.O. Box 2120Richmond, Virginia 23218-2120http://www.doe.virginia.gov
All rights reserved
Reproduction of materials contained herein for instructionalpurposes in Virginia classrooms is permitted.
Superintendent of Public InstructionJo Lynne DeMary
Deputy SuperintendentPatricia I. Wright
Assistant Superintendent for InstructionLinda M. Wallinger
Office of Elementary Instructional ServicesLinda Poorbaugh, DirectorPaula J. Klonowski, Science Specialist
Edited, designed, and produced by the CTE Resource CenterMargaret L. Watson, Administrative CoordinatorLaura Beaton, Writer/EditorBruce Stevens, Writer/EditorRichmond Medical Park Phone: 804-673-37782002 Bremo Road, Lower Level Fax: 804-673-3798Richmond, Virginia 23226 Web site: http://CTEresource.org
The CTE Resource Center is a Virginia Department of Educationgrant project administered by the Henrico County Public Schools.
NOTICE TO THE READERThe Virginia Department of Education does not unlawfully discriminate on the basis of sex, age, race, color, religion, handicapping conditions, or national origin in employment or in its educational programs and activities.

Science Enhanced Scope and Sequence – Grade 4
Introduction
The Science Standards of Learning Enhanced Scope and Sequence is a resource intended to help teachers align their classroom instruction with the Science Standards of Learning that were adopted by the Board of Education in January 2003. The Enhanced Scope and Sequence contains the following:
Units organized by topics from the 2003 Science Standards of Learning Sample Scope and Sequence. Each topic lists the following: Standards of Learning related to that topic Essential understandings, knowledge, and skills from the Science Standards of Learning
Curriculum Framework that students should acquire Sample lesson plans aligned with the essential understandings, knowledge, and skills from the
Curriculum Framework. Each lesson contains most or all of the following: An overview Identification of the related Standard(s) of Learning A list of objectives A list of materials needed A description of the instructional activity One or more sample assessments One or more follow-ups/extensions A list of resources
Sample released SOL test items for each Organizing Topic.School divisions and teachers can use the Enhanced Scope and Sequence as a resource for developing sound curricular and instructional programs. These materials are intended as examples of ways the understandings, knowledge, and skills might be presented to students in a sequence of lessons that has been aligned with the Standards of Learning. Teachers who use the Enhanced Scope and Sequence should correlate the essential understandings, knowledge, and skills with available instructional resources as noted in the materials and determine the pacing of instruction as appropriate. This resource is not a complete curriculum and is neither required nor prescriptive, but it can be a valuable instructional tool.
Virginia Department of Educationi

Science Enhanced Scope and Sequence – Grade 4
Acknowledgments
We wish to express our gratitude to the following individuals for their contributions to the Science Standards of Learning Enhanced Scope and Sequence for Grades 3 through 5:
Susan BoothVirginia Association of Science Teachers
Kelly DeckerFairfax County Public Schools
David HaganScience Museum of Virginia
Patricia HerrLoudoun County Public Schools
Tracy SmithRichmond City Public Schools
Debbie WestNewport News Public Schools
Laura WilkowskiVirginia Association of Science Teachers
Virginia Department of Educationii

Science Enhanced Scope and Sequence – Grade 4
Table of ContentsOrganizing Topic — Investigating Plant Anatomy and Life Processes (4.1, 4.4)................1
Little Sprouts......................................................................................................................................2Let There Be Light!............................................................................................................................6Photosynthesis..................................................................................................................................10Flower Dissection.............................................................................................................................14Sample Released SOL Test Items....................................................................................................18
Organizing Topic — Investigating Ecosystems (4.1, 4.5)....................................................20Hello from My Habitat!....................................................................................................................21Life in the Web.................................................................................................................................25The Best Beak for the Job.................................................................................................................29Change Is Good!...............................................................................................................................34What Can We Do?............................................................................................................................39Sample Released SOL Test Items....................................................................................................43
Organizing Topic — Investigating the Weather (4.1, 4.6)....................................................45Precipitation and Temperature..........................................................................................................46Name That Cloud..............................................................................................................................49Air Pressure......................................................................................................................................51Storm Warning.................................................................................................................................53Sample Released SOL Test Items....................................................................................................56
Organizing Topic — Investigating Motion (4.1, 4.2).............................................................58Where Am I?....................................................................................................................................59Investigating Motion, Using the Inclined Plane...............................................................................63On Your Mark! / Start Your Engines!..............................................................................................67May the Force Be with You!............................................................................................................74Sample Released SOL Test Items....................................................................................................81
Organizing Topic — Investigating Electricity (4.1, 4.3).......................................................83Inventors...........................................................................................................................................85Circuits, Batteries, and Bulbs...........................................................................................................88Electromagnets...............................................................................................................................101Static Electricity.............................................................................................................................104Sample Released SOL Test Items..................................................................................................108
Organizing Topic — Investigating Natural Resources (4.1, 4.8).......................................110Watersheds......................................................................................................................................111A River Runs Through It................................................................................................................115Journey of a Raindrop.....................................................................................................................120Forests.............................................................................................................................................126Virginia’s Mineral Resources.........................................................................................................128Sample Released SOL Test Items..................................................................................................130
Organizing Topic — Investigating the Sun-Earth-Moon System (4.1, 4.7).......................131What’s the Difference?...................................................................................................................132The Play’s the Thing.......................................................................................................................137Sun-Earth-Moon Model..................................................................................................................145Moon Phases...................................................................................................................................155Sample Released SOL Test Items..................................................................................................164
Virginia Department of Educationiii

Science Enhanced Scope and Sequence – Grade 4
Virginia Department of Educationiv

Science Enhanced Scope and Sequence – Grade 4
Organizing Topic — Investigating Plant Anatomy and Life Processes
Standards of Learning
4.1 The student will plan and conduct investigations in whicha) distinctions are made among observations, conclusions, inferences, and predictions;b) hypotheses are formulated based on cause-and-effect relationships;c) variables that must be held constant in an experimental situation are defined;d) appropriate instruments are selected to measure linear distance, volume, mass, and
temperature;e) appropriate metric measures are used to collect, record, and report data;f) data are displayed using bar and basic line graphs;g) numerical data that are contradictory or unusual in experimental results are recognized; andh) predictions are made based on data from picture graphs, bar graphs, and basic line graphs.
4.4 The student will investigate and understand basic plant anatomy and life processes. Key concepts includea) the structures of typical plants (leaves, stems, roots, and flowers);b) processes and structures involved with reproduction (pollination, stamen, pistil, sepal,
embryo, spore, and seed);c) photosynthesis (sunlight, chlorophyll, water, carbon dioxide, oxygen, and sugar); andd) dormancy.
Essential Understandings, Correlation to Textbooks andKnowledge, and Skills Other Instructional Materials
The students should be able to
create a model/diagram illustrating the parts of a flower (stamen, pistil, sepal, ovary, ovule, seed) and explain the functions of those parts;
analyze a common plant, identifying the roots, stems, leaves, and flowers and explaining the function of each;
create a model/diagram illustrating the reproductive processes in typical flowering plants, and explain the processes;
compare and contrast different ways plants are pollinated;
explain that ferns and mosses reproduce with spores rather than seeds;
explain the process of photosynthesis, using the following terminology: sunlight, chlorophyll, water, carbon dioxide, oxygen, and sugar;
Virginia Department of Education1

Science Enhanced Scope and Sequence – Grade 4
design an investigation to determine the relationship between the presence of sunlight and plant growth;
explain the role of dormancy for common plants.
Virginia Department of Education2

Science Enhanced Scope and Sequence – Grade 4
Little Sprouts
Organizing Topic Investigating Plant Anatomy and Life Processes
Overview Students observe and document the germination and growth of a seed. In the course of these observations, students label and determine the function of the roots, stems, and leaves of the emerging plant.
Related Standards of Learning 4.1; 4.5a, b
ObjectivesThe students should be able to analyze a common plant, identifying the roots, stems, leaves, and flowers and explaining the
function of each.
Materials needed Can of lima beansPer group: Clear plastic cup Paper towels 2 dried lima beans per student Potting soil Attached data sheet Metric ruler Water Spoon Metric scales (optional)
Instructional activityContent/Teacher NotesGreen plants convert solar energy to food energy in a process called “photosynthesis.” Starches and sugars, the products of photosynthesis, are essential for the survival of Earth’s other organisms. These starches and sugars are stored by plants and then passed on to the herbivores that eat them. From the herbivores, the food energy is transferred up the food chain; each organism uses some of the energy and passes the remainder to the next organism in the food chain.
Vascular plants have three major parts — roots, stems, and leaves. Many plants have an additional important part — flowers.
Roots not only anchor plants in the soil and store food but are also responsible for absorbing water and essential minerals through their millions of root hairs. Stems connect the flowers and the leaves to the roots and contain the vascular tubes, which transport water and food throughout the plant. The leaves of a plant are the primary food factories, where the majority of photosynthesis takes place. Ultimately all green parts of a plant photosynthesize.
Virginia Department of Education3

Science Enhanced Scope and Sequence – Grade 4
Introduction1. Ask the students to raise their hands if they like to eat lima beans. Ask them if they know what part
of the plant a lima bean is. After they have responded, reinforce the fact that the lima bean is a seed.
2. Open a can of lima beans, and let each student who wants to, eat a bean. Tell them that the canned beans are cooked and that cooking the bean destroys the tiny plant embryo inside. The part of the bean that we enjoy eating is actually the starches stored by the plant to give its embryo energy as it begins life as a young sprout.
3. Show the students some dried lima beans. Explain to the students that they are going to watch ordinary dried lima beans become fully developed plants.
Procedure1. Divide the class into groups of two or three students. Give each group two beans per student, a
clear plastic cup, and a data sheet. Have the students draw their beans on the data sheet. They can include the measurement of each bean by using a metric ruler to measure it at its widest part and its longest part. To reinforce the process skill of metric measurement, students may also find the mass of their beans with a metric scale. Have students record their measurements on their data sheets.
2. Ask students to predict where the new plant will emerge from the seed. Instruct students to draw their predictions in the prediction box. Have them also predict what plant part will emerge first — a root, a stem, or leaves.
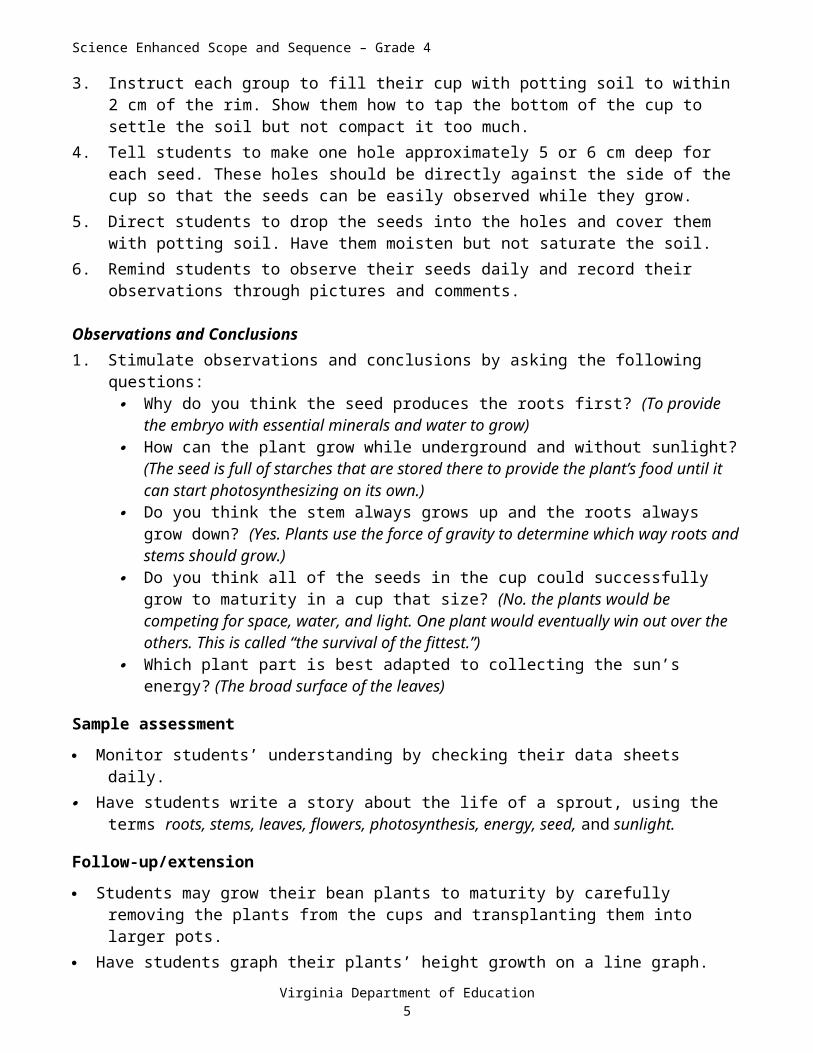
3. Instruct each group to fill their cup with potting soil to within 2 cm of the rim. Show them how to tap the bottom of the cup to settle the soil but not compact it too much.
4. Tell students to make one hole approximately 5 or 6 cm deep for each seed. These holes should be directly against the side of the cup so that the seeds can be easily observed while they grow.
5. Direct students to drop the seeds into the holes and cover them with potting soil. Have them moisten but not saturate the soil.
6. Remind students to observe their seeds daily and record their observations through pictures and comments.
Observations and Conclusions1. Stimulate observations and conclusions by asking the following questions:
Why do you think the seed produces the roots first? (To provide the embryo with essential minerals and water to grow)
How can the plant grow while underground and without sunlight? (The seed is full of starches that are stored there to provide the plant’s food until it can start photosynthesizing on its own.)
Do you think the stem always grows up and the roots always grow down? (Yes. Plants use the force of gravity to determine which way roots and stems should grow.)
Do you think all of the seeds in the cup could successfully grow to maturity in a cup that size? (No. the plants would be competing for space, water, and light. One plant would eventually win out over the others. This is called “the survival of the fittest.”)
Which plant part is best adapted to collecting the sun’s energy? (The broad surface of the leaves)
Sample assessment Monitor students’ understanding by checking their data sheets daily.
Virginia Department of Education4

Science Enhanced Scope and Sequence – Grade 4
Have students write a story about the life of a sprout, using the terms roots, stems, leaves, flowers, photosynthesis, energy, seed, and sunlight.
Follow-up/extension Students may grow their bean plants to maturity by carefully removing the plants from the cups and
transplanting them into larger pots. Have students graph their plants’ height growth on a line graph. Students may conduct an experiment to discover the role of roots in the growth of the plant. Have
them carefully cut off the roots of one plant and compare the growth of the modified plant to the growth of a plant with roots. The same may be done with the plant’s leaves.
Students may conduct an experiment to observe the function of the stem. Have students make a fresh cut in a stalk of celery and place the cut end in a clear cup of water containing red food coloring. Students should observe the red coloring as it moves up the vascular tubes (xylem tubes) of the plant. The red coloring will move through the stem and up to the leaves.
Students may observe the growth of roots. Have students insert three large toothpicks into a potato and suspend the potato in a glass jar of water.
Resources Connections: Connecting Books to the Virginia SOLs. Fairfax County Public Schools and The
College of William and Mary. http://www.fcps.edu/cpsapps/connections. Presents a database of more than 1,000 works of children’s literature and their connection to the Virginia Standards of Learning.
The Great Plant Escape. University of Illinois Extension. http://www.urbanext.uiuc.edu/gpe/index.html. Offers information on plant life and soil in a cute mystery format with Detective LaPlant.
Outstanding Science Trade Books for Students K–12. National Science Teachers Association (NSTA). http://www.nsta.org/ostbc.
Project Learning Tree. American Forest Foundation. http://www.plt.org/. Provides details on this national environmental education program.
Project WET (Water Education for Teachers). http://www.projectwet.org/. Offers watershed resources through an online store.
Search for Literature: Literature for Science and Mathematics. California Department of Education. http://www.cde.ca.gov/ci/sc/ll/ap/searchlist.asp. Offers a searchable database.
Virginia Naturally: Linking Virginians to the Environment. http://www.vanaturally.com/. Offers environmental resources for teachers.
Virginia Naturally School Recognition Program. Virginia Department of Game and Inland Fisheries. http://www.dgif.state.va.us/education/van_school_recognition.html. Provides information about the Virginia Naturally program to recognize environmental stewardship in schools.
Virginia Department of Education5
Science Enhanced Scope and Sequence – Grade 4
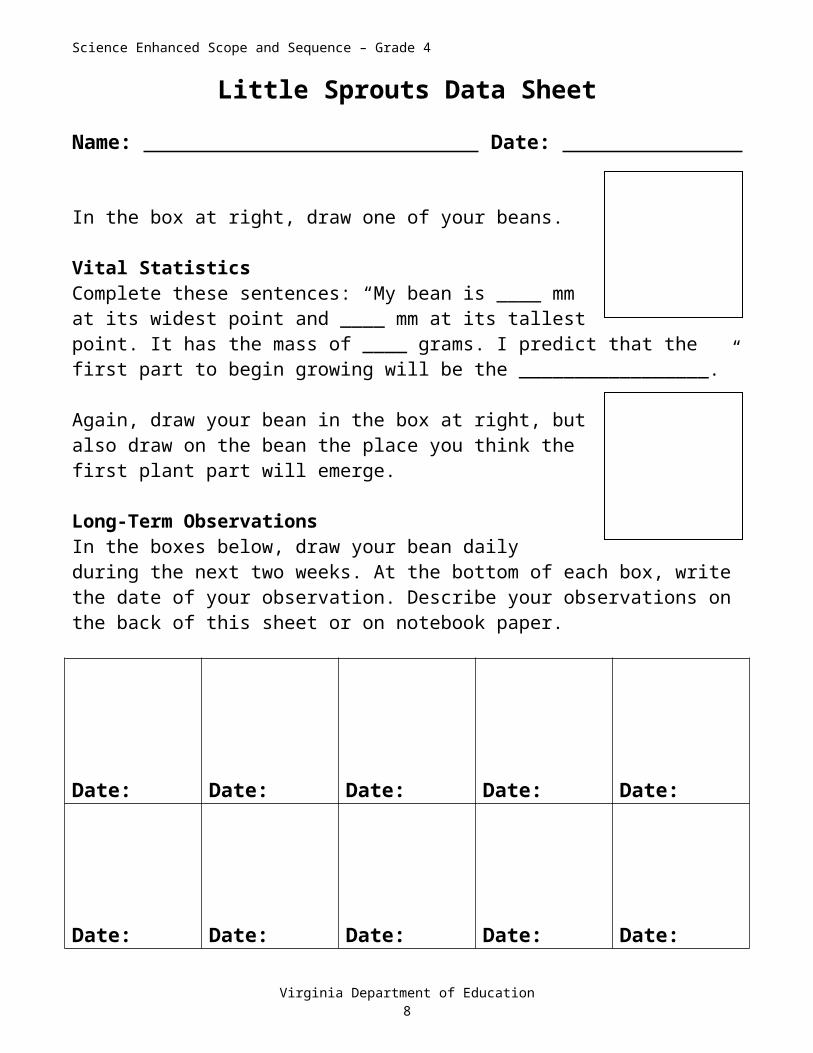
Little Sprouts Data SheetName: Date:
In the box at right, draw one of your beans.
Vital StatisticsComplete these sentences: “My bean is ____ mm at its widest point and ____ mm at its tallest point. It has the mass of ____ grams. I predict that the first part to begin growing will be the _________________.”
Again, draw your bean in the box at right, but also draw on the bean the place you think the first plant part will emerge.
Long-Term ObservationsIn the boxes below, draw your bean daily during the next two weeks. At the bottom of each box, write the date of your observation. Describe your observations on the back of this sheet or on notebook paper.
Date: Date: Date: Date: Date:
Date: Date: Date: Date: Date:
Virginia Department of Education6

Science Enhanced Scope and Sequence – Grade 4
Let There Be Light!
Organizing Topic Investigating Plant Anatomy and Life Processes
Overview Students design an investigation to determine the relationship between plants and sunlight.
Related Standards of Learning 4.1; 4.4a, c
ObjectivesThe students should be able to design an investigation to determine the relationship between the presence of sunlight and plant
growth.
Materials needed 50 dried beans Paper towels Large clear jar Water Paper cups or small milk cartons Potting soil Metric rulers Permanent markers Graph paper Attached data sheet
Instructional activityContent/Teacher NotesTwo-to-three weeks before beginning this activity, spread about 50 dried beans on a layer of damp paper towels inside a clear jar, and place the jar near a window that admits sunlight. You will be germinating more seeds than you will need in case some do not make it. Keep the paper towel moist, but do not oversaturate. When the seedlings have developed leaves and roots, they can be transplanted for use in the light experiment. See Procedure on the next page.
To function and survive, plants need sunlight, air, water, soil, and space. In a process called “photosynthesis,” energy from sunlight stimulates the chlorophyll in plants’ leaves. The chlorophyll allows minerals and water collected through the roots to combine with carbon dioxide absorbed by the leaves to make carbohydrates (sugars and starches), which are the plant’s food.
Introduction1. As the beans begin to sprout, discuss with students the conditions required for the seeds to sprout
and grow. (The seeds need light, warmth, and water to germinate.)2. Ask students if they think the seedlings could continue to grow inside the jar. (They could for a
while, but eventually they would run out of space.)3. Have students predict what would happen to the seedlings if sunlight, air, water, and/or soil were
not available. (The plants would eventually die.) At this point you may want to point out that some plants, like water lilies, live without soil. Such plants are specially adapted to draw minerals
Virginia Department of Education7

Science Enhanced Scope and Sequence – Grade 4
directly from the water instead of soil. In this investigation, however, students will focus on land plants.
Procedure1. Divide the class into five investigative teams. Challenge each team to design an experiment to
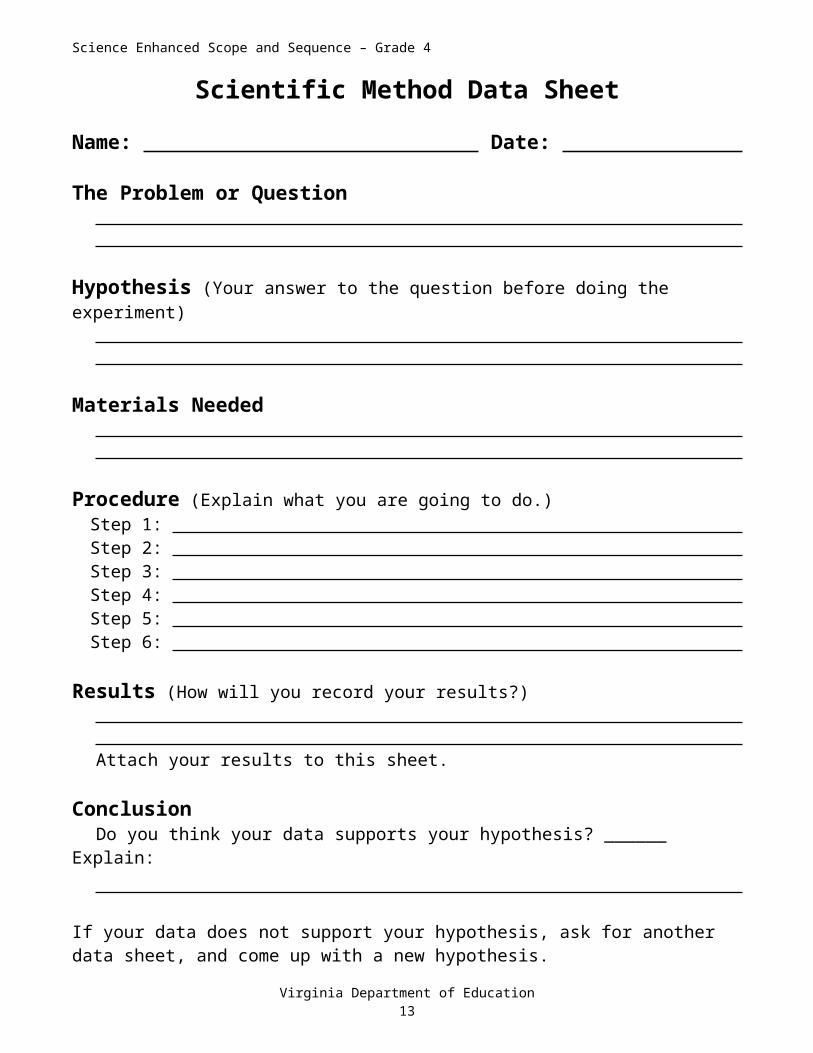
determine whether plants can grow without sunlight. Students should use the Scientific Method Data Sheet as an aid in designing their experiment. Monitor each team as they think through the steps they will take.
2. Have the teams explain their designs, and see if there are any common ideas.3. Divide the seedlings as evenly as possible among the groups, and have students carefully
transplant each seedling into a cup or milk carton containing potting soil. Direct the groups to label their seedlings, using a permanent marker, for identification later.
4. Have the students divide their seedlings evenly into group A and group B. Have them place the plants of group A near a sunlit window; these will act as control plants. Have them place the plants of group B in a dark cupboard or closet; these will be the test plants.
5. When the students water the plants, be sure that those in both groups are watered at the same time and with the same amount of water.
6. As the plants begin to grow, have the students measure the plants at regular intervals and graph the two groups’ average growth on graph paper.
Observations and Conclusions1. At the end of two weeks, ask the students the following questions:
Which group of seedlings grew the most? What other differences did you observe? What does a plant need to grow? What parts of the plant seemed to be affected the most by the lack of sunlight? What happens if a plant does not get enough sunlight? Why did we place half of the plants in light and half in darkness? Why was it important to water all of the plants the same? Can you predict the results if we repeated the experiment but withheld the soil or the water
instead of sunlight?
Sample assessment Use the questions under “Observations and Conclusions” above to assess students’ understanding.
Follow-up/extension Students may repeat the experiment by withholding soil or water instead of sunlight. Students may further investigate sunlight’s role in food production with the following experiment:
Place a broad-leaf plant, such as a geranium, in full sunlight. Cover part of one leaf with a piece of aluminum foil. After a few days, remove the aluminum foil, and have students observe the absence of color where the leaf was covered. This demonstrates the need for sunlight to stimulate the chlorophyll in a plant.
Students may study deciduous trees and their adaptation to cold weather. To conserve energy, deciduous trees drop their leaves during cold weather. They go through a dormant stage because there is not enough sunlight during the winter days to support them with all of their leaves. It is
Virginia Department of Education8
Science Enhanced Scope and Sequence – Grade 4
more efficient for a tree to go dormant than to try to photosynthesize in the cold months. Deciduous trees in warmer climates with more sunlight in the winter keep their leaves all year.
Resources Chesapeake Bay Program: America’s Premier Watershed Restoration Partnership.
http://www.chesapeakebay.net/. Provides articles and other resources on the Chesapeake Bay’s natural resources.
Connections: Connecting Books to the Virginia SOLs. Fairfax County Public Schools and The College of William and Mary. http://www.fcps.edu/cpsapps/connections. Presents a database of more than 1,000 works of children’s literature and their connection to the Virginia Standards of Learning.
The Great Plant Escape. University of Illinois Extension. http://www.urbanext.uiuc.edu/gpe/index.html. Offers information on plant life and soil in a cute mystery format with Detective LaPlant.
Outstanding Science Trade Books for Students K–12. National Science Teachers Association (NSTA). http://www.nsta.org/ostbc.
Project Learning Tree. American Forest Foundation. http://www.plt.org/. Provides details on this national environmental education program.
Project WET (Water Education for Teachers). http://www.projectwet.org/. Offers watershed resources through an online store.
Search for Literature: Literature for Science and Mathematics. California Department of Education. http://www.cde.ca.gov/ci/sc/ll/ap/searchlist.asp. Offers a searchable database.
Virginia Naturally: Linking Virginians to the Environment. http://www.vanaturally.com/. Offers environmental resources for teachers.
Virginia Naturally School Recognition Program. Virginia Department of Game and Inland Fisheries. http://www.dgif.state.va.us/education/van_school_recognition.html. Provides information about the Virginia Naturally program to recognize environmental stewardship in schools.
Virginia Department of Education9

Science Enhanced Scope and Sequence – Grade 4
Scientific Method Data SheetName: Date:
The Problem or Question
Hypothesis (Your answer to the question before doing the experiment)
Materials Needed
Procedure (Explain what you are going to do.)Step 1: Step 2: Step 3: Step 4: Step 5: Step 6:
Results (How will you record your results?) Attach your results to this sheet.
ConclusionDo you think your data supports your hypothesis? ______ Explain:
If your data does not support your hypothesis, ask for another data sheet, and come up with a new hypothesis.
Virginia Department of Education10

Science Enhanced Scope and Sequence – Grade 4
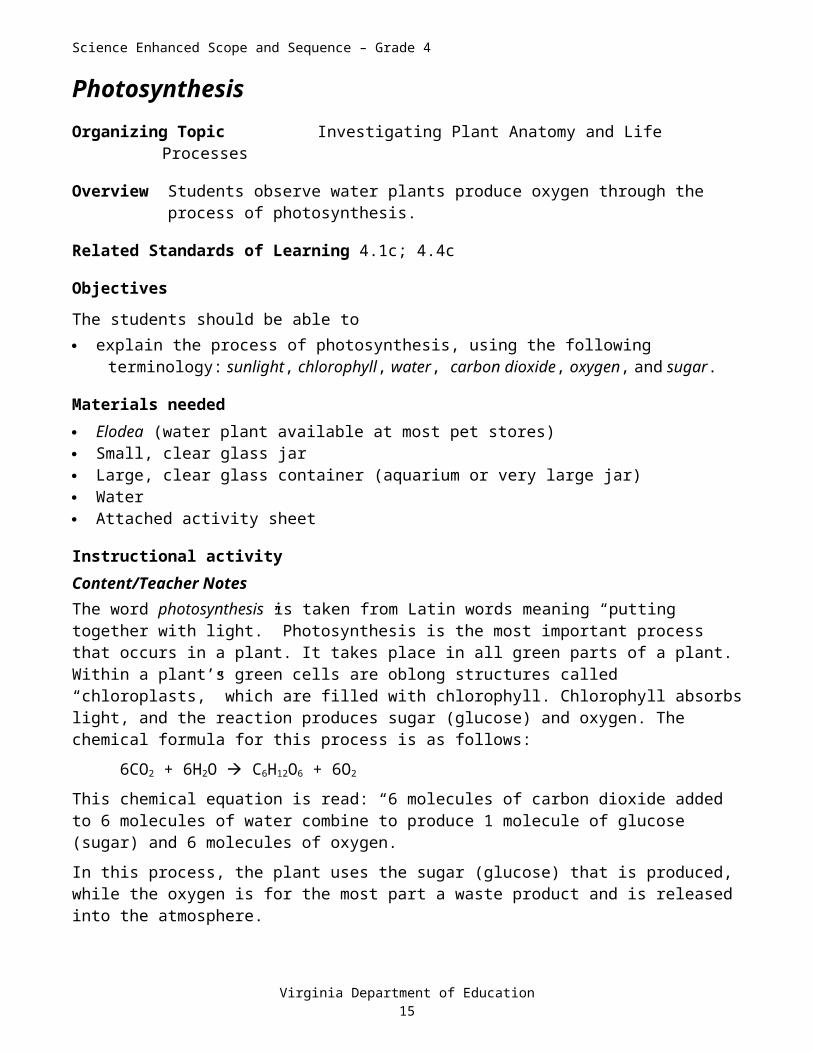
PhotosynthesisOrganizing Topic Investigating Plant Anatomy and Life Processes
Overview Students observe water plants produce oxygen through the process of photosynthesis.
Related Standards of Learning 4.1c; 4.4c
ObjectivesThe students should be able to explain the process of photosynthesis, using the following terminology: sunlight, chlorophyll, water,
carbon dioxide, oxygen, and sugar.
Materials needed Elodea (water plant available at most pet stores) Small, clear glass jar Large, clear glass container (aquarium or very large jar) Water Attached activity sheet
Instructional activityContent/Teacher NotesThe word photosynthesis is taken from Latin words meaning “putting together with light.” Photosynthesis is the most important process that occurs in a plant. It takes place in all green parts of a plant. Within a plant’s green cells are oblong structures called “chloroplasts,” which are filled with chlorophyll. Chlorophyll absorbs light, and the reaction produces sugar (glucose) and oxygen. The chemical formula for this process is as follows:
6CO2 + 6H2O C6H12O6 + 6O2
This chemical equation is read: “6 molecules of carbon dioxide added to 6 molecules of water combine to produce 1 molecule of glucose (sugar) and 6 molecules of oxygen.
In this process, the plant uses the sugar (glucose) that is produced, while the oxygen is for the most part a waste product and is released into the atmosphere.
Introduction1. Ask the students whether they think plants can live totally underwater. (Some plants can.)
Introduce students to Elodea, a common aquatic plant, and ask whether aquatic plants need strong sunlight in order for photosynthesis to take place. (They do.) Ask: “Where do aquatic plants get the carbon dioxide needed for photosynthesis?” (Bodies of water contain many molecules in addition to H2O. There are dissolved carbon dioxide molecules in the water that have been released by aquatic animals.)
2. Tell the students that they will be performing an experiment over the next few days to show how plants produce oxygen as a waste product during the process of making their food (glucose).
Procedure1. Fill a large, clear container with water.
Virginia Department of Education11

Science Enhanced Scope and Sequence – Grade 4
2. Place a three-to-four-inch-long sprig of Elodea inside a small, clear jar.3. Completely submerge the small jar in the water, keeping it upright so that it fills with water and all
air in it escapes. Then carefully turn the jar over, keeping the Elodea inside, and settle the jar upside down on the bottom of the large container. It is very important that there be no air bubbles in the jar containing the Elodea.
water line
4. Place the large container near a sunlit window for observation.5. Have students begin by making predictions on the first part of the data sheet. Then, have them
record their daily observations on the sheet. Students should see that, over time, bubbles form in the water with the plant.
Observations and Conclusions1. Ask the students the following questions to stimulate class discussion:
What happened on the surface of the plant? (Bubbles formed.) What are those bubbles? How did they form? (Oxygen was produced by the plants during
photosynthesis.) What is necessary for plants to photosynthesize? (Carbon dioxide, water, sunlight, and
chlorophyll) What is the plant producing when it photosynthesizes? (Sugar) What waste product results from photosynthesis? (Oxygen) How is photosynthesis an example of plants and animals supporting each other? (Plants
produce oxygen, which animals need, and animals produce carbon dioxide, which plants need. This is a simplified oxygen/carbon dioxide cycle.)
What happens when one of the necessary items is missing from the photosynthesis formula? (If any necessary item — CO2, H2O, sunlight, or chlorophyll — is missing, the photosynthesis cannot take place.)
Why may it be said that the sun is the basis of all life on Earth? (The energy from the sun is captured by plants. That energy is then passed up the food chain to all other organisms.)
Would there be any life on Earth without plants? (Probably not as we know it)
Sample assessment Use the students’ data sheet to assess the students’ understanding.
Follow-up/extension Students may place one setup in sunlight and one in a dark cupboard and observe the difference in
results. Students may research the percentage of oxygen produced by photo plankton in the oceans and the
amount produced by the tropical rainforest. (A vast majority of the oxygen on Earth is produced by photo plankton; large forested areas produce the second largest amount.)
Virginia Department of Education12
jar filled with water
Elodea inside jar
Science Enhanced Scope and Sequence – Grade 4
Resources Chesapeake Bay Program: America’s Premier Watershed Restoration Partnership.
http://www.chesapeakebay.net/. Provides articles and other resources on the Chesapeake Bay’s natural resources.
Connections: Connecting Books to the Virginia SOLs. Fairfax County Public Schools and The College of William and Mary. http://www.fcps.edu/cpsapps/connections. Presents a database of more than 1,000 works of children’s literature and their connection to the Virginia Standards of Learning.
The Great Plant Escape. University of Illinois Extension. http://www.urbanext.uiuc.edu/gpe/index.html. Offers information on plant life and soil in a cute mystery format with Detective LaPlant.
Outstanding Science Trade Books for Students K–12. National Science Teachers Association (NSTA). http://www.nsta.org/ostbc.
Project Learning Tree. American Forest Foundation. http://www.plt.org/. Provides details on this national environmental education program.
Project WET (Water Education for Teachers). http://www.projectwet.org/. Offers watershed resources through an online store.
Search for Literature: Literature for Science and Mathematics. California Department of Education. http://www.cde.ca.gov/ci/sc/ll/ap/searchlist.asp. Offers a searchable database.
Virginia Naturally: Linking Virginians to the Environment. http://www.vanaturally.com/. Offers environmental resources for teachers.
Virginia Naturally School Recognition Program. Virginia Department of Game and Inland Fisheries. http://www.dgif.state.va.us/education/van_school_recognition.html. Provides information about the Virginia Naturally program to recognize environmental stewardship in schools.
Virginia Department of Education13
Science Enhanced Scope and Sequence – Grade 4
Underwater ElodeaName: Date:
We have taken an aquatic (water) plant named Elodea, placed a portion of it in a small glass jar, and placed the glass jar upside down in a large container of water. We took special care to make sure we didn’t leave any air bubbles in the jar with the Elodea.
Draw the arrangement in the box below. Include the Elodea, the large container, the small container, and the water in your illustration.
You will be observing this arrangement for several days. Discuss the set up with your group. What do you predict will happen? Write your prediction below.Prediction:
You will need to record observations on a sheet of paper. For every day you make an observation, write the date, what you observed (in complete sentences), and a sentence or two explaining why you think it is happening. You may also draw illustrations to help explain your observations.
Virginia Department of Education14

Science Enhanced Scope and Sequence – Grade 4
Flower DissectionOrganizing Topic Investigating Plant Anatomy and Life Processes
Overview Students dissect a typical flower to find the different reproductive parts.
Related Standards of Learning 4.1; 4.5b
ObjectivesThe students should be able to create a model/diagram illustrating the parts of a flower (stamen, pistil, sepal, ovary, ovule, and
seed) and explain the functions of those parts; explain that ferns and mosses reproduce with spores rather than seeds; create a model/diagram illustrating the reproductive processes in typical flowering plants, and
explain the process.
Materials neededPer group: 1 flower Hand lens Tweezers Clear tape Attached data sheet Crayons or colored pencils White drawing paper Variety of fruit with seeds (e.g., cucumbers, tomatoes, squash, green peppers, Valencia oranges) Paper plates Knife (for teacher to cut fruit)
Instructional activityContent/Teacher NotesUltimately, all life on Earth depends on plants to provide food, shelter, and oxygen. Because of this, plant reproduction is very important to all living things. The first step of plant reproduction is pollination. The process of pollination begins when pollen grains (male reproductive cells) reach the stigma (the female reproductive part) of the same species of plant. Some plant species have one flower with just male parts and another with just female parts, while others have both male and female parts within the same flower. Animals assist in the pollination of more than 90 percent of the flowers on Earth. Wind and rain assist the rest. In order to attract pollinators, plants have adapted in many ways: they produce sweet nectar, colorful petals, and attractive aromas.
Some good flowers for dissection include tulips, iris, daffodils, gladioli, daisies, and petunias.
Introduction1. Divide the class into groups of two or three students. Give each group a paper plate holding a
number of slices of various fruits, making sure that seeds are present in the slices.2. Ask students what the foods have in common. Some groups will realize that all of the foods have
seeds buried inside the “flesh” of the fruit.
Virginia Department of Education15
Science Enhanced Scope and Sequence – Grade 4
3. Explain that the fruit is formed from a specialized structure in the plant, which the students will be exploring in their investigation. Fruits contain seeds and a fleshy pulp. Some foods that we call vegetables are actually the fruit of a plant — for example, cucumbers, tomatoes, and peppers.
Procedure1. Give each group a fresh flower, tweezers, hand lens, clear tape, and data sheet.2. Instruct students to carefully remove the sepal, located at the base of the flower, and carefully tape
it to the appropriate box on the data sheet.3. Then, have students complete the remaining boxes: number, color, and function.4. Allow time for students to complete the flower dissection by removing and inspecting the other
flower parts listed on the data sheet.
Observations and Conclusions1. As the students work on their dissection, move around the room, posing questions such as:
Can you locate pollen on the stamen? Do you think an insect could easily move the pollen from the stamen to the pistil? What characteristics does your flower have that might attract animals? Is the pistil of your flower well adapted for capturing and holding onto pollen? Is the stamen of your flower positioned higher or lower than the pistil? What function did the sepals perform for the flower before it opened? (They protected the
bud.) After it opened? (They help hold the flower up.) Can you find the ovary of your flower? What will this become? (“Flesh” of the fruit) Open the ovary and count the ovules inside. What will these become? (Seeds) Is the neck of the pistil hollow or solid? (Hollow, to allow the pollen tube to grow down and
release the male cell to fertilize the egg) Touch the top of the pistil. Is it a bit sticky? (Yes)
2. As the students complete their data sheet, have them also make and label a line drawing of a flower on white drawing paper to reinforce their understanding of the flower’s structure.
3. Show students a fern plant complete with spore cases on the backs of the fern fronds. The spore cases are small, raised, round, and brown. These are the “seeds” of the fern. The particles that fly out when the spore cases break open are called “spores.”
Sample assessment Check the labeled line drawings to assess the students’ understanding of the components of a flower. Assess students’ knowledge based on answers to the questions listed above under “Observations and
Conclusions.”
Follow-up/extension Have students cut out representations of the different parts of the flower from construction paper.
Then, have them assemble the flower and name the various parts and their functions. Have students create a flip book with illustrations of the stages of pollination. Give four 3 x 5 inch
index cards to each student, and have them cut the cards into quarters, producing a total of 16 small cards. Instruct students to draw on the far right edge of each card a flower in the various stages of pollination. Then have students turn their flip book over and draw the fruit forming from the flower. Direct students to stack their cards in order, holding the left side of the cards firmly with their thumb and forefinger. By flipping through the cards on the right side, students will see
Virginia Department of Education16

Science Enhanced Scope and Sequence – Grade 4
the flower become pollinated. If they turn their flip book over, they can see the ovary swelling and gradually turning into fruit.
Challenge students to improve upon nature’s delivery of pollen to the pistil. Have students draw their concept and give a written explanation.
Have students dissect a seed to find the embryo. Soak dried beans overnight, and have the students open the seed to find the tiny plant embryo inside.
Resources Chesapeake Bay Program: America’s Premier Watershed Restoration Partnership.
http://www.chesapeakebay.net/. Provides articles and other resources on the Chesapeake Bay’s natural resources.
Connections: Connecting Books to the Virginia SOLs. Fairfax County Public Schools and The College of William and Mary. http://www.fcps.edu/cpsapps/connections. Presents a database of more than 1,000 works of children’s literature and their connection to the Virginia Standards of Learning.
The Great Plant Escape. University of Illinois Extension. http://www.urbanext.uiuc.edu/gpe/index.html. Offers information on plant life and soil in a cute mystery format with Detective LaPlant.
Outstanding Science Trade Books for Students K–12. National Science Teachers Association (NSTA). http://www.nsta.org/ostbc.
Project Learning Tree. American Forest Foundation. http://www.plt.org/. Provides details on this national environmental education program.
Project WET (Water Education for Teachers). http://www.projectwet.org/. Offers watershed resources through an online store.
Search for Literature: Literature for Science and Mathematics. California Department of Education. http://www.cde.ca.gov/ci/sc/ll/ap/searchlist.asp. Offers a searchable database.
Virginia Naturally: Linking Virginians to the Environment. http://www.vanaturally.com/. Offers environmental resources for teachers.
Virginia Naturally School Recognition Program. Virginia Department of Game and Inland Fisheries. http://www.dgif.state.va.us/education/van_school_recognition.html. Provides information about the Virginia Naturally program to recognize environmental stewardship in schools.
Virginia Department of Education17

Science Enhanced Scope and Sequence – Grade 4
Flower Dissection Data SheetName: Date:
As you dissect your flower, complete the following data table:
Flower Part
Tape each part here
Number
(count)
Color Function
Sepals
Petals
Stamen
Pistil
Virginia Department of Education18

Science Enhanced Scope and Sequence – Grade 4
Sample Released SOL Test Items
Virginia Department of Education19

Science Enhanced Scope and Sequence – Grade 4
Virginia Department of Education20

Science Enhanced Scope and Sequence – Grade 4
Organizing Topic — Investigating Ecosystems
Standards of Learning
4.1 The student will plan and conduct investigations in whicha) distinctions are made among observations, conclusions, inferences, and predictions;b) hypotheses are formulated based on cause-and-effect relationships;c) variables that must be held constant in an experimental situation are defined.
4.5 The student will investigate and understand how plants and animals in an ecosystem interact with one another and the nonliving environment. Key concepts includea) behavioral and structural adaptations;b) organization of communities;c) flow of energy through food webs;d) habitats and niches;e) life cycles; andf) influence of human activity on ecosystems.
Essential Understandings, Correlation to Textbooks andKnowledge, and Skills Other Instructional Materials
The students should be able to
distinguish between structural and behavioral adaptations;
investigate and infer the function of basic adaptations and provide evidence for the conclusion;
understand that adaptations allow an organism to succeed in a given environment;
explain how different organisms use their unique adaptations to meet their needs;
describe why certain communities exist in given habitats;
illustrate the food webs in a local area and compare and contrast the niches of several different organisms within the community;
compare and contrast the differing ways an organism interacts with its surroundings at various stages of its life cycle. Specific examples include a frog and a butterfly;
differentiate among positive and negative influences of human activity on ecosystems.
Virginia Department of Education21

Science Enhanced Scope and Sequence – Grade 4
Hello from My Habitat!
Organizing Topic Investigating Ecosystems
Overview Students learn about the diversity of the world from the perspective of an organism that lives there.
Related Standards of Learning 4.5b, d
ObjectivesThe students should be able to describe why certain communities exist in given habitats.
Materials needed One small stuffed or plastic animal per student Large opaque plastic bag Pictures of habitats Reference books or Internet Habitat names written on slips of paper Attached data sheet
Instructional activityContent/Teacher NotesA habitat is a special place where an organism lives. Usually an organism’s habitat must be able to provide food, space, water, and shelter. The dominant plant form or a physical characteristic, such as forest or wetland, often characterizes a habitat. Some species can live only in very specific habitats and nowhere else; for example, the panda can only live in certain forests of China and Nepal because the food they eat and the climate they need are found only in those areas. Other organisms, such as squirrels, are well adapted for several habitats. Squirrels can live in deciduous forests and coniferous forests, as well as in suburbs and cities. Plants and climate are the two major determinants of an organism’s habitat.
Parents may be willing to provide the class with small stuffed animals. A discount store may be a good source for bags of plastic animals, such as insects, amphibians, and reptiles. It is important to use animals that look as realistic as possible for this activity.
Introduction1. Ask students to think of natural areas near their home or school. They may name examples such as
a park, a river, or a forest. List the natural areas on the board.2. Explain that these areas are all habitats and that habitats are the special places where organisms
live. Explain that all habitats must provide their inhabitants with food, water, space (to live and raise their young), and shelter.
3. Add some habitats to the list on the board, if necessary. Ask the students to name organisms that might live in each habitat. List the organisms under the correct habitat heading as students name them, keeping in mind that some organisms may be able to live in more than one habitat.
4. Tell students that they are going to get a chance to “live” with one organism from one of the habitats.
Virginia Department of Education22

Science Enhanced Scope and Sequence – Grade 4
Procedure1. Place the pictures of different habitats on the walls or on the floor around the room.2. Allow each student to pull one animal from the plastic bag. Have students stand by the picture of
the habitat in which they think their animal lives.3. Have each student tell what kind of animal he/she picked and describe the habitat where that
animal lives. Correct any incorrect placements or misconceptions.4. Have students go to their desks with their animals, and give them copies of the “Hello from My
Habitat! Data Sheet.” Allow students to use the available reference materials to fill in the spaces on their sheets. Circulate among the students as they complete their charts to help clear up any misconceptions or to offer other assistance.
5. Once the students have filled in their charts and you have checked them for accuracy, have each student write a letter to an animal in another of the classroom habitats. Encourage the students to make their letters interesting and entertaining, as well as informational, drawing from the facts recorded on their data sheets.
6. After the letters are written, have the students fold them in half and address the letter with the animal’s name and appropriate habitat, for example:
Grey SquirrelThird Oak Tree on the RightEast Forest
7. Deliver the letters to the appropriate habitats, and give the students time to read them. Have students share letters with the class.
Observations and Conclusions1. Ask students to name various habitats in which humans live and to give examples of the
adjustments some people make in order to survive in some of Earth’s more extreme habitats. (People live in just about all places on Earth. We build houses and use heating and air conditioning to survive in extreme climates. We also adapt our clothing and our activities in extreme climates.)
2. Ask students where they would live in their habitat (e.g., squirrels live in trees in the forest habitat).
Sample assessment List the animals used during the activity and the habitats in which they belong. Have students match
the animals with the appropriate habitats. Assess the accuracy of the information on the data charts and in the letters written.
Follow-up/extension Conduct the same activity, using pictures of other organisms, such as plants. Let students make a bulletin board with the letters and pictures they have drawn of their animals. Have another class complete the activity, writing letters to your class.
Resources Chesapeake Bay Program: America’s Premier Watershed Restoration Partnership.
http://www.chesapeakebay.net/. Provides articles and other resources on the Chesapeake Bay’s natural resources.
Virginia Department of Education23

Science Enhanced Scope and Sequence – Grade 4
Connections: Connecting Books to the Virginia SOLs. Fairfax County Public Schools and The College of William and Mary. http://www.fcps.edu/cpsapps/connections. Presents a database of more than 1,000 works of children’s literature and their connection to the Virginia Standards of Learning.
Lessons from the Bay. Virginia Department of Education. http://www.pen.k12.va.us/VDOE/LFB/. A resource for grades 3–6, including 16 lessons concerning watersheds and the negative human impact on the environment, specifically the Chesapeake Bay.
Outstanding Science Trade Books for Students K–12. National Science Teachers Association (NSTA). http://www.nsta.org/ostbc.
Project Learning Tree. American Forest Foundation. http://www.plt.org/. Provides details on this national environmental education program.
Project WET (Water Education for Teachers). http://www.projectwet.org/. Offers watershed resources through an online store.
Project WILD. Council for Environmental Education. http://www.projectwild.org/. Search for Literature: Literature for Science and Mathematics. California Department of Education.
http://www.cde.ca.gov/ci/sc/ll/ap/searchlist.asp. Offers a searchable database. Virginia Naturally: Linking Virginians to the Environment. http://www.vanaturally.com/. Offers
environmental resources for teachers. Virginia Naturally School Recognition Program. Virginia Department of Game and Inland Fisheries.
http://www.dgif.state.va.us/education/van_school_recognition.html. Provides information about the Virginia Naturally program to recognize environmental stewardship in schools.
Virginia’s Wildlife. Virginia Department of Game & Inland Fisheries. http://www.dgif.state.va.us/wildlife/va_wildlife/index.html.
Virginia Department of Education24

Science Enhanced Scope and Sequence – Grade 4
Hello from My Habitat! Data Sheet
Name: Date:
Organism’s name: ___________________________DietAppearancePredatorsNumber of youngHabitat
Hello from My Habitat! Data Sheet
Name: Date:
Organism’s name: ___________________________DietAppearancePredatorsNumber of youngHabitat
Virginia Department of Education25

Science Enhanced Scope and Sequence – Grade 4
Life in the WebOrganizing Topic Investigating Ecosystems
Overview Students study the roles of members of food chains and food webs and investigate the niches of those organisms in the community. The students use this information to create a forest mural.
Related Standards of Learning 4.5b, c, d, e
ObjectivesThe students should be able to illustrate the food webs in a local area and compare and contrast the niches of several different
organisms within the community.
Materials needed Paper chain Bulletin board paper Art supplies Push pins Yarn Stapler Attached data sheet
Instructional activityContent/Teacher NotesA food chain is a representation of the energy flow among organisms in an ecosystem. A food web shows the interrelationship of all of the food chains in an ecosystem. All life benefits from the process of photosynthesis, in which plants take energy from the sun and make it available to animals. The first step of a food chain is always a producer, which is usually a plant. The chain continues as herbivores eat plants. Omnivores (plant and animal eaters) or carnivores (animal eaters) then eat the herbivores or other carnivores.A simple way to illustrate a food chain is to use arrows to designate the direction of energy flow. An example of a simple food chain would be: sunwheatmouseowl.The arrow points to the organism that receives the energy. Of course, this food chain is far too simple, as in reality there will be many organisms eating the mouse and the wheat, and the owl will be eating other organisms other than just the mouse.
An organism’s niche (rhymes with ditch) is the organism’s role in an ecosystem, and a niche includes everything that the organism affects, where it lives, what it eats, and what eats it. The major difference between a niche and a habitat is that a habitat is a place, while a niche is an organism’s role. A student’s habitat is his house, but his niche is that of a brother, son, neighbor, friend, student, basketball player, and any other roles the student plays. The difference between a niche and a habitat may be a difficult distinction for students to make, but with practice they will understand how the two differ.
Virginia Department of Education26

Science Enhanced Scope and Sequence – Grade 4
Introduction1. Hold the paper chain up with one finger so that it hangs straight down. Ask students what would
happen to the chain if you cut off any of the loops. (The chain will be broken and will not be viable.)
2. Explain that in nature, plants and animals pass energy from one to another through a food chain. As in the paper chain, if one link of the food chain is broken, the entire chain will be weakened.
3. Tell students that they will be creating a food chain and a food web in the classroom.
Procedure1. Draw a familiar food chain on the board. Examples include: sunwheatmouseowl (in
grasslands or forest); sunplankton (small floating plants and animals)clamsea staroctopus (in ocean); sungrasscowhuman.
2. Inform students that the arrows point to the organisms receiving energy. Point out that all food chains begin with plants (producers) capturing the sun’s energy. The plant uses some of the energy to live and grow and then passes the rest on to the herbivore that eats the plant. The energy moves from organism to organism through the chain.
3. Have the class participate in making a list of animals that live in the forest. Some examples are crickets, squirrels, owls, bats, deer, worms, frogs, snakes, mosquitoes, raccoons, woodpeckers, snails, skunks, and lizards.
4. Have the class participate in making a list of plants that live in the forest. Some examples are mosses, clover, honeysuckle, pine trees, oak trees, violets, maple trees, and azaleas.
5. Combine the two lists, and have students determine the food chains within. Provide reference sources.
6. Divide the class into pairs of students, and assign each pair a plant and an animal to study. Students may draw their forest organisms or collect pictures from magazines, the Internet, old calendars, coloring books, and other sources.
7. Allow students to staple their pictures or drawings onto the bulletin board to form a forest mural.8. Then, have students use push pins and yarn to connect one organism to another to show the
different food chains and food webs.
Observations and Conclusions1. Ask the students the following questions to stimulate class discussion:
Does any animal eat only one thing? (No, usually animals are diversified in their diet.) How does eating a variety of things make it easier for an organism to survive? (If one food
source disappears, then the consumer can survive by eating other organisms.) What happens if one link in the food chain is lost? (The whole ecosystem is affected.
Demonstrate by removing the yarn connector from one organism to another.) How about two organisms lost? Three? (The more organisms that are lost in an ecosystem, the weaker the whole food web becomes. A healthy food web can stand to lose some components, but there is a limit.)
Sample assessment Have students compare and contrast the roles of different organisms in a food web.
Virginia Department of Education27

Science Enhanced Scope and Sequence – Grade 4
Follow-up/extension Have students make individual food web mobiles instead of the mural. Have students draw their own ecosystem and the organisms of the food web. They may draw lines to
illustrate the complex food chains that make the food web. Have students write the names of the organisms on index cards, punch two holes in each card, and
string yarn through the holes so they can wear the cards around their necks. Starting with a plant, create a food chain by having the plant hold onto the end of the skein of yarn and passing the skein to the next organism in the food chain. Passing the skein of yarn from organism to organism, the students will create a complex food web.
Have students create the food web mural at the beginning of the unit, and use it throughout the unit to reinforce other terms, such as predator, prey, carnivore, omnivore, herbivore, niche, habitat, community, population, organisms, structural adaptation, behavioral adaptation, food webs, food chains, producers, and consumers.
To reinforce the understanding of the word niche, have students complete the attached data sheet called “What’s My Niche?” Students may use the data sheet to find the niche of the different life stages of organisms, such as frogs and butterflies.
Resources Chesapeake Bay Program: America’s Premier Watershed Restoration Partnership.
http://www.chesapeakebay.net/. Provides articles and other resources on the Chesapeake Bay’s natural resources.
Connections: Connecting Books to the Virginia SOLs. Fairfax County Public Schools and The College of William and Mary. http://www.fcps.edu/cpsapps/connections. Presents a database of more than 1,000 works of children’s literature and their connection to the Virginia Standards of Learning.
Lessons from the Bay. Virginia Department of Education. http://www.pen.k12.va.us/VDOE/LFB/. A resource for grades 3–6, including 16 lessons concerning watersheds and the negative human impact on the environment, specifically the Chesapeake Bay.
Outstanding Science Trade Books for Students K–12. National Science Teachers Association (NSTA). http://www.nsta.org/ostbc.
Project Learning Tree. American Forest Foundation. http://www.plt.org/. Provides details on this national environmental education program.
Project WET (Water Education for Teachers). http://www.projectwet.org/. Offers watershed resources through an online store.
Project WILD. Council for Environmental Education. http://www.projectwild.org/. Search for Literature: Literature for Science and Mathematics. California Department of Education.
http://www.cde.ca.gov/ci/sc/ll/ap/searchlist.asp. Offers a searchable database. Virginia Naturally: Linking Virginians to the Environment. http://www.vanaturally.com/. Offers
environmental resources for teachers. Virginia Naturally School Recognition Program. Virginia Department of Game and Inland Fisheries.
http://www.dgif.state.va.us/education/van_school_recognition.html. Provides information about the Virginia Naturally program to recognize environmental stewardship in schools.
Virginia’s Wildlife. Virginia Department of Game & Inland Fisheries. http://www.dgif.state.va.us/wildlife/va_wildlife/index.html.
Virginia Department of Education28

Science Enhanced Scope and Sequence – Grade 4
What’s My Niche? Data SheetName: Date:
A niche (rhymes with ditch) is the way of life that an organism adopts to survive in a particular habitat.
Organism HabitatHow it uses living
and nonliving things
How other things use it
Mouse
Vacant lots, fields, homes, wooded areas
Uses brush or dried plants to make a nest. Uses burrows for protection. Eats grains and other plants for food.
Eaten by birds of prey, snakes, foxes, and other animals. Plants are fertilized by its waste.
Ant
Carrot plant
Raccoon
Virginia Department of Education29

Science Enhanced Scope and Sequence – Grade 4
The Best Beak for the Job
Organizing Topic Investigating Ecosystems
Overview Students participate in an investigation to determine which beak adaptation is best suited for various foods.
Related Standards of Learning 4.1; 4.5a
ObjectivesThe students should be able to distinguish between structural and behavioral adaptations; investigate and infer the function of basic adaptations and provide evidence for the conclusion; understand that adaptations allow an organism to succeed in a given environment; explain how different organisms use their adaptations to meet their needs.
Materials neededPer group: Tweezers Clothespins Spoons Straws Two small flat stones Chopsticks Cooked spaghetti Uncooked rice Raisins Birdseed Plastic worms Cup Water Attached instruction sheet Attached data sheet
Instructional activityContent/Teacher NotesOrganisms have structures uniquely adapted for their particular needs. A seed-eating bird would be unable to survive by eating worms because its beak is not adapted for catching worms. These structural adaptations affect the entire species of organisms and usually occur gradually over many generations. Although we generally use animals as examples for adaptations, all organisms in all five kingdoms of living things — animals, plants, fungi, protists, and monerans — must adapt or die. (As students progress through middle school, they will be introduced to the six-kingdom classification system. At the elementary level, however, they learn about the five-kingdom classification system.) Adaptation progresses when an organism with a characteristic favorable in its habitat enjoys an advantage over the other organisms in its species. It will most likely live longer and pass its new characteristic to its offspring, thus continuing the adaptation process.
Virginia Department of Education30

Science Enhanced Scope and Sequence – Grade 4
Introduction1. Ask the class if they have ever noticed that different species of birds have differently shaped beaks.
Show pictures of birds with different types of beaks, and have students speculate on the task each type of beak performs.
2. Tell the students that they will be investigating how birds’ beaks are adapted to perform different jobs.
Procedure1. Divide the class into groups of three. Give each group one set of “beaks” (tweezers, clothespins,
spoons, straws, flat stones, or chopsticks), one set of “bird food” (cooked spaghetti, uncooked rice, raisins, birdseed, plastic worms, or cup of water), a data sheet, and one activity instruction sheet. Have each student pick two beaks to test and record.
2. Read “The Best Beak for the Job” handout, and explain the directions to students.3. Allow students 10 minutes or so to try to “eat” each food with each of their two beaks. Circulate
through the room to clear up any misconceptions.4. When all students have completed the activity, have each group share their observations with the
class.
Observations and Conclusions1. Ask the students the following questions to stimulate class discussion:
What type of beak is best for tearing meat? (Sharp and curved) How do these beaks compare to the sharp teeth of meat-eating animals? Why might a liquid-sipping beak like the straw gradually change to a beak that not only sips
but can also chew? (This might occur if the bird’s supply of liquid begins to disappear, necessitating a change in diet for the bird’s survival.)
Sample assessment Have the students design an animal that can walk in shallow pond water, eat bugs in the mud at the
bottom of the pond, be camouflaged from its predators, and climb trees if in danger. Let each student draw and color his/her own illustration of the animal, as well as describe in a well-organized paragraph how the animal accomplishes each of the tasks required.
Follow-up/extension Have the students do a similar activity in which they are comparing other physical features of
animals, such as different birds’ feet (wading, perching, catching prey) or the legs of various land animals.
Resources Audubon. http://www.audubon.org/. Web site of the National Audubon Society. Connections: Connecting Books to the Virginia SOLs. Fairfax County Public Schools and The
College of William and Mary. http://www.fcps.edu/cpsapps/connections. Presents a database of more than 1,000 works of children’s literature and their connection to the Virginia Standards of Learning.
Outstanding Science Trade Books for Students K–12. National Science Teachers Association (NSTA). http://www.nsta.org/ostbc.
Virginia Department of Education31
Science Enhanced Scope and Sequence – Grade 4
Search for Literature: Literature for Science and Mathematics. California Department of Education. http://www.cde.ca.gov/ci/sc/ll/ap/searchlist.asp. Offers a searchable database.
Virginia’s Wildlife. Virginia Department of Game & Inland Fisheries. http://www.dgif.state.va.us/wildlife/va_wildlife/index.html.
Virginia Department of Education32

Science Enhanced Scope and Sequence – Grade 4
The Best Beak for the JobInstruction Sheet
Name: Date:
DirectionsBirds have different types of beaks that help them eat the foods they need. Suppose that the tools in this activity are different beaks. Which beak would be the best adapted to eat each food?
Materials needed“Beaks” Bird FoodsChopsticks Plastic wormsDrinking straws Cooked spaghettiTweezers RiceClothespin RaisinsSpoons BirdseedTwo small flat stones Water in a cup
Procedure1. Observe the different forms of “beaks” and “bird foods.” Predict which
beak is best adapted for picking up each food.
2. Select two “beaks,” and test out your predictions by trying to pick up the food with the chosen “beaks.”
3. Complete the chart on the accompanying data sheet. In the column marked “Observation,” write a sentence explaining why that “beak” is especially adapted for that food.
4. After completing the eating activity, complete the final two activities on your data sheet.
Virginia Department of Education33

Science Enhanced Scope and Sequence – Grade 4
The Best Beak for the JobData Sheet
Name: Date:
Food Best “Beak”
Observation
Plastic wormsCooked spaghettiRiceRaisinsBirdseedWater in a cup
Study your chart. Which beak is best adapted for picking up insects? ______________________ crushing birdseed? ______________________ digging up worms? ______________________ sipping water? ______________________ scooping up mud? ______________________ ripping meat? ______________________
In the box at right, draw two actual bird-beak shapes that match the two “beaks” you chose.
Virginia Department of Education34

Science Enhanced Scope and Sequence – Grade 4
Change Is Good!
Organizing Topic Investigating Ecosystems
Overview Students examine the differences between structural and behavioral adaptations in living things. Students determine how these adaptations allow organisms to succeed in their environment.
Related Standards of Learning 4.5a
ObjectivesThe students should be able to distinguish between structural and behavioral adaptations; investigate and infer the function of basic adaptations and provide evidence for the conclusion; understand that adaptations allow an organism to succeed in a given environment; explain how different organisms use their adaptations to meet their needs.
Materials needed Picture of a familiar animal Transparency with definitions of the terms structural adaptation and behavioral adaptation and
pictures of some organisms, each of which displays one of these adaptations Attached activity sheet
Instructional activityContent/Teacher NotesStructural adaptations, such as teeth, beaks, claws, and body coverings, are physical or functional characteristics that help animals meet their needs. These adaptations allow all organisms (animals, plants, fungi, protozoa, and bacteria) to find food, eat food, hide from predators, hide to surprise prey, flee, and maintain body heat. It is important to include organisms other than animals in teaching adaptations, as all living things must adapt to their environment or perish.
Behavioral adaptations help individual animals or groups of animals (and to some degree, all organisms) meet their needs. These are the things that organisms do to survive, such as migrate or hibernate. Living things adapt to a specific environment over a long period of time and many generations. If the environment changes, living things must also change to survive, or they must find a new environment.
Introduction1. Show the class a picture of a familiar animal, and ask students to think of structural, or physical,
features that help the animal survive. Allow the students a few minutes to discuss these features and the ways the features help the animal.
2. Introduce the term adaptation by explaining that all living organisms must change in the way they look and the way they behave in order to survive. These changes take place in the whole species and usually occur over a long period of time. All species on Earth are constantly changing to improve their odds of survival in their environment.
Virginia Department of Education35

Science Enhanced Scope and Sequence – Grade 4
Procedure1. Introduce the terms structural adaptation and behavioral adaptation by using the transparency.
Ask students to give examples of both types of adaptations.2. Divide the class into five groups, and assign each group one of the organisms shown on the
transparency. If possible, provide each group with a picture of their assigned organism. Have each group write the name of their organism at the top of a sheet of paper and under the name, put two headings: “Structural” and “Behavioral.”
3. Instruct each group to record at least two structural adaptations and two behavioral adaptations for their organism under the appropriate heading. Explain to the two groups who were assigned plants that they must record at least two structural adaptations but no behavioral adaptations. (Although some plants do exhibit behavioral adaptations, understanding this is not essential at the fourth grade level.)
4. Give the students a few minutes to discuss their observations with their group.5. Have the students share their observations with the class and explain how each adaptation helps the
organism succeed in its environment.
Observations and Conclusions1. Discuss with the class the difference between structural and behavioral adaptations. 2. Ask the following questions of students:
How are the two types of adaptation different? (A structural adaptation is how an organism looks or functions, while a behavioral adaptation is related to an organism’s activities.)
How are the two similar? (Both help the organism survive.) Can organisms have both? (Yes, and they may have many examples of each.) Do they have to have both? (No: Some, like many plants, have only structural adaptations.) What structural adaptations do humans have? (Most any physical characteristic may be
named. Our most significant structural adaptation is actually a functional one — our ability to think and reason.)
Sample assessment Have students label each of the following as a structural or behavioral adaptation:
The color of an earthworm (structural) The thorns on a rose stem (structural) The owl’s nocturnal hunting (behavioral) The giraffe’s long neck (structural) The human’s wearing of a coat when he/she is cold (behavioral) A dog’s response when called (behavioral) Bears’ practice of hibernating in the winter (behavioral) Birds’ migration (behavioral) Fishes’ gills (structural) Vines’ use of other plants or objects for support to climb and grow upward (structural).
Follow-up/extension Use pictures of organisms taken from various sources (e.g., magazines, Internet) to assemble a
library of organisms that can be used when studying the differences between adaptations. Ask students if they can think of any structural adaptations in plants to keep animals from eating
them. (Foul odor or taste, thorns, spines)
Virginia Department of Education36

Science Enhanced Scope and Sequence – Grade 4
Discuss structural adaptations in some plants that attract animals, such as bees, to aid in pollination. (Colorful flowers, pleasant smell, and sweet nectar)
Have students create an original organism, using craft supplies. They might make a supporting habitat from a box, as well as provide the organism with a name, describe its structural and behavioral adaptations, and list its predators.
Give each student a sheet of paper on which three different sized large circles (or any arrangement of shapes) have been drawn. Tell students they have been given an opportunity to create a “classroom critter” that will live in your classroom habitat. Students must decide where in the room it will live, but the “critter” must be out in the open at all times. Students must use the adaptation of camouflage to hide the “critters”; for example, a “critter” may be colored to blend with the colors on the bulletin board, or a critter may live on the side of a desk if colored the same as the desk. After students have camouflaged and cut out their critters, have one student (the predator) leave the room while several of the students attach their critters to their habitat. When the predator comes in, have her try to detect her prey in the room. This may be repeated for other groups.
Resources Chesapeake Bay Program: America’s Premier Watershed Restoration Partnership.
http://www.chesapeakebay.net/. Provides articles and other resources on the Chesapeake Bay’s natural resources.
Connections: Connecting Books to the Virginia SOLs. Fairfax County Public Schools and The College of William and Mary. http://www.fcps.edu/cpsapps/connections. Presents a database of more than 1,000 works of children’s literature and their connection to the Virginia Standards of Learning.
Lessons from the Bay. Virginia Department of Education. http://www.pen.k12.va.us/VDOE/LFB/. A resource for grades 3–6, including 16 lessons concerning watersheds and the negative human impact on the environment, specifically the Chesapeake Bay.
Outstanding Science Trade Books for Students K–12. National Science Teachers Association (NSTA). http://www.nsta.org/ostbc.
Project Learning Tree. American Forest Foundation. http://www.plt.org/. Provides details on this national environmental education program.
Project WET (Water Education for Teachers). http://www.projectwet.org/. Offers watershed resources through an online store.
Project WILD. Council for Environmental Education. http://www.projectwild.org/. Search for Literature: Literature for Science and Mathematics. California Department of Education.
http://www.cde.ca.gov/ci/sc/ll/ap/searchlist.asp. Offers a searchable database. Virginia Naturally: Linking Virginians to the Environment. http://www.vanaturally.com/. Offers
environmental resources for teachers. Virginia Naturally School Recognition Program. Virginia Department of Game and Inland Fisheries.
http://www.dgif.state.va.us/education/van_school_recognition.html. Provides information about the Virginia Naturally program to recognize environmental stewardship in schools.
Virginia’s Wildlife. Virginia Department of Game & Inland Fisheries. http://www.dgif.state.va.us/wildlife/va_wildlife/index.html.
Virginia Department of Education37

Science Enhanced Scope and Sequence – Grade 4
Change Is GoodName: Date:
ADAPTATIONScanbe
STRUCTURAL or BEHAVIORAL
STRUCTURAL ADAPTATIONS are ways the body of an organism looks or functions.
BEHAVIORAL ADAPTATIONS are ways an organism acts.
SURVIVAL OF THE FITTEST
Look at the organisms above and identifytwo structural and two behavioral adaptations for each
one.
Virginia Department of Education38

Science Enhanced Scope and Sequence – Grade 4
Change is Good — Some Possible Answers
AntStructural: antenna, camouflage coloring, long legs, size, exoskeletonBehavioral: lives in a colony; touches antenna with other ants to get information; has specific jobs in the colony; some sting when threatened.
HawkStructural: sharp beak, claws for grasping prey, superior eyesight, coloring of bodyBehavioral: nests in out of the way places; glides in the air looking for prey; grabs prey from the air
CactusIt is easy to overlook plants when considering adaptations, but just as with animals, adaptations are essential for the survival of a plant species. We look less at behavioral adaptations in plants and concentrate instead on their structural adaptations.Structural: spines, ability to store water, shallow root system that quickly absorbs infrequent rains, ability to survive in poor soil
Blue crabStructural: exoskeleton, pinching claws, stalk eyes, camouflage coloring, gills for breathingBehavioral: lives in sand burrows above the water line; runs from predators with upraised pinching claws; is most often active at night
TomatoStructural: seeds enclosed in edible fruit, which aids in seed dispersal; red color attracts animals to eat them; stalk of the plant emits an odor that repels many insects.
Virginia Department of Education39
Science Enhanced Scope and Sequence – Grade 4
What Can We Do?
Organizing Topic Investigating Ecosystems
Overview Students identify the impact humans have on the ecosystem and identify positive ways that problems might be corrected.
Related Standards of Learning 4.5f
ObjectivesThe students should be able to differentiate among positive and negative influences of human activity on ecosystems.
Materials needed Blank transparency Attached data sheet
Instructional activityContent/Teacher NotesHumans have the knowledge and ability to change the environment to satisfy our needs. These environmental changes have altered many aspects of our ecosystems in negative ways that affect all organisms on Earth. Many laws have been passed within the last 30 years to help reduce air and water pollution; however, students must realize that all responsible citizens of the world must commit to the conservation of resources. By recycling solid wastes, saving water, and reducing the use of fossil fuels, we can make Earth cleaner and preserve resources for generations to come.
Introduction1. Introduce the concept of conservation by asking the following questions:
Who recycles at home? Why are people encouraged to recycle? (Recycling materials, such as aluminum and paper,
can reduce the amount of solid wastes in our landfills and can reduce the need for additional new materials.)
What are some other ways we can conserve resources? (Moderate thermostat settings at home; drive smaller, more fuel-efficient cars; take shorter showers)
2. Tell students that today they will become energy sleuths in their school habitat.
Procedure1. Divide the class into pairs of students. Give each pair a data sheet, and explain that they will be
taking a survey of the negative impact humans have had on the ecosystem of their school.2. Monitor the students as they walk the school grounds and interior looking for signs of negative
impact on the ecosystem by man. Instruct students to record their findings on the data sheet.3. After returning to the classroom, discuss the results of the students’ surveys. Compile all data into
one set of classroom data on a transparency copy of the data sheet.4. Have the students brainstorm ways they can be instrumental in changing some of the problems.
Even though some problems may seem out of their control, inform students that they can write letters to the people who do have control to convey ideas for correcting the problems.
Virginia Department of Education40

Science Enhanced Scope and Sequence – Grade 4
5. Have students share their results with other classes as a culminating activity.
Observations and Conclusions1. Ask the following questions in order to further discussion:
How have pollution problems discovered during the survey affected other living organisms in the ecosystem?
Can you have any affect on the improvement of your environment?
Sample assessment Use some of the follow-up/extension activities for assessment tools.
Follow-up/extension Provide pictures of ecological problems (e.g., air pollution, erosion, litter), and have students offer
solutions. Have the students write a story about a 200-year-old tree on the school property and the changes it
would have seen over the last 100 years. Have students take digital photographs of an ecological problem before and again after they have
solved the problem. Have students make a presentation to the PTA and ask for their support of projects to improve the
environment. Have students make posters highlighting environmental problems to display in the hallways of the
school. Have the class speculate as to what the schoolyard looked like 200 years ago. What kind of
organisms would they have found there? Have any of these disappeared due to the negative impact of man on the environment?
Have students do a similar survey of the ecosystem in their neighborhood or in their house. Have students read a book about pollution and share their thoughts about the story.
Resources Chesapeake Bay Program: America’s Premier Watershed Restoration Partnership.
http://www.chesapeakebay.net/. Provides articles and other resources on the Chesapeake Bay’s natural resources.
Connections: Connecting Books to the Virginia SOLs. Fairfax County Public Schools and The College of William and Mary. http://www.fcps.edu/cpsapps/connections. Presents a database of more than 1,000 works of children’s literature and their connection to the Virginia Standards of Learning.
Lessons from the Bay. Virginia Department of Education. http://www.pen.k12.va.us/VDOE/LFB/. A resource for grades 3–6, including 16 lessons concerning watersheds and the negative human impact on the environment, specifically the Chesapeake Bay.
Outstanding Science Trade Books for Students K–12. National Science Teachers Association (NSTA). http://www.nsta.org/ostbc.
Pollution Solutions. http://www.deq.state.va.us/education/polsul/. A curriculum supplement about litter and pollution prevention based on the Standards of Learning for grades K-12.
Project Learning Tree. American Forest Foundation. http://www.plt.org/. Provides details on this national environmental education program.
Virginia Department of Education41

Science Enhanced Scope and Sequence – Grade 4
Project WET (Water Education for Teachers). http://www.projectwet.org/. Offers watershed resources through an online store.
Project WILD. Council for Environmental Education. http://www.projectwild.org/. Search for Literature: Literature for Science and Mathematics. California Department of Education.
http://www.cde.ca.gov/ci/sc/ll/ap/searchlist.asp. Offers a searchable database. Virginia Naturally: Linking Virginians to the Environment. http://www.vanaturally.com/. Offers
environmental resources for teachers. Virginia Naturally School Recognition Program. Virginia Department of Game and Inland Fisheries.
http://www.dgif.state.va.us/education/van_school_recognition.html. Provides information about the Virginia Naturally program to recognize environmental stewardship in schools.
Virginia Department of Education42

Science Enhanced Scope and Sequence – Grade 4
What Can We Do? Data SheetName: Date: Look for signs of human damage that you see in your school, schoolyard, or neighborhood. Beside each sign, check if it is present. If it is, write a brief comment on what the damage is and how it was created. Use rows at the bottom for other discoveries.
Sign of DamageCheck
if Present
Comments
Soil erosionLitterSoil compactionLack of trees and shrubs to hold soilGas or oil on parking lotSoil, sand, litter, leaves present in street gutters and storm drainsPaper and other school supplies thrown away in dumpsterLights left on in roomsLeaking water faucetsAir conditioning below 78F or heating above 68FRecyclable items thrown away in cafeteriaWindow shades blocking sunlight on cold day/ left open on hot days
Virginia Department of Education43

Science Enhanced Scope and Sequence – Grade 4
Sample Released SOL Test Items
Virginia Department of Education44
Science Enhanced Scope and Sequence – Grade 4
Virginia Department of Education45

Science Enhanced Scope and Sequence – Grade 4
Organizing Topic — Investigating the Weather
Standards of Learning
4.1 The student will plan and conduct investigations in whicha) distinctions are made among observations, conclusions, inferences, and predictions;b) hypotheses are formulated based on cause-and-effect relationships;c) variables that must be held constant in an experimental situation are defined;d) appropriate instruments are selected to measure linear distance, volume, mass, and
temperature;e) appropriate metric measures are used to collect, record, and report data;f) data are displayed using bar and basic line graphs;g) numerical data that are contradictory or unusual in experimental results are recognized; andh) predictions are made based on data from picture graphs, bar graphs, and basic line graphs.
4.6 The student will investigate and understand how weather conditions and phenomena occur and can be predicted. Key concepts includea) weather measurements and meteorological tools (air pressure – barometer, wind speed
anemometer, rainfall – rain gauge, and temperature – thermometer); andb) weather phenomena (fronts, clouds, and storms).
Essential Understandings, Correlation to Textbooks andKnowledge, and Skills Other Instructional Materials
The students should be able to
use a thermometer to compare air temperatures over a period of time;
analyze the changes in air pressure occurring over time, using a barometer, and predict what the changes mean in terms of changing weather patterns;
differentiate between the types of weather associated with high and low pressure air masses. Illustrate and label high and low pressure air masses and warm and cold fronts;
differentiate between cloud types (cirrus, stratus, cumulus, and cumulonimbus clouds) and the associated weather;
compare and contrast the formation of different types of precipitation (rain, snow, sleet, and hail);
recognize a variety of storm types (thunderstorms, hurricanes, and tornadoes), describe the weather conditions associated with each, and explain when they occur;
Virginia Department of Education46

Science Enhanced Scope and Sequence – Grade 4
analyze and report information about temperature and precipitation on weather maps;
measure wind speed, using an anemometer;
measure precipitation with a rain gauge;
design an investigation where weather data are gathered using meteorological tools and charted to make weather predictions.
Virginia Department of Education47
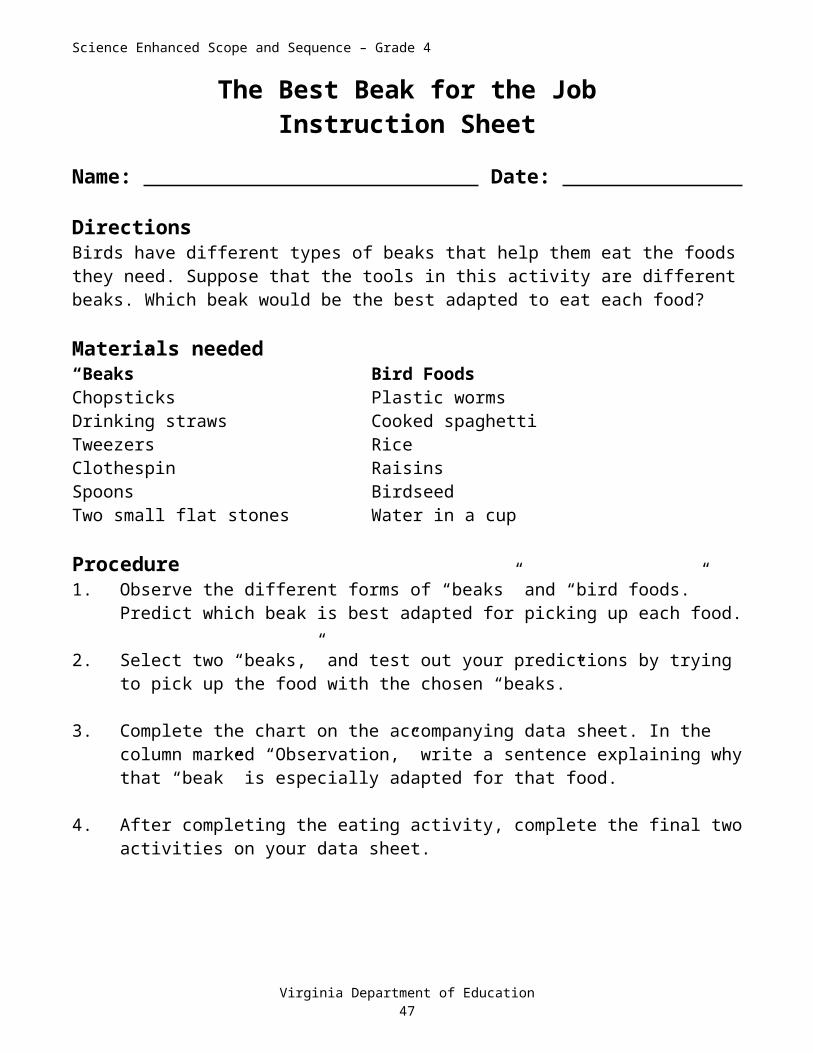
Science Enhanced Scope and Sequence – Grade 4
Precipitation and Temperature
Organizing Topic Investigating the Weather
Overview Students use weather maps to determine temperature and precipitation. They graph information gathered over a two-week period.
Related Standards of Learning 4.1d, f, g, h; 4.6a
ObjectivesThe students should be able to analyze and report information about temperature and precipitation on weather maps.
Materials needed Science journal Daily weather map from local newspaper Thermometer Graph paper Attached temperature and precipitation record
Instructional activityContent/Teacher NotesThe main types of precipitation are rain, freezing rain, sleet, snow, and hail.
Introduction1. Ask how many students read a daily newspaper. Ask how many have used the newspaper’s
weather map to determine what clothes to wear, whether to carry an umbrella, or what coat to put on.
2. Give each student a copy of the attached record sheet. Inform students that the class will study weather maps to determine what the day’s temperature will be and what type of precipitation, if any, is expected. Over a two-week period, students will record this information on the record sheet.
Procedure1. Have students consult the daily newspaper’s weather map to find the forecasted high temperature
for the day, or have them use a thermometer to determine the actual temperature. Instruct students to record the temperature on their record sheet.
2. Ask students to identify the precipitation symbols included in the weather map’s key. Then ask students to identify the day’s forecasted precipitation, if any, and have them record it on the chart.
3. Repeat steps 1 and 2 for two weeks, and at the end of that period, have students graph the temperatures. Be sure to include the title, labels, and units of measure.
Observations and Conclusions1. Encourage students to write in their science journals any inferences they can make about the
relationship between temperature and precipitation.
Virginia Department of Education48

Science Enhanced Scope and Sequence – Grade 4
2. Have students analyze their graphs and comment on any data that seems to be contradictory or unusual. Have students use the graphs to predict the temperature in the near future.
Sample assessment Given a sample set of data, have students analyze the data and make inferences about weather
conditions, such as temperature, wind, and precipitation.
Follow-up/extension Give students a national weather map, and have them identify the temperature and precipitation for
five cities other than their own. Ask students to record information on a chart and find differences and similarities in temperature and precipitation for various cities around the United States.
Resources Connections: Connecting Books to the Virginia SOLs. Fairfax County Public Schools and The
College of William and Mary. http://www.fcps.edu/cpsapps/connections. Presents a database of more than 1,000 works of children’s literature and their connection to the Virginia Standards of Learning.
“Decimal Downpour.” Activities Integrating Math and Science (AIMS). http://www.aimsedu.org/Activities/weather2/dDownpour.pdf.
Live Streaming Local Weather. Weatherbug. http://www.weatherbug.com/aws/index.asp. Outstanding Science Trade Books for Students K–12. National Science Teachers Association
(NSTA). http://www.nsta.org/ostbc. Search for Literature: Literature for Science and Mathematics. California Department of Education.
http://www.cde.ca.gov/ci/sc/ll/ap/searchlist.asp. Offers a searchable database. Weather Education. National Weather Service. http://www.nws.noaa.gov/om/edures.htm.
Virginia Department of Education49

Science Enhanced Scope and Sequence – Grade 4
Temperature and Precipitation Record (2 Weeks)
Name: Date:
DATEHIGH
TEMPERATURE (in
degrees F)
PRECIPITATION(rain, sleet, snow, hail,
freezing rain, none)
Virginia Department of Education50

Science Enhanced Scope and Sequence – Grade 4
Name That Cloud
Organizing Topic Investigating the Weather
Overview Students make models of cloud types and become able to predict the weather based on the cloud type.
Related Standards of Learning 4.6b
ObjectivesThe students should be able to differentiate between cloud types (cirrus, stratus, cumulus, and cumulonimbus) and associated
weather.
Materials needed Science journals Pictures of cloud types Cotton balls Glue Blue construction paper Black marker 2-liter glass bottle with tight-fitting lid Matches Water
Instructional activityContent/Teacher NotesClouds consist of water droplets and ice crystals and are formed around small particles of dust. Cirrus clouds are wispy clouds made of ice crystals, usually at very high altitudes, and indicate that a change in weather is coming. Stratus clouds are large, flat, layered clouds, often at a low altitude and are associated with rainy weather. Cumulus clouds are lumpy, puffy clouds, are often seen on sunny days, and are associated with fair weather. Cumulonimbus clouds, or thunderstorm clouds, are giant cumulus clouds that reach from near the surface of the earth to the upper atmosphere.
Introduction1. Tell students that they are going to learn about four different cloud types. To demonstrate the
forming of clouds, place 2 cm of water in a 2-liter glass bottle. Drop a lighted match into the bottle. Screw the lid on tight and shake the bottle. Then squeeze the bottle and release it. (Clouds should form in the bottle.)
2. Explain to students that clouds form when warm, moist air rises, cools, and expands or when air masses collide with one another. The water vapor condenses upon dust particles to form a cloud in the atmosphere.
Procedure1. Explain that clouds are classified by shape and altitude. Show students pictures of different types
of clouds, one at time. Have them draw the clouds and define them in their science journals. Cirrus — high, wispy or feathery clouds composed of ice crystals. Altitude: 7,000–13,000 m.
Virginia Department of Education51

Science Enhanced Scope and Sequence – Grade 4
Stratus (meaning “sheet” or “layer”) — low, flat, layered, and gray clouds. Altitude: 500–2,000 m.
Cumulus (meaning “heap”) — thick, white, and fluffy clouds with flat bases. Altitude: 500–1,800 m.
Cumulonimbus (meaning “rain-bearing heap”) — large, dark gray clouds with flat bottoms. Altitude: 500–18,000 m.
2. Have students make a chart of the four types of clouds, using cotton balls and blue construction paper. Instruct students to glue the cotton clouds on the paper to approximate where the cloud type would appear in the sky. Have them use a black marker to include cloud names and a brief description of each.
Observations and Conclusions1. Discuss the type of weather associated with each cloud type:
Cirrus clouds often indicate the location of a distant storm or approaching change in the weather.
Stratus clouds are associated with moist weather — light, steady rain, snow, or small ice particles, with fog at ground level.
Cumulus clouds are often present during fair weather. Cumulonimbus “thunderheads” are associated with thunderstorms, lightning, heavy rain,
hail, and tornadoes.
Sample assessment Have students identify pictures of cloud types, along with descriptions. Each day, have students predict the weather based on the clouds present in the sky. This might be a
yearlong activity.
Follow-up/extension Allow students time outdoors at various times over the course of two weeks to observe and classify
clouds. Have them keep a log and answer these questions: What do the clouds look like? Where are they located (high/low)? What type of clouds are they? What kind of weather might these clouds bring? At the end of the two weeks, have students review their log entries and discuss how different cloud types are associated with different types of weather.
Resources “A Cloud is Born.” Activities Integrating Math and Science (AIMS).
http://www.aimsedu.org/Activities/weather2/cloud.pdf . Connections: Connecting Books to the Virginia SOLs. Fairfax County Public Schools and The
College of William and Mary. http://www.fcps.edu/cpsapps/connections. Presents a database of more than 1,000 works of children’s literature and their connection to the Virginia Standards of Learning.
Live Streaming Local Weather. Weatherbug. http://www.weatherbug.com/aws/index.asp. Outstanding Science Trade Books for Students K–12. National Science Teachers Association
(NSTA). http://www.nsta.org/ostbc. Search for Literature: Literature for Science and Mathematics. California Department of Education.
http://www.cde.ca.gov/ci/sc/ll/ap/searchlist.asp. Offers a searchable database. Weather Education. National Weather Service. http://www.nws.noaa.gov/om/edures.htm.
Virginia Department of Education52

Science Enhanced Scope and Sequence – Grade 4
Air Pressure
Organizing Topic Investigating the Weather
Overview Students find the air pressure, using a barometer. They predict the meaning of changes in pressure in terms of oncoming weather and become able to associate high-pressure air masses with fair weather and low-pressure air masses with poor weather. They identify high/low pressure fronts and warm/cold fronts on a weather map.
Related Standards of Learning 4.6b
ObjectivesThe students should be able to analyze the changes in air pressure occurring over time, using a barometer, and predict what the
changes will mean in terms of changing weather patterns; differentiate between the types of weather associated with high/low pressure air masses. Illustrate
and label high and low pressure air masses and warm and cold fronts.
Materials needed Science journal Weather map from local newspaper Barometer Meter stick Full sheet of newspaper
Instructional activityContent/Teacher NotesAir pressure is the weight of air molecules on a point on the Earth. It is measured with a barometer. The atmosphere contains many different pockets of air that vary in size and temperature. Fronts are large pockets of air that can be warm-based or cold-based depending on from where they have traveled. Heavy air pockets are called high pressure areas, and lighter pockets are called low pressure areas.
Introduction1. Place a full sheet of newspaper on a table. Slide a meter stick under the newspaper so that part of
the stick remains uncovered and hangs over the edge of the table.2. Ask students to predict what will happen to the newspaper when you push down hard and quickly
on the part of the meter stick projecting off the table. (Try it; nothing should happen to the newspaper because there is air pressure pushing down on the newspaper at a rate of 14.9 lbs. per square inch. If the newspaper is 864 square inches, that is roughly 12,800 pounds of pressure on the newspaper. You may even break the stick!) Ask students why air pressure does not flatten us to the ground. (Because the air pressure pushes on us from all sides equally) Changes in air pressure may cause changes in the weather.
Procedure1. Have students use a barometer to measure air pressure several times each day for one week. Have
students record the pressure and weather conditions.
Virginia Department of Education53

Science Enhanced Scope and Sequence – Grade 4
2. At the end of the week, have students analyze the data and discuss how air pressure is related to weather conditions. If the weather has not changed all week, you will need to extend this activity for a longer period of time. Students’ observations should lead them to infer that a drop in pressure indicates precipitation, and as fair weather moves in, pressure rises.
3. Give each student a weather map, and have him or her locate areas marked with an “H” or an “L.” Such labels indicate high and low pressure systems. Ask students what type of weather might be expected in these areas. Then ask students to locate warm and cold fronts by consulting the map key to learn the symbols associated with warm and cold fronts. Ask students to predict weather conditions that may occur when a cold front and a low pressure system meet.
Observations and Conclusions1. Discuss the types of weather associated with high and low pressure systems. Have students record
the symbols for high and low pressure systems in their journals, along with a picture of the type of weather they could expect for each.
Follow-up/extension Provide students with a different weather map, and assign each student a city. Have them report what
the weather in that city may be like based upon the information on the map.
Resources Connections: Connecting Books to the Virginia SOLs. Fairfax County Public Schools and The
College of William and Mary. http://www.fcps.edu/cpsapps/connections. Presents a database of more than 1,000 works of children’s literature and their connection to the Virginia Standards of Learning.
Live Streaming Local Weather. Weatherbug. http://www.weatherbug.com/aws/index.asp. Outstanding Science Trade Books for Students K–12. National Science Teachers Association
(NSTA). http://www.nsta.org/ostbc. Search for Literature: Literature for Science and Mathematics. California Department of Education.
http://www.cde.ca.gov/ci/sc/ll/ap/searchlist.asp. Offers a searchable database. Severe Weather and Natural Disasters: Winter Storms. Scholastic.
http://teacher.scholastic.com/activities/wwatch/winter/ Weather Education. National Weather Service. http://www.nws.noaa.gov/om/edures.htm
Virginia Department of Education54

Science Enhanced Scope and Sequence – Grade 4
Storm Warning
Organizing Topic Investigating the Weather
Overview Students compare/contrast different types of storms, including thunderstorms, hurricanes, and tornadoes, and describe the weather conditions for each.
Related Standards of Learning 4.6b
ObjectivesThe students should be able to recognize a variety of storm types (thunderstorms, hurricanes, and tornadoes), describe the weather
conditions associated with each, and explain when they occur.
Materials needed Science journals Poster board Markers Resource materials on thunderstorms, tornadoes, and hurricanes Attached Storm Chart Glue K-W-L chart about storm types
Instructional activityContent/Teacher NotesSee the attached Storm Chart for background information on storms.
Introduction1. Tell students that they are going to learn about different types of storms, and explain that all storms
include winds and can carry either rain or snow.2. Have students complete the “K” portion of a K-W-L chart to show what they know about
thunderstorms, tornadoes, and hurricanes.3. Have students complete the “W” portion of the K-W-L chart to indicate what they want to learn
about these types of storms.
Procedure1. Hand out the Storm Chart, and read it aloud (or ask students read it). Have students glue the chart
into their journals.2. Provide resource materials, and have students find more information about each type of storm.
Instruct students to write a description of each storm type in their journals and to glue or draw pictures of each storm by the its description.
Observations and Conclusions1. Ask students to share information they learned by reading the resource materials and showing the
pictures that they drew. Have students complete the “L” part of their K-W-L chart.
Virginia Department of Education55

Science Enhanced Scope and Sequence – Grade 4
Follow-up/extension Have students pretend they are TV reporters reporting on a storm. Instruct them to write a script that
describes the storm, weather conditions associated with the storm, and destruction caused by the storm, but not to name the storm type. Then allow each student to read his/her reports to the class, and challenge the audience to guess the type of storm being described.
Have students make a poster presenting safety rules to observe during each type of storm.
Resources Connections: Connecting Books to the Virginia SOLs. Fairfax County Public Schools and The
College of William and Mary. http://www.fcps.edu/cpsapps/connections. Presents a database of more than 1,000 works of children’s literature and their connection to the Virginia Standards of Learning.
Live Streaming Local Weather. Weatherbug. http://www.weatherbug.com/aws/index.asp. National Severe Storms Laboratory. http://www.nssl.noaa.gov/. Outstanding Science Trade Books for Students K–12. National Science Teachers Association
(NSTA). http://www.nsta.org/ostbc. Search for Literature: Literature for Science and Mathematics. California Department of Education.
http://www.cde.ca.gov/ci/sc/ll/ap/searchlist.asp. Offers a searchable database. Weather Education. National Weather Service. http://www.nws.noaa.gov/om/edures.htm. “Wind Speed.” Activities Integrating Math and Science (AIMS).
http://www.aimsedu.org/Activities/weather1/justAGust.pdf.
Virginia Department of Education56

Science Enhanced Scope and Sequence – Grade 4
Storm ChartName: Date:
Storm TypeAssociated Weather
ConditionsWhen Storms Occur
Thunderstorm Heavy rain, strong wind, flashes of lightning, rolls of thunder
When a warm, moist air mass near the ground is covered by a mass of cold air. Severe thunderstorms have winds of 58 mph or greater.
Hurricanes (tropical storms over the Atlantic Ocean)
Heavy rain, strong whirling winds, high tides, and huge waves
When a warm, low-pressure weather system is surrounded by cooler air. Winds exceed 75 mph.
Tornadoes (funnel-shaped cloud)
Strong, whirling winds in a funnel-shaped cloud
When a warm, moist air mass near the ground is covered by a mass of cold air and creates a strong, rotating column of air that reaches from a cumulonimbus cloud to the ground.
Virginia Department of Education57

Science Enhanced Scope and Sequence – Grade 4
Sample Released SOL Test Items
Virginia Department of Education58
If this device were placed outside, it could be used to show —

Science Enhanced Scope and Sequence – Grade 4
Virginia Department of Education59
Science Enhanced Scope and Sequence – Grade 4
Organizing Topic — Investigating Motion
Standards of Learning
4.1 The student will plan and conduct investigations in which a) distinctions are made among observations, conclusions, inferences, and predictions;b) hypotheses are formulated based on cause-and-effect relationships;c) variables that must be held constant in an experimental situation are defined;d) appropriate instruments are selected to measure linear distance, volume, mass, and
temperature;e) appropriate metric measures are used to collect, record, and report data;f) data are displayed using bar and basic line graphs;g) numerical data that are contradictory or unusual in experimental results are recognized; andh) predictions are made based on data from picture graphs, bar graphs, and basic line graphs.
4.2 The student will investigate and understand characteristics and interaction of moving objects. Key concepts includea) motion is described by an object’s direction and speed;b) forces cause changes in motion;c) friction is a force that opposes motion; andd) moving objects have kinetic energy.
Essential Understandings, Correlation to Textbooks andKnowledge, and Skills Other Instructional Materials
The students should be able to
describe the position of an object;
collect and display in a table and line graph time and position data for a moving object;
explain that speed is a measure of motion;
interpret data to determine if the speed of an object is increasing, decreasing, or remaining the same;
identify the forces that cause an object’s motion;
describe the direction of an object’s motion: up, down, forward, backward;
infer that objects have kinetic energy.
Virginia Department of Education60

Science Enhanced Scope and Sequence – Grade 4
Where Am I?
Organizing Topic Investigating Motion
Overview Students determine what it means to find an object’s position, and they describe the direction of an object’s motion as up, down, forward, or backward.
Related Standards of Learning 4.1; 4.2a
ObjectivesThe students should be able to describe the position of an object; describe the direction of an object’s motion: up, down, forward, backward.
Materials needed Unlined paper Graph paper Notebook paper Attached “Community Park Map” Attached activity sheet Science journals Ball
Instructional activityContent/Teacher NotesIn the science of physics, the position of an object must always be described in relation to some point of reference. From this reference point, an object’s direction can be determined by describing the motion of the object as up, down, left, right, forward, or backward of the original reference point. The change of position of an object is called “motion.” One can demonstrate motion by referring to the direction taken, for example, “I moved up the stairs.”
Introduction1. Ask students to explain their position in the room.2. Next, ask the students to explain their position in the room without using directional words and
phrases, such as beside, in front of, or behind.3. Tell the students they will be participating in an activity called “Where Am I?” that will help them
describe the position of something, as well as the direction of an object’s motion.4. Give each student an object, such as a ball. Ask the students to move the ball up, then down. Ask
them to bring the ball forward, and then backward. These actions describe the direction of the object’s motion.
Procedure1. Instruct students to make a dot with a pencil somewhere on a sheet of unlined paper. Have students
describe in their journal or on another sheet of paper, the location of the dot.2. On the same sheet of unlined paper, have students make a second dot and describe the location of
the second dot in relation to the first dot.
Virginia Department of Education61

Science Enhanced Scope and Sequence – Grade 4
3. Have students trade their descriptions with one another, and challenge them to follow the descriptions in order to place two dots on another sheet of paper that will look like the original.
4. Have the students repeat this exercise with lined notebook paper, and then again with graph paper.5. Have students complete the “Community Park” activity.
Observations and Conclusions1. Ask students the following questions upon completion of the exercise:
Did you find it easier each time to identify the location of the dots? Why was it easier to describe the location of the dots on the lined paper and the
graph paper? Did you find that you could use phrases such as “the fourth block down” or “the second row from the top left corner”?
2. Have students explain why there must be a reference point in order to find an object’s position.
Sample assessment Check the accuracy of the students’ journal writing. Make sure the descriptions are well-written and
informative. As the students move from unlined paper to lined paper to graph paper, monitor their progress by
walking around the room and questioning them. General map skills can be used to reinforce this concept: give students a map, a location, and
destination, and have them find the destination.
Follow-up/extension Have students map out the classroom or schoolyard and write directional instructions for locating
various points on the map. Have students play “Directional Simon Says” by being given commands such as “move 5 steps
south of your chair.” Be sure to use a compass beforehand to determine north, south, east, and west. Designate the due-north point of the room by posting a piece of paper with a large “N” on it.
Create a scavenger hunt, using directional terms.
Resources Connections: Connecting Books to the Virginia SOLs. Fairfax County Public Schools and The
College of William and Mary. http://www.fcps.edu/cpsapps/connections. Presents a database of more than 1,000 works of children’s literature and their connection to the Virginia Standards of Learning.
Outstanding Science Trade Books for Students K–12. National Science Teachers Association (NSTA). http://www.nsta.org/ostbc.
Search for Literature: Literature for Science and Mathematics. California Department of Education. http://www.cde.ca.gov/ci/sc/ll/ap/searchlist.asp. Offers a searchable database.
Virginia Department of Education62

Science Enhanced Scope and Sequence – Grade 4
Community Park MapMerry-go-round
NPicnic shelter
Swings and slides
Park offices
Swimming pool Skateboard ramps
100 m
Virginia Department of Education63
Parking
Plaza

Science Enhanced Scope and Sequence – Grade 4
Community Park Activity SheetIn this activity, you will learn how to use a map to help describe position and motion.
Use the “Community Park Map” to answer the following questions:
1. What directions will you have to travel to go from the swimming pool to the picnic shelter?
2. What direction describes the path you would take when moving from the skateboard ramps to the swings and slides?
3. Where do you end up if you travel directly N of the plaza?
4. You need to meet a friend for lunch. What directions would you give her if she starts at the swimming pool and your meeting place is the picnic shelter?
Virginia Department of Education64

Science Enhanced Scope and Sequence – Grade 4
Investigating Motion, Using the Inclined Plane
Organizing Topic Investigating Motion
Overview Students investigate motion, using an inclined plane.
Related Standards of Learning 4.1c, d, e, f, h; 4.2a, b, c, d
ObjectivesThe students should be able to understand that friction is a force that acts to slow down a moving object; explain that speed is a measure of motion; collect and display in a table and line graph time and position data for a moving object.
Materials needed Pictures or examples of inclined planes and wheel and axles Attached data sheet for each student Book whose main theme is motionPer group of 3 or 4 students: Toy car (Lego™ cars are an excellent choice; Matchbox™ cars may be too light for this activity.) Piece of stiff cardboard or thin wood about 50 cm long and 30 cm wide to use as a ramp Stack of books Roll of masking tape Meter stick Marker 1 or 2 pieces of poster board Graph paper
Instructional activityContent/Teacher NotesStudents in grade 4 should already be able to measure length in centimeters and meters. They should have had some experience with gathering, charting, and graphing data. Make sure to give simple directions for setting up the ramps (inclined planes).
Let students decide where to start and stop measuring. Let them determine the three different heights. Let them notice and comment on whether all groups need to be doing exactly the same thing.
Let them wrestle with the confounding event of the cars “nosing in” when the ramp is steep. When the tape is laid out by each group to measure the distance the car travels for the three heights, have the students explain their results to the class. There will be a great deal of discussion about why the data from the various groups differ. You may also wish to introduce the concept of potential and kinetic energy, although the results will not clearly illustrate this concept. You may choose to discuss independent and dependent variables. You may also discuss the variable introduced by the different vehicles.
Ask students to decide how they would test to find the “best” vehicle. What variables would they control? How does friction affect the results? Could the experiment be modified to test different surfaces?
Virginia Department of Education65

Science Enhanced Scope and Sequence – Grade 4
Hang the tapes on the wall, side by side, so students can clearly see that the lengths of the three strands of tape convey a great deal of information, if you know how to read them.
Introduction1. Introduce the lesson by having students read a book whose main theme is motion. Have the
students answer questions pertaining to the book, and lead them in a discussion of motion.2. Tell students that they will experiment with a car on three different heights of a ramp, which is a
form of inclined plane.
Procedure1. Demonstrate building the ramp by stacking books under one edge of the cardboard or wood, and
show students that by adding books to the stack, the ramp (inclined plane) is made steeper. Show students how to measure the height of the ramp. Have students predict how the distance their car travels will be affected by the different heights of the ramp, and record their prediction on their Inclined Plane Data Sheet.
2. Demonstrate the experiment for the class before the students conduct their own. Without pushing, release the car from the top of the ramp, and allow the car to roll until it comes to a stop. Demonstrate how to mark off and label the distance the car travels, using masking tape and a marker, as described in step 6, below. These tape markers will be used later to construct a bar graph.
3. Divide the students into groups of three or four, provide materials for each group (toy car, ramp, books, tape, and marker), and have them spread out in the classroom. Ensure that each group has ample space, keeping in mind that they need room for the car to travel down and off the ramp.
4. Before allowing the students to release their cars, review the elements that must be kept constant in their trials: the same car must be used throughout the experiment; the distance should always be measured from the same starting point; the same meter stick should be used for all measurements.
5. Instruct the groups to build their ramp for the first trial, using books stacked to a height of approximately 10 cm. Have students measure and record the actual height on their Inclined Plane Data Chart.
6. Direct students to conduct the first trial. When the cars have come to a complete stop, instruct students to run a strip of masking tape from the bottom end of the ramp to the back of the car and label the strip “10 cm.”
7. Instruct students to repeat the procedure, with their books first stacked to a height of approximately 20 cm, and then to 30 cm.
8. When the three trials are complete, have students measure the three strips of tape and record the distances in centimeters. Then have them convert and record their measurements to meters.
9. When all the data has been recorded, ask each group to report their results. Then, have students remove their strips of tape from the floor and place them on the wall in order from lowest ramp to highest, forming a bar graph. These strips may be used in the graphing activity later.
Observations and Conclusions
1. Discuss with the students the effect that the change in ramp height had on the distance traveled by their cars.
2. Discuss with students the concepts of speed and friction.
Virginia Department of Education66

Science Enhanced Scope and Sequence – Grade 4
3. Ask the students the following questions in order to stimulate conclusions: What do the “bars” in the wall bar graph tell us? (The distance traveled from the bottom of
the ramp) When is the car traveling the fastest? (The car is traveling fastest, i.e., with the highest kinetic
energy, when it is at the bottom of the ramp.) Why? (Because gravity increases the speed until the car reaches the floor, where friction begins to slow the car down)
What makes the distance traveled on the floor longer or shorter? (The different speeds of the cars at the bottom of the ramp and the differences in friction on the floor)
Why did the cars slow down? (Because of friction)
Sample assessment Ask students to describe the motion of several runs of the cars down the ramp. They should include
the important parts of a description of the motion of an object — i.e., direction of travel, distance traveled, and speed of travel.
Ask the students: What form of energy does the car have when it is moving? (Kinetic energy) Why does the car slow down when coasting across the floor? (Friction) Why does the car speed up going down the ramp? (Because of the force of gravity, which is a
force acting on the car that changes its motion)
Follow-up/extension For homework, have students draw and describe an inclined plane that they or their parents use
around the house. Ask students to describe what job or jobs this simple machine helps us to do more easily.
Resources Connections: Connecting Books to the Virginia SOLs. Fairfax County Public Schools and The
College of William and Mary. http://www.fcps.edu/cpsapps/connections. Presents a database of more than 1,000 works of children’s literature and their connection to the Virginia Standards of Learning.
Outstanding Science Trade Books for Students K–12. National Science Teachers Association (NSTA). http://www.nsta.org/ostbc.
Science Museum of Virginia. http://www.smv.org/ . Search for Literature: Literature for Science and Mathematics. California Department of Education.
http://www.cde.ca.gov/ci/sc/ll/ap/searchlist.asp. Offers a searchable database.
Virginia Department of Education67

Science Enhanced Scope and Sequence – Grade 4
Inclined Plane Data SheetScientist’s name:___________________ Group: _________Date:______
MaterialsPer group of 3 or 4 students: Toy car Piece of stiff cardboard or thin wood about 50 cm long and 30 cm wide to use as
a ramp (inclined plane) Stack of books for use in increasing the height of the ramp Roll of masking tape Meter stick Marker 1 or 2 pieces of poster board
HypothesisIf the height of the hill is increased, then the distance that the car travels will ______________.
Inclined Plane Data ChartApproximateHeight of Hill
ActualHeight of Hill
DistanceCar Traveled
Small Hill (10 cm)Centimeter
sMeters
Medium Hill (20 cm)
Large Hill (30 cm)
Virginia Department of Education68

Science Enhanced Scope and Sequence – Grade 4
On Your Mark! / Start Your Engines!
Organizing Topic Investigating Motion
Overview Students collect data during student sprints or toy car races. They use the data collected to create a time-and-position line graph.
Related Standards of Learning 4.1d, e, f, h; 4.2a
ObjectivesThe students should be able to collect and display in a table and line graph time and position data for a moving object; interpret data to determine if the speed of an object is increasing, decreasing, or remaining the same; explain that speed is a measure of motion.
Materials neededActivity A: 5-meter length of string 5 stopwatches Attached “On Your Mark!” data sheet Graph paperActivity B: 11 meter sticks Matchbox™ car 5 stopwatches Attached “Start Your Engines!” data sheet Piece of stiff cardboard or wooden board for a ramp Overhead projector (optional)Follow-up/extension: “The Trip” attachments
Instructional activityContent/Teacher NotesThe time-and-position table on the attached “On Your Mark!” data sheet makes it possible to make a graph in order to visualize the motion of objects, such as people, over a period of time.
Activity A: Student RacesIntroduction1. Ask students how they could determine which student in the class is the fastest runner. One
method would be to have all students run a foot race. But what if only one student at a time could run? How would the fastest be determined? Ask students to voice their ideas. Then show them a stopwatch, and ask them to explain what it is and what it does.
2. Explain to the students that the class will be conducting timed races outside for any student who would like to participate as a runner or as a timer.
Virginia Department of Education69

Science Enhanced Scope and Sequence – Grade 4
Procedure1. Demonstrate for students the proper operation of the stopwatch. Then, have students practice using
a stopwatch.2. Take students outside to a place in the schoolyard where you can conduct a footrace.3. Choose five student volunteers to be the timers, and instruct them to use the 5-meter length of
string to position themselves 5 meters apart. Have them mark their positions so they can find them again without measuring.
4. Give each of the five students a stopwatch after they have positioned themselves.5. Choose a student volunteer to be the runner, and position the runner 5 meters before the first
stopwatch.6. Direct the timers to start their stopwatches as soon as you give the “GO” command. (“On your
mark! Get set! GO!”) As the runner passes each timer, the timer should stop his/her stopwatch. When the runner has completed the 25-meter race, ask each timer to call out the time on his/her stopwatch, and have each student record the times on his/her data sheet to the nearest tenth of a second.
7. Allow all students the chance to be a runner and/or a timer.8. Return to the classroom, and give each student a sheet of graph paper. Have students write the
name of the activity at the top of the sheet. Instruct them to label the x-axis with the 5-meter intervals (i.e., 5 m, 10 m, 15 m, 20 m, 25 m) and the y-axis with seconds (1 through 10 should be enough).
9. Have each student graph either his/her own time or the time of one of the runners.
Activity B: Toy Car RacesAs an alternative, “Start Your Engines!” is an indoor activity which measures the number of seconds a Matchbox™ car rolls along a track when released from different ramp heights.
Procedure1. Set up a racetrack by laying two rows of meter sticks end to end for five meters. Between the two
rows leave about 15 cm for the “roadway.”2. At one end of the track, place the ramp so that it is raised 10 cm from the floor.3. Place one student timer with stopwatch at each meter interval.4. Choose a student to be the “driver,” and have the “driver” hold the car at the top of the ramp.5. Direct the timers to start their stopwatches as the car is released; direct the “driver” to release the
car when you say “GO.” As the car passes in front of each timer, the timer should stop his/her stopwatch.
6. Ask each timer to call out the time on his/her stopwatch, and have each student record the times on his/her data sheet to the nearest tenth of a second.
7. Allow all students the chance to be a “driver” and/or a timer.8. Have students graph the data of one of the car’s runs on graph paper as described in step 8 of the
activity above.
Observations and Conclusions1. Discuss the steady rate at which the data climbs up the graph. Why does this happen?2. It may be helpful to the students if the teacher completed one or two runners’ data on a graph on
the overhead projector.Virginia Department of Education
70

Science Enhanced Scope and Sequence – Grade 4
Sample assessment As students prepare their graphs, circulate among the students to check for understanding. Give the students additional data sheets, and have them not only graph the results but also write a
short paragraph explaining what the graph represents.
Follow-up/extension Have students complete the activity called “The Trip,” dealing with speed (see attachments). Have students make a multiple-line graph by graphing the times of several students on the same
graph, using a different line color for each data set. Have students determine who the three fastest runners were by calculating their total times. This
activity may be repeated throughout the year to see if the times of the top three students change over time.
Have students enter their data in a graphing program and experiment with the data being interpreted in several different types of graphs.
Have advanced students calculate actual speed by using the formula: speed = distance ÷ time
Resources Connections: Connecting Books to the Virginia SOLs. Fairfax County Public Schools and The
College of William and Mary. http://www.fcps.edu/cpsapps/connections. Presents a database of more than 1,000 works of children’s literature and their connection to the Virginia Standards of Learning.
Outstanding Science Trade Books for Students K–12. National Science Teachers Association (NSTA). http://www.nsta.org/ostbc.
Science Education. Jefferson Lab. http://education.jlab.org/. Search for Literature: Literature for Science and Mathematics. California Department of Education.
http://www.cde.ca.gov/ci/sc/ll/ap/searchlist.asp. Offers a searchable database.
Virginia Department of Education71
Science Enhanced Scope and Sequence – Grade 4
On Your Mark!Name: Date: Runner:____________________
Distance 5 meters 10 meters 15 meters 20 meters 25 metersTime
Runner:____________________Distance 5 meters 10 meters 15 meters 20 meters 25 metersTime
Runner:____________________Distance 5 meters 10 meters 15 meters 20 meters 25 metersTime
Runner:____________________Distance 5 meters 10 meters 15 meters 20 meters 25 metersTime
Runner:____________________Distance 5 meters 10 meters 15 meters 20 meters 25 metersTime
Runner:____________________Distance 5 meters 10 meters 15 meters 20 meters 25 metersTime
Runner:____________________Distance 5 meters 10 meters 15 meters 20 meters 25 metersTime
Virginia Department of Education72

Science Enhanced Scope and Sequence – Grade 4
Start Your Engines!Name: Date:
Driver:___________________Height of ramp 10 cm 20 cm 30 cm 40 cm 50 cm
Time car rolled
Driver:___________________Height of ramp 10 cm 20 cm 30 cm 40 cm 50 cm
Time car rolled
Driver:___________________Height of ramp 10 cm 20 cm 30 cm 40 cm 50 cm
Time car rolled
Driver:___________________Height of ramp 10 cm 20 cm 30 cm 40 cm 50 cm
Time car rolled
Virginia Department of Education73

Science Enhanced Scope and Sequence – Grade 4
The TripRead the story below carefully. As you read, write the data from the story onto “The Trip Data Table.” Once you have all of the information on the data table, use that information to make a graph.
Ronnie and his family were finally taking off for their annual vacation. Everyone was excited because the cabin at the lake was theirs for two whole weeks. Ronnie and his sister sat in the back seat watching and waiting for the long trip to be over and the lake fun to begin. Here is a record of the average speeds Ronnie’s car drove over the entire 10 hour drive.
The first hour was all in-town driving, and the traffic was awful. They only averaged 30 mph. Once they got on the interstate, they were able to drive for 3 hours at an average speed of 60 mph, so hours 2, 3, and 4 were driven at 60 mph.
By the time they got to Plainville, everyone was starving, so they decided to stop and eat lunch. The lunch took up all of hour 5; average speed, 0 mph.
Back on the road again — slowly. Getting out of town was tedious. Average speed for hour 6 was only 40 mph. Hours 7 and 8 found the family picking up speed at an average of 65 mph.
Once they got to the mountains, their speed slowed down. Hours 9 and 10 only had an average speed of 40 mph.
At the cabin at last!
Virginia Department of Education74

Science Enhanced Scope and Sequence – Grade 4
The TripData Table
Name: Date:
Hour 1
Hour 2
Hour 3
Hour 4
Hour 5
Hour 6
Hour 7
Hour 8
Hour 9
Hour 10
Average
Speed(in
mph)
Virginia Department of Education75

Science Enhanced Scope and Sequence – Grade 4
May the Force Be with You!
Organizing Topic Investigating Motion
Overview Students conduct mini-experiments to experience five different types of forces: magnetic, electrical, gravitational, frictional, and elastic.
Related Standards of Learning 4.1; 4.2b
ObjectivesThe students should be able to identify the forces that cause an object’s motion.
Materials needed Metric ruler Rubber bands Plastic bucket Clear plastic cup Paperclips Magnet Plastic bread bag Scissors Wool fabric (scarves or socks work well) Newspaper Bath towel Board Books Plastic 2-liter bottle Plastic boat Ring magnets and pencil Metal spring Balloon Ball Paper ball Goggles Attached data sheet Attached “Station Directions” sheets Pictures demonstrating the five common forces
Instructional activityContent/Teacher NotesA force is a push or pull exerted by one object on another. A force can alter the shape or the motion of an object. The most common forces acting on objects on Earth are magnetic, electrical, gravitational, elastic, and frictional forces. In order for an object to change direction, a force such as gravity must exert its force to redirect the motion. An example of this would be a ball rolling along a tabletop until it reaches the edge. Once it reaches the edge, the force of gravity takes over to change the ball’s direction of motion from horizontal to vertical (down).
Virginia Department of Education76

Science Enhanced Scope and Sequence – Grade 4
Introduction1. Ask students to rub their hands together slowly and then faster and faster. What happens? Why do
your hands gets warmer? (Because of friction)2. Tell students that friction is a force that can stop or change an object’s direction. Explain that
there are many forces on Earth which can stop or change motion. We deal with these forces everyday. Five of the most common of these forces are frictional, gravitational, magnetic, elastic, and electrical forces. A simple explanation of each is given below; however, at this grade level it is probably best only to explain each force and give an example of each, but to focus on the most common forces.
Friction – Friction changes the movement of an object by slowing the object down. Examples: brakes on a car or bike. Without friction, an object would follow the same path at a constant speed. Demonstration: Have students rub their hands together.
Gravity – Gravity affects all objects of mass. The more the mass, the stronger the gravitational pull. Gravity is a force that pulls objects toward the Earth. Demonstration: Tell students you can throw a ball, make it pause briefly, and return back to you. As you explain this, make a throwing motion with the ball in your hand. Ask students if they believe that you can perform this feat. Ask students why they think this would never work. Show them your “magic” by throwing the ball straight up and catching it. You threw the ball; it paused briefly in midair, and returned to you. Gravity changes an object’s motion by pulling it toward Earth.
Magnetism – Demonstration: Alternate ring magnets on a pencil so that the opposing poles make the magnets “float” in the air. Ask the students what force is keeping the magnets apart. (The force of magnetism changes some objects’ motion by attracting or repelling them.) Ask if all objects are affected by magnetism. (No, only those with iron and certain other metals are affected by magnets.)
Elasticity – Demonstration: Pull a metal spring out and release it so that it returns to its original position. A substance is elastic if it quickly returns to it original shape or position when it is disturbed. Elastic forces change an object’s motion by returning the object to its original position.
Electricity – Demonstration: Rub a balloon across a piece of wool fabric or on your hair. Ask students how your hair’s motion was changed. (It was changed from hanging straight down due to the force of gravity to floating up due to the force of static electricity.)
Procedure1. Divide class into groups of two or three, and give each student a data sheet and goggles.2. Post the five station directions (see Station Directions sheets) around the room.2. Move from station to station, briefly going over the directions with the students, discussing how to
reset the station for the next group, and pointing out where to respond on the data sheet. Answer any questions.
4. Give student groups about 5 minutes at each station. Students do not need to move in the order of 1–5 but may move with their group to any open station.
5. After all are finished, allow a few minutes for groups to discuss and refine their answers.6. Go from station to station, reviewing each force and having students share their ideas and answers.
Allow students to change their answers on their data sheets as needed.
Observations and Conclusions1. Ask the students the following questions to stimulate conclusions:
Virginia Department of Education77
Science Enhanced Scope and Sequence – Grade 4
Can there be force without some object giving the force and some object receiving the force? (No)
Is it possible for one object to exert a force on another without ever touching it? (Yes, the noncontact force of a magnet can move metal through paper without actually touching the metal; the Earth can exert a gravitational pull on an object and pull it downward without touching it.)
Can forces change the shape of an object? (Yes, such as the force of wind changing the shape of sails on a sailboat)
Sample assessment Have students give additional examples of each type of force as found in everyday life. Divide class into five groups. Give each group a magazine picture demonstrating one of these five
forces. Have the group discuss their picture, decide which force it shows, and share it with the class.
Follow-up/extension In physics, terms such as agent of force, receiver of force, and effect of force are used to describe the
action and reaction of each force. The agent is the origin of the force and the receiver is the object that receives the force. The effect is the action that takes place. For example, in this lesson, the magnet is the agent and the paperclips are the receivers of the force. The effect of the force is the magnet attracting the paperclips and causing them to move toward it. Students may use the same magazine pictures used in the assessment above to find the agent, receiver, and effect for each picture.
Lead the class in naming and discussing other common forces, such as that exerted by wind or water.
Resources Connections: Connecting Books to the Virginia SOLs. Fairfax County Public Schools and The
College of William and Mary. http://www.fcps.edu/cpsapps/connections. Presents a database of more than 1,000 works of children’s literature and their connection to the Virginia Standards of Learning.
Outstanding Science Trade Books for Students K–12. National Science Teachers Association (NSTA). http://www.nsta.org/ostbc.
Science Museum of Virginia. http://www.smv.org/ . Search for Literature: Literature for Science and Mathematics. California Department of Education.
http://www.cde.ca.gov/ci/sc/ll/ap/searchlist.asp. Offers a searchable database.
Virginia Department of Education78

Science Enhanced Scope and Sequence – Grade 4
May the Force Be with You!Station Directions
Place a rubber band beside a metric ruler, and see whether you can stretch the rubber band 10 cm, 20 cm, 30 cm, and 50 cm. How many centimeters do you think you could stretch the rubber band before it breaks?
Stack two or three books on the floor, and place a board or piece of cardboard slanted from the top of the books down to the floor to form a ramp (inclined plane). Place a 2-liter bottle on its side at the top of the ramp and let it go. See how far the bottle will roll before it stops. Measure the distance it rolled from the end of the ramp to the spot where it stopped. Place several sheets of newspaper on the floor at the base of the ramp and repeat the experiment. Record the distance rolled. Replace the newspaper with a towel and repeat the experiment. Record the distance rolled.
Place 15 or 20 paper clips on the table, and cover them with a clear plastic cup. Hold a strong magnet near the cup. Try to move paper clips to the top of the cup. Feel the amount of force the magnet is placing on the steel paper clips.
Virginia Department of Education79

Science Enhanced Scope and Sequence – Grade 4
Hold up two long strips of plastic cut from a bread bag, and observe how they hang. Rub both pieces of plastic, back and front, with woolen material. Hold them up again and observe how the strips hang now.
Hold the paper ball about shoulder high and release it. Repeat five more times and observe where the ball goes.
Virginia Department of Education80
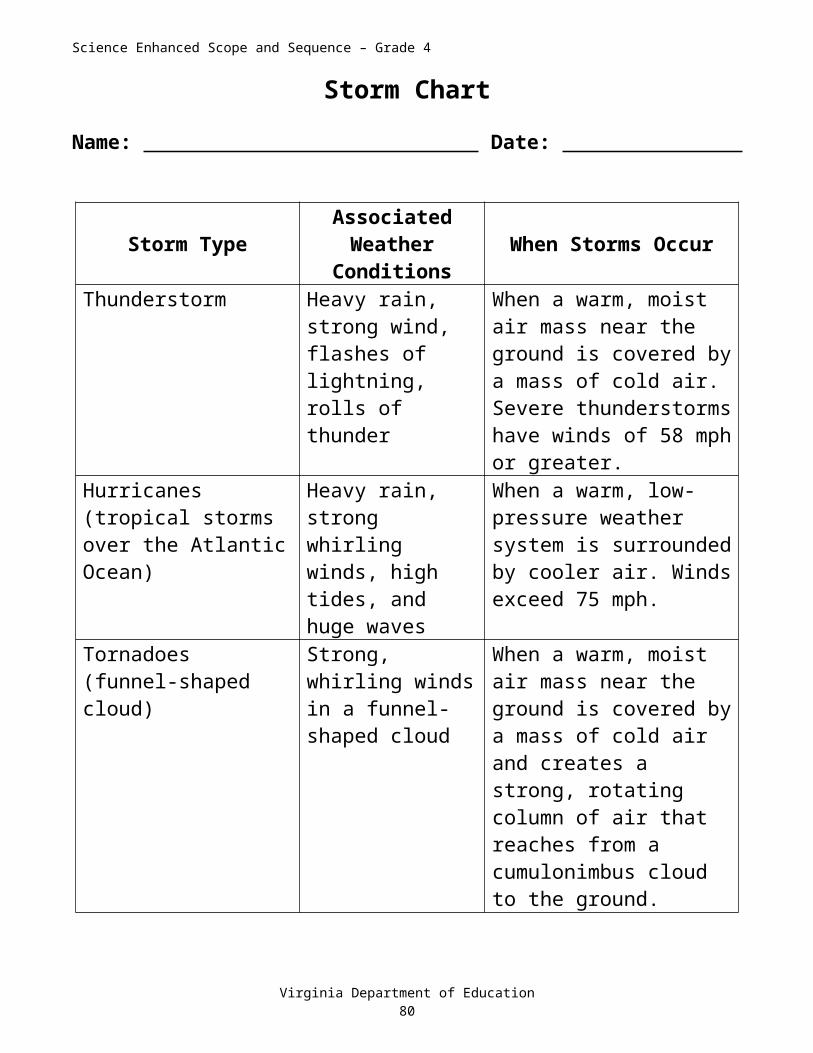
Science Enhanced Scope and Sequence – Grade 4
May the Force Be with You!Data Sheet
Name: Date:
Five different mini-experiments have been set up in stations around the room. You and your partner/group may go to any open station in any order until you have done all five experiments. Be sure to answer the questions for each station on this data sheet while you’re at that station. As you move from station to station, decide and record which type of force each station demonstrates:1. Elastic force2. Magnetic force3. Gravity4. Electrical force5. Friction
Station One How many centimeters of stretch do you predict it would take to break the
rubber band? _________
We think the force demonstrated here is _______________________________.
Station Two Record the distances the bottle rolled. Roll 1:______ Roll 2:______ Roll 3:______
Compare your three rolls. Why do you think the distance was shorter on the second and third roll?
We think the force demonstrated here is _______________________________.
Station Three How many paper clips were you able to move to the top of the cup? ______
Were you able to lift the cup with the magnet? ______________________
We think the force demonstrated here is _______________________________.Station Four What did you observe when you first held up the plastic strips?
What happened after you rubbed the strips with wool?
Virginia Department of Education81

Science Enhanced Scope and Sequence – Grade 4
We think the force demonstrated here is _______________________________.
Station Five What happened every time you dropped the paper ball?
Would it have been unusual for the ball not to fall? _______
We think the force demonstrated here is _______________________________.
Virginia Department of Education82

Science Enhanced Scope and Sequence – Grade 4
Sample Released SOL Test Items
Virginia Department of Education83

Science Enhanced Scope and Sequence – Grade 4
Virginia Department of Education84

Science Enhanced Scope and Sequence – Grade 4
Organizing Topic — Investigating Electricity
Standards of Learning
4.1 The student will plan and conduct investigations in whicha) distinctions are made among observations, conclusions, inferences, and predictions;b) hypotheses are formulated based on cause-and-effect relationships;c) variables that must be held constant in an experimental situation are defined;d) appropriate instruments are selected to measure linear distance, volume, mass, and
temperature;e) appropriate metric measures are used to collect, record, and report data;f) data are displayed using bar and basic line graphs;g) numerical data that are contradictory or unusual in experimental results are recognized; andh) predictions are made based on data from picture graphs, bar graphs, and basic line graphs.
4.3 The student will investigate and understand the characteristics of electricity. Key concepts includea) conductors and insulators;b) basic circuits (open/closed, parallel/series);c) static electricity;d) the ability of electrical energy to be transformed into heat, light, and mechanical energy;e) simple electromagnets and magnetism; andf) historical contributions in understanding electricity.
Essential Understandings, Correlation to Textbooks andKnowledge, and Skills Other Instructional Materials
The students should be able to
apply the terms insulators, conductors, open and closed in describing electrical circuits;
differentiate between an open and closed electric circuit; use the dry cell symbols (–) and (+);
create and diagram a functioning series circuit, using dry cells,
wires, switches, bulbs, and bulb holders;
create and diagram a functioning parallel circuit, using dry cells, wires, switches, bulbs, and bulb holders;
differentiate between a parallel and series circuit;
create a diagram of a magnetic field, using a magnet;
compare and contrast a permanent magnet and an electromagnet;
Virginia Department of Education85

Science Enhanced Scope and Sequence – Grade 4
explain how electricity is generated by a moving magnetic field;
design an investigation using static electricity to attract or repel a variety of materials;
explain how static electricity is created and occurs in nature;
construct a simple electromagnet, using a wire, nail, or other iron-bearing object, and a dry cell;
design and perform an investigation to determine the strength of an electromagnet. (The manipulated variable could be the number of coils of wire and the responding variable could be the number of paperclips the magnet can attract.);
describe the contributions of Ben Franklin, Michael Faraday, and Thomas Edison to the understanding and harnessing of electricity.
Virginia Department of Education86

Science Enhanced Scope and Sequence – Grade 4
Inventors
Organizing Topic Investigating Electricity
Overview Students research the contributions of Ben Franklin, Thomas Edison, and Michael Faraday to the understanding of electricity.
Related Standards of Learning 4.3f
ObjectivesThe students should be able to describe the contributions of Ben Franklin, Michael Faraday, and Thomas Edison to the
understanding and harnessing of electricity.
Materials needed Research resources, such as Internet and books Attached worksheet
Instructional activityContent/Teacher NotesThis activity may be done as an introduction to the electricity unit or as a culminating activity to the unit. Students should access library resources, classroom books, and the Internet to do research on each inventor. The resource section at the end of this lesson has some Web sites listed that may be useful. After finding the information, students should write a brief newspaper article about each inventor.
Procedure1. Provide students with access to research materials, and encourage them to focus on the inventions
that are directly related to electricity.2. Direct students to use the attached worksheet to complete a newspaper article with some important
facts about each inventor. The English Standards of Learning Enhanced Scope and Sequence for Grades K–5 provides writing strategies for students, starting on page 232. See: http://www.doe.virginia.gov/VDOE/EnhancedSandS/englishK-5.doc
Sample Assessment Have students write a story for your local newspaper, giving specific information (who, what, where,
when, and why) about each inventor and his contribution to electricity. Assess completed articles.
Follow-up/extension Have students look at the timeline as to when each discovery was invented, and discuss why it is
relevant.
Resources Benjamin Franklin: Glimpses of the Man. The Franklin Institute Online. http://sln.fi.edu/franklin/. “The Case of the Electrical Mystery.” NASA SciFiles.
http://scifiles.larc.nasa.gov/educators/index.html. Click “Episodes” and “2001–2002 Season.”
Virginia Department of Education87

Science Enhanced Scope and Sequence – Grade 4
Connections: Connecting Books to the Virginia SOLs. Fairfax County Public Schools and The College of William and Mary. http://www.fcps.edu/cpsapps/connections. Presents a database of more than 1,000 works of children’s literature and their connection to the Virginia Standards of Learning.
Electrified Ben. http://sln.fi.edu/franklin/scientst/electric.html. Presents information on Benjamin Franklin.
Franklin’s Kite. http://www.mos.org/sln/toe/kite.html. Michael Faraday. http://pmi.itmonline.com/netnotes/Big%20Questions%20Net%20Notes/Michael
%20Faraday%20-%20Bio.htm. Michael Faraday. http://www.scienceshorts.com/mfarada.htm. Michael Faraday. http://www-groups.dcs.st-and.ac.uk/~history/Mathematicians/Faraday.html. Outstanding Science Trade Books for Students K–12. National Science Teachers Association
(NSTA). http://www.nsta.org/ostbc. Search for Literature: Literature for Science and Mathematics. California Department of Education.
http://www.cde.ca.gov/ci/sc/ll/ap/searchlist.asp. Offers a searchable database. Thomas Alva Edison. http://memory.loc.gov/ammem/edhtml/edbiohm.html. Thomas Edison: American Inventor. http://www.lucidcafe.com/library/96feb/edison.html. The Wizard of Menlo Park. http://sln.fi.edu/franklin/inventor/edison.html. Presents information on
Thomas Edison.
Virginia Department of Education88

Science Enhanced Scope and Sequence – Grade 4
Virginia Department of Education89
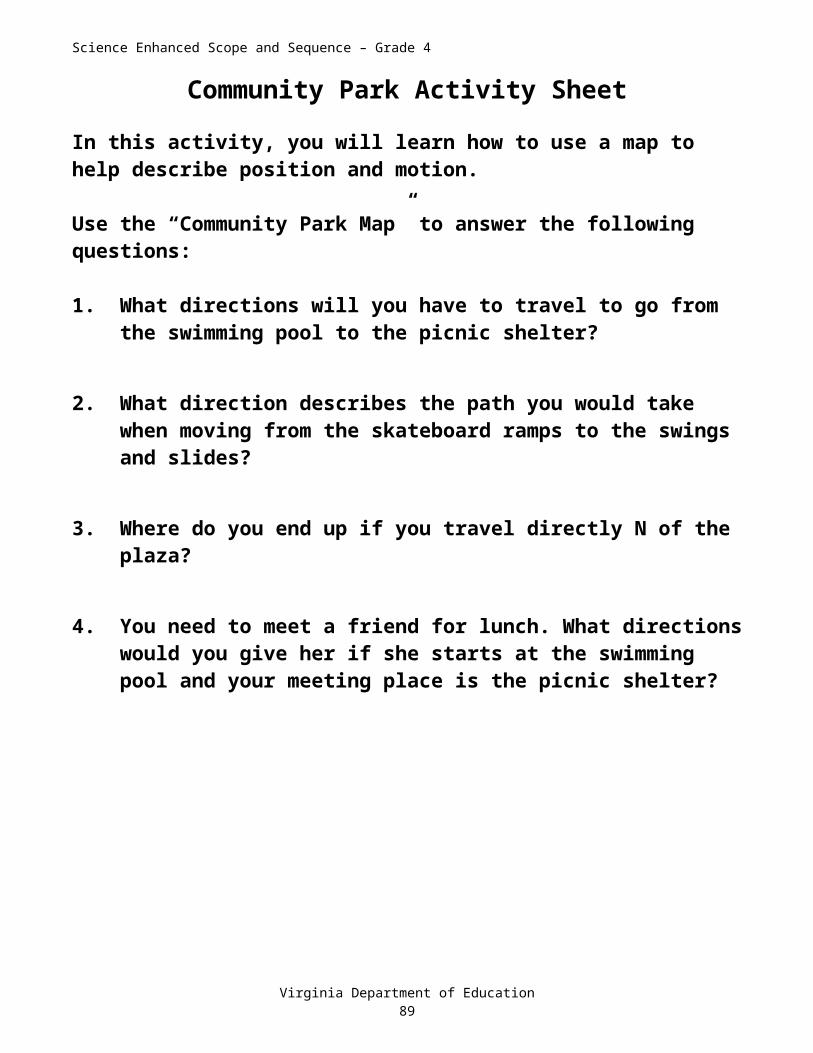
Science Enhanced Scope and Sequence – Grade 4
Circuits, Batteries, and Bulbs
Organizing Topic Investigating Electricity
Overview Students investigate properties of a circuit.
Related Standards of Learning 4.3
ObjectivesThe students should be able to apply the terms insulators, conductors, open and closed in describing electrical circuits; differentiate between an open and closed electric circuit; use the dry cell symbols (–) and (+); create and diagram a functioning series circuit, using dry cells, wires, switches, bulbs, and bulb
holders; create and diagram a functioning parallel circuit, using dry cells, wires, switches, bulbs, and bulb
holders.
Materials needed Attached activities worksheets Batteries Wires Bulbs Switches
Instructional activityContent/Teacher NotesThis activity requires a lot of student inquiry. Students are asked to design various parts of a circuit and explore what happens in each case. It is essential that the teacher follow up each activity with a discussion of what students discovered in the activity. Any misconceptions need to be addressed early. Explicit terms such as dry cell, insulators, conductors, parallel circuit, and series circuit may be introduced in a variety of ways. One suggestion is to use segments two and three from the NASA SciFiles program “The Case of the Electrical Mystery” (see Resource on the next page). The corresponding teacher’s guide can be downloaded for additional background information for students.
Twenty-one different activities are included here. It is not intended that every student should complete every activity. Choose appropriately, depending on the students’ levels. The activities can generally be broken down into three different levels: Basic: Activities #1–5, 8; Moderate: Activities #9, 12, 17–21; Advanced: Activities #6, 7, 10, 11, 13–16.
Introduction1. After using the NASA SciFiles program to introduce students to some basic concepts of electricity,
have them work in groups to complete the following activities.
Virginia Department of Education90

Science Enhanced Scope and Sequence – Grade 4
Procedure1. Provide students with a set of appropriate materials to complete the activities. It will take several
classes to complete all of the activities. You may want to split the activities among the groups and then have them share their discoveries with the class.
2. Have students use the worksheet to record their investigations and findings. If your students use a science journal, they can simply write the activity at the top of the page and go from there.
Observations and Conclusions1. After students complete the activity and answer the accompanying conclusion questions, review
each activity with the class. It is very important to make sure that students use the correct terminology and understand the processes involved.
Sample assessment Use the worksheets as an assessment for student understanding.
Follow-up/extension Have students do a search of their houses and inventory how many electrical switches they find.
Have them determine if any lights, appliances, or other electrical devices are controlled by more than one switch. If so, have them draw a sketch of what kind of circuit this may be.
Resources “The Case of the Electrical Mystery.” NASA SciFiles.
http://scifiles.larc.nasa.gov/educators/index.html. Click “Episodes” and “2001–2002 Season.” Connections: Connecting Books to the Virginia SOLs. Fairfax County Public Schools and The
College of William and Mary. http://www.fcps.edu/cpsapps/connections. Presents a database of more than 1,000 works of children’s literature and their connection to the Virginia Standards of Learning.
Outstanding Science Trade Books for Students K–12. National Science Teachers Association (NSTA). http://www.nsta.org/ostbc.
Search for Literature: Literature for Science and Mathematics. California Department of Education. http://www.cde.ca.gov/ci/sc/ll/ap/searchlist.asp. Offers a searchable database.
Virginia Department of Education91
Science Enhanced Scope and Sequence – Grade 4
Circuits, Batteries, and Bulbs ActivitiesActivity 1: Design an investigation to determine if a bulb can be lit using one battery (“D” cell) and one piece of wire.MATERIALS: (What are you going to use?)
PROCEDURE: (What are you going to do?)
PREDICTIONS: (What may happen?)
RESULTS: (What happened?)
DIAGRAM: (Draw a picture of what you did.)
Activity 2: Design an investigation to find out how many different ways a light bulb can be made to light using one battery and one piece of wire.MATERIALS: (What are you going to use?)
PROCEDURE: (What are you going to do?)
PREDICTIONS: (What may happen?)
RESULTS: (What happened?)
DIAGRAM: (Draw a picture of what you did.)
Virginia Department of Education92
Science Enhanced Scope and Sequence – Grade 4
Activity 3: Design an investigation to find out if one bulb can be lit using two batteries.MATERIALS: (What are you going to use?)
PROCEDURE: (What are you going to do?)
PREDICTIONS: (What may happen?)
RESULTS: (What happened?)
DIAGRAM: (Draw a picture of what you did.)
Activity 4: Design an investigation to find out how many similar bulbs can be lit at the same time using one battery.MATERIALS: (What are you going to use?)
PROCEDURE: (What are you going to do?)
PREDICTIONS: (What may happen?)
RESULTS: (What happened?)
DIAGRAM: (Draw a picture of what you did.)
Virginia Department of Education93

Science Enhanced Scope and Sequence – Grade 4
Activity 5: Design an investigation to find out how many batteries it takes to “burn out” a bulb.MATERIALS: (What are you going to use?)
PROCEDURE: (What are you going to do?)
PREDICTIONS: (What may happen?)
RESULTS: (What happened?)
DIAGRAM: (Draw a picture of what you did.)
Activity 6: Design an investigation to find out whether a battery or a bulb will last longer when continuously in use.MATERIALS: (What are you going to use?)
PROCEDURE: (What are you going to do?)
PREDICTIONS: (What may happen?)
RESULTS: (What happened?)
DIAGRAM: (Draw a picture of what you did.)
Virginia Department of Education94

Science Enhanced Scope and Sequence – Grade 4
Activity 7: Design an investigation to determine what happens when various lengths of wire connect both ends of a battery (dry cell).MATERIALS: (What are you going to use?)
PROCEDURE: (What are you going to do?)
PREDICTIONS: (What may happen?)
RESULTS: (What happened?)
DIAGRAM: (Draw a picture of what you did.)
Activity 8: Design an investigation to determine what parts of a bulb need to be connected to the battery in order to light.MATERIALS: (What are you going to use?)
PROCEDURE: (What are you going to do?)
PREDICTIONS: (What may happen?)
RESULTS: (What happened?)
DIAGRAM: (Draw a picture of what you did.)
Virginia Department of Education95
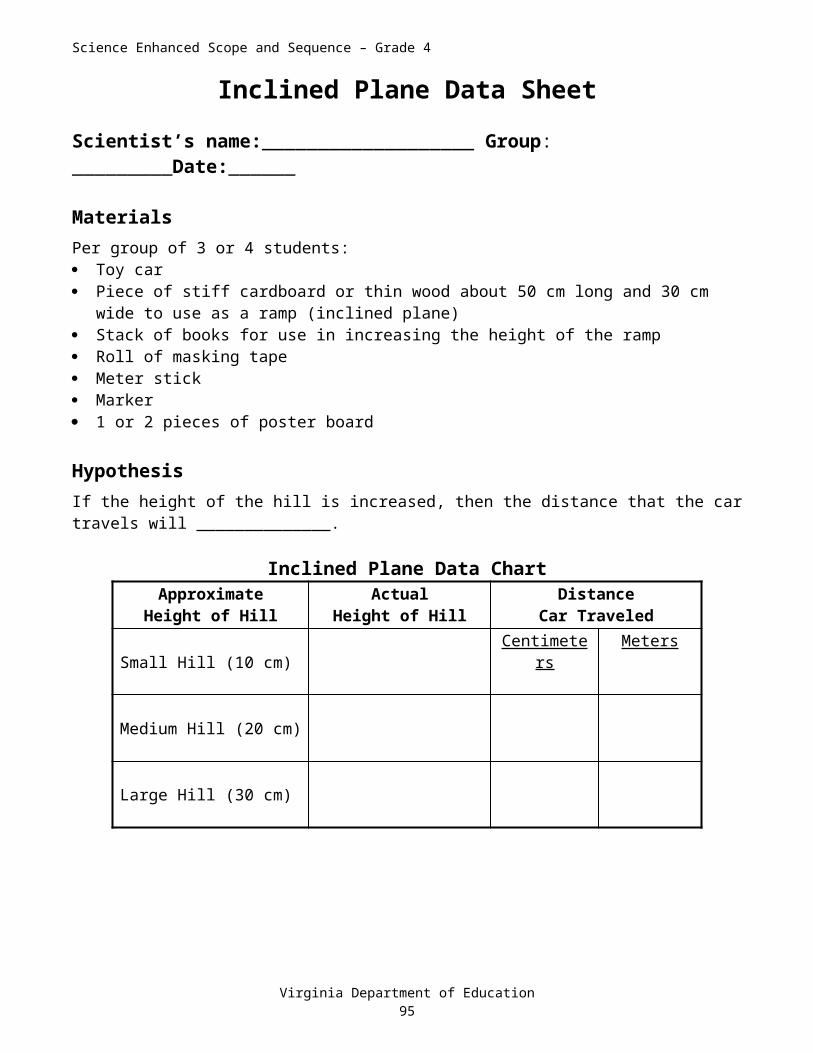
Science Enhanced Scope and Sequence – Grade 4
Activity 9: Construct a functioning circuit, using a battery holder.MATERIALS: (What are you going to use?)
PROCEDURE: (What are you going to do?)
PREDICTIONS: (What may happen?)
RESULTS: (What happened?)
DIAGRAM: (Draw a picture of what you did.)
Activity 10: Design an investigation to determine what happens when a battery holder is left on a battery overnight.MATERIALS: (What are you going to use?)
PROCEDURE: (What are you going to do?)
PREDICTIONS: (What may happen?)
RESULTS: (What happened?)
DIAGRAM: (Draw a picture of what you did.)
Virginia Department of Education96

Science Enhanced Scope and Sequence – Grade 4
Activity 11: Design and construct a functioning battery holder from commonplace materials.MATERIALS: (What are you going to use?)
PROCEDURE: (What are you going to do?)
PREDICTIONS: (What may happen?)
RESULTS: (What happened?)
DIAGRAM: (Draw a picture of what you did.)
Activity 12: Construct a functioning circuit, using a bulb holder.MATERIALS: (What are you going to use?)
PROCEDURE: (What are you going to do?)
PREDICTIONS: (What may happen?)
RESULTS: (What happened?)
DIAGRAM: (Draw a picture of what you did.)
Virginia Department of Education97
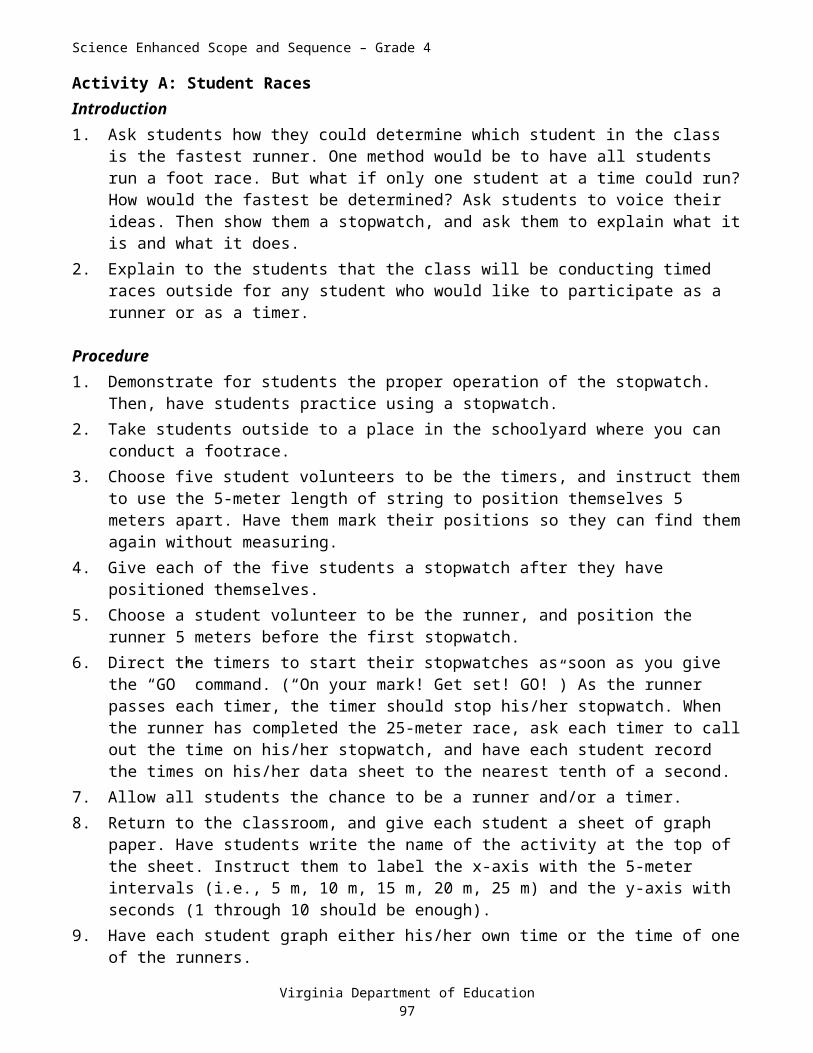
Science Enhanced Scope and Sequence – Grade 4
Activity 13: Design an investigation to determine the uses of all parts of a bulb.MATERIALS: (What are you going to use?)
PROCEDURE: (What are you going to do?)
PREDICTIONS: (What may happen?)
RESULTS: (What happened?)
DIAGRAM: (Draw a picture of what you did.)
Activity 14: Design an investigation to determine the interactions between the “inside things in a bulb” and the contact points on the outside of a bulb.MATERIALS: (What are you going to use?)
PROCEDURE: (What are you going to do?)
PREDICTIONS: (What may happen?)
RESULTS: (What happened?)
DIAGRAM: (Draw a picture of what you did.)
Virginia Department of Education98
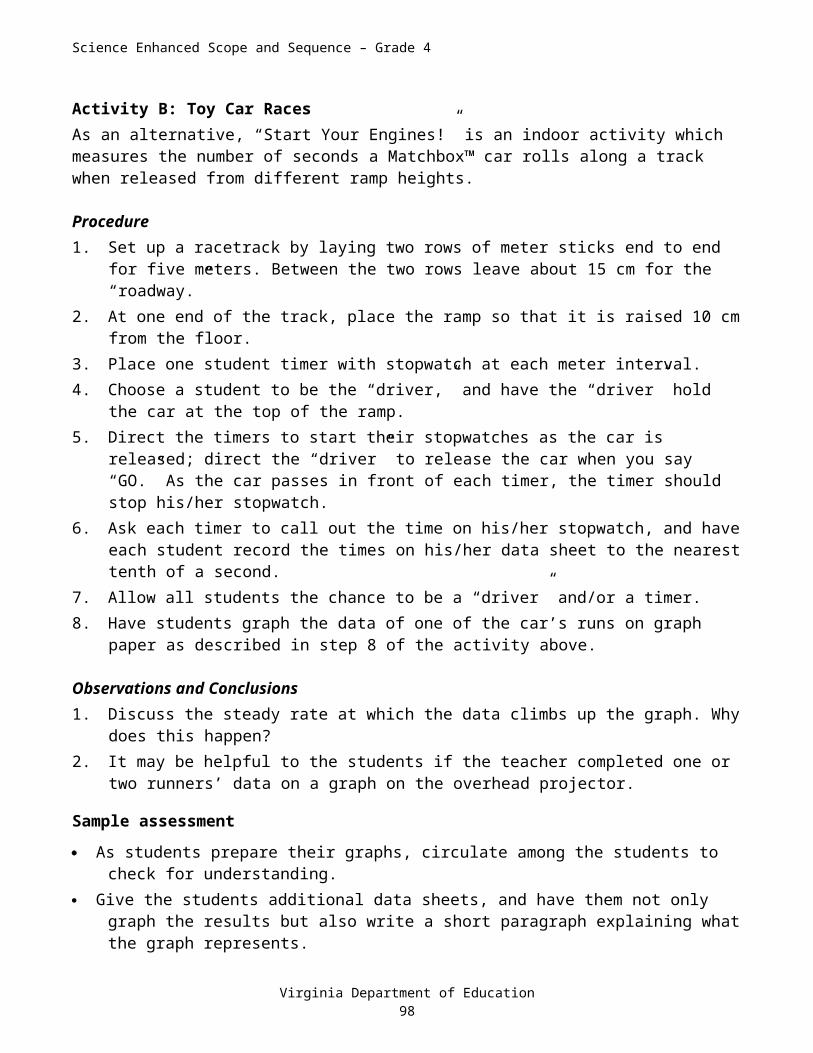
Science Enhanced Scope and Sequence – Grade 4
Activity 15: Design an investigation to determine the similarities and differences between regular light bulbs and flashlight bulbs.MATERIALS: (What are you going to use?)
PROCEDURE: (What are you going to do?)
PREDICTIONS: (What may happen?)
RESULTS: (What happened?)
DIAGRAM: (Draw a picture of what you did.)
Activity 16: Diagram and describe the internal structure of a “D” cell battery.MATERIALS: (What are you going to use?)
PROCEDURE: (What are you going to do?)
PREDICTIONS: (What may happen?)
RESULTS: (What happened?)
DIAGRAM: (Draw a picture of what you did.)
Virginia Department of Education99

Science Enhanced Scope and Sequence – Grade 4
Activity 17: Design an investigation to determine how two or more batteries can be arranged into a functioning circuit.MATERIALS: (What are you going to use?)
PROCEDURE: (What are you going to do?)
PREDICTIONS: (What may happen?)
RESULTS: (What happened?)
DIAGRAM: (Draw a picture of what you did.)
Activity 18: Construct a functioning circuit that has two or more bulbs (in bulb holders).MATERIALS: (What are you going to use?)
PROCEDURE: (What are you going to do?)
PREDICTIONS: (What may happen?)
RESULTS: (What happened?)
DIAGRAM: (Draw a picture of what you did.)
Virginia Department of Education100

Science Enhanced Scope and Sequence – Grade 4
Activity 19: Design, construct, and test a way of measuring the brightness of a functioning bulb.MATERIALS: (What are you going to use?)
PROCEDURE: (What are you going to do?)
PREDICTIONS: (What may happen?)
RESULTS: (What happened?)
DIAGRAM: (Draw a picture of what you did.)
Activity 20: Design an investigation to determine what effect changing a circuit’s design (using all the same components) will have on the brightness of bulbs in the circuit. (Use more than one bulb).MATERIALS: (What are you going to use?)
PROCEDURE: (What are you going to do?)
PREDICTIONS: (What may happen?)
RESULTS: (What happened?)
DIAGRAM: (Draw a picture of what you did.)
Virginia Department of Education101

Science Enhanced Scope and Sequence – Grade 4
Activity 21:a) Diagram a multi-component circuit, using the correct symbols, and then construct it.b) Determine what effect reversing the direction of the battery will have on the circuit (bulb brightness, etc.).MATERIALS: (What are you going to use?)
PROCEDURE: (What are you going to do?)
PREDICTIONS: (What may happen?)
RESULTS: (What happened?)
DIAGRAM: (Draw a picture of what you did.)
Virginia Department of Education102
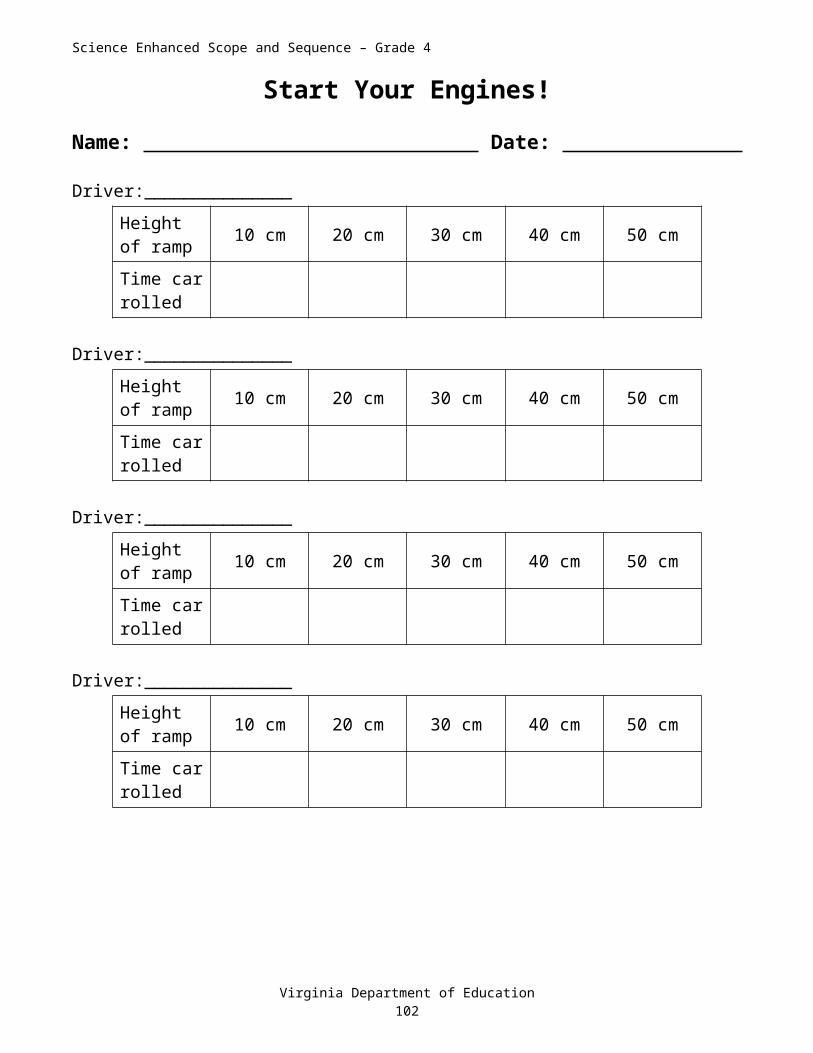
Science Enhanced Scope and Sequence – Grade 4
Electromagnets
Organizing Topic Investigating Electricity
Overview Students investigate properties of electromagnetism.
Related Standards of Learning 4.3e
ObjectivesThe students should be able to create a diagram of a magnetic field using a magnet; compare and contrast a permanent magnet and an electromagnet; explain how electricity is generated by a moving magnetic field; construct a simple electromagnet, using a wire, nail, or other iron-bearing object, and a dry cell; design and perform an investigation to determine the strength of an electromagnet.
Materials neededFor each group: Bar magnets Iron filings Plastic baggies 50 to 75 cm insulated copper wire 1 nail 5 to 10 paper clips 2 “D” batteries (with rubber bands) 2 conducting strips Scissors
Instructional activityContent/Teacher NotesMagnets are materials that will attract objects made of iron, steel, cobalt, and nickel. Many scientists believe that magnetism is due to the spinning movement of electrons as they travel around the nucleus of the atom. Each electron acts as a magnet. Non-magnetic materials have atoms in which half the electrons spin in one direction and the other half spin in the opposite direction. This cancels their magnetic effect. In atoms of magnetic materials, more electrons spin in one direction than in the other. This leaves each atom with a slight magnetic pull. These magnetic atoms group together in large clusters, called “domains.” These domains line up so that all of the north-seeking poles face one direction and all the south-seeking poles face the other.
The following Web site contains an explanation of magnetism with some diagrams that may be helpful to students: http://www.wcsscience.com/magnet/magnetism/page.html.
Materials can be made magnetic by exposing them to one of two things: a magnet or an electric current. When current flows through a wire it creates a magnetic field surrounding that wire. If a material that can be magnetized is placed into this field, it will become magnetic. When the electric current is turned off, the magnetic field is also ended, and the previously magnetized material will slowly revert to a non-magnetic state.
Virginia Department of Education103
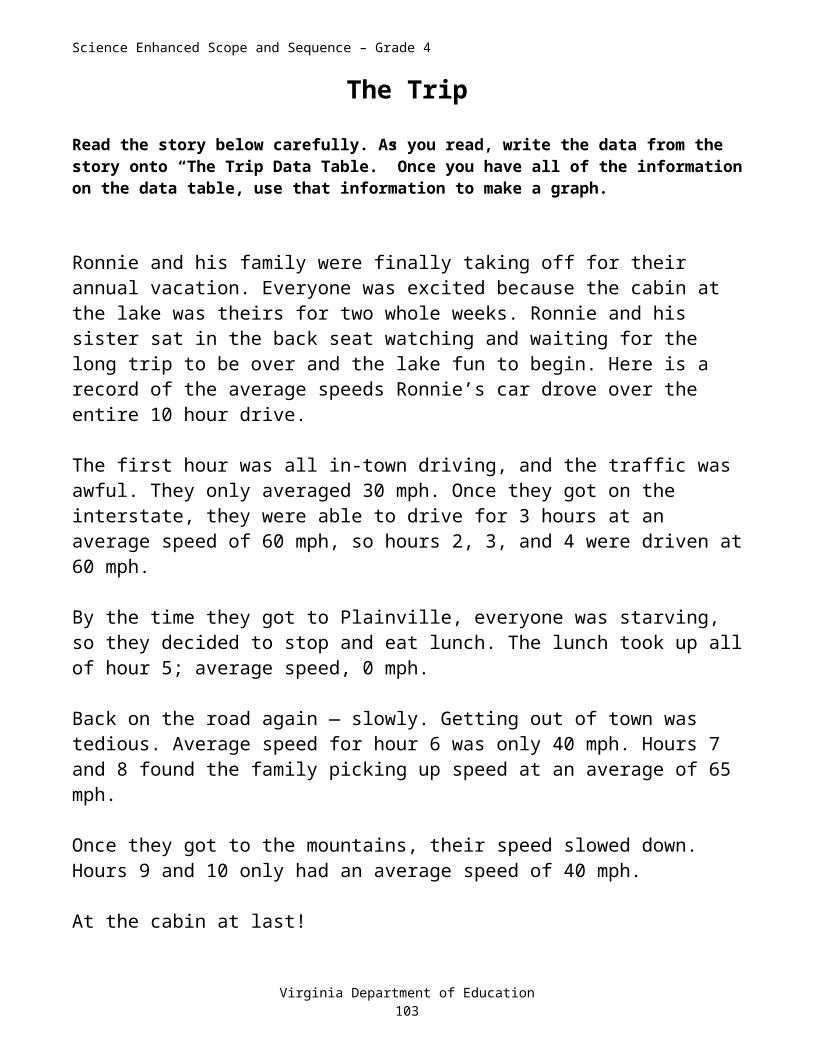
Science Enhanced Scope and Sequence – Grade 4
Soft iron is used as the core of electromagnets because it is magnetized quickly and it easily loses its magnetism when removed from the current. Electromagnets can be made stronger by increasing the number of turns of wire around the core or by increasing the current flowing through the wires.
One of the most dramatic examples of the use of an electromagnet is in salvage. Incredibly strong electromagnets are used to pick up metal objects to be moved. When the object, such as an entire car, has been moved, the current is shut off and it falls from the magnet.
Introduction1. Ask the students what they know about electricity. Then ask them about magnets: How do we use
magnets? Has anyone heard of an electromagnet? What does an electromagnet do?2. Tell the students that today they will use the magnetic field around a wire to create an
electromagnet, using layers of wire and a battery. Ask them what they think will happen. Give them a few minutes to discuss this question in groups and make a group prediction.
Procedure1. Distribute permanent bar magnets in baggies to groups of students.2. Provide iron filings for each group, and have students pour them over the magnet to visualize the
magnetic field of the magnet.3. Have students draw a diagram of the magnetic field in their science journals.4. Distribute the materials for the electromagnet (nail, copper wire) to each group. Have each group
tightly wrap the wire around the nail, starting at the nail point and making sure that about 8 cm of wire is left free at the end.
5. When they have wrapped the wire up the length of the nail all the way to the tip, have them start another layer on top of the one just completed.
6. When the second layer has completely covered the first, have students cut the wire so that about 10 cm is left free. Have them use scissors to strip the insulation from the last 3 cm of the wire.
7. Have students connect one loose end of the wire to a conducting strip that is connected to a battery terminal. Touch the other loose end to a conducting strip attached to the other battery terminal and then bring a paper clip close to the nail point.
8. Have students try to pick up more paper clips.Safety Note: When touching the wire to the conducting strip, students should not touch the bare portion of the wire. The current being used is low and not dangerous, but the wire will heat up. It is also important that students not keep the circuit connected too long.
Observations and Conclusions1. Ask the students how they think the electromagnet can be strengthened. If they have difficulty with
the idea, suggest more batteries, another layer of wire, or another material instead of iron. Have
Virginia Department of Education104
Leave about 8 cm here

Science Enhanced Scope and Sequence – Grade 4
each group decide which idea they would like to test and allow them time to do so. Remember to have them write in their journals what they have decided to test and their results.
2. Demonstrate for the student a stronger electromagnet. Let each group examine the magnet and draw conclusions about how it was strengthened.
3. Ask students why it is useful to have a magnet that can be turned on and off. Electromagnets are in doorbells, speakers, telephones, and almost every motor, but many people do not understand how such everyday devices work.
Sample Assessment Assess student journals. Have students find an electromagnet in an everyday machine or gadget and explain in their science
journals where it is and what it does.
Resources Connections: Connecting Books to the Virginia SOLs. Fairfax County Public Schools and The
College of William and Mary. http://www.fcps.edu/cpsapps/connections. Presents a database of more than 1,000 works of children’s literature and their connection to the Virginia Standards of Learning.
How Stuff Works. http://science.howstuffworks.com/electromagnet.htm . Outstanding Science Trade Books for Students K–12. National Science Teachers Association
(NSTA). http://www.nsta.org/ostbc. Science Education. Jefferson Lab. http://education.jlab.org/. Search for Literature: Literature for Science and Mathematics. California Department of Education.
http://www.cde.ca.gov/ci/sc/ll/ap/searchlist.asp. Offers a searchable database.
Virginia Department of Education105
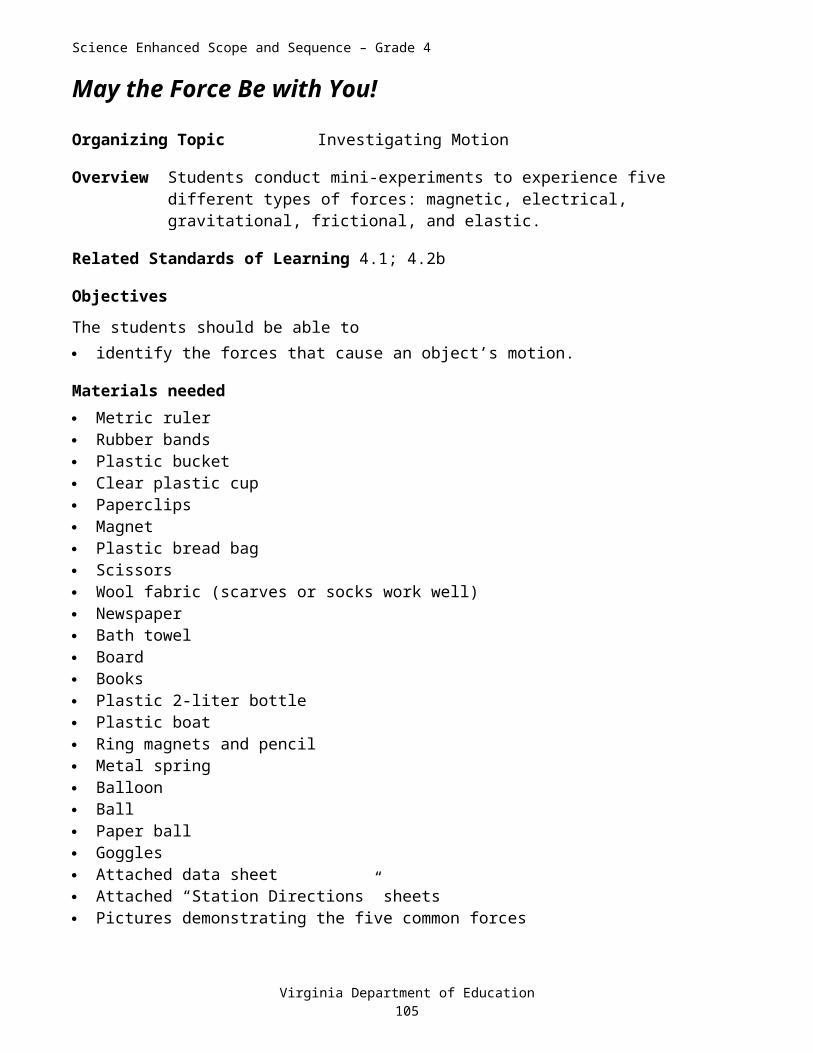
Science Enhanced Scope and Sequence – Grade 4
Static Electricity(A revised version of an activity included in the Educator’s Guide from the NASA SciFiles program “The Case of the Electrical Mystery.” Used by permission.)
Organizing Topic Investigating Electricity
Overview Students investigate the properties of static electricity.
Related Standards of Learning 4.3c
ObjectivesThe students should be able to explain how static electricity is created and occurs in nature; design an investigation using static electricity to attract or repel a variety of materials.
Materials needed Attached activity sheets Transparent tape Comb Balloon Access to water from a faucet Science journal
Instructional activityContent/Teacher NotesStatic electricity exists whenever there are unequal amounts of positively and negatively charged particles present. Rubbing a balloon or comb on your hair makes the balloon or comb have more of one type of charge. The rubbing transfers electrons from you to the balloon’s surface and gives the balloon a negative charge. As you bring the balloon near an object, the balloon induces a positive charge on the object because opposite charges attract. When the object and the balloon touch, electrons flow from the balloon to the object, giving the object a negative charge. Now that the balloon and the object both have the same charge, they repel each other.
Virginia Department of Education106

Science Enhanced Scope and Sequence – Grade 4
Static electricity is not caused by friction. It appears when two unlike materials make contact and then are separated. All that is required is the actual touching of the two materials. Rubbing will increase the total contact area between the materials and this will, in turn, make the materials more electrically dissimilar. Rubbing enhances static electricity, but it is not the cause.
Introduction1. Access “The Case of the Electrical Mystery” (see Resources below), and review the educator’s
guide related to this episode.2. Have students complete the activity on the attached activity sheet “Dr. D’s Lab Experiments,” and
then hold a class discussion about the results.3. After the discussion, have students watch “The Case of the Electrical Mystery.” Lead the
discussion into the ideas of attracting and repelling.
Procedure1. Have students complete the activity on the attached activity sheet “Cling On,” following the
directions given on the sheet.
Observations and Conclusions1. After students complete the activity and the concluding questions, review them with the class.
Sample assessment Assess student journals. Have students explain how static electricity exists.
Follow-up/extension Place some plastic drinking straws on a table. Charge a plastic pen with static electricity by rubbing
it with a wool cloth. Place the pen close to the straws. Ask students to describe what happens and why.
Have students try a variety of hairbrushes and combs made out of different materials like plastic, wood, or metal. Does your hair behave differently with each? Which one would give you a “bad hair day”?
Virginia Department of Education107
Science Enhanced Scope and Sequence – Grade 4
Brainstorm for ideas about how static electricity is produced in nature. Does weather make a difference?
Resources “The Case of the Electrical Mystery.” NASA SciFiles.
http://scifiles.larc.nasa.gov/educators/index.html. Click “Episodes” and “2001–2002 Season.” Connections: Connecting Books to the Virginia SOLs. Fairfax County Public Schools and The
College of William and Mary. http://www.fcps.edu/cpsapps/connections. Presents a database of more than 1,000 works of children’s literature and their connection to the Virginia Standards of Learning.
Outstanding Science Trade Books for Students K–12. National Science Teachers Association (NSTA). http://www.nsta.org/ostbc.
Search for Literature: Literature for Science and Mathematics. California Department of Education. http://www.cde.ca.gov/ci/sc/ll/ap/searchlist.asp. Offers a searchable database.
Virginia Department of Education108

Science Enhanced Scope and Sequence – Grade 4
Dr. D’s Lab ExperimentsName: Date:
Try some of the experiments that Dr. D did in her lab.Experiment 11. Tear a piece of paper into tiny pieces. Stroke a comb through your hair several
times. Place the comb near the paper pieces.What happens?
Why?
Experiment 21. Blow up a balloon, and rub the balloon on your head. Place the balloon near
the paper pieces and observe what happens. Repeat, substituting salt or puffed rice for the paper.Why are the paper and other objects attracted to the balloon?
Do the objects stay attracted to the balloon? Why or why not?
2. Rub the balloon on your head and try sticking the balloon to the wall. Why does it stick?
How long does the balloon stay up on the wall?Why does the balloon eventually fall?
What would make the balloon stay up longer?
3. Rub the balloon on your head and hold the balloon near a small stream of water coming from a faucet.What happens?
Why?
Virginia Department of Education109

Science Enhanced Scope and Sequence – Grade 4
Cling OnName: Date:
Virginia Department of Education110

Science Enhanced Scope and Sequence – Grade 4
Sample Released SOL Test Items
Virginia Department of Education111

Science Enhanced Scope and Sequence – Grade 4
Virginia Department of Education112

Science Enhanced Scope and Sequence – Grade 4
Organizing Topic — Investigating Natural Resources
Standards of Learning
4.1 The student will plan and conduct investigations in whicha) distinctions are made among observations, conclusions, inferences, and predictions;b) hypotheses are formulated based on cause-and-effect relationships;c) variables that must be held constant in an experimental situation are defined.
4.8 The student will investigate and understand important Virginia natural resources. Key concepts includea) watershed and water resources;b) animals and plants;c) minerals, rocks, ores, and energy sources; andd) forests, soil, and land.
Essential Understandings, Correlation to Textbooks andKnowledge, and Skills Other Instructional Materials
The students should be able to
compare and contrast natural and man-made resources;
distinguish among rivers, lakes, and bays; describe characteristics of each; and name an example of each in Virginia;
create and interpret a model of a watershed. Evaluate the statement “We all live downstream.”;
identify watershed addresses; recognize the importance of Virginia’s mineral resources,
including coal, limestone, granite, and sand and gravel;
appraise the importance of natural and cultivated forests in Virginia;
describe a variety of soil and land uses important in Virginia.
Virginia Department of Education113
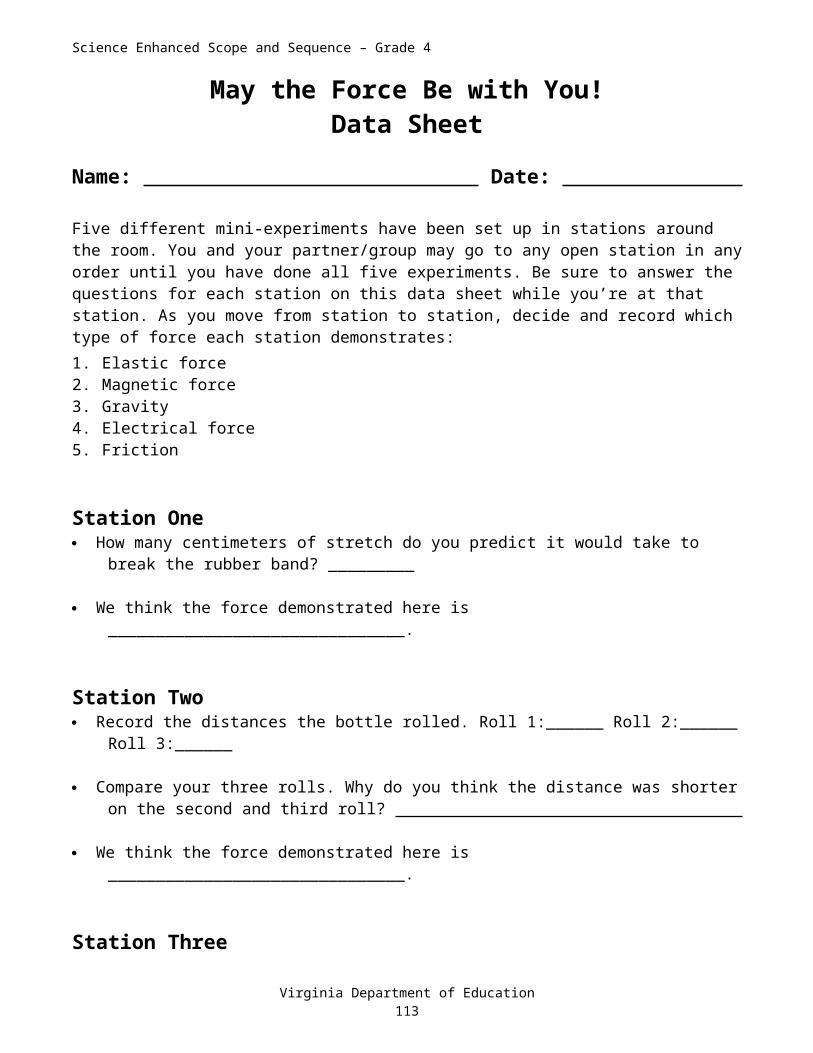
Science Enhanced Scope and Sequence – Grade 4
Watersheds
Organizing Topic Investigating Natural Resources
Overview Students create and interpret a model of a watershed.
Related Standards of Learning 4.8a
ObjectivesThe students should be able to create and interpret a model of a watershed; evaluate the statement “We all live downstream.”
Materials needed Attached map Aluminum foil Shallow, rectangular pan (can be foil, Styrofoam®, or metal) Food coloring or powdered drink mix Soil Spray bottle Rocks or blocks
Instructional activityContent/Teacher NotesThis is an introductory lesson to watersheds. There are numerous resources about watersheds in Virginia and the Chesapeake Bay (see the list under Resources for some of these). Many of the organizations listed in the Resource section provide valuable professional development opportunities for teachers in Virginia. Meaningful Watershed Educational Experiences (MWEE), which are included in the Chesapeake 2000 Agreement, are an important part of the science environmental education experience. Virginia is part of this Chesapeake 2000 Agreement and tracks the implementation of MWEE in Virginia’s school divisions. More information about the definition of an MWEE and how it ties into the science curriculum can be found at http://www.chesapeakebay.net/pubs/subcommittee/cesc/c2k.pdf.
A watershed, also called a “drainage basin,” is a geographic area in which all water drains eventually into a common body of water. Water traveling over land can carry soil sediments, dissolved minerals, livestock and pet waste, fertilizers, pesticides, and other pollutants, including trash and litter. Each watershed has unique features and potential sources of pollution.
In Virginia, the major regional watershed systems lead to the Chesapeake Bay, the North Carolina sounds, the Atlantic Ocean, or the Gulf of Mexico (via the Mississippi River). A map is attached that shows the Virginia boundaries of these watersheds.
Introduction1. Students may wonder where water goes after it flows down the street during a heavy rainstorm.
Discuss the concept of a watershed and how water travels over and through the land. Provide some examples of how individuals and businesses use water and how their actions might affect water running off the land. Don’t forget to include sewage treatment plants, homes, commercial and residential developments, farms, and factories. Help the students make the connection between
Virginia Department of Education114

Science Enhanced Scope and Sequence – Grade 4
people living in the watershed and the impact that they have upon water quality; especially, non-point-source pollution. Non-point-source pollutants are those that cannot be traced to a single source (e.g., runoff from fertilizer, air pollutants, fuel runoff).
2. Discuss the speed at which water flows and how moving water changes the land. You may wish to refer to the branches on a tree, or the veins in a leaf, or the human nervous system to depict how bodies of water “branch out.” The smaller branches are analogous to streams branching into larger ones, such as rivers, and so forth. Explain that watersheds can be open or closed depending on where the water drains. In closed systems, there is no outlet for the water, so it leaves the system naturally by evaporation or by seeping into the ground to become groundwater. In open watershed systems, such as those found in Virginia, water eventually flows into outlet rivers or a bay and ultimately into the sea.
Procedure1. Have students work in small groups to make a model of a watershed, as follows:2. Tear off a piece of foil to fit inside the shallow, rectangular pan. Crumble another piece of foil to
make dips and gullies to represent streams and rivers.3. At one end of the foil, make a larger basin or pocket. This will be a bay or ocean and will collect
water that runs off from the tributaries.4. Put blocks or rocks in the corners of one side of the pan to make mountains, and shape the foil over
the blocks.5. Pile soil at the upper end of your watershed near the mountains on top of the raised sections of foil.
You can make the mountain end higher by putting a book under the pan to prop it up. The cracks and dips represent bodies of water.
6. Squeeze a few drops of food coloring in the soil to represent a source of pollution.7. Make it rain over the mountains with a spray bottle.8. Watch how the water runs off of the land into the tributaries and then to the bay or ocean, carrying
the pollution with it.
Observations and Conclusions1. Discuss with students how the water travels through the watershed:
Where does erosion occur? How does the flow of water through the watershed affect choices for building sites? What happens to the “pollutants”? Where do they end up? What factors may lead to increased pollutants, such as runoff from sediments, industrial
wastes, phosphates and nitrates from agricultural sources, sewage, and residential runoff including pesticides?
What are some ways to reduce or prevent these non-point-source pollutants? How could you slow down water so it would filter the runoff?
How does water conservation help water quality?
Sample assessment Have students evaluate the statement “We all live downstream.” and the effect this fact has on them. Have students use the Virginia watershed map to determine how pollutants upstream would affect a
particular location downstream.
Virginia Department of Education115
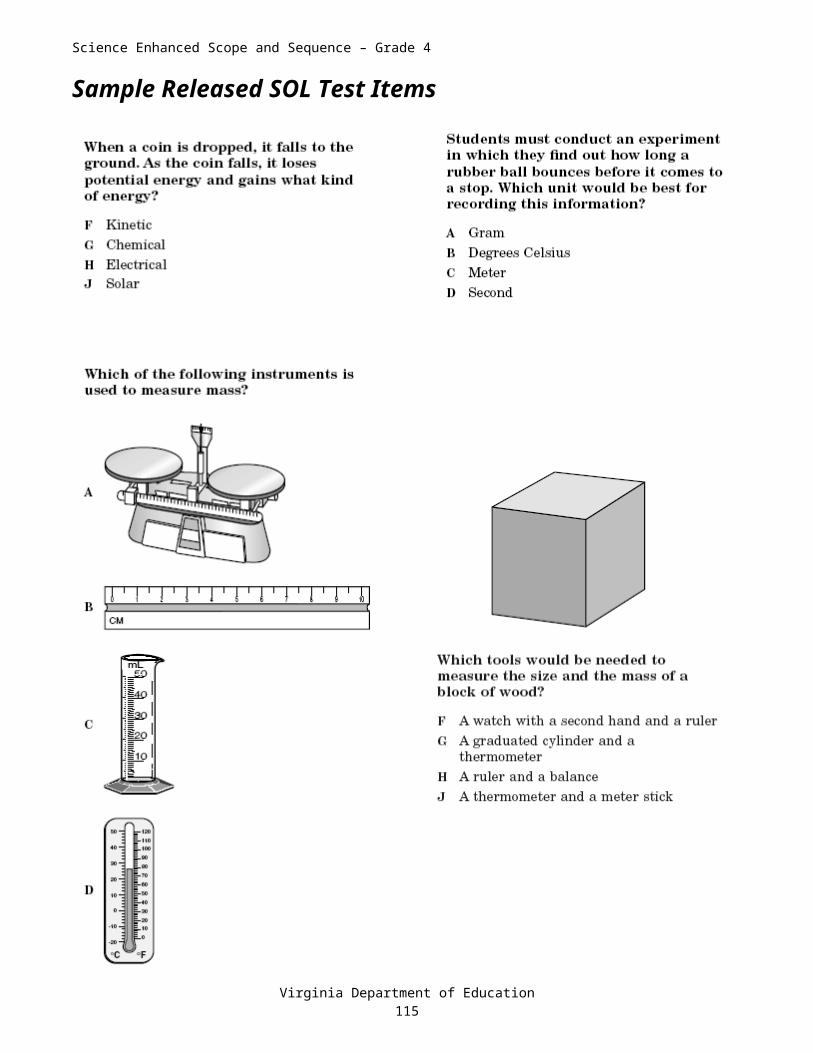
Science Enhanced Scope and Sequence – Grade 4
Follow-up/extension Have students keep a journal of a local waterway and note any changes in how the water looks or
smells, in the condition of animals, and in things being built nearby.
Resources Chesapeake Bay Foundation. http://www.cbf.org. Chesapeake Bay Program: America’s Premier Watershed Restoration Partnership.
http://www.chesapeakebay.net/. Provides articles and other resources on the Chesapeake Bay’s natural resources.
Lessons from the Bay. Virginia Department of Education. http://www.pen.k12.va.us/VDOE/LFB/. A resource for grades 3–6, including 16 lessons concerning watersheds and the negative human impact on the environment, specifically the Chesapeake Bay.
Love-a-Tree: An Environmental Education Activity Book for Teachers. http://www.vanaturally.com/lat.html. Contains lesson plans about streams.
Project WET (Water Education for Teachers). http://www.projectwet.org/. Offers watershed resources through an online store.
Virginia Institute of Marine Science. http://www.vims.edu/. Virginia Naturally: Linking Virginians to the Environment. http://www.vanaturally.com/. Offers
environmental resources for teachers.
Virginia Department of Education116

Science Enhanced Scope and Sequence – Grade 4
Virginia Department of Education117

Science Enhanced Scope and Sequence – Grade 4
A River Runs Through It(A lesson from Lessons from the Bay. Virginia Department of Education)
Organizing Topic Investigating Natural Resources
Overview Students investigate the ways land use along a river impacts the river and the entire watershed.
Related Standards of Learning 4.8a, d
ObjectivesThe students should be able to create and interpret a model of a watershed; evaluate the statement “We all live downstream.”
Materials needed Piece of drawing paper with edge cut to resemble the edge of a riverbank Long piece of blue bulletin board paper to represent a river 3 x 5 inch sticky notes Large piece of paper cut into the shape of a raindropFor each group: Attached Land-Use Scenarios
Instructional activityContent/Teacher NotesThis activity is an adaptation of a lesson of the same name in the VDOE Web resource Lessons from the Bay, which includes a process model, outline of the key components of the Chesapeake Bay, lesson plans geared to students in grades 3–6, a glossary of wetland terms, and a Project Action Guide. Lessons from the Bay is on the Web at http://www.doe.virginia.gov/VDOE/LFB/index.html.
There are numerous resources about watersheds in Virginia and the Chesapeake Bay (see the list under Resources for some of these). Many of the organizations listed in the Resource section provide valuable professional development opportunities for teachers in Virginia. Meaningful Watershed Educational Experiences (MWEE), which are included in the Chesapeake 2000 Agreement, are an important part of the science environmental education experience. Virginia is part of this Chesapeake 2000 Agreement and tracks the implementation of MWEE in Virginia’s school divisions. More information about the definition of an MWEE and how it ties into the science curriculum can be found at http://www.chesapeakebay.net/pubs/subcommittee/cesc/c2k.pdf.
Rivers, creeks, and streams throughout the Chesapeake Bay watershed are fronted by a wide variety of land types. The impact of the land use surrounding the upper portions of a river is felt all the way downstream, influencing the water quality of the river, and ultimately, the Bay.
Perhaps the greatest negative impact results from conditions that contribute to increased runoff, sediment, and nutrient levels in the water. Increased runoff causes erosion and flooding of waterways. The rapid water picks up and spreads pollutants. Erosion of exposed soil contributes sediment to the water. The sediment blocks the sunlight that underwater grasses need to produce the oxygen that benefits other organisms in the water. Increased nutrient levels in the water cause algal blooms that
Virginia Department of Education118

Science Enhanced Scope and Sequence – Grade 4
block sunlight. Several of the scenarios in this lesson also deal with air pollution and animal waste — another source of increased nutrients.
The most effective method of reducing erosion-causing runoff and pollutants entering the water is the maintenance of vegetation along the riverbank. Vegetation serves as a natural filter and slows the flow of runoff. Vegetation serves as a natural filter, slowing the flow of runoff and holding the soil in place. Vegetation also shades the waterway and prevents the water from reaching unhealthy temperature levels. Farmers who practice no-till farming and/or contour plowing help to reduce runoff and erosion. Developers who maintain a vegetated buffer along waterways help to reduce the potential runoff of pollutants and sediment. Contractors who use retaining fences also reduce the level of runoff and erosion from building sites.
ProcedureSession 1 (in the classroom):
1. Divide the class into 10 groups of students or into pairs. Give each group a piece of drawing paper and one of the Land-Use Scenarios. Instruct each group to draw a picture of their piece of land, using the information given in their scenario. Impress upon them that they should include in their drawing all the details from the scenario.
2. Give at least one 3 x 5 inch sticky note to each group. Direct each group to list on the note items from their land that could end up in the river with or without the aid of surface run-off.
3. When all groups have finished, have students place their drawings along the edge of the blue bulletin-board-paper river.
4. Beginning at the start of the river, move the paper raindrop downstream. As you pass by each land-use picture, ask the group that drew it to read their scenario to the class, describe what they have drawn, and read the list from their sticky note. Then, have the group place their sticky note on the raindrop. Proceed to the next land-use picture, and repeat the process.
5. Upon reaching the end of the river, read the sticky notes that are on the raindrop, and discuss the items. Ask students to help you list on the board the items that appear most frequently. Are some items more harmful to the water than others? Are there any that could be helpful? Discuss possible improvements to the land use in each piece of land that would decrease the negative impact on the river’s water quality.
6. Have the groups modify their drawings to reflect better stewardship of the river and the land. Discuss the meaning of stewardship.
Session 2 (in the schoolyard):
1. Take the “river” and “raindrop” used in Session 1 outside. Again, give students sticky notes, and tell them to imagine that the river passes through the schoolyard.
2. Direct the groups to search the schoolyard for land-use practices that could impact the river. Tell them to look for both negative and positive impacts and to record their findings on the sticky notes.
3. When students have completed their investigation of the schoolyard, have them attach their sticky notes to the raindrop.
Observations and Conclusions1. Return to the classroom, and discuss the items listed on the raindrop. Ask students to name and list
the items that appear most frequently. Are some items more harmful to the water than others? Are
Virginia Department of Education119

Science Enhanced Scope and Sequence – Grade 4
there any that could be helpful? Discuss possible improvements to the land use that would decrease the negative impact on the river’s water quality.
Sample assessment Have students evaluate the statement “We all live downstream.” and the effect this fact has on them. Conduct an informal assessment during the activity, determining whether or not students accurately
report harmful/helpful impacts of the land area they were assigned. Assess students’ solutions for solving land-use problems.
Follow-up/extension On a field trip to a local stream, creek, or river, have the students assess the land use along the
waterway and offer recommendations for improvements. Have the students study maps to determine land-use practices along a river in your area and then
write a story about water as it flows down the river. Have the students participate in the Chesapeake Bay Foundation’s and Maryland Department of
Natural Resources’ “Schoolyard Report Card, ” a Bay Grasses in Classes program (see Resources below).
Have the class write a letter to the principal recommending improvements in land-use practices in the schoolyard. Make sure the students support their recommendations with solid scientific reasoning. Prepare the students for both eventualities: that their letter will not be acted upon, and that it will.
Resources “Bay Buffers,” “Sources of Sediment.” Watershed Action for Virginia’s Environment (WAVE).
Chesapeake Bay Foundation. http://www.cbf.org/site/PageServer?pagename=edu_educators_curriculum_va_index. (Or contact the Virginia Office: Capitol Place, 1108 E. Main Street, Suite 1600, Richmond, VA 23219; phone 804-780-1392.)
“Bay Grasses in Classes.” Chesapeake Bay Foundation: Save the Bay. http://www.cbf.org/site/PageServer?pagename=edu_educators_restoration_grasses.
Chesapeake Bay Program: America’s Premier Watershed Restoration Partnership. http://www.chesapeakebay.net/. Provides articles and other resources on the Chesapeake Bay’s natural resources.
ChesSIE (Chesapeake Science on the Internet for Educators). http://www.bayeducation.net/. Resource for educators about the Chesapeake Bay.
Lessons from the Bay. http://www.doe.virginia.gov/VDOE/LFB/index.html. “Schoolyard Report Card.” Bay Grasses in Classes. Chesapeake Bay Foundation and Maryland
Dept. of Natural Resources. http://www.cbf.org/site/PageServer?pagename=edu_educators_restoration_grasses. (Or contact the Virginia Office: Capitol Place, 1108 E. Main Street, Suite 1600, Richmond, VA 23219; phone 804-780-1392.)
Virginia Department of Education120

Science Enhanced Scope and Sequence – Grade 4
A River Runs Through ItLand-Use Scenarios
Scenario 1You are a farmer who grows wheat, barley, and oats. Your farm is along the riverbank. In order to save money in equipment costs, you have chosen to use a no-till method of farming, which means that you do not plow the land that you farm. To keep your land free of unwanted plant growth between crops, you apply herbicides regularly. Scenario 2You are the owner of the Riverview Shopping Mall. This mall has many paved parking lots and concrete sidewalks. There is even a sidewalk along the riverbank, where shoppers can relax and eat while enjoying a lovely view of the river. There is extensive landscaping around your mall, with lush trees, shrubs, and flowers. You instruct your maintenance staff to apply fertilizers regularly to keep the landscaping lush. Scenario 3You are the owner of the Down by the Riverside golf course. Your course has 18 holes of manicured fairways and greens, all of which are kept green by the frequent application of fertilizers and herbicides. Many of the fairways slope to the river’s edge, offering golfers an extra challenge, as well as a beautiful view. Scenario 4You are the developer of the Homes on the River subdivision. This subdivision contains 25 homes owned by high-income families. Many of these families have dogs and cats that enjoy the well-manicured lawns that surround each home. Most of the homeowners apply fertilizers and herbicides regularly to their lawns to keep them beautiful. The roads and driveways in the subdivision are paved. The trees and vegetation that once lined the riverbank have been removed in order to give residents a view of the river. Scenario 5You are the owner of the Big River Marina. You have numerous concrete boat ramps that descend directly into the river, where boaters can easily gain access to the water. You also sell oil and gasoline from a dock in the river, where boaters can fill their boats with fuel without leaving the water.
Scenario 6You are a contractor assigned to build a new subdivision of riverfront homes. You are currently in the beginning stages of construction. Your bulldozers have dug up the soil where the foundations of these homes will eventually be built. There is a tremendous area of bare, exposed soil alongside the river.
Virginia Department of Education121

Science Enhanced Scope and Sequence – Grade 4
Scenario 7You are a farmer who grows corn. Corn extracts a tremendous amount of nutrients from the soil. Since you plant corn in the same fields every year, the soil does not always have enough nutrients to support the growth of the corn. Therefore, you apply a great deal of fertilizer containing nutrients to the soil. One of your fields slopes down to the edge of the river. You plow this field in rows that are perpendicular to the river. Rainwater often runs very fast down the gullies created by these rows. Scenario 8You are the owner of a forestry company that makes its money by cutting down trees along the river and selling them to lumber companies. You bring in several bulldozers and chainsaws that plow down and cut the trees. This equipment runs on gasoline and produces large quantities of exhaust. To ensure that you will have more trees to cut in the future, you replant the land in pines after you have finished clearing it. Scenario 9You are the owner of a chicken farm. Chicken manure contains a very high amount of nitrogen. You have about 20 chicken coops. When it is time for you to clean them, you shovel the manure and pile it on the edges of fields that drain into the river. Scenario 10You are the owner of a fishing pier. Many tourists and locals use this pier for sport fishing. Your dock contains a store that sells bait, tackle, and refreshments. Many of the people who fish from your pier catch an average of 20 fish a day. Those that are too small to keep are thrown back. There is also a spot beside your pier where guests can clean their fish. The remains of the fish are dumped back into the river. There is also a paved parking lot beside your pier that extends very close to the river’s edge.
Virginia Department of Education122

Science Enhanced Scope and Sequence – Grade 4
Journey of a Raindrop(A lesson from Lessons from the Bay. Virginia Department of Education)
Organizing Topic Investigating Natural Resources
Overview Students investigate the path of a raindrop through different bodies of water in Virginia and what it picks up along the way. They also identify their own watershed address.
Related Standards of Learning 4.8a
ObjectivesThe students should be able to distinguish among rivers, lakes, and bays; describe characteristics of each; and name an example of
each in Virginia; identify watershed addresses.
Materials needed On the Way to the Chesapeake Bay: The Journey of a Raindrop booklet for each student (see
Resources) Raindrop to the Bay PowerPoint presentation (see Resources) Computer with large monitor or projection device Large map of Virginia Dictionary Internet accessFor each group: Small map of Virginia from textbook or other source Enlarged topographic map of Brackett Farm, Louisa County from Virginia Atlas and Gazetteer, p.
68 (see Resources) Map of your local area, including first major tributary Tennis ball Highlighter Clipboard (optional)
Instructional activityContent/Teacher NotesThere are numerous resources about watersheds in Virginia and the Chesapeake Bay (see the list under Resources for some of these). Many of the organizations listed in the Resource section provide valuable professional development opportunities for teachers in Virginia. Meaningful Watershed Educational Experiences (MWEE), which are included in the Chesapeake 2000 Agreement, are an important part of the science environmental education experience. Virginia is part of this Chesapeake 2000 Agreement and tracks the implementation of MWEE in Virginia’s school divisions. More information about the definition of an MWEE and how it ties into the science curriculum can be found at http://www.chesapeakebay.net/pubs/subcommittee/cesc/c2k.pdf.
When rain falls, it ends up in many places. Some rainwater is taken in by plants. Some seeps into the ground and replenishes groundwater supplies. Some gathers in puddles or closed ponds and may provide water for wildlife. The rest flows across the ground pulled by gravity. This water follows many paths, depending on local topography and development. Rainwater may flow into a stream and then into a
Virginia Department of Education123

Science Enhanced Scope and Sequence – Grade 4
larger stream or river. It may flow through a wetland, such as a bog, marsh, wet meadow, shrub wetland, tree swamp, or storm-water-management pond. A stream or river may flow through an open pond or lake that was formed by a beaver dam or man-made dam. A natural stream’s permeable surface, winding course, and vegetation help to slow the flow of water and filter out pollutants.
People affect the flow of water through their communities. Rainwater flows across pavement, where it picks up oil leaked from cars, as well as litter and other pollution. In concrete gutters, channels, and storm sewers, water flows quickly and picks up pollutants. In contrast to natural streams, these man-made channels are often hot and dry between rains and therefore provide an inhospitable habitat for wildlife.
Gravity pulls rainwater to lower and lower elevations until it reaches sea level. Most of Virginia is in the Chesapeake Bay watershed. This means the water in its streams, rivers, open ponds, lakes, and even storm drains will eventually enter the Chesapeake Bay. There are four major rivers that flow into the Chesapeake: the Potomac, the Rappahannock, the York, and the James. Each river is surrounded by land that drains into the river; this area is considered the river’s watershed. These watersheds combine with the others that drain into the Bay to form the larger Chesapeake Bay watershed.
Even if your school is outside the Chesapeake Bay watershed, your students will benefit from this lesson because the concepts are the same regardless of watershed. After determining the path a raindrop follows from their schoolyard to the Chesapeake Bay, students record their findings in the form of a “watershed address.” A mailing address lists a house number, street, town, and state, conveying a location based upon man-made boundaries. A watershed address lists the streams, rivers, and Bay to identify a location based upon the flow of water across a watershed. Both addresses list information in order from local to global. Depending on the path water takes to reach the Bay, a watershed address may be long or short. Here are examples of both types of addresses:
Mailing Address Watershed AddressLake Anna State Park Drainage ditch6800 Lawyers Road Unnamed streamSpotsylvania, Virginia 22553 Pigeon Run
Lake AnnaNorth Anna RiverPamunkey RiverYork RiverChesapeake Bay
ProcedureSession 1:1. Read On the Way to the Chesapeake Bay: The Journey of a Raindrop together with the class.2. After reading, return to each page, and discuss what the raindrop might “pick up” and carry with it
from each stop on its journey. Draw a large raindrop on the chalkboard or chart paper. As students name what is picked up, write each item on the raindrop. Students may also draw these items on their copies of the story or draw a raindrop on each page with the items it has gathered.
3. Discuss which of the items on the raindrop could cause harm to the water quality of the Chesapeake Bay.
Session 2:1. Prepare to show the PowerPoint presentation Raindrop to the Bay on a large monitor or projection
device. Introduce the presentation by explaining that it follows a group of teachers as they travel the path that water takes from Louisa County to the Chesapeake Bay. Tell the students that after
Virginia Department of Education124

Science Enhanced Scope and Sequence – Grade 4
watching this journey, they will map out the path that water takes from their schoolyard to the Chesapeake Bay.
2. Divide students into “map groups.” Give each group a Virginia map, a map from the Virginia Atlas and Gazetteer that includes Brackett Farm in Louisa County, and a highlighter. Show the groups the location of Louisa County on the large classroom map of Virginia, and have them locate it on their maps of Virginia.
3. Direct groups to work together while watching the presentation to follow on their Virginia maps the water’s journey from the Pamunkey River to the York River to the Chesapeake Bay.
4. During the presentation, take special note of the slide entitled “What watershed are we a part of?” Students will use this EPA Web site later in the lesson to locate their watershed. Tell students to pay particular attention to the process of clicking Virginia within the U.S. map and then a local region of Virginia on the next slide.
5. At the slide entitled “Brackett Farm’s Watershed Address,” use a map showing Brackett Farm and the South Anna River to see how the path of the water determines the watershed address. Help students locate Brackett Farm (Nolting Pond is on the farm), and tell them to indicate the farm’s location with a star. Then, direct students to follow the water’s path with a highlighter on their Virginia Atlas and Gazetteer map as the journey continues.
Session 3 (in the schoolyard):
1. Ask students what might happen to a raindrop that falls in the schoolyard. Discuss various possibilities, and explain that the focus of this session is runoff, i.e., water that flows away.
2. Ask for a volunteer to look up the word topography in the dictionary. Discuss the definition, and explain that the students will be looking at the topography of the schoolyard to determine which direction rainwater flows.
3. Have the map groups form again, and make sure each group has a tennis ball and a clipboard, if available, with paper and pencil.
4. Tell students that they will have 5 minutes to walk around the schoolyard within your view to discover which direction rainwater flows. Direct the groups to place their tennis balls in various locations around the schoolyard to observe how the ball is affected by gravity. Groups may record their data by drawing a map of the schoolyard and marking with arrows the direction the ball rolls at each location. (See “Mapping the Schoolyard” on page 53 of the Project Action Guide in Lessons from the Bay.) Tell students to include details about the surfaces over which the rainwater flows, e.g., grass, bare soil, pavement.
5. When the groups have completed their experiments, give them a few more minutes to analyze their data and extrapolate the likely route most of the runoff takes to leave the schoolyard.
6. Call on a spokesperson for each group to share the group’s findings. Discuss and decide as a class where the rainwater goes. If the area has storm drains, you may need to do additional research by contacting your city or county public works department to find into which stream or river the storm drains empty.
7. Discuss the various surfaces rainwater flows over in the schoolyard and what effects the surfaces have on the quality of the runoff. The following chart lists some possibilities.
8. After discussing the effects that the surfaces have on the runoff, have students add drawings and notes to their schoolyard maps to explain the effects of the different surfaces on the quality of the schoolyard runoff.
Virginia Department of Education125

Science Enhanced Scope and Sequence – Grade 4
Surface What happens when water runs over Effects on water quality
Large area of pavement
Water flows rapidly, causing increased erosion after leaving the pavement.
Negative: Erosion causes increased sediment pollution.
Parking lot Water flows rapidly, causing increased erosion after leaving the pavement. Also, water picks up oil and engine fluid deposited in the lot.
Negative: Erosion causes increased sediment pollution; automotive products contribute to toxic pollution.
Bare soil Water erodes and carries away soil. Negative: Erosion causes increased sediment pollution.
Mulch Water travels slowly over bumpy mulch and soaks into the ground without carrying away soil.
Positive: Slower and reduced runoff decreases erosion and, therefore, decreases sediment pollution.
Grass Water travels slowly over uneven surface and soaks into the ground; roots take in water and hold soil in place. Grass can filter out harmful toxins.
Positive: Erosion and sediment pollution are further decreased; filtering decreases toxic pollution.
Forest Water travels the slowest in a forest. As it drips down through branches and leaves, much is taken in by trees’ and other forest plants’ roots, which also hold soil. The forest has the most plants, so it can filter out the most toxic pollution.
Positive: The slowest and cleanest runoff comes from forests. It has the least sediment pollution and the least toxic pollution when compared to other surfaces.
Session 4:
1. Display a Web browser on a large monitor or projection device; go to the EPA’s Surf Your Watershed Web site (http://cfpub.epa.gov/surf/locate/index.cfm), and click “Search by Map.” In the U.S. map, click Virginia. Then click your area of Virginia to find your local watershed.
2. Direct students to rejoin their map groups. Give each group a Virginia map, an enlarged local topographic map from the Virginia Atlas and Gazetteer that includes your school, and a highlighter.
3. Instruct the groups to find their school on the local topographic map and draw an arrow showing the direction the class determined water leaves the schoolyard.
4. Instruct the groups to find the stream nearest the point at which water leaves the schoolyard. Have the students highlight the path from that stream to the stream or river into which it flows. Topographic elevation lines are labeled in the Virginia Atlas and Gazetteer in light gray, and the water will flow from the higher elevation to the lower one. An alternative method is to find the larger tributary you know your area drains into and work backwards.
5. Have students continue to follow the water and highlight its path through all tributaries until it reaches the Chesapeake Bay.
6. As a class, review the water’s path, listing the directions on the board as you go. This list of bodies of water between the schoolyard and the Chesapeake Bay provides the school’s watershed address. Make sure to include in the address details the students noticed in the schoolyard, such as parking lots, sandboxes, athletic fields, gutters, and storm drains.
7. Follow the path of water from the schoolyard to the Chesapeake Bay, affixing a piece of string along its course on the large class wall map of Virginia. Have students help hold the string so that it follows the winding path of the streams and rivers as closely as possible. Cut the string when it reaches the Chesapeake Bay.
Virginia Department of Education126
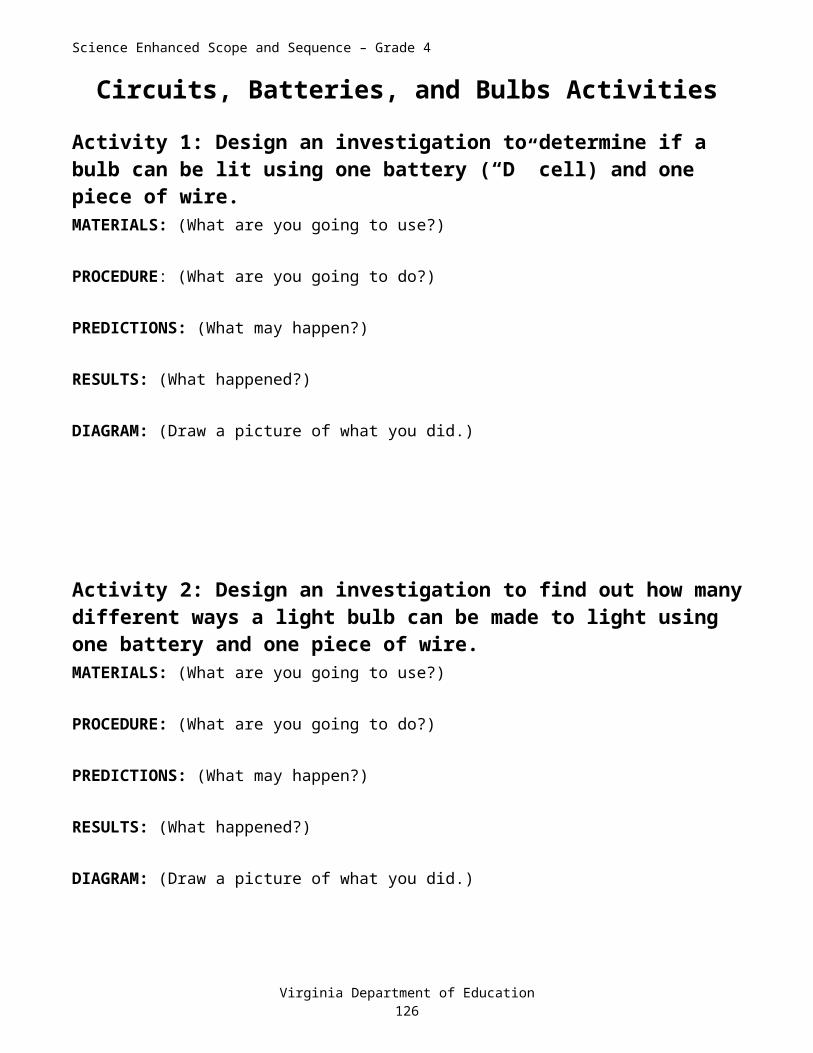
Science Enhanced Scope and Sequence – Grade 4
8. Next, remove the string from the map, lay it straight on a table, and measure it. Then use the map scale to convert the length of the string into distance in kilometers or miles — the distance a raindrop travels from the schoolyard to the Chesapeake Bay.
9. Finally, have each student pretend he/she is a raindrop writing directions to another raindrop on how to get from the schoolyard to the Chesapeake Bay. Instruct students to include the elements of the school’s watershed address as well as the distance from the schoolyard to the Chesapeake Bay. Encourage them to include things to look for along the trip, such as ground surfaces, land formations, and state parks.
Sample assessment Assess the maps of the schoolyard with their flow directions and details about surfaces, including
how surfaces will affect the quality of the runoff. Assess the written directions completed at the end of Session 4.
Follow-up/extension Have students take pictures with a digital camera, or scan 35mm photos to make the school’s own
version of Journey of a Raindrop to the Bay multimedia presentation or picture book. Photos of the larger rivers can usually be found on the Internet by doing a search or by using http://www.picsearch.com.
Have students look around their yard at home to see where runoff goes. Have them make a list to create a personal watershed address.
Have students use their rough sketch map of the schoolyard to create a more detailed topographic map of the same area.
Have students read more about rivers, lakes, and other water bodies through which water flows on its way to the Chesapeake Bay.
Have students undertake the project entitled “Building an Outdoor Classroom” on page 39 of the Project Action Guide from Lessons from the Bay (see Resources).
Resources Chesapeake Bay Foundation. http://www.cbf.org. Chesapeake Bay Program: America’s Premier Watershed Restoration Partnership.
http://www.chesapeakebay.net/. Provides articles and other resources on the Chesapeake Bay’s natural resources.
ChesSIE (Chesapeake Science on the Internet for Educators). http://www.bayeducation.net/. Resource for educators about the Chesapeake Bay.
Lessons from the Bay. Virginia Department of Education. http://www.pen.k12.va.us/VDOE/LFB/. A resource for grades 3–6, including 16 lessons concerning watersheds and the negative human impact on the environment, specifically the Chesapeake Bay.
Love-a-Tree. http://www.vanaturally.com/lat.html. An environmental education activity book for teachers with lesson plans about streams.
On the Way to the Chesapeake Bay: The Journey of a Raindrop. http://www.pen.k12.va.us/VDOE/LFB/lessonplans/journeyraindrop/rain_book.pdf .
Project WET (Water Education for Teachers). Virginia Department of Environmental Quality. http://www.deq.virginia.gov/education/wet.html. Presents information about Project WET in Virginia.
Virginia Department of Education127

Science Enhanced Scope and Sequence – Grade 4
Raindrop to the Bay PowerPoint presentation. http://www.pen.k12.va.us/VDOE/LFB/lessonplans/journeyraindrop/raindrop_to_bay.ppt.
Surf Your Watershed. U.S. Environmental Protection Agency. http://cfpub.epa.gov/surf/locate/index.cfm.
Virginia Atlas and Gazetteer: topographic maps of the entire state, back roads and recreation areas. Delorme Mapping Company, 1995. http://www.delorme.com/atlasgaz/.
Virginia Institute of Marine Science. http://www.vims.edu/. Virginia Naturally: Linking Virginians to the Environment. http://www.vanaturally.com/. Offers
environmental resources for teachers.
Virginia Department of Education128

Science Enhanced Scope and Sequence – Grade 4
Forests
Organizing Topic Investigating Natural Resources
Overview Students investigate the importance of natural and cultivated forests in Virginia, using a 4-H Virtual Forest Web site.
Related Standards of Learning 4.8d
ObjectivesThe students should be able to appraise the importance of natural and cultivated forests in Virginia; compare and contrast natural and man-made resources.
Materials needed 4-H Virtual Forest Web site: http://www.ext.vt.edu/resources/4h/virtualforest/ Computer access for each student
Instructional activityContent/Teacher NotesThis student-directed lesson, in which students use a Web site to find out more about forests in Virginia, should follow an activity/lesson about forests in Virginia. User’s guides and activity sheets accompany each module on the Web site. It may be appropriate to pair your students based on their reading abilities, or to assign different modules to students based on their ability levels, as some modules are more reading intensive than others. This lesson may take several class periods, depending on how much you extend the discussion after each group’s presentation.
Introduction1. Review information students have previously learned about forests.
Procedure1. Instruct students to access the 4-H Virtual Forest Web site. There are three modules on this Web
site that are most appropriate for this SOL — “Trees,” “Old Field Succession,” and “Timber.”2. Assign students a particular module to work through.3. After all students have completed their module and corresponding activity sheets, have all those
who worked on a particular module meet in a group to prepare a presentation about the main points of the module. This can be done in a variety of ways. An effective way is to use a projector so that the whole class can see the Web site and to have a spokesperson summarize each frame for the rest of the class.
4. Lead a discussion after each group’s presentation to summarize the key points of the module again. Have students record this information in their science journal or in a graphic organizer. After the group’s presentation about trees and natural resources, lead a discussion about natural and man-made resources. Have students brainstorm as a class and prepare a chart listing natural and man-made resources.
Virginia Department of Education129

Science Enhanced Scope and Sequence – Grade 4
Sample assessment Have students describe why forests are cultivated in Virginia, including the ways natural forests are
different from cultivated forests. Students may make a display with one side showing characteristics of a natural forest and the other side showing characteristics of a cultivated forest.
Have students distinguish between natural and man-made from a list of various object.
Follow-up/extension Have students work on other modules of the Web site.
Resources 4-H Virtual Forest. Virginia Cooperative Extension.
http://www.ext.vt.edu/resources/4h/virtualforest/. Project Learning Tree. American Forest Foundation. http://www.plt.org/. Provides details on this
national environmental education program. Virginia Cooperative Extension: Knowledge for the CommonWealth. http://www.ext.vt.edu/. Virginia Naturally: Linking Virginians to the Environment. http://www.vanaturally.com/. Offers
environmental resources for teachers.
Virginia Department of Education130

Science Enhanced Scope and Sequence – Grade 4
Virginia’s Mineral Resources
Organizing Topic Investigating Natural Resources
Overview Students name mineral resources found in Virginia and list ways they are used.
Related Standards of Learning 4.8c
ObjectivesThe students should be able to recognize the importance of Virginia’s mineral resources, including coal, limestone, granite, sand,
and gravel.
Materials needed Sample products made from Virginia’s mineral resources K-W-L chart Chart paper Research materials Internet access
Instructional activityContent/Teacher NotesCoal is mined in the mountains of the southwestern part of the state. Limestone and granite are dug from deep pits called “quarries” and are used as building materials. Sand and gravel are also dug from pits and are used in building and road construction.
Introduction1. Display products made from mineral resources found in Virginia, and have students name the
resources used in the production of each. Write the student-generated list on chart paper, and post it on the wall.
Procedure1. Give each student a K-W-L chart. Have them fill in the “K” part regarding Virginia’s mineral
resources. Then, ask what they would like to learn, and tell them to fill in the “W” part. Tell students they will be researching mineral products that are found in Virginia.
2. Allow students to use trade books, encyclopedias, and computers to conduct research on what mineral resources are mined in Virginia and what uses these minerals have. They should include the following:
Coal — energy Limestone — foundations, sidewalks, filling for the back of carpet, reservoirs for
groundwater and ore deposits, cement, building stone, concrete aggregate, agricultural lime Granite — building and ornamental stone, aggregate, countertops Sand — aggregate, concrete and masonry uses, glass, septic tanks, riverbeds, mortar, man-
made building stone Gravel — aggregate, concrete and masonry uses, driveways, roads
Virginia Department of Education131

Science Enhanced Scope and Sequence – Grade 4
Observations and Conclusions1. Once again, display the products made from mineral resources found in Virginia, and have
students name the resources used in the production of each. Compare this list to the one produced earlier.
2. Have students complete the “L” part of their chart.
Sample assessment Have students choose one of Virginia’s mineral resources and explain how it is used and why
Virginia’s resources are important.
Resources Virginia Department of Mines, Minerals and Energy. http://www.mme.state.va.us/. United States Geological Survey. http://www.usgs.gov/.
Virginia Department of Education132

Science Enhanced Scope and Sequence – Grade 4
Sample Released SOL Test Items
Virginia Department of Education133

Science Enhanced Scope and Sequence – Grade 4
Organizing Topic — Investigating the Sun-Earth-Moon System
Standards of Learning
4.1 The student will plan and conduct investigations in whicha) distinctions are made among observations, conclusions, inferences, and predictions;b) hypotheses are formulated based on cause-and-effect relationships;c) variables that must be held constant in an experimental situation are defined;
4.7 The student will investigate and understand the relationships among the Earth, moon, and sun. Key concepts includea) the motions of the Earth, moon, and sun (revolution and rotation);b) the causes for the Earth’s seasons and phases of the moon;c) the relative size, position, age, and makeup of the Earth, moon, and sun; andd) historical contributions in understanding the Earth-moon-sun system.
Essential Understandings, Correlation to Textbooks andKnowledge, and Skills Other Instructional Materials
The students should be able to
differentiate between rotation and revolution;
describe how the Earth’s axial tilt causes the seasons;
model the formation of the eight moon phases, sequence the phases in order, and describe how the phases occur;
describe the major characteristics of the sun, including its approximate size, color, age, and overall composition;
create and describe a model of the sun-Earth-moon system with approximate scale distances and sizes;
compare and contrast an Earth-centered model of the solar system to the sun-centered one;
analyze the differences in what Aristotle, Ptolemy, Copernicus, and Galileo observed and what influenced their conclusions;
compare and contrast the surface conditions of the Earth, moon, and sun;
describe a contribution of the NASA Apollo missions to our understanding of the moon.
Virginia Department of Education134

Science Enhanced Scope and Sequence – Grade 4
What’s the Difference?
Organizing Topic Investigating the Sun-Earth-Moon System
Overview Students investigate the similarities and differences among the sun, Earth, and moon.
Related Standards of Learning 4.7c
ObjectivesThe students should be able to describe the major characteristics of the sun, including its approximate size, color, age, and overall
composition; compare and contrast the surface conditions of the sun, Earth, and moon.
Materials needed Computer Research materials Materials for making a brochure Attached fact sheets
Instructional activityContent/Teacher NotesThis activity may be done in small groups or individually. For additional information, see the following NASA Web sites for lithographs of and corresponding information about each celestial body: http://www.nasa.gov/pdf/62227main_Sun_Lithograph.pdf http://www.nasa.gov/pdf/62209main_Earth_Lithograph.pdf http://www.nasa.gov/pdf/62217main_Moon_Lithograph.pdf
Introduction1. Review information students have previously learned about the sun, Earth, and moon.
Procedure1. Assign students the task of making a PR brochure about the sun, Earth, or moon, advertising the
celestial body and convincing the rest of the universe that it is the best star, planet, or moon in the universe. They should include facts from the lithographs and/or fact sheets included in this lesson.
2. Once students complete their brochure, have them meet with two other students who have done the other assignments. Challenge the small groups to come up with a chart of how the three bodies are alike and different, based on the information in their brochures and what they learned from making the brochures.
Sample assessment Have students compare different aspects of the sun, Earth, and moon. For example, they could
compare their surfaces or their sizes.
Follow-up/extension Have students make a poster about the sun, Earth, or moon.
Virginia Department of Education135

Science Enhanced Scope and Sequence – Grade 4
Resources Earth in Space: SOL Teacher-Instruction Module. Science Museum of Virginia.
http://www.smv.org. A comprehensive set of astronomy lessons and resources for grades K–6. Exploring the Moon: A Teacher’s Guide with Activities for Earth and Space Sciences. NASA.
http://www.nasa.gov/pdf/58199main_Exploring.The.Moon.pdf. Langley Research Center. NASA. http://www.nasa.gov/centers/langley/about/index.html. NASA Space Place. http://spaceplace.nasa.gov/en/kids/. A resource for students and teachers. National Aeronautics and Space Administration (NASA). http://www.nasa.gov.
Virginia Department of Education136

Science Enhanced Scope and Sequence – Grade 4
Sun Facts
The sun is an average-sized yellow star, about 110 times the diameter of the Earth. (The sun is about 1.39 million kilometers in diameter.)
The sun has 330,000 times the mass of the Earth and is 93 million miles (150 million km) away from the Earth on average.
Light from the sun takes about eight minutes to reach Earth.
The sun is composed of very hot gases, mostly hydrogen and helium, with smaller amounts of other gases.
The temperature of the sun is about 60,000ºC on the surface. Its yellow color comes from its surface temperature.
The sun’s temperature at its center is about 15,000,000ºC (27,000,000ºF). The sun’s energy (heat and light) comes from nuclear reactions, which turn hydrogen into helium.
The sun has been shining for about 5 billion years and is expected to shine for about another 4.5 billion years.
Our sun is a star that is modest in size and shines with a calm and steady light at this time in its life cycle. Unlike many stars, it does not have a companion or twin.
All these things help to make it possible for life to exist on Earth.
Virginia Department of Education137

Science Enhanced Scope and Sequence – Grade 4
Earth Facts
The Earth is 12,756 kilometers (7,927 miles) in diameter The Earth is the third planet from the sun and is about 150
million kilometers (93 million miles) from the sun. The sun provides the energy that gives light and heat to the
Earth. The Earth is close enough to the sun to be warm, but far enough away so that we don’t burn up.
The Earth has an atmosphere rich in oxygen and nitrogen. The atmosphere helps to support life and protects living creatures from some of the sun’s harmful rays. In fact, Earth is the only planet we know of that has living things on it.
The Earth has large amounts of life-supporting water. Almost three quarters of the planet’s surface is covered by water.
The Earth has seven large landmasses, called “continents.” Water occurs naturally in all three phases (ice, water, and
water vapor) on Earth.
Virginia Department of Education138

Science Enhanced Scope and Sequence – Grade 4
Moon Facts
The moon is about one-fourth the diameter of the Earth. On the surface of the moon, gravity is about one-sixth that
of Earth. The moon actually rotates exactly once each time it orbits,
which means that it keeps the same face toward the Earth all the time. It takes about 29.5 days for the moon to go through all of its phases from one full moon to the next full moon.
The moon was probably formed very early in our solar system when something the size of a planet collided with Earth. From this collision, the moon was formed.
The surface of the moon is actually darker than the Earth’s surface.
Of all the sun’s light hitting the moon, about 11 percent is reflected.
The surface of the moon has many large, dark areas, which give the moon its “man in the moon” appearance. These are ancient lava flows, called “maria,” which means “seas.” Early astronomers thought these dark areas were made of water.
The moon has many craters caused by collisions from asteroids. Early astronomers originally thought they were caused by volcanoes.
The Apollo missions to the moon (1969–1972) are thought by some scientists to be the most important science investigation in history.
Virginia Department of Education139

Science Enhanced Scope and Sequence – Grade 4
The Play’s the Thing(A lesson from Earth in Space Workshop 1: Sky Works. Used by permission.)
Organizing Topic Investigating the Sun-Earth-Moon System
Overview Students prepare and present a short play that explores how astronomy developed from the time of Aristotle until the discoveries of Galileo.
Related Standards of Learning 4.7c
ObjectivesThe students should be able to compare and contrast an Earth-centered model of the solar system to the sun-centered one; analyze the differences in what Aristotle, Ptolemy, Copernicus, and Galileo observed and what
influenced their conclusions; describe a contribution of the NASA Apollo missions to our understanding of the moon.
Materials needed Diagrams (included with the biographies) showing how Aristotle, Ptolemy, and Copernicus viewed
the universe Scrolls listing the credentials of Aristotle and Ptolemy Letter-like, wax-sealed documents listing the accomplishments of Copernicus and Galileo Small telescope (non-functioning prop) CD listing the accomplishments of Jocelyn Bell Research materials Costumes (optional) Attached script of the play “We Follow the Stars”
Instructional activityContent/Teacher NotesBackground information for teacher and students can be found in the Earth in Space Workshop 1 document, available online at http://www.smv.org/pubs/EIS%20Workshop%201history.pdf. This is the source of the play “We Follow the Stars” (see pp. 42–54).
Introduction1. Assign the various tasks to members of the class. You may wish to make the task and casting
decisions or let the students volunteer for roles and/or assignments.Props Department: This department is responsible for producing the props listed above and accurately listing the accomplishments of the various scientists in the “credentials.” You may want to have the props students investigate what materials would have been available in each scientist’s time. They must also research and make the plans or charts of the differing ideas of how the universe or solar system works. After the play, they should give a report about how they worked to take care of this task. The following information may be helpful to students researching the accomplishments of Jocelyn Bell. Jocelyn Bell Burnell (her married name) was a British astronomer born in 1943. When she was a graduate student at Cambridge University in 1967, she discovered pulsars — collapsed stars that emit periodic radio waves. There are many interesting Web sites that offer information about this famous contemporary scientist.
Virginia Department of Education140

Science Enhanced Scope and Sequence – Grade 4
Costume Department: This department must research and come up with costumes. Students may choose to simply suggest a look with a beard, a cloak, or a hat. If so, ask this team to make detailed drawings of what the costumes would look like if they had plenty of time and an unlimited budget.Director and Actors: This team must work out what to do on stage. Depending on the ability level of your students, they can memorize the lines or just read the play. The director’s job is to help the actors work together and to help them move about the “stage” in interesting ways.Marketing Department: This team is responsible for writing ads, making posters for the play, and inviting the “media” (students in the roles of newspaper, magazine, and TV critics) to come and “review” it.
Procedure1. Explain the activity to the students, setting a date for the performance of the play. 2. Have the various groups of students undertake their preparatory tasks, including rehearsal of the
play by the actors and the director.3. On the appointed day, have the students present the play to the non-actors. Have the “critics” write
short “reviews,” emphasizing the content and the more positive aspects of the production.4. After students have completed the play, hold a class discussion of the content. Use some of the
better ideas in the “reviews.” Add the importance of the NASA Apollo missions and how they have increased our understanding of the moon.
Sample assessment Have students make a chart to compare each of the scientists’ views. Have students construct a timeline of historical contributions in astronomy, including the NASA
Apollo missions.
Resources Apollo 30th Anniversary. http://www.hq.nasa.gov/office/pao/History/ap11ann/introduction.htm.
Includes background on Apollo missions. Earth in Space: SOL Teacher-Instruction Module. Science Museum of Virginia.
http://www.smv.org. A comprehensive set of astronomy lessons and resources for grades K–6. Earth in Space: Teacher Training Modules. http://www.smv.org/pubs/EarthInSpaceMenu.htm. Earth in Space Workshop 1: Sky Works. Science Museum of Virginia. http://www.smv.org/pubs/EIS
%20Workshop%201history.pdf. Exploring the Moon: A Teacher’s Guide with Activities for Earth and Space Sciences. NASA.
http://www.nasa.gov/pdf/58199main_Exploring.The.Moon.pdf. Langley Research Center. NASA. http://www.nasa.gov/centers/langley/about/index.html. NASA History Division. NASA http://www.hq.nasa.gov/office/pao/History/timeline.html.NASA
timeline of aeronautical and astronautical events. NASA Space Place. http://spaceplace.nasa.gov/en/kids/. A resource for students and teachers. National Aeronautics and Space Administration (NASA). http://www.nasa.gov.
Virginia Department of Education141

Science Enhanced Scope and Sequence – Grade 4
We Follow the StarsCast of Characters
AristotleClaudius Ptolemy
Nicolaus CopernicusGalileo GalileiJocelyn Bell
Notes: “Ptolemy” is pronounced “Tolemy.” The “p” is silent. “Galileo Galilei” is pronounced “Gal-ih-lay-o Gal-li-lay-ee.” The word anachronism is pronounced “ah-nack-kro-nism.” An anachronism is something that is not located in its correct historic time. In this play, the anachronisms are the mentions by Ptolemy of the bicycle and the dictionary.
Aristotle: (entering from stage right)(in an important manner) How do you do? My name is Aristotle. You may have heard of me. Allow me to present my credentials. (He unrolls a very, very long scroll full of writing and pictures.) I studied with Plato and later taught the young Alexander the Great.
Ptolemy: (entering from stage left)Aristotle? THE Aristotle? Everybody knows about you. Why, you wrote important works about, well... almost everything! Drama, biology, poetry . . . The list goes on and on. (He notices the list.) It really does go on and on, doesn’t it? Oh, sorry, I’m Claudius Ptolemy. Please forgive me for interrupting, but I never thought I’d have the opportunity to actually meet you. My own work in astronomy is based on your writings and teachings! Please tell us about your idea of the universe.
Aristotle: Well, the way I see it, we live on the Earth, which is round. Around the Earth there is a series of spheres. They’re like layers — or shells — that surround the Earth in bigger and bigger sizes. Oh, here, I brought visual aids. (He unrolls his plan of the universe. It’s untitled.) You can read all about it in my book On the Heavens; I’m sure it is available at your local marketplace. (He starts to point to parts of his plan of the universe as he talks.)
One of these shells is a transparent sphere that holds the stars. (He has trouble pointing and holding the diagram at the same time, so he gestures toward Ptolemy.)
Make yourself useful. Hold this while I talk. (Ptolemy gives him a look, but then obediently holds the diagram.)
Below this sphere are others that hold the planets, the sun, and the moon. All the spheres revolve around the Earth and carry the sun, stars, and planets as they move. The spheres are made of a beautiful crystal substance, which is perfect and unchanging. The sun, stars, and planets move in their spheres in everlasting, circular motion without any force at all acting on them. The spheres turn at different rates, and they work together to produce the motions of the heavenly bodies. The Earth below, of course, is constantly changing and imperfect. (He pauses.) It’s a beautiful vision of the universe, isn’t it?
Ptolemy: (a little uncomfortably) Yes, it’s certainly beautiful. But um… I, uh, had to change a few things here and there to make it work.
Aristotle: (defensively) What do you mean?
Virginia Department of Education142
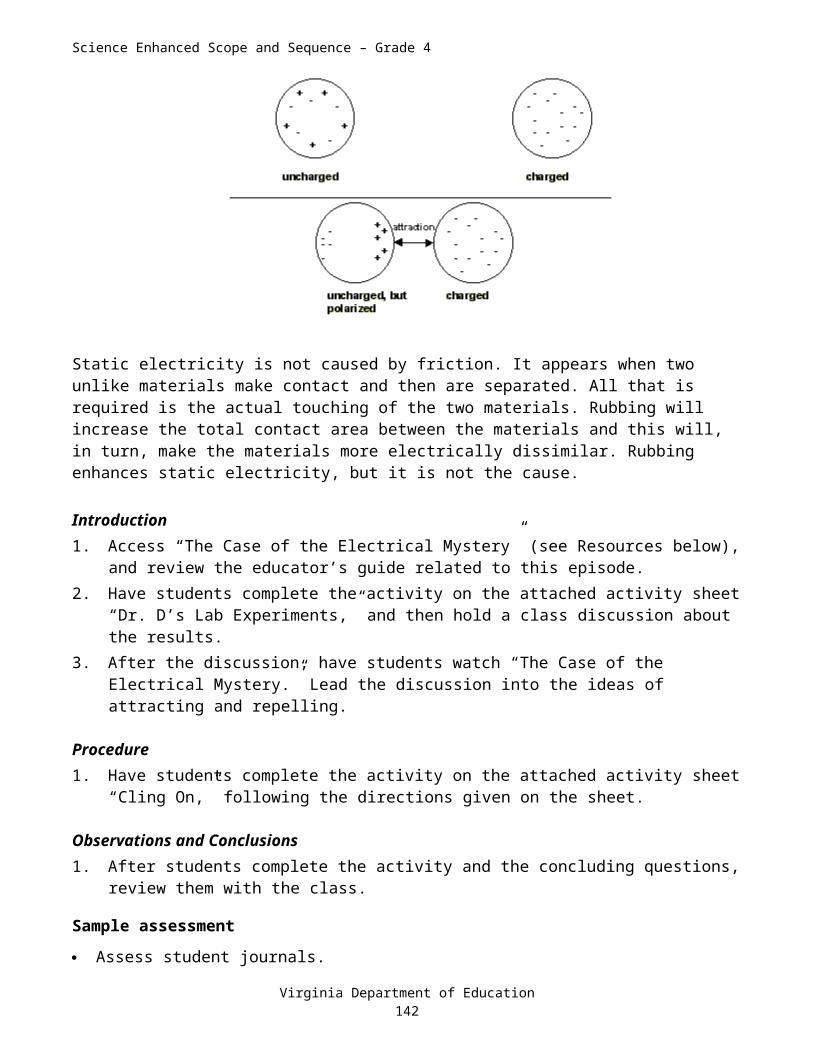
Science Enhanced Scope and Sequence – Grade 4
Ptolemy: Well, as time went on, many more astronomers added their observations to what we know. I gathered all of these writings together in the great Egyptian city of Alexandria — founded by your pupil Alexander by the way. I added to the collected observations and wrote a book, which was later named The Almagest. (He gathers confidence as he speaks.) It’s 13 volumes long! And the name means “The Greatest.” I also wrote a book called The Geological Outline — with maps! … and a…. Well, wait, here. I brought my credentials too. (He unrolls his own scroll. It’s much shorter than Aristotle’s. Ptolemy is upset at the comparison. Aristotle grins. Ptolemy notices and snaps back.) Yeah, well, textbooks call the early model with the Earth at the center “Ptolemy’s System of the Universe,” don’t they?1 I bet you could check 40 books without finding it called “Aristotle’s System!”
Aristotle: OK, OK, get on with your explanation.
Ptolemy: As I was saying, I examined all the data from many countries and from over many centuries, and I saw that your model couldn’t quite predict the movement of the stars and planets correctly. So I embellished ...
Aristotle: Embellished!?
Ptolemy: Um, added a few things, like the epicycles.
Aristotle: Epicycles?
Ptolemy: Yeah. Epicycles. (He unrolls the chart entitled “Ptolemy’s System: A Model of the Universe.”) How about if you hold the chart this time? (Aristotle holds the chart with a good-natured grin.)
I put epicycles in to explain why sometimes those pesky, wandering planets seem to move backward against the patterns of the stars. Here, let me show you. You stand in the middle of this space. You’re the Earth. Picture a giant circular racetrack around you. Now, imagine that I am a kid on a bicycle riding around the track. (He walks in circles around Aristotle.)
Other kids on bicycles are riding around in bigger circles beyond me and in smaller circles below me. All the bicycle riders represent the orbiting bodies — like the sun and the planets. I find myself getting ahead of where I want to be, so I make a little backward loop as I ride. (He loops backward as he circles.)
I used these little loops to explain what astronomers call “retrograde motion,” which is just a fancy term for the appearance of moving backward in the heavens.
Aristotle: Ptolemy, I lived in Greece from 384 to 322 B.C. That’s almost 24 centuries ago. Bicycles weren’t invented then. They weren’t even invented in your time, 422 years after my day.
Ptolemy: Yeah well, English hadn’t been invented yet either, but we seem to be communicating just fine. Must be the magic of theater.
Aristotle: (looking at the chart of Ptolemy’s system) This system of yours has sure gotten complicated.
1 Actually, Ptolemy’s system is called the “Ptolemaic System.” A system named after Aristotle would be called the “Aristotelian System.” These words are rather a mouthful for 4th-grade students, so we haven’t chosen to use them in this play, but if you want to tackle them, by all means do.
Virginia Department of Education143
Science Enhanced Scope and Sequence – Grade 4
Copernicus: (from the back of the room)That’s exactly what I thought! (He enters through the audience.) I studied Ptolemy’s model of the universe. Sure, it worked great to predict where planets would be at any given time, but it just seemed too complicated to be the true explanation. Of course, I was also able to read the works of many of the ancient writers and thinkers of the Greek world.
Aristotle: Hey, who are you calling ancient? And who are you anyway?
Copernicus: Oh, my apologies, Aristotle. It’s just that I was born in 1473 A.D., so to me you are one of the ancients — which is a term of greatest respect in my time! My name is Copernicus and I’m a Polish church administrator. I, too, developed a theory about how the universe works. I thought about the heavens for a long time and came to believe that the Almighty would have created a simpler and more beautiful system than all of Ptolemy’s clunky epicycles.
Ptolemy: Hey, now watch what you’re calling clunky! How about if you enlighten us with your un-clunky explanation?
Copernicus: I just thought I’d consider some other possibilities. After all, even the simplest version of your model uses over 80 different circles. I had the advantage of reading many of the ancient — oh, sorry — great writers of long-ago Greece. (looks at Aristotle to check his reaction)
I wondered if Aristarchus might be on the right track. Around 270 B.C., he suggested that the Earth might revolve around the sun.
(Aristotle and Ptolemy look blank.) Let me show you. Aristotle, you be the sun. You’re at the center of everything. (Aristotle likes this idea.) Ptolemy, you and I are planets. We revolve around Aristotle. So do the other four planets.
Ptolemy: Four more? But there are nine planets.
Copernicus: You’re getting ahead of yourself again. That’s called an “anachronism.” In your time, the other three planets haven’t yet been discovered.
Ptolemy: What does anachronism mean?
Copernicus: Go look it up in a dictionary.
Ptolemy: (sadly) Dictionaries haven’t been invented yet either.
Copernicus: (beginning again) So anyway, I came up with a model that puts the sun at the center with the Earth and the other planets circling around it. I called it “heliocentric,” which means “sun-centered.” (He holds up a chart of the solar system, which is labeled “Copernicus’ System”)
(This system is usually called the “Copernican System.” Again, we have chosen to simplify the wording for this play, but feel free to use the correct term if you wish.)
Aristotle: Look, he has a model named after him too. (He reads.) “Copernicus’ System.”
Ptolemy: (suspiciously to Copernicus) Do you have any credentials?
Virginia Department of Education144

Science Enhanced Scope and Sequence – Grade 4
Copernicus: I certainly do. (He holds out a handsome parchment with a very official-looking seal. Ptolemy and Aristotle come over to admire it.)
I studied astronomy and mathematics in Poland, and Greek and Roman studies at the Italian University of Ferrara. I also earned a doctorate in religious law, and later took a position at a cathedral back in Poland. I also wrote a famous book. It was called Concerning the Revolutions of the Heavenly Spheres.
(He strikes a defensive pose.) Not many people read it right away, but eventually it changed our understanding of the universe. In fact, it added a term to a number of languages. Before my book was published, the word revolution just meant a circular orbit around another object. My book . . . um . . . caused a bit of trouble, and revolution gained an additional meaning. The word revolution can now also mean “social upheaval” or “dramatic change.” Of course, I still really like your idea of the circle. I even kept some of your epicycles to make my system work.
Galileo: (entering from offstage right carrying a small telescope)And your model made a lot of sense — no matter what other people say. You might not have had everything exactly right in your new theory, but it’s important to be open to new ideas. I believe that God gave us eyes for observing the world around us, and minds for thinking about what we see. I think He wanted us to learn and develop new understandings of the world around us.
Ptolemy: (resignedly) And I suppose you have a model of the universe named after you, too?
Galileo: Oh no, I just got into some hot water for suggesting that Copernicus might be on to something. My name is Galileo Galilei and I was born in Italy in 1564, about 20 years after Copernicus’ book was published. My father sent me to school to study medicine, but I found mathematics — and the new studies of physics — much more interesting. I liked to find new ways of observing and thinking about the world. I liked inventing things too. I was already interested in studying the heavens when I heard about this new invention that was made in the Netherlands. It uses curved glass lenses to help you see things that are far away. I experimented with the idea and was able to improve on the original design. The telescope, as it came to be called, let me see things in the heavens that no one had ever seen. And everything I saw made me more and more convinced that Copernicus’s theory was correct.
Ptolemy and Copernicus: (overlapping one another) Like what?
Galileo: Like the moon. I was able to see it clearly through the telescope. I saw that it isn’t the perfect crystal sphere that you described, Aristotle. It has mountains and valleys. There are also thousands and thousands more stars in the sky than we’ve counted! The Milky Way is actually a mass of individual stars. It just looks like a cloud in the night sky because we can’t see the individual stars clearly! And then I noticed four bright lights that seem to move around Jupiter. They appear and disappear at predictable times. Their motion only makes sense if they are revolving around Jupiter. And then I noticed that Venus goes through phases that are a lot like the moon’s. It’s incredible!
Ptolemy: (with doubt in his voice) It sure is. Can I see that thing?
(He looks through Galileo’s telescope and is quite startled.) Are you sure this thing is for real? I think it might be some kind of trick. I think maybe we should see some credentials from you as well.Galileo: (He sighs.) You’re not the first person to suggest that the images are in the telescope and not the heavens. My discoveries upset many beliefs that had been held for a very long time. Sometimes it’s hard for people to adjust their thinking to new ideas.
Virginia Department of Education145

Science Enhanced Scope and Sequence – Grade 4
Ptolemy: (clearing his throat) Those credentials?
Galileo: Oh right. (He pulls out a parchment document that is quite similar to Copernicus’ and hands it to Ptolemy. The other three men come over to study the document.)
I wrote several articles and books about my discoveries. Some I published in “The Starry Messenger.” Later on, I published a book, A Dialogue Concerning the Two Chief World Systems. It compared Ptolemy’s work with yours, Copernicus. That’s the one that got me into trouble. I wrote it in Italian instead of Latin, which meant that a lot more people could read it. It attracted a fair amount of attention, and I was summoned to Rome and questioned by important church officials. I eventually had to say that I must have made a mistake, although I never really changed my mind. It troubled me to disagree with the Church of Rome. I was actually put under arrest and confined to a villa in Florence for the rest of my life — but it wasn’t too bad. I had lots of visitors from all over Europe, and I could still write books and letters.
(He chuckles.) I’ve always had my ups and downs. I studied medicine and philosophy at the University of Pisa, but I have to admit I spent a lot of time experimenting and studying mathematics. In fact, when I was 25, I became a professor of mathematics there, even though I hadn’t finished my original course of study. I started investigating how things move. I discovered that all objects fall at the same rate, no matter how much they weigh. I got into a lot of trouble for disagreeing with you in that area as well, Aristotle.
Aristotle: But surely heavy objects fall faster? That just seems to make sense.
Galileo: I like to test the things that people have always said about how things work. These tests, or experiments, help me to develop new ideas. I can then make new theories that explain how things happen better than ever before. For example, I tried dropping objects from a high place and timing their falls. If an object is really light, the air pushes up on it and keeps it from falling quickly, but if you choose objects that are heavy enough to push through the air, they all reach the ground at the same time!
Aristotle: Really? That’s amazing! And you say that people didn’t believe what you discovered because of what I wrote over 1,900 years before your time. That’s silly.
Galileo: Well, you did write about almost everything that had been studied in your time and you made amazing contributions in almost every area! Take biology as an example. You even knew that whales were mammals and not fish! It’s no surprise that your writings were so important.
Aristotle: (pleased) Well, I don’t mind being an important influence, but I did base a lot of my work on what I discovered by observing things as well. I actually sent out a thousand students to bring back reports about plants and animals. I like this new idea of yours of actually setting up tests! “Experiments,” did you call them? I suppose you have been able to solve all the mysteries of the universe with this method of yours. (Laughter from offstage interrupts their dialogue.)
Jocelyn Bell: (enters from offstage right, laughing)Are you kidding? I was born in 1943 and became an astronomer. Even in the 21st century, we can explain only a fraction of what we see in the skies. Oh, we’ve discovered amazing things about our universe — like the pulsar, which I discovered. Oh, and by the way, Galileo, the Roman Catholic Church reversed your sentence in 1992. They decided that you were right all along. We’ve made
Virginia Department of Education146

Science Enhanced Scope and Sequence – Grade 4
incredible advances in how we investigate the heavens. We’ve invented ships that can travel into space. Why, we’ve even landed on the moon!
Aristotle, Ptolemy, Copernicus and Galileo: (sort of all at once) No way! You’re kidding? Totally cool! Have you been to the moon?
Jocelyn Bell: No, I haven’t been to the moon myself, but we have lots of pictures that have been sent back for us to look at. In fact, we have sent a new satellite called the “Hubble Space Telescope” into the heavens. This device has let us see more and farther than ever before. It’s kind of like an eye in the sky. Just recently, the information it has sent back has made us revise our ideas about the universe once again. We thought we had some pretty good theories worked out that explained most of what we knew about the heavens, and then we got this new information. The universe is expanding faster than we thought, so we have to find a new theory to explain what’s happening.
Copernicus: (with respect) Do you think we could look at your images? And maybe see your credentials? I bet we’d be amazed.
Jocelyn Bell: (taking a CD out of her pocket) Sure, here you go. (She hands Copernicus the CD. Copernicus turns it over and puts his eye up to it, then holds it up to his ear. The others look puzzled and crowd around him.) Let’s go find a computer. I’ve got some amazing things to show you!
Aristotle: (as they all exit) This is magnificent. It seems that as we discover more, our theories change and give us a greater understanding of how things work.
(He stops as the others are leaving the room and turns to the audience.)Maybe one of you will come up with a way to explain this new information! I think I’ll come back in another thousand years to see what you’ve discovered by then! (He exits.)
Virginia Department of Education147

Science Enhanced Scope and Sequence – Grade 4
Sun-Earth-Moon Model(A lesson from Earth in Space Workshop 3: Here Comes the Sun! Used by permission.)
Organizing Topic Investigating the Sun-Earth-Moon System
Overview Students see the sun, Earth, and moon in scale, both in relative size and in relative distance from each other. They model how some phases of the moon occur, learn why the moon and sun appear to be the same size in the sky, and investigate how eclipses occur. They also practice measuring skills.
Related Standards of Learning 4.7a, b, c
ObjectivesThe students should be able to differentiate between rotation and revolution; model the formation of the eight moon phases, sequence the phases in order, and describe how the
phases occur; create and describe a model of the sun-Earth-moon system with approximate scale distances and
sizes.
Materials needed Model of the sun Measuring tape or measuring stick Easel or stack of books to support the sun model A large space such as a long hallway or athletic field at least 240 feet (73 meters) in length with
space enough at one end so that each small group can set up their sun-Earth-moon modelPer small group: 16 x 16 inch piece of yellow poster board Several sheets of corrugated cardboard glued together or a thick piece of corkboard slightly larger
than the 16 x 16 inch piece of poster board Glue or tape Pencil Ruler 6-mm craft bead Short, thin nail small enough to insert through the craft bead Pin with small, round ball on end Length of string at least 1 ft. long Scissors 2 tacks “Platform” to hold the Earth-moon orbit model (cardboard boxes, light TV trays, picnic tables, or
benches)Per student: Attached activity sheets Pen or pencil Clipboard or notebook
Virginia Department of Education148

Science Enhanced Scope and Sequence – Grade 4
Instructional activityContent/Teacher NotesMost of the measurements in this exercise are given in both metric and English units. The exceptions are all related to items that are sold in standard English-unit sizes, such as poster board.
Students must be able to use a ruler or measuring tape. If you are going to take them through the entire activity, they also need to have some understanding of the phases of the moon and what causes eclipses of the sun and moon. The “Moon Phases” activity from Earth in Space Workshop 4 makes an excellent prelude to this activity.
The sun model is a cutout made from yellow poster board cut into a 27-inch-diameter circle. Standard poster board is 22 inches by 28 inches, so you may need to use two pieces taped together.
Introduction1. Discuss relative sizes with students. Depending on the ability levels of your students, you may
begin with the sun or with other objects that the students think of as large. For example, is the school large? (Yes, but the city is much larger, and the state of Virginia is even larger than that.) Lead them to talk about the huge size of the Earth.
2. Show students the model of the sun, and ask them to guess how large the Earth would be in the same scale. If the sun is the size of the model, then the Earth should be the size of a craft bead or an eraser off the end of a standard pencil. Hold up one of the tiny craft beads to let this information sink in. Here are a few more facts to help the students understand the relative sizes of the sun and the Earth:
You could line up about 110 Earths across the middle of the sun. You could fit more than a million Earths inside the sun.
The Earth is not even as large as some of the sunspots on the sun nor as large as some of the flares or storms on the surface of the sun.
3. Next, ask the students how large the moon would be at this scale. (About the size of the top of a round-headed pin or as a pencil lead) Hold up one of the round-headed pins so the students can see how tiny the moon model is. Use the following facts to help students understand the moon’s relative size:
The moon is a small rocky satellite with a diameter that’s about 1/4 of the diameter of the Earth. In other words, you could line up four moons across the middle of the Earth, and you could line up about 400 moons across the middle of the sun.
The moon’s mass is only 1/80 of the mass of the Earth. If you could put the moon on one side of a seesaw and the Earth on the other, it would take 80 moons to balance the Earth. If you could replace the Earth with the sun, it would take 50 million moons to balance the seesaw.
4. Once the students have a grasp of how these sizes relate, divide them into four or five small groups. Explain that each group is going to make a model of the Earth-moon orbit in the correct scale to go with the sun model.
ProcedureSmall Group Project: Making the Earth-Moon Orbit Model
1. Go over the directions listed below with your students so they will understand the general plan for making the orbit.
Virginia Department of Education149
Science Enhanced Scope and Sequence – Grade 4
2. Pass out the corrugated cardboard, poster board, glue or tape, lengths of string, scissors, pencil, and tacks to each group.
3. Take the groups through each of the steps again, giving them time to finish each one before moving on to the next. It is best to wait until you are outside or in the school hallway to pass out the nails, craft beads, and round-headed pins. The diagram at right illustrates how the ellipse is made.Directions:1. Mount the 16 x 16 inch poster board on the corrugated cardboard or corkboard.2. Draw a line down the center of the poster board, and then make a mark at the halfway point.
This mark is at the center of the poster board.3. Make two additional marks on the centerline, 1/2 inch on either side of the center point.
These points are called “foci” and each point is called a “focus.” The Earth in your model will be located at one of these foci.
4. Push two tacks into the poster board at the focus points that you marked in step 3.5. Use string to tie a loop that measures 8 inches long when the loop is closed.6. Place the loop over the two tacks, and use a pencil to pull the loop tight. Hold the pencil
vertically, keep the string taut, and slowly draw an oval around the two points. This oval shape, which is called an “ellipse,” represents the moon’s orbit. In the model, the distance from the Earth focus (position) to the moon’s orbit line at its shortest is about 7 inches along the centerline, and the distance from the Earth focus to the most distant point on the moon’s orbit is about 8 inches along the centerline. This shows that as the moon travels on its path, it is sometimes closer to the Earth, thus appearing a bit larger in the sky, and it is sometimes farther away, appearing a bit smaller.
7. When the orbit path is complete and in the correct scale, ask the students to return the tacks to a safe location. The class is now ready to go to the hallway or athletic yard.
Class Exercise: Setting Up the Sun-Earth-Moon Model
1. Take the students to the location you have chosen for the activity. Let each group find a place along a starting line where they can set up their Earth-moon orbit poster board on their “platform” and easily see the sun model once it’s in place. You may want to review the following points before beginning the exercise. You may choose to do only the first parts of the following activities with younger students.
The model we are about to set up uses a fairly accurate scale to illustrates the diameters of the sun, Earth, and moon and their distances from each other.
The sun in our model is the 68-cm (27-in.) round yellow poster board circle. The Earth in our model is made from a 6-mm craft bead. It’s about 1/4 in. wide — about the
same width as the diameter of a standard pencil eraser. The moon in our model is made from a round-headed sewing pin. It’s 1.7 mm (1/16 in.) wide
— about the same width as the diameter of a standard pencil lead.2. You may choose to do the following setup procedure with the whole class or with each small
group. The sun model needs to be 240 feet (73 meters) from the Earth model. Ask for volunteers to measure off the distance, using a long measuring tape or stick and repeating the full length of the tape or stick as needed. If you have access to a football field, you may use the yard markers for
Virginia Department of Education150

Science Enhanced Scope and Sequence – Grade 4
your measurements. (Note: Use a math extension as an alternative method of measuring this distance, as follows. Have the students count their own steps for a known distance, calculate their pace [ft. per step], and then pace off the 240-ft. distance. For example, have students count their steps in a known distance, such as 20 ft. If a student normally walks 10 steps in 20 ft., then he/she has a pace of 2 ft. per step. Therefore, this student would take 120 steps to pace off 240 ft.)
3. Once the sun model is in place, ask the students to make sure that the centerlines they drew on their poster boards are pointing toward the sun model. Pass out the craft beads and nails, and have the students place the Earth model on their Earth-moon orbit poster boards, pushing the nail into the focus closest to the sun.
4. Once the Earth model is in place, pass out the round-headed pins to represent the moon in the model. Have students place the moon model on the orbit at a right angle to the sun-Earth line. The model is now complete, and the groups should be ready to fill out their activity sheets.
Observations and Conclusions1. After students complete the activity and the conclusion questions, review them with the class. It is
very important to make sure that students use the correct terminology and understand the processes involved as the activities are discussed.
Sample assessment Use the worksheets to assess students’ understanding.
Resources Connections: Connecting Books to the Virginia SOLs. Fairfax County Public Schools and The
College of William and Mary. http://www.fcps.edu/cpsapps/connections. Presents a database of more than 1,000 works of children’s literature and their connection to the Virginia Standards of Learning.
Earth in Space: SOL Teacher-Instruction Module. Science Museum of Virginia. http://www.smv.org. A comprehensive set of astronomy lessons and resources for grades K–6.
Earth in Space: Teacher Training Modules. http://www.smv.org/pubs/EarthInSpaceMenu.htm. Earth in Space Workshop 3: Here Comes the Sun! http://www.smv.org/pubs/EIS%20Workshop
%203%20(e-m-s).pdf. Outstanding Science Trade Books for Students K–12. National Science Teachers Association
(NSTA). http://www.nsta.org/ostbc. Search for Literature: Literature for Science and Mathematics. California Department of Education.
http://www.cde.ca.gov/ci/sc/ll/ap/searchlist.asp. Offers a searchable database.
Virginia Department of Education151

Science Enhanced Scope and Sequence – Grade 4
Sun-Earth-Moon ModelStudent Activity Sheets
Name: Date:
1. Let’s Look at Moon Phases In the diagrams below, locate the places on the ovals (the moon’s elliptical orbit) where the tiny moon model would be during the phases listed. Draw the moon at the correct location on each diagram, and answer the question that follows. The moon in this model is orbiting in a counterclockwise direction.
NEW MOON
The sun is to theleft of this page. Earth
Question: Why can’t we see the moon when it’s in its new phase?
FIRST QUARTER MOON
The sun is to theleft of this page. Earth
Question: Is the moon waxing (the lit part getting bigger) or waning (the lit part getting smaller) during this phase?
Virginia Department of Education152

Science Enhanced Scope and Sequence – Grade 4
FULL MOON
The sun is to theleft of this page. Earth
Question: How often do we have a full moon?
THIRD QUARTER MOON
The sun is to theleft of this page. Earth
Question: Is the moon waxing (the lit part getting bigger) or waning (the lit part getting smaller) during this phase?
2. Taking It Further: Apparent Size of Sun and Moon as Seen from EarthWith your eye just behind the Earth model, line up the moon model with the sun model in the distance. (This represents the new moon phase.) Notice how large the moon model appears to be against the sun in the distance. In fact, can you see very much of the sun when they are lined up this way?
If the moon is so much smaller than the sun, why do you think they appear to be about the same size in the sky? (Hint: Which looks bigger, a basketball on the table next to you or one that’s far away at the other end of the field or hallway?)
Cool Fact! The sun is about 400 times bigger across than the moon, but it’s also about 400 times farther away. That’s why the sun and the moon seem to be the same size in the sky. During a solar eclipse, you can see this clearly. The moon almost exactly
Virginia Department of Education153

Science Enhanced Scope and Sequence – Grade 4
blocks out the sun even though the moon is so much smaller than the sun.Did You Know? Have you ever noticed that the moon appears to be extra large in the sky? Think about when you might have noticed this. It’s when the moon is rising and is still close to the horizon. The human eye-brain system often helps us make sense of the world by comparing things such as size and position. When the moon is near the horizon, it looks bigger because it’s near objects, such as trees or houses, with which you can compare it. When it’s up in the middle of the sky later on, it appears smaller against the background of the sky. This is called the “Moon Illusion.”Check It Out! Next time you have a chance to spend some time outside at night, you can check this observation by using an artist’s technique. Just after the moon has risen (when it appears large to you), hold up your finger at arm’s length, close one eye, and sight along your arm to the moon. Notice that the moon looks about the same size as half of your fingernail. Return to the same spot several hours later and measure the moon with your fingernail again. It looks smaller in the sky, but it’s still about the same size as half of your fingernail!Of course, since the moon’s orbit is elliptical, it really is closer at some times than at others. This can make a slight difference in its apparent size in the sky, but we usually don’t notice this except during solar eclipses when we can compare the size of the moon with the size of the sun. You can explore this a little more in the next section of this activity.
3. Moons of Different SizesBecause the moon’s orbit is slightly elliptical, it is sometimes a little bit closer to the Earth than at other times. The difference is quite small, however, when you think about the huge distance between the Earth and the sun. When the moon is the smallest in the sky (when it’s the farthest away), it appears only about 10 percent smaller than it does when it appears the largest (when it’s closest to the Earth). The best time to notice this is during a solar eclipse.Never look directly at the sun, even during an eclipse. The direct light of the sun can damage your eyes!
Check It Out! Try this exercise with your sun-Earth-moon model: Place the moon model at the closest point to the Earth, and turn
the board so that the moon model is in line with the sun model. With your eye just behind the Earth model, look at the sun
model with the moon model covering it. Notice that the moon model seems bigger because it is closer. Make a sketch in the box at right of what you see.
Now try the exercise again with the moon farther away. Place the moon model at the farthest point away from the Earth and turn the board so that the moon model is in line with the sun model.
With your eye just behind the Earth model, look at the moon again. How does its size compare with the sun this time? _________________ Make a sketch in the box at right of what you see this time.
When an eclipse occurs with the moon farther away in its orbit, it does not quite cover the sun, and we see a ring of sunlight around the moon. This is called an “annular eclipse.” Does your drawing show why this happens? ______________
Virginia Department of Education154

Science Enhanced Scope and Sequence – Grade 4
4. Let’s Find Out More about EclipsesPlace the moon model on the poster board so that you show the occurrence of a lunar eclipse (eclipse of the moon). The sun, Earth, and moon models should all be in a straight line.Question: Which phase is the moon in during a lunar eclipse (eclipse of the moon)?
Now arrange the models to demonstrate a solar eclipse (eclipse of the sun).Question: Which phase is the moon in during a solar eclipse?
Question: Why don’t we have a solar eclipse and a lunar eclipse every month? (The exercise described below will help you figure out the answer to this question.)
Lift the back end of the poster board model an inch or two. The board should now be tilted so that the sun would shine on the board if it were real. Notice that the sun, Earth, and moon models are no longer in a straight line. The light from the sun model could fall on the moon model because the Earth model is no longer directly between them.The moon’s orbit is slanted at a slightly different angle than that of the Earth’s orbit. (The angle between the two is about 5.2 degrees.) This slant keeps eclipses from happening every month. About every year and a half, the moon’s orbit happens to be in line with both the Earth and the sun as it crosses the path the Earth takes around the sun. That’s when we have an eclipse. In fact, we call the plane of the Earth’s orbit around the sun the “ecliptic” because eclipses can occur only when the moon’s orbit cuts across this plane.A lunar eclipse can be seen about every 18 months from anywhere on the half of the Earth facing the full moon at night. A solar eclipse is witnessed much more rarely, since it can be seen only from a small area of shadow that is about 25 miles across.
Virginia Department of Education155

Science Enhanced Scope and Sequence – Grade 4
Sun-Earth-Moon Model: Student Activity Sheets — Teacher Answer Key1. Let’s Look at Moon Phases
(Note: This activity works best if you do it after the students have completed the “Moon Phases” investigation in Workshop 4.)Why can’t we see the moon when it’s in its new phase? We can’t see it because the sun is lighting up the side of the moon that faces away from Earth. Also, the moon is near the bright sun in the sky during this phase.Is the moon waxing (the lit part getting bigger) or waning (the lit part getting smaller) during this phase? The moon is waxing (getting bigger) in its first quarter phase.How often do we have a full moon? We have a full moon about once a month. The lunar cycle is actually 29.5 days from full moon to full moon, so once in a while we have two full moons in a single month.Is the moon waxing (the lit part getting bigger) or waning (the lit part getting smaller) during this phase? The moon is waning during its third quarter phase.
2. Taking It Further: Apparent Size of Sun and Moon as Seen from EarthIn fact, can you see very much of the sun when they are lined up this way? No, you can’t see much of it at all.If the moon is so much smaller than the sun, why do you think they appear to be about the same size in the sky? When objects are farther away from us, they appear smaller. The sun is much farther away than the moon, so it appears to be much smaller than it really is.
3. Moons of Different SizesWith your eye just behind the Earth model, look at the sun model with the moon model covering it. Notice that the moon model seems bigger because it is closer. Make a sketch of what you see in the box at right.With your eye just behind the Earth model, look at the moon again. How does its size compare with the sun this time? Make a sketch of what you see this time in the box at right.
4. Let’s Find Out More about EclipsesWhich phase is the moon in during a lunar eclipse? The moon is in its full moon phase.Which phase is the moon in during the solar eclipse? The moon is in the new moon phase during a solar eclipse.
Virginia Department of Education156

Science Enhanced Scope and Sequence – Grade 4
Sun, Earth, and Moon Vocabularyaxis. A straight line around which a body spins or rotates. Axis is also a Latin word that
can mean “hub,” “axis,” or “axle.”cycle. A repeated patterneclipse. The temporary disappearance or darkening of one celestial body, such as the sun
or moon, when another body moves between it and an observer or between it and the light source. An eclipse of the sun is seen by an observer on Earth when the moon is between the observer and the sun. An eclipse of the moon is seen by an observer on Earth when the Earth moves between the sun and the moon and the Earth’s shadow falls across the surface of the moon.
ecliptic. The plane in which the Earth orbits the sunellipse. The shape that results when a cone is sliced on a diagonal.elliptical. Having a shape that is in the form of an ellipseexperiment. A fair test designed to answer a questionfocus (plural: foci). One of the two points around which an ellipse is constructedhypothesis. A statement that is made to be proved or disproved. Scientists make
hypotheses based on what they expect will happen and then test whether or not the hypotheses are correct.
inference. A conclusion based on evidence that results from events that have already occurred
light. A source of illumination, such as the sun or a lamp. Light is also a form of energy that scientists call “electromagnetic radiation.”
model. A system that is built to represent or help us understand a more complicated system. For example, a small-scale version of the sun-Earth-moon system is a model. A model can also be a larger version of something we can’t see (e.g., a model of an atom).
observation. Something that is noticed by using the sensesobserve. To notice or seeprediction. A forecast about what may happen in some future situation. A prediction is
based on information and evidence, and is different from a guess.rotate. To turn or spin on an axis. This word comes from the Latin word rota, which
means “wheel.”rotation. The motion of turning on an axisrevolution. A complete orbit around a central point or objectrevolve. To orbit around a central pointsequence. A series of events that occur in a natural ordershadow. An area that receives no light or less light than the areas that are around ittemperature. A measure of the hotness or coldness of an object or an area
Virginia Department of Education157

Science Enhanced Scope and Sequence – Grade 4
Moon Phases(A lesson from Earth in Space Workshop 4: I See the Moon. Used by permission.)
Organizing Topic Investigating the Sun-Earth-Moon System
Overview Students investigate and model the phases of the moon.
Related Standards of Learning 4.7a
ObjectivesThe students should be able to model the formation of the eight moon phases, sequence the phases in order, and describe how the
phases occur.
Materials neededPer class: A clear, 100-watt light bulb and lamp (no shade) A large room that can be darkened for the demonstrationPer student: 1 Styrofoam® ball (2, 3, or 4-inch) 1 sharpened pencil Attached activity sheets
Instructional activityContent/Teacher NotesThis lesson is an adaptation of a lesson from the Science Museum of Virginia’s, Earth in Space teaching module. This lesson, as well as others that cover the Earth/space systems and cycles, can be found at http://www.smv.org/pubs/EarthInSpaceMenu.htm.
See the attached Moon Phases Teacher Demonstration Script, Easy Version for detailed information about the phases of the moon.
Procedure1. Push the Styrofoam® balls down onto the end of the pencils. Give one ball-pencil set to each
student.2. Place the bare 100-watt light in the center of the room at the height of the students’ heads. Ask 10
students at a time to stand in a circle, at least an arm’s length apart, around the bulb.3. Have the students stand facing the light and holding the Styrofoam® balls between themselves and
the light. The balls should be held at arm’s length and slightly above eye level so that the students can still see the light.
4. Turn the light on, and ask each student to look at his/her ball. The side of the ball that faces the student should be in shadow.
5. Explain that the ball represents the moon, the light represents the sun, and the student’s head is the Earth.
7. Next, have the students continue to hold the Styrofoam® balls in the same position and turn slowly counterclockwise (as seen from the ceiling), stopping every quarter turn to observe the shadowing on the ball. Each quarter turn represents the next phase of the moon.
Virginia Department of Education158

Science Enhanced Scope and Sequence – Grade 4
8. Once the students have grasped the basic concept of this demonstration, take them through one of the two demonstrations that follow. The first one is an easy version for lower level students. The second provides more advanced information that will help upper level students grasp the movements of the Earth and moon more completely. The second script also contains several extensions and student worksheets. The worksheets may be used with the lower level script also.
Observations and Conclusions1. Have students make observations and answer questions throughout activity.
Sample assessment Assess worksheets associated with activity. Have students describe and model the phases of the moon.
Follow-up/extension See the Earth in Space teaching module for lessons regarding the seasons. Ask students to make a drawing that includes the sun in the sky in either early morning or late
afternoon. East should be on the right side of the picture and west on the left side of the picture so that students will associate east and west with standard map orientation. Astronomers in the Northern Hemisphere usually view the sky while facing south, but younger students may have trouble understanding the reversal of viewpoint. Noon is omitted from the options because, at our latitude, the sun would be behind the student high in the sky and objects would cast their shadows toward the north — directly behind the objects from the student’s point of view. Remind the students to include the shadows that the objects in their drawing cast on the ground. They should also label the drawing with the time of day represented.
Resources Byrd, Deborah. Understanding Moon Phases. Earth & Sky Radio Series.
http://www.earthsky.com/skywatching/moonphases-wangib.php. Connections: Connecting Books to the Virginia SOLs. Fairfax County Public Schools and The
College of William and Mary. http://www.fcps.edu/cpsapps/connections. Presents a database of more than 1,000 works of children’s literature and their connection to the Virginia Standards of Learning.
Earth in Space Workshop 4: I See the Moon. Science Museum of Virginia. http://www.smv.org/pubs/EIS%20Workshop%204moon.pdf.
Earth in Space: SOL Teacher-Instruction Module. Science Museum of Virginia. http://www.smv.org. A comprehensive set of astronomy lessons and resources for grades K–6.
Earth in Space: Teacher Training Modules. http://www.smv.org/pubs/EarthInSpaceMenu.htm. For Educators: (Grades K–4). NASA.
http://www.nasa.gov/audience/foreducators/k-4/features/index.html. NASA SciFiles. http://scifiles.larc.nasa.gov/educators/index.html. Outstanding Science Trade Books for Students K–12. National Science Teachers Association
(NSTA). http://www.nsta.org/ostbc. Science Museum of Virginia. http://www.smv.org. Search for Literature: Literature for Science and Mathematics. California Department of Education.
http://www.cde.ca.gov/ci/sc/ll/ap/searchlist.asp. Offers a searchable database.
Virginia Department of Education159

Science Enhanced Scope and Sequence – Grade 4
Moon Phases Teacher Demonstration Script, Easy VersionThe moon generates no light of its own. It shines because it reflects the light from the sun. Though it does not always appear so from Earth, half of the moon is always illuminated, and the other half is always in darkness. However, as the moon orbits the Earth, its position in relation to the Earth and the sun changes, and more or less of the illuminated side may be seen from Earth. These different views are called “phases of the moon.”
1. New moon: When the moon is directly between the sun and the Earth, the side of the moon facing the Earth is in darkness; hence, it is not visible in the sky. The intensity of the sun is so great that the moon is lost in the sun’s glare. This phase is called the “new moon.”
2. Waxing crescent: As the moon continues to move in its orbit around the Earth, a sliver of the illuminated side of the moon becomes visible. This phase is called the “waxing crescent.” (To wax is to increase.)
3. First quarter: When the moon has completed one quarter of its orbit around the Earth, it makes a right angle with the Earth and the sun. One half of the moon is still illuminated by the sun, and the other half is still in darkness. However, from the Earth, the moon now appears to be a half circle. This phase is called the “first quarter.”
4. Waxing gibbous: As the moon continues in its orbit, the portion of the illuminated side of the moon visible from the Earth continues to increase. When the moon appears to be more than a half moon but less than a full moon, it is called a “gibbous moon.” At this point in its orbit, the moon appears to be growing, so this phase is called a “waxing gibbous.”
5. Full moon: When the moon has completed one half of its orbit around the Earth, it is almost in a straight line with the Earth and the sun. The entire side of the moon that faces Earth is illuminated. This phase is called a “full moon.”
6. Waning gibbous: The darkened side of the moon begins to reappear to observers after the full moon. This phase is called a “waning gibbous.” The moon is described as waning when it appears to grow smaller. (To wane is to decrease.)
7. Third quarter: When the moon has completed three-quarters of its orbit around the Earth, it again makes a right angle with the Earth and the sun. This phase is called the “third quarter” or “last quarter.”
8. Waning crescent: As the moon’s orbit continues, the moon appears as a crescent shape once again. Since it appears to grow smaller, this phase is called a “waning crescent.”
The darkened area continues to grow larger until no portion of the illuminated moon can be seen. The moon has returned to the new moon phase.
Virginia Department of Education160
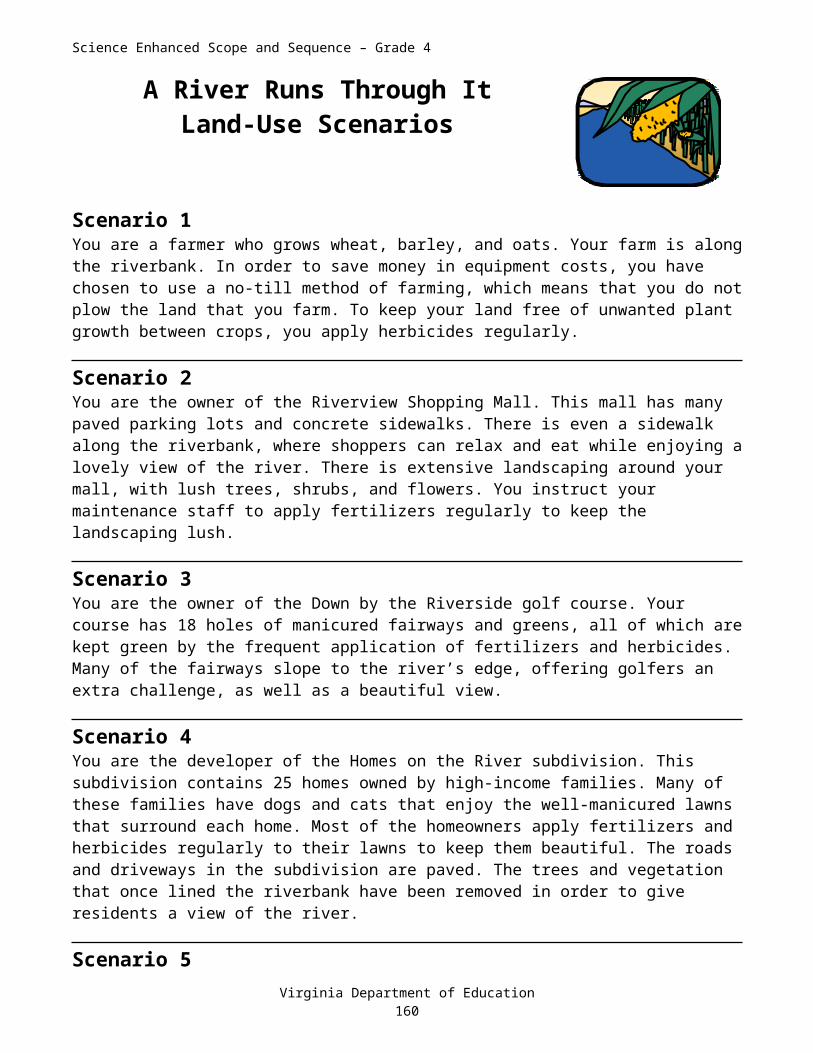
Science Enhanced Scope and Sequence – Grade 4
Moon Phases Teacher Demonstration Script, Advanced Version
Setting up the Model: Earth’s Rotation and RevolutionLet’s set up our model of the sun, Earth, and moon. The clear light bulb in the center of the room represents the sun, the Styrofoam® ball represents the moon, and your head represents the Earth. We can use this setup, or model, to show how everything moves. Scientists use the word model to mean a structure that is made to help them understand another structure. For example, a globe is a kind of model of the Earth. This class setup that we are using is a model of the sun-Earth-moon system.
Remember that the Earth rotates on its axis in a counterclockwise direction, as seen from above the North Pole. Can someone demonstrate for the class what we mean by rotation on an axis in a counterclockwise direction? The Earth also revolves around the sun in a counterclockwise direction. All the planets orbit counterclockwise, and most of them rotate counterclockwise, as Earth does. (Walk very slowly around the sun model in a counterclockwise direction while turning counterclockwise to make sure that the students are clear about these terms.) This is hard to do in exactly the right way in this model because you would have to turn 365 times in every full trip around the light bulb.
The Moon’s RevolutionThe moon also orbits counterclockwise around the Earth, but the same side of the moon always faces the Earth. (Have a student hold the moon model at arm’s length from you and rotate the model counterclockwise around you, leaving the same side of the moon facing you as it moves.) This is because the moon is heavier on the near side and the Earth’s gravity has gradually “locked” it into this position. (See “Extension 1: The Moon Rotates!” below for an explanation of the rotation of the moon.)
For our model to work in exactly the right way, the Earth model would have to spin on its axis almost 30 times from one full moon to the next. Does anyone remember what represents the Earth in this model? (The students’ heads) Since we can’t really spin our heads around, you’ll just have to remember that the Earth is spinning as we move through the moon phases. As we make a full circle with our outstretched arms, the Earth (our heads) moves 1/12 (one month’s worth) of the way around the sun. During this same month, the Earth rotates on its axis about 30 times. So how many days and nights is that? (About 30 days and nights)
Day and NightEarth’s daily rotation is important for our moon phase model because we can see the moon’s location in the sky at a certain time of day or night for each phase of the moon. Picture your head as the Earth, and imagine yourself standing on the Earth and looking at the moon from one eye. You can identify the time of day by noticing where the sun is from your vantage point. Remember that Earth rotates counterclockwise (toward your left). Here’s how it works: If you stand facing the light bulb, which represents the sun, your head, which represents the Earth, is in the noon position. When you turn to your left so that your right shoulder is toward the light bulb, you are in the sunset position. If you turn again so that the back of your head is toward the light bulb, you are in the midnight position. If the back of your head represents the part of the Earth that contains China, your face represents the part of the Earth that contains the United States. Finally, another quarter turn to the left puts your left shoulder toward the bulb. This is the sunrise position. These positions will help you understand where the moon is during each time of the day in each phase.
Virginia Department of Education161

Science Enhanced Scope and Sequence – Grade 4
New Moon and Solar EclipseThink of where the new moon is in the sky. Why can’t we see it during the day? (We can’t see the moon during the day during the new moon phase because it appears to be immediately next to the sun and it’s lit-up side is facing away from us.) Why don’t we see the moon at night during the new moon phase? (We can’t see the moon at night during the new moon phase because the moon appears next to the sun at this time. As the sun sets, so does the new moon, which means that there is no moon in the night sky to see.)
Which kind of eclipse can happen during the new moon? (A solar eclipse can occur during the new moon phase. A solar eclipse happens when the moon moves directly between the sun and the Earth, eclipsing, or blocking, the sun.)
Why doesn’t an eclipse occur each month? (We don’t have an eclipse every month because the orbit of the moon around the Earth is slanted about five degrees from the orbit of the Earth around the sun. The path of the Earth around the sun is in the same plane as the orbits of most of the planets. This plane is called the “ecliptic.”) The moon and sun do not form a perfect line with the Earth during the new moon every month. A perfect alignment happens somewhere on Earth only once every 18 months or so (about every year and a half). A total solar eclipse is seen only along a narrow path — about as wide as a large city — on the Earth at any one time.
Waxing CrescentThe lit portion of the moon increases each night from new moon to full moon; these phases are called “waxing moons.” The word waxing means growing larger. The word comes from candle making, when the candle grew as it was repeatedly dipped in wax. Swing your moon model to your left (counterclockwise) a little until you can see a bright crescent-shaped edge on the right side of the Styrofoam® ball. You can see the model of the waxing crescent moon above the setting sun by turning your head to the left until you see the moon model, but not the sun model. This places the waxing crescent moon in the darkening twilight in the western sky above where the sun has set about an hour ago.
The waxing crescent moon can sometimes be seen in the daytime if you know where to look — just east of the sun. The waxing crescent sets an hour or two after the sun. Something to notice about the crescent moon is the round, dark part of the moon which is not lit by the sun. The pale, bluish-gray glow on the dark part of the moon is caused by the reflection of sunlight from Earth. This “Earthshine” is very bright on the moon because the Earth has 16 times the area of the moon and is more reflective or shiny than the moon is.
First Quarter MoonWhen the moon has completed one fourth of its orbit around the Earth, it makes a right angle with the Earth and the sun. The right half of the moon will appear to be lit. This phase is called the “first quarter.” Notice the sun at your right shoulder and the moon directly ahead in the model. The arrangement shows that the first quarter moon is highest in the sky at sunset. You can hold the moon in place and turn your body to see that the first quarter moon rises at noon and is visible in the east during the afternoon.
As the moon continues in its orbit, the part of the moon illuminated by the sun and visible from the Earth continues to increase. Swing your arm to the left while holding the moon at arm’s length.
Virginia Department of Education162

Science Enhanced Scope and Sequence – Grade 4
Waxing GibbousWhen the moon appears to be much fuller than the first quarter moon, but less than a full moon, it is called a “gibbous moon.” Gibbous comes from the French word for hunchback. At this point in its orbit, the moon still appears to be growing, so this phase is called a “waxing gibbous.”
Full Moon and Lunar EclipseWhen the moon has completed one half of its orbit around the Earth, it is almost in a straight line with the Earth and the sun. The entire side of the moon that faces the Earth is illuminated. This phase is called a “full moon.” There is the only day of the month that the moon rises as the sun sets and the moon is up whenever the sun is down. When you are facing the moon in your model, the sun is shining on the back of your head. You are seeing the moon high in the sky at midnight. Now face the moon model in the full moon phase, and move the moon model into the shadow of your head. What kind of eclipse is this? (This situation represents an eclipse of the moon, or a lunar eclipse. A lunar eclipse occurs when the moon moves into the Earth’s shadow. The moon is eclipsed. Just as with the solar eclipse, a lunar eclipse happens about every year and a half because the orbit of the moon is angled in relation to that of the Earth.) Now, hold the moon model above the shadow of your head so that it is in full sunlight. This shows how the moon can be full during most months without the occurrence of an eclipse.
Waning GibbousThe darkened half of the moon begins to reappear to observers after the full moon. Continue to turn to the left until you are halfway between the full moon position and the third quarter position. This phase is called a “waning gibbous.” The moon is described as waning when it appears to grow smaller. The word wane means to decrease.
Third Quarter MoonWhen the moon has completed three-quarters of its orbit around the Earth, it makes a right angle with the Earth and the sun. Turn to your left until you have turned three-quarters of the way around a complete circle. This phase is called the “third quarter.” When can you see the third quarter moon? Face the third quarter moon model with the rising sun at your left shoulder. This means that the third quarter moon is highest in the sky at dawn. Turn your head to the right, facing away from the sun, and notice that the third quarter moon rises at midnight. The third quarter moon is high in the west in mid-morning and can be seen in the daytime.
Waning CrescentAs the moon’s orbit continues, the moon appears as a crescent shape once again. Continue to turn left until you are about halfway in between the third quarter position and the new moon position. Since the moon appears to grow smaller, this phase is called a “waning crescent.” The waning crescent is seen in the east before sunrise. You can also see the waning crescent in the daytime if you look hard for it.The darkened area continues to grow larger until no portion of the illuminated moon can be seen. The moon has returned to the new moon phase. We have completed one complete orbit of the moon, which takes about one month, and we have seen all of the phases.
Virginia Department of Education163

Science Enhanced Scope and Sequence – Grade 4
Extension 1: The Moon Rotates!The moon really does rotate exactly once as it completes one orbit. This is hard to see when you’re looking at it from the Earth. Try putting a small sticker or push pin on the Styrofoam® ball that represents the moon. Let the students take turns observing the turning of the ball from the outside of the circle of students. The outside observer will see that the moon rotates once for each revolution of the moon around the Earth. (The sticker disappears behind the ball and then reappears as the ball finishes its revolution.)
You may need to go over this concept several times before the students absorb it. It may help to point out that the Earth moves forward in its revolution as it rotates. We usually demonstrate revolution and rotation separately, but they actually happen simultaneously.
Extension 2: Seeing the Moon During School Hours!If you want to see the moon during school hours, you can use your model to find the best place and time to look.
For the easiest view of the moon in the daytime, you can look for the first quarter moon in the east in the afternoon. Set up your model with the moon in front of you and the sun over your right shoulder (sunset). The first quarter moon is highest in the sky toward the south at sunset. This means that when the sun is at its 2 p.m. position, the moon is 90 degrees to the left of the sun in the eastern sky in the early afternoon. So, when the moon is in the first quarter phase, you know to look for it in the east in the early afternoon.
To see where the moon can be found in mid-morning, model the third quarter moon at dawn. The sun is at your left shoulder and the moon is straight ahead and is seen as half full. From this position, turn your head so the sun is at your left and the moon is on your right (west), and you’ll see where to find the moon in the morning hours. To see the third quarter moon in mid-morning, simply look to the west when the sun is three hours past sunrise. You can also see in the third quarter phase that the moon rises at midnight: it comes into our view at our left when we are facing directly away from the sun.
The following exercise is an excellent way to tie the moon phases light bulb activity to the real world. It also emphasizes the fact that the moon is as likely to be out in the day as in the night. A “Moon in the Daytime Student Activity Sheet” is included to help your students with this extension. An answer key is not provided since the answers will vary depending on which time of day you choose for this activity.
Go outside and find either the third quarter moon in the west in the morning or the first quarter moon in the east in the afternoon. Hold your Styrofoam® ball at arm’s length directly toward the moon Do not try this with the sun! Remember that looking directly at the sun can damage your retinas! You will see that the sunlight and shadow line on your moon model is identical to the sunlight and shadow line on the real moon in the sky.
Virginia Department of Education164

Science Enhanced Scope and Sequence – Grade 4
Moon PhasesStudent Activity Sheet
Name: Date:
What Phase Is It? The Earth is between the sun and the moon. _____________ The moon is between the sun and the Earth. _____________ We see the moon “half full” and it is getting fuller. _________ We cannot see the moon during the day or at night. __________________ It is almost full and getting less full each night. ______________ We can have a solar eclipse. ___________________ We can have a lunar eclipse. ___________________
Draw the Moon in Each Phase!
New Waxing Crescent First Quarter Waxing Gibbous
Full Waning Gibbous Third Quarter Waning Crescent
Virginia Department of Education165

Science Enhanced Scope and Sequence – Grade 4
Seeing the Moon in the DaytimeStudent Activity Sheet
Name: Date:
Did you know you could see the moon in the daytime?Find the moonYour teacher or your parents can help you to find out when each phase of the moon happens each month by checking the newspaper or logging on to a Web site such as that of the Science Museum of Virginia (www.smv.org).Find the first quarter moonWhen the moon is near the first quarter, you can see it in the afternoon. If it is the day of the first quarter, you can see the moon at about noon rising in the east.Find the third quarter moonWhen the moon is near the third quarter, you can see it in the morning in the west. If it is the day of the third quarter, you can see the moon high in the sky toward the south at sunrise, and in the western sky until about noon. When the moon is between the third quarter and new, you can see it into the early afternoon.See the moon in the daytimeYour teacher will take you outside on a clear day when the sun and the moon are in the sky.1. First notice the moon.
What phase is the moon in? _______________________ Which side of it is lit up? (left or right) ______________ In which direction are you looking to see the moon? (north,
south, east or west) __________2. Sketch the moon as you see it in the sky.3. Hold your Styrofoam® ball-on-a-pencil at arm’s length, and move it in the
direction of the moon. Can you see the moon in the sky and your moon model next to each
other?_______ Notice the light and shadow line on your moon model. Is it the same
shape as the moon in the sky? _______________.This means that the sun is shining on the real moon and on your moon model from the same direction.
Virginia Department of Education166

Science Enhanced Scope and Sequence – Grade 4
Sample Released SOL Test Items
Virginia Department of Education167