distribution beyond the basicsftp.sagesoftwareuniversity.com/lms/acs/webdocs/course... ·...
TRANSCRIPT

Sage Course Curriculum - Version 3.0 Page 1 Copyright © 2018 Sage, Inc. All Rights Reserved.
Sage X3
Distribution: Beyond the Basics

Not for Resale or Reproduction
Sage Course Curriculum - Version 3.0 Page 2 Copyright © 2018 Sage, Inc. All Rights Reserved.
Important Notice
The course materials provided are the product of Sage. Please do not copy, reproduce or disburse
without express consent from Sage.
This material is provided for informational purposes only. Accordingly, Sage does not provide advice
per the information included. The use of this material is not a substitute for the guidance of a lawyer,
tax, or compliance professional. When in doubt, please consult your lawyer, tax, or compliance
professional for counsel. The Sage product(s) described herein is/are governed by the terms and
conditions per the Sage End User License Agreement ("EULA") or other agreement that is provided
with or included in the Sage product. Nothing in this document supplements, modifies, or amends
those terms and conditions.
© 2018 The Sage Group plc or its licensors. All rights reserved. Sage, Sage logos, and Sage product
and service names mentioned herein are the trademarks of The Sage Group plc or its licensors. All
other trademarks are the property of their respective owners.

Sage Course Curriculum - Version 3.0 Page 3 Copyright © 2018 Sage, Inc. All Rights Reserved.
Contents
Welcome and Introduction ....................................................................... 6
Quality Control and Sampling ................................................................. 8
Understanding the Quality Control Process ............................................. 9
Stock Status ............................................................................................ 12
Stock Management Rules ....................................................................... 13
Quality Control Responses ..................................................................... 15
Quality Control Questions ...................................................................... 16
Technical Sheets ..................................................................................... 19
Product Information ............................................................................... 21
Quality Control Entry Transactions ....................................................... 23
Receipts – Quality .................................................................................. 25
Analysis Requests .................................................................................. 26
Quality Control Process ......................................................................... 28
Lesson Practices ..................................................................................... 35
Warehouses .............................................................................................. 42
Overview of Warehouses ....................................................................... 43
Activating Warehouses in a Site ............................................................ 46
Creating Warehouses .............................................................................. 47
Assigning a Location to a Warehouse .................................................... 48
Product - Warehouse .............................................................................. 49
Assigning Default Warehouse(s) ........................................................... 50
Using Warehouses in Transactions ........................................................ 51
Lesson Practices ..................................................................................... 53
Purchasing Signature Management ...................................................... 56
Purchasing Signature Management Overview ....................................... 57
Assignment Rules ................................................................................... 59
User Assignment .................................................................................... 63
Delegated Users ...................................................................................... 66
Manage Signatures ................................................................................. 68
Workflow Monitor ................................................................................. 69
Standard Workflow Rules – PR Signatures ........................................... 71
Standard Workflow Rules – PO Signatures ........................................... 81
Standard Workflow Rules – Open Orders Signatures ............................ 85
Lesson Practices ..................................................................................... 89

Sage Course Curriculum - Version 3.0 Page 4 Copyright © 2018 Sage, Inc. All Rights Reserved.
Sales Signature Management ................................................................. 93
Sales Order Signature Workflow ........................................................... 94
Assignment Rules & User Assignments ................................................ 95
Manage Signatures ................................................................................. 96
Workflow Monitor ................................................................................. 98
Workflow Rules ................................................................................... 100
Lesson Practices ................................................................................... 102
Loan Order Management ..................................................................... 105
Loan Orders Overview ......................................................................... 106
Loan Order Type .................................................................................. 107
Loan Order Entry Transactions ............................................................ 108
Customer Locations .............................................................................. 109
Customer & Product Settings ............................................................... 110
Loan Orders .......................................................................................... 111
Loan Deliveries .................................................................................... 112
Loan Returns ........................................................................................ 113
Invoicing a Loan ................................................................................... 114
Lesson Practices ................................................................................... 115
Inter-site & Inter-company Transactions ........................................... 122
Inter-site & Inter-company Overview .................................................. 123
Sites ...................................................................................................... 125
Elements, Invoice Types & Price Lists ................................................ 127
Inter-site/Inter-company Links ............................................................. 129
Inter-site/Inter-company Flow .............................................................. 132
Lesson Practices ................................................................................... 137
Advanced Purchasing techniques ........................................................ 142
Overview of Advanced Purchase Costs ............................................... 143
Cost Natures ......................................................................................... 148
Tax Rates .............................................................................................. 149
Costs ..................................................................................................... 150
Cost Structure ....................................................................................... 154
Incoterm................................................................................................ 156
Orders, Receipts & Invoices ................................................................. 157
Additional Purchasing Enhancements .................................................. 161
Lesson Practices ................................................................................... 170
Sage Course Curriculum - Version 3.0 Page 5 Copyright © 2018 Sage, Inc. All Rights Reserved.
Purchasing Three-Way Matching ........................................................ 177
Three-Way Matching Overview ........................................................... 178
Matching Tolerance Codes ................................................................... 180
Transaction Entries for Matching ......................................................... 183
Assigning Default Tolerance Codes ..................................................... 186
Three-Way Matching Process .............................................................. 187
Bill of Lading ......................................................................................... 192
Understanding the Bill of Lading ......................................................... 193
Lesson Practices ................................................................................... 206
Summary .............................................................................................. 208

Sage Course Curriculum - Version 3.0 Page 6 Copyright © 2018 Sage, Inc. All Rights Reserved.
Lesson 1 Welcome and Introduction
Welcome to the Sage X3 Distribution Beyond the Basics training class. This course is
divided into discussion of concepts, activities, and a review.
The information in this document is intended to provide you with information on setting
up and using the quality control features, understanding statistical reordering, how to
perform a stock count and record the results, signature and loan order management, and
how to process inter-site/inter-company transactions.
This course is designed to provide you with knowledge of:
How to set up and use the quality control and sampling features available in Stock.
How to use statistical reordering to determine what products should be purchased to
meet demand.
How to define parameters, select products to be counted, and record the results of a
physical count in Stock.
How to use the purchasing signature management features in Purchasing to control
purchase orders entered and processed.
How to use the Loan Order Management features to loan products to customers,
receive the loaned products back into stock, and how to invoice the customer for
loaned products that are not returned.
How to process inter-site/inter-company purchases and sales.
How to use advanced purchase functions to foresee the purchase costs for
international imports using international standards (incoterm) or inland purchases.
How to set up purchasing three-way matching capabilities, including matching the
purchase order, receipt, and invoice based on parameters you define

Sage Course Curriculum - Version 3.0 Page 7 Copyright © 2018 Sage, Inc. All Rights Reserved.
Welcome and Introduction (continued)
How to Use This Curriculum
The following table describes the conventions used in this curriculum:
Convention Explanation
Step numbers versus
Practice numbers
Step numbers are not part of a Practice and
are intended to provide you with the steps
typically used to complete a task. Practice
numbers appear in bold and are completed in
class.
Italic font in a
Practice
Items that are part of a Practice and appear in
an italic font indicate you need to select a task
or perform a specific action to complete the
step (for example, click OK).
Courier font in a
Practice
Items that are part of a Practice and appear in
courier font indicate information you should
enter (for example, at the Customer No. field,
enter 01-ABS).
Logging on to the program
Use the following steps to log onto the program.
1. Click the Sage X3 icon on the desktop of your training image.
2. Type admin as the user name and admin as the password.
3. Click Sign in.

Sage Course Curriculum - Version 3.0 Page 8 Copyright © 2018 Sage, Inc. All Rights Reserved.
Lesson 2 Quality Control and Sampling
In the following topics, you will learn about the quality control process.
The topics in this lesson include:
Understanding the Quality Control Process
Stock Status
Stock Management Rules
Quality Control Responses
Quality Control Questions
Technical Sheets
Product Information
Quality Control Entry Transactions
Receipts – Quality Controlled
Analysis Requests
Quality Control Process
Lesson Practices

Sage Course Curriculum - Version 3.0 Page 9 Copyright © 2018 Sage, Inc. All Rights Reserved.
Understanding the Quality Control Process
The Quality Control Process allows you to receive items into a quality control status.
Based on settings you define, while in this status, you can restrict access to these
products from being shipped, used in the manufacturing process, and from being
allocated.
Requirements for the quality control process include the following.
- The Inventory and Common data modules must be present.
- At least one site with stock management must be defined.
- At least one product with inventory management must be defined.
- At least one product must be defined as quality control managed.
- At least one receipt flow rule with status Q* and QC request must be set to YES.
- At least one quality control entry transaction must be defined.
The following is a high-level process flow for quality control in Sage X3.

Sage Course Curriculum - Version 3.0 Page 10 Copyright © 2018 Sage, Inc. All Rights Reserved.
Understanding the Quality Control Process (continued)
Quality control status
The status identifies if the stock of a product is accepted (status A), in quality control
(status Q), or rejected (status R).
A: This status identifies the good stock.
Q: This status identifies the stock waiting validation. If the parameters indicate the
generation of an analysis request is mandatory on the creation of stock with the
status Q, then it is necessary to perform the quality control process in order to
validate the quality of the stock.
- The parameters are made through the use of management rules defined in the
product category.
- Otherwise, a simple status change is sufficient.
- You can select to allocate stock with the status Q during a global or detailed
allocation.
- Additionally, you can take into account stock with a Q status during the
replenishment calculations.
R (Rejected): This status identifies the rejected stock waiting for destruction or
return to the supplier. Stocks with the status R cannot be taken into account during
the replenishment calculations.
Quality control roles
The quality control process is used to perform the following roles:
Test: The quality control process is used to test a product on the basis of a technical
sheet. A technical sheet can be attached to a product and assembles the list of tests
to be carried out for the product.
- When an analysis request is generated for this product, the technical sheet is
linked to the quality control.
- It is then necessary to introduce the responses to the question set up for the
record.
Modify: The quality control process is used to modify the status of the stock in
order to pass from status Q to status A or R according to the results of the tests that
were performed.
Update: The quality control process is used to update the lot characteristics
(supplier lot, expiration information, any lot name, and user fields) following a
control.
- Note that these characteristics can be updated independent of any quality control
through the Lot modifications > Characteristics change function.

Sage Course Curriculum - Version 3.0 Page 11 Copyright © 2018 Sage, Inc. All Rights Reserved.
Understanding the Quality Control Process (continued)
The quality control process updates the following:
- The stock totals by status that can be used in the product-site record and through
various stock inquiries.
- The stock lines as a function of the newly assigned statuses and any location
changes introduced.

Sage Course Curriculum - Version 3.0 Page 12 Copyright © 2018 Sage, Inc. All Rights Reserved.
Stock Status
Use Stock statuses (GESTST) in the Common data > Product tables to define statuses
which are used to manage your stock.
The status identifies if the stock of a product is accepted (status A), in quality
control (status Q), or rejected (status R).
- The A, Q, and R statuses are imposed by the program and cannot be deleted or
the status code changed.
You can create up to a three-character sub-status to customize statuses to your
company’s needs.
- For example, you can enter RR for Supplier Return or RD for Reject and
Destroy.
- The first character must be either A, Q, or R and identifies the sub-status as
Accepted, Quality, or Rejected.
You can define stock management rules to provide control and filters on how each
status can be used in the system.
- For example, you can specify that you can only issue a product with a status of
A using the Miscellaneous Issues function.
- If a status is followed by an asterisk (*) such as A*, then any status is allowed
that starts with an A.
Sage Course Curriculum - Version 3.0 Page 13 Copyright © 2018 Sage, Inc. All Rights Reserved.
Stock Management Rules
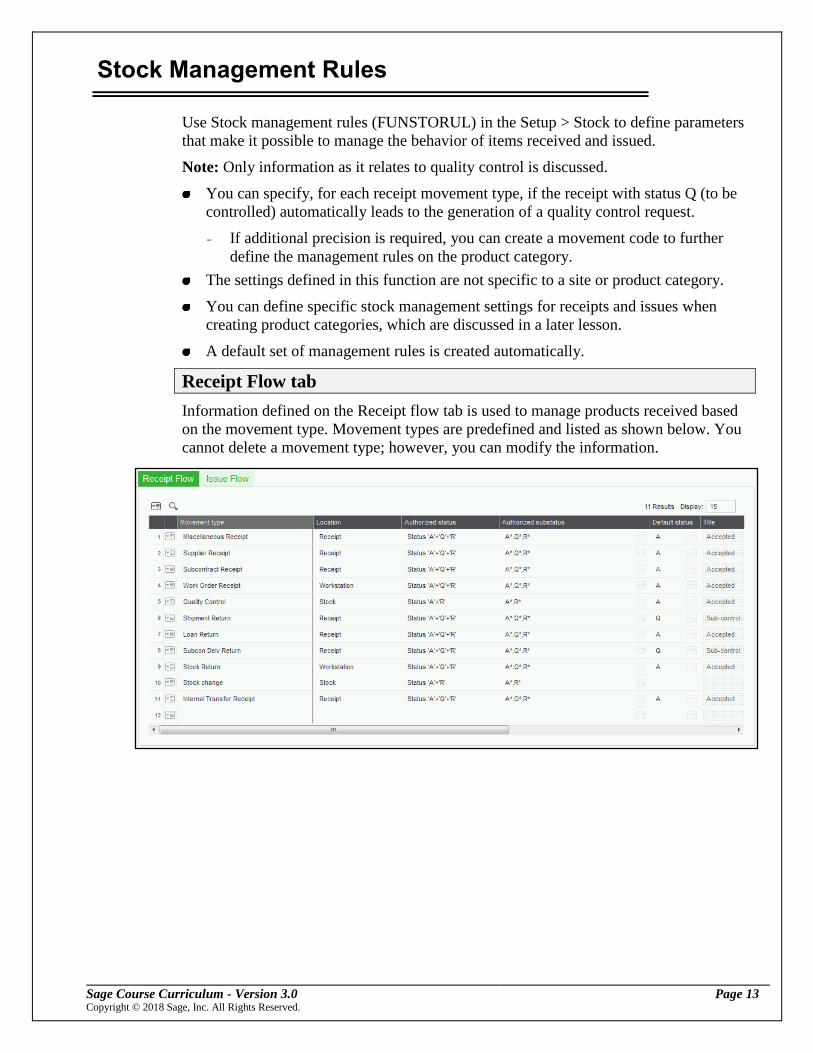
Use Stock management rules (FUNSTORUL) in the Setup > Stock to define parameters
that make it possible to manage the behavior of items received and issued.
Note: Only information as it relates to quality control is discussed.
You can specify, for each receipt movement type, if the receipt with status Q (to be
controlled) automatically leads to the generation of a quality control request.
- If additional precision is required, you can create a movement code to further
define the management rules on the product category.
The settings defined in this function are not specific to a site or product category.
You can define specific stock management settings for receipts and issues when
creating product categories, which are discussed in a later lesson.
A default set of management rules is created automatically.
Receipt Flow tab
Information defined on the Receipt flow tab is used to manage products received based
on the movement type. Movement types are predefined and listed as shown below. You
cannot delete a movement type; however, you can modify the information.

Sage Course Curriculum - Version 3.0 Page 14 Copyright © 2018 Sage, Inc. All Rights Reserved.
Stock Management Rules (continued)
At the Authorized Status field, select the statuses authorized for the movement type.
These are based on the statuses you defined including ‘A’, ‘Q’ and ‘R’.
- In addition, you can select an authorized sub-status. During data entry, you can
enter the authorized sub-status.
- You can enter a default sub-status at the Default status field. It must be one of
the authorized sub-statuses defined at the Authorized S/status field.
At the QC Request field, you determine if a QC analysis request is submitted when
an entry flow movement occurs with a ‘Q’ status.
- If you select No, you cannot change the status of a product from ‘A’ to ‘R’
through the quality control functions. You must process a status change.
Issue Flow tab
Information defined on the Issue Flow tab is used to manage products issued based on
the movement type. Movement types are predefined and listed as shown below.
The information defined for Movement type, Authorized status, and Authorized
s/status are the same as discussed on the Receipt Flow tab.

Sage Course Curriculum - Version 3.0 Page 15 Copyright © 2018 Sage, Inc. All Rights Reserved.
Quality Control Responses
Use Responses (GESTCT) under Quality records in the Common data > Product tables
to define all possible responses for a question. These responses are then used when
setting up the technical sheet and associated questions.
During quality control, a response is checked against the response table.
The system verifies the response belongs to the list of values associated with the
question.
For each response group, enter an ID and identify whether the values entered are
alphanumeric or numeric.
Enter the valid responses associated with the response group. You can enter a
different description for each language activated.

Sage Course Curriculum - Version 3.0 Page 16 Copyright © 2018 Sage, Inc. All Rights Reserved.
Quality Control Questions
Use Questions (GESQST) under Quality records in the Common data > Product tables
to manage questions used when defining technical sheets. When a technical sheet is
used, the QC personnel must answer any associated questions.
The Response type field allows you to define the response entered as Alphanumeric,
Numeric, Date, and Boolean.
- If Date or Boolean are selected, you cannot select a control type or allow non-
standard responses.
- You also cannot associate a response group or starting and ending ranges for
these response types.
The Responses field allows you to optionally select a response group to associate
with the question. You can only select a group with the same entry type as selected
at the Response type field.

Sage Course Curriculum - Version 3.0 Page 17 Copyright © 2018 Sage, Inc. All Rights Reserved.
Quality Control Questions (continued)
Control type
The option selected at the Control type field determines if the responses to the question
are controlled as well as if the entry must fall within a range.
If No Control is selected, the response to the question is not controlled and you can
enter any alphanumeric/numeric value.
Select Value List if the user must select a response based on a response group
defined. The response group must be selected at the Responses field.
Select Ranges if you do not want to specify a response group but you do want to
ensure the response is between a starting and ending range defined at the Start range
and End range fields.
- This is beneficial when the response type is Numeric.
- You can enter a maximum of 20 characters as the starting and ending values.
- You can also define a starting and ending range using the Formula fields.
- At the Nominal value field, enter the lowest possible value you will accept based
on the range defined.
Non-standard response
Select the Non-standard response check box to authorize the entry of a nonstandard
response. This allows a response that is not in the data contained in the responses group
selected or falls outside the values range.
This check box is available only if Value List or Ranges is selected at the Control
type field.
The Block type field indicates the action to take when the response is not standard.
For example, you can apply a hold on a lot until the response is verified.
- Select No Block if the non-standard response does not question the quality of the
product and no hold is enforced.
- Select Status Block to indicate a problem with the product’s quality. The status
remains in status Q or to change to status R.
- Select Next Sheet to indicate the entry of a non-standard response necessitates
the entry of a new technical sheet. You identify the technical sheet at the New
record field.

Sage Course Curriculum - Version 3.0 Page 18 Copyright © 2018 Sage, Inc. All Rights Reserved.
Quality Control Questions (continued)
Additional information
You can enter a default response at the Default response field, regardless of the
control type selected.
- If a response group or range is entered, the default response entered must either
be associated with the group or fall within the range.
If the response type is Numeric, you can also identify a unit of measure and number
of decimal places.
The group code selected at the Grouping field is used to group questions together.
These group codes are defined through the Data function in the Development > Data
and parameters block under Miscellaneous tables.
Select the Print check box to include the question on the quality control documents.

Sage Course Curriculum - Version 3.0 Page 19 Copyright © 2018 Sage, Inc. All Rights Reserved.
Technical Sheets
Use Technical sheets (GESQLC) under Quality records in the Common data > Product
tables to define the technical sheet used in the Quality control function for receipt, status
change, or production control. The technical sheet lists questions to which responses are
assigned during quality control.
The technical sheet is used to record two types of information:
The text describing the control process or the operating mode.
A set of questions/responses used during quality control or production tracking. The
responses provided can have pre-set values and produce statistics.
At the Text field, you can enter free text you can use to provide supporting
information for the technical sheet or to attach to a defined question.
To attach the entry to a question, select the appropriate question at the Question
field. The remaining fields display information based on the question, and they
cannot be changed.
Sage Course Curriculum - Version 3.0 Page 20 Copyright © 2018 Sage, Inc. All Rights Reserved.
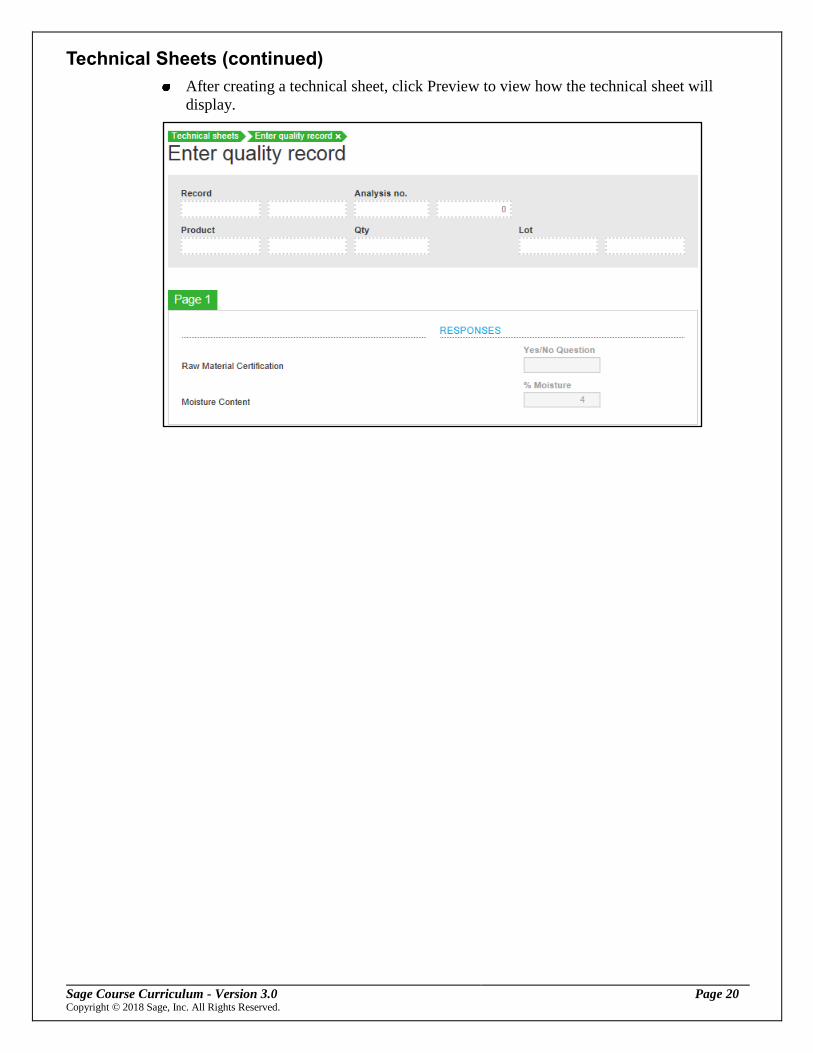
Technical Sheets (continued)
After creating a technical sheet, click Preview to view how the technical sheet will
display.

Sage Course Curriculum - Version 3.0 Page 21 Copyright © 2018 Sage, Inc. All Rights Reserved.
Product Information
When defining product categories and product-site information, you can determine if
the product is QC managed and the quality sheet used.
Note: You can modify the information defined at the product category level for QC
Management when setting up product-site information.
Product category – Management tab
Use Product categories (GESITG) in the Common data > Products to define quality
control information for product categories. The options available in the Quality section
on the Management tab define whether a product must be controlled on receipt into
stock.
The options available at the QC management field include No Control, Non-
changeable Control, Changeable Control, and Periodic control.
- Select No Control to default the status to ‘A’, but allow it to be manually
modified.
- Select Non-changeable Control to make quality control mandatory. When
receiving, you can only enter the status of ‘Q’ for products received into stock.
Sage Course Curriculum - Version 3.0 Page 22 Copyright © 2018 Sage, Inc. All Rights Reserved.
Product Information (continued)
- Select Changeable Control to have the ability to change the status of products
received from ‘Q’ to ‘A’ or ‘R’ at the time of receipt. The status defaults to ‘Q’
automatically, but you can change.
- Select Periodic control to periodically check items received. The items received
are given a ‘Q’ status only and cannot be changed.
The technical sheet selected at the Quality record field details the quality control
tests to apply to the product. Technical sheets are defined through the Technical
Sheets function under Quality records in the Common data > Product tables block.
To add additional access restrictions for products from this category placed in
quality control, you can optionally define a QC Access Code.
- This allows or prohibits the quality control on this product.
- The user can modify the status of a product and execute the Quality Control
function if this access code is associated with the user’s profile.
Receipts tab
Use the Receipts tab to define the stock management rules that apply to this specific
product category. By default all statuses associated with the type of product category
you are creating display based on rules defined in Stock management rules. The options
available are the same as discussed in the Stock management rules function.
Product-sites – Management tab
Use Product-sites (GESITF) in the Common data > Products to define quality control
information specific to product/site combinations. The options available in the Quality
section on the Management tab are similar to those defined for the product category.
This information defaults from the product category associated with the product;
however, it can be changed.
An additional field for Frequency is available if Periodic control is selected at the
QC management field.
- The number entered represents the number of receipts and defines the frequency
at which a product should be QC Managed.
- For example, entering 10 indicates that every 10th receipt is QC managed.
Sage Course Curriculum - Version 3.0 Page 23 Copyright © 2018 Sage, Inc. All Rights Reserved.
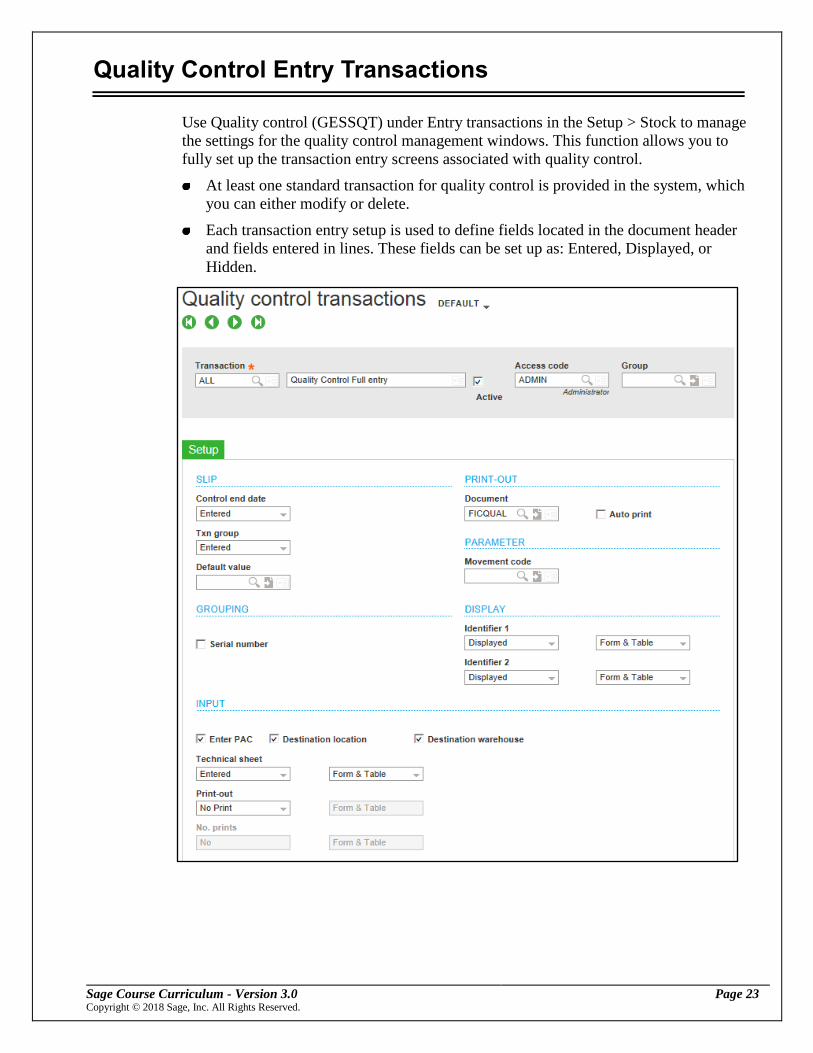
Quality Control Entry Transactions
Use Quality control (GESSQT) under Entry transactions in the Setup > Stock to manage
the settings for the quality control management windows. This function allows you to
fully set up the transaction entry screens associated with quality control.
At least one standard transaction for quality control is provided in the system, which
you can either modify or delete.
Each transaction entry setup is used to define fields located in the document header
and fields entered in lines. These fields can be set up as: Entered, Displayed, or
Hidden.

Sage Course Curriculum - Version 3.0 Page 24 Copyright © 2018 Sage, Inc. All Rights Reserved.
Quality Control Entry Transactions (continued)
In the Note section, you determine if a control end date is entered as well as
transaction group.
- The control end date tells the QC team when the testing is expected to be
completed. It is generated based on the date the quality control request is created
plus the number of days for the quality control lead time.
- By allowing the entry of a transaction group, you can optionally select to group
transactions posted to accounting to make a single entry for several transactions,
which would otherwise post separately. Use the Default value field to define a
default transaction group code for this transaction entry.
In the Input section, you define whether the unit of measure is entered and if the
user can change the destination location, as well as whether the user can change the
technical sheet and if labels are printed.
- If the Destination location check box is selected, you can modify the destination
location; otherwise, it remains the same as the original location. The destination
location is initialized with the original location except if the original location
does not accept the new status. In this case, the management rule is applied to
initialize the location.
- At the Technical sheet field you can select whether it is displayed or entered.
Select Entered to allow the user to overwrite the default technical sheet during
transaction entry.
The Movement code field in the Characters section is used to define specific stock
movement rules for certain transactions.
- It is possible, however, to have a transaction entry dedicated and assigned to
users with authorization to carry out a receipt to stock of goods with status A,
while other users can carry out a receipt with a status Q.
- Note that this only concerns product categories that authorize this type of receipt
rules and movement code.

Sage Course Curriculum - Version 3.0 Page 25 Copyright © 2018 Sage, Inc. All Rights Reserved.
Receipts – Quality
When entering the receipt of a product, either through the Miscellaneous receipts
function in Stock or the Receipts function in Purchasing, the QC management settings
will impact how the item is received.
Sage Course Curriculum - Version 3.0 Page 26 Copyright © 2018 Sage, Inc. All Rights Reserved.
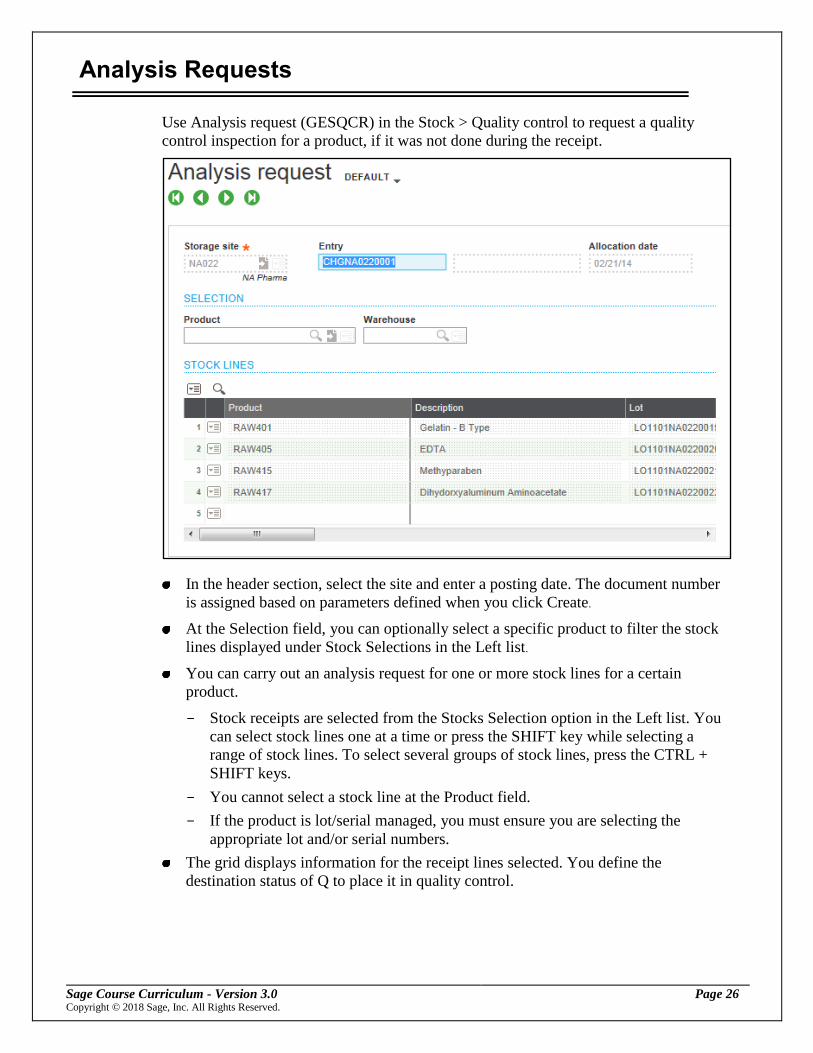
Analysis Requests
Use Analysis request (GESQCR) in the Stock > Quality control to request a quality
control inspection for a product, if it was not done during the receipt.
In the header section, select the site and enter a posting date. The document number
is assigned based on parameters defined when you click Create.
At the Selection field, you can optionally select a specific product to filter the stock
lines displayed under Stock Selections in the Left list.
You can carry out an analysis request for one or more stock lines for a certain
product.
- Stock receipts are selected from the Stocks Selection option in the Left list. You
can select stock lines one at a time or press the SHIFT key while selecting a
range of stock lines. To select several groups of stock lines, press the CTRL +
SHIFT keys.
- You cannot select a stock line at the Product field.
- If the product is lot/serial managed, you must ensure you are selecting the
appropriate lot and/or serial numbers.
The grid displays information for the receipt lines selected. You define the
destination status of Q to place it in quality control.

Sage Course Curriculum - Version 3.0 Page 27 Copyright © 2018 Sage, Inc. All Rights Reserved.
Analysis Requests (continued)
At the Quantity STK field, enter the quantity from the receipt you are placing into a
quality control status.
- This is limited to the available quantity for this stock line.
The Properties field displays the site where the quality control function is
performed. This defaults based on the stock rules defined.

Sage Course Curriculum - Version 3.0 Page 28 Copyright © 2018 Sage, Inc. All Rights Reserved.
Quality Control Process
Use Quality control (GESSTQ) in the Stock > Quality control to track the QC process
for a QC request. QC requests are automatically generated by several transactions based
on the setup. This includes:
On receipt to stock of a product coming either from a supplier or from production. A
receipt to stock can be entered directly or pass through quality control, depending on
the settings chosen for the product and product-supplier.
When the expiration date of a lot-managed product is reached.
During the receipt to stock or during the use of the product. The Status change
function is used to request a quality control operation for a product or lot in stock
whose quality is questionable. When setting up the product, you must have planned
for the generation of an analysis request during the change of status to Q.
The QC request is used to:
- List the products and lots pending control
- To keep a history of data entered during the quality control process
- To keep the link with the receipt or the work order.
It is important to note that a lot can have several simultaneous analysis requests if it
has been subject to several separate receipts.

Sage Course Curriculum - Version 3.0 Page 29 Copyright © 2018 Sage, Inc. All Rights Reserved.
Quality Control Process (continued)
Quality control
A QC request is selected from the Quality control listing in the Left list. You can filter
the information displayed in this list by selecting a site at the Site Filter field.
Click Stock by site to view the stock by product/site or for all sites in which the
product is defined.
The number of the original document that generated the quality control record is
displayed.
At the Status field, the status can be pre-loaded using the default status defined by
the quality control management rules of the product.
The Quantity information section displays the quantity for each control status based
on the lines listed.

Sage Course Curriculum - Version 3.0 Page 30 Copyright © 2018 Sage, Inc. All Rights Reserved.
Quality Control Process (continued)
Quality control detail grid
The grid displays all the analysis request lines, with each line representing a stock line.
According to the method of management for the product (managed by lot, sub-lot,
serial number), the appropriate fields display.
The quality control transaction is used to plan the grouping of analysis request lines
involving serial numbers.
- In this case, the grid displays the analysis request lines grouped by consecutive
serial number ranges, accelerating the entry in quality control.
- The entry of the technical sheet for a grouped line as well as the entry of the
statuses after control is then valid for all the lines that it “grouped.”
You can click the Actions icon on a line in the grid to access the serial number
detail.
The first field in the grid is used to identify the status of the control of a line. The
following are the different status values:
Status Description
E After filling the quality record, this status means there is a
sample.
F The quality record has not been produced yet or has been
processed only in part.
+ : * + The technical sheet has been completely processed; however, the
stock statuses can be intervened.
If part of the stock on the analysis request line has been
qualified in terms of status, the line remains with the status
“+”.
The technical sheet remains accessible in modification mode,
provided none of the stock has been qualified.
After part of the stock on the line has changed status, the
technical sheet is no longer accessible except for information
purposes.
* All the stock on the line has been qualified. The quality control is
complete for this line.
The technical sheet is no longer accessible.
The detail of the status changes carried out is accessible from
the Actions icon.
R This status means there are responses out of standard.

Sage Course Curriculum - Version 3.0 Page 31 Copyright © 2018 Sage, Inc. All Rights Reserved.
Quality Control Process (continued)
Entering technical sheets
The Quality record field displays the technical sheet associated with the line. If a quality
record is attached to a line, it must be entered completely in order to proceed with the
changes to the statuses.
Entering quality records
You can access a quality record for a line by clicking the Actions icon on the line
and selecting Quality record.
Different actions are possible depending on how the questions and responses are set
up.

Sage Course Curriculum - Version 3.0 Page 32 Copyright © 2018 Sage, Inc. All Rights Reserved.
Quality Control Process (continued)
To directly enter the response or to validate the proposed response:
- If the question was set up as Value List type, the list of possible values can be
accessed by clicking the Actions icon at the response field as shown below.
- You can also view the description of the question.
- If the question is set up as a Ranges type, the description of the question is
available from the Actions icon. You can view the range of possible responses
and their type (alphanumeric or numeric).
- If the question is set up as a Date type, you can use the calendar on the clicking
the Actions icon to select a date.
- If the question is set up as a Boolean type, the response field is a check box.
If the setup of the question accounts for non-standard responses, a message displays
prompting you to confirm the non-standard response.
- Depending on the setup of the question, the entry of a non-standard response
may have no consequence, but it can have an entry of status R* (Rejected) or
impose a new technical sheet.
- If the non-standard responses are not authorized, you cannot enter responses that
are not planned for the question.
Sage Course Curriculum - Version 3.0 Page 33 Copyright © 2018 Sage, Inc. All Rights Reserved.
Quality Control Process (continued)
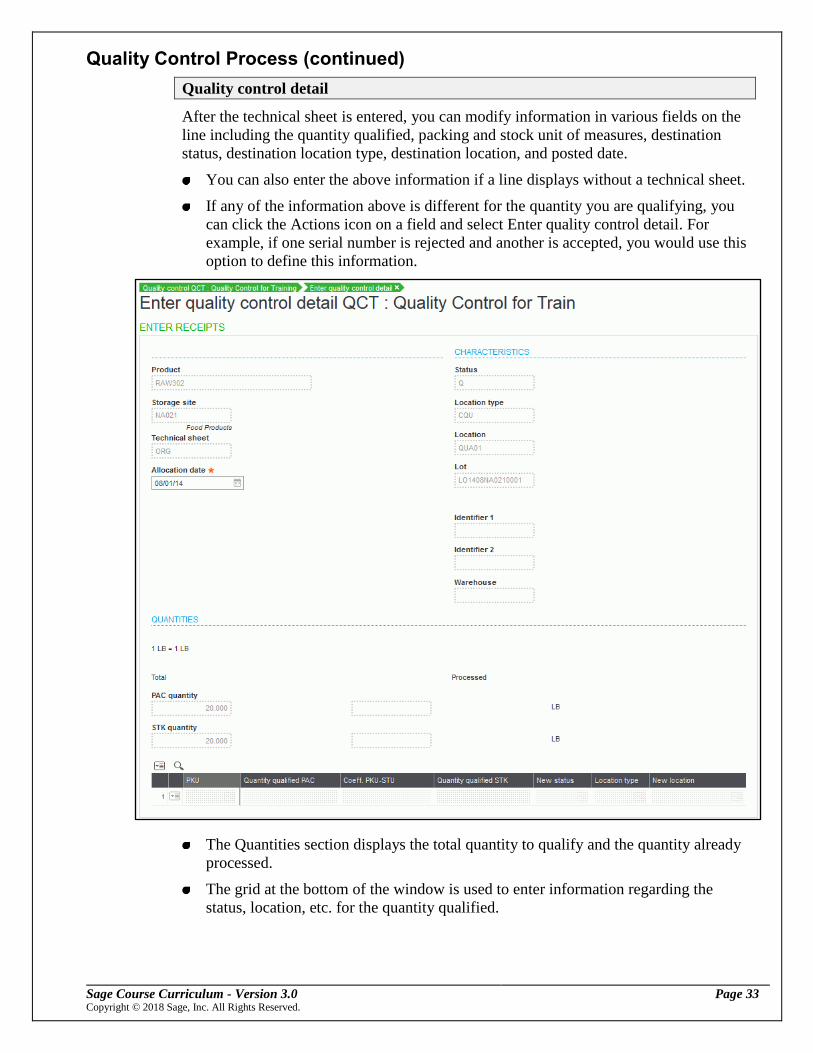
Quality control detail
After the technical sheet is entered, you can modify information in various fields on the
line including the quantity qualified, packing and stock unit of measures, destination
status, destination location type, destination location, and posted date.
You can also enter the above information if a line displays without a technical sheet.
If any of the information above is different for the quantity you are qualifying, you
can click the Actions icon on a field and select Enter quality control detail. For
example, if one serial number is rejected and another is accepted, you would use this
option to define this information.
The Quantities section displays the total quantity to qualify and the quantity already
processed.
The grid at the bottom of the window is used to enter information regarding the
status, location, etc. for the quantity qualified.
Sage Course Curriculum - Version 3.0 Page 34 Copyright © 2018 Sage, Inc. All Rights Reserved.
Quality Control Process (continued)
You can access the technical sheet by clicking the Actions icon at the Quality record
field. This allows you to view the technical sheet as it was entered for the processed
line.
You can also modify the information if no status change has been entered yet for the
line.
There are Management rules defined for product categories regarding quality
control. The management rules specify the statuses and sub-statuses that can be
attributed during quality control. The choice of a new status is therefore made on the
basis of:
- The management rules
- Any constraints imposed by the entry of a nonstandard response to the technical
sheet questions
- The control made following the reading of the technical sheet
Additional fields display in this window based on the type of product and location
management information.
- For example, if the product is managed by serial number or lot, you would be
able to enter information for specific serial numbers/lots.
- Additionally, based on the set up of the site and the product, you may be able to
enter the destination location type and location. This is important if the new
status is no longer compatible with the receiving location. The system will
propose a default location based on the management rule and product category.
If a quality control line is distributed over several different units of measure,
statuses, location, lot, or serial numbers, the corresponding field in the Quality
control detail section in the Quality control window displays $.
Additional information
After entering the QC information for a line, you can view the history by clicking
Quality history. This includes the technical sheet responses, lot/serial number
information, and the source document.
- You can also access this information by clicking the Actions icon on a line and
selecting Quality history: record.
If the QC quantity qualified had different statuses, lot, serial numbers, locations,
etc., you can view the distribution information by clicking the Actions icon on a line
and selecting the Movement visualization option. This displays the Quality control
detail window.
After the information is completely entered for a QC request, it is automatically
archived and displays under the Archived option in the Left list.
- If the complete QC request is not qualified but a line is, you can click the
Actions icon on the line and select to archive.
- Once archived, you cannot modify information.

Sage Course Curriculum - Version 3.0 Page 35 Copyright © 2018 Sage, Inc. All Rights Reserved.
Lesson Practices
Complete the following lesson Practices in the order shown.
Create new sub-statuses
In this Practice, create two new sub-statuses.
1. In the Common data > Product tables, select Stock statuses (GESTST).
2. In the first clear row, enter RR as the status, Rejected sup. return as the
description, and Rej Return as the short title.
3. In the next row, enter RD as the status, Rejected to be destroyed, and
Rej Destroy as the short title.
4. Click Save and Close page.
Change product category stock management rule
In this Practice, change the stock management rule for miscellaneous receipts.
1. In the Common data > Products > Product category (GESITG).
2. From left list, select RAWMA
3. For the Miscellaneous Receipt row on the Receipts tab, verify Yes is selected at the
Analysis Request field.
4. Click Save if necessary and Close page.
Create a new response group
In this Practice, create a new response group.
1. Under Quality records in the Common data > Product tables, select Responses
(GESTCT.
2. Click the New button.
3. At the Response field, type ORG and then type Organic as the description.
4. Select the Alphanumeric option, if it is not already selected.
5. Enter the following in the grid:
Code Code description
Yes Yes
No No
6. Click Create.
7. Close page.

Sage Course Curriculum - Version 3.0 Page 36 Copyright © 2018 Sage, Inc. All Rights Reserved.
Lesson Practices (continued)
Create a new question
In this Practice, create a new question to use during the quality control process.
1. Under Quality records in the Common data > Product tables, select Questions
(GESQST).
2. Click New.
3. At the Question field, enter ORGANIC as the code and Organic as the description
and short title.
4. At the Response type field, select Alphanumeric.
5. At the Control type field, select Value List.
6. At the Response table field, select ORG. This is the response you previously created.
7. Select the Non-standard response check box.
8. At the Block type field, select Next Sheet.
9. At the New record field, select QC000002.
10. Click Create.
11. Close page.
Create a technical sheet
In this Practice, create a technical sheet to assign the question you created.
1. Under Quality records in the Common data > Product tables, select Technical sheets
(GESQLC).
2. Click New.
3. Enter ORG as the code and Organic as the description.
4. In the first row, enter Organic at the Text field.
5. At the Question field, select the ORGANIC question code you previously created.
6. Click Create.
7. Click Preview in the Right panel to preview the technical sheet interface.
8. Close page twice.

Sage Course Curriculum - Version 3.0 Page 37 Copyright © 2018 Sage, Inc. All Rights Reserved.
Lesson Practices (continued)
Modify QC management for products
In this Practice, modify the QC management information for two products in the NA021
site.
1. In the Common data > Products, select Products – sites (GESITF).
2. From the Products-site option in the Left list, select the RAW302 product in the
NA021 site.
3. At the QC management field, verify Non-changeable Control is selected.
4. At the Quality record field, select the ORG technical sheet.
5. Click Save.
6. Now select the RAW331 product in the NA021 site.
7. Select Changeable Control as the QC management and ORG as the quality sheet.
8. Click Save and Close page.
Create a quality control entry transaction
In this Practice, create a new quality control entry transaction.
1. Under Entry transactions in the Setup > Stock, select Quality control (GESSQT).
2. Click New.
3. At the Transaction field, type QCT as the ID and then Quality Control for
Training as the description.
4. Select the Active check box, if it is not already selected.
5. At the Control end date and the Stock movement group field fields, select Entered.
6. Select the Serial number check box.
7. At the Technical sheet field, select Entered and Form and table.
8. Accept all other defaults and click Create.
When creating a transaction entry code, the system performs a validation to
ensure the settings are valid and no errors are encountered.
9. Close page.

Sage Course Curriculum - Version 3.0 Page 38 Copyright © 2018 Sage, Inc. All Rights Reserved.
Lesson Practices (continued)
Enter a product receipt for RAW302
In this Practice, enter a miscellaneous receipt for the RAW302 product in the NA021
site. Remember, you modified the QC management information for this product in the
Product – sites function in a previous activity.
1. In the Stock > Receipt/issue transactions, select Miscellaneous receipts (GESSMR).
2. Select the ALL Misc Stock Receipts Full Entry transaction entry type.
3. Click New.
4. At the Storage site field, select NA021.
5. Accept the current default allocation date. If the date is after 12/31/17, enter
12/31/17 as the Allocation date.
6. Select RAW302 at the Product field and enter 20 as the quantity received.
What is the status assigned to this receipt line? ______________________
Can you change the status for this receipt line? If not, why?
____________________________________________________________
7. Verify the status is still set to Q and select CQU as the location type.
8. At the Price field, enter 4.25.
9. Exit the Enter lot complement window if it appears.
10. Click Create.
11. Close page.
12. In the Stock > Inquiries under Stock, select Detailed stock (CONSSDE).
13. Select NA021 as the site and RAW302 as the product.
14. Click Search in the Right panel. What is the stock status of the quantity you
received into stock? _________________________
15. Is there an analysis request created for this stock? If so, why?
__________________________________________________________________
16. Close page.
Sage Course Curriculum - Version 3.0 Page 39 Copyright © 2018 Sage, Inc. All Rights Reserved.
Lesson Practices (continued)
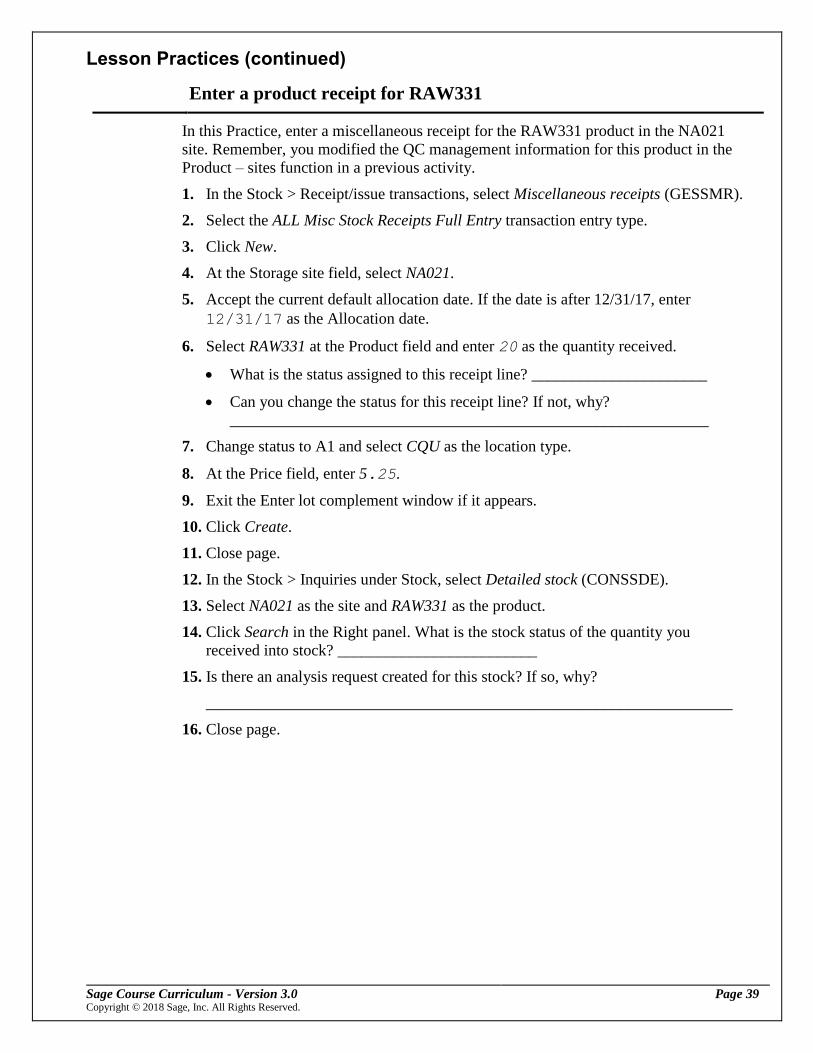
Enter a product receipt for RAW331
In this Practice, enter a miscellaneous receipt for the RAW331 product in the NA021
site. Remember, you modified the QC management information for this product in the
Product – sites function in a previous activity.
1. In the Stock > Receipt/issue transactions, select Miscellaneous receipts (GESSMR).
2. Select the ALL Misc Stock Receipts Full Entry transaction entry type.
3. Click New.
4. At the Storage site field, select NA021.
5. Accept the current default allocation date. If the date is after 12/31/17, enter
12/31/17 as the Allocation date.
6. Select RAW331 at the Product field and enter 20 as the quantity received.
What is the status assigned to this receipt line? ______________________
Can you change the status for this receipt line? If not, why?
____________________________________________________________
7. Change status to A1 and select CQU as the location type.
8. At the Price field, enter 5.25.
9. Exit the Enter lot complement window if it appears.
10. Click Create.
11. Close page.
12. In the Stock > Inquiries under Stock, select Detailed stock (CONSSDE).
13. Select NA021 as the site and RAW331 as the product.
14. Click Search in the Right panel. What is the stock status of the quantity you
received into stock? _________________________
15. Is there an analysis request created for this stock? If so, why?
__________________________________________________________________
16. Close page.

Sage Course Curriculum - Version 3.0 Page 40 Copyright © 2018 Sage, Inc. All Rights Reserved.
Lesson Practices (continued)
Analysis request
In this Practice, place the RAW331 product you received previously into a quality
control status.
1. In the Stock > Quality Control, select Analysis request (GESQCR).
2. Click New.
3. At the Storage site field, select NA021.
4. Accept the current default allocation date. If the date is after 12/31/17, enter
12/31/17 as the date.
5. At the Product field, select RAW331.
6. Select Stocks selection in the Left list.
7. Several stock lines should show. Select the stock you received.
8. Click Create.
9. When you click Create, the system will automatically generate a quality control
number, which is accessible in the Quality Control function.
10. Close page.
Start the quality control process
In this Practice start the process for qualifying the QC request generated.
1. In the Stock > Quality control, select Quality control (GESSTQ).
2. Select the QCT Quality Control for Training transaction selection.
3. In the Left list, select the QC request created for product RAW302.
4. Click the Actions icon on the line shown and select Quality record.
5. In the Enter quality record window, select Yes at the Organic field.
6. Click Save.
7. 19 of the quantity received passed the QC process; however, one of the items was
rejected. For the first line, accept the default packing unit of measure and enter 19
as the quantity qualified.
8. If the new status is not ‘A’, select it now.
9. Click the Actions icon for the first row and select Enter quality control detail.
10. For the first line,at the bottom of the window enter 19 for Quantity qualified PAC
and default New status & Location type
11. Tab to second row enter 1 as the quantity qualified and change the new status to R
as it was rejected and STO location type.

Sage Course Curriculum - Version 3.0 Page 41 Copyright © 2018 Sage, Inc. All Rights Reserved.
Lesson Practices (continued)
12. Click Save.
Note: For the rejected quantity, you can enter return information for the supplier
and select the appropriate product stock to return.
13. Click Save again in the Quality control window to save the entry.
14. Close page.
Verify statuses
In this Practice, verify the statuses assigned to the stock for each product.
1. Under Stock in the Stock > Inquiries, select Detailed stock (CONSSDE).
2. Select NA021 as the site and RAW302 as the product.
3. Click Search.
4. What is the stock status of the quantity in stock? __________________
5. Close page.
Sage Course Curriculum - Version 3.0 Page 42 Copyright © 2018 Sage, Inc. All Rights Reserved.
Lesson 3 Warehouses
In the following lesson, you will learn about Warehouses which allows you to group
locations.
The topics in this lesson include:
Overview of Warehouses
Activating Warehouses in a Site
Creating Warehouses
Assigning a Location to a Warehouse
Product – Warehouse
Assigning Default Warehouse(s)
Using Warehouses in Transactions
Lesson Practices

Sage Course Curriculum - Version 3.0 Page 43 Copyright © 2018 Sage, Inc. All Rights Reserved.
Overview of Warehouses
A warehouse is a group of locations and multiple warehouses can be associated with a
single site.
With warehouses, locations become a physical place.
- You can separate locations of the same location type into different warehouses.
The management of locations becomes easier for a site with the use of warehouse(s).
- You can assign a default warehouses to a user and product.
- You can perform all stock transactions with warehouses.

Sage Course Curriculum - Version 3.0 Page 44 Copyright © 2018 Sage, Inc. All Rights Reserved.
Overview of Warehouses (continued)
You can use warehouses in the following functions/reports.
Domain Function Report
Common Data Site
User
Product category
Product-site
Location type
Location
Weight stations
Sales Picking ticket
Delivery
Customer return
Loan return
Subcontract return
Inquiries
Deliver picking
tickets
Purchasing Receipt
Return management
Receipt notes
Inventory Miscellaneous input
Miscellaneous output
Inter-sites transfer
Subcontract transfer
Subcontract return
Stock change
Assembly
De-assembly
Storage plan
Quality control
Inventory sessions
Counts
Inquiries
Allocations
Picking ticket
Counts
Manufacturing Production tracking
Reintegration plan
Production plan
Material tracking plan
Subcontract consumption
Configure weight stations
Material issue
notes

Sage Course Curriculum - Version 3.0 Page 45 Copyright © 2018 Sage, Inc. All Rights Reserved.
Overview of Warehouses (continued)
Data Set Up Flow
The setup process changes with the inclusion of warehouses.
Prerequisites & Limitations
Keep in mind the following prerequisites and limitations regarding warehouse.
Prerequisites:
- The WRH activity code must be active
- Can only be used on a Stock site managing location; therefore, the EMP activity
code (Location management) must also be active
Limitations:
- ADC functions: No warehouse entry.
- ADC work only on locations but a control is always made to check whether the
product-warehouse record exists. If it does not exist, transaction is aborted.
No impact on:
- User profiles
- MRP calculation
- Stock valuation
- Stock management rules

Sage Course Curriculum - Version 3.0 Page 46 Copyright © 2018 Sage, Inc. All Rights Reserved.
Activating Warehouses in a Site
Use Sites in the Setup > Organizational structure to activate warehouses for a site and
define default warehouses for use in receipt and issue flows.
The options on the Warehouse tab are not available if the Stock checkbox is not
selected on the Details tab.
Sage Course Curriculum - Version 3.0 Page 47 Copyright © 2018 Sage, Inc. All Rights Reserved.
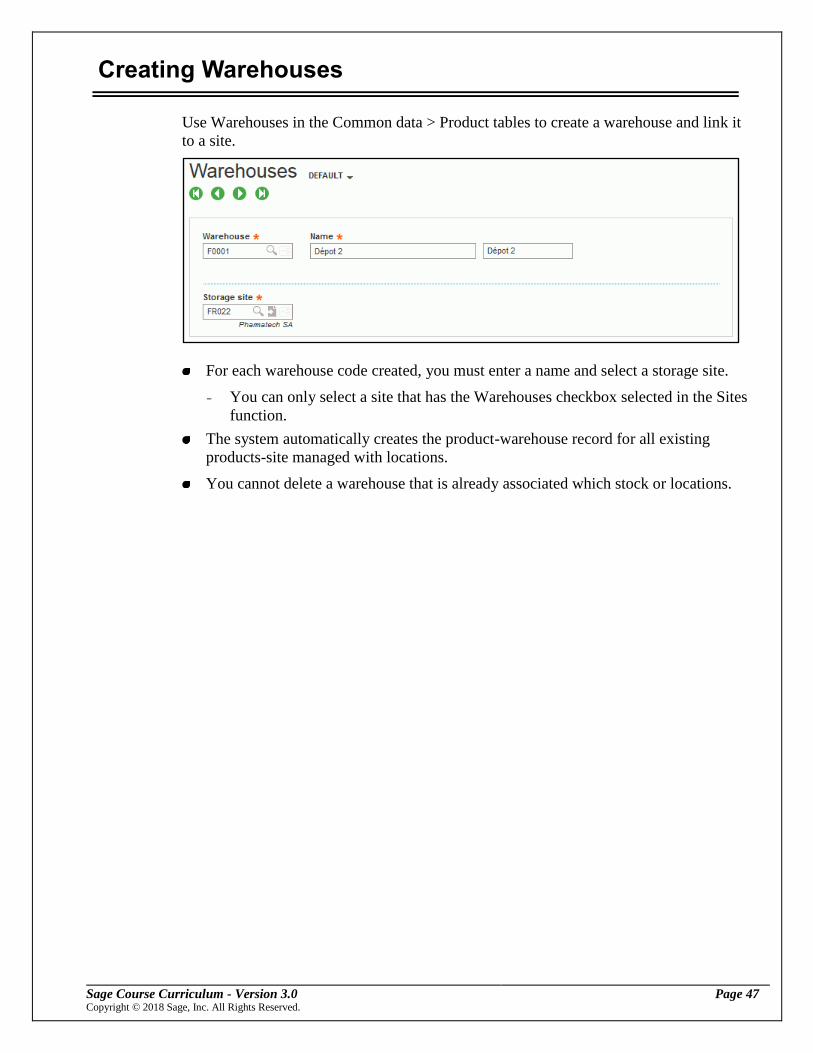
Creating Warehouses
Use Warehouses in the Common data > Product tables to create a warehouse and link it
to a site.
For each warehouse code created, you must enter a name and select a storage site.
- You can only select a site that has the Warehouses checkbox selected in the Sites
function.
The system automatically creates the product-warehouse record for all existing
products-site managed with locations.
You cannot delete a warehouse that is already associated which stock or locations.

Sage Course Curriculum - Version 3.0 Page 48 Copyright © 2018 Sage, Inc. All Rights Reserved.
Assigning a Location to a Warehouse
In the Locations function in the Common data > Product tables, you can link a location
with a warehouse.
Note: There is no link between a location type and a warehouse.
If the Warehouse checkbox is selected for a site, you are required to link a location
associated with the Internal or Dock – awaiting storage location type to a
warehouse.
- You cannot link locations associated with a customer or sub-contract type to a
warehouse.

Sage Course Curriculum - Version 3.0 Page 49 Copyright © 2018 Sage, Inc. All Rights Reserved.
Product - Warehouse
Use Products-warehouses in the Common data > Products, to create a product-
warehouse combination. Only products associated with the warehouse and site are
entered for a transaction is available for selection.
For each product-warehouse combination, you can define how the product is
counted during a physical count as well as define default locations by warehouse.
- If default locations are not defined, than the default locations defined for the
product-site are used.
The Stock tab displays stock information for the product in the selected warehouse.
For example, you can view the quantity of stock currently allocated, sitting on the
dock, etc.

Sage Course Curriculum - Version 3.0 Page 50 Copyright © 2018 Sage, Inc. All Rights Reserved.
Assigning Default Warehouse(s)
You can assign a default warehouse to use for specific transactions when defining users
as well as for product categories and product-site combinations.
Note: The Change of warehouse function can be used to change the default warehouse
for a single site.
Users
You can define a default warehouse for stock transactions performed by a user in the
Users task in the Setup > Users.
The default warehouse is assigned on the General tab.
If no default is defined, the default warehouse for the product-site record is used.
Product Category & Product-Site
In the Product category and Product - sites functions in the Common data > Products,
use the Warehouses tab to define default warehouses for allocation and issue flows.
The creation of a product-site record creates a product-warehouse record linked to
the site. You can view the product-warehouse record created in the Product
warehouses function.
If you delete a product-site record, it will delete all product-warehouse records
linked to the site.

Sage Course Curriculum - Version 3.0 Page 51 Copyright © 2018 Sage, Inc. All Rights Reserved.
Using Warehouses in Transactions
It is important to keep the following information in mind regarding entering transactions
when Warehouses is activated for a site.
Entry Flows
When defining entry transactions for the various entry flows, you can determine if
only a single warehouse can be entered or if warehouses can be entered for different
document lines.
- If only a single warehouse is required, the warehouse is mandatory and entered
at the header level. You cannot change the warehouse when entering the
document line.
- If warehouses can be selected on the document lines, the warehouse must be
defined as Entered in the entry transaction.
Warehouse saved in entry flow document:
- If the document is single warehouse, the warehouse is saved on the header and
lines of the document.
- If the warehouse is entered on the document line, it is saved only for the
document line and not the header.
Issue Flows
When defining entry transactions for the various issue flows, you can determine if
only a single warehouse can be entered or if warehouses can be entered for different
document lines.
- If only a single warehouse is required, the warehouse is mandatory and entered
at the header level. You cannot change the warehouse when entering the
document line.
- If warehouses can be selected on the document lines, the warehouse must be
defined as Entered in the entry transaction.
In the Detail window (manual stock line selection and automatic determination),
stock lines are filtered with the warehouse of the document line.
- If no warehouse is entered at the document line, it is filtered with the warehouse
of the product-site for the issue flow (then also filtered by locations).
- If there is stock shortage, the warehouse is saved into the shortage transaction.
Warehouse saved in issue flow document:
- If the document is single warehouse, the warehouse is saved on the header and
lines of the document.
- If the warehouse is entered on the document line, it is saved only for the
document line and not the header.

Sage Course Curriculum - Version 3.0 Page 52 Copyright © 2018 Sage, Inc. All Rights Reserved.
Using Warehouses in Transactions (continued)
Allocation Flows
For manual stock line selected, data is filtered based on the warehouse defined for
the product-site and the appropriate movement type.
- The warehouse is populated in the filter screen; however, it can be modified.
- By default, stock line selection is also filtered by locations.
For automatic allocation, the products are selected with the warehouse set for the
product-site and the appropriate movement type.
In cases of stock shortage, the warehouse is saved into the shortage transaction.
You cannot define default chaining warehouses for allocation rules. For example,
after searching one warehouse have it automatically search another warehouse.
Internal Flows
In the document header, the default source warehouse is the warehouse for the user.
If one is not defined, the warehouse for the site and the appropriate internal flow
type is used.
- There is no default for the destination warehouse in the document header.
In the document lines, both the source warehouse and the destination warehouse are
set to the source warehouse and destination warehouse on the header.
In the Detail window, the default destination warehouse is the same as the
destination warehouse on the document line and cannot be modified.
Warehouse saved in internal flow document:
- The source warehouse is saved in document line and the destination warehouse
is saved in detail line.

Sage Course Curriculum - Version 3.0 Page 53 Copyright © 2018 Sage, Inc. All Rights Reserved.
Lesson Practices
Complete the following lesson practices in the order shown.
Site, Warehouse, Location
In this Practice, review information defined for the site, warehouse, and location.
1. From the Setup > Organizational structure, select Sites (GESFCY).
2. Select the FR022 site under FR20 in the Left list.
3. Click the Warehouse tab review the defaults defined. What is the default warehouse
for the receipt flow? ______________________
4. Close page.
5. From the Common data > Product tables, select Warehouses (GESWRH). How
many warehouses are defined for the FR022 site? ___________________
6. Close page.
7. From the Common data > Product tables, select Locations (GESLOC).
8. Create a selection to only show the locations for the FR221 warehouse and the
FR022 site. Hint: Use ESC+F6 for data details
9. Close page.
Products & User
In this Practice, review information defined for the site, warehouse, and location.
1. From the Common data > Products, select Products (GESITM).
2. Select the BMS055 product.
3. From the Right panel, click Product-site.
4. Select the BMS055-FR022 product-site combination in the Left list and review the
settings on the Warehouses tab. What is the default warehouse for orders?
______________________________
5. From the Right panel, click Product-warehouse.
6. Select the BMS055-FR221 product-warehouse combination in the Left list. What is
the default picking location? __________________________________
7. Exit all functions.
8. From the Setup > Users, select Users (GESAUS).
9. Select the user you logged in as and assign FR221 as the default warehouse.
10. Save the changes and Close page.

Sage Course Curriculum - Version 3.0 Page 54 Copyright © 2018 Sage, Inc. All Rights Reserved.
Lesson Practices (continued)
Miscellaneous Receipt
In this Practice, enter a miscellaneous receipt for the BMS055 product.
1. From the Stock > Receipt/issue transactions, select Miscellaneous receipts
(GESSMR).
2. Select the WRH Warehouse entry transaction selection.
3. Click New.
4. Select FR022 as the site and enter Current date as the date.
5. Tab through to the Lines tab.
What is the default warehouse? _______________________
Where did it come from? ____________________________
6. Select BMS055 as the product and enter 200 as the quantity?
What is the default location? _________________________
Where did it come from? ____________________________
7. Click Create.
8. Close page.
9. From the Stock > Inquiries block, select Detailed stock (CONSSDE).
10. Check the available stock for the BMS055 product in the FR022 site and the FR221
warehouse.
11. Close page.
Internal and Issue Flows
In this Practice, define information for an allocation rule, process a stock change, and
create a sales order.
1. From the Common data > Products, select Product categories (GESITG).
2. Select the BMSOL product category.
3. Click the Issue Flow tab and select ALL07 as the allocation rule at the Order field.
4. Click Save.
5. Close page.
6. From the Common data > Products, select Product-warehouses.
7. Select the BMS055/FR221 product warehouse combination.
What is the default picking location? _______________________
8. Close page.
Sage Course Curriculum - Version 3.0 Page 55 Copyright © 2018 Sage, Inc. All Rights Reserved.
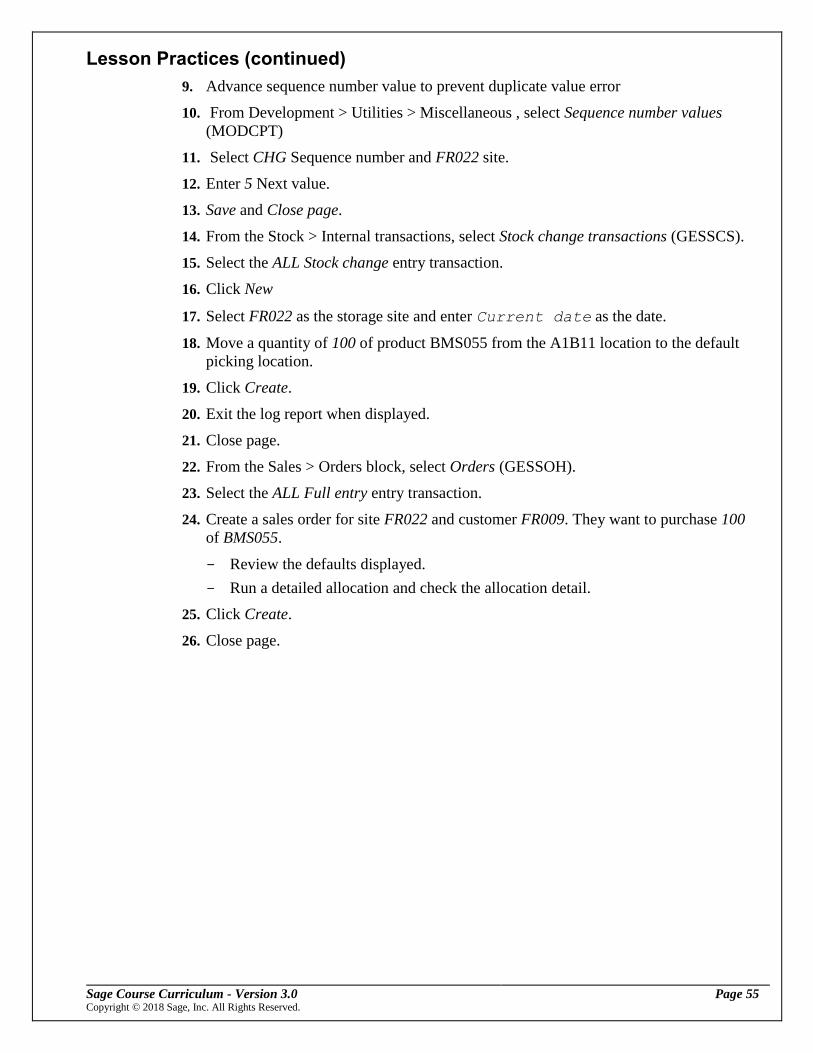
Lesson Practices (continued)
9. Advance sequence number value to prevent duplicate value error
10. From Development > Utilities > Miscellaneous , select Sequence number values
(MODCPT)
11. Select CHG Sequence number and FR022 site.
12. Enter 5 Next value.
13. Save and Close page.
14. From the Stock > Internal transactions, select Stock change transactions (GESSCS).
15. Select the ALL Stock change entry transaction.
16. Click New
17. Select FR022 as the storage site and enter Current date as the date.
18. Move a quantity of 100 of product BMS055 from the A1B11 location to the default
picking location.
19. Click Create.
20. Exit the log report when displayed.
21. Close page.
22. From the Sales > Orders block, select Orders (GESSOH).
23. Select the ALL Full entry entry transaction.
24. Create a sales order for site FR022 and customer FR009. They want to purchase 100
of BMS055.
- Review the defaults displayed.
- Run a detailed allocation and check the allocation detail.
25. Click Create.
26. Close page.
Sage Course Curriculum - Version 3.0 Page 56 Copyright © 2018 Sage, Inc. All Rights Reserved.
Lesson 4 Purchasing Signature Management
In the following topics, you will learn how to set up and use signature rules in the
Purchasing module.
The topics in this lesson include:
Purchasing Signature Management Overview
Assignment Rules
User Assignment
Delegated users
Manage Signatures
Workflow Monitor
Standard Workflow Rules – PR Signatures
Standard Workflow Rules – PO Signatures
Standard Workflow Rules – Open Orders Signatures
Lesson Practices

Sage Course Curriculum - Version 3.0 Page 57 Copyright © 2018 Sage, Inc. All Rights Reserved.
Purchasing Signature Management Overview
As part of the purchasing process, you can require signatures as part of the workflow
process. The requirement of these signatures can prevent a purchase request from being
converted to a purchase order and a purchase order from being printed.
Signature rules are used in the Purchasing module documents such as purchase
requests, purchase orders or open orders, and also in budget management in order to
validate budget envelopes.
- Only signature rules as they relate to Purchasing are discussed in this lesson.
Management of signature rules is closely linked to notifications by workflow.
- Each signature flow can be broken down into several successive workflow rules.
- The signature circuit is a set of successive workflow rules which are triggered
when creating or modifying the document. Each rule has triggering criteria and a
list of recipients.
- The user must perform an action in order to launch the next rule. An action may
consist of modifying the document, signing, cancelling the signature, refusing a
signature, etc.
- According to the nature of the action, the workflow rule that follows is different.
If signature management is activated for a document and a company, this document
must then be signed so that it can be converted.
- This signature can then be made by the user or automatically.
There are standard workflow rules automatically defined to cover the most common
job cases.
Below is an example of a circuit.

Sage Course Curriculum - Version 3.0 Page 58 Copyright © 2018 Sage, Inc. All Rights Reserved.
Purchasing Signature Management Overview (continued)
Implementing the signature circuit requires setting up rules for triggering
notifications by workflow.
This setup is broken down into five steps:
1. Setup of assignment rules
2. Assignment of main signatures and definition of assignment criteria
3. Assignment of substitute signers
4. Link between assignment rule and workflow rule
5. Setup of planning workbench for notification tracking
Sage Course Curriculum - Version 3.0 Page 59 Copyright © 2018 Sage, Inc. All Rights Reserved.
Assignment Rules
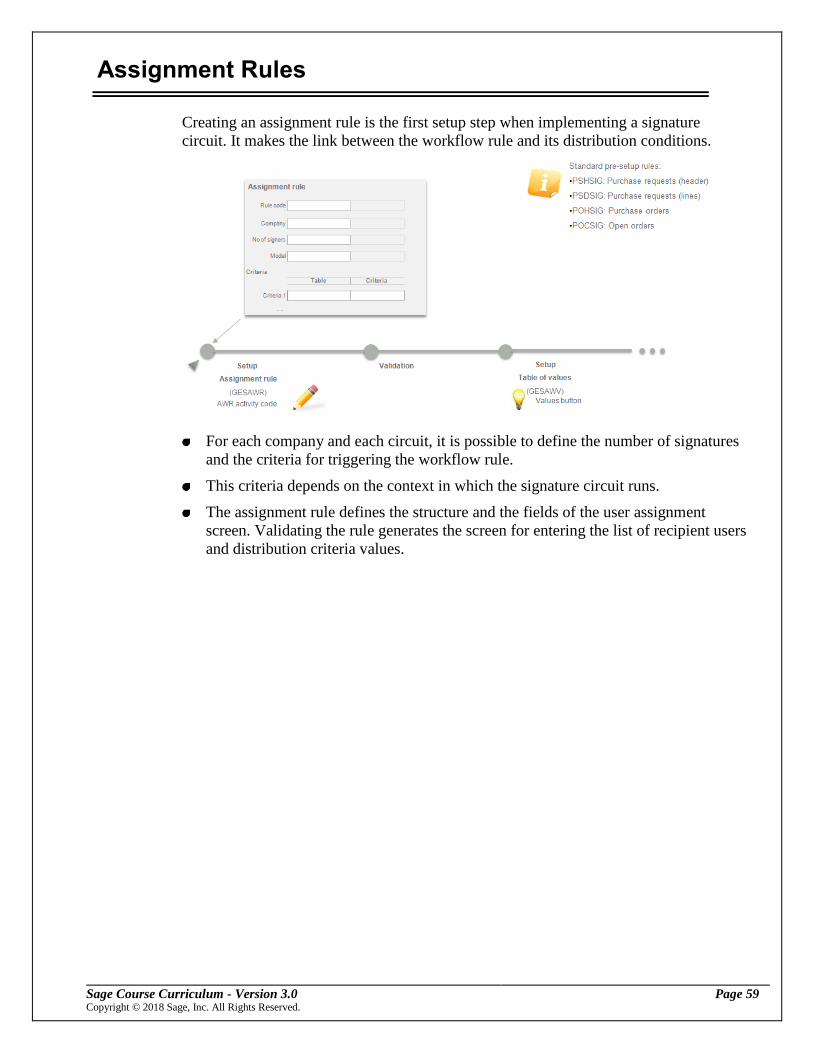
Creating an assignment rule is the first setup step when implementing a signature
circuit. It makes the link between the workflow rule and its distribution conditions.
For each company and each circuit, it is possible to define the number of signatures
and the criteria for triggering the workflow rule.
This criteria depends on the context in which the signature circuit runs.
The assignment rule defines the structure and the fields of the user assignment
screen. Validating the rule generates the screen for entering the list of recipient users
and distribution criteria values.

Sage Course Curriculum - Version 3.0 Page 60 Copyright © 2018 Sage, Inc. All Rights Reserved.
Assignment Rules (continued)
User rules of assignment
Use User rules of assignment (GESAWR) in the Setup > Workflow to create or modify
an assignment rule, define the data model, number of signatures, and table information.
For each assignment rule, you must enter an ID and description.
To make the rule specific to a company, you must select a company at the Company
field; otherwise, leave the field blank.
The data model selected at the Data model field determines the tables available
when evaluating the allocation rule.
- The model selected must be the same as the model associated with the
Workflow rule using the allocation rule.
- For example, the POHSIG assignment rule is based on the PORDER data model.
This model groups together three tables: PORDER, BPSUPPLIER, and
AUTILIS, making it possible to enter criteria on these three tables in the
assignment rule.
- Data models are defined through the Data models function under Development
in the Development > Data and parameters block.

Sage Course Curriculum - Version 3.0 Page 61 Copyright © 2018 Sage, Inc. All Rights Reserved.
Assignment Rules (continued)
If the data model selected contains line tables associated with a header, you can
enter the table line at the Table line field.
- If a table line is entered, this is the table used to determine the Workflow
recipients.
- The Workflow using the corresponding allocation rule is set to Line type.
At the Number of signatures field, enter the maximum number of signers for the
circuit.
- The AWR activity code determines the maximum number of signers who can be
declared in an assignment rule. It is a maximum of 10 by default.
- This number does not apply to substitute signers.
- The screen generated by the validation of the rule contains, in addition to the
criteria columns, as many User columns as entered at this field.
Criteria
The criteria defined in the grid is used to set the Workflow rules’ triggering conditions.
Each time a document is created, the system searches for an assignment rule.
- If an assignment rule is set up, the system compares the values of the criteria
with the document created.
- The results of this comparison combined with the list of users are used to
determine the main signers.
Each row defined, creates a criteria.
- For each row, you determine the table accessed, the criteria (formula), column
description, data type, length, local menu (if it’s a local menu), parameter, link
(displays the long or short title for entered value), and default value.

Sage Course Curriculum - Version 3.0 Page 62 Copyright © 2018 Sage, Inc. All Rights Reserved.
Assignment Rules (continued)
Validation
Validation automatically occurs when creating or modifying an assignment rule. It is
used to generate the screen for entering users and criteria values which are accessed
during data entry.
Standard rules
The standard assignment rules automatically created include:
POHSIG (purchase order signature) - Criteria equals:
- Supplier Statistical group (First statistical group for the Supplier table).
- Amount (Function returns the order total converted to the Company currency for
the rate type and date of the order.)
- Budget overrun (Boolean statement “Number of lines exceeding budget > 0”
returns 0 for no lines, or 1 for some lines. Add 1 to be consistent with Local
menu 1 (1=No; 2=Yes)).
PSDSIG (Purchase request line signature) – Criteria equals:
- 1-Product statistical family
- Line amount
- Budget overrun
PSHSIG (purchase request signature) – Criteria equals:
- 1-Supplier Statistical group
- Amount

Sage Course Curriculum - Version 3.0 Page 63 Copyright © 2018 Sage, Inc. All Rights Reserved.
User Assignment
After defining the assignment rules, the next step is to define combinations of criteria
and users to determine the recipients and trigger the workflow.
It is possible to assign the maximum number of signers entered in the assignment
rule.
- These recipients are all Sage X3 users and they represent the document’s main
signers.
- The signature circuit is not complete until all the main users or their delegates
have signed.
It is common practice to define the maximum authorized budget levels. Each level
has its own signature circuit.
- This makes it possible to find the right signers.
- For example, the managers and directors only sign exceptional orders which
have high amounts.
Supplier stat group
Maximum value Budget overrun User 1 User 2
20 100000 No ACHE
20 200000 No ACHE DIRG

Sage Course Curriculum - Version 3.0 Page 64 Copyright © 2018 Sage, Inc. All Rights Reserved.
User Assignment (continued)
User assignment
Use User assignment (GESAWV) in the Setup > Workflow to create the necessary
criteria and user combinations for each assignment rule created.
This function can also be accessed by clicking Values for a specific assignment rule
in the User rules of assignment function.
You can create user assignments for an assignment rule or an assignment
rule/company combination.
Select the Formula/user check box if you want to define a formula for determining
the user in either the Default user section or a user field.
- For example, the [F:AUS]CHEF(0) formula identifies the user’s immediate
manager as user.
The Default user section is used to list the users who are recipients if no criteria
combination is matched.

Sage Course Curriculum - Version 3.0 Page 65 Copyright © 2018 Sage, Inc. All Rights Reserved.
User Assignment (continued)
Use the Values section to define the criteria values and the required signers.
- You are not required to define a signer for every user column in the Values
section.
- For example, in the above example if the purchase request line amount is less
than or equal to 100, only the ADMNA user is required to sign.
- Otherwise, both the PUR and ADMNA users are required to sign.
When using budgets as a criteria, it is common practice to define the maximum
authorized budget levels. Each level has its own signature circuit.
- This makes it possible to find the right signers.
- For example, the managers and directors only sign exceptional orders which
have high amounts.
Supplier stat group
Maximum value User 1 User 2
20 100000 ACHE
20 200000 ACHE DIRG

Sage Course Curriculum - Version 3.0 Page 66 Copyright © 2018 Sage, Inc. All Rights Reserved.
Delegated Users
In addition to defining signers for an assignment rule, you can also define delegated
users. Delegated users are replacement signers if the main signer is absent, a user who
receives a copy of the emails or a line manager authorized to sign in exceptional
circumstances when there are no signers available.
There are three types of delegation:
- Copy for information – The delegate does not have the power to sign documents
but receives a copy of each circuit mail addressed to the main user.
- With signature authority – The delegate has the power to sign. To manage
signature conflicts, if several people are authorized to sign a document, the first
who signs sends an email to the other authorized personnel.
- Exceptional – The delegate has the power to sign but does not receive
notification by email. They may consult the notifications in the workflow
planning workbench intended for the person for whom they are exceptional
signer.
A delegation can be permanent or temporary. For temporary delegates, the start and
end validity dates are entered.

Sage Course Curriculum - Version 3.0 Page 67 Copyright © 2018 Sage, Inc. All Rights Reserved.
Delegated Users (continued)
User delegates
Use User delegates (GESAWU) in the Setup > Workflow to define the user delegates
for a specific user.
The Type field is used to restrict the delegate so that they are only taken into
account if the workflow event to be processed has a nature equal to the nature
selected.
The Type of delegate field determines the type of delegate. The options are: With
authority, Copy for information, and Exceptional.
If the delegate is temporary, you must define the appropriate validity dates.

Sage Course Curriculum - Version 3.0 Page 68 Copyright © 2018 Sage, Inc. All Rights Reserved.
Manage Signatures
Although you define signature rules and assignments, you must also indicate in general
parameters that you are managing signatures.
This is done through the Parameter values (ADPVAL) function in the Setup >
General parameters.
- For Purchasing, you define these settings for the ACH Purchase parameter and
APP group.
For the APPPOC, APPPOH, and APPPSH parameters, you can select whether
signatures are required (Yes, Mandatory); optional (Yes, Optional), or not used
(No).
You can also select whether to close orders and purchase requests if signatures are
refused and whether to require a signature at the purchase request header level, not
just the line items.

Sage Course Curriculum - Version 3.0 Page 69 Copyright © 2018 Sage, Inc. All Rights Reserved.
Workflow Monitor
Use Workflow monitor (SAIWRKPLN) in the Usage > Usage to track the documents
awaiting signature. It shows the context of the circuit’s triggering, the messages sent,
and the signature history.
You can read and manage the notification messages sent by the workflow rules.
- For example, a buyer can read the signature requests sent by their department, as
well as information concerning the trigger event.
Messages are displayed in summary tables called Planning Workbenches.
- It can be fully set up by entry transaction (up to 8 tabs) and can be customized
by applying presentation style and sorting order.
- For example, in the figure below there are separate tabs for PR (purchase
request) signatures, PR history, Order signatures, Order history, etc.
You can view such information as the PR number, signature flag, recipient, product,
amount, etc.
You can perform signature actions on each pending document (refusal, validation,
cancellation).
- This is done by clicking the Actions icon on a line and selecting Signature.
You can view the request history by clicking the Actions icon on a line and select
Approval request history.
You can also click the Actions icon on a line and select Return to access the original
document.

Sage Course Curriculum - Version 3.0 Page 70 Copyright © 2018 Sage, Inc. All Rights Reserved.
Workflow Monitor (continued)
Action hyperlinks in workflow emails
According to the structure of the workflow rule, it is possible for the notification emails
to include action hyperlinks which allow the recipients to accept or reject a signature by
clicking directly on the hyperlink.
Note: Do not use client workflow mail sending because the originator of the message
will have the message in the sent-items of their mail client (Outlook, etc.). Therefore,
they could click on the approval link themselves.
User parameters
You can restrict access to the Workflow monitor function when defining information for
the user record.
This is done through the User menu profile function in the Setup > Users.
The CONSAWW function must be added to the user menu.
Authorization levels
You can define the following three authorization levels in the Functions function in the
Development > Processes.
Code A: Signature authorization
Code G: Cancellation authorization
Code U: All authorizations to consult, sign and cancel any document for any signer
Planning workbench
You can define a planning workbench (entry transaction) using the Workbench
parameters (GESAWW) function in the Setup > Workflow.
For each workbench, you can set the number of tabs and the maximum number of
lines displayed.
A tab has a short title and a long title and can display filtered information.
For each tab, you can define the fields to display.
The list of suggested fields cannot be modified as it depends on the context defined
by the filter; however, you can modify the field title.
The setup is also used to determine the table’s sorting order and to apply the
conditional styled defined in the Presentation styles function in the Parameters >
General parameters block.

Sage Course Curriculum - Version 3.0 Page 71 Copyright © 2018 Sage, Inc. All Rights Reserved.
Standard Workflow Rules – PR Signatures
Signatures on the purchase request documents can be managed either in the Header or
on the Line. This means that:
In the first case, only the Header must be signed by all people in the circuit so the
purchase request can be turned into an order.
In the second case, all the purchase request lines must be signed so that the purchase
request can be turned into an order.
The PSHSIG workflow rule uses the PSHSIG assignment rule.
It is triggered when creating and modifying the purchase request regardless of the
origin (e.g. via an ordering workbench).
It compares the values of the document’s fields with the values of the assignment
rule’s criteria.
- If the values match and a list of recipients is set up, it can call upon other
workflow rules and trigger tracking and actions.

Sage Course Curriculum - Version 3.0 Page 72 Copyright © 2018 Sage, Inc. All Rights Reserved.
Standard Workflow Rules – PR Signatures (continued)
Parameters & prerequisites
The PSHAPPHEA (1) parameter is used to manage a signature circuit on the
purchase request line or globally if signature management is active. It can be defined
at the company level.
- No indicates purchase requests are signed on the line and Yes indicates purchase
requests are signed in the Header.
The APPSH (2) parameter is used to activate signature management on the purchase
requests and to define whether a signature circuit is mandatory or optional.
The PSHAPPCLE parameter makes it possible to automatically close a purchase
request if a signature is refused. It is defined at the company level.
PSHSIG workflow rule – purchase request signature management
The following conditions are mandatory for activating the PSHSIG workflow rule
when creating or modifying the purchase request:
- The PSHAPPHEA parameter is set to Yes
- The APPPSH parameter is set to Yes; Optional or Yes; Mandatory
- The request is not closed.
When creating a purchase request (3), the system checks the parameter values. If
signature management is activated in the document header, the PSHSIG workflow
rule is running.
- This rule looks for the assignment rule which shares the same data model as the
workflow rule. By comparing the criteria with the purchase request lines, it
determines the first signer.
- The number of signers in the circuit depends on the number of users entered on
each rule value. The purchase request remains partly signed if the last signer has
not signed.

Sage Course Curriculum - Version 3.0 Page 73 Copyright © 2018 Sage, Inc. All Rights Reserved.
Standard Workflow Rules – PR Signatures (continued)
The PSHSIG workflow rule triggers the SIGWRK action according to the following
three cases:
- If the first signer is the user who created the purchase request, then signature is
automatic. The SIGWRK actions sets the value of the signature field to Yes
automatic with a response code set to VAL Validation. Notification is sent to the
administrator via the PSHSIGNCR workflow rule (No signature rule).
- If no signature circuit was found and the value of the APPPSH parameter is set
to Yes; Optional (4), signature of the document is automatic with an AUT
response code (Automatic signature). Notification is sent to the administrator via
the PSHSIGNCR workflow rule.
- If no signature circuit was found and the value of the APPPSH parameter is set
to Yes; Mandatory (5), the signature of the document is automatic with an NCR
response code (Undefined circuit). Notification is sent to the administrator so
they can create a new assignment rule value. This notification is sent by the
PSHSIGNCR workflow rule. The administrator must create a new rule. For the
purchase request to be linked to the new rule, you must modify it.
If no condition allows the SIGWRK action to be run (6), a message is sent to the
first signer and a signature request is assigned to it. Signing the document triggers
the PSHSIGVAL rule.
The closing of a purchase request awaiting signature cancels the last signature
request and interrupts the signature circuit.
- In this case, the pre-commitments put through are reversed.
- If the purchase request is reactivated (close action on line) then the signature
circuit is re-activated from the start.
- The closing of a purchase request or a fully signed purchase request line does
not affect the signature circuit.

Sage Course Curriculum - Version 3.0 Page 74 Copyright © 2018 Sage, Inc. All Rights Reserved.
Standard Workflow Rules – PR Signatures (continued)
Principle of circuit in modification
When receiving a signature request email sent by the PSHSIG rule, the user may give
three possible answers.
A signature refusal materialized by a rejection (response code = REJ)
A signature cancellation (response code = ANU)
A document validation (response code = VAL)
You can give responses using the Signature option in the Signature menu for the
purchase request or through the Workflow Monitor in the operation menu.
- The signature block is only accessible after the request has been created.
A workflow rule manages each of these three cases and is used to inform the
requester or the signers of the purchase request's status.
Any user with the ADMNA profile has the right to sign, cancel, and reject a
document in the signer’s name.
PSHSIGVAL workflow rule – PR signature
Each document validation triggers the PSHSIGVAL rule (response code = VAL). This
rule updates the signature field in the purchase request's header. This update is repeated
on all the document's lines.
If the signer is not the last on the circuit, this rule sends a signature request for the
following signer and the signature field is equal to Partially.
If the signer is the last on the circuit; this rule launches the PSHSIGNOT rule -
signature notification and the signature field is equal to Fully.

Sage Course Curriculum - Version 3.0 Page 75 Copyright © 2018 Sage, Inc. All Rights Reserved.
Standard Workflow Rules – PR Signatures (continued)
PSHSIGNOT workflow rule – PR signature notification
When the purchase request is signed by the last signer, the PSHSIGVAL workflow rule
triggers the PSHSIGNOT rule to send a notification and an email to the person who
originally requested the document.
The rule sends no message if the last signer is also the requester.
By setting up the workflow rule, it is possible to deactivate either the sending of an
email or the creation of a notification in the workflow monitor.
PSHSIGCAN workflow rule – cancelling a PR signature
A signature is cancelled via the Workflow monitor. In the PR history tab, the signer has
the list of documents they have signed.
By clicking the Actions icon on each line, you can click the Cancel button which
you can use to trigger the PSHSIGCAN rule.
This workflow rule deletes the various tracking operations generated by the
signature and sends a cancellation message to the users informing of the signature
previously made.
These users are:
- The requester
- The signers
- The users included in the distribution list defined in the user assignment
function.
The cancelled document appears in the history of each of the circuit's signers with
the signature cancelled status.
The PSHSIGCAN rule updates the signature field in the header and the purchase
request's lines and resets the status of the signature in the situation which precedes
the cancellation.
PSHSIGVAL workflow rule – PR rejection
Rejecting a document is entered through the Signature Option on the Signature menu
for a purchase request or by right clicking on the line to be signed and selecting Signed
in the Workflow Monitor.
It is possible to associate a refusal reason. The reasons are set up in miscellaneous
table 55.
The rejection runs the PSHSIGREJ workflow rule which sends a notification
message to the user who requested the purchase request. The other users included in
the distribution list (signers or recipients by default) also receive a message in their
workflow monitor.
According to the value of the PSHAPPCLE parameter, the PSHSIGREJ rule
automatically closes all the purchase request lines. In this case, you must reopen
each of the purchase request lines to reactivate the signature circuit.

Sage Course Curriculum - Version 3.0 Page 76 Copyright © 2018 Sage, Inc. All Rights Reserved.
Standard Workflow Rules – PR Signatures (continued)
Managing pre-commitments
The diagram below shows the impact the signature circuit has on managing pre-
commitments.
Parameters in pre-commitments
PURCMMRP Parameter - This parameter activates the management of pre-
commitments on the purchase requests. It can be defined at the site level.
- Activating this parameter is necessary in order to check the budget overrun used
in the assignment rules.
PSHCMMLEV Parameter - This parameter is used to define the point in the
signature circuit at which the pre-commitment will be generated. This parameter can
be defined at the site level and it can take three values:
- Upon the first signature
- Upon the last signature
- Upon creation of the purchase request line
Note: If there is no signature management for the company, the pre-commitments
are managed when creating the purchase request line regardless of the
PSHCMMLEV parameter.

Sage Course Curriculum - Version 3.0 Page 77 Copyright © 2018 Sage, Inc. All Rights Reserved.
Standard Workflow Rules – PR Signatures (continued)
Upon creation of the purchase request
In principle, the pre-commitments are automatically generated the moment the
document is signed.
Nevertheless, there are two special cases which automate their management:
- If signature management is not activated (APPPSH parameter = No), a pre-
commitment is automatically generated when a new purchase request line is
created. In this case, the PSHCMMLEV parameter value is not taken into
account.
- If the value of the PSHCMMLEV parameter is set to First signature or Last
signature and if the value of the APPPSH parameter is set to Yes optional, a pre-
commitment is automatically generated when the purchase request is created if
no signature circuit is found.
The DIVALLCMM action is then run by the PSHSIG rule.
Upon signature
According to the value of the PSHCMMLEV parameter, if the pre-commitments must
be generated upon the first signature, the PSHSIGVAL workflow rule runs the
DIVALLCMM action to create a pre-commitment for all the purchase request lines.
If the pre-commitments must be generated upon the last signature, the PSHSIGNOT
workflow rule runs the DIVALLCMM action to create a pre-commitment for all the
purchase request lines.
In the event of signature cancellation
All the pre-commitments generated in the first or last signature are reversed to the
signature's cancellation. The action code used is DIVALLCMM on the PSHSIGCAN
workflow rule.
If signature is rejected
Rejecting a signature automatically cancels the pre-commitments for all the purchase
request lines. The action code used is DIVALLCMM on the PSHSIGREJ workflow
rule.

Sage Course Curriculum - Version 3.0 Page 78 Copyright © 2018 Sage, Inc. All Rights Reserved.
Standard Workflow Rules – PR Signatures (continued)
Purchase request line signatures
The signature circuits for the purchase request lines are identical to those in the header.
The workflow rules set up beforehand in order to manage these circuits are more or less
the same. The parameters can take the same values but their operation only applies to
the document's lines.
Only the differences of each workflow rule between managing in the header and on
the line are discussed.
The PSDSIG workflow rule uses the PSDSIG assignment rule. It is triggered when
creating and modifying the PR line.
Parameters in pre-requisites:
PSHAPPHEA Parameter - This parameter must have the NO value to manage a
signature circuit on the PR's line. It may be defined at the folder, legislation and
company level.
- A PR line must be fully signed so that it can be turned into an order.
PSHAPPCLE Parameter - With this parameter it is possible to automatically close a
PR line if a signature is refused. It is defined at company level.
PSHSIG workflow rule – PR signature management
The three following conditions are mandatory for activating this rule when creating
or modifying the purchase request:
- The PSHAPPHEA parameter is set to No
- The APPPSH parameter is set to Yes optional or Yes mandatory.
- The purchase request line has not been closed.
When inserting a new line or when modifying a line, the PSDSIG workflow rule is
run.
- This rule looks for the assignment rule which shares the same data model. By
comparing the rule's criteria with the purchase request field values, it determines
the first signer.
The purchase request remains partly signed if the last signer has not signed. The PR
remains partly signed if all the lines have not been fully signed.
The balance of a PR line awaiting signature cancels the last signature request. If the
line is reactivated by a re-opening, the signature circuit is reactivated from the
beginning.
When a purchase request is modified, deleted, or closed, the PSDSIGCAN rule is
not triggered. The cancellation action used in this case cancels all active tracking
without sending messages.

Sage Course Curriculum - Version 3.0 Page 79 Copyright © 2018 Sage, Inc. All Rights Reserved.
Standard Workflow Rules – PR Signatures (continued)
The PSDSIG workflow rule triggers the SIGWRK action used by the PSHSIG rule
(management of signature in document header) depending on the following three
cases:
- 1. If the first signer is the user who created the PR line, then signature is
automatic.
- 2. If no signature circuit was found and the value of the APPPSH parameter is
set to Yes mandatory, signature of the line is automatic with an NCR response
code (Undefined circuit).
- 3. If no signature circuit was found and the value of the APPPSH parameter is
set to Yes optional, signature of the document is automatic with an AUT
response code (Automatic signature).
The PSDSIGNCR workflow rule sends a notification to the administrator for cases 2
and 3.
If no condition allows the SIGWRK action to be run, a message is sent to the first
signer and a signature request is assigned to it.
- Signing the document triggers the PSDSIGVAL rule.
Signing the purchase request lines in modification
Unlike signature management in the document's header, signature on the line is only
possible via the Workflow Monitor. There is no Signature option when clicking the
Actions icon on a line.
As for the purchase request, the user can refuse, validate or cancel their signature.
Each modification of the PR line cancels the current signature and reactivates it,
assumed it has not yet been signed by one of the signers.
Note: A signed line cannot be modified. First you must cancel the signature.
PSHSIGVAL workflow rule – PR signature
Each document validation triggers the PSHSIGVAL rule (response code = VAL). This
rule updates the Signature field on the document's line and uses the value of this field in
the header if the PR only has one line.
If the signer is not the last on the circuit, this rule sends a signature request for the
following signer and the signature field is equal to Partially.
If the signer is the last on the circuit, this rule launches the PSDSIGNOT rule -
signature notification which is strictly identical to the previous description.
- The requester who receives the messages is in this case the user who has inserted
the line and the signature field is equal to Fully.
Note: The PR is considered signed if all the lines are fully signed.

Sage Course Curriculum - Version 3.0 Page 80 Copyright © 2018 Sage, Inc. All Rights Reserved.
Standard Workflow Rules – PR Signatures (continued)
PSHSIGCAN workflow rule – cancelling a PR signature
Cancelling a signature is mandatory to be able to modify a signed line. It is performed
through the Workflow monitor in the same way as for managing the document header.
Modifying the line triggers the signature circuit again.
Closing the PR line cancels the signature circuit. In this case, the PSDSIGCAN rule
cancels all tracking linked to this line, cancels the last signature request sent to the
next signer, but does not send messages to the users to inform them of the line's
closure. This will be done by a manual workflow.
This operation is also applied when deleting lines.
PSDSIGREJ workflow rule – PR rejection
Rejecting a document is entered from the Workflow monitor. It works in a similar way
to document rejection (managed in the header).
According to the value of the PSHAPPCLE parameter, the PSHSIGREJ rule
automatically closes the PR line.
In this case, you must reopen the line to reactivate the signature circuit.
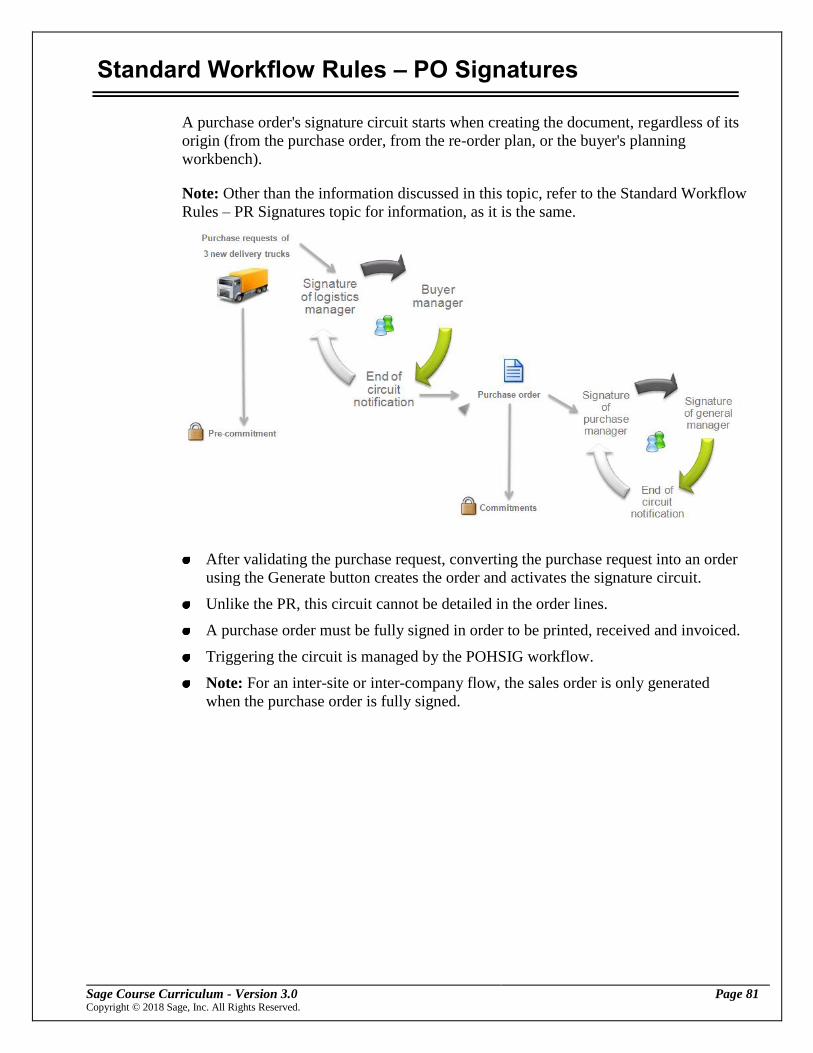
Sage Course Curriculum - Version 3.0 Page 81 Copyright © 2018 Sage, Inc. All Rights Reserved.
Standard Workflow Rules – PO Signatures
A purchase order's signature circuit starts when creating the document, regardless of its
origin (from the purchase order, from the re-order plan, or the buyer's planning
workbench).
Note: Other than the information discussed in this topic, refer to the Standard Workflow
Rules – PR Signatures topic for information, as it is the same.
After validating the purchase request, converting the purchase request into an order
using the Generate button creates the order and activates the signature circuit.
Unlike the PR, this circuit cannot be detailed in the order lines.
A purchase order must be fully signed in order to be printed, received and invoiced.
Triggering the circuit is managed by the POHSIG workflow.
Note: For an inter-site or inter-company flow, the sales order is only generated
when the purchase order is fully signed.

Sage Course Curriculum - Version 3.0 Page 82 Copyright © 2018 Sage, Inc. All Rights Reserved.
Standard Workflow Rules – PO Signatures (continued)
Principle of circuit in creation
The POHSIG workflow rule uses the POHSIG assignment rules.
Parameters in pre-requisites
APPPOH Parameter (1) - This parameter is used to activate signature management
on purchase orders. It can take the following values:
- No: Deactivation of signature management. The signature field is set to No
management.
- Yes optional: Activation of signature management. If no signature circuit is
found, it is signed automatically.
- Yes mandatory: Activation of signature management, it is not possible to receive
and invoice if the order has not been signed.
POHAPPCLE Parameter - With this parameter it is possible to automatically close a
purchase order if a signature is refused. It is defined at the company level.
PURCMM Parameter - With this parameter it is possible to create commitments
when creating the order.
PURCMMDAT Parameter - This parameter is used to define the date to be used
when creating a commitment. The possible values are:
- Order date
- Scheduled reception date

Sage Course Curriculum - Version 3.0 Page 83 Copyright © 2018 Sage, Inc. All Rights Reserved.
Standard Workflow Rules – PO Signatures (continued)
POHSIG workflow rule – order signature management
The three following conditions are mandatory for activating this rule when creating
or modifying the purchase order:
- The APPPOH parameter is set to Yes optional or Yes mandatory.
- The order is not closed.
- The order is not fully signed.
Upon creation of the purchase order (2), the POHSIG workflow rule is run. It
determines the first signer by comparing the rule's criteria with the values of the
purchase request fields.
The purchase order remains partly signed if the last signer has not signed.
Each purchase order modification cancels the signature circuit and retriggers it.
Only the purchase order's balance can permanently terminate the circuit.
The POHSIG workflow rule triggers the SIGWRK action depending on the
following three cases:
- If the first signer (3) is the user who created the purchase order, then signature is
automatic.
- If no signature circuit was found and the value of the APPPOH parameter is set
to Yes mandatory (4), signature of the document is automatic with an NCR
response code (Undefined circuit).
- If no signature circuit was found and the value of the APPPOH parameter is set
to Yes optional, signature of the document is automatic with an AUT response
code (Automatic signature).
Notification is sent to the administrator via the POHSIGNCR workflow rule for
each of these three cases.
If no condition allows the SIGWRK action to be run (5), a message is sent to the
first signer and a signature request is assigned to it. Signing the document triggers
the POHSIGVAL rule.
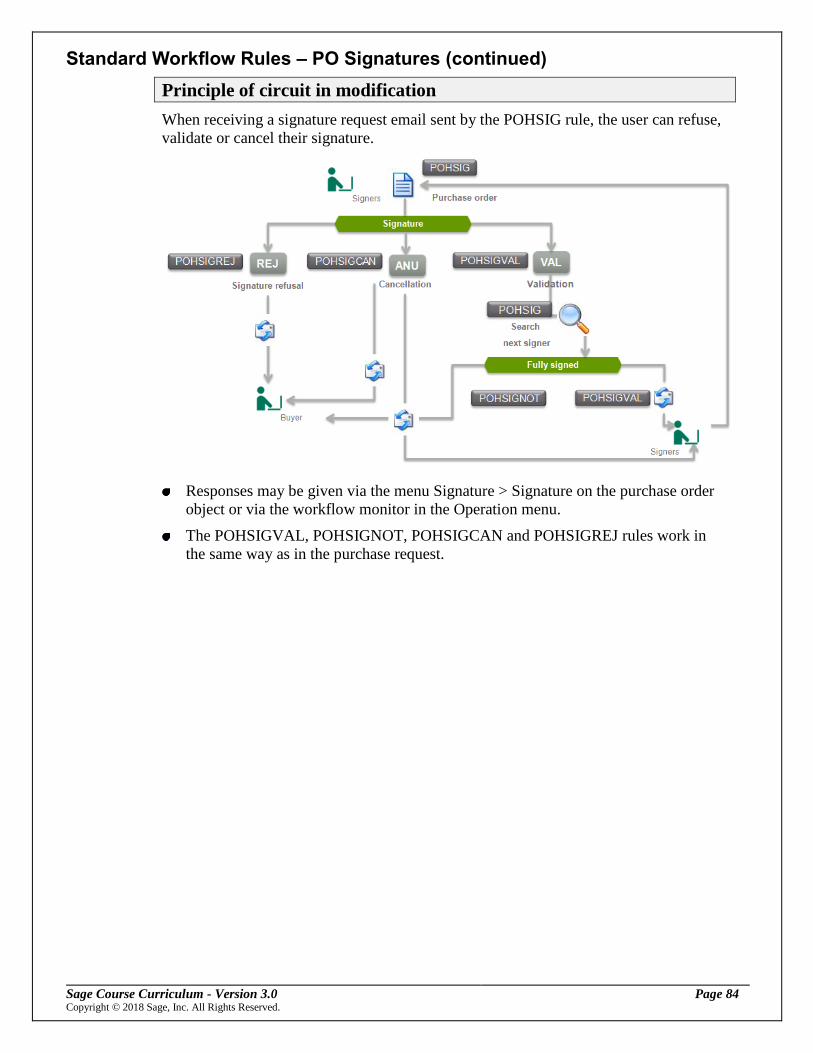
Sage Course Curriculum - Version 3.0 Page 84 Copyright © 2018 Sage, Inc. All Rights Reserved.
Standard Workflow Rules – PO Signatures (continued)
Principle of circuit in modification
When receiving a signature request email sent by the POHSIG rule, the user can refuse,
validate or cancel their signature.
Responses may be given via the menu Signature > Signature on the purchase order
object or via the workflow monitor in the Operation menu.
The POHSIGVAL, POHSIGNOT, POHSIGCAN and POHSIGREJ rules work in
the same way as in the purchase request.

Sage Course Curriculum - Version 3.0 Page 85 Copyright © 2018 Sage, Inc. All Rights Reserved.
Standard Workflow Rules – Open Orders Signatures
An open order's signature circuit starts when the document is created or modified.
Triggering the circuit is managed by the POCSIG workflow rule.
Note: Other than the information discussed in this topic, refer to the Standard Workflow
Rules – PR Signatures topic for information, as it is the same.
Unlike the purchase request, this circuit cannot be detailed in the order lines.
Only open orders can be signed. There is no signature management for the delivery
requests. A purchase order must be fully signed to be valid for delivery requests.
The commitments are automatically created upon creation of the delivery requests
according to the PURCMM parameter. It is therefore not possible to check the
budget overrun in the open order signature rules.
Note: For an inter-site or inter-company flow, the sales order is only generated when
the purchase order is fully signed.

Sage Course Curriculum - Version 3.0 Page 86 Copyright © 2018 Sage, Inc. All Rights Reserved.
Standard Workflow Rules – Open Orders Signatures (continued)
Principle of circuit in creation
The POCSIG workflow rule uses the POCSIG assignment rule.
Parameters for open orders
APPPOC Parameter (1) - This parameter is used to activate signature management
on the open orders and to define whether a signature circuit is mandatory or
optional. This parameter can take the following values:
- No: Deactivation of signature management. The signature field on the purchase
order is set to No management. Creation of delivery requests is never blocked.
- Yes optional: Activation of signature management. If the open order does not fill
the criteria defined in the user assignment rule, it is signed automatically.
- Yes mandatory: Activation of signature management and blocking of delivery
requests if the order has not been fully signed.

Sage Course Curriculum - Version 3.0 Page 87 Copyright © 2018 Sage, Inc. All Rights Reserved.
Standard Workflow Rules – Open Orders Signatures (continued)
POCSIG workflow rule – order signature management
The following conditions are mandatory for activating this rule when creating or
modifying the purchase order:
- The APPPOC parameter is set to Yes optional or Yes mandatory.
- The open order is not closed.
- The order is not fully signed.
Upon creation of the purchase order (2), if signature management is activated for the
company, the POCSIG workflow rule is run to determine the first signer.
The purchase order remains partly signed and can be modified if the last signer has
not signed.
Each modification of the open order cancels the signature circuit and reactivates the
POCSIG rule. Only the open order from the delivery request can permanently close
the circuit.
The POCSIG workflow rule triggers the SIGWRK action depending on the
following three cases:
- 1. If the first signer is the user who created the purchase order or is the buyer,
then signature is automatic. The SIGWRK action sets the value of the signature
field to Yes automatic with a response code set to VAL Validation.
- 2. If no signature circuit was found and the value of the APPPOC parameter is
set to Yes optional (3), signature of the document is automatic with an AUT
response code (Automatic signature).
- 3. If no signature circuit was found and the value of the APPPOC parameter is
set to Yes mandatory (4), the signature of the document is automatic with an
NCR response code (Undefined circuit).
Notification is sent to the administrator via the POCSIGNCR workflow rule (No
signature rule) for cases 2 and 3.
If no condition allows the SIGWRK action to be run (5), a message is sent to the
first signer and a signature request is assigned to it. Signing the document triggers
the POCSIGVAL rule.

Sage Course Curriculum - Version 3.0 Page 88 Copyright © 2018 Sage, Inc. All Rights Reserved.
Standard Workflow Rules – Open Orders Signatures (continued)
Principle of circuit in modification
The POCSIGVAL, POCSIGNOT, POCSIGCAN and POCSIGREJ rules work in the
same way as in the purchase request.

Sage Course Curriculum - Version 3.0 Page 89 Copyright © 2018 Sage, Inc. All Rights Reserved.
Lesson Practices
Complete the following lesson Practice in the order shown.
Assignment rules
In this Practice, create a new assignment rule for the NA010 company based on the
PSHSIG assignment rule.
1. In the Setup > Workflow, select User rules of assignment (GESAWR).
2. Select the PSHSIG assignment rule from the Assignment rules option in the Left list.
Do not select the one for the AU10 company.
3. At the Company field, select NA10.
4. At the Number of signatures field, enter 8. You should receive a warning that this
exceeds the maximum defined. Click OK.
5. Enter 2 as the number of signatures.
6. In the grid, click the Actions icon on the first row and select Delete.
7. Now delete the last line list. Your screen should look the same as the figure below.
8. Click Create and Continue to confirm the duplication of the information.
9. Close page.
Create a new user assignment
In this Practice, create a new user assignment for the assignment rule you created in the
previous activity.
1. Prior to creating the user assignment, we must first create a new user to use as part
of this activity. In the Setup > Users, select Users (GESAUS).
2. Select the USR09 (Director) user from the Left list.
3. Change the user code to DIR01.
4. At the Login field on the General tab, enter DIR01.
5. Click Create and Continue to confirm the duplication.
6. Close page.

Sage Course Curriculum - Version 3.0 Page 90 Copyright © 2018 Sage, Inc. All Rights Reserved.
Lesson Practices (continued)
7. In the Setup > Workflow, select User assignment (GESAWV).
8. Click New.
9. At the Assignment rule field, click the Selection icon and select the PSHSIG rule
created for the NA10 company.
10. At the Company field, select NA10 as the company.
11. Enter the following values for the criteria.
Maximum value 500; User 1 – blank; User 2 – blank
Maximum value 5,000; User 1 – USR09; User 2 – blank
Maximum value 10,000; User 1 – USR09; User 2 – DIR01
12. Click Create and Continue when prompted.
13. Close page.
Parameter values
In this Practice, verify that the signatures are being managed for purchase requests.
1. In the Setup > General parameters, select Parameter values (ADPVAL).
2. In the Left list, select ACH as the module and the USA legislation.
3. Click the Actions icon in the second row for the APP group and select Detail.
4. Change the selection for the APPPSH parameter to Yes, Mandatory, if it is not
already selected.
5. Change the selection for the PSHAPPHEA parameter to Yes, if it is not already
selected.
6. Click OK.
7. Click Save.
8. Close page.
9. To update Log out and in using same user.
Signature history & circuit
In this Practice, enter several different purchase requests to view the signature
management information.
1. In the Purchasing > Purchase requests, select Purchase requests (GESPSH).
2. Select the ALL Full entry transaction type.
3. Click New.

Sage Course Curriculum - Version 3.0 Page 91 Copyright © 2018 Sage, Inc. All Rights Reserved.
Lesson Practices (continued)
4. Select ADMIN as the requester and TR011 as the site.
TR011 is a site within company NA10. Remember, we set up specific signature
management rules based on this company.
5. Request date <Today>.
6. At the Product field, select TRBMS999.
7. Enter <Today> as the requested date.
8. Enter 700 as the purchase quantity and select TRSUP1 as the supplier.
9. Click Ok when prompted regarding the product reference for this supplier.
10. Accept all other defaults and click Create.
11. To view the signature history for a specific line, select Signature history under
Signature in the Right panel.
The information displayed includes the sequence number, date, sender, recipient,
event type, tracked text, signer, delegate, signature status, and date.
12. Close the window.
13. Select Signature circuit under Signature in the Right panel to view where the
request is in the signature process. For example, if you are waiting on a response
from a specific user.
Information includes the recipients, signature date and time, signing user,
answer, status, response reason, and date limit.
14. Exit all functions.
Workflow monitor
In this Practice, use Workflow monitor to process the last signature required for the
purchase request.
1. In the Usage > Usage, select Workflow monitor (SAIWRKPLN).
2. Select the PUR transaction type.
3. Click the Actions icon on the purchase request listed on the PR Sig. tab and select
Signature.
4. Select the VAL-Validation answer.
5. Review the information updated for the line. Verify that the Signature flag field now
shows Signed.
6. Close page.
7. Review the purchase request in the Purchase requests function in the Purchasing >
Purchase requests. What is the signature status? ______________________

Sage Course Curriculum - Version 3.0 Page 92 Copyright © 2018 Sage, Inc. All Rights Reserved.
Lesson Practices (continued)
8. You are ready to turn this request into an order. Click Order in the Right panel.
9. Click OK to generate the order.
10. A log report should display showing the order generated. Close the log report
11. Close page twice.

Sage Course Curriculum - Version 3.0 Page 93 Copyright © 2018 Sage, Inc. All Rights Reserved.
Lesson 5 Sales Signature Management
In the following topics, you will learn how to set up and use signature rules in the Sales
module.
The sections in this chapter include:
Sales Order Signature Workflow
Assignment Rules & User Assignment
Managing Signatures
Workflow Monitor
Workflow Rules
Lesson Practices

Sage Course Curriculum - Version 3.0 Page 94 Copyright © 2018 Sage, Inc. All Rights Reserved.
Sales Order Signature Workflow
As part of the sales process, you can require signatures as part of the workflow process.
The requirement of these signatures can prevent such items as a quote from being
converted to an order and an order from being printed.
Signature rules are used in the Sales module documents such as quotes, sales orders
or open orders.
- Only signature rules as they relate to Sales are discussed in this lesson.
Management of signature rules is closely linked to notifications by workflow.
- Each signature flow can be broken down into several successive workflow rules.
- The signature circuit is a set of successive workflow rules which are triggered
when creating or modifying the document. Each rule has triggering criteria and a
list of recipients.
- The user must perform an action in order to launch the next rule. An action may
consist of modifying the document, signing, cancelling the signature, refusing a
signature, etc.
- According to the nature of the action, the workflow rule that follows is different.
If signature management is activated for a document and a company, this document
must then be signed so that it can be converted.
- This signature can then be made by the user or automatically.
There are standard workflow rules automatically defined to cover the most common
job cases.
When a document is not signed, it will not be turned into another document:
- An unsigned quote cannot be selected on an order.
- An unsigned order cannot be prepared, delivered, or invoiced.
- An unsigned open order cannot have shipment requests.
Implementing the signature circuit requires setting up rules for triggering
notifications by workflow.
This setup is broken down into five steps:
1. Setup of assignment rules
2. Assignment of main signatures and definition of assignment criteria
3. Assignment of substitute signers
4. Link between assignment rule and workflow rule
5. Setup of planning workbench for notification tracking

Sage Course Curriculum - Version 3.0 Page 95 Copyright © 2018 Sage, Inc. All Rights Reserved.
Assignment Rules & User Assignments
Information for assignment rules, user assignments, and delegating users is the same as
discussed in the previous lesson. Use User rules of assignment in the Setup > Workflow
to set up a user assignment rule.
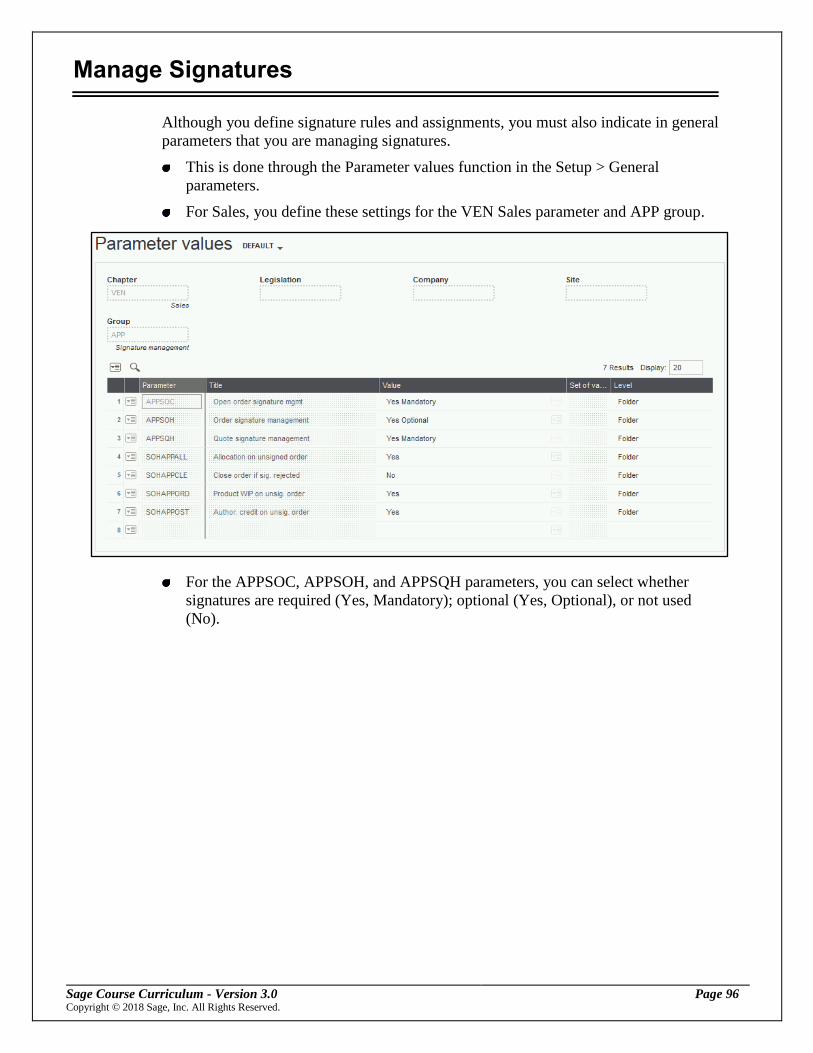
Sage Course Curriculum - Version 3.0 Page 96 Copyright © 2018 Sage, Inc. All Rights Reserved.
Manage Signatures
Although you define signature rules and assignments, you must also indicate in general
parameters that you are managing signatures.
This is done through the Parameter values function in the Setup > General
parameters.
For Sales, you define these settings for the VEN Sales parameter and APP group.
For the APPSOC, APPSOH, and APPSQH parameters, you can select whether
signatures are required (Yes, Mandatory); optional (Yes, Optional), or not used
(No).

Sage Course Curriculum - Version 3.0 Page 97 Copyright © 2018 Sage, Inc. All Rights Reserved.
Signature Parameters (continued)
Additional parameters
The following are additional parameters that can be set up to manage the signature
process:
- SOHAPPALL: Allocation on unsigned order: This parameter allows allocation
on products even if the order is not signed or not completely signed. This
parameter is efficient only if the previous parameter authorizes orders in process.
- SOHAPPCLE: Close order if signature rejected: This parameter allows orders
to close automatically when a signer rejects an order.
- SOHAPPORD: Orders in process on unsigned order: This parameter allows
orders in process to accept on orders that are not signed or not completely
signed. If orders in process are not allowed, the allocation is also rejected.
- SOHAPPOST: Financial credit on order not signed: This parameter allows line
amounts to be included on a customer’s financial credit.
These parameters have the values of Yes or No.
When updating operation on sales documents partly or completely signed:
- A message indicates that the document is signed.
- If particular values are changed or a line is added or deleted, a message indicates
that the signatures will be canceled. In some cases, this can lead to the choice of
another signature circuit.
Open order and updating:
- When an open order has a shipment request, no updating can change the level of
signature.
Document deletion:
- When a document is partly signed or not signed at all, the deletion of the
document triggers the cancellation of the signature request.
Sales order closing:
- When an order is partly signed or not signed at all, the closing operation triggers
the cancellation of the signature request.

Sage Course Curriculum - Version 3.0 Page 98 Copyright © 2018 Sage, Inc. All Rights Reserved.
Workflow Monitor
Use Workflow monitor (SAIWWRKPLN) in the Usage > Usage to track the documents
awaiting signature. It shows the context of the circuit’s triggering, the messages sent,
and the signature history.
You can read and manage the notification messages sent by the workflow rules.
- For example, a buyer can read the signature requests sent by their department, as
well as information concerning the trigger event.
Messages are displayed in summary tables called Planning Workbenches.
- It can be fully set up by entry transaction (up to 8 tabs) and can be customized
by applying presentation style and sorting order.
- For example, in the figure below there are separate tabs for Quote signatures,
Quote history, Order signatures, Order history, etc.
You can view such information as the order number, signature flag, recipient,
product, amount, etc.
You can perform signature actions on each pending document (refusal, validation,
cancellation).
- This is done by clicking the Actions icon on a line and selecting Signature.
You can view the request history by clicking the Actions icon on a line and select
Approval request history.
You can also click the Action icon on a line and select Return to access the original
document.

Sage Course Curriculum - Version 3.0 Page 99 Copyright © 2018 Sage, Inc. All Rights Reserved.
Workflow Monitor (continued)
Action hyperlinks in workflow emails
According to the structure of the workflow rule, it is possible for the notification emails
to include action hyperlinks which allow the recipients to accept or reject a signature by
clicking directly on the hyperlink.
Note: Do not use client workflow mail sending because the originator of the message
will have the message in the sent-items of their mail client (Outlook, etc.). Therefore,
they could click on the approval link themselves.
User parameters
You can restrict access to the Workflow monitor function when defining information for
the user record.
This is done through the User menu profile function on the Setup > Users menu.
The CONSAWW function must be added to the user menu.
Authorization levels
You can define the following three authorization levels in Functions in the Development
> Processes.
Code A: Signature authorization
Code G: Cancellation authorization
Code U: All authorizations to consult, sign and cancel any document for any signer
Planning workbench
You can define a planning workbench (entry transaction) using the Workbench
parameters (GESAWW) function in the Setup > Workflow.
For each workbench, you can set the number of tabs and the maximum number of
lines displayed.
A tab has a short title and a long title and can display filtered information.
For each tab, you can define the fields to display.
The list of suggested fields cannot be modified as it depends on the context defined
by the filter; however, you can modify the field title.
The setup is also used to determine the table’s sorting order and to apply the
conditional styled defined in the Presentation styles (GESASY) function in the
Setup > General parameters .

Sage Course Curriculum - Version 3.0 Page 100 Copyright © 2018 Sage, Inc. All Rights Reserved.
Workflow Rules
You can define rules for the sales quotes, orders, and open orders. If rules are defined, a
quote must be approved before an order can be created. Additionally, the order needs to
be approved before delivery. The rules of definition are based on the workflow engine.
Several approvers can be defined and several levels of signature can also be defined.
The rules might depend on any criteria combination present in the document. Approval
can be done by clicking a link in an email or through a dedicated workbench.
New workflow rules are available for each type of document containing a signature:
- SQH* for quotes
- SOH* for orders
- SOC* for open orders

Sage Course Curriculum - Version 3.0 Page 101 Copyright © 2018 Sage, Inc. All Rights Reserved.
Workflow Rules (continued)
The different rules are:
- *SIG: This is the main rule that is triggered when the document is created or
updated. This rule initiates the flow and informs the signer that a new document
needs to be signed.
- *SIGVAL: This rule is triggered when the document is signed manually. This
rule informs the next signer that the signature has been issued by a signer.
- *SIGREJ: This rule is triggered when the document is rejected. This rule
informs the requester that the signature has been rejected.
- *SIGNOT: This rule is triggered when the document is completely signed. This
rule allows the requester to be informed.
- *SIGNCR: This rule is triggered when no assignment rule has been found and
the general parameter APP* is equal to Yes Mandatory. This rule informs a
dedicated person that the setup is not complete.
- *SIGCAN: This rule is triggered when a signer has canceled their own signature
(in case of error, for example). This rule informs the next signer or requester that
the signature has been canceled.
For each rule of assignment, values must be given for criteria and signers must be
defined.
The screen shot below shows the workflow rule for SOHSIG (Order signature
mgmt).
The following diagram shows the signature process.

Sage Course Curriculum - Version 3.0 Page 102 Copyright © 2018 Sage, Inc. All Rights Reserved.
Lesson Practices
Complete the following lesson Practice in the order shown.
Set up a user assignment
In this Practice, set up a user assignment rule that is associated with SOHSIG (Order
signature mgmt).
1. In the Setup > Workflow, select User rules of assignment (GESAWR).
2. In the Left list, select SOHSIG (Sales order signature). Do not select the one defined
for the AU10 company.
3. At the Company field, enter NA10.
4. Enter 2 as the number of signatures.
5. Click Create and Continue when prompted to duplicate the information.
6. Click Values in the Right panel. This launches the Rule values function.
7. Click New.
8. Select SOHSIG as the assignment rule and NA10 as the company.
9. Enter the following in the Values grid.
10. Click Create.
11. Close page twice.

Sage Course Curriculum - Version 3.0 Page 103 Copyright © 2018 Sage, Inc. All Rights Reserved.
Lesson Practices (continued)
Set up sales signature parameters
In this Practice, make settings to sales signature parameters allowing for signature
management on open orders, orders, and quotes.
1. In the Setup > General parameters, select Parameter values (ADPVAL).
2. In the Left list, select VEN as the module and USA as the legislation.
3. Click the Actions icon in the row for the APP group and select Detail.
4. At the Value column for the APPSOC, APPSOH, and APPSQH parameters, verify
that Yes Mandatory is selected. If not, select it now.
5. For the SOHAPPALL, SOHAPPCLE, SOHAPPORD, and SOHAPPOST
parameters, select Yes.
6. Click OK in the Right panel.
7. Click Save in the Parameter values function and Close page.
8. To Update Log out and in as same user.
Sales signature circuit
In this Practice, you will enter a sales order and view the signature management history
and circuit information.
1. In the Sales > Orders, select Orders (GESSOH).
2. Select ALL Full entry as the transaction type.
3. Click New.
4. Select TR011 as the sales site and enter Current date as the date.
5. Select TRCUS1 as the sold-to customer.
6. Click Ok on Authorized credit level reached warning, if prompted.
7. What displays at the Signed field on the Management tab?
____________________________________
8. Click the Delivery tab and select TR011 as the shipping site, if it is not already
selected.
9. Click the Lines tab and enter a quantity of 20 for product TRBMS999.
10. Click Create, click Ok if prompted.
11. Click the Management tab.

Sage Course Curriculum - Version 3.0 Page 104 Copyright © 2018 Sage, Inc. All Rights Reserved.
Lesson Practices (continued)
12. Explain the setting at the Signed field.
___________________________________________________________________
___________________________________________________________________
___________________________________________________________________
The different values for the Signed field are:
- No: The document must be signed, but has not been signed yet.
- Partly: The document has been signed, but not by all signers.
- Completely: The document has been signed by all signers.
- Not managed: Signatures are not activated for this type of document.
- Automatic: The document has been automatically signed. This is the case when
no rule has been found and the general parameter APP* is equal to Yes
Optional.
13. To view the signature history, select Signature history under Signature in the Right
panel.
The information displayed includes the sequence number, date, sender, recipient,
event type, tracked text, signer, delegate, signature status, and date.
14. Select Signature circuit from the Signature menu to view where the request is in the
signature process. For example, if you are waiting on a response from a specific
user.
Information includes the recipients, signature date and time, signing user,
answer, status, response reason, and date limit.
15. Close page.
Workflow monitor
In this Practice, use Workflow Monitor to process the last signature required for the
order.
1. In the Usage, select Workflow monitor (SAIWRKPLN).
2. Select the SAL transaction type.
3. Click the Ord sig. tab.
4. Click the Actions icon on the order listed and select Signature.
5. Select the VAL-Validation answer.
6. Review the information updated for the line. Once completed, return to the
Navigation page.
7. Review the order in the Orders function. What is the signature status?
______________________
8. Close page.

Sage Course Curriculum - Version 3.0 Page 105 Copyright © 2018 Sage, Inc. All Rights Reserved.
Lesson 6 Loan Order Management
In the following topics, you will learn how the loan process works for products loaned
to a customer. This includes creating the loan, defining the return date, and invoicing for
products not returned.
The topics in this lesson include:
Loan Orders Overview
Loan Order Type
Loan Order Entry Transactions
Customer Locations
Customer & Product Settings
Loan Orders
Loan Deliveries
Loan Returns
Invoicing a Loan
Lesson Practices

Sage Course Curriculum - Version 3.0 Page 106 Copyright © 2018 Sage, Inc. All Rights Reserved.
Loan Orders Overview
Loan orders are for products that you ship to a customer, and the customer may return
the products by a defined return date or keep the products and be invoiced at a later
time.
For example, you may loan equipment to a Business Partner for a special event,
which they will return once the event is completed.
Below is the general process flow for loan management.
The essential data consists of defining specific loan information in regards to
transaction entry types, locations, and customer and product information.

Sage Course Curriculum - Version 3.0 Page 107 Copyright © 2018 Sage, Inc. All Rights Reserved.
Loan Order Type
To enter orders corresponding to the loaning of products, you must have at least one
order type defined with the Loan category.
Distinguishing by order type makes it possible to assign a sequence number counter
to loans different from normal orders.
The Loan order type is defined through the Sales order types (GESTSO) function in
the Setup > Sales.
- At the Order category field, select Loan.
- You can select to either manually number these orders or select a sequence
counter to use.

Sage Course Curriculum - Version 3.0 Page 108 Copyright © 2018 Sage, Inc. All Rights Reserved.
Loan Order Entry Transactions
In addition to defining a Loan order type, you must also define entry transactions for
orders and shipments that are defined with a category and delivery type of Loan or All
Categories/All Types.
As with any entry transaction defined, you can define parameter and display
information for each entry transaction defined.
The Loan order entry transaction defined is accessible in the Orders function when
entering an order and the Loan shipment entry transaction defined is accessible in
the Shipments function.

Sage Course Curriculum - Version 3.0 Page 109 Copyright © 2018 Sage, Inc. All Rights Reserved.
Customer Locations
When delivering a loan order, the internal stock is moved to a BP location. It is
therefore necessary that you define at least one Customer location.
When creating the location type, you must select Customer in the Characteristics
section on the Characteristics tab.
- The location type is associated with a storage site and the loaned stock is valued
on the storage site.
After defining the Customer location type, click Create locn. to define the actual
customer locations.
- Unlike defining internal locations, you cannot create multiple customer locations
at the same time.
- They are created one-by-one.

Sage Course Curriculum - Version 3.0 Page 110 Copyright © 2018 Sage, Inc. All Rights Reserved.
Customer & Product Settings
When creating products and customers, there are specific settings you must define in
order to manage loans correctly for the products and customers.
You can only enter the loan of a product if both the product and the customer have
the Loan Authorized check box selected.
- For customers, the Loan Authorized check box is selected on the Commercial
tab in the Customers function in the Common data > BPs.
- For products, the Loan Authorized check box is selected on the Sales tab in the
Products function in the Common data > Products.
- You can also define this setting in the Product Category and Customer category
functions so that it defaults for any products/customers assigned to the category.
- The Loan Authorized check box only displays in these functions if the LND
activity code is active. This is done through the Activity codes function in the
Development > Data and parameters under Development Setup.
It is essential for the customer’s ship-to address that you define the loan location.
- The loan locations available are based on the shipping site selected and only
Custom locations defined for that site are available for selection.
- If this information is not defined, you can still enter a loan delivery after the
order is entered; however, it is not possible to validate it creating the necessary
stock movement.

Sage Course Curriculum - Version 3.0 Page 111 Copyright © 2018 Sage, Inc. All Rights Reserved.
Loan Orders
Entering a loan order in the Orders (GESSOH) function in the Sales > Orders is
identical to entering a normal order, except for the type of order selected.
The OSTLND general parameter specifies whether the loan order total is included in
the customer’s order total, which can impact their credit limit.
- This parameters is accessed by viewing the detail for the VEN module and OST
group in the Parameter values function in the Parameters > General parameters
block.
When creating the order regardless of the entry transaction selected, you must select
an order type defined with a Loan category.
For loan orders, you can define a loan return date. This automatically defaults to one
month past the current date; however, it can be changed.
- You cannot invoice a loan order until after the loan return date defined.

Sage Course Curriculum - Version 3.0 Page 112 Copyright © 2018 Sage, Inc. All Rights Reserved.
Loan Deliveries
You can process the loan delivery using either the Order Deliveries function or the
Deliveries function to ship the products on the order.
Note: You can also click Delivery within the Orders function to directly access
Shipments for the loan order selected.
In cases when shipments are generated using the Deliveries (GESSDH) function, the
TRSLND general parameter specifies the entry transaction associated, when the
original order is a Loan type.
- This parameters is accessed by viewing the detail for the VEN module and TRS
group in the Parameter values function in the Setup > General parameters.
The products shipped are tracked at the BP location you defined on the order.
Remember, this is how the loaned product is tracked and valued.

Sage Course Curriculum - Version 3.0 Page 113 Copyright © 2018 Sage, Inc. All Rights Reserved.
Loan Returns
When products loaned to a customer are returned, you must process the return against
the loan order and shipment created. Generally, a loan is to be returned on a given date,
as defined when creating the loan order.
Loan returns are processed through the Loan returns function in the Sales > Returns.
- A loan return is always created from a loan shipment by picking the appropriate
shipment.
- It is not possible to process a direct loan return.
After the return is created, the stock is transferred if necessary and it is possible to
print a return note for the customer.
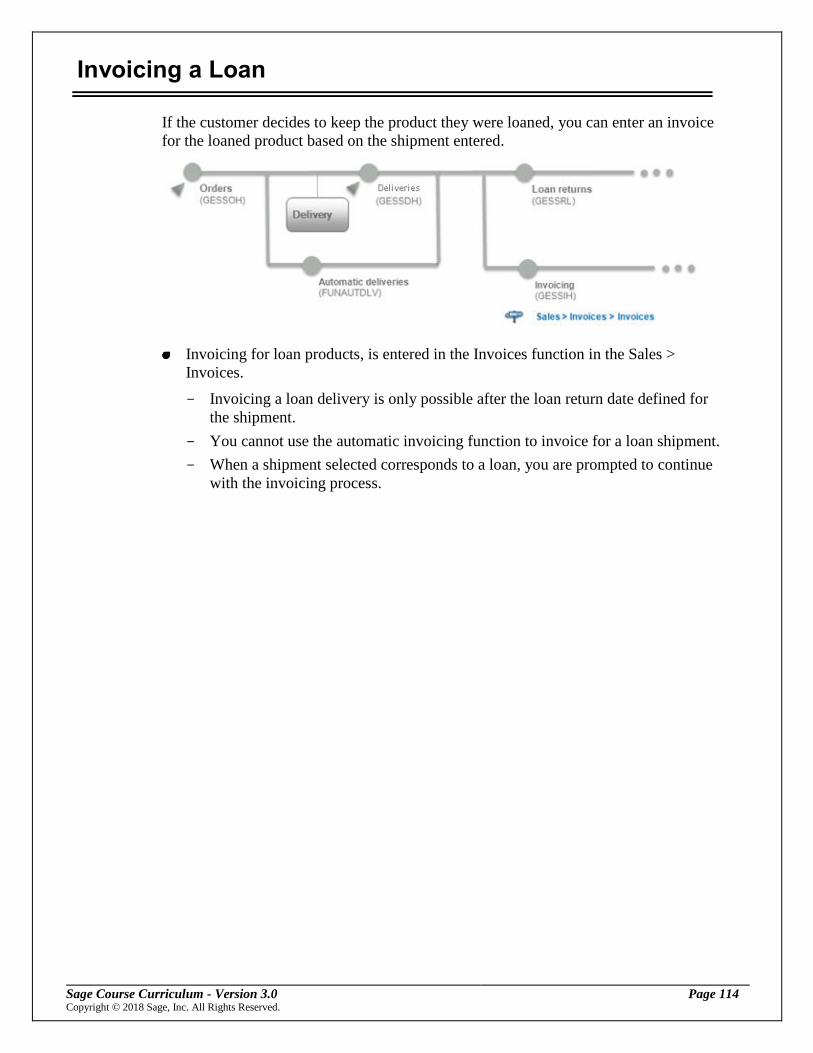
Sage Course Curriculum - Version 3.0 Page 114 Copyright © 2018 Sage, Inc. All Rights Reserved.
Invoicing a Loan
If the customer decides to keep the product they were loaned, you can enter an invoice
for the loaned product based on the shipment entered.
Invoicing for loan products, is entered in the Invoices function in the Sales >
Invoices.
- Invoicing a loan delivery is only possible after the loan return date defined for
the shipment.
- You cannot use the automatic invoicing function to invoice for a loan shipment.
- When a shipment selected corresponds to a loan, you are prompted to continue
with the invoicing process.

Sage Course Curriculum - Version 3.0 Page 115 Copyright © 2018 Sage, Inc. All Rights Reserved.
Lesson Practices
Complete the following lesson Practice in the order shown.
Loan order type
In this Practice, review the Loan order type already defined.
Before starting, let’s turn off the signature workflows that were created in a previous
activity.
1. In the Setup > General parameters, select Parameter values (ADPVAL).
2. In the Left list, select VEN as the module and USA as the legislation.
3. Click the Actions icon on the row for the APP group and select Detail.
4. At the Value column for the APPSOC, APPSOH, and APPSQ parameters, select
No.
5. For the SOHAPPALL, SOHAPPCLE, SOHAPPORD, and SOHAPPOST
parameters, select No.
6. Click OK.
7. Click Save
8. Click the Actions icon on the row for the SAL group and select Detail.
9. At the Value column for INIALLORD – Order allocation rules parameter, select
Yes.
10. Click OK.
11. Click Save.
12. Close page.
13. To update Log out and in as same user
14. Now review the loan order type already defined. Under Documents in the Setup >
Sales, select Order types (GESTSO).
15. Select the SOL order type already defined.
16. Verify Loan is selected at the Order category field.
17. At the Seq counter field, verify SOL is selected.
18. At the Delivery type field, select SDL.
19. Click Save.
20. Close page.

Sage Course Curriculum - Version 3.0 Page 116 Copyright © 2018 Sage, Inc. All Rights Reserved.
Lesson Practices (continued)
Loan order entry transactions
In this exercise, review the All order entry transactions defined for orders and shipments.
1. Under Entry transaction in the Setup > Sales, select Orders (GESSLC).
2. Select the ALL Full entry transaction.
3. On the Parameter Definition tab, verify All Categories is selected as the order
category.
4. We could optionally define an entry transaction specific to just loan orders.
5. Review the information defined for this entry transaction. When completed, Close
page.
6. Under Entry transaction in the Setup > Sales, select Deliveries (GESSLD).
7. Select the ALL Full entry transaction.
8. On the Parameter definition tab, verify All types is selected as the Delivery category
in the Miscellaneous section.
9. We could optionally define an entry transaction specific to just loan orders.
10. Review the information defined for this entry transaction. Close page.
Customer locations
In this exercise, create a new Customer location type for the TR011 site and create a location
specific to this type.
1. In the Common data > Product tables, select Location types (GESTLO).
2. Click New
3. Select Stock site TR011 , enter LOA Location type, Loan for Description and Short
description
4. Select Customer as the location category on the Characteristics tab.
5. At the Authorized substatus field, enter A*.
6. Click Create.
7. Now create a location for this type. This location is specific to the TRCUS2
customer. Click Create loc. in the Right panel to access the Location creation
function.
8. At the First Location field, enter TRCUS2.
9. Click Save and OK when prompted that one location will be created and click OK
again when prompted the location was created successfully.
10. Close the Location creation function.
11. Close page.

Sage Course Curriculum - Version 3.0 Page 117 Copyright © 2018 Sage, Inc. All Rights Reserved.
Lesson Practices (continued)
Customer locations
In this Practice, verify the appropriate settings are defined for the necessary product-site
and customer records as well as assign the loan location created for customer TRCUS2.
1. In the Common data > Products, select Products (GESITM).
2. From the Products option in the Left list, select the TRBMS999 product already
defined.
3. Click the Sales tab.
4. In the Miscellaneous section, select the Loan authorized check box.
5. Click Save.
6. Close page.
7. In the Common data > BPs, select Customers (GESBPC).
8. Select customer TRCUS2.
9. Click the Commercial tab.
10. Click the Management tab.
11. In the Credit under Credit control, select No check, if not selected.
12. In the Order section, select the Loan authorized check box.
13. Click the Ship-To customer tab.
14. For the default address displayed, select TR011 as the shipment site.
15. At the Loan loc field, select the loan location you created previously.
16. Click Save.
17. Close page.
Loan order
In this Practice, create two loan orders for customer TRCUS2. You will process
information for each loan order differently to see the impact on functions associated
with shipping, returning loan products, and invoicing.
Note: Before performing the following Practices, make sure to activate the LND
activity code in the Activity codes function under Development setup in the
Development > Data and parameters.
1. In the Sales > Orders, select Orders (GESSOH).
2. Select the ALL Full entry transaction.
– It is important to note, that you can select any entry transaction that allows you
to select a Loan order type.
3. Click New.

Sage Course Curriculum - Version 3.0 Page 118 Copyright © 2018 Sage, Inc. All Rights Reserved.
Lesson Practices (continued)
4. Select TR011 as the site and SOL as the type. Enter <Today> as the date.
5. Select TRCUS2 as the sold-to customer.
6. What is the loan return date?
7. On the Management tab, enter 02/28/18 as the loan return date.
8. At the Product field on the Lines tab, select the TRBMS999 product and enter 10 as
the quantity. Accept the remaining defaults for the product, including the gross
price.
– The gross price is the amount they will be charged if the product is not returned
and the loan order is invoiced.
9. Click Create.I think
10. Now let’s make a copy of this order. Delete the number at the Number field and
press Enter.
– This automatically creates a copy.
11. Click Yes if prompted to recalculate the amounts and Yes again to complete the
copy.
12. Change the order date and the delivery date to <Today -7 days> and enter a date for
the loan return date <Yesterday>.
– If prompted, select to update prices and any entries on the Lines tab.
13. Click Save.
14. Do not close the function.
Product delivery
In this Practice, process the shipments to the customer for the loan orders.
1. You should still be in the Orders function with the second loan order you created
selected. If not, select it now.
2. Click Delivery in the Right panel to create the shipment for just this loan order.
3. Select All Full entry
Notice on the shipment created, the category is set to Loan (Same line as Bill-to
customer).
The category is automatically set and cannot be changed when the shipment is
created from a Loan order or if a specific Loan entry transaction is used.
4. On the Lines tab, shipment date <Today -7days>.

Sage Course Curriculum - Version 3.0 Page 119 Copyright © 2018 Sage, Inc. All Rights Reserved.
Lesson Practices (continued)
5. Click the Actions icon on the line and select Stock issues.
6. Accept the default allocation and click Save.
7. Click Save to save the shipment.
8. Click Validation to validate the entry.
9. Close the Deliveries function to return to the Orders function.
10. Select the first load order you created.
11. We are not ready for the delivery so you are ready to return to the Navigation page
12. Close page.
13. Now let’s view how this is being tracked in inventory for the product. Under Stock
in the Stock > Inquiries, select Stock by product (CONSSAR).
14. Select TR011 as the site and TRBMS999 as the product.
15. Click Search.
16. Verify the quantity at the Total loan stock field is 10 (order delivered)
17. Verify the quantity at the Global allocated field is 10 (the order not yet processed
for delivery)
18. Close page.
19. Remember, as discussed previously, the quantity of the loaned product is tracked
based on the BP location defined. To view this stock, in the Stock > Inquiries under
Stock > select Loan stock (CONSSBP).
20. Select TR011 as the site and TRBMS999 as the product.
21. Click Search.
22. The Loan Stock tab should show that 10 of this product are at the TRCUS2 location.
23. Close page.
Loan return
In this Practice, process the return for one of the TRBMS999 products that was loaned
to customer TRCUS2.
1. In the Sales > Returns, select Loan returns (GESSRL).
2. Select ALL Full entry as the transaction selection.
3. Click New.
4. Select TR011 as the receiving site.
5. Accept the default return date <Today>.
6. At the Ship-to field, select TRCUS2.
7. In the Left list, select Delivery selection.

Sage Course Curriculum - Version 3.0 Page 120 Copyright © 2018 Sage, Inc. All Rights Reserved.
Lesson Practices (continued)
8. The shipment listed is based on the receiving site and ship-to selected. Select the
shipment listed to update the Lines tab for the loan return.
9. At the Returned field, enter the returned quantity of 6.
10. You can only enter a returned quantity that is equal to or less than the loaned
quantity displayed.
11. The remaining fields such as the lot, serial number, etc are the same as when
entering a normal return.
12. Click Create.
13. You are automatically taken to the Print labels function. This is based on the setup
of the entry transaction. We do not want to print labels, so Close page.
14. You should be returned to the Loan returns function with the return created
automatically displayed. Click the Print icon and select Record to print the return
note for the customer.
15. Accept the default report parameters and click Print to preview the return note.
16. If prompted, select to open the report in Adobe Acrobat Reader.
17. Review the return note generated and close the window.
18. Clear the print list displayed and return to the Navigation page.
19. Using the information you have learned, review the stock information for the TR011
site and the loan location to verify the stock movement was performed and the
correct quantities now display.
20. Close page.
Loan Invoice
As the return date was yesterday we can invoice the Customer for any stock not
returned.
1. In Sales> Invoices, select Invoices (GESSIH).
2. Select ALL Full entry invoice as the transaction selection.
3. Click New.
4. Select TR011 as the Sales site.
5. Accept the default date <Today>.
6. At the Bill-to customer field, select TRCUS2.
7. In the left list, select Delivery selection.
8. The delivery listed is the non returned stock.
9. Click Create.
10. Click Post.

Sage Course Curriculum - Version 3.0 Page 121 Copyright © 2018 Sage, Inc. All Rights Reserved.
Lesson Practices (continued)
11. Select Action icon on line and Stock by site.
12. Select Action icon on line and Detailed stock.
13. Is there any stock still in the Loan
location?____________________________________

Sage Course Curriculum - Version 3.0 Page 122 Copyright © 2018 Sage, Inc. All Rights Reserved.
Lesson 7 Inter-site & Inter-company Transactions
In the following topics, you will learn how to set up information between sites and
companies so that you can enter inter-site and inter-company transactions and
understand the flow of data.
The topics in this lesson include:
Inter-site & Inter-company Overview
Sites
Elements, Invoice Types & Price Lists
Inter-site/Inter-company Links
Inter-site/Inter-company Flow
Lesson Practices

Sage Course Curriculum - Version 3.0 Page 123 Copyright © 2018 Sage, Inc. All Rights Reserved.
Inter-site & Inter-company Overview
In the program, you can enter transactions between sites in the same company (inter-
site) or between sites belonging to two different companies (inter-company).
The diagram below shows the flow of information for inter-site and inter-company
transactions as they pertain to Purchasing and Sales.
- In site A, the flow is initialized by the purchase order. This order is addressed to
the supplier that represents the site B.
- In site B, the sales order is created automatically. This order is created for the
business partner that represents site A.
- In site B, the shipment of the order to the customer (site A) is done normally.
- In site A, the receipt is done by picking the shipment (not the order as in a
normal receipt).
- A purchase order is closed by the receipt independently of the sales order which
is closed by the shipment.
- For inter-company flows only, in site B the sales invoice is created normally.
The validation of this invoice can automatically create the purchase invoice.
There are settings and information that must be defined in order to implement inter-
site and inter-company transactions.

Sage Course Curriculum - Version 3.0 Page 124 Copyright © 2018 Sage, Inc. All Rights Reserved.
Inter-site & Inter-company Overview (continued)
The diagram below shows the implementation stages. Each step is discussed in this
lesson.
Automatic purchase order/sales order creation
Based on parameters defined, the system automatically creates reciprocal documents as
part of inter-site/inter-company exchange.
Automatic creation of
sales order from
purchase order
A purchase order is created for purchase site A to be sent to sales
site B.
In an automatic function, the site B sales order for site A is created
as a mirror image.
The completion of the circle is carried out when site B ships the
products on the order and site A records the receipt by direct
picking from the shipment made by site B.
The generation of the customer invoice at site B allows for the
automatic generation of the invoice at site A or the manual
selection from the sales invoice.
Automatic creation of
purchase invoice from
a sales invoice
When validating a sales invoice, the system automatically generates
the purchase invoice.
The system also creates a direct purchase invoice when validating a
direct sales invoice.
Note: Direct sales and purchase invoices are not associated with an
order, shipment, or receipt.
Manual Selection You can always create certain documents by picking the original
document.
For example, in the case of receipts pre-loaded by picking customer
shipments or customer returns pre-loaded by picking supplier
returns.

Sage Course Curriculum - Version 3.0 Page 125 Copyright © 2018 Sage, Inc. All Rights Reserved.
Sites
In order to process inter-site and inter-company transactions, you must ensure specific
settings are defined for your sites as well as define BP-sites.
Type of site
When creating sites in the Sites (GESFCY) function in the Setup > Organizational
structure, you must define the type of site on the Details tab. To include a site in an
inter-site or inter-company transaction, you must have both the Sales and Purchasing
types selected.
Inter-site BP
Once a site is created, you must define an inter-site BP as both a customer and supplier.
To begin, use the BPs (GESBPR) function in the Common data > BPs to create the
initial BP record.
BP
On the Identity tab, select the Inter-sites check box and select the site you are
creating this inter-site BP for at the Site field.
- When selecting a site at the Site field, you are prompted to retrieve the site’s
information. This will copy over address, contact, and bank information.
- When creating the inter-site BP, a warning displays indicating any changes made
to the address, contact, and bank information copied from the site is written back
to the actual site record in the Sites function.
- However, no new address, contact, or bank information defined at the BP level
is written back to the site.

Sage Course Curriculum - Version 3.0 Page 126 Copyright © 2018 Sage, Inc. All Rights Reserved.
Sites (continued)
- It is important that you maintain consistency with the address and bank details
between the site and inter-site BP records.
- The above information also applies if you create the customer or supplier record
without first defining the BP record.
Customer
When defining the customer information in the Customers function for the inter-site
BP record created, you must select a receiving site at the Receiving site field for an
address on the Ship-to customer tab.
- In an inter-company transaction, the receipt site is, on the purchase order side,
the site receiving the goods, and on the sales side, it is the address where the
goods are shipped.
- The receiving site selected must be defined with the Stock type selected.
In addition, you must select an inter-site BP with a Finance role as the paying and
bill-to BP.
Supplier
The site associated with a supplier BP must have the role of Sales or Finance.
You must select an inter-site BP with a Finance role as the invoicing and bill-to BP.

Sage Course Curriculum - Version 3.0 Page 127 Copyright © 2018 Sage, Inc. All Rights Reserved.
Elements, Invoice Types & Price Lists
In order for the system to automatically generate documents as part of the inter-
site/inter-company transaction, it is necessary to define similar parameters for invoicing
elements and invoice types, as well as to create inter-company price lists.
Elements & invoice types
When defining inter-site/inter-company linking information, you can:
Associate a sales invoice element with a purchase invoice element.
- The invoice elements must be identical to ensure coherence between the linked
documents. For example, they must both be entered as a rate or amount as well
as both increase or decrease the invoice total.
- To avoid the generation of variances between the documents, it is also necessary
that the tax rules are consistent.
- Use the Invoicing elements function in the Setup > Purchasing block to define
the invoice elements for the Purchasing module.
- Use the Invoicing elements function in the Setup > Sales block to define the
invoice elements for the Sales module.
Associate a sales invoice type with a purchase invoice type.
- This is necessary in order to generate on the purchase side the appropriate
account type taking into account the sales invoice type generated.
- The system verifies that the accounting document sense is the same. For
example, a customer invoice, a customer note, or a customer Proforma can be
associated with a supplier invoice or a supplier credit note.
- Conversely, a customer credit note or a customer credit memo can be associated
with a supplier credit note or a supplier debit note.
- Use the Invoice types function in the Setup > Purchasing block to define the
invoice types for the Purchasing module.
- Use the Sales invoice type function in the Setup > Sales block to define the
invoice types for the Sales module.

Sage Course Curriculum - Version 3.0 Page 128 Copyright © 2018 Sage, Inc. All Rights Reserved.
Elements, Invoices Types & Price Lists (continued)
Price lists
For inter-company transactions only, you must create inter-company price lists to allow
the valuation of the recorded documents.
When defining either the purchase price list or sales price list parameters, you must
select Group at the Customers and Supplier fields and the price codes must be the
same.
- When creating the price list parameters with Group selected, a warning displays
if the same price code ID is not found in the corresponding module.
- If Group is selected, some parameters cannot be defined. For example, you
cannot select Component or Restricted as the price type.
Although the inter-company price list must be created for both the Purchasing and
Sales modules, the creation of the price list is only entered in the Price list entry
function in the Sales > Price lists block.
- The inter-company purchasing price lists point to the sales prices lists created for
the associated price codes.
- Selecting the Price entry function in the Purchasing module and the inter-
company price code automatically launches the Price list entry function in the
Sales module.
- You can only view the price entry information when accessed through
Purchasing. To modify, you must select the inter-company price code in the
Price list entry function in the Sales > Price lists block.

Sage Course Curriculum - Version 3.0 Page 129 Copyright © 2018 Sage, Inc. All Rights Reserved.
Inter-site/Inter-company Links
As discussed previously, the system can automatically generate certain documents such
as a sales order from a purchase order when entering inter-site/inter-company
transactions.
The Intercompany (FUNBCH) function in the Setup > Organizational structure
allows you to define specific parameters used when automatically creating
documents.
This includes associated invoice elements and invoice types, as well as the order
types to generate.
Sage Course Curriculum - Version 3.0 Page 130 Copyright © 2018 Sage, Inc. All Rights Reserved.
Inter-site/Inter-company Links (continued)
Automatic flow
In the Automatic flow section, you can define information used by all companies and
sites or for specific companies and sites.
Note: Contract orders are not affected by these defined settings. A purchase contract
order will always generate a sales contract order. This is the same for shipment requests.
The option selected at the Type field determines if the information is used for inter-
site or inter-company transactions.
The Origin and Dest fields allow you to define the information for specific company
and site combinations.
- For example, you can define the automatic flow of information based on the
originating company of 010 and the destination company of 020.
- Defining information at these fields is optional. Leaving them blank indicates
the settings apply to all companies and sites.
- You can select only a company or company group without defining a specific
site or site group. This means all sites associated with the selected company
follow the flow defined.
- Settings defined for a company/site combination take precedence over those
defined for just a company or for all companies.
- If Inter-site is selected as the type, the destination company and site are set to the
origin company and site selected, and cannot be changed.
- If Inter-company is selected at the type, the origin and destination companies
and sites cannot be the same as that would be considered as inter-site.
The option selected at the first Document (origin) field sets the value for the second
Document (destination) field.
- For example, if the originating document is Purchase Order, the system will
automatically create the destination document of Sales Order.
- The options available are Purchase Order and Sales Invoice.
- If you do not define an inter-site or inter-company flow, the system will not
allow for the inter-site/inter-company transaction to be entered.
- For example, in the settings defined, you cannot enter an originating document
of Sales Invoice and have the system automatically create the Supplier Invoice
as an inter-site transaction.
The option selected at the Authorization field determines whether or not the
automatic flow is possible.
- If Yes is selected, the system will generate the appropriate destination document
automatically.
- If No is selected, you must manually create the destination document.

Sage Course Curriculum - Version 3.0 Page 131 Copyright © 2018 Sage, Inc. All Rights Reserved.
Inter-site/Inter-company Links (continued)
An option can only be selected at the Invoicing elements field if the original
document is Purchase Order.
- The selection determines if, at the time of customer order generation, the
invoicing elements on the purchase order are used or if the standard calculation
of the invoice elements from the customer are used.
- If Sales is selected, the originating purchase order is not updated based on the
invoice elements for the customer.
Associated invoice types
The Associated invoice types section is used to associate sales and purchasing invoice
types.
Associated elements invoices
Use the Automatic flow section to associate sales and purchasing invoice elements.
Allocation of purchase variances
The Allocation of purchase variances section determines that if there is a difference
between the invoice elements linked between sales and purchasing, how to account for
the variance.
You can select a specific invoice element to use if the variance is positive or
negative.
If an invoice element is not defined and a variance occurs, the automatic or manual
generation of the destination document is blocked.
Order types to generate
For each order category, define which order type to use at the time of automatic sales
order creation. You can optionally define this information specific to a company group.

Sage Course Curriculum - Version 3.0 Page 132 Copyright © 2018 Sage, Inc. All Rights Reserved.
Inter-site/Inter-company Flow
The following information is specific to the flow of information when creating an inter-
site/inter-company purchase order through the purchase invoice.
Note: Many of the features and options available are the same for various functions in
Purchasing and Sales when creating inter-site/inter-company transaction. Only key
information and differences are discussed in this topic.
Purchasing
You can create purchase requests, purchase orders, and contract orders in Purchasing
that transfer items from one site to another either within the same company (transfer) or
in another company (inter-company).
To purchase items from another site, the site must be defined as a supplier.
- The Transfer check box must be selected on the Identify tab in the Suppliers
function for the appropriate supplier, and the site associated with the supplier
must be a sales site.
- Additionally, the purchase site must have identified an inter-site customer that is
used to create the reciprocal customer sales order.
When creating an order for an inter-site supplier, the Transfer check box is
automatically selected if it is part of the same company as the purchasing site.
- If the inter-site supplier belongs to another company other than the purchase site
of the order, both the Transfer and Inter-company check boxes are selected.
- You cannot manually select or clear these check boxes.
- If only the Transfer check box is selected, you cannot enter an invoice.
- If the Inter-company check box is selected, you can enter an invoice for the
order.

Sage Course Curriculum - Version 3.0 Page 133 Copyright © 2018 Sage, Inc. All Rights Reserved.
Inter-site/Inter-company Flow (continued)
A non-modifiable receiving site displays on the Management tab of an inter-site
order.
- It specifies the default receipt site entered for each product selected on the Lines
tab, which can be changed.
- The receiving site defaults to the receiving site entered in the default delivery
address of the sold-to customer associated with the purchase site of the order.
- During the generation of the sales order, the deliver address for the receipt site is
the delivery address for the products on the sales order.
The invoice site selected defaults to the site associated with the bill-to customer
defined in the customer record for the purchase site.
- At the time of the sales order generation, the bill-to customer and the pay-by
customer default to the customer associated with the invoicing site selected on
the purchase order.
Contract orders
Similar to purchase orders, you can also create inter-site and inter-company contracts.
The type is determined the same as a standard purchase order.
The creation of an inter-site purchase contract automatically generates the associated
sale contract.
- The main contract is the purchase contract.
The delivery schedule of the purchasing contract updates the shipment delivery
schedule of the sales contract.
- Modifications on a delivery purchase are reflected automatically on the request
for delivery sales. This includes modifications of the quantity and cancellations
of the delivery.
- You cannot modify information on the delivery request for the sale contract
unless a delivery is partially shipped. Then the request for sale is expanded in
two requests for delivery (the first relating to the shipped part and the second the
balance). This also divides the purchase request into two in order to correspond
to the requests of the sales delivery.
When reviewing requirements to consider on the purchase contract, open transfers
are also included.
The validation of the contract shipment updates the Transferred amount of the
supplier and the In-Transit amount of the customer site.
- The receipt of the transferred products increments the physical stock of the
customer site and reduces the In-Transit stock of the customer site.

Sage Course Curriculum - Version 3.0 Page 134 Copyright © 2018 Sage, Inc. All Rights Reserved.
Inter-site/Inter-company Flow (continued)
Inter-site/Inter-company Returns
To process an inter-site or inter-company return, you must keep in mind the following.
The supplier must be defined as a sales site or associated with a sales site.
The return site must be entered as the receipt site with a delivery address of a
customer identified as the purchase site.
You cannot request a credit memo for inter-site type returns; however, it is possible
for inter-company returns.
The validation of inter-site and inter-company returns, updates the stock totals In
transfer for site returning the product and In transit for the site expecting the return.
Sales
Keep the following information in mind regarding inter-site or inter-company sales
orders.
For an inter-company order automatically generated from a purchase order:
- The Sold-to customer corresponds to the customer associated with the purchase
site entered on the purchase order.
- The bill-to customer corresponds to the customer associated with the invoice
information entered on the purchase order.
- The pay-by BP corresponds to the customer associated with the invoicing site
entered on the purchase order.
- The delivery address corresponds to the ship-to customer associated with the
receiving site entered on the purchase order.
For an inter-site or inter-company order generated from a purchase order:
- The shipment site defaults based on the shipment site entered on the purchase
order; however, it can be changed. The original purchase order is not updated by
the change.
- The requested delivery date is initialized to the earliest date in the planned
receipt dates entered on the purchase order lines.
- The shipment method defaults to the shipment method on the purchase order, if
the shipment method is not defined for the ship-to customer.
- The carrier defaults to the carrier on the purchase order, if the carrier is not
defined for the ship-to customer.
- For the product, the shipment unit of measure and quantity defaults to the
product information entered on the purchase order and cannot be changed.

Sage Course Curriculum - Version 3.0 Page 135 Copyright © 2018 Sage, Inc. All Rights Reserved.
Inter-site/Inter-company Flow (continued)
Contract orders
Similar to purchase orders, you can also create inter-site and inter-company contracts.
The type is determined the same as a standard purchase order.
The creation of an inter-site sales contract automatically generates the associated
purchase contract.
- The main contract is the sales contract.
The delivery schedule of the sales contract updates the shipment delivery schedule
of the purchase contract.
When reviewing requirements to consider on the sales contract, open transfers are
also included.
The validation of the contract shipment updates the Transferred amount of the
supplier and the In-Transit amount of the customer site.
- The receipt of the transferred products increments the physical stock of the
customer site and reduces the In-Transit stock of the customer site.
Product information
When selecting products, you can only select products for which you have defined
product/site information for both the purchasing and shipping sites.
You cannot select products that are received into stock along with products that are
not.
- This is because the sales order type created is different for the different types of
stocked and non-stocked products.
- If the purchase order contains products that are not received into stock, the sales
order generated is a direct invoicing type.
The unit of measure entered for a product is checked to ensure that a corresponding
unit of measure exists in the sales module.
The purchase quantity entered is validated against the minimum and maximum sales
quantity.
- Based on parameters defined, this can prevent you from entering a purchase
quantity lower or higher than the minimum and maximum sales quantity
allowed.
The delivery date requested in the generated sales order header is set to the nearest
planned due date from the purchase order lines.
- The planned due date for each sales order line is set to the planned due date for
the corresponding purchase order line.

Sage Course Curriculum - Version 3.0 Page 136 Copyright © 2018 Sage, Inc. All Rights Reserved.
Inter-site/Inter-company Flow (continued)
If parameters are defined for inter-site company price lists they are used in the same
way as normal price lists.
- When the sales order is generated, the prices and the discounts calculated for the
product on the sales order are determined from the inter-company price lists or
the normal price lists.
- At no time are prices and discounts on the purchase order used on the sales
order.
- If different, the reconciliation of the differences is made at the time of invoicing.
The Receipt acknowledgement date and number for inter-site or inter-company
orders is updated once the sales order is generated. It displays the date and number
of the sales order.

Sage Course Curriculum - Version 3.0 Page 137 Copyright © 2018 Sage, Inc. All Rights Reserved.
Lesson Practices
Complete the following lesson Practice in the order shown.
Create a new site and inter-site BP
In this Practice, create a new site and create an intersite BP.
1. In the Setup > Organizational structure, select Sites (GESFCY)
2. Select the TR011 site under the NA10 company.
3. We want to use this site information as the basis for a new site. At the Site field,
enter TRN12 and Training site as the description.
4. On the General tab, enter Site TRN12 as the short title.
5. Click Create and Continue when prompted to duplicate the information.
6. Close page.
7. In the Common data > BPs, select BPs (GESBPR).
8. Select the NA012 BP already created.
9. We want to use this information as the basis for a new BP. At the BP field, enter
TRN12, Site TRN12 as the short description, and Training site as the company name.
10. Select the Intersites check box, if it is not already selected
11. Select TRN12 at the Site field.
12. Click Create and Continue when prompted to duplicate.
13. Click OK when prompted regarding the overwriting of information.
14. Select Customer in right panel.
15. Click New.
16. Select US at the Category field and type TRN12 as the customer code. The
information defaults from the BP record already created.
17. Click the Financial tab and define the following settings, if not already defined:
– Select NTX at the Tax rule field.
– Select CH30NET at the Payment terms field.
18. Click the Ship-to Customer tab, and verify that TRN12 is selected at the Receiving
site field for the address created. This defaults to the site selected on the Identify tab.
19. Click Create and OK when prompted regarding the overwriting of information.
20. Close page.
21. select Supplier in right panel.
22. Click New.
Sage Course Curriculum - Version 3.0 Page 138 Copyright © 2018 Sage, Inc. All Rights Reserved.
Lesson Practices (continued)
23. Select US at the Category field and type TRN12 as the supplier code. The
information defaults from the BP record already created.
24. Click the Addresses tab and change the address to 160 S Brand Blvd for address
code AD1.
25. Click the Financial tab
26. Select NTX as the tax rule.
27. Click Create and OK when prompted regarding the overwriting of information.
28. Close page twice.
Inter-company parameters
In this Practice, define information for a specific company/site combination.
1. In the Setup > Organizational structure, select Intercompany (FUNBCH).
2. In the Automatic Flows section, select Inter-site as the type, NA10 as the Source
co./group, and TRN12 as the Source site/group.
3. Select Purchase Order as the document.
4. Select NA10 as the Target co./group and NA012 as the Target site/group. Select Yes
as the authorization. Accept all other defaults.
5. Click Save.
6. Close page.
Product – sites & Locations
In this Practice, create the necessary products in the new TRN12 site created and a new
location for this site.
1. In the Common data > Products > select Products (GESITM).
2. in the left list Select the TRBMS999 product
3. In the right panel under Functions, select Product site creation
4. Check Log check box and check boxes for sites NA012 and TRN12
5. Click Create in right panel, verify results and Close page(s).
6. In the Common data > Product tables, select Location type (GESTLO).
7. Select the STO location type for the NA012 site.
8. Change the storage site to TRN12.
9. Click Create and Continue when prompted to confirm the duplication.
10. Click Create loc in the Right panel.
11. Enter STO001 as the first location and STO009 as the last location.
12. Click Save and Ok when prompted regarding the number of locations to create.

Sage Course Curriculum - Version 3.0 Page 139 Copyright © 2018 Sage, Inc. All Rights Reserved.
Lesson Practices (continued)
13. Click Ok when prompted regarding the number of locations created.
14. Close page to the Location creation page.
15. Close page.
Inter-site/inter-company transactions
In this Practice, enter an inter-site purchase order and follow the flow of information
through the sales order creation, shipment, receipt, and invoicing processes.
1. In the Purchasing > Orders, select Orders (GESPOH).
2. Select the ALL Full entry transaction type.
3. Click New.
4. Select TRN12 as the purchasing site and default order date.
5. Select NA012 as the supplier.
6. NA012 is an intersite BP defined as both a supplier and a customer.
7. Because the supplier selected is a site within the same company as the purchasing
site, the Intersites check box is automatically selected. This indicates it is an intersite
transaction.
8. Click the Lines tab.
9. Select the TRBMS999 product and click OK when prompted regarding the reference
to the supplier.
10. Enter 1 as the quantity.
11. Click Create.
12. A log report should display showing the automatic generation of the sales order.
What sales order number was created? ______________________________
13. You can also review the line item on the Lines tab to view the sales order number
created.
14. Close page to the log report and do not print the purchase order.
15. What is the purchase order number created? _____________________
16. Close page.
17. Before reviewing the order and processing a delivery, we need to receive items into
the NA012 site. In the Stock > Receipt/issue transactions, select Miscellaneous
receipts (GESSMR).
18. Select the ALL Misc Stock Receipts Full Entry transaction.
19. Click New.
20. Select NA012 as the site and accept the default allocation date <Today>.
21. At the Product field, select TRBMS999 and enter 100 as the quantity. Status = A.
Enter 19.95 as the unit price.

Sage Course Curriculum - Version 3.0 Page 140 Copyright © 2018 Sage, Inc. All Rights Reserved.
Lesson Practices (continued)
22. Click Create and Close page.
23. In the Purchasing > Orders, select Orders (GESPOH).
24. When prompted, select the All Full entry transaction.
25. In the Left list, select the purchase order you created.
26. Click the Totals tab and under Acknowledgement notes, Ack ID, click the Action
icon and select sales orders
27. Select the All Full entry transaction.
28. We first need to allocate the product to this order. Click Allocation in the Right
panel.
29. Accept the defaults in the Order allocation button window and click Allocation in
the Right panel.
30. Close page the log report displayed.
31. Click Delivery in the Right panel to ship the product.
32. Select ALL Full entry as the transaction.
33. Accept the default shipment date <Today>.
34. Click the Actions icon for the line and select Stock issues. Accept the default
allocation and click Save.
35. In the Delivery management window, click Save.
36. Click Validation in the Right panel to validate the entry.
37. Note the delivery number assigned. _________________________
38. Close page(s).
39. Check the Stock on the Product Site records.
40. Common data > Products , select Products-site (GESITF)
41. Site TR012. How many in-Transit? ____________________________
42. Site NA012. How many Transferred? __________________________
43. Close page(s).
44. In the Purchasing > Receipts, select Receipts (GESPTH2).
45. Select ALL Full entry as the transaction.
46. Click New and select TRN12 as the receiving site.
47. Select NA012 as the Supplier.
48. Because we want to receive products from an intersite shipment created, select the
shipment created from Sales using the Delivery selection listing in the Left list
window.

Sage Course Curriculum - Version 3.0 Page 141 Copyright © 2018 Sage, Inc. All Rights Reserved.
Lesson Practices (continued)
49. Select shipment generated through sales which should display on the lines tab with
the appropriate quantity information. Click Create.
50. Close page.
51. Based on what you have learned in previous training courses, review the stock
available for this product in the TR012 site.
52. After reviewing information, close page(s).
Sage Course Curriculum - Version 3.0 Page 142 Copyright © 2018 Sage, Inc. All Rights Reserved.
Lesson 8 Advanced Purchasing techniques
In the following lesson, you will learn about the management of advanced purchase
techniques in the Purchasing module.
The topics in this lesson include:
Overview of Advanced Purchase Costs
Cost Natures
Tax Rates
Costs
Cost Structure
Incoterm
Orders, Receipts & Invoices
Additional Purchasing Improvements
Lesson Practices

Sage Course Curriculum - Version 3.0 Page 143 Copyright © 2018 Sage, Inc. All Rights Reserved.
Overview of Advanced Purchase Costs
In order for companies to foresee the purchase costs for international imports using
international standards (incoterm) or inland purchases, new features were added for the
management of APC (Advanced Purchase Costs).
There are three steps associated with the management of costs. This includes the setup
of information to calculate estimated costs, actual costs, and the analysis of costs to
make the appropriate updates.
There are now two methods available to manage the calculation of purchase costs.
They include:
- LC (Landed Cost) coefficient (coefficient * cost per unit)
- Cost Structure
The objective is to estimate the purchase cost of a good, along with the logistic
operations included.

Sage Course Curriculum - Version 3.0 Page 144 Copyright © 2018 Sage, Inc. All Rights Reserved.
Overview of Advanced Purchase Costs (continued)
Landed Cost Coefficient Method (Global)
The Landed cost coefficient method was added to unitary and fixed costs to calculate
the purchase cost and stock cost using the formulas below.
LC Coefficient & Fixed cost per unit (FCU)
Purchase cost Line amount (tax excluded) * LC coefficient
+ fixed cost per unit * qty PU
+ total of invoicing elements of the line
+ total undeductible tax
Purchase cost per
unit
Purchase cost/quantity of stock unit (SU)
Stock cost Line amount (tax excluded) * LC coefficient
+ fixed cost per unit * qty PU
+ total of valuated invoicing elements of the line
+ total line undeductible tax according to NODVATSTO
parameter
Stock cost per unit Stock cost/Quantity of stock unit (SU)

Sage Course Curriculum - Version 3.0 Page 145 Copyright © 2018 Sage, Inc. All Rights Reserved.
Overview of Advanced Purchase Costs (continued)
Cost Structure Method (Detailed)
The Cost structure method is composed of a cost structure including different added
costs to calculate the purchase and stock costs using the formula below.
Cost Structure
Purchase cost Line amount (tax excluded)
+ total of the cost from cost structure
+ total of invoicing elements of the line
+ total undeductible tax of the line
Purchase cost per
unit
Purchase cost/quantity of stock unit (SU)
Stock cost Line amount (tax excluded)
+ total of the valuated cost from cost structure
+ total of valuated invoicing elements of the line
+ total line undeductible tax according to NODVATSTO
parameter
Stock cost per unit Stock cost/Quantity of stock unit (SU)

Sage Course Curriculum - Version 3.0 Page 146 Copyright © 2018 Sage, Inc. All Rights Reserved.
Cost Structure Method (Detailed) (Continued)
Example – Cost Structure Method
The example below is taking into account costs from the cost structure to determine the
overall purchase cost.
The below shows how the cost structure is impacted by the settings defined in the
Incoterms function. You determine who is responsible (Buyer, Seller, or Both) for
costs.

Sage Course Curriculum - Version 3.0 Page 147 Copyright © 2018 Sage, Inc. All Rights Reserved.
Cost Structure Method (Detailed) (Continued)
Additional Manual Costs Added or Adjusted
The diagram below shows how additional costs adding through the order and receipt
process impact the costs on the final invoice. The costs can be updated by purchase
invoices.
Setup & Common Data
Modifications were made in several Setup and Common data functions to accommodate
the new methods for the calculation of purchase costs.

Sage Course Curriculum - Version 3.0 Page 148 Copyright © 2018 Sage, Inc. All Rights Reserved.
Cost Natures
Use Local menus – messages under Tables in the Development > Data and parameters
to define cost natures. Cost natures define the type of costs which can include such
items as packing, loading, pre-transportation, main transport loading.
They are considered in costs and the Incoterms function.
In the Local menus – messages function, information is defined by selecting 2276 at
the Chapter field.

Sage Course Curriculum - Version 3.0 Page 149 Copyright © 2018 Sage, Inc. All Rights Reserved.
Tax Rates
For each tax rate defined in the Tax rates function under Taxes in the Common data >
Common tables , you can define the percentage deductible.
The percentage entered impacts the cost amount calculated.
For example:
- Cost amount – tax = $1000
- Tax rate = 15%
- Tax amount = $150
- If % deductible equals:
o 100% - Cost is $1000
o 50% - Cost is $1075
o 0% - Cost is $1150
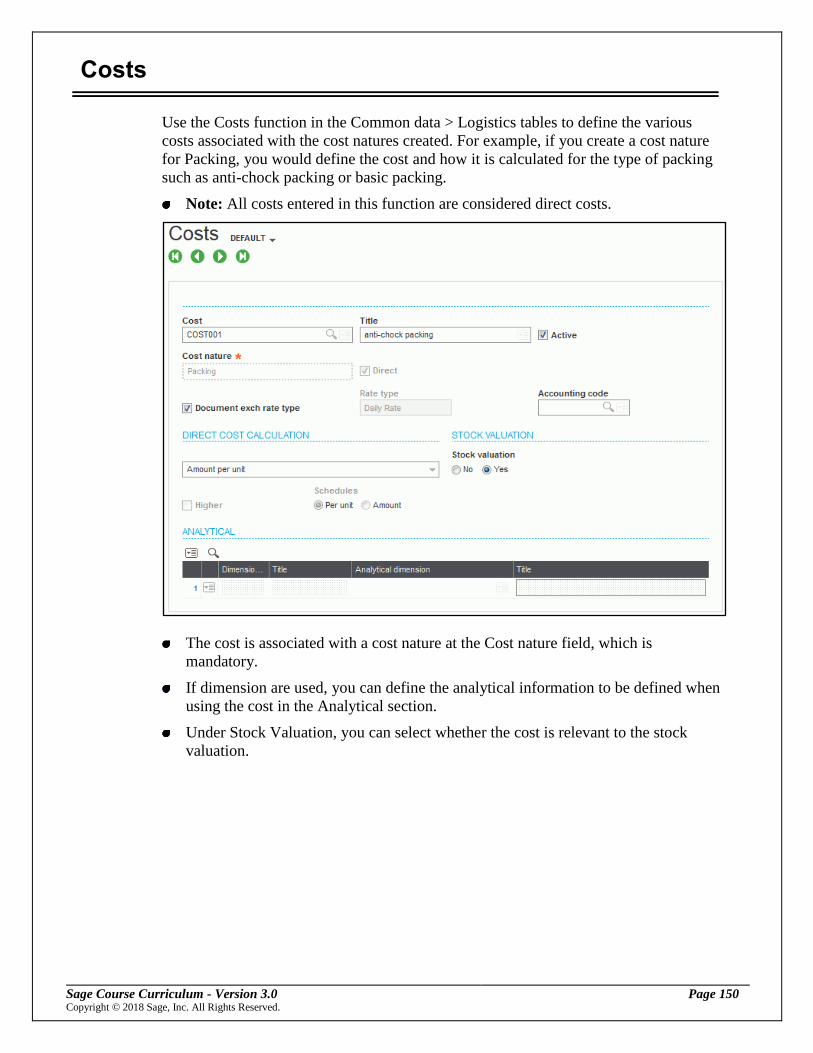
Sage Course Curriculum - Version 3.0 Page 150 Copyright © 2018 Sage, Inc. All Rights Reserved.
Costs
Use the Costs function in the Common data > Logistics tables to define the various
costs associated with the cost natures created. For example, if you create a cost nature
for Packing, you would define the cost and how it is calculated for the type of packing
such as anti-chock packing or basic packing.
Note: All costs entered in this function are considered direct costs.
The cost is associated with a cost nature at the Cost nature field, which is
mandatory.
If dimension are used, you can define the analytical information to be defined when
using the cost in the Analytical section.
Under Stock Valuation, you can select whether the cost is relevant to the stock
valuation.

Sage Course Curriculum - Version 3.0 Page 151 Copyright © 2018 Sage, Inc. All Rights Reserved.
Costs (continued)
Direct Cost Calculation
There are eight options available for determining how the cost is calculated.
Percentage per net price: The percentage is added to the net price of the document
line.
- For example, if the percentage is 3.75% and the net price is $100, the cost
amount is $3.75.
Fixed amount: The amount is added regardless of any criteria.
- For example, the cost is always $42.00 regardless of such items as the quantity,
amount, or weight.
Amount per unit: The amount is added every N quantities of a unit.
- For example 1, you can enter $10.23 per KG (quantity is always 1, base: Weight,
and unit: KG).
- For example 2, you can enter $20.00 per pack (quantity is always 1, base:
Quantity, and unit: PAC).
Amount by fixed bracket: A fixed amount is applied every time based on a range.
- For example, the cost is $5.00 for every 100 liters (base:volume). If you buy 200
liters, you have a cost of $10.00.
- There is an exception if the Higher check box is selected and you buy 250, than
you have a cost of $15.00.

Sage Course Curriculum - Version 3.0 Page 152 Copyright © 2018 Sage, Inc. All Rights Reserved.
Costs (continued)
Schedule (Amount): If you select Schedule and the Amount option under Schedule,
the amount, base, and unit is set in the schedule. For example:
- You create a schedule from 1 to 1000kg at a cost of $26.00 and from 1001 to
2000kg at a cost of $25.00.
- We order 1200kg of wheat at $1.00 per kg.
- If the schedule is by amount, the program:
o Applies $25.00 to the purchase cost ($1200 + $25.00 = $1225.00)
o Comes up with $1.02 as the purchase cost per unit ($1225.00/1200kg =
$1.02 per kg).
Schedule (Per unit): If you select Schedule and the Per unit option under Schedule,
the amount, base, and unit is set in the schedule. For example:
- You create a schedule from 1 to 1000kg at a cost of $26.00 and from 1001 to
2000kg at a cost of $25.00.
- We order 1200kg of wheat at $1.00 per kg.
- If the schedule is by unit, the program:
o Applies $25.00 per unit (1200kg * $25.00 = $30000.00)
o Adds the above to the purchase cost ($1200 + $30000.00 = $31225.00)
o Comes up with $1.02 as the purchase cost per unit ($1225.00/1200kg =
$26.00 per kg).

Sage Course Curriculum - Version 3.0 Page 153 Copyright © 2018 Sage, Inc. All Rights Reserved.
Costs (continued)
Weighted amount: Mostly used in loading or unloading to calculate the cost of a
product unit. For example:
- It takes 10 minutes (0.10) to load the goods and an hour costs $100.00
- The quantity in the program would be set to 0.10, the base is equal to purchase,
unit is equal to man hour at $100.00 per hour, and the weight is 100%.
- The cost is calculated as (Quantity * amount / (Weight/100)), which give us
$10.00 as the cost (0.10 * 100.00 / (100/100)).
Formula: Define a formula using the item, supplier, and context table (ITM, ITP,
POQ, POP, POH, POC, BPS, and PPK).

Sage Course Curriculum - Version 3.0 Page 154 Copyright © 2018 Sage, Inc. All Rights Reserved.
Cost Structure
Use the Cost structure function in the Common data > Logistics tables to create a listing
of costs with their values.
The values entered for a cost selected are based on the cost calculation method
selected for the cost in the Costs function.
- In the Range column for the applicable costs, click the Magnifying glass icon to
define the range information.

Sage Course Curriculum - Version 3.0 Page 155 Copyright © 2018 Sage, Inc. All Rights Reserved.
Cost Structure (continued)
Assigning Cost Structures
You can assign a default cost structure to a product category, product, and product-
supplier.
You can assign a cost structure to the:
- Product category at the Cost structure field on the Purchase/sales tab in the
Product category function.
- Product at the Cost structure field on the Supply tab and/or to a specific supplier
on the Suppliers tab in the Product function.

Sage Course Curriculum - Version 3.0 Page 156 Copyright © 2018 Sage, Inc. All Rights Reserved.
Incoterm
Use Incoterm in the Common data > Logistics to define freight term. The freight term
(Incoterm) defines who pays the cost nature. It can be: Neither the buyer, nor the seller,
Seller, Buyer, or Buyer and seller.
It is linked to the supplier in the Suppliers function and therefore defaulted in the
purchase document.
Keep in mind only those cost natures where the buyer is responsible will impact the
calculation of the purchase cost.
If Buyer and seller is selected, the amount is split evenly between the buyer and
seller.

Sage Course Curriculum - Version 3.0 Page 157 Copyright © 2018 Sage, Inc. All Rights Reserved.
Orders, Receipts & Invoices
New fields were added when entering lines on orders, receipts, and invoices in the
Purchasing module.
The Purchase cost per unit and Purchase cost represent the estimated purchase cost.
The Stock cost per unit and Stock cost represent the stock valuation.
The Actual purchase cost field displays the actual purchase cost when invoiced.
Cost Structure Detail
If the cost structure selected is a detailed cost structure, you can access Cost structure
detail by clicking the Action icon for the line. You can modify the costs displayed by
changing the amount at the Adjusted tax excl amt field.

Sage Course Curriculum - Version 3.0 Page 158 Copyright © 2018 Sage, Inc. All Rights Reserved.
Orders, Receipts & Invoices (continued)
Line Cost
Through Line cost you can view the cost detail including the calculation for the fixed
cost per unit, direct cost, stock cost, purchase cost, and cost total. This displays on the
Cost Detail tab in the Line cost window.
On the Detail Validation tab, you can now view the Non-deductible tax amount.
A variance can appear between the stock cost and the purchase cost.
- This can occur based on the general parameters NODVATSTO (Non-deductible
taxed is stock) and whether or not you selected to include Costs in the stock
valuation.

Sage Course Curriculum - Version 3.0 Page 159 Copyright © 2018 Sage, Inc. All Rights Reserved.
Orders, Receipts & Invoices (continued)
Cost Tab
The Cost tab in the Orders function displays the cost information including the total
minus tax, direct costs, invoicing elements, landed cost total, additional invoice totals,
purchase cost total, and actual purchase cost total.
Purchase Complimentary Invoice
When entering a complimentary invoice in the Invoice control function, you can now
not only update a receipt or invoice but a purchase order as well.

Sage Course Curriculum - Version 3.0 Page 160 Copyright © 2018 Sage, Inc. All Rights Reserved.
Orders, Receipts & Invoices (continued)
Set up relationships for advanced purchasing costs
The diagram below shows the relationships between the advanced purchasing setup
tools and functions. From the start the user can see the order of setup and the tools and
settings that have a controlling influence on the purchase operation.
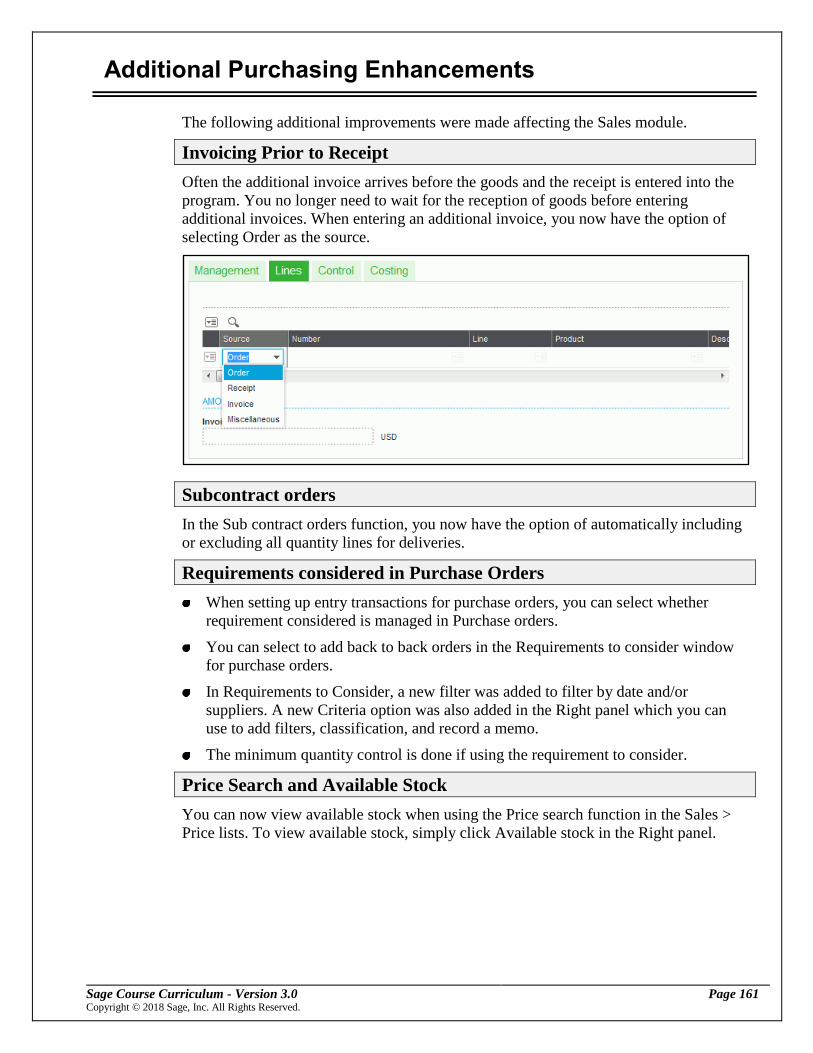
Sage Course Curriculum - Version 3.0 Page 161 Copyright © 2018 Sage, Inc. All Rights Reserved.
Additional Purchasing Enhancements
The following additional improvements were made affecting the Sales module.
Invoicing Prior to Receipt
Often the additional invoice arrives before the goods and the receipt is entered into the
program. You no longer need to wait for the reception of goods before entering
additional invoices. When entering an additional invoice, you now have the option of
selecting Order as the source.
Subcontract orders
In the Sub contract orders function, you now have the option of automatically including
or excluding all quantity lines for deliveries.
Requirements considered in Purchase Orders
When setting up entry transactions for purchase orders, you can select whether
requirement considered is managed in Purchase orders.
You can select to add back to back orders in the Requirements to consider window
for purchase orders.
In Requirements to Consider, a new filter was added to filter by date and/or
suppliers. A new Criteria option was also added in the Right panel which you can
use to add filters, classification, and record a memo.
The minimum quantity control is done if using the requirement to consider.
Price Search and Available Stock
You can now view available stock when using the Price search function in the Sales >
Price lists. To view available stock, simply click Available stock in the Right panel.

Sage Course Curriculum - Version 3.0 Page 162 Copyright © 2018 Sage, Inc. All Rights Reserved.
Additional Purchasing Enhancements (continued)
Buyer Plan
For the Requirements to Consider option in the Buyer plan function, you can now filter
by date and/or supplier. A new Criteria option is also available in the Right panel to add
filters, classification, and record memos.
The minimum PO quantities are controlled in requirement considered.
In the quantity setup of requirement considered, you can also select to automatically
include or exclude all quantities lines.
Purchase Inquiries Updated
New Purchase inquiries were added to give you more visibility into purchasing. This
includes: List of orders, Order line, Orders per period, List of receipts, Receipt lines,
Receipts by period, and List of invoices.
No Deductible Taxes in Stock
A new parameter NODVATSTO was created to include in stock valuation, the no
deductible taxes. This was not possible in previous versions.

Sage Course Curriculum - Version 3.0 Page 163 Copyright © 2018 Sage, Inc. All Rights Reserved.
Additional Purchasing Enhancements (continued)
Purchasing planning tools to control costs
Tools and features to manage and control purchase and shipping costs are imbedded in
many of the purchasing functions of Sage X3. These tools allow companies to set
budget targets for a purchase, set freight discount targets for a purchase and to control
shipping container volumes to ensure that opportunities for free or reduced freight costs
related to purchasing are maximized.
Tools include features to:
Maximizing shipments from a Supplier to reduce transportation costs
Getting the most of your freight costs by ordering based on Container capacity
Purchasing based on order costs
Identify additional products within the purchase plan for this order
Add items to max out container capacity
Purchase based on order costs
Shipping Container Definitions and considerations
Two definitions are used for the term container
A box, typically 10 to 40 feet long, which is primarily used for ocean freight shipments.
For travel to and from ports, containers are loaded onto truck chassis or on railroad
flatcars. The term container can also refer to packaging, such as a carton, case, box,
bucket, drum, bin, bottle, bundle, or bag, that an item is packed and shipped in.
Other considerations include:
Container size and weight capacity
Container volume
Supplier Minimum Order Values to achieve free freight
Purchasing Budgets for the material to be bought
These considerations have been included in the Sage X3 tools. The chart below shows
the Sage X3 functions that display values to be considered during the purchasing
activity

Sage Course Curriculum - Version 3.0 Page 164 Copyright © 2018 Sage, Inc. All Rights Reserved.
Additional Purchasing Enhancements (continued)
Setup for advanced purchasing planning
Free freight in Buyer planning and Product by supplier and Product usage is defined by
Supplier or Supplier category. Upon acheving the minimum order and free freight
threshhold the buyer can aquire a free shipment.
Function Weight
&
Volume
Supplier
cost Min &
Max
order
Free
freight Container
& Capacity Products
by
supplier
Product
usage Entry
transaction
Enterprise
planning
Planning
Grouping
Buyer
planning
Purchase
order
Requirement
to consider

Sage Course Curriculum - Version 3.0 Page 165 Copyright © 2018 Sage, Inc. All Rights Reserved.
Additional Purchasing Enhancements (continued)
Setup the free freight thresholds for suppliers at:
- Common Data > BP's > suppliers > commercial tab
Note: You can also add free freight thresholds to the supplier category.
Basic data defining the shipping container must be provided for freight calculations.
- Go to Common Data > Logistics Tables > Shipping Containers to enter
container information. See the screen below.
The buyer will select containers during the purchasing operation.
- Container selection is available in Grouping workbench, Buyer planning,
Purchase order, and the Plan/Order window of Enterprise planning.
Capacity is calculated based on weight and volume from the Container setup
multiplied by the number of containers entered.
Filling container space with the products by supplier inquiry
The new Products by supplier functionality provides visibility of other products
purchased from the same Supplier. Searching for products from the same supplier
allows the buyer to fill a shipping container with the items most likely to be needed and
used.
The function lists other products and suggestions for the Supplier that are outside
the original selection criteria in the workbench. It displays other key details about
the Products and Supplier, allowing the Buyer to make informative purchasing
decisions.

Sage Course Curriculum - Version 3.0 Page 166 Copyright © 2018 Sage, Inc. All Rights Reserved.
Additional Purchasing Enhancements (continued)
Products by supplier can also be launched from the action menu of POS lines in
Grouping workbench.
The screen below shows the user accessing products by supplier from Enterprise
planning.

Sage Course Curriculum - Version 3.0 Page 167 Copyright © 2018 Sage, Inc. All Rights Reserved.
Additional Purchasing Enhancements (continued)
The screen below shows the buyer accessing the same screen a from the Grouping
function.
Using Products by supplier, the buyer can see Supplier contact information as well
as Minimum and Free freight thresholds. Maximum order amount can be entered to
assist Buyer with budgeting.
The buyer can enter amounts in the Order qty. column to immediately create
additional Purchase order suggestions (POS) as needed.
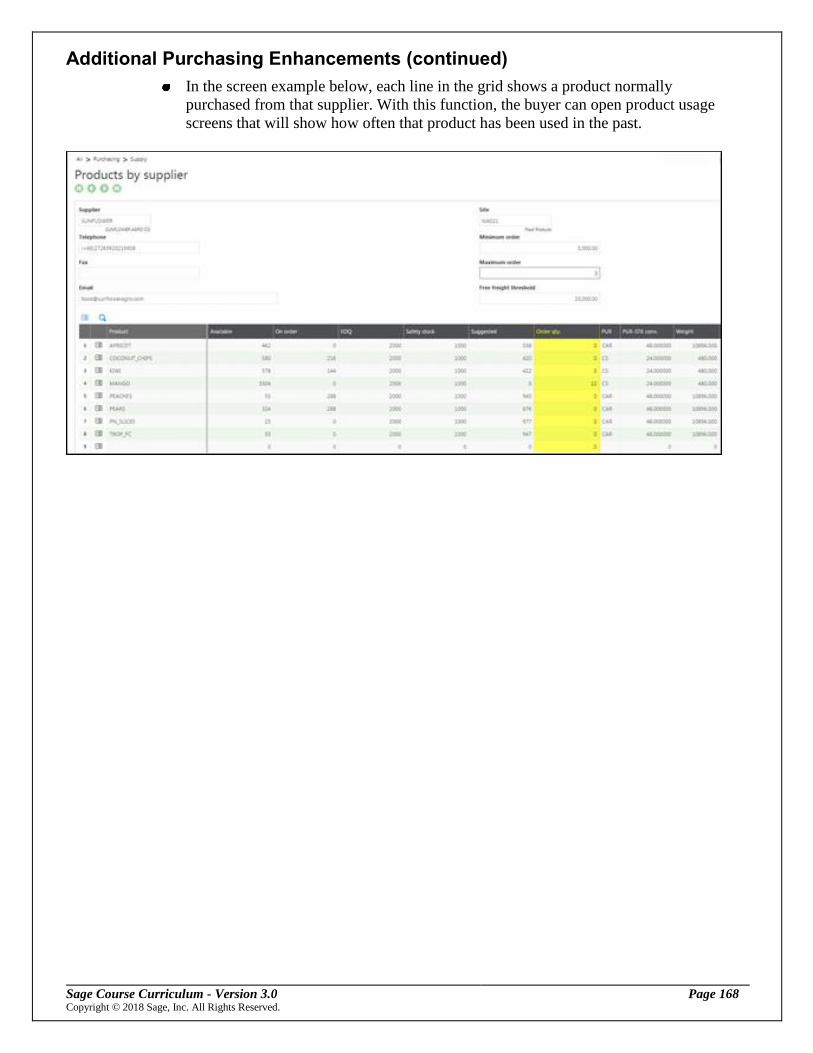
Sage Course Curriculum - Version 3.0 Page 168 Copyright © 2018 Sage, Inc. All Rights Reserved.
Additional Purchasing Enhancements (continued)
In the screen example below, each line in the grid shows a product normally
purchased from that supplier. With this function, the buyer can open product usage
screens that will show how often that product has been used in the past.

Sage Course Curriculum - Version 3.0 Page 169 Copyright © 2018 Sage, Inc. All Rights Reserved.
Additional Purchasing Enhancements (continued)
Using the product usage information
The new Product usage functionality displays the historical usage in a rolling 36-month
view.
Amounts are the total product consumption each month including sales,
miscellaneous issues and inter-site transfers.
Available on the Ordered qty. actions menu of Purchase order and Buyer planning.
Enterprise planning, Purchase planning and the Grouping workbench have the
ability to launch Product usage from the action menu of any POS line.
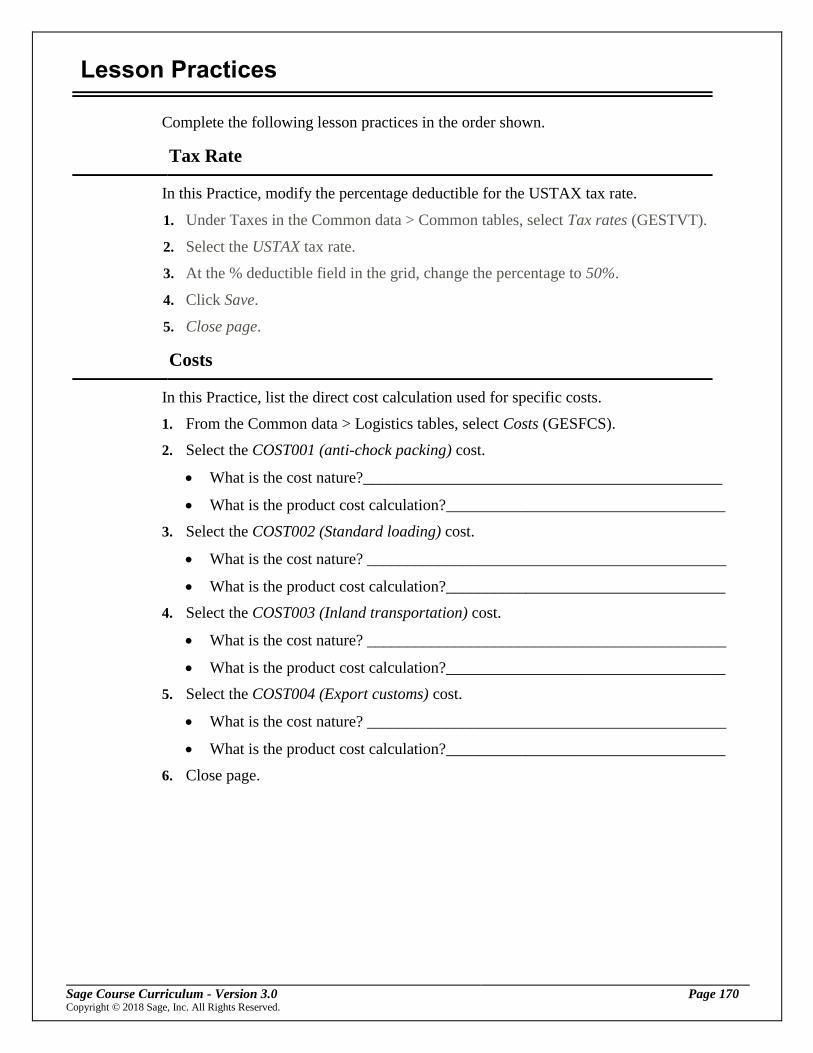
Sage Course Curriculum - Version 3.0 Page 170 Copyright © 2018 Sage, Inc. All Rights Reserved.
Lesson Practices
Complete the following lesson practices in the order shown.
Tax Rate
In this Practice, modify the percentage deductible for the USTAX tax rate.
1. Under Taxes in the Common data > Common tables, select Tax rates (GESTVT).
2. Select the USTAX tax rate.
3. At the % deductible field in the grid, change the percentage to 50%.
4. Click Save.
5. Close page.
Costs
In this Practice, list the direct cost calculation used for specific costs.
1. From the Common data > Logistics tables, select Costs (GESFCS).
2. Select the COST001 (anti-chock packing) cost.
What is the cost nature?_____________________________________________
What is the product cost calculation?___________________________________
3. Select the COST002 (Standard loading) cost.
What is the cost nature? _____________________________________________
What is the product cost calculation?___________________________________
4. Select the COST003 (Inland transportation) cost.
What is the cost nature? _____________________________________________
What is the product cost calculation?___________________________________
5. Select the COST004 (Export customs) cost.
What is the cost nature? _____________________________________________
What is the product cost calculation?___________________________________
6. Close page.

Sage Course Curriculum - Version 3.0 Page 171 Copyright © 2018 Sage, Inc. All Rights Reserved.
Lesson Practices (continued)
Cost Structure
In this Practice, create a new cost structure called COST_TRAIN.
1. From the Common data > Logistics tables, select Cost structure (GESSTC).
2. Select the COST_STO001 (Sensitive products) cost structure.
3. At the Cost structure field, enter COST_TRAIN. This will create a new cost
structure using COST_ST001 as the basis.
4. Change the description to Sensible products – Training.
5. Delete rows 5 – 10 using the appropriate Action icon. You should be left with
COST001, COST002, COST003, and COST004.
6. Explain the cost calculations for the following:
COST001: _____________________________________________________
COST002: _____________________________________________________
COST003: _____________________________________________________
COST004: _____________________________________________________
7. Click Create and Continue when prompted to confirm the copy.
8. Close page.
9. Now assign the new cost structure to a product. From the Common data > Products,
select Products (GESITM).
10. Select DIS012 (IPad 5 Retina Black) as the product.
11. Click the Suppliers tab and click the Actions icon for the row listing NA061 as the
supplier and select Delete line.
12. Click the Selection icon for row 2 and select supplier NA061.
13. Enter IPAD as the supplier product and verify 1 is the LC coefficient and 0.00 is the
fixed cost per unit.
14. At the Cost structure field, select COST_TRAIN and enter 1 as the minimum PO
quantity.
15. Click Save.
16. Create Product site for TR011
17. Select DIS013 (IPHONE 5) as the product.
18. Click the Suppliers tab and click the Actions icon for the row listing NA061 as the
supplier and select Delete line.
19. Click the Selection icon for row 2 and select supplier NA061.
20. Enter IPHONE5 as the supplier product and enter 1.10 as the LC coefficient and
20.00 as the fixed cost per unit.
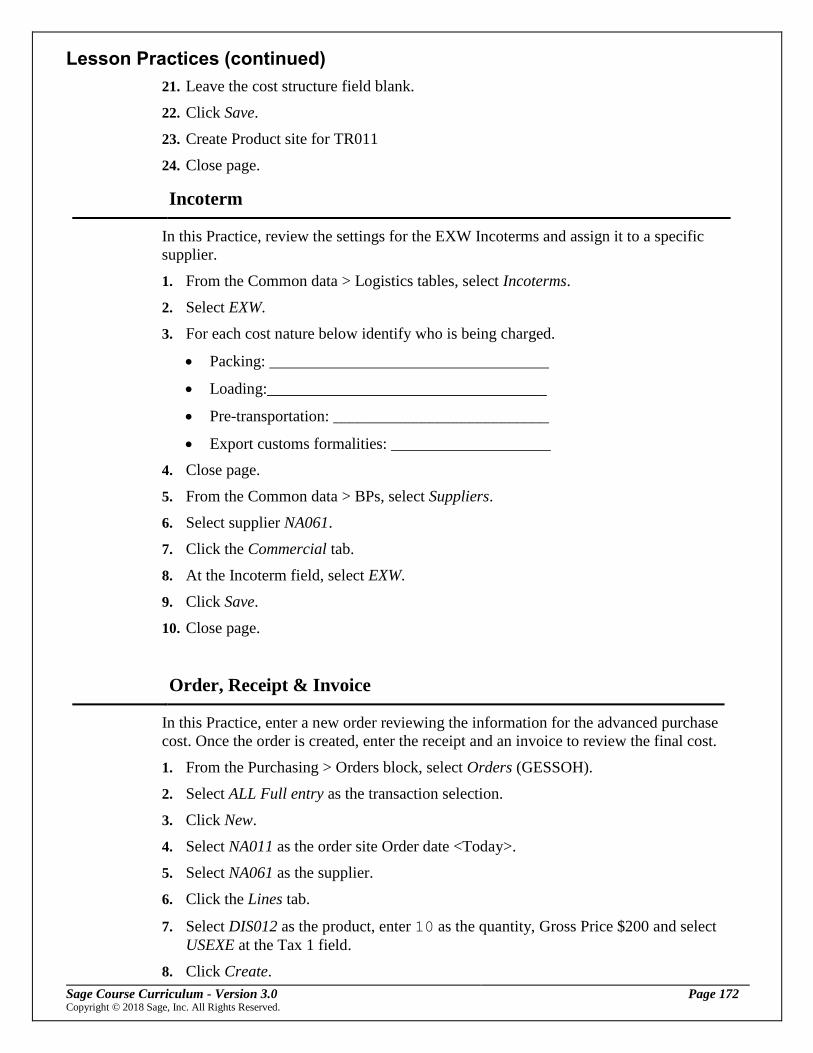
Sage Course Curriculum - Version 3.0 Page 172 Copyright © 2018 Sage, Inc. All Rights Reserved.
Lesson Practices (continued)
21. Leave the cost structure field blank.
22. Click Save.
23. Create Product site for TR011
24. Close page.
Incoterm
In this Practice, review the settings for the EXW Incoterms and assign it to a specific
supplier.
1. From the Common data > Logistics tables, select Incoterms.
2. Select EXW.
3. For each cost nature below identify who is being charged.
Packing: ___________________________________
Loading:___________________________________
Pre-transportation: ___________________________
Export customs formalities: ____________________
4. Close page.
5. From the Common data > BPs, select Suppliers.
6. Select supplier NA061.
7. Click the Commercial tab.
8. At the Incoterm field, select EXW.
9. Click Save.
10. Close page.
Order, Receipt & Invoice
In this Practice, enter a new order reviewing the information for the advanced purchase
cost. Once the order is created, enter the receipt and an invoice to review the final cost.
1. From the Purchasing > Orders block, select Orders (GESSOH).
2. Select ALL Full entry as the transaction selection.
3. Click New.
4. Select NA011 as the order site Order date <Today>.
5. Select NA061 as the supplier.
6. Click the Lines tab.
7. Select DIS012 as the product, enter 10 as the quantity, Gross Price $200 and select
USEXE at the Tax 1 field.
8. Click Create.

Sage Course Curriculum - Version 3.0 Page 173 Copyright © 2018 Sage, Inc. All Rights Reserved.
Lesson Practices (continued)
9. Click the Actions icon for the line and select Cost structure detail.
10. Using what you have documented so far on the calculations used for the costs listed,
explain the calculated costs.
COST001:_______________________________________________________
COST002: _______________________________________________________
COST003: _______________________________________________________
COST004: _______________________________________________________
11. Remove the cost for COST004 by entering 0.00 at the Adjusted tax excl amt field.
12. Click Save.
13. You are automatically returned to the order.
14. Click Save.
15. Click the Cost Detail tab.
16. Review the information for the costs calculated.
17. What is the Stock Cost? ______________________________________________
18. What is the Purchase Cost? ___________________________________________
19. Why are they the same? ______________________________________________
20. Click New to create a new order.
21. Select TR011 as the order site, Order Date <Today>, and select NA061 as the
supplier.
22. Click the Lines tab
23. Select DIS013 as the product and close the requirements to consider page displayed.
24. Enter 10 as the quantity, Gross price $400 and select NAEXE at the Tax 1 field.
Why are you able to access such fields as the LE coefficient field?
______________________________________________________________
25. Click Create.
26. Click the Action icon for the line and select Line Cost.
27. Click the Cost Detail tab.
28. Review the information for the costs calculated.
29. What is the Stock Cost? _____________________________________________
30. What is the Purchase Cost? __________________________________________
31. Why are they the same? _____________________________________________
32. Close page for the Line cost page.
33. Close page.
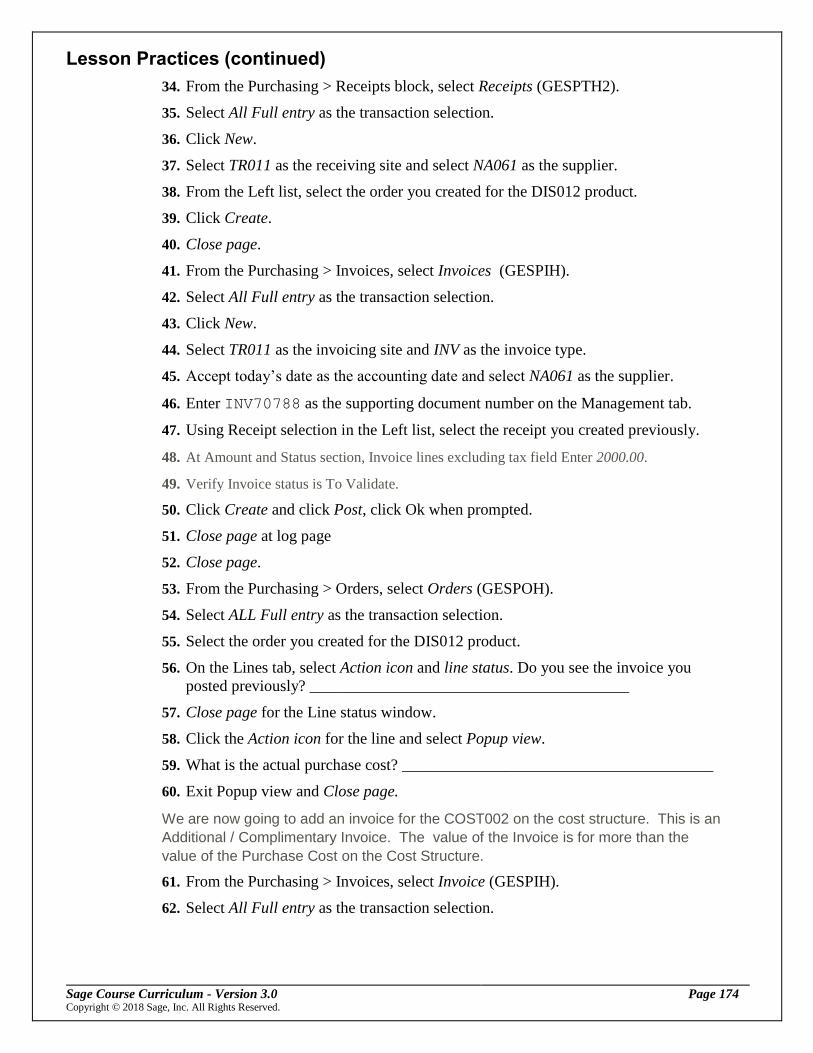
Sage Course Curriculum - Version 3.0 Page 174 Copyright © 2018 Sage, Inc. All Rights Reserved.
Lesson Practices (continued)
34. From the Purchasing > Receipts block, select Receipts (GESPTH2).
35. Select All Full entry as the transaction selection.
36. Click New.
37. Select TR011 as the receiving site and select NA061 as the supplier.
38. From the Left list, select the order you created for the DIS012 product.
39. Click Create.
40. Close page.
41. From the Purchasing > Invoices, select Invoices (GESPIH).
42. Select All Full entry as the transaction selection.
43. Click New.
44. Select TR011 as the invoicing site and INV as the invoice type.
45. Accept today’s date as the accounting date and select NA061 as the supplier.
46. Enter INV70788 as the supporting document number on the Management tab.
47. Using Receipt selection in the Left list, select the receipt you created previously.
48. At Amount and Status section, Invoice lines excluding tax field Enter 2000.00.
49. Verify Invoice status is To Validate.
50. Click Create and click Post, click Ok when prompted.
51. Close page at log page
52. Close page.
53. From the Purchasing > Orders, select Orders (GESPOH).
54. Select ALL Full entry as the transaction selection.
55. Select the order you created for the DIS012 product.
56. On the Lines tab, select Action icon and line status. Do you see the invoice you
posted previously? ________________________________________
57. Close page for the Line status window.
58. Click the Action icon for the line and select Popup view.
59. What is the actual purchase cost? _______________________________________
60. Exit Popup view and Close page.
We are now going to add an invoice for the COST002 on the cost structure. This is an
Additional / Complimentary Invoice. The value of the Invoice is for more than the
value of the Purchase Cost on the Cost Structure.
61. From the Purchasing > Invoices, select Invoice (GESPIH).
62. Select All Full entry as the transaction selection.

Sage Course Curriculum - Version 3.0 Page 175 Copyright © 2018 Sage, Inc. All Rights Reserved.
Lesson Practices (continued)
63. Click New.
64. Select TR011 as the invoicing site and CMP as the invoice type.
65. Accept today’s date as the accounting date and select NA053 as the supplier.
66. Enter IN12345 as the supporting document number on the Management tab.
67. On the lines tab – Action button on the line – Pre-loading the lines
68. Amount-tax $1000,uncheck the New cost field, Cost is COST002.
69. Order Selection from the left list, choose the order line for DIS012, if you don’t
remember the order number, search for today’s date. OK.
70. Management Tab. At Amount and Status section, Invoice lines excluding tax field
Enter 1000.00.
71. Click Create.
72. Click Post.
73. On the Purchase Order check the Actual Cost, has it changed? ________________
74. We need to run batch process to update the cost. This process can be set as a
recurrring task.
75. Usage> Batch Server, select Query Submission (EXERQT)
76. Task Code, STCREG. Language, ENG. Date <Today>. Validation
77. What is the actual purchase cost in the Purchase Order? ______________________
78. Why is this the new value? _____________________________________________
Create a purchase order from what you have learned
In this Practice, you will:
1. Choose a product and enter a base price for the product at Common Data >
products> supply tab > base price field. Note: remember the price books are not
used.
2. Review the products by supplier function at Purchasing > inquiries > products by
supplier.
3. Create a purchase order. Use Enterprise planning to create the order.
4. Choose the buyer transaction.
5. Select a product to buy COM911, for example.
6. Click the Action icon of the line to run the grouping function.
7. Exclude all lines but the first.
8. Enter order quantity at 1000 units ea.
9. Add a container for example 40D.
10. Pick a number of containers - just enough to hold your items - 20 containers.
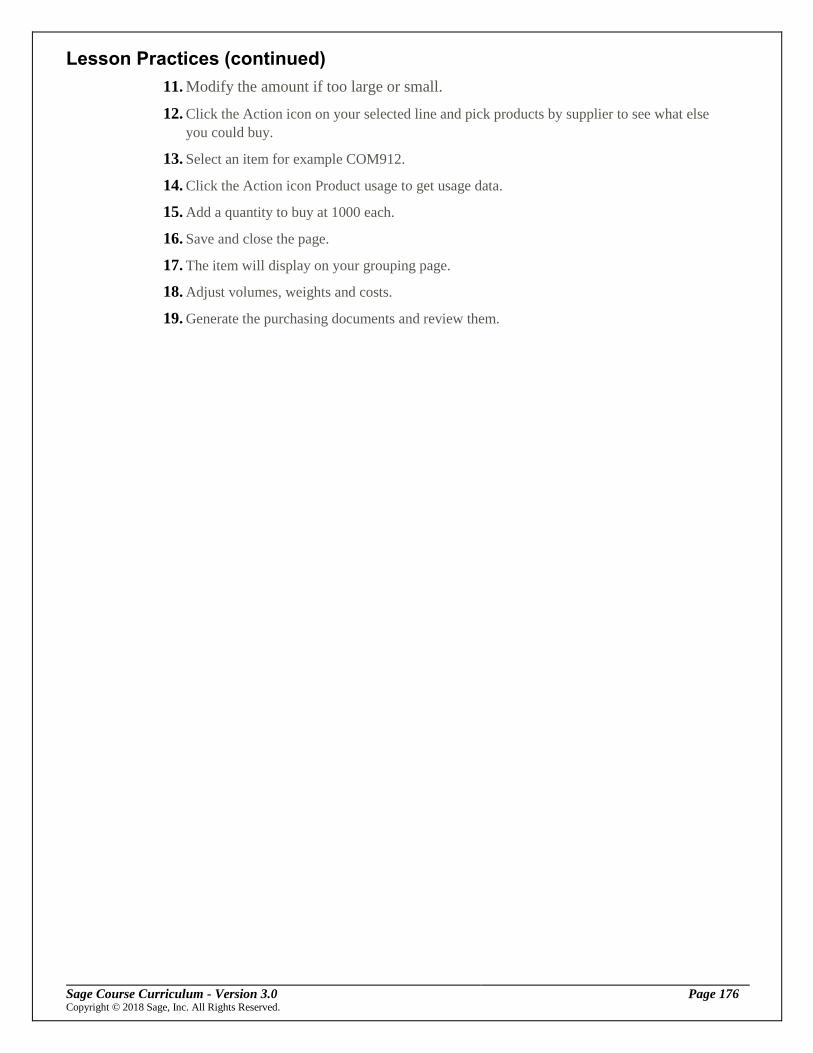
Sage Course Curriculum - Version 3.0 Page 176 Copyright © 2018 Sage, Inc. All Rights Reserved.
Lesson Practices (continued)
11. Modify the amount if too large or small.
12. Click the Action icon on your selected line and pick products by supplier to see what else
you could buy.
13. Select an item for example COM912.
14. Click the Action icon Product usage to get usage data.
15. Add a quantity to buy at 1000 each.
16. Save and close the page.
17. The item will display on your grouping page.
18. Adjust volumes, weights and costs.
19. Generate the purchasing documents and review them.

Sage Course Curriculum - Version 3.0 Page 177 Copyright © 2018 Sage, Inc. All Rights Reserved.
Lesson 9 Purchasing Three-Way Matching
In the following topics, you will learn how to set up purchasing three-way matching
capabilities. Three-way matching allows you to match the purchase order, receipt, and
invoice based on parameters you define, and works as an extension to the existing
purchasing controls.
The topics in this lesson include:
Three-Way Matching Overview
Matching Tolerance Codes
Transaction Entries for Matching
Assigning Default Tolerance Codes
Three-Way Matching Process

Sage Course Curriculum - Version 3.0 Page 178 Copyright © 2018 Sage, Inc. All Rights Reserved.
Three-Way Matching Overview
Three-way matching allows you to control the amount and the percent receipts and
invoices can deviate from the original purchase order created.
Receipts and invoices are matched to the original purchase order based on the
tolerance codes selected.
Tolerance codes determine the actual amount and percent a receipt or invoice can
deviate from the original purchase order entered.
It is important to note that the three-way mating process works as an extension to
the purchasing controls that already exist and will not override or change the
behavior of existing parameters and controls.
- For example, the POHVLE and RCPORD parameters will not change.
Before defining tolerance codes, it is important to consider the following:
- Do you want to use the tolerance matching logic?
- What type of tolerance checks will be used?
- How many codes are required and what are the thresholds?
- At what level (supplier, product, supplier-product) are the tolerance codes to be
assigned?
- For each tolerance, what is the desired action?
- Will you allow the tolerance code be edited on the purchase order?
- What users are authorized to unblock an invoice?
- Will you use the PIBLKPO parameter to force invoice loading from receipts?

Sage Course Curriculum - Version 3.0 Page 179 Copyright © 2018 Sage, Inc. All Rights Reserved.
Three-Way Matching Overview (continued)
Purchase invoice line loading restriction
In order for three-way matching to work successfully, there is a parameter for
determining how lines are loaded on an invoice. The option selected, determines if true
three-way matching is performed between the order, receipt, and invoice.
The PIBLKR parameter is under the ACH chapter and the INV group.
The Options available include:
- No restriction: The line can be loaded from with a receipt or order: regardless if
the corresponding receipt has been processed or not.
- Load from PO if no receipt exists: The line is only loaded from the receipt
when the receipt has been processed against the purchase order. The only time
the line can be loaded from the PO line is when the corresponding receipt does
not exist at the time of invoicing. This allows the parameter to work for Pos that
have slip or prepaid payment terms. PO lines that are back-to-back are not
blocked as they are not received.
- Load from receipt only: The line is always loaded from the receipt: regardless
if the receipt has been processed. This is for lines that are for products with the
received check box selected. This enforces the user to always process receipts
before invoicing, which ensure the real three-way matching.

Sage Course Curriculum - Version 3.0 Page 180 Copyright © 2018 Sage, Inc. All Rights Reserved.
Matching Tolerance Codes
Use Matching tolerance (GESMAT) in the Setup > Purchasing to define the amount or
percent the receipt or invoice can deviate from the original purchase order created.
Tolerance codes are defined for the complete purchase order and individual line items.
For each tolerance code, you define:
- The amount or percent the total invoice amount cannot exceed or fall below
based on the original purchase order.
- The amount or percent the extended line amount cannot exceed or fall below
based on the original purchase order.
- The quantity or percent of the total quantity received for a product cannot
exceed or fall below based on the original purchase order.
- The maximum number of days early or late you can receive the shipment.
Receipts tab
Use the Receipts tab to determine the quantity or percentage the quantity received
during the receipt process cannot exceed or fall below the original purchase order. You
can also determine the minimum and maximum number of days before or after the
expected receipt date you can enter a receipt.
In each section, you determine if it is controlled by selecting the Control check box.
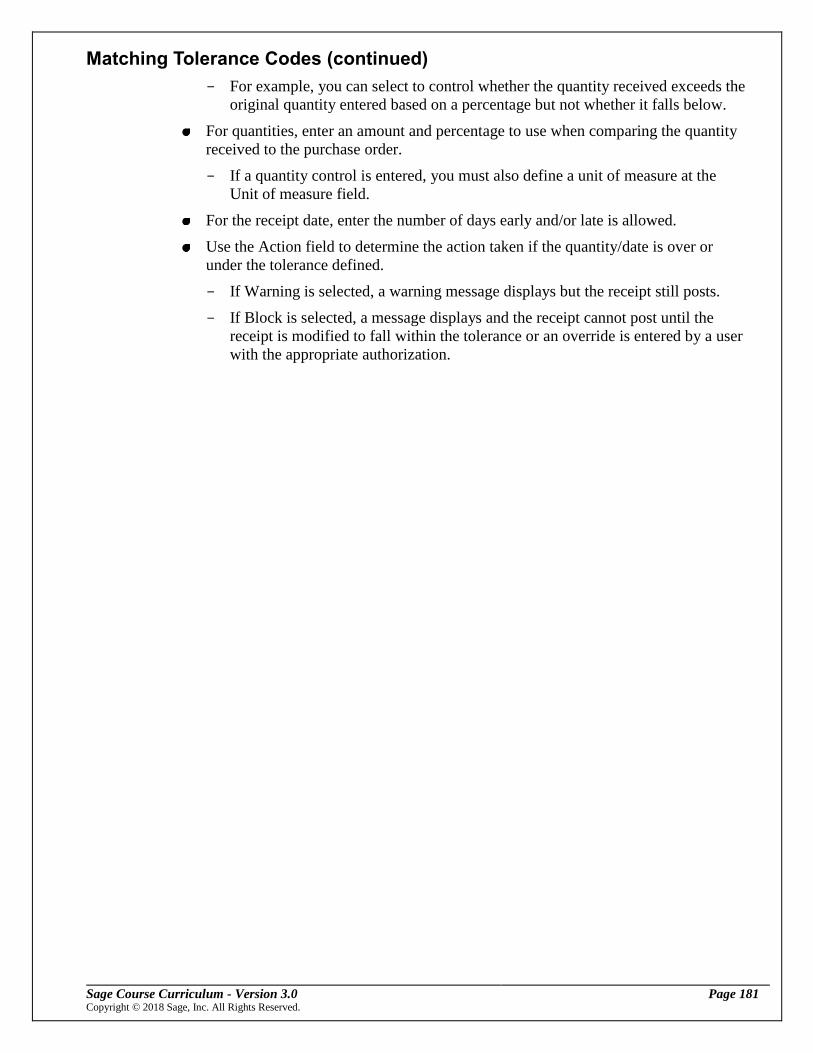
Sage Course Curriculum - Version 3.0 Page 181 Copyright © 2018 Sage, Inc. All Rights Reserved.
Matching Tolerance Codes (continued)
- For example, you can select to control whether the quantity received exceeds the
original quantity entered based on a percentage but not whether it falls below.
For quantities, enter an amount and percentage to use when comparing the quantity
received to the purchase order.
- If a quantity control is entered, you must also define a unit of measure at the
Unit of measure field.
For the receipt date, enter the number of days early and/or late is allowed.
Use the Action field to determine the action taken if the quantity/date is over or
under the tolerance defined.
- If Warning is selected, a warning message displays but the receipt still posts.
- If Block is selected, a message displays and the receipt cannot post until the
receipt is modified to fall within the tolerance or an override is entered by a user
with the appropriate authorization.

Sage Course Curriculum - Version 3.0 Page 182 Copyright © 2018 Sage, Inc. All Rights Reserved.
Matching Tolerance Codes (continued)
Invoices tab
Use the Invoices tab to determine the quantity or percent the quantity received during
the invoicing process cannot exceed or fall below the original purchase order. You can
also determine the amount or percent the total extended line amount and/or invoice total
cannot exceed or fall below.
Modifying tolerance codes
If you modify a tolerance code and it is currently in use, a message displays indicating
that updating the code may change the match status on existing transactions; however,
you can proceed.
You cannot delete a tolerance code if it is assigned to a common data element or
currently in use on a transaction.

Sage Course Curriculum - Version 3.0 Page 183 Copyright © 2018 Sage, Inc. All Rights Reserved.
Transaction Entries for Matching
Several transaction entry functions allow for the display of matching features.
Purchase entry transactions
For order entry transactions (Setup > Purchasing > Entry transactions > Orders), a
Matching tolerance field determines if a user has access to the tolerance code on the
purchase order line.
You cannot delete a tolerance code if it is assigned to a common data element or
currently in use on a transaction.

Sage Course Curriculum - Version 3.0 Page 184 Copyright © 2018 Sage, Inc. All Rights Reserved.
Transaction Entries for Matching (continued)
Receipt entry transactions
For receipt entry transactions (Setup > Purchasing > Entry transactions > Receipts),
several fields allow for the display of matching features.
Select the Match status / results check box on the Parameter Definition tab to add a
field at the bottom of the receipt displaying all match blocking and warning
messages, as well as a match status field on the receipt lines.
The Matching tolerance field on the Line 1 tab controls a user’s ability to modify the
tolerance code assigned to a receipt line.

Sage Course Curriculum - Version 3.0 Page 185 Copyright © 2018 Sage, Inc. All Rights Reserved.
Transaction Entries for Matching (continued)
Invoices / credit memos entry transactions
For invoices/credit memos entry transactions (Setup > Purchasing > Entry transactions
> Invoices), several fields allow for the display of matching features.
Selecting the Match status / results check box adds several new fields to the
purchase invoice.
- A match status is displayed on the Header next to the current status, Match
status on the invoice line next to the Matching tolerance field, and a Match
results button at the bottom of the screen to display all match
blockings/warnings.
- This check box is not applicable for credit invoices and is not accessible when
processing an invoice credit.
The Matching tolerance field on the Line tab controls a user’s ability to modify the
tolerance code assigned to an invoice line.

Sage Course Curriculum - Version 3.0 Page 186 Copyright © 2018 Sage, Inc. All Rights Reserved.
Assigning Default Tolerance Codes
After tolerance codes are defined, you can assign a default to a supplier, product, and
product/supplier combination.
You can optionally define a default tolerance code in the following functions.
Suppliers:
- Defined in the Miscellaneous section on the Management tab.
- You can also define a default tolerance code for the supplier category in the
Supplier Categories function on the Commercial tab.
Products:
- Defined in the Purchasing section on the Repl tab. This is used for the overall
product.
- You can define a specific product/supplier combination tolerance code when
defining supplier information on the Suppliers tab.
- You can also define a default tolerance code for the product category in the
Product Categories functions on the Purchase/sales tab.
The system first looks for a product/supplier tolerance code, then a product
tolerance code, and finally a supplier tolerance code.
If no defaults are defined, the field is left blank and it is based on the setup of entry
transaction as to whether a user can modify or select the tolerance code during data
entry.

Sage Course Curriculum - Version 3.0 Page 187 Copyright © 2018 Sage, Inc. All Rights Reserved.
Three-Way Matching Process
This topic provides information on how the three-way matching process works starting
with the order, followed by a receipt, and finally the invoice.
Order
Based on settings defined for the order entry transaction, you can view and/or modify
the default tolerance code on the Lines tab for each product selected.
The tolerance code selected is used when matching the receipt and/or invoice to the
order.

Sage Course Curriculum - Version 3.0 Page 188 Copyright © 2018 Sage, Inc. All Rights Reserved.
Three-Way Matching Process (continued)
Receiving items
When receiving items from an order, the tolerance code is reviewed and the line is
compared to the original order line.
Lines that are not within the tolerance defined are indicated by orange when a match
error occurs and in blue when a match warning occurs.
A match status is also displayed for each line. There are five possible values:
- Not applicable: No matching has been performed. This can occur if a tolerance
code was not defined for the line on the order or if it is a direct receipt line.
- Successful: Matching returned no warning or blocking.
- Warning: One or more match warning exists for the line, but no blocking.
- Blocked: One or more match blocking exists for the line.
- Unblocked: One or more match blocking existed for the line before they were
overridden by a user.
- The match status can also be viewed when reviewing the Line Status
information.

Sage Course Curriculum - Version 3.0 Page 189 Copyright © 2018 Sage, Inc. All Rights Reserved.
Three-Way Matching Process (continued)
Match results
If you selected the Match status/results checkbox when defining the Receipts entry
transaction, the Match results button displays at the bottom of the Receipts window.
Each line item that has a warning or blocked status displays.
For each line item, you can view the description, variance, tolerance, and quantity
and date information.
Warning and blocked statuses
If only a Warning status appears for any line item on the receipt, you will receive a
message indicating there is a warning; however, you have the option to continue.
You cannot create a receipt if one or more line items have a Blocked status. You
must either modify the information entered to change the tolerance code to a less
restrictive one for the blocked line item.
- The ability to change the tolerance code is controlled by the Receipts entry
transaction.

Sage Course Curriculum - Version 3.0 Page 190 Copyright © 2018 Sage, Inc. All Rights Reserved.
Three-Way Matching Process (continued)
Invoicing
Three-way matching at the invoice level is similar to what was discussed for receipts.
Unlike the receipt blocking, you can create a purchase invoice that contains blocking;
however, you cannot validate the invoice.
It is important to keep in mind the setting that was defined for the PIBLKR
parameter. To achieve true three-way matching, you should be loading line items
from a receipt.
The status displays for each line item at the Match status field. You can also view
the status by reviewing the Line Details.
The statuses displayed are the same as those discussed for receipts.
Match results
If you selected the Match status/results checkbox when defining the Invoices / credit
memos entry transaction, the Match results button displays in the Right panel on the
Invoice window.
Each line item that has a warning or blocked status displays.
For each line item, you can view the description, variance, tolerance, quantity, price,
and date information.

Sage Course Curriculum - Version 3.0 Page 191 Copyright © 2018 Sage, Inc. All Rights Reserved.
Three-Way Matching Process (continued)
Warning and blocked statuses
If only a Warning status appears for any line item on the invoice, you will receive a
message indicating there is a warning; however, you have the option to continue.
This will allow you to create and post the invoice.
You can create an invoice regardless of the line item matching status; however, you
cannot post an invoice if one or more line items have a Blocked status.
Based on settings defined, you can optionally modify the information entered or
change the tolerance code to a less restrictive one for the blocked line item.
- The ability to change the tolerance code is controlled by the Invoice / credit
memo entry transaction.
It is important to note that the Post button is disabled if there is a Blocked status
even when the invoice status is set to “To Confirm”.
If the invoice is not balanced and will be suspended, the suspend status will take
precedence over the Blocked status.
Unblock matching error
The Unblock matching error option was added to the Function menu and is available
after the invoice is created. This option allows you to unblock any blocked line items for
continuing processing.
If the line item is changed after it is unblocked, the matching process is run again
and if matching issues arise the same line item can be blocked again.
If blocked line items are unblocked, the Match status field displays Unblocked.
You must have the appropriate security definition defined (function profile) to have
access to this option.

Sage Course Curriculum - Version 3.0 Page 192 Copyright © 2018 Sage, Inc. All Rights Reserved.
Lesson 11 Bill of Lading
In the following topics, you will learn about Allergens and the allergen setup process.
The topics in this lesson include:
Learn what a Bill of Lading is and how it is used
Learn about the setup requirements
Identify BOL fields added to X3 functions to support shipping activity
Learn to setup essential information in the Freight Class and Freight Commodity
Code functions
Understand how the Deliveries function effects the BOL function
Develop the skill to create a BOL for a delivery/supplier return
Learn how to view a BOL after it is created an the restrictions on modifications that
can be made
Lesson Practices

Sage Course Curriculum - Version 3.0 Page 193 Copyright © 2018 Sage, Inc. All Rights Reserved.
Understanding the Bill of Lading
The Bill of Lading (BOL) is a legal document establishing contract terms between a
shipper and a transportation company.
The BOL function:
Creates a BOL document that is required by truck carriers to transport goods
(deliveries).
Lists freight class, description of contents, number of packages, weights, volume,
and other shipping/delivery information.
Summarizes delivery information and prints the BOL form to be given to a carrier.

Sage Course Curriculum - Version 3.0 Page 194 Copyright © 2018 Sage, Inc. All Rights Reserved.
Understanding the BOL (continued)
BOL Business Flow Information
The BOL forms are created and attached to deliveries (Sales activity) or supplier
returns (Purchasing activity).
For sales deliveries, detail lines are created from delivery lines or packages, if a
package is created.
Shippers can also create ad-hoc BOL.
Ad-hoc BOL’s are used to manage shipments of non-stock products (e.g. catalogues,
marketing materials, samples, etc.)
The BOL also serves as a receipt of shipment when goods are delivered to the
predetermined destination.
If a BOL is required, the work flow changes to include the generation/attachment
and printing of the BOL. See the example below.

Sage Course Curriculum - Version 3.0 Page 195 Copyright © 2018 Sage, Inc. All Rights Reserved.
Understanding the BOL (continued)
Bill of Lading Setup Information
The BOL requires the setup of sequence numbers, carrier codes, freight class and
commodity information. This sections describes the setup for each of these BOL
features.
Setup > General Parameters > Sequence number definition.
Two sequence number definitions must be configured.
BOL created with no legislation – Based off customer delivery (SDH)
NABOL created with USA legislation – Based of customer delivery (NASHP)
- Setup > General Parameters > Assignment
A line defining sequence to use for generating BOL document must be set in the
Common Data chapter/module assignments.
- Common data > BPs > Carriers
A SCAC code (Standard carrier alpha code) field on the Carrier Identity tab should
be complted.
- It is used to enter SCAC for the transportation company and printed on BOL
form
- SCAC Codes are defined by National Motor Freight Traffic Association, Inc
(NMFTA)
- The SCAC Field is only available if activity code KUS and the USABOL
parameter are set to Yes. Entering information in this field is optional
A field added to the entry transaction that controls deliveries determins if the BOL
fields are displayed or hiden when using the delivery funcition. The field is on the
header tab of the Delivery entry transaction Entry Mode block. The BOL Number
and the Trailer Seal number appear based on the transacction code.
If the KUS activity code is set to “Yes” the SCAC code and the PRO number are
displayed.

Sage Course Curriculum - Version 3.0 Page 196 Copyright © 2018 Sage, Inc. All Rights Reserved.
Understanding the BOL (continued)
Freight Class Code Setup
The freight class code defines the free class on the bill of lading. Freight classes are
designed to help shippers get common standardized freight pricing for a shipment when
working with various carriers in North America. There are 18 freight classes defined by
the National Motor Freight Traffic Association (NMFTA).
The code is assigned to the project site record and used when creating a bill of lauding
detail line.
Products and goods are categorized based on the following criteria:
- Weight
- Length
- Height
- Density
- Ease of handling
- Value
- Liability related to theft, damage, sensitivity to shock, spoilage
Freight classes can be managed, set up and edited using the function shown below.
- Common data > Common tables > Freight class (GESFRT)
Freight Class Code - Can be assigned to a product category and product-site record.
Legislation - Limits the use of freight class to a specific legislation.
Active - Specifies if freight class is active.
Description - Long title used on screens and reports.
Short description - Short title used in screens and reports Can be translated and it is
recorded in the connection language of user
Group - Used to assign to the site/company groups available

Sage Course Curriculum - Version 3.0 Page 197 Copyright © 2018 Sage, Inc. All Rights Reserved.
Understanding the BOL (continued)
Freight Commodity Code Setup
The freight commodity code is defined for each type of product shipped by a carrier. In
North America the national motor freight codes is the freight commodity code assigned
to a product and used for domestic freight shipments.
The products NMFC code identifies the freight class and the freight class determines
the carrier shipping charges.
The NMFTA provides the NMFC code to use in a bill of lading. At this time, only
NMFC types are supported.
- The path is: Common data > Common tables > Freight commodity code
(GESFCC).
Freight Commodity Code- Can be assigned to a product category and product
Type - Displays the NMFC commodity type
Active - Specifies if freight commodity code is active
Description - Long title used on screens and reports
Short description - Short title used in screens and reports and can be translated and it
is recorded in the connection language of user

Sage Course Curriculum - Version 3.0 Page 198 Copyright © 2018 Sage, Inc. All Rights Reserved.
Understanding the BOL (continued)
Freight Codes Setup
The freight commodity code and the freight class code should be added to each product
category and each product site record.
When a product site record is created for a product the codes for the product site
record are defaulted from the codes entered on the product category record.
Add the codes to the Bill Of Lading block on Management tab of the product
category.
Freight class: Serves as default when creating new product-site records.
If product category is defined at site level, legislation associated with the freight
class must be blank or match site legislation.
NMFC: Serves as default when creating new product-site records.
In North America the national motor freight codes is the freight commodity code
assigned to a product and used for domestic freight shipments. The products NMFC
code identifies the freight class.

Sage Course Curriculum - Version 3.0 Page 199 Copyright © 2018 Sage, Inc. All Rights Reserved.
Understanding the BOL (continued)
Creating a Bill of Lading
A Bill of Lading is made up of one or more deliveries. The BOL has 2 sections. The
header containing basic shipping information and the details listing information about
each shipment included on the BOL.
The detail section has 2 tabs. The first tab labeled “Detail” lists the information
about deliveries included on the bill. The second tab labeled “Content” lists the
content detail.
Freight commodity code and the freight class code should be added to each product
category and each product site record.
When a product site record is created for a product the codes for the product site
record are defaulted from the codes entered on the product category record.
Add the codes to the Bill Of Lading block on Management tab of the product
category.
There are two paths to create a BOL. The most common is part of the sales module
and is used in the sales order fulfillment process. The path is:
- Sales > Deliveries > Bill of lading
It is also possible to create a BOL in the course of returning a product to a supplier.
For purchase returns the path to create a BOL is:
- Purchasing > Returns > Bill of lading
The BOL document consists of a header section and contains two tables each in a
tab. The header section is shown below.
Bill of Lading Header
Site
Enter the shipping site where the deliveries will be consolidate on to the bill of
lading
Company
Displays the company associated with the site
BOL type
Used to select the type of BOL
Choices include: Customer, Supplier, and Miscellaneous
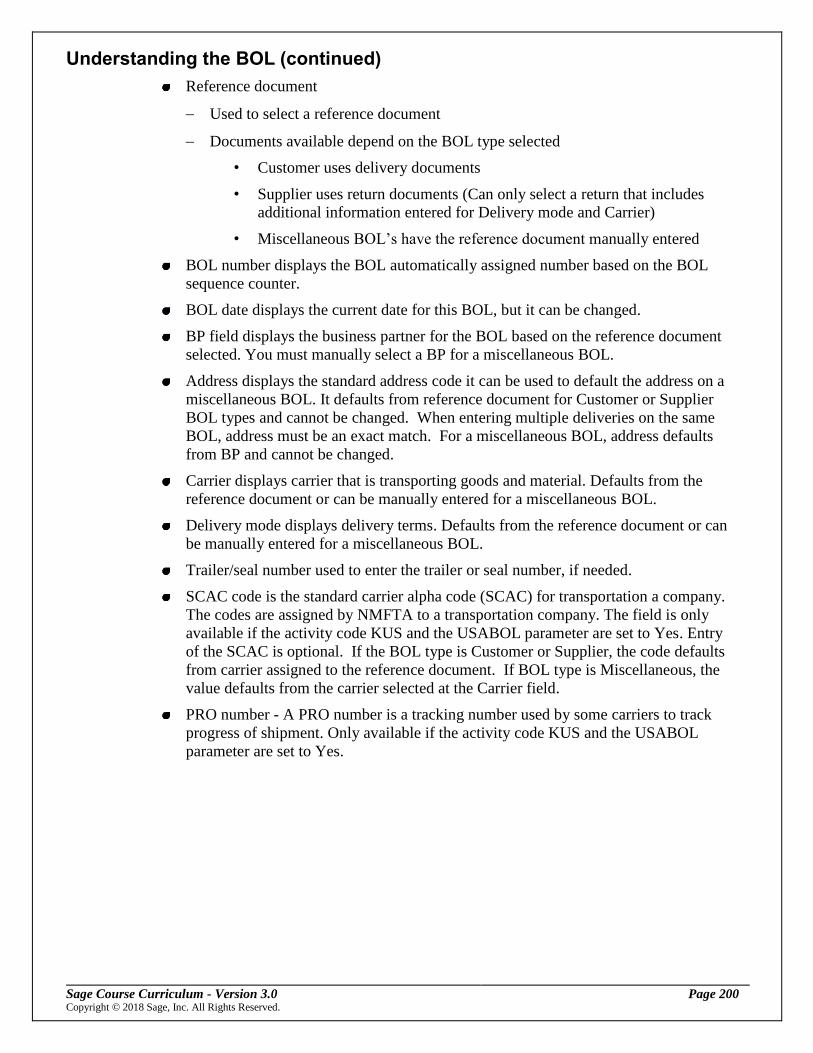
Sage Course Curriculum - Version 3.0 Page 200 Copyright © 2018 Sage, Inc. All Rights Reserved.
Understanding the BOL (continued)
Reference document
Used to select a reference document
Documents available depend on the BOL type selected
• Customer uses delivery documents
• Supplier uses return documents (Can only select a return that includes
additional information entered for Delivery mode and Carrier)
• Miscellaneous BOL’s have the reference document manually entered
BOL number displays the BOL automatically assigned number based on the BOL
sequence counter.
BOL date displays the current date for this BOL, but it can be changed.
BP field displays the business partner for the BOL based on the reference document
selected. You must manually select a BP for a miscellaneous BOL.
Address displays the standard address code it can be used to default the address on a
miscellaneous BOL. It defaults from reference document for Customer or Supplier
BOL types and cannot be changed. When entering multiple deliveries on the same
BOL, address must be an exact match. For a miscellaneous BOL, address defaults
from BP and cannot be changed.
Carrier displays carrier that is transporting goods and material. Defaults from the
reference document or can be manually entered for a miscellaneous BOL.
Delivery mode displays delivery terms. Defaults from the reference document or can
be manually entered for a miscellaneous BOL.
Trailer/seal number used to enter the trailer or seal number, if needed.
SCAC code is the standard carrier alpha code (SCAC) for transportation a company.
The codes are assigned by NMFTA to a transportation company. The field is only
available if the activity code KUS and the USABOL parameter are set to Yes. Entry
of the SCAC is optional. If the BOL type is Customer or Supplier, the code defaults
from carrier assigned to the reference document. If BOL type is Miscellaneous, the
value defaults from the carrier selected at the Carrier field.
PRO number - A PRO number is a tracking number used by some carriers to track
progress of shipment. Only available if the activity code KUS and the USABOL
parameter are set to Yes.

Sage Course Curriculum - Version 3.0 Page 201 Copyright © 2018 Sage, Inc. All Rights Reserved.
Understanding the BOL (continued)
Bill of Lading Edits and Printing
The printed flag is automatically checked when the BOL is printed. If edits are made
to the BOL after it is printed, the check box is automatically cleared. You must
reprint the BOL before the system will select the Printed check box.
The manual adjustment check box is checked if edits are made to the BOL after it is
printed, the system automatically selects this check box. This warns the user that
changes may have created inconsistencies between the BOL and the document
linked to the BOL and that the BOL should be re-printed.
Bill of Lading Detail Tab
Detail Tab Information is summarized by grouping the freight class, package, and
NMFC code as defined in the table on following slide.
Bill of Lading Summarization Principals
The BOL organizes and consolidates information from multiple deliveries into a
single document to be handled buy a carrier. When Sage X3 deliveries are added to
a BOL each product on the delivery is summarized by its freight class, package code
and NMFC, and added to the detail table of the BOL. Items that are not in the Sage
X3 product data need to be entered manually. Other lines being shipped and
delivered are grouped and summarized using the information associated with the
product on the delivery document. The table below shows how shipment details are
summarized on the BOL.

Sage Course Curriculum - Version 3.0 Page 202 Copyright © 2018 Sage, Inc. All Rights Reserved.
Understanding the BOL (continued)
Bill of Lading Summarized Detail Lines
The BOL detail line is shown below in two sections due to its length.
BOL Type Pack status
Summarization
Miscellaneous Not applicable
None. Lines must be manually entered.
Supplier Not applicable
Lines are grouped by the freight class, package, and NMFC code. The freight class, package, and NMFC code default from the product-site record of the products included in the supplier return. If one of these fields is not specified, then you must manually assign it on the bill of lading. The NMFC code is optional.
Customer Not packed
Lines are grouped by the freight class, package, and NMFC code. The freight class and NMFC code default from the product-site record. The package value defaults from the delivery line. If one of these fields is not specified, then you must manually assign it on the bill of lading. The NMFC code is optional.
Customer Packed
Lines are grouped by the freight class, package, and NMFC code. The freight class and NMFC code default from the product-site record. The package value defaults from the package entered when declared or after packing. If one of these fields is not specified, then you must manually assign it on the bill of lading. The NMFC code is optional.

Sage Course Curriculum - Version 3.0 Page 203 Copyright © 2018 Sage, Inc. All Rights Reserved.
Understanding the BOL (continued)
Freight class shows the freight class associated with the package. It defaults to
value on the product-site records with the reference document, but can be manually
entered.
NMFC field displays the NMFC code, it defaults to value on product-site record
associated with the reference document. It can be manually entered and is available
only if activity code KUS and the USABOL parameter set to Yes.
Package field displays package code from reference document or can be manually
entered for miscellaneous BOL. When entering a new package, the volume and
weight are converted to the global unit of measure and totals are recalculated.
No of packages displays the number of packages from reference document or can be
manually entered for miscellaneous BOL.
Package weight displays total package weight from reference document or can be
manually changed. It must be manually entered for miscellaneous BOL.
New weight displays net weight from reference document.
Gross weight displays gross weight from reference document.
Weight unit displays the weight unit of measure from reference document.
The Totals section at the bottom of the BOL
Displays the totals for information entered on the Details tab
Includes: Weight, Weight Unit, Volume, Volume unit, and Packages

Sage Course Curriculum - Version 3.0 Page 204 Copyright © 2018 Sage, Inc. All Rights Reserved.
Understanding the BOL (continued)
Bill of Lading Content Tab
The data that appears on this tab defaults from the reference document selected and
cannot be changed.
It includes the reference document number, document date, delivery date for
customer deliveries, and whether the delivery or return is validated.
Bill of Lading Right Panel Controls
Options in Right panel offer additional features of the function. Text can be added
at the header and the footer and the user can search for additional deliveries to be
added to the BOL.
BOL header text – Use this function to enter a BOL header text that will print on
the BOL form
BOL footer text – Use this function to enter a BOL footer text that will print on
the BOL form
Additional deliveries – Use this function to find and display additional deliveries
to include on the BOL
• Deliveries must match all grouping criteria of the reference document,
including the address
Bill of Lading Printing
Report details include the date, ship from/to, third party freight charges, bill to,
special instructions, BOL number, carrier information, SCAC and PRO number,
freight terms, customer order information, and carrier handling information.
SCAC and PRO number print only if the activity code KUS and the USABOL
parameter are set to Yes
If number of detail lines causes overflow, supplemental page is created, which
include all summarized lines and grid on the first page is blank.

Sage Course Curriculum - Version 3.0 Page 205 Copyright © 2018 Sage, Inc. All Rights Reserved.
Understanding the BOL (continued)
Once printed, the user can view BOL for the appropriate reference document in the
Deliveries and Returns functions. This new button provides additional BOL controls
in the delivery and returns functions. It is accessed by selecting the appropriate
reference document and selecting Bill of lading under Options in Right panel.
Bill of Lading Modifications and Deletions
Deleting or modifying components of a BOL affects all of the documents that may
be associated with it or linked to it.
deleting a package associated with a delivery linked to a BOL will cause an error
message
If you modify a package tied to a BOL, a warning message appears indicating
the package is tied to a BOL
If you perform maintenance actions that can impact the integrity of a BOL, a
warning message appears indicating the package is tied to a BOL
Bill of Lading Return Processing
When returning material to a supplier using a BOL if a deletion is required it must
be done from the Contents Tab. Deleting a BOL can impact other deliveries
included in the BOL. If this is done, an error message including the BOL also
displays when deleting a return associated with a BOL.
If you modify a document tied to a BOL, a warning message appears indicating
the shipment is tied to a BOL
You cannot delete a supplier bill of lading from supplier returns if the return is
validated
- You must delete the BOL directly in the Bill of lading function

Sage Course Curriculum - Version 3.0 Page 206 Copyright © 2018 Sage, Inc. All Rights Reserved.
Lesson Practices
Complete the following lesson practices in the order shown.
BOL creation as part of the order fulfilment process.
In this exercise, you will review the freight and commodity setup, create at least 2
deliveries with similar requirements and create a BOL.
1. Review the freight class code listing. Do not add or change them. All possible
codes are setup.
2. In Common data > Common tables > select Freight class (GESFRT).
3. Review the freigh class code listings.
4. Close page.
5. Add 2 new commodity codes. The first code is 12345 Steel Products. The second
code is 99999 Wood Products.
6. In Common data > Common tables > select Freight commodity code (GESFCC).
7. Click New.
8. Enter 12345 in Commodity code field.
9. Enter Steel Products in Description and Steel Prod Short description field.
10. Click Create.
11. Click New.
12. Enter 99999 in Commodity code field.
13. Enter Wood Products in Description and Wood Prod Short description field.
14. Click Create.
15. Close page.
Placing codes on product site records
Select 2 products and place the codes on the product site records of each product. They
should both be in the same site. Use freight class code 100 with commodity code
12345 and freight class code 200 with commodity code 99999.
1. In Common data> Products > select Product-site (GESITF).
2. In left list select product TRBMS003 and in Stock site field TR012.
3. On Management tab, Bill of Lading section, Freight class field, select 100
4. In NMFC (Freight Commodity Code) field, select 12345.
5. Click Save.
6. Select product TRBMS999 and in Stock site field TR012.
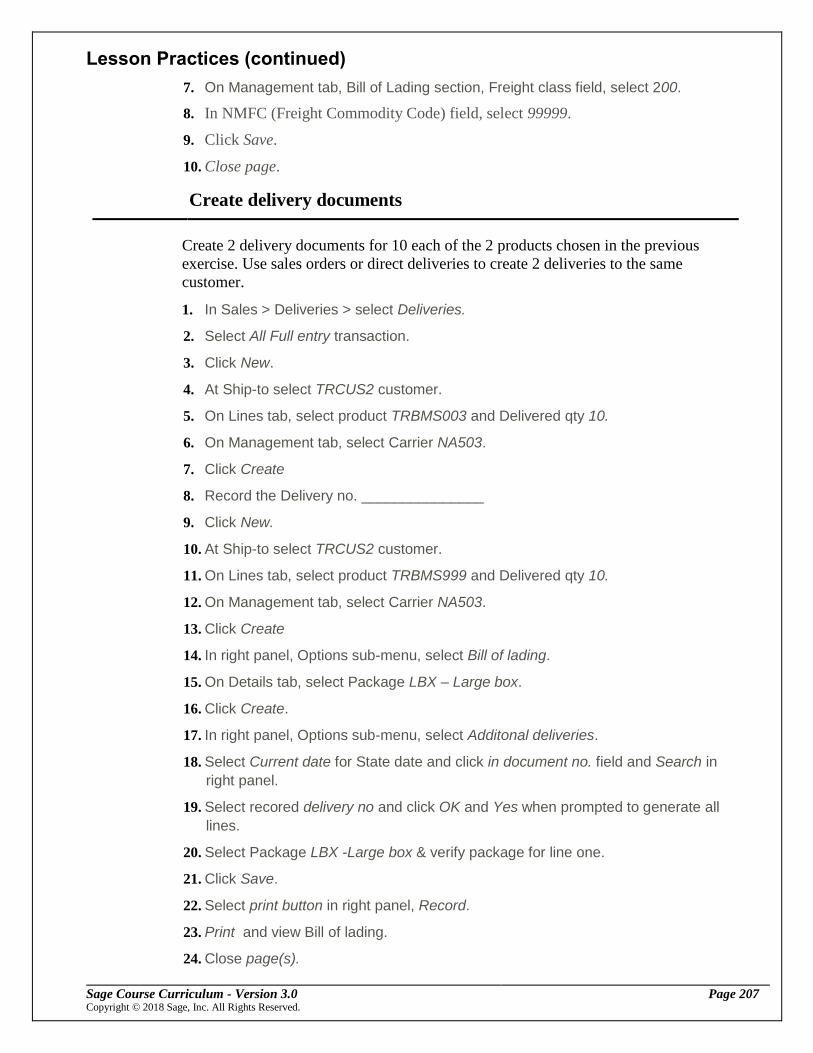
Sage Course Curriculum - Version 3.0 Page 207 Copyright © 2018 Sage, Inc. All Rights Reserved.
Lesson Practices (continued)
7. On Management tab, Bill of Lading section, Freight class field, select 200.
8. In NMFC (Freight Commodity Code) field, select 99999.
9. Click Save.
10. Close page.
11. Create delivery documents
Create 2 delivery documents for 10 each of the 2 products chosen in the previous
exercise. Use sales orders or direct deliveries to create 2 deliveries to the same
customer.
1. In Sales > Deliveries > select Deliveries.
2. Select All Full entry transaction.
3. Click New.
4. At Ship-to select TRCUS2 customer.
5. On Lines tab, select product TRBMS003 and Delivered qty 10.
6. On Management tab, select Carrier NA503.
7. Click Create
8. Record the Delivery no. _______________
9. Click New.
10. At Ship-to select TRCUS2 customer.
11. On Lines tab, select product TRBMS999 and Delivered qty 10.
12. On Management tab, select Carrier NA503.
13. Click Create
14. In right panel, Options sub-menu, select Bill of lading.
15. On Details tab, select Package LBX – Large box.
16. Click Create.
17. In right panel, Options sub-menu, select Additonal deliveries.
18. Select Current date for State date and click in document no. field and Search in
right panel.
19. Select recored delivery no and click OK and Yes when prompted to generate all
lines.
20. Select Package LBX -Large box & verify package for line one.
21. Click Save.
22. Select print button in right panel, Record.
23. Print and view Bill of lading.
24. Close page(s).

Sage Course Curriculum - Version 3.0 Page 208 Copyright © 2018 Sage, Inc. All Rights Reserved.
Summary
You have learned:
How to access and define settings specific to Inventory including defining stock
statuses, units of measure, packages, and understanding product lines.
How to define locations within a warehouse including defining the locations types
and specific locations.
How to define information necessary for creating products such as valuation
methods, stock management rules, and product categories.
How to enter transactions that include miscellaneous issues and receipts, inter-site
transfers, and assemble and disassemble a production bill of material.
How to use advanced purchase functions to foresee the purchase costs for
international imports using international standards (incoterm) or inland purchases
How to set up purchasing three-way matching capabilities, including matching the
purchase order, receipt, and invoice based on parameters you define.
How a Bill of Lading is used to create shipments
How to create and print a Bill of Lading

Sage Course Curriculum - Version 3.0 Page 209 Copyright © 2018 Sage, Inc. All Rights Reserved.
Visit Sage University for your training needs. www.SageU.com
© 2018 Sage Software, Inc. All rights reserved. Sage, the Sage logos, and the Sage product and
service names mentioned herein are registered trademarks or trademarks of Sage Software, Inc., or its
affiliated entities. All other trademarks are the property of their respective owner