deskjet ink advantage - welcome.hp-ww.comwelcome.hp-ww.com/ctg/manual/c03424258.pdf · deskjet ink...
TRANSCRIPT

DESKJET INK ADVANTAGE 6525 e-ALL-IN-ONE SERIES
SetupUnpack and power on your printer (see setup flyer), and then follow instructions and animations on the printer display to complete the printer setup.
ReadmeThe Readme file contains HP support contact information, operating system requirements, and the most recent updates to your printer information.Windows: Insert software CD. On software CD locate ReadMe.chm. Click ReadMe.chm to open and then select ReadMe in your language.Mac: Insert the software CD, and then double-click the Read Me folder located at the top-level of the software CD.
Ink UsageInk from the cartridges is used in the printing process in several ways, including in the initialization process, which prepares the printer and cartridges for printing, and in the printhead servicing process, which keeps print nozzles clear and ink flowing smoothly. In addition, some residual ink is left in the cartridge after it is used. For more information, go to: www.hp.com/go/inkusage.
Electronic HelpThe electronic Help is automatically installed during printer software installation. Electronic Help includes instructions on printer features and troubleshooting, with additional links to online content. It also provides printer specifications, legal notices, environmental, regulatory, and support information.Windows: After software installation, click Start > All Programs > HP > HP Deskjet 6520 series > Help.Mac: During software installation, on the screen showing recommended software, select HP Recommended Software, and then finish software installation. • Mac OS X v10.6: Choose Mac Help from Help. In the Help Viewer, click and hold the Home button, and
then choose the Help for your device. • Mac OS X v10.7: Choose Help Center from Help, click Help for all your apps, and then choose the Help
for your device.
To find the European Union Regulatory Notice statement and compliance information, go to the electronic Help, click Appendix > Technical information > Regulatory notices > European Union Regulatory Notice. The Declaration of Conformity for this printer is available at the following web address: www.hp.eu/certificates.
Register your printerGet quicker service and support alerts by registering at www.register.hp.com.
No CD/DVD drive?For computers without a CD/DVD drive, please go to www.hp.com/support to download and install the software.
*CZ276-90008**CZ276-90008*
CZ276-90008 © 2012 Hewlett-Packard Development Company, L.P.
Printed in [English]
ZHCN THEN ID
Printed in [Simplified Chinese]
Engl
ish

2
14
Get to know your HP Deskjet
Control panel buttons:1. Home: Returns you to the Home screen.2. Back: Returns to the previous screen.3. Help: On the Home screen, shows all Help
topics. On other screens, shows Help for that screen.
4. Cancel: Stops the current operation.5. Photo: Print photos directly from a memory
card in various sizes and papers. Insert your memory card into the memory card slot. Touch View & Print, select a print type, and then browse and print photos. Use the Edit menu to edit photo (rotate, crop, fix) or change photo effects (add frame and color effect, adjust brightness).
6. Copy: Make one-sided or two-sided color or black copies. Touch the Settings button to change paper settings (size, type, resize, margins) and image quality (lighten/darken, enhancements).
7. Scan: Select a destination by touching Email, Memory Card, or Computer. You can also start a scan from the computer sofware, which provides more advanced features.
8. ePrint icon: Displays the printer’s email address, ePrint status, and ePrint feature. You can change ePrint settings, or print an Info page.
9. Wireless icon: Displays wireless status, IP address, network name, hardware address (MAC), and Wireless Direct status. You can change the wireless settings or print a wireless test report to help diagnose network connection issues.
10. eco icon: You can set up screen brightness, 2–sided copy, the Sleep mode, and auto Power-off to help energy saving.
11. Ink icon: Shows estimated ink levels by cartridge.12. Settings icon: You can change language,
country/region, or other settings from the Preferences menu and use tools to perform maintenance functions.
13. Get More: If Web Services are enabled, takes you to the Internet for downloading more apps.
14. Apps: Provides a quick and easy way to access and print information from the web, such as maps, coloring pages, puzzles, and more.
Anonymous usage information storageThe HP cartridges used with this printer contain a memory chip that assists in the operation of the printer and stores a limited set of anonymous information about the usage of the printer. This information might be used to improve future HP printers. For more information and instructions for disabling this usage information collection, go to the electronic Help, click Appendix > Technical information > Cartridge chip information.
English
3
Windows Mac
Setup and troubleshooting
Power specifications
CQ191-60018 • Input voltage: 200-240 Vac (+/- 10%) • Input frequency: 50/60 Hz (+/- 3 Hz)
CQ191-60017 • Input voltage: 100-240 Vac (+/- 10%) • Input frequency: 50/60 Hz (+/- 3 Hz)
If you are unable to print...Check for error messages and resolve them. If you are still unable to print, try the following in order:
Make sure that your HP Deskjet is set as the default printer and is not offline.To do this:1. On the Windows taskbar, click Start.2. Then click:
• Devices and Printers (Windows 7®) • Printers (Windows Vista®) • Control Panel, and then click Printers and
Faxes (Windows XP®)Look for your printer to see if it has a check mark in a circle next to it. If not, right-click the printer icon and select Set as default printer from the menu.To check that your printer is not offline, right-click the printer icon and ensure that Use Printer Offline and Pause Printing are not selected.
If the HP printer software installation failed:1. Remove the CD from your computer’s CD
drive, and then disconnect the printer from the computer.
2. Restart the computer.3. Temporarily disable any software firewall and
close any anti-virus software.4. Insert the printer software CD into your computer’s
CD drive, then follow the onscreen instructions to install the printer software. Do not connect the USB cable until you are told to do so.
5. After the installation finishes, restart the computer and any security software you disabled or closed.
Restart and reset:1. Restart the computer.2. Reset the printer:
a. Turn off the printer and unplug the power cord.
b. Wait a minute, then plug the power cord back in and turn on the printer.
Check your print queue:1. In System Preferences, click:
• Print & Fax (Mac OS X v10.6) • Print & Scan (Mac OS X v10.7)
2. Click the Open Print Queue button.3. Click a print job to select it.4. Use the following buttons to manage the print
job: • Delete: Cancel the selected print job. • Resume: Continue a paused print job. • If you made any changes, try to print again.
If you are still unable to print, uninstall and reinstall the HP printer software.To uninstall the software:1. Disconnect the printer from your computer.2. Open the Applications: Hewlett-Packard folder.3. Double-click HP Uninstaller. Follow the onscreen
instructions.To install the software:1. Insert the CD into your computer’s CD drive.2. On the desktop, open the CD, then double-click
HP Installer.3. Follow the onscreen instructions.
Note: Only use this printer with the power cord supplied by HP. HP recommends that you connect the printer directly to a wall outlet.
Engl
ish

4
Windows Mac
Networked printer use
Change from USB to wireless network connectionIf you initially set up your printer using a USB connection to your computer, you can switch the connection to a wireless network connection by following these steps.
Share your printer with multiple computersIf you already have your printer connected to your wireless network and want to share it with other computers connected to the same network, you need to install the printer software on the other computers. During the software installation, select the Wireless connection when prompted, and then follow the instructions on the screen to finish installing the printer software.
To change from USB to wireless connection:1. From your computer, click Start > All Programs >
HP > HP Deskjet 6520 series > Printer Setup & Software.
2. Click Convert a USB connected printer to wireless. Keep your USB cable connected until prompted to disconnect it.
3. Follow the instructions on the screen.
To change from USB to wireless connection:1. From your printer’s control panel, touch the
Wireless button.2. Touch Wireless Setup Wizard.3. Follow the steps in the Wireless Setup Wizard to
connect the printer.4. Use HP Setup Assistant in Applications/Hewlett-
Packard/Device Utilities to change the connection to this printer to wireless.
Connect wirelessly to the printer without a routerHP Wireless Direct allows your Wi-Fi devices (for example: computers or smartphones) to print directly to your printer wirelessly, without a wireless router, from your Wi-Fi enabled devices. To set up and use Wireless Direct:1. From your printer’s control panel, touch the Wireless icon.2. Touch Settings.3. Touch Wireless Direct, touch On (No Security) or On (With Security).
Note: If you turn on security, only users with the password will be able to print wirelessly to the printer. If you turn off security, anyone with a Wi-Fi device within Wi-Fi range of the printer will be able to connect to the printer. HP recommends that you turn on security for Wireless Direct.
4. Touch Display Name to display the Wireless Direct name.5. Touch Display Password to display the Wireless Direct password if you have the Wireless Direct security
on.6. From your wireless computer or mobile device, turn on the Wi-Fi radio, search for and connect to the
Wireless Direct name (for example: HP-Print-xx-Deskjet 6520). Then print as you normally do from your computer or mobile device.If you have Wireless Direct security on, enter the Wireless Direct password when prompted.
Note: • If you want to print from a mobile device, you need to have a print application on your mobile device. • If you want to print from your computer, you need to install the printer software. During the software
installation, on the screen showing connection type, select Wireless, select your printer when it appears in the list, and then finish the software installation.
• The Wireless Direct connection is available even if the printer is also connected to a wireless home network.
• You cannot access the Internet through the Wireless Direct connection. • The Wireless Direct connection supports up to five clients at a time.
English

5
Networked printer troubleshooting
If you cannot connect the printer to the network… • Get help from Wireless Printing Center: The HP Wireless Printing Center website
(www.hp.com/go/wirelessprinting) is an online reference guide to setting up your home network and HP printer for wireless printing. On this website, you will find information that can help you prepare your wireless network, set up or reconfigure your printer, and troubleshoot your setup (including using the Windows Network Diagnostic Utility).
• Confirm your printer’s wireless radio is on. From the Home screen, touch the Wireless icon, if it shows Wireless Off, touch Turn On.
• Confirm that your printer is on your network. To do this:1. From the Home screen, touch the Wireless icon.2. Touch Settings, touch and drag your finger vertically to scroll through the options, and then touch
Print Wireless Test Report.3. The Wireless Test Report is automatically printed.
- Check the top of the report to see if something failed during the test. - See the Diagnostics Results section for all tests that were performed, and whether or not your printer passed.
- Find out the Network Name (SSID) to which your printer is currently configured for connection from the Current Configuration section.
Note: Your computer might be connected to a Virtual Private Network (VPN). Temporarily disable the VPN before proceeding with the installation. Being connected to a VPN is like being on a different network; you will need to disconnect the VPN to access the printer over the home network.If your printer is not connected to your network, you need to reconnect the printer to your network. From the Home screen, touch the Wireless icon, touch Settings, touch Wireless Setup Wizard, and then follow the steps on the screen to connect the printer.
• Security software might be causing problems. Security software installed on your computer is designed to protect your computer against threats that can come from outside your home network. A security software suite can contain different types of software such as an anti-virus, anti-spyware, firewall and child protection applications. Firewalls can block communication between devices connected on the home network and can cause problems when using devices like network printers and scanners.Problems that you might see include:
- The printer cannot be found over the network when installing the printer software. - You suddenly cannot print to the printer even though you could the day before. - The printer shows that it is OFFLINE in the Printer and Faxes folder. - The software shows the printer status is “disconnected“ even though the printer is connected to the network.
- If you have an All-in-One, some functions work, like print, and others don’t, like scan.A quick troubleshooting technique is to disable your firewall and check if the problem goes away.Here are some basic guidelines for using security software:
- If your firewall has a setting called trusted zone, use it when your computer is connected to your home network.
- Keep your firewall up to date. Many security software vendors provide updates which correct known issues.
- If your firewall has a setting to not show alert messages, you should disable it. When installing the HP software and using the HP printer, you may see alert messages from your firewall software. You should allow any HP software which causes an alert. The alert message may provide options to allow, permit, or unblock. Also, if the alert has a remember this action or create a rule for this selection, make sure to select it. This is how the firewall learns what can be trusted on your home network.
If you still cannot connect the printer to the network, go to www.hp.com/go/wirelessprinting, click Firewall Help. You can find more solutions there.
Engl
ish

6
HP printer limited warranty statement
A. Extent of limited warranty 1. Hewlett-Packard (HP) warrants to the end-user customer that the HP products specified above will be free from
defects in materials and workmanship for the duration specified above, which duration begins on the date of purchase by the customer.
2. For software products, HP's limited warranty applies only to a failure to execute programming instructions. HP does not warrant that the operation of any product will be interrupted or error free.
3. HP's limited warranty covers only those defects that arise as a result of normal use of the product, and does not cover any other problems, including those that arise as a result of:
a. Improper maintenance or modification; b. Software, media, parts, or supplies not provided or supported by HP; c. Operation outside the product's specifications; d. Unauthorized modification or misuse. 4. For HP printer products, the use of a non-HP cartridge or a refilled cartridge does not affect either the warranty to the
customer or any HP support contract with the customer. However, if printer failure or damage is attributable to the use of a non-HP or refilled ink cartridge, HP will charge its standard time and materials charges to service the printer for the particular failure or damage.
5. If HP receives, during the applicable warranty period, notice of a defect in any product which is covered by HP's warranty, HP shall either repair or replace the product, at HP's option.
6. If HP is unable to repair or replace, as applicable, a defective product which is covered by HP's warranty, HP shall, within a reasonable time after being notified of the defect, refund the purchase price for the product.
7. HP shall have no obligation to repair, replace, or refund until the customer returns the defective product to HP. 8. Any replacement product may be either new or like-new, provided that it has functionality at least equal to that of the
product being replaced. 9. HP products may contain remanufactured parts, components, or materials equivalent to new in performance. 10. HP's Limited Warranty Statement is valid in any country where the covered HP product is distributed by HP. Contracts
for additional warranty services, such as on-site service, may be available from any authorized HP service facility in countries where the product is distributed by HP or by an authorized importer.
B. Limitations of warrantyTO THE EXTENT ALLOWED BY LOCAL LAW, NEITHER HP NOR ITS THIRD PARTY SUPPLIERS MAKES ANY OTHER WARRANTY OR CONDITION OF ANY KIND, WHETHER EXPRESS OR IMPLIED WARRANTIES OR CONDITIONS OF MERCHANTABILITY, SATISFACTORY QUALITY, AND FITNESS FOR A PARTICULAR PURPOSE.
C. Limitations of liability 1. To the extent allowed by local law, the remedies provided in this Warranty Statement are the customer's sole and
exclusive remedies. 2. TO THE EXTENT ALLOWED BY LOCAL LAW, EXCEPT FOR THE OBLIGATIONS SPECIFICALLY SET FORTH IN
THIS WARRANTY STATEMENT, IN NO EVENT SHALL HP OR ITS THIRD PARTY SUPPLIERS BE LIABLE FOR DIRECT, INDIRECT, SPECIAL, INCIDENTAL, OR CONSEQUENTIAL DAMAGES, WHETHER BASED ON CONTRACT, TORT, OR ANY OTHER LEGAL THEORY AND WHETHER ADVISED OF THE POSSIBILITY OF SUCH DAMAGES.
D. Local law 1. This Warranty Statement gives the customer specific legal rights. The customer may also have other rights which vary
from state to state in the United States, from province to province in Canada, and from country to country elsewhere in the world.
2. To the extent that this Warranty Statement is inconsistent with local law, this Warranty Statement shall be deemed modified to be consistent with such local law. Under such local law, certain disclaimers and limitations of this Warranty Statement may not apply to the customer. For example, some states in the United States, as well as some governments outside the United States (including provinces in Canada), may:
a. Preclude the disclaimers and limitations in this Warranty Statement from limiting the statutory rights of a consumer (e.g., the United Kingdom);
b. Otherwise restrict the ability of a manufacturer to enforce such disclaimers or limitations; or c. Grant the customer additional warranty rights, specify the duration of implied warranties which the manufacturer
cannot disclaim, or allow limitations on the duration of implied warranties. 3. THE TERMS IN THIS WARRANTY STATEMENT, EXCEPT TO THE EXTENT LAWFULLY PERMITTED, DO NOT
EXCLUDE, RESTRICT, OR MODIFY, AND ARE IN ADDITION TO, THE MANDATORY STATUTORY RIGHTS APPLICABLE TO THE SALE OF THE HP PRODUCTS TO SUCH CUSTOMERS.
HP product Duration of limited warrantySoftware Media 90 daysPrinter Technical support by phone: 1 year worldwide Parts and labor: 90 days in US and Canada (outside the US and Canada 1 year or as required by local law)Print or Ink cartridges Until the HP ink is depleted or the “end of warranty” date printed
on the cartridge has been reached, whichever occurs first. This warranty does not cover HP ink products that have been refilled, remanufactured, refurbished, misused, or tampered with.
Printheads (only applies to products with customer 1 year replaceable printheads)Accessories 90 days
English

DESKJET INK ADVANTAGE 6525 e-ALL-IN-ONE SERIES
安装
打开并启动您的打印机(请参见安装宣传单),然后按照打印机显示的说明和动画来完成打印机安装。
自述文件
自述文件包含 HP 支持联系信息、操作系统要求和打印机信息的最新更新。
Windows:插入软件 CD。在软件 CD 上找到 ReadMe.chm。单击 ReadMe.chm,将其打开,然后选择您的语言版本的 ReadMe。Mac:插入软件 CD,然后双击软件 CD 顶层目录中的 Read Me 文件夹。
墨水使用
在打印过程中使用墨盒中墨水的方式有很多,这些方式包括在初始化过程中准备打印机和墨盒进行打印,以及在打印头维护过程中使打印喷嘴保持清洁并使墨水通畅流动。此外,当墨盒用完后,墨盒中还会残留一些墨水。有关详细信息,请访问:www.hp.com/go/inkusage。
电子版帮助
在打印机软件安装期间将自动安装电子版帮助。电子版帮助包含有关打印机功能和故障排除的说明,以及其他 指向在线内容的链接。另外还提供有关打印机规格、法律声明、环境、管制和支持信息。
Windows:软件安装后,单击开始 > 所有程序 > HP > HP Deskjet 6520 series > 帮助。
Mac:在软件安装期间,在显示推荐软件的屏幕上选择 HP 推荐软件,然后完成软件安装。
• Mac OS X v10.6:从帮助中选择 Mac 帮助。在帮助查看器中单击并按住主页按钮,然后选择与您的设备 相对应的帮助。
• Mac OS X v10.7:从帮助中选择帮助中心,单击所有应用程序帮助,然后选择与您的设备相对应的帮助。
要查阅欧盟法规通告声明和遵从性信息,请转到电子版帮助,单击附录 > 技术信息 > 法规通告 > 欧盟法规通告。本打印机的“符合性声明”位于以下网址:www.hp.eu/certificates。
注册您的打印机
通过在 www.register.hp.com 注册, 获得更快的服务和支持通知。
没有 CD/DVD 驱动器?
如果计算机没有 CD/DVD 驱动器,请转到 www.hp.com/support 下载并安装该软件。
简体中文

8
14
HP Deskjet 入门
控制面板按钮:
1. 主页:用于返回到“主页”屏幕。
2. 返回:用于返回到上一个屏幕。
3. 帮助:在“主页”屏幕中,显示所有的“帮助”主题。在其他屏幕中,显示该屏幕的“帮助”。
4. 取消:停止当前操作。
5. 照片:直接从存储卡打印各种尺寸和纸张的照片。将存储卡插到存储卡插槽内。点击查看和打印, 选择打印类型,然后浏览并打印照片。使用编辑 菜单编辑照片(旋转、裁切、修复)或更改照片效果(添加边框和色彩效果、调整亮度)。
6. 复印:制作单面或双面彩色或黑白副本。点击设置 按钮来更改纸张设置(大小、类型、大小调整、 页边距)和图像质量(变浅/变深、增强)。
7. 扫描:通过点击电子邮件、存储卡或计算机,选择 目的地。也可以从提供更高级功能的计算机软件开始扫描。
8. ePrint 图标:显示打印机的电子邮件地址、ePrint 状态和 ePrint 功能。您可以更改 ePrint 设置,或者打印“信息”页面。
9. 无线图标:显示无线状态、IP 地址、网络名称、硬件地址 (MAC) 和 Wireless Direct 状态。可以更改 无线设置,或打印无线测试报告,以帮助诊断网络连接问题。
10. 环保图标:可以设置屏幕亮度、双面副本、“睡眠”模式和“自动关机”以降低能耗。
11. 墨水图标:显示墨盒的估计墨水量。
12. 设置图标:可以从首选项菜单更改语言、国家/地区或其他设置,并使用工具来执行维护功能。
13. 了解更多信息:如果启用了 Web 服务,则可以通过 Internet 下载更多应用程序。
14. 应用程序:提供快捷简便的方式以访问和打印来自 Web 的信息,如地图、着色页和迷题等。
匿名使用信息存储
该打印机使用的 HP 墨盒包含协助打印机运转的存储芯片,并且存储了一组有关打印机使用情况的有限匿名信息。该信息可以用于改进未来的 HP 打印机。有关禁用此使用情况信息集合的更多信息和说明,请转到电子版帮助,单击附录 > 技术信息 > 墨盒芯片信息。
简体中文

9
Windows Mac
安装和故障排除
电源规格
CQ191-60018 • 输入电压:200-240 Vac (+/- 10%) • 输入频率:50/60 Hz (+/- 3 Hz)
CQ191-60017 • 输入电压:100-240 Vac (+/- 10%) • 输入频率:50/60 Hz (+/- 3 Hz)
如果无法打印...检查错误消息并解决。如果您仍无法进行打印,请按顺序尝试以下操作:
确保 HP Deskjet 设置为默认打印机且未处于脱机 状态。
为此,请:
1. 在 Windows 任务栏上,单击开始。
2. 然后,单击:
• 设备和打印机 (Windows 7®) • 打印机 (Windows Vista®) • 控制面板,然后单击打印机和传真
(Windows XP®)查看打印机旁边是否有一个带对号的圈。如果没有,右键单击打印机图标,然后从菜单中选择设置为默认打印机。
要确认您的打印机未脱机,请右键单击打印机图标,确认脱机使用打印机和暂停打印未选中。
如果 HP 打印机软件安装失败:
1. 从计算机的 CD 驱动器中取出 CD,然后断开打印机与计算机间的连接。
2. 重新启动计算机。
3. 暂时禁用所有软件防火墙并关闭所有反病毒软件。
4. 将打印机软件 CD 插入计算机的 CD 驱动器, 然后按照屏幕上的说明安装打印机软件。请勿在 没有提示的情况下连接 USB 连接线。
5. 安装完成后,重启计算机以及您禁用或关闭的 任何安全软件。
重新启动并重置:
1. 重新启动计算机。
2. 重置打印机:
a. 关闭打印机,然后断开电源线连接。
b. 等待一分钟,然后再插上电源线,并启动 打印机。
检查打印队列:
1. 在“系统首选项”中,单击:
• 打印和传真 (Mac OS X v10.6) • 打印和扫描 (Mac OS X v10.7)
2. 单击打开打印队列按钮。
3. 单击打印作业将其选中。
4. 使用下列按钮来管理打印作业:
• 删除:取消选取的打印作业。
• 继续:继续执行暂停的打印作业。
• 进行了任何更改后,再次尝试打印。
如果仍然无法打印,请卸载并重新安装 HP 打印软件。
卸载软件的方法:
1. 断开打印机和计算机的连接。
2. 打开应用程序:Hewlett-Packard 文件夹。
3. 双击 HP Uninstaller。按照屏幕上的说明执行操作。
安装软件的方法:
1. 将 CD 插入计算机的 CD 驱动器。
2. 在桌面上,打开 CD,然后双击 HP Installer。3. 按照屏幕上的说明执行操作。
注意:仅能对此打印机使用由 HP 提供的电源线。HP 建议您将打印机直接与墙壁插座相连。
简体中文

10
Windows Mac
网络打印机的使用
将 USB 连接更改为无线网络连接
如果您最初是用 USB 连接至计算机来设置打印机的,可以通过以下步骤将连接改为无线网络连接。
与多台计算机共享打印机
如果打印机已经连接到无线网络,并且需要将它与连接到相同网络的其他计算机共享,则需要在其他计算机上 安装打印机软件。软件安装期间,在出现提示时选择无线连接,然后执行屏幕上的说明,完成打印机软件的安装。
从 USB 改为无线连接的步骤:
1. 在计算机中,单击开始 > 所有程序 > HP > HP Deskjet 6520 series > 打印机设置和软件。
2. 单击将连接 USB 的打印机转换为无线。在系统 提示断开连接之前,请始终保持 USB 电缆处于连接状态。
3. 随后按照屏幕上的说明操作即可。
从 USB 改为无线连接的步骤:
1. 从打印机的控制面板,点击无线按钮。
2. 点击无线设置向导。
3. 按照无线设置向导中的步骤连接打印机。
4. 使用“应用程序/Hewlett-Packard/设备实用程序”中的 HP 设置助手将此打印机的连接更改为无线。
不使用路由器与打印机无线连接
HP Wireless Direct 允许您的 Wi-Fi 设备(例如:计算机或智能手机)从启用 Wi-Fi 的设备无线直接打印到打印机,而无需无线路由器。设置和使用 Wireless Direct:1. 在打印机的控制面板中,点击无线按钮。
2. 点击设置。
3. 点击 Wireless Direct,点击开启(无安全性)或开启(有安全性)。
注意:如果打开安全机制,则只有拥有密码的用户才能在打印机上无线打印。如果关闭安全机制,则在 打印机的 Wi-Fi 范围内的任何拥有 Wi-Fi 设备的人都可以连接到打印机。HP 建议您打开 Wireless Direct 的安全机制。
4. 点击显示名称显示 Wireless Direct 名称。
5. 如果您打开了 Wireless Direct 安全机制,请点击显示密码以显示 Wireless Direct 的密码。
6. 在无线计算机或移动设备中,打开 Wi-Fi 无线功能,搜索并连接到 Wireless Direct 名称(例如: HP-Print-xx-Deskjet 6520)。然后按照与正常情况下从计算机或移动设备打印的相同方式执行打印。
如果打开了 Wireless Direct 安全机制,请在弹出提示时输入 Wireless Direct 的密码。
注意:
• 如果要从移动设备进行打印,则需要在移动设备上安装打印应用程序。
• 如果要从计算机进行打印,则需要安装打印机软件。在安装软件过程中,屏幕上显示连接类型时, 选择无线,您的打印机出现在列表中后将其选中,从而完成软件安装。
• 即使打印机仍然连接到无线主网络,也可使用 Wireless Direct 连接。
• 无法通过 Wireless Direct 连接访问互联网。
• Wireless Direct 连接一次最多可支持五个客户端。
简体中文
11
网络打印机故障排除
如果无法将打印机连接至网络…
• 从无线打印中心获取帮助:HP 无线打印中心网站 (www.hp.com/go/wirelessprinting) 是在线参考指南, 可用来设置家庭网络和 HP 打印机进行无线打印。此网站上找到的信息可以帮助您准备无线网络、设置或 重新配置打印机、对设置进行故障排除(包括使用 Windows 网络诊断实用程序)。
• 确认已打开打印机的无线功能。在“主页”屏幕中,点击无线图标,如果该图标显示为无线关闭,请单击打开。
• 确认您的打印机是否已连接到网络。为此,请:
1. 在“主页”屏幕上,点击无线图标。
2. 点击设置,点击并垂直拖动手指以滚动选项,然后点击打印无线测试报告。
3. 将自动打印无线测试报告。
- 查看报告开头,看测试过程中是否出现故障。
- 查看执行的所有测试的“诊断结果”部分,看看您的打印机是否通过了测试。
- 从“当前配置”部分中,找到当前为打印机连接而配置的网络名称 (SSID)。注意:您的计算机可能已连接到虚拟专用网络 (VPN)。在继续安装前临时禁用 VPN。连接到 VPN 如同位于其他网络;您需要断开与 VPN 的连接才能访问家庭网络上的打印机。
如果您的打印机未连接到网络,则需要将其重新连接到网络。在“主页”屏幕中,依次点击无线图标、设置、 无线安装向导,然后按照屏幕上的步骤连接打印机。
• 安全软件可能导致了问题。安装在您计算机上的安全软件旨在保护计算机免受来自主网络外部的攻击。一套安全软件可能包含不同类型的软件,比如防病毒、防间谍软件、防火墙和儿童保护应用程序。防火墙可以阻止连接到主网络上的设备之间的通信,当使用类似于网络打印机和扫描仪等设备时,这可能导致问题。
您可能遇到的问题包括:
- 安装打印机软件时,在网络上找不到打印机。
- 在前一天还可以打印的情况下突然无法打印到打印机。
- 打印机的打印机和传真文件夹中显示“脱机”。
- 即使打印机已连接到网络,软件仍显示打印机处于“断开连接”状态。
- 如果有一体机,一些功能可正常运行(如打印),其他功能不能正常运行(如扫描)。
一个快速排除故障的方法是,禁用防火墙,然后检查问题是否消失。以下是使用安全软件的一些基本原则:
- 如果防火墙具有称为信任区域的设置,则在计算机连接到主网络时使用该设置。
- 保持防火墙经常更新。许多安全软件供应商提供用于更正已知问题的更新程序。
- 如果防火墙设置为不显示警报消息,则禁用这种设置。这样,当安装 HP 软件和使用 HP 打印机时, 就可以看到防火墙软件发出的警报消息。您应该允许使用导致警报的任何 HP 软件。警报消息可能 提供允许、放行或阻止。而且,如果警报具有记住此操作或为此创建规则选项,请确保选择该选项。 防火墙通过这样的方式就可以了解在主网络中可以信任什么内容。
如果仍然无法将打印机连接到网络,请转到 www.hp.com/go/wirelessprinting,然后单击防火墙帮助。 您可在此处获得更多解决方案。
简体中文

12
HP 打印机有限保修声明
简体中文
DESKJET INK ADVANTAGE 6525 e-ALL-IN-ONE SERIES
การตงคา
แกะเครองพมพของคณออกจากกลองและเปดเครอง (โปรดดแผนพบการตดตง) แลวทำาตามคำาแนะนำาและภาพเคลอนไหวบนจอแสดงผลของเครองพมพ เพอใหการตงคาเครองพมพเสรจสมบรณ
Readme ไฟล Readme ประกอบดวยขอมลการตดตอฝายสนบสนนของ HP ขอกำาหนดดานระบบปฏบตการ และขอมลลาสดสำาหรบเครองพมพของคณ Windows: ใสแผนซดซอฟตแวร หาไฟล ReadMe.chm จากซดซอฟตแวร คลก ReadMe.chm เพอเปดไฟล แลวเลอก ReadMe สำาหรบภาษาของคณ Mac: ใสซดซอฟตแวร แลวดบเบลคลกโฟลเดอร Read Me ทอยในระดบบนสดของซดซอฟตแวร
การใชหมกพมพ
หมกพมพจากตลบหมกพมพถกนำามาใชในกระบวนการพมพในหลากหลายวธ รวมถงในกระบวนการกำาหนดการทำางานเรมตน ซงเปนการเตรยมเครองพมพและตลบหมกพมพสำาหรบการพมพ รวมทงกระบวนการตรวจสอบหวพนหมก ซงเปนการดแลใหหวพนหมกสะอาดและหมกไหลไดสะดวก ทงน ตลบหมกพมพทใชงานแลวจะมหมกพมพเหลอคางอยเลกนอย สำาหรบขอมลเพมเตม โปรดไปท www.hp.com/go/inkusage
วธใชแบบอเลกทรอนกส
วธใชแบบอเลกทรอนกสจะตดตงโดยอตโนมตในระหวางการตดตงซอฟตแวรเครองพมพ วธใชแบบอเลกทรอนกสประกอบดวย คำาแนะนำาเกยวกบคณลกษณะของเครองพมพและการแกไขปญหาเบองตนพรอมการเชอมโยงเพมเตมไปยงเนอหาออนไลน นอกจากน ยงมขอมลจำาเพาะของเครองพมพ ประกาศเกยวกบกฎหมาย ขอมลดานสงแวดลอม ขอบงคบ และขอมลการสนบสนน Windows: หลงจากการตดตงซอฟตแวร คลก Start (เรม) > All Programs (โปรแกรมทงหมด) > HP > HP Deskjet 6520 series > Help (วธใช) Mac: ในระหวางการตดตงซอฟตแวร ซอฟตแวรทแนะนำาจะแสดงขนบนหนาจอ ใหเลอก HP Recommended Software (ซอฟตแวรทแนะนำาของ HP) จากนนตดตงซอฟตแวรใหเสรจสมบรณ
• Mac OS X v10.6: เลอก Mac Help (วธใชของแมค) จาก Help (วธใช) ใน Help Viewer (ตวแสดงวธใช) ใหคลกปม Home (หนาแรก) คางไว แลวเลอก Help (วธใช) สำาหรบอปกรณของคณ
• Mac OS X v10.7: เลอก Help Center (ศนยขอมลวธใช) จาก Help (วธใช) คลก Help for all your apps (วธใชสำาหรบแอปพลเคชนทงหมดของคณ) จากนนเลอก Help (วธใช) สำาหรบอปกรณของคณ
หากตองการดรายละเอยดประกาศขอบงคบของสหภาพยโรป (European Union Regulatory Notice) และขอมลการปฏบตทถกตอง ใหไปทวธใชแบบอเลกทรอนกส คลก Appendix (ภาคผนวก) > Technical information (ขอมลทางเทคนค) > Regulatory notices (ประกาศขอบงคบ) > European Union Regulatory Notice (ประกาศขอบงคบของสหภาพยโรป) สำาหรบขอมลแสดงการปฏบตตามมาตรฐานสำาหรบเครองพมพนมเผยแพรในทอยเวบตอไปน: www.hp.eu/certificates
การลงทะเบยนเครองพมพของคณ รบบรการและการสนบสนนทรวดเรวกวาเมอลงทะเบยนท www.register.hp.com
หากไมมไดรฟซด/ดวด สำาหรบคอมพวเตอรทไมมไดรฟซด/ดวด โปรดไปท www.hp.com/support เพอดาวนโหลดและตดตงซอฟตแวร
ภาษ
าไทย

14
14
ทำาความรจกกบ HP Deskjet
ปมบนแผงควบคม: 1. Home (หนาหลก): กลบไปทหนาจอหลก 2. Back (ยอนกลบ): กลบไปยงหนาจอกอนหนา 3. Help (วธใช): หนาจอหลกจะแสดงหวขอวธใชทงหมด สวนหนาจออนๆ
จะแสดงวธใชบนหนาจอนน 4. Cancel (ยกเลก): หยดการทำางานปจจบน 5. Photo (ภาพถาย): พมพภาพถายโดยตรงจากการดหนวยความจำาดวยขนาด
และกระดาษตางๆ กน ใสการดหนวยความจำาของคณลงใน memory card slot (ชองเสยบการดหนวยความจำา) แตะ View & Print (ดและพมพ) เลอกประเภทของเครองพมพ จากนนเรยกดและพมพภาพถาย ใชเมน Edit (แกไข) เพอแกไขภาพถาย (หมน ครอบตด แกไข) หรอเปลยนเอฟเฟกตภาพถาย (เพมกรอบและเอฟเฟกตส ปรบความสวาง)
6. Copy (ทำาสำาเนา): ทำาสำาเนาสหรอสำาเนาขาวดำาหนงดานหรอสองดาน สมผสปม Settings (การตงคา) เพอเปลยนการตงคากระดาษ (ขนาด ประเภท ปรบขนาด ระยะขอบ) และระดบคณภาพ (เพมความสวาง/ ลดความสวาง การเพมคณภาพ)
7. Scan (สแกน): เลอกปลายทางโดยแตะ Email (อเมล) Memory Card (การดหนวยความจำา) หรอ Computer (คอมพวเตอร) คณสามารถเรมการสแกนจากซอฟตแวรคอมพวเตอรซงมคณลกษณะขนสงเพมเตมได
8. ไอคอน ePrint: แสดงทอยอเมลของเครองพมพ สถานะ ePrint และคณสมบต ePrint คณสามารถเปลยนการตงคา ePrint หรอพมพหนาขอมล
9. ไอคอน Wireless (ไรสาย): แสดงสถานะของระบบไรสาย, IP แอดเดรส, ชอเครอขาย, ฮารดแวรแอดเดรส (MAC) และสถานะระบบ Wireless Direct คณสามารถเปลยนการตงคาไรสายหรอพมพรายงานการทดสอบ ไรสายเพอชวยในการวนจฉยปญหาเกยวกบการเชอมตอเครอขาย
10. ไอคอน Eco: คณสามารถตงคาความสวางของหนาจอ สำาเนา 2 ดาน โหมดสลป และการปดเครองอตโนมตได เพอชวยประหยดพลงงาน
11. ไอคอน Ink (หมกพมพ): แสดงระดบหมกพมพโดยประมาณของตลบหมกพมพแตละตลบ
12. ไอคอน Settings (การตงคา): คณสามารถเปลยนภาษา ประเทศ/ภมภาค หรอการตงคาอนๆ ไดจากเมน Preferences (การกำาหนดลกษณะ) และใชเครองมอเพอใชงานฟงกชนการบำารงรกษา
13. Get More (ดเพมเตม): หากเปดใชงานบรการทางเวบ ระบบจะเชอมตออนเทอรเนตใหคณไดดาวนโหลดแอพพลเคชนเพมเตม
14. Apps (แอพพลเคชน): ชวยใหคณสามารถเขาถงและสงพมพขอมลจากเวบไซต เชน แผนท หนาเอกสารส เกมปรศนา และอนๆ ไดอยางรวด เรวและงายดาย
การจดเกบขอมลการใชแบบไมระบชอ ตลบหมก HP ทใชกบเครองพมพนประกอบดวยชปหนวยความจำาทชวยการทำางานของเครองพมพ และจดเกบขอมลทจำากดชดหนงเกยวกบการใชเครองพมพ ขอมลนอาจใชในการปรบปรงเครองพมพในอนาคตของ HP สำาหรบคำาแนะนำาและขอมลเพมเตมเกยวกบการปดใชงานการรวบรวมขอมลการใชงานน โปรดไปทวธใชแบบอเลกทรอนกส คลก Appendix (ภาคผนวก) > Technical information (ขอมลทางเทคนค) > Cartridge chip information (ขอมลชปของตลบหมก)
ภาษ
าไทย

15
Windows Mac
การตงคาและการแกไขปญหา
ขอมลจำาเพาะเกยวกบกระแสไฟฟา
CQ191-60018 • แรงดนไฟฟาเขา: 200-240 Vac (+/- 10%) • ความถไฟฟาเขา: 50/60 Hz (+/- 3 Hz)
CQ191-60017 • แรงดนไฟฟาเขา: 100-240 Vac (+/- 10%) • ความถไฟฟาเขา: 50/60 Hz (+/- 3 Hz)
หากคณไมสามารถพมพงานได... ตรวจสอบขอความแสดงขอผดพลาดและแกไข หากยงไมสามารถพมพงานได ใหลองปฏบตตามขนตอนดงตอไปน
ตรวจสอบใหแนใจวามการตงคา HP Deskjet เปนเครองพมพคาเรมตนและไมไดออฟไลน โดยใชวธการดงน 1. ในทาสกบารของ Windows ใหคลก Start (เรม) 2. จากนนคลก
• Devices and Printers (อปกรณและเครองพมพ) (Windows 7®)
• Printers (เครองพมพ) (Windows Vista®) • Control Panel (แผงควบคม) แลวคลก Printers and Faxes
(เครองพมพและโทรสาร) (Windows XP®) มองหาเครองพมพของคณเพอดวามเครองหมายถกในวงกลมทอยตดกนหรอไม หากไมม ใหคลกขวาทไอคอนเครองพมพและเลอก Set as default printer (ตงเปนเครองพมพคาเรมตน) จากเมนทปรากฏ เมอตองการตรวจสอบวาเครองพมพไมไดออฟไลน ใหคลกขวาทไอคอนเครองพมพ และตรวจสอบวา Use Printer Offline (ใชเครองพมพแบบออฟไลน) และ Pause Printing (หยดการพมพชวคราว) ไมไดถกเลอกไว
หากการตดตงซอฟตแวรเครองพมพ HP ลมเหลว 1. นำาแผนซดออกจากไดรฟซดรอมของคอมพวเตอร จากนนใหถอดสาย USB
ออกจากคอมพวเตอร 2. เรมการทำางานของคอมพวเตอรใหม 3. ปดการใชงานซอฟตแวรไฟรวอลลและปดซอฟตแวรปองกนไวรสชวคราว 4. ใหใสแผนซดซอฟตแวรเครองพมพไวในไดรฟซดของคอมพวเตอร และดำาเนน
การตามคำาแนะนำาทปรากฏบนหนาจอ เพอตดตงซอฟตแวรเครองพมพ อยาตอสาย USB จนกวาจะปรากฏขอความแจงใหดำาเนนการเชนนน
5. หลงจากตดตงเรยบรอยแลว ใหรสตารทคอมพวเตอรและเปดใชงานซอฟตแวรความปลอดภยใดๆ ทคณปดใชงานหรอปดไว
รสตารทและรเซต 1. เรมการทำางานของคอมพวเตอรใหม 2. รเซตเครองพมพ
a. ปดเครองพมพ แลวถอดสายไฟออก b. รอประมาณหนงนาท จากนนเสยบปลกสายไฟกลบเขาไป แลวเปด
เครองพมพ
ตรวจสอบควการพมพของคณ: 1. ใน System Preferences (ลกษณะทตองการของระบบ) คลก:
• Print & Fax (พมพและสงโทรสาร) (Mac OS X v10.6) • Print & Scan (พมพและสแกน) (Mac OS X v10.7)
2. คลกปม Open Print Queue (เปดควการพมพ) 3. คลกทงานพมพเพอเลอก 4. ใชปมตอไปนเพอจดการกบงานพมพ
• Delete (ลบ): ยกเลกงานพมพทเลอก • Resume (กลบสการทำางาน): พมพงานทหยดไวชวคราวตอไป • หากคณเปลยนแปลงคาตางๆ เรยบรอยแลว ใหลองพมพใหมอกครง
หากคณยงไมสามารถพมพงานได ใหถอนการตดตงและตดตงซอฟตแวรเครองพมพ HP อกครง วธถอนการตดตงซอฟตแวร: 1. ถอดสายเครองพมพออกจากคอมพวเตอร 2. เปดแอพพลเคชน: โฟลเดอร Hewlett-Packard 3. ดบเบลคลก HP Uninstaller (โปรแกรมถอนการตดตง HP)
ปฏบตตามคำาแนะนำาทปรากฏบนหนาจอ
วธตดตงซอฟตแวร: 1. ใสแผนซดลงในไดรฟซดของคอมพวเตอร 2. บนเดสกทอป เปดแผนซดและดบเบลคลก HP Installer
(โปรแกรมตดตง HP) 3. ปฏบตตามคำาแนะนำาทปรากฏบนหนาจอ
หมายเหต: ใชเครองพมพนกบสายไฟท HP ใหมาเทานน HP ขอแนะนำาใหคณเชอมตอเครองพมพโดยตรงเขากบเตาเสยบทผนง
ภาษ
าไทย

16
Windows Mac
การใชงานเครองพมพบนเครอขาย
การเปลยนจากการเชอมตอ USB เปนการเชอมตอเครอขายแบบไรสาย หากคณใชการเชอมตอ USB กบคอมพวเตอรเพอตดตงเครองพมพในครงแรก คณสามารถเปลยนการเชอมตอเปนการเชอมตอเครอขายแบบไรสายไดโดยทำาตามขนตอนดงตอไปน
การใชเครองพมพรวมกนกบคอมพวเตอรหลายเครอง หากคณมเครองพมพทเชอมตอกบเครอขายไรสายอยแลวและตองการใชเครองพมพรวมกนกบคอมพวเตอรเครองอนๆ ทเชอมตอบนเครอขายเดยวกน คณตองตดตงซอฟตแวรเครองพมพบนคอมพวเตอรเครองอนๆ ดวย ระหวางการตดตงซอฟตแวร ใหเลอกการเชอมตอ Wireless (แบบไรสาย) และปฏบตตามคำาแนะนำาบนหนาจอเพอทำาการตดตงซอฟตแวรเครองพมพใหเสรจสมบรณ
วธเปลยนจากการเชอมตอ USB เปนแบบไรสาย: 1. จากคอมพวเตอรของคณ ใหคลก Start (เรม) > All Programs
(โปรแกรมทงหมด) > HP > HP Deskjet 6520 series > Printer Setup & Software (การตดตงเครองพมพและซอฟตแวร)
2. คลก Convert a USB connected printer to wireless (แปลงการเชอมตอเครองพมพจาก USB เปนแบบไรสาย) ตอสาย USB ของคณไวจนกวาจะไดรบขอความแจงใหถอดออก
3. ปฏบตตามคำาแนะนำาบนหนาจอ
วธเปลยนจากการเชอมตอ USB เปนแบบไรสาย: 1. จากแผงควบคมของเครองพมพ ใหแตะปม Wireless (ไรสาย) 2. แตะ Wireless Setup Wizard (ตวชวยการตดตงแบบไรสาย) 3. ทำาตามขนตอนใน Wireless Setup Wizard (ตวชวยการตดตงแบบไร
สาย) เพอเชอมตอเครองพมพ 4. ใช HP Setup Assistant (ตวชวยตงคาของ HP) ใน Applications/
Hewlett-Packard/Device Utilities (ยทลตอปกรณ/ Hewlett-Packard/แอพพลเคชน) เพอเปลยนการเชอมตอไปยงเครองพมพนเปนแบบไรสาย
การเชอมตอไปยงเครองพมพแบบไรสายโดยไมตองใชเราเตอร HP Wireless Direct ชวยใหอปกรณ Wi-Fi ของคณ (ตวอยางเชน คอมพวเตอรหรอสมารทโฟน) สามารถพมพแบบไรสายจากอปกรณทเปดใชงาน Wi-Fi ของคณไปยงเครองพมพไดโดยตรงโดยไมตองใชเราเตอรไรสาย หากตองการตงคาและใช Wireless Direct (โดยตรงแบบไรสาย): 1. จากแผงควบคมของเครองพมพ ใหแตะไอคอน Wireless (ไรสาย) 2. แตะ Settings (การตงคา) 3. แตะ Wireless Direct (โดยตรงแบบไรสาย) แตะ On (No Security) (เปด (แบบไมปลอดภย)) หรอ On (With Security) (เปด (แบบปลอดภย))
หมายเหต: หากคณเปดการรกษาความปลอดภย เฉพาะผใชทมรหสผานเทานนจะสามารถพมพไปยงเครองพมพในแบบไรสายได หากคณปดการรกษาความปลอดภย บคคลใดกตามทมอปกรณ Wi-Fi อยภายในระยะ Wi-Fi ของเครองพมพจะสามารถเชอมตอกบเครองพมพได HP ขอแนะนำาใหคณเปดการรกษาความปลอดภยสำาหรบ Wireless Direct (โดยตรงแบบไรสาย)
4. แตะ Display Name (ชอทแสดง) เพอแสดงชอของ Wireless Direct 5. แตะ Display Password (รหสผานทแสดง) เพอแสดงรหสผานของ Wireless Direct (โดยตรงแบบไรสาย) หากคณมการรกษาความปลอดภยของ
Wireless Direct (โดยตรงแบบไรสาย) เปดอย 6. ใหใชคอมพวเตอรไรสายหรอโทรศพทมอถอของคณเปดวทย Wi-Fi คนหาและเชอมตอชอ Wireless Direct (โดยตรงแบบไรสาย)
(ตวอยางเชน: HP-Print-xx-Deskjet 6520) จากนน พมพงานตามปกตแบบเดยวกบทคณพมพจากคอมพวเตอรหรออปกรณมอถอ หากคณกำาหนดใหความปลอดภยของ Wireless Direct (โดยตรงแบบไรสาย) อยในสถานะเปด ใหปอนรหสผานของ Wireless Direct (โดยตรงแบบไรสาย) เมอไดรบขอความแจง
หมายเหต: • หากคณตองการพมพจากอปกรณมอถอ คณตองมแอพพลเคชนการพมพบนอปกรณมอถอของคณ • หากคณตองการพมพจากคอมพวเตอรของคณ คณตองตดตงซอฟตแวรเครองพมพ ในระหวางการตดตงซอฟตแวร ประเภทการเชอมตอจะแสดงขนบนหนาจอ
ใหเลอก Wireless (ไรสาย) เลอกเครองพมพของคณเมอปรากฏในรายการ แลวตดตงซอฟตแวรใหเสรจสมบรณ • การเชอมตอ Wireless Direct จะสามารถใชงานไดแมเมอเครองพมพจะเชอมตอกบเครอขายในบานแบบไรสาย • คณไมสามารถเขาถงอนเทอรเนตผานทางการเชอมตอ Wireless Direct (โดยตรงแบบไรสาย) ได • การเชอมตอ Wireless Direct (โดยตรงแบบไรสาย) รองรบไดถงทละหาไคลเอนต
ภาษ
าไทย

17
การแกไขปญหาเครองพมพบนเครอขาย
หากคณไมสามารถเชอมตอเครองพมพกบเครอขาย… • การขอรบความชวยเหลอจากศนยการพมพไรสาย: เวบไซตศนยการพมพไรสาย HP (www.hp.com/go/wirelessprinting) เปนคมออางองแบบ
ออนไลนสำาหรบการตดตงเครอขายภายในบานและเครองพมพ HP สำาหรบการพมพแบบไรสาย ในเวบไซตน คณจะพบขอมลทสามารถชวยคณจดเตรยมเครอขายไรสายของคณ ตงคาหรอกำาหนดคาเครองพมพของคณ และแกไขปญหาการตดตงของคณ (รวมถงการใชยทลตการวนจฉยเครอขายของ Windows)
• ยนยนวาวทยไรสายของเครองพมพของคณเปดทำางานอย จากหนาจอหลก ใหสมผสไอคอน Wireless (ไรสาย) หากปรากฏขอความ Wireless Off (ปดระบบไรสาย) ใหแตะ Turn On (เปด)
• ยนยนวาเครองพมพของคณอยบนเครอขาย โดยใชวธการดงน 1. จากหนาจอหลก ใหแตะไอคอน Wireless (ไรสาย) 2. แตะ Settings (การตงคา) แตะแลวลากนวของคณในแนวตงเพอเลอนดตวเลอก แลวแตะ Print Wireless Test Report (พมพรายงานการทดสอบระบบไรสาย) 3. เครองจะพมพรายงานการทดสอบเครอขายไรสายโดยอตโนมต
- ดทดานบนของรายงานเพอตรวจสอบวามขอผดพลาดใดๆ ระหวางการทดสอบหรอไม - ดสวน Diagnostics Results (ขอมลสรปการวนจฉย) สำาหรบการทดสอบทงหมดทดำาเนนการ รวมทงตรวจดวาเครองพมพของคณผานการทดสอบหรอไม - คนหาชอเครอขาย (SSID) ของเครองพมพทกำาหนดคาไวสำาหรบการเชอมตอจากสวน Current Configuration (การกำาหนดคาปจจบน)
หมายเหต: คอมพวเตอรของคณอาจเชอมตอกบเครอขาย Virtual Private Network (VPN) ลองปดใชงาน VPN ชวคราวกอนทจะดำาเนนการตดตงตอ การเชอมตอกบเครอขาย VPN ใหผลเชนเดยวกบการเชอมตอเครอขายอน คณอาจตองยกเลกการเชอมตอกบเครอขาย VPN จงจะเขาถงเครองพมพผานเครอขายทบานได ถาคณไมไดเชอมตอเครองพมพเขากบเครอขายของคณ คณตองเชอมตอเครองพมพเขากบเครอขายของคณอกครง จากหนาจอหลก ใหแตะไอคอน Wireless (ไรสาย) แตะ Settings (การตงคา) แตะ Wireless Setup Wizard (ตวชวยการตดตงแบบไรสาย) แลวปฏบตตามขนตอนบนหนาจอเพอเชอมตอกบเครองพมพ
• ซอฟตแวรความปลอดภยอาจเปนสาเหตของปญหา ซอฟตแวรความปลอดภยทตดตงบนคอมพวเตอรของคณไดรบการออกแบบมาเพอปกปองคอมพวเตอรจากการคกคามตางๆ ทมาจากภายนอกเครอขายในบานของคณ ชดซอฟตแวรความปลอดภยอาจประกอบดวยซอฟตแวรประเภทตางๆ เชน แอพพลเคชนปองกนไวรส แอพพลเคชนปองกนสปายแวร ไฟรวอลล และแอพพลเคชนควบคมการใชงานของเดก ไฟรวอลลสามารถบลอกการสอสารระหวางอปกรณทเชอมตอบนเครอขาย ในบานของคณ และอาจทำาใหเกดปญหาเมอใชอปกรณตางๆ เชน เครองพมพและสแกนเนอรบนเครอขาย
คณอาจพบปญหาใดปญหาหนงตอไปน - ไมพบเครองพมพบนเครอขายเมอตดตงซอฟตแวรเครองพมพ - คณไมสามารถพมพงานไดอยางกะทนหน แมวาเมอวานนจะพมพไดกตาม - เครองพมพแสดงสถานะเปน OFFLINE (ออฟไลน) ในโฟลเดอร Printer and Faxes (เครองพมพและโทรสาร) - ซอฟตแวรแสดงสถานะของเครองพมพเปน "disconnected" (ไมไดเชอมตอ) แมวาเครองพมพจะเชอมตอกบเครอขายอยกตาม - หากคณใชเครองพมพแบบ All-in-One บางคณสมบต เชน การพมพ จะใชงานได แตการทำางานบางอยาง เชน การสแกน กลบใชไมได
การแกไขปญหาแบบดวน คอ การปดใชงานไฟรวอลลและตรวจสอบวาสามารถแกปญหาไดหรอไมตอไปนเปนคำาแนะนำาเบองตนในการใชซอฟตแวรความปลอดภย: - หากไฟรวอลลของคณมการตงคาทเรยกวา trusted zone (พนททเชอถอได) ใหใชการตงคานเมอคอมพวเตอรของคณเชอมตอกบเครอขายในบาน - ปรบปรงไฟรวอลลของคณใหทนสมยอยเสมอ ผจำาหนายซอฟตแวรความปลอดภยหลายรายมการอพเดตซงจะชวยแกไขปญหาทพบ - หากไฟรวอลลของคณมการตงคาเปน not show alert messages (ไมตองแสดงขอความแจงเตอน) คณควรปดใชงานการตงคาน เมอตดตงซอฟตแวร HP และใชเครองพมพ HP คณอาจไดรบขอความแจงเตอนจากซอฟตแวรไฟรวอลลของคณ คณควรอนญาตใหมการตดตงซอฟตแวร HP ทมการแจงเตอน ขอความแจงเตอนอาจมตวเลอกให allow (อนญาต), permit (ยนยอม) หรอ unblock (ยกเลกการบลอก) นอกจากน หากการแจงเตอนมตวเลอก remember this action (จดจำาการดำาเนนการน) หรอ create a rule for this selection (สรางกฎสำาหรบการดำาเนนการน) โปรดเลอกตวเลอกเหลาน ซงเปนวธการทไฟรวอลลจะเรยนรวาสงใดในเครอขายในบานของคณทสามารถเชอถอได
หากคณยงไมสามารถเชอมตอเครองพมพกบเครอขาย ใหไปท www.hp.com/go/wirelessprinting คลก Firewall Help (วธใชไฟรวอลล) คณสามารถหาการแกไขปญหาเพมเตมไดจากทนน
ภาษ
าไทย
18
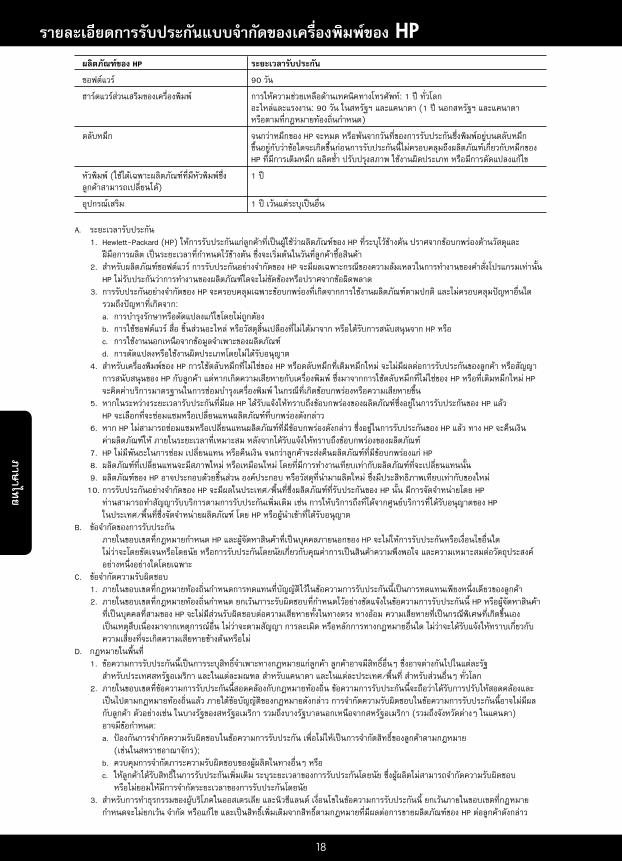
รายละเอยดการรบประกนแบบจำากดของเครองพมพของ HP
A. ระยะเวลารบประกน 1. Hewlett-Packard (HP) ใหการรบประกนแกลกคาทเปนผใชวาผลตภณฑของ HP ทระบไวขางตน ปราศจากขอบกพรองดานวสดและ
ฝมอการผลต เปนระยะเวลาทกำหนดไวขางตน ซงจะเรมตนในวนทลกคาซอสนคา 2. สำหรบผลตภณฑซอฟตแวร การรบประกนอยางจำกดของ HP จะมผลเฉพาะกรณของความลมเหลวในการทำงานของคำสงโปรแกรมเทานน
HP ไมรบประกนวาการทำงานของผลตภณฑใดจะไมขดของหรอปราศจากขอผดพลาด 3. การรบประกนอยางจำกดของ HP จะครอบคลมเฉพาะขอบกพรองทเกดจากการใชงานผลตภณฑตามปกต และไมครอบคลมปญหาอนใด
รวมถงปญหาทเกดจาก: a. การบำรงรกษาหรอดดแปลงแกไขโดยไมถกตอง b. การใชซอฟตแวร สอ ชนสวนอะไหล หรอวสดสนเปลองทไมไดมาจาก หรอไดรบการสนบสนนจาก HP หรอ c. การใชงานนอกเหนอจากขอมลจำเพาะของผลตภณฑ d. การดดแปลงหรอใชงานผดประเภทโดยไมไดรบอนญาต 4. สำหรบเครองพมพของ HP การใชตลบหมกทไมใชของ HP หรอตลบหมกทเตมหมกใหม จะไมมผลตอการรบประกนของลกคา หรอสญญา
การสนบสนนของ HP กบลกคา แตหากเกดความเสยหายกบเครองพมพ ซงมาจากการใชตลบหมกทไมใชของ HP หรอทเตมหมกใหม HP จะคดคาบรการมาตรฐานในการซอมบำรงเครองพมพ ในกรณทเกดขอบกพรองหรอความเสยหายขน
5. หากในระหวางระยะเวลารบประกนทมผล HP ไดรบแจงใหทราบถงขอบกพรองของผลตภณฑซงอยในการรบประกนของ HP แลว HP จะเลอกทจะซอมแซมหรอเปลยนแทนผลตภณฑทบกพรองดงกลาว
6. หาก HP ไมสามารถซอมแซมหรอเปลยนแทนผลตภณฑทมขอบกพรองดงกลาว ซงอยในการรบประกนของ HP แลว ทาง HP จะคนเงนคาผลตภณฑให ภายในระยะเวลาทเหมาะสม หลงจากไดรบแจงใหทราบถงขอบกพรองของผลตภณฑ
7. HP ไมมพนธะในการซอม เปลยนแทน หรอคนเงน จนกวาลกคาจะสงคนผลตภณฑทมขอบกพรองแก HP 8. ผลตภณฑทเปลยนแทนจะมสภาพใหม หรอเหมอนใหม โดยทมการทำงานเทยบเทากบผลตภณฑทจะเปลยนแทนนน 9. ผลตภณฑของ HP อาจประกอบดวยชนสวน องคประกอบ หรอวสดทนำมาผลตใหม ซงมประสทธภาพเทยบเทากบของใหม 10. การรบประกนอยางจำกดของ HP จะมผลในประเทศ/พนทซงผลตภณฑทรบประกนของ HP นน มการจดจำหนายโดย HP
ทานสามารถทำสญญารบบรการตามการรบประกนเพมเตม เชน การใหบรการถงทไดจากศนยบรการทไดรบอนญาตของ HP ในประเทศ/พนทซงจดจำหนายผลตภณฑ โดย HP หรอผนำเขาทไดรบอนญาต
B. ขอจำกดของการรบประกน ภายในขอบเขตทกฎหมายกำหนด HP และผจดหาสนคาทเปนบคคลภายนอกของ HP จะไมใหการรบประกนหรอเงอนไขอนใด
ไมวาจะโดยชดเจนหรอโดยนย หรอการรบประกนโดยนยเกยวกบคณคาการเปนสนคาความพงพอใจ และความเหมาะสมตอวตถประสงคอยางหนงอยางใดโดยเฉพาะ
C. ขอจำกดความรบผดชอบ 1. ภายในขอบเขตทกฎหมายทองถนกำหนดการทดแทนทบญญตไวในขอความการรบประกนนเปนการทดแทนเพยงหนงเดยวของลกคา 2. ภายในขอบเขตทกฎหมายทองถนกำหนด ยกเวนภาระรบผดชอบทกำหนดไวอยางชดแจงในขอความการรบประกนน HP หรอผจดหาสนคา
ทเปนบคคลทสามของ HP จะไมมสวนรบผดชอบตอความเสยหายทงในทางตรง ทางออม ความเสยหายทเปนกรณพเศษทเกดขนเอง เปนเหตสบเนองมาจากเหตการณอน ไมวาจะตามสญญา การละเมด หรอหลกการทางกฎหมายอนใด ไมวาจะไดรบแจงใหทราบเกยวกบความเสยงทจะเกดความเสยหายขางตนหรอไม
D. กฎหมายในพนท 1. ขอความการรบประกนนเปนการระบสทธจำเพาะทางกฎหมายแกลกคา ลกคาอาจมสทธอนๆ ซงอาจตางกนไปในแตละรฐ
สำหรบประเทศสหรฐอเมรกา และในแตละมณฑล สำหรบแคนาดา และในแตละประเทศ/พนท สำหรบสวนอนๆ ทวโลก 2. ภายในขอบเขตทขอความการรบประกนนสอดคลองกบกฎหมายทองถน ขอความการรบประกนนจะถอวาไดรบการปรบใหสอดคลองและ
เปนไปตามกฎหมายทองถนแลว ภายใตขอบญญตของกฎหมายดงกลาว การจำกดความรบผดชอบในขอความการรบประกนนอาจไมมผลกบลกคา ตวอยางเชน ในบางรฐของสหรฐอเมรกา รวมถงบางรฐบาลนอกเหนอจากสหรฐอเมรกา (รวมถงจงหวดตางๆ ในแคนดา) อาจมขอกำหนด:
a. ปองกนการจำกดความรบผดชอบในขอความการรบประกน เพอไมใหเปนการจำกดสทธของลกคาตามกฎหมาย (เชนในสหราชอาณาจกร);
b. ควบคมการจำกดภาระความรบผดชอบของผผลตในทางอนๆ หรอ c. ใหลกคาไดรบสทธในการรบประกนเพมเตม ระบระยะเวลาของการรบประกนโดยนย ซงผผลตไมสามารถจำกดความรบผดชอบ
หรอไมยอมใหมการจำกดระยะเวลาของการรบประกนโดยนย 3. สำหรบการทำธรกรรมของผบรโภคในออสเตรเลย และนวซแลนด เงอนไขในขอความการรบประกนน ยกเวนภายในขอบเขตทกฎหมาย
กำหนดจะไมยกเวน จำกด หรอแกไข และเปนสทธเพมเตมจากสทธตามกฎหมายทมผลตอการขายผลตภณฑของ HP ตอลกคาดงกลาว
ผลตภณฑของ HP ระยะเวลารบประกนซอฟตแวร 90 วนฮารดแวรสวนเสรมของเครองพมพ การใหความชวยเหลอดานเทคนคทางโทรศพท: 1 ป ทวโลก อะไหลและแรงงาน: 90 วน ในสหรฐฯ และแคนาดา (1 ป นอกสหรฐฯ และแคนาดา หรอตามทกฎหมายทองถนกำหนด)ตลบหมก จนกวาหมกของ HP จะหมด หรอพนจากวนทของการรบประกนซงพมพอยบนตลบหมก
ขนอยกบวาขอใดจะเกดขนกอนการรบประกนนไมครอบคลมถงผลตภณฑเกยวกบหมกของ HP ทมการเตมหมก ผลตซำ ปรบปรงสภาพ ใชงานผดประเภท หรอมการดดแปลงแกไข
หวพมพ (ใชไดเฉพาะผลตภณฑทมหวพมพซง 1 ปลกคาสามารถเปลยนได)อปกรณเสรม 1 ป เวนแตระบเปนอน
ภาษ
าไทย

DESKJET INK ADVANTAGE 6525 e-ALL-IN-ONE SERIES
PenyiapanKeluarkan isi kemasan dan nyalakan printer (lihat lembar penyiapan), kemudian ikuti petunjuk dan animasi pada layar printer untuk menyelesaikan pengkonfigurasian printer.
ReadmeFile Readme berisi informasi kontak dukungan HP, persyaratan sistem operasi, dan pembaruan terkini untuk informasi printer Anda.Windows: Masukkan CD perangkat lunak. Pada CD perangkat lunak, cari file ReadMe.chm. Klik ReadMe.chm untuk membukanya, lalu pilih ReadMe dalam bahasa Anda.Mac: Masukkan CD perangkat lunak, kemudian klik dua kali folder Read Me yang terletak di level teratas CD perangkat lunak.
Pemakaian TintaTinta pada kartrid digunakan dalam proses pencetakan melalui beberapa cara, termasuk dalam proses inisialisasi yang mempersiapkan printer dan kartrid untuk pencetakan, juga dalam pengoperasian kepala cetak yang menjaga saluran tinta cetak tetap bersih dan aliran tinta lancar. Selain itu, sedikit sisa tinta akan tertinggal di dalam kartrid setelah habis digunakan. Untuk informasi lebih lanjut, kunjungi: www.hp.com/go/inkusage.
Bantuan ElektronikBantuan Elektronik secara otomatis akan terinstal saat penginstalan perangkat lunak printer berlangsung. Bantuan Elektronik berisi petunjuk tentang fitur dan pemecahan masalah printer dengan tautan tambahan ke konten online. Bantuan Elektronik juga menyediakan spesifikasi printer, maklumat hukum, lingkungan, pengaturan, dan informasi dukungan.Windows: Setelah perangkat lunak terinstal, klik Mulai > All Programs (Semua Program) > HP > HP Deskjet 6520 series > Help (Bantuan).Mac: Saat penginstalan perangkat lunak berlangsung, layar akan menampilkan perangkat lunak yang direkomendasikan, pilih HP Recommended Software (Perangkat Lunak yang Direkomendasikan HP), kemudian selesaikan penginstalan perangkat lunak. • Mac OS X v10.6: Pilih Mac Help (Bantuan Mac) dari Help (Bantuan). Dalam Help Viewer (Penampil
Bantuan), klik dan tahan tombol Laman, kemudian pilih Bantuan untuk perangkat Anda. • Mac OS X v10.7: Pilih Help Center (Pusat Bantuan) dari Help (Bantuan), klik Help for all your apps
(Bantuan untuk semua aplikasi Anda), kemudian pilih Bantuan untuk perangkat Anda.Untuk mencari informasi kepatuhan dan pernyataan Maklumat Pengaturan Uni Eropa, pilih Bantuan elektronik, klik Appendix (Apendiks) > Technical information (Informasi teknis) > Regulatory notices (Maklumat pengaturan) > European Union Regulatory Notice (Maklumat Pengaturan Uni Eropa). Deklarasi Kesesuaian untuk printer ini tersedia melalui alamat web berikut: www.hp.eu/certificates.
Mendaftarkan printerDapatkan notifikasi layanan dan dukungan yang lebih cepat dengan mendaftarkan produk di www.register.hp.com.
Tidak memiliki drive CD/DVD?Untuk komputer yang tidak dilengkapi drive CD/DVD, kunjungi www.hp.com/support untuk mengunduh dan menginstal perangkat lunak.
Baha
sa In
done
sia
20
14
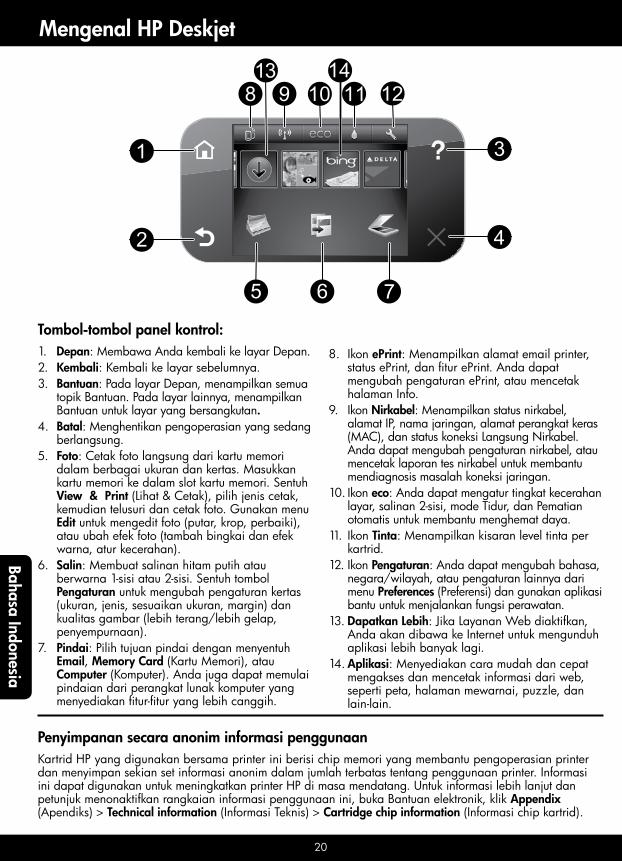
Mengenal HP Deskjet
Tombol-tombol panel kontrol:1. Depan: Membawa Anda kembali ke layar Depan.2. Kembali: Kembali ke layar sebelumnya.3. Bantuan: Pada layar Depan, menampilkan semua
topik Bantuan. Pada layar lainnya, menampilkan Bantuan untuk layar yang bersangkutan.
4. Batal: Menghentikan pengoperasian yang sedang berlangsung.
5. Foto: Cetak foto langsung dari kartu memori dalam berbagai ukuran dan kertas. Masukkan kartu memori ke dalam slot kartu memori. Sentuh View & Print (Lihat & Cetak), pilih jenis cetak, kemudian telusuri dan cetak foto. Gunakan menu Edit untuk mengedit foto (putar, krop, perbaiki), atau ubah efek foto (tambah bingkai dan efek warna, atur kecerahan).
6. Salin: Membuat salinan hitam putih atau berwarna 1-sisi atau 2-sisi. Sentuh tombol Pengaturan untuk mengubah pengaturan kertas (ukuran, jenis, sesuaikan ukuran, margin) dan kualitas gambar (lebih terang/lebih gelap, penyempurnaan).
7. Pindai: Pilih tujuan pindai dengan menyentuh Email, Memory Card (Kartu Memori), atau Computer (Komputer). Anda juga dapat memulai pindaian dari perangkat lunak komputer yang menyediakan fitur-fitur yang lebih canggih.
8. Ikon ePrint: Menampilkan alamat email printer, status ePrint, dan fitur ePrint. Anda dapat mengubah pengaturan ePrint, atau mencetak halaman Info.
9. Ikon Nirkabel: Menampilkan status nirkabel, alamat IP, nama jaringan, alamat perangkat keras (MAC), dan status koneksi Langsung Nirkabel. Anda dapat mengubah pengaturan nirkabel, atau mencetak laporan tes nirkabel untuk membantu mendiagnosis masalah koneksi jaringan.
10. Ikon eco: Anda dapat mengatur tingkat kecerahan layar, salinan 2-sisi, mode Tidur, dan Pematian otomatis untuk membantu menghemat daya.
11. Ikon Tinta: Menampilkan kisaran level tinta per kartrid.
12. Ikon Pengaturan: Anda dapat mengubah bahasa, negara/wilayah, atau pengaturan lainnya dari menu Preferences (Preferensi) dan gunakan aplikasi bantu untuk menjalankan fungsi perawatan.
13. Dapatkan Lebih: Jika Layanan Web diaktifkan, Anda akan dibawa ke Internet untuk mengunduh aplikasi lebih banyak lagi.
14. Aplikasi: Menyediakan cara mudah dan cepat mengakses dan mencetak informasi dari web, seperti peta, halaman mewarnai, puzzle, dan lain-lain.
Penyimpanan secara anonim informasi penggunaanKartrid HP yang digunakan bersama printer ini berisi chip memori yang membantu pengoperasian printer dan menyimpan sekian set informasi anonim dalam jumlah terbatas tentang penggunaan printer. Informasi ini dapat digunakan untuk meningkatkan printer HP di masa mendatang. Untuk informasi lebih lanjut dan petunjuk menonaktifkan rangkaian informasi penggunaan ini, buka Bantuan elektronik, klik Appendix (Apendiks) > Technical information (Informasi Teknis) > Cartridge chip information (Informasi chip kartrid).
Bahasa Indonesia

21
Windows Mac
Penyiapan dan pemecahan masalah
Spesifikasi daya
CQ191-60018 • Tegangan masuk: 200-240 Vac (+/- 10%) • Frekuensi masuk: 50/60 Hz (+/- 3 Hz)
CQ191-60017 • Tegangan masuk: 100-240 Vac (+/- 10%) • Frekuensi masuk: 50/60 Hz (+/- 3 Hz)
Jika Anda tidak dapat mencetak...Periksa pesan kesalahan dan atasi. Jika Anda masih tidak dapat mencetak, cobalah langkah berikut sesuai urutan:
Pastikan HP Deskjet Anda telah diset sebagai printer standar dan tersambung.Untuk melakukannya:1. Pada bilah tugas Windows, klik Mulai.2. Kemudian klik:
• Devices and Printers (Perangkat dan Printer) (Windows 7®)
• Printers (Printer) (Windows Vista®) • Control Panel (Panel Kontrol), kemudian
klik Printers and Faxes (Printer dan Faks) (Windows XP®)
Perhatikan printer Anda untuk melihat adakah tanda centang pada lingkaran di sebelahnya. Jika tidak ada, klik kanan ikon printer lalu pilih Set as default printer (Set sebagai printer standar) dari menu.Untuk memeriksa apakah printer Anda dalam keadaan tersambung, klik kanan ikon printer dan pastikan Use Printer Offline (Gunakan Printer Tanpa Tersambung) dan Pause Printing (Tunda Pencetakan) tidak dipilih.Jika penginstalan perangkat lunak printer HP gagal:1. Keluarkan CD dari drive CD komputer, kemudian
putuskan sambungan printer dari komputer.2. Nyalakan ulang komputer.3. Nonaktifkan untuk sementara setiap firewall
perangkat lunak dan tutup semua perangkat lunak antivirus.
4. Masukkan CD perangkat lunak printer ke dalam drive CD komputer, kemudian ikuti petunjuk pada layar untuk menginstal perangkat lunak printer. Jangan hubungkan kabel USB sebelum diperintahkan.
5. Setelah penginstalan selesai, nyalakan ulang komputer dan semua perangkat lunak keamanan yang telah dinonaktifkan atau ditutup.
Nyalakan ulang dan set ulang:1. Nyalakan ulang komputer.2. Set ulang printer:
a. Matikan printer dan cabut kabel daya printer.b. Tunggu kira-kira 1 menit, kemudian pasang
kembali kabel tersebut lalu hidupkan printer.
Periksa antrian cetak Anda:1. Dalam System Preferences (Preferensi Sistem), klik:
• Print & Fax (Cetak & Faks) (Mac OS X v10.6) • Print & Scan (Cetak & Pindai) (Mac OS X
v10.7)2. Klik tombol Open Print Queue (Buka Antrian Cetak).3. Klik pekerjaan cetak untuk memilihnya.4. Gunakan tombol berikut untuk mengatur
pekerjaan cetak: • Hapus: Membatalkan pekerjaan cetak yang
dipilih. • Lanjutkan: Melanjutkan pekerjaan cetak
yang dihentikan. • Jika Anda telah membuat perubahan, coba
cetak kembali.
Jika Anda masih tidak dapat mencetak, hapus dan instal ulang perangkat lunak printer HP.Untuk menghapus instalan perangkat lunak:1. Lepas kabel printer dari komputer.2. Buka Aplikasi: Folder Hewlett-Packard.3. Klik dua kali HP Uninstaller. Ikuti petunjuk pada
layar.Untuk menginstal perangkat lunak:1. Masukkan CD ke dalam drive CD komputer Anda.2. Pada desktop, buka CD lalu klik dua kali
HP Installer.3. Ikuti petunjuk pada layar.
Catatan: Gunakan printer ini hanya dengan kabel daya yang disediakan oleh HP. HP menganjurkan Anda untuk menghubungkan printer langsung ke stopkontak di dinding.
Baha
sa In
done
sia

22
Windows Mac
Penggunaan printer berjaringan
Mengubah sambungan USB ke jaringan nirkabelJika awalnya printer dihubungkan melalui sambungan USB ke komputer, sambungan ini dapat diubah ke sambungan jaringan nirkabel melalui langkah-langkah berikut.
Bagikan fungsi printer melalui beberapa komputerJika printer Anda telah dihubungkan ke jaringan nirkabel dan Anda ingin berbagi fungsi printer dengan komputer lain yang terhubung ke jaringan yang sama, Anda harus menginstal perangkat lunak printer pada komputer itu. Saat penginstalan perangkat lunak berlangsung, pilih sambungan Wireless (Nirkabel) saat diminta, kemudian ikuti petunjuk pada layar untuk menyelesaikan penginstalan perangkat lunak printer.
Untuk mengubah dari sambungan USB ke nirkabel:1. Dari komputer, klik Mulai > All Programs (Semua
Program) > HP > HP Deskjet 6520 series > Printer Setup & Software (Penyiapan Printer & Perangkat Lunak)
2. Klik Convert a USB connected printer to wireless (Ubah sambungan printer dari USB ke nirkabel). Biarkan kabel USB tetap terhubung sebelum Anda diminta melepasnya.
3. Ikuti petunjuk pada layar.
Untuk mengubah dari sambungan USB ke nirkabel:1. Dari panel kontrol printer, sentuh tombol Nirkabel.2. Sentuh Wireless Setup Wizard (Wisaya Penyiapan
Nirkabel).3. Ikuti langkah-langkah dalam Wireless Setup
Wizard (Wisaya Penyiapan Nirkabel) untuk menghubungkan printer.
4. Gunakan HP Setup Assistant dalam Applications/ Hewlett-Packard/Device Utilities untuk mengubah sambungan ke printer ini menjadi lewat nirkabel.
Menyambung nirkabel ke printer tanpa routerHP Wireless Direct memungkinkan perangkat Wi-Fi (misalnya: komputer atau smartphone) mencetak langsung ke printer secara nirkabel tanpa router nirkabel, dari perangkat berbasis Wi-Fi. Untuk menyiapkan dan menggunakan koneksi Langsung Nirkabel:1. Dari panel kontrol printer, sentuh ikon Nirkabel.2. Sentuh Settings (Pengaturan).3. Sentuh koneksi Wireless Direct (Langsung Nirkabel), sentuh On (No Security) (Aktif [Tanpa Keamanan])
atau On (With Security) (Aktif [Dengan Keamanan]).Catatan: Jika Anda mengaktifkan sistem keamanan, hanya pengguna yang memiliki katasandi yang dapat mencetak secara nirkabel ke printer. Jika Anda menonaktifkan keamanan, siapapun dengan perangkat Wi-Fi yang berada dalam jangkauan Wi-Fi printer dapat terhubung ke printer tersebut. HP menganjurkan Anda untuk mengaktifkan sistem keamanan untuk koneksi Langsung Nirkabel.
4. Sentuh Display Name (Tampilkan Nama) untuk menampilkan nama koneksi Langsung Nirkabel.5. Sentuh Display Password (Tampilkan Katasandi) untuk menampilkan katasandi koneksi Langsung Nirkabel
jika sistem keamanan koneksi Langsung Nirkabel telah diaktifkan.6. Dari komputer nirkabel atau perangkat mobile Anda, aktifkan radio Wi-Fi, telusuri dan hubungkan ke
nama koneksi Langsung Nirkabel, (misalnya: HP-Print-xx-Deskjet 6520). Cetak seperti yang biasa Anda lakukan dari komputer atau perangkat mobile.Jika sistem keamanan koneksi Langsung Nirkabel telah diaktifkan, masukkan katasandi koneksi Langsung Nirkabel saat diminta.
Catatan: • Jika Anda ingin mencetak dari perangkat mobile, Anda harus memiliki aplikasi cetak di dalam
perangkat mobile Anda. • Jika Anda ingin mencetak dari komputer, Anda harus menginstal perangkat lunak printer. Saat
penginstalan perangkat lunak berlangsung, layar akan menampilkan jenis sambungan, pilih Wireless (Nirkabel), pilih printer saat muncul dalam daftar, kemudian selesaikan penginstalan perangkat lunak.
• Koneksi Langsung Nirkabel tetap tersedia meskipun printer juga dihubungkan ke jaringan lokal nirkabel. • Anda tidak dapat mengakses Internet melalui koneksi Langsung Nirkabel. • Koneksi Langsung Nirkabel mendukung sekaligus hingga 5 klien.
Bahasa Indonesia
23
Pemecahan masalah printer berjaringan
Jika Anda tidak dapat menghubungkan printer ke jaringan… • Dapatkan bantuan dari Pusat Pencetakan Nirkabel: Situs web Pusat Pencetakan Nirkabel HP di
(www.hp.com/go/wirelessprinting) adalah panduan referensi online untuk menyiapkan jaringan lokal dan printer HP untuk pencetakan nirkabel. Di situs web ini, Anda dapat menemukan informasi yang dapat membantu Anda menyiapkan jaringan nirkabel, menyiapkan dan mengkonfigurasi printer, dan mengatasi masalah penyiapan (termasuk menggunakan Windows Network Diagnostic Utility).
• Pastikan radio nirkabel printer Anda telah dinyalakan. Dari layar Depan, sentuh ikon Nirkabel, jika tampil Wireless Off (Nirkabel Nonaktif), sentuh Turn On (Aktifkan).
• Pastikan printer Anda terhubung ke jaringan. Untuk melakukannya:1. Dari layar Depan, sentuh ikon Nirkabel.2. Sentuh Settings (Pengaturan), sentuh dan geser-geser jari Anda secara vertikal untuk menelusuri pilihan,
kemudian sentuh Print Wireless Test Report (Cetak Laporan Tes Nirkabel).3. Laporan Tes Nirkabel secara otomatis akan dicetak.
- Periksa bagian atas laporan untuk melihat adakah sesuatu yang gagal selama tes. - Lihat bagian Diagnostics Results (Hasil Diagnosis) untuk semua tes yang telah dijalankan, dan apakah printer Anda lolos tes atau tidak.
- Dari bagian Konfigurasi Saat Ini, temukan Nama Jaringan (SSID) ke mana printer Anda saat ini terhubung.Catatan: Komputer Anda mungkin terhubung ke Jaringan Privat Virtual (VPN). Nonaktifkan VPN untuk sementara sebelum meneruskan penginstalan. Mencoba menyambung ke VPN sama seperti menyambung ke jaringan yang lain; Anda harus memutuskan sambungan dari VPN untuk mengakses printer melalui jaringan lokal.Jika printer Anda tidak terhubung ke jaringan, Anda harus menghubungkannya kembali ke jaringan. Dari layar Depan, sentuh ikon Nirkabel, sentuh Settings (Pengaturan), sentuh Wireless Setup Wizard (Wisaya Penyiapan Nirkabel), kemudian ikuti langkah-langkah pada layar untuk menghubungkan printer.
• Perangkat lunak keamanan mungkin telah menjadi penyebab masalah. Perangkat lunak keamanan yang terinstal pada komputer dirancang untuk melindungi komputer Anda dari berbagai ancaman yang berasal dari luar jaringan lokal. Paket perangkat lunak keamanan dapat berisi aneka jenis perangkat lunak seperti antivirus, antispyware, aplikasi firewall, dan aplikasi pelindung untuk anak-anak. Firewall dapat memblokir komunikasi antar-perangkat yang terhubung ke jaringan lokal dan dapat menyebabkan masalah bila menggunakan perangkat seperti printer dan pemindai berjaringan.Masalah yang mungkin timbul adalah:
- Printer tidak dapat ditemukan pada jaringan saat menginstal perangkat lunak printer. - Anda tiba-tiba tidak dapat mencetak ke printer padahal hari sebelumnya bisa. - Pada folder Printer and Faxes (Printer dan Faks), printer memperlihatkan pesan OFFLINE (TIDAK TERSAMBUNG).
- Perangkat lunak menampilkan status sambungan printer “terputus” padahal printer ini terhubung ke jaringan. - Jika printer yang Anda miliki adalah jenis All-in-One, sebagian fungsinya (misal mencetak) dapat berkerja, namun sebagian lain tidak (misal memindai).
Teknik cepat mengatasi masalah ini adalah dengan menonaktifkan firewall dan memeriksa apakah masalahnya sudah teratasi. Berikut adalah sejumlah petunjuk dasar penggunaan perangkat lunak keamanan:
- Jika firewall Anda memiliki pengaturan yang disebut dengan zona terpercaya, gunakan pengaturan ini bila komputer Anda terhubung ke jaringan lokal.
- Perbarui terus firewall Anda. Banyak vendor perangkat lunak keamanan menyediakan pembaruan yang mampu memperbaiki masalah-masalah umum.
- Jika firewall Anda memiliki pengaturan untuk tidak menampilkan pesan peringatan, Anda harus menonaktifkannya. Saat menginstal perangkat lunak HP dan menggunakan printer HP, Anda dapat melihat beberapa pesan peringatan dari perangkat lunak firewall. Anda sebaiknya memperbolehkan setiap perangkat lunak HP yang memberikan pesan peringatan. Pesan peringatan ini mungkin memberikan pilihan untuk perbolehkan, izinkan atau buka blokir. Selain itu, jika peringatan ini memiliki pilihan ingat aksi ini atau buat aturan untuk pilihan ini, pastikan Anda memilihnya. Ini adalah cara firewall mempelajari apa yang dapat dipercaya pada jaringan lokal Anda.
Jika Anda masih tidak dapat menghubungkan printer ke jaringan, kunjungi www.hp.com/go/wirelessprinting, klik Firewall Help (Bantuan Firewall). Di situ Anda dapat menemukan solusi lainnya.
Baha
sa In
done
sia

24
Pernyataan jaminan terbatas printer HP
Kepala cetak (hanya berlaku untuk produk dengan kepala cetak yang dapat diganti oleh pelanggan)
Dukungan teknis melalui telepon: 1 tahun di seluruh duniaSuku cadang dan servis: 90 hari di Amerika Serikat dan Kanada (Di luar Amerika Serikat dan Kanada 1 tahun atau seperti ditentukan oleh hukum setempat)
Bahasa Indonesia