designer - seeed studio started… · web viewconnect the dobot shield to arduino mega2560, as...
TRANSCRIPT

Getting Started
Warning:All electronic modules (motor drive module, Bluetooth module, etc.) are not hot-swappable, hot plugging may damage the module.
Step One:Connect the Dobot shield to Arduino MEGA2560, as shown in the figures below
Pic(a) Please use a licensed Arduino or self-customized Arduino
Pic(b) dobot transfer board

Step Two:Insert the motor drive into the corresponding interfaces as shown in the picture above. After insertion, you will get something like in the picture below. Watch out for the direction of the knob, if you insert it in the opposite direction it will overheat when the power is on.
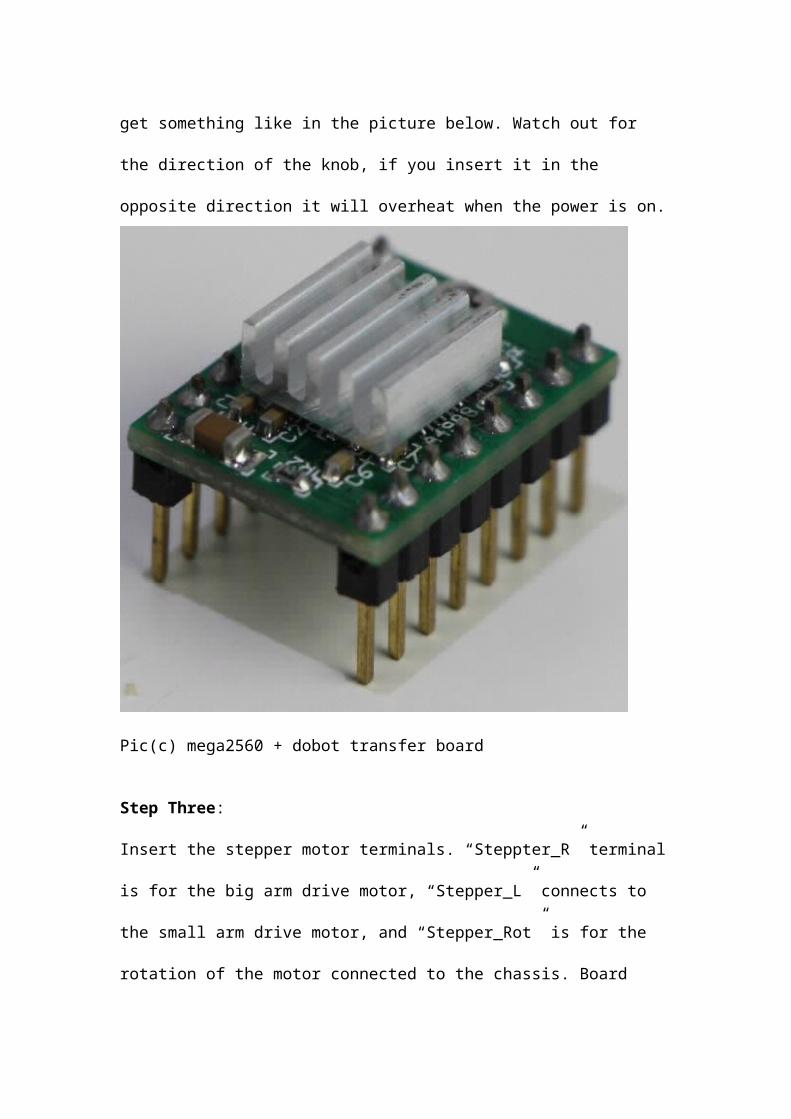
Pic(c) mega2560 + dobot transfer board
Step Three:Insert the stepper motor terminals. “Steppter_R” terminal is for the big arm drive motor, “Stepper_L” connects to the small arm drive motor, and “Stepper_Rot” is for the rotation of the motor connected to the chassis. Board silkscreen "RBGK" means to be connected with the motor "red, blue, green,black", respectively. Do NOT randomly switch positions of the four lines as they have been pre-set in the factory.

Step Four:If an effector is needed, you need to install the effector and connect the lines correctly. In all versions of Dobot, we provide an air pump and sucker dish. Here we use the installation of a sucker dish as an example to demonstrate. Insert Pump and Valve, connect the two red lines with +12V, corresponding to the two +12V terminals.
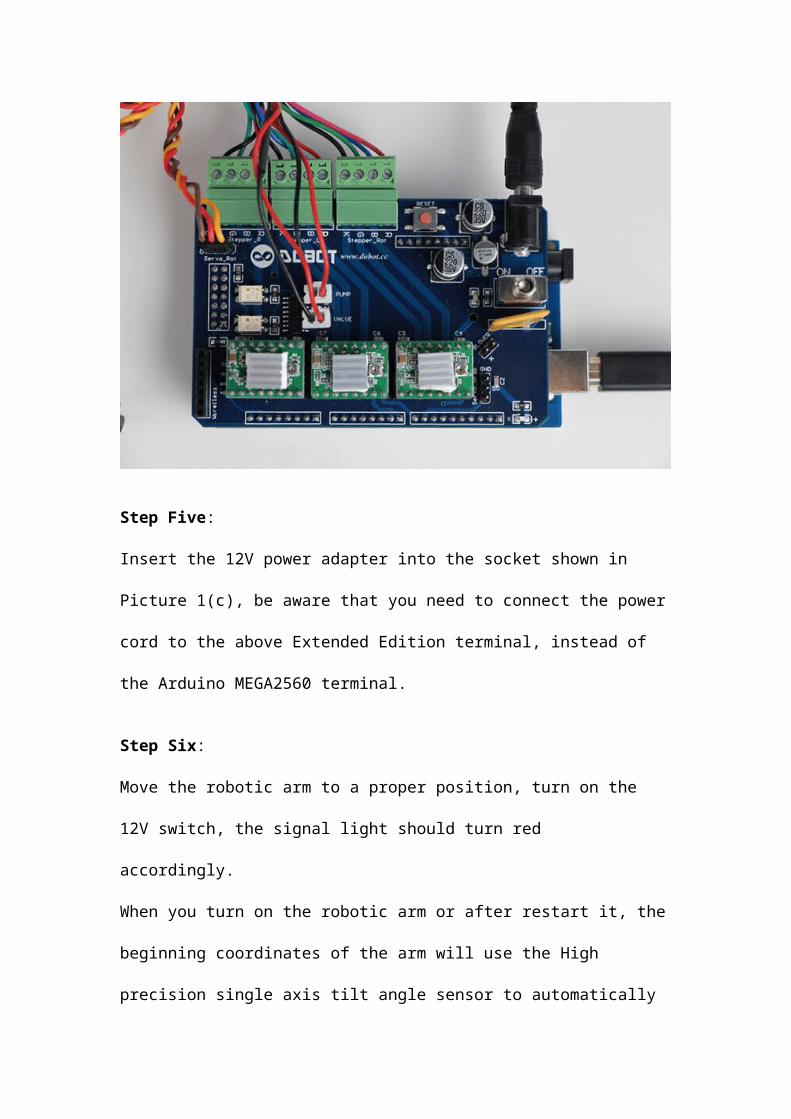
Step Five:Insert the 12V power adapter into the socket shown in Picture 1(c), be aware that you need to connect the power cord to the above Extended Edition terminal, instead of the Arduino MEGA2560 terminal.
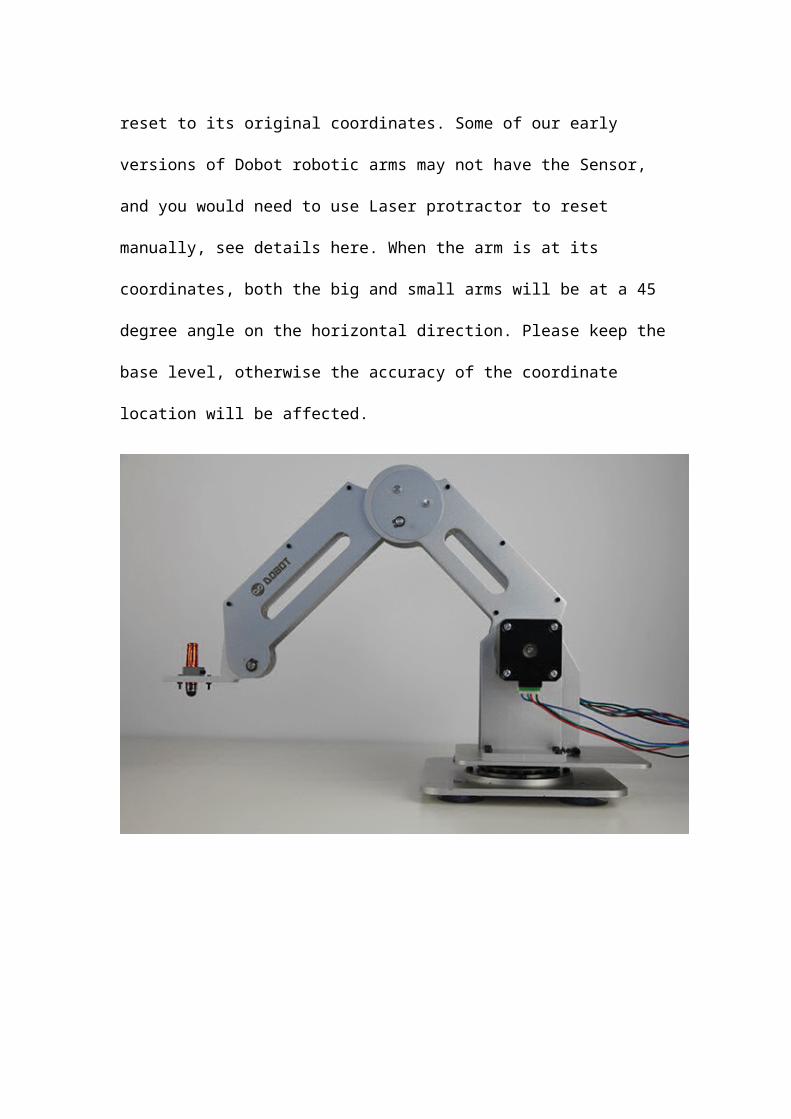
Step Six:Move the robotic arm to a proper position, turn on the 12V switch, the signal light should turn red accordingly. When you turn on the robotic arm or after restart it, the beginning coordinates of the arm will use the High precision single axis tilt angle sensor to automatically reset to its original coordinates. Some of our early versions of Dobot robotic arms may not have the Sensor, and you would need to use Laser protractor to reset manually, see details here. When the arm is at its coordinates, both the big and small arms will be at a 45 degree angle on the horizontal direction. Please keep the base level, otherwise the accuracy of the coordinate location will be affected.
Step Seven:Run the Dobot.exe in Upper computer folder, click Dobot Para to set the beginning angles.

Based on the angle measurements of the robot in the second chapter, type the beginning angle degrees of the big and small arms you measured previously in the UserDef section (By default, the big and small arms will reset its angles to 45 degree every time it restarts). Then click “Send”.
Step Eight:Back to the main window, Click Axis to enter the “Teach and Playback” section.

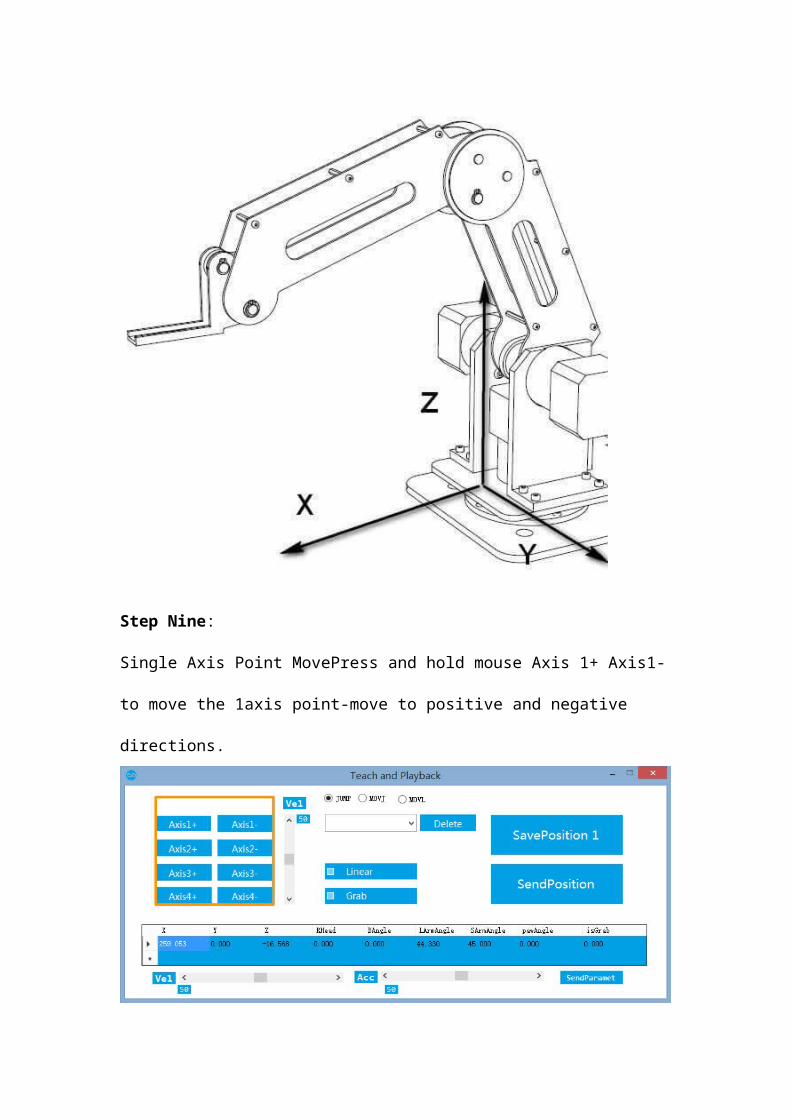
Step Nine:Single Axis Point MovePress and hold mouse Axis 1+ Axis1- to move the 1axis point-move to positive and negative directions.

Step Ten:You can use the Vel progress bar at the bottom left corner to set/adjust the speed of point move. The default speed is 50%. After adjustment, click SendParamet at the bottom right corner to apply.
Step Eleven:More Point Move Methods
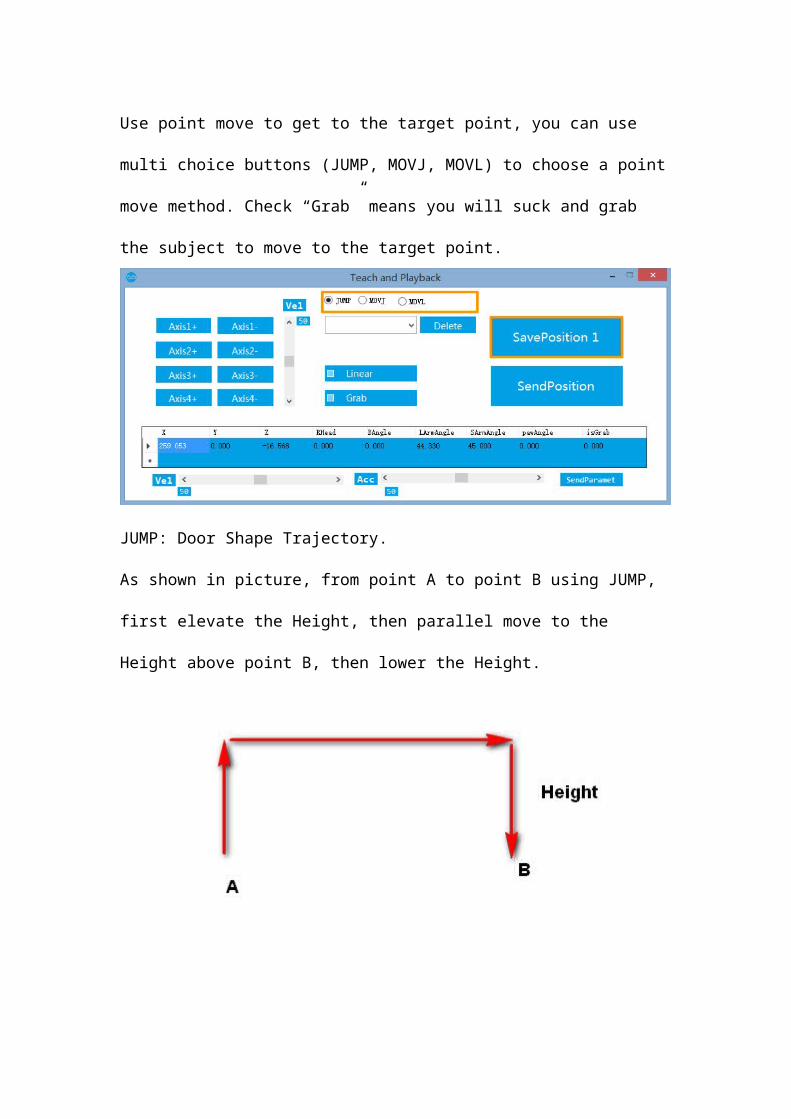
Use point move to get to the target point, you can use multi choice buttons (JUMP, MOVJ, MOVL) to choose a point move method. Check “Grab” means you will suck and grab the subject to move to the target point.
JUMP: Door Shape Trajectory.

As shown in picture, from point A to point B using JUMP, first elevate the Height, then parallel move to the Height above point B, then lower the Height.
You can set different Height indexes at the “Jump Height” box in the Play section, and don’t forget to click “Send” to apply.
MOVJ: Joint MoveFrom point A to point B, every joint starts with the joint angle A, then moves to the joint angle B as its ending position. During the process, all axises will arrive at the same time. The scenario wouldn’t take place where one axis stops and another keeps moving.

MOVL: Linear Move. The trajectory from point A to point B is a straight line.
Step twelve:Point Save Memory Repeat ModeClick “SavePosition” to save the position of this point, the moving method and the status of the dish. Following points will be saved automatically in consecutive numerals, such as SavePosition1,2,3...etc. Moreover, when the arm reaches one point, it can take a short pause before reaching the next by adjusting the Pause Time through Play section, unit is ms.
Select the point from the drop-down list, you can delete actions or save new points.
Click “SendPosition”, the robot will then begin running the saved positions accordingly.
Through the Vel progress bar and Acc progress bar, you can adjust the speed of point move, after you are done, you need to click “SendParamet” on the bottom right corner to apply.
Attention:Do NOT adjust speed while in movement, adjust it before moving.