design and manufacturing vacuum forming. manufacturing – vacuum forming process a sheet of...
TRANSCRIPT

Design and Manufacturing Design and Manufacturing
Vacuum Forming Vacuum Forming

Manufacturing – Vacuum FormingProcessA sheet of thermoplastic material is clamped around its edges and heated until flexible. A heat-proof mould of the required shape is raised into the softened plastic. The air between the sheet and the mould is evacuated by a vacuum pump. Atmospheric pressure then forces the plastic sheet tightly over the mould.
MaterialsHigh Impact Polystyrene sheets from 1mm to 3mm in range of colours are available Including clear sheet used for bubble packaging in presentation boxes.
Manufacturing – Vacuum Forming
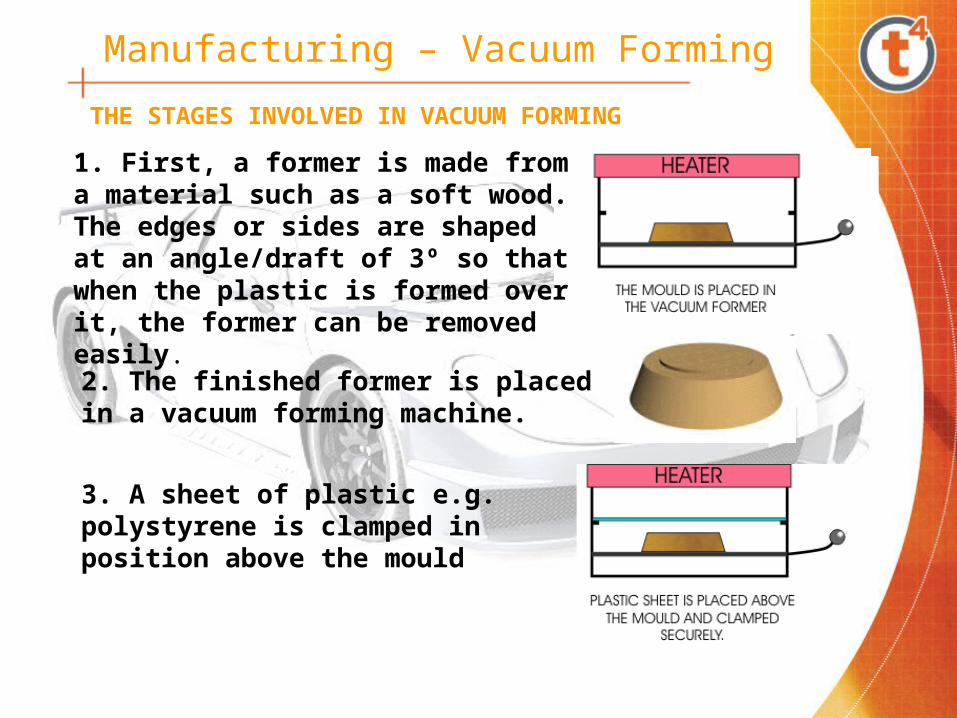
THE STAGES INVOLVED IN VACUUM FORMING
1. First, a former is made from a material such as a soft wood. The edges or sides are shaped at an angle/draft of 3º so that when the plastic is formed over it, the former can be removed easily.
2. The finished former is placed in a vacuum forming machine.
3. A sheet of plastic e.g. polystyrene is clamped in position above the mould

Manufacturing – Vacuum Forming
4. The heating elements are then turned on and the plastic slowly becomes soft and pliable as it heats up. The plastic can be seen to ‘sag’ and as the surface expands
5. After a few minutes the plastic is ready for ‘forming’ as it becomes very
flexible or rubbery.
6. The heater is turned off and the mould is moved upwards by lifting the lever until it locks in position.
MOULDING PROCESS

Manufacturing – Vacuum Forming
7. The 'vacuum' is turned on and this pumps out all the air beneath the plastic sheet. Atmospheric pressure above the plastic sheet forces it down on the mould. The shape of the mould can now be clearly seen through the plastic sheet. When the plastic has cooled the vacuum pump is switched off.
8. The plastic sheet is removed from the vacuum former. The sheet has the shape of the former pressed into its surface.
9. The excess plastic is trimmed so that only the plastic bowl remains An enlarged view of the final dish is seen opposite.
COMPLETED MOULD

Manufacturing – Vacuum Forming
Mould ManufactureTo achieve the desired shape moulds may be made by gluing layers of material together and then shaping using a variety of hand and machine tools such as CNC Routers, Laser Cutting, Scroll Saws, Spindle molding table and Belt sanders .
Materials used in mould construction may be MDF, Balsa wood, Modelling clay. MDF is usually used in school and cast aluminum or epoxy resin in industry. Mould strength and rigidity may increased by designing in recesses, grooves or steps.
Example of trays or bubble or blister packaging produced by vacuum forming
http://www.uni-plastic.com/Thermoforming%20&%20Vacuun%20Forming.htm
Web site link to commercial blister vacuum forming & packaging

Manufacturing – Vacuum Forming
When designing a mould it is most important to considering the removal of the vacuum formed shell. No overhanging lips or negative angles. A draft angles of 3° to 5° must be provided on all surfaces of the mould. The formed plastic and the mold is very difficult to seperate and may split or crack. A wooden mould may be dusted with Talcuum powder to aid removal.
By using light plywood, aluminum or Perspex sheet as a base layer on your mould, it may be attached using two sided tape so that it may be easily removed and used as the base for your completed project. See example of car mould opposite.
MAKING A MOULD

Manufacturing – Vacuum Forming
Commercial examples of Vacuum Forming
Manufacturing – Vacuum Forming
Tips & Tricks1. MDF & 3mm plywood sheet are cheap and suitable materials used
for manufacturing Moulds.
2. Complex shapes can be built up in layers.
3. Two sided tape, coins, dowels, metal crests, car badges, superglue, wood fillers, matches may be used to enhance or personalize a mould.
4. Hole saws, counter sinking bits, counter boring bits, sanding blocks.
5. Existing shapes may be filled with patching plaster to make a mould.
6. Internal holes cavities in a mould must have 2 Ø mm holes drilled through to the base of the mould to all the cavity to emptied by the vacuum pump.
7. Large or complicated shape may be dusted with talcum powder to assist in releasing them from the mould.
8. The base of the mould may be drilled and treaded M6 to allow a handle to be attached to pull the mould from the formed shape.
Manufacturing – Vacuum Forming
Mould Manufacture
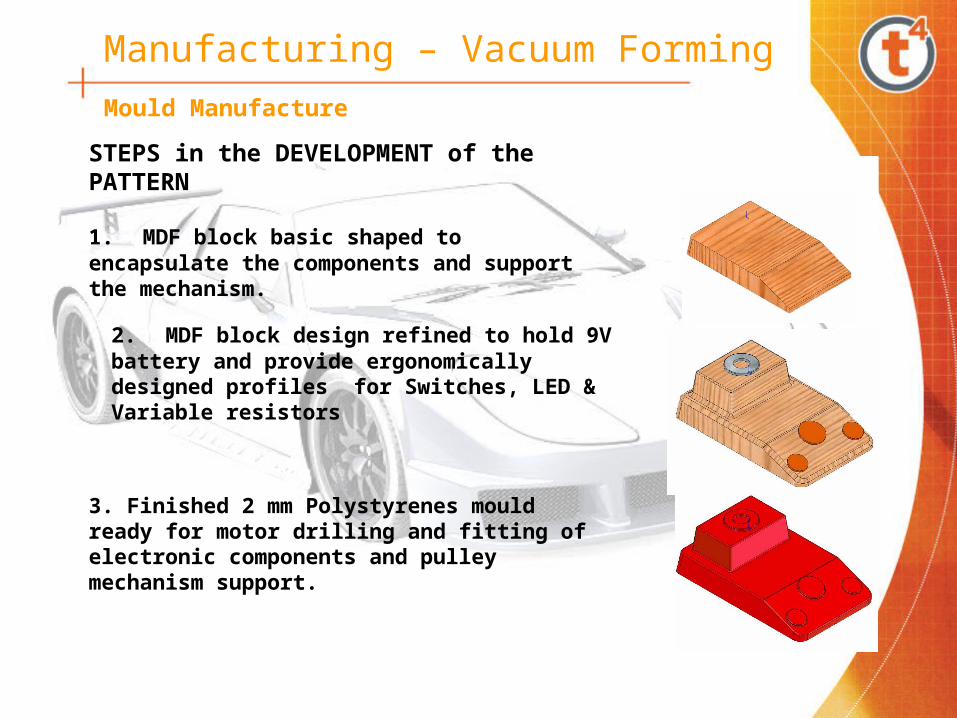
1. MDF block basic shaped to encapsulate the components and support the mechanism.
2. MDF block design refined to hold 9V battery and provide ergonomically designed profiles for Switches, LED & Variable resistors
3. Finished 2 mm Polystyrenes mould ready for motor drilling and fitting of electronic components and pulley mechanism support.
STEPS in the DEVELOPMENT of the PATTERN

Manufacturing – Vacuum Forming
Examples of six Pattern Designs made from the MDF blank
Manufacturing – Vacuum Forming
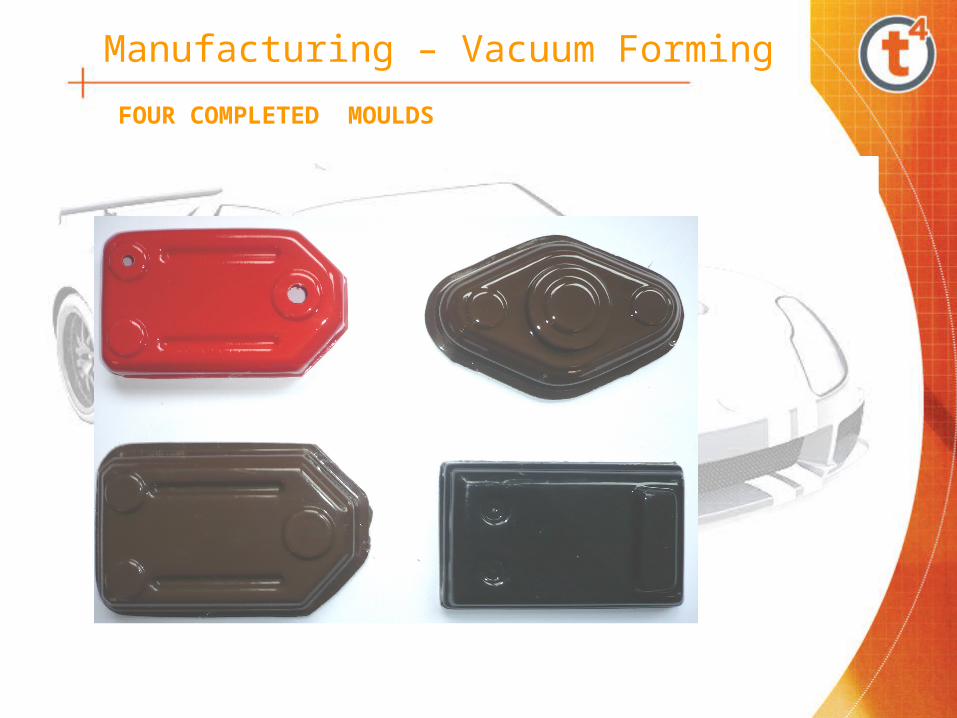
FOUR COMPLETED MOULDS