design and discovery - teacher guide - scifest
TRANSCRIPT

Design andDiscovery
A TRANSITION YEAR MODULE
TEACHER GUIDE
Intel Ireland Public Affairs

PHOTO: DONAL MURPHY PHOTO: JONATHAN HUNT
PHOTO: DAVID O’NEILL PHOTO: ALINE GILMORE
10cover teacher guide 24/11/05 10:35 pm Page 2

Why?Design and Discovery
"The best way to predict the future is to create it"- Alan Kay
10NEWPAGES.qxd 24/11/05 11:00 pm Page 1

Participating in the design process provides students with the experience to understand how much of the worldaround them is created. Engaging in real design and engineering gives students an opportunity to look morecritically at the designed world and tap into their own capacity to create change. It strengthens skills in problem-solving, creativity, risk-taking, and decision-making. The skills and knowledge developed have wide applicabilityacross a variety of curriculum areas as well as in everyday life.
The Design and Discovery course is intended to serve as a ‘stand alone’ Transition Year module, and is suitablefor all students. It does not require students to have a prior knowledge of science, or a high level of ability inmathematics. It is very much a hands-on, practical course intended to capture the interests of students, and givethem insights into the processes that underlie problem solving, designing and making. The overall aims of thecourse fit with those in the Department of Education’s statement of Transition Year Guidelines:
1. Education for maturity with the emphasis on personal development including social awareness and increased social competence.
2. The promotion of general, technical and academic skills with an emphasis on interdisciplinary and self-directed learning.
3. Education through experience of adult and working life as a basis for personal development and maturity.
In addition to the more general skills need to tackle problems, the course helps students develop theirunderstanding of important ideas in science; especially those of energy changes, basic electricity, forces, motion,and properties of materials. The scientific concepts are introduced in context and designed to show how they canbe used in practice.
The course also fits the view of technology taken in the Junior Certificate Technology course: "Education in andthrough technology involves appropriate resources, suitable tasks, and the interplay between the two."
Why Teach Design and Engineering?
Design and Discovery Connects Science and Engineering
The Design and Discovery Program provides an environment where science concepts and skills are applied inways that make them meaningful to students. The design and engineering process reinforces skills such asproblem-solving, making and using models, collecting and interpreting data, inferring, formulating questions, andpredicting-all skills shared between science and engineering. This is a unique opportunity for students to identifyand design solutions to problems significant in their own lives.
The Massachusetts Science and Technology/Engineering Curriculum Framework (2001) describes the relationshipbetween science, technology, and engineering this way:
"Science tries to understand the natural world. Based on the knowledge that scientists develop, the goal ofengineering is to solve practical problems through the development or use of technologies."
10NEWPAGES.qxd 24/11/05 11:00 pm Page 2

Scientific inquiry and experimentation should not be taught or tested as separate, stand-alone skills. Rather,opportunities for inquiry and experimentation should arise within a well-planned curriculum. Design and Discoverypromotes inquiry-based learning. Inquiry is an approach to learning that involves exploring the world, askingquestions, making discoveries, and gaining new understandings. The inquiry process is driven by one's curiosity,interest, or passion to understand and solve a problem. In Design and Discovery, the inquiry process begins whenstudents examine everyday objects and consider ways that they could be improved. Inquiry skills evolvethroughout the sessions as students explore the world around them, identify a problem that interests them andthrough test and trials, develop ideas to solve the problem.
The Design and Discovery Approach:Hands-on Inquiry and Experimentation
SCIENCE ENGINEERING
TECHNOLOGY
"Science seeks to understand the naturalworld, and often needs
new tools to helpdiscover the answers."
"Technologies (products and processes) are the
result of engineered designs. They are created by technicians
to solve societal needs and wants."
"Engineers use new scientific discoveries to
design products and processes that meet
society's needs."
10NEWPAGES.qxd 24/11/05 11:00 pm Page 3

"In helping students learn, what is known should never be separated from how it is known." - MA Science, Technology/Engineering Standards, 2001
10NEWPAGES.qxd 24/11/05 11:00 pm Page 4

Introduction
Implementation
Overview
Design and Discovery Planner
Pre-Survey
SESSIONS
Understanding the Design Process
Session 1 – Jump into the Designed World l
Session 2 – Jump into the Designed World ll
Session 3 – Material Science
Engineering Fundamentals
Session 4 – Electronic Engineering I
Session 5 – Electronic Engineering II
Session 6 – Making Machines and Observing Functionality
Session 7 – Robotics
Design and Discovery Curriculum Teacher GuideDesign and Discovery Curriculum
Table of Contents
1
3
20
23
24
26
38
55
86
103
115
136

Thinking Creatively about Problems and Solutions
Session 8 – The 3 R’s of Problem Identification
Session 9 – A Solution Taking Place
Making, Modelling and Materializing
Session 10 – Project Analysis and Planning for Models
Session 11 – Making It! Models, Trials and Tests
Prototyping and Final Presentations
Session 12 – Prototype Practicalities
Session 13 – Prototype Review and Presentation
Design and Discovery Curriculum Teacher Guide
155
172
191
209
214
226

TEACHER NOTES
Electronics
Motors
Post-Survey
Design and Discovery Curriculum Teacher Guide
240
251
253


Introduction
10blue arrow starter 24/11/05 10:31 pm Page 1

10contents 24/11/05 10:48 pm Page 4

This introductory course to engineering is aimed at transition year students. It is hoped that the course will get more young students interested in engineeringthrough a hands-on design and interactive learning experience. The module offers an approachable and personally meaningful introduction to engineering throughdesign.
The module focuses on some basic design and engineering concepts in whichstudents follow a design process, used by professionals, that culminates in buildingprototypes of their ideas. The module encourages a hands-on, inquiry-basedexperience by encouraging students to identify and design creative solutions toeveryday problems in the world of design and engineering.
Aims• To develop students’ understanding of the role of engineering and design in
producing effective solutions to real world problems.• To provide students with a background in electrical and mechanical
engineering principles.• To introduce students to the decision-making process of material selection in
design based on material properties and economics.• To improve the students problem-solving, analytical, and inquiry skills.• To develop students’ skills using hand tools to construct a prototype of an
engineering design.• To foster students’ skills in independent learning, communication and
teamwork.• To develop students’ ability to become experts and share their expertise.• To allow students to make informed choices about Leaving Certificate
subjects.• To raise students’ awareness of the many and varied career opportunities in
engineering in Ireland today.
ObjectivesAt the end of the module the student will:
• Be able to recognise design opportunities in their everyday lives.• Be familiar with a 10 step design process used by engineers.• Understand the principles of simple mechanics, be able to identify different
mechanical components and outline the function of those components.• Be able to build a simple mechanical toy.• Understand the principles of simple electronics, be able to identify different
components and outline the function of those components.
Design and Discovery Introduction
Design and Discovery Curriculum Teacher Guide
1

• Be able to build simple electronic circuits and be aware of the practicalapplications of these circuits.
• Understand the economics of material selection and differentiate materialsbased on their properties.
• Understand the concept of systems, components and parts.• Demonstrate methods of representing design solutions through sketching and
orthographic drawing.• Be capable of turning their ideas into reality by researching, modelling and
prototyping.• Have a completed project ready for showcasing at TY Open Day at which they
present a design solution and communicate engineering and design expertise.
Design and Discovery Curriculum Introduction (continued)
Design and Discovery Curriculum Teacher Guide
2

Implementation
10blue arrow starter 24/11/05 10:31 pm Page 3

10contents 24/11/05 10:48 pm Page 4

Implementation
Using the Module Module Structure Scheduling Field Trips Supply Shopping List
Participating in Fairs YSTE Intel ISEF Hosting a Fair
Starting a new program may seem like a daunting task, but the Implementationsection will help answer your questions and provide the background needed to planand organize Design and Discovery as part of your school’s transition year programme.
Using the Module presents information on the structure, processes, and majorfeatures of each of the 13 sessions in the curriculum.
Module Structure describes the common elements of each session and suggestsstrategies for grouping students during design investigations. It also explains what ismeant by a Design Notebook, its importance and what it should contain
Scheduling outlines the timing of the sessions
Field Trips assists with all logistics in arranging meaningful field trips that integratewith the curriculum.
Supply Shopping List is a handy guide to all materials that need to be gathered,purchased, or borrowed for all sessions.
The Design and Discovery website contains lots of resources and supplementalmaterials including photographs and videos of projects and activities. This websitemay be found on http:www.skoool.ie. Click on Teachers tab. Select Design andDiscovery.
Design and DiscoveryImplementation
Design and Discovery Curriculum Teacher Guide
3

Implementation
Using the Module Module Structure Scheduling Field Trips Supply Shopping List
Participating in Fairs YSTE Intel ISEF Hosting a Fair
The Design and Discovery module engages students actively in the development of apersonal design and engineering project through a sequence of 13 extended labsessions that include investigative tasks, readings, discussions, and record keeping.
Each session typically begins with a warm-up discussion followed by hands-onactivities or explorations done in small groups. Each activity includes a studentworksheet that helps students work independently through activities. The studentworksheet can be used to document ideas and results but students should beencouraged to capture all of their ideas and results in their design notebook. Activitiesmay be supplemented with brief background readings or further research at Web sites.
Sessions can include “Homework” activities that are completed at home with theinvolvement and input of family members. All sessions involve reflection and recordkeeping in design notebooks that the students maintain throughout their projects.
Design Notebooks The design notebook is a diary of progress of an idea. It is a place to record ideas,inspirations, discoveries, sketches, and notes. It is very important for students planningto participate in a science fair such as the Young Scientist & Technology Exhibition orwho are interested in applying for a patent.
Design Notebook Guidelines• Date and sign each page.• Number each page.• Never remove pages.• Do not erase.• Include explanation notes with any sketches or diagrams.• Keep accurate and detailed notes.• Be consistent and thorough.
Video RecordingsCapturing students’ thoughts on video can serve as a powerful tool for reflection. Setup a video camera on a tripod at the end of each session and ask a few students to talkabout their experiences and their projects. This can be organized with questions,prompts, or left open for students to just talk. It can be done in pairs or individually,although students will probably feel more comfortable in front of a video camera witha friend.
Using the Module
Module Structure
Design and Discovery Curriculum Teacher Guide
4

Suggested Prompts• Explain what you worked on today and how it helped further your project.• Explain how you are feeling about your experience in Design and Discovery.• Explain what your goals are for your project and how you plan to meet them.• Explain what has been most helpful so far in developing your project.
The video can be shared with the students throughout Design and Discovery as a wayto discuss and reflect upon the design process. It may be shared with parents so thatthey can see what their child is thinking and doing in Design and Discovery. It can alsobe edited and made into a short video piece to be shown at the final presentation.
Grouping Session descriptions indicate when it is preferable to have students work in smallgroups or in pairs. Otherwise, the module is flexible for students to work as the teacherwishes. In sessions where students are grouped, it is recommended that studentsrotate through different groups or pairings to encourage students to work with differentpeople.
It is also up to the teacher to decide how the students will work on their design projects.It is suggested that they work individually or in pairs. If they work in pairs, they shouldbe able to get together outside of class time to work.
Module Structure (continued)
Design and Discovery Curriculum Teacher Guide
5

The Design and Discovery transition year module covers approximately 13 x 120minutes of contact time with students.
The first class period should be spent introducing Design and Discovery to students.
A schedule would divide sessions over two to three school periods depending on thelength of a period. With two to three periods per week devoted to Design and Discoverysessions, the program could be completed in a term.
Using the Module
Scheduling
Design and Discovery Curriculum Teacher Guide
6
Implementation
Using the Module Module Structure Scheduling Field Trips Supply Shopping List
Participating in Fairs YSTE Intel ISEF Hosting a Fair

Implementation
Using the Module Module Structure Scheduling Field Trips Supply Shopping List
Participating in Fairs YSTE Intel ISEF Hosting a Fair
Local field trips are a wonderful way to expose students to the real world of design andengineering Try to relate the field trip to components of the design process. Field tripsshould be designed to give students a unique opportunity to experience engineering inthe real world. Field trips need not be expensive. The designed world is all around us,so even something as simple as a structured trip to the supermarket can be an effectivefield trip. Look for opportunities to show students engineering solutions at work. Thiscan be as complex as an automated packaging plant or as simple as the water slide atthe local pool.
Making ContactTo schedule a field trip, start with your personal connections. Most companies will allowbehind-the-scenes tours, especially if an employee has an interest in it. Ask parentsabout their workplaces and jobs. Next, contact local branches of professionalengineering organizations, such as the IEI (the Institute of Engineers of Irelandhttp://www.iei.ie/Home/index.asp. Members of the IEI work in the engineering field andmay be interested in helping some aspiring engineers.
Before the Field TripTo get the most out of a field trip experience, it is important to be prepared. Familiarisethe host organisation with the module and establish a clear plan. Have goals andexpectations clearly discussed up front. Students can come up with questions or canbe provided with a scavenger hunt. Students should be prepared to draw sketches, takepictures, and take notes to record their observations. Before going, pose the followingquestions: What are we trying to find, discover, or understand today? How will yourecord what you find?
Using the Module
Field Trips
Design and Discovery Curriculum Teacher Guide
7

During the Field TripEncourage students to look for solutions that they have seen designed. Be sure todebrief during the field trip. Discussion questions might include: What did you find thatothers should see? How did you figure out how a design solved a problem? Are thereadditional problems you see that still exist? Keep asking targeting questions thatconnect to the goals of the field trip. Tell them to look for things like specially placedlighting, signage, ways of containing or displaying materials, items that do one specificjob, and features of the place they are visiting that have been designed to solve aproblem. Tell them to notice informational displays and interpretive boards. Discuss:How are materials presented? How is important information conveyed? How arepictures used? Drawings? Models?
Allow time for sketches and picture taking, with the goals in mind. Ask that studentsshare these pictures when they return as ways of reminding themselves and otherswhat they saw that was valuable. They should also take advantage of any contacts theymeet who can help them with their design projects.
After the Field TripDebrief the field trip by discussing what students got out of it and how the experiencewill help them with their projects. Have them share observations, sketches, and photos.Don’t forget to send thank-you notes!
Field Trip AlternativesIf a field trip is not possible due to time or distance, consider inviting a local engineer,designer, or inventor to present to the group. Ask for an interactive presentation with ahands-on activity for the students.
Suggested Field Trips and Experts (By module session)
Jump into the Designed World (session 1)• A walk around the school to identify problems, needs, and opportunities
Engineering Fundamentals• Experts: electrical engineer, mechanical engineer
The 3 R’ of Problem Identification (session 6)• A visit to a place, such as a shopping centre, to conduct interviews and get
feedback on their ideas• Experts: materials engineer
Field Trips (continued)
Design and Discovery Curriculum Teacher Guide
8

Making, Modeling, and Materializing• A field trip to a bicycle repair shop• A visit to the modeling shop of a design firm• A trip to a hardware or home improvement store to look at parts and
components• Experts: product designer, shop manager, handyperson
Prototyping and Final Presentations• A visit to a design firm to see prototypes• A place to conduct user testing on prototypes• Expert: product designer• Guest speakers: engineer, product designer
Other Field Trip Ideas• Manufacturing or packaging plant• Supermarket• Train station or rail yard• Commercial farm with equipment• Post office• Water park (slides, tubes, fountains, etc.)• Auto repair shop• Machine shop• Distribution warehouse• Commercial bakery• City waterworks or sewage treatment plant• Power generation dam• Bridges• Locks• Shipyards and docks• Shopping malls (with escalators, people movers, etc.)• Light rail, trolley or transit system• Construction site• Rock quarry• Military base• Ship (merchant marine, military, cruise)• Army Corps of Engineers• City, county, or state engineering departments
Field Trips (continued)
Design and Discovery Curriculum Teacher Guide
9

Below is a supply list with materials compiled by the six sections of the curriculum. When organizing the materialsfor each session and activity, you will need to refer to the supplies listed in each session and activity as well as theSupplies page. Of course, many of these materials can be supplied by the students, mentors, and other volunteerdonations.
Prices listed below are approximations. Most of the material can be found at any hardware or stationary shop.Electrical products can be found at most good electrical shops or can be ordered on line from Maplin Electronics(www.maplin.co.uk). Specially commissioned Design and Discovery electronics kits are available from WilliamCooney, Cooney Electronics, 15 Windsor Avenue, Dublin 3. Phone 01 8334703.
Understanding the Design ProcessSession Item Quantity Cost
1B Straight pins 40 €2
1B Safety pins 40 €2
1B T pins 40 €2
1B Variety of paper clips 40 €2
1B 4 different types of wire 4 metres each of €204 different typesof wire
1B, 4A, Wire cutters/strippers 1 for each pair €105C of students
1B, 6C Needle-nose pliers Several pairs of both €10
1B Scratch paper to Stack of paper €2test solutions
1B Rulers A few rulers €1
1B Embellishment supplies Enough for €5such as beads, buttons, etc. each student
2A Potato peelers in A few samples €2multiple styles per group
2B Fruit (potato) mashers 1 per pair of students €2
Using the Module
Supply Shopping List
Design and Discovery Curriculum Teacher Guide
10

Engineering Fundamentals
Session Item Quantity Cost (Maplin part no.)
4/5 Breadboard 1 €6.15 (AG10L)
9V battery (PP3) 1 €4.65 (AR46A)
clip for battery 1 €0.36 (NE19V)
4093B CMOS chip 2 €0.60 (QW53H)
2003A Darlington Driver chip 2 €0.60 (AD93B)
Small 3V lamps 2 €0.60 (L81AH)
Lamp holders 2 €0.48 (VW65V)
Resistors, 1K, 10K, 22k, 47k 2 of each €0.011 each in lots of 25(G1K, G10K, G22K, G47K)
Capacitors, 10mF, 22mF, 2 of each €0.05 47mF, 100mF (VH22Y, VH26D, VH32K, VH37S)
LEDs, red, green 2 of each €0.226 each in lots of 25(J64U, CJ65V)
Motor 1 €4.79 each (HA83E)
Reed switch and magnet 1 €2.44 (YW47B)(sold as pair)
Push switch 1 €0.60 (FH59P0
Micro switch 1 €1.83 (N96AQ)
Buzzer 1 €1.36 (FL39N0
Selection of wires - 8 (say) €12.24 (FS65V)best purchased as a kitthat should supply enough for all groups.
6A Film canister with lid, with 1 per student €0.10holes drilled in both ends -Plastic tablet containers work just as well and can be obtained from your localpharmacist
Supply Shopping List (continued)
Design and Discovery Curriculum Teacher Guide
11

Session Item Quantity Cost
6A Rubber bands (#30 or #31) 1 per student €0.10(dimensions 6.5 cm x 3 mmx 0.7 mm, #31 is slightly heavier)
6A Washers 2 per student €0.201.25 cm or 2 cm outside diameter)
6A, 6B Thick drinking straws 1 per student €0.10
6B Small wooden dowels Optional €1(Bamboo skewers will work.)
6B Tools that use moving parts: A variety €20eggbeaters, hand drills,winged corkscrews, flour sifters, ice cream scoopers,nut grinders, and manual can openers
6B Milk carton 1 per student €1
6B 3 pieces 16-gauge steel 3 per student €3wire; one 20 cm length,two 7.5 cm lengths
6B Electrical tape or long bead For all students €2(for crank handle)
6B Miscellaneous gears, belts Enough for €10and wheels, wire, art each studentsupplies, and other materials of choice
6C Lego Technic* (Item #8735) 1 set €50(toy construction set)
7 Requires use of computer
* can be ordered on line at www.shop.lego.com
Supply Shopping List (continued)
Design and Discovery Curriculum Teacher Guide
12

Thinking Creatively About Problems and Solutions
Session Item Quantity Cost and Purchase Information8/9 Require use of computer
with internet access
Making, Modelling and Materializing
Session Item Quantity Cost and Purchase Information10D, 11A Structural materials:(continued) • Foam (Styrofoam* in sheets and
several shapes, including foam tubes for pipe insulation)
• Foam core board• Balsa wood (sheets and pre-cut
strips from craft supply stores)• Modeling clay• Aluminum foil• Pipe cleaners and plastic straws• Cardboard (tubes, boxes of all
sizes, flat pieces)• Paper (including poster board or
card stock weights)• Lego* set• Dowels, bamboo skewers
• Wheels
Supply Shopping List (continued)
Design and Discovery Curriculum Teacher Guide
13

Session Item Quantity Cost and Purchase Information10D, 11A Optional structural materials:(continued) Recyclable materials:
• Wine corks• Aluminum soda cans• Bubble wrap• Packaging peanuts• Twist ties
Sample items for students toacquire and use in large constructions:• PVC pipe and connectors• Lumber (plywood and 2x4s)
of different sizes
10D, 11A Parts and materials to connect things:• String• Wire• Rubber bands• Rubber tubing• Tape (duct, masking, packaging,
and electrical)• Glues (epoxy, superglue, glue
sticks, glues for hot glue gun,and rubber cement)
Supply Shopping List (continued)
Design and Discovery Curriculum Teacher Guide
14
Enough for eachstudent to have achoice of materials
Enough for eachstudent to have achoice of materials

Session Item Quantity Cost and Purchase Information
10D, 11A(continued)
10D, 11A Tools: several sets of each: Several sets of each
Prototyping
Session Item Quantity Cost12C, 13A Have students bring in.
Supply Shopping List (continued)
Design and Discovery Curriculum Teacher Guide
15
• Hinges• Nuts and bolts• Washers• Assorted screws• Nails• Thumbtacks
• Wood• Foam• Plexiglass • Fiberglass• Metal• Canvas fabric• Bubble packing• Cotton balls• Tubing• Sandpaper• Sponges• Steel wool pads
• Pliers €5• Saw €12• Hammer €12• Screwdriver €5• Hot glue gun
• Tin snips €10
Enough for eachstudent

Prototyping
Session Item Quantity Cost12C, 13A(continued)
12B Spreadsheet software program and computers
Final Presentations
Session Item Quantity Cost13D Enough for each
student
Supply Shopping List (continued)
Design and Discovery Curriculum Teacher Guide
16
• String or twine €1• Glue €1• Masking tape €2• Duct tape €2
• Scissors• Colored paper• Rubber cement• Markers• Scrapbooking supplies• Glue sticks• Other art materials

Implementation
Using the Module Module Structure Scheduling Field Trips Supply Shopping List
Participating in Fairs YSTE Intel ISEF Hosting a Fair
Participating in Fairs provides information on opportunities for students to share theirhard work by showcasing their projects and competing in engineering competitions.
The Young Scientist and Technology Exhibition is Irelands national science andtechnology fair which has been running for over 40 years. It provides an opportunity forthe country’s best young scientists and inventors to come together to share ideas.
The exhibition takes place every January in the RDS, Dublin. Winners of the physicalscience section go on to participate in the Intel International Science and EngineeringFair (ISEF) which takes place in Portland, Oregon every May.
Any student aged between 12 and 18 years on 31st October, from any secondaryschool throughout Ireland both North and South, is eligible to submit a project.
Students can choose to enter a project in one of the following four categories.1. Biological and Ecological Sciences2. Chemical, Physical and Mathematical Sciences3. Social and Behavioural Sciences4. Technology
For a project to be accepted into the technology category the core of the project mustbe the application of technology in new or improved products, enhanced efficiencies,new innovations or better ways to do things. The category could include things relatedto the Internet, communications, electronic systems, robotics, control technology,applications of technology, biotechnology, innovative developments to existingproblems, computing and automation.
The Chemical, Physical and Mathematical Sciences category covers projects onchemistry, physics, mathematics, engineering, computer programming, electronics andencryption as well as earth and space sciences such as meteorology, geophysics andastronomy.
For more information on the Young Scientist and Technology Exhibition and how to enterplease visit http://www.btyoungscientist.ie
Participating in FairsShowcasing Student Learning
Design and Discovery Curriculum Teacher Guide
17

Implementation
Using the Module Module Structure Scheduling Field Trips Supply Shopping List
Participating in Fairs YSTE Intel ISEF Hosting a Fair
Participating in Fairs
Intel ISEFThe Intel International Science and Engineering Fair (ISEF) (www.intel.com/education/isef/) is the world’s largest pre-college science competition. It provides anopportunity for the world’s best young scientists and inventors to come together toshare ideas, showcase cutting-edge science projects, and compete more than US$3million in awards and scholarships. Each year, 10 to 15 percent of finalists file forpatents on their projects.
Overview The Intel ISEF is the world’s only international science fair representing all life sciencesfor students. Every year, more than one million students in grades 9-12 compete inregional science fairs and nearly 500 Intel ISEF-affiliated fairs held around the world.Then, at Intel ISEF, more than 1,200 students from 40-plus countries win the chance tocompete for the scholarships and prizes in 14 scientific categories and a team projectcategory.
The Intel ISEF has been coordinated for 53 years by Science Service, one of the mostrespected nonprofit organizations advancing the cause of science. As title sponsor, IntelCorporation has committed millions of dollars to developing and promoting thiscompetition. In addition, each year a volunteer committee representing the host cityraises funds to sponsor events throughout the fair.
Intel’s SponsorshipIntel became the first title sponsor for the Intel ISEF in 1997 as a way to recognize andreward excellence in science from the world’s best young scientists, and to encouragemore young people to explore science and technology in their higher education andcareer choices.
Since assuming the sponsorship, Intel has focused on increasing internationalparticipation and adding new awards such as Young Scientists Scholarships,Achievement Awards, Best of Category, and awards to teachers and fair directors.Intel’s sponsorship of the Intel ISEF is part of the Intel® Innovation in Education initiativeto prepare today’s teachers and students for tomorrow’s demands.
Design and Discovery Curriculum Teacher Guide
18

Implementation
Using the Module Module Structure Scheduling Field Trips Supply Shopping List
Participating in Fairs YSTE Intel ISEF Hosting a Fair
Many schools Transition year students generally have an awards and achievementsopen evening which would be a suitable showcase for students designs.
This culminating event should recognise the students’ hard work and celebrate theiraccomplishments. Students can share their engineering expertise with others, practicepresenting projects to an audience, get feedback on their projects, display boards,prototypes and presentations.
Design and Discovery Curriculum Teacher Guide
19
Participating in Fairs
Hosting a Fair

Notes:

Overview and Planner
10blue arrow starter 24/11/05 10:31 pm Page 5

10contents 24/11/05 10:48 pm Page 4

Design and Discovery is a comprehensive inquiry-based course for transition yearstudents. The course introduces engineering through design and it is hoped that havingcompleted the course the student will appreciate the prevalence of engineering anddesign in the world around them. The course is organised into 13 sessions. Eachsession is intended to be of two hours duration (three forty-minute periods). It ispreferable if two of these periods are available as a double period in order to facilitatethe practical work. The teaching units of the module could then be covered in athirteen-week period.
Each activity includes a teacher’s instruction page and a student worksheet withdirections for students. However, in addition to completing the worksheets students areencouraged to record their work in their design notebook. Supplies are listed for eachsession. Many activities also include a student reading. The readings often providereal-world examples of professionals working in the design and engineering world.
All of the Student Worksheets and Student Readings, which are in the Teacher Guide,have also been duplicated in the Student Booklet.
A Design and Discovery Planner is printed after the list of sessions. A copy is alsoincluded in the Student Booklet. At the start of the module students should be madefamiliar with the planner and encouraged to take ownership of the module and keeptrack of their own progress. Periodically, teachers should refer to the planner, thusensuring that the students complete their projects on time.
Students are introduced to the designed world and then practise the design processthat is revisited throughout the module.
Session 1: Jump Into The Designed World lStudents re-think and re-engineer everyday objects. These hands-on activitiesreinforce a ten-step design process that is used many times throughout the Designand Discovery module.
Session 2: Jump Into The Designed World llStudents learn that design opportunities are everywhere. This session builds theirability to analyse existing objects for improvements and helps students identifysuitable problems to solve with design and engineering.
Design and DiscoveryOverview and Planner
Design and Discovery Curriculum Teacher Guide
20
Understanding the Design Process

Session 3: Material ScienceFrom spacecraft to ballpoint pens, materials make the difference in successfulperformance of a product. Students learn about four different classes of materials andtest them to understand their properties. They apply selection criteria to determine thebest materials for different applications, while learning to consider cost andenvironmental impact when choosing materials.
These sessions provide background in electrical and mechanical principles thatstudents may need to incorporate in their designs.
Session 4: Electronic Engineering ICircuits are the building blocks of all electrical appliances. In this session, studentsexplore simple circuitry with bulbs, batteries, wires, and breadboards.
Session 5: Electronic Engineering IIStudents continue to learn about simple circuitry. They use reed switches, LEDs andmotors and begin to think about their application in the world around them.
Session 6: Making Machines and Observing FunctionalityStudents study mechanics and motion. They build simple mechanical devices such asa rolling toy and a crankshaft. This session also introduces students to motors andexplains how motors can be used to produce motion.
Session 7: RoboticsThis session will expand the students’ knowledge of the world of robotics. Students willidentify many of the different types of robot in general use and will carry out activitiesthat illustrates some of the issues that arise in the programming of these devices.
In these sessions, students identify interesting problems and develop ideas forsolutions.
Session 8: The 3 R’s of Problem IdentificationThe 3 R’s of problem identification invites students to revisit, refine, and researchdesign opportunities for a project of their own. Using a variety of techniques, studentsnarrow down their list of design opportunities.
Design and Discovery Overview and Planner (continued)
Design and Discovery Curriculum Teacher Guide
21
Engineering Fundamentals
Thinking Creatively about Problems and Solutions

Session 9: A Solution Taking ShapePreparing a design brief helps students to focus their understanding of a problem andpropose a solution. Students delve deeper into their proposed design solution as theyresearch patents for similar ideas and consider the necessary parts to get from "think"to "thing."
Students turn their thinking into things and begin several cycles of building trials andtesting their ideas.
Session 10: Project Analysis and Planning for ModelsStudents begin this session by reviewing their solution before proceeding to the nextsteps. They make sketches of their design in their design notebooks and list thematerials that they need to make their model.
Session 11: Making It! Models, Trials, and TestsLet the construction begin! Pieces, parts, and connections become trials and models ofa system, a component, or the product itself.
In these sessions, students refine their project into a working prototype and learn howto display and present their projects.
Session 12: Prototype PracticalitiesProjects are taken to the next level as students plan how to develop their workingprototypes. They consider the product specifications, materials and budget. Studentsbegin to construct their prototype.
Session 13: Prototype Review and PresentationThis work session gives students more time to work on their prototypes. They mayneed to make several prototypes as they conduct trials and tests of the product.Conducting user testing allows students to try out their products, get feedback,evaluate the feedback, and plan their revisions. In this final session students begin toprepare for the end of year exhibition. Preparation involves planning the event anddesigning a display. Students practise their presentations and receive feedback fromtheir peers. Following the event, they reflect on their Design and Discoveryexperience.
Design and Discovery Overview and Planner (continued)
Design and Discovery Curriculum Teacher Guide
22
Making, Modelling and Materializing
Prototyping and Final Presentations

Design and Discovery Curriculum Teacher Guide
23
Sess
ion
No.
Topi
cNo
tes
and
Com
men
tsDa
te
Date
(3x4
0 m
ins)
Star
ted
Com
plet
ed
1Ju
mp
Into
The
Des
igne
d W
orld
I
2Ju
mp
Into
The
Des
igne
d W
orld
II
3M
ater
ial S
cien
ce
4El
ectro
nic
Engi
neer
ing
I
5El
ectro
nic
Engi
neer
ing
II
6M
akin
g M
achi
nes
and
Obse
rvin
g Fu
nctio
nalit
y
7Ro
botic
s
8Th
e 3
R’s
Of P
robl
em
* __
wee
ks to
exh
ibiti
on
Iden
tific
atio
n
9A
Solu
tion
Taki
ng S
hape
* __
wee
ks to
exh
ibiti
on
10Pr
ojec
t Ana
lysi
s an
d Pl
anni
ng*
__ w
eeks
to e
xhib
ition
for M
odel
s
11M
akin
g It!
Mod
els,
Tria
ls
* __
wee
ks to
exh
ibiti
on
and
Test
s
12Pr
otot
ype
Prac
tical
ities
* __
wee
ks to
exh
ibiti
on
13Pr
otot
ype
Revi
ew
* __
wee
ks to
exh
ibiti
on
and
Pres
enta
tion
Date
s to
Rem
embe
r Tran
sitio
n Ye
ar E
veni
ng/S
cien
ce F
air
Youn
g Sc
ient
ist &
Tec
hnol
ogy
Exhi
bitio
n (w
ww
.bty
oung
scie
ntis
t.ie)
Date
Date
Overview
Planner

Pre-Survey
10blue arrow starter 24/11/05 10:32 pm Page 7

10contents 24/11/05 10:48 pm Page 4

Please answer the questions below honestly. There are no right or wrong answers. Your survey will be keptconfidential. Select the number indicating your level of agreement with the statements. Thank you for sharingyour thoughts.
Disagree Disagree Agree Agreea little a little
1. I like taking things apart and putting them 1 2 3 4back together again.
2. I am interested in my maths class. 1 2 3 4
3. I am good at designing things. 1 2 3 4
4 I like to know how things work. 1 2 3 4
5. I enjoy doing projects in school that involve 1 2 3 4maths and science.
6. I often think about what I want to do after 1 2 3 4I graduate from school.
7. I know what an engineer does. 1 2 3 4
8. I am good at solving problems. 1 2 3 4
9. I would like a career that requires a maths 1 2 3 4or science background.
10. I can explain my ideas to someone else so 1 2 3 4they can understand them.
11. I would like a career that involves designing things. 1 2 3 4
12. It is important for me to be good at science. 1 2 3 4
13.Creative thinking is one of my strengths. 1 2 3 4
14. I try to think of different ways to solve a problem 1 2 3 4before deciding on a solution.
15. I like to find out things on my own. 1 2 3 4
16. I like working with a team to create things or 1 2 3 4solve problems.
17. I could be a successful engineer. 1 2 3 4
18. I try to solve problems first before asking for help. 1 2 3 4
19. I consider myself mechanically inclined. 1 2 3 4
20. I am interested in pursuing a career in engineering. 1 2 3 4
Design and DiscoveryPre-Survey
Design and Discovery Curriculum Teacher Guide
24
10pre-survey 24/11/05 11:03 pm Page 24

21. Describe what you think an engineer does at work. What kinds of skills are needed to become an engineer?
22. Name some things that have been created by an engineer?
23. What type of career are you interested in?
24. The courses/skills that you most need for your career choice are (check all that apply):
art computers English maths science writing
other (what? )
26. What types of things do you think you will learn while participating in this program?
First two letters of your:
/ /
first name* last name* Date of birth*
Thank you for your time and thoughts.
*This information will allow us to follow your responses over time.We will summarize all data, however, and no one will be identified.
Design and Discovery Pre-Survey (continued)
Design and Discovery Curriculum Teacher Guide
25
10pre-survey 24/11/05 11:03 pm Page 25

Understanding the Design Process
10blue arrow starter 24/11/05 10:32 pm Page 9

10contents 24/11/05 10:48 pm Page 4

The designed world orients students to a design process thatguides the work of engineers and designers. Hands-onactivities build understanding of the role of engineering anddesign in producing effective solutions to real world problems.
In 1B: Build a Better Paper Clip students carefully examine theform and function of standard paper clips. Given a set of wiresand tools, they are challenged to design a new paper clip thatmeets predetermined requirements. This design challengeprovides a firsthand connection with a 10-step design processthat is introduced in a group activity, 1C: The Design Process.Students should be encouraged to bring home their work andcontinue as homework.
1C: The Design Process forms the foundation for work on students’ own projects, andeach step is revisited in greater depth in subsequent sessions. This session buildsappreciation for the designed world around us and prepares students for finding adesign and engineering project. Students develop skills by thinking creatively aboutdesigned things they use. They also learn to identify problems that lead to opportunitiesfor new design solutions.
Supplies • For each student: straight pins, safety pins, and a variety of different types of
paper clips of varying sizes • 4 metres each of 4 different types of wire cut into lengths of 30 cm for
designing paper clips • Several pairs of wire cutters and needle-nose pliers • Stack of scratch paper to test solutions • A few rulers • Additional materials for embellishment, such as beads, buttons, superglue, etc
In This Session:
A Survey and Introduction(40 mins)
B Build a Better Paper Clip(60 mins) Student Reading Student Worksheet
C The Design Process(20 mins + H/W) Student Reading Student Discussion
Session 1
Jump into the Designed World I
Design and Discovery Curriculum Teacher Guide
26
Design and Discovery Curriculum
In Session 1, students are introduced to the concept of design and engineering as a formal process through a seriesof hands-on activities. They begin with redesigning a simple object - the paper clip - in order to develop a commonreference point as they begin their experience with the design process. This experience with the design processbuilds an important foundation for the rest of the activities in Design and Discovery as the design process formsthe basis of the curriculum.
Key Concepts
The Design Process: A systematic problem-solving strategy, with criteria and constraints, used to develop manypossible solutions to solve a problem and to narrow down the possible solutions to one final choice.
The design process is a recognized set of generally defined steps designers and engineers use based on a problem-solving strategy that leads to product development. It begins with the identification of a problem through a seriesof exploratory and data-gathering stages, to a creation of a solution. Though the process is introduced as a seriesof sequential steps, it is important to understand that the process is not truly linear - it is much more like a designcycle since many of the steps are intended to be revisited as more information is gathered. Because this forms thecore of the curriculum, adults working with students must be comfortable with the process and how it plays out inthe subsequent activities. Students are introduced to the design process in 1C, Worsheet, The Design Process.
If you recall "the scientific method" you were introduced to in science classes, you will recognize the similarity ofa sequenced set of steps, used as reference by professional scientists. There are natural and logical steps thatfacilitate the desired outcome. However, the scientific method and the design process are fundamentally different.While scientists propose a "solution" up front (the hypothesis) and then test it through experimentation to see if itis correct, designers identify the problem, define it as a design challenge, then brainstorm, research, gather dataand test to identify what the correct solution should be. The "solution" is arrived at later as a result of the processof data gathering and experimentation. Both represent the formal process used by each profession from each field,though inquiry and experimentation are at the heart of both.
Jump Into DesignKey Concepts: Session 1
Design and Discovery Curriculum Teacher Guide
27

Goal Experience the design process by re-engineering an everyday object.
OutcomeDesign and engineer a new paper clip that meets requirements.
DescriptionAfter careful observations of how different kinds of paper clips function and perform,students design a new paper clip that meets several requirements including a uniquelook. They construct them using a selection of materials and prepare drawings of thevarious designs. Each designer presents a new paper clip model.
Note About WireWire needs to be flexible but have sufficient springiness to retain its shape after somebending. Recommended: Steel or copper wire, 14 or 18 gauge. Floral stem wire (18gauge steel) is available in craft stores and floral shops.
Preparation
1. Read 1B Reading: The Perfect Paper Clip.
Procedures
1. Briefly review the purpose and importance of keeping notes, sketches, and ideasin a design notebook. Point out the value of putting dates on notebook pages.
2. Refer to the worksheet with the design requirements, and allow time forstudents to read it thoroughly.
3. Describe the materials and tools for the design challenge and reviewrequirements as needed.
4. Encourage students to experiment carefully with all the examples provided,exploring the ability of various materials to hold paper.
5. Remind students to make notes about their observations of different materialsand paper clip designs in their design notebooks.
Session 1, Activity B
Build a Better Paper Clip
Design and Discovery Curriculum Teacher Guide
28
In This Session:
A Survey and Introduction(40 mins)
B Build a Better Paper Clip(60 mins) Student Reading Student Worksheet
C The Design Process(20 mins + H/W) Student Reading Student Discussion

6. Move among the students and discuss their observations about the materialsand the extent to which they bend and spring back, retaining the ability to “hold”materials.
7. Remind the students to draw quick sketches in their design notebooks of theirideas and note test results.
8. Monitor progress and allow 40 minutes for designing, engineering and testing.
9. The remaining 20 minutes should be spent evaluating the designs. Ask eachstudent to briefly present their prototype.
10.Discuss whether or not the prototypes fit the given criteria.
Wrap Up Each student presents a brief explanation and demonstration of his or her paper clipdesign.
Follow With In the next activity, 1C: The Design Process, students become familiar with the designprocess which they will use throughout the sessions.
Teacher Guide
29
1B: Build a Better Paper Clip (continued)
Design and Discovery Curriculum

Why in the world would you study a paper clip as you learn about engineering and design? Henry Petroski, aprofessor of civil engineering, has written many interesting books about design and engineering in everyday things.In his book, Invention by Design, he devotes a whole chapter to paper clips. He notes that the paper clip, althoughone of the simplest of objects, can provide many lessons about the nature of engineering.
We take paper clips for granted—it seems as if they’ve always been around. In fact, they’ve been in use only sincearound the time of the Industrial Revolution. Before that, paper was held together with straight pins. However, thestraight pin was difficult to thread through more than a few sheets of paper because it left holes in the paper, andit bulked up piles of paper.
With the developments of the Industrial Revolution, however, volumes of paper increased as technology enabledbusiness to expand nationally and internationally. The paper clip had a clear advantage over the straight pin inholding together a group of papers, and eliminated pricked fingers! The increase in technology associated with theIndustrial Revolution also allowed paper clips to be produced in quantities that kept the cost per clip low.
Early versions of the paper clip had problems that later versions sought to remedy. The paper clip we know and lovetoday, with its (almost) perfect design, did not start out that way. Earlier models got tangled together, slipped off tooeasily, had too much “springiness” or not enough…
As Henry Petroski notes, the paper clip we are familiar with works because:
“… its loops can be spread apart just enough to get it around some papers, and when released, can spring backto grab the papers and hold them. This springing action, more than its shape per se, is what makes the paper clipwork. Springiness, and its limits, are also critical for paper clips to be made in the first place.”
The most successful paper clip yet designed is the Gem* clip. The shape of the Gem clip was introduced in Englandin the late 19th century by a company known as Gem, Limited. The classic Gem has certain proportions that seemto be “just right.”
Petroski quotes an architecture critic who had the Gem in mind when he wrote:
“Could there possibly be anything better than a paper clip to do the job that a paper clip does? The common paperclip is light, inexpensive, strong, easy to use, and quite good-looking. There is a neatness of line to it that could notviolate the ethos of any purist. One could not really improve on the paper clip, and the innumerable attempts totry—such awkward, larger plastic clips in various colors, or paper clips with square instead of rounded ends—onlyunderscore the quality of the real thing.”
The Perfect Paper ClipReading: Session 1, Activity B
Design and Discovery Curriculum Teacher Guide
30

The Gem became to paper clips what Kleenex* is to facial tissue because of a patent issued to William Middlebrook,of Waterbury, Connecticut, in 1899. The unique aspect of Middlebrook’s patent was that, although there were manyinventors patenting all sorts of sizes and shapes of paper clips, Middlebrook was patenting the machine that wouldform the paper clip economically.
Petroski writes:
“The complexity of Middlebrook’s machine is clear from his patent drawings, and it is apparent that he wasengaged in serious mechanical engineering…The principles upon which the machine works, bending wire aroundpegs, are well suited to the Gem design and it to them. In short, Middlebrook’s machine and the Gem were madefor each other.”
So the combination of a well-designed paper clip and a well-designed machine led to the success of the Gem cliptoday.
The architecture critic aside, many believe that even the Gem could use improvement: It goes on only one way; itdoesn’t just slip on; it doesn’t always stay on; it tears the papers; it doesn’t hold many papers well.
This is what makes engineering and inventing so challenging. All design involves conflicting objectives and thuscompromise. The best designs will always be those that come up with the best compromise.
Of course, inventors will always look for ways to improve upon an object. They will continue to look for ways tomake a better paper clip. Newer clips, for instance, may be plastic coated, or shaped like Gems, yet their proportionsnever seem to be quite right. One improvement to the paper clip has been the introduction of a turned-up lip on theend of the inner loop. This allows the paper clip to slide onto the papers without actually opening the clip. Asmentioned above, design involves tradeoffs. This “improvement” adds to the bulk of bundled papers.
One key point to remember is that the laws of nature always bind invention, design, engineering, andmanufacturing. Change in one area of design may lead to design weakness in another.
To inventors, the quest for the perfect paper clip remains elusive. Perhaps the simple paper clip isn’t so simple adevice after all!
Adapted from:Petroski, Henry. Invention by Design: How Engineers Get from Thought to Thing. Cambridge, MA: Harvard UniversityPress, 1996.
1B Reading: The Perfect Paper Clip (continued)
Design and Discovery Curriculum Teacher Guide
31

ExplorationExplore the paper clips and pins (two types of fasteners) that you have in front of you. Pins were used to fasten papertogether before the invention of the paper clip. Pay close attention to your hands and fingers as you use each one to fastentogether pieces of paper. What do you notice?
You might notice the action needed to separate the paper clip loops so it slips onto the papers; the way your fingers directthe clip onto the papers. Each of these actions is unconscious, and the ease with which the object is used indicates asuccessful design.
Explore the properties of the shape and the materials of each paper clip design. Observe the operation of each design, makenotes about each, and apply what you learn to designing a unique, new paper clip.What is common about the way each shapeworks to do the job? What properties in the material (the metal) allow each to do the job of fastening paper together?
DesignYou have wire, tools, and examples of paper clips. You must now design a prototype of a new paper clip that meets severaldesign requirements listed below. Try out your ideas and make drawings of your designs. Choose one to engineer and testit. Be prepared to present your model.
Student ChallengeThe owners of P&C Office Supplies are seeking new designs for paper clips. The company has come across hard times andbelieves a new paper clip design could revive their once thriving business. It is up to you to save their company. Use yourimagination and creativity to invent a new paper clip design, the owners have come up with requirements for the design.
Requirements • Your paper clip will be unique. It cannot look • You may use other materials to enhance your
like any paper clip you have ever seen before, design, but your main material must be wire.but may have features of other clips. • It must hold 10 pieces of paper together.
• It can be no bigger than 2 inches square. • You should use your design notebook to draw your • It must not be a hazard to small children. various designs.
Build a Better Paper ClipWorksheet: Session 1, Activity B
Design and Discovery Curriculum Teacher Guide
32
Design and Discovery Curriculum

In This Session:
A Survey and Introduction(40 mins)
B Build a Better Paper Clip(60 mins) Student Reading Student Worksheet
C The Design Process(20 mins + H/W) Student Reading Student Discussion
GoalBecome familiar with the design process.
OutcomeThe experience with designing paper clips is formalized into a design process thatguides students throughout their design and engineering projects.
DescriptionA small group discussion of the paper clip design activity collects the students’experiences with the design process they experienced directly. The discussion movesto connecting their experience to a general design process outlined on 1C Worksheet:The Design Process. A short reading that clarifies the relationship among design,engineering, and scientific research wraps up the activity.
SuppliesWhite board and markers, or computer to display discussion points
PreparationBlack board and markers, or computer to display discussion points.
ProceduresBrief Discussion
1. Ask students to reflect on their experience with designing a new paper clip. Youmight prompt them to think about:• What gave them their ideas?• What stages or steps did they go through as their ideas took shape?• What helped them move their idea into a prototype?
2. Ask students to share their experience with their designs. Have each personshare. Make quick notes on black board. Call attention to areas of commonexperiences.
Session 1, Activity C
The Design Process
Design and Discovery Curriculum Teacher Guide
33

Design Process Review
1. Look at the 1C Worksheet: The Design Process, and have students take turnsreading each step out loud.
2. Discuss any connections between the students’ experience and the designprocess as you go through each step.
3. Emphasize that the design process is iterative—that is, it goes through cyclesor iterations as steps are revisited throughout the process.
Wrap UpAsk participants to look around the room and discuss:
• What things in the room were designed? • Which ones were engineered?• What is the difference between design and engineering?• What does the expression “form follows function” mean to you?• What happens when function is forced to follow form? (In other words, when
something is designed first and then someone figures out what to do with it.)• Why is it important to have form follow function?
1C: The Design Process (continued)
Design and Discovery Curriculum Teacher Guide
34

Getting From “Think” To “Thing”We will be using a design process to guide the development of a project from your idea to the design of a prototype.The steps of the design process are iterative, or cyclical. That means that throughout the stages of designing aproduct, you will revisit many of these steps as you refine your ideas.
1. Identify a design opportunity.Notice that design opportunities are everywhere and often come from a need, problem, or improvement toan existing solution. The goal is to identify many design opportunities and then narrow them down later.
2. Research the design opportunity.Gather lots of information about the nature of the problem in order to narrow your choices down. Find outabout user needs and similar products.
3. Brainstorm possible solutions to the problem.Try to come up with five to ten ideas for solving the problem or addressing the design opportunity.Brainstorming may involve the use of SCAMPER and other techniques.
4. Write a design brief. Define the problem clearly in a problem statement. Describe the user needs and a proposed solution.Draw a sketch of the solution.
5. Research your solution.Do a literature review and talk to experts to find similar solutions and other approaches.
6. Refine your solution.Analyze the solution for feasibility, safety, and implications of the idea. Consider materials and methods forconstructing the project.
7. Prepare design requirements and conceptual drawings.Write up the criteria the solution must meet (requirements) and sketch drawings.
8. Build models and component parts.Analyze the project design for its systems, components, and parts. Now build a model of the entire designand/or its systems.
9. Build the prototype.Develop project specifications and create a working prototype.
10.Improve your solution. Test, evaluate, and revise.Evaluate the prototype for function, feasibility, safety, aesthetics, and other criteria. Revise or build anotherprototype.
The Design Process Worksheet: Session 1, Activity C
Design and Discovery Curriculum Teacher Guide
35

1C Worksheet: The Design Process (continued)
Design and Discovery Curriculum Teacher Guide
36
THE DESIGN PROCESS
1Identify a design
opportunity
6Refine your
solution
7Prepare design requirements
and conceptual drawings
2Research the design
opportunity
3Brainstorm possible
solutions to the problem
8Build models andcomponent parts
9Build theprototype
10Improve your solution. Test,
evaluate and revise
4Write a
design brief
5Research
your solution

The scientist seeks to understand what is; the engineer seeks to create what never was.—attributed to Theodore Van Karman
Every thing is supposed to function—it’s supposed to do something, to work. Engineering is about function: doesthe product work, does it meet specifications, can it be manufactured efficiently, etc. All of this involves solvingproblems. We are going to be problem solvers and create things that function; we will think like engineers.
We will also learn the skills of good industrial designers. The form of an object (how it is designed and constructed)should follow the task it is to perform. In other words, you must know exactly what you want something to do beforeyou can design and build it. How effectively something functions is often related to its form, or the quality of itsdesign. Designers are concerned with qualities such as ease of use, efficient operation, and appealing aesthetics.We will pay attention to form in our project development. Though we will not focus on packaging design ormarketing aesthetics, we will talk about the subtle but powerful influences of the “visual attraction” and “tactileappeal” of a product. Our goals are to meet an identified need with an idea that could work.
Science, Engineering, and Design: Where Do They Intersect?While both engineers and scientists experiment and research problems, they differ in the kind of problems theywork on. Engineers tend to work on problems that are of immediate concern to many people’s daily lives. Scientificproblems often build on basic understanding and may not have an immediate application in daily life.
The work of designers and engineers overlaps as well. Both seek to develop solutions to specific and immediateproblems and needs. While design is involved in the entire process, engineering is the more specific process ofmaking the idea meet specifications and function. One is useless without the other.
The First Step To a Good Design Is a Good Description Of the Real ProblemThe ability to really see a need, and then be able to describe that need, is at the heart of successful productdevelopment. It requires a heightened awareness of the way people use things, and an ability to observe one’ssurroundings. Watching for difficulties people experience in doing a task, or how a particular product is used in anunintended way, takes practice and skill. Our job will be to learn to watch for opportunities for improving a tool orproduct.
Form Follows Fuction-What Does That Mean?Reading: Session 1, Activity C
Design and Discovery Curriculum Teacher Guide
37

This session builds appreciation for the designed world aroundus and prepares students for finding a design and engineeringproject. Students develop skills by thinking creatively aboutdesigned things they use. They also learn to identify problemsthat lead to opportunities for new design solutions. In the firstactivity, 2A: The Potato Peeler Upgrades, students learn aboutand practice a seven-part creative technique for improvingexisting designs known as SCAMPER. They follow the exercisewith a short reading about market research on potato peelers.The next activity, 2B: SCAMPER and The Potato Masher,reinforces generative thinking using the SCAMPER techniquewith another object, a potato masher.
The final activity in this session, 2C: Design Opportunities Are Everywhere, is the firststep of students’ project development. It involves introducing the Activity Mapping tohelp students identify problems, and involves a short field trip or walking tour topractice recognizing problems and needs around them. The session ends with studentsbeginning to develop a list of design opportunities that interest them.
A Home Improvement activity, Improvement Of Everyday Things, has students makedistinctions between functional and superficial improvements with objects in theirhomes.
Supplies • Potato peelers in multiple styles • For each pair of students: 1 standard design potato masher • Additional potato mashers with other designs • Clipboards (optional, but handy for taking notes during walking tour)• Chart paper for posters and markers
In This Session:
A The Potato Peeler Upgrades(40 mins) Student Reading Student Discussion
B SCAMPER and The Potato Masher(40 mins) Student Worksheet Student Discussion
C Design Opportunities are Everywhere(40mins + H/W) Student Worksheet Student Discussion
Session 2
Jump into the Designed World II
Design and Discovery Curriculum Teacher Guide
38
Design and Discovery Curriculum

In Session 2, students are introduced to two brainstorming techniques. Although many strategies exist to encouragecreativity, this session focuses on SCAMPER and Activity Mapping. In this session students practice recognisingdesign problems for themselves. A field trip or even a walk around the school is helpful to get the students thinkingabout design opportunities. Students should be encouraged to search for design opportunities outside of school e.g.at home, at play, on holiday, while out with family or friends, in clubs or societies they may be members etc., etc.By the end of this session students should have generated a list of design opportunities that interest them.
Key Concepts
SCAMPERThe SCAMPER technique is a brainstorming method that builds one idea into several ideas by asking questionsabout the actions represented by the SCAMPER acronym. Alex Osborn, an early teacher of creativity, first introducedthe idea of using questions to spur idea creation in his book Applied Imagination. This technique was later adaptedby Bob Eberle and is now used often as a method for new idea generation. Students are introduced to the SCAMPERtechnique by examining an everyday item - a potato peeler.
SubstituteCombineAdaptMinimize/MagnifyPut to other usesEliminate/ElaborateReverse/Rearrange
Some questions to ask students as they use this technique and some examples to illustrate the concepts are shownbelow:
Substitute: What can be used instead? What can you use instead of the materials, objects, places or methods nowused? Meatless burgers and disposable cameras are examples of products that illustrate substitution.
Combine: Which parts or ideas can you blend together? What could be added? How can I combine uses withsomething else? Can you combine materials? Scented markers and clock radios are examples of combinations.
Adapt: What else is like this? What can be copied or imitated? How can it be adjusted to fit another purpose? Whatelse is like this? What has worked before? What would you copy? Running shoes and hiking boots are examples ofadaptations.
Jump Into Design IIKey Concepts: Session 2
Design and Discovery Curriculum Teacher Guide
39

Mimimize: Can it be made smaller, lighter, less frequent or divided? How can it be made smaller or shorter? Howcan it take less time? Mini-staplers and pocket-sized cell phones demonstrate how objects can be minimized.
Magnify: Can it be stronger, larger, higher, exaggerated or more frequent? What happens if I exaggerate acomponent? How can it be made larger or stronger? What can be duplicated? Repeated? Big-screen televisionsand oversized floor pillows illustrate products that have been magnified.
Put to other Uses: Can it be used in a way other that how it was intended to be used? Who else might be able touse it? What other market can it be used in? What else can it be used for other than its original purpose? Old tyresused as swings and drinking cups used as pen and pencil holders illustrate the idea of "put to other uses."
Eliminate: What can you take away or remove? What parts aren’t really necessary? Cordless telephones andwireless keyboards are examples of eliminating something.
Rearrange: Can parts be exchanged or the pattern changed? Can any components be interchanged? Can it be laidout differently? Ergonomic keyboards and recumbent bicycles are examples of products that have been rearranged.
Activity MappingThe Activity Mapping technique allows for keen observation into processes needed to accomplish a certain activity.Describing four process stages in detail helps determine if any design opportunities might exist.
Key Concepts (continued)
Design and Discovery Curriculum Teacher Guide
40

More about the Design Process and Brainstorming
Garratt, James. Design and Technology. New York: Cambridge University Press, 1993.
Petrowski, Henry. Invention by Design; How Engineers get from Thought to Thing. Cambridge: MA: HarvardUniversity press, 1998.
Petroski, Henry. To Engineer is Human: The Role of Failure in Successful Design. Reprint, New York: Vintage Books,1992.
Eberle, Bob. Scamper: Games for Imagination Development. Waco, TX Prufrock Press, 1996. This book provides adescription of SCAMPER and also activities that can be used with students to practice the technique.
Eberle, Bob. Scamper On. Waco, Tx: Prufrock Press, 1997.This book provides more guided activities encouraging students to think in creative ways.
IDEO. IDEO Method Cards: 51 Ways to Inspire Design. San Francisco: William Stout Architectural Books, 2003.www.ideo.com/methodcards/MethodDeck/index.html*IDEO, a design firm, publishes cards illustrating methods to inspire innovative ideas. Sharing these methods withstudents will provide additional ways to look creatively at design solutions.
Michalko, Michael. Cracking Creativity: The Secrets of Creative Genius. Berkeley, CA: Ten Speed Press, 1998.This book provides creative thinking strategies, stories and exercises to use with students.
Michalko, Michael. Thinkpak: A Brainstorming Card Deck. Berkeley, CA: Ten Speed Press, 1994.ThinkPak is a deck of cards focusing on the SCAMPER technique. the cards may be used to develop new andinnovative ideas through the practice of the SCAMPER technique.
Osborn, Alex. Applied Imagination. New York: Scribners, 1953.This book discusses the idea of brainstorming and the study of creativity. This book influenced the development ofcreative thinking techniques and idea generation.
Key Concepts (continued)
Design and Discovery Curriculum Teacher Guide
41

Goal Introduce and practice SCAMPER, a creative technique for improvement of existingdesigns.
OutcomeLearn and practice the SCAMPER process. (see page 39)
DescriptionStudents learn about and use SCAMPER, a systematic technique for generating ideasabout improving existing designs. They study a potato peeler and try to create ideasabout designing an improved peeler.
SubstituteCombineAdaptMinimize/MagnifyPut to other usesEliminate/ElaborateReverse/Rearrange
Supplies • Potato peelers in multiple styles • Clipboards (optional, but handy for taking notes during walking tour)• Chart paper for posters and markers
Preparation
1. Read through the SCAMPER technique for expanding thinking aboutimprovements.
2. Practice using SCAMPER to come up with an improvement yourself!
Session 2, Activity A
The Potato Peeler Upgrades
Design and Discovery Curriculum Teacher Guide
42
In This Session:
A The Potato Peeler Upgrades(40 mins) Student Reading Student Discussion
B SCAMPER and The Potato Masher(40 mins) Student Worksheet Student Discussion
C Design Opportunities are Everywhere(40mins + H/W) Student Worksheet Student Discussion

Procedures
1. Distribute potato peelers among groups of students.
2. Present each step of the SCAMPER process using a potato peeler as anexample.
3. Assign a different letter of SCAMPER to seven groups and have them createand display posters of the SCAMPER technique using the letters and keywordsfrom the worksheet.
4. Discuss each step individually and encourage participants to apply and sharethe step to the potato peeler example they have.
5. Provide time for participants to study different potato peelers and think ofimprovements as a group.
6. Together, compare two different peeler designs and determine which step ofSCAMPER was applied.
Wrap UpDiscuss any other strategies for generating new ideas and approaches to existingsolutions.
Follow WithActivity 2B: SCAMPER and The Potato Masher applies the SCAMPER technique toanother household device, the potato masher.
Teacher Guide
43
2A: The Potato Peeler Upgrades (continued)
Design and Discovery Curriculum

Ready to SCAMPER? SCAMPER is a technique that gets you to think about improving an existing design. It is anacronym that helps you remember seven different ways to think up new improvements. It is useful for beingcreative in a systematic way. It generates ideas you might not have on your own. Try it!
S Substitute one thing for another.
C Combine with other materials, things, or functions.
A Adapt: Can it be used for something else?
M Minimize/Magnify: Make it larger or smaller.
P Put to other uses: Can you put it to another use? In this case, use it for another vegetable? If you make it larger,would it work for some other food?
E Eliminate/Elaborate: Remove some part or material, or make one section more detailed or refined.
R Reverse/Rearrange: Flip-flop some section of the item, move parts around.
SCAMPER Peeler Improvement Benefit
Substitute Different handle material Rubber handle, more comfortable to hold
Combine Combine peeling with Peeler with potato scrubbing brushother functions
Adapt Adapt peeler for other uses Potato, carrot, and asparagus peeler
Magnify/ Longer cutting edge on blade Better for peeling large potatoesMinimize Fold-away blade Safer when stored in drawer
Put to other uses Larger and sharper blade Can be used for food with thicker skin
Eliminate/ Eliminate plastic. Have one-piece Striking all-metal appearanceElaborate metal peeler rolled to form handle.
Curved blade Fits round curved surface of potato
Rearrange/ Blade angled at 120º to handle Better ergonomics for peelingReverse Gouge at base of handle Easier to use
instead of at tip of blade
Adapted from: Baxter, Mike. Product Design: Practical Methods for the Systematic Development of New Products,1st ed. Cheltenham, United Kingdom: Stanley Thornes, 1995.
The Potato Peeler UpgradesWorksheet: Session 2, Activity A
Design and Discovery Curriculum Teacher Guide
44
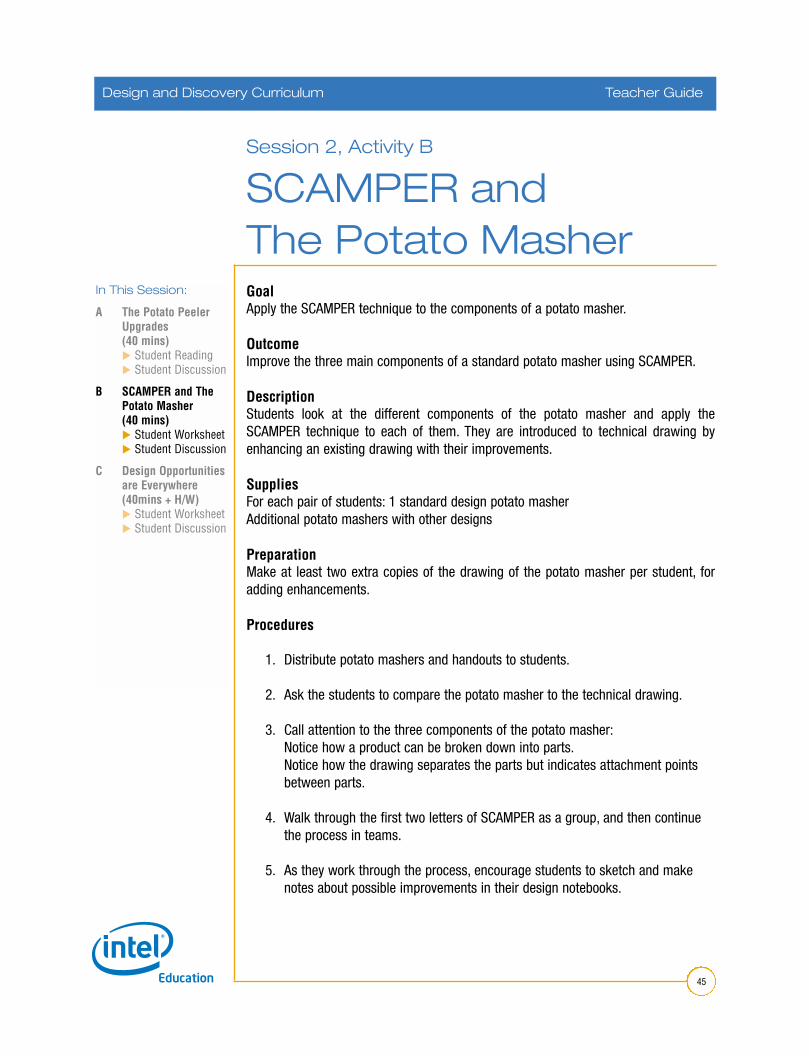
GoalApply the SCAMPER technique to the components of a potato masher.
OutcomeImprove the three main components of a standard potato masher using SCAMPER.
DescriptionStudents look at the different components of the potato masher and apply theSCAMPER technique to each of them. They are introduced to technical drawing byenhancing an existing drawing with their improvements.
SuppliesFor each pair of students: 1 standard design potato masherAdditional potato mashers with other designs
PreparationMake at least two extra copies of the drawing of the potato masher per student, foradding enhancements.
Procedures
1. Distribute potato mashers and handouts to students.
2. Ask the students to compare the potato masher to the technical drawing.
3. Call attention to the three components of the potato masher:Notice how a product can be broken down into parts.Notice how the drawing separates the parts but indicates attachment pointsbetween parts.
4. Walk through the first two letters of SCAMPER as a group, and then continuethe process in teams.
5. As they work through the process, encourage students to sketch and makenotes about possible improvements in their design notebooks.
Session 2, Activity B
SCAMPER andThe Potato Masher
Design and Discovery Curriculum Teacher Guide
45
In This Session:
A The Potato Peeler Upgrades(40 mins) Student Reading Student Discussion
B SCAMPER and The Potato Masher(40 mins) Student Worksheet Student Discussion
C Design Opportunities are Everywhere(40mins + H/W) Student Worksheet Student Discussion

7. Have them draw improvements on the worksheet that shows a technicaldrawing of a standard potato masher.
Wrap UpShare improvement ideas for each SCAMPER letter and discuss:
• What component was improved or used differently? • What idea comes to mind first? • How many ways do you think this product could be changed?
Follow WithActivity 2C: Design Opportunities Are Everywhere generates ideas for design projectsfrom a field trip or walking tour of a public space.
2B: SCAMPER and The Potato Masher (continued)
Design and Discovery Curriculum Teacher Guide
46
Design and Discovery Curriculum Teacher Guide

SCAMPER and The Potato MasherWorksheet: Session 2, Activity B
Design and Discovery Curriculum Teacher Guide
47
The Potato Masher, Improve It!
Apply SCAMPER to each of the potato masher parts. Sketch and make notes about your improvement ideas. Drawyour best ideas on this technical drawing of the standard potato masher.

Goal Learn to identify problems, needs, and opportunities for design improvements.
OutcomeStudents generate a list of 10 problems that they see as opportunities for designsolutions.
DescriptionThis activity begins the students’ project development. It should expand theirawareness into many possible opportunities for designed solutions. The activityintroduces another brainstorming technique, the Activity Mapping where studentsidentify an activity, think about the steps in this activity, and consider where there couldbe room for improvement. Following this, a short field trip or walking tour is a preferredmethod to give students ideas for design opportunities. This outing can be as simple asa walking around the school. Students should be encouraged to take every opportunityto look for design opportunities, around their homes or when they are out with theirfriends. A field trip to any convenient public place such as a department store or a mallwill work well.
Students collect their observations and information about problems and select 10 thatpresent opportunities for designing new solutions. Students will revisit and refine thislist of problems and begin to work on solutions in Sessions 8 and 9.
Session 2, Activity C
Design Opportunitiesare Everywhere
Design and Discovery Curriculum Teacher Guide
48
In This Session:
A The Potato Peeler Upgrades(40 mins) Student Reading Student Discussion
B SCAMPER and The Potato Masher(40 mins) Student Worksheet Student Discussion
C Design Opportunities are Everywhere(40mins + H/W) Student Worksheet Student Discussion

ProceduresZIBA Design Activity Mapping
1. The Activity Mapping is used as a way to identify processes, the products usedin the processes, and identify problems in the processes. Model strategies foridentifying problems by introducing the Activity Mapping. This technique is usedby ZIBA Design, http://www.ziba.com*, an international design firm that hasdesigned products for many global companies, including FedEx, Microsoft, Intel,Fujitsu, Black & Decker, Sony, Pioneer North America, Dial, and Clorox. Studentspractice using a Activity Mapping with a group example, using teeth brushing.
2. Explain that the Activity Mapping has four primary user goals that summarizewhat people are trying to accomplish when engaging in an activity.
Activity Mapping
1. Pre-activity: Describes what is done before the activity
2. Activity: Explains what is involved in the activity
3. Post-activity: Includes what is involved after the activity
4. Assessment: Involves how one knows if the activity has been successful
2C: Design Opportunities are Everywhere (continued)
Design and Discovery Curriculum Teacher Guide
49

3. Using chart paper, ask students what is involved for each phase of brushingteeth. In the example below, “prepare” is the pre-activity, “mouth cleaning” isthe activity, and “cleanup” is the post-activity, The Activity Mapping should looksomething like this:
Four primary user goals summarize whatpeople are trying to accomplish whenengaging in daily oral care.
PreparePreparation involves all the tool preparationsteps that need to be done before usersactually brush their teeth.
Mouth CleaningMouth cleaning begins when the cleaningsurfaces of the toothbrush are applied to theinside of the mouth. This is the active part ofthe brushing, where all efforts are physicallyfocused on the removal of food debris, nightfilms, mouth freshening, and gummaintenance.
CleanupCleanup has three elements: tool maintenance,tool storage, and personal rinsing. Toolmaintenance is focused primarily on gettingbrushes, sinks, and toothpaste rinsed andready for next use. Tool storage involveskeeping a bathroom tidy and getting the brush,paste, cups, etc. to a safe place where theyare less likely to be contaminated. Personalrinsing refers to removal of saliva and pastefrom the mouth and hands. Rinsing is followedby towel drying.
AssessmentAssessment allows users to determinewhether they’ve accomplished their personalgoals with respect to mouth cleaning. Methodsinclude visual inspection in the bathroommirror, tactile inspection with the tongue, andself-perception of a minty mouth and freshbreath.
4. Ask students what products are involved in each process. Ask them to considerif there are any problems with any of these products, any suggestions they havefor improving a product, or inventing a new product. What could make life easierfor people when they brush their teeth? Explain that this is one way to identifyproblems and begin to consider solutions.
2C: Design Opportunities are Everywhere (continued)
Design and Discovery Curriculum Teacher Guide
50
Design and Discovery Curriculum Teacher Guide
Prepare
Mouth Cleaning
Cleanup
Assessment
Get Paste Locate BrushWet BrushLoad BrushCap Paste
Brush UpperLowerInteriorExteriorTongue
Spit Rinse MouthRinse HandsWipe MouthDry HandsStore BrushStore Paste
Mouth Feels Clean Looks GoodTastes Good

5. Students can apply this tool to identifying other problems and ultimatelycoming up with solutions.
Wrap UpIntroduce the Home Improvement Activity, Improvement Of Everyday Things.
Follow WithSession 3 Material Science where students learn about materials and the principlesbehind material selection.
2C: Design Opportunities are Everywhere (continued)
Design and Discovery Curriculum Teacher Guide
51

Problem Identification: What Makes a Good Problem To Solve?Many important engineering and design ideas start with a problem or need. You have the capacity to solve importantproblems, and make amazing things happen. Good ideas are inside you. Good problems often start with things youknow about or have some personal connection to. Perhaps it’s something that bothers you and you think about howit could be different. Maybe you have a relative or friend who struggles with something. Sometimes a problem tosolve just comes from an idea of yours that sounds like a fun or easier way to do something.
In this activity, you will practice identifying design opportunities. Some of these opportunities may be problemswhile others may be needs, or simple improvements.
Who knows about problems? What kinds of problems are there? • Health problems: Doctors and nurses would know, researchers too.• Safety problems: Emergency room staff would know, firemen and police would know.• Problems of a specific group: The elderly, the very young, people in wheelchairs, left-handed people, short
people, deaf people. Try to understand through experience what it would be like to be in their shoes.Research the associations or organizations of these groups.
• Inconvenient problems: What bugs you? Always losing your keys?
Make a list of the people or organizations you could call for more information about problems or things that don’twork well enough:
Design Opportunities are Everywhere Worksheet: Session 2, Activity C
Design and Discovery Curriculum Teacher Guide
52

ZIBA Design Activity MappingAs a group, you’ll do a practice Activity Mapping. This is a useful tool for identifying problems. The Activity Mappinghas four primary user goals that summarize what people are trying to accomplish when engaging in an activity.
Activity Mapping
1. Pre-activity: Describes what is done before the activity
2. Activity: Explains what is involved in the activity
3. Post-activity: Includes what is involved after the activity
4. Assessment: Involves how one knows if the activity has been successful
Now, do your own Activity Mapping for a problem that you identify. This can be done in your design notebook.
Where Can You Find Problems To Solve?The answer is: everywhere. With attention and focus on designed things you see and use wherever you go, you willsee all kinds of problems just waiting for your ideas and creativity. You will be taking a trip today to observe a publicplace (a mall, a park, or a store). Look for problems to solve. Watch how people use things in that place. Look forproblems to solve. Study a few objects and items in that place. Look for problems to solve. Take notes:
2C: Worksheet: Design Opportunities are Everywhere (continued)
Design and Discovery Curriculum Teacher Guide
53

What Problems Would You Like To Solve?They can be big problems or small problems. You decide. Creativity takes practice and patience. And it takes a fewgood strategies. One strategy is called “brainwriting.” Brainwriting is different from brainstorming because youdon’t talk. You write your ideas on paper, quietly.
Write down 10 “problems” you are aware of (these may be from the field trip). Include things that exist that coulduse improvement. Write this list in your design notebook or in the space below.
1.
2.
3.
4.
5.
6.
7.
8.
9.
10.
Save this list. Revisit it as you work through the other Design and Discovery sessions. Add new design opportunitiesas you think of them.
2C: Worksheet: Design Opportunities are Everywhere (continued)
Design and Discovery Curriculum Teacher Guide
54

Notes:

From spacecraft to ball point pens, materials make the difference in successfulperformance of a product. In this session students learn about four different classes ofmaterials and test them to understand their properties. They apply selection criteria todetermine the best materials for different applications, while learning to consider thecost and environmental impact when choosing materials. Like materials engineers,students learn to differentiate and select materials based on their properties.
In 3A: Properties of Materials, students test samples of metals, ceramics, polymers, andcomposites to compare their properties. They test for density, ductility, strength, fatigue,electrical and thermal conductivity, and optical properties. In 3B: Materials Applications,students apply their knowledge of material properties to solve real-world problemsfaced by materials engineers. When materials engineers select which materials to use,they also consider materials cost and in 3C: Material Choice, students gain anunderstanding of the economics of material selection through a cost analysis of abeverage container made of different materials. They then think innovatively about howto design a beverage container that can be put to another use.
Supplies
For demonstration:• Chart Paper.• A brick, a block of wood, and a block of Styrofoam*.• 2 Chocolate bars with caramel filling (1 frozen; 1 room temperature)
For each small group:• 1 wooden popsicle stick, 1 plastic eating utensil, 1 metal eating utensil, 1
piece of tile • 8x1 strips of Aluminium foil, heavy duty zip lock Ziploc* plastic bags, paper,
2 buckets (10 litre and 5 litre), 2 kg of sand, rice, or beans (as weights),2 C-clamps
• plastic multipurpose cable tie, 16-18 gauge copper or aluminium wire (or steelpaper clips) cut to same size as tie, small piece of thin plywood (approx. 5 mmthick).
• candle, matches• battery, wire, bulb• flashlight, samples of transparent (plastic bag), translucent (plastic cup—hazy
type), and opaque (colored plastic bucket)• 1 of each for each group: 330 ml glass, aluminium and plastic beverage
containers
Session 3
Material Science
Design and Discovery Curriculum Teacher Guide
55
Design and Discovery Curriculum
In This Session:
A Properties of Materials(80 mins) Student Worksheet Student Reading
(H/W)
B Materials Applications(20 mins) Student Worksheet
C Material Choice(20 mins) Student Worksheet
D Do Materials Matter? (H/W) Student Worksheet

Session 3 is about materials. In order to select suitable materials for use in a product, it is important to know thedifferences between the classes of materials and their related properties. Students need to build familiarity withmaterial classes, material properties, how materials are selected and used, how cost is considered and theenvironmental impact of materials.
Key Concepts
Materials are so important to engineering and design that there is a whole field of engineering devoted to materials.Materials engineers envision, design, prototype and test new or modified materials for products. They provideexpertise on materials selection and properties for a given product. Some materials engineers develop materialsprocessing methods and even create new materials.
Classes of Materials Materials are grouped into categories or classes based on their chemical composition. Material selection isdetermined by the capabilities and qualities of materials or their properties. A chart on page 70 shows four classesof materials, their definitions, types of materials within each class, properties and examples of usage.
Properties of Materials A chart on material properties is shown on page 70.
Costs of Materials Materials are usually sold by weight or by size. Material costs are therefore given as cost per unit weight or costper unit volume. Many materials are initially made in bulk (such as cast metal ingots). They are usually shaped intostandard stock items (for example, a sheet or tube) before being bought by a manufacturer. As a result, the cost ofa material to a manufacturer is often higher than the cost of the raw material. Also, as a general rule, the more amaterial is "improved," for example by alloying, the more expensive it becomes.
Material costs are not fixed, but are strongly affected by the marketplace and international trading and by changesin the stability of the supply of the raw materials - which can be disrupted by wars and global politics. Somematerials, such as steel, have had a very stable price for many years. The price of others, like aluminium, havevaried by more than a factor of 3 in the last decade. The cost of newer materials steadily decreases as their usageincreases. The most accurate information on material price can be obtained by contacting material suppliers. Notethat the price will depend on the form the material is supplied in (as a raw material, or formed into a sheet or tube),and that bulk discounts can be significant.
Material ScienceKey Concepts: Session 3
Design and Discovery Curriculum Teacher Guide
56

Materials RecyclingAluminium Recycling: Aluminium is easily and frequently recycled. It is sorted at a sorting plant using magnetsthat separate steel and aluminium. Aluminium is a chemical element that cannot be found in the earth in its pureform. Therefore, extraction becomes quite a complex and energy-intensive process that takes aluminium oxide frombauxite and then removes the oxygen in a smelting process to produce aluminium. the recycling of aluminium isrelatively easy, and saves up to 95 percent of the energy required to refine it after original extraction. Thissignificantly increases the need for keeping refined aluminium within the material stream rather than letting itbecome waste, thereby placing a premium on its recycling.
Glass Recycling: Glass is a highly effective recycled material and a very stable, nontoxic material when disposedof. Glass recycling is heavily dependent on the appropriate colour separation of the material. In addition to colourconsiderations, glass recycling must remove other impurities that are common, such as porcelain, ceramics, corkand paper from labels, which all cause problems in the subsequent manufacturing process.
Paper Recycling: The recycling of paper and cardboard is the most easily attained and most effective. The quantityof paper recycled has increased. The quality of paper recycling depends on the process used. Paper cannot berecycled forever. each process reduces the fibre length, thus reducing the ability of the fibres to stick togetherwithout the use of additional adhesives.
Plastics Recycling: The primary problem with plastics recycling is cross-contamination of resins. If one type ofplastic is recycled with another, it can significantly degrade the quality of the end product. therefore, a carefulprocess of sorting is required to ensure this does not occur. There are different methods used to sort plastics. Oncethe material has been sorted, it can be remanufactured using a number of different techniques including extrusion,blow molding and injection molding and reused in many different applications. Certain packaging functions do notallow the use of recycled materials, particularly packaging of foodstuff.
The Plastic Coding SystemThe use of coding facilitates sorting for plastic recycling. It ensures that plastic containers and materials of variousresin types can be identified so that they can be properly collected, sorted and recycled. Plastics are numbered 1-7 based on their material composition.
Key Concepts (continued)
Design and Discovery Curriculum Teacher Guide
57

Type of Plastic Common Uses
1 = PET or PETE = Polyethylene terephthalate Soft drink, fruit juice,alcohol beverage bottles
2 = HDPE = High Density polyethylene Clear HDPE – milk jugs, distilled water and large vinegar bottles and grocery bagsColoured HDPE – Liquid laundry and dish detergent, fabric softener,motor oil, antifreeze, bleach and lotion containers
3 = V or PVC = Vinyl/polyvinyl chloride Vegetable oil, mouthwash and salad dressing bottles
4 = LDPE = low density polyethylene Food storage containers and bags for dry cleaning, bread,produce and trash
5 = PP = Polypropylene Battery cases, dairy tubs and cereal box liners
6 = PS = Polystyrene Yoghurt cups, clear carryout containers,vitamin bottles, fast food spoons, knives and forks,hot cups, meat and produce trays and egg cartons
7 = Other types of plastics Squeezable ketchup containers, most crisp snack bags and juice boxes (individual servings)
More About Materials
American Plastics Council, www.americanplasticscouncil.org*This site provides everything that you ever wanted to know about plastics.
Materials World Modules, www.materialsworldmodules.org*These modules provide more in-depth activities for students and can be ordered from Northwestern University.
Design inSite, www.designinsite.dk*This danish Website is a designer’s guide to manufacturing. It provides information about materials, materialsproperties and material use in products.
Demi Guide to Sustainability, www.demiorg.uk*This guide explores design for sustainability, environmental issues of design, and how to design materials andproducts with sustainability in mind.
Inquiring Minds, www.tvo.org/iqm/site_contents.html*This site provides clear explanations and pictures that make learning about plastics easy. The site also includesshort videos, for example, How Velcro Works.
Key Concepts (continued)
Design and Discovery Curriculum Teacher Guide
58

GoalUnderstand the classes of materials and be able to differentiate materials based ontheir properties.
OutcomeStudents know the properties of four different classes of materials.
DescriptionStudents test samples of metals, ceramics, polymers, and composites to compare theirproperties. They test for density, ductility, strength, fatigue, electrical and thermalconductivity, and optical properties.
SuppliesAs on page 55
Safety IssuesBe sure to have students use safety precautions when testing materials. In the thermalconductivity test, students use candles to heat materials. Be sure that they do not putthe materials too close to the flame. This can also be done as a demonstration.
Design and Discovery Curriculum Teacher Guide
59
Session 3, Activity A
Properties of MaterialsIn This Session:
A Properties of Materials(80 mins) Student Worksheet Student Reading
(H/W)
B Materials Applications(20 mins) Student Worksheet
C Material Choice(20 mins) Student Worksheet
D Do Materials Matter? (H/W) Student Worksheet

Preparation
1. Familiarize yourself with the different classes of materials (see chart on page70).
2. Conduct the properties tests yourself.
3. Distribute supplies to each pair or group. Decide if students will do all the testsfirst and then discuss the results or if a discussion will take place after each test.
Testing Material Properties
1. To understand material properties, student run tests comparing materials. Thesecan be done in pairs or small groups.
2. Be sure to explain that understanding material properties will help studentswhen planning what materials to use for their projects. They will be able toselect materials that make the most sense for their required use.
3. After each test, students should consider examples of objects where thatproperty characteristic is important.
Materials Test 1: Density Test
1. Question: What materials are more dense?
2. Materials: a brick, a block of wood, and a block of Styrofoam
3. Explain: Discuss what density is. Density is a measure of how heavy an object isfor a given size, i.e. the mass of material per unit volume. The formula todetermine density is:
4. Test: Show an example of how to use the formula. Find the volume of thematerial (cm3). Regular shape (LxWxH). Irregular shape (Measuring cylinder).Find mass of material on electronic balance (g). Then use the formula todetermine the density of each object.
5. Rate: Rate the density of the materials: high, medium, or low density.
6. Discuss design issues: Think of examples of other objects where high densityis important (paperweight, building material). Think of examples of objectswhere low density is important (baseball bat, tennis racket, backpack.)
Teacher Guide
60
3A: Properties of Materials (continued)
Design and Discovery Curriculum
Density = g/cm3Mass
Volume

Materials Test 2: Ductility vs Brittleness Test
1. Question: How easily does it stretch when force is applied?
2. Materials: For optional demonstration: 2 chocolate bars with caramel filling (1frozen; 1 room temperature). For testing: 1 wooden popsicle stick, 1 plasticeating utensil, 1 metal eating utensil, 1 piece of tile.
3. Demonstration (Optional): To demonstrate the concept of ductility, breakchocolate bars one at a time. What happens? Does it bend or crack first? (Theunfrozen bar will stretch and bend before breaking [ductile], while the frozen onewill not stretch but rather break immediately [brittle]).
4. Test: Bend the wooden popsicle stick, a plastic utensil, and a metal utensil. Whathappens? Which one is most ductile?
5. Rate materials from the most ductile to the least ductile. (The plastic utensil willstretch and easily return to its original form and is therefore the most ductile; thewooden stick will bend, but will not return to its original form; the metal will behard to bend and is less ductile; and the ceramic tile will snap and break and istherefore the least ductile).
6. Discuss design issues: Ductility is important in designing products which canonly be allowed to bend by a certain amount (bridges, bicycles, furniture) or thatneed to be flexible when used and return to their original shape when not in use(rubber bands, plastic shopping bags). Ductility is also important in springs,which store energy (vaulting poles, bungee ropes.) Brittleness is important forobjects that maintain their shape regardless of how much force is applied(ceramic floor tile, wooden shelves).
Materials Test 3: Strength Test (Tensile Test)
1. Question: How much weight can it hold without failing or breaking?
2. Materials: 8x1 strips of aluminium foil, heavy duty zip lock Ziploc plastic bags,paper, 2 buckets (10 litre and 5 litre), 2 C-clamps, some weights (e.g. newtonweights).
3. Test: Before assembling the materials, weigh the individual materials. Attach abucket with a G-clamp to the material to be tested and attach the material witha G-clamp to a table. Be sure to have a larger bucket below to catch the weights.Fill the bucket slowly with weights. How much weight will it take until thematerial breaks? Record results and compare.
3A: Properties of Materials (continued)
Design and Discovery Curriculum Teacher Guide
61

4. Rate materials: strong, medium, and weak in strength
5. Explain: It may be surprising that paper is so strong. This is a good place toexplain more about composites. Composites are two or more distinct substancesthat are combined to produce a new material with properties not present ineither individual material. Composites are often made to create a strongermaterial. For example, plywood is a composite. Thin sheets of wood are stackedand glued so that the end product is stronger than each material on its own.
6. Discuss design issues: Material strength is important in structural applications(brick, stone, and concrete for bridges and buildings.) Material strength is alsoimportant in transportation applications (airplanes, cars, bicycles.)
Materials Test 4: Fatigue Test
1. Question: How much repeated stress can cause the material to fail or break?
2. Materials: plastic multipurpose cable tie, copper or aluminium wire (or steelpaper clips work well) cut to same size as tie, small piece of thin plywood.
3. Test: Bend each item back and forth as you count how many times it takes tobreak. Record the times. Be sure that students use the same amount of strengthor stress when bending the material back and forth over and over. As strengthvaries from student to student, the participants should recognize that there maybe variety in the data collected.
4. Rate materials: high, medium, low. (most turns=high fatigue resistant).
5. Discuss design issues: For what objects is fatigue important? (Anything usedrepeatedly –paper clip, eating utensils, bridges, airplane wings) For what objectsis material fatigue not important? (Anything that is disposable or anything thatdoesn’t experience repeated stresses – plastic eating utensil).
Materials Test 5: Electrical Conductivity Test
1. Does electricity pass through the material easily?
2. Materials: battery, wire, bulb, aluminium foil, cardboard, plastic bag, ceramic tile.
3. Test: Make an electrical circuit with each material and see if the bulb lights.
4. Rate: yes or no if the bulb lights
3A: Properties of Materials (continued)
Design and Discovery Curriculum Teacher Guide
62

5. Discuss design issues: When is it important to use a material that conductselectricity? (When an electrical charge needs to be transported.) When it isimportant to use a material that does not conduct electricity? (Anything thatcovers electrically conductive material – plastic on TV, plastic around wire onelectrical cord)
Materials Test 6: Thermal Conductivity Test
1. Question: Does heat pass through it easily?
2. Materials: candle, matches, same material as above
3. Test: Investigate the ability of materials to transmit heat by holding each materialabout a few inches from the candle flame for 10 seconds. Take the materialaway from the flame and compare how hot it is and how long it stays hot. Amaterial that is very hot and remains hot for awhile, has higher thermalconductivity than a material the does not feel hot and cools quickly. Recordresults and repeat.
4. Rate: high conductivity, medium, low (aluminium – high, ceramic – medium,paper – medium, plastic – low)
5. Discuss design issues: Thermal conduction is the passage of heat through amaterial, such as metal. Thermal insulation is a barrier to the conduction of heat.Knowing how conductive a material is helps determine if the material is suitableto include in home construction, clothing, sports shoes, cooking products, andspacecraft design, for example. What are examples of objects that need amaterial that is a thermal conductor? (baking sheets, heating radiators.) When isthe use of insulation materials necessary? (polystyrene and paper cups for hotdrinks.)
3A: Properties of Materials (continued)
Design and Discovery Curriculum Teacher Guide
63

Materials Test 7: Optical Properties Test
1. Question: How easily does light pass through it? (Transparent, translucent,opaque)
2. Materials: flashlight or bulb and battery, samples of transparent (plastic bag),translucent (plastic cup—hazy type), and opaque (coloured plastic bucket)
3. Test: Compare materials by shining a light through them.
4. Rate: transparent, translucent, opaque
5. Explain: Light passes through transparent materials, and images can be viewedthrough them. Light passes through a translucent material; however, imagescannot be seen easily or at all through the translucent material. Light cannotpass through an opaque material, and images cannot be seen through them.
6. Discuss design issues: What are examples of objects made that are transparent(car windshields, eyeglasses, plastic food containers), translucent (bathroomwindows—very often for privacy, glass mugs for decoration, some curtains), andopaque (room darkening curtains or blinds, sunscreens for car windshields)?When are these properties important? Help the students find examples of thesethree characteristics in materials or objects where the passage of light andviewing of objects matters and may or may not be desired. In many cases,optical materials are chosen for their aesthetics and not properties.
Wrap UpReview students’ charts and check for understanding.
Follow WithThe next activity, 3B: Materials Applications, students apply problem-solving skills toreal-world material problems.
3A: Properties of Materials (continued)
Design and Discovery Curriculum Teacher Guide
64
Design and Discovery Curriculum

Materials engineers design new materials and determine what materials are best used for certain structures anddevices. They determine this by understanding the properties of materials so that they can select the mostappropriate material or combination of materials for a particular use.
In this activity, you will test materials to learn about their properties. After each test, rate each material that youtested in the chart on this page. For each property, come up with examples of objects where each property isimportant.
Density Test1. Question: What materials are more dense?
2. Materials: a brick, block of wood, and block of Styrofoam, ruler, balance and measuring cylinder.
3. Test: Compare the density of a brick, a block of wood, and a block of Styrofoam.Find the volume of the material (cm3). Regular shape (LxWxH). Irregular shape (Measuring cylinder).Find mass of material on electronic balance (g).Calculate density
Record your results in the chart below
4. Rate: Rate the materials according to their density (high, medium, low).
5. Discuss design issues: Think of examples of other objects where high density is important. Think ofexamples of objects where low density is important.
Material Class and PropertiesWorksheet: Session 3, Activity A
Design and Discovery Curriculum Teacher Guide
65
Density = g/cm3Mass
Volume
Material Length(cm) Width(cm) Height(cm) Volume (cm3) Mass (g) Density (g/cm3)
Brick
Wood
Styrofoam

Ductility vs Brittleness Test
1. Question: How easily does it stretch when force is applied?
2. Materials: For optional demonstration: 2 chocolate bars with caramel filling (1 frozen; 1 roomtemperature). For testing: 1 wooden popsicle stick, 1 plastic eating utensil, 1 metal eating utensil, 1 pieceof tile.
3. Test: Bend the wooden popsicle stick, a plastic utensil, and a metal utensil. What happens? Which one ismost ductile?
4. Rate materials from the most ductile to the least ductile.
5. Discuss design issues: Ductility is important in designing products which can only be allowed to bend by acertain amount or that need to be flexible when used and return to their original shape when not in use.What are examples of applications where ductile materials are needed?
Strength Test (Tensile Test)
1. Question: How much weight can it hold without failing or breaking?
2. Materials: 8x1 strips of aluminium foil, heavy duty zip lock Ziploc plastic bags, paper, 2 buckets, 2 kg ofsand, rice, or beans (as weights), 2 C-clamps
3. Test: Before assembling the materials, weigh the individual materials. Attach a bucket with a C-clamp tothe material to be tested and attach the material with a C-clamp to a table. Be sure to have a largerbucket below to catch the weights. Fill the bucket slowly with weights. How much weight will it take untilthe material breaks? Record results and compare.
4. Rate materials: strong, medium, weak in strength.
5. Discuss design issues: Material strength is important in structural applications. What are examples of this?Material strength is also important in transportation applications. What are examples of this?
3A Worksheet: Material Class and Properties (continued)
Design and Discovery Curriculum Teacher Guide
66

Fatigue Test
1. Question: How much repeated stress can cause the material to fail or break?
2. Materials: plastic multipurpose cable tie, copper or aluminium wire (or steel paper clips) cut to same sizeas tie, small piece of thin plywood.
3. Test: Bend each item back and forth as you count how many times it takes to break. Record the times. Besure that students use the same amount of strength or stress when bending the material back and forthover and over.
4. Rate materials: high, medium, low. (most turns=high fatigue resistant)
5. Discuss design issues: For what objects is fatigue important? For what objects is material fatigue notimportant?
Electrical Conductivity Test
1. Does electricity pass through the material easily?
2. Materials: battery, wire, bulb, aluminium foil, cardboard, plastic bag, ceramic tile – all 1x8 with the samethickness
3. Test: Make an electrical circuit with each material and see if the bulb lights.
4. Rate: yes or no if the bulb lights
Record your results in the chart below
5. Discuss design issues: When is it important to use a material that conducts electricity? When it is importantto use a material that does not conduct electricity?
3A Worksheet: Material Class and Properties (continued)
Design and Discovery Curriculum Teacher Guide
67
Material Aluminium Cardboard Plastic Ceramic
Bulb Lights?
Conductor/Insulator

Thermal Conductivity Test
1. Question: Does heat pass through it easily?
2. Materials: candle, matches, same material as above
3. Test: Investigate the ability of materials to transmit heat by holding each material about a few inches fromthe candle flame for 10 seconds. Take the material away from the flame and compare how hot it is and howlong it stays hot. A material that is very hot and remains hot for awhile, has higher thermal conductivity thana material the does not feel hot and cools quickly. Record results and repeat.
4. Rate: high conductivity, medium, low
5. Discuss design issues: What are other examples of objects that need a material that is a thermal conductor?When is the use of insulation materials necessary?
Optical Properties Test
1. Question: How easily does light pass through it? (Transparent, translucent, opaque)
2. Materials: flashlight or bulb and battery, samples of transparent (plastic bag), translucent (plastic cup—hazytype), and opaque (colored plastic bucket)
3. Test: Compare materials by shining a light through them.
4. Rate: transparent, translucent, opaque
5. Discuss design issues: What are examples of objects made that are transparent, translucent, and opaque?When are these properties important?
3A Worksheet: Material Class and Properties (continued)
Design and Discovery Curriculum Teacher Guide
68

Property DefinitionDensity How heavy objects are that occupy the same volume.
Ductility How easily a material stretches when force is applied.
Strength How much weight a material can hold without failing or breaking.
Fatigue How easily a material withstands repeated stresses.
Electrical Conductivity Whether or not electricity passes through the material.
Thermal Conductivity How easily heat passes through the material.
Optical Properties How easily light passes through (transparent, translucent, opaque)
Corrosion If the material degrades easily because of the physical environment.
Material Density Ductility Strength Fatigue Electrical Thermal OpticalProne Cond. Cond.
(High, (High, (Strong, (High, (Yes/No) (High, (Transparent,Medium, Medium, Medium, Medium, Medium, Translucent,
Low) Low) Weak) Low) Low) Opaque)
Metal
Polymer
Ceramic
Composite
Example
3A Worksheet: Material Class and Properties (continued)
Design and Discovery Curriculum Teacher Guide
69

From the Stone Age to the Information Age, humans have made use a wide array of materials to improve their lives.Stroll through the halls of a museum and you will see that major epochs have been shaped and even defined bycertain materials. From iron and steel to textiles and microprocessors, materials have a seemingly infinite range ofproperties and applications.
Not surprisingly, the field of materials science covers a wide range of disciplines. Materials engineers contribute tothe field by evaluating materials for how well they distribute stress, transfer heat, conduct electricity, and meet otherdesign specifications.
New materials are constantly being invented, and new uses for existing materials continue to emerge. In recentyears, for example, researches from Nike have figured out how to grind up used athletic shoes and create a newmaterial for resurfacing running tracks and basketball courts. Researchers from Patagonia have developed amethod to reuse the plastic in soda bottles to make a synthetic fiber that is spun into soft fleece for makingsportswear.
Let’s take a look at four of the major classes of materials.
Material Class and PropertiesReading: Session 3, Activity A
Design and Discovery Curriculum Teacher Guide
70
Definition
Metals are materials that display certainproperties such as a metallic lustre andthe capacity to lose electrons and to formpositive ions.
When a metal is mixed with another metalor non-metal, the substance formed iscalled an alloy.
Examples
Pure metals: aluminiumironleadcoppersilvergoldplatinum
Alloys:*steel (iron+carbon)
brass(copper+zinc)
bronze (copper+tin)
Properties
strong denseductile opaque
good conductorsof heat andelectricity
Applications
electrical wiring,
structures (buildings, bridges)
automobiles (body, springs)
aeroplanes (engine, fuselage,landing gear assembly)
trains (rails, enginecomponents, body, wheels)
shape memory materials
magnets
MaterialsClass
Metals

3A Reading: Material Class and Properties (continued)
Design and Discovery Curriculum Teacher Guide
71
Definition
Ceramic materials are inorganic materialswith non-metallic properties. Ceramics arecompounds made of metallic and non-metallic elements and include suchcompounds as oxides, nitrides, andcarbides. The term ceramic comes fromthe Greek word keramikos, which meansburnt stuff. The properties of ceramics arenormally achieved through a high-temperature heat treatment process calledfiring.
Examples
structuralceramics
refractoriesporcelainglass
Properties
lower densitythan metals
strong
low ductility(brittle),
low thermalconductivity,
corrosionresistant
high durability
MaterialsClass
Ceramics
The word polymer means "many parts."A polymer contains many chemicallybonded parts or units that are bondedtogether to forma solid.Two important polymers are plastics andelastomers.
Plastics are a large group of organic,man-made compounds based on apolymer of carbon and hydrogen. They areobtained from crude oil.
Elastomers are rubbers
Plastics nylonpolystyrene
polyvinylchloride (PVC)
acrylic
Elastomers: rubber
low density
poor conductorsof heat andelectricity
different opticalproperties
usually lowdensities
some soft andflexible, othershard and rigid
fabricscar parts
packaging materials
bags
packing materials(Styrofoam*)
fasteners (Velcro*)glue containers,telephone headsetsCD caseslunch boxesrubber bands
Polymers
Composites are two or more distinctsubstances that are combined to producea new material with properties not presentin either individual material.Many new combinations include ceramicfibres in metal or polymer matrix.
Fibreglass (glass and apolymer)
plywood(layers of woodandglue)
concrete (cement andsand)
Lower densitythanmetals
stronglow ductility(brittle),
low thermalconductivity
corrosionresistant
golf clubs tennis racketsbicycle framestyrescars
aerospace materialspaint
Composites
Applications
dinnerwarefigurinesvasessinks and bathtubs
electrical and thermalinsulating devices
water and sewage pipes
floor and wall tiles dental fillingsabrasives,glass television tubes

*Steel Steel is probably the most important engineering material. It is an alloy of iron and carbon. There can be between0.05% and 1.5% carbon added to the iron, depending on the hardness required. This versatile construction materialhas several very important properties: it is exceptionally strong and can be formed into practical shapes. Forexample, while an earthquake will shatter the glass in a window, it will probably still leave the steel frame intact.
Sometimes other substances such as chromium or nickel are also added along with the carbon and the product isthen known as a steel alloy. Stainless steel is an example of a steel alloy. It consists of iron, carbon and at least12% chromium.
Ceramics and Dental UseDentists have developed a way to use ceramics for fillings despite the special demands on materials to be usedinside the mouth. In adapting ceramics for dental use, materials scientists had to develop ceramics that would notbe affected by acids, would have low thermal conductivity, would be resistant to wear from chewing, would notexpand or contract when exposed to heat or cold, and would be appealing cosmetically.
Semiconductor MaterialsThere is a small group of materials that are neither good electrical conductors nor good electrical insulators.Instead, their ability to conduct electricity is intermediate. These materials are called semiconductors. Because asemiconductor can conduct electricity under some conditions but not others they provide a good medium for thecontrol of electric current. Silicon is the best known semiconductor as it forms the basis of most integrated circuits.
ReferencesExploring Materials Engineering, Web site, Chemical and Engineering Department, San Jose State University,www.engr.sjsu.edu/WofMatE.
Materials Science and Engineering, Web site, The Minerals, Metals and Materials Society,www.crc4mse.org/Index.html.
3A Reading: Material Class and Properties (continued)
Design and Discovery Curriculum Teacher Guide
72

Session 3, Activity B
Materials Applications
Design and Discovery Curriculum Teacher Guide
73
GoalTo evaluate properties in order to determine what materials should be used for specificapplications.
OutcomeStudents apply problem-solving skills to select materials based on their properties.
DescriptionUsing students’ materials properties chart from the previous activity, studentsdetermine the best materials for a variety of material usage problems.
SuppliesNone
PreparationNone
Procedure
Using Materials
1. In groups, students are given materials problems to solve. Each probleminvolves identifying materials properties, recognizing which materials havethese properties, and selecting materials for the product.
2. Each group should solve all the problems and then share and compare theirsolutions.
3. For each problem, students must determine the following:4. Which properties are important to solving the problem?5. Which materials have the important properties? 6. What types of materials would you use to make this product?7. Students should then make a sketch of the object and label the materials.8. Groups present their solutions.
In This Session:
A Properties of Materials(80 mins) Student Worksheet Student Reading
(H/W)
B Materials Applications(20 mins) Student Worksheet
C Material Choice(20 mins) Student Worksheet Student Reading
D Do Materials Matter? (H/W) Student Worksheet

Problems
1. Erin Foods has a problem. Erin started making a new product that requires usinghot corn syrup. The corn syrup must be portioned out with a spoon into largebottles while it is still hot (175ºC). The operator will be using a big spoon that shewill be holding for more than an hour a day. The company needs a new spoonto serve this purpose. (Important properties: thermal conductivity, density)
2. A new golf club manufacturer would like to make lightweight, sturdy, andelectrically non-conductive golf clubs but doesn’t know where to start. The golfclub heads should be hard and wear resistant and must withstand repeatedstrokes of high force against the golf ball. (Important properties: electricalconductivity, density, strength, fatigue)
3. Hang Dry Clothespin Manufacturers is undertaking an aggressive campaign toencourage people to conserve energy by hanging their clothes out to dry. Theywould like to come up with a new modern clothespin that will appeal to themasses. (Important properties: fatigue, ductility)
4. Eircom is trying to come up with a new phone booth for the 21st century. Notonly will the phone booth contain pay phones, but will also be a private publicplace for people to use their cell phones and plug in their laptop computers. Thebooth must be private, but allow for daylight to pass through and allow peopleto see if it is occupied. (Important properties: optical)
Wrap UpHold a discussion for each problem, comparing the solutions and discussing thebenefits and challenges of certain material choices.
Follow WithIn 3C: Material Choice, students consider cost and environmental impact whenselecting materials
3B Materials Applications (continued)
Design and Discovery Curriculum Teacher Guide
74

Using the materials properties chart from the previous activity, you will solve each problem to determine the bestmaterials for particular uses.
1. For each problem, determine the following:• Which properties are important to solving the problem?• Which materials have the important properties?• What types of materials would you use to make this product?
2. Make a sketch of the object for each problem and label the materials.
Problems
1. Erin Foods has a problem. Erin started making a new product that requires using hot corn syrup. The cornsyrup must be portioned out with a spoon into large bottles while it is still hot (175ºC). The operator will beusing a big spoon that she will be holding for more than an hour a day. The company needs a new spoon toserve this purpose.
2. A new golf club manufacturer would like to make lightweight, sturdy, and electrically non-conductive golfclubs but doesn’t know where to start. The golf club heads should be hard and wear resistant and mustwithstand repeated strokes of high force against the golf ball.
Materials ApplicationsWorksheet: Session 3, Activity B
Design and Discovery Curriculum Teacher Guide
75
Design and Discovery Curriculum Teacher Guide

3B Worksheet: Materials Applications (continued)
Design and Discovery Curriculum Teacher Guide
76
3. Hang Dry Clothespin Manufacturers is undertaking an aggressive campaign to encourage people to conserveenergy by hanging their clothes out to dry. They would like to come up with a new modern clothespin thatwill appeal to the masses.
4. Eircom is trying to come up with a new phone booth for the 21st century. Not only will the phone boothcontain pay phones, but will also be a private public place for people to use their cell phones and plug intheir laptop computers. The booth must be private, but allow for daylight to pass through and allow peopleto see if it is occupied.

GoalStudents understand factors other than material properties when choosing materials.
OutcomeStudents will be able to select material with cost and environmental impact in mind.
DescriptionThis activity introduces students to other factors, aside from material properties, thatgo into material selection. Using a beverage container, students compare the cost ofmaking a beverage container from different materials in order to understand theeconomic tradeoffs when choosing materials. Environmental impact is introduced tostudents as they design a container that can be reconstituted to make another productor reused for a secondary purpose.
Supplies1 of each for each group: Plastic, aluminium, and glass beverage containers
PreparationDistribute a 330ml plastic, aluminium, and glass beverage container to each group.
Procedure
Materials and Cost
1. Begin a discussion of cost. Explain that cost is often one of the most importantdesign considerations when choosing materials. In most designs the aim is tominimize the cost. For most products material cost dominates design. Thismakes it difficult to introduce expensive, high performance materials. Cost onlybecomes less important when product performance is everything to thecustomer and they are prepared to pay for it. Examples are top-of-the-line sportsproducts (racing bicycles, sports cars, golf clubs etc.), medical implants (hipprostheses and heart valves). In some cases cost is virtually irrelevant, forexample in satellites
2. Introduce beverage containers. Beverage containers pose an interestingengineering challenge. They must satisfy a number of physical and structuralcriteria, must be inexpensive, and should have a minimal impact on theenvironment.
Session 3, Activity C
Material Choice
Design and Discovery Curriculum Teacher Guide
77
Design and Discovery Curriculum Teacher Guide
In This Session:
A Properties of Materials(80 mins) Student Worksheet Student Reading
(H/W)
B Materials Applications(20 mins) Student Worksheet
C Material Choice(20 mins) Student Worksheet
D Do Materials Matter? (H/W) Student Worksheet

3. Introduce the challenge: Your class has decided to go into the fruit juicebusiness. You have already come up with delicious recipes and are nowconsidering how you will package the drinks. As employees, the owner (thefacilitator) has asked for your input on which type of beverage container to use.You are to do a cost analysis of aluminium, plastic, and glass and make a casefor one of these materials.
Cost Analysis of Beverage Containers
1. Explain that many cost factors go into determining what type of material to usefor a product. Tell each group to analyze the charts and determine which type ofmaterial they feel is best for packaging the fruit juice. They should prepare anargument to support their position.
2. The first chart shows the number of containers per kg of material, the rawmaterial cost per kg, the production cost per container, and the average shippingcost per kg. Using this information, students rank aluminium, glass, and plasticin the total cost to produce and deliver one container. (They will need to figureout how much one container weighs for each material, the material cost for onecontainer, and the shipping cost for one container. Plastic is the cheapest,followed by aluminium, and then glass)
Material # containers Material Production Shipping/kg Cost in €/kg €/container €/kg
Aluminium 30 .70 .10 .50
Glass 2 03 .06 .50
Plastic 15 .50 .04 .50
3. The next chart shows the total cost of returning the material to a state where itcan reused to make a new container instead of using raw materials. Thisincludes the market price to purchase and reprocess scrap material. Note thatthis processing includes cleaning the material, shredding or grinding, and re-melting. The chart also includes the cost of disposing the material into a landfillas an alternative to recycling. Students calculate the cost to purchase scrapmaterial and reprocess it and compare this amount to the cost of the rawmaterial (in the above chart.) For each material, is it more economicallyadvantageous to recycle scrap material or dispose of it in a landfill? (It makessense to recycle aluminium and glass, but it is cheaper to dispose of plastic.)
3C: Material Choice (continued)
Design and Discovery Curriculum Teacher Guide
78

Material Scrap Process Scrap Disposal€/kg €/kg €/kg
Aluminium .35 .15 .02
Glass .01 .01 .02
Plastic .10 .50 .02
4. Global warming has been linked to the increase in emissions to the atmosphereof carbon dioxide. Carbon dioxide is emitted by the burning of fossil fuels. Fossilfuels are burned to create energy that is used to manufacture and transportmaterials. Manufacturing beverage containers using recycled materialsdecreases the total carbon dioxide emissions because reprocessing consumesless energy than processing the raw material. The following chart summarizesthe kilograms of carbon dioxide emissions avoided by using recycled materials.From which material do you gain the most benefit by recycling? (Aluminium,plastic, glass)
Material kgs of CO2 avoided per kg of material recycled
Aluminium 4.5
Glass 0.2
Plastic 0.8
Make a Case
1. Now that each group has done a cost benefits analysis of three different typesof beverage containers, have each group prepare an argument to lobby to thehead of the beverage company to use plastic, glass, or aluminium beveragecontainers. Groups may also consider other factors aside from cost, such asmaterials properties, taste, and aesthetics.
2. Hold a debate to convince the company owner (i.e. the facilitator) how he or sheshould package the new beverage.
3. Discuss the tradeoffs between economic decision-making and total costdecision-making which incorporates environmental benefits.
3C: Material Choice (continued)
Design and Discovery Curriculum Teacher Guide
79

Container Design: Extending the Life
1. Now that each group has chosen which material they think makes the mostsense from a cost perspective, they now consider how the life of the beveragecontainer can be extended by coming up with a secondary use for the container.
2. Present the following design challenge: You have been asked to design abeverage container that would not be considered waste after its use. Considerhow the container might be recycled and reconstituted for another use or howthe container might be redesigned to achieve a secondary use.
3. Provide a few examples of this to get students to think innovatively.
Emium (Argentina, container company): Emium redesigned the shape of a bottleso that it could be a building block that can be attached to others to fulfill a widerange of recreational or functional structures. The bottles can be attached to oneanother lengthways or sideways by pressing the protruding knobs of one into thecavities of the other. The scope of use for these include: children’s toys or playhouses, furniture, shelving, boxes, partitions. http://www.emium.com.ar/ingl/home.html
Patagonia (United States, outdoor apparel): Patagonia became the first companyto adopt a post-consumer recycled fleece into their product line. These aremanufactured from PET soft drink bottles. From 3,700 recycled 2-litre plasticsoft-drink bottles, 150 fleeces can be manufactured. This saves a barrel of oiland avoids approximately half a ton of toxic air emissions being released into theatmosphere. http://www.patagonia.com/
4. Groups should sketch their idea and present their designs.
Wrap UpStudents share their designs. As an optional extension (to be done at home), they cancreate models of their designs.
3C: Material Choice (continued)
Design and Discovery Curriculum Teacher Guide
80

Did you know that when you purchase a beverage, you pay more for the packaging than the beverage itself? So,what does it take to produce a beverage container and how are decisions made about what type of container touse?
The challenge: Your class has decided to go into the fruit juice business. You have already come up with deliciousrecipes and are now considering how you will package the drinks. As employees, the owner has asked for yourinput on which type of beverage container to use. You are to do a cost analysis of aluminium, plastic, and glass andmake a case for one of these materials.
This chart shows the number of containers per kg of material, the raw material cost per kg, the production cost percontainer, and the average shipping cost per kg. Using this information, rank aluminium, glass, and plastic in thetotal cost to produce and deliver one container. You will need to first determine how much one container weighs
Material # containers Material Production Shipping/kg Cost in €/kg €/container Cost in €/kg
Aluminium 30 .70 .10 .50
Glass 2 03 .06 .50
Plastic 15 .50 .04 .50
The next chart shows the total cost of returning the material to a state where it can reused to make a new containerinstead of using raw materials. The chart also includes the cost of disposing the material into a landfill as analternative to recycling. Calculate the cost to purchase scrap material and reprocess it and compare this amount tothe cost of the raw material (in the above chart.) For each material, is it more economically advantageous to recyclescrap material or dispose of it in a landfill?
Material Scrap Process Scrap Disposal€/kg €/kg €/kg
Aluminium .35 .15 .02
Glass .01 .01 .02
Plastic .10 .50 .02
Material ChoiceWorksheet: Session 3, Activity C
Design and Discovery Curriculum Teacher Guide
81

Global warming has been linked to the increase in emissions to the atmosphere of carbon dioxide. Carbon dioxideis emitted by the burning of fossil fuels. Fossil fuels are burned to create energy that is used to manufacture andtransport materials. Manufacturing beverage containers using recycled materials decreases the total carbon dioxideemissions because reprocessing consumes less energy than processing the raw material. The following chartsummarizes the kilograms of carbon dioxide emissions avoided by using recycled materials. From which materialdo you gain the most benefit by recycling?
Material kgs of CO2 avoided per kg of material recycled
Aluminium 4.5
Glass 0.2
Plastic 0.8
What type of beverage container do you think the juice company should use? Make a case for aluminium, glass, orplastic.
Extending the Life of the ContainerDesign challenge: You have been asked to design a beverage container that would not be considered waste afterits use. Consider how the container might be recycled and reconstituted for another use or how the container mightbe redesigned to achieve a secondary use. Be innovative! Sketch your design idea.
3C Worksheet: Material Choice (continued)
Design and Discovery Curriculum Teacher Guide
82

GoalTo look at common objects and determine whether their materials make a difference infunction and effectiveness.
OutcomeGain an understanding of the connections between materials and function.
DescriptionStudents walk through their homes looking at objects and analyzing what materialswere used to make them.
Procedures
1. Explain that the young engineers will walk through their home like a detective,looking for objects and what they are made of, and why the materials matter.Ask students to bear in mind all the different properties they have discussedduring the session.
2. When looking at materials, they should consider what the product propertyrequirements are and why those materials were selected. Provide a fewexamples such as: An outdoor mat may need to be waterproof and non-slip, thusrubber is often used.
3. Ask them to consider the flooring in their home. Do they have different flooringin different rooms? Why? Consider how soft carpet materials, vinyl, and woodflooring serve different purposes based on functional needs.
Next ClassShare and compare observations, discussing how and why particular materials areused.
Session 3, Homework
Do Materials Matter?
Design and Discovery Curriculum Teacher Guide
83
In This Session:
A Properties of Materials(80 mins) Student Worksheet Student Reading
(H/W)
B Materials Applications(20 mins) Student Worksheet
C Material Choice(20 mins) Student Worksheet
D Do Materials Matter? (H/W) Student Worksheet

Walk through your home like a detective. Look for objects and what they are made of. Write a sentence about eachitem you find where the materials it is made of matter!
What is it?
What does it do?
How and why do the materials matter?
What is it?
What does it do?
How and why do the materials matter?
Materials Scavenger Hunt 3D Worksheet: Homework
Design and Discovery Curriculum Teacher Guide
84

What is it?
What does it do?
How and why do the materials matter?
What is it?
What does it do?
How and why do the materials matter?
Think about the end-of-year projects you are considering. What material property requirements mightyour project have?
3D Worksheet: Materials Scavenger Hunt (continued)
Design and Discovery Curriculum Teacher Guide
85

Notes:

Engineering Fundamentals
10blue arrow starter 24/11/05 10:32 pm Page 11

10contents 24/11/05 10:48 pm Page 4

In This Session:
A Building Simple Circuits(40 mins)
B Using Simple Switches(40 mins)
C Using a ‘Silicon Chip’(30 mins)
D Completing the Input Pattern for the 4093(10 mins)
Background information for teachers on electronics can befound in the Teacher’s Notes section at the end of the TeacherGuide. As the electronics activities are quite sophisticated all ofthe normal text in Sessions 4 and 5 has been duplicated in theStudent Booklet as a guide for students. Any text in italics is inthe Teacher Guide only. Students should study their StudentBooklet prior to commencing the practical work contained inthe activities.
Have you ever wondered how burglar alarms work, or how street lights turn onautomatically when it gets dark? Or perhaps you have seen Christmas tree lights thattwinkle, turning on and off every few seconds. In this module you will find out how tobuild electric circuits to do these sorts of things. You will be using some modern piecesof electrical equipment that have ‘silicon chips’ inside them. They can be easilydamaged, so take care of them! While you do the work in this module, try to think ofways you could use the circuits you build in a project of your own. Most of the time youwill be working with small pieces of electrical equipment that you put onto a circuitboard, using a battery to make them work. However, before you begin there is a numberof key ideas that you need to know. (Most of them you may have met in your JuniorCertificate work in Science or Technology.)
SafetyYou should know that electricity can be dangerous. If too much current flows throughyou, it can kill. This can happen if you use electricity from the mains electricity supply.In this module you do not need to use the mains supply at all. However, your teachermay ask you to use a powerpack that is connected to the mains. You must use thepowerpack ONLY in the way that your teacher tells you. DO NOT change any of thecontrols ‘just to see what happens’. You could damage the apparatus you use; but moreimportantly, you could harm yourself or other students in your group.
Design and Discovery Curriculum Teacher Guide
86
Design and Discovery Curriculum
Session 4
Electronic Engineering I

Key ideas in electricity1. Electricity needs a complete circuit to make things work.2. The movement of electricity round a circuit is called an electric current (or just
current for short).3. To make current move round a circuit there has to be a battery or powerpack
that supplies a voltage. You will be using a ‘nine volt’ (9V) battery.4. A battery has a positive terminal marked with a + sign. It also has a negative
terminal, marked with a – sign. We say that current flows from the positiveterminal to the negative terminal.
5. The general rule is that the greater the voltage applied to a circuit, the morecurrent will flow.
6. Current goes through devices in a circuit, e.g. lamps, motors, buzzers; butvoltage is measured across each of the devices.
7. Metals allow current to flow through them very easily. We say metals conductelectricity easily. They have a low resistance. If a substance does not conductelectricity at all easily we say it has a high resistance. If a substance has a very,very high resistance we usually call it an insulator. Plastic, rubber and wood areinsulators.
8. Some substances are neither good nor bad conductors; they suddenly changetheir ability to conduct as the voltage changes. These substances are known assemiconductors. Often they contain the element called silicon.
A word of warning: people often talk about ‘the power’ in a circuit, or a battery.In nearly every case, using the word power when talking about electric circuitsis likely to be wrong. So, please forget about ‘power’—if you are tempted toexplain how a circuit works by talking about power, our advice is: don’t!
Check your understandingHere are a few questions for you to do in your group. Discuss the questions with yourpartner(s) and decide on your answers together. This should take you no more than 10minutes. Your teacher will check your answers when you have finished.
Q.1 The diagram show a battery and lampsconnected with some wires.(i) Why won’t the bulbs light?(ii) What would you do to make the
circuit work properly?(You can draw on the diagram if you want.)
A.1 (i) Circuit not complete; (ii) Link wire and bulb.
4: Electronic Engineering I (continued)
Design and Discovery Curriculum Teacher Guide
87

Q.2 We measure the amount of current flowing through a circuit in amps (A). Supposethe circuit is made to work properly so that both bulbs light. Also suppose wemeasured the current flowing through the wire at P as one amp (1A).(i) What would you predict the size of the current to be at point Q?(ii) What would you predict the size of the current to be at point R?
A.2 (i) Correct predictions are 1A at all three places.(ii) Current is not ‘used up’ in a circuit! (Many students believe it is.)
Q.3 Assume you had built the circuit so that both bulbs were glowing. What do youthink would happen if you connected a wire from point P to point Q?
A.3 The bulb would ‘go out’. The wire from P to Q would have a much lower resistance than the bulb, so almost all the current would go through the wire and not the bulb. Incidentally, the other bulb would glow much more brightly.
Q.4 Imagine that the circuit was working properly, with both lamps glowing. Nowimagine you replaced the 9V battery by a 90V battery. Write down what you thinkwould happen, and why it would happen.
A.4 The 90V battery could drive a much greater current through the circuit (about 10times as much). It is likely that so much current would ‘burn out’ the filamentsof the bulbs; i.e. they would glow very brightly for a brief moment and then stopworking.
You are going to use small electrical components. You can see pictures of some them below.
4: Electronic Engineering I (continued)
Design and Discovery Curriculum Teacher Guide
88

SuppliesFor Each Pair Of Students
• 1 x Breadboard• 1 x 9V battery (PP3)• 1 x clip for battery• 2 x 4093B CMOS chip• 2 x 2003A Darlington Driver chip• 2 x Small 3V lamp• 2 x Lamp holder• 2 x Resistors, 1K, 10K, 22k, 47k (each)• 2 x Capacitors, 10mF, 22mF, 47mF, 100mF (each)• 1 x Push switch• 1 x Micro switch• 1 x Buzzer• 8 x Selection of wires—best purchased as a kit
that should supply enough for all groups.
Shortly, you will build a circuit using the lamps and LEDs. Because the components aresmall, we need a special way to build circuits with them. We use a ‘bread board’.
Below is a picture of part of one in use. It is vital that you understand how bread boardsare made. They can be confusing at first because they have so many ‘holes’ where thecomponents can fit, and because the connections between the holes are hidden underthe plastic. The bread board you use may not look exactly like the one in the photo, butit will work in exactly the same way. Here are the key things you need to know:
• The bread board has four main parts:• One or more horizontal rows of holes at the top. All these holes are connected
together by a wire running underneath.• One or more horizontal rows of holes at the bottom. These holes are also
connected together.• Two sets of five rows of holes separated by a gap. These holes are connected
vertically only. So, for example, two holes side-by-side are NOT connected. Thecolumns are not connected across the gap.
Look carefully at the photo of the bread board in use and the diagram showing the waythe holes on a bread board are connected. Make sure you can understand why thecomponents and wires are connected the way they are shown.
4: Electronic Engineering I (continued)
Design and Discovery Curriculum Teacher Guide
89

Diagram showing the connections on a bread board
Picture of a bread board in use
4: Electronic Engineering I (continued)
Design and Discovery Curriculum Teacher Guide
90

The main aims of this section of Design & Discovery are to give students and enjoyable practical experience ofbuilding circuits that:
(i) allow them to develop insights into some uses of modern integrated circuits, and (ii) give them ideas for how they might use simple circuits as part of their final projects.
Throughout the emphasis should be on students working in groups and sharing their ideas, with the emphasis onobserving what happens during the practical tasks that they undertake.
Very little theory is needed to perform the tasks successfully. The Teachers' Notes (see resource section) give someof the theory, but it is not intended that students should know, for example, how semiconductors are used in themanufacture of 'silicon chips'. On the other hand, it is important to stress the correct use of basic terms such as'current', 'voltage' and 'resistance'.
Key concepts
The work begins with a brief revision of key ideas in electricity that most students should have met in JuniorCertificate Science; especially:
(i) a complete circuit is needed for an electric current to flow;(ii) a resistor will make the flow of current round a circuit more difficult;(iii) the voltage of a battery or power pack is a measure of the 'push' that can make a current flow.
Additional ideas that are developed include:
(iv) current is not used up when it flows through a circuit;(v) not all electrical component obey Ohm's law, e.g. silicon chips, capacitors, light emitting diodes (LEDs);(vi) circuits inside silicon chips can be turned on or off by changing the voltage they sense
(rather than current).
It is not expected that students will master such ideas. However, this should not prevent them from being able toobserve the effects of operating their circuits. Thus, at the end of this unit of work they should be able to:
(i) know how to use switches that normally open and/or normally closed connections;(ii) know uses for reed switches.(iii) use a logic gate to detect changes in the states of switches attached to the gate inputs;(iv) use the output of a logic gate to switch on (or off) an LED or buzzer;(v) suggest uses for such circuits;
Electronic Engineering IKey Concepts: Session 4
Design and Discovery Curriculum Teacher Guide
91

If students progress rapidly through the core work, their are suggestions for further practicals that they canundertake. These involve them in building circuits that can be used
(i) as timing circuits, e.g. to make LEDs flash on and off, and(ii) to control motors.
Throughout this section, students should be encouraged to think of applications for the circuits theybuild, and how they might form part of their final project.
Key Concepts (continued)
Design and Discovery Curriculum Teacher Guide
92

In This Session:
A Building Simple Circuits(40 mins)
B Using Simple Switches(40 mins)
C Using a ‘Silicon Chip’(30 mins)
D Completing the Input Pattern for the 4093(10 mins)
GoalGet familiar with using breadboards to build simple circuits
OutcomeParticipants will be able to use a breadboard to light lamps and use LEDs in a circuit.
DescriptionStudents build a circuit to make 2 lamps light then replace one lamp with an LED.
SuppliesBreadboard, electrical wire, 2 lamps, 1 LED
Procedure1. Build the circuit shown in the photo to make two lamps light.
Session 4, Activity A
Building Simple Circuits
Design and Discovery Curriculum Teacher Guide
93
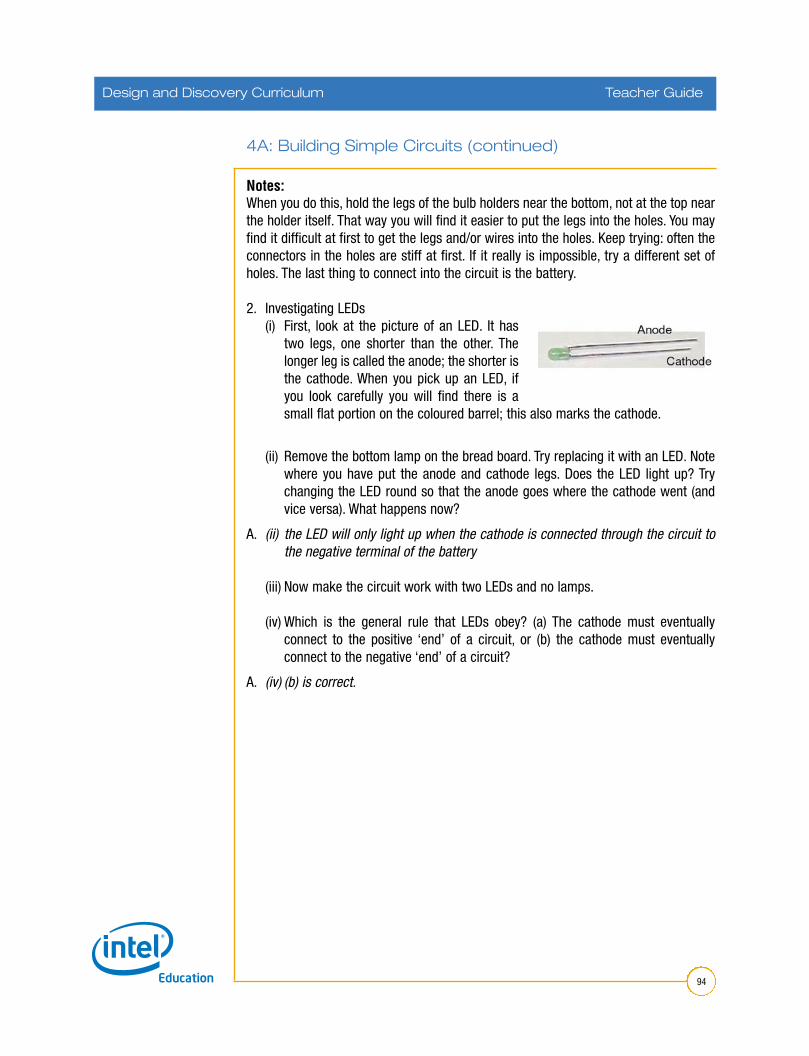
Notes:When you do this, hold the legs of the bulb holders near the bottom, not at the top nearthe holder itself. That way you will find it easier to put the legs into the holes. You mayfind it difficult at first to get the legs and/or wires into the holes. Keep trying: often theconnectors in the holes are stiff at first. If it really is impossible, try a different set ofholes. The last thing to connect into the circuit is the battery.
2. Investigating LEDs(i) First, look at the picture of an LED. It has
two legs, one shorter than the other. Thelonger leg is called the anode; the shorter isthe cathode. When you pick up an LED, ifyou look carefully you will find there is asmall flat portion on the coloured barrel; this also marks the cathode.
(ii) Remove the bottom lamp on the bread board. Try replacing it with an LED. Notewhere you have put the anode and cathode legs. Does the LED light up? Trychanging the LED round so that the anode goes where the cathode went (andvice versa). What happens now?
A. (ii) the LED will only light up when the cathode is connected through the circuit to the negative terminal of the battery
(iii) Now make the circuit work with two LEDs and no lamps.
(iv) Which is the general rule that LEDs obey? (a) The cathode must eventuallyconnect to the positive ‘end’ of a circuit, or (b) the cathode must eventuallyconnect to the negative ‘end’ of a circuit?
A. (iv) (b) is correct.
4A: Building Simple Circuits (continued)
Design and Discovery Curriculum Teacher Guide
94

Follow-up work1. Find out where LEDs are used in your home. Write down a list of two or three uses.
A. Used in remote controls for hi-fi, tvs etc.
2. Use the internet or a library to find out why LEDs are so often used instead ofordinary lamps. Bring your findings to the next lesson.
A. LEDs generally require less current to make them work than do ordinary filamentlamps. Thus they will not ‘run down’ a battery as fast as filament lamps. Also, theytend to be very long-lasting and not so susceptible to failure if they are moved.
3. Write down one or two ways in which you could use LEDs in a project. E.g. in toy,or model. Are there things that you would like to make LEDs do that they do not doin the circuit you built?
A. LEDs could be used as miniature lamps in a model home, or car etc. It is possibleto ‘string them together’ to make Xmas tree lights. Students might want to makethem flash. There is an optional practical about this. However, you might like toknow that it is possible to buy LEDs that will flash on their own accord; but theflashing rate is fixed. Also, it is possible to buy LEDs of different colours; especiallyred, blue, green, yellow, and even some that give out white light.
4A: Building Simple Circuits (continued)
Design and Discovery Curriculum Teacher Guide
95

In This Session:
A Building Simple Circuits(40 mins)
B Using Simple Switches(40 mins)
C Using a ‘Silicon Chip’(30 mins)
D Completing the Input Pattern for the 4093(10 mins)
GoalInvestigate how a switch works.
OutcomeStudents will be able to connect switches into a circuit and explain how they work.
DescriptionStudents connect a push switch and a micro switch into the circuit from Activity 1 andinvestigate their differences.
SuppliesBreadboard, electrical wire, 2 lamps, 1 LED, 1 push switch and 1 micro switch
Procedure1. Try connecting the push switch as shown in the photo below.
2. Does it matter which way round the switch is put into the circuit? (Try it.)
A. No.
3. Explain what the switch does. For example, does it behave like a light switch athome, that locks into place when it is pressed, or does it only work when you holdthe button down, or…?
A. It only works when the button is pressed. That is, it doesn’t latch (like most homelight switches).
Session 4, Activity B
Using Simple Switches
Design and Discovery Curriculum Teacher Guide
96

4. Now connect the micro switch. When you use themicro switch, make sure you use the labels asshown, i.e. with the lever pointing to the right.Ithas a lever that is very sensitive—a slight pushon the lever, and the switch will work. However,you can see that it has three terminals (and threewires attached).
Your task is to investigate how this switch works. Try using two of the three wiresin turn to put the switch in the same circuit as you have just used. Carefully notedown which two leads you use each time, and what happens before and after thelever is pressed: Call the wires 1, 2 and 3 as shown in the diagram above.
Wires used What happens to the lamps What happens to the lampsbefore the lever is pressed? after the lever is pressed?
1 and 2 Light off Light on
1 and 3 Light on Light off
2 and 3 Light off Light off
5. One set of contacts in the micro switch is known as ‘normally open (NO)’. anotherset is said to be ‘normally closed (NC)’. Which pins make the NO contacts, and whichpins make the NC contacts?
A. Pins 1 and 2 are NO; pins 1 and 3 are NC.
In this part of the work, there is nothing more for the students to do than get the circuitworking. Observations and results should be recorded in their design notebooks.
4B: Using Simple Switches (continued)
Design and Discovery Curriculum Teacher Guide
97

Follow-up1. Which switch is the most sensitive? What do you think is the point of having a
lever on the micro switch?
A. Hard to say just using one’s hands; but the micro switch is the more sensitive inpractice because the lever can be used to ‘magnify’ small movements thatwould not affect the push switch. (The button on the latter has to move muchfurther than the lever on the micro switch.)
2. Briefly describe two applications that would make use of the ‘ordinary’ switch, andtwo for the microswitch. The examples you use could be ones that you might usein a project, or an application in industry; e.g. for controlling machines.
A. A suitable push switch could be used to work a camera or flash light, or otherapplication where only a momentary signal, light etc. is needed. A variety of pushswitch is used to control pieces of equipment such as electric mowers or drillswhere it is important that the device stops if the handle/trigger is released.The micro switch would be used where it necessary to start/stop equipmentautomatically; e.g. good passing down a conveyor belt could be made to toucha micro switch that is connected to an electronic counter. Another example,might be where an alarm is made to sound at the slightest opening of adoor/window to which the micro switch is attached.
4B: Using Simple Switches (continued)
Design and Discovery Curriculum Teacher Guide
98

In This Session:
A Building Simple Circuits(40 mins)
B Using Simple Switches(40 mins)
C Using a ‘Silicon Chip’(30 mins)
D Completing the Input Pattern for the 4093(10 mins)
GoalInvestigate the use of a ‘Silicon Chip’
OutcomeStudents will be able to use a silicon chip as part of a simple circuit.
DescriptionStudents build a circuit consisting of a silicon chip and and an LED and investigate theeffect of the silicon chip when the circuit is broken.
Supplies1 Breadboard, some electrical wire, 1 4093 silicon chip, 1 LED.
ProcedureAlmost everything we use in the home or at work now makes use of microelectroniccircuits. In this lesson you are going to investigate the use of one type of ‘chip’ calleda logic gate. The silicon chip itself that makes the device work is hidden inside the bodymade of insulating material. The chip you use has fourteen legs (often called ‘pins’) thatwe use to make the connections to the silicon chip inside. It is known by its number; inthis case it is a 4093.
1. Look carefully at the 4093. At one end you should see a small semi-circle or notchmarked at one end. You will use this to tell you which way round to put the chip ina circuit. The pins (legs) are numbered from one to fourteen as shown in thediagram. Pin number 14 connects to the positive terminal of the battery, and pinnumber 7 goes to the negative terminal. You will only use pins 1, 2 and 3 (as wellas 7 and 14) in your circuits. Pins 1 and 2 are inputs, pin 3 is the output.
2. The circuit you are going to build is shown in the photo below.
Before you start, please not that It is vital that you put the chip the right way round inthe circuits you build. (Make sure you can identify the end with the semi-circle ornotch.) If the chip has not been used before you will find that the legs do not quite fitin the holes correctly. You will have to gently bend them inwards by a very smallamount. Ask your teacher for advice before doing this. Make the circuit as shown in thephoto. The battery should only be connected when everything else is in place. The LEDshould light up. If it doesn’t, carefully check all the connections are made to the rightplaces, and that the wires are properly seated in the holes.
Session 4, Activity C
Using a ‘Silicon Chip’
Design and Discovery Curriculum Teacher Guide
99

3. Try removing the LED and replacing it by a buzzer.
At this stage you might wonder what the point of this circuit is—after all there aresimpler ways of making an LED light. Well, the idea is that this chip can do somethingthat ordinary circuits can’t do. Especially, it can make something happen when a circuitis broken. (You may recall that up until now you we expect devices in a circuit to turnoff if a circuit is broken.) To see how the chip behaves you will have to investigate itsproperties more closely.
We shall use a short-hand to draw up a table of results. Here are the rules:
If a pin is connected to the + of the battery, we shall say that the pin is ‘ON’.
If a pin is connected to the – of the battery, we shall say that the pin is ‘OFF’.
If the output pin (3) is live, i.e. LED turns on, it is ‘ON’; if the LED is off, the pin is ‘OFF’.For example, if you look at your circuit you just made, the pattern is this:
Pin 1 Pin 2 Pin 3
Connected to + Connected to – Live (turns LED on)
Code ON OFF ON
4C: Using a ‘Silicon Chip’ (continued)
Design and Discovery Curriculum Teacher Guide
100

4C: Using a ‘Silicon Chip’ (continued)
Design and Discovery Curriculum Teacher Guide
101

In This Session:
A Building Simple Circuits(40 mins)
B Using Simple Switches(40 mins)
C Using a ‘Silicon Chip’(30 mins)
D Completing the Input Pattern for the 4093(10 mins)
GoalTo investigate further the properties of the 4093
OutcomeStudents investigate how changing the pin input can affect the pin output.
DescriptionStudents vary the inputs on the pins of the 4093 and record the outputs in a table.
Supplies1 Breadboard, some electrical wire, 1 4093 silicon chip, 1 LED.
Procedure
Use the same circuit as in the last practical to complete the table of results below.
Note that you canmake the input to a pin ON by connecting it to the + of the battery,and ‘OFF’ by connecting it to the – ofthe battery.
Pin 1 Pin 2 Pin 3 (output)
OFF OFF ON
ON OFF ON
OFF ON ON
ON ON OFF
Students should populate the table in their Booklet and the teacher can check when completed.
Session 4, Activity D
Completing the InputPattern for the 4093
Design and Discovery Curriculum Teacher Guide
102

Notes:

In This Session:
A A Reed Switch Circuit (40 mins)
B Making an LED Flash (40 mins)
C Controlling a Motor(40 mins)
Background information for teachers on electronics can befound in the Teacher’s Notes section at the end of the TeacherGuide. As the electronics activities are quite sophisticated all ofthe normal text in Sessions 4 and 5 has been duplicated in theStudent Booklet as a guide for students. Any text in italics is inthe Teacher Guide only. Students should study their StudentBooklet prior to commencing the practical work contained inthe activities.
SuppliesFor Each Pair Of Students
• 1 x Breadboard• 1 x 9V battery (PP3)• 1 x clip for battery• 2 x 4093B CMOS chip• 2 x 2003A Darlington Driver chip• 2 x Small 3V lamp• 2 x Lamp holder• 2 x Resistors, 1K, 10K, 22k, 47k (each)• 2 x Capacitors, 10mF, 22mF, 47mF, 100mF (each)• 2 x LEDs, red, green (each)• 1 x Motor• 1 x Reed switch and magnet (sold as pair)• 1 x Push switch• 1 x Micro switch• 1 x Buzzer• 8 x Selection of wires—best purchased as a kit
that should supply enough for all groups.
Session 5
Electronic Engineering II
Design and Discovery Curriculum Teacher Guide
103
Design and Discovery Curriculum

In This Session:
A A Reed Switch Circuit (40 mins)
B Making an LED Flash (40 mins)
C Controlling a Motor(40 mins)
Reed SwitchesThe pattern you should have discovered tellsyou that when one (or both) of the inputs isconnected to the positive of the battery theoutput is OFF; otherwise the output is ON.Now imagine that you have the job ofdesigning a burglar alarm which turns on ifthe front or back door in a house is opened.We could do this if we find a way of wiringthe doors to make a complete circuit to abattery and a 4093 chip. Here is one way ofdoing this; but first you need to knowsomething about devices that are used inreal burglar alarm systems. They are calledreed switches, and are operated by magnets.
A reed switch has two thin pieces of metal that are contained in a small glass tubewhich has had all the air removed. When a magnet is brought near to the glass, the twometal contacts are attracted together, and the contacts are connected.
Your teacher will show you a reed switch, but they are too fragile to be used withoutbeing held in a protecting plastic case. You will use a reed switch and magnet that canbe used as part of a real burglar alarm system.
Session 5, Activity A
A Reed Switch Circuit
Design and Discovery Curriculum Teacher Guide
104

GoalTo become familiar with how a reed switch operates and how they might be used ineveryday life.
OutcomeStudents will be able to build a reed switch circuit and understand how they might beused in a burglar alarm system.
DescriptionStudents add a reed switch to the circuit they built in Session 4, then swap the LED fora buzzer.
SuppliesAs in Session 4 plus a reed switch.
Procedure 1. Build the circuit shown in the photo below.
(i) What happens when you bring the magnet near tothe reed switch?
A. (i) The LED goes out. Note that this is how reedswitches in burglar alarm systems work: themagnetmay be on a window, and the reed switch on the frame.When the widow is closed, the alarm will be off; butwhen the window opens the alarm sounds. Of course,real alarm systems are more complex than this wouldsuggest; but the principle remains valid.
You may be asked why the resistor is needed in the circuit. Here is the answer:Logic gates only work properly if their inputs are either ‘high’ or ‘low’. If they are leftunconnected the chip doesn’t know what the input levels are. The resistor connects pin2 to 0V (the negative terminal of the battery), so if the reed switch is open, the (partial)circuit looks like this: As shown, pin2 is ‘low’; but when the switch is closed, pin 2 isconnected to 9V, i.e. it goes ‘high’. If the resistor is omitted, (so there is no connectionto 0V) when theswitch is open, pin 2 is neither ‘high’ nor ‘low’, and the circuit will beunstable.
2. Swap the LED for a buzzer.Students like noise!
5A: A Reed Switch Circuit (continued)
Design and Discovery Curriculum Teacher Guide
105

3. How would you change the circuit so that it uses two reed switches.(i) See if you can find two ways of doing this. What are the advantages/
disadvantages/uses of the two ways if you were to use them in a real burglaralarm?
(ii) How could you make use of them in a real burglar alarm system?
A. (i), (ii) The two reed switches could be put in series with one another. A moresophisticated method is to duplicate the reed switch and resistor combination(shown connected to pin 2 of the chip) and putting the second switch and resistoron pin 1. In real burglar alarms systems it is common to have the sensors allocatedto different zones. If the switches are in series they must be in the same zone. Ifthey are on different circuits, they can be isolated from one another and allocatedto separate zones.
To follow-up1. The reed switch and magnet are made of white plastic. Why do you think this
might be? (That is, why white, and why plastic?)
A. Cosmetic reasons. Least offence to use in a home. Plastic an insulator, easily moulded and inexpensive.
2. Think about how you would put the switch and magnet to use in your home on a door or window. Where would the switch go, and where would the magnet go?
A. At first sight it might not seem to matter which goes on the door/window and whichon the surround; but in practice, the wires go to the reed switch and not the magnet.So the magnet goes on the door/window, and the switch on the surround.
5A: A Reed Switch Circuit (continued)
Design and Discovery Curriculum Teacher Guide
106

3. Are these devices suitable for all types of door and window? How could you change the design to be suitable in other cases?
A. Not easy to use with metal doors/windows; rather than using screws, need analternative means of fastening. (Could be glued on of course.) Also, the switch andmagnet are quite large. it would be better to have smaller versions, e.g. that couldbe inserted into the structure of the door/ window and surround. This keeps themout of sight. Such devices are available.
4. Think how you might make a reed switch and magnet combination that could be hidden from view. Sketch your design, and write a brief explanation.
A. Any sensible solution.
5. In industry it can be important to prevent something happening if a circuit is left unconnected; i.e. left ‘open’. Think of examples, e.g. a safety guard for a machine that prevent the machine form starting if the guard is not down. (Why could this be a vital safety device?) How could you adapt your circuit to act as part of such a safety system?
See comments in “To Follow-Up”
5A: A Reed Switch Circuit (continued)
Design and Discovery Curriculum Teacher Guide
107

In This Session:
A A Reed Switch Circuit (40 mins)
B Making an LED Flash (40 mins)
C Controlling a Motor(40 mins)
Flashing LEDsThere is a neat trick that can be played on a 4093 chip to make it repeatedly flash anLED on an off. To make it do this, you need to use a capacitor and a resistor (see thephoto on page 109).
A capacitor stores electric charge. It has two ‘legs’, and like an LED one must beconnected (eventually) to the positive and one to the negative terminal of a battery. Youwill find a + sign on the body of the capacitor near one of the legs. The larger the valueof the capacitor the more charge it can store. We measure a capacitor’s ability to storecharge by the value of its capacitance, measured in units of farads. A one farad (1F)capacitor can store a large amount of charge, and it is more common to use muchsmaller values in electronic circuits. You will use a value of 10 or 100 micro-farads (10µF or 100 µF) . (One micro-farad is one millionth of a farad.)
A resistor can help to control how much current flows through a circuit. A very highresistance would be one hundred million ohms, 100M Ω. However, you will use aresistor of value between 1 thousand (1k Ω) and 47 thousand ohms, 47k Ω.
Session 5, Activity B
Making an LED Flash
Design and Discovery Curriculum Teacher Guide
108

GoalTo learn how to make an LED flash in a simple circuit.
OutcomeStudents will understand how varying capacitor and resistor values affect the flash rateof the LED.
DescriptionStudents add a resistor and a capacitor to the circuit from the previous activity andobserve the effect of varying the resistor and capacitor values on the flash rate of theLED.
SuppliesAs in Session 5 plus 1 resistor and 1 capacitor.
Procedure1. Build the circuit shown in the photo.
2. Count, and note, the number of flashes given in 1 second, or 10 seconds if the LEDflashes quickly.
A. There is no ‘right answer’ to this.Note that variations in the components make itunlikely that any two groups of students will get the same result. Also, it dependson the quality of the battery.
5B: Making an LED Flash (continued)
Design and Discovery Curriculum Teacher Guide
109

3. Now change the capacitor and resistor for other values that your teacher hasavailable. Investigate how the flashing rate changes as the capacitor and resistorvalues change. Note: take care how you do this. What is the systematic way (ratherthan trial and error)?(i) Write down short sentences to summarise your findings. E.g. ‘As the value of thecapacitor increases, the flashing rate …’Note: your circuit may appear not to work with some values of capacitor andresistor. Why might this be? There are two way it might seem not to be working(assuming you have not made a mistake in putting the circuit together).
A. As the value of the capacitor/resistance increases, the flashing rate decreases.’Two things can go wrong: (i) if the values of the capacitor and resistor are too low,the flashing rate is so fast that the LED appears to be on all the time; (ii) if the valuesare too large, the LED won’t switch on for several minutes, so it will also seem thatthe circuit has stopped working. (Unfortunately the latter possibility is possible aswell.)
Things to think about1. Write down at least two ways you could use a flashing LED circuit in a toy or some
other device that people might buy. (It would be fairly easy to adapt the circuit tocontrol more than one LED.)See earlier work on LEDs above.
2. Can you think of any uses for flashing LED circuits in industry? Warnings of all kinds.
5B: Making an LED Flash (continued)
Design and Discovery Curriculum Teacher Guide
110

In This Session:
A A Reed Switch Circuit (40 mins)
B Making an LED Flash (40 mins)
C Controlling a Motor(40 mins)
Making motors turnThe 4093 chip is very useful, but some devices that you might want to use such asmotors need more current to flow them than is good for the 4093. You may not havethought much about the way this chip works, but the current mainly flows from pin 8through the output pin 3 and through the LED, buzzer etc. that is connected to it. Thechip senses the voltage that is applied to the input pins 1 and 2, but almost no currentflows through these pins. The chip will get very hot, and finally stop working if too muchcurrent goes through it. So, if we want to use a motor, as a device to turn on and off,we have to use another chip connected to the 4093 that can allow higher currents toflow through it. Such a chip has the code number 2003. Also, it is important to knowthat when motors are switched on or off, very high voltages can be produced. Thevoltages may only last for a tiny fraction of a second, but they can cause damage to thechips or other electrical components. A small electrical component called a diode canprotect the circuit. Fortunately, the 2003 has a number of diodes built into it, so it cansafely be used with small motors.
The numbering system for the 2003 pins is shown in the diagram below. When you usethis chip, the negative of the battery MUST be connected to pin 8, and the positive topin 9.
Session 5, Activity C
Controlling a Motor
Design and Discovery Curriculum Teacher Guide
111

GoalStudents learn about the current capacities of different silicon chips and why this needsto be considered when using circuits to turn on and off other devices.
OutcomeStudents will use a simple circuit to turn on and off a motor.
DescriptionStudents build a circuit using a 2003 chip connected to a motor. They use the 2003 to turn the motor on and off. If they have time students can try adapting their previouscircuits using the 4093 chip, a micro switch or a reed switch to turn the motor on andoff.
SuppliesComponents from previous activities plus 1 electric motor, and 1 2003 chip.
Procedure1. Connect the 2003 chip into a circuit as shown in the photo opposite. You will use pin
1 to turn the motor on and off. Notice that the motor is connected between thepositive of the battery and pin 16.
2. In the photo, you can see that one wire is connected to pin 1, but its other end isnot connected to anything. Try connecting the free end to the positive of the battery,and then to the negative of the battery. What happens? Which of the following twostatements is correct?(i) A positive voltage at pin 1 turns the motor on.(ii) A positive voltage at pin 1 turns the motor off.Students should find that (i) is correct.
Exercises1. The motor you have used turns very quickly (about 4000 revolutions every minute).
Suppose you wanted to use it to drive a small four-wheeled buggy. Suggest a way ofconnecting the motor to the wheels so that the wheels only turn at 500 rotations perminute. Sketch a diagram to show how your idea would work.Use gears. The diagram might show the motor’s shaft with a small cog, which is usedto drive a larger cog. The two cogs should have their number of teeth in the ratio 1 to8. E.g suppose the smaller cog had 12 teeth, and the larger cog had 96 teeth. Whenthe small cog turns through 360 degrees, 12 teeth have engaged with the larger cog,so the latter will have turned 360*12/96, i.e. 45 degrees. Thus the larger cog will turnonce for every eight turns of the motor’s shaft (=500 rotations per minute).
5C: Controlling a Motor (continued)
Design and Discovery Curriculum Teacher Guide
112

2. Think of a way of making the motor turn on and off in short pulses. Build thecircuit.The circuit would take the output produced by the flashing LED circuit and feedthe signal into the 2003 chip.
Note: please do not let the motor run for more than a few seconds at a time. You maydamage it if you leave it running for more than 10 seconds at a time.
3. Now you can use the circuit you built with the 4093 chip that made an LED lightto turn the motor on and off as shown in the photo below. If you look carefully, youcan see that one wire is used to connect pins 1 and 2 together. Another wire goesfrom pin 1 but is not connected to anything else. (You will use it shortly.) Remember, the connections to the battery should be the last to be made. Connectthe free end of the wire to the positive of the battery, and then to the negative ofthe battery. what happens?
4. Try swapping the two wires to the motor. Does it change the direction of rotationof the shaft?
5. If you have time, try adapting your previous circuits using a micro switch, or reedswitch to turn the motor on and off.
5C: Controlling a Motor (continued)
Design and Discovery Curriculum Teacher Guide
113

Something to think about1. With your partner, think of two ways you could use a motor in a project. (You don’t
have to use the circuits you have built, although you can if you want.) Write downthe key points of your ideas.
5C: Controlling a Motor (continued)
Design and Discovery Curriculum Teacher Guide
114

In This Session:
A Design, Build, Make It Go!(40 mins) Student Worksheet Student Reading Student Reading
B Gears, Cranks, Crankshafts, and Belts(40 mins) Student Worksheet
C Using Motors to Produce Motion(40 mins) Student Worksheet
This session really puts things in motion. In 5A: Design, Build,Make It Go, students make rolling toys from a set of everydaymaterials in a mini-design challenge, and then recall priorexperiences with simple machines. The activity 5B: Gears,Cranks, Crankshafts, and Belts is an exploration of gears,cranks, crankshafts, belts. The last activity in this sessionintroduces students to motors and explains how motors can beused to produce motion.
SuppliesOne “Rolling Kit” Per Student
• 1 film canister with lid, with holes drilled in both ends• 2 size #30 or #31 rubber bands (dimensions 6.5 cm x 3 mm x 0.7 mm, #31 is
slightly heavier)• 2 small washers• 1 piece of thick drinking straw the length of the canister
One Crankshaft Kit Per Student• Small box (250 ml milk carton will do)• 3 pieces 16-gauge steel wire: one 20 cm length, two 7.5 cm lengths• 1 straw• Electrical tape or long bead (for crank handle)• Several pairs of needle-nose pliers
Other• Tools that use moving parts: eggbeaters, hand drills, winged corkscrews, flour
sifters, ice cream scoopers, nut grinders, and manual can openers• Miscellaneous gears, belts and wheels, wire, art supplies, and other materials of
choice• Legotechnic 8735
Session 6
Making Machines andObserving Functionality
Design and Discovery Curriculum Teacher Guide
115
Design and Discovery Curriculum

Session 6 explores fundamental physical science concepts of mechanical engineering. A rolling-toy designchallenge begins students thinking about machines. Students explore the mechanics of simple machines and learnthat most mechanical devices are really a set of simple machines working together. They learn how machine actioncan be transferred or change direction by experimenting with gears, wheels and belts, and crankshafts. The sessionculminates with the construction of an electronically powered mechanical buggy.
Key Concepts
Simple and compound machines make work easier by multiplying the force we are able to exert. Imagine trying tobreak a piece of wood apart using your bare hands. Now think how an axe helps you accomplish this task. The axeis a wedge, one of six simple machines.
Machines provide mechanical advantage to make work easier. "Work" is defined as the application of force to movea load over distance
Work = Force x Distance
Any machine makes work easier by reducing the force required to move a load. This is known as mechanicaladvantage. Machines can change the force we exert but not the amount of work done.
Simple MachinesThere are six basic or simple machines, which alone or in combination make up most of the mechanical deviceswe use.
1. Lever: A see saw is a lever familiar to everyone. A lever is a stiff rod or plank that rotates around a fixedpoint, or fulcrum. Downward motion at one end results in upward motion at the other end. Depending onwhere the fulcrum is located, a lever can multiply either the force applied, or the distance over which theforce is applied. There are three kinds of levers and which kind you have depends on where the fulcrum isset. These are all levers: see saw, wheelbarrow, hammer claw, crowbar, bottle opener, oar, fork, baseball batand scissors.
2. Inclined plane: The inclined plane can be best described as a ramp or slanted surface, which decreasesthe amount of force needed to move an object to a higher level. On an inclined plane, the object travels alonger distance but it takes less force. These are examples of an inclined plane: wheelchair ramp, slide,rollercoaster and escalator.
Making MachinesKey Concepts: Session 6
Design and Discovery Curriculum Teacher Guide
116

3. Wedge: A wedge is an inclined plane with either one or two sloping sides. It converts motion in one directioninto a splitting motion that acts at right angles to the blade. Nearly all cutting machines use the wedge. Alifting machine may use a wedge to get under a load. the following are all examples of wedges: chisel, saw,screwdriver, scissors, door wedge, thumbtack, pin and nail.
4. Screw: The screw is an inclined plane wrapped around a cylinder. the advantage offered by the screw isthat as it turns, rotary motion is converted into a straight motion. This motion can be used to move thingsapart (as in a car jack) or bring two objects (a screw drawing two boards together). These devices are screwsor have a screw component: jar lid, light bulb, piano stool, clamp, jack, wrench, key ring and corkscrew.
5. Wheel and axle: When a wheel is locked to a central axle, as one is turned the other must turn. A longermotion at the edge of the wheel converts to a shorter more powerful motion at the axle. In reverse, a short,powerful force at the axle will move the wheel’s edge a greater distance. The wheel and axle are the basisof these devices: doorknob, roller skates, eggbeaters, manual pencil sharpener and skateboard.
6. Pulley: A single pulley reverses the direction of a force. When two or more pulleys are connected together,they permit a heavy load to be lifted with less force, because the force is spread over a greater distance.Fixtures on flag poles, clotheslines, blinds, cranes and fan belts all rely on the pulley.
Compound MachinesA compound machine is made of simple machines acting together to perform work. For example, a rotary pencilsharpener is made up of a wedge and a wheel and axle. Students will see that many mechanical devices arecomprised of component simple machines when they explore eggbeaters, winged corkscrews, manual can openersand other everyday household implements.
Compound machines redistribute force with gears, belts and crankshaft. Energy transfer between componentsimple machines is what makes a compound machine work. Gears, belts and crankshafts are mechanicalcomponents that often tie simple machines together, by either transferring a force or changing its direction.
Gear: The common or "spur" gear is a wheel and axle with lever "teeth". When force is applied to the gear, itsteeth mesh with those of another gear, transferring the force to that gear. When one gear is larger than another, theturning rate changes. Adjusting relative gear sizes, or gear ratios, gives us a way to change how force is expressed.Anyone who has ridden a bicycle with multiple gears has changed force by adjusting gear ratios. Gears can changethe direction of a force when their teeth are bevelled or when they are set at an angle to another gear. You can seethis change in direction when you observe a rotary eggbeater in action.
Belt: Belts work with wheels and axles to transfer energy. A belt attached between two wheels or shafts transfersforce from the one that is powered to the one that is not. A belt can change direction of a force when the wheel orshafts are set at different angles. It is advantageous to use belts when you want to connect components that arefar apart. as with gears, if a belt connects wheels or shafts of different sizes, these will turn at different rates.
Key Concepts (continued)
Design and Discovery Curriculum Teacher Guide
117

Crankshaft: Crankshafts turn rotary (circular) motion into reciprocal (up and down) motion. Students will see howforce changes direction when they make their crankshaft toy.
Potential and Kinetic EnergyEnergy can be stored and then released in machines. Stored energy is called potential energy. released energy iscalled kinetic energy. Think about a windup plane. When you wind the propeller attached to a rubber band, yourhuman energy is stored as potential energy in the wound rubber band. When you let go, the unwinding rubber bandreleases energy and powers the plane’s propeller.
FrictionFriction is the resistance encountered when one body moves while in contact with another. Friction is the friend andthe enemy of machines. In car brakes, friction from the brake shoe pressing against the drum is what causes thevehicle to slow. In this case, friction is an essential function. In other devices, friction causes problems. Whencomponent parts meet each other, friction between them can waste energy, produce unwanted heat and degradematerials. To make machines run well, engineers choose materials carefully, and design components to worktogether efficiently
More about Simple and Compound Machines
Advanced Technologies Academywww.atech.org/faculty/dunne/about/SM*This site explains simple machines with vivid, colourful graphics and simple explanations.
Boston Museum of Sciencewww.mos.org/sin/Leonardo/InventorsToolbox.html*The Inventor’s Toolbox on this site provides information on simple machines.
COSI Science Centre, Columbus and Toledo, Ohiowww.cosi.org/onlineExhibits/simpMach/sm1.html*(Macromedia Flash Player* is required.) This site is best used as a guided demonstration.
The Franklin Institutehttp://sin.fi.edu/qa97/spotlight3/spotlight3.html*Simple Machines section shows six simple machines in action.
University of Texaswww.engr.utexas.edu/dteach/Experience/mechanisms/brief_overview.htm*The Mechanisms site is a good review of the concepts of simple machines and mechanics.
Key Concepts (continued)
Design and Discovery Curriculum Teacher Guide
118
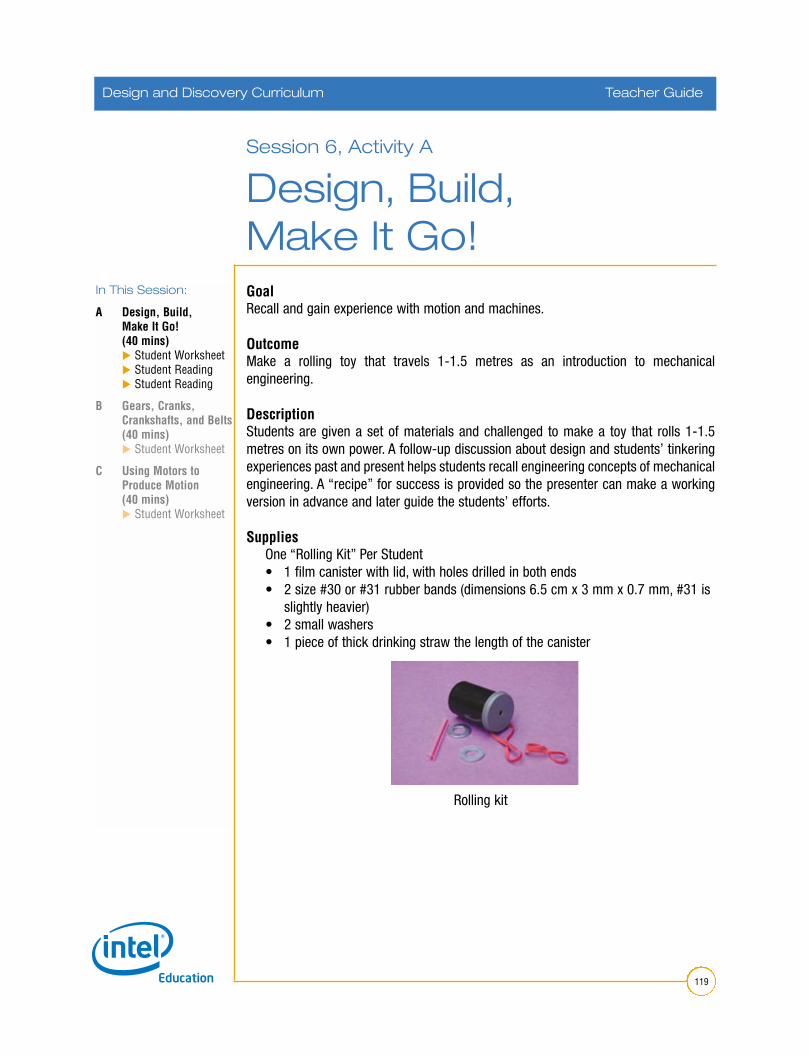
In This Session:
A Design, Build, Make It Go!(40 mins) Student Worksheet Student Reading Student Reading
B Gears, Cranks, Crankshafts, and Belts(40 mins) Student Worksheet
C Using Motors to Produce Motion(40 mins) Student Worksheet
GoalRecall and gain experience with motion and machines.
OutcomeMake a rolling toy that travels 1-1.5 metres as an introduction to mechanicalengineering.
DescriptionStudents are given a set of materials and challenged to make a toy that rolls 1-1.5metres on its own power. A follow-up discussion about design and students’ tinkeringexperiences past and present helps students recall engineering concepts of mechanicalengineering. A “recipe” for success is provided so the presenter can make a workingversion in advance and later guide the students’ efforts.
SuppliesOne “Rolling Kit” Per Student• 1 film canister with lid, with holes drilled in both ends• 2 size #30 or #31 rubber bands (dimensions 6.5 cm x 3 mm x 0.7 mm, #31 is
slightly heavier)• 2 small washers• 1 piece of thick drinking straw the length of the canister
Rolling kit
Session 6, Activity A
Design, Build, Make It Go!
Design and Discovery Curriculum Teacher Guide
119

Preparation1. Make holes in the flat ends of the film canisters and lids. The holes can be drilled
with a drill bit.
2. Cut drinking straws into lengths. They should be the length of the canister. (Youcan also use small pieces of a broken pencil if the straw is not strong enough.)
3. Place the other materials (2 rubber bands, 2 washers, piece of drinking straw)inside the canister and put the lid on. This is a “rolling kit.”
4. Write the design challenge on the board or poster paper: Using any or all of thematerials in your kit, make a rolling toy that travels 1-1.5 metres on its ownpower. It does not need to go in a straight line.
5. Provide measuring tapes or precut lengths of string.
6. Watch a short video clip that demonstrates how to make the rolling toy.
Rolling toy
This video can be found on the Design and Discovery website atwww.intel.com/education/design/session05/activity1.htm
7. So that you can provide guidance as the students engage in the work, make aroll toy of your own using the following “recipe” for success (but let theparticipants design their own varied solutions to the challenge!):
• Put the rubber band halfway through one washer. Thread one loop throughthe other loop and pull. The washer should be securely on the rubber band.
• Poke the rubber band through the hole in the end of the film canister so thewasher is on the outside.
6A: Design, Build, Make It Go! (continued)
Design and Discovery Curriculum Teacher Guide
120

• Poke the other end of the rubber band through the hole in the lid so the loopof the rubber band is on the outside of the lid.
• Hold the loop and put the lid back on the film canister.• Put the loop of the rubber band through the second washer and then put the
end of the straw through the loop, with most of the straw length extendingbeyond the canister. If there is slack in the rubber band, you may need toknot it around the straw.
• Turn the straw at least 30 times so the rubber band twists.• Put your toy on the floor and let it go! (No one said the toys had to go in a
straight line.)• The second rubber band can be wound onto the non-capped end of the
canister, to correct for its smaller circumference.
ProceduresTinker With Toys
1. As students come in, give them each a “rolling kit,” direct their attention to the“Rolling Toy Design Challenge” on the board, and challenge them to build theirrolling toy.
2. After 15 minutes or so of work time, give participants a 5-minute warning, andthen let them demonstrate their toys to one another. (No one said the toys hadto go in a straight line.) If they fail to make the toy roll, assure them that there isa method that works, and encourage them to continue trying later. Either way,proceed with step 3.
3. Guide a discussion, asking questions that cause budding engineers to reflect onthe design process they just engaged in (successful or not), such as:
• Is there any one “right” solution for this challenge? Why or why not?• What would you do differently if you had more time? Different materials?
6A: Design, Build, Make It Go! (continued)
Design and Discovery Curriculum Teacher Guide
121

• Can anyone tell about their process; when and why they might haveswitched to a new idea?
• What did you learn from watching each other?• It is said you have to have a breakdown before a breakthrough. Can anyone
relate to that?
Develop Concepts
1. Develop the concept of energy transfer and component parts: Tell student pairsto discuss how the toy is powered and be ready with an agreed-uponexplanation for the group. Have them report, and probe for answers to thesequestions:
• Where does the energy come from, and where does it go?• At what point is energy transferred from you to the toy?• At what point does potential (stored) energy change to kinetic (released)
energy?• Is this a machine?
Wrap UpExplain that many devices are made up of mechanical component parts that act inconcert to perform work. The next activities will give them more experience withmoving parts, some of which they may want to include in their personal design projectslater on.
Have students read and then discuss Reading: 6A: What is a Mechanical Engineer?
6A: Design, Build, Make It Go! (continued)
Design and Discovery Curriculum Teacher Guide
122

Make a Rolling Toy Design Challenge: Using any or all of the materials in your kit, make a rolling toy that travels 1-1.5 metres on its own power. It does not need to go in a straight line.
If you get stuck along the way, here are some hints:
• Consider a wind-up toy. How does it work?
• Wind-up toys convert potential energy into kinetic energy as they unwind.
• How is the energy stored and released? (Often this is a spring.)
• What could be used instead of springs to store and release energy?
Design, Build, Make It Go!Worksheet: Session 6, Activity A
Design and Discovery Curriculum Teacher Guide
123

SlinkyReading: Session 6, Activity A
Patented by Richard James, Upper Darby, Pennsylvania for James Industries.Filed 1 November 1945 and published as GB 630702 and US 2415012.
This is the familiar toy which consists of coils that move downstairs, along the floor, or from hand to hand. RichardJames was a mechanical engineer working for the U.S. Navy. While on a ship undergoing trials, a lurch caused atorsion spring to fall accidentally from a table to the floor. Its springy movement made him think. When he saw hiswife Betty that night he showed her the spring and said “I think there might be a toy in this.” Two years ofexperimentation followed to achieve the right tension, wire width, and diameter. The result was a steel coil with apleasant feeling when handheld, with an ability to creep like a caterpillar down inclined planes or stairs, and aninteresting action when propelled along the floor. Betty came up with the name of Slinky*, from slithering.
James managed to persuade Gimbels, the department store, to give him some space at the end of a counter. Hewould demonstrate the toy and hope to sell some of his stock of 400. It was a miserable November night, and Bettyand a friend were on hand to buy a couple to encourage sales. They never had the chance, as crowds gatheredaround and the entire stock went in an hour and a half. A company, James Industries, was set up to make theproduct. A machine was devised which coiled 24 metres in 10 seconds. The price was $1 in 1945, which hadincreased to $2 by 1994. Over 250 million have been made, with some variations, including brightly colored plasticmodels. The only substantial change in the design is that the end wires are now joined together to prevent loosewires damaging, for example, an eye. The trademark was registered in the United States in 1947 and in Britain in1946.
Besides the obvious fun possibilities, the toy has been used by science teachers to demonstrate the properties ofwaves. NASA has used them to carry out zero gravity physics experiments in the space shuttle. And in Vietnam,American troops used them as mobile radio antennae.
Reproduced with permission:Van Dulken, Stephen. Inventing the 20th Century, 100 Inventions That Shaped the World. New York: New YorkUniversity Press, May 2002. www.nyupress.nyu.edu*
Design and Discovery Curriculum Teacher Guide
124

What Do Mechanical Engineers Do?Mechanical engineers turn energy into power and motion. Machines, tools, and equipment are designed, produced,tested, and improved by mechanical engineering teams. Examples include fuel-efficient cars, scooters, toys, powerplants, hydraulic systems, medical devices, laser-based tools, sports equipment, measurement devices, and the listgoes on and on… In fact, almost every object with moving parts that you encounter today involved a mechanicalengineer.
In the future, mechanical engineers will continue to develop new materials, work on problems such asenvironmental pollution control and in the electric power, airline, and telecommunications industries. They will beinvolved with laser technology, computer-aided design, automation, and robotics.
Where Do Mechanical Engineers Work?Mechanical engineers work in all areas of manufacturing industries. They can work in research and development,management, maintenance, and production operations. Some engineers become consultants in the research,design, and testing of technologies. Creativity combined with mechanical engineering skills is a great start for aninventor!
For more information on mechanical engineering as a career go to the resources section at the back of this folder.Students could be asked to familiarize themselves with the role of an mechanical engineer as homework.
What is a MechanicalEngineer?Reading : Session 6, Activity A
Design and Discovery Curriculum Teacher Guide
125

In This Session:
A Design, Build, Make It Go!(40 mins) Student Worksheet Student Reading Student Reading
B Gears, Cranks, Crankshafts, and Belts(40 mins) Student Worksheet
C Using Motors to Produce Motion(40 mins) Student Worksheet
GoalStudy moving machine parts to learn how force can be transferred or change directionto accomplish work.
OutcomeMake a crankshaft mechanism.
DescriptionAfter an introduction to the moving parts of machines (gears, cranks, crankshafts, belts,and wheels), students investigate these parts and make a crankshaft mechanism.
Supplies One Crankshaft Kit Per Student
• Small box (250 ml milk carton will do)• 3 pieces 16-gauge steel wire: one 20 cm length, two 7.5 cm lengths• 1 straw• Electrical tape or long bead (for crank handle)• Several pairs of needle-nose pliers
Other• Tools that use moving parts: eggbeaters, hand drills, winged corkscrews, flour
sifters, ice cream scoopers, nut grinders, and manual can openers• Miscellaneous gears, belts and wheels, wire, art supplies, and other materials of
choice• Crankshaft model (see below)
Session 6, Activity B
Gears, Cranks,Crankshafts and Belts
Design and Discovery Curriculum Teacher Guide
126

Preparation1. Collect a variety of mechanical devices that have visible moving parts (example:
eggbeaters, hand drills), enough for one device per group of three students. Amounted manual pencil sharpener in the room (cover removed) can serve as onedevice. (Consider asking students to bring devices from home at the end of theprevious day.)
2. Collect tools, including needle nose pliers, rulers or measuring tapes, andscissors.
3. Prepare a model crankshaft in a box. See 6B Worksheet: Gears, Cranks,Crankshafts, and Belts.
4. You can watch a short video clip that demonstrates how to make the crankshafttoy at http://www.intel.com/education/design/session05/activity3.htm
ProceduresExploration: Look at Moving Parts
1. Distribute a variety of mechanical devices (egg beaters, etc.) that have visiblemoving parts, one to each group of three students. Ask these questions, andhave each team answer and demonstrate:• Can you count the moving parts?• How do the moving parts connect to one another?• Can you name any of the moving parts (crank, gear, moving shaft, blade,
spring)?• Can you find places where the force or motion changes direction (example:
corkscrew wings press down causing the cork to pull up)?• Demonstrate how the device operates to perform work.
2. Introduce the crankshaft by showing a wire crankshaftmade from a paper clip bent into the shape shown. Showhow a crankshaft changes the direction of a motion fromrotary to reciprocal.
3. Give students 10-15 minutes to investigate the components. Encourage them toconsider using these parts in combination in mechanical devices they mightmake.
Construction1. Make the crankshaft device, following directions on the worksheet. Students
should take this basic device home and turn it into an appealing toy.
Teacher Guide
127
6B: Gears, Cranks,Crankshafts and Belts (continued)
Design and Discovery Curriculum

Make a Crankshaft DeviceDo you remember playing with jack-in-the-box toys when you were small? They have a crank mechanismsomething like the toy you will make today. With this crankshaft toy, you will see how the direction of a force canbe changed mechanically. Turning the crank around and around makes other parts go up and down!
Supplies• Small box (250 ml. milk carton will do)• 3 pieces 16-gauge steel wire: one 20 cm length, two 7.5 cm lengths• 1 straw• Electrical tape or long bead (for crank handle)• Needle-nose pliers
Steps
1. Cut off the top of a milk carton to make a small box with one side open.
2. Turn the box so the opening is on the table, and drill or poke (using the wire) a hole in the right and left sidesof the box at the same height.
3. Drill or poke two holes in the top. They should be in a straight line with the other two holes.
4. Cut two short pieces of straw about 1/3 the length of the box.
5. Wrap the end of one of the small pieces of wire around one of thepieces of straw. Make it secure, but not too tight, as the straw shouldspin freely on the wire that will go through it. Repeat with the otherwire and the other straw.
6. Place the straws (with wires dangling for now) over the long piece of wire, leaving one more inch of wire onwhat will be the crank handle end.
7. Make the centre two bends between the straws, leaving a straw-length section of wire between the bends.
Gears, Cranks,Crankshafts and BeltsWorksheet: Session 6, Activity B
Design and Discovery Curriculum Teacher Guide
128

8. Bend the shorter non-crank end of the wire at the outside edge of one straw.
9. Bend the longer crank end of the wire at the outside of the other straw.
10. From the inside of the box, stick the non-crank end of the wire through one of the holes and bend the endon the outside of the box so it doesn’t slide out. You will need to put careful tension to make this fit into thebox. Try to keep the wire in the same form.
11. Reach into the underside of the box and gently turn the smaller wires so they poke through the holes in thetop of the box.
12. Stick the other end of the wire into the other hole, and make two bends outside the box, making a crank.
13. Secure a large bead or electrical tape on the crank to make a handle.
Crank the handle and watch the wires go up and down. It may need some adjustment to get the best motion. Nowit’s all up to you! How will you turn the up and down motion into something fun?
6B: Gears, Cranks,Crankshafts and Belts (continued)
Design and Discovery Curriculum Teacher Guide
129

In This Session:
A Design, Build, Make It Go!(40 mins) Student Worksheet Student Reading Student Reading
B Gears, Cranks, Crankshafts, and Belts(40 mins) Student Worksheet
C Using Motors to Produce Motion(40 mins) Student Worksheet
As with the electronics sessions 4 and 5 the following piece on Motors has beenduplicated in the Students Booklet to make it easier for the students to follow. Any text initalics is in the Teacher Guide only. For more teacher notes on this activity please seeteacher notes in resources section at back of the folder.
GoalTo investigate some aspects of using motors to produce motion.
OutcomeStudents will use a Lego Technic kit to build a buggy and study how it works.
DescriptionThis activity is designed to introduce you to some aspects of using motors to producemotion. A familiar example is the use of an electric mixer in food preparation; but nodoubt you will be able to think of many more examples where motors are used. Wecan’t easily investigate a food mixer in class; instead you will use a LEGO Technic kit tobuild a small buggy, and study how that works. You may do this work with your grouppartner(s); or you may do it as a class activity. Much of what you will learn applies tolarger scale devices such as food mixers, or cars that use motors (whether they beelectric, petrol or diesel).
ProcedureExercise 1Build the small LEGO buggy by following the instructions on the separate sheets.However, as you do this, write down brief notes and/or draw diagrams in answer to thequestions below.
Do NOT connect the motor to the battery pack until you are told do so.
1. How many cogs are there on the large gear wheel?2. How many cogs are there on the small gear wheel to which the large one
connects?3. The large and small gear wheels are at right angles to the axles of the buggy.
How is the motion of the gear wheels transferred to the front axle?4. Would you say the finished buggy is stable? Explain your answer.
Session 6, Activity C
Using Motors toProduce Motion
Design and Discovery Curriculum Teacher Guide
130

Ask your teacher for permission to try out the buggy. Please do NOT leave the buggyswitched on for more than a few seconds—otherwise the batteries run down veryquickly.
Exercise 21. Work out a way to measure the speed of the buggy. You MUST write down your
plan. You may be asked to discuss your ideas with other students.
2. When your teacher gives permission, try our your ideas. You should finish upwith an estimate of the speed of the buggy in cm/second. How accurate do youthink your estimate is? Could you improve the accuracy? If so, how?
3. The diameter of the wheels is about 3cm, so the radius is about 1.5cm. Use theformula for the circumference of a circle to calculate the circumference of oneof the wheels.
circumference = 2 x π x radius = 2 x 3.14 x radius
4. The circumference is also how far the buggy will go when the wheels revolveonce. Use your result for the speed of the buggy to calculate how many timesthe wheels would turn in 1 second. Your answer will have units of ‘revolutionsper second’. Then convert your answer to revolutions per minute. Give youranswer as a whole number. Write down your results, e.g. by saying ‘The wheelsturned at XX revolutions per second’, ‘The wheels turned at XX revolutions perminute’.
Now we shall try to estimate the speed of the motor itself. You will remember that thewheels are driven using gear wheels. The first thing to do is to work out how the gearsaffect the speed of the buggy.
Exercise 31. If the large gear wheel goes round once, how many times will the small gear
wheel go round? (Look back to your answers in Exercise 1.)
2. Suppose the wheels were turning at 300 revolutions each minute, how fastwould the motor actually be turning? Check your answer with your teacherbefore continuing with the next question.
6C: Using Motors to Produce Motion (continued)
Design and Discovery Curriculum Teacher Guide
131

3. Now using your answer to question 4 of Exercise 2, estimate the actual speedof the LEGO motor.
4. In the information that LEGO provide about the motor, it says that it turns atabout 350 revolutions per minute. How does your answer compare with thatfigure? Why do you think your result is likely to be at least a little different fromthe one LEGO claims?
More about gears and using motorsYou should have discovered that the effect of using a large gear wheel attached to themotor, and a small gear wheel connected to the wheels makes the wheels rotate fasterthan the motor turns. In such a case we say that there is ‘high gearing’.
QuestionsQ.1 Suppose you wanted the buggy
to move much more slowly thanthe motor turns. How would youmake this happen? (Thisarrangement could be called‘low gearing’.)
Q.2 Imagine the buggy was veryheavy. Would it be easier for themotor to move the buggy usinghigh gearing, or low gearing?
Q.3 Look at the picture of the foodmixer opposite. You can see onthe side a lever near a series ofnumbers. What do you think thelever is for? Why are differentsettings needed on a foodmixer?
Q.4 If you could see inside themixer, suggest (in a simple way)what happens inside it whenthe lever is moved.
6C: Using Motors to Produce Motion (continued)
Design and Discovery Curriculum Teacher Guide
132

Follow-up work1. Most students want to learn to drive a car. If/when you take driving lessons, one
of the most tricky things to do is to learn how to use the clutch pedal and changegears properly. Find out what the clutch does, and briefly write down what youfind out. You may be asked to outline your findings to the rest of the class.
2. Most cars run on petrol or diesel fuel. However, car engines are not veryefficient, and much research is taking place on trying to find more efficientengines. Some manufacturers are investigating the use of electric motors. Findout about alternatives to petrol an diesel engines. (Hint: try putting words suchas ‘Prius’, ‘energy efficiency’, ‘fuel cells” into Google or some other searchengine on the internet.)
3. Look carefully at a food mixer that you may have at home. What are the keyfeatures of its design? Is it easy to use? Does it have any faults? Make somesuggestions for improving the mixer so that it would be more appealing tocustomers.
6C: Using Motors to Produce Motion (continued)
Design and Discovery Curriculum Teacher Guide
133

Using Motors to Produce MotionWorksheet: Instructions for making the LEGO buggy
Design and Discovery Curriculum Teacher Guide
134

6C: Using Motors to Produce Motion (continued)
Design and Discovery Curriculum Teacher Guide
135

Notes:

In This Session:
A Setting the Scene(40 mins) Student Worksheet
B Programme the Human Robot(40 mins)
C Robot Locomotionand Interaction(40 mins) Student Worksheet
D Robot Applications(40 mins) Student Worksheet Student Reading Student Worksheet
E Robot Programming(40 mins) Student Worksheet
Self Directed LearningDepending on the time available, the students can undertake self directed learningrather than engage in purely classroom work. Some activities in the session can beundertaken outside the classroom environment.
What is a Robot?This session will establish the students’ current knowledge and perceptions of what arobot is. Perceptions of what constitutes a robotic device may be narrow and limited.Each student should write down three robots that they know of in their workbook andthey should be encouraged to be as diverse as possible. In the classroom, allsuggestions should be written down on a board or flipchart. Typically they will haveincluded examples from film and TV advertising.
Examples: Elevator, Dishwasher, Bomb Disposal Robot, Mars Sojourner, Dalek, LawnMower, Doll, Citroen Picasso, Cruise Missile, JCB, Unmanned surveillance aircraft, CNClathe, Undersea rescue and research vehicles, TV and security cameras, Robot Warscontestants.
Session 7
Robotics
Design and Discovery Curriculum Teacher Guide
136
Design and Discovery Curriculum

In This Session:
A Setting the Scene(40 mins) Student Worksheet
B Programme the Human Robot(40 mins)
C Robot Locomotionand Interaction(40 mins) Student Worksheet
D Robot Applications(40 mins) Student Worksheet Student Reading Student Worksheet
E Robot Programming(40 mins) Student Worksheet
Everyone has observed a robot in action or even interacted with one. This module helpsus to expand our knowledge of the world of robotics. We will identify many of thedifferent types of robot in general use. Next you will carry out an activity that illustratessome of the issues that arise in the programming of these devices. Finally we will getour hands on Quadrabotz, our educational robot.
A Quick IntroductionThe word robot is often applied to any device that works automatically or by remotecontrol, especially a machine (automaton) that can be programmed to perform tasksnormally done by people.
Before the 1960s, robot usually meant a manlike mechanical device (mechanical manor humanoid) capable of performing human tasks or behaving in a human manner.Today robots come in all shapes and sizes, including small robots made of LEGO, andlarger wheeled robots that play robot football with a full size ball. What many robotshave in common is that they perform tasks that are too dull, dirty, delicate or dangerousfor people. Usually, we also expect them to be autonomous, that is, to work using theirown sensors and intelligence, without the constant need for a human to control them.According to this definition, a radio controlled aeroplane is not a robot, neither are theradio controlled combat robots that appear on television. However there is no cleardividing line between fully autonomous robots and human-controlled machines. Forexample the robot that performs space missions on planets like Mars may getinstructions from humans on Earth, but since it can take about ten minutes formessages to get back and forth, the robot has to be autonomous during that time.
A robot has been developed that moves around thehospital wards under the control of a consultant who isbased in another part of the country. They can speakwith patients and visually examine them using a videocamera.
Another robot is used to carry out physiotherapy onpatients thus saving the valuable resources of a qualifiedprofessional.
Session 7, Activity A
Setting the Scene
Design and Discovery Curriculum Teacher Guide
137

You will have seen robots in action in film, in the news, on documentaries and in real life. Write down the names ofthree of these and the function that they were carrying out.
Some formal definitionsThe technical people have attempted to come up with really fancy definitions such as:
1. An intelligent robot is a machine able to extract information from its environment and use knowledgeabout its world to move safely in a meaningful and purposeful manner.
2. A robot is a system which exists in the physical world and autonomously senses its environment and actsin it.
3. A robot is a re-programmable, multi-functional, manipulator designed to move material, parts, orspecialised devices though variable programmed motions for the performance of a task.
4. Robotics is the intelligent connection of perception to action.Which one of these best describes the robot? You could come up with a better definition, have a go. Wewill discuss these in class. Also we will go through everyone’s 3 robot names and record these on theboard. You should write down all of the robots on the list as you will need this in the next session.
Ask the students to select which definition best describes robotics to them and select a few people to reflect onwhy one definition appeals to them. Then ask for their own suggestions. There is a debate amongst the expertsabout what really constitutes a robot, so it is perfectly valid for the students to argue the case for and against thedishwasher for example. It may not look like the Mars Sojourner but it is computer controlled to take in specificamounts of water, heat it to the correct temperature, spray the dishes for a specified time having added thedetergent first and then empty out that water and begin the rinse process!
Design and Discovery Curriculum Teacher Guide
138
Design and Discovery Curriculum
Brainstorm - What is a robot ?Worksheet: Session 7, Activity A
Robot Name Function

In This Session:
A Setting the Scene(40 mins) Student Worksheet
B Programme the Human Robot(40 mins)
C Robot Locomotionand Interaction(40 mins) Student Worksheet
D Robot Applications(40 mins) Student Worksheet Student Reading Student Worksheet
E Robot Programming(40 mins) Student Worksheet
This activity is designed to illustrate the task of programming a robot to navigateobstacles. Have the students write down the avoidance commands that they will issueto the robot when an obstacle is encountered. They must stick to these commands untilthey have identified the weaknesses in the programme and propose modifications.Discuss possible changes, implement them and monitor the results. An alternative tothis exercise to have the blindfolded student pick up an object with the outstretchedhand and place it in another location. All of their movements being guided by theircolleague issuing commands of "Forward, Right, Up, Down, Open Fingers, Close Fingersetc."
You are in ControlA volunteer is asked to be the robot and is blindfolded. In the room where there aredesks and other obstacles, the "robot" slowly steps forwards with their armsoutstretched to feel the desks. The "robot" will come in contact with a desk and call outeither "Right Obstacle" or "Left Obstacle". You will have written some simpleinstructions that they must follow when, for example, they touch a right obstacle. Thismight be:
1. Step back
2. Turn 90º to the left
3. Continue stepping forward
You must always give just the instructions orprogramme that you have written down. After acouple of tries you can modify your programme tomake the "robot" navigate the obstacles moreefficiently.
Teacher Guide
139139
Session 7, Activity B
Programme the Human Robot
Design and Discovery Curriculum
The Honda Asimo Robot

Lets have a CompetitionThis exercise can be a competitive team exercise between two robots and theirrespective programmers. One group of students could be assigned the task ofdesigning a fair obstacle course to be used by the competing teams.
Teams of three students will compete to see who has written a programme thatcontrols the movement of their "robot" through an obstacle course in the shortest time.This can be undertaken after the class session.
Demo the QuadrabotzThe teacher loads the programme "Demo1.bbg". This programme tells the Quadrabotzto continously walk forward until it senses an obstacle on its right or left. It then takesthe appropriate steps to avoid that object before resuming the forward walking motion.These are some points of discussion:
• Quadrabotz always takes the same avoidance steps for, say, the right obstacle andthis may not be enough to get around it.• Quadrabotz cannot decide to do something different until the programme ischanged.• It may back into something because there are no proximity sensors on the rear.• While it is avoiding an obstacle to the right, it may crash into an obstacle on the leftbecause during the avoidance manoeuvre the sensors are deactivated.• Identify the shortcomings and possible improvements to this programme.
7B: Programme the Human Robot (continued)
Design and Discovery Curriculum Teacher Guide
140
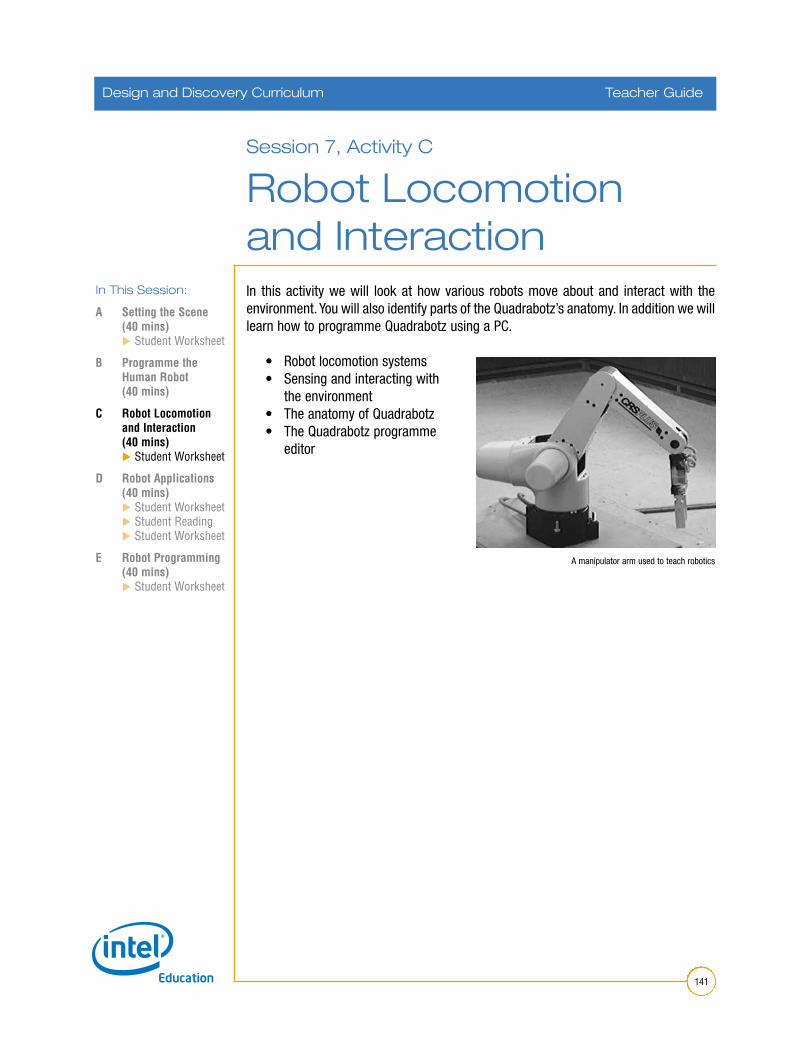
In This Session:
A Setting the Scene(40 mins) Student Worksheet
B Programme the Human Robot(40 mins)
C Robot Locomotionand Interaction(40 mins) Student Worksheet
D Robot Applications(40 mins) Student Worksheet Student Reading Student Worksheet
E Robot Programming(40 mins) Student Worksheet
In this activity we will look at how various robots move about and interact with theenvironment. You will also identify parts of the Quadrabotz’s anatomy. In addition we willlearn how to programme Quadrabotz using a PC.
• Robot locomotion systems• Sensing and interacting with
the environment• The anatomy of Quadrabotz• The Quadrabotz programme
editor
Session 7, Activity C
Robot Locomotionand Interaction
Design and Discovery Curriculum Teacher Guide
141
A manipulator arm used to teach robotics

Design and Discovery Curriculum Teacher Guide
142
Robot Movement – Locomotion SystemWorksheet: Session 7, Activity C
142
Locomotion SystemsUsing the list of robots from the brainstorming session, pick examples for each locomotion system in thefollowing table.
Sensing and interacting with the environment
Imagine if a robot could not interact in any way with the environment around it.Can you imagine what value it would be? Think about it! The reality is that it wouldbe completely and totally useless! Take two examples of robots from thebrainstorm list and describe how they react with the environment.
Design and Discovery Curriculum
Locomotion system Robot
Move on wheels
Move on Tracks
Walk
Fly
Swim
Remain Stationary
Robot Name How it senses and interacts with the environment
Bomb disposal robot

The students present their list of locomotion systems to the class. Thisexercise broadens the notion of robots as moving and fighting etc. Theymight even appear quite lifeless or mundane!
The students report back to the class with their suggestions of how therobots interact with the environment.
Some examples of sensors and actuators:• Touch sensors – micro-switches
• Visual – video camera
• Audio – microphone
• Distance – passive infra-red detectors as used in burglar alarms and ultrasonic transmitters and receiverssimilar to what the bat uses
• Temperature – temperature sensors used in washing machines, heat seeking missiles
• Car assembly robots use welding tools and sockets on the end of the arm or the manipulator
• The Bomb Disposal Robot may use a manipulator with crude fingers and also may have a manipulatorwith a shotgun mounted on it
Energy SourcesIf a robot is to move around then it nearly always gets its power from batteries. Providing they are charged up,batteries provide a steady stream of energy. Robotic forklift trucks are often used in industry for packing shelves.When they sense the batteries going low, they go to the "sick bay" and plug themselves in to the charger. The MarsSojourner robot uses solar power to keep the batteries charged. Robots used in car assembly are usually stationaryand can be connected to mains power. Have a look around the school, town and in your own home and try and findat least one item that is powered by:
1. Rechargeable batteries
2. Non-rechargeable batteries
3. Mains
4. Light
5. Movement
7C Worksheet: Robot Locomotion and Interaction (continued)
Design and Discovery Curriculum Teacher Guide
143
Mars Sojourner

Exercise 3Identify parts of the Quadrabotz’s anatomyOn the blank diagram the students should labelthe following items that make up the robot,obviously without a knowledge of electronicssome components may have to be guessed at.
Quadrabotz’s anatomyOn the photograph of Quadrabotz see how manyof the following parts you can label:
• Front, middle and back motors.• Left and right LEDS and photo detectors• The micro-controller• Battery packs• The PC programming socket• On/Off switch• Piezo sounder
Manual Dexterity ExerciseThis exercise will illustrate the freedom of movement and sensitivity of the human hand. The student is asked to tietheir shoelaces using a pair of pliers in each hand. While some robots have much more sophisticated manipulatorsthan this, no artificial hand has been developed to match all of the attributes of the human hand. Specific industrialtasks will only need to emulate the hand in a limited way like picking up an object using thumb and forefinger.Robots may do a much better job in these circumstances because they can be more accurate for placement, notso heat sensitive and be able to handle much greater loads.
Quadrabotz program editorThe students can use the tutorials that come on the Quadrabotz CD to learn how to programme the robot. Thefollowing programs may be loaded and run:
Demo2.bbgThis program causes the robot to beep and move backwards when you bring your finger towards either sensor.
Demo3.bbgThis program counts the number of times that you put your finger in front of the left sensor. When you put yourfinger in front of the right sensor it multiplies the count by two and beeps the number of times corresponding to theanswer. Students can try changing the program to multiply by three or divide by some number.
7C Worksheet: Robot Locomotion and Interaction (continued)
Design and Discovery Curriculum Teacher Guide
144144144144144
Quadrabotz

In This Session:
A Setting the Scene(40 mins) Student Worksheet
B Programme the Human Robot(40 mins)
C Robot Locomotionand Interaction(40 mins) Student Worksheet
D Robot Applications(40 mins) Student Worksheet Student Reading Student Worksheet
E Robot Programming(40 mins) Student Worksheet
In this activity we will look at specific robotapplications and the issues that arise in eachone. We will also see if robots will take over theworld and how we would divide up the workbetween humans and robots. You will also dosome more programming here.
• Discuss robot applications• Strengths / Weaknesses• Programming
Strengths and Weakness of both Robots and HumansYou may have seen the series on TV called "Robot Wars" where ordinary people builttheir own fighting machines that were remote controlled. The weapons were quitedeadly with robots using hammers, flippers, cutting discs and brute force to try anddefeat the others. There are many things that robots can do better than humans andvice versa. Each has their own strengths and weaknesses. Robot submarines havebeen used to go down to great depths in the sea to take samples, photograph the seabed and to carry out rescue missions. The surface of Mars does not have anatmosphere or reasonable temperatures to support human life, this is why NASA builtthe Mars Sojourner to explore the surface of this planet. Tidying up your CDs is a bit ofa chore. Imagine if your job was to take a CD from the burner and put into the case andyou were expected to do 1000 of these every day! It would drive you nuts! Robots lovethis sort of work. Can Robots like or dislike work?
Session 7, Activity D
Robot Applications
Design and Discovery Curriculum Teacher Guide
145
Robotic Hand

In the grid, list out three strengths and weaknesses for both humans and robots.
As the students report back, their own suggestion can be supplemented as necessary with some of the following:
Robot ApplicationsWorksheet: Session 7, Activity D
Design and Discovery Curriculum Teacher Guide
146146
Human Robot
Strengths:• Creative
• Has many sensory inputs
• Very powerful computer (brain)
• Can learn
• Can adapt to new environments
Strengths:• Never gets tired
• Never gets bored and rebellious
• Consistent worker and programmable
• Can be very precise
• May not need air to breath
• May withstand more extreme temperatures
• May be very strong
• Can be manufactured on demand
Weaknesses:• Needs food, water and rest
• May get into bad mood
• Has ‘off’ days
• Usually not absolutely consistent
• Has variable body strength
• Must have comfortable temperatures
• Does not come in really small sizes
Weaknesses:
• Pretty dumb
• Limited sensory inputs
• A mere computer for a brain
• No feelings
• Not versatile
• Limited range of actuators
• Programmed by humans who have weakness!
• Can only learn simple facts

ProgrammingEvery computer from the tiny one that controls Quadrabotz to the world’s biggest super-computer understands justone’s and zero’s. All of these computers depend totally on humans to tell them what to do. Humans must programevery step of the computer’s activity whether that is to carry out a calculation, play a game or guide a missile.Quadrabotz is no exception. You can write the program on a PC and send it to the robot via the communicationslead. Quadrabotz will faithfully follow your every command, no matter how silly or wrong they are! For instance wecan tell Quadrabotz to beep, wait a moment and continuously repeat this action. Quadrabotz will keep doing thisuntil its battery runs down. This not very useful you will agree but it just proves that you are in control of Quadrabotz,not the other way around. The wonderful thing about programming is that you can take what seems to be acollection of simple commands and put them together to create a really useful function. It is bit like painting wherethe artist works with a palette of paints to create a wonderful picture. So two of the most attractive things aboutprogramming are creativity and control. Given that you have total control and also given that we all make mistakesit is to be expected that our programs will contain errors and the robot will not perform as expected. Errors are aninescapable part of the task of programming. The programmer accepts this fact and continuously modifies theprogram removing all the errors and ensuring that it performs exactly the task it was designed for. There are twomain categories of error:
Logical Errors: You want the robot to move forwards but you give it the command to move backwards. You onlydiscover these errors when you run the program.
Syntax Errors: You have given the command to the robot to burp(200). The program editor will actually tellyou that this command is unknown to Quadrabotz when you attempt to download the program. The correctcommand spelling is beep(200).
Don’t worry about any errors that arise, this is an everyday part of programming. You cannot instruct Quadrabotz toself-destruct, unless you tell it to walk off the side of the table! In the real world, errors that arise in programs maynot be so harmless.
A programming error in banking software might cause an ATM to give you €100 when you requested €10 eventhough you only had €20 to start with in your account! Banks do an awful lot of testing on their software to ensurethat this does not arise.
Design and Discovery Curriculum Teacher Guide
147
Robot ApplicationsReading: Session 7, Activity D

Aeroplanes are controlled by moving flaps on the wings and this is true of themost modern jets. In older planes the pilot’s joystick was connected by a steelcable to the flap mechanism for direct control. Modern jets have a joystickjust like on a games machine. The joystick is connected to a computer. Theprogram in the computer monitors the movement of the joystick and thenmoves the flaps by the correct amount. A logical error in this program thatcaused the plane to go down when the pilot actually pulled the joystick to goup would be a disaster. Understandably, these programs are tested for yearsbefore they are released for commercial use.
Thankfully we are not working on such mission critical software so we can relax and have fun with Quadrabotz.
An aeroplane on automatic pilot is a giant robot. It sensesthe effects of air currents and continually adjusts all of thevarious controls to provide a smooth flight. It will evenexecute a complex series of turns as it follows a flightplan from, say, Dublin to Athens. The pilot and co-pilotcould both sit with the passengers and watch the in-flightmovie but this would obviously cause panic.
7D: Reading (continued)
Design and Discovery Curriculum Teacher Guide
148
Robotic lawn mower
Pilot’s joystick on the Airbus A330 just like a games machine!

Quadrabotz
Load "Exercise1.bbg"This program delays for 20 jiffies. There are 20 jiffies in 1 second. Quadrabotz starts to run the program followingeach instruction faithfully. To start with, it does nothing for 1 second. The next line tells it to do a beep(220). It thengoes back to the first instruction and repeats the whole program again. This causes Quadrabotz to beep once asecond.Delay(20)Beep(220)Write a program that will make two beeps one second apart, wait for two seconds. Quadrabotz will continuouslyexecute your program so that you should hear BEEP-BEEP SILENCE( 2 Secs), BEEP-BEEP SILENCE( 2 Secs), etc.
Robot ApplicationsWorksheet: Session 7, Activity D
Design and Discovery Curriculum Teacher Guide
149

In This Session:
A Setting the Scene(40 mins) Student Worksheet
B Programme the Human Robot(40 mins)
C Robot Locomotionand Interaction(40 mins) Student Worksheet
D Robot Applications(40 mins) Student Worksheet Student Reading Student Worksheet
E Robot Programming(40 mins) Student Worksheet
In this final activity we will do some more programming of Quadrabotz. Having hadsome exposure to this robot you will become part of the design team to develop thenext generation Quadrabotz. This will involve taking a critical view of the technology ofQuadrabotz and identifying where improvements can be made. The last part of thissession will consist of a brainstorm to suggest how Quadrabotz might be used in arobotics project.
• Analyse and program a gait• Quadrabotz design teams• Some ideas for a robotics project
Analyse and Program a gaitA gait is a style of walking and is simply a combination of movements of the threemotors on Quadrabotz. Rather than having to program these movements yourself everytime you wanted the robot to walk, the programming language has some high-levelcommands like Gait(gFwd). This command simply causes the motors to move in theright sequence so that the robot steps forward once. Your task is to examine themovements of the motors and the sequence that they operate in. You can then writeyour own program using the low-level Motors command to reproduce this same gait ormaybe one that works even better!
Session 7, Activity E
Robot Programming
Design and Discovery Curriculum Teacher Guide
150

Quadrabotz design teams Congratulations! You have now worked with Quadrabotz for a short while and you qualify to join the Quadrabotzengineering design team. You will be split into four separate teams to carry out an evaluation of version 1 ofQuadrabotz and you will decide on what improvements need to be made for version 2. It is designed to be aneducational robot and you have already learned many things from Quadrabotz version 1. There are four designteams looking at the following aspects of the design:
1. Locomotion
2. Sensing and interacting with the environment
3. Intelligence
4. Power
Each functional team will take 20 minutes to evaluate Quadrabotz and will report back to the executive design teamwhere you will defend your well thought-out designs.
Just to get you thinking here are some issues that you may wish to consider as you develop the next generationQuadrabotz.
Team - Locomotion
• As a walking robot, how useful is it?
• What environments is this walking robot particularly suited to and what factors, if present, would causeproblems?
• What are the limitations (ability to climb, step over stones, walk through grass etc.)?
ProgrammingWorksheet: Session 7, Activity E
Design and Discovery Curriculum Teacher Guide
151

• Would two legs be better than four and what issues would that give rise to?
• What other system of locomotion would be more useful and fun to work with and learn from?
Team – Sensing and interacting with the environment
• What can Quadrabotz currently sense in the external environment?
• What additional things would it be useful for it to have an awareness of?
• If the Locomotion Team decide that the robot should walk on just two legs, how will it maintain itsbalance?
• Are there any manipulators that would be useful to include on the next generation robot?
• Is the beeper sufficient as a sounder?
• What other sound would be useful to make?
Team – Intelligence
• From what you have seen of the programming environment, is Quadrabotz really smart enough?
• Are there things that you would like to do, like more complex maths, or have the ability to measuredistances?
7E Worksheet: (continued)
Design and Discovery Curriculum Teacher Guide
152

• Do you think the programming environment is OK for writing instructions for the robot? Are thereimprovements that you would make?
Team – Power
• Quadrabotz would certainly not survive long in a Robot Wars tournament, but do you think that it ispowerful enough as an educational toy?
• If you feel that it is a bit of a weakling, in what ways would you beef it up? Bear in mind that morepowerful batteries may be required.
• How would you be able to guarantee that the robot would run forever?
• How would you recharge the batteries?
• Are the 4 AA batteries sufficiently powerful to keep the robot going for a reasonable amount of time?
Projects Brainstorm
• Light source seeker. Quadrabotz can be placed in a dark room and programmed to locate and walktowards a torch light.
• Item counter. The obstacle detection feature could be used to sense when an object has passed in frontof the robot. You could then programme it to beep for every ten items that passed by.
• Oversize rejection. A common issue in manufacturing is to automatically reject an item on the assemblyline that is out of specification e.g. too wide or too tall. Quadrabotz could be positioned so that theobstacle detector was triggered by an oversized item and the front leg could then be programmed to kickthe item off the assembly line. The assembly line track can be powered from one of the motors.
7E Worksheet: (continued)
Design and Discovery Curriculum Teacher Guide
153153

• Automatic traffic barrier. The right sensor could be used to detect a car approaching the barrier. Thefront leg could then be used to raise the barrier. When the car triggers the left sensor the barrier isdropped.
• Quadrabotz on wheels. Two motors are attached to the two rear wheels of a three-wheeled cart. Thesingle front wheel can be a castor type. The cart will be steered by moving one of the rear wheels at atime.
Links
Computer Science Lecture Notes "Introduction to Robotics" http://www-scf.usc.edu/~csci445/
The NASA robotics site for educatorshttp://www.nasa.gov/audience/foreducators/topnav/subjects/technology/Robotics.html
7E Worksheet: (continued)
Design and Discovery Curriculum Teacher Guide
154

Notes:

Thinking Creatively aboutProblems and Solutions
10blue arrow starter 24/11/05 10:32 pm Page 13

10contents 24/11/05 10:48 pm Page 4

So many problems to solve and improvements to make. Howdo you decide which one to tackle? In this session, studentsrevisit and refine their broad list of problems, needs, andimprovement ideas (started in Session 2) to identify one designopportunity as their project. They use a variety of observationand data collection strategies to consider what exactly needsfixing, developing, or improving.
Students refine and focus on a problem to solve from theperspective of the users’ needs. They write a problem statement, a description of thecontext for the problem, and a proposed solution.
In the first activity, 8A: Revisit, students revisit their list of design opportunities startedearlier in Session 2, Design Opportunities are Everywhere. Here, they develop thecriteria for choosing a problem to pursue. In 8B: Research and 8C: Refine, studentsrefine their list of problems and conduct market research by gathering informationabout the nature of the problem. They can do this by going off site to conduct a surveyand collect data about the user, the user’s preferences, and the realities of the user’slife, environment, and behaviors. The SCAMPER brainstorm technique is used in 8D:SCAMPER To Solutions to help students begin to think about the solutions for the designopportunity which they can do as home work. Students should each have one projectin mind and about five possible solutions by then.
Design and Discovery Curriculum Teacher Guide
155
Design and Discovery Curriculum
Session 8
The 3 R’s of ProblemIdentification
In This Session:
A Revisit(40 mins) Student Worksheet Student Discussion
+ H/W
B Research(40 mins) Student Worksheet Student Discussion
+ H/W
C Refine(40 mins) Student Worksheet
+ H/W
D SCAMPER to Solutions(H/W) Student Worksheet

In Session 8 students use product research to gather information about the nature of their design problems in orderto narrow their choices. Students then learn about user needs by conducting surveys and using the data to chooseone design opportunity that is compelling to them. Once students know the design challenge they want to pursue,they move to Step 3 of the design process - Brainstorming Possible Solutions to the Problem.
Key Concepts
During this session students are introduced to product research methods to help refine their design problem. Thesemethods include asking potential product users probing questions and studying user data through surveys andobservation. Understanding the user of the product is critical to product design. This process, called marketresearch, focuses on the collection and study of user preferences toward new or existing products.
Surveys allow for gathering data about a user, a user’s preferences, and the context of a user’s life and environment.When designers understand their users, they can design with them in mind. A survey provides a way for designersto get specific information about a user. Questions used in a survey should help gather data about the problem andthe user
Some question examples include:• What do you find frustrating about this particular product?• What aspects of the product do you find useful?• What changes would you like to see made to this product?• Would you purchase this product if (describe change)?• How often do you use this product?
Surveys do have drawbacks because participants might give information about what they believe, not on what theydo. An integrated approach to product research is often necessary to get a better understanding of the user.
An additional method for gathering information is through observations. Ethnography is a field of product researchthat uses observation as a method for gathering information. Ethnographic studies can be conducted by sendingan observer to watch people use a specific product. By observing behaviour, researchers discover user needs thatare not being met and possible design solutions that might meet those needs. IDEO (www.ideo.com*), a productdesign firm, uses ethnographic studies as a method to come up with design solutions. IDEO designed a conceptvacuum cleaner that follows the user during cleaning, after conducting many user observations to understand thelimitations around current vacuums. The model they designed addressed numerous issues that frustrated vacuumcleaner users.
The 3R’s of ProblemIdentificationKey Concepts: Session 8
Design and Discovery Curriculum Teacher Guide
156

More about Product Research and Design
Industrial Designers Society of America (Editor) and Groddich, Kristina (Introduction). Design Secrets: Products: 50Real-Life Product Design Projects. Gloucester, MA: Rockport Publishers, 2001.
Kelley, Tom. The Art of Innovation: Lessons in Creativity from IDEO, America’s Leading Design Firm. New York:Doubleday, 2001.
The resorces provided below are design agencies. Reviewing these Web sites may be helpful in learning howprofessional companies develop products.
IDEO, www.ideo.com*
ZIBA Design, www.ziba.com*
ECCO Design, www.eccoid.com*
I.D. Magazine, www.idonline.com*
Key Concepts (continued)
Design and Discovery Curriculum Teacher Guide
157

GoalTo add to and prioritize the list of problems and improvements that students began inSession 2 Design Opportunities are Everywhere.
OutcomeIdentify three problems or improvements (design opportunities) to focus on.
DescriptionStudents generate additional ideas to add to their list of design opportunities, lookingfor needs, problems, or improvements. They then go through a prioritization andselection process to narrow their list.
SuppliesNone
PreparationBe sure to ask students to take out their list of design opportunities from 2C Worksheet:Design Opportunities Are Everywhere. (They should have been adding to this listthroughout the sessions.)
ProceduresIn this activity, students revisit their list of needs, problems, or improvements that theybegan earlier. This is Step 1 of the design process: Identify a Design Opportunity.Students should see that opportunities are everywhere and often come from a need,problem, or improvement to an existing solution.
Expanding the List
1. Provide some time for learners to add other ideas to their list that may havecome up throughout the previous sessions. In doing so, their ideas should comefrom observations that they’ve made based on frustrations with particulareveryday objects.
2. Give some examples here. For example, perhaps some students in the class areleft-handed. They may have trouble using a computer mouse which is designedfor a right-handed person. They might like to see adaptations made to a mouseso that it is suitable for a left-handed person.
Session 8, Activity A
Revisit
Design and Discovery Curriculum Teacher Guide
158
In This Session:
A Revisit(40 mins) Student Worksheet Student Discussion
+ H/W
B Research(40 mins) Student Worksheet Student Discussion
+ H/W
C Refine(40 mins) Student Worksheet
+ H/W
D SCAMPER to Solutions(H/W) Student Worksheet

3. Have students look around the room and choose something in the room. Now,ask them to consider what problems they have using this item. This might be aproblem with the entire product or with one part of the item. Now, ask them tocome up with a way that they would like to see it improved. Go around the roomand ask students to share. You might find, for example, that someone doesn’tlike the pencil sharpener in the room. She doesn’t like the fact that you have toconstantly take out your pencil to see if it is sharpened. She would like to seethe sharpener indicate when a pencil is sharpened. Remind them to think aboutfunction as opposed to form, the way it works as opposed to the way it looks.Ultimately, the goal is for them to re-engineer a product to make a functionalimprovement.
4. Students can also apply the Activity Mapping that they learned in 2C: DesignOpportunities Are Everywhere, to help them identify a problem. They can developthe Activity Mapping individually for a problem that interests them. This is auseful tool if they have difficulty coming up with a design challenge. Suggestthat they choose an activity that is routine for them and try to identify problemsin that activity. For example: eating breakfast, going grocery shopping, washingtheir dog, taking a hike, and so forth.
Activity Mapping
1) Pre-activity: Describes what is done before the activity
2) Activity: Explains what is involved in the activity
3) Post-activity: Includes what is involved after the activity
4) Assessment: Involves how one knows if the activity has been successful
5. Now, have students add additional design problems to their list and be asspecific as they can. Remind them of the question: “What problems would youlike to solve or what improvements would you like to make on a currentproduct?” Encourage the young designers to dream!
Refining the List
1. Ask the group to come up with some questions to help each other narrow downtheir list of design opportunities to select a few to focus on. Working in pairs,students should ask each other probing questions to help clarify what the need,problem, or improvement is and which holds the most promise for solutions.
8A: Revisit (continued)
Design and Discovery Curriculum Teacher Guide
159

Example probing questions are:• What about this product is frustrating?• Do you know of any similar products that have been adapted from this
product?• What would you like to see this product do?• What part of the product would need to be changed, the whole thing or one
part?• Would other people benefit from this improvement? If so, who?
2. Another option is to have students place their lists of design opportunities ontheir desks and walk around to look at everyone’s list. Students may read thelists and write comments next to the problems that their peers addressed. Theycan then use the comments to help them narrow down their list.
3. Each student should be ready to select the top three design opportunity choices.
4. Ask them to consider where they could gather the most data about otherpeople’s use and impressions of the problem or improvement that they haveidentified.
Wrap Up Students share their top three design opportunities with the whole group. Then, theydiscuss where they could gather the most data about the problems and improvementsthat they identified.
Follow With In 8B: Research and 8C: Refine, students learn how to conduct a survey to gather moredata about problems and improvements.
8A: Revisit (continued)
Design and Discovery Curriculum Teacher Guide
160

It is now time to think about your end-of-year exhibition. This will give you the opportunity to show how hard youhave worked and to celebrate your accomplishments. Listen to what other students and parents/visitors say whenthey visit you at your stand to look at your project. This will provide you with useful information on your prototypeand presentation skills. You may then like to do some further work on your project and enter it into the YoungScientist and Technology Exhibition, which is held in the RDS in Dublin each January.
In Session 2 you listed 10 problems you would like to solve. It is now time to REVISIT that list, carry out RESEARCHand REFINE your ideas. You can add some new ideas if you like.
Remember the first step of the design process:
Design Process Step 1. Identify a Design Opportunity
Working with a partner or two other students sort through your lists and identify ten design opportunities.
1.
2.
3.
4.
5.
6.
7.
8.
9.
10.
RevisitWorksheet: Session 8, Activity A
Design and Discovery Curriculum Teacher Guide
161

Review the list with your partner/s and select your three favourites based on your discussion and your interest inpursuing the problem.
1.
2.
3.
Where could you gather data about other people’s uses and impressions of the problems and improvements thatyou have identified?
8A Worksheet: Revisit (continued)
Design and Discovery Curriculum Teacher Guide
162

GoalStudents gather data about design opportunities to help them select a design project.
OutcomeStudents will collect data about design problems and choose one to solve with a designproject.
DescriptionStudents conduct a survey with a variety of people and observe how people interactwith products to help them clarify one design opportunity. This one design opportunitymay change as ideas are refined in an iterative design process.
Supplies Clipboard for surveying (optional)
PreparationReview students’ lists and ideas for data collection.
As homework students might visit the local shop or shopping centre, the hardwarestore, and so forth.
Students should have their lists from the previous activity, 8A: Revisit.
ProceduresConducting the Survey
In this activity, students focus on Step 2 of the design process: Research the DesignOpportunity. This is where they gather lots of information about the nature of theproblem. They find out about the user, the user’s preferences, and collect data aboutthe context and realities of the user’s life, environment, and behaviors. In short, marketresearch. The idea is for students to get feedback on the design opportunity beforerefining their choice even further.
Session 8, Activity B
Research
Design and Discovery Curriculum Teacher Guide
163
In This Session:
A Revisit(40 mins) Student Worksheet Student Discussion
+ H/W
B Research(40 mins) Student Worksheet Student Discussion
+ H/W
C Refine(40 mins) Student Worksheet
+ H/W
D SCAMPER to Solutions(H/W) Student Worksheet

2. Have students prepare survey questions. The questions should help them gatherdata about the problem and the user. Some sample questions are given in thestudent worksheet.
3. Now have them make a list of things that they will be observing (note: in somecases, they may not be observable—especially if students have come up withsomething completely novel). For example:
• Who is looking at this product?• Are people purchasing this product? • How much is this product? • How is this product made?
4. Ask them to come up with a script for an introduction, explaining who they are,what they are doing, and the purpose of their survey, and requesting a fewminutes of someone’s time.
5. They can practice their script and questions in pairs.
6. They are now ready to conduct their survey. They should try to survey about 10people.
8B: Research (continued)
Design and Discovery Curriculum Teacher Guide
164
Design and Discovery Curriculum

You will now have a chance by surveying people from the general public to do some market research on the threedesign challenges you chose in the previous activity. Gathering data in this way will help you decide on one designopportunity.
Design Process Step 2. Research the Design Opportunity
Writing a SurveyWriting a survey is harder than it appears. Remember to include a brief introduction explaining what you are doing.
Survey Questions Questions should be as simple as possible. Remember not to include too many questions and that you are lookingfor short answers.
Sample questions you might like to ask
1. Do you use this product?
Product 1 yes no
Product 2 yes no
Product 3 yes no
2. What do you not like about this product?
Product 1
Product 2
Product 3
3. Would you use this product if (describe change)?
Product 1 yes no
Product 2 yes no
Product 3 yes no
When you have written your survey you should test it on other members of the class. This will help you identify anyquestions that might need changing.
ResearchWorksheet: Session 8, Activity B
Design and Discovery Curriculum Teacher Guide
165

Narrowing the Design Project
1. Back in class with their market research in hand, students should spend timesorting through the data that they collected. In doing so, their goal is to narrowtheir list of design opportunities. They should think about which problem wouldbe most possible for them to work on. They can begin to do this by listing thepros and cons for each possibility based on their research. Remind them thatthey are still focusing on problems; however, it’s natural to have ideas forsolutions “popping up” and this may guide them as they narrow their focus.
2. As they narrow down their choices, remind them to consider what aspect of aparticular design they would like to see improved or developed, since they coulddecide to choose the whole product or a part of the product.
3. In small groups, have them share their lists of pros and cons and get feedbackfrom each other to help them choose one design opportunity.
4. They are now ready to make a decision. Encourage them to make a decision byselecting one or two problems that are most compelling to them. Explain thattheir decisions are not permanent; they may find that they change their designchoice a few times throughout this process. Do not force or rush the process!
Developing the Problem Statement
1. Now that they have narrowed their list to one design opportunity, they need toformulate a “problem statement” that expresses the “heart” of the situation.
2. Discuss the features of a problem statement for example using the toothpastecap example:
• Begins with a clear, concise, well-supported statement of the problem to beovercome.
The toothpaste screw cap poses many problems for people. When takenoff, the cap may be easily dropped into the sink drain, on the dirty floor, oreven into the toilet.
Session 8, Activity C
Refine
Design and Discovery Curriculum Teacher Guide
166
In This Session:
A Revisit(40 mins) Student Worksheet Student Discussion
+ H/W
B Research(40 mins) Student Worksheet Student Discussion
+ H/W
C Refine(40 mins) Student Worksheet
+ H/W
D SCAMPER to Solutions(H/W) Student Worksheet

• Includes data collected during the survey/observation in order to betterillustrate the problem.After observing my family members using toothpaste with a screw cap, Iobserved my younger sister leaving the cap off and on the sink, my dadputting the cap down on the sink and leaving toothpaste behind after puttingthe cap back on, and my mom dropping the cap on the floor. When talking topeople about their use of the screw cap, they reported similar problems.
• Establishes the importance and significance of this problem.These problems with the screw cap seem to be widespread. With a littleinnovation, this problem can be solved.
• Describes the target population.While I realized that everyone uses toothpaste, I also observed that it isprimarily women who purchase the toothpaste. Therefore, my product designwill need to appeal to women in particular.
3. Tell them to write the problem clearly so that it could be explained to anyone.
Wrap UpHave students discuss how easy or difficult it was to narrow their lists and why this wasthe case.
Follow WithIn 8D: SCAMPER To Solutions, students begin to consider solutions to their problems.
8C: Refine (continued)
Design and Discovery Curriculum Teacher Guide
167

Review the results of your survey
Using the survey results write the pros and cons next to each of the three design challenges.
Design Challenge Pros Cons
1
2
3
Select One design opportunity to address
Develop a Problem Statement
Write a clear problem statement. This is intended for someone who knows nothing about this problem. The problemstatement should:
• Begin with a clear, concise, well-supported statement of the problem to be overcome• Include data collected during the survey/observation in order to better illustrate the problem• Establish the importance and significance of the problem• Describe the target population
Refine the ProblemWorksheet: Session 8, Activity C
Design and Discovery Curriculum Teacher Guide
168

GoalAs a homework exercise students brainstorm possible solutions to their design project.
OutcomeStudents generate several solutions for their design project.
DescriptionUsing the SCAMPER process, students develop a list of possible solutions to theirproblem or improvement.
Supplies None
ProceduresSCAMPER
This activity is Step 3 of the design process: Brainstorm Possible Solutions To TheProblem. Now that students have one design project in mind, they are ready to considersolutions to their problem. In doing so, they should first consider what the desiredoutcome is. That is, how will they know when the problem is solved? The goal of thisexercise is to have them come up with five solutions to their design challenge. This issimilar to what they did in the potato masher in 2B Worksheet: SCAMPER and ThePotato Masher. However, now they are doing SCAMPER for their own design projects.
Ask: What is the desired outcome of the design? What do you want the product to do?
From the previous activities, students should be familiar with the creative thinkingprocesses. Revisit the SCAMPER technique for brainstorming. Have students reviewSCAMPER and the SCAMPER process applied to a potato masher from 2B: SCAMPERand The Potato Masher. SCAMPER should help them generate several ideas forsolutions to their design challenge.
Design and Discovery Curriculum Teacher Guide
169
Session 8, Activity D
Scamper to SolutionsIn This Session:
A Revisit(40 mins) Student Worksheet Student Discussion
+ H/W
B Research(40 mins) Student Worksheet Student Discussion
+ H/W
C Refine(40 mins) Student Worksheet
+ H/W
D SCAMPER to Solutions(H/W) Student Worksheet

Revisit Activity Mapping
1. Time permitting, students could also use Activity Mapping to help them focusand come up with solutions, 2C Worksheet: Design Opportunities areEverywhere.
Solution Criteria
1. Now that learners have a number of ideas that can serve as possible solutionsto their problem, it’s time to evaluate them systematically. Have them generatea variety of criteria and analyze their solutions with the criteria. This mightinclude such things as:
• It is practical.• It can be made easily.• It is safe.• It will not cost too much to make or use.• It is a new idea.• It is not too similar to something else.• It addresses the problem.
2. Have students review each solution. Using the criteria, they should identify andevaluate the relative strengths and weaknesses of possible solutions.
2. Depending on which of their solutions meet the criteria, ask students to furthernarrow their list of solutions to three that they will investigate in greater depth.
Wrap UpRemind students to keep careful notes of their decision-making process in their designnotebooks. Have them review their notes and ensure that they are keeping clearrecords of their process.
8D: Scamper to Solutions (continued)
Design and Discovery Curriculum Teacher Guide
170

You now need to consider possible solutions to your design project. In doing so, it is important to consider theoutcome of the design - what do you want the product to do? Use SCAMPER to come up with some solutions. Youdo not have to use all the steps of SCAMPER
Design Process Step 3. Brainstorm Possible Solutions to the Problem
Substitute (What else can be used instead? Other ingredients? Other materials?)Combine (Combine other materials, things, or functions.)Adapt (Can it be used for something else?)Minimise/Magnify (Make it bigger or smaller.)Put to other uses (New ways to use as is? Other uses if modified? Other people or places to reach?)Eliminate/Elaborate (Remove some part or materials, or make one section more detailed or refined.)Reverse/Rearrange (Flip-flop some section of the item or move parts around. Interchange components? Different sequence? Turn it upside-down?)
List your design solution ideas below:
1.
2.
3.
4.
5.
Review your solutions, asking yourself questions such as:
• Does it address the problem?• Is it practical?• Can it be made easily?• Is it safe?• Will it cost too much to make or use?• Is it too similar to something else?
Having answered the questions circle the three best solutions
Scamper to SolutionsWorksheet: Session 8, Activity D
Design and Discovery Curriculum Teacher Guide
171

Notes:

This session involves online research using computers withInternet access. It is ideal for each student to have his or herown computer to use during this session. If you do not haveaccess to computers, try to arrange a visit to the local librarywhere students can use computers. In this session, studentsplan out one of their design solutions by following Steps 4 and5 of the design process.
The first activity of this session 9A: Sample Design Brief, students read and discuss theparts of the design brief as a group, analyse the sample and think about writing theirown. In the next activity 9B: My Design Brief, students prepare their own design brief.In 9C: The User, students delve in deeper into who the users of the product will be andhow they will design the product to meet the user’s needs. In activity 9D: Patents andInventions, students use the government’s official patent Web site to dig into the worldof patents looking for products that might be similar to their own.
Supplies• Computers with Internet connections• Optional: Parts catalogues
Session 9
A Solution Taking Place
Design and Discovery Curriculum Teacher Guide
172
In This Session:
A Sample Design Brief(40 mins) Student Worksheet
B My Design Brief(40 mins) Student Worksheet
+ H/W
C The User(20 mins) Student Worksheet
D Patents and Inventions(20 mins) Student Worksheet Student Reading
+ H/W

In Session 9, students concentrate on the improvement and refinement of their design solutions by writing a designbrief and gathering information about inventors and inventions through the research of patents. A design brief isanother formal tool written by professional designers and engineers to begin to gather and describe importantdetails about the idea, the solution and other facts. While the design process informs the steps that students followto develop their projects, the design brief is used to record their own ideas and guide them through the designprocess. In this session, students start to think about realistic aspects of their projects, such as who will be usingtheir project. This is a perfect time to bring in mentors who assist students as they develop their projects. The useof the Internet is critical in making this research process effective. As students begin to explore the development ofinventions on various Web sites, they may think of new ideas that will further refine their design solutions. Key tothis session is the idea that designers and inventors take many different approaches to solving problems and theresult is a wide variety of design solutions.
Key Concepts
Design brief: A written plan that identifies a problem to be solved, its criteria, and its constraints. The design briefis used to encourage thinking of all aspects of a problem before attempting a solution.
Creating a Design BriefA design brief is the blueprint or road map for a project. Writing down ideas helps students think through theproblem and their ideas for a solution. The design brief is an evolving document that can and should be changedthroughout the design process. In helping students develop their design brief, it is best to encourage them to thinkbig and not limit themselves at this stage. They should do what they can to understand the problem throughobservation and visualizing a solution. At this point, they may even have multiple solutions. They should not see thedesign brief as limiting their thinking, but rather as a place to record, track and communicate their ideas.
Students are introduced to a design brief in 9A Worksheet: Sample Design Brief. The act of writing down ideas andplans strengthens critical thinking.
User ConsiderationsAs students develop their projects, it is important for them to remember that not all users will be like them. In thereal world, design agencies develop user profiles and usability requirements by gathering information about users.There are different strategies for this - definition and observations of different kinds of users, conducting formalusability studies, or doing surveys. They will want to understand, for example, people who are most likely to use anew product and people who are hesitant to use new products. Interviews are another means to acquire user data.
A Solution Taking PlaceKey Concepts: Session 9
Design and Discovery Curriculum Teacher Guide
173

This takes place through observation as well as interviews because it seems that when people are asked questions,as is typically done in market research, they may not answer honestly. there is a difference between what peoplesay and what they do. Students begin to consider who might use their products. Developing a user persona helpsthem to keep in mind the end user throughout the design process. Encourage students to observe people usingsimilar products to the one they are improving upon or creating and keep in mind the typical user as they developtheir project.
A patent is granted to the inventor by a country’s government and it gives the inventor the right to make, use andsell an invention for a set period of time. You can search patents at the Irish Patents Office(http://www.patentsoffice.ie/) to see if an invention has already been patented by someone else.
Gaining a patent can be a complex process. A solicitor is often sought out when applying for a patent, due to thecomplexity of the procedure. A patent application needs to be completed and submitted to the Irish Patents Office.A patent application consists of several parts: (1) the abstract; (2) the specification; (3) the claims; and (4) thedrawings. A brief abstract summarizes the invention. The specification describes the method and process of makingand using the invention. Claims conclude the specification section and legally define the boundaries of patents. Theclaims describe any unique features of the invention that need to be protected. The final piece of the patentapplication is drawings which illustrate the invention.
Trademarks protect words, names, symbols, sounds or colours that identify goods and services from those sold byothers. Trademarks can be renewed indefinitely. Some trademark owners use a TM (trademark) or SM (servicemark) symbol to indicate that they are claiming rights to the use of the trademark. The Nike® swoosh is a familiartrademark symbol. The ® designation is used once a trademark is registered in the Patent Office.
Copyrights provide the right to reproduce, distribute, perform, display or license original writing, music and worksof art. Copyright covers the expression of ideas and not the idea itself.
Key Concepts (continued)
Design and Discovery Curriculum Teacher Guide
174

GoalLearn the contents of a design brief.
OutcomeStudents learn how to write their own design brief.
DescriptionGroup review of a sample design brief for a string bass hand holder allows studentsto study the contents and purpose of a design brief before writing their own.Following a short introduction on what a design brief is and what it does, studentsread the sample design brief. A group discussion of each part of the brief assures thatstudents understand what they will be preparing in the next activity. They have timeat the end to review their notes and share their plans for the design brief with apartner.
SuppliesNone
PreparationReview 9A Worksheet: Sample Design Brief.
Procedures
1. Discuss students’ thinking about appropriate materials for different functionsin the home.
Design Brief
1. Introduce the activity as Step 4 in the design process. Write a Design Brief.Explain that they will be writing a design brief after studying a sample.
Session 9, Activity A
Sample Design Brief
Design and Discovery Curriculum Teacher Guide
In This Session:
A Sample Design Brief(40 mins) Student Worksheet
B My Design Brief(40 mins) Student Worksheet
+ H/W
C The User(20 mins) Student Worksheet
D Patents and Inventions(20 mins) Student Worksheet Student Reading
+ H/W
175

2. Describe what a design brief is and what it does.
What it is. A design brief is a short description of a design problem and aproposed solution. It describes the typical users and their needs, and states aproposed solution in terms of how it will solve the problem. A design briefincludes a sketch or sketches of the solution. The design brief provides aplanning tool for the project and is a living document that may be changedthroughout the design process.
What it does. The design brief is a way to clarify the problem that thedesigner-engineer is trying to solve. It doesn’t provide a lot of detail about thesolution but puts on paper the thinking and research about the problem tosolve. Often the act of writing and communicating the problem and proposedsolution helps the designer move along in the design process. The design briefalso serves to introduce the idea to others for feedback.
3. Have students read 9A worksheet: Sample Design Brief.
4. Review and discuss each section:
Wrap Up Organize students for writing rough drafts of the design brief.
Follow With Students write and present their own design brief in 9B: My Design Brief.
9A: Sample Design Brief (continued)
Design and Discovery Curriculum Teacher Guide
176

Design Process Step 4. Write a Design Brief
A Design Brief – What it isA design brief contains:
• a short description of a design problem• a proposed solution • the profile of a typical user• a proposed solution in terms of how it will solve the problem • a sketch or sketches of the solution • the basic requirements needed to produce a prototype
A Design Brief – What it does • It helps clarify the problem that the designer/engineer is trying to solve.• It doesn’t provide a lot of detail about the solution but puts on paper the thinking and research about the
problem. Often the act of writing and communicating the problem and proposed solution helps the designermove along in the design process.
• It also serves to introduce the idea to others for feedback.
Remember the design brief may be changed at any time throughout the design process.
Sample Design Brief: Bass Space (patent pending)Erica is a Design and Discovery student. She has played the string bass for a few years and remembers as abeginner struggling with keeping her fingers together. This is Erica’s design brief.
Describe the problem. Write a statement that focuses on what’s wrong and not working. Recall the features of aproblem statement
• Begins with a clear, concise, well-supported statement of the problem to be overcome.• Includes data collected during the survey/observation in order to better illustrate the problem.• Establishes the importance and significance of this problem.
When people start playing the string bass, most beginners cannot hold their hand correctly, preventing them frombeing able to play properly. As a string bass player, I have had personal experience with this and have seen otherbeginner string bass players also struggle with this.
Describe how the current product is used. Provide a context for the problem and explain any related solutionsthat resemble or relate to the problem but have failed to address the problem.
Currently, there is not a product for this. Sometimes, a string bass teacher may tell her students to tape their fingerstogether.
Sample Design BriefWorksheet : Session 9, Activity A
Design and Discovery Curriculum Teacher Guide
177

Describe a typical user (user profile). This addresses who uses the product and how their needs are or are notmet. How will they benefit from a different product?
A typical user is a beginning string bass player. They struggle with holding their hand correctly and keeping theirfingers in place. They will benefit from a product that helps them keep their fingers and hands in the correct formto learn to play the string bass. They will be much more comfortable and able to practise for longer periods of time.
Propose a solution: Describe how it will work, and how it solves the problem. Explain the features.
I’m not sure what type of material I would use, but the Bass Space would allow the player to keep her two middlefingers together and separate from her pointer finger and pinky. It would be adjustable in size depending on the sizeof the person’s hands.
Draw a quick sketch of your ideas. This is a rough sketch and can include drawings of different angles of thesolution.
Describe the basic requirements that will best suit the proposed product. For example, this describes thequality (for example: flexible or sturdy) and the type of materials (for example: metal or plastic).
The material needs to be stiff yet flexible to allow hand movement, it cannot break easily, it has to be adjustable fordifferent size hands, will need to slide on and off easily, must be low on the fingers to allow the fingers to bend,must be cost efficient, must hold hand correctly, and it must be comfortable.
9A Worksheet: Sample Design Brief (continued)
Design and Discovery Curriculum Teacher Guide
178
GoalRefine and describe a problem to solve and a proposed solution.
Outcome Each student introduces his or her idea by completing and presenting a design brief.
DescriptionStudents use this time to prepare a draft of the design brief and draw rough sketchesin their design journals. They write a final draft and draw sketches on the design briefworksheet or in their journal. Each student uses the design brief to give a shortpresentation about the problem and proposed idea.
Supplies None
PreparationNone
Procedures
1. Students work on their own design briefs.
2. Allow enough time for presentations and wrap up. Announce a deadline for thefinal draft and sketches.
3. Students should plan a 2-minute presentation of their problem and theproposed solution.• State the problem and describe the needs of the user.• Describe the solution.
Wrap UpHave students reflect and write about: In what ways did writing my design brief helpme with a solution?
Follow WithActivity 9C: The User helps students think about the person(s) for whom they aredesigning their projects.
Session 9, Activity B
My Design Brief
Design and Discovery Curriculum Teacher Guide
In This Session:
A Sample Design Brief(40 mins) Student Worksheet
B My Design Brief(40 mins) Student Worksheet
+ H/W
C The User(20 mins) Student Worksheet
D Patents and Inventions(20 mins) Student Worksheet Student Reading
+ H/W
179

Writing your own design brief should help you clarify your ideas and think about them systematically. This is aworking document: It will be your road map as you develop your ideas.
Describe the problem. Write a statement that focuses on what’s wrong and not working. Recall the features of aproblem statement:
• Begins with a clear, concise, well-supported statement of the problem to be overcome• Includes data collected during the survey/observation in order to better illustrate the problem.• Establishes the importance and significance of the problem
Describe how the current product is used. Provide a context for the problem and explain any related solutionsthat resemble or relate to the problem but have failed to address the problem.
Describe a typical user (user profile). This addresses who uses the product and how their needs are or are notmet. How will they benefit from a different product?
My Design BriefWorksheet: Session 9, Activity B
Design and Discovery Curriculum Teacher Guide
180

Propose a solution: Describe how it will work, and how it solves the problem. Explain the features.
Draw a quick sketch of your ideas. This is a rough sketch and can include drawings of different angles of thesolution.
Describe the basic requirements that will best suit the proposed product. This describes the quality (forexample: flexible or sturdy), and the type of materials (for example: metal or plastic).
9B Worksheet: My Design Brief (continued)
Design and Discovery Curriculum Teacher Guide
181

GoalLearn how to define the user of the product.
OutcomeIdentify a typical user of the product in order to help focus the development of theproduct.
DescriptionStudents look at a variety of familiar objects from the perspective of a typical user. Theylearn how to identify users of products and ultimately define their user base for theirprojects.
Supplies None
PreparationBring in a variety of familiar objects that appeal to different ages and genders. Thismight include toys (for different ages), kitchen items, tools, and so forth.
ProceduresShow the group one of the familiar objects. Ask them:Who typically uses this product?What is their gender? Age? Experience with this type of product?How is the product designed for this type of person (user)?Where does the user use this product?What motivates the user to use it?Now, describe a scenario of someone using this product:Give the person an identity (name, age, gender, occupation, etc.).Describe the setting in which the person is using the product.Explain what the person’s goals are. What do they want to get out of this experience?Tell how they use this product.Summarize how their goals are met by this product.Follow the first procedure for a few other familiar objects.
Session 9, Activity C
The User
Design and Discovery Curriculum Teacher Guide
182
In This Session:
A Sample Design Brief(40 mins) Student Worksheet
B My Design Brief(40 mins) Student Worksheet
+ H/W
C The User(20 mins) Student Worksheet
D Patents and Inventions(20 mins) Student Worksheet Student Reading
+ H/W

Ask students how this exercise can help them with their projects. Creating an identityof the user helps the experience of designing something become more concrete.Without narrowly defining the user, a product that tries to please too many differenttypes of people will most likely fail.Now ask students to consider their own projects and who they see as the typical user.They should come up with a user scenario on their handouts.
Wrap UpStudents can share their user scenarios in small groups and get feedback from eachother.
Follow WithActivity 9D Patents and Inventions
The User (continued)
Design and Discovery Curriculum Teacher Guide
183

Now that you have a particular design idea in mind it is time to concentrate on the improvement and refinement ofyour design solution by gathering information about a typical user. It is also a good idea at this stage to look at otherinventions and to find out about patenting your idea. This will help you see that there are many different approachesto solving problems and the result is often a variety of design solutions.
Design Process Step 5. Research Your Solution.
The User
Think about your product area. Consider the following questions.
• Who will use this product?
• What is the person’s gender? Age? Experience with this type of product?
• Where will they use this product?
• Why will they use this product?
• What will they be doing to operate or use this product?
Using the above information, describe one person who will be the user. What are there characteristics and thescenario in which they will use the product? You may include a drawing of the person using the product if that helps.
What considerations will you need to keep in mind when you design the product to meet the needs of the user?
The UserWorksheet: Session 9, Activity C
Design and Discovery Curriculum Teacher Guide
184

GoalUse research on similar design solutions to refine ideas.
Outcome Solutions are further refined or revised after research.
DescriptionIn this activity, students explore Patent Web sites to find and learn from patents similarto their idea.
Supplies Computers with Internet connections
PreparationIdeally, each student will have a computer to work on for this activity. If computers arenot available, you may print out suggested examples.
Procedures
Patent Scavenger Hunt
1. Begin by asking students to go on a short scavenger hunt around the room.Have them look at manufactured objects (furnishings, electronic devices,appliances) in the room and see if they have a manufacturer’s label on themwith a patent number (or the words Patent Pending.)
2. Discuss the purpose of patents. At the very basic level, according to the PatentOffice, “A patent is a grant issued by the governments giving inventors theright to exclude all others from making, using, or selling their inventions.Thepatent system protects inventors and records new inventions.
Patent Search for an Idea or a Problem
1. A patent search can provide useful information at any point in the designprocess. Begin by having students learn how to search Patent and TrademarkWeb sites.
2. Note: If you do not have computer access for all students, it is suggested thatyou print a few examples of patents (the first page) and the images.
Session 9, Activity D
Patents and Inventions
Design and Discovery Curriculum Teacher Guide
185
In This Session:
A Sample Design Brief(40 mins) Student Worksheet
B My Design Brief(40 mins) Student Worksheet
+ H/W
C The User(20 mins) Student Worksheet
D Patents and Inventions(20 mins) Student Worksheet Student Reading
+ H/W

Patent Search for Your Design Solutions
1. Now that students are familiar with how to do a patent search, they canconduct a search for their own design solutions. This process helps them tosee if anyone else thought of an idea like theirs, and if so, how those solutionsare similar to or different from their ideas.
2. To begin, they will need to come up with key words to search.
3. Once they conduct a search and find the results, they can explore eachseparate patent to find out about other inventors’ approaches to problems andsee that there are quite a variety of engineering solutions, materials, anddesign ideas for the same problem!
4. As they conduct the search, they should ask themselves the followingquestions:
How do other inventors view the nature of the problem?a. In looking at the various patents that are similar, are the inventors
designing for the same “user”? How do the different solutions show thatinventors may consider different aspects of a user’s life, environment, andbehaviors?
b. What materials have other inventors used to address the problem? Howhave others manufactured their inventions?
c. Have other inventors’ solutions caused unintended problems, like wastedue to packaging?
d. What do other inventors’ sketches/designs look like? What are thesimilarities/differences in the design solutions?
e. What components have other people used? Have they considered similar orvery different components for their design solutions? Have they used thesame essential components but arranged them in a different way? Dodifferent parts of the various inventions captivate you?
f. How can you recombine their ideas to improve on the solution to theoriginal problem?
9D: Patents and Inventions (continued)
Design and Discovery Curriculum Teacher Guide
186

Students may find themselves stimulated by the ideas on the patent site. They maywant to use others’ ideas to improve upon their own design ideas and solutions.Encourage them to mingle their ideas and see what new and creative ideas they cancome up with.
Wrap Up Students should be keeping detailed records in their design notebooks; be sure thatthey record any changes and additions throughout the process and date everything!
Have students read 9D Reading: Great Inventors and try looking up the patents for someof these inventions.
9D: Patents and Inventions (continued)
Design and Discovery Curriculum Teacher Guide
187

In this activity, you will explore the patent website to find and learn from patents similar to your idea. You will alsoexplore invention Web sites for inspiration and ideas for your project.
Remember you should be keeping detailed records in your design notebook. Be sure to record anychanges and additions throughout the process and date everything!
Patent Search for a Problem or IdeaVisit the patent website http://www.patentsoffice.ie/
Patent Search for Your Design SolutionsNow that you are familiar with patents, you can use the patent site for your own research on design solutions. Thisprocess will help you to see if anyone else thought of an idea like yours and if so, how those solutions are similarto or different from your ideas. It should also help you plan your solution. If you find that your solution has alreadybeen patented or that there is another idea that is better than yours, you may need to take a few steps back andrevisit your other problems and/or solutions.
How to do a search:1. Come up with key words to search.2. Once you have some results, explore each separate patent to find out about other inventors’ approaches
to problems and see that there are quite a variety of engineering solutions, materials and design ideas tothe same problem!
Ask yourself the following questions:• How do other inventors view the nature of the problem?• In looking at the various patents that are similar, are the inventors designing for the same "user"?• What materials have other inventors used to address the problem? How have others manufactured their
inventions?• Have other inventors’ solutions caused unintended problems, like waste due to packaging?• What do other inventors’ sketches/designs look like? What are the similarities/differences in the design
solutions?• What components have other people used? Have they considered similar or very different components for
their design solutions? Have they used the same essential components but arranged them in a differentway?
• Do different parts of the various inventions captivate you? How can you recombine their ideas to improveon the solution to the original problem?
Patents and InventionsWorksheet: Session 9, Activity D
Design and Discovery Curriculum Teacher Guide
188

Other useful Websites that you might like to check out include:
• Rolex* Awards for Enterprise: http://www.rolexawards.com*• US Inventors Hall of Fame*: http://www.invent.org/index.asp* • Invention Facts and Myths: http://www.ideafinder.com/history/of_inventions.htm*.• HowStuffWorks: http://www.howstuffworks.com*• Timeline of Inventions: http:www.cbc4kids.cbc.ca/general/the-lab/history-of-invention/default.html*
Worksheet: Patents and Inventions (continued)
Design and Discovery Curriculum Teacher Guide
189

Margaret Knight, patent #220,925 (1879) Paper Bag MachineKnight, the "female Edison," invented a square-bottomed paper bag machine that allowed folded bags to standopen by themselves. She received 26 more patents, including shoe manufacturing methods and improvements torotary engines.
Harriet Williams Strong, patent # 374,378 (1887), Dam and Reservoir ConstructionStrong, a widow with four children, registered patents on flood control/water storage dams and irrigation systems.The dams in her system used the pressure of the water itself in a lower dam to structurally support the higher dam.She became known as "The Walnut Queen" as her system was widely adopted, especially for irrigating walnutgroves.
Elisha Gray and Alexander Graham Bell, patent #174,465 (1876) Telegraphy.In the 1870s, two inventors Elisha Gray and Alexander Graham Bell both independently designed devices that couldtransmit speech electrically (the telephone). Both men rushed their respective designs to the patent office withinhours of each other, Alexander Graham Bell patented his telephone first. Elisha Gray and Alexander Graham Bellentered into a famous legal battle over the invention of the telephone, which Bell won.
Orville and Wilbur Wright, patent #821,393 (1906) Flying Machine.In 1900, the Wright brothers, Orville and Wilbur, successfully tested their new 50-pound biplane glider with its 17-foot wingspan and wing-warping mechanism at Kitty Hawk, in both unmanned and piloted flights. During 1902, thebrothers flew numerous test glides using their new glider. After months of studying how propellers work the WrightBrothers designed a motor and a new aircraft sturdy enough to accommodate the motor's weight and vibrations.The craft weighed 700 pounds and came to be known as the Flyer.
Janet L. Rideout and Martha H. St. Clair, patent #4,724,232 (1988), Treatment of Human Viral Infections.Rideout, a chemist who worked with retro-virus specialist St. Clair and three other colleagues, discovered that theAZT compound was effective in combating the AIDS virus.
Garrett Augustus Morgan, patent #1,475,824 (1922) Traffic Signal.Morgan was an African-American businessman and inventor. Among his inventions was an early traffic signal, thatgreatly improved safety on America's streets and roadways. Indeed, Morgan's technology was the basis for moderntraffic signal systems and was an early example of what we know today as Intelligent Transportation Systems.
Great InventorsReading: Session 9, Activity D
Design and Discovery Curriculum Teacher Guide
190

Notes:

Making, Modelling and Materializing
10blue arrow starter 24/11/05 10:32 pm Page 15

10contents 24/11/05 10:48 pm Page 4

In This Session:
A Project Analysis(40 mins) Student Worksheet
B Conceptual Drawing: Thinking on Paper(40 mins) Student Worksheet
C Checking in on the Design Process(20 mins) Student Worksheet
D Materials and Modelling Plans(20 mins + H/W) Student Worksheet Student Reading
This session begins with a project analysis to examine the cost, safety and practicalityof each design solution. The session also helps students develop a better understandingof the visual aspects of their project as they make detailed drawings of their ideas.Having checked their progress they then look at the materials needed to build theirmodel.
In the first activity, Activity 10A: Project Analysis, students look at whether or not theirproposed solution is feasible. Looking at aspects such as cost, durability and safety maylead to further changes.
In Activity 10B: Conceptual Drawing: Thinking on Paper, students learn how drawinghelps the thinking process. Having made a series of conceptual drawings in their designnotebooks they can now better visualise their design and have an idea of what isneeded to complete the project.
In Activity 10C: Checking in on the Design Process, students look at a checklist of stepsthat follow the design process to determine how far they’ve come. Looking at theremaining steps and referring to the Design and Discovery Planner will give them anidea of what they have got to do in the time remaining.
In the final activity, 10D, students have time in class and at home to decide on, andcheck the availability of, the materials they need to build their model.
Session 10
Project Analysis andPlanning For Models
Design and Discovery Curriculum Teacher Guide
191

Supplies
A variety of materials to build models.Supplies for Structure
• Foam (Styrofoam* in sheets and several shapes, including foam tubes for pipeinsulation)
• Foam core board• Balsa wood (sheets and pre-cut strips from craft supply stores)• Modeling clay• Aluminum foil• Pipe cleaners and plastic straws• Cardboard (tubes, boxes of all sizes, flat pieces)• Paper (including poster board or card stock weights• Lego* set• Dowels, bamboo skewers• Wheels
Other Optional Structural supplies• Recyclable materials such as wine corks, aluminum soda cans, bubble wrap,
packaging and twist ties
Parts and Materials To Connect Things• String• Wire• Rubber bands• Rubber tubing• Tape (duct, masking, packaging, and electrical)• Glues (epoxy, superglue, glue sticks, glues for hot glue gun and rubber cement)• Hinges• Nuts and bolts, washers, assorted screws• Nails, thumbtacks
Tools• Several sets of each: pliers, saw, hammer, screwdriver, hot glue gun, tin snips,
scissors, Swiss Army knife, measuring tape, stackable measuring cups andspoons.
10: Project Analysis and Planning For Models (continued)
Design and Discovery Curriculum Teacher Guide
192

A key component of the design process is the making of sketches and diagrams to clarify their ideas. Many productshave come about because of "napkin drafting", a cruder and more simplistic way to communicate ideas. Encouragestudents to doodle, sketch and make diagrams before the actual construction occurs. This session concentrates onusing elements of mechanical drawing to show the students how the visualisation of a project can help to refinethe needs of the design.
Although computers are usually used nowadays to produce mechanical drawings, hand drawings of the design arestill the most widely used communication tool in the engineering community, especially in the revision stage. Theprimary reason for this is because drawings often serve as documentation of requirements. They are used toproduce quotes, determine manufacturing methods or processes and inspect parts to ensure they meet therequirements defined within the drawings. Making a readable diagram ensures that the design team members canlook at it and understand what is required.
Drawing the design is an important step in refining the project and identifying some issues with the design. It is agood idea to stress to the students that if they change something to get around an issue that they should record intheir design notebooks what the issue was and how they changed the design.
Drawing MethodsThis session serves as an introduction to basic drawing techniques. Students should come to understand thatshowing their project from all angles and with component pars will help them to identify potential problems and torefine the project without having to build it first.
More about Conceptual DrawingLo, Jack. The Patent Drawing Book. CA:Nolo Press, 1997.Walker, J.R. Exploring Drafting. Tinley Park, IL: Goodheart-Wilcox, 1996
Project Analysis and PlanningFor ModelsKey Concepts
Design and Discovery Curriculum Teacher Guide
193

In This Session:
A Project Analysis(40 mins) Student Worksheet
B Conceptual Drawing: Thinking on Paper(40 mins) Student Worksheet
C Checking in on the Design Process(20 mins) Student Worksheet
D Materials and Modelling Plans(20 mins + H/W) Student Worksheet Student Reading
GoalTo carefully examine solution ideas.
DescriptionStudents review their solution and consider the feasibility from different angles such assafety, cost, and durability. They get feedback from other people about their solution.
Before Going HomeTell students that they need to carefully examine their solution before proceeding to thenext steps. They should be sure that their solution is feasible. It is not too late to revisitthe other problems and/or solutions from the earlier sessions if they come acrossstumbling blocks. Encourage them to talk to as many people as possible about theiridea. They will need to do testing throughout their project development to ensure thattheir project is safe, durable, and works the way they want it to.
Next DayStudents should be prepared to check in with the teacher before moving ahead.
Session 10, Activity A
Project Analysis
Design and Discovery Curriculum Teacher Guide
194

Now that you have narrowed down your design solution, you are ready for Step 6 of the design process. You needto do testing throughout your project development to ensure that your project is safe, durable, and works the wayyou want it to. It is also necessary to analyse the solution for cost, safety and other implications of the idea.
Design Process Step 6. Refine Your Solution.Before you continue give your design project more thought and answer the following questions about your designsolution.
Is my idea practical? If so, how?
Can it be made easily? How?
Is it as simple as possible? Explain.
Is it safe? How?
Project analysisWorksheet: Session 10 Activity A
Design and Discovery Curriculum Teacher Guide
195

Is my project durable? Will it withstand use, or will it break easily? Explain.
Will it cost too much to make or use? Explain.
Is my idea really new? Explain.
Is my idea similar to something else? Explain.
Will people really use my product? How?
10A Worksheet: Project Analysis (continued)
Design and Discovery Curriculum Teacher Guide
196
In This Session:
A Project Analysis(40 mins) Student Worksheet
B Conceptual Drawing: Thinking on Paper(40 mins) Student Worksheet
C Checking in on the Design Process(20 mins) Student Worksheet
D Materials and Modelling Plans(20 mins + H/W) Student Worksheet Student Reading
Session 10, Activity B
Conceptual Drawing:Thinking on Paper
Design and Discovery Curriculum Teacher Guide
197
GoalLearn how conceptual drawings help fine-tune a design.
OutcomeLearners make conceptual drawings of their projects that show all the parts of thedesign.
DescriptionStudent designers take their project another step farther along the design process asthey make conceptual drawings of their project ideas. They learn that the drawingprocess is a helpful part of refining a design concept, bringing to light practicalconcerns that need to be resolved, such as how component parts fit together. Drawingfrom a variety of perspectives helps illustrate all the features of a design and helps thedesigner communicate ideas to others.
SuppliesNone
PreparationNone
ProceduresImagine…
1. Start with a visual imagery activity. Ask designers to close their eyes or resttheir heads on their arms and try to picture their project. Speak slowly withthinking time between the questions and statements.
• Try to get a picture of your project in your mind. Can you see it?• Try to picture the user using the product. Can you picture the device doing
its job? • Imagine its size. How big is it? • Can you picture the materials it’s made of? • How about the parts? Try to imagine each of them. Imagine one part
connecting to another. Can you see how they work together?

2. Ask students to look up and talk about their ability to visualize their design.Ask how knowing what it looks like helps a person design a product (knowingthe end result makes it easier to design; it’s a way of refining and improving adesign; lets the person look at parts in relation to the whole; conceptual andpractical problems that need work will become evident).
Drawing Basics
1. Discuss how that, in addition to drawings made along the way, final drawingsare made, too, before a product can go into production. Why? Drawings areneeded if the designer applies for a patent; also, before the product ismanufactured, drawings aid communication between the designers, engineers,materials people, and the manufacturer.
2. Discuss how seeing the object as a set of shapes is important to sketchingideas. If you know how to draw each of the shapes, then drawing the object iseasier. Explain that designers show an object from several views. Have themlook at the first drawing on the worksheet and discuss what the differentviews show about the object. Tell students that drawing their project mightinvolve two or three drawings, one of each unique side, and maybe the innerworkings as well. They may want to label parts and use arrows to show howparts move.
3. For the second set of drawings, ask students to try to match the objectsshown in 3-D on the top row in their front, side and top views.(answers: A=3, B=2, C=1,D=4, E=9, F=8, G=5, H=6, and I=7)
4. Ask students if they recognize the next set of drawings (different views of thecrankshaft toy.) Can they tell what views they are seeing? Have them labeleach figure with its viewpoint: top, interior, and side. Each drawing helps showdifferent aspects of the device.
Begin Drawing
1. Start students on drawing a series of sketches of their design in their designnotebooks. The first sketches will help them think through their design; otherswill be attempts at showing it as they see it in their mind’s eye. Suggest thatthey may want to start with the most obvious features of the design and thenmove toward the ones that have not been resolved. Labels, notes, and arrowsshowing the motion of moving parts are helpful.
10B: Conceptual Drawing: Thinking on Paper (continued)
Design and Discovery Curriculum Teacher Guide
198

2. Encourage students to draw repeatedly and not worry about making a perfectrendering—this is a thinking step, and the successive drawings are a helpfulrecord of their thinking process. Remind them to draw the device from top,side and front views, and even an interior cutaway view if it is helpful.
3. After 10 or 15 minutes of drawing, ask students to pause for a moment, andencourage them to talk about their efforts. Ask them to recommend tricks andtips they are finding that might be helpful to their fellow drafters—theirsuggestions can be really encouraging at this stage. Remind students to drawtheir design from all sides, and draw each view large enough to label partsand motion, and then have them continue.
Wrap UpHave students talk about their drawings and show them to one another. What do theylike about them? What new design considerations came up as a result of drawing? Isthere a drawing technique they can recommend? The next step will be to model theirdesign, and having a strong image of it will be helpful. Suggest that students continuedrawing and refining their ideas before the next session.
Also suggest that students may want to make other visual representations of their ideassuch as collages.
Follow WithSession 10C, Checking in on the Design Process.
10B: Conceptual Drawing: Thinking on Paper (continued)
Design and Discovery Curriculum Teacher Guide
199

Drawing From All SidesDrawing your ideas can help you visualise your plan and will be very useful when you make your model. You mayfind it very useful to draw the different components and parts of your project from different perspectives. You willprobably have several drawings of your project as your ideas evolve.
Design Process Step 7. Prepare Design Requirements and Conceptual Drawings.
Example of Conceptual Drawing
Compare the 3-D drawing of the object below to the three views of the object on the right.
What do the three views show you about the object that you didn’t know about the 3-D version?
Conceptual Drawing:Thinking on PaperWorksheet: Session 10, Activity B
Design and Discovery Curriculum Teacher Guide
200

2. Match the object in the top row with its orthographic sketch.
3. What object is shown here? Label the different figures: interior, top and side.
Now You TryIn your design notebook try your hand at conceptual drawings. Be sure to draw different views as well as individualdrawings of the components and parts. Make lots of drawings. Make them large enough to label components andshow the direction of any movement that may be appropriate to your design. A video on the Bass Hand project andother project examples can be found at www.intel.com/education/design/resources/project_examples.htm
10B Worksheet: Conceptual Drawing: Thinking on paper (continued)
Design and Discovery Curriculum Teacher Guide
201

In This Session:
A Project Analysis(40 mins) Student Worksheet
B Conceptual Drawing: Thinking on Paper(40 mins) Student Worksheet
C Checking in on the Design Process(20 mins) Student Worksheet
D Materials and Modelling Plans(20 mins + H/W) Student Worksheet Student Reading
GoalUnderstand the design project timeline.
OutcomeStudents know where they are and what comes next on their design project.
DescriptionStudents review a checklist for their design project and look ahead to what they will bedoing. It is not a direct and linear progression through the series of steps. The steps maybe repeated, and there may be small cycles between some of the steps. While they seethat checklist steps follow the design process, students also discuss the non-linearnature of design.
SuppliesNone
PreparationNone
Procedures
1. Introduce the session by asking students to think about where they are withtheir project—closer to the beginning, or to the end? Somewhere near themiddle? How can they tell? Introduce the checklist worksheet as an organizerfor the work they have done and will be doing in order to complete the designproject—a refined working prototype.
2. Discuss the steps in the checklist and point out that while the checklist followsthe design process, the design process is not linear with one step alwaysfollowing another. Some steps are revisited time and again; others cause thedesigner to change direction. The process changes as the designer’s ideaschange.
3. Review the schedule. Refer to the Design and Discovery Planner. Discuss goalsand work time available in and out of class time.
202
Session 10, Activity C
Checking in on theDesign Process
Design and Discovery Curriculum Teacher Guide

4. Allow time for students to review their progress, complete the checklist, anddiscuss any questions that come up.
NOTE In the Teacher Guide and the Student Booklet the entire 10 steps of the designprocess are mapped out. While emphasising the importance of, and thedifference between, a model and a prototype, you may decide, depending ontime, facilities and materials available, that the student only needs to buildeither a model or a prototype. This would allow more time (approx. 7 x 40minutes) for planning, construction and evaluation.
Models: Models can be visual representations of a total design that is nonfunctional.They can represent some aspect (form or function) of a specific component.Prototypes: Prototypes tend to demonstrate some aspect of the design as a whole,either its form, function or both.
Wrap UpDiscuss any questions about the design process and review expectations for the projectwork ahead.
10C: Checking in on the Design Process (continued)
Design and Discovery Curriculum Teacher Guide
203

The Design Process: Getting From “Think” To “Thing”
The checklist below is adapted from the design process steps. This is a tool to keep you organised and thinkingabout where you have been and where you want to go. It would also be a good idea, at this stage, to look at theplanner at the beginning of the module to check how much time you have left to work on your project before theend-of-year exhibition.
1. Identify a design opportunity. (Session 8)
Identified about 10 design opportunities (needs, problems, or cool things to design). Narrowed the list of opportunities to three for further research.
2. Research the design opportunity. (Session 8)
Refined my design opportunities with interviews and other data-gathering research. Selected one design opportunity to address. Wrote a problem statement to clarify and explain to anyone what I will solve with a design solution.
3. Brainstorm possible solutions to the problem. (Session 8)
Expanded my possible solutions using SCAMPER and other research. Evaluated my solutions using criteria that we determined. Narrowed my solutions to three possibilities. Began thinking about the types of materials I could use for my solutions.
4. Write a design brief. (Session 9)
Wrote a design brief with a problem statement, description of user needs, a proposed solution, anda sketch of the solution.
5. Research your solution. (Session 9)
Researched and refined my proposed solution using the U.S. Patent Office Web site and otherresources.
Took notes and wrote down information from my research.
Checking in on the Design ProcessWorksheet: Session 10, Activity C
Design and Discovery Curriculum Teacher Guide
204

6. Refine your solution. (Session 10)
Interviewed experts and possible users to analyze my project for feasibility, safety, and otherimplications of my solution.
Researched materials and methods that would be appropriate for constructing my project. Conducted a project analysis to consider any changes to my solution.
7. Prepare design requirements and conceptual drawings. (Session 10)
Developed design requirements that focused on the needs of the user. Completed conceptual drawings.
8. Build models and component parts. (Sessions 10 and 11)
Analyzed my project design for its systems, components, and parts. Planned models to build and what each model would test or be able to demonstrate. Built a model or models of components of my design. Developed a project plan for completing my design.
9. Build the prototype. (Session 12)
Conducted further research, model building, and testing, as needed to complete a workingprototype.
Developed specifications. Completed first working prototype. Analyzed prototype for functional improvements.
10. Improve your solution. Test, evaluate and revise. (Session 13)
Prioritized improvements needed and built new or revised prototype to meet priorities. Evaluated prototype for function, feasibility, safety, aesthetics, and other criteria.
10C Worksheet: Checking in on the Design Process (continued)
Design and Discovery Curriculum Teacher Guide
205

GoalLearn about available materials and plan model(s) to build.
OutcomeKnow about available materials, select those useful for their needs, and plan modelbuilding.
DescriptionAfter a brief introduction to the variety of materials available for modeling, studentshave time to study the materials and plan what models they want to build. Thematerials are organized into three groups: materials for structure, materials forconnections, and tools.
Supplies A variety of materials to build models.(See list on page 192)
Preparation
1. Gather the materials well in advance of this session. Send home information toparents and request donations of used building materials or any of thesuggested recyclable items. Purchase what is not supplied or donated.
2. On the day of the session, lay out the modeling materials organized by: a) thingsto build with, b) things for connecting and attaching, and c) the tools.
ProceduresPlanning
1. Introduce the modeling materials. Explain, demonstrate, and answer students’questions about any unusual or unfamiliar materials or tools. Build a commonvocabulary as you introduce and students study the materials.
2. Plan what to model. Have students complete Worksheet Activity 10D, answeringthe questions in their design notebooks.
Session 10, Activity D
Materials and Modelling Plans
Design and Discovery Curriculum Teacher Guide
In This Session:
A Project Analysis(40 mins) Student Worksheet
B Conceptual Drawing: Thinking on Paper(40 mins) Student Worksheet
C Checking in on the Design Process(20 mins) Student Worksheet
D Materials and Modelling Plans(20 mins + H/W) Student Worksheet Student Reading
206

3. During this planning time, students should select and manipulate differentmaterials as they plan. Encourage them to make notes about the materials thatthey study: their flexibility, strength, and their suitability as a modeling material.
Wrap Up Ensure that each student has a plan and a clear purpose for constructing at least onemodel.
Follow With Activity 11A: Making Models provides the opportunity for students to consider thestructure of their projects.
10D: Materials and Modelling Plans (continued)
Design and Discovery Curriculum Teacher Guide
207

In this activity, you will start to plan your model. Like anything, the more planning you do in advance, the better yourchances of achieving what you want. It’s best to put answers to the questions below in your design notebook.
A Model is a small but exact copy of something
1. What do you want or need a model of? (List at least three possibilities.)
2. For each model possibility, consider the following questions and answer them in your design notebook:
• Is this a system or a component of your design project?• What will this model help you understand about your idea?• Will it be a small or full-scale version?
3. As you plan, you may select and manipulate different materials. Be sure to make notes about thematerials that you study: their flexibility, strength, and their suitability as a modeling material. Fill out thechecklist below and write a list of what materials are available in school and what you need to getyourself and bring into the next class.
Material Available in school Must bring in
Tip: When planning your model, it is better to plan to build a bigger model so that the details can be seen, tested,and understood.
Materials and Modelling PlansWorksheet: Session 10, Activity D
Design and Discovery Curriculum Teacher Guide
208

In This Session:
A Making Models(3 x 40 mins) Student Worksheet
+ H/W
Students’ design projects move to the tangible and testable.This session provides time to build and test models ofcomponents, systems, or the product itself. In the singleactivity for the session, 11A: Making Models, students areencouraged to be methodical as they build and report on theirmodels, tests, and results in their design notebooks. This is asession where mentors can support students’ work and helpthem take time to reflect on results and be thoughtful aboutappropriate next steps.
SuppliesA variety of materials to build models.
Supplies for Structure• Foam (Styrofoam* in sheets and several shapes, including foam tubes for pipe
insulation) • Foam core board • Balsa wood (sheets and pre-cut strips from craft supply stores) • Modeling clay • Aluminum foil • Pipe cleaners and plastic straws • Cardboard (tubes, boxes of all sizes, flat pieces) • Paper (including poster board or card stock weights)• Dowels, bamboo skewers • Wheels
Other Optional Structural supplies• Recyclable materials such as wine corks, aluminum soda cans, bubble wrap,
packaging peanuts, and twist ties • Sample items (for students to acquire and use in larger constructions): PVC pipe
and connectors, lumber (plywood and 2x4s) of different sizes
Session 11
Making it! Models,Trials and Tests
Design and Discovery Curriculum Teacher Guide
209

Parts and Materials To Connect Things• String• Wire• Rubber bands • Rubber tubing • Tape (duct, masking, packaging, and electrical) • Glues (epoxy, superglue, glue sticks, glues for hot glue gun, and rubber
cement) • Hinges • Nuts and bolts, washers, assorted screws • Nails, thumbtacks
Tools• Several sets of each: pliers, saw, hammer, screwdriver, hot glue gun, and tin
snips
Session 11: Making it! Models, Trials and Tests (continued)
Design and Discovery Curriculum Teacher Guide
210

In This Session:
A Making Models(3 x 40 mins) Student Worksheet
+ H/W
GoalLearn how models contribute to design.
OutcomeBuild models, evaluate results, and consider design modifications.
DescriptionStudents work on their models of the project or trials of components, systems, orsubsystems. They are encouraged to be methodical by keeping records of what theyplan to construct and why, and what the results show for next steps or modificationsto their design.
SuppliesA variety of materials to build models.(See list on page 209)
Preparation• Make sure you have a good supply of materials.
Procedures
1. Have students review the worksheet.2. Discuss the value of good records as they build and learn about their design.
Point out that they need to take the time to be methodical and write downwhat they plan to do and why. As they build and think about what themodeling process shows them, they should keep records about what thedesign issues come up as they build models. When they complete a model,they “test” it, gather data about results, and write notes about modificationsand next steps which may be another model, depending on time available.
3. Clean up and organize storage or transport of models home for further work.
Wrap UpHave all model makers show what they built and state one or two things that theylearned in the process.
Follow WithSession 12 Prototype Practicalities allows students to develop the next stages of theproject.
Session 11, Activity A
Making Models
Design and Discovery Curriculum Teacher Guide
211

It is helpful to keep good records of your model building efforts. Good records allow you to adjust your design basedon what you learn from each model you build. For each model record your plans, purpose, tests and results, andnext steps using the questions below. You may find it easier to use your design notebook for these records.
Design Process Step 8. Build Models and Component Parts.
PlansWhat do you want to build a model of? Is this a system or component of the product?
PurposeWhat will this model help you understand about your design?
Tests and ResultsWhat did your model show you about your design? What functions did you test? Did it function as intended? Did itmeet requirements? Did the form suit you? Are the materials suitable? What modifications do you need to make?What new ideas do you have for your design?
Making ModelsWorksheet: Session 11, Activity A
Design and Discovery Curriculum Teacher Guide
212

Next StepsWhat do you want to do next? Adjust this model? Build another version of this model? Build a model ofsomething else?
For the next two class periods and at home you will continue to build your model/s. Remember to use your designnotebook to record any changes.
11A: Making Models (continued)
Design and Discovery Curriculum Teacher Guide
213

Notes:
Prototyping andFinal Presentations
10blue arrow starter 24/11/05 10:32 pm Page 17

10contents 24/11/05 10:48 pm Page 4

In This Session:
A Prototype Planning(40 mins) Student Worksheet Student Reading
+ H/W
B Budget Schedule(H/W) Student Worksheet
C Prototype Work Session. Develop it!(2 x 40 mins) Student Worksheet
+ H/W
In this session students begin planning how they will constructtheir prototypes. In 12A: Prototype Planning, prototypes arereintroduced as students strategize plans and create theirspecifications for developing a prototype. They also considerwhat materials they will use to develop their prototypes. In12B: Budget, they can use a spreadsheet program to developbudgets for the project.
Student designers’ ideas take on new forms as they developtheir prototypes. These prototypes should be workingprototypes with full functionality. Of course, students may findthat as they refine and test their ideas they develop severalworking prototypes. Activity, 12C: Prototype Work Session isdevoted to prototype development.
Supplies• Materials to demonstrate what may be used in
prototypes:• Wood • Tubing• Foam • Sandpaper• Plexiglass • Sponges• Fiberglass • Steel wool pads• Metal • String or twine• Canvas fabric • Glue• Bubble packing • Masking tape• Cotton balls • Duct tape
Teacher Guide
214
Session 12
Prototype Practicalities
Design and Discovery Curriculum

ToolsSeveral sets of each: pliers, saw, hammer, screwdriver, hot glue gun, and tin snips
Supplies• Spreadsheet software program• Computers• Materials to demonstrate what may be used in prototypes:
• Wood • Foam• Plexiglass • Fiberglass• Metal • Canvas fabric• Bubble packing • Cotton balls• Tubing • Sandpaper• Sponges • Steel wool pads• String or twine • Glue• Masking tape • Duct tape
Session 12: Prototype Practicalities (continued)
Design and Discovery Curriculum Teacher Guide
215

In This Session:
A Prototype Planning(40 mins) Student Worksheet Student Reading
+ H/W
B Budget Schedule(H/W) Student Worksheet
C Prototype Work Session. Develop it!(2 x 40 mins) Student Worksheet
+ H/W
GoalUnderstand what a prototype is.
OutcomeStudents will be ready to begin building their prototypes.
DescriptionThis is the first part of Step 9 of the design process: Build the Prototype - developproject specifications. Revisit the difference between a model and a prototype. Studentsbegin to think about how they are going to develop prototypes and get ideas from oneanother.
SuppliesNone
PreparationNone
ProceduresWhat Is a Prototype?
1. Have students refer back to the design process checklist in Worksheet:Checking in on the Design Process, Step 9: Build the Prototype.
2. Ask students the difference between a model and a prototype (this wasintroduced in Thinking Again About Design).
Model: A small but exact copy of something.Prototype: A working model of a machine or other object used to test itbefore producing the final version.
3. Discuss the purpose of prototypes (learning, communication, integration, andmilestones):• Learning: Prototypes are often used to answer two types of questions: “Will
it work?” and “How well does it meet the users’ needs?”• Communication: Prototypes allow better communication of product ideas.
They are a visual, tactile, three-dimensional representations of a product.
Session 12, Activity A
Prototype Planning
Design and Discovery Curriculum Teacher Guide
216

• Integration: Prototypes are used to ensure that components andsubsystems of the product work together as expected.
• Milestones: Prototypes are used to demonstrate that the product hasachieved a desired level of functionality—providing tangible goals anddemonstrating progress.
4. Remind students that as they plan their prototypes, they will have lots ofsketches of their ideas before developing the prototype and may develop a fewprototypes.
Wrap UpBe sure that students have a clear idea of the difference between making a model andbuilding a prototype.
Follow WithIn: Prototype Materials, students consider materials for their projects. The next activity12B: Budget gets students planning their materials budget.
12A: Prototype Planning (continued)
Design and Discovery Curriculum Teacher Guide
217

Now that you have a model made, it’s time to move on to the next step: building a prototype. Remember thedifferences between a prototype and a model.
Model: A small but exact copy of something.Prototype: A working model of a machine or other object used to test it before producing the final version.
This is the first part of Step 9 of the design process: Build the Prototype - develop project specifications.
Design Process Step 9. Build the Prototype.
Building a prototype can be fun and challenging. Here are a few tips to keep in mind.
1. Make it large enough. Remember that others will want to see the detail and you will want to make sure allthe parts work.
2. Pay attention to detail. Be sure that you show all the parts and components.3. Make it strong. Use durable materials.4. Make it "green." Use recyclable materials when possible.5. Make it realistic. The prototype should be as close to the real product as possible.
Ask yourself the following questions.
1. What ideas do you have for developing your prototype?
2. What suggestions do your peers have for you?
Prototype PlanningWorksheet: Session 12, Activity A
Design and Discovery Curriculum Teacher Guide
218

3. What materials are you considering using for your prototype?
Fill out the checklist below and write a list of what materials are available in school and what you need to getyourself and bring into the next class.
Material Available in school Must bring in
Draw a sketch of your prototype in your design notebook and label the materials.
12A Worksheet: Prototype Planning (continued)
Design and Discovery Curriculum Teacher Guide
219

In This Session:
A Prototype Planning(40 mins) Student Worksheet Student Reading
+ H/W
B Budget Schedule(H/W) Student Worksheet
C Prototype Work Session. Develop it!(2 x 40 mins) Student Worksheet
+ H/W
GoalConsider the budget for developing a prototype.
OutcomeStudents will create a budget for their materials using a spreadsheet.
DescriptionIn this activity students begin to develop a budget for their materials using aspreadsheet.
SuppliesSpreadsheet software program, computers
Preparation
1. Be sure that if you are going to have students develop budgets on a spreadsheetprogram, that you have enough computers with the appropriate software forstudents to do so.
2. You may want to set up a basic template that will help novice spreadsheet usersget started.
3. Decide what students’ budgets will be (if you are providing the resources).
ProceduresMake a Budget
1. Get students started on a spreadsheet to prepare a materials budget for theirproject. Use an electronic spreadsheet program to do this. If students are notfamiliar with spreadsheets, this may take some time to explain how to set up aspreadsheet.
2. Include the following in the budget: material, quantity, and price. Students shouldlist the materials that they selected in the previous activity, figure out how muchthey will need of each material, and the price for that quantity.
3. Depending on who is doing the shopping for the material (the facilitator or thestudent), students either give their budgets and materials lists to the facilitatoror take them home to serve as a shopping list.
Session 12, Activity B (Homework)
Budget
Design and Discovery Curriculum Teacher Guide
220

Wrap UpReview students’ budgets to be sure they are realistic.
Also refer to the Design and Discovery Planner to check out the time available tocomplete the project.
Follow WithIn Develop It! Students work on their prototypes.
12B Budget (continued)
Design and Discovery Curriculum Teacher Guide
221

BudgetWorksheet: Session 12, Activity B
Design and Discovery Curriculum Teacher Guide
222
Prepare a budget for your project. Include the materials, how much you will need of each material, the cost for eachmaterial, and the total cost.
Materials Quantity Cost
Total Cost =

In This Session:
A Prototype Planning(40 mins) Student Worksheet Student Reading
+ H/W
B Budget Schedule(H/W) Student Worksheet
C Prototype Work Session. Develop it!(2 x 40 mins) Student Worksheet
+ H/W
Session 12, Activity C
Prototype WorkSession. Develop it!
Design and Discovery Curriculum Teacher Guide
223
GoalLearn how to develop a working prototype.
OutcomeBuild a working, fully functional prototype.
DescriptionStudents work on their prototypes of the project. Be sure to have them keep records todocument their progress. Encourage a culture of experimentation. The goal is not to getthe prototype done, but to try out different ways that the product could work and findthe best solution.
SuppliesSee list on page 214.
PreparationNone.

ProcedureDebrief Home Work
Work Session
1. Discuss the purpose of a prototype. Refer back to the purposes from PrototypePlanning: learning, communication, integration, and milestones. Be sure toemphasize that prototypes are still part of the experimental stage.
2. Remind students that they are wearing two hats: that of an engineer and that ofa designer. As an engineer, they should be sure that the prototype demonstratesthat the product is feasible, possible, manufacturable, and cost-effective. As adesigner, they should keep in mind the idea of user-centered design andcontinue to ask: Is it useful, usable, and desirable?
3. Have them take out their design specifications from Worksheet: PrototypePlanning so that they can use the specs when developing their prototypes.
4. Reiterate the value of good records as they develop their prototypes. Remindthem that they need to take the time to be methodical and write down what theyplan to do and why.
5. Discuss the value of testing and data gathering. Give examples of kinds oftesting and how to be systematic. For example, stress load testing on straps.This can be done by adding successive weights to measure up to specifications.Determine how much weight the strap can hold.
6. Clean up and organize storage or transport of prototypes home for further work.
Wrap UpHave each junior engineer stand up and show what he or she developed so far andstate what he or she is planning to do next.
Follow WithIn the next session students continue with develop it!
12C: Prototype Work Session (continued)
Design and Discovery Curriculum Teacher Guide
224

It is helpful to keep good records of your prototyping efforts. Good records allow you to adjust your design basedon what you learn from each step of the process. The questions below can help with this record keeping.
PlansHow do you plan to build your prototype?
PurposeWhat will this prototype be able to do?
TestingWill the prototype meet your specifications? How will you test this and what data will you gather?
Next StepsWhat do you want to do next? Adjust this prototype? Build another version of this prototype?
Prototype Work SessionWorksheet: Session 12, Activity C
Design and Discovery Curriculum Teacher Guide
225

In This Session:
A Prototype Work Session. Develop It!(60 mins)
B Test It(20 mins) Student Worksheet
C Evaluate and Revise It(H/W) Student Worksheet Student Reading
D Present It(20 mins) Student Handout Student Reading
+ H/W
E Project Reflection(H/W) Student Handout Student Reading
In this session students take approximately one hour tocontinue working on their prototype, which they began inSession 12. Being an engineer requires trial and error!Students learn this as they continue with the design process:Step 9 Build the Prototype and Step 10 Improve Your Solution:Test, Evaluate, and Revise. As they develop workingprototypes, students test and evaluate the prototypes forfunction, feasibility, safety and aesthetics and makemodifications. This process of testing and modificationcontinues until they have a final working prototype.
In the Activity 13B: Test It, students get feedback on function, appeal and value of theproduct.
In the homework activity, 13C: Evaluate and Revise It, they consider the feedback fromuser testing and prioritise the revisions.
Activity 13D: Present It, helps students prepare for an exhibition. It gives them hints ondisplay and presentation.
Finally, Activity 13E: Project Reflection gives students the opportunity to reflect on theirown progress and their experience in Design and Discovery.
Before beginning the session, teachers should read through the session and decidewhat type of exhibition they wish to have the students do: the Young Scientist andTechnology Exhibition (www.btyoungscientist.ie) or an Engineering Fair in their school(which could be part of the Transition Year end-of-year showcase event).
Session 13
Prototype Review and Presentation
Design and Discovery Curriculum Teacher Guide
226
Design and Discovery Curriculum

Supplies
For Prototype ConstructionAs in Session 12
For Presentation• Flip chart and markers• Video camera• Tripod• Supplies for hands-on activities (if needed)• Copies of Passport Scavenger Hunt (if needed)• Copies of feedback forms• Room decorations• Food• Prizes for scavenger hunt• Science/engineering fair forms• 3-panel display boards• Scissors• Coloured paper• Rubber cement• Markers• Scrapbooking supplies• Glue sticks• Other art materials
13: Prototype Review and Presentation (continued)
Design and Discovery Curriculum Teacher Guide
227

In This Session:
A Prototype Work Session. Develop It!(60 mins)
B Test It(20 mins) Student Worksheet
C Evaluate and Revise It(H/W) Student Worksheet Student Reading
D Present It(20 mins) Student Handout Student Reading
+ H/W
E Project Reflection(H/W) Student Handout Student Reading
GoalTo get user feedback on function, appeal, and value of the product.
OutcomeTo know if the product does what it is supposed to do.
DescriptionDeveloping a product does not happen in a vacuum. It is important to remember thatthe goal is to develop something that others will use. In this activity, students conductuser testing to determine their next steps.
SuppliesNone
PreparationInvite a variety of people to participate in user testing. Ideally, you will ask students tocharacterize a typical user of their product (as they did in The User) and invite peoplewho represent these users.
ProceduresUser Testing Techniques
1. Explain to students that they will conduct user testing to see how their productis received by others.
2. Remind them that when they talk to users, they will need to step away fromtheir personal involvement and understanding of the product and focus on theuser. They should listen carefully to what people say, jot down notes, and thendecide which comments seem helpful and valid, and which do not.
3. Testing more than one prototype is preferable because the comparison helpspeople see what they like and what they don’t.
4. Explain that the best feedback comes when the designer is as invisible aspossible. They can give the user the minimum information necessary and thenlet the user try the prototypes. The designer should step back and observe.
Session 13, Activity B
Test It!
Design and Discovery Curriculum Teacher Guide
228

5. If students are participating in the Young Scientist and Technology Exhibition,be sure that they understand the user testing rules.
6. Conduct user testing.
Wrap UpDiscuss how students will use the feedback from the user testing.
Follow WithIn 13C: Evaluate and Revise It, students analyze the feedback from their user testingand plan their next steps.
13B: Test It (continued)
Design and Discovery Curriculum Teacher Guide
229

The time has now come for you to test and evaluate your prototype for function, feasibility, safety, and aestheticsand then make modifications. This process of testing and modification continues until you have a final workingprototype.
Design Process Step 10. Improve Your Solution. Test, Evaluate and Revise.
User testing will help you to know if your product does what you want it to do. For example, does it work the wayit is supposed to? Do people like the way it looks? It’s best to conduct user testing with people who you think willbe using this product and have more than one prototype (if possible) for them to compare. In order to make the usertesting most useful, select appropriate people to do the user testing and appropriate conditions to conduct thetesting.
Sample Questions
1. What do you like and dislike about this product?
2. What do you think this product should do?
3. What could be done to make you want to use this product more?
4. What do you think of the way this product looks (the aesthetics)?
5. Is this product efficient, safe, and comfortable to use? If not, how could it be improved to make it moreergonomic?
6. What do you see as some problems with this product?
7. What can be done to solve these problems?
Test ItWorksheet: Session 13, Activity B
Design and Discovery Curriculum Teacher Guide
230

Additional Questions
1.
2.
3.
4.
5.
Observations
1. What does the user do with the product?
2. What are the user’s perceptions of the product?
3. How successful or unsuccessful does the user think the product is?
4. How does it meet or fail to meet the user’s needs?
5. How safe is the product?
Additional Observations
1.
2.
13B: Test It! (continued)
Design and Discovery Curriculum Teacher Guide
231

In This Session:
A Prototype Work Session. Develop It!(60 mins)
B Test It(20 mins) Student Worksheet
C Evaluate and Revise It(H/W) Student Worksheet Student Reading
D Present It(20 mins) Student Handout Student Reading
+ H/W
E Project Reflection(H/W) Student Handout Student Reading
GoalEvaluate feedback from user testing to plan changes to the prototype.
Outcome Students will have conceptualized and prioritized changes to their prototype.
DescriptionStudents plan their modifications based on valuable feedback from the user testing.
Supplies None
PreparationNone
Procedures
1. Students should use the chart to categorize and prioritize the feedback theyreceived from their user testing.
2. Next, have them plan which revisions they will make and how they will makethese changes.
3. Students can get feedback from their peers and/or mentors in planning theirnext prototype.
4. They should consider additional materials they will need and make anynecessary changes to their budgets.
5. Check in with each student to ensure they are on track.
6. Remind them to continue work on their prototypes at home.
Session 13, Activity C
Evaluate and Revise It
Design and Discovery Curriculum Teacher Guide
232

Wrap Up Review the charts and discuss what changes are realistic.
Follow With Session 13D, Present It, helps students and facilitators make presentation decisions.
13C: Evaluate and Revise It (continued)
Design and Discovery Curriculum Teacher Guide
233

Now that you have feedback from your user testing, you need to organize the information in order to figure outwhich suggestions you will incorporate into your revisions. After completing the chart, decide which revisions aremost feasible and what your process will be.
Priority Problem Criteria Revision
Evaluate and Revise ItWorksheet: Session 13, Activity C
Design and Discovery Curriculum Teacher Guide
234

In This Session:
A Prototype Work Session. Develop It!(60 mins)
B Test It(20 mins) Student Worksheet
C Evaluate and Revise It(H/W) Student Worksheet Student Reading
D Present It(20 mins) Student Handout Student Reading
+ H/W
E Project Reflection(H/W) Student Handout Student Reading
GoalDevelop presentation criteria, plan presentations and design presentation boards.
OutcomeStudents plan their own presentations and summarise their projects on presentationboards.
DescriptionThe students critique the project content and their presentation skills and developcriteria for their final presentations. They then plan their own presentations.
Supplies • 3-panel display boards• Scissors• Coloured paper• Rubber cement• Markers• Scrapbooking supplies• Glue sticks• Other art materials
PreparationIn advance, tell students to bring things they may want to put on their boards.
Procedures1. Study Worksheet 13, Activity D: Present It
2. With the group, develop criteria to help students prepare for their presentations.
Wrap UpTime permitting, students may practice their presentations with one another. Encouragestudents to practice their presentations at home.
Follow WithThe next activity, 13E students can reflect on their design and discovery experience asa homework activity.
Session 13, Activity D
Present It
Design and Discovery Curriculum Teacher Guide
235

Design Your Display
You are now ready to design your display for Transition Year night or maybe you are planning to participate in theYoung Scientist and Technology Exhibition. It is important when designing your presentation board, to keep in mindseveral design principles. Attention to the principles of graphic design will make your presentation more enticingand easier for others to use. Good design should attract viewers’ attention to your project and then guide theirunderstanding of the information you wish to convey.
Consistency• Establish a style for your display and stick to it. Too much variation will make your display seem disjointed.
Be consistent with all the elements.
Clarity• Keep questioning whether your message is being conveyed clearly. Do the illustrations and charts convey
what they are supposed to?• Think about the clarity of your visual presentation. Is it cluttered? Question any possibly unnecessary
elements like cute stickers, doodles, patterns, etc.
Attention To Detail• Judges will notice if a display has grammar and spelling errors. Get people to proof your work.• Make a checklist of the points you want to cover in your display and double-check that you present each.• Make sure all your pieces are cut out with straight lines (use a ruler) as this will make your presentation
look more polished and professional.
Elements Of Your DesignColour
• Limit your design to two or three colours. Use tints and shades of these. A large number of colours makedesigns seem less planned and inconsistent.
• Determine how colour will be used and why. For example, you might want all your headers to be one-colour and text blocks to be another, so the headers will stand out.
• Keep in mind that different colours have different connotations and a power of their own. For instance, redusually demands attention. It can be used effectively for this purpose, but only if used in moderation.
Type• Pick only one or two fonts for the text so your display will look consistent and unified. A large number of
fonts, like too many colours, can seem disjointed and confusing.• Decide on one or two techniques for emphasis in your type style. Some possibilities are: bold, italic, all
caps (capitalising all the letters of a word), colour and choice of font.• Don’t use underlining if you have italic available. Underlining was designed to represent italic for typing
since typewriters don’t have italic.
Present ItWorksheet: Session 13, Activity D
Design and Discovery Curriculum Teacher Guide
236

• Avoid writing words vertically (with the letters stacked) as this will reduce readability.• All caps are less readable than standard text, so if you choose to use them, do so only with small
quantities of text, such as titles.• Narrow columns of text are easier to read than wide columns of text. Left-justified or full-justified text is
easier to read than centred text (for longer items).
The PresentationNow that you have completed your project you need to spend some time improving your presentation skills.Conduct a brainstorm with your team members. Ask yourself the following questions:
• What will you need to explain in the presentation?• What will you need to show in the presentation?• What presentation skills will make your presentation successful?• How long is the presentation expected to be?
The following points should help you.
Presentation Content• Problem clearly described• Solution clearly explained• Design process articulated• Drawings, models, and prototypes explained• Documentation on hand for questions
Drawing, Models, and Prototypes• Design drawn in detail• Models show how project works. Model may include parts and components• Prototype is a working prototype• Drawings, models, and prototypes explained in detail
Presentation Skills• Presenter speaks clearly and explains project in detail• Presenter is knowledgeable about all aspects of project and can answer questions.• Presenter is well prepared• Speaker holds interest (maintains eye contact, uses gestures, varies voice inflection)
Time permitting; you should practise your presentation with other students. You should also practiseyour presentation at home.
13D Worksheet: Present It (continued)
Design and Discovery Curriculum Teacher Guide
237

Goal To reflect on the fair, students’ Design and Discovery experience, and to plan for nextsteps.
DescriptionTime should be set aside after the fair to reflect on the fair and students’ Design andDiscovery experience in general. Students who are planning to attend anotherscience/engineering fair can begin to plan their project and presentation boardrevisions.
Procedures
1. After the fair, students should review the Project Feedback forms.
2. Ask students to take some time to answer the reflection questions individually.
3. Be sure to check in with students who are planning to participate in anotherscience fair. Discuss their revision plans.
4. Thank students for their hard work and participation in Design and Discovery.Encourage them to pursue their interests in science and engineering.
Teacher Guide
In This Session:
A Prototype Work Session. Develop It!(60 mins)
B Test It(20 mins) Student Worksheet
C Evaluate and Revise It(H/W) Student Worksheet Student Reading
D Present It(20 mins) Student Handout Student Reading
+ H/W
E Project Reflection(H/W) Student Handout Student Reading
238
Session 13, Activity E (Homework)
Project Reflection
Design and Discovery Curriculum

Project Reflection
1. In general, how do you feel about the fair? What did you like or dislike about it? How would you change itif you were to hold the fair again?
2. How did Design and Discovery meet or not meet your expectations?
3. Would you recommend Design and Discovery to a friend? Why or why not?
4. How did Design and Discovery influence the career you are considering?
5. How do you feel about your project?
6. What changes are you planning to make on your project or presentation board?
Project ReflectionWorksheet: Session 13, Activity E (Homework)
Design and Discovery Curriculum Teacher Guide
239

Electronics
10blue arrow starter 24/11/05 10:32 pm Page 19

10contents 24/11/05 10:48 pm Page 4

IntroductionThese notes provide background information about the practical work in the students’ work book. If you are new toworking with electricity/electronics you may find the work a little daunting; but fortunately it is possible to do all ofthe activities without having to know very much of the theory. Indeed, the students’ work book avoids technicalexplanations of the various ‘chips’ that are used. This is for several reasons: first, students don’t need to know whatis happening inside to discover what the chips do; secondly, what is happening inside the chips is far toocomplicated to explain at school level. However, it is very likely that you, and some students, will want to know morethan is written in the work book. The notes that are provided below are designed to give a basic explanation of howthe circuits work without getting too technical and worrying about such things as the structure of semiconductors.
Please remember that D&D is a practical course that gives students theory on a ‘need to know’ basis, rather thantreating knowledge/understanding of theory as an end in itself. Thus the ‘theory’ in these notes is not to be taughtas part of the D&D lessons.
Also, experience shows that D&D works best when students work in groups, rather than as individuals. Doencourage them to share their ideas; e.g. in the brief revision of electricity, it is sensible for students to answerthequestions in their groups rather than on their own.
We begin with suggestions about timing of the various activities, followed by a review of basic electricity. Answersto the questions posed in the Student Booklet are given in italics after each question.
Suggested timing of activitiesIt is in the nature of practical work with groups that some will complete tasks more quickly than others. For thisreason not all students are expected to complete all activities. Also, the speed with which students complete the work will vary with their intellectual ability, and with the level of their manipulative skills. However, it issuggested that:
By the end of two D&D sessions, everyone should have completed the introductory work on electricity and activities1 through 5.
It is likely that many students will comfortably complete these activities. It is then up to you to set them working on one (or both) of the two activities that remain. (Of course, if you have others in mind, feel free to usethem instead.)
ElectronicsTeacher Notes for Sessions 4 & 5
Design and Discovery Curriculum Teacher Guide
240
10elect.teach.notes 24/11/05 10:49 pm Page 240

Basic electricityThe key ideas that students should have met at Junior Certificate Science are those of current (I), voltage (V) andresistance (R). It is enough for them to know that voltage is a measure of the ‘push’ that a battery, power pack etc.has to move an electric current through a circuit. They should also have learnt about Ohm’s law, which is usuallystated in symbols as R=V/I.1 However, what they aren’t usually told that almost all the components in circuits thatare of any use don’t obey Ohm’s law. This is especially true of components that contain semiconductors; e.g. lightemitting diodes (LEDs), and ‘silicon chips’ of all kinds. For this reason there are no Ohm’s law calculations (or anyothers) to be done in this module of work!
Indeed, when trying to explain how the circuits work it is best not to think about them in terms of patterns like ‘ahigher voltage will cause more current to flow’ etc. Many of the circuits are best considered to work as switches,which are either ‘on’ or ‘off’. A key idea that you will need is that the ‘chips’ the students will use are electronicswitches that are switched ‘on’ or ‘off’ according to the voltage that is applied to them. For much of the time youwill not need to think in terms of current (and certainly not in terms of resistance as defined in Ohm’s law).
A point that sometimes troubles students is that it is possible to measure a voltage without a current flowing. Infact, the ideal voltmeter would have absolutely no current flowing through it. A good analogy here is with a car tyrepressure gauge at a garage. The gauge will only be accurate if there is no air escaping from the tyre. Similarly, ifyou put your finger over the nozzle of a water hose, you can feel the water pressure acting on your finger eventhough no water is flowing through the hose.
Another point, mentioned in the first page of the students’ work book: for some reason students will persist in tryingto describe electric circuits using phrases like ‘the voltage goes through here’, or ‘the power goes in here’, or ‘thebattery is not very powerful’. It is essential that such ideas are not reinforced (you may not be able to stop them entirely,but try to encourage students not to talk in such terms). Voltage does not ‘go through’ anything—voltage does not‘travel’; it is the current that travels through a circuit. However, we can talk correctly about measuring the voltageacross a component, or about the voltage at a point. Think of an analogy with water pressure in a house: if water isfed from a tank in an attic, the pressure of water at a tap in an upstairs bathroom will be less than the water pressureat a tap in a downstairs kitchen. We could measure the difference in pressure, but it makes no sense to say that thepressure is flowing through the pipes: only the water (current) will flow.
Much the same goes for students’ use of ‘power’. For physicists, ‘power’ related to electric circuits has a veryrestricted meaning. It is one that need not concern us here, except to say that use of the term is best avoided. Italmost 100% certain that if students do try to use ‘power’ to explain what is happening in the circuits then they willbe wrong.
Finally, a last word about voltage, and batteries.2 The 9V battery that we recommend of ruse in this module has oneterminal marked + (plus) and another – (minus). If you use a voltmeter to measure the voltage between theterminals of a new battery you should find that it is near to 9V. However, please try to understand that this is adifference. Strictly we know nothing from this measurement about the absolute voltages of the terminals. Forexample, one could be at +20V, the other at +11V and the difference would still be 9V. Alternatively, if one were at+4.5V and the other at –4.5V, again the voltmeter would measure 9V. The circuit itself doesn’t care about ourconventions of assigning voltages; but it makes a big difference to how we explain how it works.
Electronics (continued)
Design and Discovery Curriculum Teacher Guide
241
1. Actually, to write Ohm’s law like that isn’t strictly correct; but that is not too important here.2. At this point physicists will have to accept that we are not going to develop the important distinction between voltage and potential difference.
10elect.teach.notes 24/11/05 10:49 pm Page 241

It is best to use this convention: assume that (in spite of the label) the negative terminal of the battery is at 0V, andthe positive terminal is at +9V. You will see later that another way of applying this convention it say that a voltageof +9V (or roughly 9V) is given the label ‘high’ and a voltage of 0V (or nearly 0V) is given the label ‘low’.
Light emitting diodes (LEDs)LEDs are found in very many devices in homes, and elsewhere. For example, almost any remote control for atelevision or video will have an LED indicator. More elaborate LEDs are being used in traffic lights, where they arearranged in rows/columns of individual lights rather than having one large lamp behind a coloured screen.
An LED has to be put in a circuit the ‘right way round’. It has two leads: a cathode that must (eventually) beconnected to the negative terminal of a battery, and an anode that must (eventually) connect to the positiveterminal. Note: the anode and cathode does not have to connect directly to these terminals.
An LED will switch on only if the voltage across it is (in roundnumbers) at least 2V. If the voltage is less than that, it will not work.On the other hand, if the voltage goes up much higher, so muchcurrent flows through the LED that it will glow very brightly andpromptly ‘burn out’. For this reason, LEDs are often used in circuitsin partnership with resistors. The resistor prevents too much currentflowing through the circuit (or put in other terms, it stops the voltageacross the LED going up too high).
If you have looked at some of the diagrams in the students’ work book, you will see that where LEDs are used thereare no protecting resistors. the reason is that the LEDs that we recommend for use have such a resistor alreadybuilt into them. Please note: it is most important that you do not use just ‘any’ LED in place of those that have beenrecommended for use. “Ordinary’ LEDs can be used, but only if protecting resistors are used in series with them.(However, to include the resistors on a bread board makes life much more complicated, and is best avoided.)
CMOS Logic gatesThe main ‘chip’ used in the practical work is labelled as ‘4093’ in the students’ work book. In fact the full descriptionof this chip is that it is a ‘Schmitt Quad, 2-input NAND CMOS logic chip, code number 4093B’. (Perhaps you cansee why the shortened label is used!) Here is a brief explanation of what this chip does. We will take the variousterms in the full title in turn, but in a different order.
CMOSCMOS stands for ‘complimentary metal oxide semiconductor’. It is one family of semiconductors that is verywidely used in the electronics industry. The details of CMOS need not concern us except for one important point:CMOS chips are very hard to wreck because they can be used with a very wide range of voltages, perhaps as highas 50V. Likewise they are quite tolerant of varying sizes of current flowing through them. However, as all teachersnow, nothing is student-proof, and if your students mess with the circuits that have been suggested they will surelyfind a way to ‘blow’ the chip. So, it is best to warn them of the consequences of doing other than is suggested inthe activities.
Electronics (continued)
Design and Discovery Curriculum Teacher Guide
242
10elect.teach.notes 24/11/05 10:49 pm Page 242

On the other hand, it is always possible that a chip will cease to work through no fault of the students. (There ismore about this point below.)
Logic chips and gatesLogic chips are generally found with either 14 or 16 ‘legs’ or ‘pins’. Two of these are used to connect the chip tothe power supply. Just what the others do varies greatly with the specific chip. Let us consider a simple case of achip that performs a NOT function: see the diagram and table below.
In the diagram opposite is shown a schematic diagram of a ‘NOT’ logic chip with just one input and one outputshown (the connections to the power supply are omitted). If you were to connect the input to the positive terminalof, say, a 9V battery you would find that the output was about 0V. That is, a ‘high’ at the input gives a ‘low’ at theoutput. Similarly if you made the input 0V, the output would be near to 9V; i.e. a ‘low’ at the input gives a ‘high’ atthe output. This pattern is shown in the table.
A circuit that works in this way is called a ‘NOT gate’, buttypically the chip itself might have seven or eight pairs ofinputs and outputs. The symbol for a NOT gate looks like this:
Now let us turn to a more complicated logic gate an AND gate.The pattern here is shown in the table opposite together withthe standard symbol for the gate. The key thing about an ANDgate is that the output is high only if the two inputs are bothhigh.
This brings us to a NAND gate. Essentially this is an AND gatewhose output is put through a NOT gate. The outcome is shownopposite. Note the small circle on the output (as shown on theNOT gate above) indicates that the output has gone through aNOT operation.
Schmitt versions of CMOS chipsIt is possible to buy ‘ordinary’ CMOS chips, but the Schmittversions have advantages. Specifically, the output is ‘cleaned’from any ‘noise’ in the input signals. The diagram below shouldgive you a sense of what this means.
The two inputs are connected, so that the chip receives only a pattern of two highs or two lows. In practice theinputs can be used separately (as is the case with the students’ circuits). Using the Schmitt versions of logic chipscan help to make the circuits more stable and perform consistently.
Electronics (continued)
Design and Discovery Curriculum Teacher Guide
243
10elect.teach.notes 24/11/05 10:49 pm Page 243

Code numbersThere is a wide variety of CMOS logic chips available. Every type has its own unique code number. For example,a 4049UB is a chip with six NOT gates, and a 40106 is its Schmitt equivalent. If you have to order logic chips froma supplier, it is essential to view the catalogue, and make sure that you order the chips using the correct CMOSnumber. (See later for information about suppliers of components.)
The 4093 circuitryThe 4093 has 14 ‘legs’ or ‘pins’. Two of them are used toconnect the chip to the battery, the other 12 are used tomake four NAND circuits, each with two inputs and oneoutput. The arrangement is shown in the diagram opposite.The student activities only use the NAND gate using pins 1,2 and 3. However, there is no reason why the other gatesshould not be used.
Indeed, if you find that a group’s circuit is not working and you can’t find any obvious fault with it, then the reasonmay be that the logic gate has ceased to work properly. It is worth getting the students to try one of the other gatesinstead. If that doesn’t work either, then the entire chip may have ‘blown’ and should be replaced.
Using motorsUsing electric motors with logic chips can cause problems. the reason is that whenever an electric motor switcheson or off very high voltage ‘spikes’ can occur. They may last for only very short times (e.g. 1/10000th of a second),but they can be sufficient to ‘blow’ the chip to which the motor is attached. This problem can be addressed by usinga diode in the circuit. However, even small motors can have relatively large currents flowing through them (say0.5A), and most logic chips are not able to withstand such currents (well, not for long at any rate). For these reasons,motors should not be connected directly to logic chips.
One solution is to use a chip that goes between the motor and logic chip. Such a chip is the ‘ULN2003A DarlingtonArray’, given the code number 2003 in the students’ work book. It has protecting diodes built into it, and is able towithstand currents up to 0.5A. This chip also has logic gates built into it so it can ‘talk to’ other logic chips. Asimplified diagram illustrating the operation of the chip is shown below.
Electronics (continued)
Design and Discovery Curriculum Teacher Guide
244
10elect.teach.notes 24/11/05 10:49 pm Page 244

The chip is designed so that a ‘high’ at the input causes a complete circuit to be made to the motor thus causingit turn on. Likewise, a ‘low’ at the input opens the (electronic) switch, which breaks the circuit and causes the motorto switch off.
Actually the 2003 has seven inputs (and outputs), so it could be used to control up to seven different motors (orother devices); but one would have to be careful not to exceed its maximum current rating.
Resistor colour codesResistors come in two series—4-band and 5-band. The 4-band are more commonly used in simple work. The 4-band code is as follows:
Bands 1 and 2 give the first two digits of the value; band 3 gives the powers of 10. The 4th band establishes thequality of the resistor—usually 5% or 10% in general purpose resistors. 5% shown by a gold band, and 10% by asilver band. The 4th band is separated from the others, which fact allows us to tell at which end to start countingfrom.
Resistors come in ‘preferred’ values;e.g. it is possible to buy a 1k, 1.1k anda 1.2k resistor, but not a 1.05k, or anyother value in between the preferredvalues. You will find out the preferredvalues by looking in an electronicscatalogue. Note that values can bewritten in two ways e.g. 2.2k or 2k2,4.7k or 4k7, and so on.
In 5-band resistors, the first threebands are the digits and the fourthband gives the powers of ten.
Electronics (continued)
Design and Discovery Curriculum Teacher Guide
245
Colour Value
Black 0
Brown 1
Red 2
Orange 3
Yellow 4
Green 5
Blue 6
Violet 7
Grey 8
White 9
10elect.teach.notes 24/11/05 10:49 pm Page 245

Flashing LEDsThe circuit that some of the students might build tomake an LED flash is really a simple pulsegenerator made from a Schmitt trigger NAND, aresistor and a capacitor. The circuit is shownopposite. The square wave is produced by therepeated charging and discharging of the capacitorthrough the resistor. Many combinations of resistorand capacitor values may be used.
To understand how the circuit works, you need toknow a little about capacitors. Capacitors storecharge. You can think of them as having two metalsurfaces that are separated by an insulator.(However, the actual construction of capacitors isvery different.) On its own, a capacitor will not becharged, so the voltage across its terminals will bezero. However, if you connect the terminals to abattery, one of the surfaces (labelled A on thediagram) connects to the positive terminal and one(labelled B) connects to the negative terminal.Electrons that are free to move on A will beattracted to the positive terminal of the battery, sowill travel towards the battery. When they leave A,a positive charge is left behind. This positivecharge will attract electrons on B, and from thenegative terminal of the battery towards it.Eventually all the electrons that could move off ofA will have done so, at which stage the processcomes to a halt with a layer of positive charge onA and a layer of negative charge on B. Where thereis a separation of charge there is a voltagedifference, and you would find that if you wereusing a 9V battery, the voltage across the terminalsof the capacitor would be 9V also.
In principle, you could disconnect the capacitor from the circuit, and the extra charge on A and B would remain untilyou connected a conductor between the two terminals. Then the electrons on B would rush round to A, and thecapacitor would have discharged. The charging and discharging of a capacitor can be slowed down by putting aresistor in the circuit—here the resistor lives up to its name by resisting the flow of current.
The ability of a capacitor to store charge is measured by its capacitance, and is measured in ‘farads’. A capacitanceof one farad, 1F, is in practice a very a large value, and in most work with logic chips etc. values of microfrarads
Electronics (continued)
Design and Discovery Curriculum Teacher Guide
246
10elect.teach.notes 24/11/05 10:49 pm Page 246

(µF) and picofarads (pF) are more common (1 µF = 10 –6 F; 1pF = 10 –12 F). The larger the value of the capacitor,and the larger the value of the resistor in series with it, the longer it takes for the capacitor to charge and discharge.
Now, let us return to the circuit thatuses the logic gate. Suppose thecapacitor has become fullycharged. Then the voltage at P willbe equal to the battery voltage, 9V.This represents a ‘high’, so theoutput of the NAND will be ‘low’(say 1V). But as soon as the outputgoes ‘low’, the voltage at Q will alsobe ‘low’. The charge on thecapacitor will then ‘leak’ outthrough the resistor and at thesame time the voltage across thecapacitor will fall. That is, thevoltage at P will start to drop. However, when the voltage goes low enough the NAND gate will recognise that theinput has gone from a ‘high’ to a ‘low’. Then the output will immediately change in the reverse direction—to a‘high’. At once the current will flow from the output through the resistor to recharge the capacitor. The voltage at Pwill gradually rise to 9V again, and the whole cycle repeats.
The time it takes to charge and discharge the capacitor changes if the values of the capacitance and resistance arechanged—higher values, longer times (and vice-versa). Students should find that a 1k resistor with a 1000 µFcapacitor gives a sensible rate of flashing (1 per second or so), as does a 47k resistor with a 10 µF capacitor. A 1kwith 10 µF appears to stay on permanently because the flashing is so fast; the 47k with 1000 µF may give theimpression of not flashing because the delay is so long.
Using bread boardsIt may be that you have never used bread boards before. If so, you may find the following ‘hints and tips’ useful.First, if the bread boards are new, it may be difficult for the students to get the wires to go into the holes becausethe connectors underneath are too stiff. The connectors can be eased by pushing one of the legs of a resistor intothe holes that are found to be difficult to use.
On the other hand, if the same holes are used a great deal, the connectors can become quite loose. If this happens,the wires go in very easily, but may not make good connections. It can be necessary to ‘fiddle’ with the wires beforea good connection is made.
Emphasise to the students that the bread boards should all be aligned in the same way (as shown in thephotographs). that is, with the rows of five holes going vertically, and the long lines of holes (where the battery isconnected) going horizontally. If they don’t all use the same orientation of the bread board it makes it very difficultfor them to build the circuits properly, and for you to check them if/when necessary.
Electronics (continued)
Design and Discovery Curriculum Teacher Guide
247
10elect.teach.notes 24/11/05 10:49 pm Page 247

The wires connecting the battery to the bread board may become frayed after a few uses. If so, the plastic coatingwill need to be stripped back to revel more of the wire. If you are used to soldering, it can be useful to apply a littlesolder to the ends of the wires in order to stiffen them.
When new, the chips that have to be used will not fit directly into the holes in a breadboard. the legs are splayed out, as shown in the diagram (A). Before you give the chips tothe class, you (or a trusty student) should push the legs inwards, e.g. by pressing themdown gently (!) against a table top until they are almost vertical (B).
Also, in order to avoid the students making mistakes about the correct orientation of the chips. It is best to labelthem (as shown in the photographs). There is almost always a small indentation in one end of the top face of thechip (often a small semicircle) that marks where the numbering of the pins begins. The label should read correctlyfrom left to right with the indentation on the left hand side of the label.
MotorsThe motor that we suggest using in this work is fairly robust. It will run off of a 1.5V battery, and draw a current ofabout 0.5A. It has the advantage of being fixed to a metal platform, which could be screwed down to a largerwooden base. Using it with a 9V battery for short periods does not do it any harm; but it should not be left runningfor long periods; i.e. a minute or more. Please emphasise this point to the students.
The motor has a speed of nearly 4000 rev/min. (as stated in the students’ work book). This is too fast to be usedto drive (say) a small buggy. However, the final rotation of the wheels to which it might be attached can be reducedby suitable gearing.
Before the motor is given to students it should have two connecting leads soldered to its terminals. (Advice will beavailable if you have had no experience of soldering.)
There is more work on motors in the mechanics section of the course.
Coping with componentsThe number of components that students need to use is not large; but owing to their small size, they are easily lostand/or damaged. It can be useful to give each group of students a set of equipment in a plastic ‘lunch box’ or foodcontainer that has a tight-fitting lid. Also, it can be very handy to have one or more pieces of (flat) polystyrene foam(e.g. as used in packing). The components can be safely pushed into the foam to keep them from getting jumbledup.
Electronics (continued)
Design and Discovery Curriculum Teacher Guide
248
10elect.teach.notes 24/11/05 10:49 pm Page 248

The following is list of equipment that should be provided for each group. The data refers to the Maplin 2003/4catalogue.
Item Number Maplin part no. Page
Breadboard 1 AG10L 165
9V battery (PP3) 1 AR46A 483
clip for battery 1 NE19V 502
4093B CMOS chip 2 QW53H 208
2003A Darlington Driver chip 2 AD93B 208
Small 3V lamps 2 L81AH 534
Lamp holders 2 VW65V 536
Resistors, 1K, 10K, 22k, 47k 2 of each G1K, G10K, G22K, G47K 177
Capacitors, 10mF, 22mF, 47mF, 100mF 2 of each VH22Y, VH26D, VH32K, VH37S 81
LEDs, red, green 2 of each J64U, CJ65V 136
Motor 1 HA83E 644
Reed switch and magnet (sold as pair) 1 YW47B 558
Push switch 1 FH59P 241
Micro switch 1 N96AQ 239
Buzzer 1 FL39N 761
Selection of wires—best purchased as a kit 8 (say) FS65V 166that should supply enough for all groups.
Suppliers of electronics componentsThere are many suppliers of electronics parts; but we list just three here:
Maplin Electronics, Unit 1–4 Jervis Street, Dublin 1 and Unit 413, Blanchardstown Retail Park, Dublin 15.Maplin has a very wide range of equipment and a comprehensive catalogue; but it doesn’t always carry a completerange of stock. However, it has an efficient mail order system via the web at www.maplin.co.uk.
Peats World of Electronics, 197/200 Parnell Street, Dublin 1.
Radionics, Glenview Industrial Estate, Herberton Road, Rialto, Dublin 12.
Electronics (continued)
Design and Discovery Curriculum Teacher Guide
249
10elect.teach.notes 24/11/05 10:49 pm Page 249

Explaining the behaviour of the students’ circuitsThe first point to realise is that the D&D course is not about students’ reaching a good theoretical understanding ofthe circuits they build. Rather, the emphasis is on them getting practical experience of building circuits, andknowing what the circuits do. They should also be able to link their observations to wider contexts; especially inrelation to possible uses of the circuits in their later projects, and in industry or the home. Thus, we think there isno harm in saying that at Transition Year level, the working of the chips is just too complicated to explain. Thishappens to be true; but it doesn’t mean the students can’t make the circuits work.
Electronics (continued)
Design and Discovery Curriculum Teacher Guide
250
10elect.teach.notes 24/11/05 10:49 pm Page 250

Notes:
10session 11 24/11/05 11:26 pm Page 214

Motors
10blue arrow starter 24/11/05 10:32 pm Page 21

10contents 24/11/05 10:48 pm Page 4

This activitiy is based upon the use of a LEGO kit. How many of the kits you have available will mainly depend on finance. Ideally there would be one kit per group, but if you have just one it is possible to use it as part of a classactivity.
The key aims of this work are to introduce students to the practical uses of motors (e.g. in food mixers, cars and thelike) and the use of gears to transfer motion from the motor to the wheels etc. The way this is done is to involve thestudents in a series of short activities with the LEGO kit. Most of the work is straightforward, but it does require thestudents to measure, and think! As usual, the idea is that students discuss the tasks, questions etc., with each otherin their groups. The notes that follow should be read in conjunction with the student instructions.
Exercise 1Building the buggy is not too difficult, but there are more parts in the kit than the students need. It would be bestto issue the kit with only the parts they need. A convenient way to do this is to put the parts in a good qualitysealable freezer bag, or a small plastic lunch box. Note: six AA batteries are needed for each controller box. (Thelatter can be difficult to open.)1. There are 24 cogs on the large gear wheel.2. There are 8 cogs on the small gear wheel.3. The students might describe this in words and/or with a diagram. Note that the gear wheels in question have
identical numbers of cogs.4. Stable can have several meanings; but the key things are for the students to think about relevant factors. Key
ones are: the motor is heavy and is (roughly) in the middle so the weight is fairly evenly distributed; howeverthe motor is quite high, so the centre of gravity will fall outside the base if the buggy tips too much. When yougo over their answers it would be useful to stress such factors in the design of cars (for general use and, say,in Formula 1 racing). Needless to say, students will have fun trying out the buggy. How much you can stand ofthis will depend on you!
Exercise 21. Students may suggest many different ways, some of which will not be possible in a lab or class room.
However, do let them try out different ways if at all possible. One way that we have tried is to measure out1m, and time the buggy over that distance. It is necessary to have a timing device that measure to at least1/10th of a second—many mobile phones have such a facility. Doing that, we observed a time of (about)1.2seconds, which gives a speed of 100cm/1.2 s = 88.33 cm/s. The accuracy is not that good of course: themain errors are getting accurate times when there is variation in starting and stopping the stop-watch/timer.Probably the inaccuracy is of the order of 30% (possibly more) when short times are being measured. Amechanical device for controlling a time would be best. This could be a possible use of a microswitchattached to the buggy (see the electronics module); but a datalogger would be best.
MotorsTeacher Notes for Session 6 Activity C
Design and Discovery Curriculum Teacher Guide
251

Another point to be aware of is that it take time for the buggy to get to its top speed, so ideally it is bestto time it not from a standing start, but when it crosses a mark already moving.
2. One key idea is to repeat measurements, so as to obtain a better estimate. If you are confident with its use,this could be an ideal opportunity to use datalogging equipment to measure the speed of the buggy.
3. The diameter is about 3cm, so the radius is 1.5cm and the circumference is about 9.42 cm.
4. Using our result, the buggy travels 88.33cm in one second, so the number of revolutions is 88.33/9.42, i.e.9.34 revolutions per second. The number of revolutions per minute is 60 times greater, i.e. 563 revolutionsper minute.
Exercise 31. The small gear wheel will go round 24/8 = 3 times for each revolution of the large wheel. That is, the wheels
will be rotating three times faster than the motor shaft.2. If the speed were 300 rev/min, then the motor shaft would turn at 100 rev/min.3. We found a speed of 563 rev/min, so the estimate for the motor speed is 188 rev/min.4. The result is almost 50% less than the LEGO figure. Reasons for the difference include: errors of timing (see
above), slipping of the wheels on the floor/bench, batteries not being at 9V (so motor turns more slowly thanstated by LEGO). Note: a datalogger should give a much better estimate, but only if the timing starts when thebuggy is at top speed.
More about gears and using motorsQ.1Put the large gear on the wheel shaft, and the small on the motor shaft.Q.2Easier to move with low gearing; that’s why cars start in 1st gear and gradually change up to 4th once the car
is moving more rapidly.Q.3 and 4. The lever is for changing the gears in the mixer. The first setting might be used for mixing dough for
bread (thick/heavy and hard to move). The last setting might be used for beating egg whites (light and easy tomove)
Follow-up workThe working of a clutch is best explained using diagrams e.g. from auto.howstuffworks.com/clutch.htm.Depending on the nature of the groups, it can be worthwhile asking each group to give a short report to the wholeclass. The Prius is a car marketed by Toyota (at less than cost price) that uses a combination of electric and petrolmotors. The electronics swaps between the two to give the most economical running. The search for a fuel-efficientengine is becoming much more pressing as oil prices rise. Problems remain with making batteries efficient but ableto sustain sensible mileages while keeping their weight down. They are not so environmentally friendly as might bethought at first sight—if they are plugged into the mains, then more fuel is used in power stations (more carbondioxide released etc.).
How students tackle the design issue will vary greatly; but main issues might be the nature of the tasks the mixeris to carry out (distinguish mixers from blenders?); weight and size: the more powerful, the heavier the mixer hasto be to remain stable in use; elegance of design (contours, colour etc.).
Motors (continued)
Design and Discovery Curriculum Teacher Guide
252

Post-Survey
10blue arrow starter 24/11/05 10:32 pm Page 23

10contents 24/11/05 10:48 pm Page 4

What you think is important to this science project. Please answer the questions below honestly. There are noright or wrong answers, and your surveys will be kept confidential. Thank you for sharing your thoughts. Circlethe number indicating your level of agreement with the statements.
Disagree Disagree Agree Agreea little a little
1. I understand what I need to do to complete my pro-ject display at the TY end of year event and how to 1 2 3 4enter in the Young Scientist and Technology Exhibition.
2. Learning how computers work is interesting. 1 2 3 4
3. Continuous advances in computer technology 1 2 3 4are important.
4 I understand how I can use the computer for 1 2 3 4my science fair project.
5. I would like a career that requires a math 1 2 3 4or science background.
6. I would like a career that involves 1 2 3 4designing things.
7. My future career requires a computer . 1 2 3 4technology background.
8. I am good at solving problems. 1 2 3 4
9. If I try hard, I can learn anything. 1 2 3 4
10. I like to find out things on my own. 1 2 3 4
11. I am informed about different kinds of jobs that use:
Maths. 1 2 3 4
Engineering design. 1 2 3 4
Science. 1 2 3 4
Computer technology. 1 2 3 4
12. Describe what you think an engineer does at work. What kinds of skills are needed to become an engineer?
Design and DiscoveryPost-Survey
Design and Discovery Curriculum Teacher Guide
253
10 post-survey 24/11/05 10:47 pm Page 253

Did you go on any field trips? Where?
Why?
I plan to enter the science fair this year. Yes No Not sure
Do you know what your project will be? Yes Not completely No
If 'Yes', what is your topic?
First two letters of your:/ /
first name* last name* Date of birth*
Thank you for your time and thoughts.
*This information will allow us to follow your responses over time.We will summarize all data, however, and no one will be identified.
Design and Discovery Post-Survey (continued)
Design and Discovery Curriculum Teacher Guide
254
Disagree Disagree Agree Agree Xa little a little
In Design and Discovery it was interesting to:
Interview and talk to engineers 1 2 3 4 XTalk with teachers 1 2 3 4 XLearn about problem solving 1 2 3 4 XWork on group projects 1 2 3 4 XWork on my science fair project 1 2 3 4 XUse the computer for research 1 2 3 4 XUse the computer to talk to other students 1 2 3 4 XTalk about my work 1 2 3 4 XLearn about design 1 2 3 4 XDraw designs 1 2 3 4 XTake field trips 1 2 3 4 X
10 post-survey 24/11/05 10:47 pm Page 254

10contents 24/11/05 10:48 pm Page 4

10contents 24/11/05 10:48 pm Page 4