cs elite training guide - v7.0 software - pacific biomedical
TRANSCRIPT

TRN-OTH-010091-US(AA)
INTEGRATED DEVICES
Training Guide
This guide is not intended as a substitute for the Cell Saver® Elite® System User Manual or authorized training.
Page 2
TRN-OTH-010091-US(AA)
Contents
Contents . . . . . . . . . . . . . . . . . . . . . . . . . . . . . . . . . . . . 2
Supplies and ordering information . . . . . . . . . . . . . . . . . . . 3
Prepare device, Collect First . . . . . . . . . . . . . . . . . . . . . . . . 4
Load processing set (1 of 2) . . . . . . . . . . . . . . . . . . . . . . . . 5
Load processing set (2 of 2), initiate procedure . . . . . . . . . . . 6
Blood transfusion . . . . . . . . . . . . . . . . . . . . . . . . . . . . . . 7
Emptying and changing waste bag . . . . . . . . . . . . . . . . . . . 8
Partial bowl options . . . . . . . . . . . . . . . . . . . . . . . . . . . . 9
Emergency mode . . . . . . . . . . . . . . . . . . . . . . . . . . . . . 10
Settings groups . . . . . . . . . . . . . . . . . . . . . . . . . . . . . . .11
Procedure records (1 of 2) . . . . . . . . . . . . . . . . . . . . . . . . 12
Procedure records (2 of 2) . . . . . . . . . . . . . . . . . . . . . . . . 13
Ending a procedure . . . . . . . . . . . . . . . . . . . . . . . . . . . . 14
Cleaning and maintenance . . . . . . . . . . . . . . . . . . . . . . . 15
Page 3
TRN-OTH-010091-US(AA)
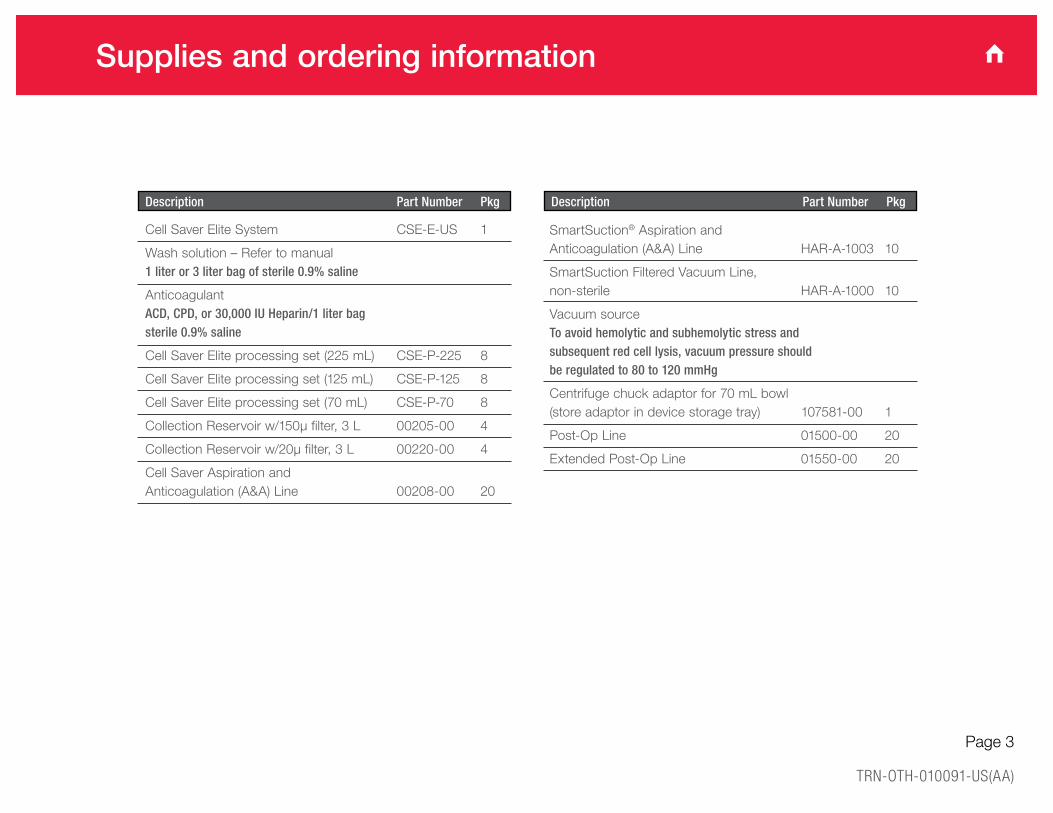
Description Part Number Pkg
Cell Saver Elite System CSE-E-US 1
Wash solution – Refer to manual 1 liter or 3 liter bag of sterile 0.9% saline
Anticoagulant ACD, CPD, or 30,000 IU Heparin/1 liter bag sterile 0.9% saline
Cell Saver Elite processing set (225 mL) CSE-P-225 8
Cell Saver Elite processing set (125 mL) CSE-P-125 8
Cell Saver Elite processing set (70 mL) CSE-P-70 8
Collection Reservoir w/150µ filter, 3 L 00205-00 4
Collection Reservoir w/20µ filter, 3 L 00220-00 4
Cell Saver Aspiration and Anticoagulation (A&A) Line 00208-00 20
SmartSuction® Aspiration and Anticoagulation (A&A) Line HAR-A-1003 10
SmartSuction Filtered Vacuum Line, non-sterile HAR-A-1000 10
Vacuum source To avoid hemolytic and subhemolytic stress and subsequent red cell lysis, vacuum pressure should be regulated to 80 to 120 mmHg
Centrifuge chuck adaptor for 70 mL bowl (store adaptor in device storage tray) 107581-00 1
Post-Op Line 01500-00 20
Extended Post-Op Line 01550-00 20
Description Part Number Pkg
Supplies and ordering information
Page 4
TRN-OTH-010091-US(AA)
Prepare device:1. Unfold biohazard waste bag stored in tray on
underside of device. Ensure biohazard waste bag is connected to and hanging from drain tube. Open slide clamp.
2. Ensure pump platen lever and device cover are closed. Ensure valve module cover and centrifuge header arm are closed and locked.
3. Power on device and allow self test to complete.
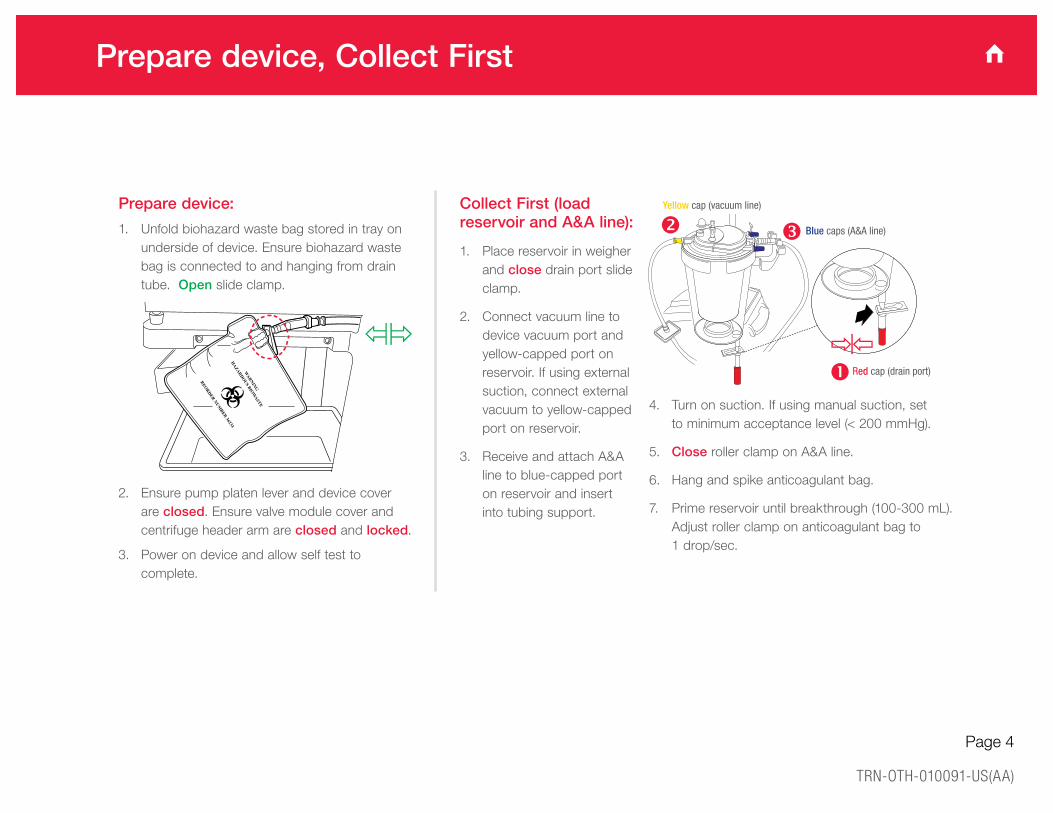
Collect First (load reservoir and A&A line):
1. Place reservoir in weigher and close drain port slide clamp.
2. Connect vacuum line to device vacuum port and yellow-capped port on reservoir. If using external suction, connect external vacuum to yellow-capped port on reservoir.
3. Receive and attach A&A line to blue-capped port on reservoir and insert into tubing support.
4. Turn on suction. If using manual suction, set to minimum acceptance level (< 200 mmHg).
5. Close roller clamp on A&A line.
6. Hang and spike anticoagulant bag.
7. Prime reservoir until breakthrough (100-300 mL). Adjust roller clamp on anticoagulant bag to 1 drop/sec.
wYellow cap (vacuum line)
Red cap (drain port)
Blue caps (A&A line)
Prepare device, Collect First
Page 5
TRN-OTH-010091-US(AA)
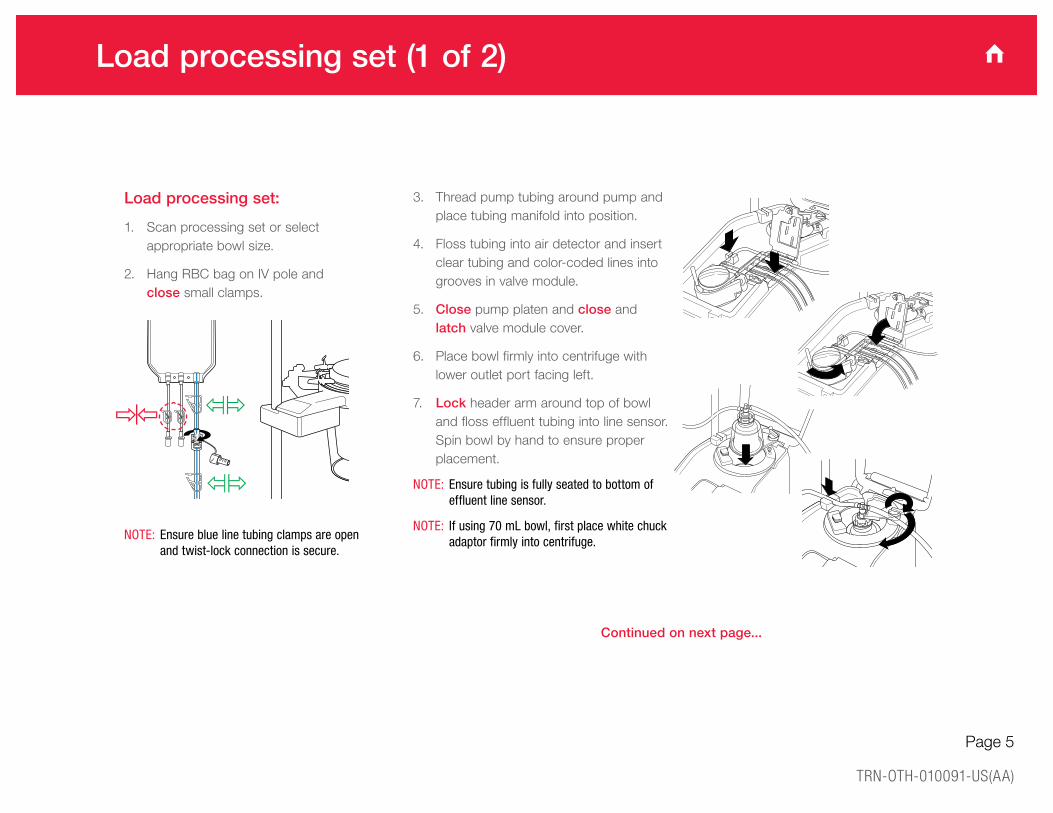
Load processing set:
1. Scan processing set or select appropriate bowl size.
2. Hang RBC bag on IV pole and close small clamps.
NOTE: Ensure blue line tubing clamps are open and twist-lock connection is secure.
3. Thread pump tubing around pump and place tubing manifold into position.
4. Floss tubing into air detector and insert clear tubing and color-coded lines into grooves in valve module.
5. Close pump platen and close and latch valve module cover.
6. Place bowl firmly into centrifuge with lower outlet port facing left.
7. Lock header arm around top of bowl and floss effluent tubing into line sensor. Spin bowl by hand to ensure proper placement.
NOTE: Ensure tubing is fully seated to bottom of effluent line sensor.
NOTE: If using 70 mL bowl, first place white chuck adaptor firmly into centrifuge.
Continued on next page...
Load processing set (1 of 2)
Page 6
TRN-OTH-010091-US(AA)
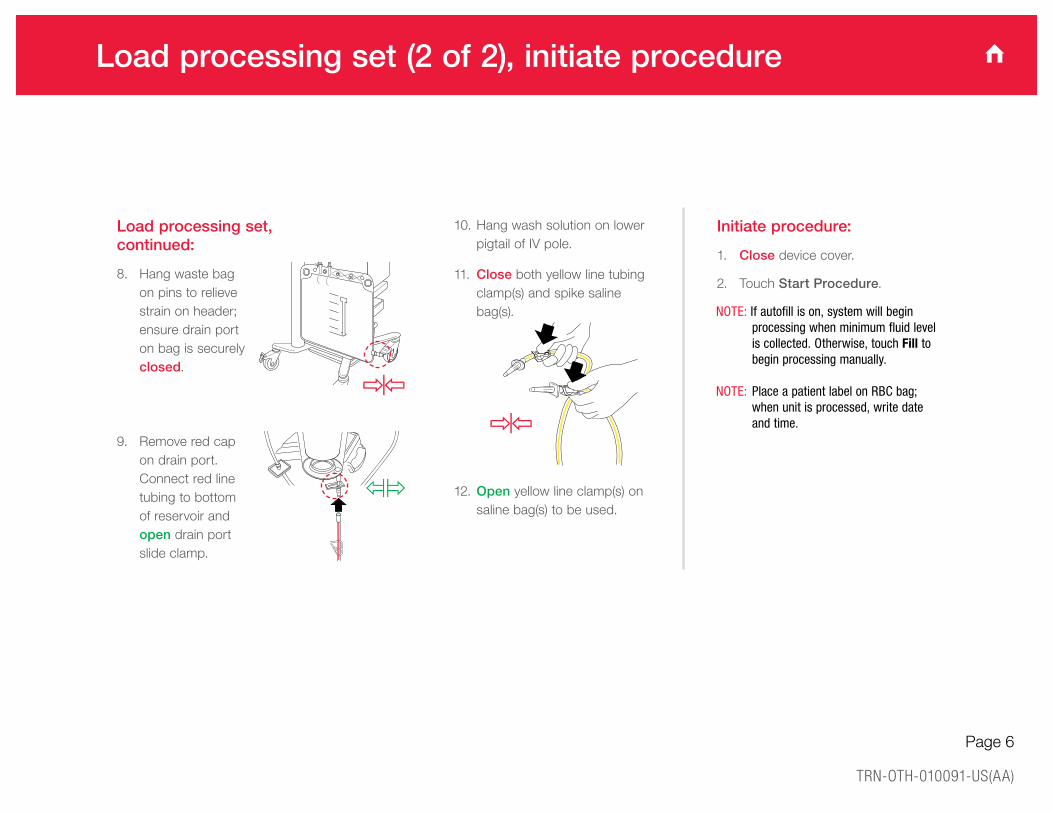
Load processing set, continued:
8. Hang waste bag on pins to relieve strain on header; ensure drain port on bag is securely closed.
9. Remove red cap on drain port. Connect red line tubing to bottom of reservoir and open drain port slide clamp.
10. Hang wash solution on lower pigtail of IV pole.
11. Close both yellow line tubing clamp(s) and spike saline bag(s).
12. Open yellow line clamp(s) on saline bag(s) to be used.
Initiate procedure:
1. Close device cover.
2. Touch Start Procedure.
NOTE: If autofill is on, system will begin processing when minimum fluid level is collected. Otherwise, touch Fill to begin processing manually.
NOTE: Place a patient label on RBC bag; when unit is processed, write date and time.
Load processing set (2 of 2), initiate procedure
Page 7
TRN-OTH-010091-US(AA)
Direct from RBC bag:
� RBCs may be transfused by placing a reinfusion line with filter between RBC bag and patient.
� Infusion must be performed by gravity drip only.
From secondary transfer pack:
� RBCs may be transferred from RBC bag to a secondary transfusion pack and then reinfused to patient according to hospital policy.
� Prior to disconnecting transfer pack, express any air back to reinfusion bag to prevent loss of displacement air from processing set.
OR
WARNING: Do not pressure infuse. May cause fatal infusion of air.
WARNING: Do not allow RBC bag to empty completely between reinfusions. If air enters the reinfusion line, it must be purged before starting reinfusion.
� Physician in charge must make all decisions regarding reinfusion.
� Transfuse each RBC bag according to hospital policies/procedures and AABB Guidelines.
Blood transfusion
Page 8
TRN-OTH-010091-US(AA)
During the procedure, the device monitors the volume of fluid in the waste bag and alerts you to empty or change the bag when it is almost full.
Changing the waste bag:
To prevent loss of displacement air, make sure the bowl is empty. If the bowl is not empty, return its contents to the reservoir.
Before removing full waste bag, touch to ensure that processing does not begin.
After new bag is installed, touch to resume.
Emptying the waste bag:
Drain waste fluid into empty canister, fluid bottle, or waste collection device.
NOTE: To prevent loss of displacement air, do not allow the fluid level in the bag to fall below the 1 liter mark.
Emptying and changing waste bag
Page 9
TRN-OTH-010091-US(AA)
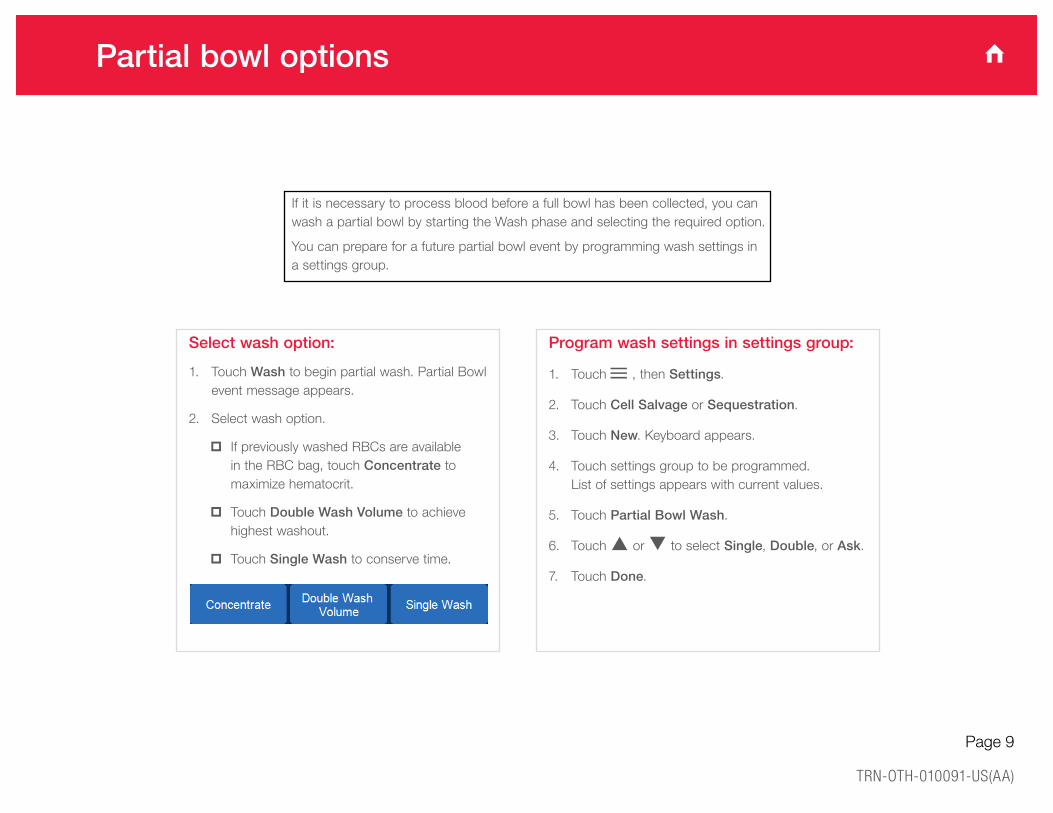
If it is necessary to process blood before a full bowl has been collected, you can wash a partial bowl by starting the Wash phase and selecting the required option.
You can prepare for a future partial bowl event by programming wash settings in a settings group.
Program wash settings in settings group:
1. Touch ≡ , then Settings.
2. Touch Cell Salvage or Sequestration.
3. Touch New. Keyboard appears.
4. Touch settings group to be programmed. List of settings appears with current values.
5. Touch Partial Bowl Wash.
6. Touch S or T to select Single, Double, or Ask.
7. Touch Done.
Select wash option:
1. Touch Wash to begin partial wash. Partial Bowl event message appears.
2. Select wash option.
� If previously washed RBCs are available in the RBC bag, touch Concentrate to maximize hematocrit.
� Touch Double Wash Volume to achieve highest washout.
� Touch Single Wash to conserve time.
Partial bowl options
Page 10
TRN-OTH-010091-US(AA)
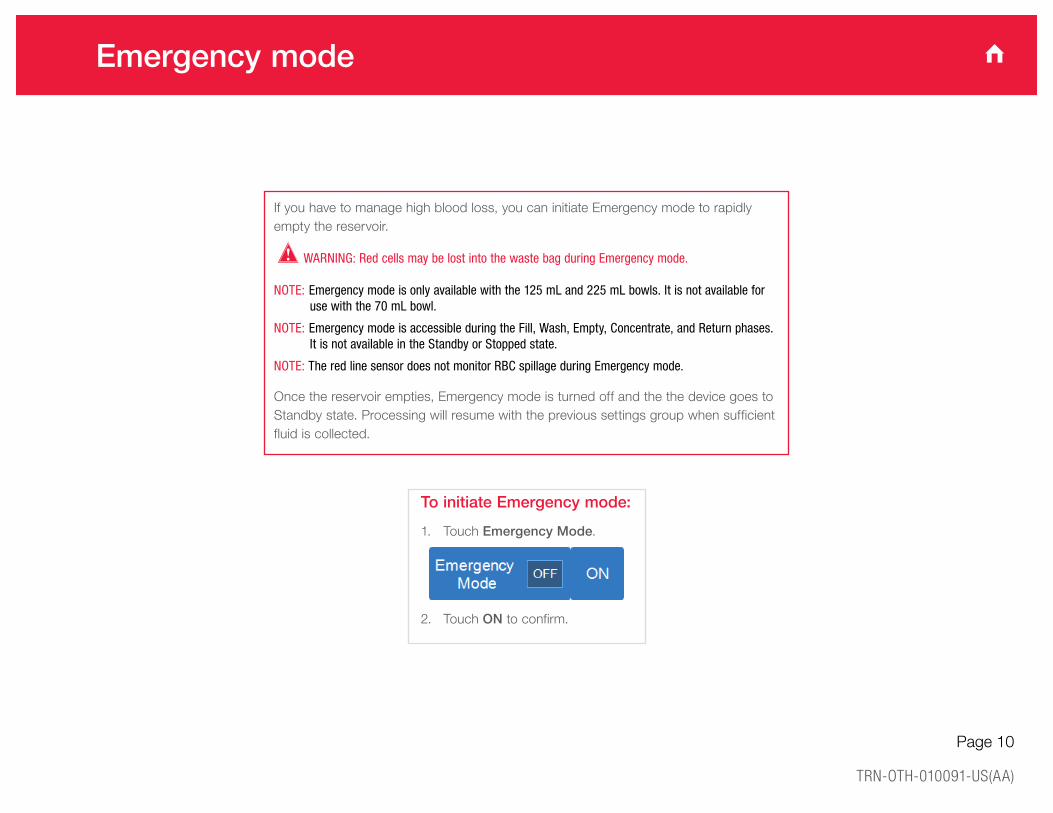
If you have to manage high blood loss, you can initiate Emergency mode to rapidly empty the reservoir.
WARNING: Red cells may be lost into the waste bag during Emergency mode.
NOTE: Emergency mode is only available with the 125 mL and 225 mL bowls. It is not available for use with the 70 mL bowl.
NOTE: Emergency mode is accessible during the Fill, Wash, Empty, Concentrate, and Return phases. It is not available in the Standby or Stopped state.
NOTE: The red line sensor does not monitor RBC spillage during Emergency mode.
Once the reservoir empties, Emergency mode is turned off and the the device goes to Standby state. Processing will resume with the previous settings group when sufficient fluid is collected.
To initiate Emergency mode:
1. Touch Emergency Mode.
2. Touch ON to confirm.
Emergency mode
Page 11
TRN-OTH-010091-US(AA)
To activate a settings group:
1. Touch Active Settings. List of settings groups appears.
2. Touch settings group to be applied.
To create a settings group:
1. Touch ≡ , then Settings.
2. Touch Cell Salvage or Sequestration.
3. Touch New. Keyboard appears.
4. Enter name of new settings group.
5. Touch . List of settings appears, with default values.
6. Locking a settings group is optional. To lock settings group, touch Lock. Keyboard appears. Enter password and touch .
7. Touch Done.
To delete a settings group:
NOTE: You cannot delete the active settings group, the Haemonetics default settings group, or the Fat Reduction settings group.
1. Touch settings group to be deleted.
2. Touch Delete.
3. Touch Confirm.
To change a setting:
NOTE: You cannot change settings in the Haemonetics default settings group or the Fat Reduction settings group.
1. Touch settings group to be changed.
2. Touch View.
3. Select bowl size.
4. If Unlock is present, you must unlock the settings group.
5. To unlock settings group, touch Unlock. Keyboard appears.
6. Enter password and touch .
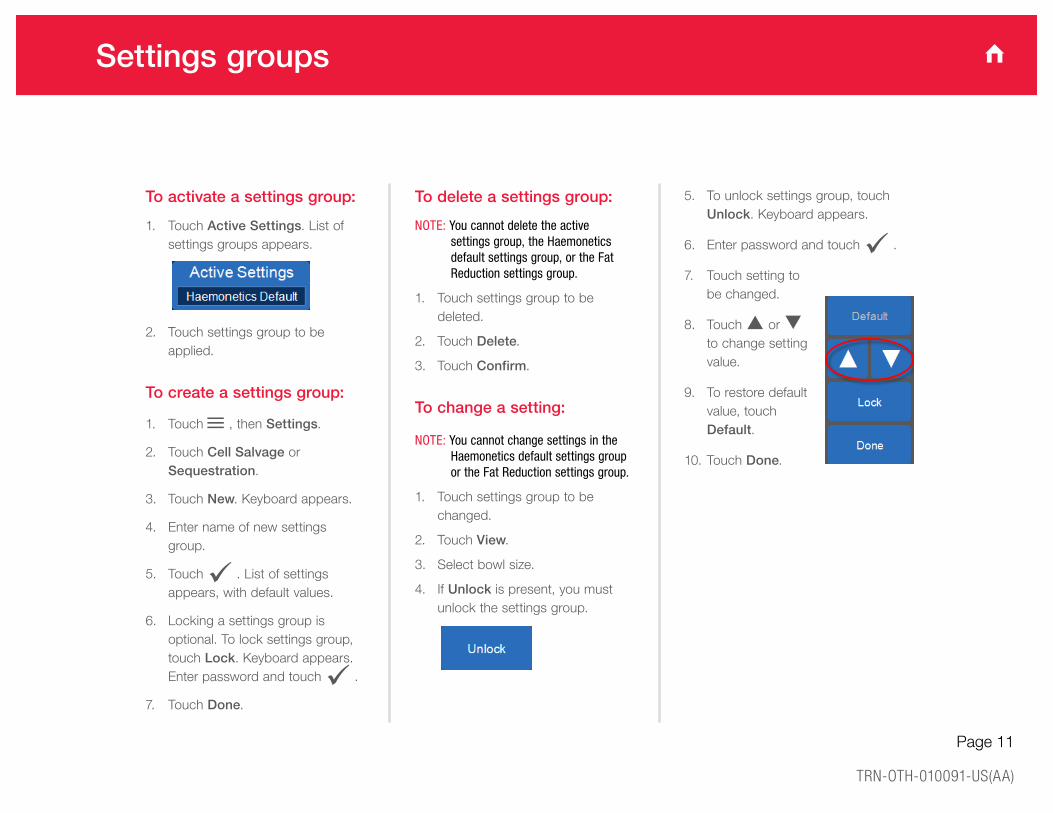
7. Touch setting to be changed.
8. Touch S or T to change setting value.
9. To restore default value, touch Default.
10. Touch Done.
Settings groups
Page 12
TRN-OTH-010091-US(AA)
To view all procedure records:
1. Touch ≡ , then Records. Current procedure record appears.
2. Touch History.
To view a procedure record:
1. Touch ≡ , then Records. Current procedure record appears.
2. Touch History.
3. Touch record to be viewed. (Use scroll arrows if necessary.)
4. Touch View.
5. Touch Volume By Cycle to view volume statistics.
Touch Disposables to view disposables used. Touch Events to view events.
To edit a procedure record:
1. Select record to be edited as at left.
2. Touch field to be edited. (Use scroll arrows if necessary.)
3. Touch Edit. Depending on the field:
� Pop-up menu appears. Touch required value.
� Pop-up menu appears. Touch <New>. Keyboard appears. Enter value and touch
to save.
� Keyboard appears. Enter information and touch to save.
4. Touch Done.
Procedure records (1 of 2)
Page 13
TRN-OTH-010091-US(AA)
To add a Haemonetics disposable item using barcode reader:
1. Touch ≡ , then Records. Current procedure record appears.
2. Touch History.
3. Touch record to be changed. (Use scroll arrows if necessary.)
4. Touch View.
5. Touch Disposables. Current list of disposables appears.
6. Scan barcode.
7. Touch Done.
To add a disposable item manually:
1. Touch Disposables. List of disposables appears.
2. Touch New.
3. Touch required disposable type.
4. Touch reference number.
5. Touch LOT field. Touch Edit. Keyboard appears. Enter lot number and touch
to save.
6. Touch (expiry date) field. Touch Edit. Touch day, month, or year field. Use arrows to select value. Touch to save.
7. Touch Done.
To delete a disposable:
1. Touch Disposables. List of disposables appears.
2. Touch disposable to be deleted.
3. Touch Delete.
4. Touch Confirm.
To export procedure records to a USB drive:
1. Touch ≡ , then Records.
2. Touch History.
3. Connect USB drive.
4. Select a record and touch Export, or touch Export All to export all records.
Procedure records (2 of 2)
Page 14
TRN-OTH-010091-US(AA)
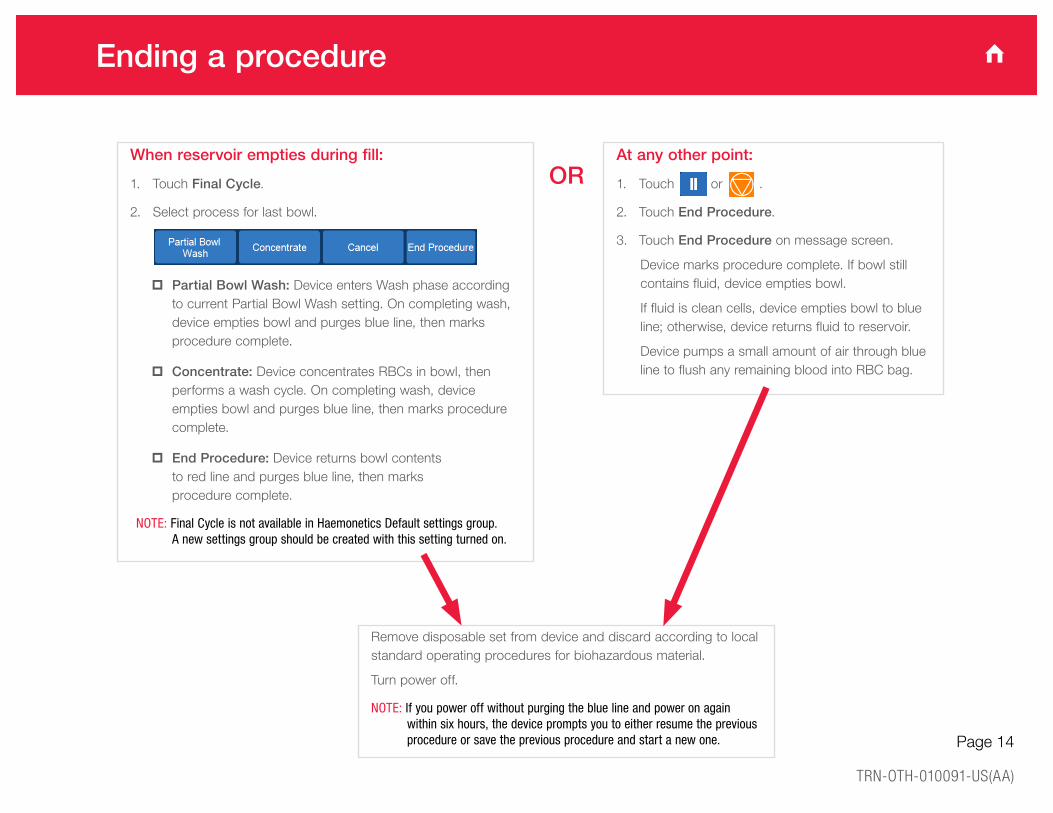
At any other point:
1. Touch or .
2. Touch End Procedure.
3. Touch End Procedure on message screen.
Device marks procedure complete. If bowl still contains fluid, device empties bowl.
If fluid is clean cells, device empties bowl to blue line; otherwise, device returns fluid to reservoir.
Device pumps a small amount of air through blue line to flush any remaining blood into RBC bag.
When reservoir empties during fill:
1. Touch Final Cycle.
2. Select process for last bowl.
� Partial Bowl Wash: Device enters Wash phase according to current Partial Bowl Wash setting. On completing wash, device empties bowl and purges blue line, then marks procedure complete.
� Concentrate: Device concentrates RBCs in bowl then performs a wash cycle. On completing wash, device empties bowl and purges blue line, then marks procedure complete.
� End Procedure: Device returns bowl contents to red line and purges blue line, then marks procedure complete.
NOTE: Final Cycle is not available in Haemonetics Default settings group. A new settings group should be created with this setting turned on.
Remove disposable set from device and discard according to local standard operating procedures for biohazardous material.
Turn power off.
NOTE: If you power off without purging the blue line and power on again within six hours, the device prompts you to either resume the previous procedure or save the previous procedure and start a new one.
OR
Ending a procedure
Page 15
TRN-OTH-010091-US(AA)
WARNING: To avoid the danger of electrical shock, only clean the Cell Saver Elite device when it is disconnected from the external power source.
Follow local standard operating procedure for blood precautions when cleaning up a blood spill or dealing with blood-contaminated components.
In the event of a blood spill, disinfect the exterior surfaces using a cleaning solution followed by a wipedown with distilled/sterile water.
If blood enters the cabinet through the vacuum port, remove the device from service and contact your local Haemonetics representative.
Exterior surfaces:
Clean exterior surface of device using cleaning solution, water, and lint-free gauze or cloth. Application of cleaning solution should be followed by a wipedown with distilled/sterile water applied with lint-free gauze or cloth.
If blood spills into centrifuge:
1. Turn power off and unplug device.
2. Ensure biohazard waste bag is unfolded and hanging from device tray and slide clamp is open.
3. Disconnect reservoir from processing set. If desired, transfer to another device.
4. Open device cover and remove processing set.
5. Dispose of processing set in an appropriate biohazard protective bag.
6. If spill is due to a leak in the disposable set, return set to Haemonetics for evaluation.
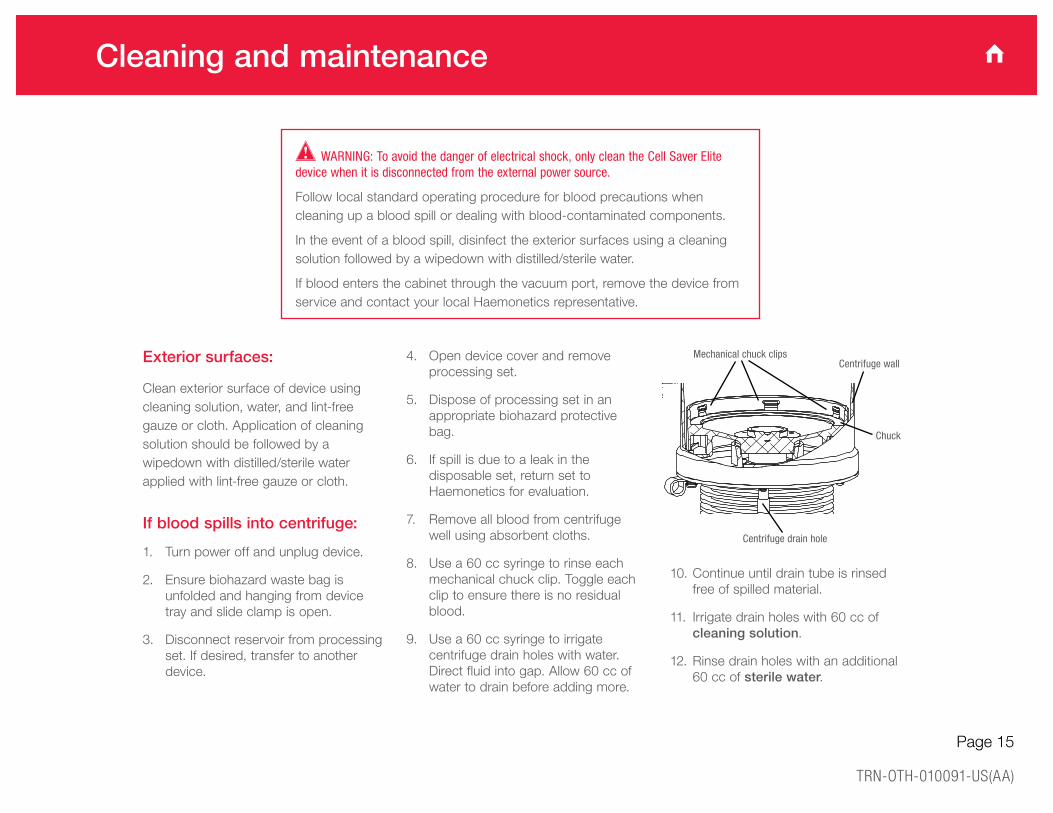
7. Remove all blood from centrifuge well using absorbent cloths.
8. Use a 60 cc syringe to rinse each mechanical chuck clip. Toggle each clip to ensure there is no residual blood.
9. Use a 60 cc syringe to irrigate centrifuge drain holes with water. Direct fluid into gap. Allow 60 cc of water to drain before adding more.
10. Continue until drain tube is rinsed free of spilled material.
11. Irrigate drain holes with 60 cc of cleaning solution.
12. Rinse drain holes with an additional 60 cc of sterile water.
Chuck
Centrifuge wallMechanical chuck clips
Centrifuge drain hole
Cleaning and maintenance

TRN-OTH-010091-US(AA)
Haemonetics Corporation400 Wood Road
Braintree, MA 02184 USAT: 781.848.7100
www.haemonetics.com
© 2016 Haemonetics Corporation. Haemonetics, Haemonetics The Blood Management Company, Cell Saver, Elite, and SmartSuction are trademarks or registered trademarks of Haemonetics Corporation in the USA, other countries, or both. TRN-OTH-010091-US
For a list of worldwide office locations and contact information, visit www.haemonetics.com/officelocations