crrftsm;in · for two years from date of purchese, when this craftsman lawn mower is maintained,...
TRANSCRIPT
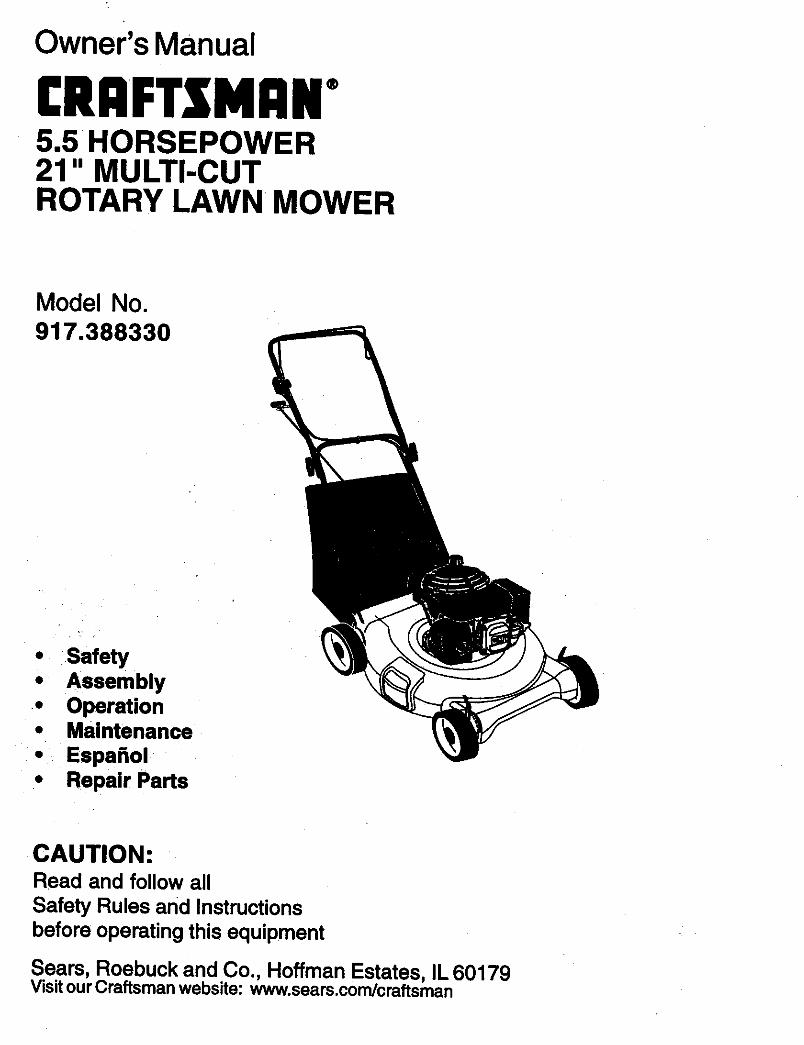
Owner's Manual
CRRFTSM;IN5.5 HORSEPOWER21" MULTI-CUTROTARY LAWN MOWER
Model No.917.388330
• ,Safety• Assembly•. Operation• Maintenance
• Espa_ol• Repair Parts
CAUTION:Read and follow allSafety Rules and Instructionsbefore operating this equipment
Sears, Roebuck and Co., Hoffman Estates, IL 60179VisitourCraftsman website: www.sears.com/craftsman

Warranty ........................... .................... 2Safety Rules ......................................... 2Assembly .............................................. 4Operation .............................................. 6Maintenance Schedule ........................ 10Maintenance ......................................... 10
Product Specifications .......................... 11Service and Adjustments ...................... 13Storage ................................................. 14Troubleshooting ................................... 15Repair Parts .......................................... 34Parts Ordering ...................... Back Cover
LIMITED TWO YEAR WARRANTY ON CRAFTSMAN POWER MOWER
For two years from date of purchese, when this Craftsman Lawn Mower is maintained,lubricated, and tuned up according to the operating and maintenance instructions inthe owner's manual, Sears will repair free of charge any defect in material or workman-ship.If this Craftsman Lawn Mower is used for commercial or rental purposes, this warrantyapplies for only 90 days from the date of purchase.This Warranty does not cover:• Expendable items which become worn during normal use, such as rotary mower
blades, blade adapters, belts, air cleaners and spark plug.• Repairs necessary because of operator abuse or negligence, including bent
crankshafts and the failure to maintain the equipment according to the instructionscontained in the owner's manual.
Warranty service is available by returning the Craftsman power mower to the nearestSears Service Center/Department in the United States. This warranty applies onlywhile this product is in use in the United States.This Warranty gives you specific legal dghts, and you may also have other rights whichvary from state to state.
SEARS, ROEBUCKAND CO, D/817 WA, HOFFMAN ESTATES, ILLINOIS 60179
Safety standards require operatorpresence control to minimize the risk ofinjury.Your unit is equipped with cuchcontrols,do not attempt to defeat thefunction of the operator presence controlsunder any circumstances.TRAINING:
• Read this operator's manual carefully.Become familiar with the controls and
know how to operate your mowerproperly, Learn how to quickly stopmower.
• Do not allow children to use yourmower. Never allow adults to use
mower without proper instructions.• Keep the area of operation clear of all
persons, especially small children andpets.
• Use mower only as the manufacturerintended and as described in thismanual.
• Always thoroughly check the area to bemowed and clear it of all stones, sticks,wires, bones, and other foreign objects.These objects will be thrown by theblade and can cause severe injury.
• Always wear safety glasses or eyeshields when starting and while usingyour mower.
• Dress properly. Do not operate mowerwhen barefoot or wearing open
• Do not operate mower if it has beendropped or damaged in any manner.Always have damage repaired beforeusing your mower.
• Do not use accessory attachments thatare not recommended by the manufac-turer. Use of such attachments may behazardous.
• The blade tums when the engine isrunning.
PREPARATION:
2

sandals. Wear only solid shoes withgood traction when mowing. _
• Check fuel tank before starting engine.Do not fill gas tank indoors, when theengine is running or when the engine ishot. Allow the engine to cool for severalminutes before filling the gas tank.Clean off any spilled gasoline beforestarting the engine.
• Always make wheelheight adjustmentsbefore starting your mower. Neverattempt to do this while the engine isrunning.
• Mow only in daylight or good artificiallight,
OPERATION:• Keep your eyes and mind on your
mower and the area being cut. Do notlet other interests distract you.
• Do not mow wet or slippery grass.Never run while operating your mower.Always be sure of your footing - keep afirm hold on the handles and walk.
• Do not put hands or feet near or underrotating parts. Keep clear of thedischarge opening at all times.
• Always stop the engine whenever youleave or are not using your mower, orbefore crossing driveways, walks,roads, and any gravel-covered areas.
• Never direct discharge of materialtoward bystanders nor allow anyonenear the mower while you are operatingit.
• Before cleaning, inspecting, or repair-ing your mower, stop the engine andmake absolutely sure the blade and allmoving parts have stopped. Thendisconnect the spark plug wire andkeep it away from the spark plug toprevent accidental starting.
• Do not continue to run your mower ifyou hit a foreign object. Follow theprocedure outlined above, then repairany damage before restarting andoperating your mower.
• Do not change the governor settings oroverspeed the engine. Engine damageor personal injury may result.
• Do not operate your mower if it vibratesabnormally. Excessive vibration is anindication of damage; stop the engine,safely check for the cause of vibrationand repair as required.
• Do not run the engine indoors. Exhaustfumes are dangerous.
• Never cut grass by pulling the mowertowards you. Mow across the face ofslopes, never up and down or youmight lose your footing. •Do not mowexcessively steep slopes. Use caution
• when operating the mower on uneventerrain or when changing directions -maintain good footing.
• Never operate your mower withoutproper guards, plates, grass catcher orother safety devices in place.
MAINTENANCE AND STORAGE:
• Check the blade and the enginemounting bolts often to be sure they aretightened properly.
• Check all bolts, nuts and screws atfrequent intervals for proper tightness tobe sure mower is in safe workingcondition.
• Keep all safety devices in place andworking.
• To reduce fire hazard, keep the enginefree of grass, leaves or excessivegrease and oil.
• Check grass catcher often for deteriora-tion and wear and replace wom bags.Use only replacement bags that arerecommended by and comply withspecifications of the manufacturer ofyour mower.
• Always keep a sharp blade on yourmower.
• Allow engine to cool before storing inany enclosure.
• Never store mower with fuel in the tank
inside a building where fumes mayreach an open flame or an ignitionsource such as a hot water heater,space heater, clothes dryer, etc.
ALook for this symbol to point outimportant safety precautions, it meansCAUTIONIU BECOMEALERTIH YOURSAFE'I_ IS iNVOLVED.
ACAUTION: Always disconnect sparkplug wire and place wire where it cannotcontact spark plug in order to preventaccidental starting when setting up,transporting, adjusting or making repairs.
_WARNING: The engine exhaust fromthis product contains chemicals known tothe State of California to cause cancer,birth defects, or other reproductive harm.
3

These accessories were available when this lawn mower was produced. They are notshipped with your mower. They are also available at most Sears retail outletsandservice centers. Most Sears stores can also order repair parts for you, when youprovide the model number of your lawn mower. Some of these accessories may notaP_B,k4_ I_I_L_MANCE
CLIPPING DEFLECTORFOR REAR DISCHARGE LAWN MOWERS MULCRER KITS
GRASS CATCHERSFOR
REAR DISCHARGELAWN MOWERS GRASS CATCHERS
FORSIDE DISCHARGELAWN MOWERS
LAWN MOWER MAINTENANCE
MUFFLERS AIR RLTERS
BLA ES BLADE ADAPTERS
STABILIZER
GAS CANS
SPARK PLUGS
ENGINE OIL
Read these instructions and this manual
in its entirety before you attempt toaSSemble or operate your new lawnmower.IMPORTANT: This lawn mower is shippedWITHOUT OIL OR GASOLINE in theengine.Your new lawn mower has been as-sembled at the factory with the exceptionof those pads left unassembled forshipping purposes. To ensure safe andproper operation of your lawn mower, allparts and hardware you assemble mustbe tightened securely. Use the correcttools as neceSSary to ensure propertightness. All parts such as nuts, washers,bolts, etc., necessary to complete theassembly have been placed in the padsbag.
TO REMOVE LAWN MOWER FROMCARTON
• Remove loose parts included withmower.
• Cut down two end comers of cartonand lay end panel down flat.
• Remove all packing materials exceptpadding between upper and lowerhandle and padding •holdingoperatorpresence control bar to upper handle.
• Roll lawn mower out of carton andcheck carton thoroughly for additionalloose pads.
4

HOW TO SET UP YOUR LAWNMOWERTO UNFOLD HANDLE
IMPORTANT: Unfold handle carefully soas not to pinch or damage control cables, handle• Raise handles until lower handle Liftup
section _ocks into place in mowing
position. Lower• Remove protective padding, raise handle
upper handle section into place onlower handle and tighten both handleknobs.
• Remove handle padding holdingoperator presence control bar to upperhandle.
• Your lawn mower handle can be
adjusted for your mowing comfort.Refer to "Adjust Handle" in the Service manual.and Adjustments section of this manual.
Operatorpresencecontrol bar
Mowingposition
TO INSTALL A'I'rACHMENTS
Your lawn mower was shipped ready tobe used as a mulcher. To converttobagging or discharging, see =To convertmower" in the OPERATION section of this
5

KNOW YOUR LAWN MOWERREADTHIS OWNER'S MANUALAND SAFETY RULES BEFOREOPERATINGYOUR LAWNMOWER. Comparethe illustrationswithyourlawn mowerto familiarizeyourselfwiththelocationof variouscontrolsand adjustments.Save this manualforfuturereference.
These symbols may appear on your lawn mower or in literature supplied with theproduct. Learn and understand their meaning.
CAUTION ENGINE ENGINE FAST SLOW CHOKE FUEL OIL DANGER, KEEP HANDSOR WARNING ON OFF AND FEET AWAY
Throttle/chokecontrol
Operator presence controlbar
zone control cable
filler cap
valve
Engine oil capwith dipstick
Mulcher door Lawn mower housing
IMPORTANT: This lawn mower is shippedWITHOUT OIL OR GASOLINE in the Wheel adjuster
en_line. (on each wheel)MEETS CPSC SAFETY REQUIREMENTS
Sears rotary walk-behind power lawn mowers conform to the safety standards of theAmerican National Standards Institute and the U.S. Consumer Product Safety Commis-sion. The blade tums when the engine is running,
Operator Presence Control Bar- mustbe held down to the handle to start the
engine. Release to stop the engine.
Primer - pumps additional fuel from thecarburetor to the cylinder for use whenstarting a cold engine.Starter Handle - used for starting theengine.
6

The operation of any lawnmower can result in foreignobjects thrown into the eyes,
which can result in severe eye damage.Always wear safety glasses or eye shieldswhile operating your lawn mower orperforming any adjustments or repairs.We recommend a wide vision safety maskover spectacles or standard safetyglasses.HOW TO USE YOUR LAWN MOWER
ENGINE SPEED
The engine speed is controlled by athrottle control located on the side of the
upper handle. Choke position is forstarting a cold engine and fast position isfor normal cutting, trimming, and bettergrass bagging. Slow position is for lightcutting, trimming and fuel economy.
Fast
. -.s,ow
ENGINE ZONE CONTROL
_CAUTION: Federal regulations requirean engine control to be installed on thislawn mower in order to minimize the riskof blade contact injury. Do not under anycircumstances attempt to defeat thefunction of the operator control. The bladeturns when the engine is running.
• Your lawn mower is equipped with anoperator presence control bar whichrequires the operator to be positionedbehind the lawn mower handle to startand operate the lawn mower.
TO ADJUST CUTTING HEIGHT
• Raise wheels for low cut and lower
wheels for high cut.• Adjust cutting height to suit your
requirements. Medium position is bestfor most lawns.
• To change cutting height, squeezeadjuster lever toward wheel. Movewheel up or down to suit your require-ments. Be sure all wheels are in thesame setting.
NOTE: Adjuster is properly positionedwhen plate tab inserts into hole in lever.Also, 9-position adjusters (if so equipped)allow lever to be positioned between theplate tabs.
Lower Wheels for High CutPlate Tab
• _ Lever
RaiseWheels for.Low CutTO CONVERT MOWER
Your lawn mower was shipped ready tobe used as a mulcher. To convertto
bagging or discharging:
REAR BAGGING
• Lift rear door of the lawn mower andplace the grass catcher frame hooksonto the door pivot pins.
• To convert to mulching or discharging•operation, remove grass catcher andclose rear door.
Pivot pinsSIDE DISCHARGING
• Rear door must be closed.• Open mulcher door and install dis-
charge deflector under guard as shown.• Mower is now ready for discharging
operation.• To convert to mulching or bagging
operation, discharge deflector must beremoved and mulcher door must beclosed.
SIMPLE STEPS TO REMEMBERWHEN CONVERTING YOUR LAWN
MOWER
FOR MULCHING -
• Rear door closed.• Mulcher door closed.
FOR REAR BAGGING -• Grass catcher installed.• Mulcher door closed.
FOR SIDE DISCHARGING -
• Rear door closed.• Side discharge deflector installed.
7
ACAUTION: Do not run your lawnmower without rear door closed orapproved grass catcher in place. Neverattempt to operate the lawn mower withthe rear door removed or propped open.

OpenMulcher Door
Mulcherdoor
Dischargedeflector
BEFORE STARTING ENGINEOIL
Your lawn mower is shipped without oil inthe engine.• Be sure mower is level and area
around oil fill is clean.
• Remove engine oil cap and fill to theupper limit mark on dipstick.
NOTE: Allow oil to settle down into
engine for accurate dipstick reading.• Engine holds 18 112 ozs. of oil. For
type and grade of oil to use, see=ENGINE" in Maintenance section ofthis manual.
• Pour oil slowly. Do not over fill.• Check oil level before each use. Add
oil if needed. Fill to the upper limit markon dipstick.
• To read proper level, insert the dipstickinto the tube and rest engine oil cap onthe tube. Do not thread the cap ontothe tube. Remove and read the oillevel.
• Reinstall engine oil cap and tighten.• Change the oil after every 25 hours of
operation or each season. You mayneed to change the oil more oftenunder dusty, dirty conditions.
ADD GASOLINE
• Fill fuel tank. Use fresh, clean, regularunleaded gasoline with a minimum of87 octane. Do not mix oil with gasoline.Purchase fuel in quantities that can beused within 30 days to assure fuelfreshness.
AWARNING: Experience indicates thatalcohol blended fuels (called gasohol orusing ethanol or methanol) can attractmoisture which leads to separation andformation of acids during storage. Acidicgas can damage the fuel system of anengine while in storage. To avoid engineproblems, the fuel system should beemptied before storage of 30 days orlonger. Drain the fuel tank, start theengine and let it run until fuel lines andcarburetor are empty. Use fresh fuel nextseason. See Storage Instructions foradditional information. Never use engineor carburetor cleaner products in fuel tankor permanent damage may occur._IICAUTION: Fill to bottom of gas tankfiller neck. Do not overfill. Wipe off anyspilled oil or fuel. Do not store, spill or usegasoline near an open flame.
Oil filler
cap
Oil filler calddipstJck
8

TO START ENGINE MULCHING MOWING TIPS
• Turn fuel valve to ON position.• To start a cold engine, move handle
mounted throttle/choke control lever tochoke position.
• Hold operator presence control bardown to the handle and pull starterhandle quickly. Do not allow starterrope to snap back.
• Slowly move throttle control lever tofast position after engine starts.
• To start a warm engine, move throttlecontrol lever to fast or slow positionthen follow steps above.
• To stop engine, release operatorpresence control bar. Wait until bladeand all moving parts have stopped andtum fuel valve to OFF position if you donot intend to restart the engine soon.
IMPORTANT: For best performance, keepmower housing free of built-up grass andtrash. Clean UNDERSIDE OF MOWER
HOUSING after each use. See "Cleaning"in MAINTENANCE section of this manual.
• The special mulching blade will recutthe grass clippings many times andreduce them in size so that as they fallonto the lawn they will disperse into thegrass and not be noticed. Also, themulched grass will biodegrade quicklyto provide nutrients for the lawn. Alwaysmulch with your highest engine (blade)speed as this will provide the bestrecutting action of the blades.
• Avoid cutting your lawn when it is wet.Wet grass tends to form clumps andinterferes with the mulching action. Thebest time to mow your lawn is the earlyafternoon. At this time the grass hasdried and the newly cut area will not beexposed to the direct sun.
• For best results, adjust the lawn mowercutting height so that the lawn mowercuts off only the top one-third of thegrass blades. If the lawn is overgrown itwill be necessary to raise the height ofcut to reduce pushing effort and to keepfrom overloading the engine andleaving clumps of mulched grass. Forextremely heavy mulching, reduce yourwidth of cut, mow slowly and raisethe rear of the lawn mower one wheel
adjuster setting higher than the front.• Certain types of grass and grass
conditions may require that an area bemulched a second time to completelyhide the clippings. When doing asecond cut, mow across or perpendicu-lar to the first cut path.
• Change your cutting pattem from weekto week. Mow north to south one weekthen change to east to west the nextweek. This will help prevent mattingand graining of the lawn.
On
Fuel Valve lever
MOWINGTIPS
• Under certain conditions, such as verytall grass, it may be necessary to raisethe height of cut to reduce pushingeffort and to keep from overloading theengine and leaving clumps of grassclippings. It may also be necessary toreduce ground speed and/or run thelawn mower over the area a secondtime.
• For extremely heavy cutting, reduce thewidth of cut by ovedapping previouslycut path and mow slowly.
• For better grass bagging and mostcutting conditions, the engine speedshould be set in the fast position.
• Pores in cloth grass catchers canbecome filled with dirt and dust with use
and catchers will collect less grass. Toprevent this, regularly hose catcher offwith water and let dry before using.
• Keep top of engine around starter clearand clean of grass clippings and chaff.This will help engine air flow andextend engine life. 9
1/3

MAINTENANCE SCHEDULEFILL IN DATESAS YOU COMPLETEREGULAR SERVICE
Checkfo,Loo "v" " " ' v' rClean/Inspect Grass Catcher
(nfE_tppad) _ _,_M Clean Lawn Mower
;ERVICE DATES
0 C_eanUnder edve Cover(Power-Propelled Mowers1Check drive belt/pulteys
RE (Power-Propelled Mowers)_nYl=teptex:e BladeLubricationChart
IElectricStartMowersI
E Check Engine Oi(Level
N Change Engine Oil,G Clean Air Filter
InspectMuffler
iN Clean or Replace Spark Plug!E Rel_aca Air Filter Paper Cartridge
v'
v'
v'=
V'=1 - Change more often when operating under a heavy load or in high ambient lamperaturea.2. Sewlce more olten when opemiing in dkty or dusly conditions.3 - Replace blades more often when mowing In sandy soil
4 - Charge 48 hours at end of season.
GENERAL RECOMMENDATIONS
The warranty on this lawn mower doesnot cover items that have been subjectedto operator abuse or negligence. Toreceive full value from the warranty,operator must maintain mower asinstructed in this manual.Some adjustments will need to be madeperiodically to propedy maintain your unit.All adjustments in the Service andAdjustments section of this manual shouldbe checked at least once each season.• Once a year, replace the spark plug,
replace air filter element and checkblade for wear. A new spark plug andclean/new air filter element assures
proper air-fuel mixture and helps yourengine run better and last longer.
• Follow the maintenance schedule inthis manual.
BEFORE EACH USE
• Check engine oil level.• Check for loose fasteners.LUBRICATION
Keep unit well lubricated (See "LUBRICA-TION CHART").
LUBRICATION CHARTWheeladjusters
door bracket
hinge mounting pin
(_ SPRAY LUBRICANT
(_ ShE 30 MOTOR OIL REFER TOENGINE - MAINTENANCE SECTION.
IMPORTANT: Do not oil or grease plasticwheel bearings. Viscous lubricants willattract dust and dirt that will shorten thelife of the self lubricating bearings. If youfeel they must be lubricated, use only adry, powdered graphite type lubricantsparingly.
10
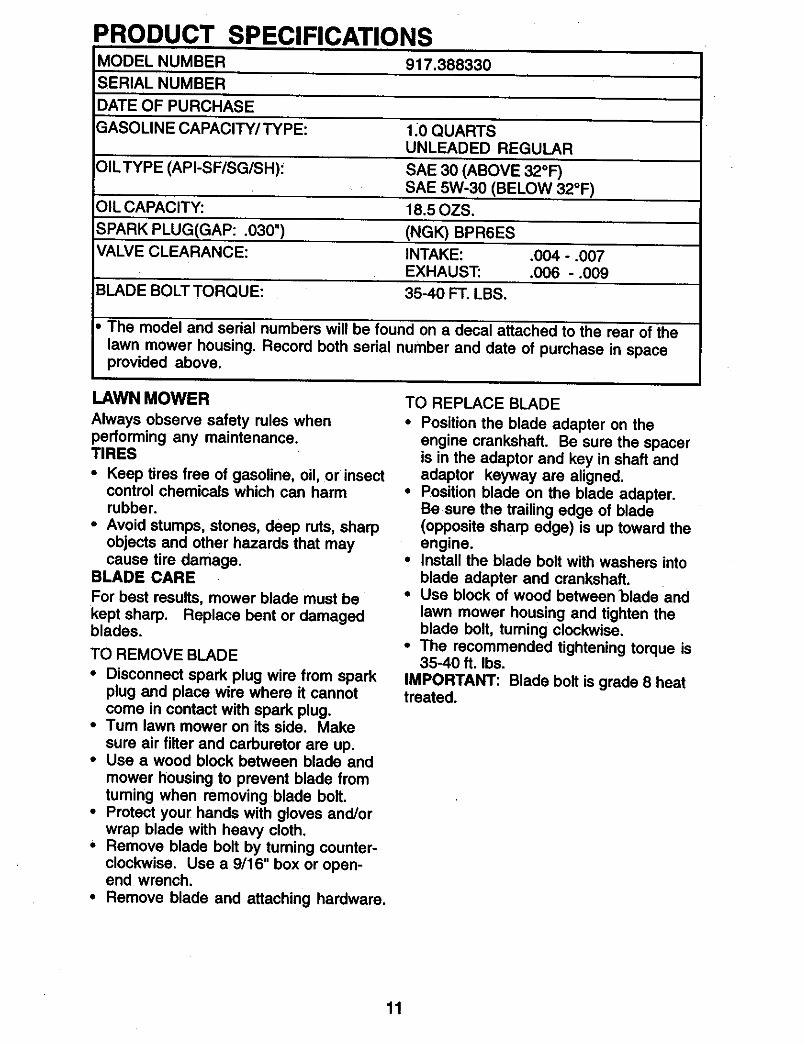
PRODUCT SPECIFICATIONSMODEL NUMBER
SERIAL NUMBER
DATE OF PURCHASE
GASOLINE CAPACITY/TYPE:
917.388330
OILTYPE (API-SF/SG/SH):
1:0 QUARTSUNLEADED REGULAR
SAE 30 (ABOVE 32°F)SAE 5W-30 (BELOW 32°F)
OIL CAPACITY: 18.50ZS.
SPARK PLUG(GAP: .030') (NGK) BPR6ES
VALVE CLEARANCE: INTAKE: .004 - .007EXHAUST: .006 - .009
BLADE BOLT TORQUE: 35-40 FT. LBS.
The model and serial numbers will be found on a decal attached to the rear of the
lawn mower housing. Record both serial number and date of purchase in spaceprovided above.
LAWN MOWERAlways observe safety rules whenperforming any maintenance.TIRES
• Keep tires free of gasoline, oil, or insectcontrol chemicals which can harmrubber.
• Avoid stumps, stones, deep ruts, sharpobjects and other hazards that maycause tire damage.
BLADE CARE
For best results, mower blade must bekept sharp. Replace bent or damagedblades.
TO REMOVE BLADE
• Disconnect spark plug wire from sparkplug and place wire where it cannotcome in contact with spark plug.
•Tum lawn mower on its side. Makesure air filter and carburetor are up.
• Use a wood block between blade andmower housing to prevent blade fromtuming when removing blade bolt.
• Protect your hands with gloves and/orwrap blade with heavy cloth.
• Remove blade bolt by turning counter-clockwise. Use a 9/16" box or open-end wrench.
• Remove blade and attaching hardware.
TO REPLACE BLADE
• Position the blade adapter on theengine crankshaft. Be sure the spaceris in the adaptor and key in shaft andadaptor keyway are aligned.
• Position blade on the blade adapter.Be sure the trailing edge of blade(opposite sharp edge) is up toward theengine.
• Install the blade bolt with washers intoblade adapter and crankshaft.
• Use block of wood between blade andlawn mower housing and tighten theblade bolt, turning clockwise.
• The recommended tightening torque is35-40 ft. Ibs.
IMPORTANT: Blade bolt is grade 8 heattreated.
11

TO SHARPEN BLADE
NOTE: We do not recommend
sharpening blade - but if you do, be surethe blade is balanced.
Care should be taken to keep the bladebalanced. An unbalanced blade will
cause eventual damage to lawn mower orengine.• The blade can be sharpened with a file
or on a grinding wheel. Do not attemptto sharpen while on the mower.
• To check blade balance, drive a nailinto a beam or wall. Leave about one
inch of the straight nail exposed. Placecenter hole of blade over the head ofthe nail. If blade is balanced, it shouldremain in a horizontal position. If eitherend of the blade moves downward,
sharpen the heavy end until the bladeis balanced.
CrankSpacer shaft
Spacerwasher
BladeBolt
\
Lockwasher Hardened Blade
washer Trailing adapteredge
GRASS CATCHER
• The grass catcher may be hosed withwater, but must be dry when used.
• Check your grass catcher ()ften fordamage or deterioration. Throughnormal use it will wear. If catcher needs
replacing, replace only with a manufac-turer approved replacement catcher.Give the lawn mower model numberwhen ordering.
ENGINE
LUBRICATION
Use only high quality detergent oil ratedwith API service classification SF, SH orSG. Select the oil's SAE viscosity gradeaccording to your expected operating
NOTE: Although multi--viscosity oils(5W30, 10W30 etc.) improve starting incold weather, these multi_viscosity oilswill result in increased oil consumptionwhen used above 32°F. Check yourengine oil level more frequently to avoidpossible engine damage from runninglow on oil.
Change the oil after every 25 hours ofoperation or at least once a year if thelawn mower is not used for 25 hours in
one year.Check the crankcase oil level before
starting the engine and after each five (5)hours of continuous use. "13ghtenoil plugsecurely each time you check the oil level,TO CHANGE ENGINE OIL
NOTE: Before tipping lawn mower todrain oil, drain fuel tank by runningengine until fuel tank is empty.
• Disconnect spark plug wire from sparkplug and place wire where it cannotcome in contact with spark plug.
• Remove engine oil cap; lay aside on aclean surface.
• Tip lawn mower on its side as shownand drain oil into a suitable container.Rock lawn mower back and forth toremove any oil trapped inside ofengine.
• Wipe off any spilled oil on lawn mowerand on side of engine.
• Fill engine with oil. Fill to the upperlimit mark on the dipstick. DO NOTOVER FILL.
• To read proper level, insert the dipstickinto the tube and rest oil fill cap on thetube. Do not thread the cap onto thetube. Remove and read the oil level.
• Replace engine oil cap.• Reconnect spark plug wire to spark
plug.
Oil rifler cap/dipstick
Upper limiti
_Lower limit
-10" 9_ 1_ tO= lO =
TEMPERATURE RANGE ANTICtPATEO BEFORE NEXT 011.CK_MGE
12

AIR FILTER
Your engine will not run properly and maybe damaged by using a dirty air filter.Replace the air filter every year, moreoften if you mow in very dusty, dirtyconditions.
TO CLEAN AIR FILTER
• Remove cover.• Carefully remove cartridge.• Clean by gently tapping on a flat
surface. If very dirty, replace cartridge._CAUTION: Petroleum solvents, such askerosene, are not to be used to cleancartridge. They may cause deteriorationof the cartridge. Do not oil cartridge. Donot use pressurized air to clean or drycartddge.
• Install cartridge, then replace cover.
Filter FilterCover
Tabs
Tabs
MUFFLER
Inspect and replace corroded muffler as itcould create afire hazard and/or damage.SPARK PLUG
Change your spark plug each year tomake your engine start easier and runbetter. Set spark plug gap at .030 inch.
CLEANING
IMPORTANT: For best performance, keepmower housing free of built--up grassand trash. Clean underside of mower
housing after each use.
ACAUTION: Disconnect spark plug wirefrom spark plug and place wire where itcannot come in contact with the sparkplug.• Turn lawn mower on its side. Make sure
air filter and carburetor are up. Cleanthe underside of your lawn mower byscraping to remove build--up of grassand trash.
• Clean engine often to keep trash fromaccumulating. A clogged engine runshotter and shortens engine life.
• Keep finished surfaces and wheels freeof all gasoline, oil, etc.
• We DO NOT recommend using agarden hose to clean lawn mowerunless the electrical system, muffler, airfilter and carburetor are covered to
keep water out. Water in engine canresult in shortened engine life.
ACAUTION: Before performing anyservice or adjustments:
• Release control bar and stop engine.• Make sure the blade and all moving
parts have completely stopped.• Disconnect spark plug wire from spark
plug and place where it cannot come incontact with plug.
LAWN MOWER
TO ADJUST CUTFING HEIGHTSee "TO ADJUST CUTTING HEIGHT" inthe Operation section of this manual.REAR DEFLECTOR
The rear deflector, attached between therear wheels of your lawn mower, isprovided to minimize the possibility thatobjects will be thrown out the rear of thelawn mower into the operator's mowingposition.If the rear deflector becomes damaged, itshould be replaced.
TO ADJUST HANDLE
The handle can be mounted in a high orlow position. The mounting holes in thebottom of lower handle are oft center for
raising or lowering the handle.• Remove upper handle and all parts
attached to lower handle.• Remove hairpin cotters from lower
handle bracket mounting pin.• Squeeze lower handle in to remove it
from mounting pins.• Turn lower handle over to raise or lower
handle.• Squeeze lower handle in and position
holes onto mounting pins on handlebracket.
• Reassemble upper handle and all partsremoved from lower handle.
13
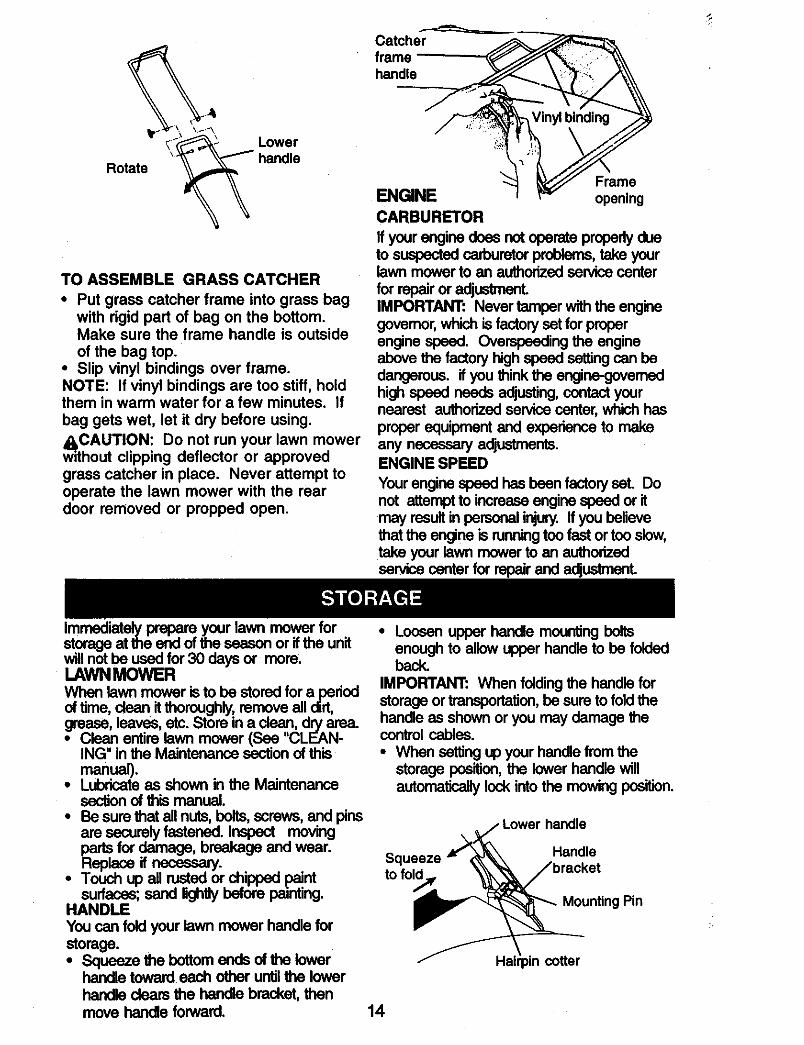
Catcherframehandle
\ Lower
Rotate
TO ASSEMBLE GRASS CATCHER
• Put grass catcher frame into grass bagwith rigid part of bag on the bottom.Make sure the frame handle is outsideof the bag top.
• Slip vinyl bindings over frame.NOTE: If vinyl bindings are too stiff, holdthem in warm water for a few minutes. If
bag gets wet, let it dry before using.
ACAUTION: Do not run your lawn mowerwithout clipping deflector or approvedgrass catcher in place. Never attempt tooperate the lawn mower with the reardoor removed or propped open.
Frame
ENGINE openingCARBURETOR
If your engine does not operate propedy dueto suspected carburetor problems, take yourlawn mower to an authorized service centerfor repair or adjustmenLIMPORTANT: Never tamper with the enginegovemor, which is factory set for properengine speed. Overspeeding the engineabove the factory high speed setting can bedangerous, if you think the engine-govemedhigh speed needs adjusting,contact yournearest authorized service center, which hasproper equipment and experiance to makeany necessary adjustments.ENGINE SPEED
Your engine speed has been factory set. Donot attempt to increase engine speed or itmay result in personal injury. If you believethat the engine is runningtoo fast or too slow,take your lawn mower to an authorizedservice center for repair and adjustment.
Immediately prepare your lawn mower forstorage at the end of the season or ifthe unitwill not be used for 30 days or more.LAWNMOWERWhen lawn mower is to be stored for a periodof time, dean itthoroughly, remove all dirt,grease, leaves, etc. Store in a clean, dry area.• Clean entire lawn mower (See "CLEAN-
ING" inthe Maintenance section of thismanual).
• Lubricate as shown in the Maintenancesection of this manual.
• Be sure that all nuts, bolts, screws, and pinsare securely fastened. Inspect movingparts for damage, breakage and wear.Replace if necessary.
• Touch up all rusted or chipped l_..'ntsurfaces; sand lighify before painting.
HANDLEYou can fold your lawn mower handle forstorage.• Squeeze the bottom ands of the lower
handle toward each other untilthe lowerhandle dears the handle bracket, thenmove handle forward.
• Loosen upper handle mounting boltsenough to allow upper handle to be foldedback=
IMPORTANT: When folding the handle forstorage or transportation,be sure to fold thehandle as shown or you may damage thecontrol cables.
• When setting up your handle from thestorage position, the lower handle willautomatically lock into the mowing position.
to fold
Handle
Mounting Pin
co_er
14

Operator PresenceControl Bar
UpperHandle
Fold ForwardFor Storage
LowerHandle
FoldBackward
MowingPosition
ENGINEFUEL SYSTEM
IMPORTANT: It is important to prevent_uUmdeposits from forming in essential
el system parts such as carburetor, fuelfilter, fuel hose, or tank during storage.Also, experience indicates that alcoholblended fuels (called gasohol or usingethanol or methanol) can attract moisturewhich leads to separation and formationof acids during storage. Acidic gascandamage the fuel system of an enginewhile in storage.• Drain the fuel tank.• Start the engine and let it run until the
fuel lines and carburetor are empty.• Never use engine or carburetor cleaner
products in the fuel tank or permanentdamage may occur.
• Use fresh fuel next season.
NOTE: Fuel stabilizer is an acceptablealternative in minimizing the formation offuel gum deposits during storage. Addstabilizer to gasoline in fuel tank orstorage container. Always follow the mix
TROUBLESHOOTING CHART
PROBLEM CAUSE
Does not start
ratio found on stabilizer container. Runengine at least 10 minutes after addingstabilizer to allow the stabilizer to reachthe carburetor. Do not drain the gas tankand carburetor if using fuel stabilizer.
ENGINE OIL
Drain oil (with engine warm ! and rep!acewith clean engine oil..(See ENGINE inthe Maintenance section of this manual).CYLINDER
•Remove spark plug.Pour one ounce (29 ml) of oil throughspark plug hole into cylinder.Pull starter handle slowly a few times todistribute oil.
• Replace with new spark plug.OTHER• Do not store gasoline from one season
to another.• Replace your gasoline can if your can
starts to rust. Rust and/or dirt in yourgasoline will cause problems.
• If possible, store your unit indoors andcover it to give protection from dust anddirt.
• Cover your unit with a suitable protec-tive cover that does not retain moisture.Do not use plastic. Plastic cannotbreathe which allows condensation toform and will cause your unit to rust.
IMPORTANT: Never cover mower whileengine and exhaust areas are still warm.
_CAUTION: Never store the lawn mowerwith gasoline in the tank inside a buildingwhere fumes may reach an open flame orspark. Allow the engine to cool beforestoring in any enclosure.
1. Dirtyair filter.2. Out of fuel3. Stale fuel.
4. Water in fuel.
5. Spark plug wire isdisconnected.
6. Bad spark plug.7. Loose blade or broken blade
adapter.8. Control bar in released
posen.9. Control bar defective.
CORRECTION
t. Clean/replace air filter.2. FIll fuel tank.3. Drain tank and refillwith
fresh clean fuet.4. Drain fuel tank and
carburetor and refilltank
with fresh gasoline.5. Connect wire to plug.
6. Replace spark plug,7. T'_jhten blade bolt or
replace blade adapter.8. Depress controlbar to
handle.
9. Replace control bar.
15

TROUBLESHOOTING CHARTPROBLEM
Lces of power
Poor cut- uneven
Excessivevibration
Starterropehardtopull
Grass catcher
notfllllng (If soequipped)
Hard to push
CAUSE
1. Rear of lawn mower housingor cutting blade draggingin heavy grass.
2. Cutting too much grass.
3. Dirty air filter.4. Buildup of grass, leaves,
and trash under mower.
5. Too much oil in engine.6. Walking speed too fast.
1. Wom, bent or loose blade.
2. Wheel heights uneven.
3. Low engine speed
4. Buildup of grass, leavesand trash under mower.
1. Wom, bentor looseblade.
2. Bentengine crankshaft.
1. Engine flywheel brake is onwhen control bar is released.
2. Bent en_ crankshaft.
3. Blade adapter broken.4. Blade dragging in grass.
1. Cuttingheighttoo low.2. Lifton blade wom off.3. Catchernot ventingair.4. LOWengine speed
1. Grass is too high or wheel
height is too low.2. Rear of lawn mower
housing or blade dragging
in grass.3. Grass catcher too full
4. Handle height position notrightfor you.
CORRECTION
1. Set to "Higher Cut"potion.
2. Set to =Higher Cut"position.
3. Clean/replace air filter.4. Clean underside Of mower
housing.5. Check oil level.
6. Cut at slower waildngspeed.
1. Replace blade. "l'_jhtenblade bolt.
2. Set ail wheels at same
height3. Contact an authorized center/
department4. Clean underside of
mower housing.
1. Replace blade. "l-_jhtenb_de borL
2. Contact an authorizedservice center.
• [
1. Depress controlbar toupper handle beforepulling starter rope.
2. Contact an authonzedservice center.
3. Replace blade adapter.4. Move lawn mower to cut
grass or to hard surface
1. RaisecutUnghek._2. Replace blade.3. Cleangraescetcher.4. Contact_ authorizedcenter/
department
1. Raise cutting heighL
2. Raise rear of lawn mower
hou_ng one (1) sett_ghigher.
3. Empty gress catchar.4. _4usthand_h_ht to
su'¢
16

33

CRAFTSMAN ROTARY LAWN MOWER -- MODEL NO. 917.388330
68
67
7
21
I lili24
4O
37
37
27

KEYNO.
12345679
101112131415161718192O2122232425262728293O313233
PARTNO.
86902169709X479169708X4791320016360113195966426154132165754851671750097850733X00413637651793147286165946X47917600406167132X004167133X004165858168360X00416687575115316611 lX479166112X479851856152124160835X00719112222165760169421X00487877
CRAFTSMAN ROTARY LAWN MOWER -- MODEL NO. 917.388330
DESCRIPTION
KEY PARTNO. NO. DESCRIPTION
ControlBar 34 165762X004UpperHandle 36 160828LowerHandle 37 151157RopeGuide 39 83923Locknut1/4-20 40 77400HandleBolt 41 88652Wire'Re 42 165766HingeBracket 43 165767MulcherDoor 44 165912EngineZoneControlCable 45 150406Hex Washer HeadScrew#10-24 x 1/2 46 85463Up-StopBrecket 48 165761X004HandleKnob 52 166878HaiqolnCotter 53 851084HingeRod 54 85O263SupportBracket 56 851074Screw 56 165833AxleArmAssembly- LF 57 851514AxleArmAssembly- RF 67 166113RearSkirt 68 165755SelectorSpdng- Front 70 ......RearDoorAssemblyKit(Incl.Spflngs)Locknut5/16-18 71 147759HandleBracketAssembly(Left) 72 144929HandleBracketAssembly(Right) - - 161058Screw 1/4-20 x 3/8 - - 172490HingeSpdngWheel AdjustingBracket- FrontSpacerClipon DischargeGuardSelectorSpdng- RearSelectorKnob
Axle ArmAssembly- LRShoulderBolt 5/16-18WheelAssemblyFlangedLocknutHubcapHingeScrewSpring(U-I)Spdng(RH)DoorBoltHex HeadThreadRollingScrew3/8-16 x 1DangerDecalAxleArmAssembly- RRHousingAssembly(Incl. Ref. #17, 18& 46)Hex Head Screw3/8-24 x 1-3/8 Grd. 8HelicalLockwasherHardenedWasher21" BladeBladeAdapterGrassBagCatcherFrameEngine- (See Breakdown)
HondaGCV160Throttle ControlScrewWarningDecal(NotShown)Owner'sManual
Availableaccessoriesnot includedwithlawnmower:7133623 Gas Can (2.5 gal.)7133,500 FuelStabilizer7133000 SAE 30W Oil (20 oz.)

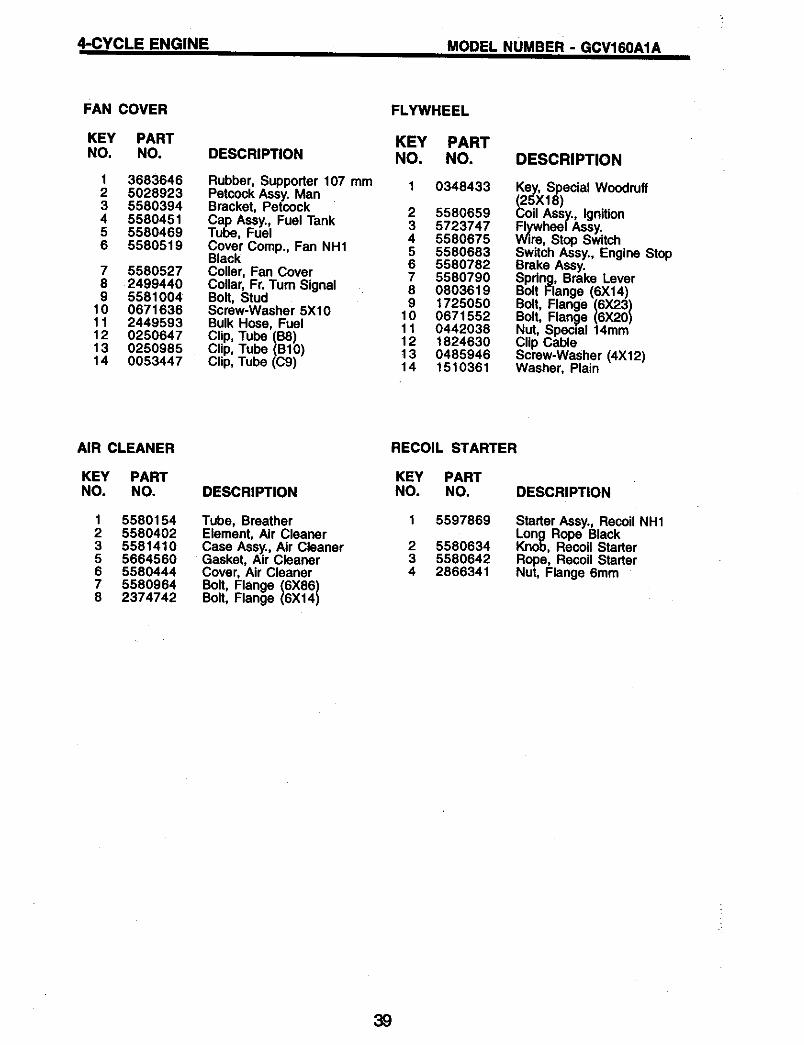
4-CYCLE ENGINE MODEL NUMBER - GCV160AIA
CONTROL I
,_ I__l _-'_" _zU 10
12112"-_"_ _11_
13-_ _r 12 4
CARBURETOR I 10
11
14
36
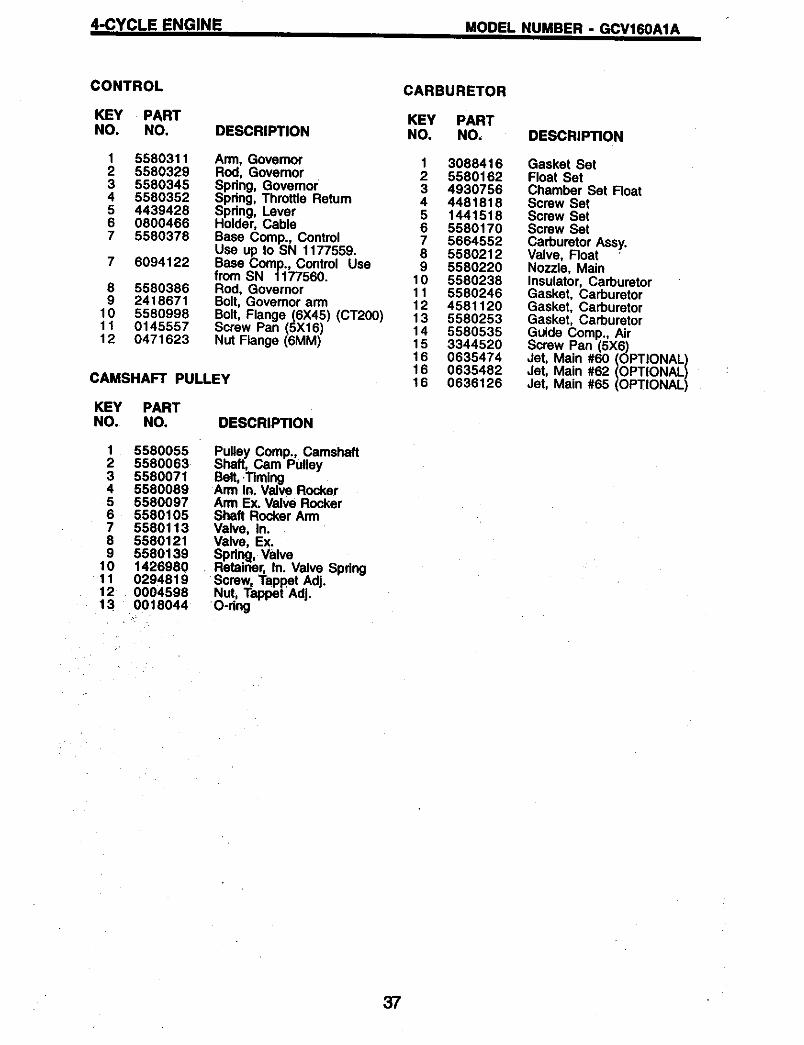
4-CYCLE ENGINE MODEL NUMBER - GCV160AIAI
CONTROL
KEY PARTNO. NO.
1 55803112 55803293 55803454 55803525 44394286 08004667 5580378
7 6094122
8 55803869 2418671
10 558099811 014555712 0471623
DESCRIPTION
Arm, GovemorRod, GovemorSpdng, GovernorSpdng, Throttle RetumSpring, LeverHolder, CableBase Comp., ControlUse up to SN 1177559.Base Comp., Control Usefrom SN 1177560.Rod, GovernorBolt, Govemor armBolt, Flange (6X45) (CT200)Screw Pan (5X16)Nut Flange (6MM)
CAMSHAFT PULLEY
KEY PARTNO. NO. DESCRIPTION
1 55800552 55800633 55800714 55800895 55800976 55801057 55801138 58801219 5580139
10 142698011 029481912 000459813 0018044
Pulley Comp., CamshaftShaft, Cam PulleyBell -TimingArm In. Valve RockerArm Ex. Valve RockerShaft Rocker ArmValve, In.Valve, Ex.Spdng, ValveRetainer, In. Valve SpringScrew, Tapt_t. Adj.Nut, Tappet Adj.O-ring
CARBURETOR
KEY PARTNO. NO,
1 30884162 55801623 49307564 44818185 14415186 55801707 56645528 55802129 5580220
10 558023811 558024612 458112013 558025314 558053515 334452016 063547416 063548216 0636126
DESCRIPTION
Gasket SetFloat SetChamber Set FloatScrew SetScrew SetScrew SetCarburetor Asey.Valve, FloatNozzle, MainInsulator, CarburetorGasket, CarburetorGasket, CarburetorGasket, CarburetorGuide Comp., AirScrew Pan (5X6)Jet, Main #60 (OPTIONAL)Jet, Main #62 (OPTIONAL)Jet, Main #65 (OPTIONAL)
37

4-CYCLE ENGINE MODEL NUMBER. GCV160AIA
FAN COVER I_--4
13
13
FLYWHEEL I
14
5
RECOIL STARTER I
I
I
6
I
38
4-CYCLE ENGINE MODEL NUMBER - GCV16OAIA
FAN COVER
KEY PARTNO. NO.
1 36836462 50289233 55803944 55804515 55804696 5580519
7 55805278 24994409 5581004
10 067163611 244959312 025064713 025098514 0053447
DESCRIPTION
Rubber, Supporter 107 mmPetcock Assy. ManBracket, PetcockCap Assy., Fuel TankTube, FuelCover Comp., Fan NH1BlackCollar, Fan CoverCollar, Fr. Tum SignalBolt, StudScrew-Washer 5X10Bulk Hose, FuelClip, Tube (B8)Clip, Tube (B10)Clip, Tube ((39)
FLYWHEEL
KEY PARTNO. NO.
1 0348433
2 55806593 57237474 55806755 55806836 55807827 55807908 08036199 1725050
10 067155211 044203812 1824630t3 048594614 1510361
DESCRIPTION
Key, Special Woodruff(25X16)Coil Assy., IgnitionFlywhae/Assy.Wire, Stop SwitchSwitch Assy., Engine StopBrake Assy.Spring, Brake LeverBolt Range (6X14)Bolt, Flange (6X23)Bolt, Flan_e (6X20)Nut, Special 14ramClip CableScrew-Washer (4X12)Washer, Plain
AIR CLEANER
KEY PARTNO. NO.
1 55801542 55804023 55814105 56645606 55804447 55809648 2374742
DESCRIPTION
Tube, BreatherElement, Air CleanerCase Assy., Air CleanerGasket, Air CleanerCover, Air CleanerBolt, Flange (6X86)Bolt, Flange (6X14)
RECOIL STARTER
KEY PARTNO. NO, DESCRIPTION
234
5597869
558063455806422866341
Starter Assy., Recoil NH1Long Rope BlackKnob, Recoit StarterRope, Recoil StarterNut, Flange 6mm
39

4-CYCLE ENGINE MODEL NUMBER - GCV160AIA
CYLINDER BARREL
$
5
4
OIL PAN
0-18
CRANKSHAFT PISTON CONNECTING ROD 4
5---_ /.,_'_
40

4-CYCLE ENGINE MODEL NUMBER - GCV160AIA
CYLINDER BARREL
KEY PARTNO. NO. DESCRIPTION
1 55799822 23997803 55799904 55800065 06368456 08036197 55810388 1441112
OIL PAN
Cylinder Assy.Clip, Valve GuideCover, HeadCover Comp., BreatherBolt, Flange (6X12)Bolt, Flange (6X14)Oil Seal 25.4X62X6Spark Plug (BPR6ES NGK)
KEY PARTNO. NO. DESCRIPTION
1 55799742 44979474 5580261
5 55802796 55802877 55802958 14272449 1427251
10 558030311 080361912 074811113 241386214 245669715 558104616 034590017 011552718 141736919 5722996
CRANKSHAFT
Pan Assy., OilGasket, Oil Filler CapShaft Comp., GovemorHolderGovemor Assy.Weight, GovernorHolder, Govemor WeightPin, Govemor WeightSlider, GovernorShaft, Governor ArmBolt Flange (6X14)Bolt, Flange (6X25)Washer, Thrust 6ramClip, Govemor HolderOil Seal (28X41 25X6)Washer, Plain 6mmPin, Lock 8mmPin, Dowel (I]X20)Gauge Aasy., Oil Level
KEY PARTNO. NO. DESCRIPTION
1 55800305 5581012
Crankshaft Comp.(N1-Type)Washer Thrust
PISTON CONNECTING ROD
KEY PARTNO. NO. DESCRIPTION
1234566
5580014142657655800221431055260551756559495655956
PistonPin, PistonRod Assy., ConnectingBolt, Connecting RodClip, Piston Pin 13mmRing Set, Piston (Riken)Ring Set, Piston (Teikoku)
MUFFLER
KEY PARTNO. NO.
1 55804852 55805013 55809724 06368455 5737457
DESCRIPTION
Muffler Comp.Protector, Muff erBolt, Flange (6X79)CT200Bolt, Flange (6X12)Gasket, Muffler (Optional)
41

42

43

For in-home major brand repair service:Call 24 hoursa day, 7 days a week
1-800-4-MY-Home sM(1-800-469-4663)Para pedir servicio de reparaci6n a domicilio
1-800-676-5811
In Canada for all your service and parts needs callAu Canada pour tout le service ou les pi_ces
1-800-665-4455
For the repair or replacement parts you need:Call 6 am-11pm CST, 7 days a week
PartsDirect sM1-800-366-PART (1-800-366-7278)
Para ordenar piezas con entrega a domicilio1-800-659-7084
For the location of a Sears Parts and Repair Centerin your area:
Call 24 Hours a day, 7 days a week1-800-488-1222
For information on purchasing a Sears MaintenanceAgreement or to inquire about an existing Agreement:
Call 9 am-5 pm, Monday - Saturday1-800-827-6655
SEARS
172490 12.02.99 VB Printed in U.S.A.