cross platform game development
TRANSCRIPT
Cross Platform Game DevelopmentWITH UNITY3D AND C#

What Introduction to developing production quality video games with Unity3D and C#
◦ Explore the Unity3D Interface◦ Developing on a PC or Mac◦ Unity and C#
◦ Scenes◦ GameObjects◦ Components◦ Scripts
◦ Deployment◦ PC/Mac◦ Mobile

WhyYou have been training for this your whole career!

The Setup Download and Install Unity3D
◦ http://unity3d.com/unity/download (Hopefully I have brought along thumb drives)
PC/MAC◦ A Web Browser
iOS◦ Xcode
Android◦ Android SDK and JDK
WP8◦ WP8 SDK
Most Importantly Have an Idea

Additional Tools Image Editor
◦ Photoshop, Gimp, Paint.Net
Video Editor◦ Adobe Premiere, Lightworks
3D Editor◦ 3ds Max, Blender
Sound Editor◦ Adobe Audition, Audacity

Unity 3DLet us build a Voxel Engine

Unity3D TourINTEGRATED EDITOR OVERVIEW

Adding to the Scene Let us begin doing something!
◦ Examine the Camera◦ Add a GameObject (Cube) to the Hierarchy◦ View the Cube within the Scene◦ View the Cube within the Game◦ View the Cube within the Inspector◦ View the Cube’s Gizmos◦ Manipulate the Cube with the Transform Tools (Pan, Transform, Rotate, Scale)

Project BrowserHighlights
• Assets
• Preview
• Favorites
• Search

Hierarchy• Contains all GameObjects in the current
scene.
• Shows Parenting• Inherits movement and rotation
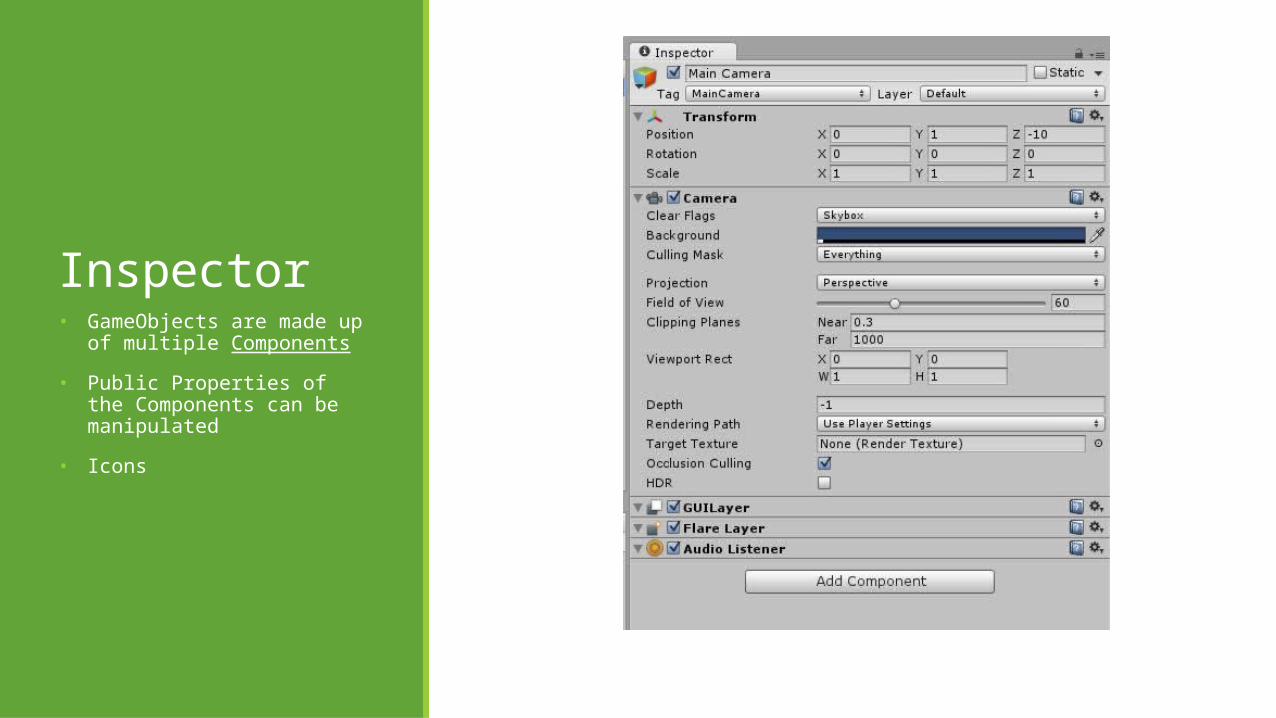
Inspector• GameObjects are made up of
multiple Components
• Public Properties of the Components can be manipulated
• Icons

Game The Game View is rendered from the Camera(s) in your game.

Scene The Scene View is your primary interaction surface with Unity

GameObjects Every object in your game is a GameObject
Without Components GameObjects are more of an organizational tool using Parenting
GameObjects contain Components
All GameObjects contain a Transform Components◦ Transform Components tell Unity where to put the GameObject in the Scene, more later◦ Transform are essential for Parenting

Components Components are the functional pieces of every GameObject.
Component Properties can be changed by the Editor or Scripts.
Components can be; Added, Copied, Removed, Reordered, Reset, and Required
Unity tries to choose the best Editor for the Properties. Hints or Custom Editors can be used with Properties to make the Inspector incredibly useful.
!Important: Changes made to the Unity while Running the Game are reverted once the Game is stopped. More on this when start looking at Scripts.

Component Cont. Goal
◦ Add a GameObject whose Mesh we can tile and manipulate later
Setup◦ Add a New GameObject (Ctrl+Shift+N)
◦ Name it Chunk
◦ Add a Components to Chunk◦ Mesh Filter◦ Mesh Render◦ Mesh Colider
◦ Transform Chunk to 0,0,10

Adding BehaviorsUSING VISUAL STUDIO OR MONODEVELOP
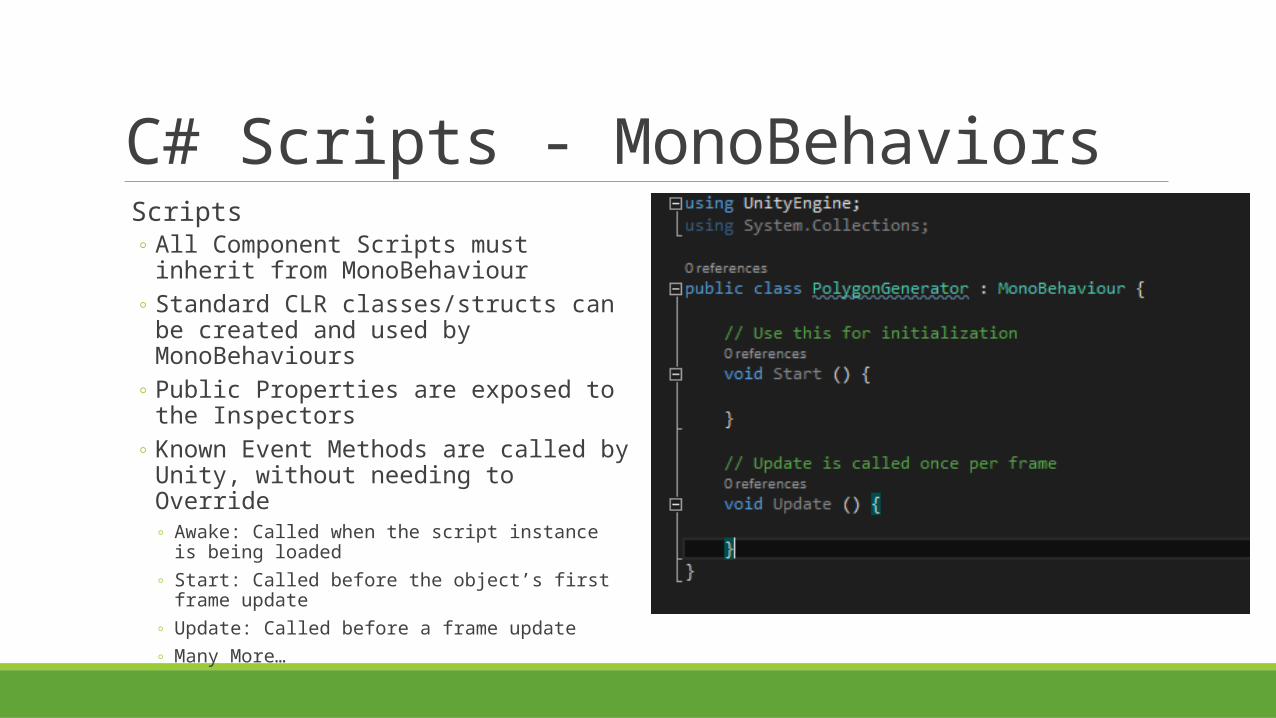
C# Scripts - MonoBehaviors Scripts
◦ All Component Scripts must inherit from MonoBehaviour
◦ Standard CLR classes/structs can be created and used by MonoBehaviours
◦ Public Properties are exposed to the Inspectors◦ Known Event Methods are called by Unity,
without needing to Override◦ Awake: Called when the script instance is being loaded◦ Start: Called before the object’s first frame update◦ Update: Called before a frame update◦ Many More…

C# Scripts – PolygonGenerator – Class
Goal◦ Use a Script to hold our mesh geometry
Setup◦ Create a Folder named “Scripts”◦ Create a Folder in “Scripts” Named “Generators”◦ Create a Script named “PolygonGenerator”◦ Drag “PolygonGenerator” onto “Chunk”◦ Create Structures to hold the new Mesh
Geometry◦ Create a cache to hold the GameObjects Mesh
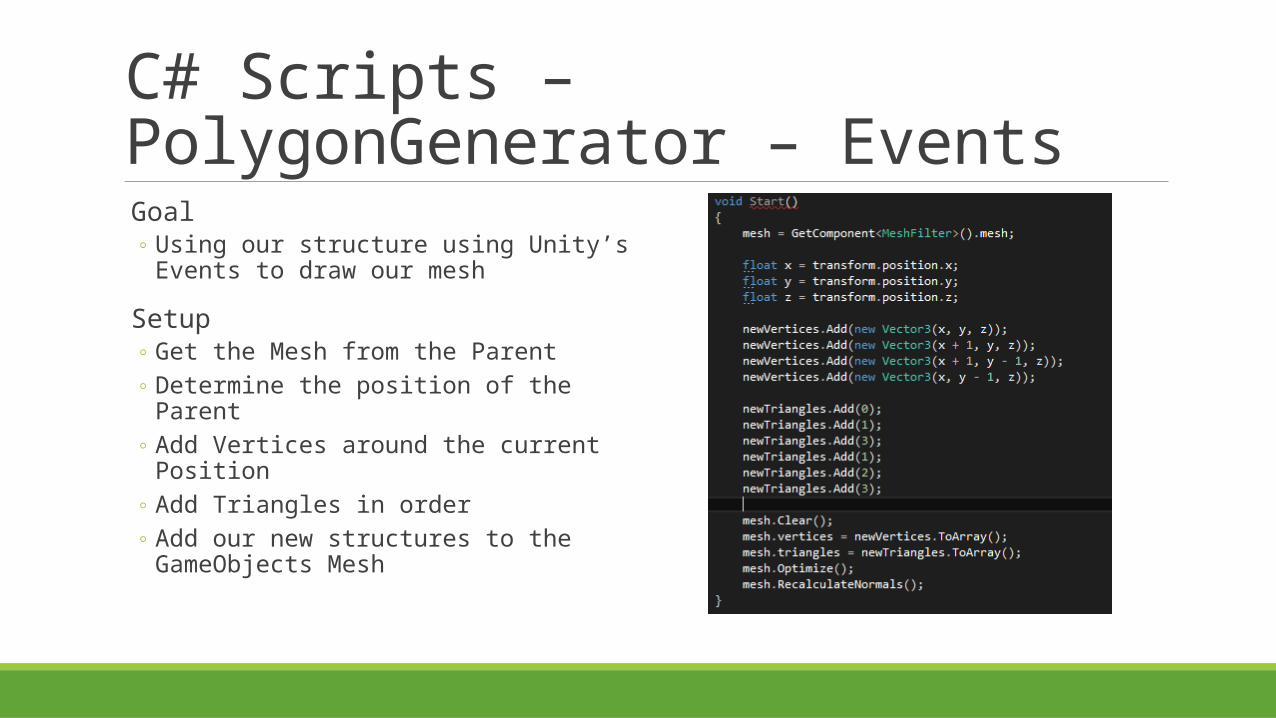
C# Scripts – PolygonGenerator – Events
Goal◦ Using our structure using Unity’s Events to draw
our mesh
Setup◦ Get the Mesh from the Parent◦ Determine the position of the Parent◦ Add Vertices around the current Position◦ Add Triangles in order◦ Add our new structures to the GameObjects
Mesh

Look A PolygonRun Unity Ctrl+P
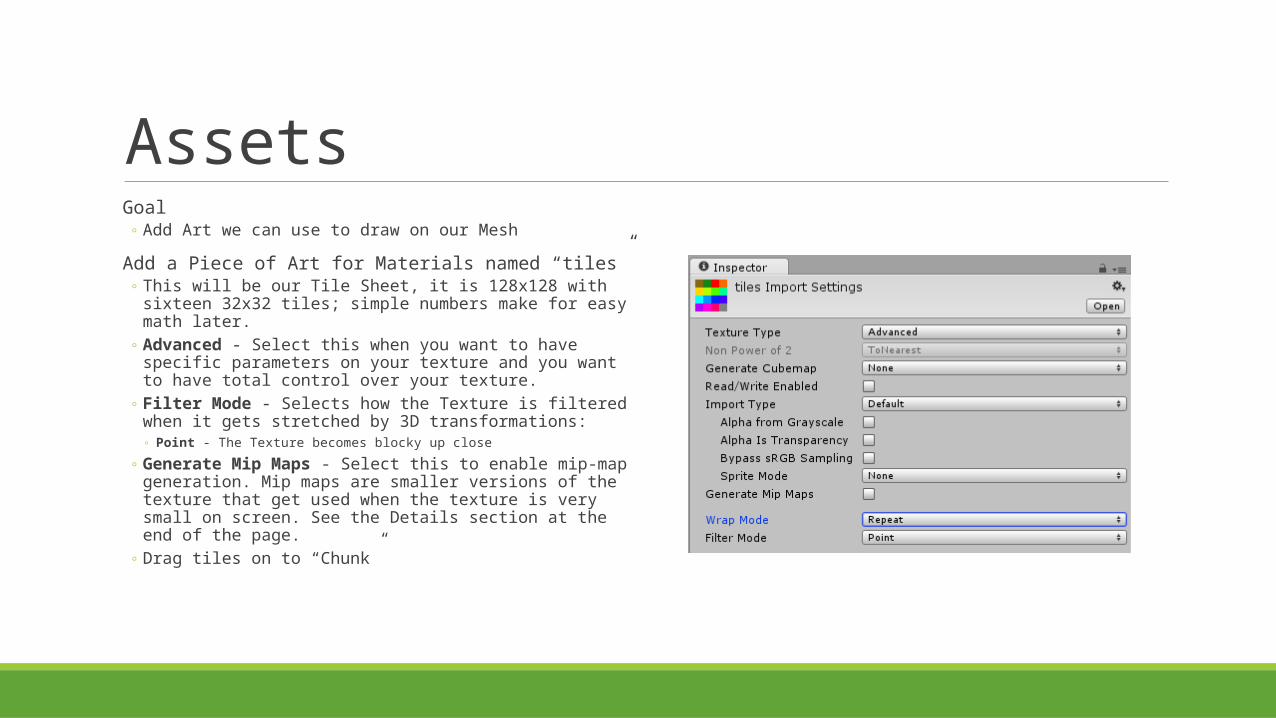
Assets Goal
◦ Add Art we can use to draw on our Mesh
Add a Piece of Art for Materials named “tiles”◦ This will be our Tile Sheet, it is 128x128 with sixteen
32x32 tiles; simple numbers make for easy math later.◦ Advanced - Select this when you want to have specific
parameters on your texture and you want to have total control over your texture.
◦ Filter Mode - Selects how the Texture is filtered when it gets stretched by 3D transformations: ◦ Point - The Texture becomes blocky up close
◦ Generate Mip Maps - Select this to enable mip-map generation. Mip maps are smaller versions of the texture that get used when the texture is very small on screen. See the Details section at the end of the page.
◦ Drag tiles on to “Chunk”
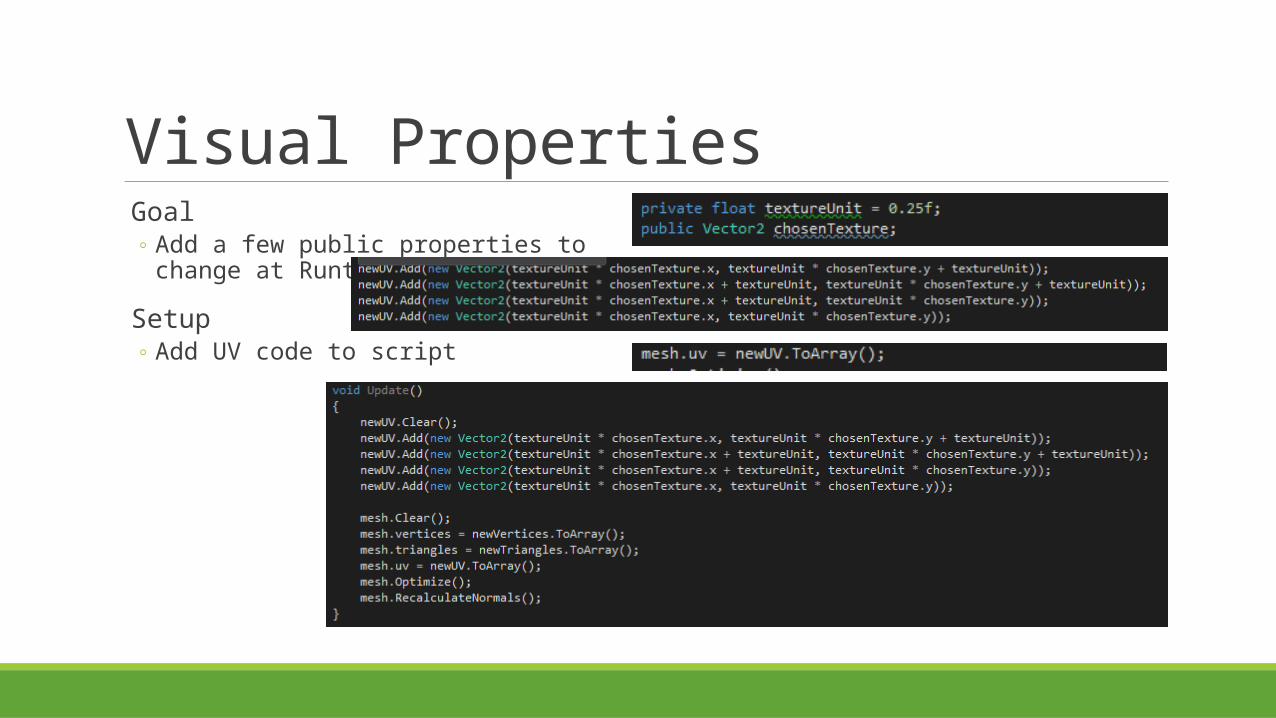
Visual Properties Goal
◦ Add a few public properties to change at Runtime
Setup◦ Add UV code to script

Visual Properties Cont. Goal
◦ Change the Chosen Texture
Setup◦ Run the Game◦ Use the Inspector to change values of Chosen
Texture◦ From 0,0◦ To 0,3

C# Scripts – PolygonGenerator – Terrain
Goal◦ Extend our simple polygon to a whole terrain of
polygon
Setup◦ Create a 2 Dimensional array to hold the block
textures◦ Change our generation to Generate Squares◦ Count the squares◦ Randomize the Terrain◦ Build the Mesh
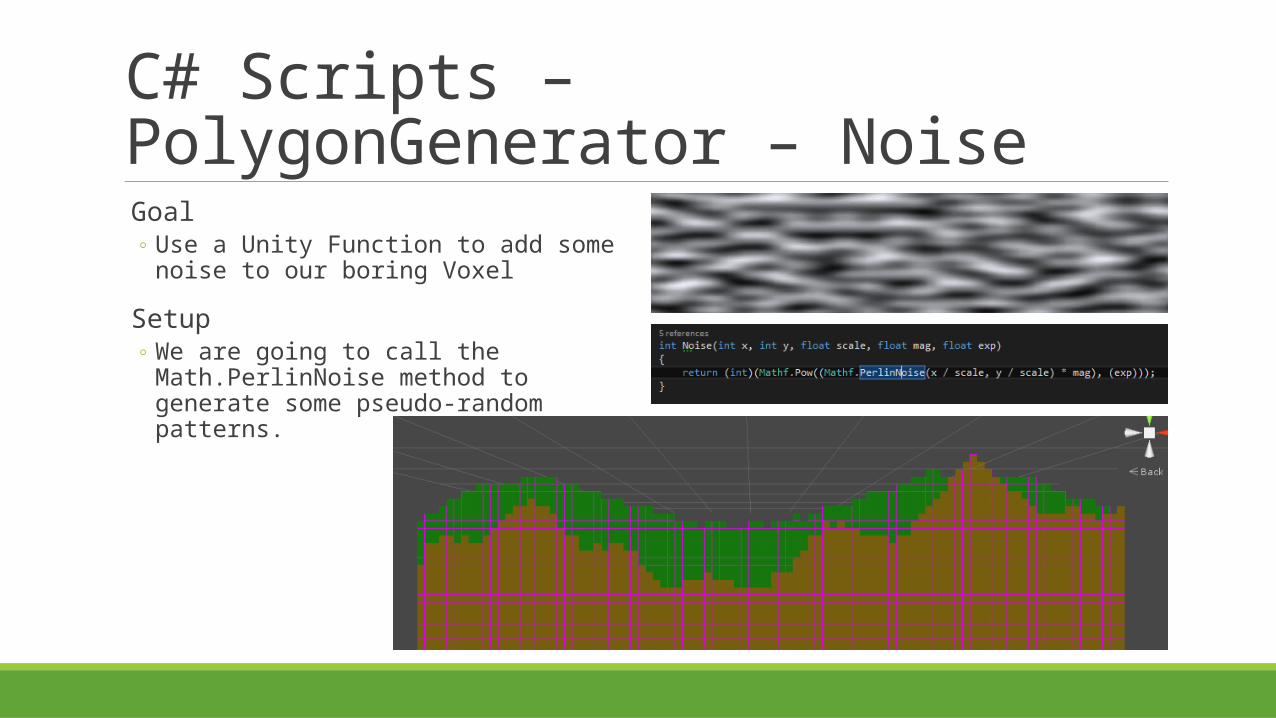
C# Scripts – PolygonGenerator – Noise
Goal◦ Use a Unity Function to add some noise to our
boring Voxel
Setup◦ We are going to call the Math.PerlinNoise
method to generate some pseudo-random patterns.
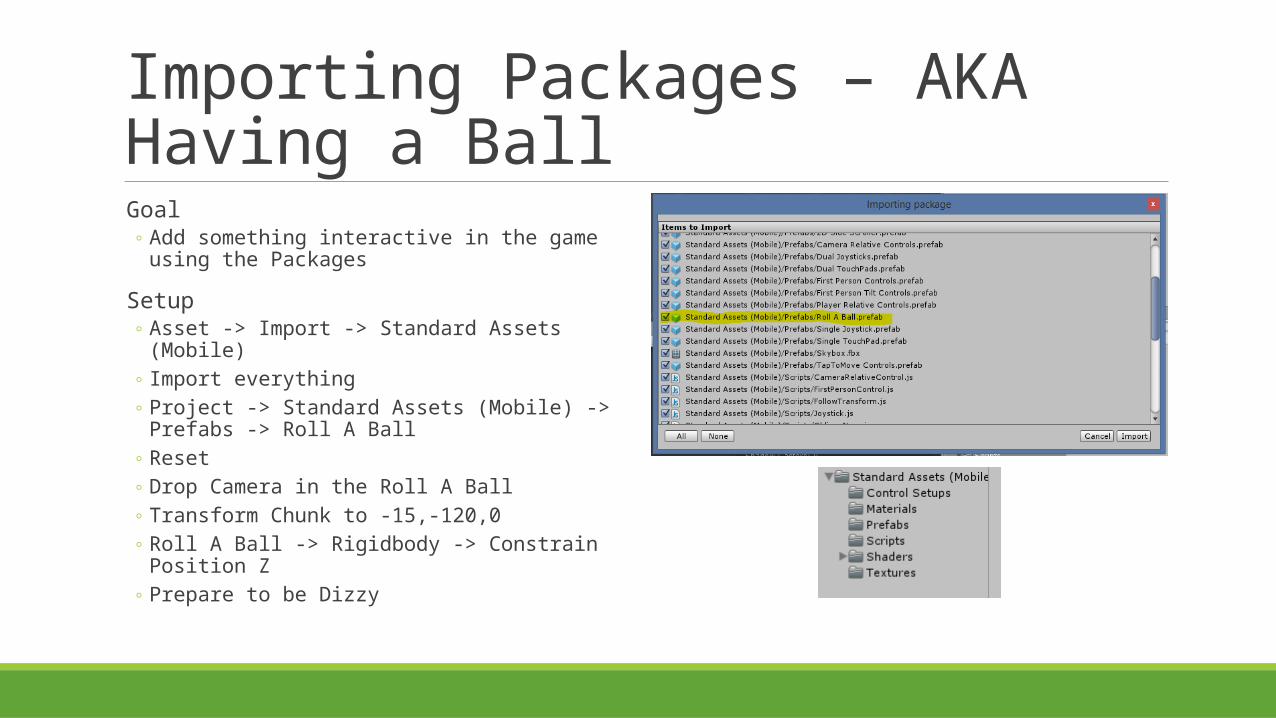
Importing Packages – AKA Having a Ball
Goal◦ Add something interactive in the game using the
Packages
Setup◦ Asset -> Import -> Standard Assets (Mobile)◦ Import everything◦ Project -> Standard Assets (Mobile) -> Prefabs ->
Roll A Ball◦ Reset◦ Drop Camera in the Roll A Ball◦ Transform Chunk to -15,-120,0◦ Roll A Ball -> Rigidbody -> Constrain Position Z◦ Prepare to be Dizzy

A Game with Bounce Goal
◦ Add some interaction and glance at using Inputs in Unity
Setup◦ Disable the Roll A Ball Script
◦ That will keep the Start and Update Events from occuring
◦ Create Script Named “TapToBounce”◦ Start with Grabbing the Owners RigidBody◦ During the Update check in MouseButton 0 was
lifted◦ This will translate to the First Touch up in Mobile
◦ When Touch is lifted AddForce to the RigidBody

Unity RemoteANDROID IOS

Exporting the Web Lets Take our app and ship it out to the Web
◦ Ctrl+Shift+B◦ Add Current (to add the current scene)◦ Platform Web Player◦ Switch Platform (if your current platform isn’t
web)◦ Create Folder “Web”◦ Build And Run

Exporting to Mobile Well the web was nice, now lets kick it out to Android
◦ Create a Bundle Identifier◦ Ctrl+Shift+B◦ Platform Android◦ Switch Platform (if your current platform isn’t
Android)◦ Create Folder “Android”◦ Build And Run
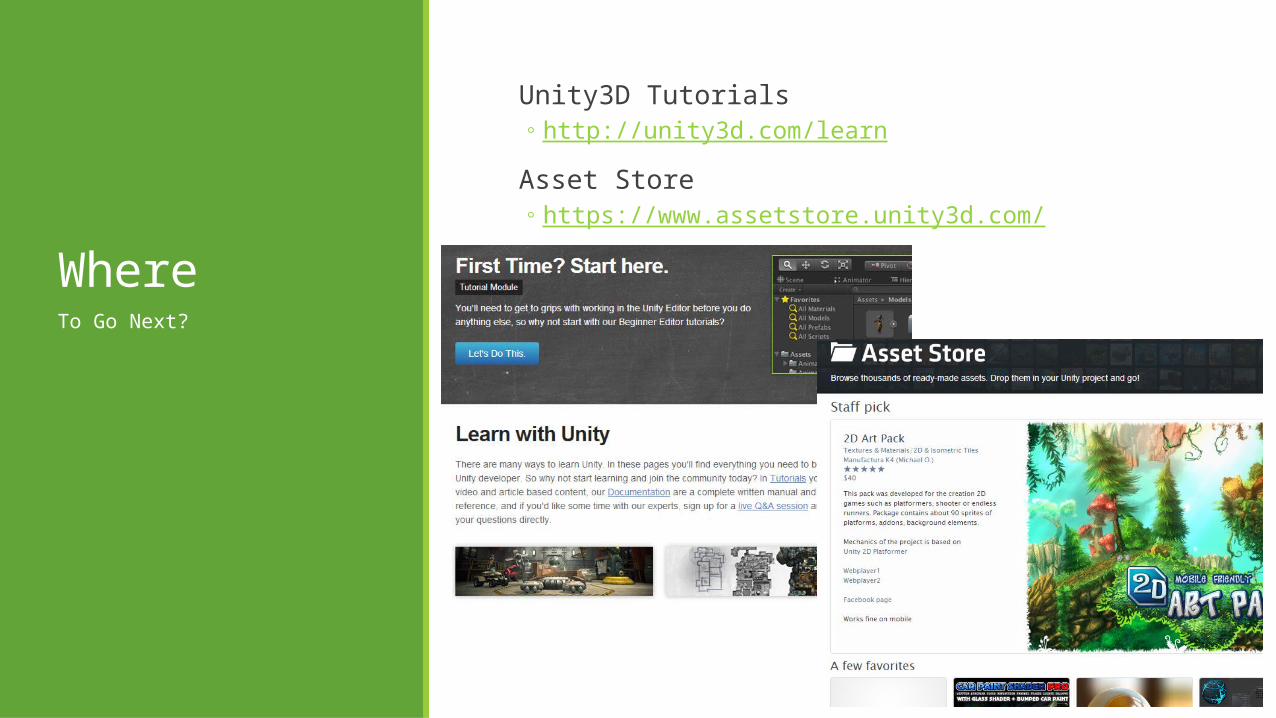
Where
Unity3D Tutorials◦ http://unity3d.com/learn
Asset Store◦ https://www.assetstore.unity3d.com/
To Go Next?

Questions?COMMENTS