creating topography - wordpress.com · 2013-01-10 · this method sometimes results in a...
TRANSCRIPT

2012 Beehive Lecture Series Autodesk Revit Workshop A Instructors: Ryan Orr, Aaron Wertman, Matt Underwood CREATING TOPOGRAPHY Topography from SketchUp to Revit using Google Earth: // SketchUp
• Open Google SketchUp Pro and create a new file • Click the “Add Location” icon and find your site
• Click “Select Region”, adjust boundary and click “Grab”. The area selected will be loaded into your SketchUp file.
• Click the “Toggle Terrain” icon • Right click and unlock the topo object • Turn on the layers palette (found under “Window” tab) • Make the “Google Earth Snapshot” visible • Select this layer, unlock it, and delete it.
• Click File >> Export >> 3D Model • Save as an AutoCAD DWG File
This method sometimes results in a triangulated topography in Revit. If you wish to avoid this, there is an alternative method seen here: http://www.youtube.com/watch?v=tk-Mc2uWHfI&feature=player_embedded#!
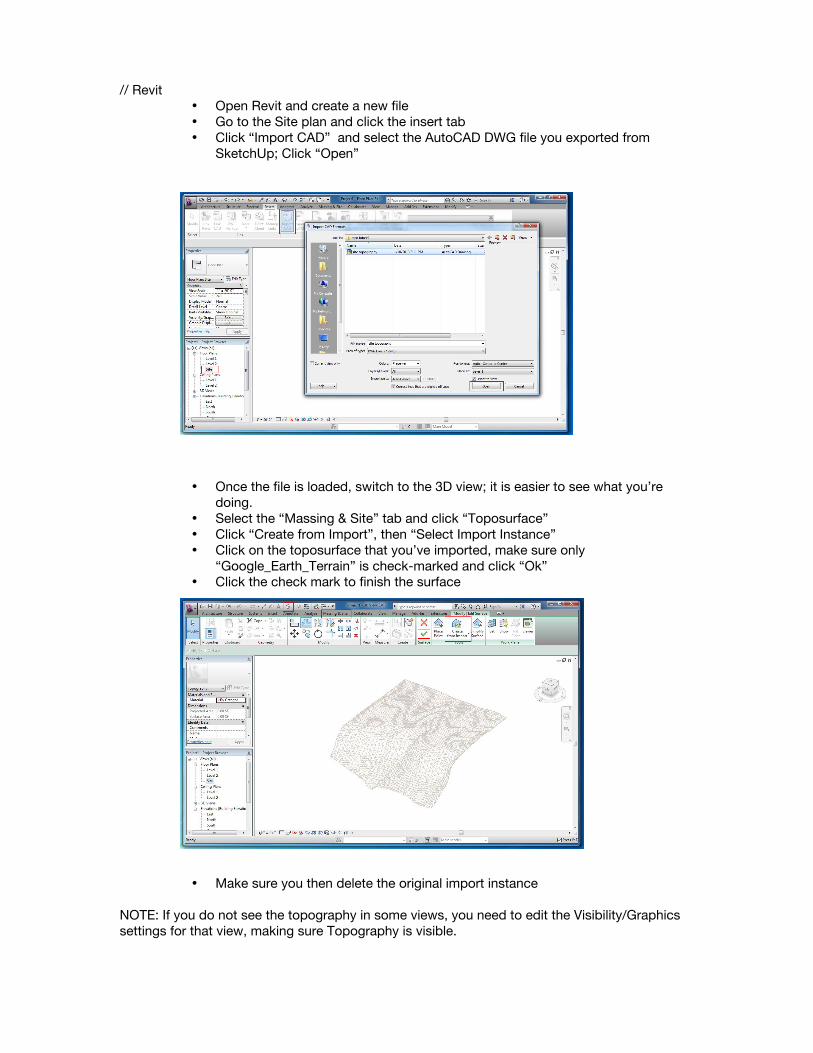
// Revit
• Open Revit and create a new file • Go to the Site plan and click the insert tab • Click “Import CAD” and select the AutoCAD DWG file you exported from
SketchUp; Click “Open”
• Once the file is loaded, switch to the 3D view; it is easier to see what you’re doing.
• Select the “Massing & Site” tab and click “Toposurface” • Click “Create from Import”, then “Select Import Instance” • Click on the toposurface that you’ve imported, make sure only
“Google_Earth_Terrain” is check-marked and click “Ok” • Click the check mark to finish the surface
• Make sure you then delete the original import instance NOTE: If you do not see the topography in some views, you need to edit the Visibility/Graphics settings for that view, making sure Topography is visible.

You can also create topography using the same method but with a CAD file containing topo lines, as long as the lines have been set to their proper heights in AutoCAD prior to importing the file.