creating organized and dynamic presentations...adding interactivity with action buttons adding an...
TRANSCRIPT

PowerPoint 2016Creating Organized and Dynamic Presentations
Adding Navigation with Hyperlinks
Adding a Hyperlink to Open a Web Page1. Select the text or object that will display as the hyperlink.2. Select Insert → Links → Hyperlink.3. Click Existing File or Web Page.4. Click in the Address field and type the web page address.5. Click OK.
Adding a Hyperlink to Open a File1. Select the text or object that will display as the hyperlink.2. Select Insert → Links → Hyperlink.3. Click Existing File or Web Page.4. Navigate to and select the desired file.5. Click OK.
Note: Add hyperlinks quickly by right-clicking on highlighted text and selecting Hyperlink.
TOOL TIP: Add a Screentip in the Edit Hyperlink dialog box to help guide users.
Adding a Hyperlink to Navigate to a Slide in the Presentation1. Select the text or object that will display the hyperlink.2. Go to Insert → Links → Hyperlink.3. Click Place in This Document.4. Select the desired Slide.5. Click OK.
Editing a Hyperlink1. Select the text or object the hyperlink is assigned to.2. Click Insert → Links → Hyperlink.3. Make the desired changes in the dialog box.4. Click OK.
TOOL TIP: Hyperlinks can be removed or edited by right-clicking the hyperlink and selecting Edit Hyperlink or Remove Hyperlink.
Adding Interactivity with Action Buttons
Adding an Action Button to Open a Web Page1. Go to Insert → Illustrations
→ Shapes drop-down arrow.
2. Select the desired action button.
3. Click a location on the slide to insert the action button.
4. In the Action Settings dialog box, click the “Hyperlink to” selector button, if necessary.
5. Click the “Hyperlink to” drop-down arrow.
6. Select URL.7. Type in the web page address.8. Click OK.
Inserting an Action Button to Run on Mouse Over1. Insert an Action Button.2. In the Action Settings dialog box, select the Mouse Over tab.3. Select the desired options.4. Click OK.
Modifying an Action Button 1. Select the action button.2. Go to Insert → Links → Action.3. Make the desired changes in the dialog box.4. Click OK.
Note: To remove an action from a slide, select the Action button on the slide and press Delete.
2PowerPoint 2016 Creating Organized and Dynamic Presentations
Adding an Action to an Object1. Select the object.2. Go to Insert → Links → Action.3. Make desired selections in the Action Settings dialog box.4. Click OK.
TOOL TIP: To quickly add an Action Button to all slides, place it on a Master Slide.
Creating Custom Slide ShowsCreating a Custom Slide Show
1. Open the main presentation.2. Go to Slide Show → Start Slide Show → Custom Slide
Show → Custom Shows.3. Click New.4. In the Custom Show dialog box, type the Custom Show name.5. Select the desired slides in the “Slides in Presentation” area.6. Click Add.7. Click OK.
Running a Custom Show from the Ribbon1. Go to Slide Show → Start Slide Show →
Custom Slide Show drop-down arrow.2. Select the desired custom show.
Running a Custom Show During a Presentation1. From the presentation, right-click
the slide and select Custom Show.2. From the menu, select the Custom
Show to run.
TOOL TIP: To return to the main presentation, press Ctrl + S, then select All Slides from the drop-down menu, select a slide, and click Go To.
Modifying a Custom Show1. Go to Slide Show →
Start Slide Show → Custom Slide Show drop-down arrow.
2. Select Custom Shows.3. Select the desired
custom slide show.4. Click Edit.5. Make the desired additions, deletions or order changes.6. Click OK.
Note: Delete or copy custom shows in the Custom Shows dialog box.
Organizing Slides with SectionsCreating and Renaming a Section
1. Select the first slide in the section in the slide pane.
2. Go to Home → Slides → Section drop-down arrow.
3. Select Add Section.4. Right-click the section name.5. Select Rename Section.6. In the Section Name field, type the
desired name.7. Click Rename.
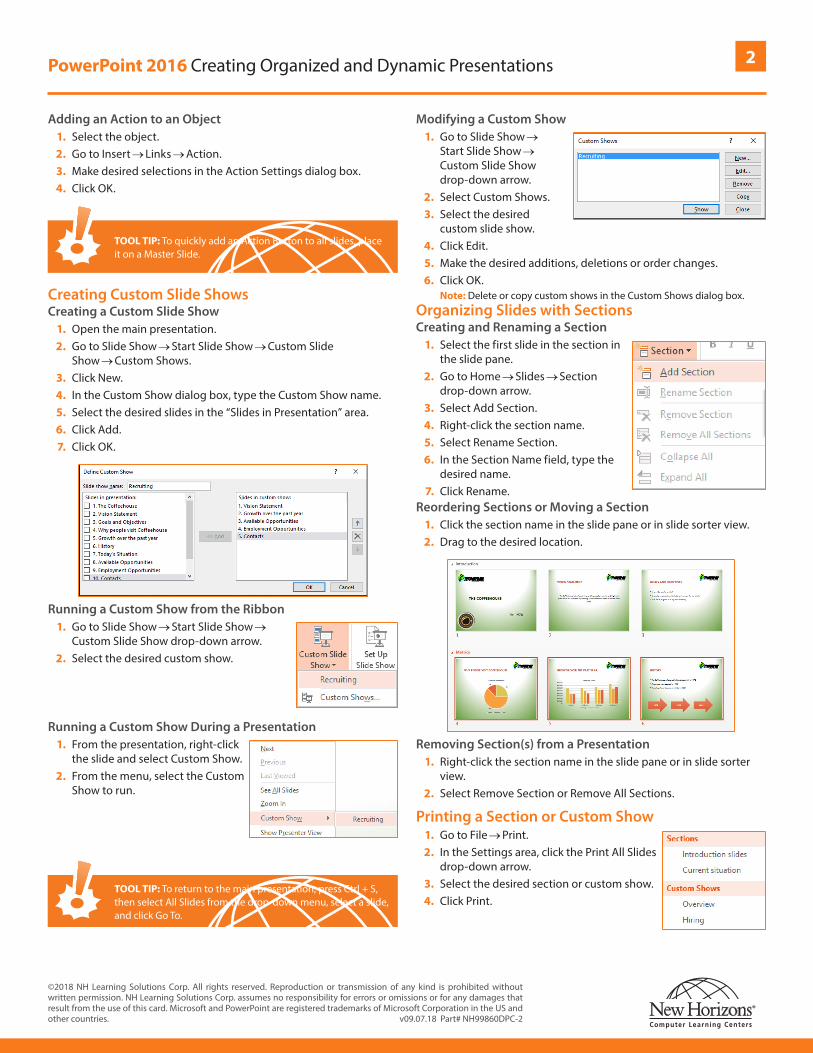
Reordering Sections or Moving a Section1. Click the section name in the slide pane or in slide sorter view.2. Drag to the desired location.
Removing Section(s) from a Presentation1. Right-click the section name in the slide pane or in slide sorter
view.2. Select Remove Section or Remove All Sections.
Printing a Section or Custom Show1. Go to File → Print.2. In the Settings area, click the Print All Slides
drop-down arrow.3. Select the desired section or custom show.4. Click Print.
©2018 NH Learning Solutions Corp. All rights reserved. Reproduction or transmission of any kind is prohibited without written permission. NH Learning Solutions Corp. assumes no responsibility for errors or omissions or for any damages that result from the use of this card. Microsoft and PowerPoint are registered trademarks of Microsoft Corporation in the US and other countries. v09.07.18 Part# NH99860DPC-2