creating a print to pdf printer in windows 2000 · 2018-04-01 · creating a "print to...
TRANSCRIPT

Creating a "Print to PDF" Printer in Windows 2000
Prepared by Alejandro Kapauan 6/17/2003 Updated for external presentation by Bob 04/02/2008
Update April 03, 2008
I was made aware by Joe Lawlor of a front-end program that uses Ghostscript and RedMon that makes it much easier to install and configure a Print to PDF printer. The Program is called PDF Creator. Documentation is scant, but I've tried it and it works very well. It is available at:
http://www.sourceforge.net/projects/pdfcreator/
The PDF Creator home page is (note: this is developed in Germany, so most of the pages are in German):
http://www.pdfcreator.de.vu/
A local copy of the current Windows installation file is in the zip file containing this document. It is PDFCreator_Setup_0.6.0.exe
The original instructions using Ghostscript and RedMon directly are provided below just in case you want one less program in the print chain, you like "hacking" configurations, or if you want to use RedMon for some other purposes.
A few notes on using PDF Creator compared with using the direct method.
• When creating large graphics-intensive PDFs, using the direct method takes far less real time than using PDF Creator. If you foresee creating a lot of large PDFs, consider investing time in setting up the printer the direct way. PDF Creator was written in Visual Basic, so that might be the performance issue.
• PDF Creator seems to to set the margins of the document too close to the edges of the paper. I have not figured out why this is so yet. It might be an issue when the output PDFs are printed.
• When prompted for the file name to store your PDF, PDF Creator throws you in My Documents, but it is not the current user's My Documents, it is the default user's My Documents. Navigate to your own My Documents first, or you will wonder where your file went.
• The default configuration of PDF Creator generates files which are larger than using the direct method (which is larger than using full Acrobat).
Original Instructions (Direct Method, not using PDF Creator)
This is an illustrated guide to creating a "Print to PDF" printer in Windows 2000 using the Fee Public Licensed tool AFPL Ghostscript. This provides similar functionality to the PDF Writer feature of Adobe's full version of Acrobat, but at very low cost (free) rather than the hundreds of dollars for an Acrobat license. Setting up the printer is a little more involved than most Windows tasks, but once set up the printer is very easy to use.
1. Download and Install AFPL Ghostscript and RedMon
First, download the latest versions of Ghostscript and RedMon for Windows at:
http://www.cs.wisc.edu/~ghost/
The versions of the tools is this guide are Ghostscript 8.00 and RedMon 1.7. The paths and filenames in this guide assume version 8.00 of Ghostscript is used. Change the paths and filenames accordingly if you use a newer version. The installs for both are in the zip file containing this document.
2. Create and Configure your Printer
2a. Create the Pdfwrite options file
Create a file called "C:\gs\pdfwrite.rsp" using Notepad containing the following:
-Ic:\gs\gs8.00\lib;c:\gs\fonts -sDEVICE=pdfwrite -r600 -dNOPAUSE -dSAFER -sPAPERSIZE=letter

2b. Add a new Color Postscript Printer
Next, create a new local postscript printer the usual way. Use Start->Settings->Printers
In the printers window, double-click on Add Printer.

Step through the wizard as follows. Click on Next after each step.
Select Local Printer.

The when prompted for the port to use, select Create a new port, and in the port type pull down, select Redirected port.

When you click on Next, you will be prompted for the port name. You will be given a default name of RPTn, where n is some integer depending on how many other redirected ports exist. Leave it at its default value.
Next, you will be asked for the manufacturer and model of the printer you are installing. Select any color postscript printer. In this example, the printer driver used is a QMS ColorScript Laser 1000.
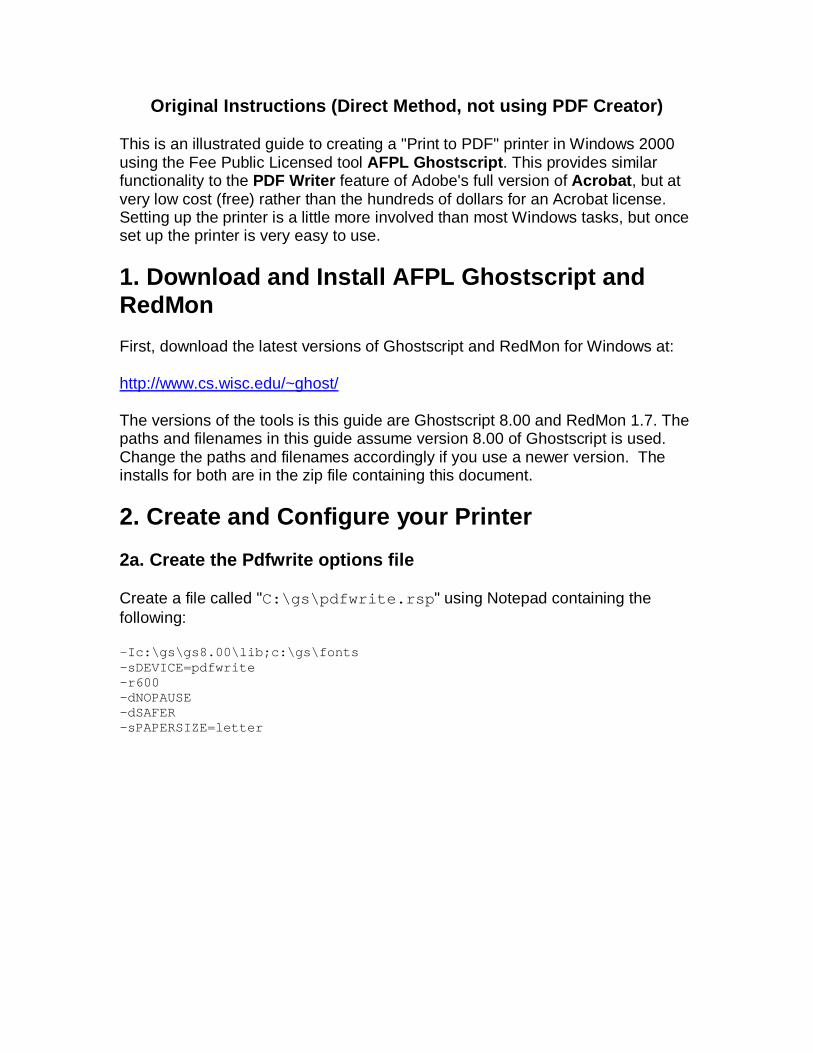
You will be asked to name your printer. Use a name "Print to PDF", "PDF Writer" or some name that describes the PDF printing function.
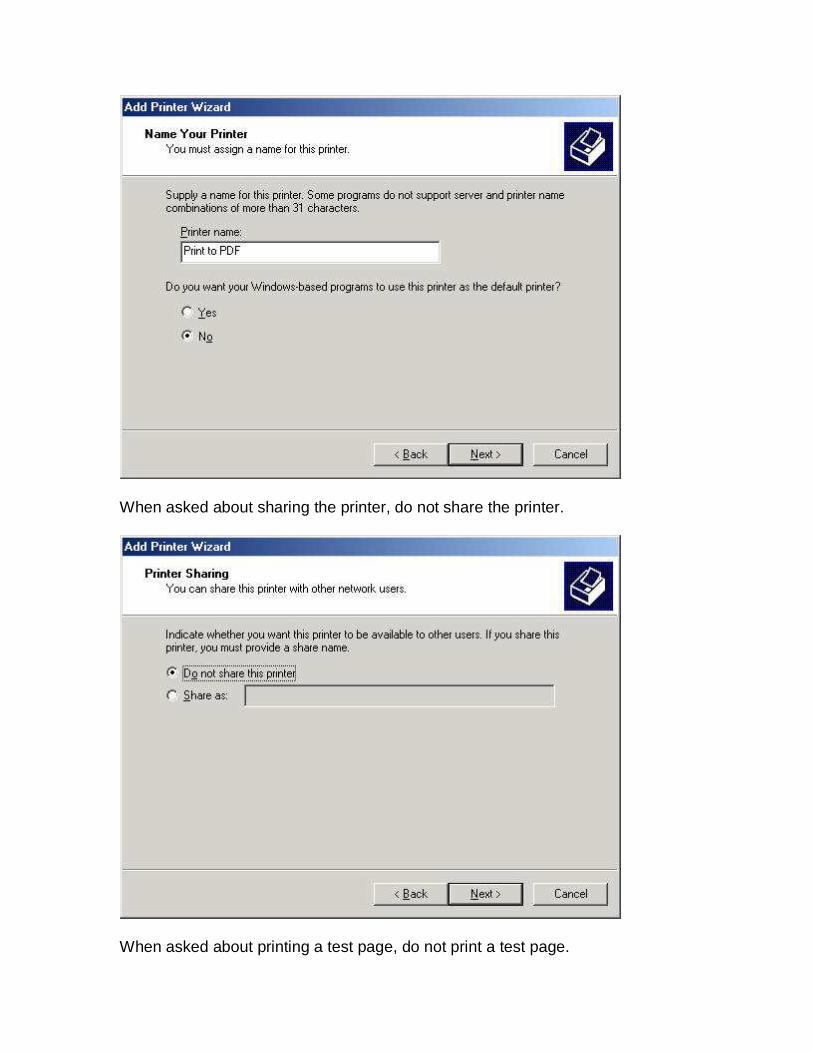
When asked about sharing the printer, do not share the printer.
When asked about printing a test page, do not print a test page.

Finally, finish installing the printer.

2c. Edit the Properties of the Port
In the Printers window, highlight your newly defined Print to PDF printer, and edit its properties.
In the properties dialog box, select the "Ports" tab and highlight the port assigned to your newly defined printer (the port with the check mark in its box). Then click on Configure Port.
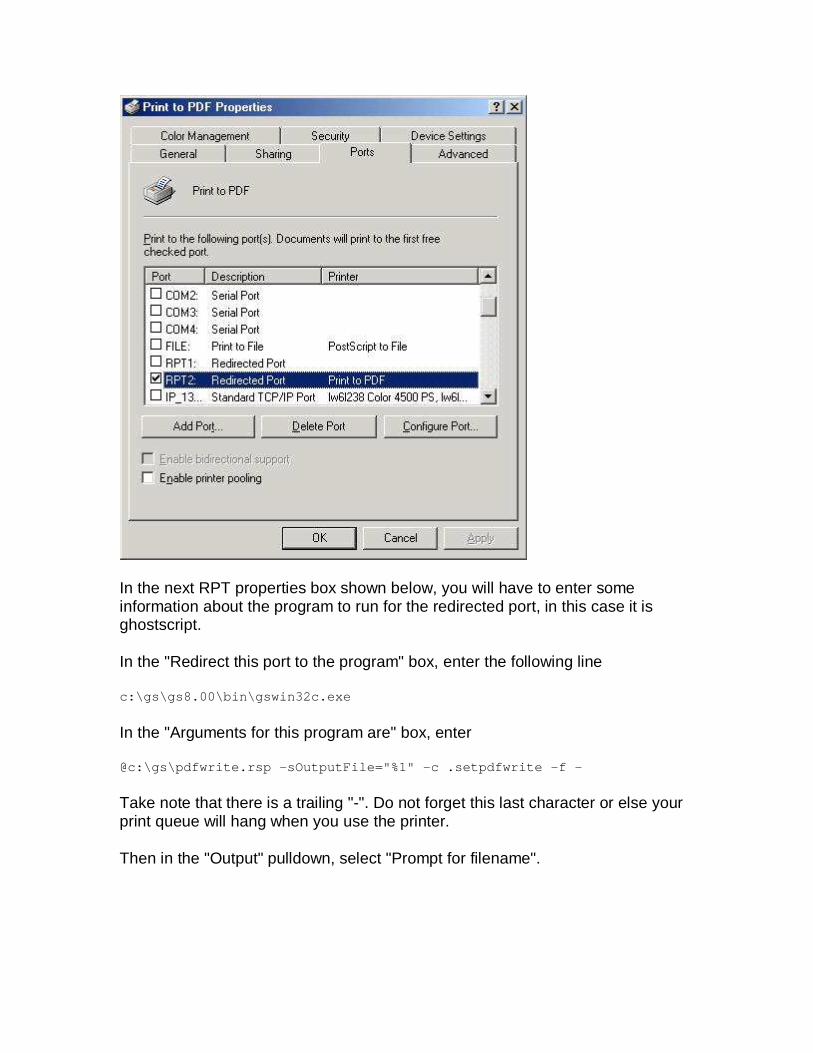
In the next RPT properties box shown below, you will have to enter some information about the program to run for the redirected port, in this case it is ghostscript.
In the "Redirect this port to the program" box, enter the following line
c:\gs\gs8.00\bin\gswin32c.exe
In the "Arguments for this program are" box, enter
@c:\gs\pdfwrite.rsp -sOutputFile="%1" -c .setpdfwrite -f -
Take note that there is a trailing "-". Do not forget this last character or else your print queue will hang when you use the printer.
Then in the "Output" pulldown, select "Prompt for filename".

Click OK.
2d. Configure the Postscript Driver
Back in the properties window of the printer as shown below, click on the "General" tab, then click on the "Printing Preferences" button.

In the "Layout" tab of the next window, click on the "Advanced" button.
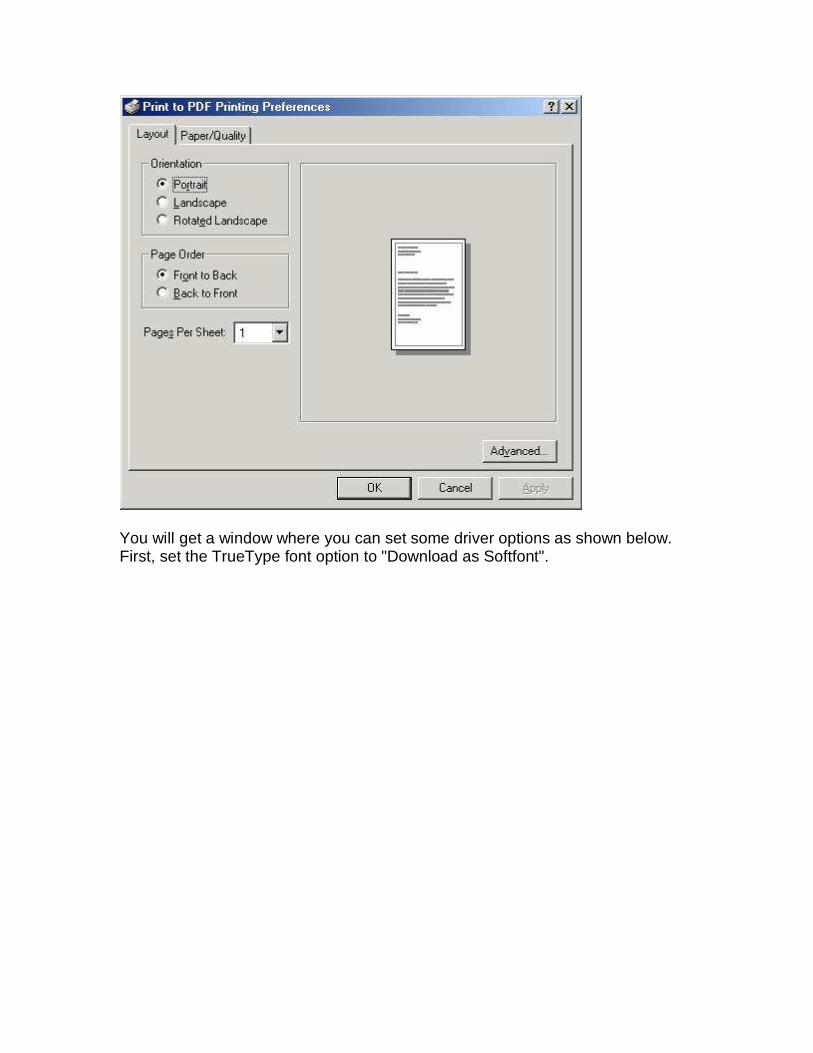
You will get a window where you can set some driver options as shown below. First, set the TrueType font option to "Download as Softfont".

Next, expand the PostScript Options branch by clicking on the "+" next to the item, then set the "TrueType Font Download Option" to "Outline".

Once you have set these options, click on OK and OK and OK to exit the setup windows.
That's it. You're done. Using any application, select the "Print to PDF" printer if you want to generate a PDF output file. You may want to define a separate .rsp file and printer for printing tabloid size PDFs. Just replace the paper size option to -sPAPERSIZE=11x17.