consolidating servers and applications with solaris...
TRANSCRIPT

> Solaris™ 10 How To Guides
Joost Pronk van Hoogeveen & Paul Steeves, Solaris Software
CONSOLIDATING SERVERS and APPLICATIONS
WITH SOLARISTM CONTAINERS
ContentsSolaris™ Containers: Overview Page 1 > 2Solaris Zones Page 1
Dynamic Resource Pools Page 1
Fair Share Scheduler Page 1 > 2
Two Types of Zones Page 2
Solaris™ Containers: An Example Page 2 > 13Creating a New Resource Pool Page 2 > 6
Creating the Email Zone on the New Resource Pool Page 6 > 9
Configuration Page 6 > 7
Installation Page 7
Virtual Platform Management Page 8
Zone Login Page 8 > 9
Enabling the Fair Share Scheduling on the Web Server Resource Pool Page 9
Creating the First Web Server Container Page 9 > 11
Creating the Second Web Server Container Page 11 > 13
For More Information Page 13
About This Solaris How To GuideThis How to Guide instructs users, system administrators, and developers unfamiliar with Solaris 10 OS on how to
consolidate applications onto a single server using Solaris Containers technology. The guide starts with a brief
overview of Solaris Containers and follows with an example of using Solaris Containers to consolidate two Web server
applications and an email server application onto a single server.
Users are guided step-by-step through the consolidation process, with code examples and illustrations. After using
this guide, a user should be able to create Solaris Containers by:
• Creating a resource pool
• Defining Solaris Zones
• Assigning CPU usage with the Fair Share Scheduler (FSS)
• Installing and booting a zone
• Configuring access to raw devices from the zone

Solaris™ Containers: OverviewSolaris™ Containers—Sun's operating system virtualization
technique—consists of several technologies that work
together to foster improved resource management and
isolate the environment from the underlying OS. With
Solaris Containers, organizations can determine how to
allocate resources among applications and services, and
ensure they do not interfere with one another.
This guide uses an example in which an organization wants
to consolidate three applications—an email server
application and two Web servers—onto a single server with
four CPUs.
Figure 1—With server virtualization, applications can be
safely consolidated onto a fewer number of servers.
Solaris ZonesAs part of the consolidation effort, it is important to
evaluate the needs of the applications that will share the
consolidated system. In this example, the email server and
Web server applications need to run in isolated
environments that make it appear as if they are running on
physically separate machines. This is made possible by a
Solaris Container technology called Solaris Zones, which
provides separate environments on a machine and logically
isolates applications from one another. Each application
receives a dedicated namespace in which to run, and
cannot see, monitor, or affect applications running in
another zone. See Figure 2.
Figure 2—All three applications have their own Solaris
Zone.
Dynamic Resource PoolsIn this example there are two types of applications, one
that needs a fully dedicated CPU—an email server, and
another that is more flexible and can share CPUs—the two
Web servers. To accomplish these different levels of
isolation we use a Solaris Container technology called
Dynamic Resource Pools that enables CPU resources to be
dedicated to specific applications. In this example, the
email server needs a separate resource pool, while the Web
servers can share another. As can be seen in Figure 3, we
give one CPU to resource pool 1 and three CPUs to resource
pool 2.
Figure 3—The email server has resource pool 1, and the
Web servers are sharing resource pool 2.
Fair Share SchedulerWhile the two Web servers are capable of sharing the
remaining CPUs on the system, they each need a minimum
guarantee of CPU resources that will be available to them.
This is made possible by another Solaris Container
technology called the Fair Share Scheduler (FSS). This
software enables CPU resources to be allocated
proportionally to applications. That is, each application
gets assigned a number of the available “shares” of the
total CPU. See Figure 4.
Figure 4—Of the five available shares, Web server 1 gets
three, and Web server 2 gets two.
Email Application
Web Server 1
Web Server 2
Email Application Web Server 1 Web Server 2
Zone 2Web Server 1
Zone 3Web Server 2
Zone 1Email Application
Web Server 1 Web Server 2Email Application
Resource Pool 1 (1 CPU)
Resource Pool 2(3 CPUs)
Resource Pool 1 (1 CPU)
Resource Pool 2 (3 CPUs and Fair Share Scheduler)
Web Server 1 Web Server 2Email Application
3 2 Numberof Shares
Consolidating Applications with Solaris Containers
1Solaris 10 Operating System sun.com/solaris

Using all these Solaris Container technologies on this new
server creates an environment like that shown in Figure 5.
Now the system includes three Containers: one with
dedicated CPU resources, and two others sharing CPU
resources.
Figure 5—A Container with a zone on a dedicated resource
pool, and two Containers each with a zone on a shared
pool with shares.
Two Types of ZonesAll systems that run Solaris 10 contain a master zone,
called the global zone. The global zone is the original
Solaris OS instance. It has access to the physical hardware
and can control all processes. It also has the authority to
create and control new zones, called non-global zones, in
which applications run. Non-global zones do not run
inside the global zone—they run along side it—yet the
global zone can look inside non-global zones to see how
they are configured, monitor, and control them.
Like the other zones, this global zone is also associated
with a resource pool. In our example this is resource pool
2. In this case, it shares CPU resources with the Web
servers. When the Fair Share Scheduler is enabled, the
global zone defaults to one share. So Figure 5 needs to be
amended to include the global zone as shown in Figure 6.
Figure 6—The full example with all the resource pools and
zones.
Solaris™ Containers: An ExampleThis section is a step-by-step guide that shows how to
create the email and Web server example described above.
It does this by going through the following steps:
• Creating a new resource pool
• Creating the email zone on the new resource pool
• Enabling the Fair Share Scheduling on the Web server
resource pool
• Creating the first Web server Container
• Creating the second Web server Container
When creating the last two Containers we will also show
some extra configuration options available to Solaris
Zones.
As the starting point, Figure 7 shows how the system looks
before any of these steps are taken. The only existing
objects are the global zone, and one resource pool. The
global zone is associated with this one resource pool. This
first resource pool is also called the default pool, and
before any action is taken, it has all the CPUs in the
system.
Figure 7—Every system has a default processor set.
Creating a New Resource PoolIn the Solaris OS, a resource pool is a logical entity that
owns a subset of the system resources, like CPU and
Memory. These subsets are known as resource sets.
Currently the Solaris OS only has one type of resource
set—a processor set. Every resource pool is associated
with a processor set—so if you want to give this pool its
own unique CPUs, you will need to define the processor
set, the number of processors it contains, and associate it
with a pool.
Every additional resource pool created is taken out of the
default pool. So, the email server's CPU comes out of the
four CPUs initially assigned to the default pool (leaving
three). Resource pools can be dynamically created and
removed on a running system, but you must leave one
CPU for the default pool.
Resource Pool 1 (1 CPUs)
Default Resource Pool (3 CPUs)
Global Zone
Zone 2
3
Zone 3
2 1
Zone 1
Container 2 Container 1
Numberof Shares
Numberof Shares
Container 4 Container 3
Resource Pool 1 (1 CPU)
Resou rce Pool 2(3 CPUs and Fair Share Scheduler)
3 2
Zone 2Web Server 1
Zone 3Web Server 2
Zone 1Email Application
Container 2 Container 3 Container 1
Numberof Shares
Numberof Shares
Default Resource Pool (4 CPUs)
Global Zone
Solaris 10 Operating System sun.com/solaris
2

3Solaris 10 Operating System sun.com/solaris
To create a new resource pool:
1. Enable the resource pools feature, using the pooladm(1M) command.
The use of the “global#” prompt throughout this example indicates that a command is run in the global zone, this
is where you'll be by default.
2. Save the current configuration to a file by using the pooladm(1M) command.
3. See if any pools already exist on the system, using the pooladm(1M) command.
global# pooladm
system my_system
string system.comment
int system.version 1
boolean system.bind-default true
int system.poold.pid 638
pool pool_default
int pool.sys_id 0
boolean pool.active true
boolean pool.default true
int pool.importance 1
string pool.comment
pset pset_default
pset pset_default
int pset.sys_id -1
boolean pset.default true
uint pset.min 1
uint pset.max 65536
string pset.units population
uint pset.load 7
uint pset.size 8
string pset.comment
cpu
int cpu.sys_id 1
string cpu.comment
string cpu.status on-line
cpu
int cpu.sys_id 0
string cpu.comment
string cpu.status on-line
cpu
int cpu.sys_id 3
string cpu.comment
string cpu.status on-line
cpu
int cpu.sys_id 2
string cpu.comment
string cpu.status on-line
global# pooladm -s
global# pooladm -e

You are starting on a system on which no pools were configured, you should only see one pool entry, “pool
pool_default”
4. Create a processor set containing one CPU, using the poolcfg(1M) command.
This command says change the pool configuration to create a processor set (pset) called “email-pset” with a minimum
of 1 CPU and and maximum of 1 CPU.
5. Create a resource pool for the processor set.
6. Link the pool to the processor set. This resource pool will be used by the email server.
7. Activate the configuration.
8. Verify the existence of the resource pool, using pooladm(1M).
global# pooladm
system my_system
string system.comment
int system.version 1
boolean system.bind-default true
int system.poold.pid 638
pool email-pool
int pool.sys_id 1
boolean pool.active true
boolean pool.default false
int pool.importance 1
string pool.comment
pset email
pool pool_default
int pool.sys_id 0
boolean pool.active true
boolean pool.default true
int pool.importance 1
string pool.comment
pset pset_default
pset email-pset
int pset.sys_id 1
boolean pset.default false
uint pset.min 1
uint pset.max 1
string pset.units population
uint pset.load 0
uint pset.size 1
string pset.comment
global# poolcfg -c 'create pset email-pset (uint pset.min=1; uint pset.max=1)'
global# pooladm -c
global# poolcfg -c 'associate pool email-pool (pset email-pset)'
global# poolcfg -c 'create pool email-pool'
Solaris 10 Operating System sun.com/solaris
4

Solaris 10 Operating System sun.com/solaris
Note “pool email-pool” and “pset email-pset” sections in the output. The “pset email-pset” section also displays that
there is one CPU allocated to this pool “pset. size 1”
Figure 8 illustrates the new state of the system.
Figure 8—A system with a new one-CPU resource pool.
Email-Pool(1 CPU)
Default Resource Pool (3 CPUs)
Global Zone
cpu
int cpu.sys_id 0
string cpu.comment
string cpu.status on-line
pset pset_default
int pset.sys_id -1
boolean pset.default true
uint pset.min 1
uint pset.max 65536
string pset.units population
uint pset.load 7
uint pset.size 7
string pset.comment
cpu
int cpu.sys_id 1
string cpu.comment
string cpu.status on-line
cpu
int cpu.sys_id 3
string cpu.comment
string cpu.status on-line
cpu
int cpu.sys_id 2
string cpu.comment
string cpu.status on-line
5
Solaris 10 Operating System sun.com/solaris
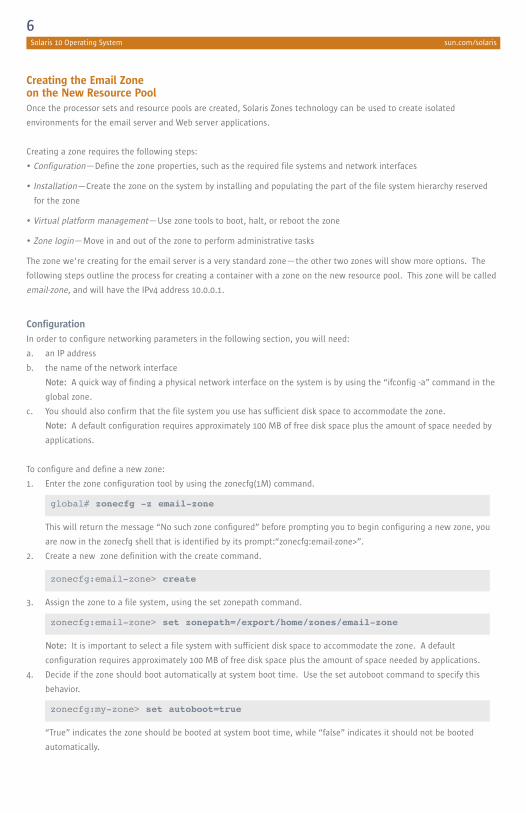
Creating the Email Zone on the New Resource PoolOnce the processor sets and resource pools are created, Solaris Zones technology can be used to create isolated
environments for the email server and Web server applications.
Creating a zone requires the following steps:
• Configuration—Define the zone properties, such as the required file systems and network interfaces
• Installation—Create the zone on the system by installing and populating the part of the file system hierarchy reserved
for the zone
• Virtual platform management—Use zone tools to boot, halt, or reboot the zone
• Zone login—Move in and out of the zone to perform administrative tasks
The zone we're creating for the email server is a very standard zone—the other two zones will show more options. The
following steps outline the process for creating a container with a zone on the new resource pool. This zone will be called
email-zone, and will have the IPv4 address 10.0.0.1.
Configuration
In order to configure networking parameters in the following section, you will need:
a. an IP address
b. the name of the network interface
Note: A quick way of finding a physical network interface on the system is by using the “ifconfig -a” command in the
global zone.
c. You should also confirm that the file system you use has sufficient disk space to accommodate the zone.
Note: A default configuration requires approximately 100 MB of free disk space plus the amount of space needed by
applications.
To configure and define a new zone:
1. Enter the zone configuration tool by using the zonecfg(1M) command.
This will return the message “No such zone configured” before prompting you to begin configuring a new zone, you
are now in the zonecfg shell that is identified by its prompt:“zonecfg:email-zone>”.
2. Create a new zone definition with the create command.
3. Assign the zone to a file system, using the set zonepath command.
Note: It is important to select a file system with sufficient disk space to accommodate the zone. A default
configuration requires approximately 100 MB of free disk space plus the amount of space needed by applications.
4. Decide if the zone should boot automatically at system boot time. Use the set autoboot command to specify this
behavior.
“True” indicates the zone should be booted at system boot time, while “false” indicates it should not be booted
automatically.
zonecfg:my-zone> set autoboot=true
zonecfg:email-zone> set zonepath=/export/home/zones/email-zone
zonecfg:email-zone> create
global# zonecfg -z email-zone
6

5. Configure networking parameters, using the add net command and its subcommands.
In this example, the virtual network interface with IP address 10.0.0.1 is configured on the eri0 interface.
6. Assign the zone to the email pool.
7. Verify the configuration is syntactically correct, using the verify command.
This will only return a message if any errors in the configuration were found.
8. Write the in-memory configuration to stable memory, using the commit command, and then exit the shell
A standard zone automatically shares the /usr, /lib, /platform, and /sbin file systems with the global zone. It is
important to note that a standard zone configuration mounts all global file systems as read-only. As a result, an
attempt to install an application to any of these directories will fail. See the section Creating the First Web Server
Container (page 9) to learn how to mount a global zone file system with write permissions in the directory in which
the application is installed.
InstallationThe verify command in the zone configuration process is only concerned with the syntactic correctness of theconfiguration. It determines if the configuration could be created on a system, but not necessarily this particular system.The true verification for the target system is performed automatically when the zone is installed. The zoneadm(1M)command checks to see if all resources, such as the physical network interface specified in the configuration, are available.It then installs the files needed for the zone's root file system in the correct location under the zonepath, and creates themount points for additional file systems specified in the configuration.
9. Install the zone, using the zoneadm(1M) command.
This can take a few minutes.
global# zoneadm -z email-zone install
Preparing to install zone email-zone
Creating list of files to copy from the global zone.
[Some output was omitted here for brevity]
Zone email-zone is initialized.
zonecfg:email-zone> commit
zonecfg:email-zone> exit (or ^D [Ctrl ”d”])
zonecfg:email-zone> verify
zonecfg:email-zone> set pool=email-pool
zonecfg:email-zone> add net
zonecfg:email-zone:net> set address=10.0.0.1
zonecfg:email-zone:net> set physical=eri0
zonecfg:email-zone:net> end
7Solaris 10 Operating System sun.com/solaris
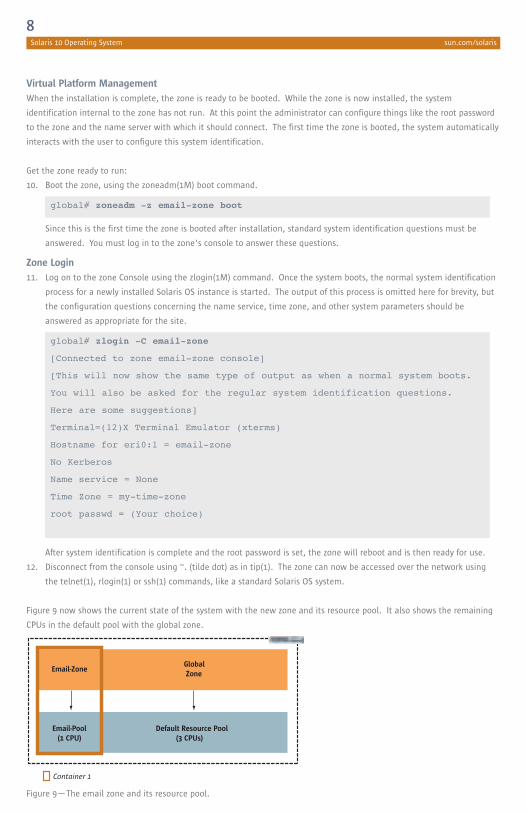
Virtual Platform Management
When the installation is complete, the zone is ready to be booted. While the zone is now installed, the system
identification internal to the zone has not run. At this point the administrator can configure things like the root password
to the zone and the name server with which it should connect. The first time the zone is booted, the system automatically
interacts with the user to configure this system identification.
Get the zone ready to run:
10. Boot the zone, using the zoneadm(1M) boot command.
Since this is the first time the zone is booted after installation, standard system identification questions must be
answered. You must log in to the zone's console to answer these questions.
Zone Login
11. Log on to the zone Console using the zlogin(1M) command. Once the system boots, the normal system identification
process for a newly installed Solaris OS instance is started. The output of this process is omitted here for brevity, but
the configuration questions concerning the name service, time zone, and other system parameters should be
answered as appropriate for the site.
After system identification is complete and the root password is set, the zone will reboot and is then ready for use.
12. Disconnect from the console using ~. (tilde dot) as in tip(1). The zone can now be accessed over the network using
the telnet(1), rlogin(1) or ssh(1) commands, like a standard Solaris OS system.
Figure 9 now shows the current state of the system with the new zone and its resource pool. It also shows the remaining
CPUs in the default pool with the global zone.
Figure 9—The email zone and its resource pool.
Email-Pool(1 CPU)
Default Resource Pool (3 CPUs)
Global Zone
Email-Zone
Container 1
global# zlogin -C email-zone
[Connected to zone email-zone console]
[This will now show the same type of output as when a normal system boots.
You will also be asked for the regular system identification questions.
Here are some suggestions]
Terminal=(12)X Terminal Emulator (xterms)
Hostname for eri0:1 = email-zone
No Kerberos
Name service = None
Time Zone = my-time-zone
root passwd = (Your choice)
global# zoneadm -z email-zone boot
Solaris 10 Operating System sun.com/solaris
8
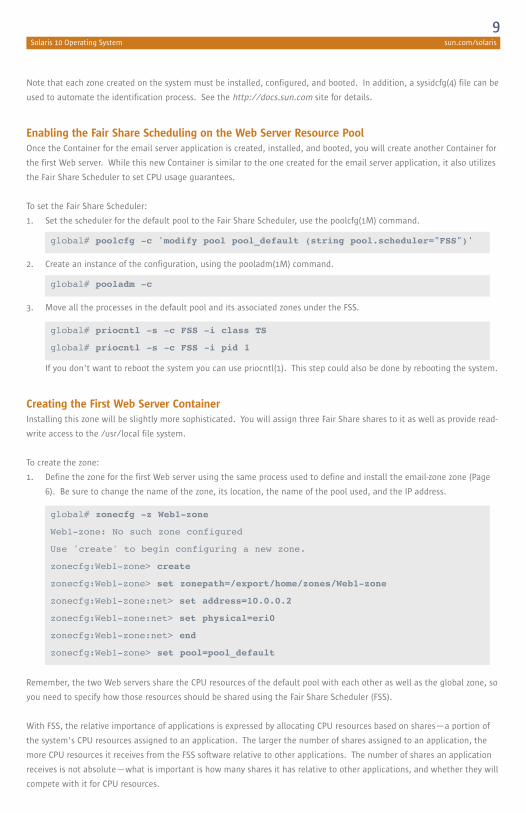
Note that each zone created on the system must be installed, configured, and booted. In addition, a sysidcfg(4) file can be
used to automate the identification process. See the http://docs.sun.com site for details.
Enabling the Fair Share Scheduling on the Web Server Resource PoolOnce the Container for the email server application is created, installed, and booted, you will create another Container for
the first Web server. While this new Container is similar to the one created for the email server application, it also utilizes
the Fair Share Scheduler to set CPU usage guarantees.
To set the Fair Share Scheduler:
1. Set the scheduler for the default pool to the Fair Share Scheduler, use the poolcfg(1M) command.
2. Create an instance of the configuration, using the pooladm(1M) command.
3. Move all the processes in the default pool and its associated zones under the FSS.
If you don't want to reboot the system you can use priocntl(1). This step could also be done by rebooting the system.
Creating the First Web Server ContainerInstalling this zone will be slightly more sophisticated. You will assign three Fair Share shares to it as well as provide read-
write access to the /usr/local file system.
To create the zone:
1. Define the zone for the first Web server using the same process used to define and install the email-zone zone (Page
6). Be sure to change the name of the zone, its location, the name of the pool used, and the IP address.
Remember, the two Web servers share the CPU resources of the default pool with each other as well as the global zone, so
you need to specify how those resources should be shared using the Fair Share Scheduler (FSS).
With FSS, the relative importance of applications is expressed by allocating CPU resources based on shares—a portion of
the system's CPU resources assigned to an application. The larger the number of shares assigned to an application, the
more CPU resources it receives from the FSS software relative to other applications. The number of shares an application
receives is not absolute—what is important is how many shares it has relative to other applications, and whether they will
compete with it for CPU resources.
global# priocntl -s -c FSS -i class TS
global# priocntl -s -c FSS -i pid 1
global# poolcfg -c 'modify pool pool_default (string pool.scheduler="FSS")'
global# zonecfg -z Web1-zone
Web1-zone: No such zone configured
Use 'create' to begin configuring a new zone.
zonecfg:Web1-zone> create
zonecfg:Web1-zone> set zonepath=/export/home/zones/Web1-zone
zonecfg:Web1-zone:net> set address=10.0.0.2
zonecfg:Web1-zone:net> set physical=eri0
zonecfg:Web1-zone:net> end
zonecfg:Web1-zone> set pool=pool_default
global# pooladm -c
9Solaris 10 Operating System sun.com/solaris

2. Assign three shares to this zone, using the following commands.
In the case of a standard zone install—like the email server—the /usr directory is configured to be read-only. In some
cases an application may need to be installed into a sub-directory under /usr like /usr/local (i.e., open source software
often installs here). A standard zone install will not allow this. However, this can be done by changing the zone
configuration so that it mounts an additional directory on the /usr/local directory in the zone, as read-write.
In this example, the first Web server is installed in /usr/local/bin, which means we need to configure the zone to support
this.
To configure a read-write /usr/local directory:
3. In the global zone, create the directory to be exported to the zone, using the mkdir(1) command.
4. Set the permissions such that only root in the global zone can enter this directory, using the chmod(1) command.
5. Create the directory on which the file system is to be mounted if it doesn't already exist (otherwise skip this step).
6. Enter the zone configuration tool for this zone, using zonecfg(1M)
7. Add a file system to the zone, using the add fs command.
8. Specify a directory in the zone on which the file system can be mounted.
9. Export the directory from the global zone to the new zone.
10. Set the file system type to the loopback file system.
11. Set the directory to have read and write permissions.
12. End the configuration.
zonecfg:Web1-zone> add rctl
zonecfg:Web1-zone:rctl> set name=zone.cpu-shares
zonecfg:Web1-zone:rctl> add value (priv=privileged,limit=3,action=none)
zonecfg:Web1-zone:rctl> end
zonecfg:Web1-zone> exit
zonecfg:Web1-zone:fs> end
zonecfg:Web1-zone:fs> set options=[rw,nodevices]
zonecfg:Web1-zone:fs> set type=lofs
zonecfg:Web1-zone:fs> set special=/export/home/zones/Web1-zone/local
zonecfg:Web1-zone:fs> set dir=/usr/local
zonecfg:Web1-zone> add fs
global# zonecfg -z Web1-zone
global# mkdir /usr/local
global# chmod 700 /export/home/zones/Web1-zone
global# mkdir -p /export/home/zones/Web1-zone/local
Solaris 10 Operating System sun.com/solaris
10

13. Be sure to verify and commit the configuration, and then install and boot the zone. Perform a system configuration
as shown in the Zone Login section, above (Page 8, Step 11).
Note: zoneadm list -cv is a quick way to see what state the zone is in.
This results in the configuration depicted in Figure 10. You now have two containers created; one with a fixed amount of
CPU, and one dynamically sharing CPU with the global zone.
Figure 10—A second zone is added to the system, and is assigned three shares.
Creating the Second Web Server ContainerOnce the Container for the first Web server is created, installed, and booted, a Container can be created for the second
Web server. This Container is similar to the one just created, but will be assigned a different amount of FSS shares, and
also includes access to a CD-ROM device and a raw disk partition.
To create the second Container:
1. Create the zone for the second Web site using the same process used to create the Web1-zone zone. Be sure to
change the name of the zone, its location, the name of the pool used, and the IP address.
zonecfg -z Web2-zone
Web2-zone: No such zone configured
Use 'create' to begin configuring a new zone.
zonecfg:Web2-zone> create
zonecfg:Web2-zone> set zonepath=/export/home/zones/Web2-zone
zonecfg:Web2-zone> add net
zonecfg:Web2-zone:net> set address=10.0.0.3
zonecfg:Web2-zone:net> set physical=eri0
zonecfg:Web2-zone:net> end...
zonecfg:Web2-zone> set pool=pool_default
Email-Pool(1 CPU)
Default Resource Pool (3 CPUs)
Global Zone
Web1-Zone
3 1
Email-Zone
Container 2
Numberof Shares
zonecfg:Web1-zone> verify
zonecfg:Web1-zone> commit
zonecfg:Web1-zone> exit
global# zoneadm -z email-zone install
global# [output omitted here for brevity]
global# zoneadm -z Web1-zone boot
global# zlogin -C Web1-zone
11Solaris 10 Operating System sun.com/solaris
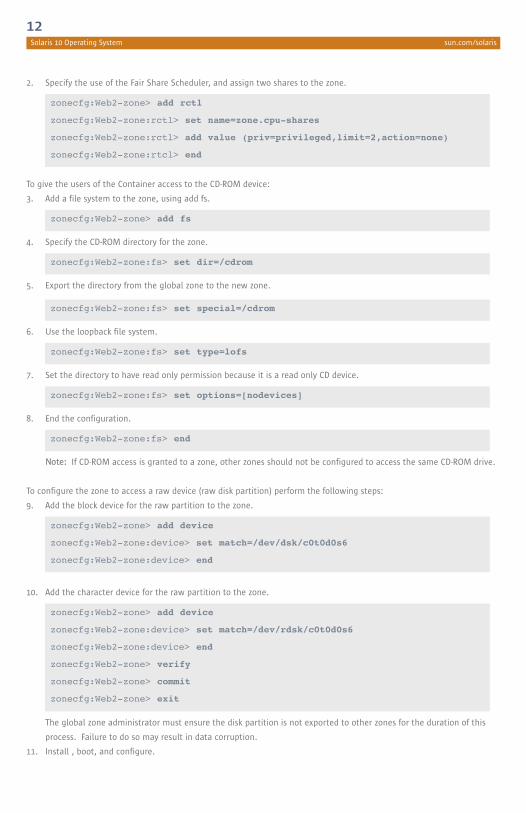
2. Specify the use of the Fair Share Scheduler, and assign two shares to the zone.
To give the users of the Container access to the CD-ROM device:
3. Add a file system to the zone, using add fs.
4. Specify the CD-ROM directory for the zone.
5. Export the directory from the global zone to the new zone.
6. Use the loopback file system.
7. Set the directory to have read only permission because it is a read only CD device.
8. End the configuration.
Note: If CD-ROM access is granted to a zone, other zones should not be configured to access the same CD-ROM drive.
To configure the zone to access a raw device (raw disk partition) perform the following steps:
9. Add the block device for the raw partition to the zone.
10. Add the character device for the raw partition to the zone.
The global zone administrator must ensure the disk partition is not exported to other zones for the duration of this
process. Failure to do so may result in data corruption.
11. Install , boot, and configure.
zonecfg:Web2-zone> add device
zonecfg:Web2-zone:device> set match=/dev/rdsk/c0t0d0s6
zonecfg:Web2-zone:device> end
zonecfg:Web2-zone> verify
zonecfg:Web2-zone> commit
zonecfg:Web2-zone> exit
zonecfg:Web2-zone> add device
zonecfg:Web2-zone:device> set match=/dev/dsk/c0t0d0s6
zonecfg:Web2-zone:device> end
zonecfg:Web2-zone:fs> end
zonecfg:Web2-zone:fs> set options=[nodevices]
zonecfg:Web2-zone:fs> set type=lofs
zonecfg:Web2-zone:fs> set special=/cdrom
zonecfg:Web2-zone:fs> set dir=/cdrom
zonecfg:Web2-zone> add fs
zonecfg:Web2-zone> add rctl
zonecfg:Web2-zone:rctl> set name=zone.cpu-shares
zonecfg:Web2-zone:rctl> add value (priv=privileged,limit=2,action=none)
zonecfg:Web2-zone:rtcl> end
Solaris 10 Operating System sun.com/solaris
12

Figure 11 illustrates the resulting system configuration from our example. The email server will run on its own guaranteed
CPU, protected from the other applications on this system, while the Webservers share the remaining three CPUs.
To clarify the FSS share usage, the first Web server application has three out of the total six shares, entitling it to 1.5 CPUs
worth of the three CPUs (3*3/6=1.5); the second has two of the six shares, giving it one CPUs worth; and the global zone
gets the remaining 0.5 CPUs worth.
Figure 11—The complete system.
As a final comment, Oracle acknowledges these types of Solaris Containers as a valid license boundary. In their
terminology they are known as Capped Containers, and are made by a combination of Dynamic Resource Pools and
Solaris Zones—where the amount of CPUs in the pool determines the size of the license.
For More InformationWhile this Solaris How To Guide provides the steps needed to get Solaris Container technology up and running quickly,
more sophisticated configurations are possible. For more information regarding Solaris Containers and Solaris Zones, visit
sun.com/solaris.
Default Resource Pool (3 CPUs)
3 2 1
Container 2 Container 1
Numberof Shares
Numberof Shares
Container 4 Container 3
Email-Pool(1 CPU)
Web1-Zone Web2-ZoneEmail-Zone Global Zone
13Solaris 10 Operating System sun.com/solaris
Manuals
Frequently Asked Questions (FAQ)
White Papers
Sun BluePrint Articles
System Administration Guide: Solaris Containers—Resource Management and Solaris Zones
Open Solaris FAQ opensolaris.org/os/community/zones/faq/
Solaris Patch Management—Recommended Strategy
Solaris Containers—Server Virtualization and Manageability
Solaris 9 Resource Manager
docs-pdf.sun.com/817-0574/817-0574.pdf
www.sun.com/software/whitepapers/solaris10/grid_containers.pdf
www.sun.com/software/whitepapers/solaris9/srm.pdf
Solaris Containers—What They Are and How to Use Them
Web Consolidation on the Sun Fire T1000 using Solaris Containers
Slicing and Dicing Servers: A Guide to Virtualization and Containment Technologies
Creating Self-Balancing Solutions with Solaris Containers
www.sun.com/blueprints/0505/819-2679.pdf
www.sun.com/blueprints/1205/819-5149.pdf
www.sun.com/blueprints/1005/819-3734.pdf
www.sun.com/blueprints/0605/819-2888.pdf
docs.sun.com/app/docs/doc/817-1592/
Graphical User Interface Tools
Solaris Container Manager GUI www.sun.com/software/products/sunmanagementcenter/
Oracle Licensing
Information on Solaris Containers and Oracle www.sun.com/third-party/global/oracle/consolidation/solaris10.html

sun.com/solaris
©2008 Sun Microsystems, Inc. All rights reserved. Sun, Sun Microsystems, the Sun logo and Solaris are trademarks or registered trademarks of Sun Microsystems, Inc. in the United States and other countries.SunWIN # 466817 Lit # SWOT14251-0 04/08
Sun Microsystems, Inc. 4150 Network Circle, Santa Clara, CA 95054 USA Phone 1-650-960-1300 or 1-800-555-9SUN Web sun.com
