congratulations & thank you for purchasing the … please read all the instructions in this...
TRANSCRIPT

OPERATION INSTRUCTIONS • Mode d’emploi • Gebruiksaanwijzing • Bedienungsanleitung • Instrucciones de Operación

1
Please read all the instructions in this manual before using your Spellbinders Platinum machine.
Inside Your Box1. Spellbinders Platinum 6 3. Standard Platform 5. Embossing Mat2. Pair of Clear Cutting Plates 4. Embossing Plate 6. Handle
Before you start using your Platinum 6, you will need to fi nd a suitable workspace to use your machine. Ensure that your work area has a clean, sturdy, fl at surface with enough space to feed through the plates and platform.
Attaching Your Handle1. Place your Platinum 6 Machine, front facing on a sturdy, fl at surface so that the metal post is to the right hand side of the machine. You will notice the metal post has two fl at sides – rotate this so the fl at sides are facing the front and back of the machine. Position the handle on the metal post matching the fl at sides on the post with the fl at sides of the handle’s hole. See fi g 1.
2. Slide washer onto screw and place both inside handle. Using supplied Allen wrench, turn screw clockwise to tighten. Insert cap to cover screw. See fi g 2.
3. To remove the handle, turn screw counter-clockwise to loosen and pull handle off . fi g. 2
fi g. 1
Congratulations & thank you for purchasing the Spellbinders® Platinum 6™ Machine!Designed with your creativity in mind, the Platinum 6 Machine is the latest in Spellbinders Paper Arts line of innovative die cutting and embossing machines. This machine is easy to use, versatile and is compatible with all Spellbinders die templates and Em-bossing Fold’ers.
Get creative on a brilliant scale with the Platinum 6 Machine and cut and/or emboss 6 inches wide with the turn of a handle. The Spellbinders Platinum 6 off ers endless possibilities for scrapbooking, card making, party decor, gift giving and more!
ENGLISH

2
Preparing the Machine1. Pull down tray on both sides of Platinum 6™ Machine to feed your Cutting and Embossing Sandwiches through the Platinum 6. See fi g. 3.
2. The rubberized bottom will aide in the stability of machine. *Keep the bottom of machine clean for best performance.
3. When fi nished with use, return tray sides to fold up position for compact storage. See fi g. 4.
Prepare for CreativityWhether you’re cutting, embossing or both, you will need the right tools for the job.
1. Spellbinders® Die Templates (sold separately) - Nestabilities® and Shapeabilities® allow you to cut, emboss and stencil for unlimited creative possibilities. The Spellbinders Die Templates come in all shapes and sizes inspiring creativity with beautiful details. Note: Spellbinders Dies will cut through a variety of diff erent media from cardstock, papers and foils to light-weight materials such as thin chipboard, fabrics and thin leather.
2. Spellbinders 3D and 2-sided Em-bossing Fold’ers� (sold separately) allow you to emboss detail that can make your project extra special.
3. Spellbinders Steel Rule (sold separately) allow you to cut multiple layers of a wide range of materials such as chipboard, wool felt, fabrics and thin metals.
Building a SandwichALL Sandwiches should be stacked in the correct order. Attempting to use incorrect plates may cause damage to the machine. Please ensure the combinations of plates are correct. To ensure the best results, experiment with a scrap piece of paper fi rst.
fi g. 3
fi g. 4
ENGLISH

3
Cutting Sandwich for Wafer-Thin Dies - (Stack from bottom up)1. Platform 2. Clear Cutting Plate 3. Paper, cardstock, craft foil, etc. 4. Shaped die template with cut ridges down. 5. Clear Cutting Plate 6. Run through the Platinum 6™ Machine
Cutting Sandwich for Steel Rule Dies - (Stack from bottom up)1. Clear Cutting Plate 2. Steel Rule Die with die facing up. 3. Paper, cardstock, craft foil, etc. 4. Clear Cutting Plate 5. Run through the Platinum 6 Machine
Embossing a Cut Shape - (Stack from bottom up)1. Platform 2. Shaped die template (cut ridges up) with cut shape inside 3. Tan Embossing Mat 4. Embossing Plate 5. Run through the Platinum 6 Machine
Embossing Sandwich for Em-bossing Fold’ers™ - (Stack from bottom up)1. Platform 2. Em-bossing Fold’er with paper inside 3a. Clear cutting plate (for single or double-sided Em-bossing Fold’ers)or3b. 3D Embossing Plate (for 3D Em-bossing Fold’ers™ ) 4. Run through the Platinum 6 Machine
fig. 5
fig. 8
fig. 11
fig. 14
fig. 6
fig. 9
fig. 12
fig. 15
fig. 7
fig. 10
fig. 13
fig. 16
ENGLISH
4
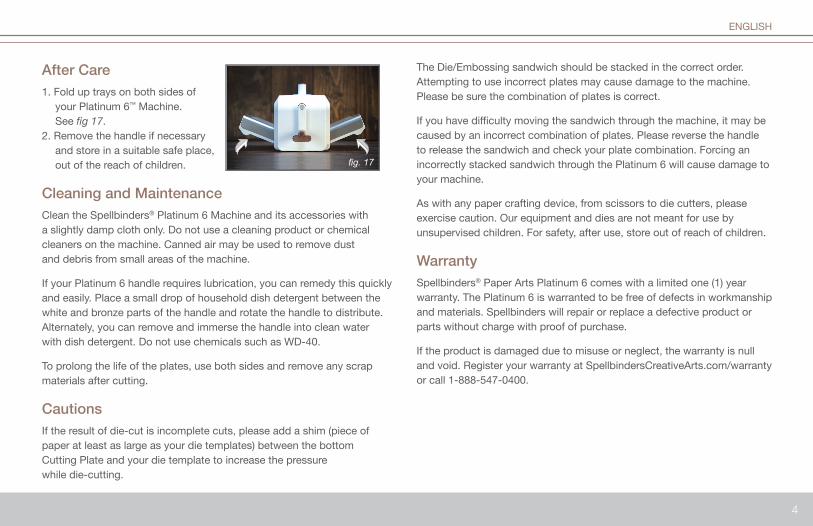
After Care1. Fold up trays on both sides of your Platinum 6™ Machine. See fi g 17.2. Remove the handle if necessary and store in a suitable safe place, out of the reach of children.
Cleaning and MaintenanceClean the Spellbinders® Platinum 6 Machine and its accessories with a slightly damp cloth only. Do not use a cleaning product or chemical cleaners on the machine. Canned air may be used to remove dust and debris from small areas of the machine.
If your Platinum 6 handle requires lubrication, you can remedy this quickly and easily. Place a small drop of household dish detergent between the white and bronze parts of the handle and rotate the handle to distribute. Alternately, you can remove and immerse the handle into clean water with dish detergent. Do not use chemicals such as WD-40.
To prolong the life of the plates, use both sides and remove any scrap materials after cutting.
CautionsIf the result of die-cut is incomplete cuts, please add a shim (piece of paper at least as large as your die templates) between the bottom Cutting Plate and your die template to increase the pressure while die-cutting.
The Die/Embossing sandwich should be stacked in the correct order. Attempting to use incorrect plates may cause damage to the machine. Please be sure the combination of plates is correct.
If you have diffi culty moving the sandwich through the machine, it may be caused by an incorrect combination of plates. Please reverse the handle to release the sandwich and check your plate combination. Forcing an incorrectly stacked sandwich through the Platinum 6 will cause damage to your machine.
As with any paper crafting device, from scissors to die cutters, please exercise caution. Our equipment and dies are not meant for use by unsupervised children. For safety, after use, store out of reach of children.
WarrantySpellbinders® Paper Arts Platinum 6 comes with a limited one (1) year warranty. The Platinum 6 is warranted to be free of defects in workmanship and materials. Spellbinders will repair or replace a defective product or parts without charge with proof of purchase.
If the product is damaged due to misuse or neglect, the warranty is null and void. Register your warranty at SpellbindersCreativeArts.com/warranty or call 1-888-547-0400.
fi g. 17
ENGLISH

5
Veuillez lire toutes les instructions de ce manuel avant d’utiliser votre machine Spellbinders Platinum 6.
Contenu de votre boîte1. Spellbinders Platinum 6 3. Plateforme standard 5. Tapis de gaufrage2. Paire de plaques de découpe transparentes 4. Plaque de gaufrage 6. Manivelle
Vous devez d’abord trouver un espace de travail approprié avant de commencer à utiliser votre machine. Il faut s’assurer que l’espace de travail possède une surface propre, robuste et plane avec suffi samment d’espace pour préparer l’insertion des plaques et de la plateforme.
Fixation de la manivelle1. Placer la façade de la Machine Platinum 6 face à une surface solide et plate de façon à ce que le montant métallique se trouve du côté droit de l’appareil. Le montant métallique dispose de deux côtés plats ; faire pivoter le montant de façon à ce que les côtés plats soient orientés vers l’avant et l’arrière de l’appareil. Placer la manivelle sur le montant métallique. Les côtés plats du montant doivent être appariés à ceux du trou de la manivelle. Voir fi gure 1.
2. Faire glisser la rondelle sur la vis et placer les deux dans la manivelle. À l'aide de la clé Allen fournie, serrer la vis dans le sens horaire. Recouvrir la vis à l'aide du capuchon. Voir fi gure 2.
3. Pour retirer la manivelle, desserrer la vis en tournant dans le sens anti-horaire et tirer sur la manivelle.fi g. 2
fi g. 1
Félicitations et merci d’avoir acheté la Machine Spellbinders® Platinum 6™!Conçue pour vous permettre d’exprimer votre créativité, la Machine Platinum 6 est la dernière née de la gamme Spellbinders Paper Arts qui comprend des machines de découpe et de gaufrage innovantes. Cet appareil est facile à utiliser, portatif et est compatible avec tous les modèles d’emporte-pièce et les dossiers de gaufrage Em-bossing Fold'ers™.
Libérez votre passion créative avec la machine Platinum 6 et découpez et gaufrez des matériaux d’une largeur pouvant aller jusqu’à 21,5 cm, d’un tour de manivelle. La Spellbinders Platinum 6 off re des possibilités infi nies pour le collimage, la fabrication de cartes, les décorations de fête, les emballages-cadeaux et autres !
FRENCH

6
Préparer l’appareil1. Abaisser les plateaux des deux côtés de la machine pour faire passer vos sandwichs de coupe et de gaufrage dans le Platinum 6™. Voir fi gure 3.
2. La partie inférieure en caoutchouc aidera à stabiliser la machine. *Pour un fonctionnement optimal, s’assurer que le fond de l’appareil est propre.
3. Lorsque vous avez terminé, replacer le plateau des deux côtés en position surélevée pour ranger l’appareil de manière compacte. Voir fi gure 4.
Se Préparer à être CréatifQue vous eff ectuiez un découpage, un gaufrage ou les deux, il est nécessaire de disposer d’outils appropriés pour exécuter la tâche.
1. Les modèles d’emporte-pièces Spellbinders® (vendus séparément), Nestabilities® et Shapeabilities® vous permettent de découper, de gaufrer et d’imprimer au pochoir, et off rent des possibilités créatives illimitées. Les modèles d’emporte-pièces Spellbinders sont disponibles sous toutes les formes et toutes les tailles et inspirent la créativité grâce aux magnifi ques détails proposés. Remarque : Les emporte-pièces Spellbinders découpent divers matériaux, du papier cartonné, des papiers et feuilles métalliques aux matériaux légers tels que les cartons minces, les tissus et le cuir mince.
2. Les dossiers de gaufrage 3D, mono et biface Em-bossing Fold'ers™ Spellbinders (vendus séparément) vous permettent de gaufrer des détails afi n d’ajouter une touche encore plus spéciale à votre projet.
3. La bande d’acier Spellbinders Contour™ (vendue séparément) vous permet de couper une grande variété de matériaux comme le carton, le feutre de laine, le tissu et les métaux fi ns.
Création d’un SandwichTOUS les sandwichs doivent être empilés dans l’ordre prescrit. Tenter d’utiliser les plaques de manière incorrecte peut endommager l’appareil. Assurez-vous d’utiliser la combinaison de plaques indiquée. Afi n d’assurer les meilleurs résultats possible, faites d’abord un essai avec une chute de papier.
fi g. 3
fi g. 4
FRENCH

7
Épaisseur de coupe pour emporte-pièces ultra-fins (superposer de bas en haut)1. Plateforme 2. Libérer la plaque de coupe 3. Papier, papier cartonné, feuilles métallisées, etc. 4. Modèle d’emporte-pièce à forme avec nervures vers le bas 5. Libérer la plaque de coupe 6. Faire passer dans la Machine Platinum 6™
Épaisseur de coupe pour emporte-pièces à bandes d’acier (superposer de bas en haut)1. Libérer la plaque de coupe 2. Emporte-pièces à bandes d’acier, face vers le haut 3. papier, carton, papier d'artisanat, etc. 4. Libérer la plaque de coupe 5. Faire passer dans la Machine Platinum 6
Épaisseurs de gaufrage - (superposer de bas en haut)1. Plateforme 2. Modèle d’emporte-pièce à forme (nervures vers le haut), forme découpée à l’intérieur 3. Tapis de gaufrage beige 4. Plaque de gaufrage 5. Faire passer dans la Machine Platinum 6
fig. 5
fig. 8
fig. 11
fig. 14
fig. 6
fig. 9
fig. 12
fig. 15
fig. 7
fig. 10
fig. 13
fig. 16
FRENCH
Épaisseurs de gaufrage pour sandwich Fold’ers™ (superposer de bas en haut)1. Plateforme 2. Dossiers de gaufrage Em-bossing Fold'er avec papier à l'intérieur 3a. Libérer la plaque de coupe (pour dossiers de gaufrage mono et biface Em-bossing Fold'er) - ou - 3b. plaque de gaufrage 3D (pour dossiers de gaufrage 3D Em-bossing Fold'er™) 4. Faire passer dans la machine Platinum 6
8
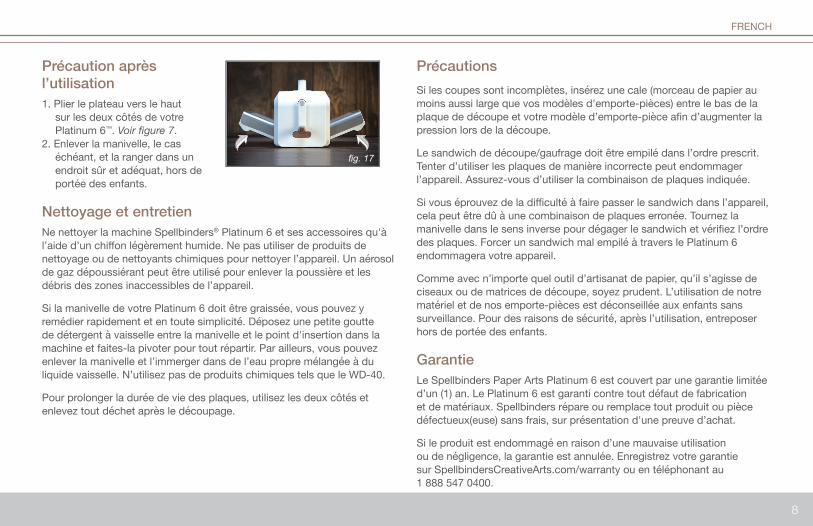
Précaution après l’utilisation1. Plier le plateau vers le haut sur les deux côtés de votre Platinum 6™. Voir fi gure 7.2. Enlever la manivelle, le cas échéant, et la ranger dans un endroit sûr et adéquat, hors de portée des enfants.
Nettoyage et entretienNe nettoyer la machine Spellbinders® Platinum 6 et ses accessoires qu'à l’aide d’un chiff on légèrement humide. Ne pas utiliser de produits de nettoyage ou de nettoyants chimiques pour nettoyer l’appareil. Un aérosol de gaz dépoussiérant peut être utilisé pour enlever la poussière et les débris des zones inaccessibles de l’appareil.
Si la manivelle de votre Platinum 6 doit être graissée, vous pouvez y remédier rapidement et en toute simplicité. Déposez une petite goutte de détergent à vaisselle entre la manivelle et le point d'insertion dans la machine et faites-la pivoter pour tout répartir. Par ailleurs, vous pouvez enlever la manivelle et l’immerger dans de l’eau propre mélangée à du liquide vaisselle. N’utilisez pas de produits chimiques tels que le WD-40.
Pour prolonger la durée de vie des plaques, utilisez les deux côtés et enlevez tout déchet après le découpage.
PrécautionsSi les coupes sont incomplètes, insérez une cale (morceau de papier au moins aussi large que vos modèles d’emporte-pièces) entre le bas de la plaque de découpe et votre modèle d’emporte-pièce afi n d’augmenter la pression lors de la découpe.
Le sandwich de découpe/gaufrage doit être empilé dans l’ordre prescrit. Tenter d’utiliser les plaques de manière incorrecte peut endommager l’appareil. Assurez-vous d’utiliser la combinaison de plaques indiquée.
Si vous éprouvez de la diffi culté à faire passer le sandwich dans l’appareil, cela peut être dû à une combinaison de plaques erronée. Tournez la manivelle dans le sens inverse pour dégager le sandwich et vérifi ez l’ordre des plaques. Forcer un sandwich mal empilé à travers le Platinum 6 endommagera votre appareil.
Comme avec n’importe quel outil d’artisanat de papier, qu’il s’agisse de ciseaux ou de matrices de découpe, soyez prudent. L’utilisation de notre matériel et de nos emporte-pièces est déconseillée aux enfants sans surveillance. Pour des raisons de sécurité, après l’utilisation, entreposer hors de portée des enfants.
GarantieLe Spellbinders Paper Arts Platinum 6 est couvert par une garantie limitée d’un (1) an. Le Platinum 6 est garanti contre tout défaut de fabrication et de matériaux. Spellbinders répare ou remplace tout produit ou pièce défectueux(euse) sans frais, sur présentation d'une preuve d’achat.
Si le produit est endommagé en raison d’une mauvaise utilisation ou de négligence, la garantie est annulée. Enregistrez votre garantie sur SpellbindersCreativeArts.com/warranty ou en téléphonant au 1 888 547 0400.
FRENCH
fi g. 17

9
Lesen Sie sich vor Benutzung der Platinum 6 Maschine von Spellbinders alle in dieser Bedienungsanleitung bereitgestellten Informationen sorgfältig durch.
Lieferumfang1. Spellbinders Platinum 6 3. Standardplattform 5. Prägematte2. Zwei transparente Stanzplatten 4. Prägeplatte 6. Kurbel
Bestimmen Sie erst einen geeigneten Arbeitsplatz, bevor Sie mit der Benutzung der Platinum 6 Maschine beginnen. Stellen Sie sicher, dass der Arbeitsplatz über eine saubere, stabile und ebene Oberfl äche verfügt und genügend Platz zum Durchdrehen der Platten und Plattform bietet.
Anbringung der Kurbel1. Platzieren Sie die Platinum 6 Maschine nach vorn gerichtet auf einer stabilen, ebenen Fläche, sodass sich der Metallstutzen auf der rechten Seite der Maschine befi ndet. Sie werden feststellen, dass der Metallstutzen über zwei fl ache Stellen verfügt. Drehen Sie den Stutzen so weit, bis die fl achen Stellen nach vorn bzw. hinten zeigen. Setzen Sie die Kurbel so auf den Metallstutzen auf, dass die fl achen Stellen des Stutzens und die fl achen Stellen auf der Innenseite der Kurbelöff nung aufeinander liegen. Siehe Abb. 1
2. Legen Sie die Unterlegscheibe auf die Schraube, und platzieren Sie beide im Inneren der Kurbel. Drehen Sie die Schraube unter Verwendung des bereitgestellten Imbusschlüssels im Uhrzeigersinn fest an. Setzen Sie die Kappe auf die Schraube. Siehe Abb. 2.
3. Um die Kurbel zu entfernen, lösen Sie die Schraube, indem Sie sie gegen den Uhrzeigersinn drehen, und ziehen Sie die Kurbel ab.
fi g. 2
fi g. 1
Vielen Dank, dass Sie sich für die Spellbinders® Platinum 6™ Maschine entschieden haben.Die Platinum 6 Maschine mit seinem kreativen Design ist das neueste Modell der innovativen Paper Arts-Produktlinie von Spellbinders zum Stanzen und Prägen. Die Maschine ist einfach zu bedienen, vielseitig und für alle Stanzschablonen und Em-bossing Fold'ers™ von Spellbinders geeignet.
Entfalten Sie mit der Platinum 6 Maschine eine neue Stufe Ihrer Kreativität – stanzen und prägen Sie auf einer Breite von 21,5 cm mit einer Umdrehung der Kurbel. Die Platinum 6 Maschine von Spellbinders bietet unendlich viele Möglichkeiten zur Gestaltung von Sammelalben und Karten, für Partydekoration, Geschenkverpackungen und mehr!
GERMAN
10
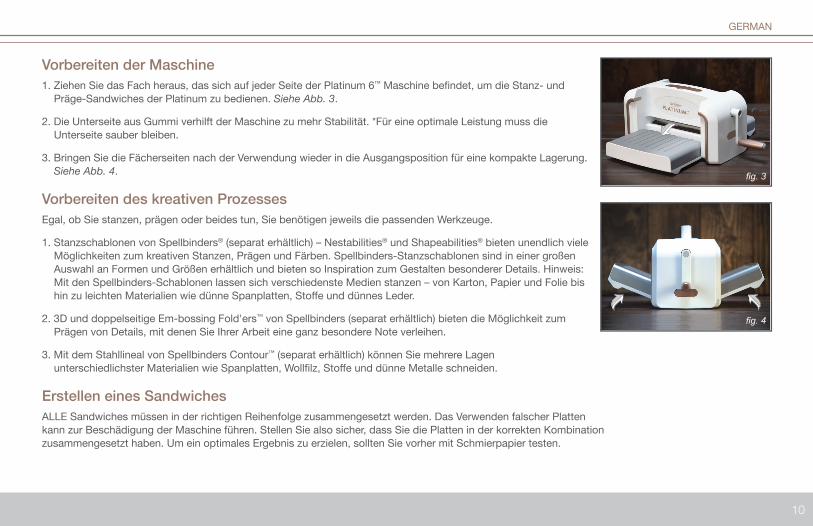
Vorbereiten der Maschine1. Ziehen Sie das Fach heraus, das sich auf jeder Seite der Platinum 6™ Maschine befi ndet, um die Stanz- und Präge-Sandwiches der Platinum zu bedienen. Siehe Abb. 3.
2. Die Unterseite aus Gummi verhilft der Maschine zu mehr Stabilität. *Für eine optimale Leistung muss die Unterseite sauber bleiben.
3. Bringen Sie die Fächerseiten nach der Verwendung wieder in die Ausgangsposition für eine kompakte Lagerung. Siehe Abb. 4.
Vorbereiten des kreativen ProzessesEgal, ob Sie stanzen, prägen oder beides tun, Sie benötigen jeweils die passenden Werkzeuge.
1. Stanzschablonen von Spellbinders® (separat erhältlich) – Nestabilities® und Shapeabilities® bieten unendlich viele Möglichkeiten zum kreativen Stanzen, Prägen und Färben. Spellbinders-Stanzschablonen sind in einer großen Auswahl an Formen und Größen erhältlich und bieten so Inspiration zum Gestalten besonderer Details. Hinweis: Mit den Spellbinders-Schablonen lassen sich verschiedenste Medien stanzen – von Karton, Papier und Folie bis hin zu leichten Materialien wie dünne Spanplatten, Stoff e und dünnes Leder.
2. 3D und doppelseitige Em-bossing Fold'ers™ von Spellbinders (separat erhältlich) bieten die Möglichkeit zum Prägen von Details, mit denen Sie Ihrer Arbeit eine ganz besondere Note verleihen.
3. Mit dem Stahllineal von Spellbinders Contour™ (separat erhältlich) können Sie mehrere Lagen unterschiedlichster Materialien wie Spanplatten, Wollfi lz, Stoff e und dünne Metalle schneiden.
Erstellen eines SandwichesALLE Sandwiches müssen in der richtigen Reihenfolge zusammengesetzt werden. Das Verwenden falscher Platten kann zur Beschädigung der Maschine führen. Stellen Sie also sicher, dass Sie die Platten in der korrekten Kombination zusammengesetzt haben. Um ein optimales Ergebnis zu erzielen, sollten Sie vorher mit Schmierpapier testen.
fi g. 3
fi g. 4
GERMAN

11
Stanz-Sandwich für hauchdünne Schablonen (Stapelung von unten nach oben)1. Plattform 2. Transparente Stanzplatte 3. Papier, Tonpapier, Bastel-Folie usw. 4. Geformte Musterschablone mit Schneidkanten nach unten 5. Transparente Stanzplatte 6. Durchgang mit der Platinum 6™ Maschine
Stanz-Sandwich für Stahllineal-Schablonen (Stapelung von unten nach oben)1. Transparente Stanzplatte 2. Stahllineal-Schablone mit Markierung oben 3. Papier, Tonpapier, Bastel-Folie usw. 4. Transparente Stanzplatte 5. Durchgang mit der Platinum 6 Maschine
Formstanzen einer Stanzform - (von unten nach oben aufeinander legen)1. Plattform 2. Geformte Musterschablone (Schneidkanten nach oben) mit Stanzform innen 3. Beige Prägematte 4. Prägeplatte 5. Durchgang mit der Platinum 6 Maschine
fig. 5
fig. 8
fig. 11
fig. 14
fig. 6
fig. 9
fig. 12
fig. 15
fig. 7
fig. 10
fig. 13
fig. 16
GERMAN
Präge-Sandwiches für Em-bossing Fold'ers™ (von unten nach oben aufeinander legen)1. Plattform 2. Em-bossing Fold'er mit eingelegtem Papier 3. Transparente Stanzplatte (für ein- oder zweiseitige Em-bossing Fold'er) - oder - 3D-Prägeplatte (für 3D Em-bossing Fold'ers™) 4. Durchgang mit der Platinum 6 Maschine
12
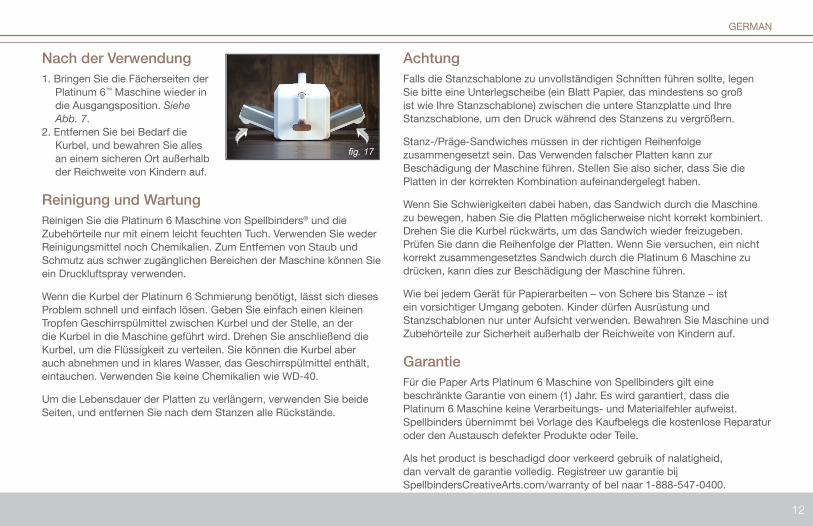
Nach der Verwendung1. Bringen Sie die Fächerseiten der Platinum 6™ Maschine wieder in die Ausgangsposition. Siehe Abb. 7.2. Entfernen Sie bei Bedarf die Kurbel, und bewahren Sie alles an einem sicheren Ort außerhalb der Reichweite von Kindern auf.
Reinigung und WartungReinigen Sie die Platinum 6 Maschine von Spellbinders® und die Zubehörteile nur mit einem leicht feuchten Tuch. Verwenden Sie weder Reinigungsmittel noch Chemikalien. Zum Entfernen von Staub und Schmutz aus schwer zugänglichen Bereichen der Maschine können Sie ein Druckluftspray verwenden.
Wenn die Kurbel der Platinum 6 Schmierung benötigt, lässt sich dieses Problem schnell und einfach lösen. Geben Sie einfach einen kleinen Tropfen Geschirrspülmittel zwischen Kurbel und der Stelle, an der die Kurbel in die Maschine geführt wird. Drehen Sie anschließend die Kurbel, um die Flüssigkeit zu verteilen. Sie können die Kurbel aber auch abnehmen und in klares Wasser, das Geschirrspülmittel enthält, eintauchen. Verwenden Sie keine Chemikalien wie WD-40.
Um die Lebensdauer der Platten zu verlängern, verwenden Sie beide Seiten, und entfernen Sie nach dem Stanzen alle Rückstände.
AchtungFalls die Stanzschablone zu unvollständigen Schnitten führen sollte, legen Sie bitte eine Unterlegscheibe (ein Blatt Papier, das mindestens so groß ist wie Ihre Stanzschablone) zwischen die untere Stanzplatte und Ihre Stanzschablone, um den Druck während des Stanzens zu vergrößern.
Stanz-/Präge-Sandwiches müssen in der richtigen Reihenfolge zusammengesetzt sein. Das Verwenden falscher Platten kann zur Beschädigung der Maschine führen. Stellen Sie also sicher, dass Sie die Platten in der korrekten Kombination aufeinandergelegt haben.
Wenn Sie Schwierigkeiten dabei haben, das Sandwich durch die Maschine zu bewegen, haben Sie die Platten möglicherweise nicht korrekt kombiniert. Drehen Sie die Kurbel rückwärts, um das Sandwich wieder freizugeben. Prüfen Sie dann die Reihenfolge der Platten. Wenn Sie versuchen, ein nicht korrekt zusammengesetztes Sandwich durch die Platinum 6 Maschine zu drücken, kann dies zur Beschädigung der Maschine führen.
Wie bei jedem Gerät für Papierarbeiten – von Schere bis Stanze – ist ein vorsichtiger Umgang geboten. Kinder dürfen Ausrüstung und Stanzschablonen nur unter Aufsicht verwenden. Bewahren Sie Maschine und Zubehörteile zur Sicherheit außerhalb der Reichweite von Kindern auf.
GarantieFür die Paper Arts Platinum 6 Maschine von Spellbinders gilt eine beschränkte Garantie von einem (1) Jahr. Es wird garantiert, dass die Platinum 6 Maschine keine Verarbeitungs- und Materialfehler aufweist. Spellbinders übernimmt bei Vorlage des Kaufbelegs die kostenlose Reparatur oder den Austausch defekter Produkte oder Teile.
Als het product is beschadigd door verkeerd gebruik of nalatigheid, dan vervalt de garantie volledig. Registreer uw garantie bij SpellbindersCreativeArts.com/warranty of bel naar 1-888-547-0400.
GERMAN
fi g. 17

13
Lees de instructies in deze handleiding voordat u uw Platinum 6 Machine van Spellbinders gaat gebruiken.
Inhoud van uw doos1. Spellbinders Platinum 6 3. Standaard platform 5. Embossingmat2. Twee snijplaten 4. Embossingplaat 6. Handgreep
Voordat u uw Platinum 6 Machine gebruikt, moet u een geschikte werklocatie zoeken om uw machine te gebruiken. Zorg dat uw werklocatie schoon is, met een stevig en vlak oppervlak met voldoende ruimte om de platen en het platform te gebruiken.
Aanbrengen van de handgreep1. Plaats uw Platinum 6 Machine met de voorkant naar u gericht op een stevig, vlak oppervlak zodat het metalen deel aan de rechterkant van de machine zit. U ziet dat het metalen deel twee platte kanten heeft. Draai deze, zodat de platte kanten naar voren en achteren gericht staan. Positioneer de handgreep op het metalen deel zodat de platte kanten van het metalen deel zijn uitgelijnd met de platte kanten in het gat van de handgreep. Zie fi g 1
2. Legen Sie die Unterlegscheibe auf die Schraube, und platzieren Sie beide im Inneren der Kurbel. Drehen Sie die ScPlaats de ring op de schroef en plaats beiden aan de binnenkant van de handgreep. Gebruik de bijgeleverde Allensleutel om de schroef met de klok mee vast te draaien. Plaats het dopje om de schroef te bedekken. Zie fi g 2.
3. Om de handgreep te verwijderen, draai je de schroef tegen de klok in om deze los te maken en trek je de handgreep los.
fi g. 2
fi g. 1
Gefeliciteerd en bedankt voor uw aankoop van de Spellbinders® Platinum 6™ - Machine!De Platinum 6 Machine is ontworpen met uw creativiteit in gedachten, en is het nieuwste product in de Spellbinders Paper Arts-serie van innovatieve stanssystemen en reliëfdruk-machines. Deze machine is eenvoudig in gebruik, draagbaar en werkt met alle Spellbinders stanssystemen en Em-bossing Fold'ers™.
Wees indrukwekkend creatief dankzij de Platinum 6 Machine en snij en/of breng reliëf aan (embossing) van 21,5 cm breed, gewoon met een draai aan de handgreep. De Spellbinders Platinum 6 biedt eindeloze mogelijkheden voor scrapbooking, kaarten maken, schoolprojecten, feestdecoraties, cadeaus en meer!
DUTCH
14
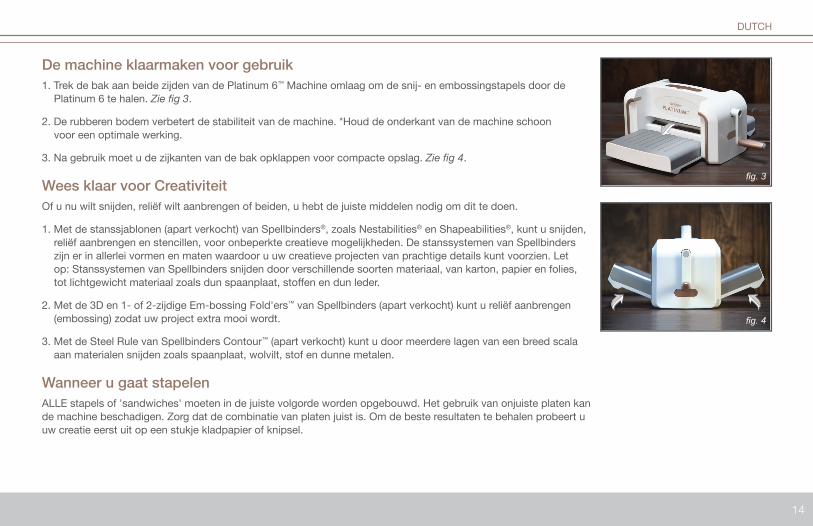
De machine klaarmaken voor gebruik1. Trek de bak aan beide zijden van de Platinum 6™ Machine omlaag om de snij- en embossingstapels door de Platinum 6 te halen. Zie fi g 3.
2. De rubberen bodem verbetert de stabiliteit van de machine. *Houd de onderkant van de machine schoon voor een optimale werking.
3. Na gebruik moet u de zijkanten van de bak opklappen voor compacte opslag. Zie fi g 4.
Wees klaar voor CreativiteitOf u nu wilt snijden, reliëf wilt aanbrengen of beiden, u hebt de juiste middelen nodig om dit te doen.
1. Met de stanssjablonen (apart verkocht) van Spellbinders®, zoals Nestabilities® en Shapeabilities®, kunt u snijden, reliëf aanbrengen en stencillen, voor onbeperkte creatieve mogelijkheden. De stanssystemen van Spellbinders zijn er in allerlei vormen en maten waardoor u uw creatieve projecten van prachtige details kunt voorzien. Let op: Stanssystemen van Spellbinders snijden door verschillende soorten materiaal, van karton, papier en folies, tot lichtgewicht materiaal zoals dun spaanplaat, stoff en en dun leder.
2. Met de 3D en 1- of 2-zijdige Em-bossing Fold'ers™ van Spellbinders (apart verkocht) kunt u reliëf aanbrengen (embossing) zodat uw project extra mooi wordt.
3. Met de Steel Rule van Spellbinders Contour™ (apart verkocht) kunt u door meerdere lagen van een breed scala aan materialen snijden zoals spaanplaat, wolvilt, stof en dunne metalen.
Wanneer u gaat stapelenALLE stapels of 'sandwiches' moeten in de juiste volgorde worden opgebouwd. Het gebruik van onjuiste platen kan de machine beschadigen. Zorg dat de combinatie van platen juist is. Om de beste resultaten te behalen probeert u uw creatie eerst uit op een stukje kladpapier of knipsel.
fi g. 3
fi g. 4
DUTCH

15
Stapel snijden voor flinterdunne stansen (Stapel van onder naar boven)1. Platform 2. Doorzichtige snijplaat 3. Papier, kaartkarton, folie etc.. 4. Gevormde stanssjabloon met gesneden randen omlaag 5. Doorzichtige snijplaat 6. Haal door de Platinum 6™ Machine
Stapel snijden voor staal-stansvormen (Stapel van onder naar boven)1. Doorzichtige snijplaat 2. Staal-stansvorm met stans omhoog 3. Papier, kaartkarton, folie etc. 4. Doorzichtige snijplaat 5. Haal door de Platinum 6 Machine
Embossing van een snijvorm - (Stapel van onder naar boven)1. Platform 2. Gevormde stanssjabloon (gesneden randen omlaag) met snijvorm binnenin 3. Geelbruine embossingmat 4. Embossingplaat 5. Haal door de Platinum 6 Machine
fig. 5
fig. 8
fig. 11
fig. 14
fig. 6
fig. 9
fig. 12
fig. 15
fig. 7
fig. 10
fig. 13
fig. 16
DUTCH
Embossingstapel voor Em-bossing Fold'ers™ (Stapel van onder naar boven)1. Platform 2. Em-bossing Fold'er™ met papier binnenin 3. Doorzichtige snijplaat (voor enkel- of dubbelzijdige Em-bossing Fold'ers) - of - 3D Embossing-plaat (voor 3D Em-bossing Fold'ers™) 4. Haal door de Platinum 6 Machine

16
Nazorg1. Klap de bak op aan beide zijden van uw Platinum 6™ Machine. Zie fi g 7.2. Verwijder de handgreep indien nodig en berg de machine veilig op, buiten bereik van kinderen.
Schoonmaken en onderhoudenMaak de Platinum 6 Machine van Spellbinders® en alle accessoires alleen schoon met een vochtige doek. Gebruik geen reinigingsmiddel of chemische reinigers op de machine. Perslucht mag worden gebruikt om stof en vuiltjes uit kleine delen van de machine te verwijderen.
Als de handgreep van uw Platinum 6 gesmeerd moet worden, kunt u dat snel en eenvoudig doen. Plaats een kleine druppel afwasmiddel tussen de handgreep en waar deze ingezet wordt en draai aan de handgreep om het afwasmiddel te verdelen. Of u kunt de handgreep verwijderen en in schoon water met afwasmiddel onderdompelen. Gebruik geen chemisch middel zoals WD-40.
Om de platen langer goed te houden moet u beide kanten gebruiken en afvalmateriaal na het snijden verwijderen.
WaarschuwingenAls het stanswerk onvolledige delen oplevert, voegt u een opvulstukje toe (een stukje papier minstens net zo groot als uw stanssjablonen) tussen de basissnijplaat en uw stanssjabloon om de druk te vergroten bij het stansen.
De stapel voor stansen of embossing moet in de juiste volgorde worden opgebouwd. Het gebruik van onjuiste platen kan de machine beschadigen. Zorg dat de combinatie van platen juist is.
Als u moeite hebt om uw stapel door de machine te krijgen, kan dit worden veroorzaakt door een verkeerde combinatie van platen. Draai de handgreep terug om de stapel uit de machine te kunnen halen en controleer uw combinatie. Een verkeerd opgebouwde stapel door de Platinum 6 Machine forceren zal uw machine beschadigen.
Net als bij alle andere papierbewerkmachines, van scharen tot stansen, moet u voorzichtig zijn. Onze middelen en stansen zijn niet geschikt voor het gebruik door kinderen zonder toezicht. Sla uw machine daarom na gebruik op buiten het bereik van kinderen.
GarantieDe Paper Arts Platinum 6 van Spellbinders heeft een beperkte garantie van één (1) jaar. De Platinum 6 is gegarandeerd vrij van defecten in werking en materialen. Spellbinders zal defecte producten of onderdelen gratis vervangen of repareren op vertoon van een aankoopbewijs.
Als het product is beschadigd door verkeerd gebruik of nalatigheid, dan vervalt de garantie volledig. Registreer uw garantie bij SpellbindersCreativeArts.com/warranty of bel naar 1-888-547-0400.
DUTCH
fi g. 17

17
Leer todas las instrucciones incluidas en este manual antes de usar la máquina Platinum 6 de Spellbinders.
Contenido de la caja1. Spellbinders Platinum 6 3. Plataforma estándar 5. Tabla de repujado2. Un par de placas de corte transparentes 4. Placa de repujado 6. Manija
Antes de empezar a usar la máquina Platinum 6, se debe buscar un área de trabajo apropiada donde colocarla. Asegurarse de que la superfi cie del área de trabajo esté limpia y sea resistente y plana, y de que haya sufi ciente espacio para pasar las placas y la plataforma.
Cómo colocar la manija1. Colocar la máquina Platinum 6 orientada hacia el frente sobre una superfi cie plana y resistente de manera tal que el perno metálico quede del lado derecho de la máquina. El perno metálico tiene dos lados planos: girar el perno de modo que los lados planos queden orientados hacia el frente y el dorso de la máquina. Insertar la manija en el perno metálico de modo que los lados planos del perno coincidan con los lados planos del orifi cio de la manija. Ver la fi g. 1
2. Colocar la arandela en el tornillo y, luego, colocarlos dentro de la manija. Ajustar el tornillo en el sentido de las agujas del reloj con la llave Allen suministrada. Colocar la tapa para cubrir el tornillo. Ver la fi g. 2.
3. Para retirar la manija, afl ojar el tornillo en el sentido contrario a las agujas del reloj y jalar hacia afuera..fi g. 2
fi g. 1
¡Felicitaciones y gracias por comprar la Máquina Spellbinders® Platinum 6™!Diseñada pensando en su creatividad, la máquina Platinum 6 es lo último de la innovadora línea Spellbinders Paper Arts para troquelar y repujar. Esta máquina es fácil de usar, versátil y compatible con todas las plantillas de troquelado y las Carpetas de Repujado de Spellbinders.
Es hora de desplegar la creatividad en grande con la máquina Platinum 6 para troquelar y repujar fi guras de 21.5 cm de ancho con tan solo girar la manija. ¡Platinum 6 de Spellbinders ofrece innumerables posibilidades para diseñar álbumes de recortes, tarjetas, elementos decorativos para una fi esta, obsequios y más!
SPANISH
18
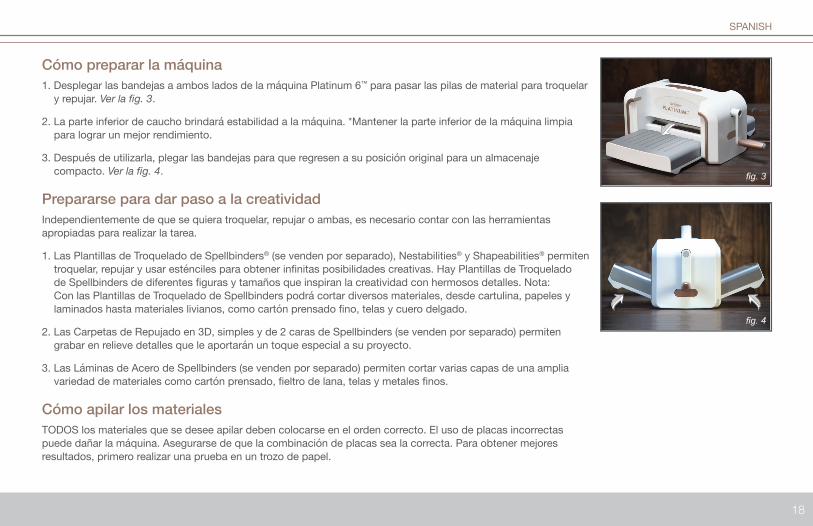
Cómo preparar la máquina1. Desplegar las bandejas a ambos lados de la máquina Platinum 6™ para pasar las pilas de material para troquelar y repujar. Ver la fi g. 3.
2. La parte inferior de caucho brindará estabilidad a la máquina. *Mantener la parte inferior de la máquina limpia para lograr un mejor rendimiento.
3. Después de utilizarla, plegar las bandejas para que regresen a su posición original para un almacenaje compacto. Ver la fi g. 4.
Prepararse para dar paso a la creatividadIndependientemente de que se quiera troquelar, repujar o ambas, es necesario contar con las herramientas apropiadas para realizar la tarea.
1. Las Plantillas de Troquelado de Spellbinders® (se venden por separado), Nestabilities® y Shapeabilities® permiten troquelar, repujar y usar esténciles para obtener infi nitas posibilidades creativas. Hay Plantillas de Troquelado de Spellbinders de diferentes fi guras y tamaños que inspiran la creatividad con hermosos detalles. Nota: Con las Plantillas de Troquelado de Spellbinders podrá cortar diversos materiales, desde cartulina, papeles y laminados hasta materiales livianos, como cartón prensado fi no, telas y cuero delgado.
2. Las Carpetas de Repujado en 3D, simples y de 2 caras de Spellbinders (se venden por separado) permiten grabar en relieve detalles que le aportarán un toque especial a su proyecto.
3. Las Láminas de Acero de Spellbinders (se venden por separado) permiten cortar varias capas de una amplia variedad de materiales como cartón prensado, fi eltro de lana, telas y metales fi nos.
Cómo apilar los materialesTODOS los materiales que se desee apilar deben colocarse en el orden correcto. El uso de placas incorrectas puede dañar la máquina. Asegurarse de que la combinación de placas sea la correcta. Para obtener mejores resultados, primero realizar una prueba en un trozo de papel.
fi g. 3
fi g. 4
SPANISH

19
Pila de materiales para troquelado delgado (desde abajo hacia arriba)1. Plataforma 2. Placa de corte transparente 3. Papel, cartulina, laminado para manualidades, etc. 4. Plantilla de troquelado con forma y con bordes de corte hacia abajo 5. Placa de corte transparente 6. Pasar por la Máquina Platinum 6™
Pila de materiales para troquelado con lámina de acero (desde abajo hacia arriba)1. Placa de corte transparente 2. Troquelado con lámina de acero con troquel hacia arriba 3. Papel, cartulina, laminado para manualidades, etc. 4. Placa de corte transparente 5. Pasar por la Máquina Platinum 6
Cómo repujar figuras troqueladas - (desde abajo hacia arriba)1. Plataforma 2. Plantilla de troquelado con forma (bordes de corte hacia arriba) y forma de corte en el interior 3. Tabla de repujado marrón claro 4. Placa de repujado 5. Pasar por la Máquina Platinum 6
fig. 5
fig. 8
fig. 11
fig. 14
fig. 6
fig. 9
fig. 12
fig. 15
fig. 7
fig. 10
fig. 13
fig. 16
SPANISH
Pila de materiales para las Carpetas de Repujado (desde abajo hacia arriba)1. Plataforma 2. Carpetas de Repujado con papel en el interior 3. Placa de corte transparente (para Carpetas de Repujado de doble cara o simples) o placa de repujado en 3D (para Carpetas de Repujado en 3D) 4. Pasar por la Máquina Platinum 6

20
Cuidados1. Plegar las bandejas a los dos costados de la Máquina Platinum 6™. Ver la fi g. 7.2. Si es necesario, retirar la manija y almacenarla en un lugar seguro, fuera del alcance de los niños.
Limpieza y mantenimientoLimpiar la Máquina Platinum 6 de Spellbinders® y sus accesorios solo con un paño ligeramente húmedo. No limpiar la máquina con productos de limpieza ni con limpiadores químicos. Se puede usar aire comprimido para eliminar el polvo y los residuos de las áreas pequeñas de la máquina.
Si es necesario lubricar la manija de la máquina Platinum 6, se puede hacer de forma rápida y fácil. Colocar una gotita de detergente lavavajillas entre la manija y el espacio en donde se la coloca y girarla para distribuir el lubricante. Otra opción es retirar la manija y sumergirla en agua limpia con detergente lavavajillas. No usar productos químicos, como WD-40.
Para prolongar la vida útil de las placas, usar los dos lados y eliminar los restos de materiales después del troquelado
PrecaucionesSi, como resultado del troquelado, los cortes quedan incompletos, agregar un calce (trozo de papel del tamaño de la plantilla de troquelado) entre la placa de corte inferior y la plantilla de troquelado a fi n de aumentar la presión mientras se realiza el corte.
Los materiales de la pila de troquelado/repujado deben colocarse en el orden correcto. El uso de placas incorrectas puede dañar la máquina. Asegurarse de que la combinación de placas sea la correcta.
Si no puede mover la pila por la máquina, es posible que la combinación de placas sea incorrecta. Girar la manija en dirección inversa para liberar la pila y comprobar la combinación de placas. No intentar introducir una pila armada incorrectamente, ya que esto puede ocasionar daños en la máquina Platinum 6.
Se debe tener precaución, al igual que con todos los dispositivos para crear manualidades con papel, como tijeras o troqueladoras. Nuestro equipo y las formas de troquelado no están pensados para que las utilicen niños sin supervisión. Por razones de seguridad, almacenar la máquina fuera del alcance de los niños después de su uso.
GarantíaPlatino de la línea Spellbinders Paper Arts posee una garantía limitada de un (1) año. La máquina Platinum 6 posee una garantía contra defectos en la mano de obra y en los materiales. Spellbinders reparará o reemplazará un producto o piezas defectuosas sin cargo con el comprobante de compra.
Si el producto está dañado a causa del uso incorrecto o por negligencia, la garantía es nula. Registrar su garantía en SpellbindersCreativeArts.com/warranty o llamar al +1-888-547-0400.
SPANISH
fi g. 17

21

22

Spellbinders® Paper Arts Company, L.L.C.Phoenix, Arizona
Toll Free 888-547-0400 Local 602-385-7700
2016 © All Rights Reserved Patent PendingMade in China
Spellbinders® Paper Arts Company, L.L.C.Phoenix, Arizona
Gratuit 888-547-0400 Locale 602-385-7700
2016 © Tous les droits sont réservés En attente de brevetFabriqué en Chine
Spellbinders® Paper Arts Company, L.L.C.Phoenix, Arizona
Llamada Gratuita 888-547-0400 Local 602-385-7700
2016 © Todos los derechos reservados Patente pendiente
Hecho en China