configuring secure sockets layer (ssl) communication
TRANSCRIPT

Configuring Secure Sockets Layer (SSL) communication between Cognos and DB2 database in an OpenPages GRC Platform on Linux This article provides guidance on configuring the SSL connection between the IBM® Cognos® Business Intelligence (Cognos) server with the IBM DB2® database in an OpenPages installation. Three main topics are discussed.
1. Setting up SSL on the DB2 database
2. Setting up SSL on the Cognos 10.2.2.x Server
3. Enable OPX database and application to use SSL
All the steps in this article were tested on an OpenPages GRC Platform v7.3.0.1 installation with Cognos version 10.2.2.7 and DB2 version 11.1.0.0
Section I: Setting up SSL on the DB2 database This topic describes the steps to set up SSL on the DB2 database server
1.1 Stop all application servers a. Log on to the application server system as an application user (e.g. opuser)
b. Navigate to <OP_HOME>/bin
c. Linux command: ./stopAllServers.sh <was_username> <was_password> (default credentials are admin/openpages)
1.2 Stop DB2 database a. Log on to the database server as a database user (use db2inst2 for Cognos or the instance used to create the Cognos database)
b. Execute command: db2 deactivate db <cognos_database_name> (eg. cognosdb)
c. Execute command: db2stop
1.3 Enable SSL on DB2 database a. Log on to the database server as a database user (For example use db2inst2 for Cognos or the instance used to create the Cognos database)
b. Create a directory for the database key, command: mkdir <keystore_directory>
c. Add <db2_home>/sqllib/gskit/bin to the system path
Example: export PATH=$PATH:/home/db2inst2/sqllib/gskit/bin
d. Execute command: gsk8capicmd_64 -keydb -create -db <keystore_directory>/<db_key_name>.p12 -pw “<db_key_password>” -type pkcs12 –stash
e. Navigate to <keystore_directory>, using command: cd <keystore_directory>
f. Execute command: gsk8capicmd_64 -cert -create -db "<db_key_name>.p12" -pw "<db_key_password>" -label "<certificate_name>" -dn "CN=<hostname>, O=<company>, L=<city>, ST=<state>, C=<country>" -size 2048
g. Execute command: gsk8capicmd_64 -cert -extract -db “<db_key_name>.p12” -pw “<db_key_password>” -label “<certificate_name>” -target “<certificate_name>.arm” -format ascii –fips

Example: gsk8capicmd_64 -cert -extract -db “db2_ssl_cognos_certi.p12” -pw “<db_key_password>” -label “db2_ssl_cognos_certi” -target “db2_ssl_cognos_certi.arm” -format ascii -fips
Note: By executing the commands above we created a self-signed certificate for the DB2 database. Use unique certificate names if Cognos and WebSphere uses the same java instance.
h. Make a backup of the keystore directory.
1.4 Updating DB2 configuration parameters a. Execute command: db2 update dbm cfg using SSL_SVR_KEYDB <keystore_directory>/<db_key_name>.p12
b. Execute command: db2 update dbm cfg using SSL_SVR_STASH <keystore_directory>/<db_key_name>.sth
c. Execute command: db2 update dbm cfg using SSL_SVR_LABEL <certificate_name>
d. Execute command: db2 update dbm cfg using SSL_SVCENAME <db2_ssl_port> (e.g. 50052)
e. Execute command: db2 update dbm cfg using SSL_VERSIONS TLSv12
Note: Make sure the port number mentioned in 1.4 d (<db2_ssl_port>) is not being used prior to setting it in this step.
f. Execute command: db2set -i <db_user_name> DB2COMM=SSL,TCPIP
g. If you have a secondary DB server, repeat steps in this section on the secondary servers.
h. Validate the SSL enablement by using command: db2 get dbm cfg | grep SSL
1.5 Start DB2 server a. Log on to the database server as database user (e.g. db2inst2 or the instance used to create the Cognos database)
b. Execute command: db2start
c. Execute command: db2 activate db <cognos_database_name> (e.g. cognosdb)
Note: firewall modification maybe needed to open the port used for the DB2 SSL connection.
Section II: Setting up SSL on the Cognos 10.2.2.x Server All the steps in this section must be done by logging into the reporting server as application user. (E.g. opuser)
2.1 Import SSL certificate into Cognos Java a. Copy the <keystore_directory> created on database server which contains certificate files into the reporting server.
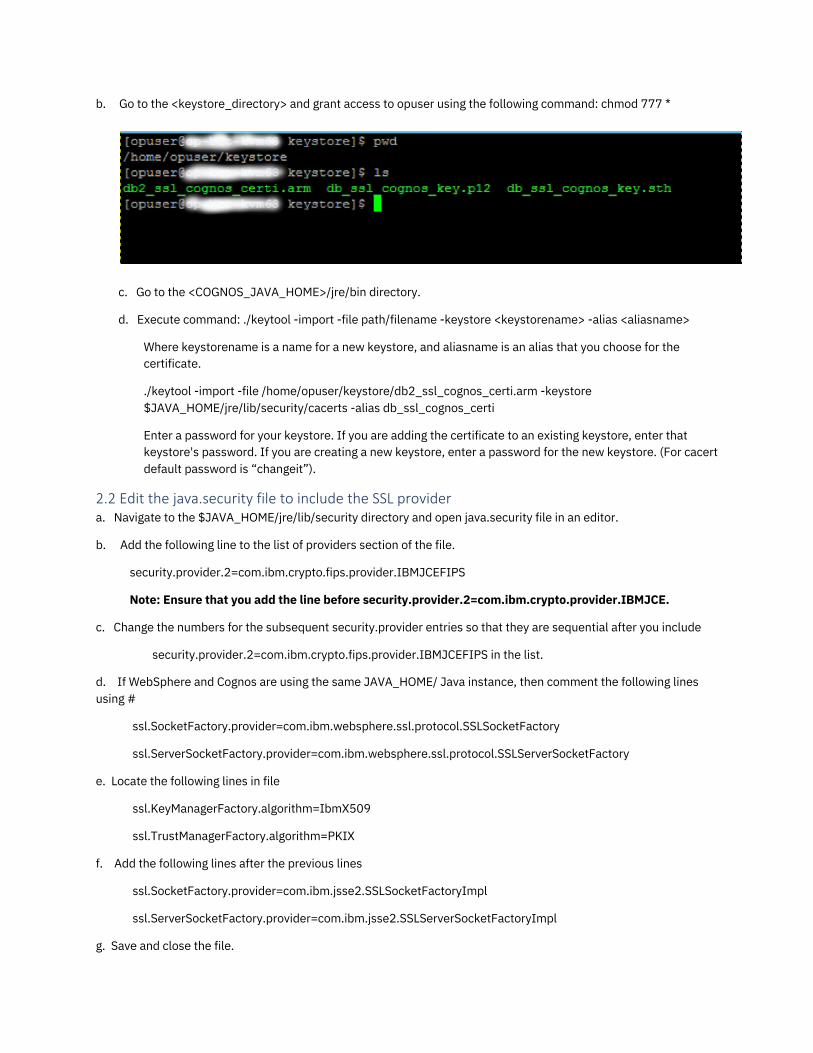
b. Go to the <keystore_directory> and grant access to opuser using the following command: chmod 777 *
c. Go to the <COGNOS_JAVA_HOME>/jre/bin directory.
d. Execute command: ./keytool -import -file path/filename -keystore <keystorename> -alias <aliasname>
Where keystorename is a name for a new keystore, and aliasname is an alias that you choose for the certificate.
./keytool -import -file /home/opuser/keystore/db2_ssl_cognos_certi.arm -keystore $JAVA_HOME/jre/lib/security/cacerts -alias db_ssl_cognos_certi
Enter a password for your keystore. If you are adding the certificate to an existing keystore, enter that keystore's password. If you are creating a new keystore, enter a password for the new keystore. (For cacert default password is “changeit”).
2.2 Edit the java.security file to include the SSL provider a. Navigate to the $JAVA_HOME/jre/lib/security directory and open java.security file in an editor.
b. Add the following line to the list of providers section of the file.
security.provider.2=com.ibm.crypto.fips.provider.IBMJCEFIPS
Note: Ensure that you add the line before security.provider.2=com.ibm.crypto.provider.IBMJCE.
c. Change the numbers for the subsequent security.provider entries so that they are sequential after you include
security.provider.2=com.ibm.crypto.fips.provider.IBMJCEFIPS in the list.
d. If WebSphere and Cognos are using the same JAVA_HOME/ Java instance, then comment the following lines using #
ssl.SocketFactory.provider=com.ibm.websphere.ssl.protocol.SSLSocketFactory
ssl.ServerSocketFactory.provider=com.ibm.websphere.ssl.protocol.SSLServerSocketFactory
e. Locate the following lines in file
ssl.KeyManagerFactory.algorithm=IbmX509
ssl.TrustManagerFactory.algorithm=PKIX
f. Add the following lines after the previous lines
ssl.SocketFactory.provider=com.ibm.jsse2.SSLSocketFactoryImpl
ssl.ServerSocketFactory.provider=com.ibm.jsse2.SSLServerSocketFactoryImpl
g. Save and close the file.

2.3 Edit the IBM Cognos startwlp.sh file. This file is used when you start IBM Cognos BI a. Navigate to the $COGNOS_HOME/bin64 directory and open startwlp.sh file in an editor.
b Locate the following line
DISP_OPTS="-Dcom.ibm.cognos.disp.useDaemonThreads=true"
c. Add the following line after previous line
SSL_OPTS="-Dcom.ibm.jsse2.JSSEFIPS=true -Djavax.net.ssl.trustStore=path/keystorename"
Where path is the path to the keystore, and keystorename is the name of the keystore.
d. Locate the following line
JVM_ARGS="$PROTOCOL $JAVA_64BIT_OPTS $DISP_OPTS -Xmx${MEM}m $MAX_NEW_SIZE $NEW_SIZE $MAX_PERM_SIZE"
e. Add $SSL_OPTS after $DISP_OPTS in above line. The result will be as follows
f. Save and close the file.
2.4 Edit the bootstrap files. These files are used when you start IBM Cognos as a service from the IBM Cognos Configuration. (Note: Edit bootstrap_linuxi38664.xml, bootstrap_wlp_linuxi38664.xml and bootstrap_sg_linuxi38664.xml files)
a. Navigate to the $COGNOS_HOME/bin64 directory.
b. There are 3 bootstrap files that need to be edited where the filename includes the version. On Linux the “osversion” parameter is substituted with “linuxi38664”. (Note: edit bootstrap_linuxi38664.xml, bootstrap_sg_linuxi38664.xml and bootstrap_wlp_linuxi38664.xml files)
c. Open each file and locate the line
<param condName1="${java_vendor}" condValue1="Oracle" condName2="${java_version}" condValue2="1.8.0" condOp2="lt">-XX:MaxPermSize=128m</param>
Add the following lines after previous line to the file
<param>-Dcom.ibm.jsse2.JSSEFIPS=true</param>
<param>-Djavax.net.ssl.trustStore=path/keystorename</param>
d. Save and close each of these three files.
2.5 Edit the IBM Cognos cogconfig file. a. Navigate to the $COGNOS_HOME/bin64 directory.
b. Open cogconfig.sh file in editor.
c. Locate the following line.

$JAVA_CMD $JAVA_OPTS CRConfig $*
d. Add the following line after the previous lines
JAVA_OPTS="$JAVA_OPTS - Dcom.ibm.jsse2.JSSEFIPS=true -Djavax.net.ssl.trustStore=path/keystorename"
e. Save and close the file
2.6 Edit the IBM Cognos cogstartup.xml file There are two approaches to editing the cogstartup.xml file. Steps a through c explain how to edit file using a text editor. Steps d through e explain how to edit cogstartup.xml using third party tool such as UltraVNC or MobaXterm.
a. Navigate to the $COGNOS_HOME/configuration directory and open cogstartup.xml in editor.
b. Update the port and enable SSL encryption by making it true.
c. Restart the Cognos server.
d. Open the Cognos configuration in UltraVNC or MobaXterm and navigate to Data Access -> Content Manager -> <CONTENT_STORE>
e. Update port to the SSL enabled port e.g. 50052 and select SSL Encryption Enabled as true.

f. Test the connection and restart the server.
Section III: Enable OPX database and application to use SSL This section assumes that you already completed enabling the SSL on OPX at database server side. Please refer to the website below:
https://www.ibm.com/developerworks/community/blogs/d89a3ddf-2acf-4cc8-b11b-14f33b5c653e/entry/Configuring_Secure_Sockets_Layer_SSL_communication_between_OpenPages_application_server_WebSphere_and_DB2_database?lang=en
a. Log on the application server as application user (e.g. opuser)
b. Uncatalog the opx database and node associated with it if exists by using following commands
db2 uncatalog db <DATABASE_NAME> (e.g. OPX)
db2 uncatalog node <NODE_NAME>
c. The list of databases can be viewed by following command
db2 list db directory
d. The list of nodes can be viewed by following command
db2 list node directory
e. Create a new node with SSL enabled by using following command
db2 catalog TCPIP NODE <NODE_NAME> REMOTE <HOST_ADDRESS> SERVER <OPX_SSL_ENABLED_PORT> SECURITY SSL

f. Create a new database OPX under the node created in above step by using following command
db2 catalog database OPX as OPX at node <NODE_NAME> AUTHENTICATION SERVER
g. Use the following commands to update the database configuration to point to the SSL certificate associated with the OPX database(which was created on server machine while enabling SSL between WebSphere and DB2).
a. db2 update dbm cfg using SSL_CLNT_KEYDB <keystore_directory>/<db_key_name>.p12
E.g. db2 update dbm cfg using SSL_CLNT_KEYDB /home/opuser/keystore_opx/db_ssl_key.p12
b. db2 update dbm cfg using SSL_CLNT_STASH <keystore_directory>/<db_key_name>.sth
E.g. db2 update dbm cfg using SSL_CLNT_STASH /home/opuser/keystore_opx/db_ssl_key.sth
h. Restart the Cognos server.
i. Login to the OpenPages application navigate to the Reporting->Cognos Connection -> Launch Options -> IBM Cognos Administration -> Configuration and test the data access connection.

